Recovering from a crash with an iMeshh grass append
Blender crashed and ate the geometry-node grass setup. Rather than rebuild it, we head to iMeshh, grab the free grass system, and use File → Append to bring it into the scene. It doubles as a first proper lesson on importing objects from another .blend.
The lesson: save your file
Blender just crashed mid-build and ate the geometry-node grass setup from the previous part. The single most valuable habit you can take from this entire course is to hit Ctrl+S constantly. Blender will crash on you eventually, and a recent save is the cheapest possible recovery. Far cheaper than rebuilding a complex node tree from memory.
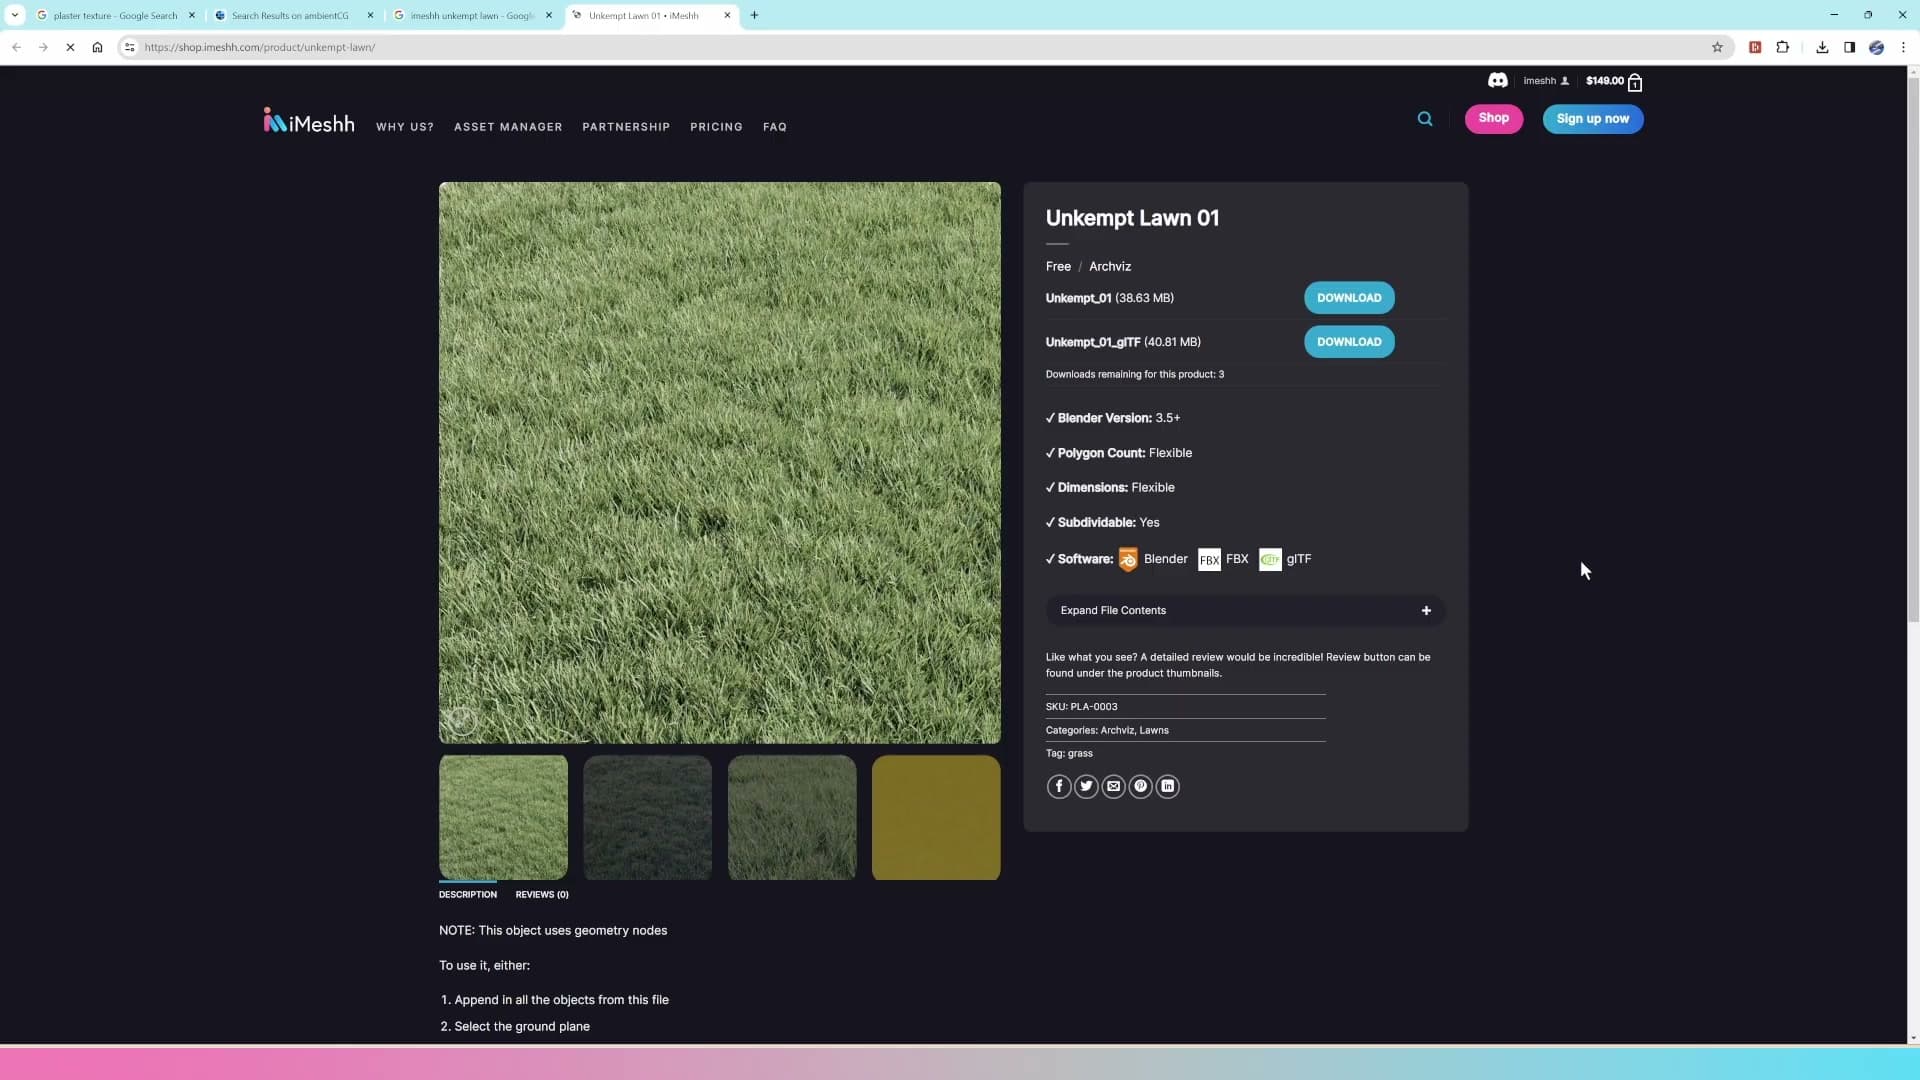
Rather than recreate the grass from scratch, you can borrow a pre-made one from iMeshh. That is faster than rebuilding, and it doubles as a proper first lesson in appending objects from another .blend. The course hasn't covered this yet, so this crash is arguably a useful detour.
Appending the iMeshh grass geometry-node system
Head over to iMeshh, click Shop, and open the Free section. The pre-made geometry-node grass system is published there. Sign in to your account and click Download.
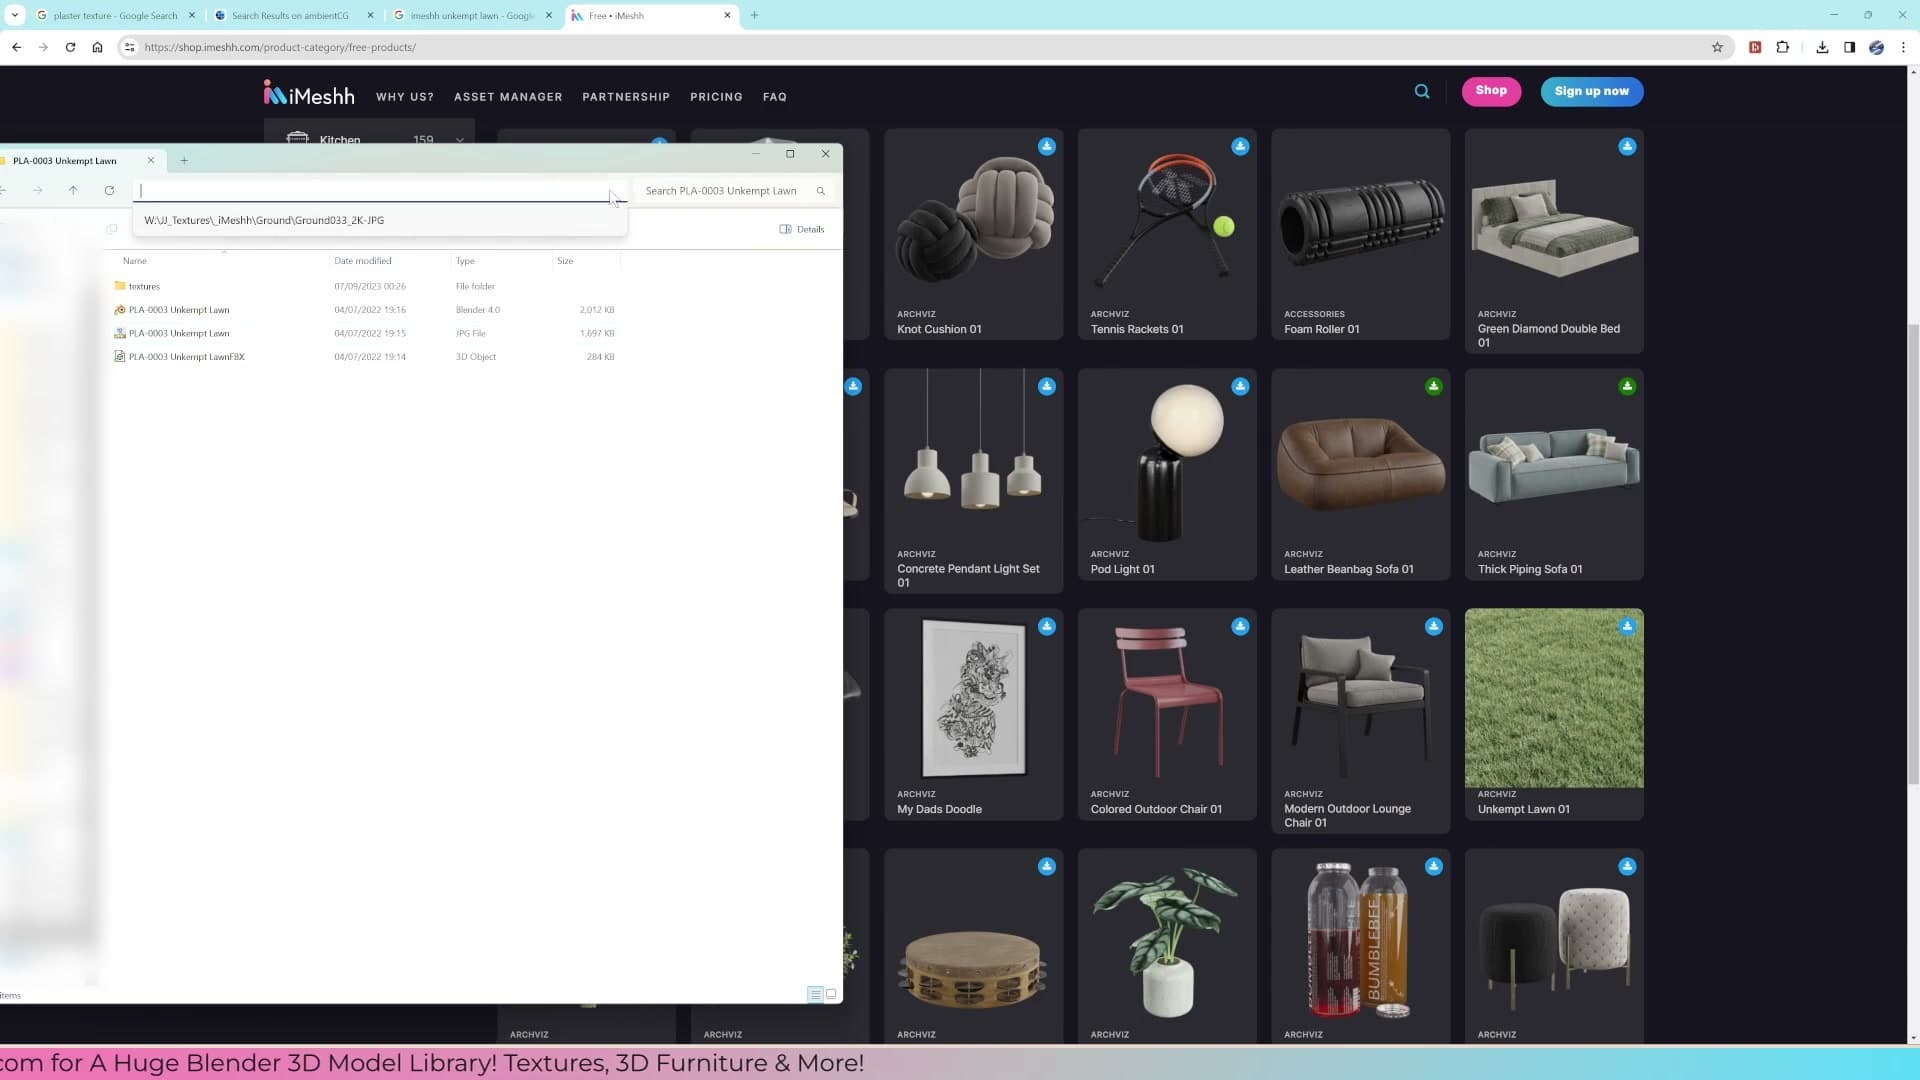
Extract the downloaded archive. Inside you'll find three files: an image texture, an FBX, and a .blend. The .blend is the one Blender needs.
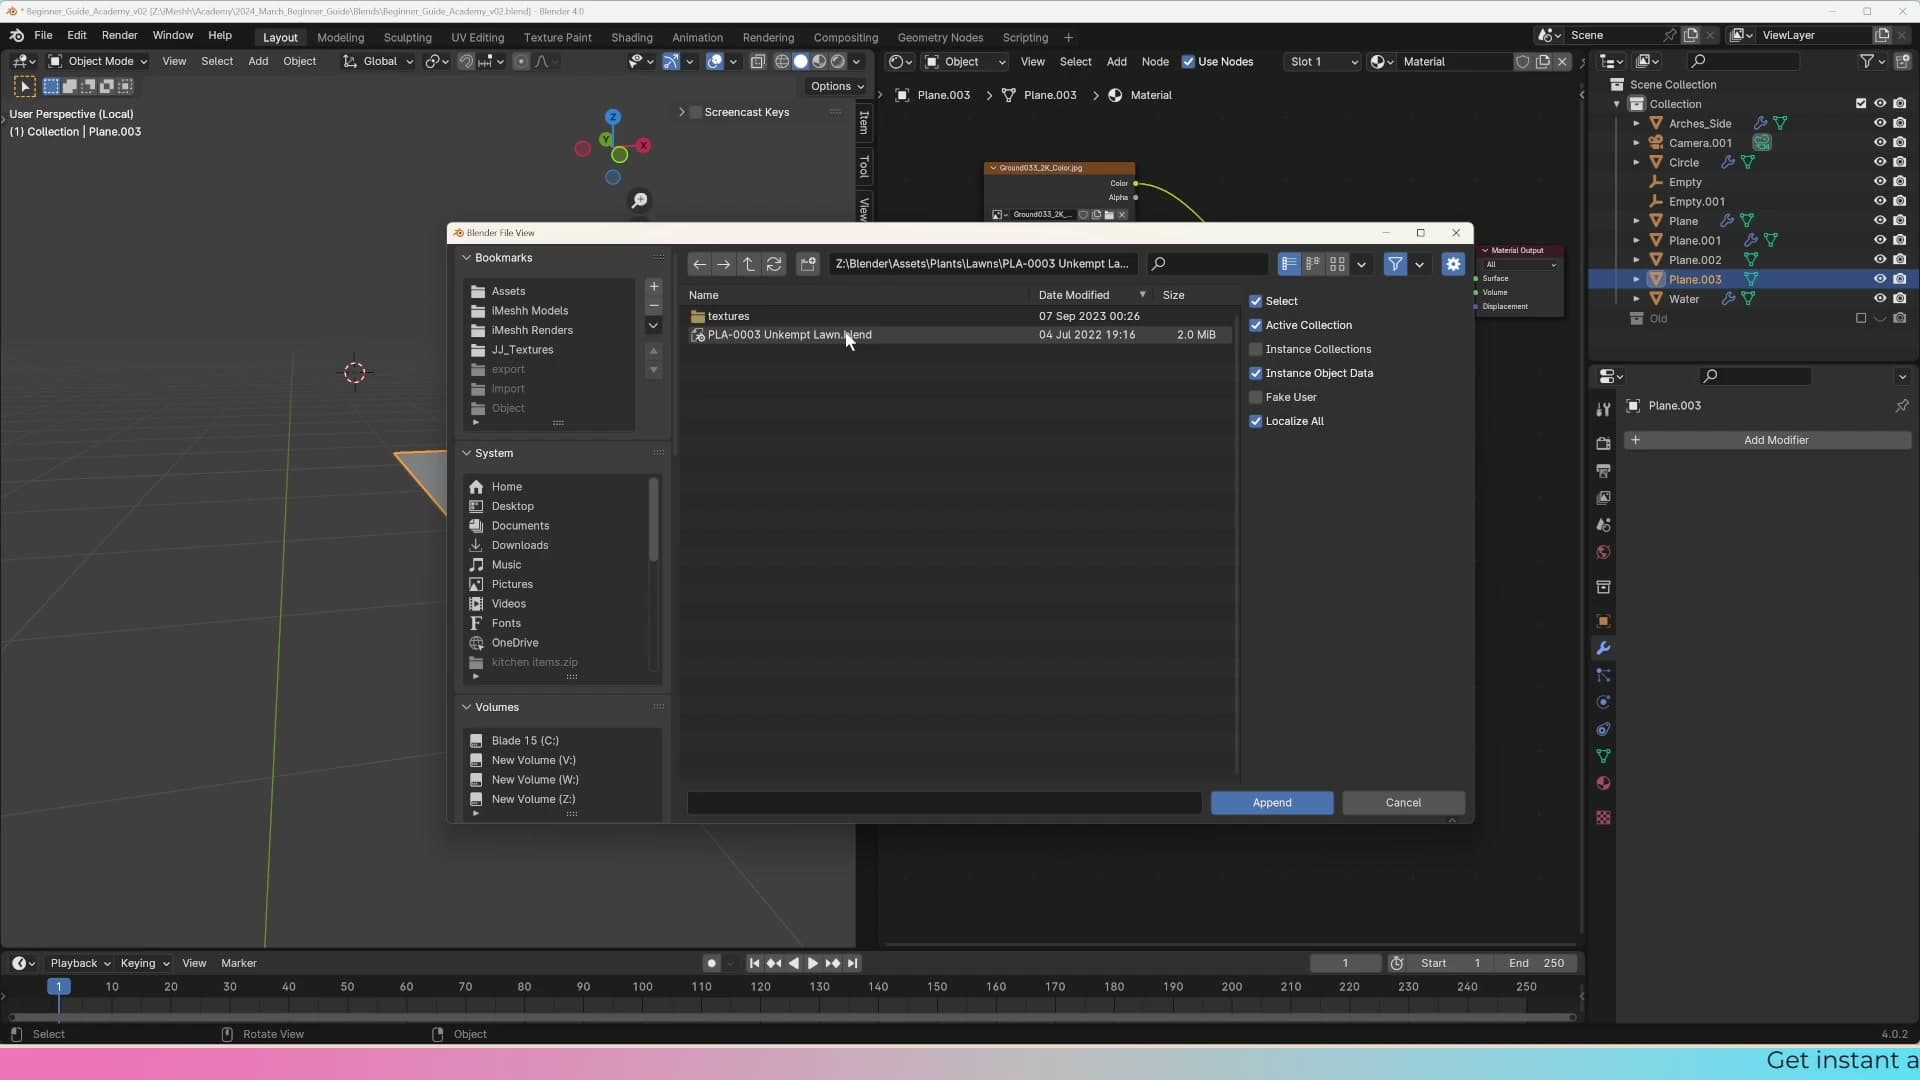
Copy the full file path to that .blend. Back in Blender, go to File → Append, then paste the path straight into the location bar at the top of the dialog and press Enter. Blender jumps directly to the file rather than making you click through your folder tree.
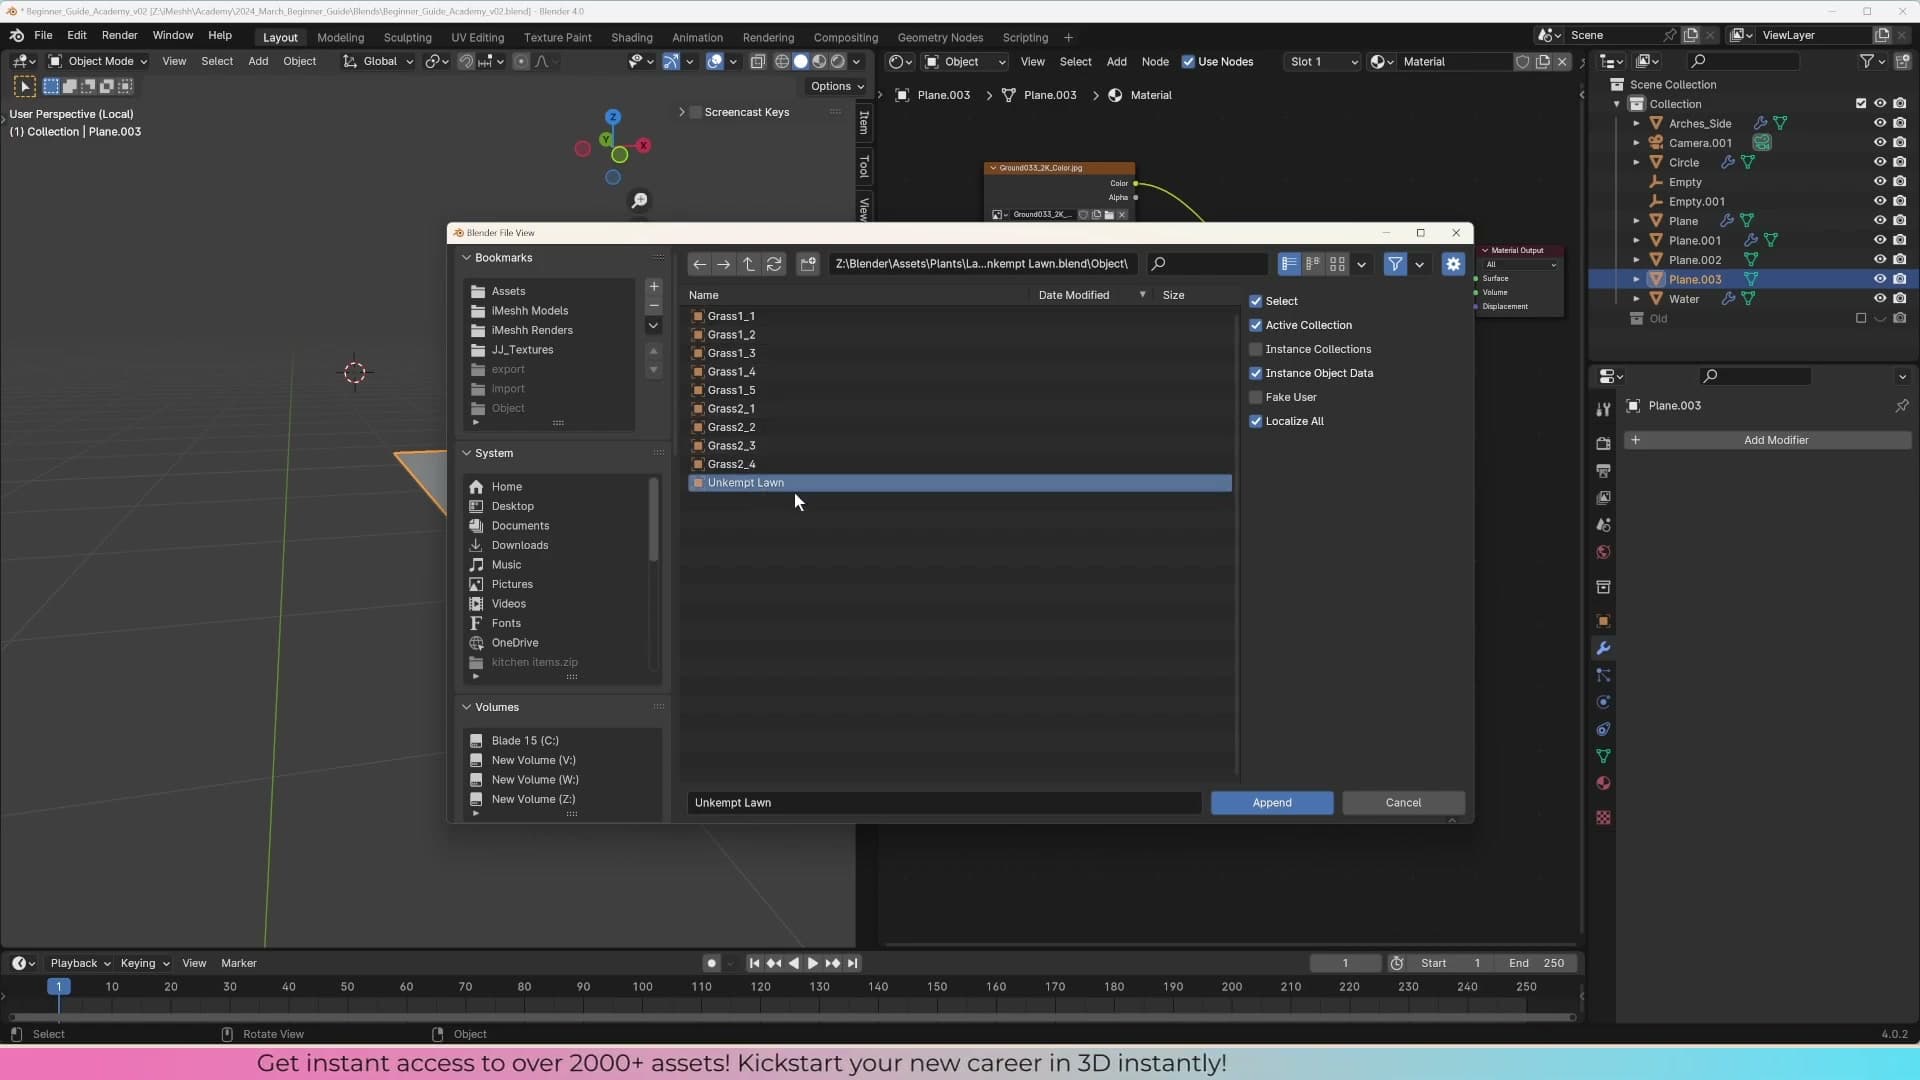
Double-click the .blend to browse its contents and open the Object folder. You'll see a long list. Pick Unkempt Lawn. There are several other grass variants listed alongside it, but you don't need to tick them individually. Blender knows the Unkempt Lawn object depends on those variants and will pull them in for you.
Click Append. The grass system drops into the scene with noticeably more geometry and variety than the setup from the previous part, which is exactly why it's worth borrowing rather than rebuilding.
Joining the grass object to the ground plane
Just as in the previous part, you want the geometry-node setup attached to your existing ground plane rather than sitting beside it as a separate object. Click the ground plane, Shift-click the appended Unkempt Lawn so the lawn is the active selection, then press Ctrl+J. The geometry-node grass now drives the ground surface as well as the lawn's original mesh.
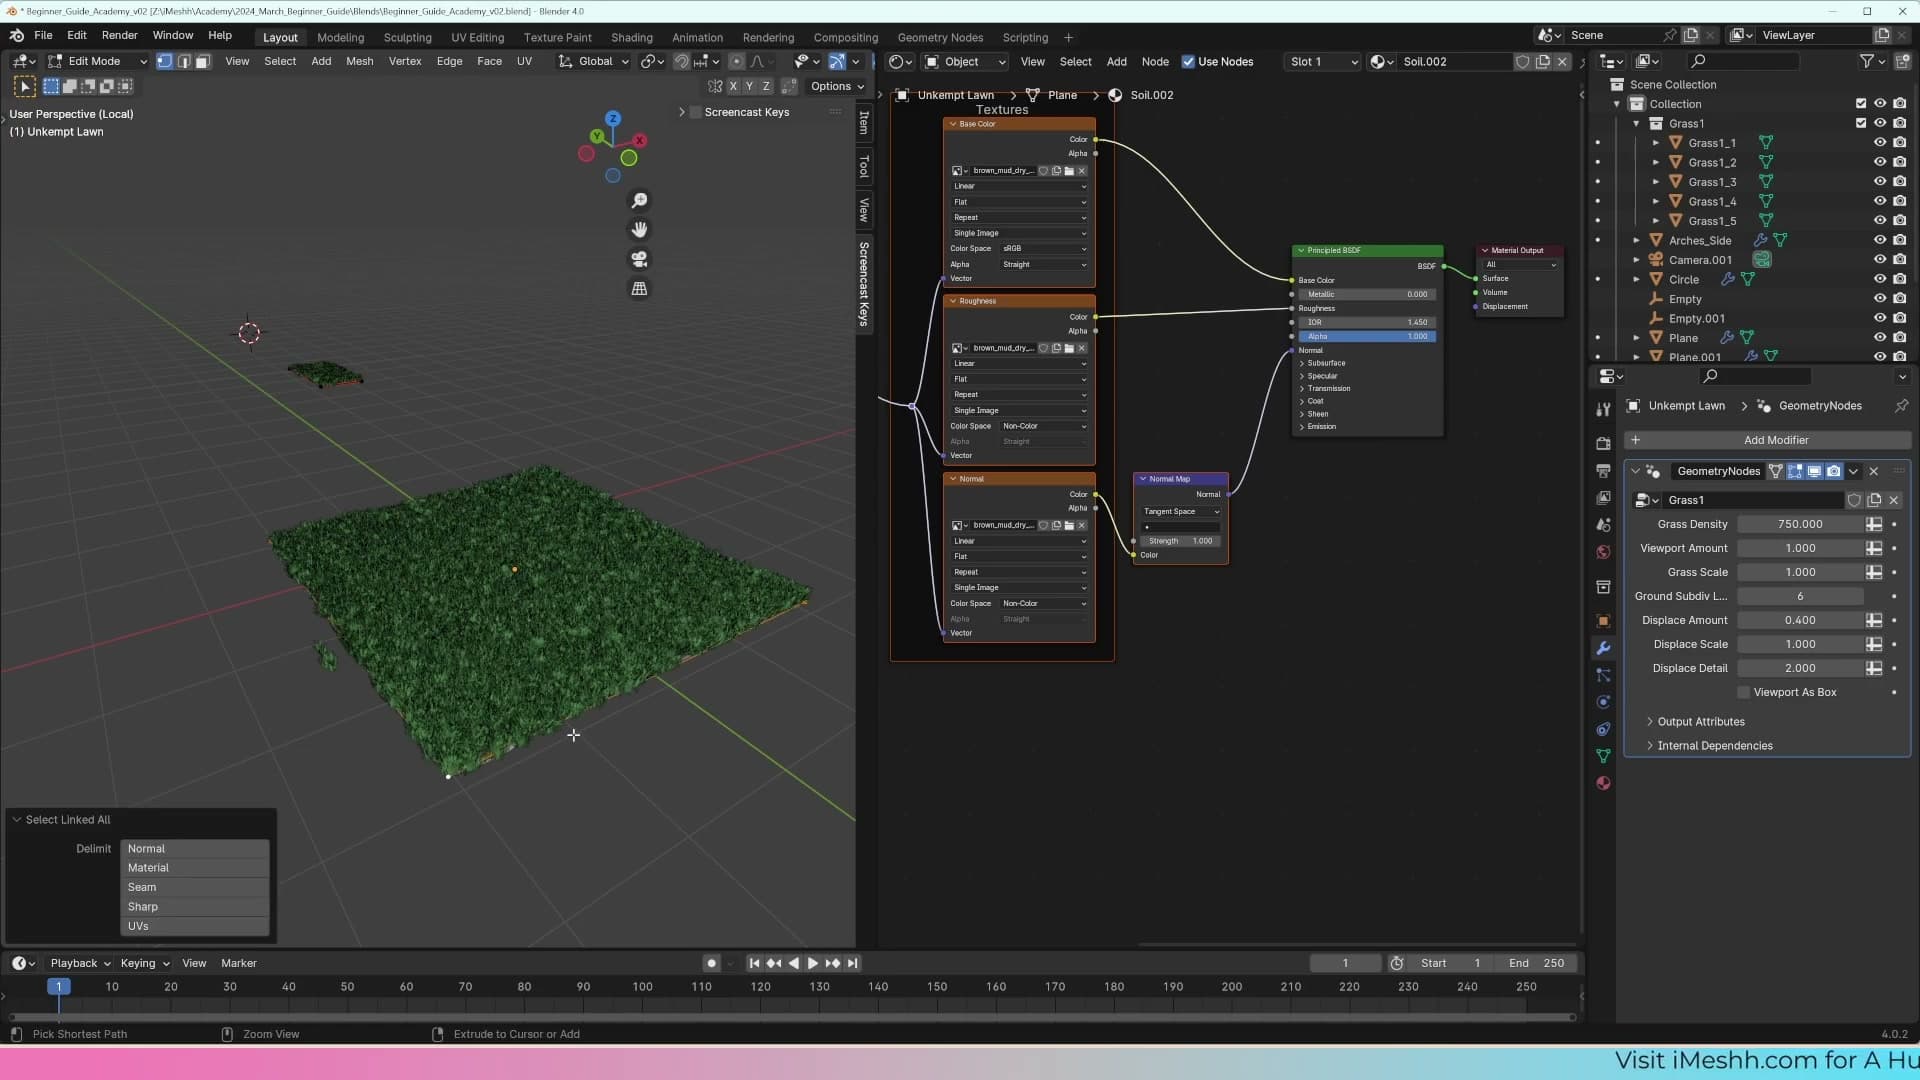
The lawn arrives with a small base face of its own, so after the join you'll see grass spilling onto a patch you don't want covered. To clean it up, drop into Edit Mode, click any vertex on the unwanted face, press Ctrl+L to expand the selection to all linked geometry, then hit X → Faces to delete it. The grass system is now driven solely by the ground plane you intended.
Tuning grass scale, density and ground bumpiness
The new grass is too tall and the ground is too lumpy from the previous module's displacement. Dial both back: grass scale around 0.5, density up to 3500, and tone down the displacement strength so the bumps read as soil, not dunes.
Adjusting grass scale and density
With the grass appended and joined to the ground, the blades sit too tall for this camera height. They overpower the archway rather than dressing it. Select the joined object so the exposed sockets on the grass geometry-nodes modifier are visible in the properties panel.
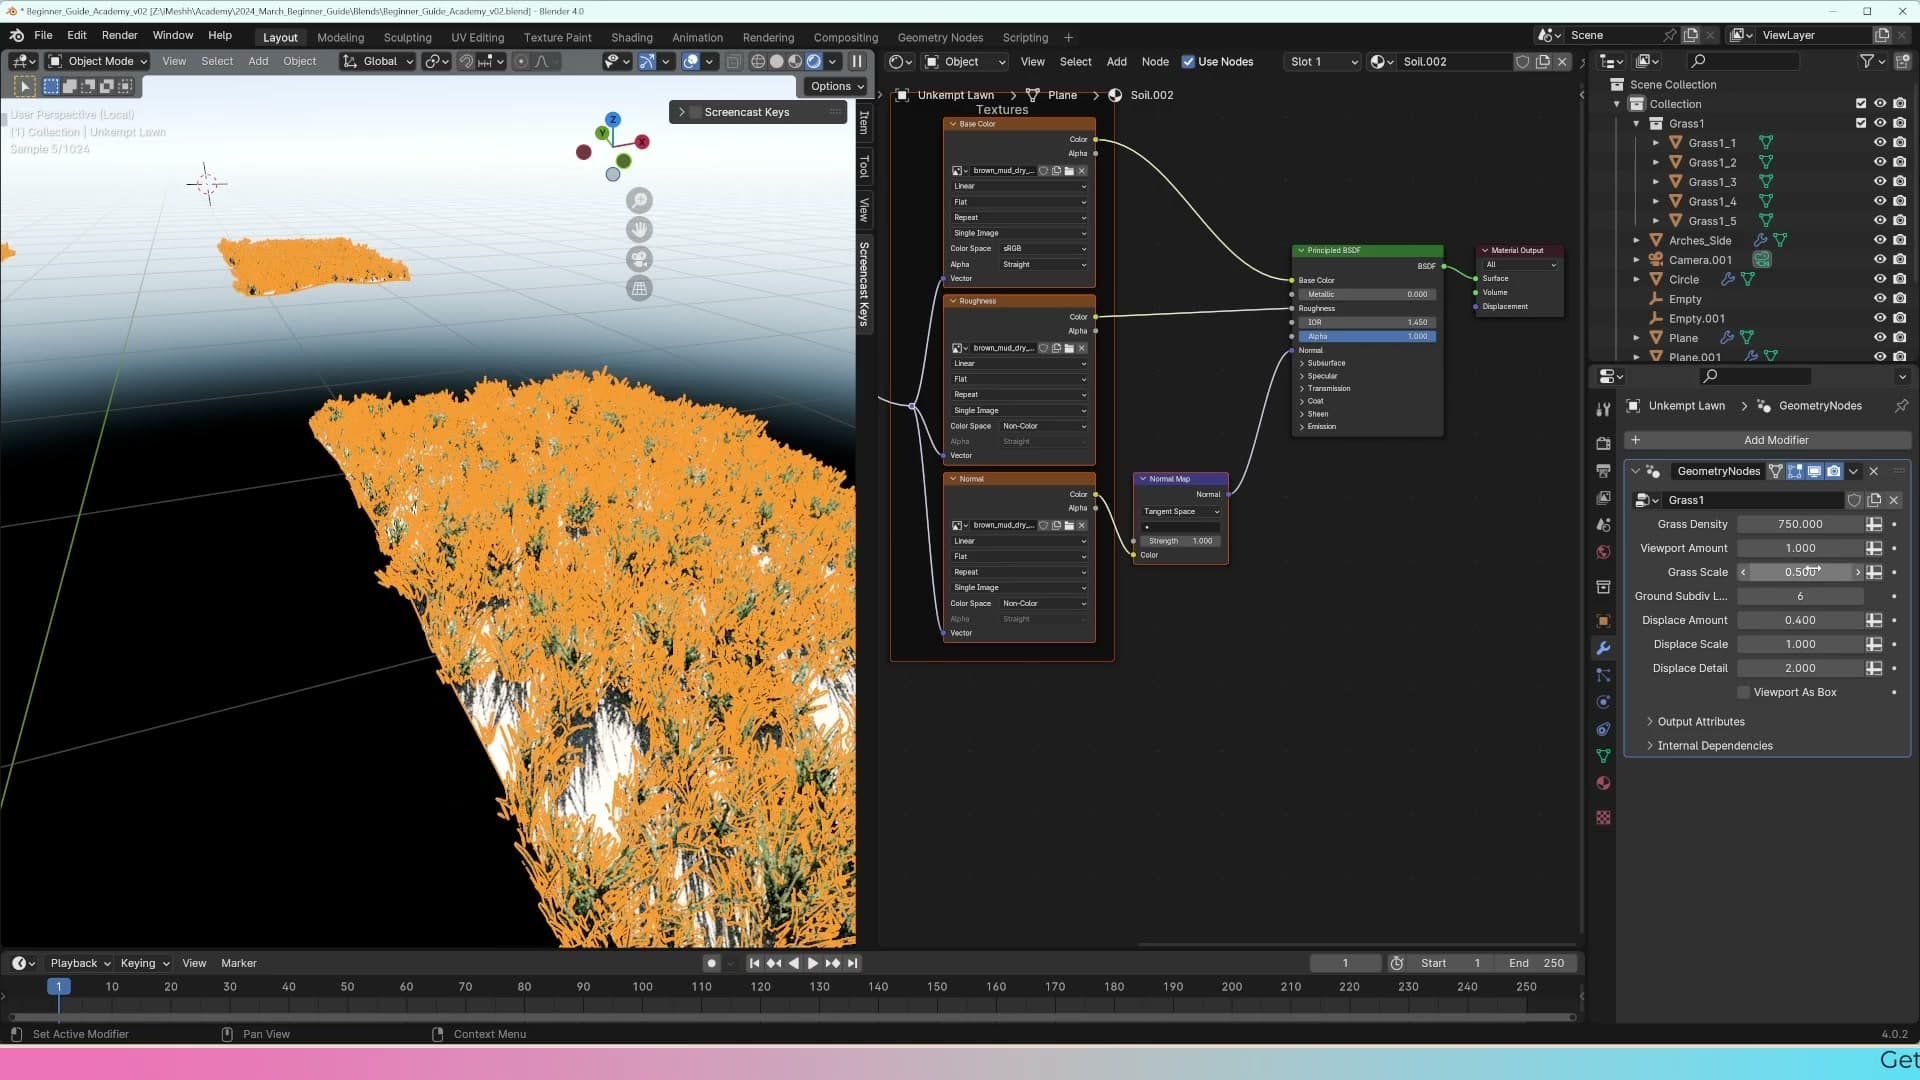
Drop the grass scale socket to 0.5. That alone brings the blades back to a believable height, but you'll see the lawn now reads as patchy. Push the density socket up to 1500 first, then keep nudging it until 3500 fills the gaps without choking the viewport.
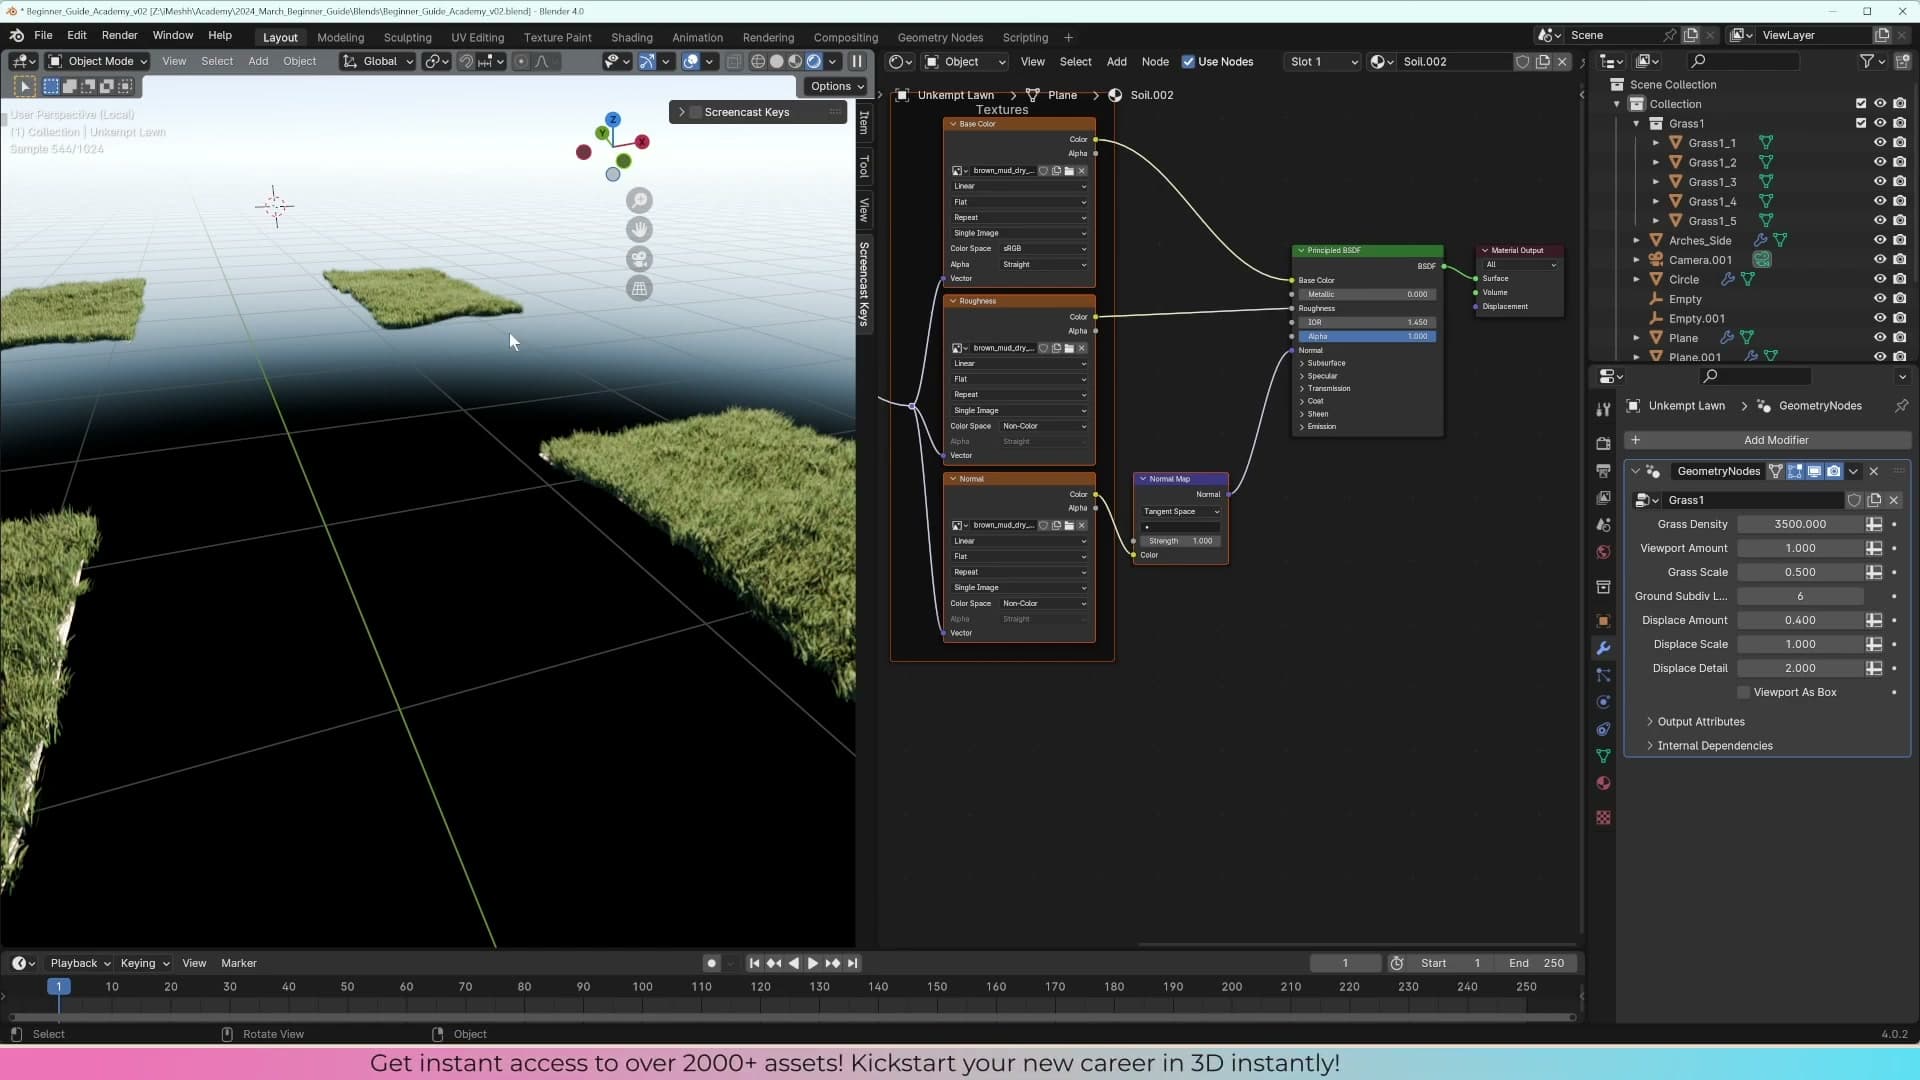
The wind sway is part of the same geometry-node group, so you get the wave through the grass automatically. No extra setup required once the scale and density read right.
Toning down the ground displacement
Before appending the grass you set up a separate displacement geometry-node system on the ground plane so the terrain wouldn't read as a flat slab under the blades. Sat next to grass at this scale, those bumps now look more like sand dunes than soil.
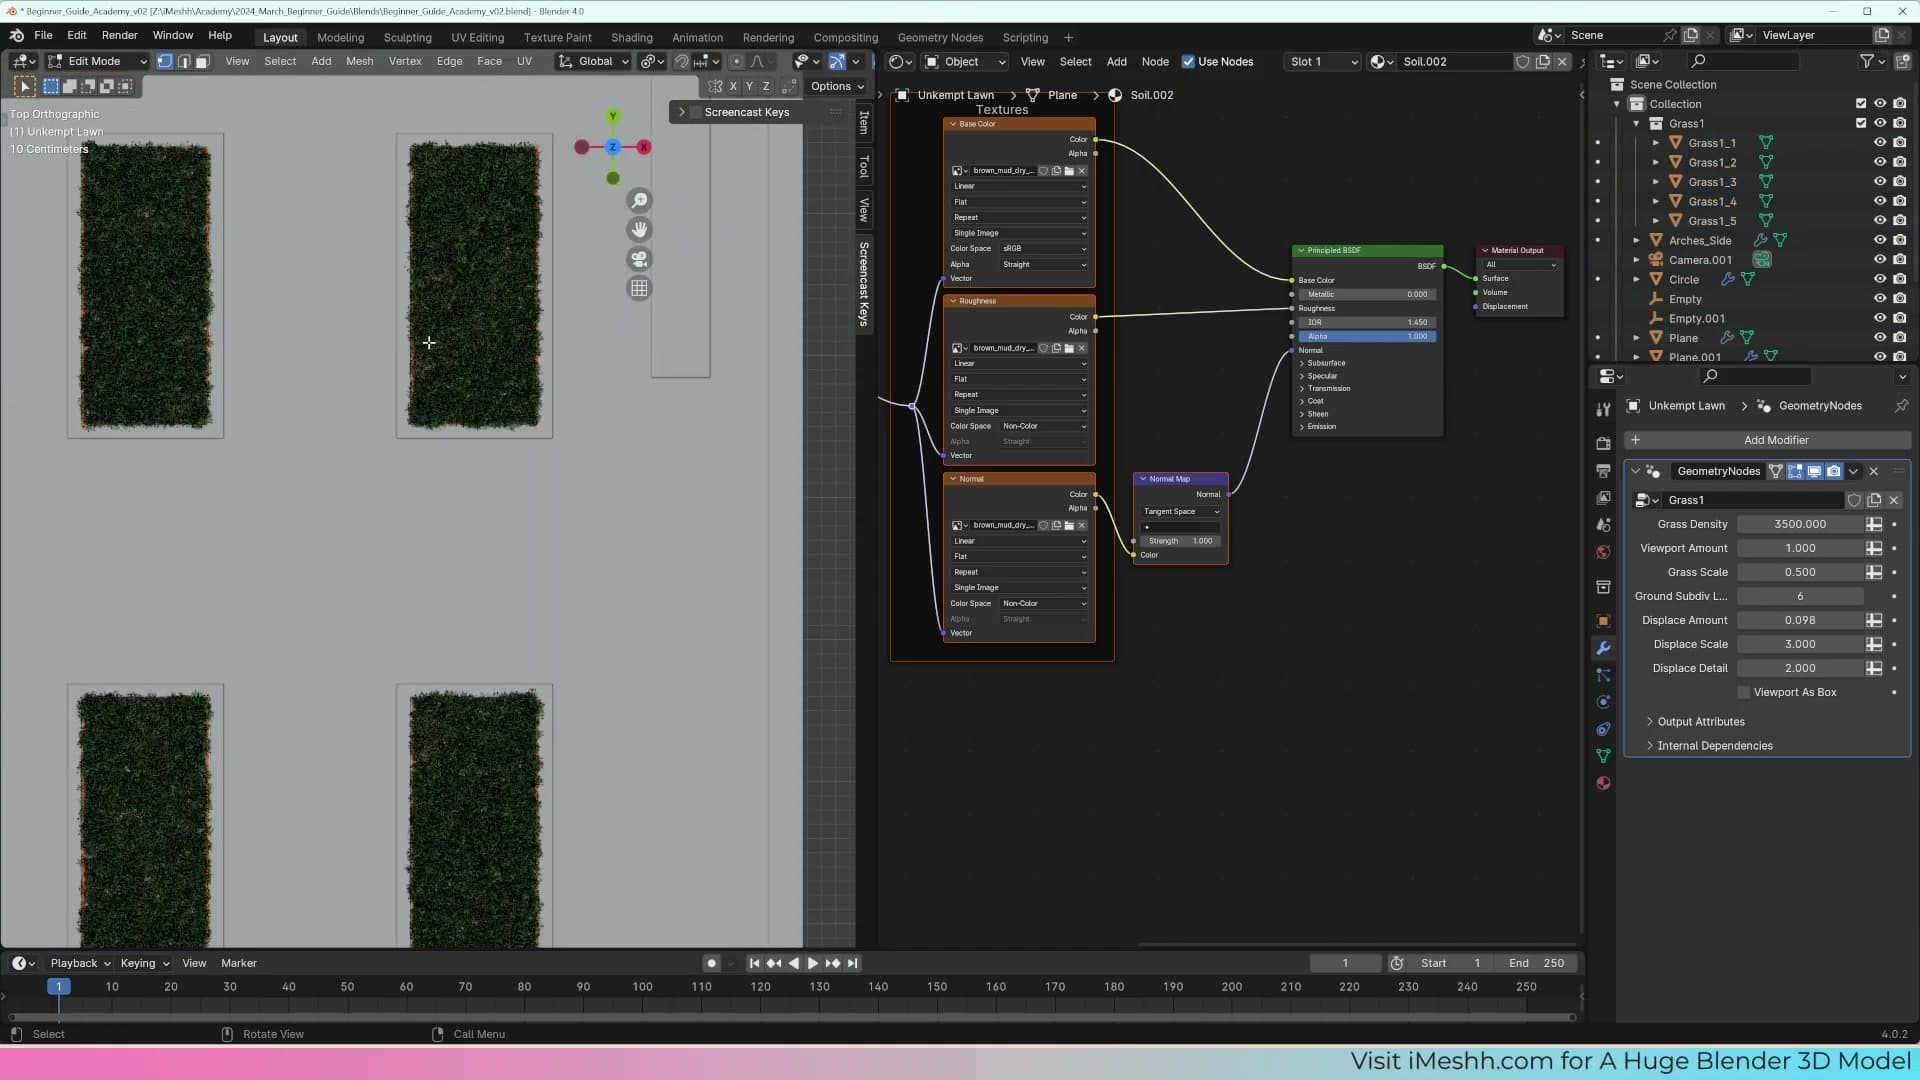
Find the displacement strength socket on the ground's modifier and dial it down until the unevenness becomes subtle. The shadows under the grass should hint at terrain rather than announce it. Once you can read the bumps as gentle soil variation, you're in the right zone.
Then switch to render view to check the result. Increase the displacement scale to 2.2. That tightens the bump pattern so the ground picks up smaller-frequency detail that reads as compacted dirt rather than rolling hills at this camera distance.
Adding the background hill
Build a back hill by 3D-cursor-snapping to the empty, adding a subdivided plane, and sculpting a low rise with proportional editing. A sharp edge marks the horizon so the hill feels like it disappears into distance.
Snapping the cursor and adding a subdivided plane
The hill plane needs to spawn at the centre of the scene, not wherever the cursor happens to be sitting. Select the empty that marks the scene's centre and press Shift+S → Cursor to Selected. The 3D cursor now sits exactly where the empty is, so anything you add next appears in the right place.
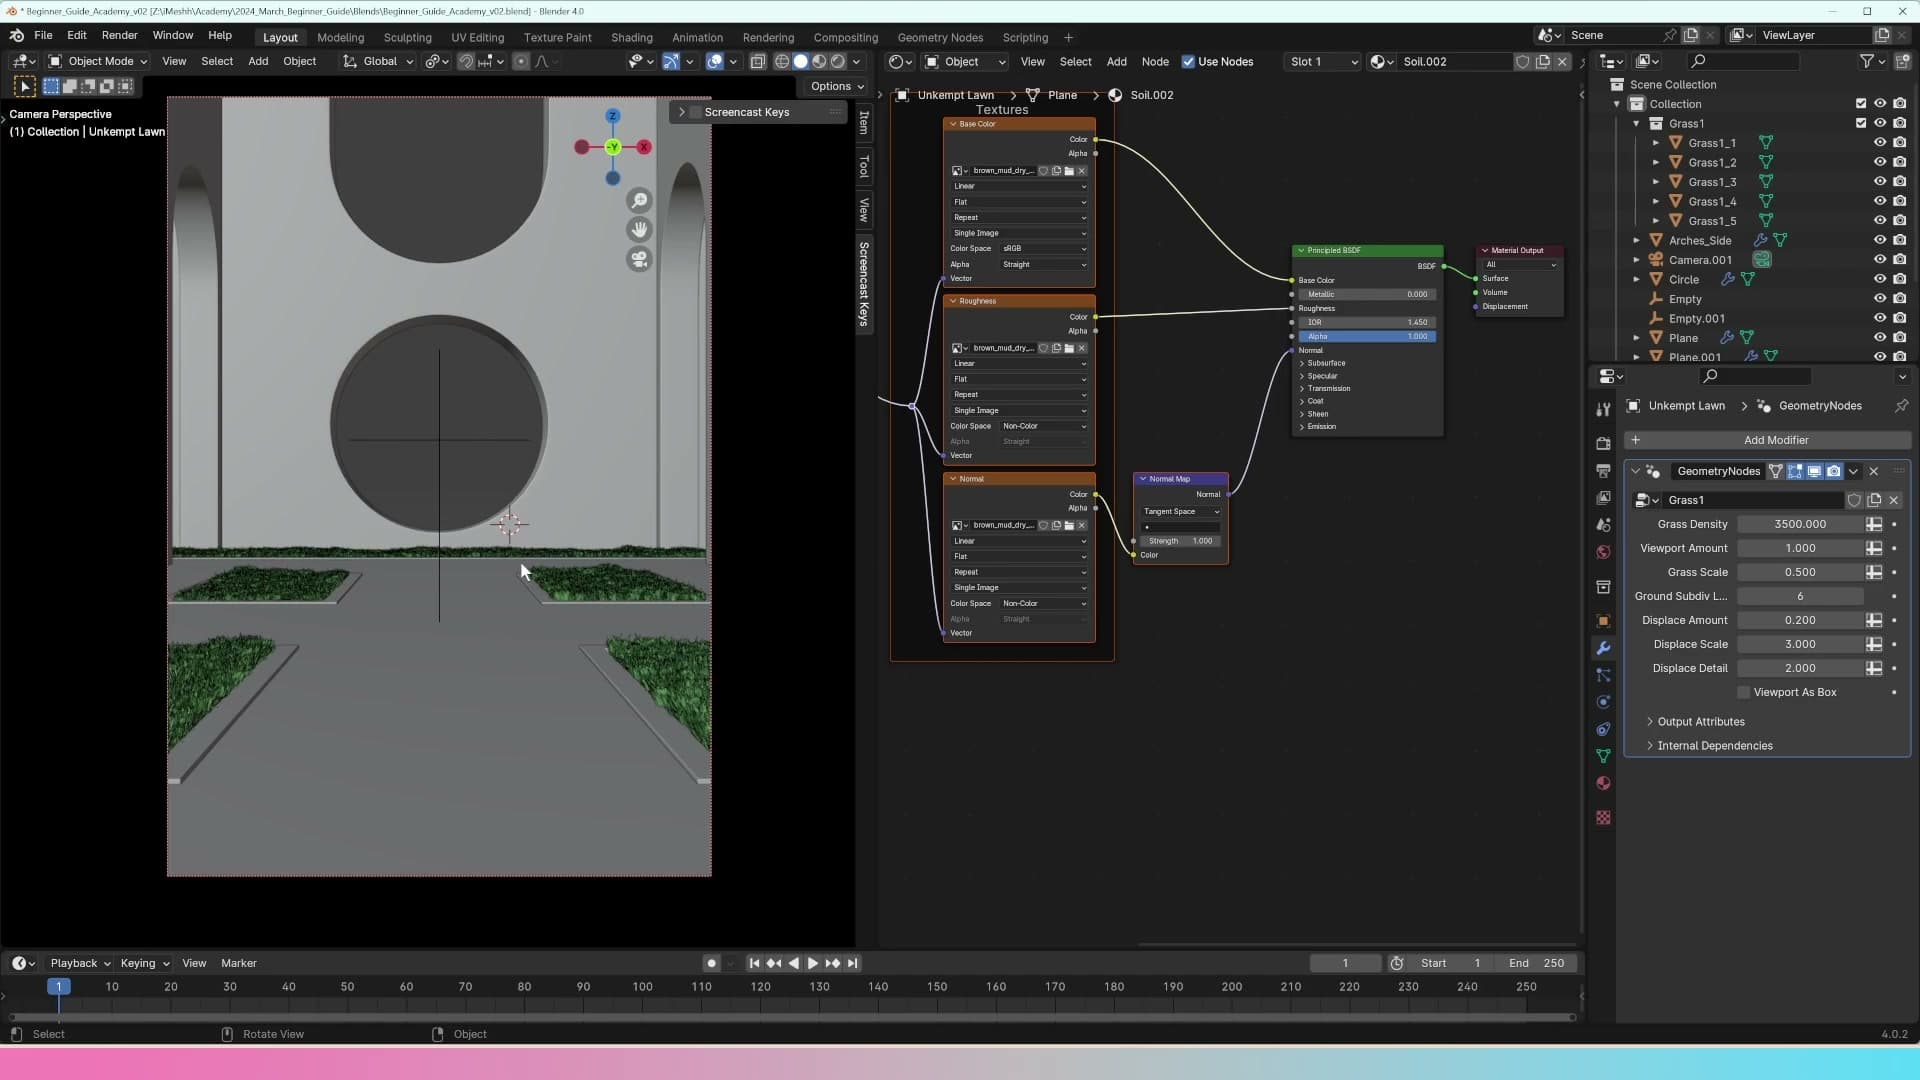
With the cursor parked, drop in a plane (Shift+A → Mesh → Plane), tab into edit mode and scale it up until it covers the back of the scene. Right-click and choose Subdivide a few times. You need enough geometry across the surface for proportional editing to push a smooth mound through without faceting.
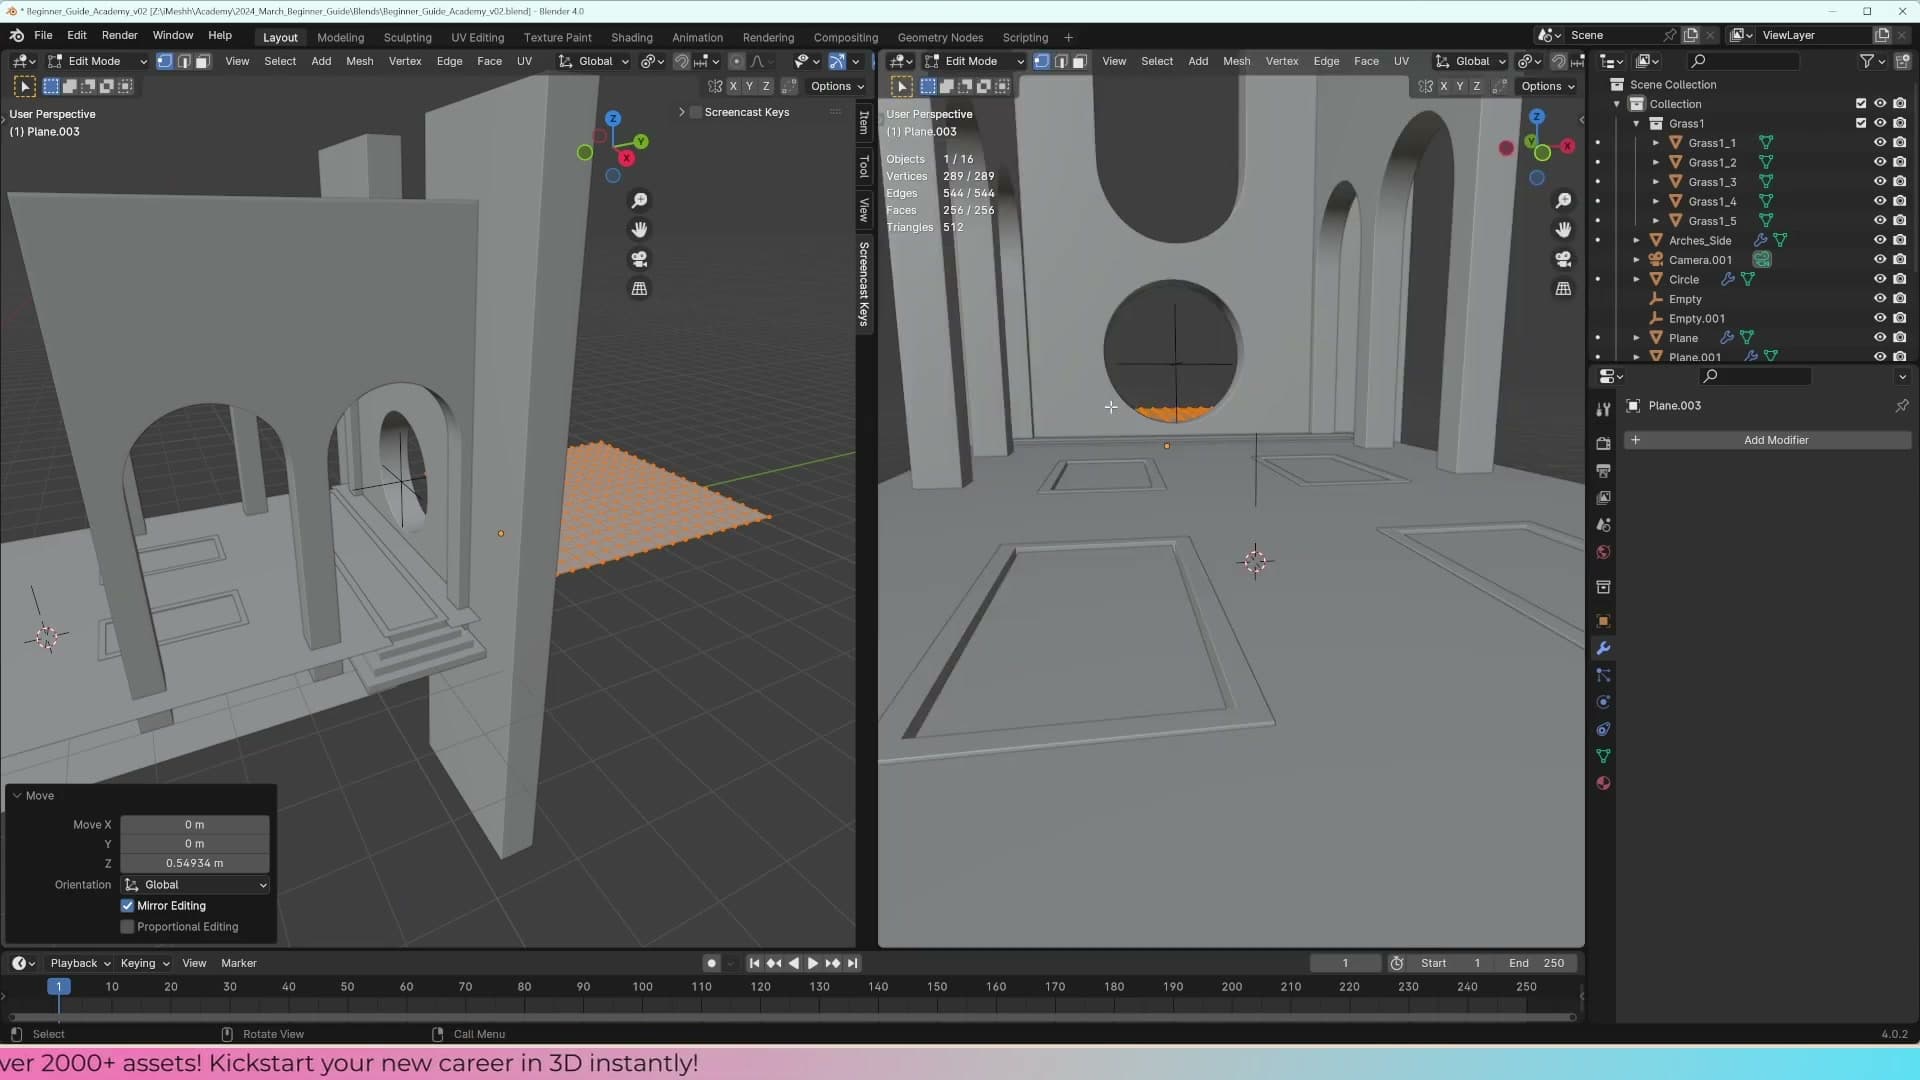
Flick into camera view (Numpad 0) and use G then Z to lift the whole plane up to roughly where you want the horizon to sit. Then pop back to a free 3D viewport and toggle local view (/) so you can sculpt the hill on its own. Grass, walls and pillars stop crowding the screen while you work.
Sculpting the hill with proportional editing
Proportional editing is the trick that turns the flat plane into a hill. If it isn't already on, press O to toggle it. Every grab now affects nearby vertices with a soft falloff, which is exactly what a rolling landform needs.
Select a single vertex near the middle of the plane and press G then Z to begin moving it upwards. Before committing, scroll the middle mouse wheel out to expand the proportional radius until the falloff covers a wide patch of the plane. You'll see the soft circle of influence grow. Lift the vertex up by eye until the mound reads as a low hill, then left-click to confirm.
Sharpening the horizon edge and unwrapping
The back edge of the plane is what reads as the horizon from the camera, so it needs to look like the ground is folding away rather than cutting off. Select that back edge in edit mode, mark it sharp, and drag it down a touch. The combination of a crisp crease and a lower position sells the silhouette as land receding into the distance rather than a sheet ending abruptly.
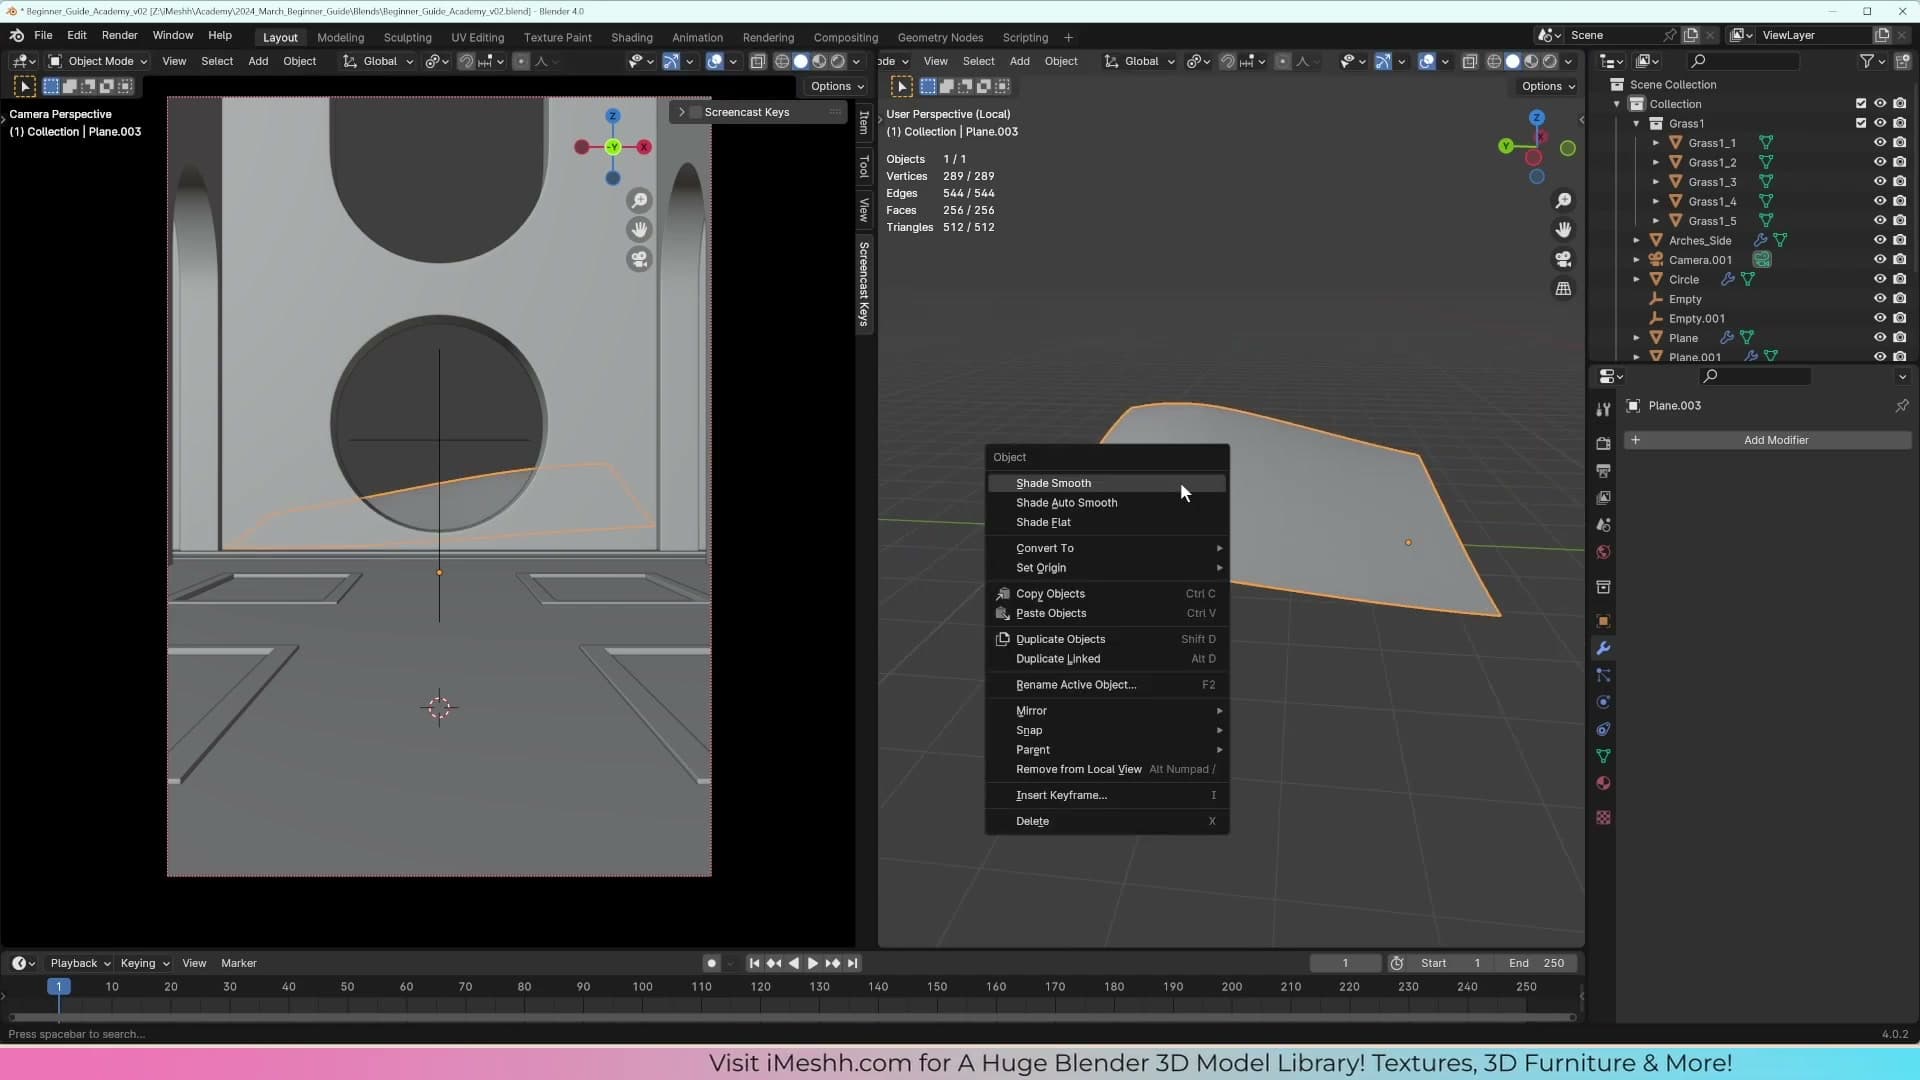
Drop out of edit mode and right-click → Shade Smooth so the bulk of the hill reads as a soft curve instead of faceted polygons. Finally, tab back into edit mode, select everything and press U → Unwrap so the mesh has UVs ready for whatever material you assign to it next.
Bringing grass onto the hill
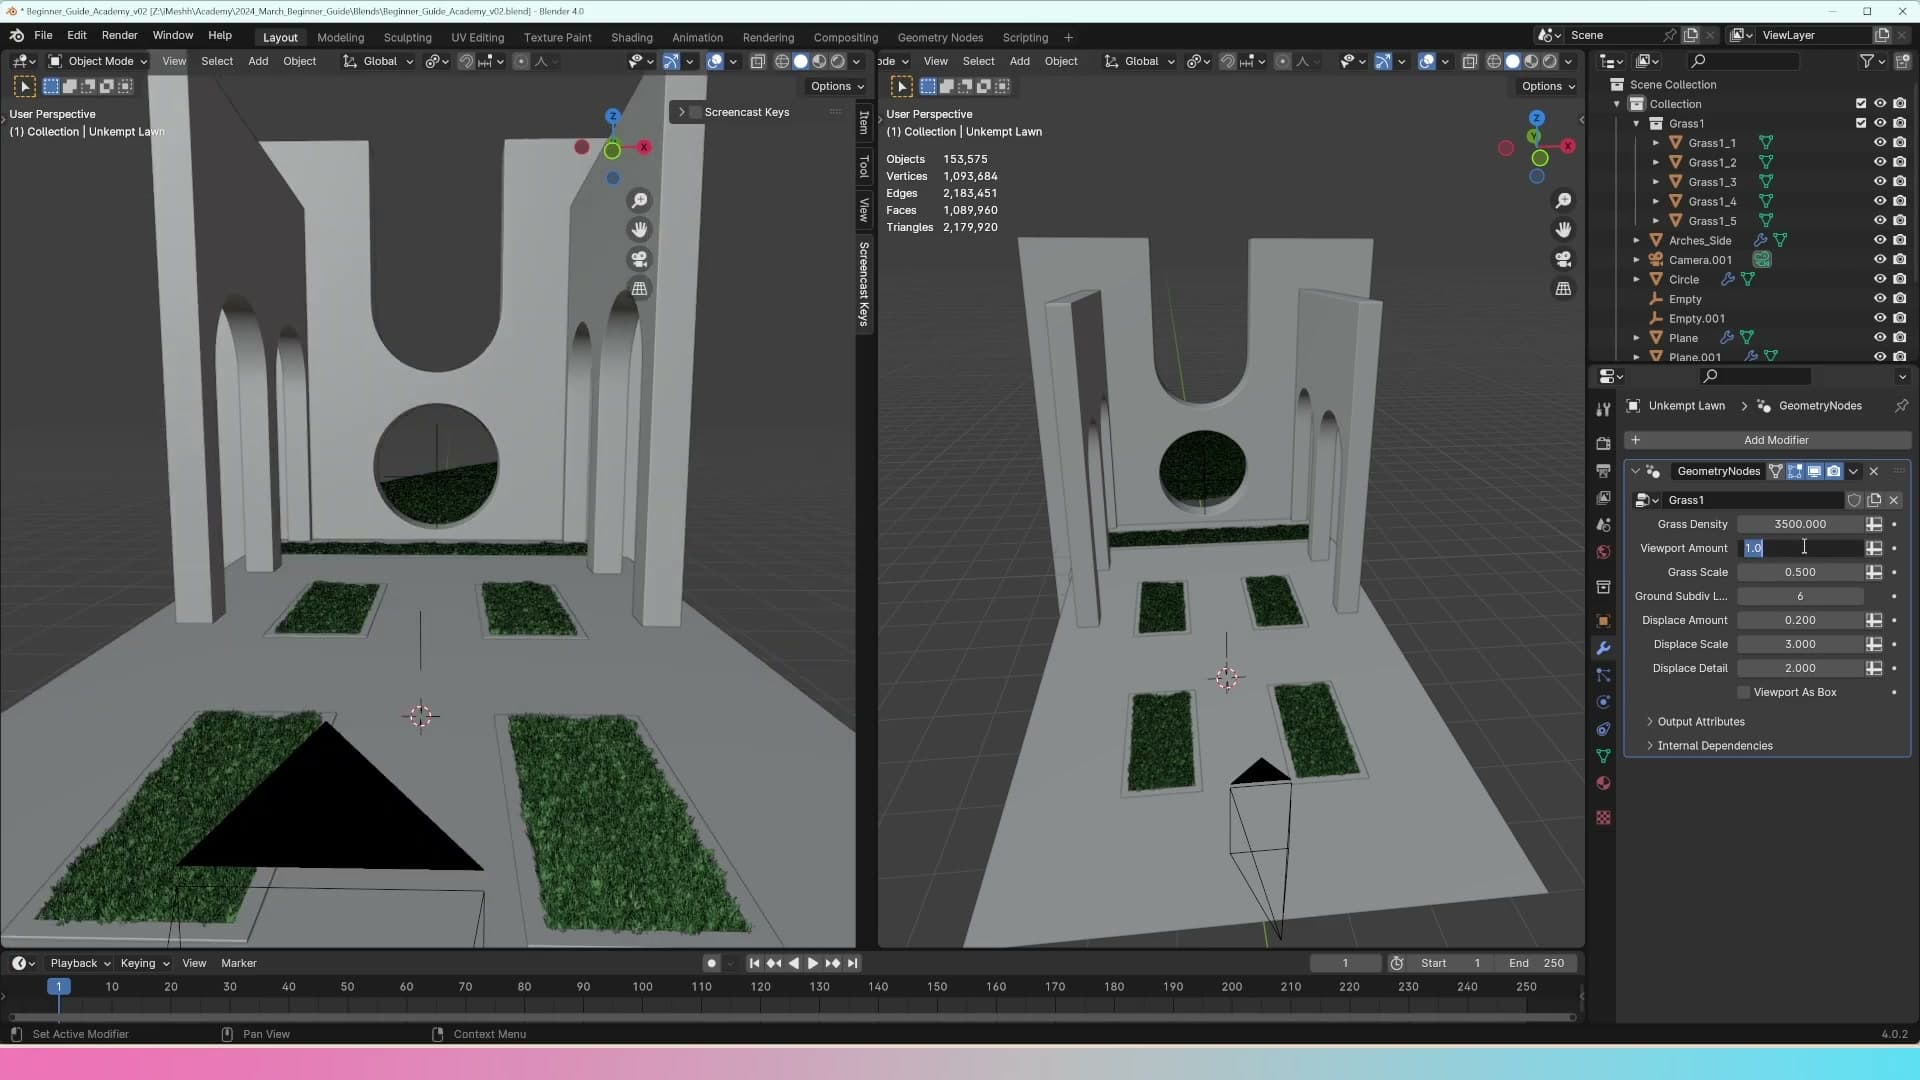
Join the hill to the grass object so the same geometry-node system covers it. The viewport instantly chokes, so drop viewport density to 0.05. Render density stays at 1 and you just preview lighter.
Joining the hill to the grass system
Right now the hill is a separate mesh from the ground plane that carries the grass geometry-node setup, so the back of the scene is still bare. The fix is to merge the two objects into one. When they share a single mesh, the grass GN modifier scatters across both the ground and the hill in one pass.
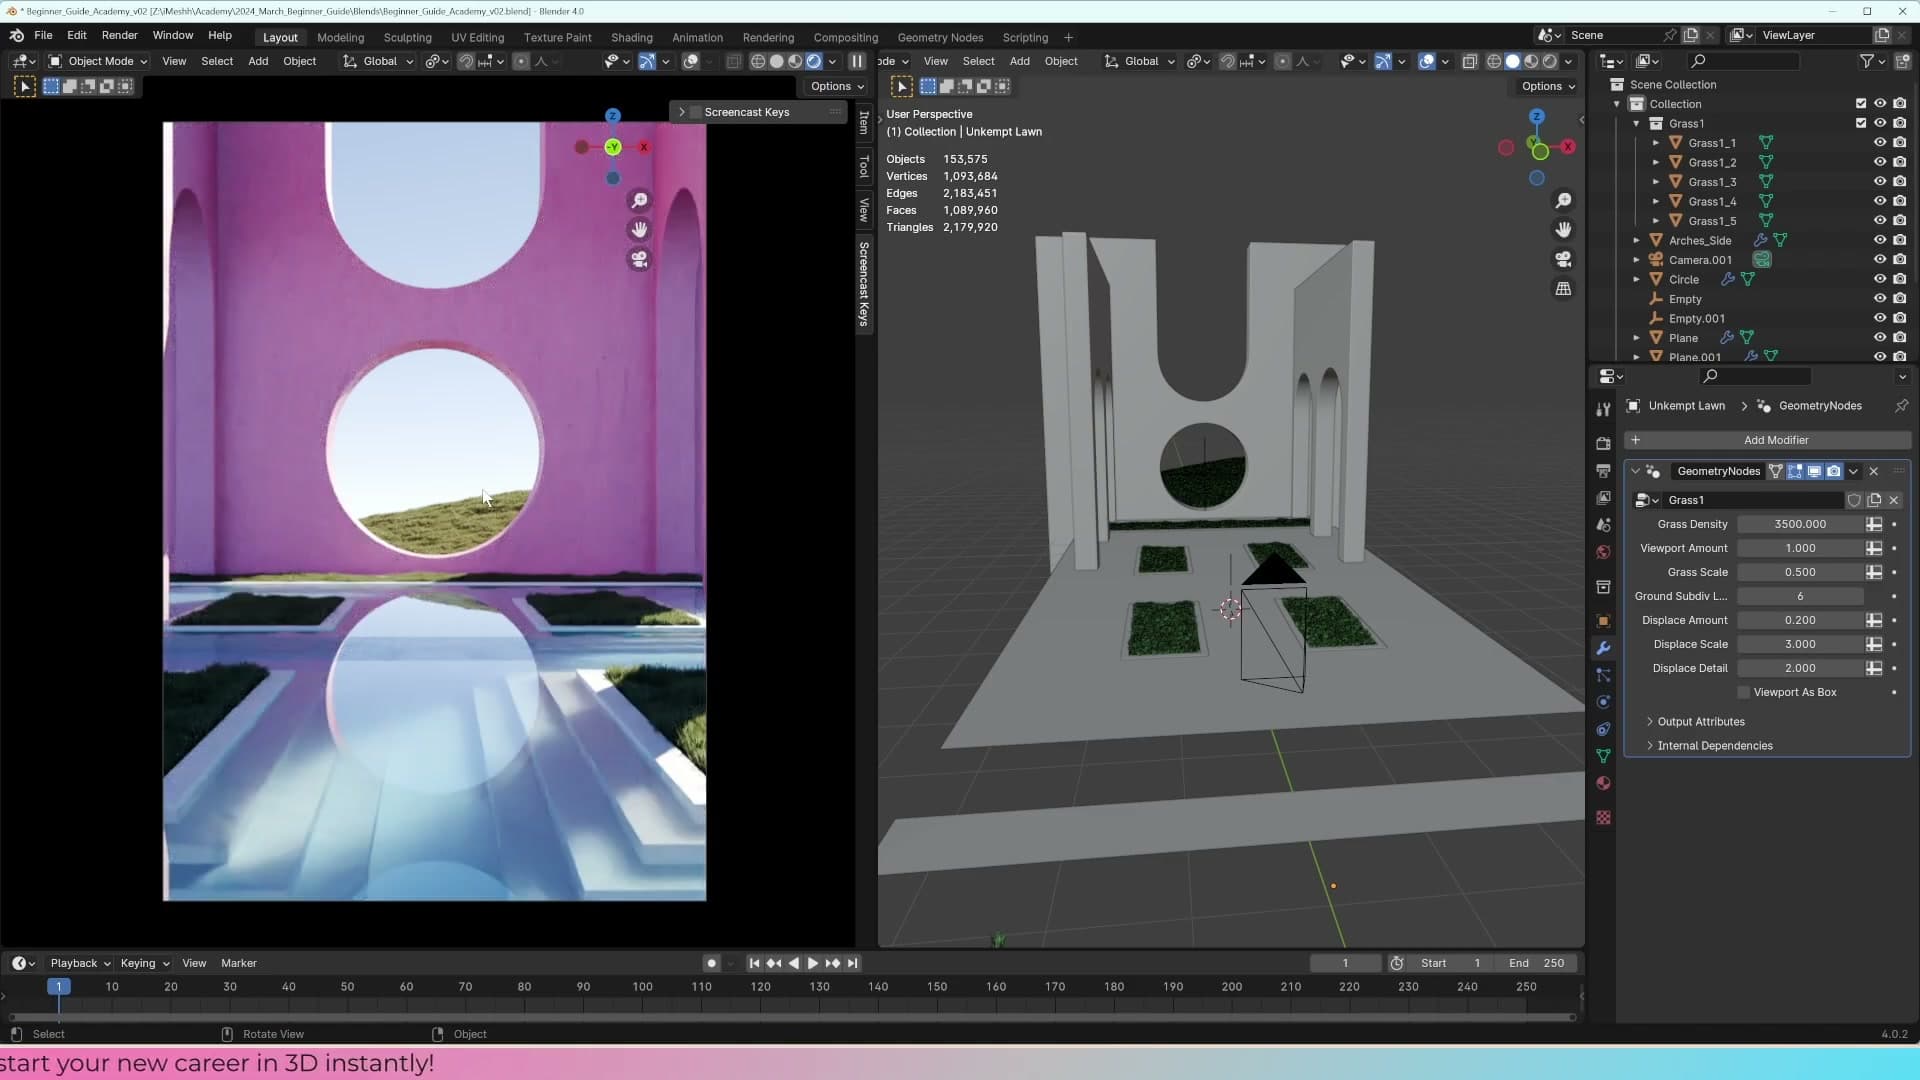
Select the hill first, then shift-select the grass object so it becomes the active one, and press Ctrl+J. Blender joins the hill into the grass object, the grass object's modifier stack carries over, and the hill instantly fills with grass.
Lowering viewport density for performance
Joining the hill onto the grass object roughly doubles the surface the GN system has to scatter over, and the viewport will choke almost immediately. You don't want to drop the actual grass density though. That would weaken the final render.
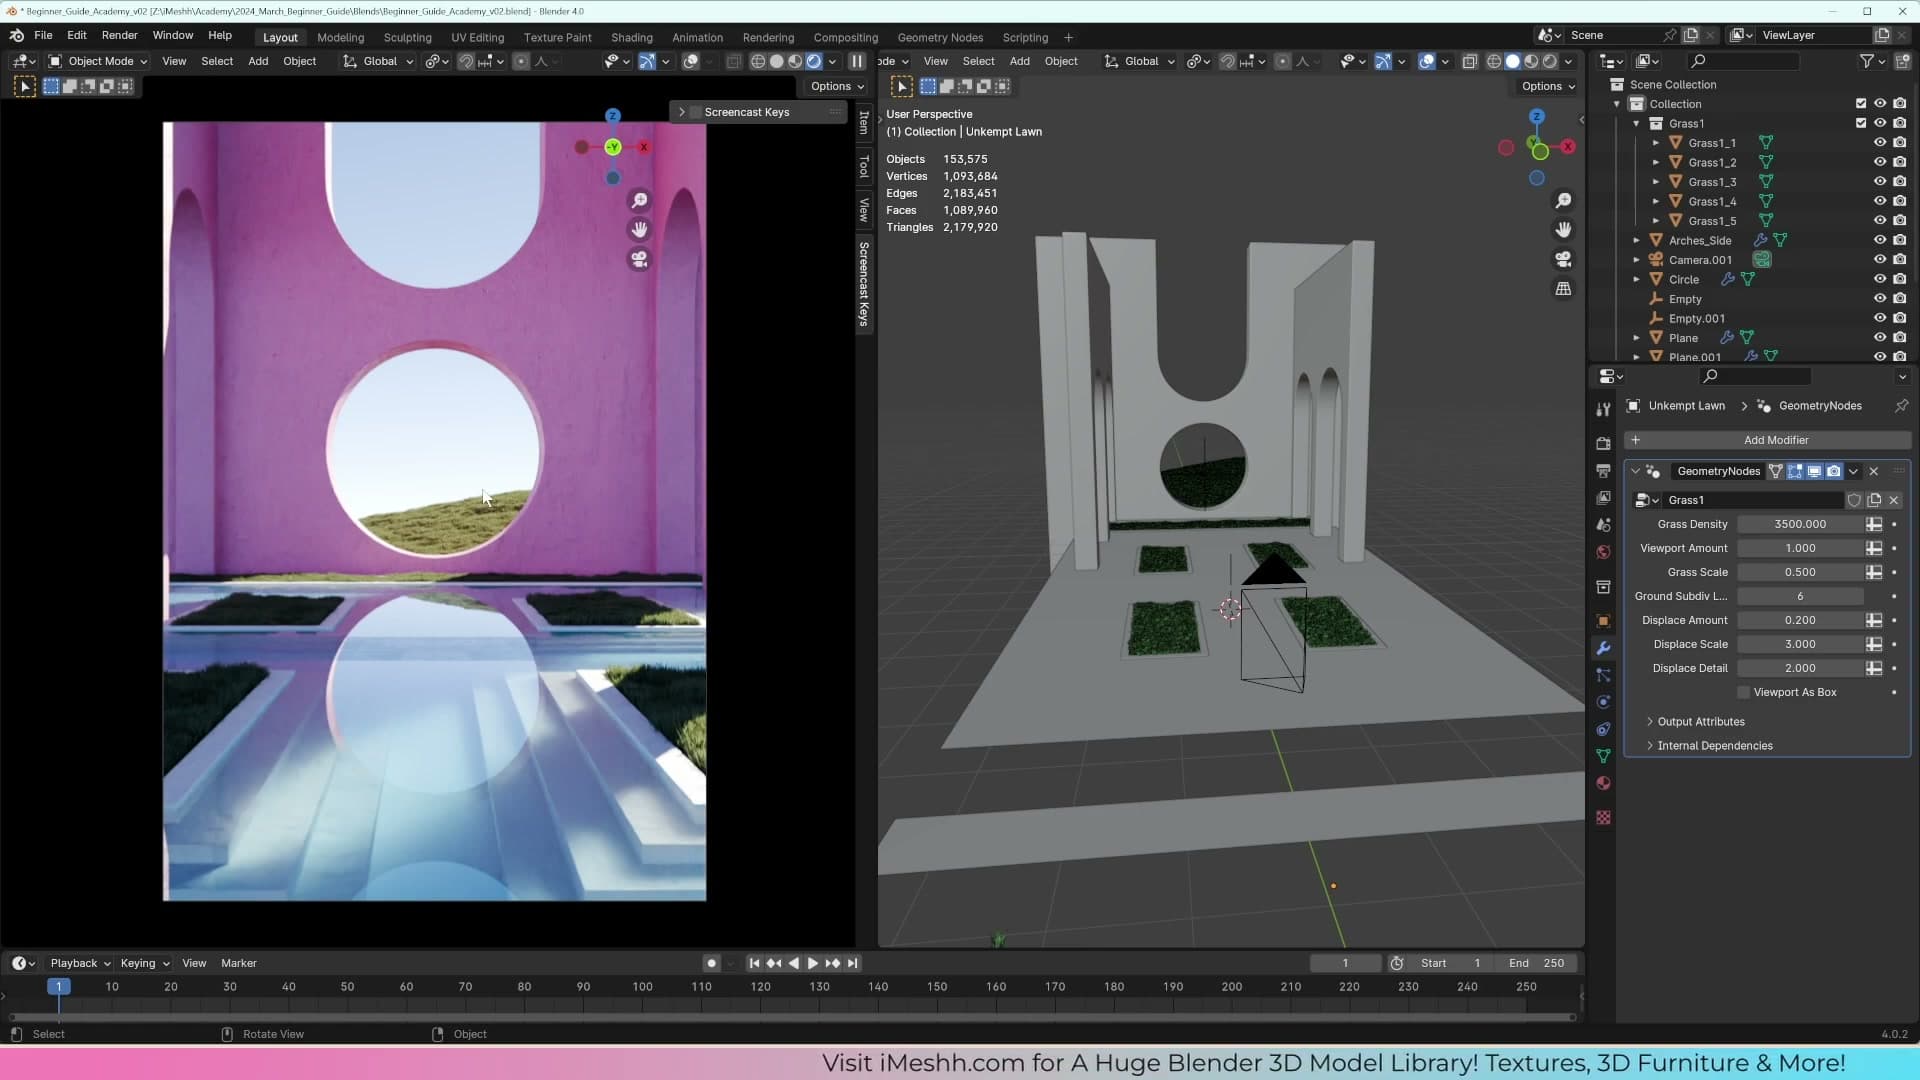
The trick is the viewport-only density override on the grass modifier. Set that value to around 0.05 while you're working and the preview thins out to something Blender can spin and pan smoothly. The render density socket stays at 1, so when you hit F12 the grass comes back at full strength.
If 0.05 looks too sparse to judge composition, 0.1 is a comfortable middle ground: still light enough to navigate, dense enough to read the silhouette of the lawn against the hill.
Appending ivy plants onto the pillars
Use the same Append flow to bring the iMeshh Ivy Boulevard onto an archway pillar. The plant is 500k faces, so duplicate it with Alt+D instead of Shift+D. Linked duplicates are instant where Shift+D stutters.
Appending the Ivy Boulevard from iMeshh
There are other ways to bring objects into a scene: Blender's Asset Browser, third-party asset managers. But the File → Append flow you already used for the grass works just as well for plants. Keep using it for now so the workflow becomes muscle memory.
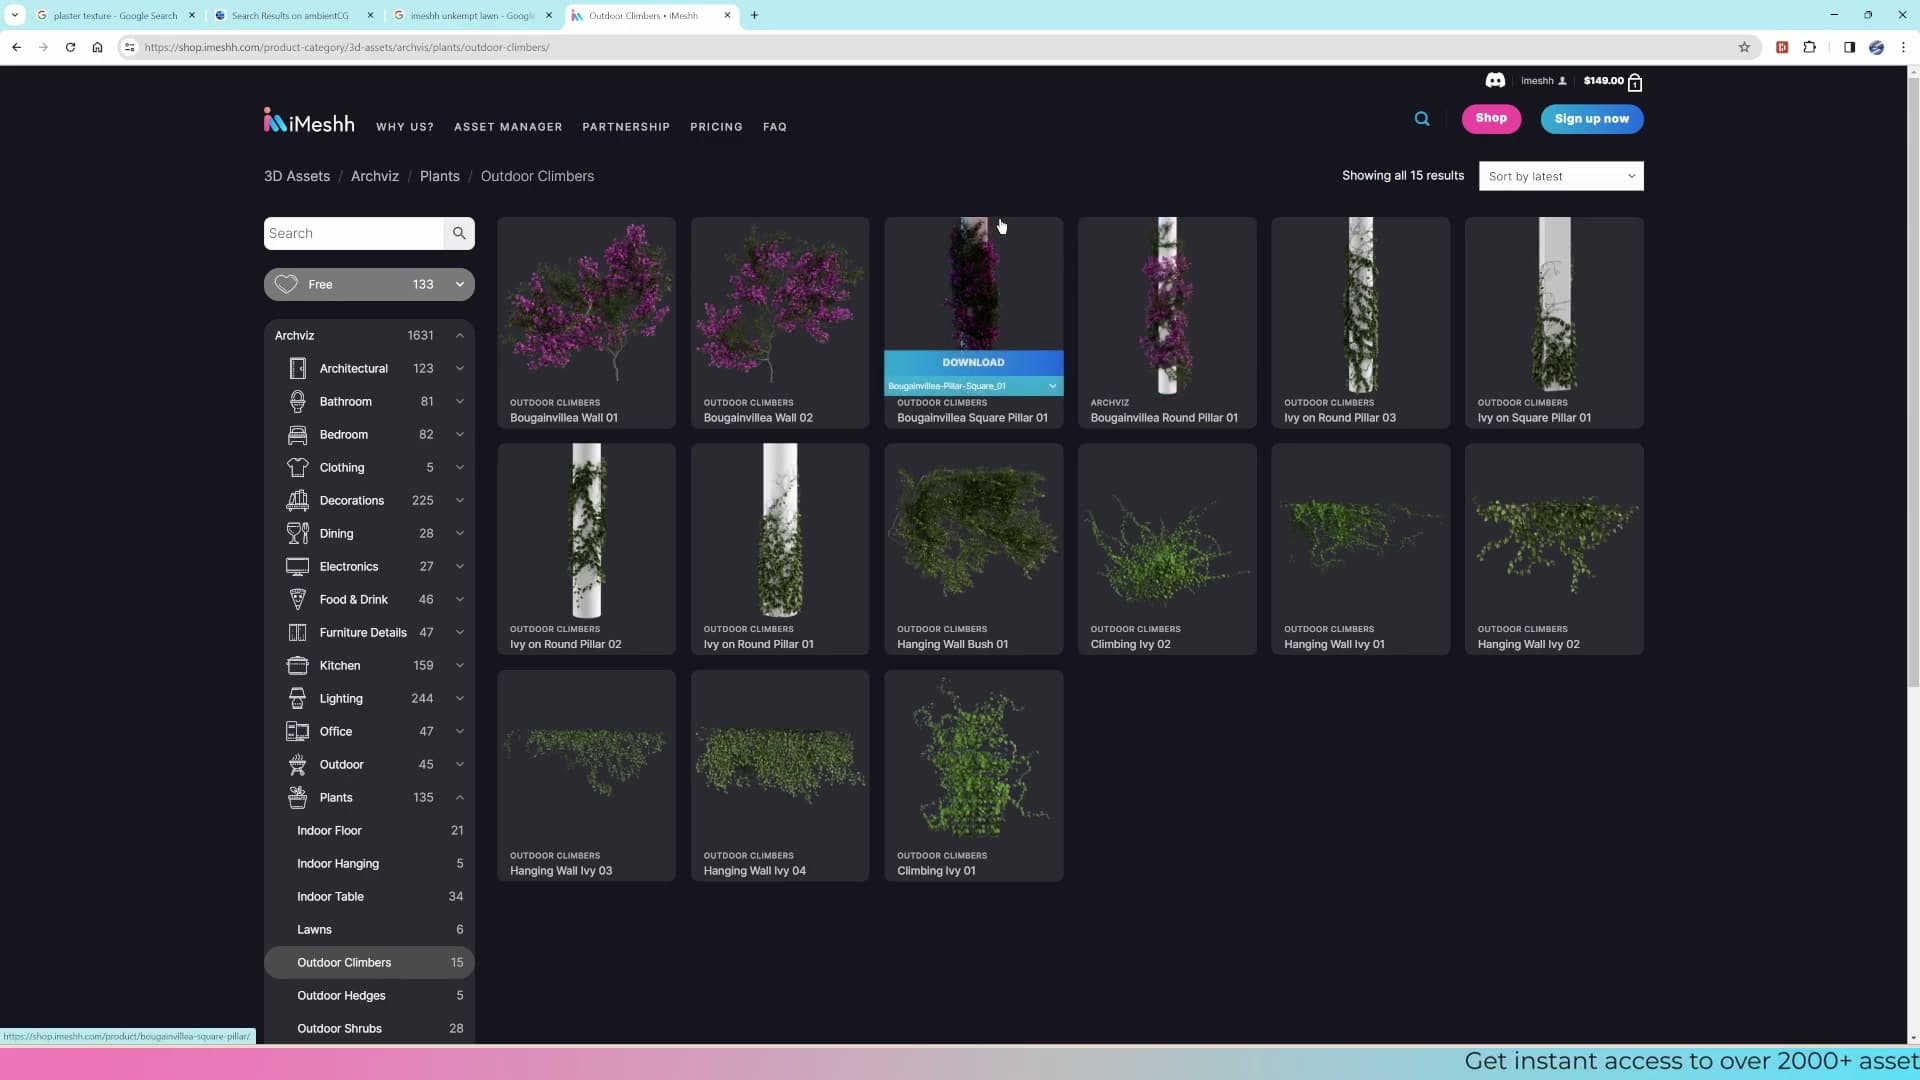
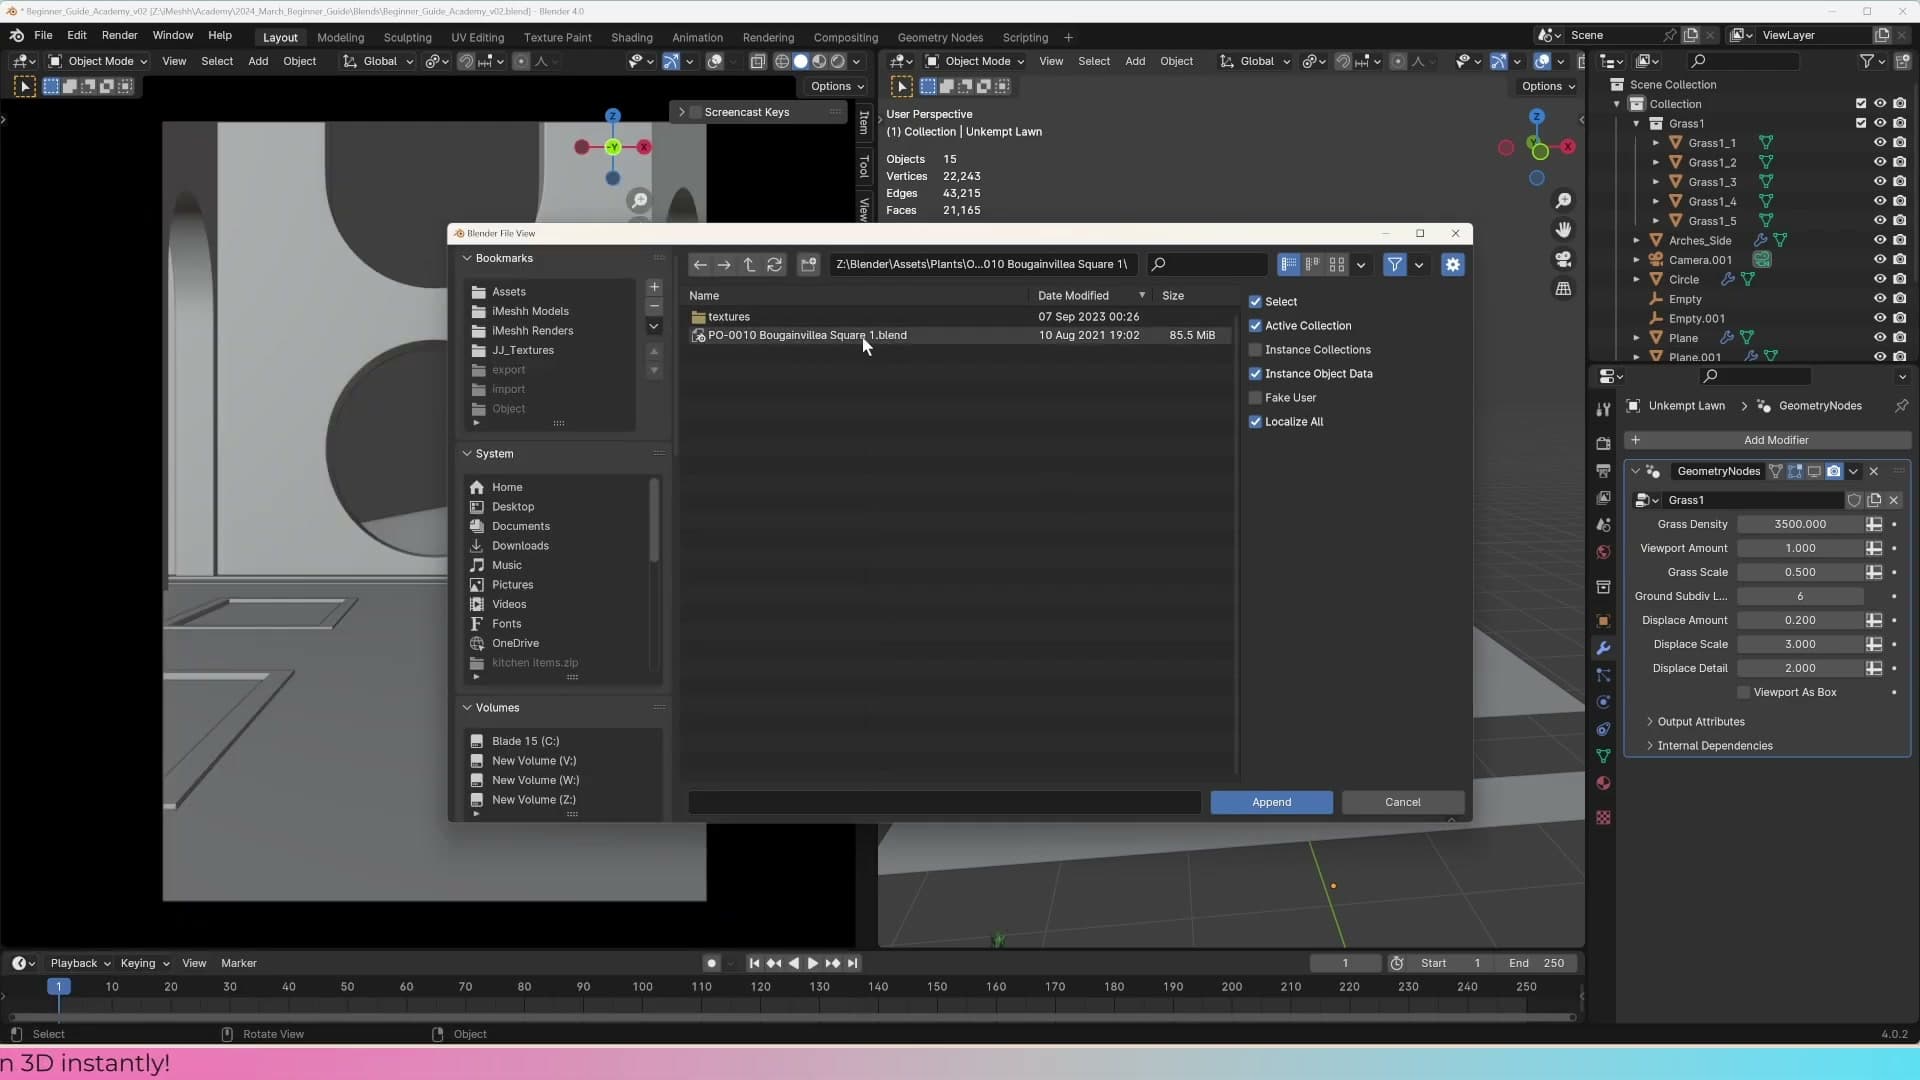
Download and unzip the ivy .blend, then go back to File → Append. Navigate into the .blend, open the Object folder, and pick Ivy Boulevard Square. This particular plant was built to sit cleanly on a square base, which is exactly what the archway pillars give you.
Placing the ivy onto the pillar
The ivy drops in at the 3D cursor, so the first job is to slide it over to one of the pillars. Switch to top view to see exactly where the pillar sits, then translate the plant on top of it.
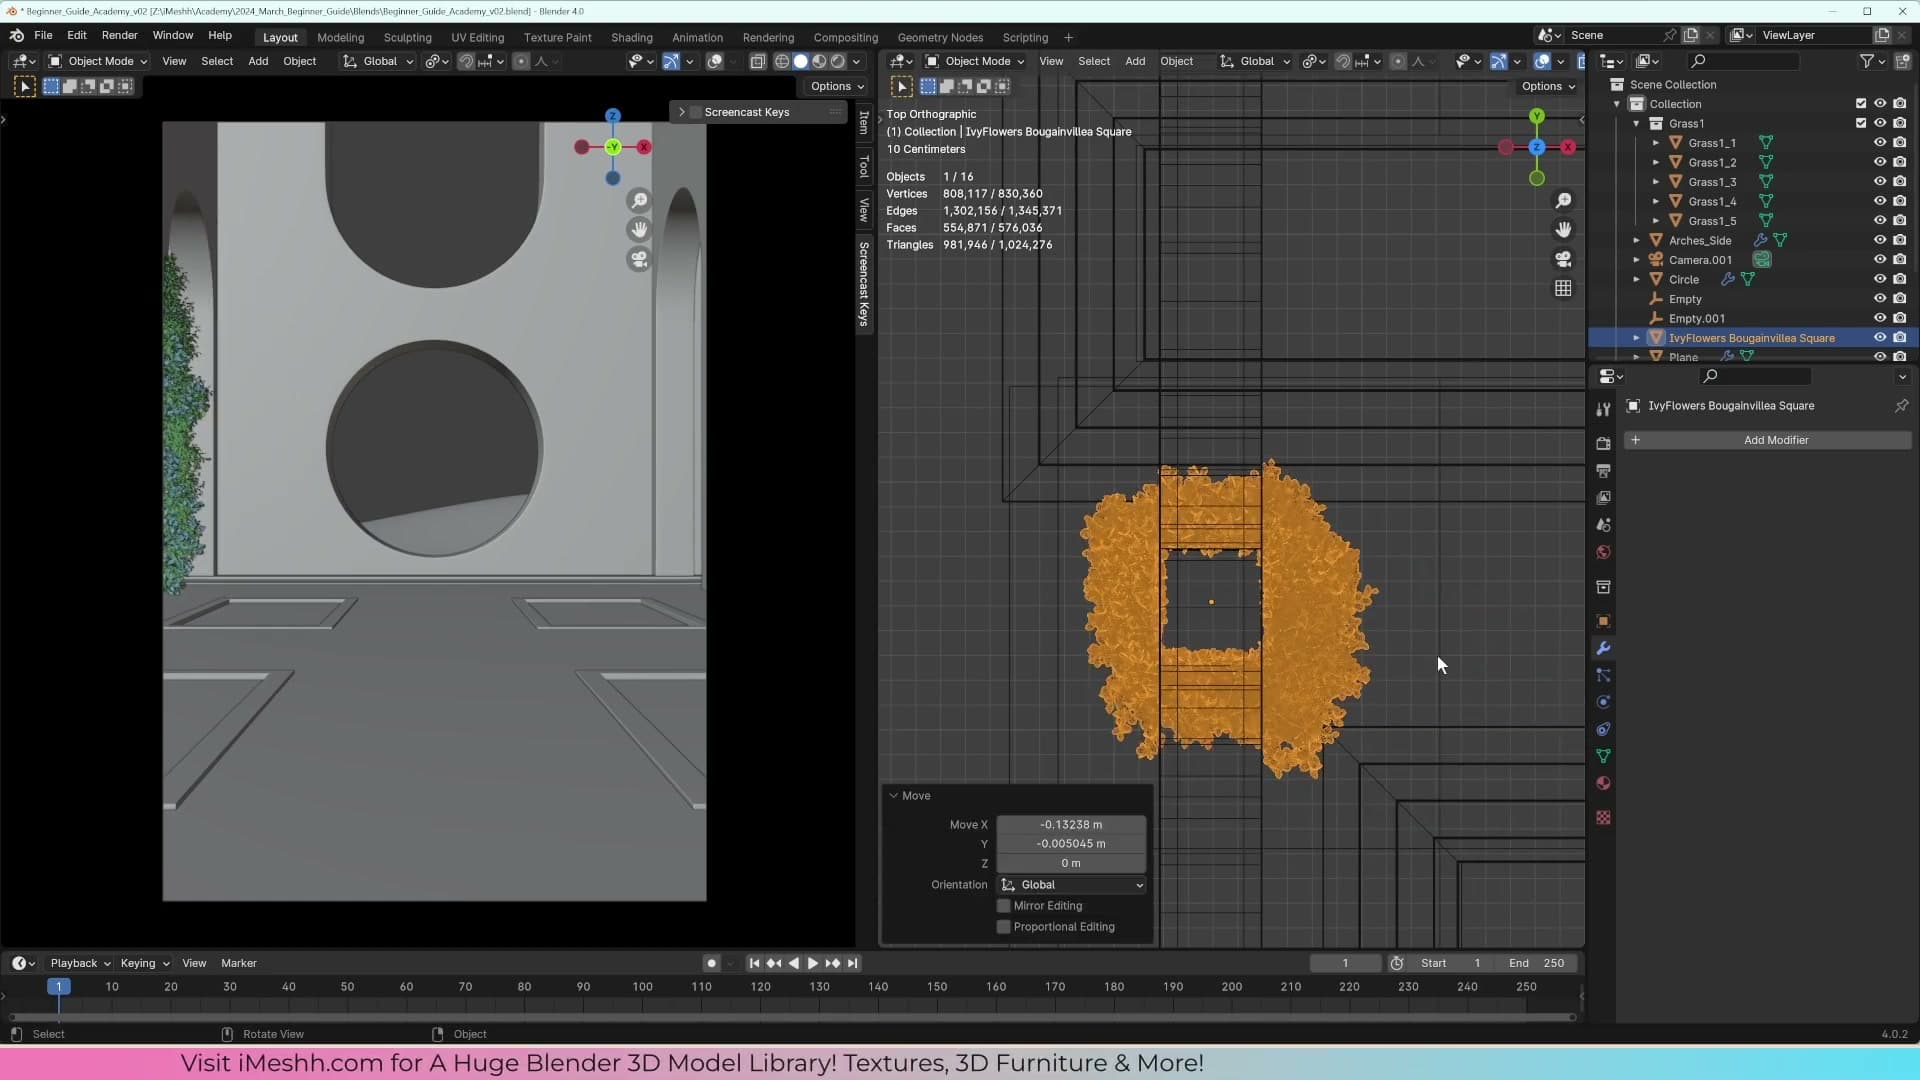
If the footprint needs adjusting, press S followed by Shift+Z to scale on X and Y at the same time while locking Z. That lets the plant spread without changing its height.
Push the ivy slightly outwards, past the pillar's outside edge. From the camera angle this hides the seam where the leaves would otherwise visibly cut into the pillar. A small cheat that costs nothing and makes the plant read as wrapping the column naturally.
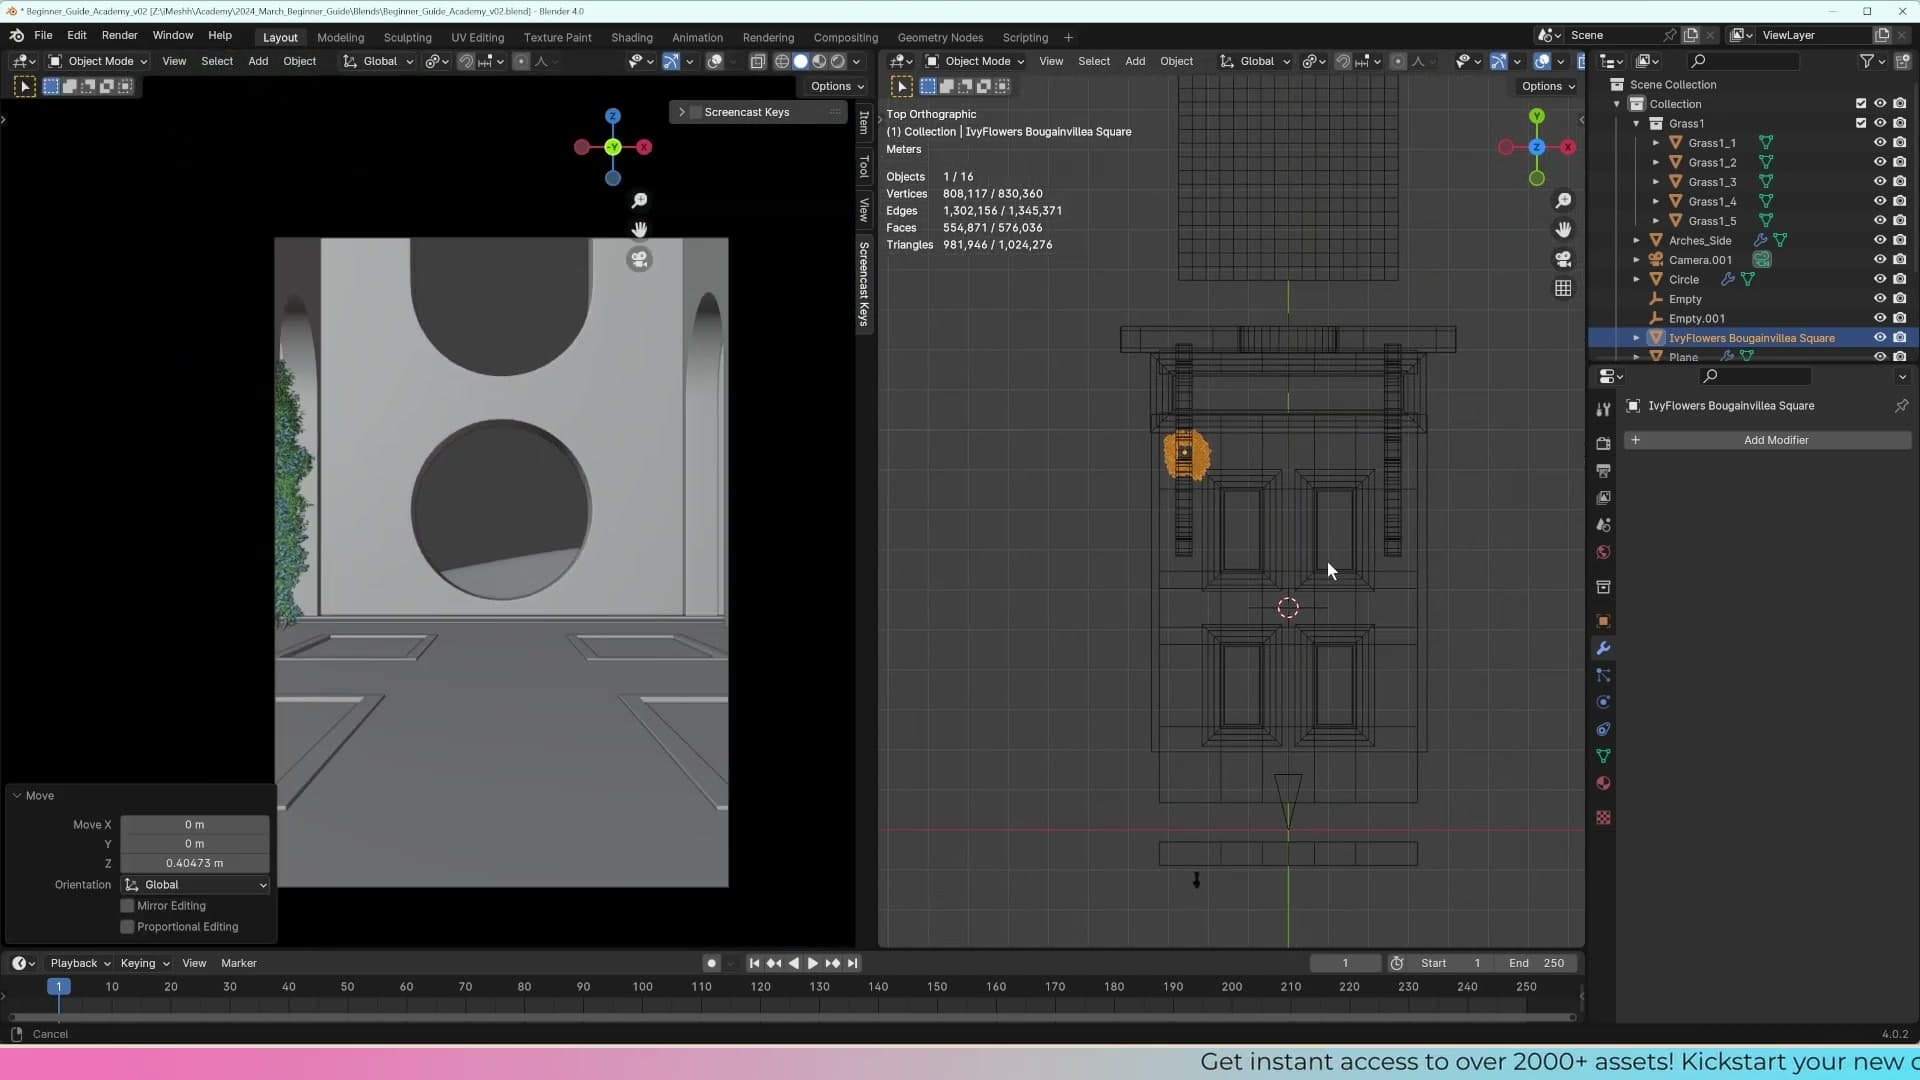
Nudge the ivy upwards a touch so the root is just visible at the base, then pull the camera back a little so more of the plant comes into shot.
Alt+D linked duplicates for heavy geometry
The second pillar wants a copy of the ivy too, but this is where a small habit pays off. The ivy is roughly 500,000 faces, and plants are usually heavy like that. If you press Shift+D to duplicate, you will see Blender stall for a second while it generates a fresh copy of all that geometry.
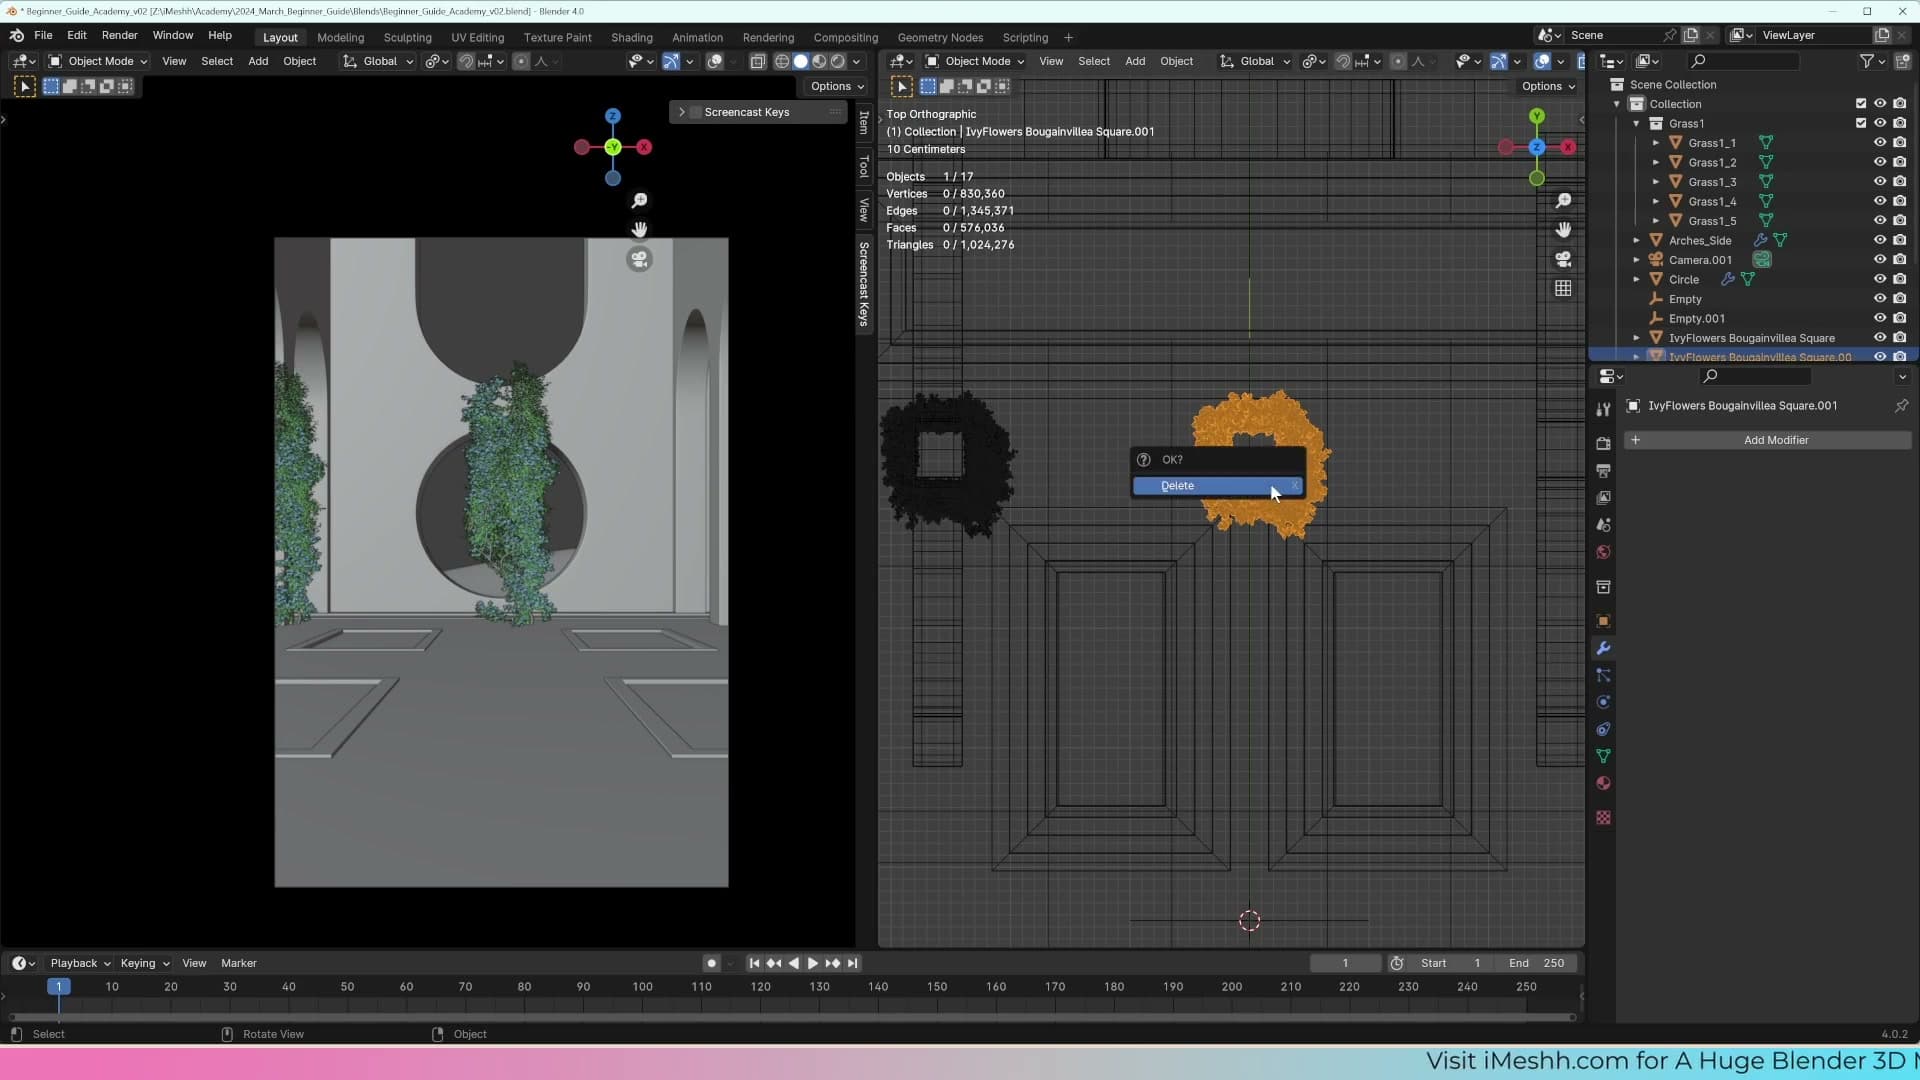
Press Alt+D instead. That makes a linked duplicate. The new object shares the same mesh data as the original, so there is no second geometry to build and the duplicate appears instantly. Constrain the move to an axis straight after with X, Y or Z as usual.
The trade-off is that the two objects are tied at the mesh level: if you go into Edit Mode on one and move some leaves around, the other updates at the same time. For multiple copies of the same plant that is exactly what you want, and at render time Blender only needs to load the geometry once.
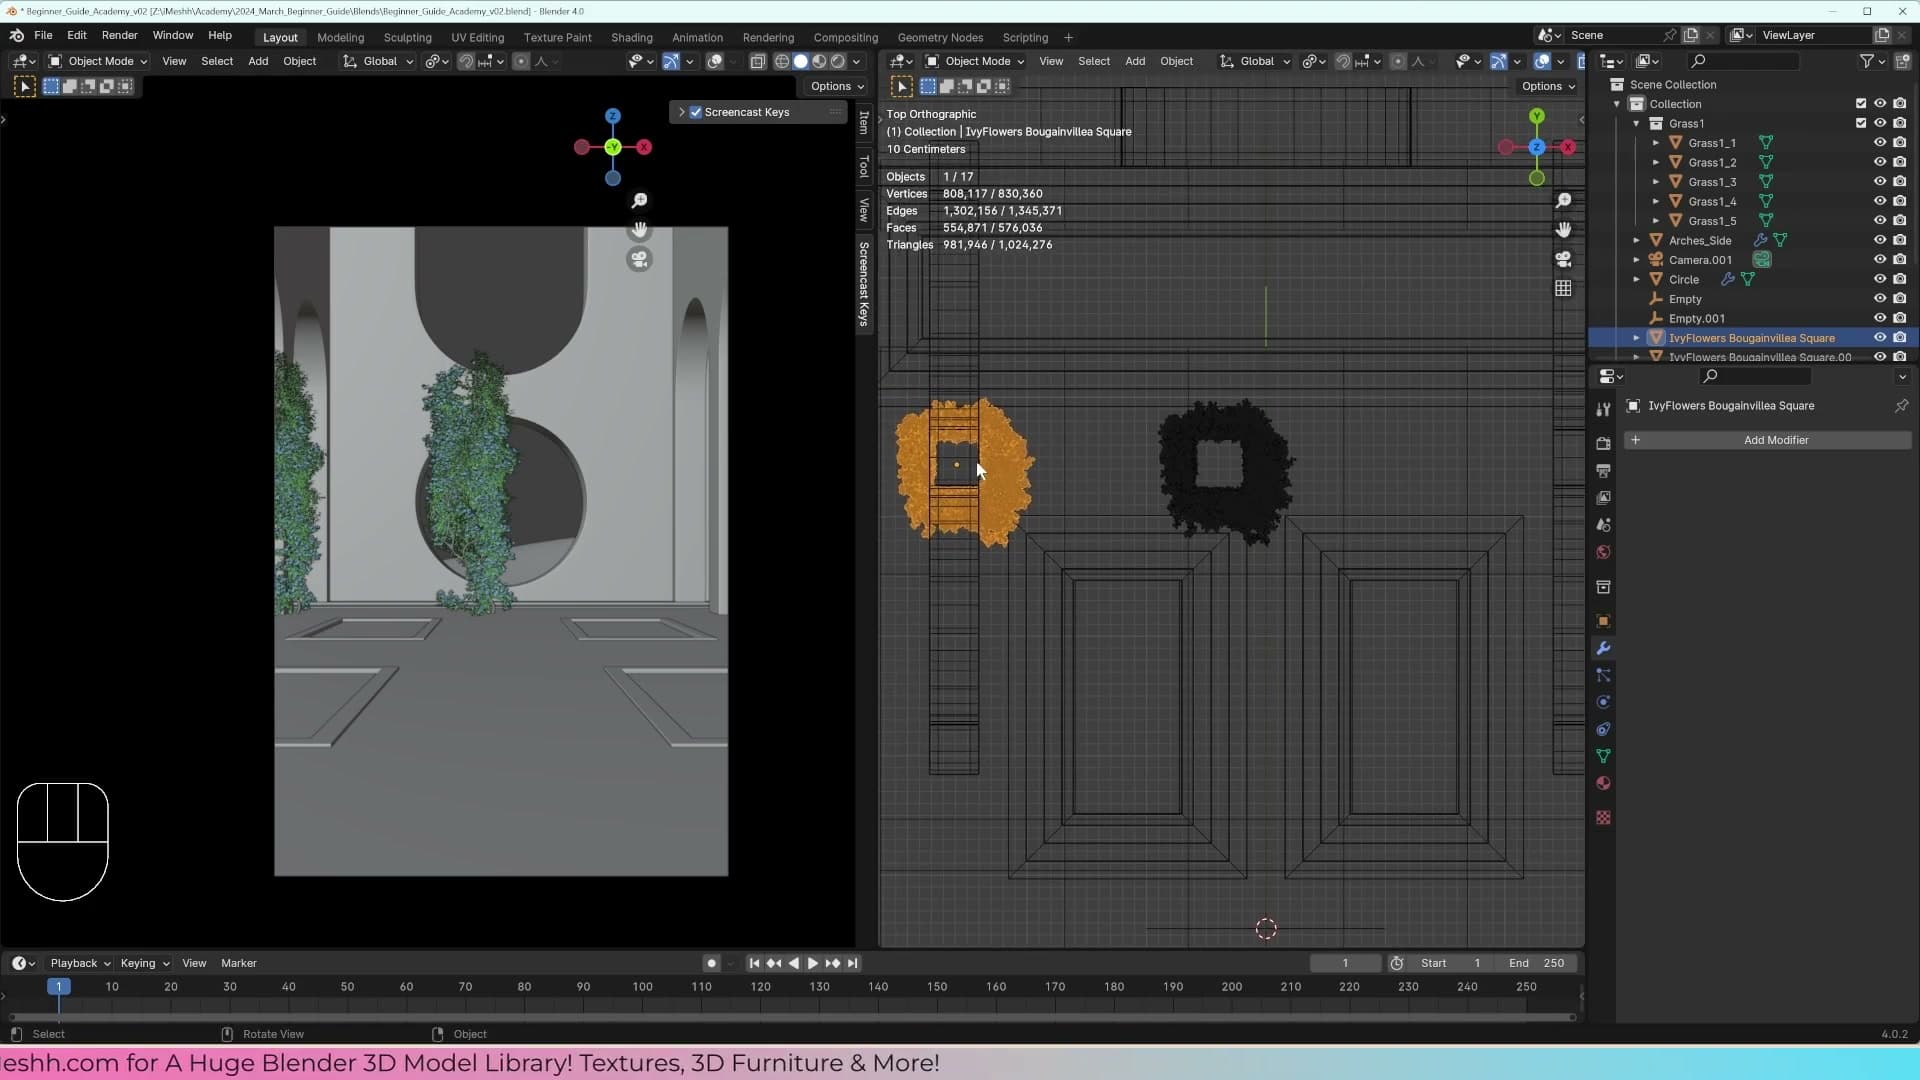
Drop the duplicate onto the second pillar and rotate or nudge it until it reads as wrapping around the column. Two pillars dressed with mature ivy for almost no extra cost. It's a good moment to notice how much the pre-made assets are doing for the final image.
Adding decorative spheres without pole artifacts
A glossy sphere on the ground adds reflective interest. The default UV sphere pinches at the poles under subdivision surface, so enable the Extra Objects add-on and use a Rounded Cube with the corner radius set to 1. That gives you a true sphere with clean shading.
Why the UV sphere pinches under subdivision
With the grass, plants and stairs settled, I want to drop in a couple of glossy spheres on the lawn. It gives the ground plane somewhere to bounce light back from and breaks up the flat surface in front of the archway.
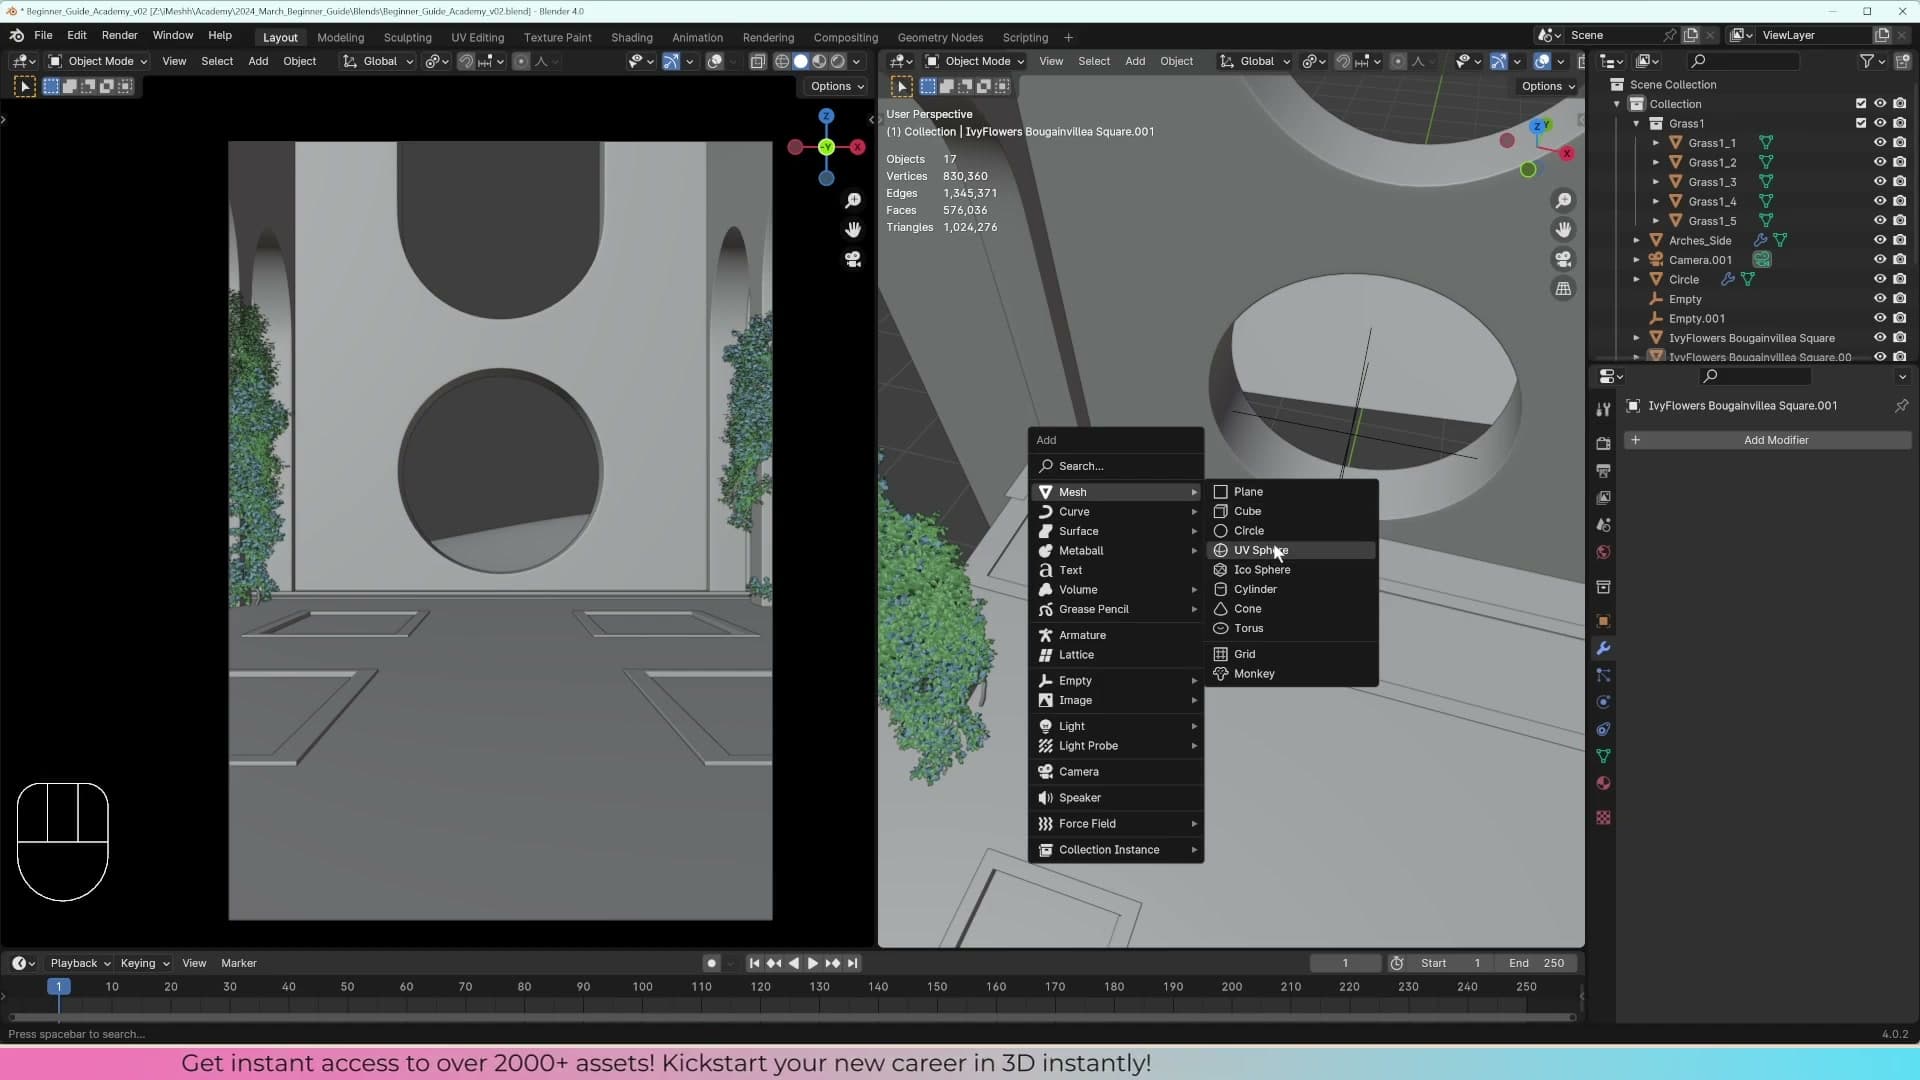
Reach for Shift+A → Mesh, and you would normally hit UV Sphere. Don't. The default UV sphere has a topology problem that becomes obvious the moment you try to smooth it. Add a Subdivision Surface modifier, bump the viewport level to 2, then right-click and Shade Smooth.
Look closely at the top and bottom of the sphere and you'll see faint pinch lines radiating out from each pole. Every edge loop on a UV sphere converges into a single vertex at the top and bottom, so when the Subdivision Surface modifier tries to even out the curvature it has nowhere clean to distribute the geometry. The result is a visible artefact you can't shade your way out of.
Enabling the Extra Objects add-on
Blender ships with a better primitive for this situation, but it's hidden behind a bundled add-on. Open Edit → Preferences → Add-ons and search for Extra Objects. Enable both of the matching add-ons that come up. That exposes a handful of extra mesh and curve primitives in the Add menu.
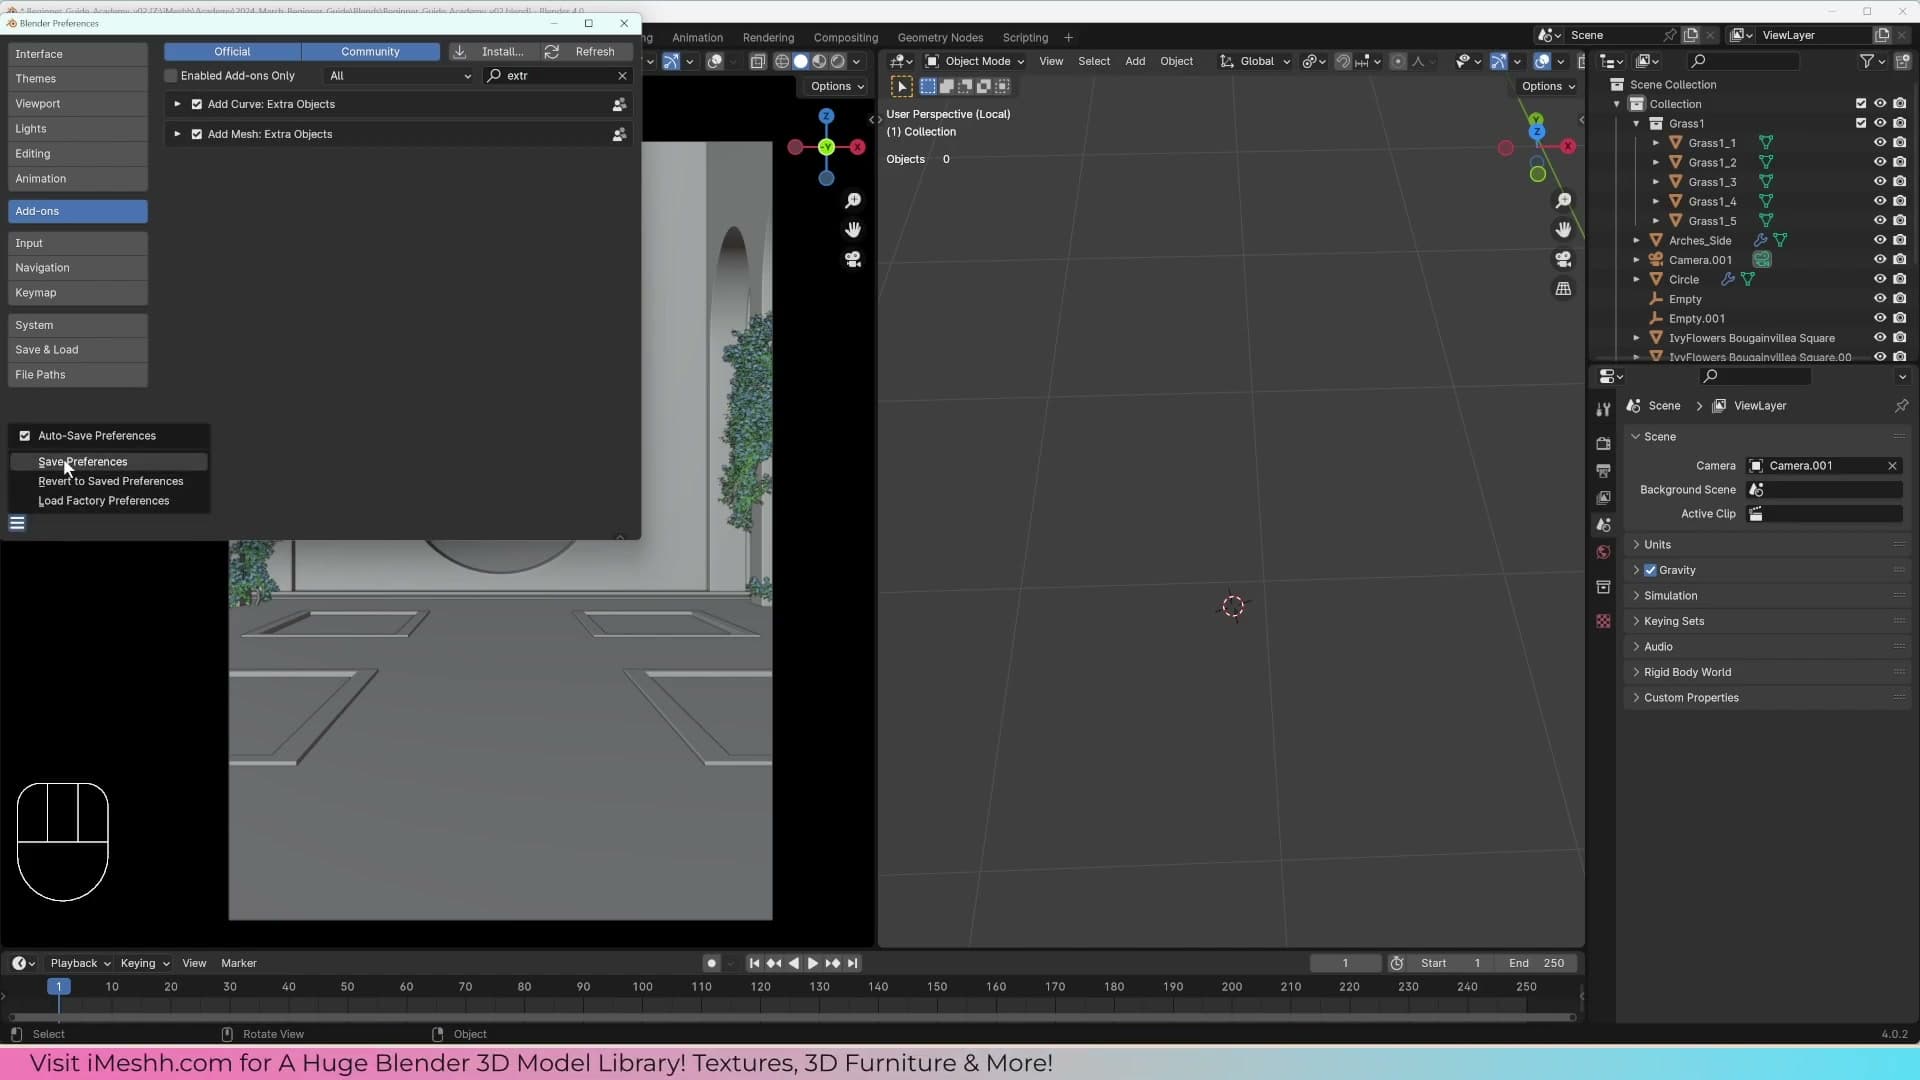
Before you close the Preferences window, click Save Preferences at the bottom so the add-ons stay enabled the next time you open Blender.
Placing the glossy white spheres
Back in the viewport, hit Shift+A → Mesh, and this time pick Rounded Cube from the new entries the add-on has added. It drops in looking like a cube, but the operator panel in the bottom-left exposes a corner-radius parameter. Set that to 1 and the cube becomes a true sphere with no pole.
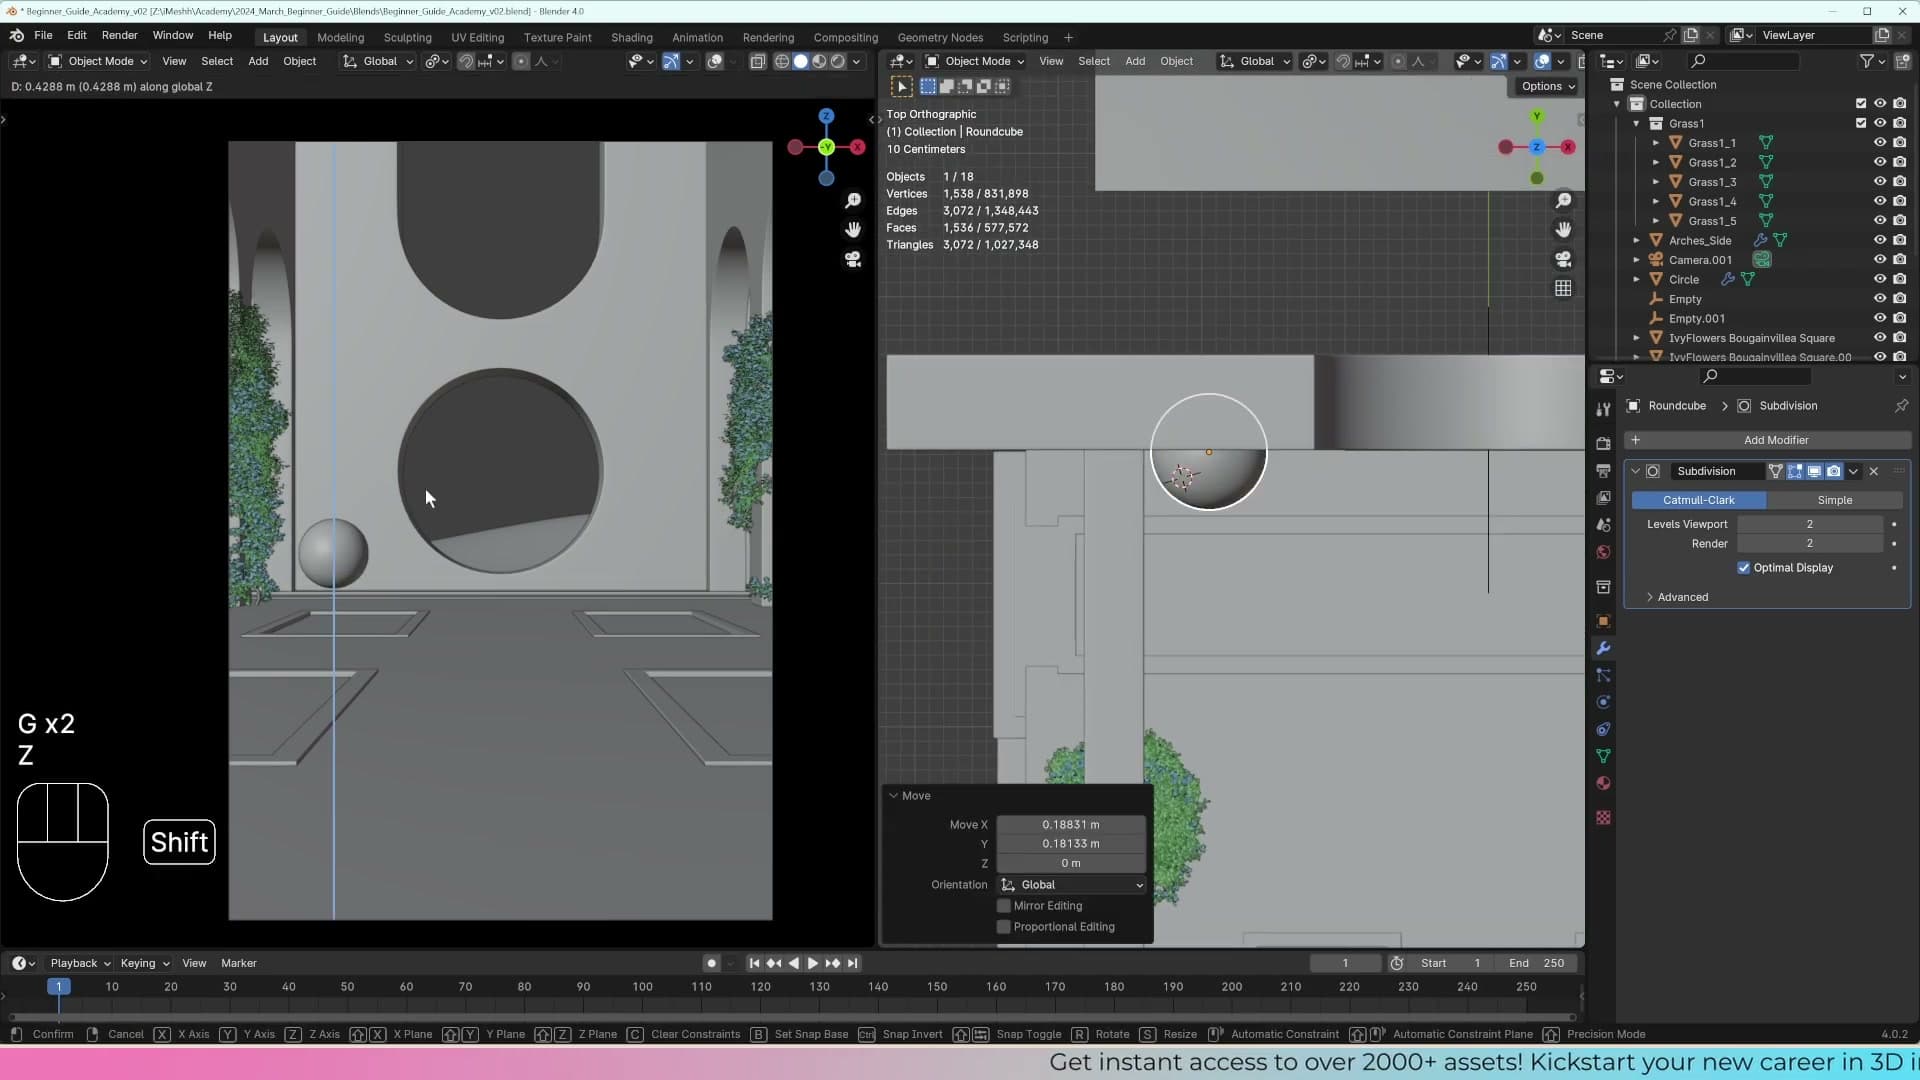
Now add a Subdivision Surface modifier to this one as well. Because the underlying topology is based on a cube rather than a stack of converging rings, the smoothing distributes evenly across the whole surface. You get a perfect sphere with no pinching anywhere.
Scale the sphere down and slide it into roughly the position you want it on the grass. My first attempt was clipping through the wall, so I nudged the surrounding plants and ground planes outward a touch to make room. Small layout tweaks like that are normal at this stage of dressing the scene.
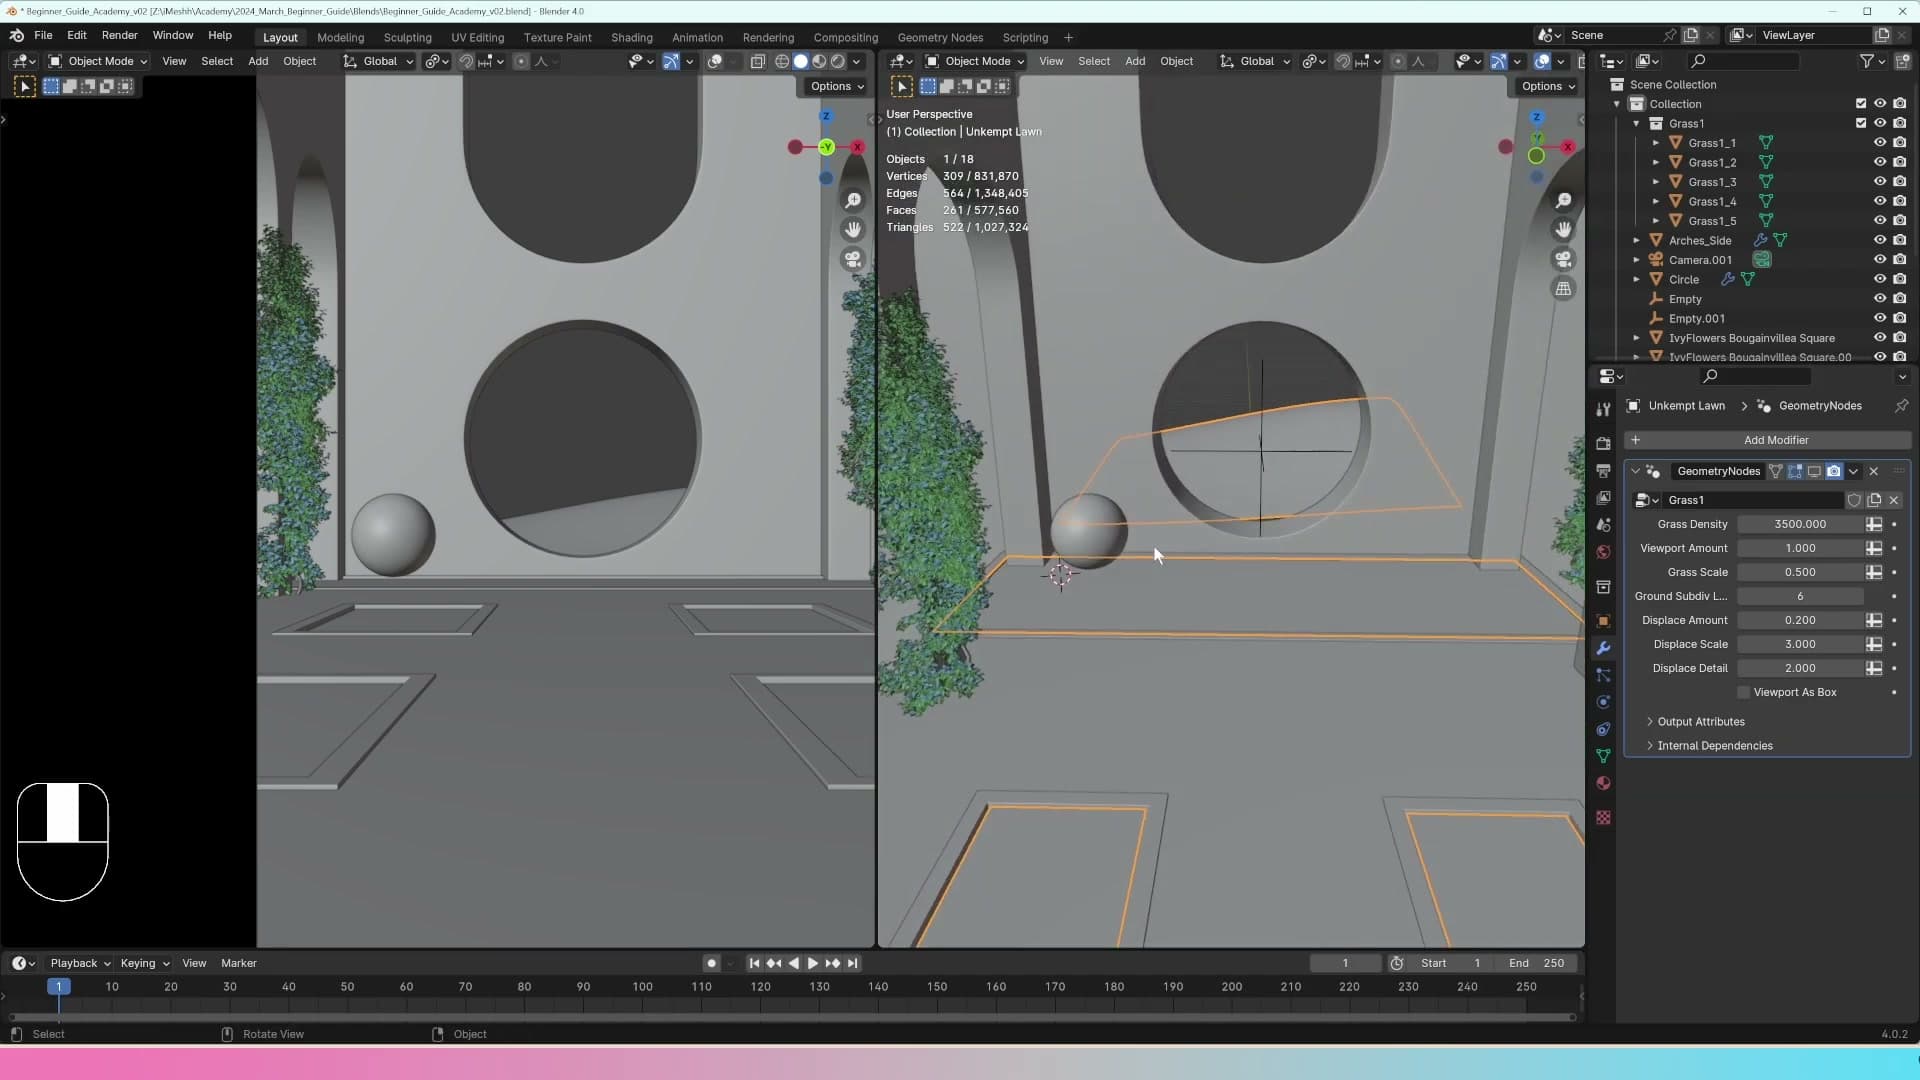
Give it a material so the sphere has something to reflect with. Open the Material slot, hit New, rename it glossy white, then drop the roughness right down so it picks up the sky and the surrounding geometry rather than reading as a chalky ball.
Add a second sphere by selecting the first and pressing Shift+D. Scale it down a touch and place it nearby on the grass so the two read as a pair.
Mirroring grass strips onto the side edges
The side strips feel bare. Duplicate the front grass plane, mirror it across the scene, then use loop cuts and P → Separate to carve out the parts that would intersect the water before joining the new faces to the grass object.
Duplicating and mirroring the grass plane
With the front grass reading well, the bare side edges start to look strange next to it. The fix is to reuse the work you've already done rather than build new strips from scratch. Turn off the grass object in the viewport first so you're not dragging hundreds of thousands of blades around while you position the new geometry.
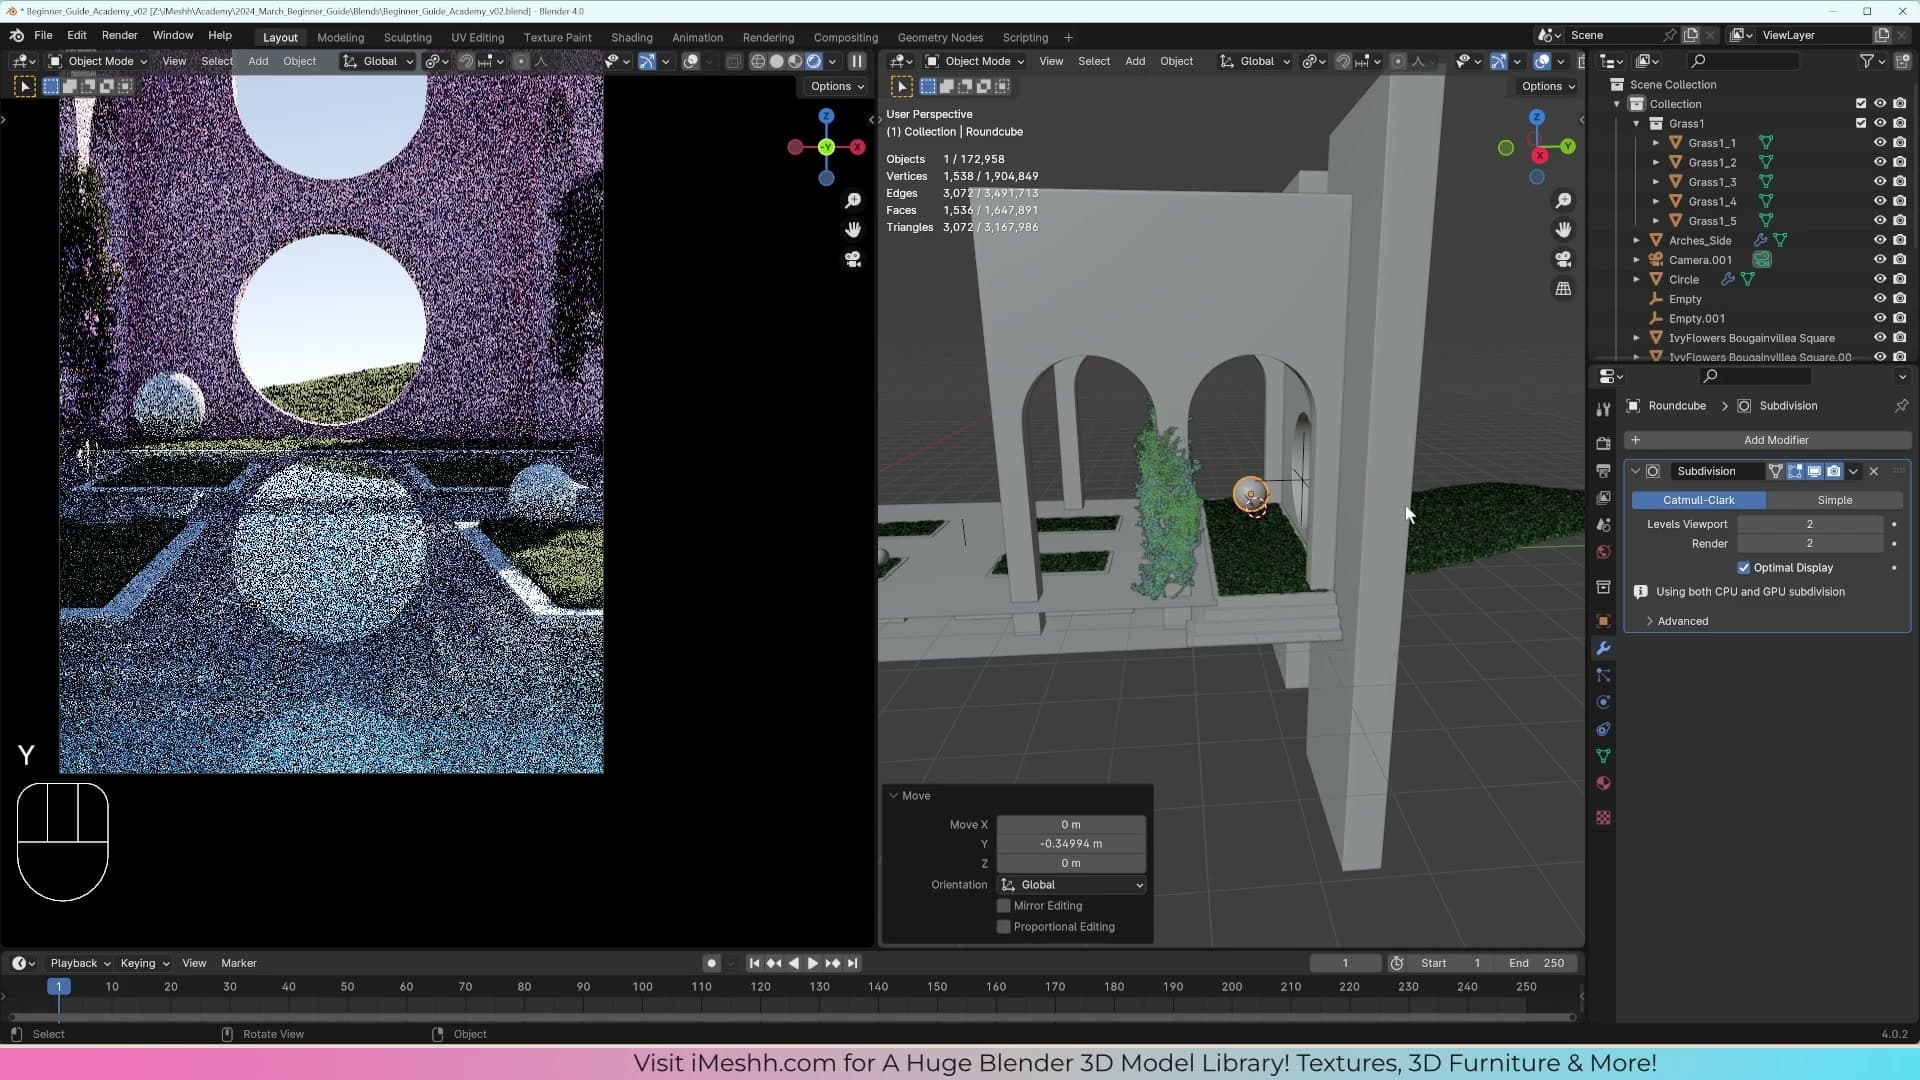
Select the front grass plane and press Shift+D to duplicate it, then rotate the copy 90 degrees and slide it into place along one of the side edges. The shape is rough at this point, but rough is all you need. The geometry-node grass will read the whole surface uniformly once it's joined back in.
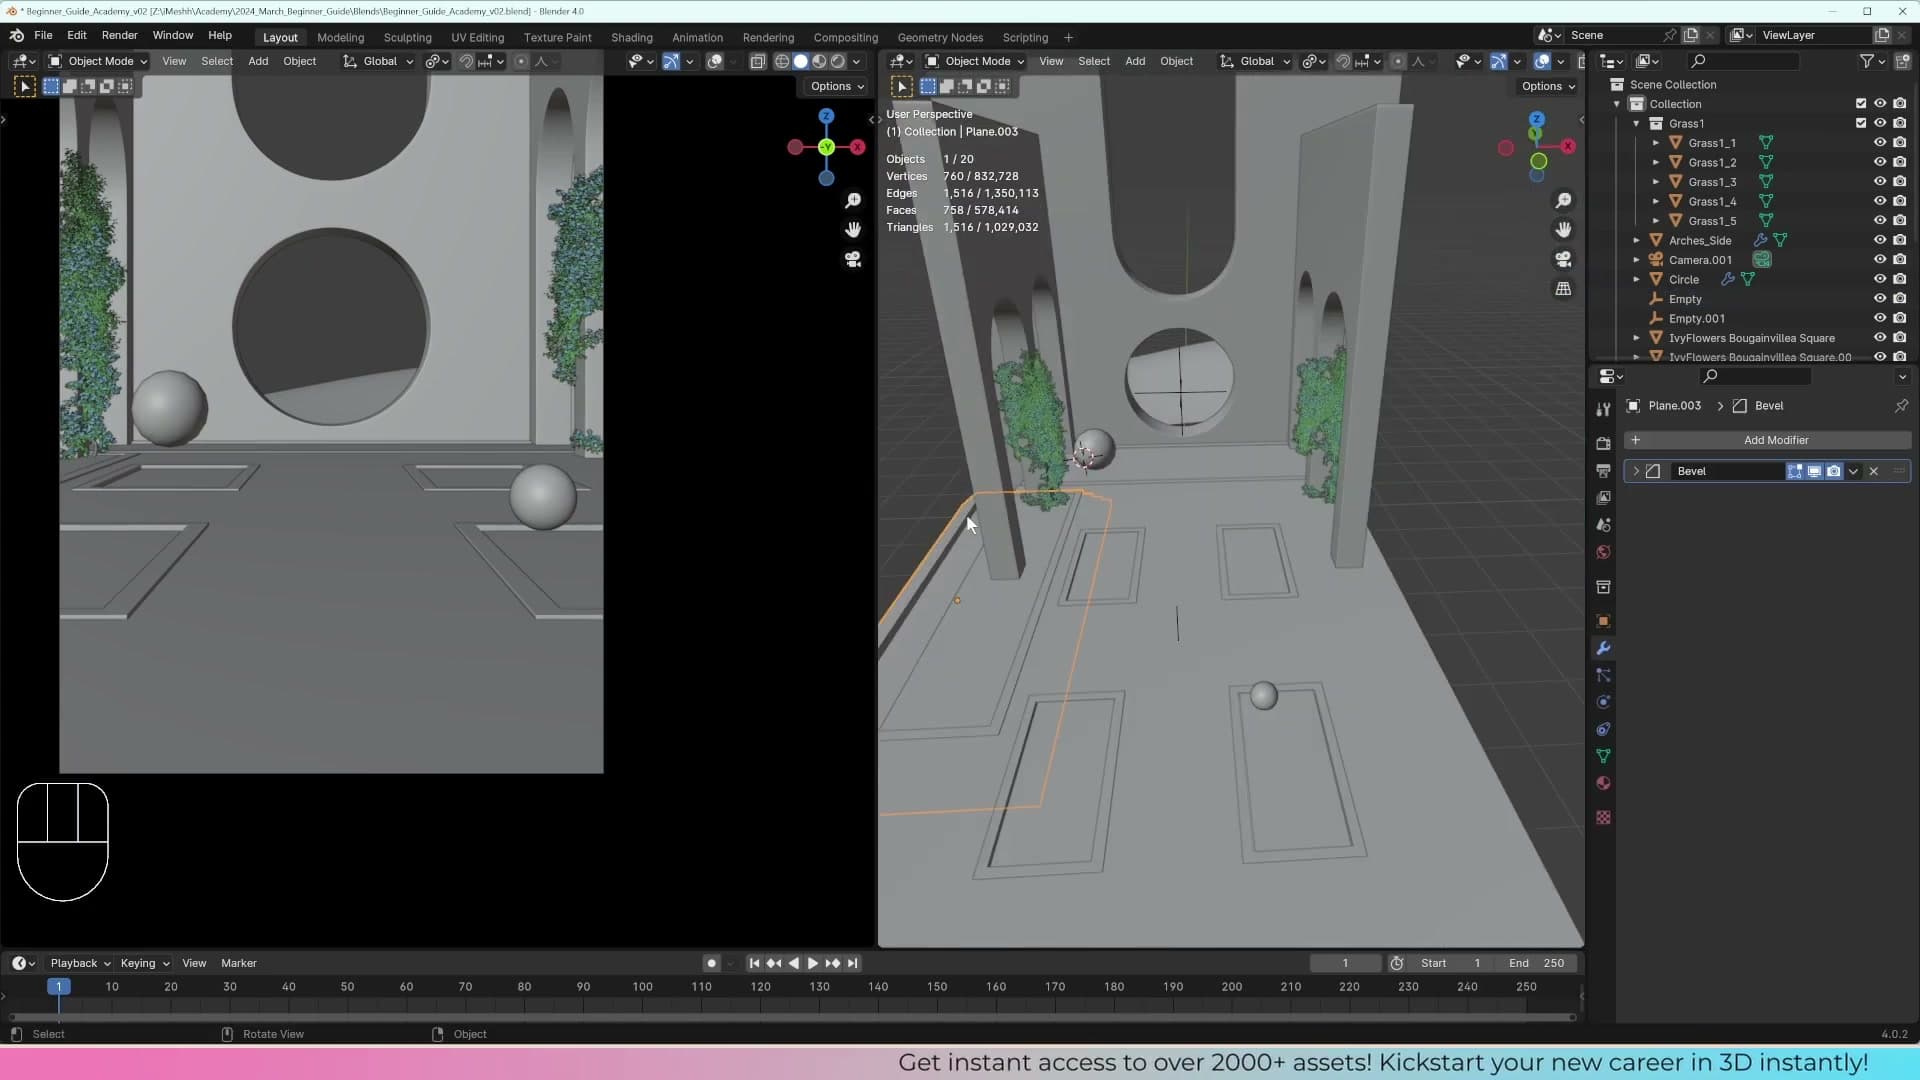
To get the matching strip on the opposite side, add a Mirror modifier to the duplicate. Instead of mirroring around its own origin, set the Mirror Object picker to the corresponding object on the other side of the scene. Both side strips now match without you having to duplicate and align a second time.
Loop cuts and P → Separate to carve out the water
The new strips currently run straight across, which means a chunk of each one sits over the water in the centre. That's exactly where you don't want grass growing. The trick is to slice the plane up, peel out the middle, and keep only the parts that should be lawn.
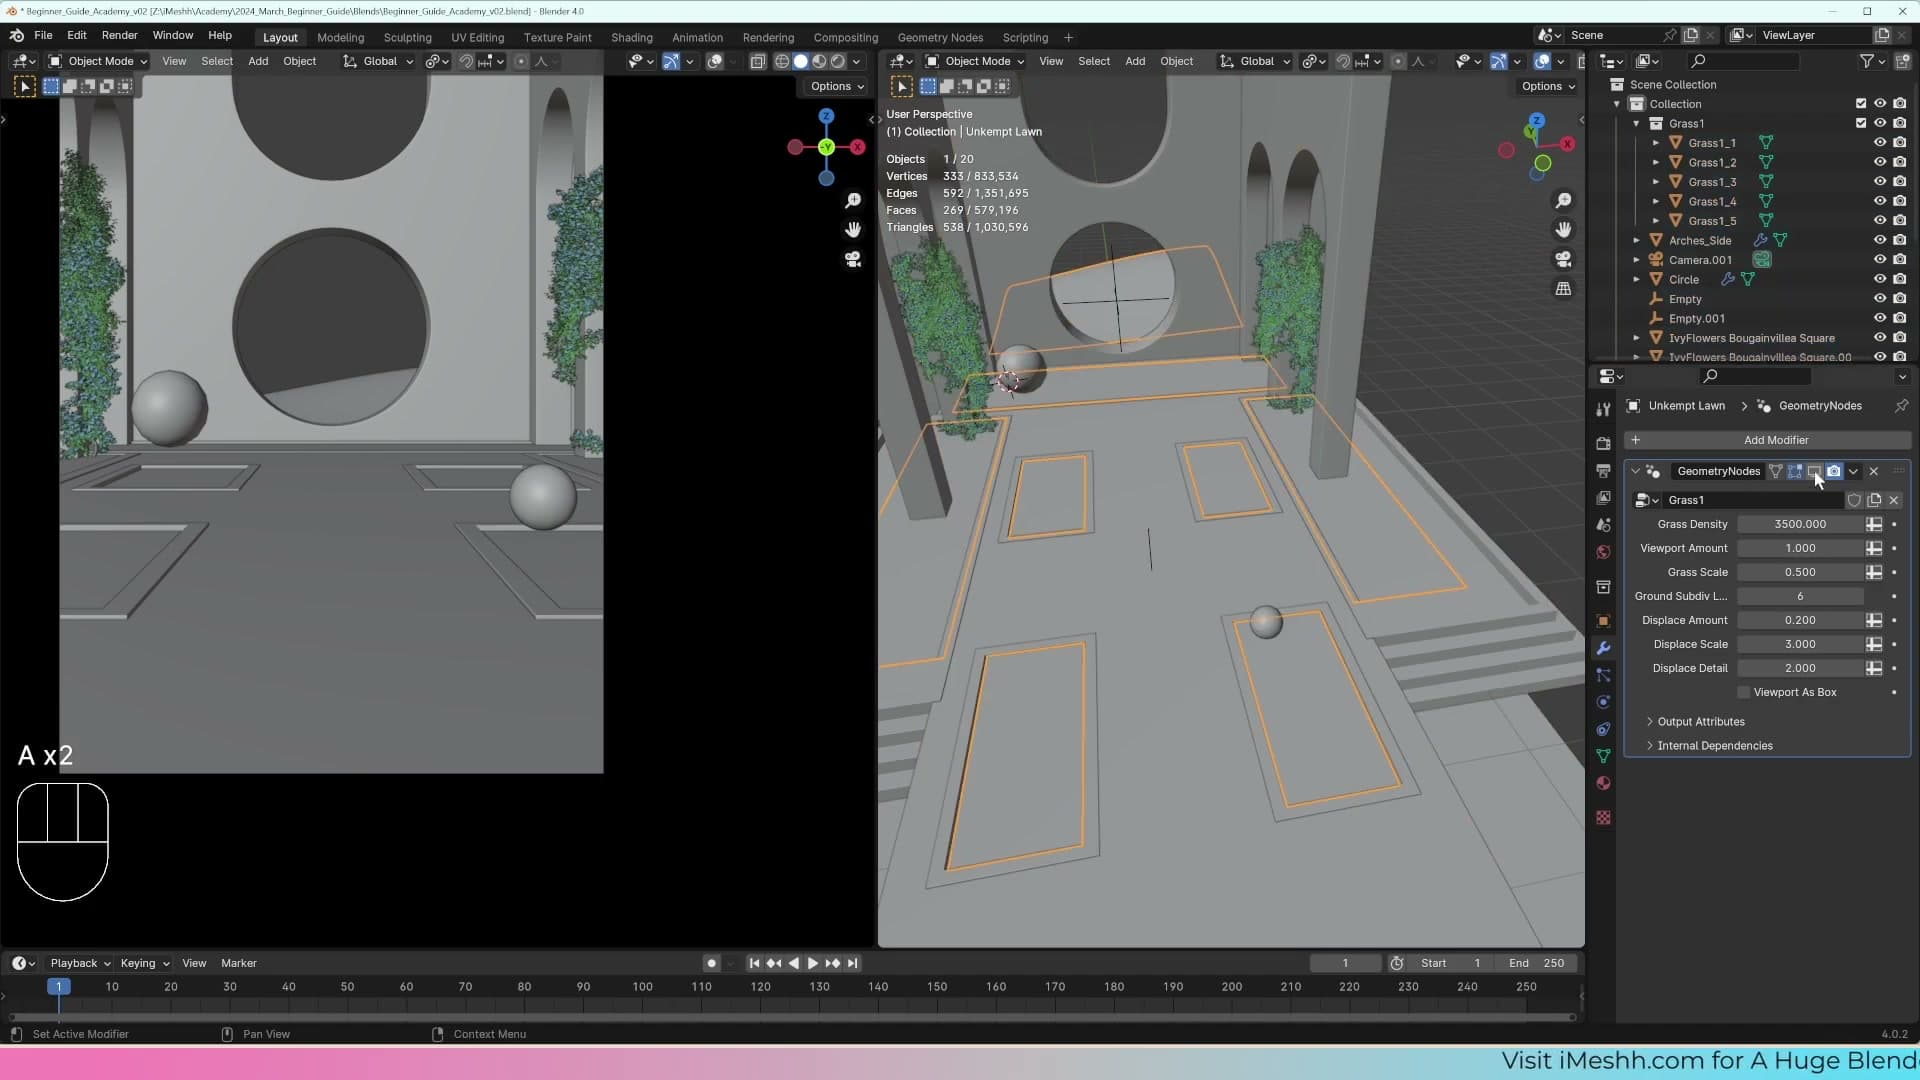
Drop into edit mode and press Ctrl+R twice to add two loop cuts, positioning them so the middle band lines up with the water and the outer bands sit over the side ground. With those middle faces selected, press P and choose Separate so the unwanted faces become their own object.
Apply the Mirror modifier on the remaining strip, delete the separated middle faces you don't need, and then join the cleaned-up side strips into the main grass object. Switch the grass back on and the lawn now wraps around the front and both sides, with the water left clear in the middle.
Brightening the world without blowing out the sun
The shadowed parts of the scene read too dark. Push the Sky Texture strength up to around 0.75 for overall lift, then drop the sun strength to ~0.25 so the direct light does not overpower. Brighter ambient, softer hero light.
Balancing sky strength against sun strength
With the chair lit and the materials sitting where you want them, the shadowed parts of the archway are still reading a bit too dark. Rather than push the area light harder and risk blowing out the chair, lift the world instead. Swap the shader editor back to the World tab so you can edit the sky setup you built earlier.
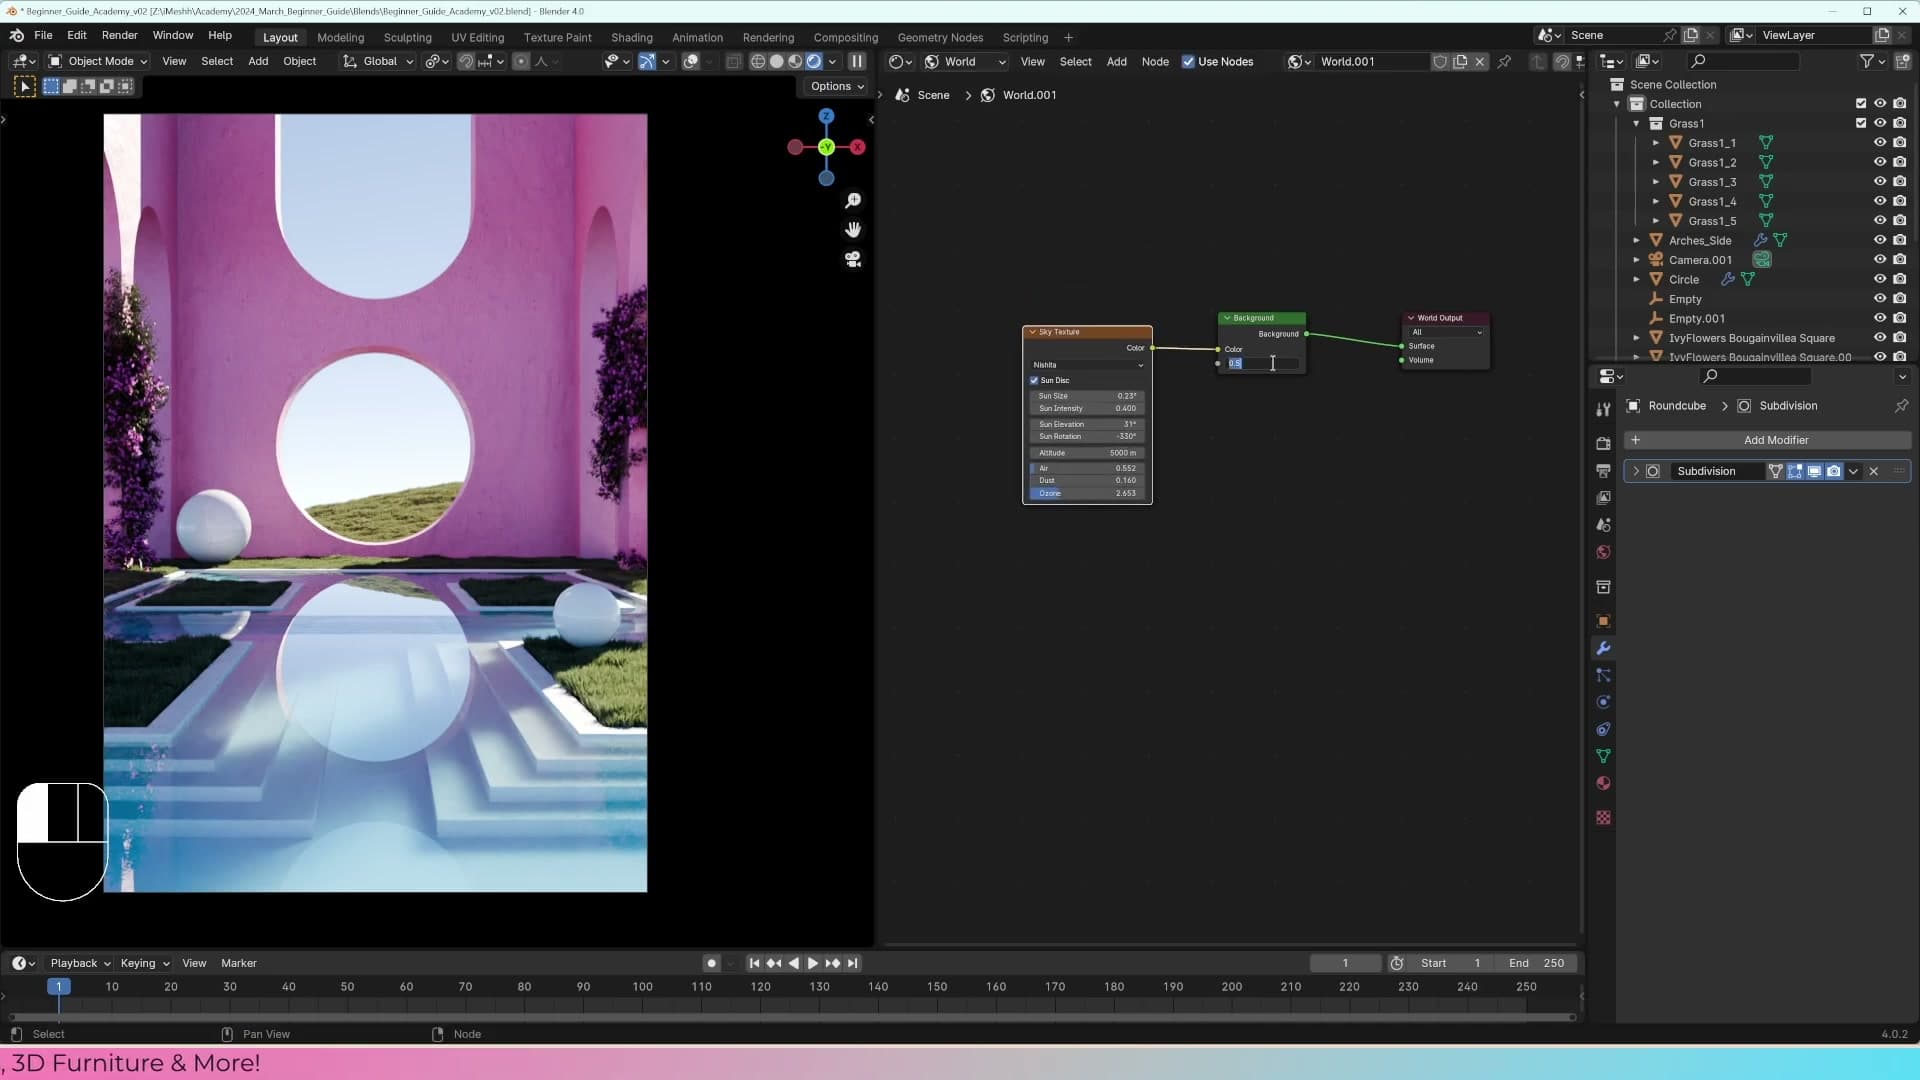
Push the sky texture strength up to around 0.75. The whole scene brightens in one move (the plaster, the ground, the foliage in shadow) because you are lifting the ambient contribution rather than adding another direct light. The downside is that the sun rides on the same node, so the direct light now feels a little hot.
Pull the sun strength back down to roughly 0.25 to compensate. The result is the balance you want for the final render: brighter ambient fill across the shadowed pillars and ground, with a softer, more controlled hero light raking across the chair and the archway.
Appending the hero chair
Every archviz shot needs a hero object. Here it's an iMeshh chair. Append it, drop it under the archway, set Origin to Center of Mass so rotation pivots feel natural, and angle it for a slightly off-axis composition.
Appending the chair from iMeshh
Before the chair goes in, the plaster on the archway is worth a quick nudge. With the plants in place, the wall reads as very pink against equally pink foliage, so there is no separation between the back wall and the foreground. Pop back into Object mode on the archway, open the material in the slot list, and shift the plaster to a paler, slightly more desaturated pink. Bump the pink on the plants a touch more saturated to push them forward.
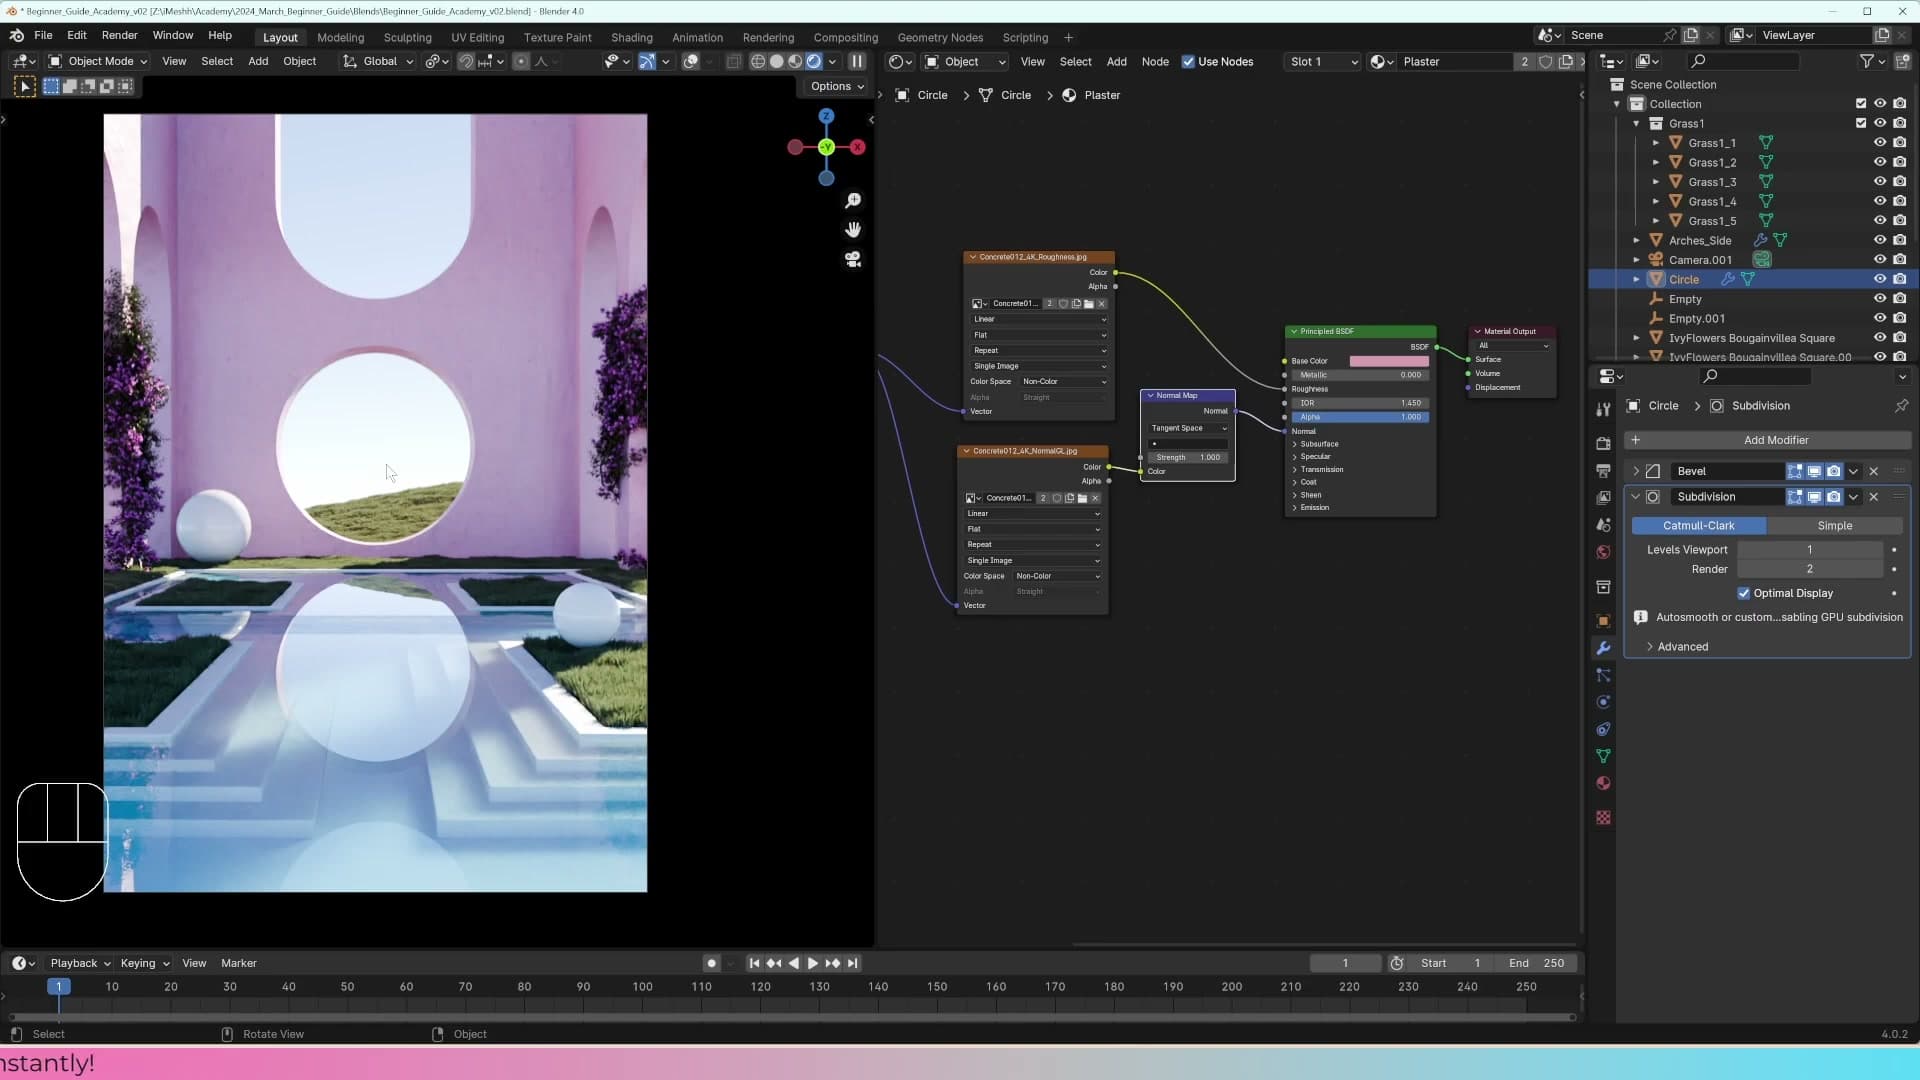
Every archviz shot benefits from a hero object: the single piece of furniture or prop the camera is built around. For this scene that hero is a chair, also from iMeshh. If it is not yet in the free section when you go looking, it has been made available specifically for this course. Grab the .blend, extract the archive, and drop it into your project folder alongside the other appended assets.
From there it is the same workflow as the grass and the ivy. File → Append, navigate into the chair .blend, open the Object folder, and bring the chair through. There are other ways to pull objects between scenes, but for this course Append stays the consistent route.
Positioning and angling the chair
The chair drops in wherever the 3D cursor happens to be sitting. Move it under the archway and scale it to roughly fit the opening. This is an artistic composition rather than a measured architectural plan, so the chair does not need to be 100% to real-world scale. You are dressing the shot, not specifying furniture.
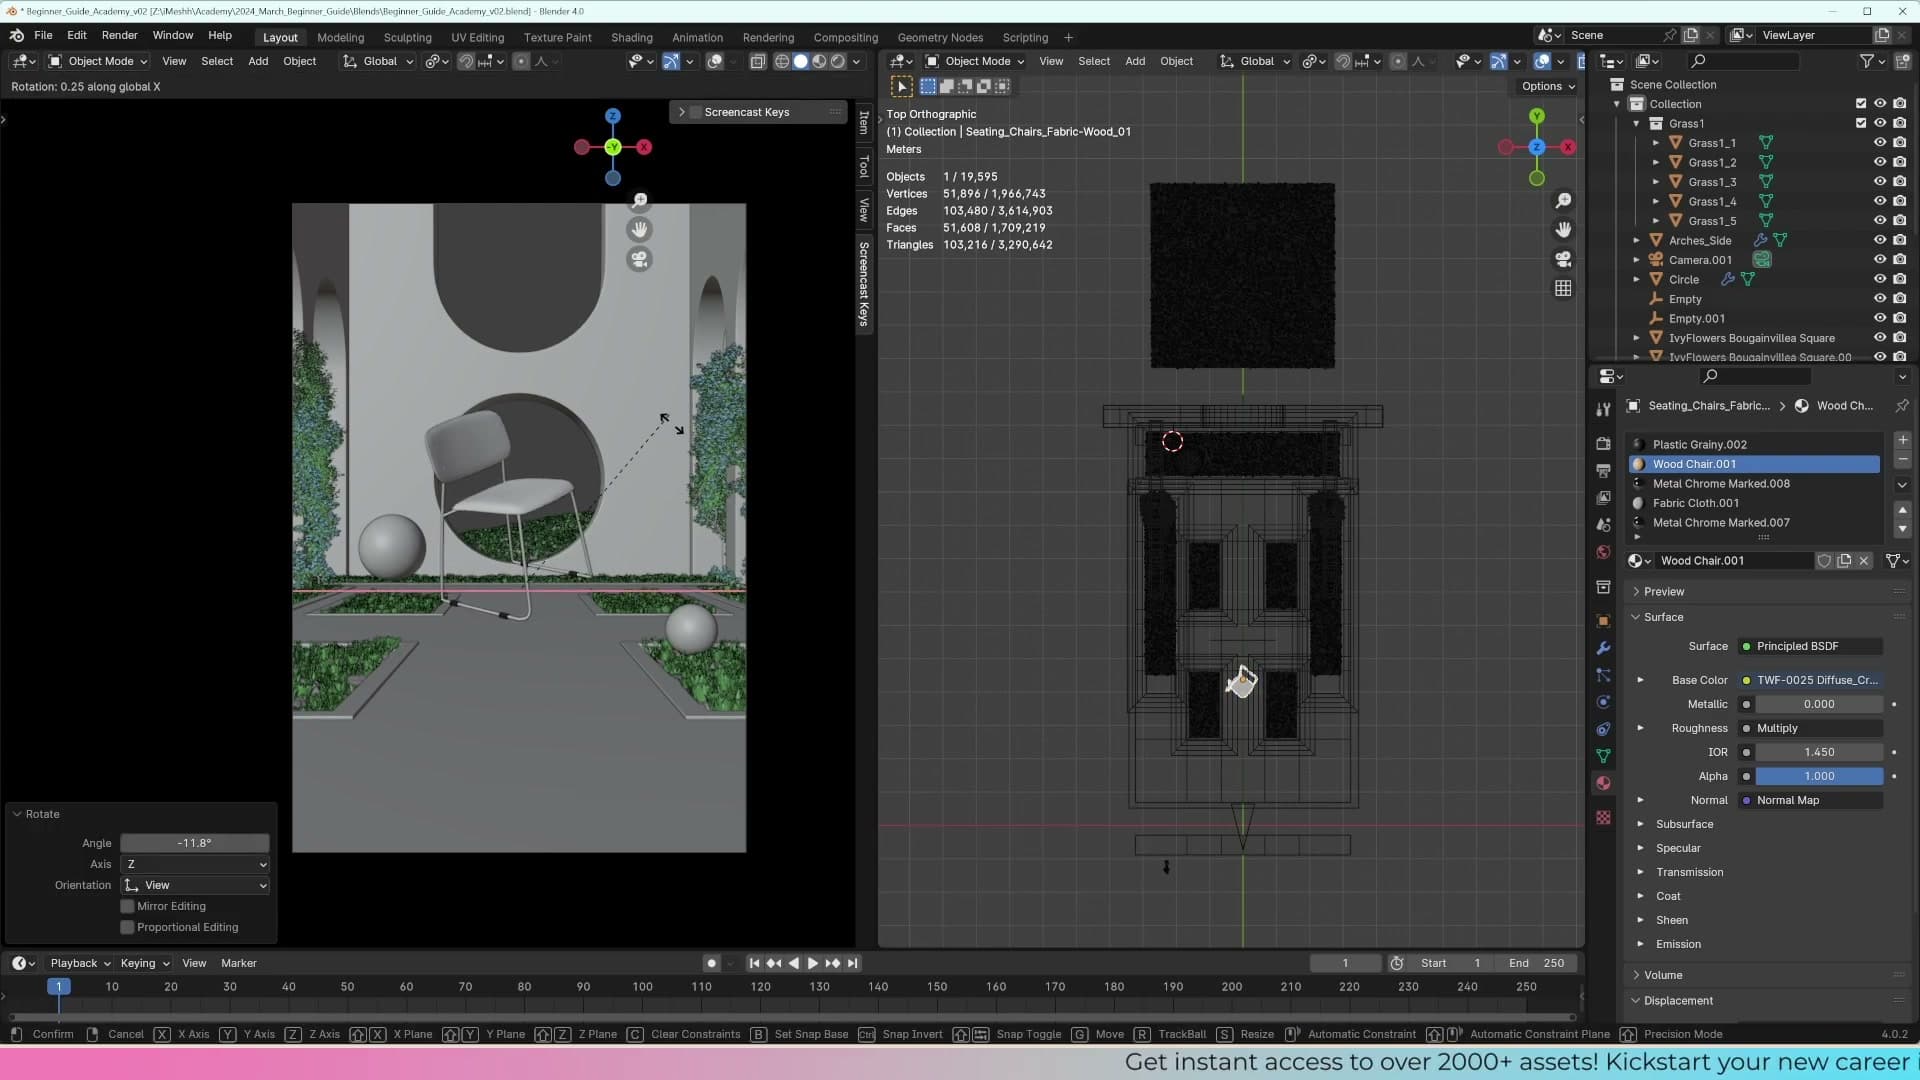
Before you start rotating, fix the pivot. With the chair selected, go to Object → Set Origin → Origin to Center of Mass so the origin sits inside the body of the chair rather than at an arbitrary corner of its bounding box. Any rotation now pivots around the seat, which is far more intuitive than spinning the chair around a leg.
With the pivot sorted, angle the chair slightly off-axis under the archway. A straight-on placement reads as too symmetrical and static. Try a few rotations until you find something more interesting. Then nudge the chair back toward the centre of the archway and scale it up a touch if it is reading small in camera.
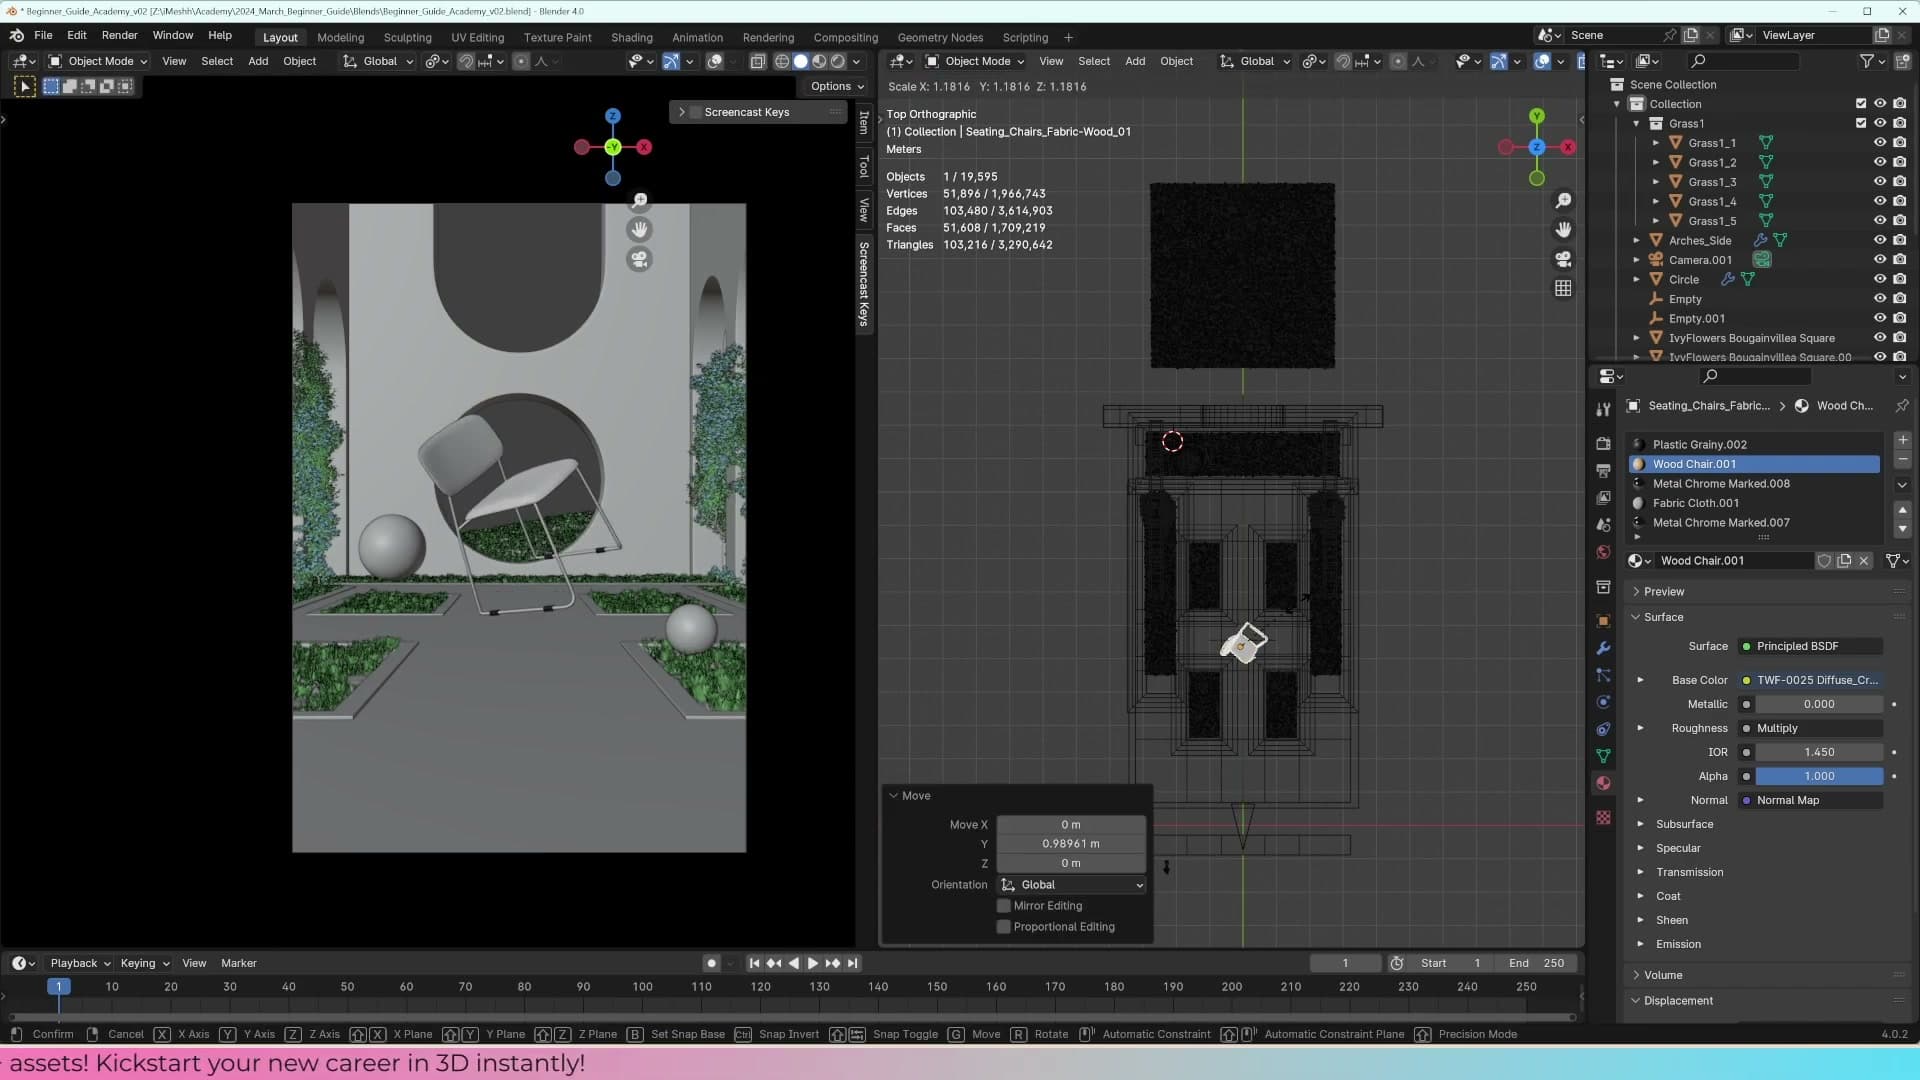
Drop into the camera view and check how it sits. At this stage the chair is in position and roughly framed, but it is reading too dark. The sun and sky on their own are not lifting it enough against the rest of the scene. That dark hero is the cue for the next step: a dedicated light, linked only to the chair.
Light linking to illuminate only the chair
Adding an area light to lift the chair also brightens everything around it. Move the chair to its own collection, then on the area light's Object Properties → Shading → Light Linking, link the light to that collection only. The rest of the scene stays in its existing mood.
Adding an area light above the chair
With the chair still selected, snap the 3D cursor to it with Shift+S → Cursor to Selected so the next light spawns in the right place. Then Shift+A → Light → Area to drop in an area light, and in its Object Data properties change the shape to Disc. Move the disc just above the chair so it reads as a soft top fill.
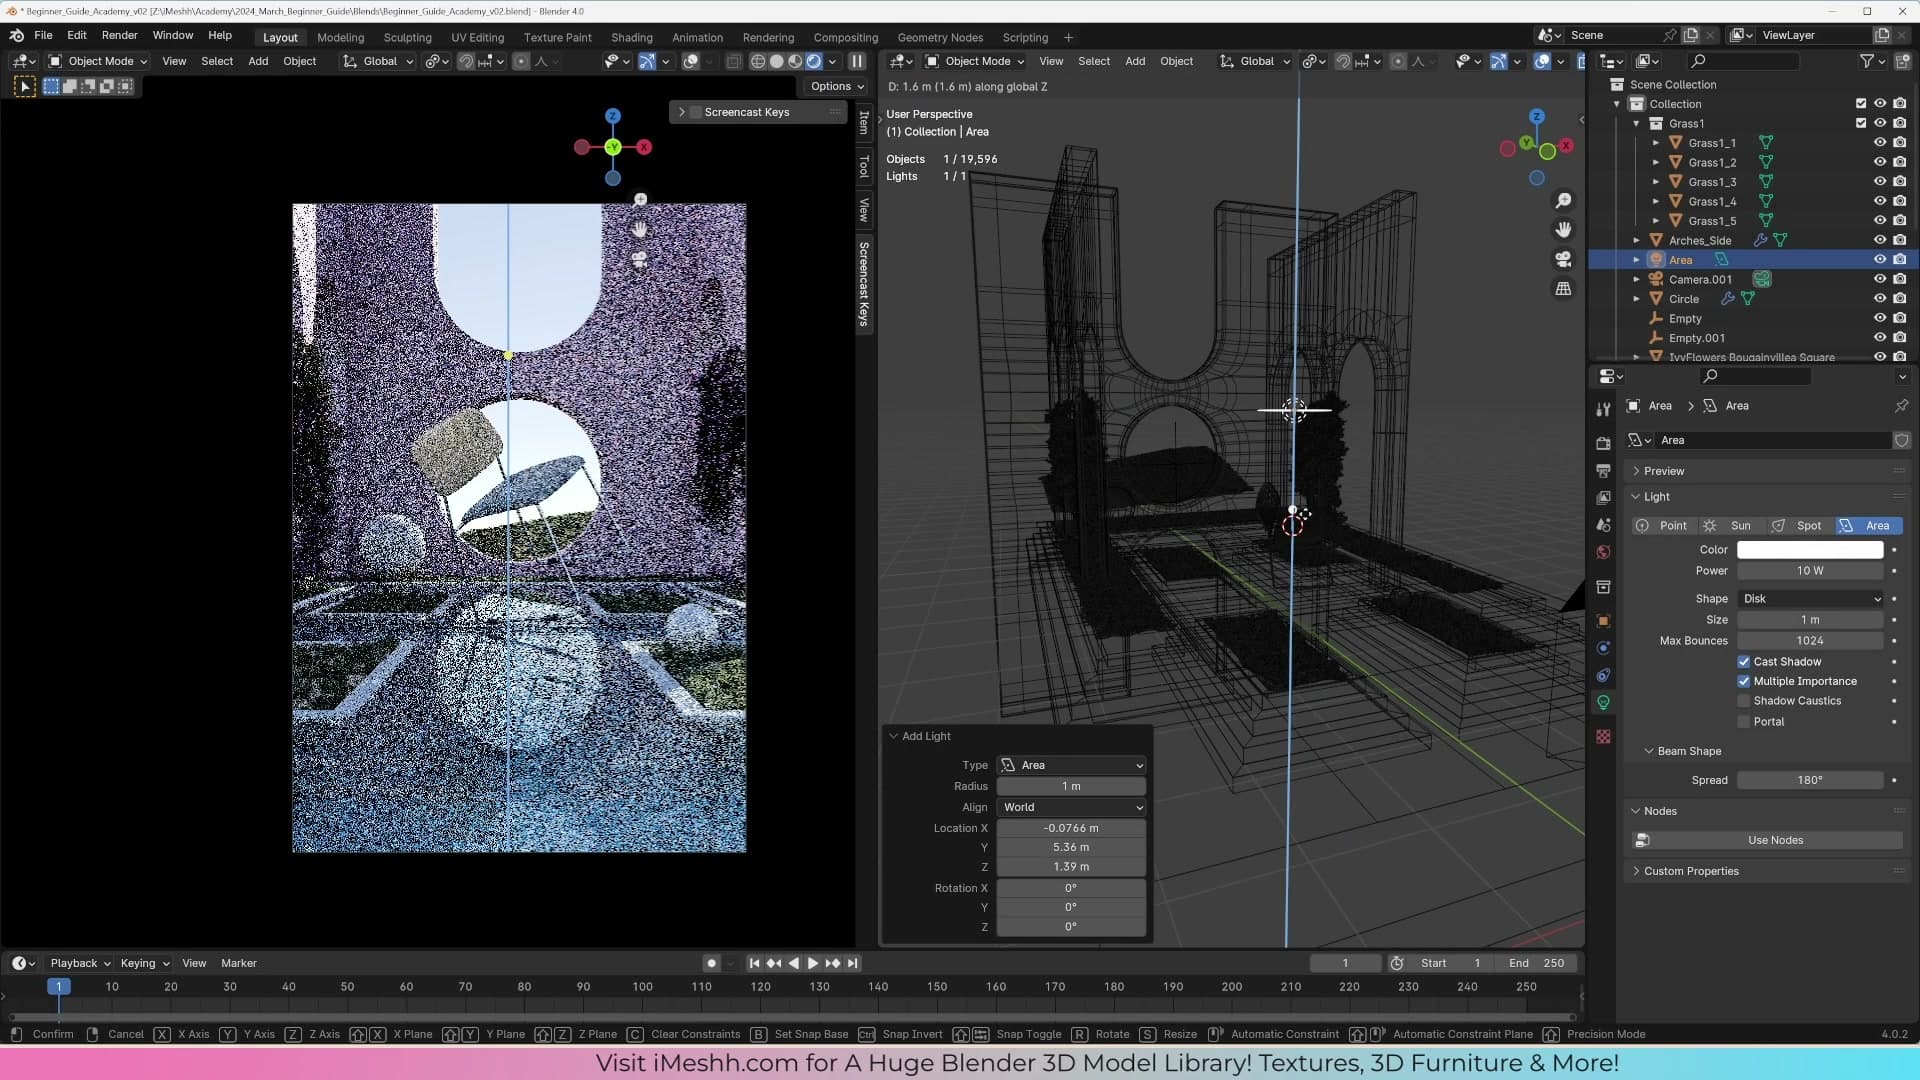
By default the area light spreads in every direction across the hemisphere, which floods the surrounding plants as much as the chair. Drop the Spread value down to roughly 40 so the beam becomes more directional and angular. You should immediately see a cleaner pool of light land on the chair instead of bleeding sideways into the rest of the scene.
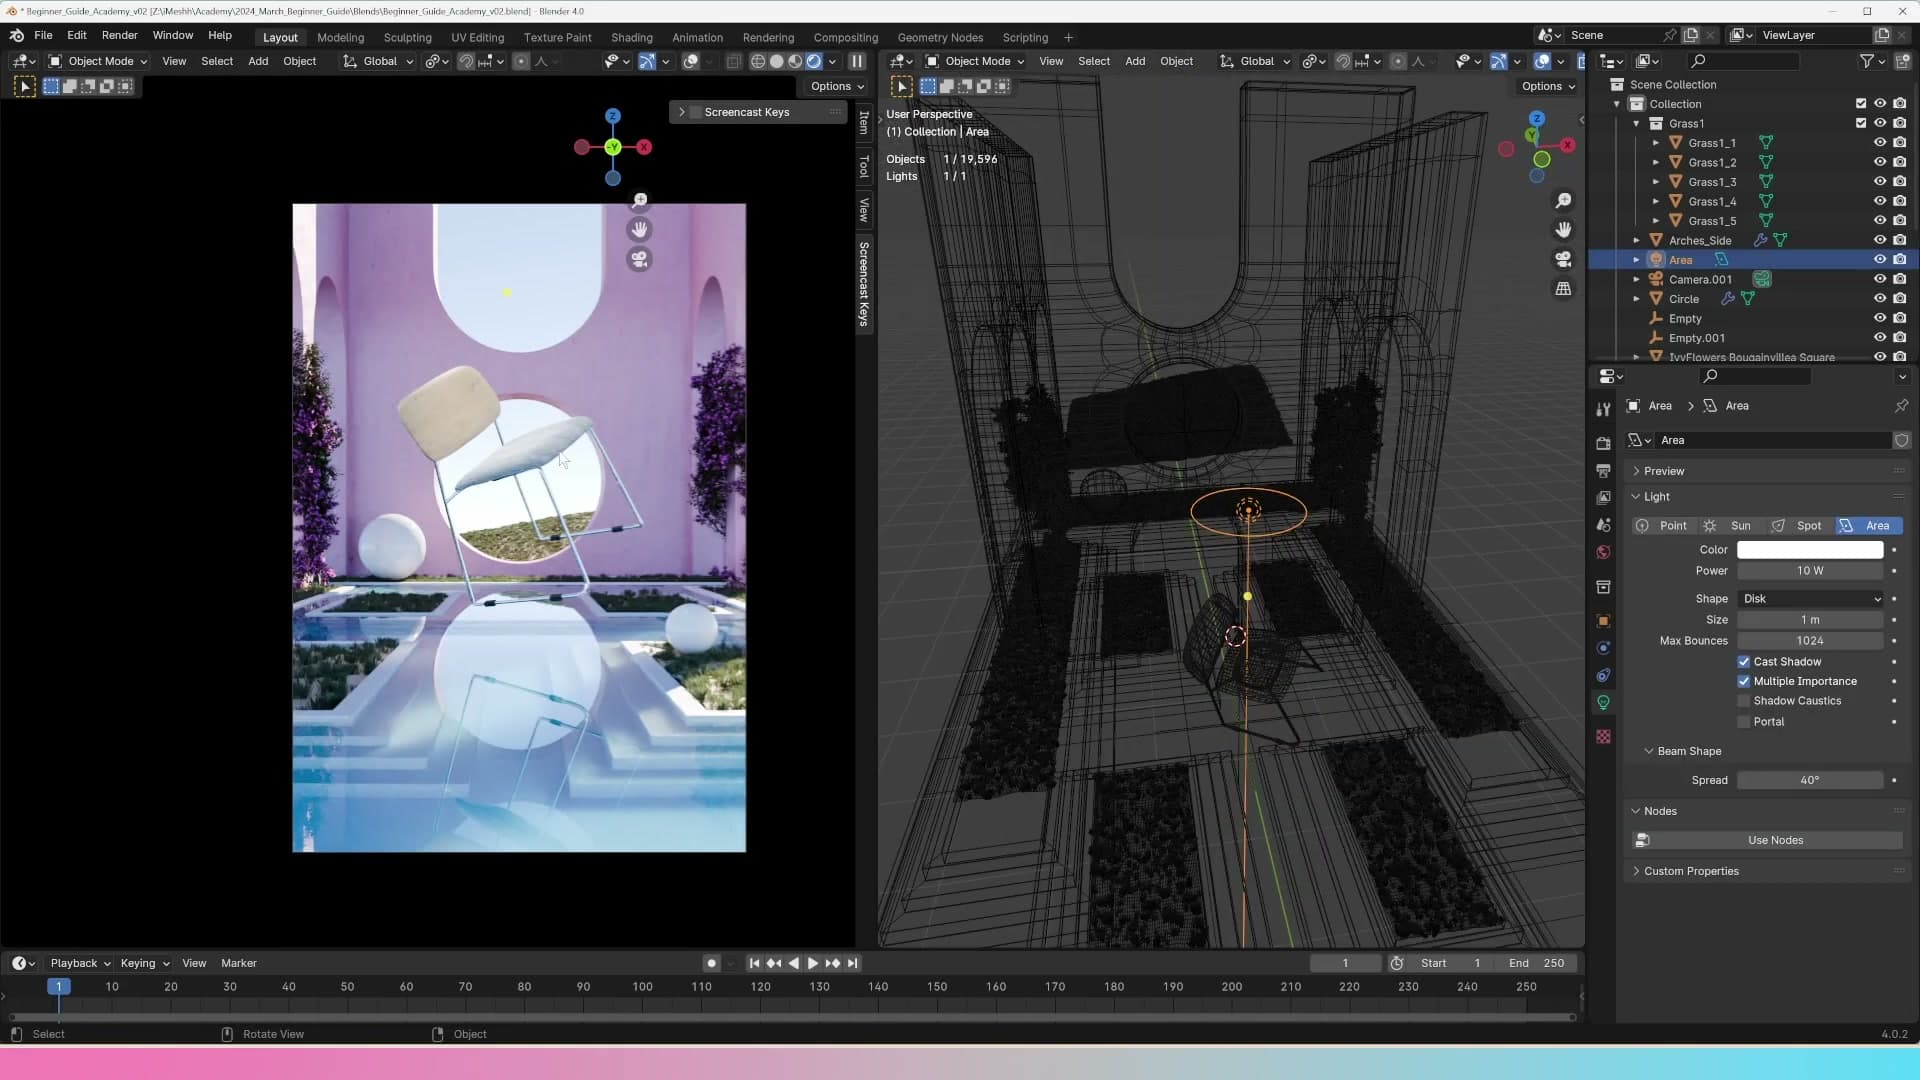
Nudge the light a little closer to the camera and lift it slightly so the shadow it casts feels natural for a top fill rather than a flat overhead. The position doesn't need to be precise yet. You're going to come back and tweak rotation and height once the light linking is wired up in the next step.
Linking the light to the chair collection only
Push the area light's power up to around 100 for a moment to see the problem clearly: the chair lifts nicely, but every plant, sphere and patch of ground sitting near it lifts too. The fix in Blender 4.0 is Light Linking, which lets a light affect only the objects in a chosen collection instead of everything within range.
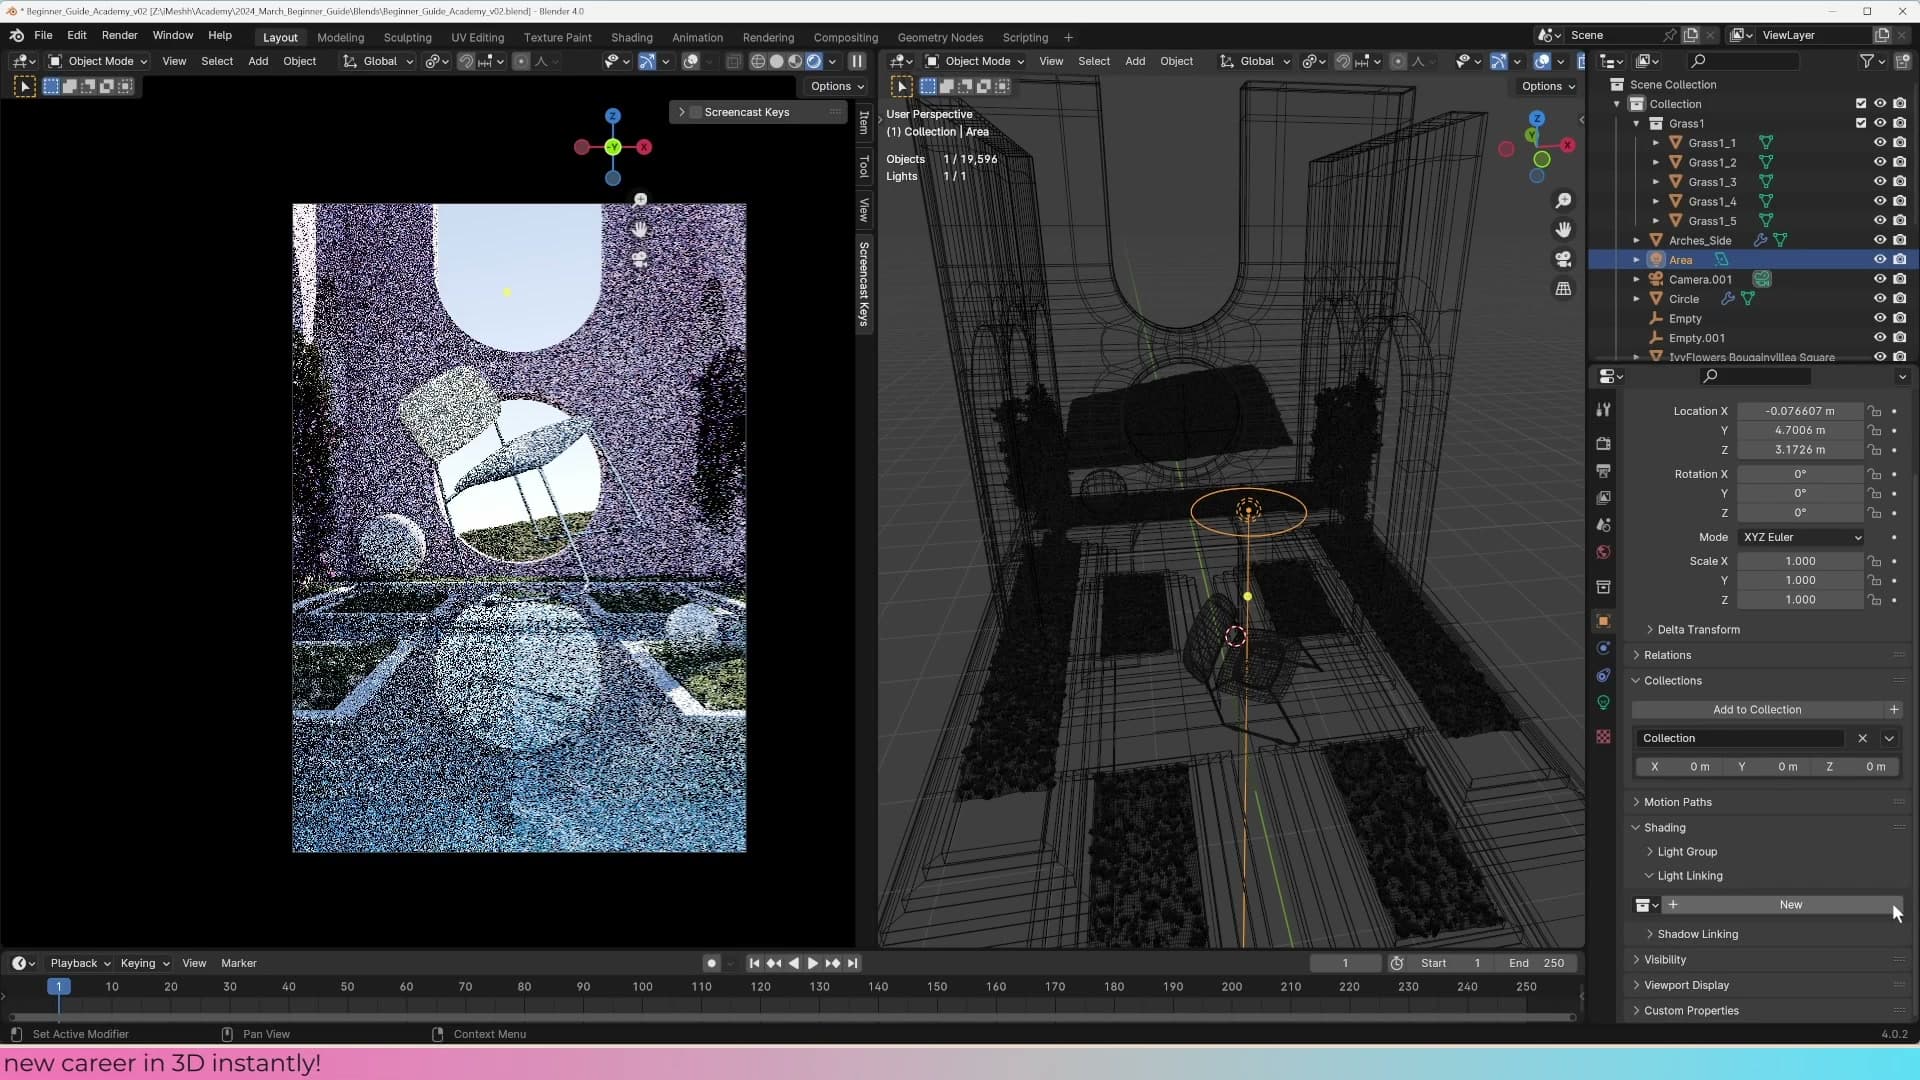
First, give the chair its own collection so there's a single thing to point the light at. Select the chair, press M → New Collection, and name it chair. Then select the area light, open Object Properties, expand the Shading section, and under Light Linking add the chair collection. The moment you do, the surrounding plants and ground go back to whatever the sun and sky were giving them. Only the chair still feels the area light.
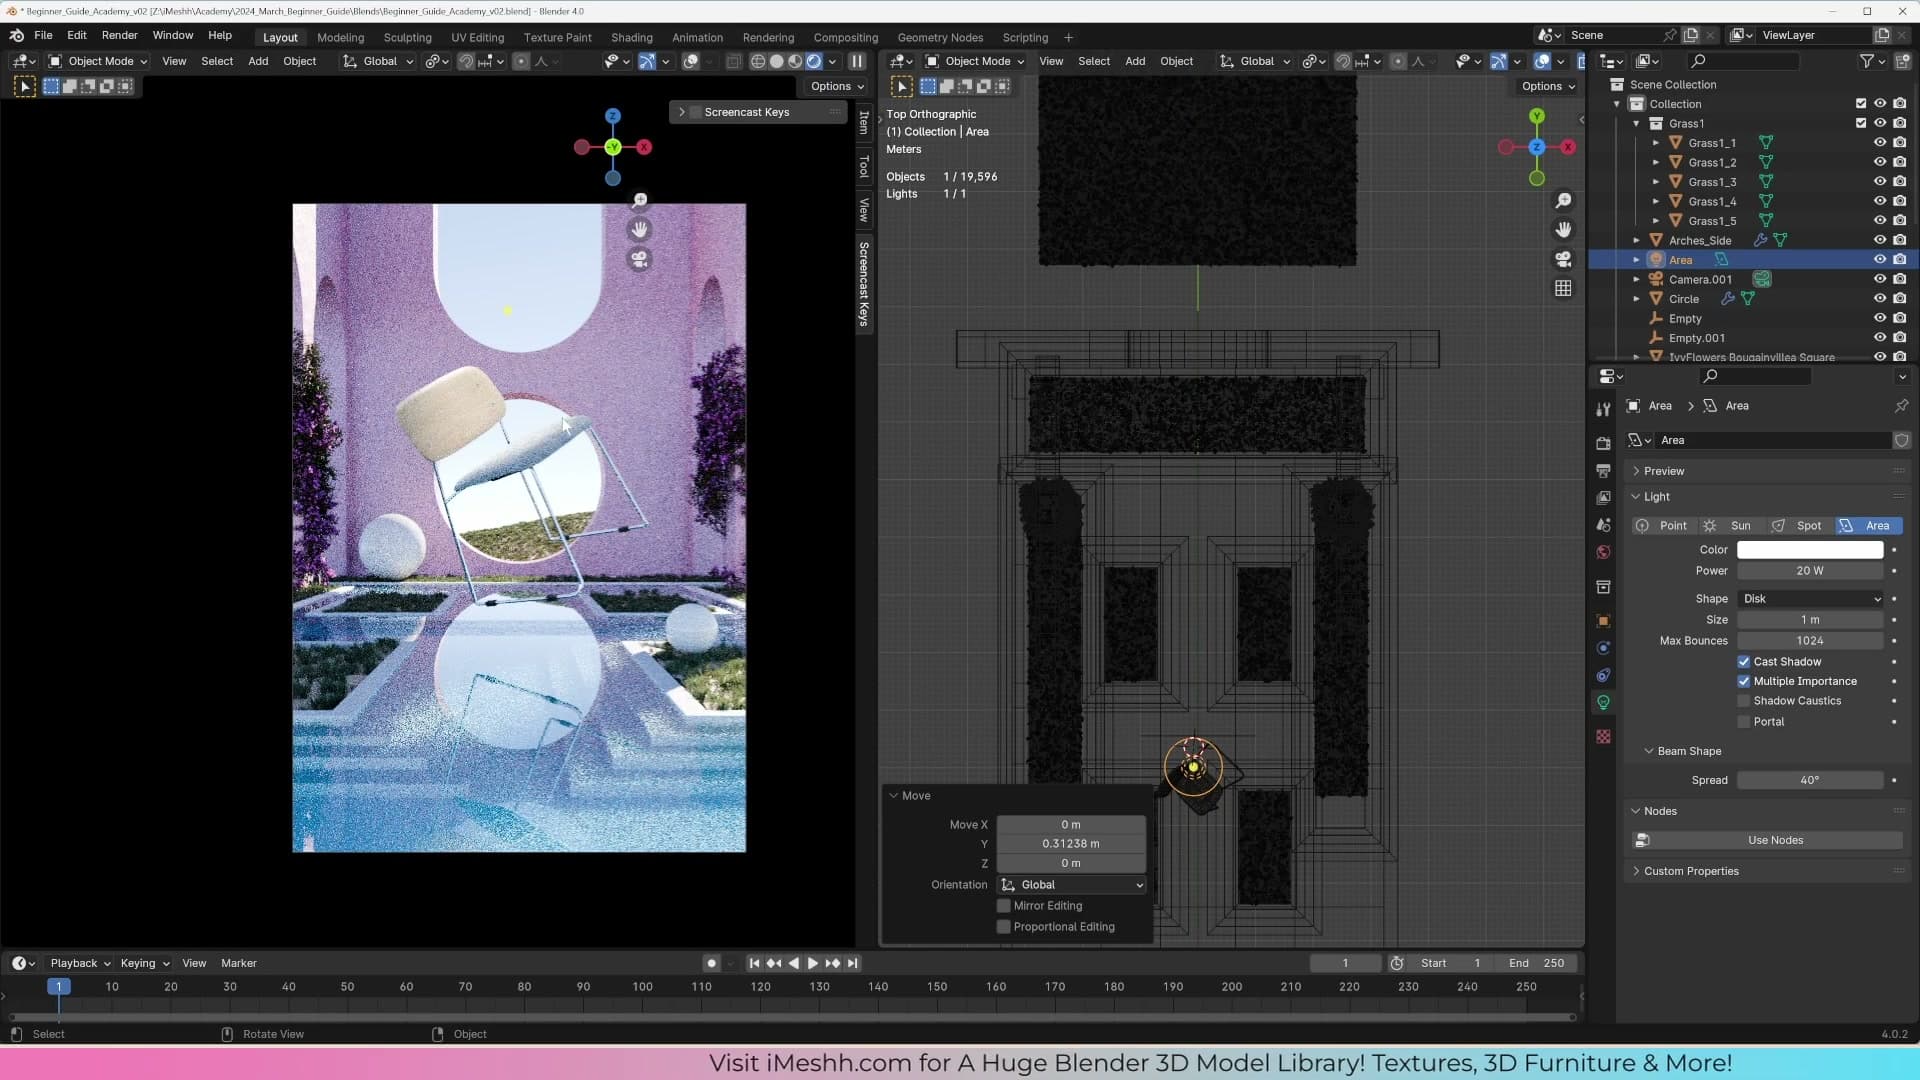
With the light isolated to the chair, the 100 setting is suddenly far too hot, so pull the power back down to around 20. Finally, rotate the light a touch and slide it sideways so the shadow falls across the chair from a slightly off-axis angle. That adds depth and stops the lit side from looking pancake-flat against the background.
Material and sun-angle polish
The chair legs blend into the background, so darken their material directly from the slot list. A small sun rotation lifts the whole scene, and raising the back grass edge with proportional editing pushes more lushness into the upper third of the frame.
Darkening the chair legs for separation
With the chair selected, the material slot list shows every material on the object, but it isn't always obvious which slot drives which part. The fastest way to identify a leg's material is to drop into edit mode, switch to face select, and click one of the leg faces. The slot list highlights the live material as you select: clicking a cushion face shows the fabric cloth slot, and clicking a leg face shows the leg material.
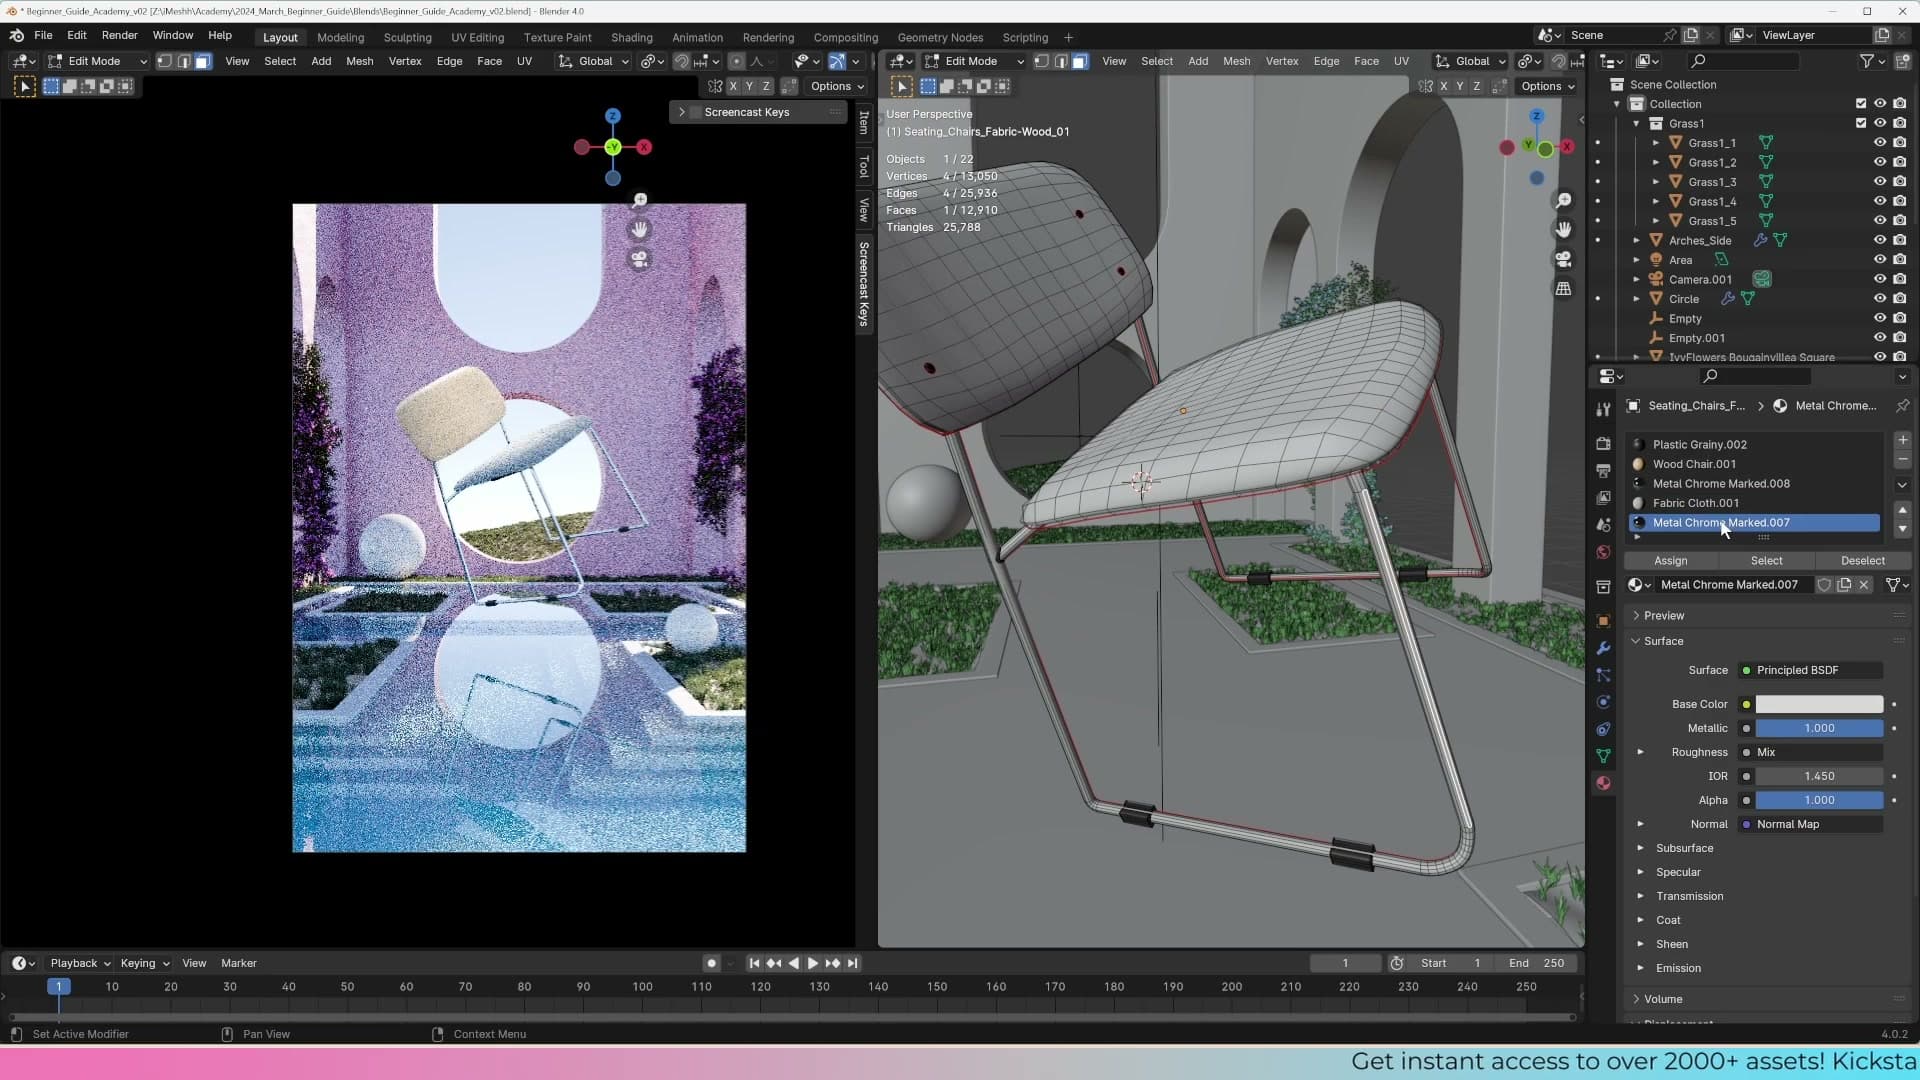
You could open the shader editor to retune the colour, but there's a quicker route when nothing is plugged into the Base Color socket. The material slot exposes the Base Color swatch directly, so you can click it and darken the value right there without leaving the Properties panel.
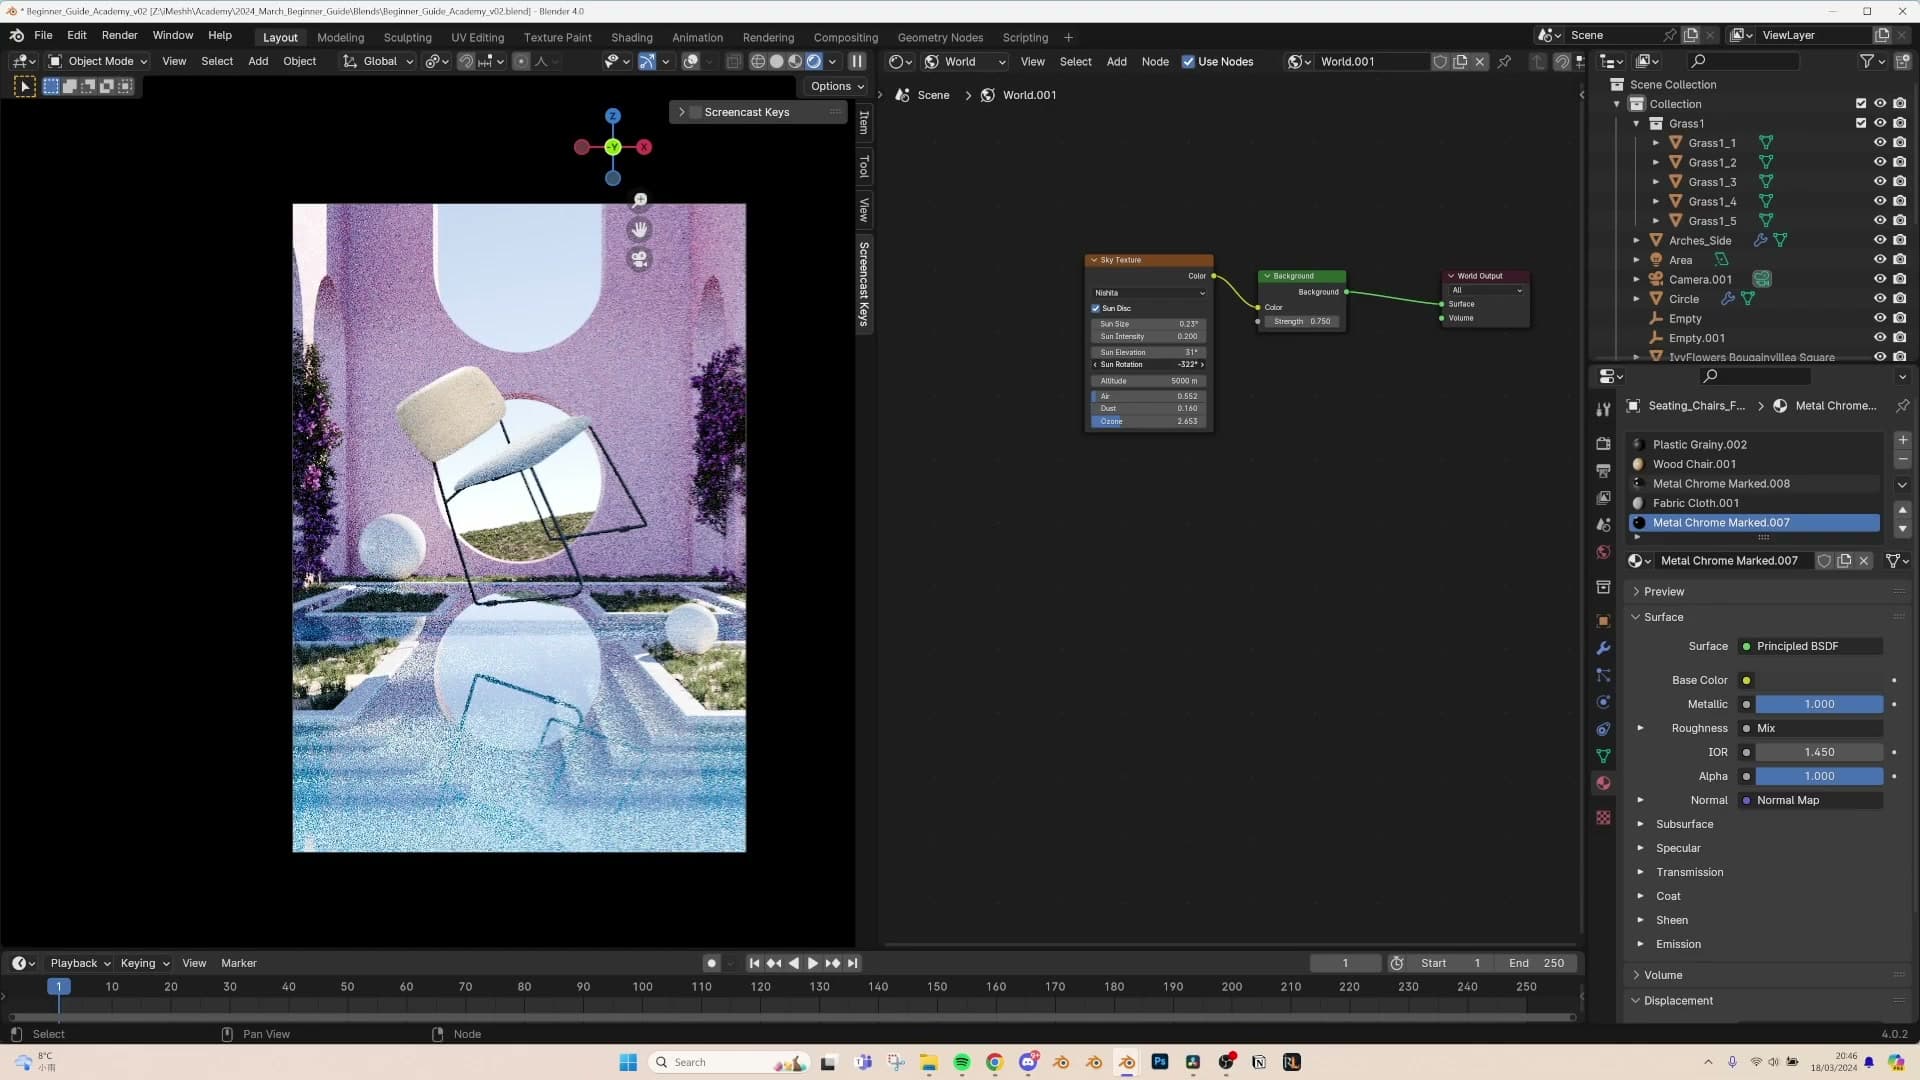
Push the leg colour toward near-black. The lighter chrome was blending into the warm wall and grass behind, and a much darker base makes the legs read as a clean silhouette against the background. The eye registers the chair as a single shape instead of losing the bottom half into the scene.
Sun angle and raising the back grass edge
Jump back into the world setup and nudge the sun a little further around. A small rotation is enough. You're after a fresh angle that pushes more directional light into the scene, brightens the overall feel, and gives the chair a stronger highlight without restaging anything.
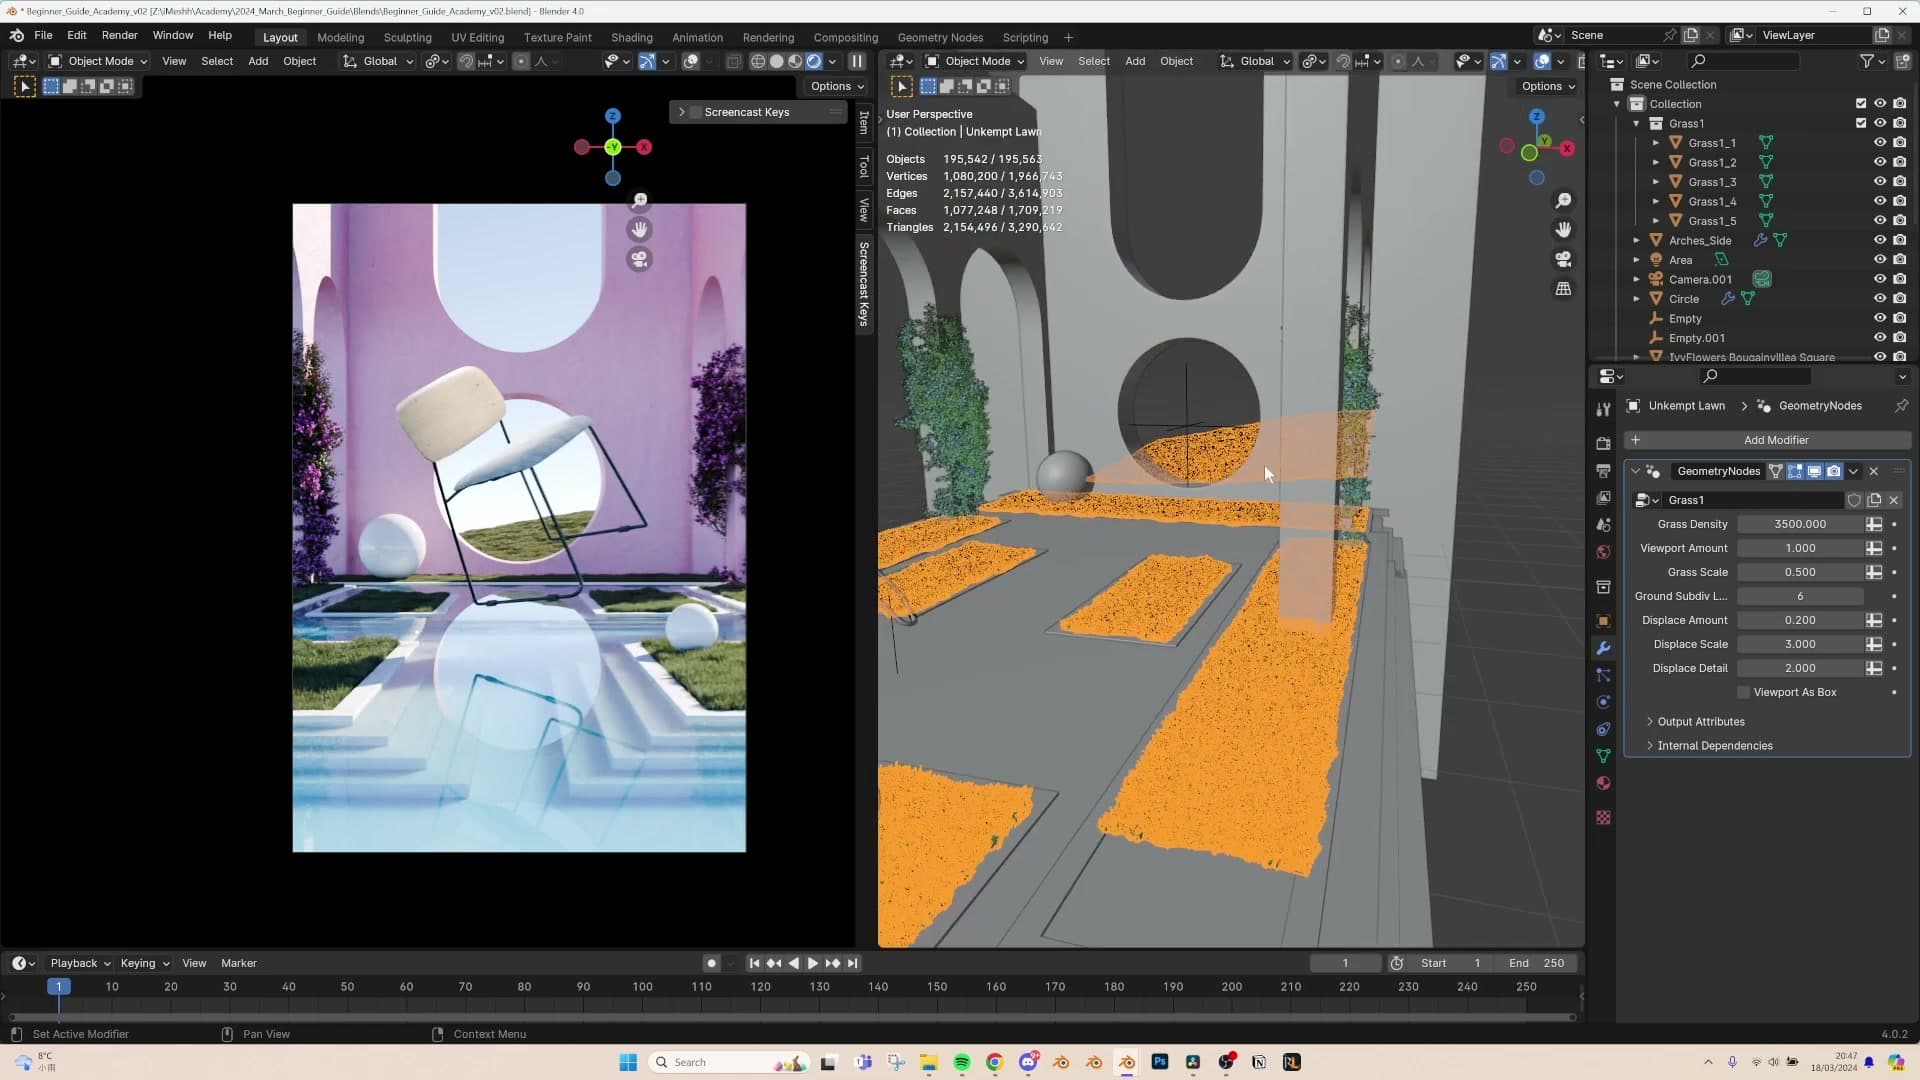
Hit Ctrl+S, then drop the grass geometry-nodes viewport density back up to 1 so you can see the scene at full lushness. With the sun angle improved and the grass at full strength, the foreground reads soft and the hill behind looks convincing.
The one thing still pulling the eye is the back grass. It sits a touch too low against the wall, leaving a thin strip of bare hill visible. Select the back edge of the hill plane, press O to enable proportional editing, and set the falloff to Smooth. Grab the edge upward until the grass covers roughly halfway up the visible background. The smooth falloff drags the surrounding hill geometry with it, so the lift looks natural rather than a sharp ridge.
Preview the result. The taller back edge fills more of the upper third of the frame, the new sun direction adds bounce, and the darker chair legs anchor the foreground. The slight choppiness in the grass silhouette actually helps. It reads as density rather than a flat carpet.
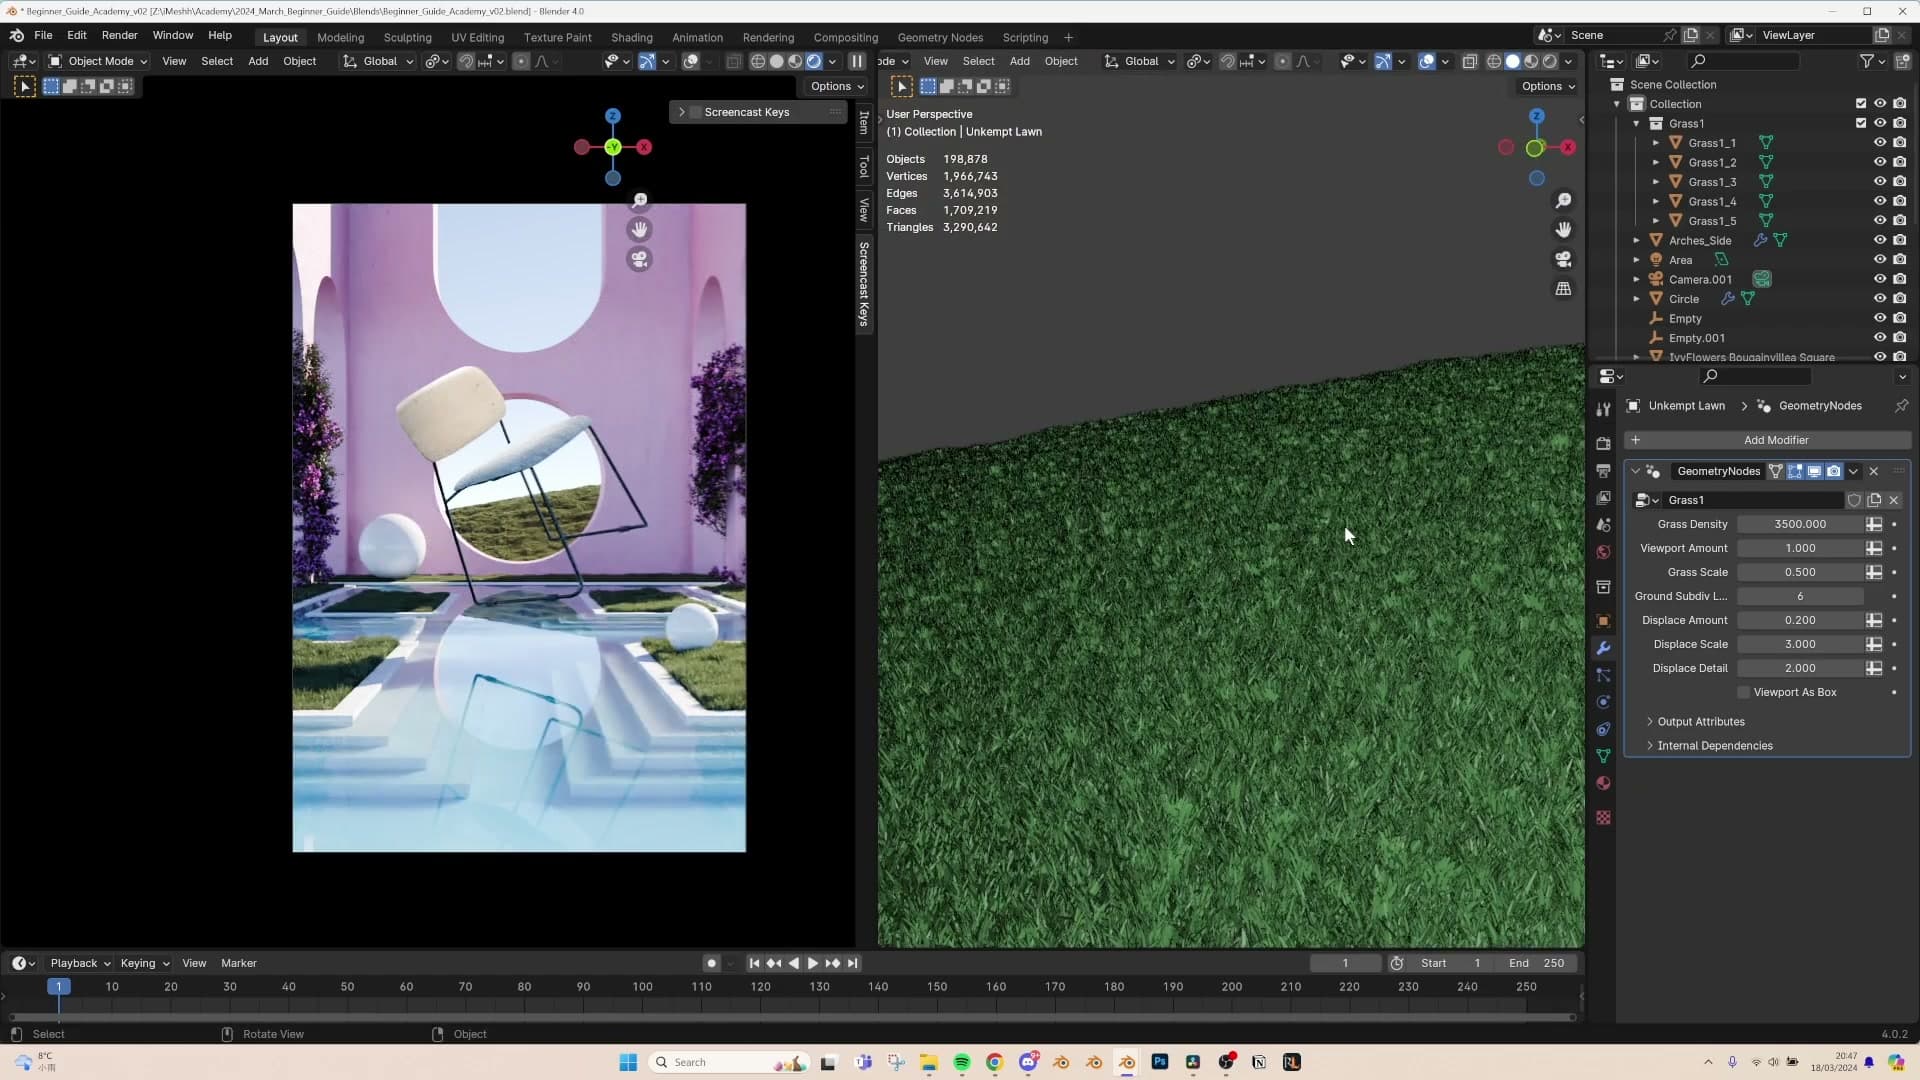
A foreground plant for leading lines
One last composition tweak: duplicate one of the existing ivy plants and place it closer to camera so its silhouette leads the eye into the chair. The scene is now ready for render settings in the final part.
Adding a foreground plant near the camera
One last composition tweak before render settings. The scene reads well, but the foreground feels a bit empty. Pulling one of the existing plants closer to camera will add a second depth plane and create leading lines that draw the eye toward the chair.
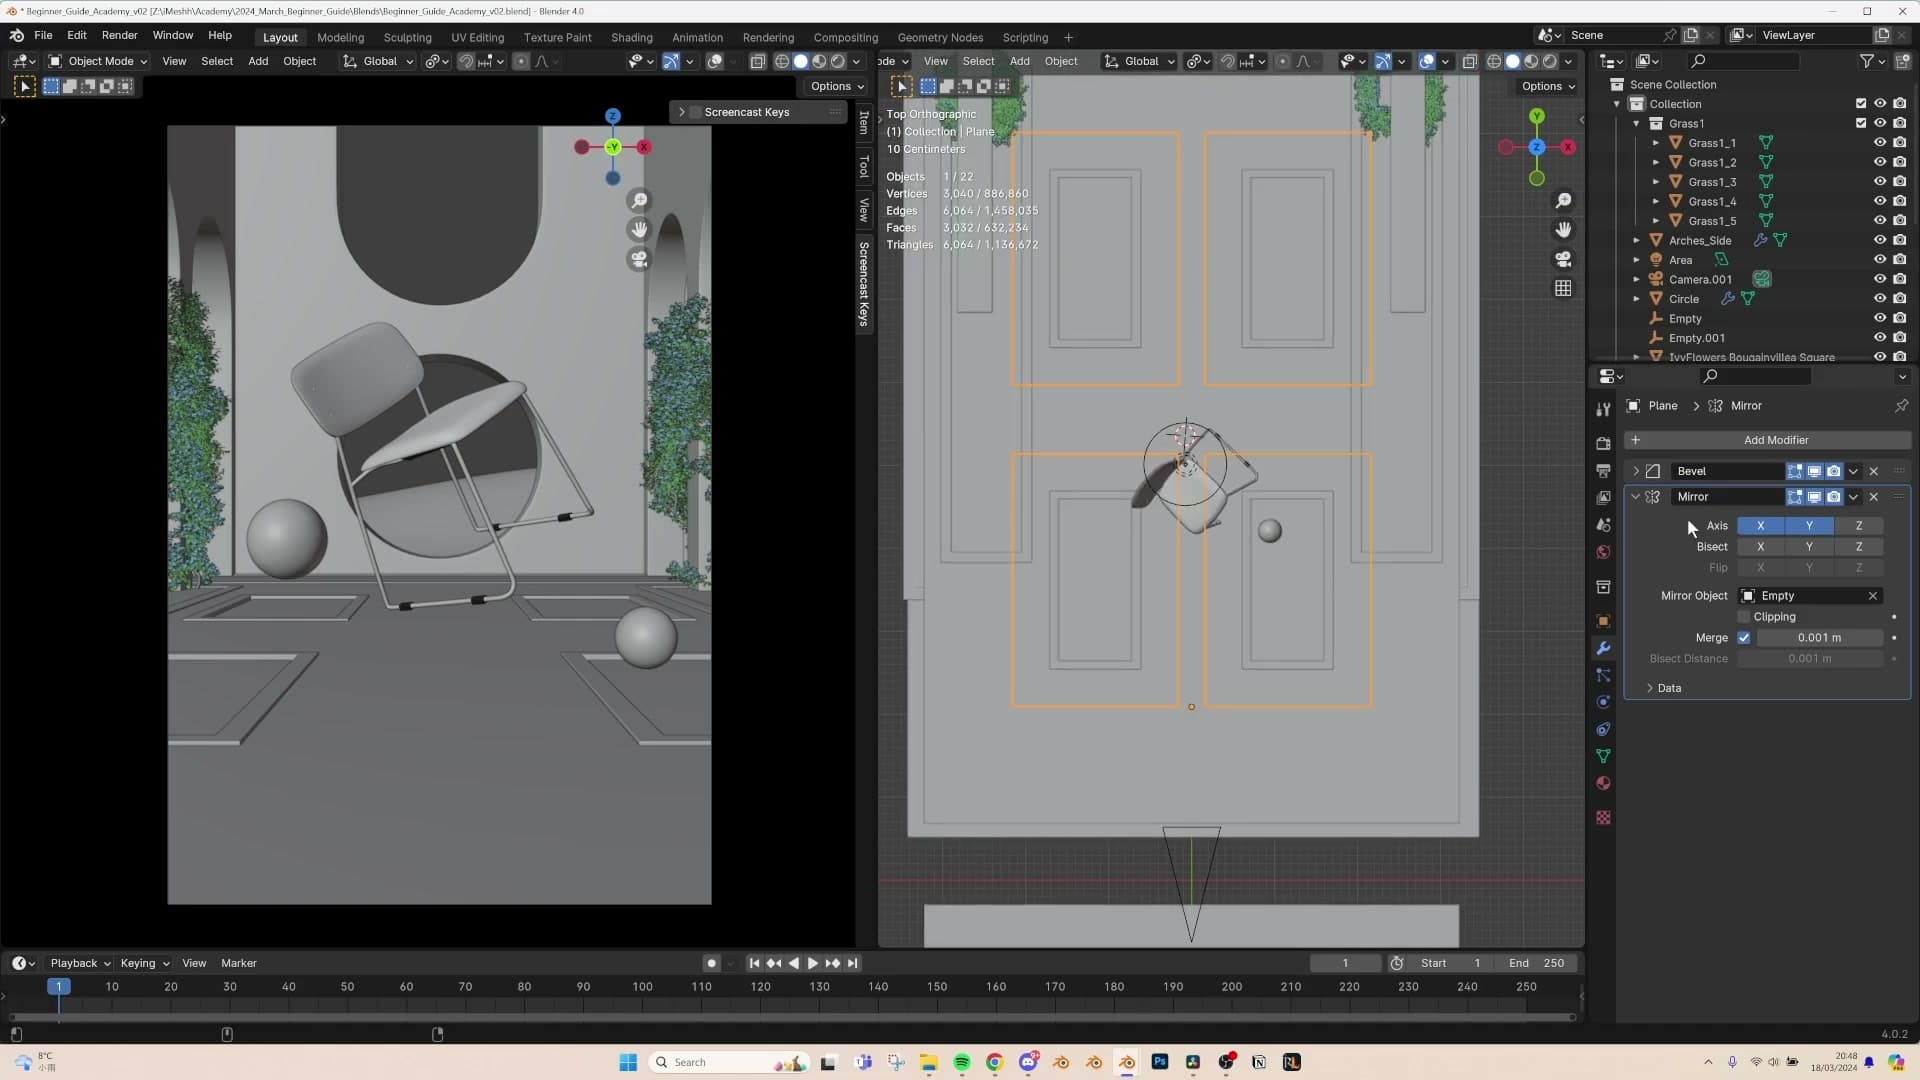
Pick one of the ivy plants you've already placed. If it still has a Mirror modifier on it, apply the mirror first so the duplicate doesn't inherit a mirrored partner you don't want. Then select the leaves you want to clone, press Shift+D to duplicate, and lock the move to the Y axis by tapping Y. Drag the copy forward by eye until the new leaves sit just inside the camera frame. Close enough that you can see a clear step between the foreground plant and the one behind it, but not so close that they crowd the chair.

That's the composition done. Grass, hill, ivy, the glossy spheres and the hero chair are all in position, the lighting is shaped, and the foreground has the leading-line silhouette it was missing. In the next part you'll move on to render settings and finish the image.
Tools and credits
Everything mentioned in this tutorial, with links.
- Blender (the renderer this entire build runs in).
- iMeshh studio platform (project management, client review, asset library, invoicing). The asset library used in this tutorial is included with every iMeshh Pro plan.
- Poly Haven (free CC0 textures and HDRIs).
Pillar guide: Beginner Course hub