Why iMeshh built a new asset manager
Charles introduces himself as the other iMeshh founder and explains the friction in the old workflow: browsing the site, downloading zips, unzipping into the right folder, and juggling asset managers. The new extension is designed to remove all of that.
The designer pain point this asset manager solves
"What if you could access iMeshh's entire asset library directly in Blender in one click?" That's the promise Charles opens with, and it's the whole reason this asset manager exists. If you're surprised to see a new face on camera, Charles is the other iMeshh co-founder. Chris usually presents the channel, but Charles wanted to walk through the new extension personally because of how much it changes the day-to-day archviz workflow.
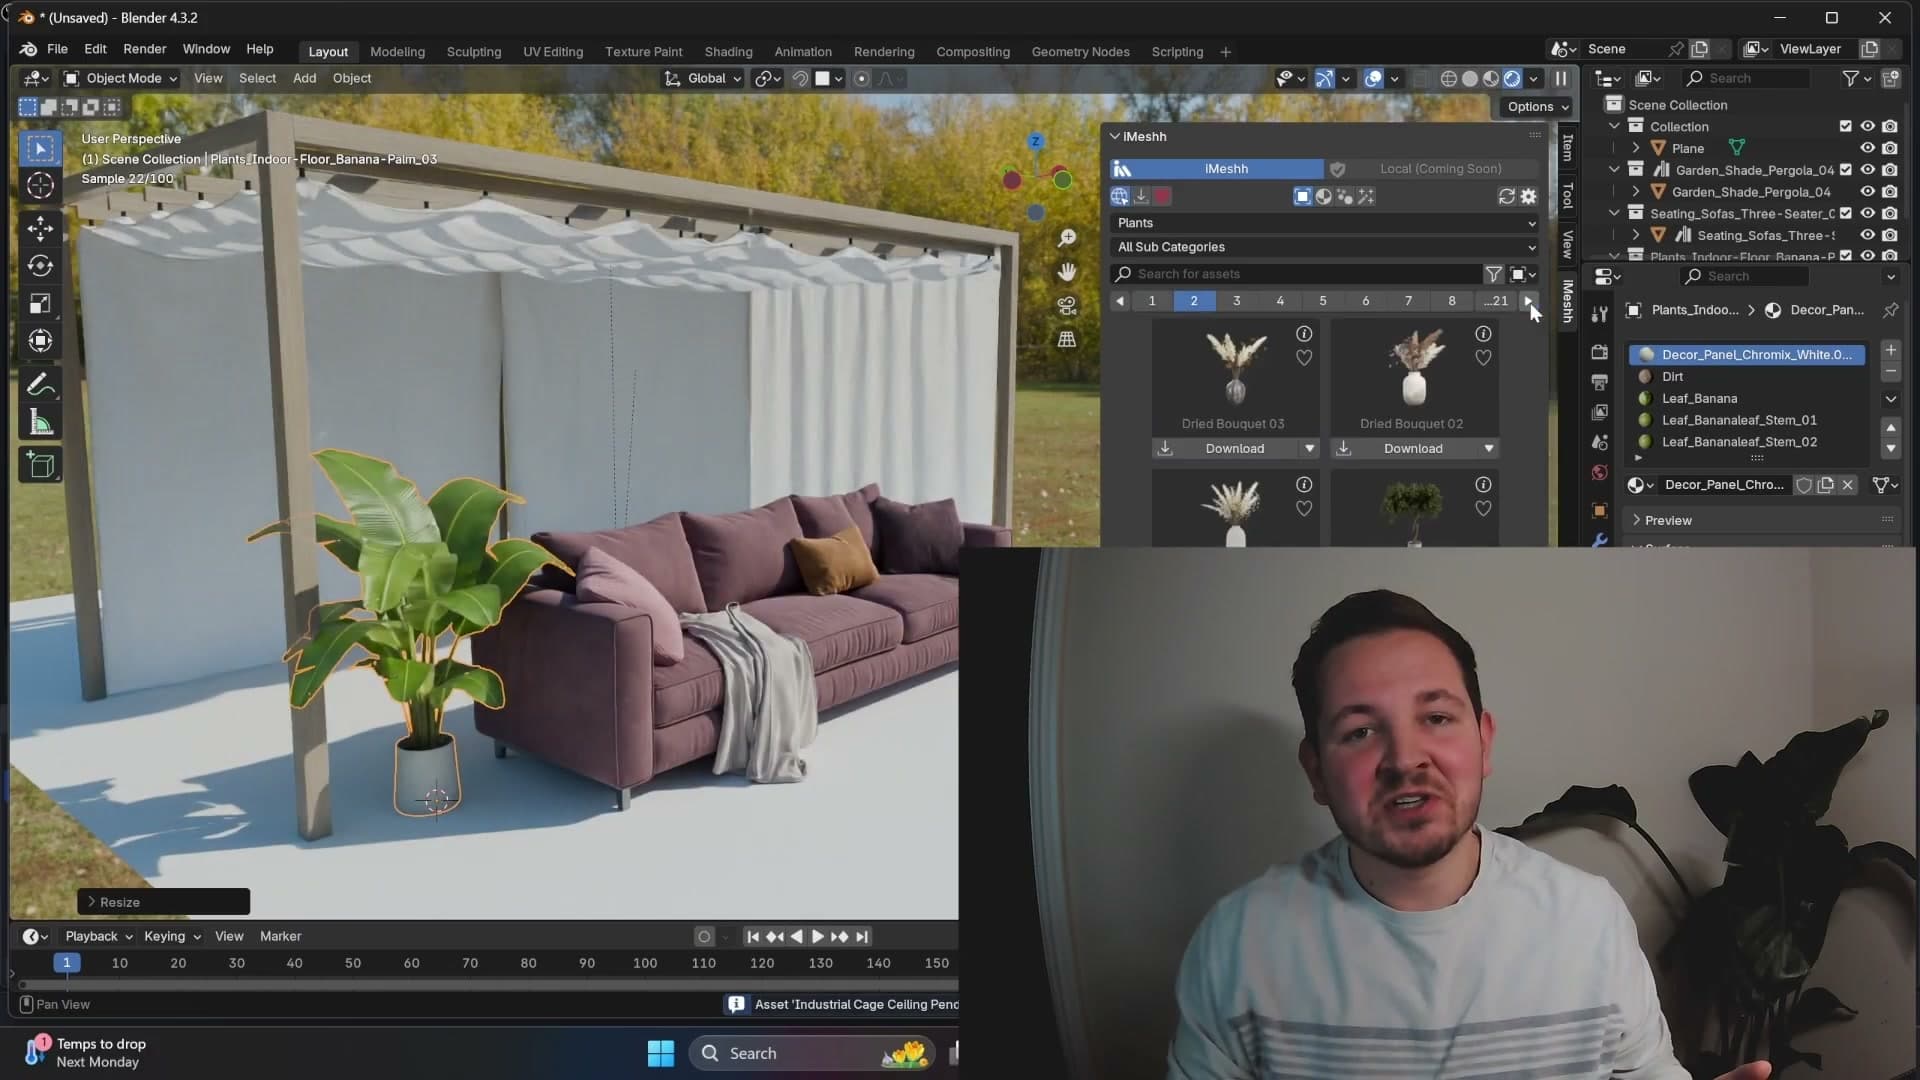
Before the extension existed, the designer process looked roughly like this. You browsed the iMeshh website in your browser, downloaded a zip file for each asset you wanted, unzipped the archive into the correct folder on disk, then leaned on either the legacy iMeshh asset manager or Blender's built-in asset browser to organise the result. Doable, but the friction added up: you couldn't easily see which products were newly released, swapping one model out for another inside a scene was a multi-step exercise, and a real chunk of every project went on file admin rather than design.
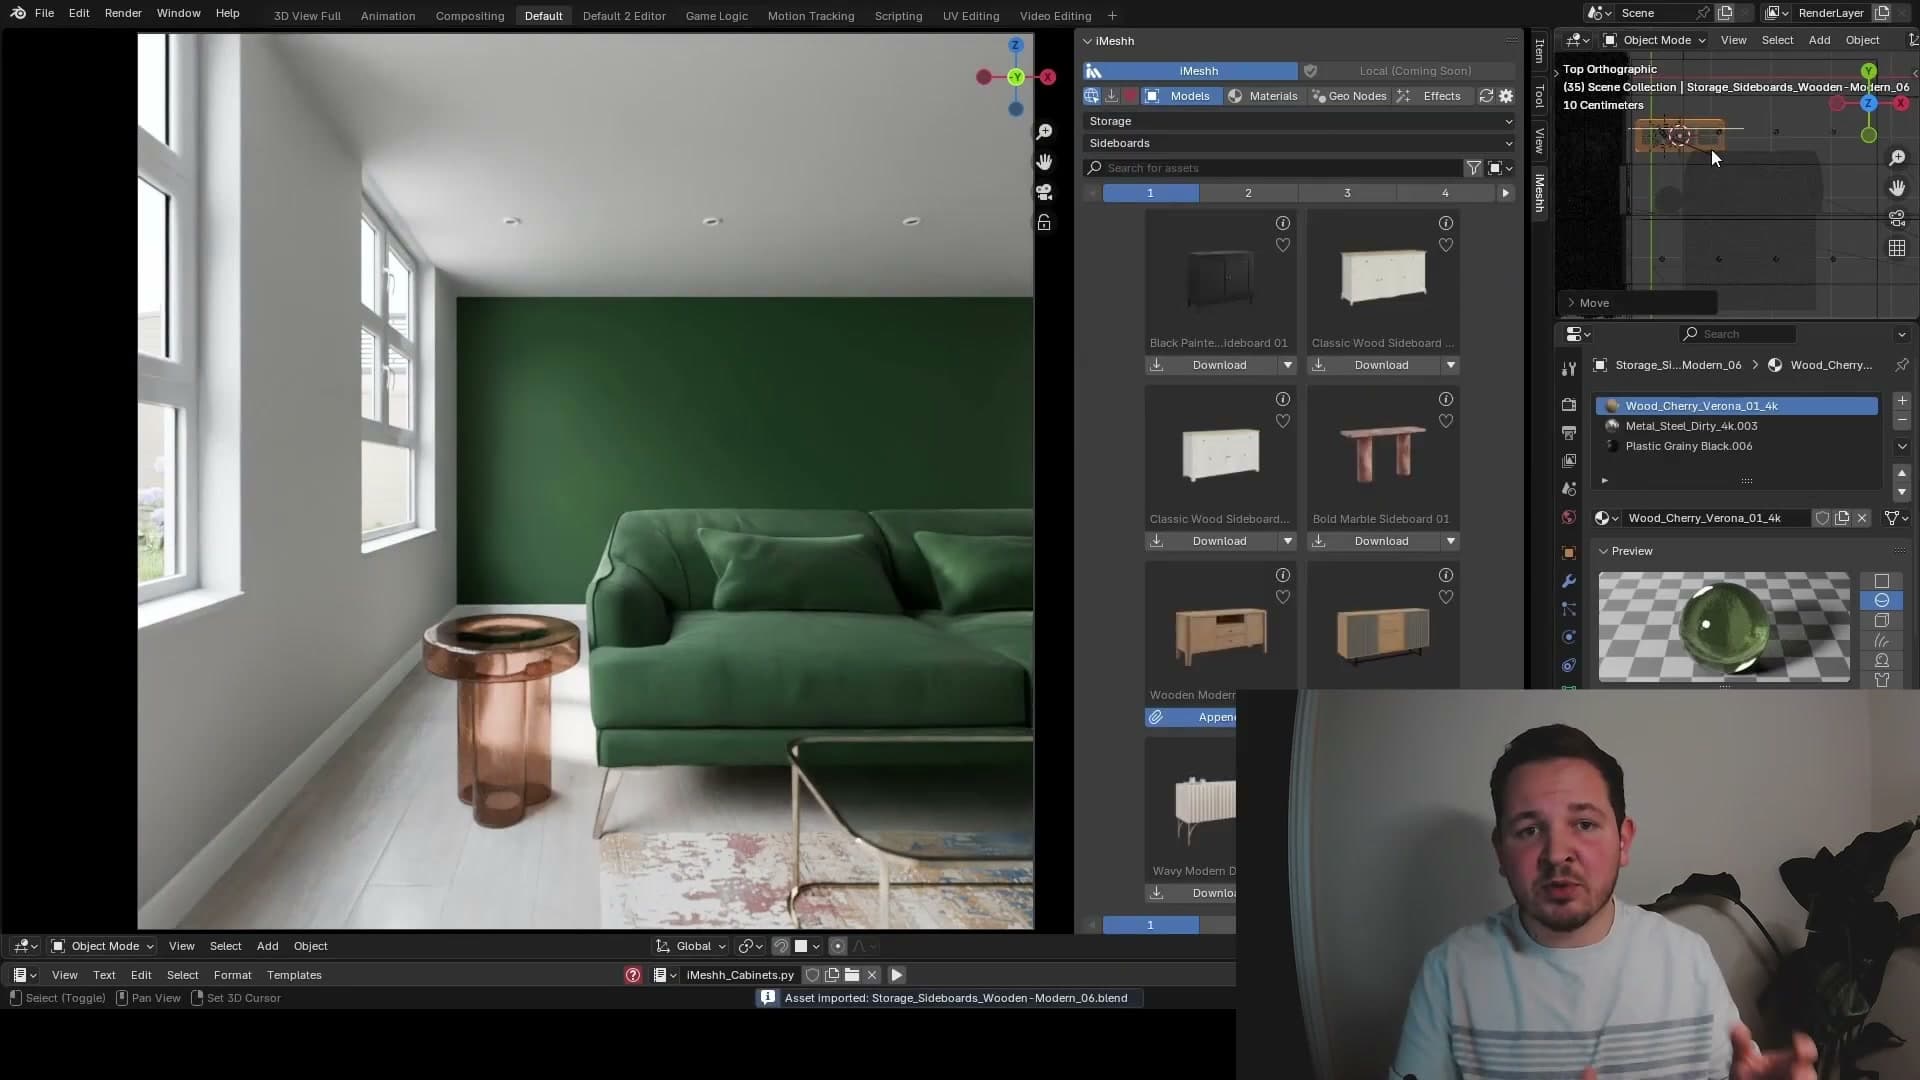
The new asset manager collapses that whole loop into a single panel inside Blender. You can browse iMeshh's full product catalogue without leaving the viewport, search the library by keyword, and favourite individual items so you can pull them back into future scenes without scrolling through pages of thumbnails. The rest of this guide walks through installing the extension, pointing it at your iMeshh account, and using each part of the panel end-to-end. We start with the install itself.
Installing the iMeshh extension in Blender
Add the iMeshh extension repository to Blender's preferences, enable auto-update on launch, and install the add-on so an iMeshh tab appears in the N-panel.
Adding the iMeshh remote repository URL
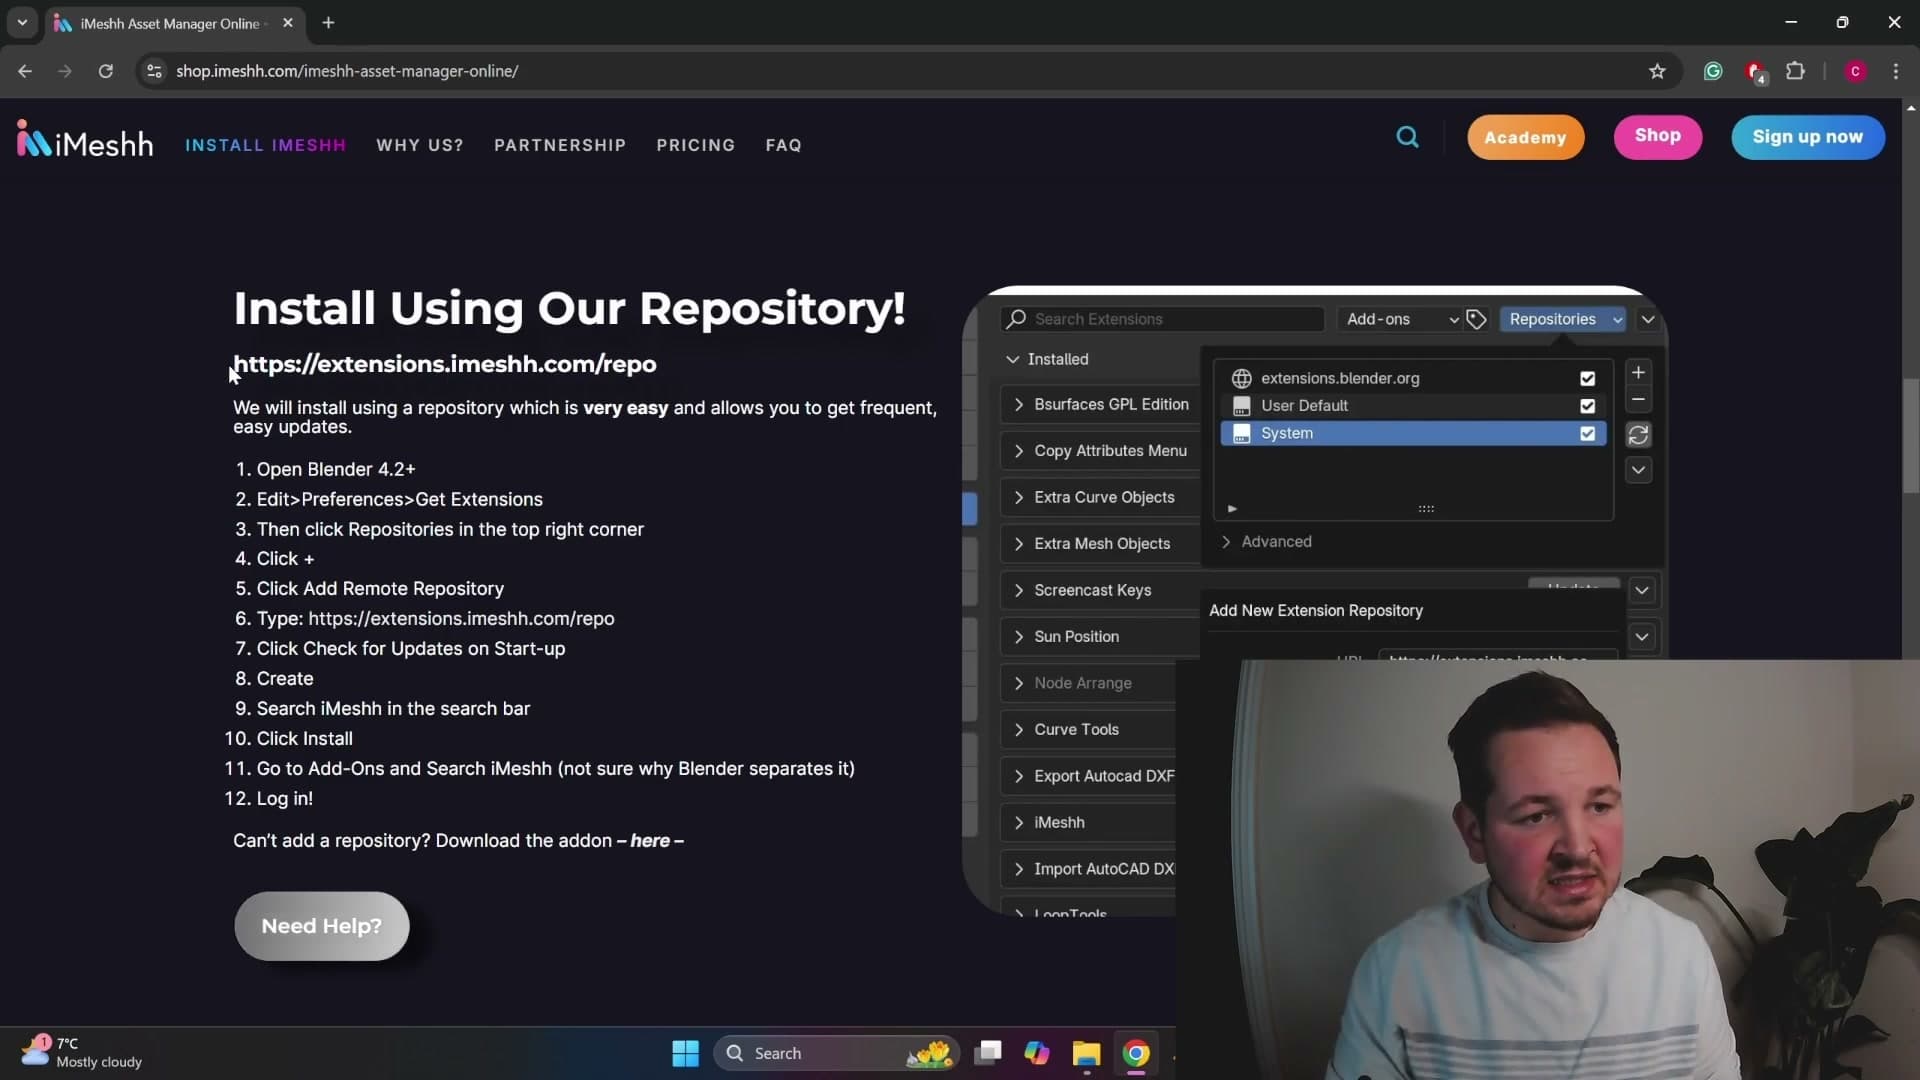
Head to the iMeshh website and look for the Install iMeshh link in the top navigation. The brand is mid-rebrand, so the visual styling may shift between now and when you watch this, but that link is always sitting along the top. The page itself walks through a full installation breakdown, but you only need one thing from it: the repository URL, https://extensions.imeshh.com/.
Back in Blender, open Edit → Preferences → Get Extensions. If this is the first time you've used extensions on this machine, Blender will ask permission to go online. Click Allow.
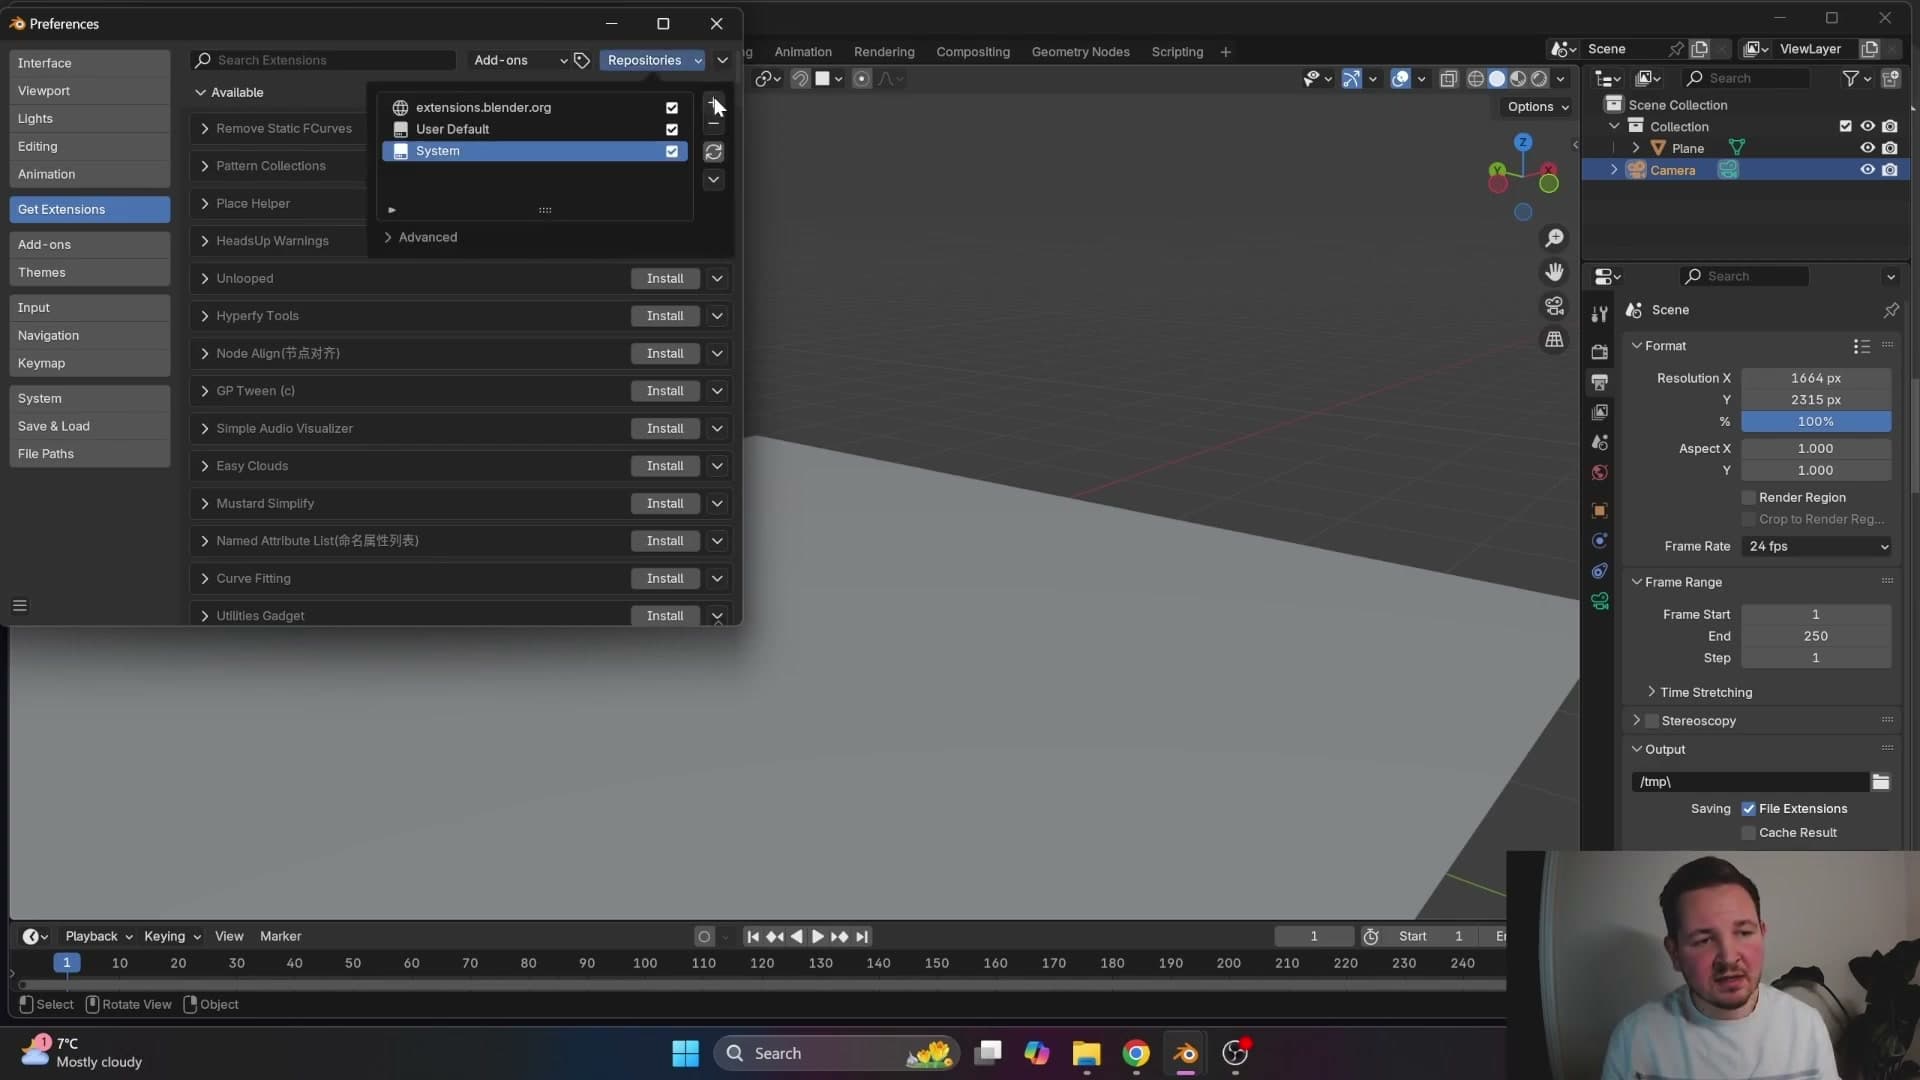
Along the top of the panel, expand Repositories, click the +, and choose Add Remote Repository. Paste in the iMeshh URL, tick Check for updates on startup, and click Create to register it.
Searching and installing the iMeshh extension
With the repository registered, type iMeshh into the extension search at the top of the Get Extensions panel and click Install on the result.
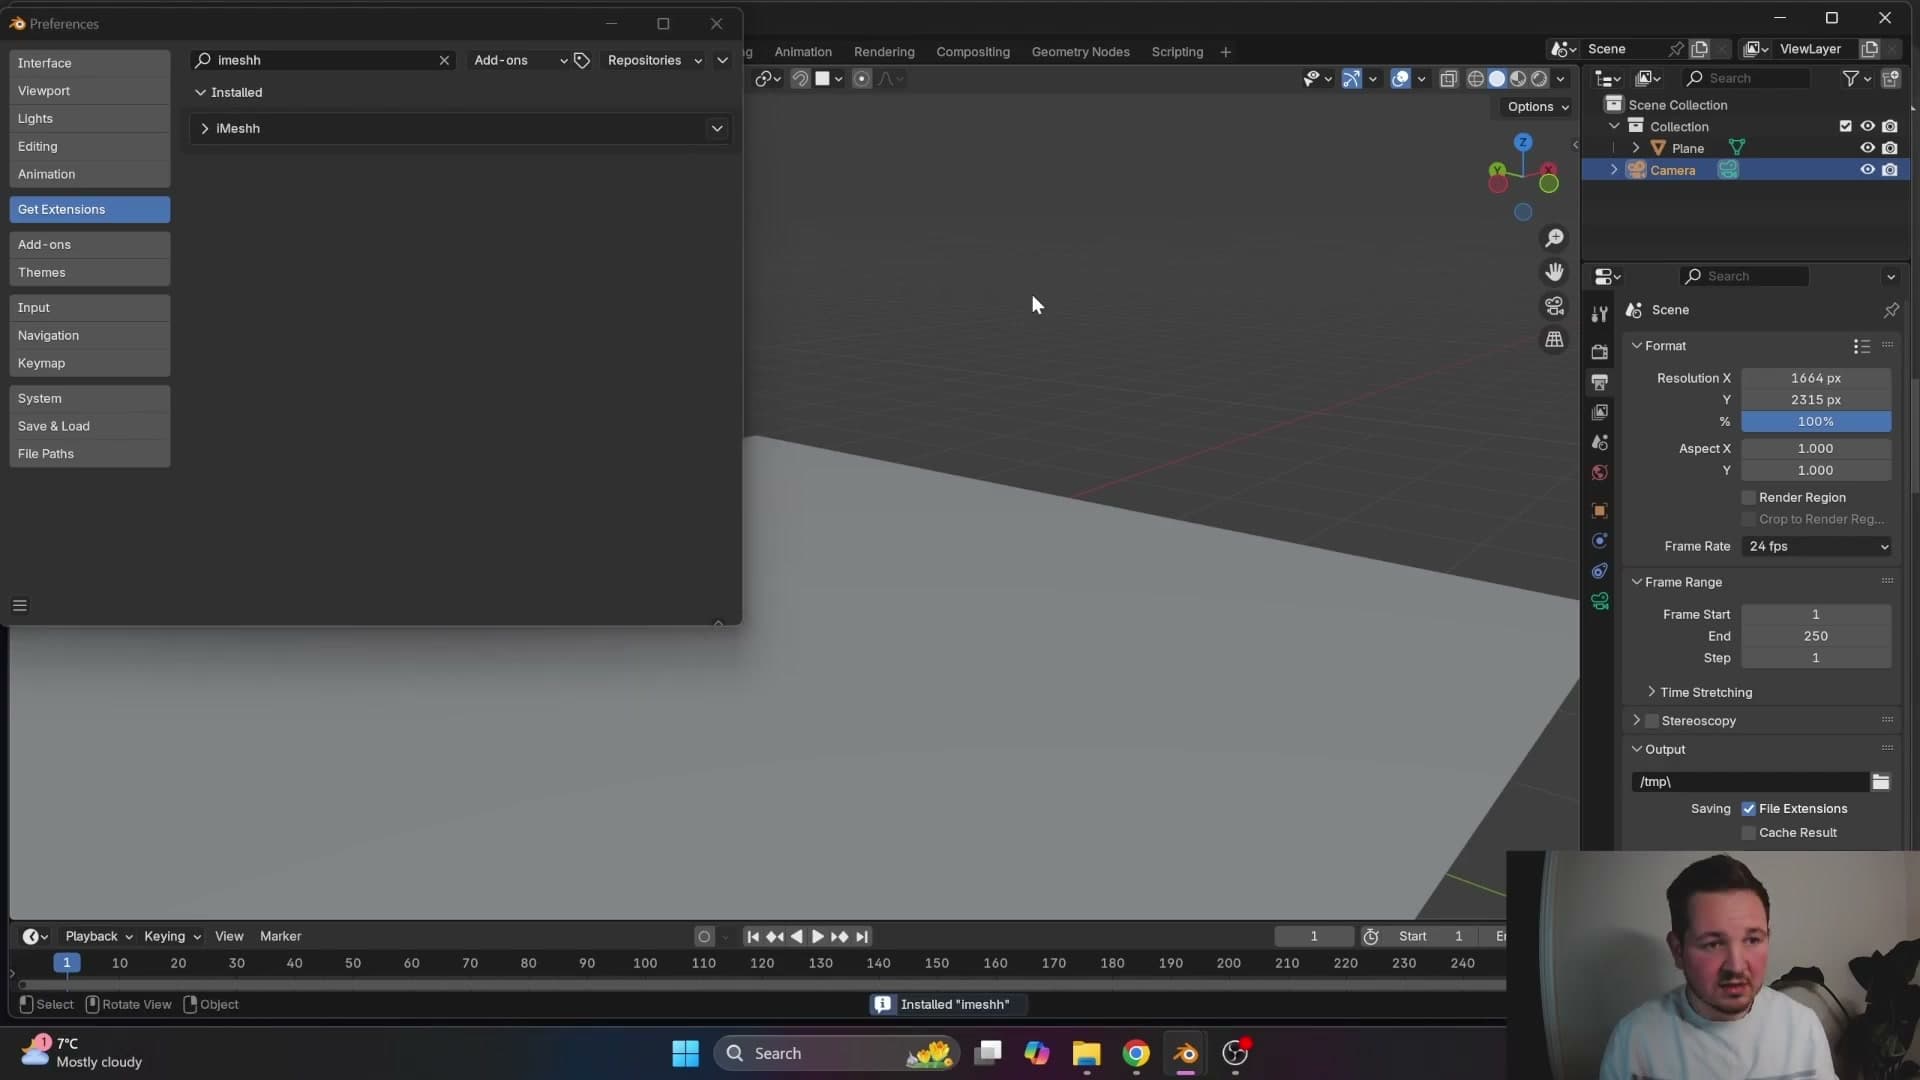
The install finishes in a few seconds. No Blender restart needed.
Opening the iMeshh tab and loading thumbnails
Hop back into the 3D viewport and press N to open the sidebar. Alongside the usual Item, Tool, and View tabs, you'll see a new iMeshh tab. Click it and the browser loads up with every asset category listed along the top.
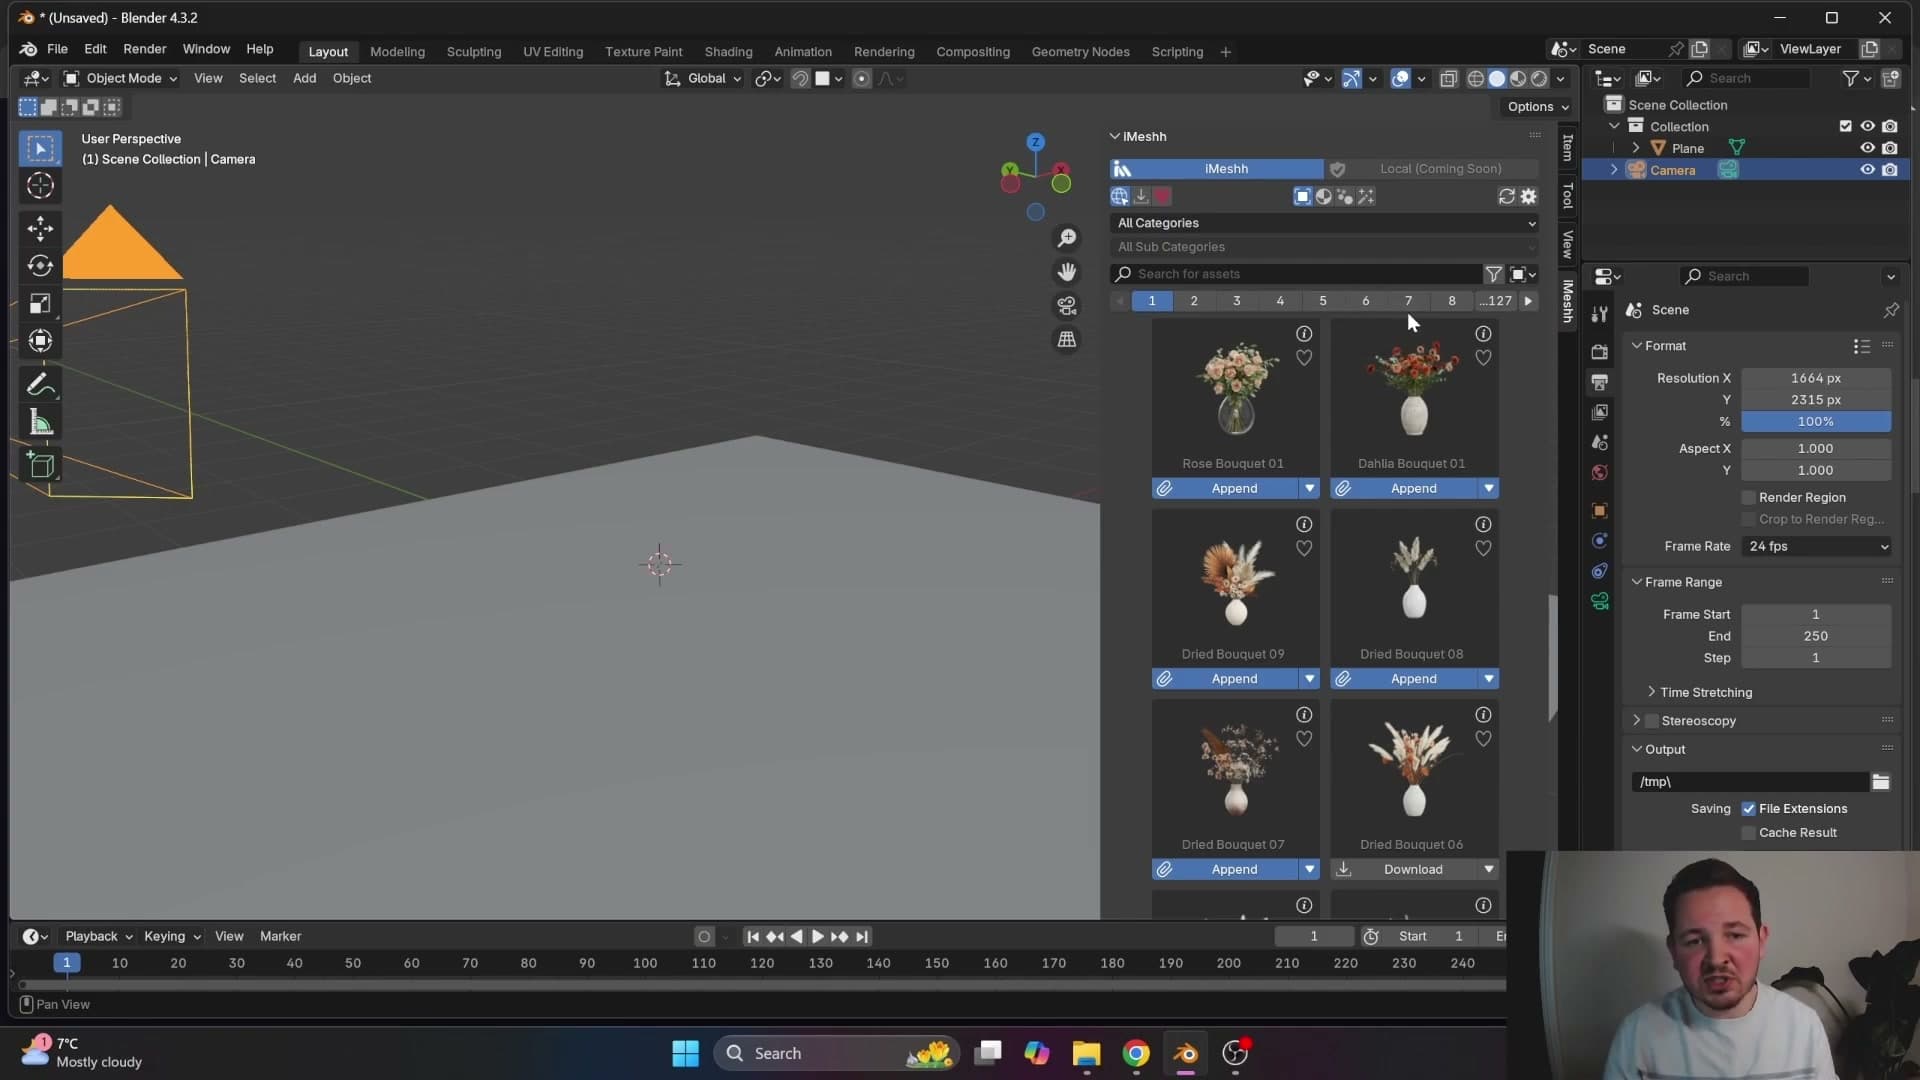
On first launch you'll see grey placeholders instead of thumbnails. The extension is generating those previews on demand and caching them locally to your machine, so each one only renders once. As each thumbnail finishes, the placeholder swaps in for the real preview and stays loaded from then on.
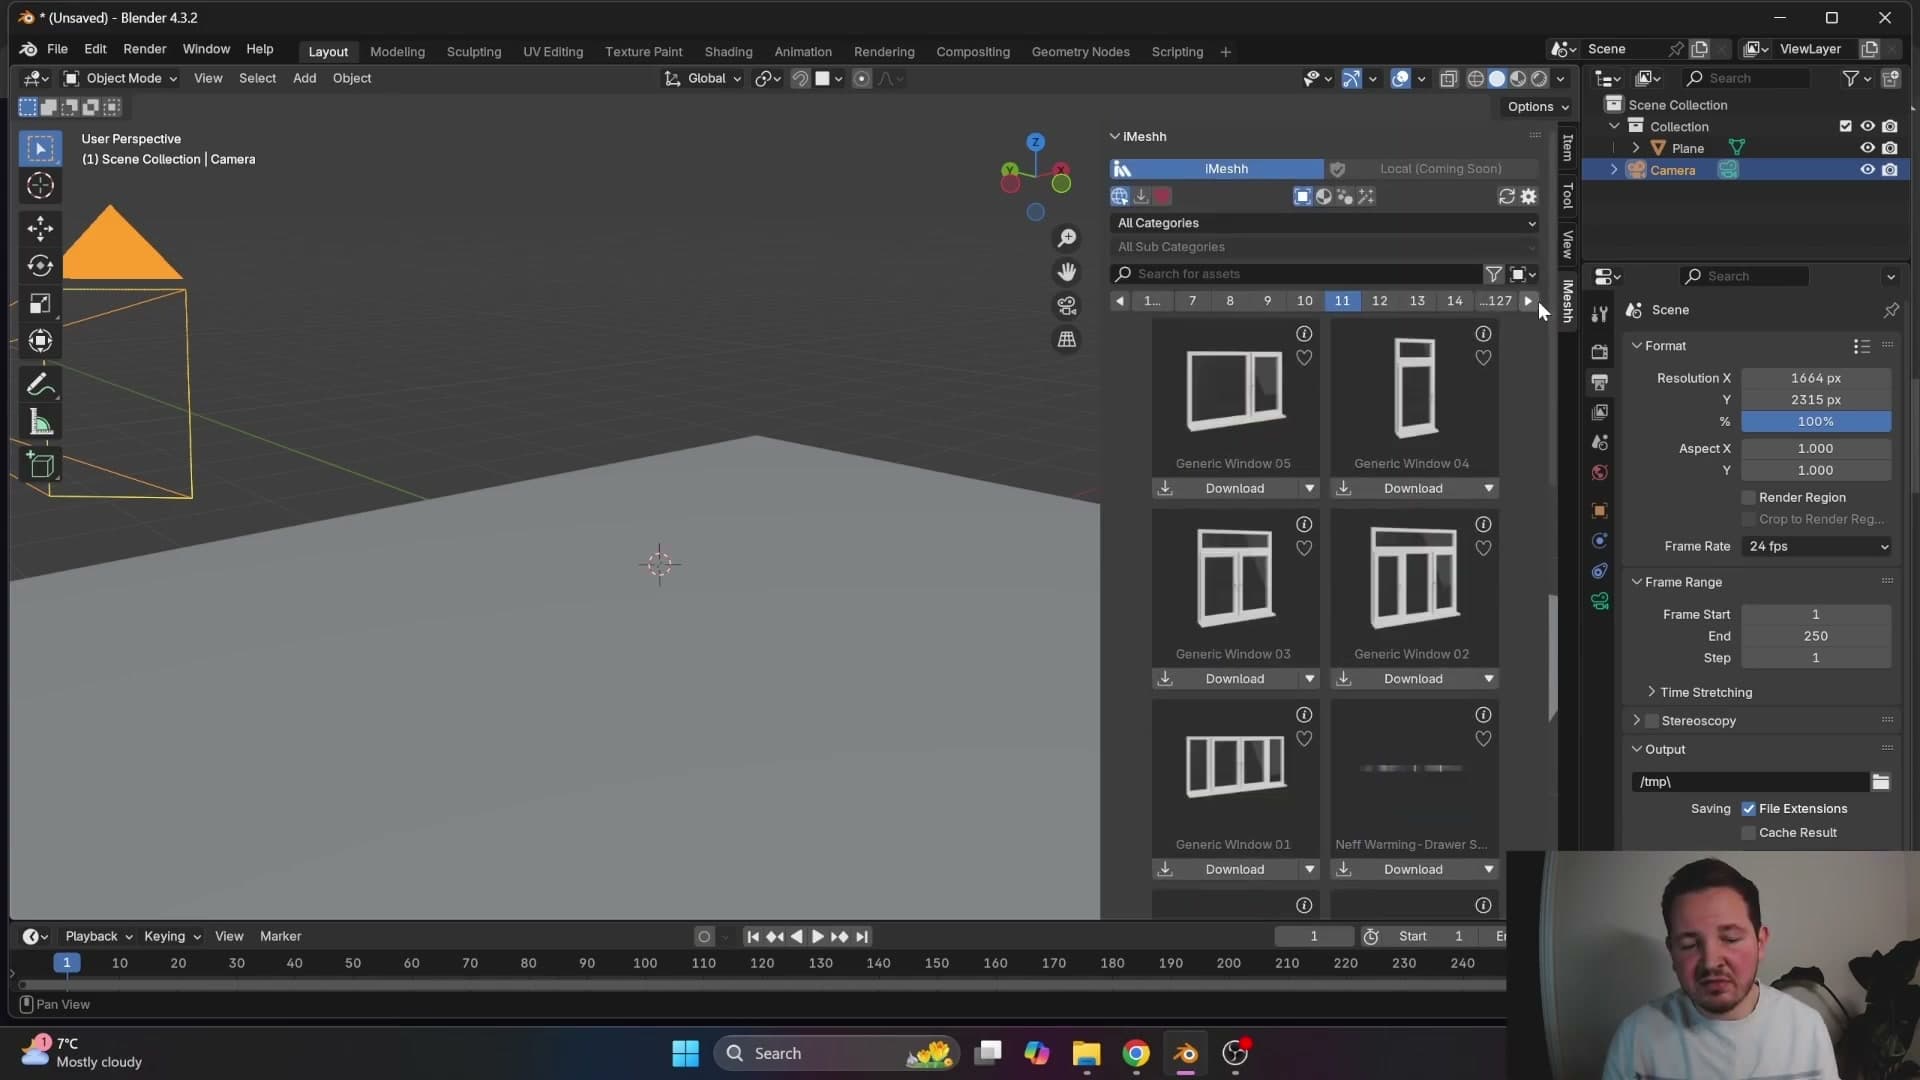
You don't need to manually scroll through every page to prime the cache. Generation is quick enough that browsing as normal will fill it in as you go.
Sign in and configure preferences
Authenticate against your iMeshh account, set per-category storage paths, and tune how many thumbnails appear per page and at what scale.
Authenticating with your iMeshh account
With the extension installed, open its preferences by clicking the settings cog at the top of the iMeshh panel. The first tab is where you sign in. Enter the email address and password tied to your iMeshh account.
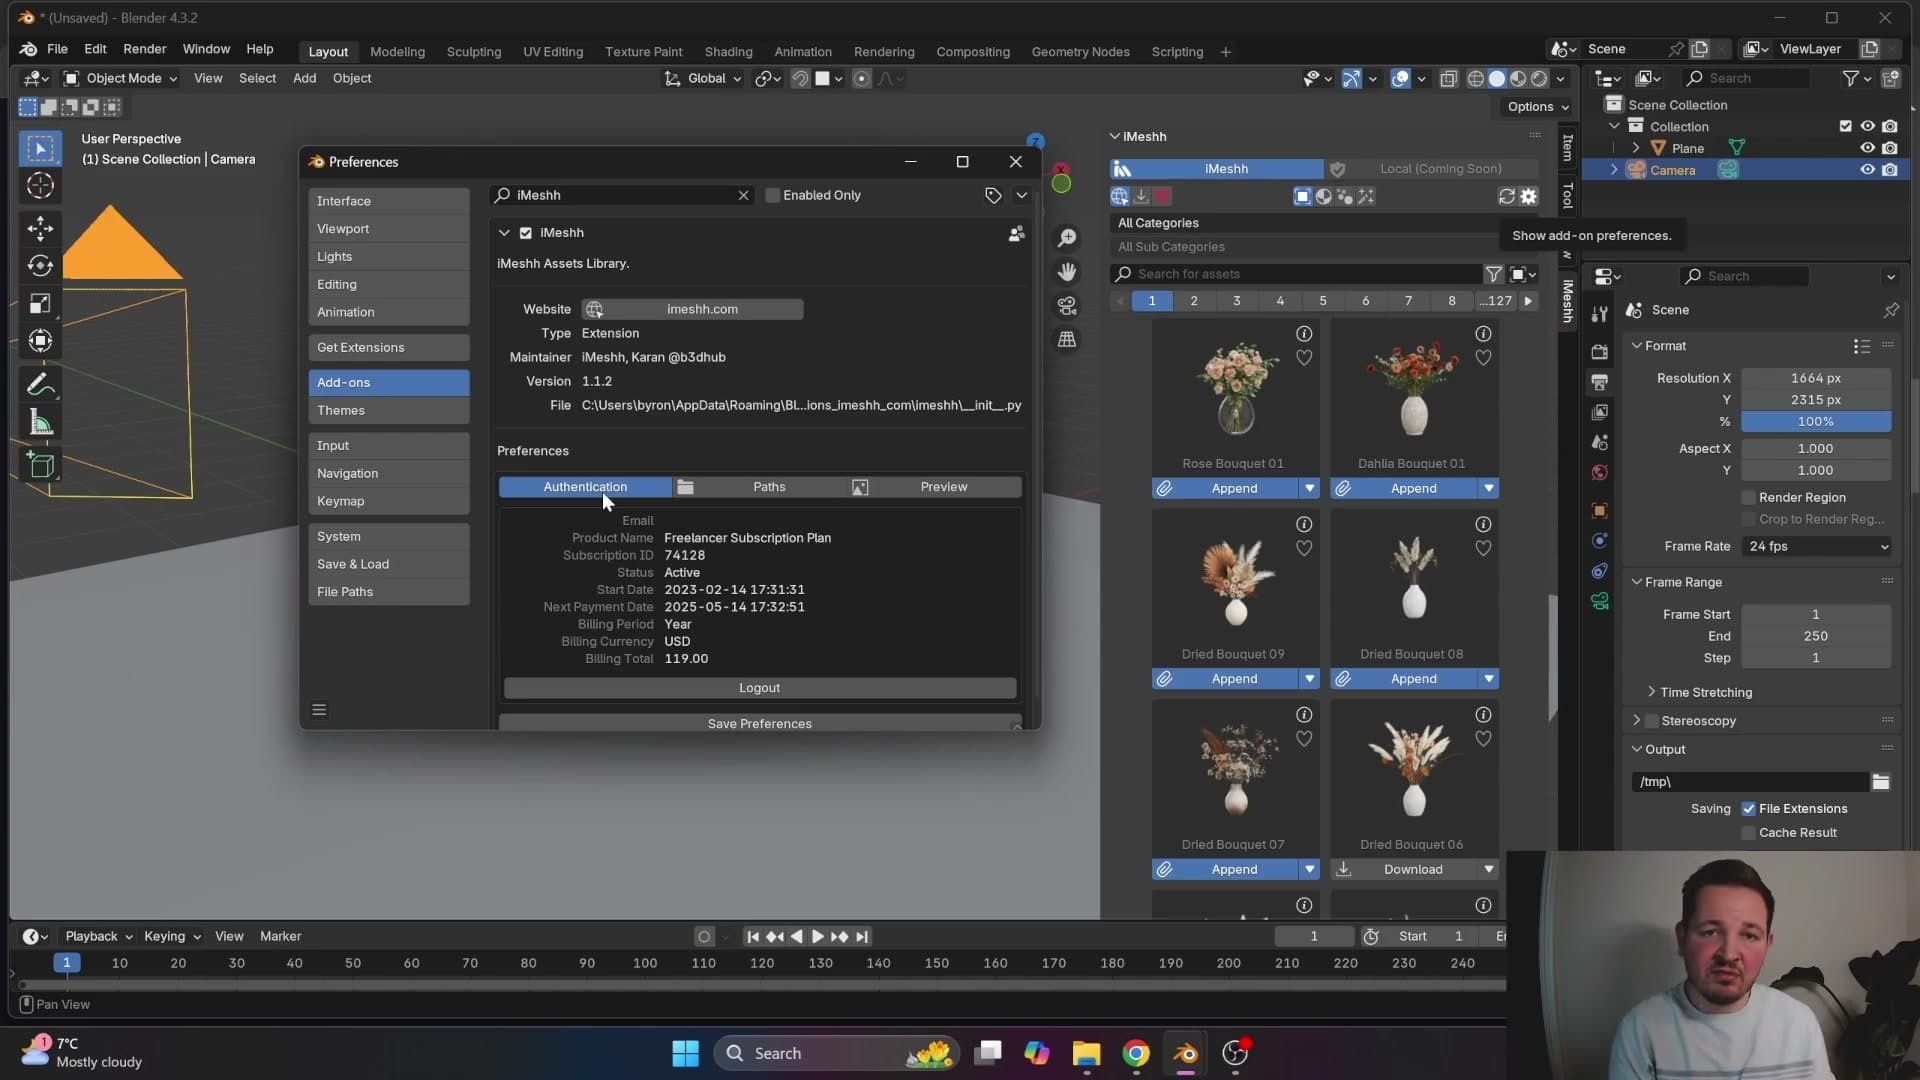
The same tab keeps a log-out button next to your credentials, so you can switch accounts later without uninstalling the extension.
Setting storage paths for models, materials, geo-nodes, and effects
Below the authentication section sits the storage paths panel, which defaults to a folder under your user account. The asset manager handles four kinds of content: Materials, Models, Geo Nodes, and Effects. Each category gets its own folder field.
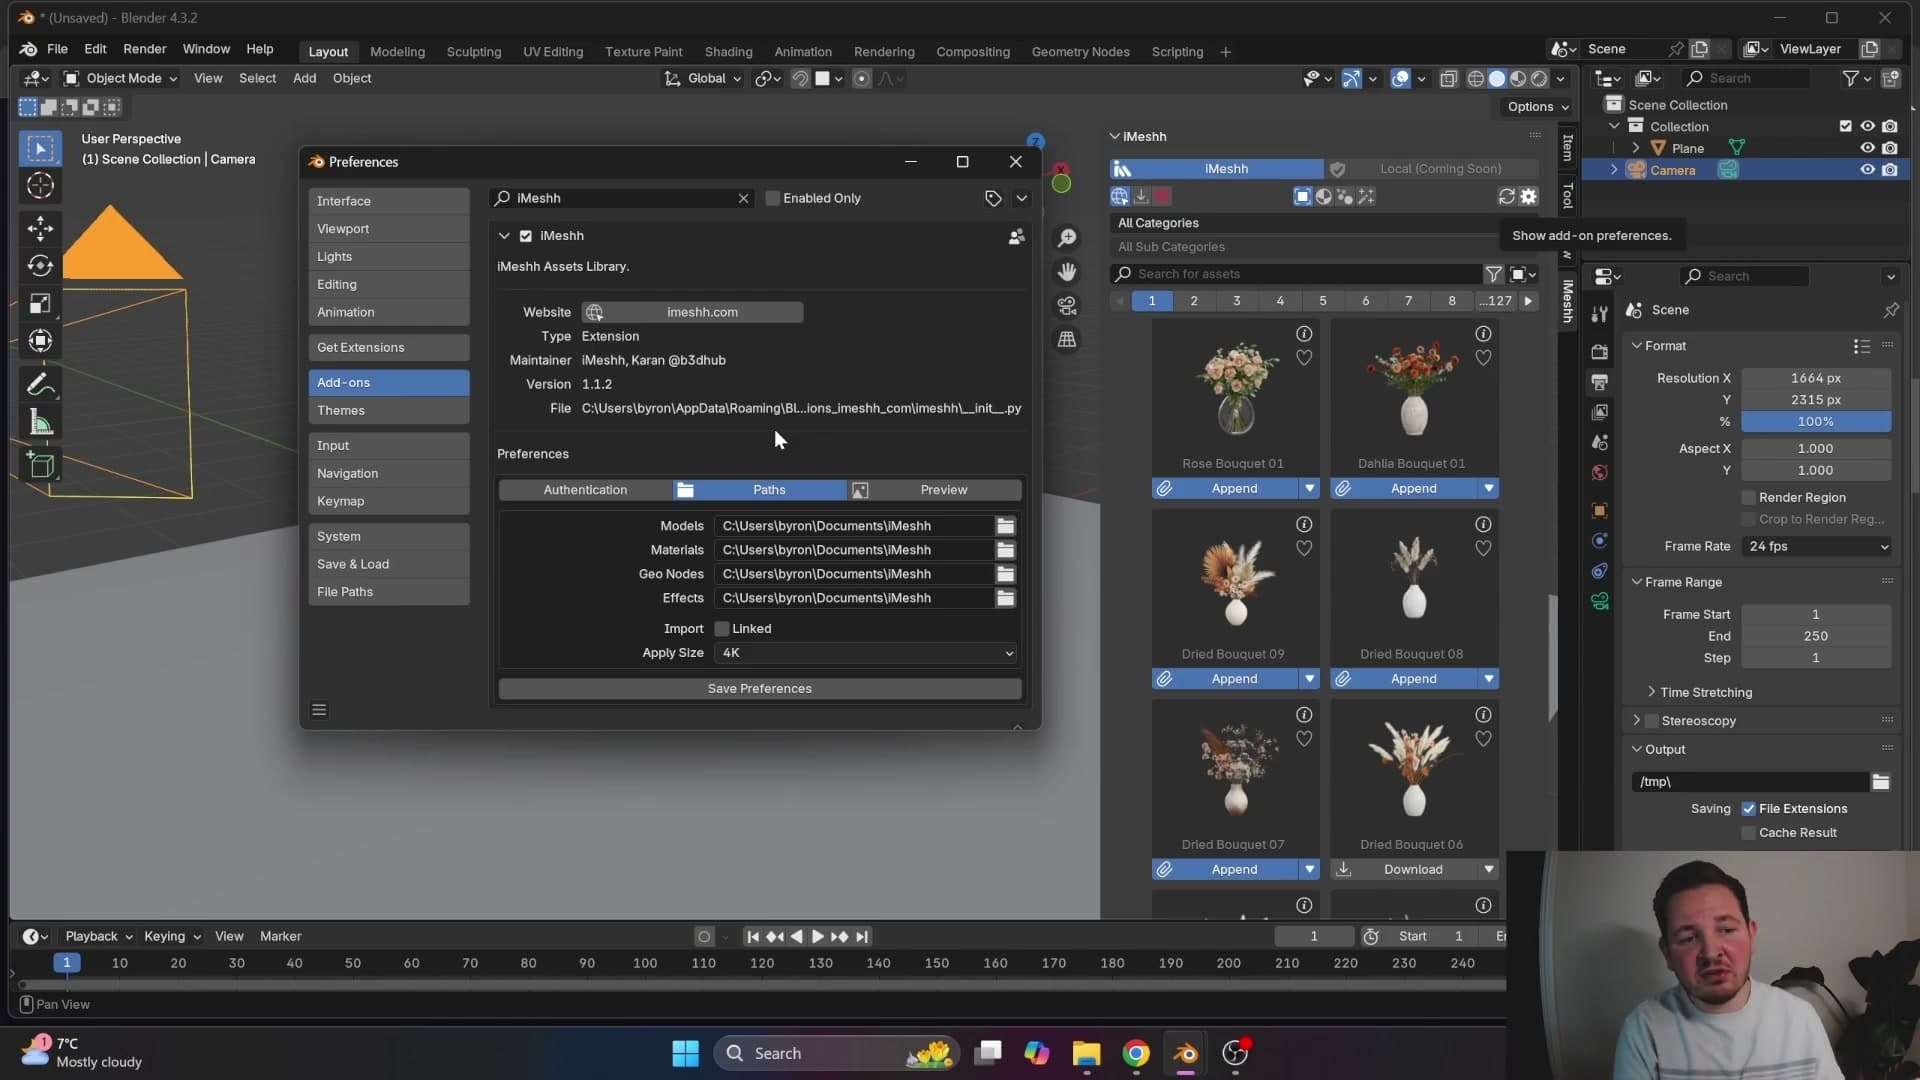
Click the small folder icon next to a category and point it at wherever you want that asset type to live on disk. Splitting the categories across folders is useful if you keep a large model library on a dedicated hard drive but would rather route materials, geo-node systems, or effects to a different drive.
Tuning thumbnail count and scale to fit the panel
The Preview section controls how the asset grid on the right-hand side of the N-panel displays. By default the grid lists more thumbnails than fit at once, so you scroll down to see all the products. You can tighten it up so everything fits inside the panel without scrolling.
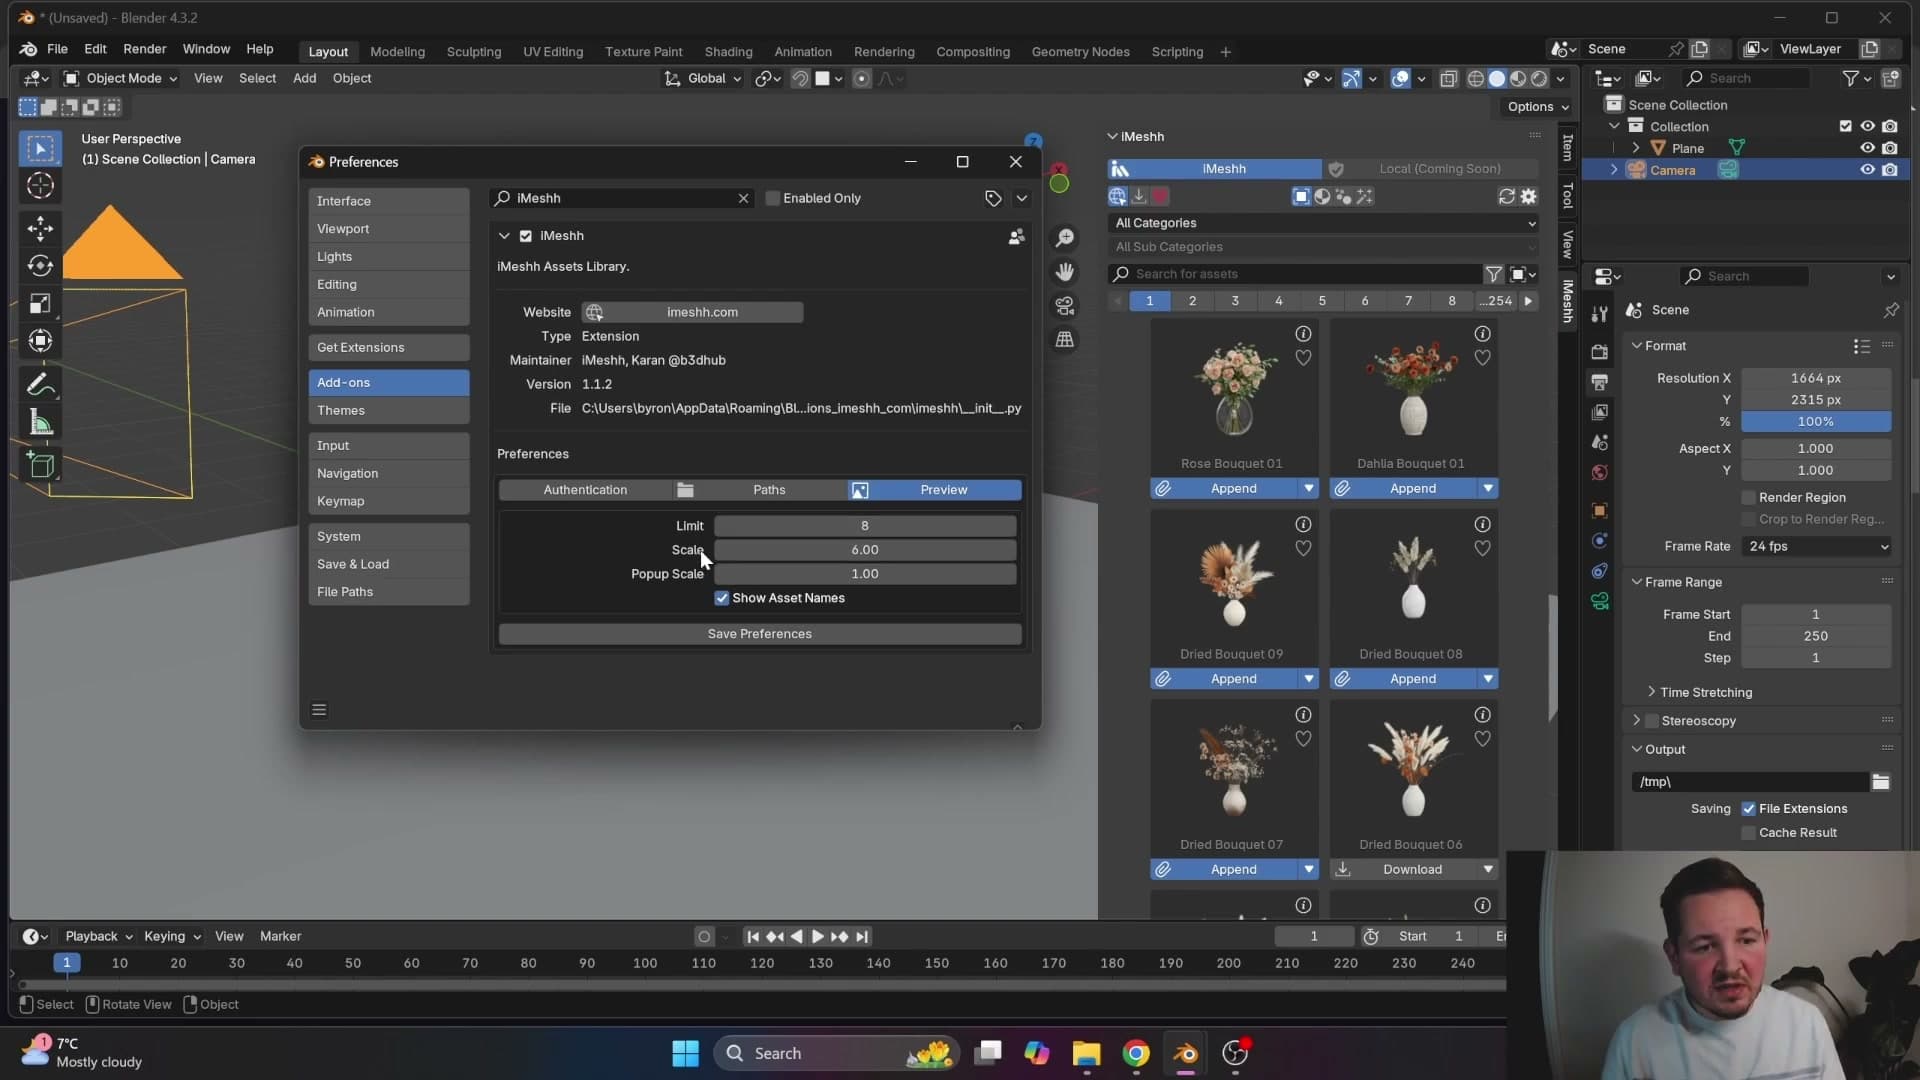
Set the thumbnails per page value to limit how many tiles appear at once. Drop it to 8 for a compact grid. Then use the thumbnail scale slider to shrink each preview so all eight tiles fit comfortably inside the panel's current width. This is especially helpful if you've narrowed the N-panel to make room for the viewport, or are working on a smaller screen resolution.
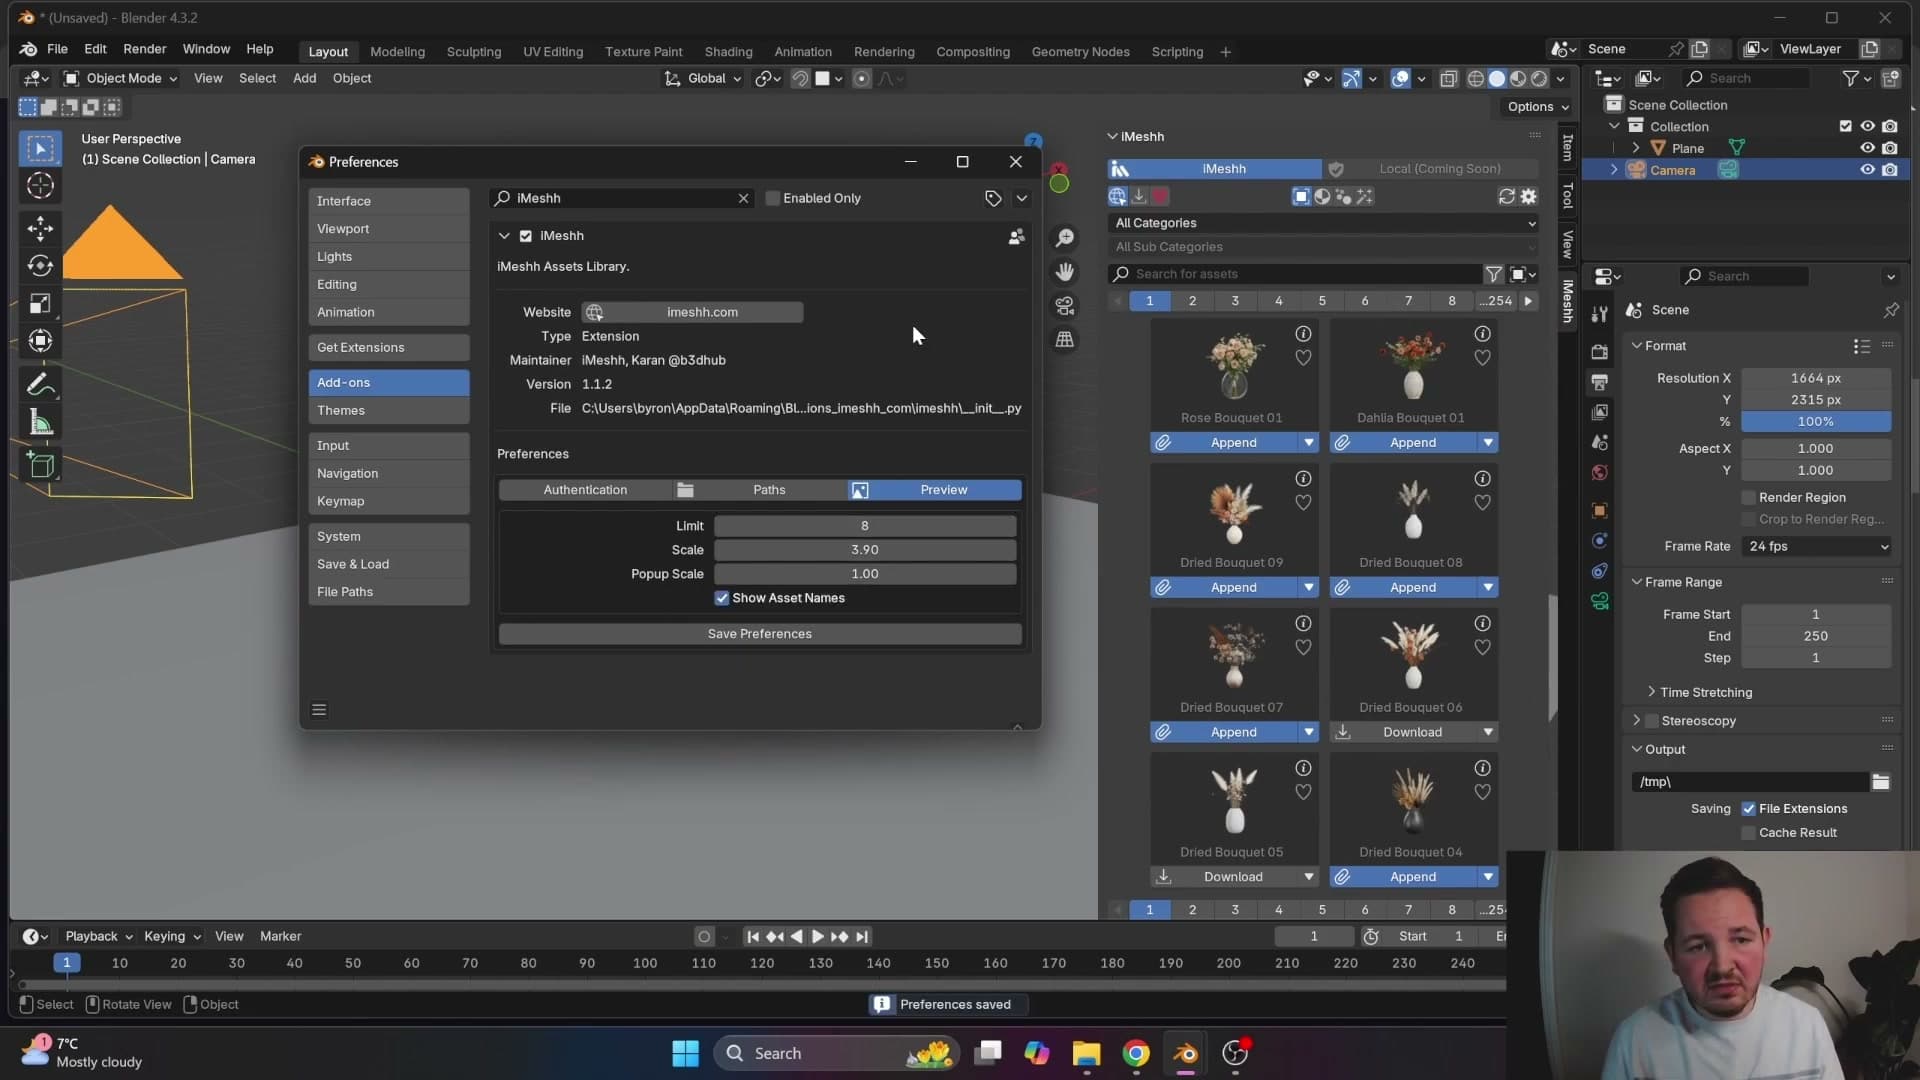
Click Save and close the preferences to apply the changes. The pop-up scale value in the same panel is demonstrated in the next section.
Inspecting assets and downloading them
Use the information button to pull the high-res renders, geometry views, dimensions, poly count, and licensing direct from the iMeshh site, then download and append the asset at the 3D cursor.
Pulling renders and specs through the info button
Every asset card carries a small info icon. Click it and the manager opens a pop-up that pulls the asset's product page directly from the iMeshh website, so you get everything you'd normally see in the browser without leaving Blender. The renders can take a moment to appear (these are the full-resolution gallery shots, not compressed thumbnails), but once they're in you can flip through the close-ups and dedicated geometry views.
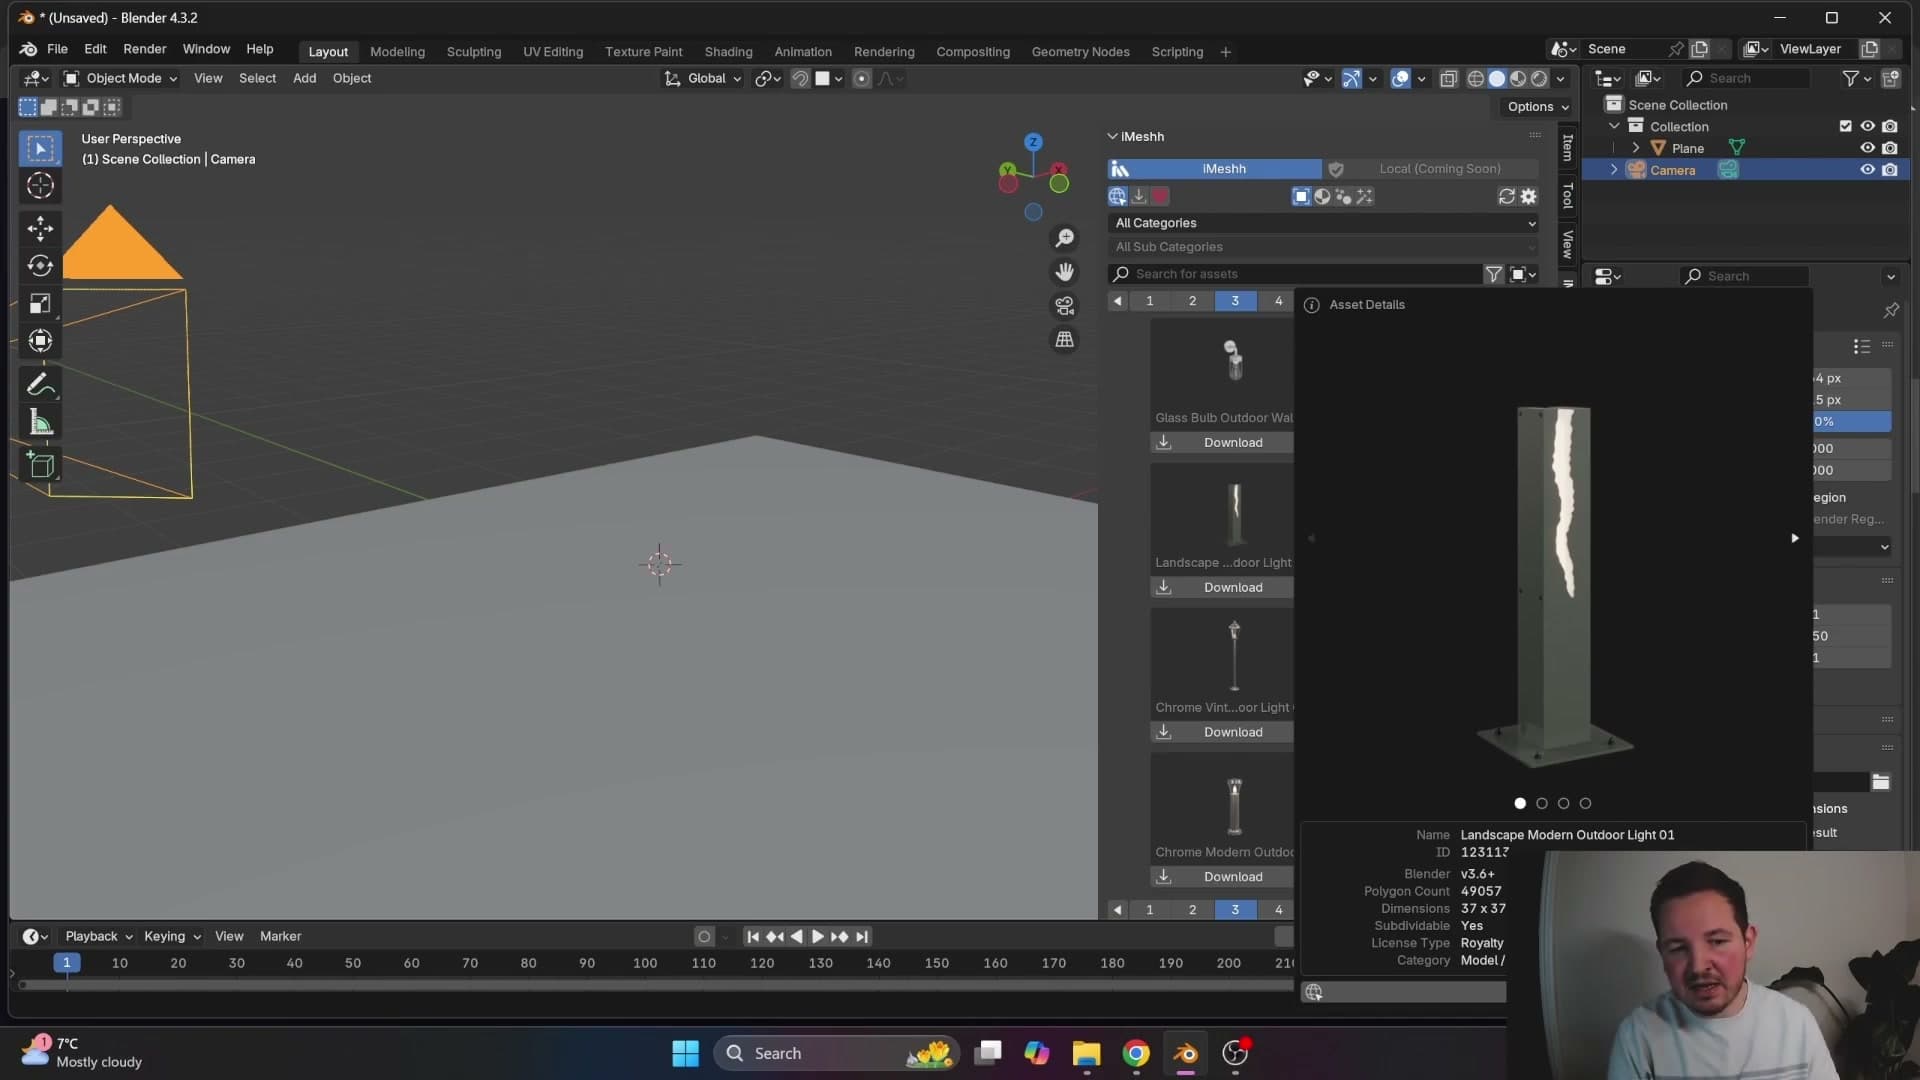
Underneath the imagery, the same panel lists the asset's specifications: dimensions, polygon count, the Blender version the file was authored in, and the licence type. iMeshh assets are royalty-free, but the info panel is still the place to confirm that for any given model before you commit it to a client scene.
The point of the info button is to let you make a decision before spending bandwidth. Browse the renders, check the poly count against your scene budget, glance at the dimensions, and only then move on to downloading.
Downloading and appending at the 3D cursor
Once you're happy with the asset, click Download inside the info panel. The asset manager handles the whole pipeline in the background: it fetches the zip, unpacks it into the correct subfolder under your configured Models path, and clears up the archive once the files are in place. You don't touch a file browser at any point.
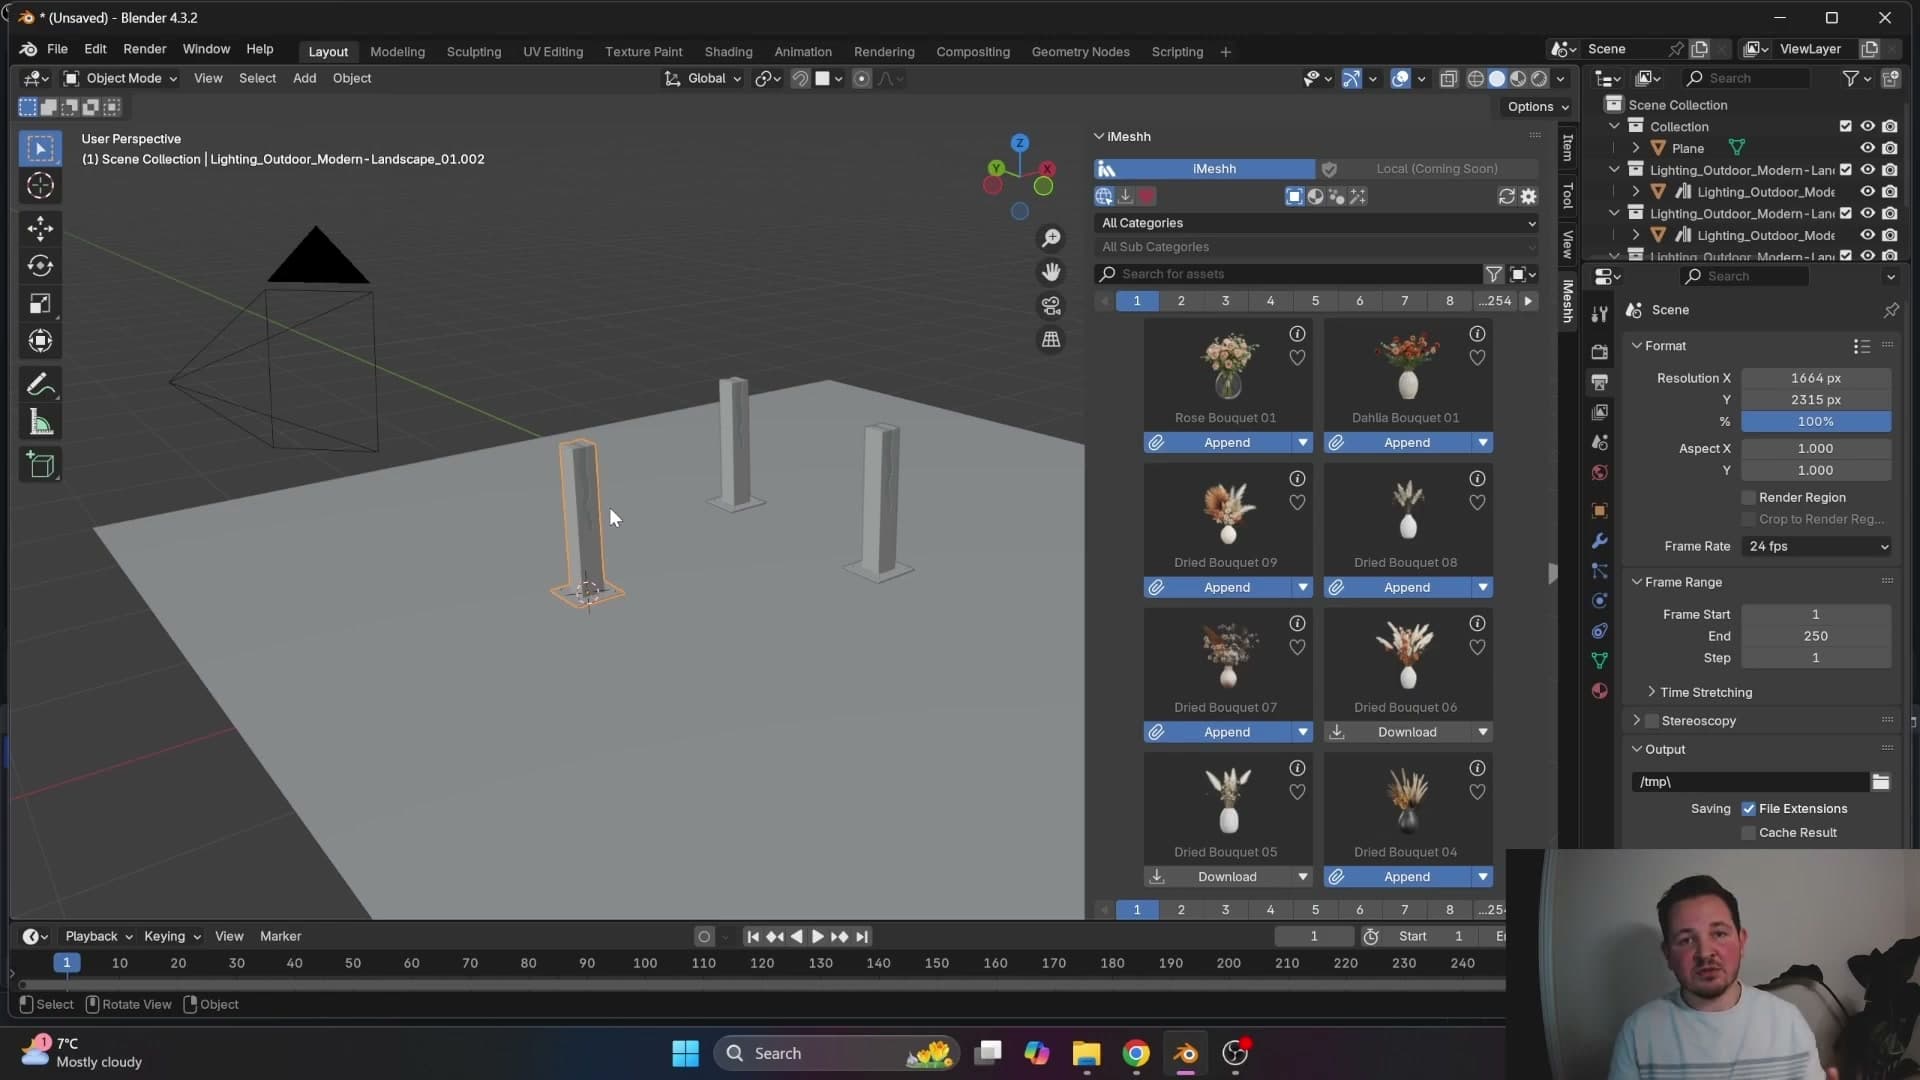
Download speed depends on your connection rather than the add-on; Charles points out he's on a roughly 20 Mbps line from the middle of nowhere, so most studio connections will pull assets noticeably faster.
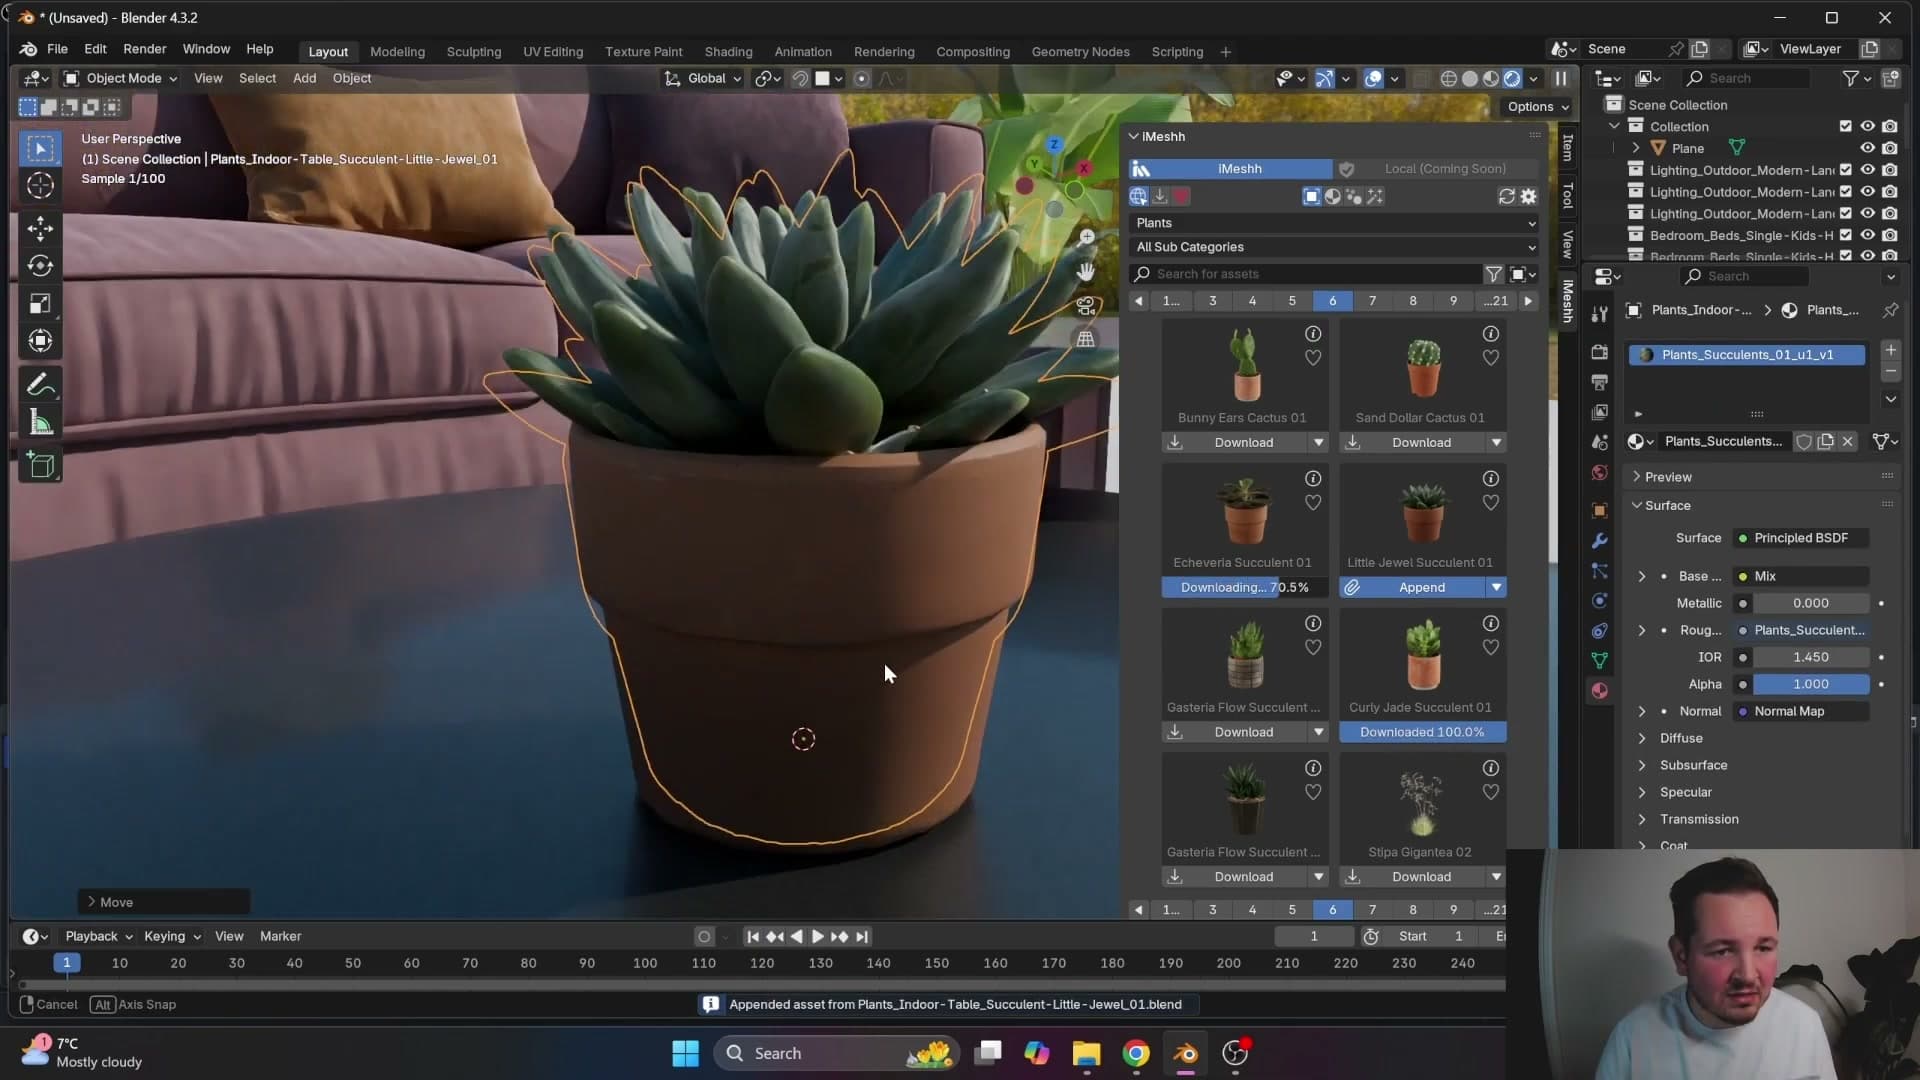
When the file has landed, the same button switches to Append. Clicking it drops the model into your scene at the location of the 3D cursor. One click from browser to scene, with no manual import dialog.
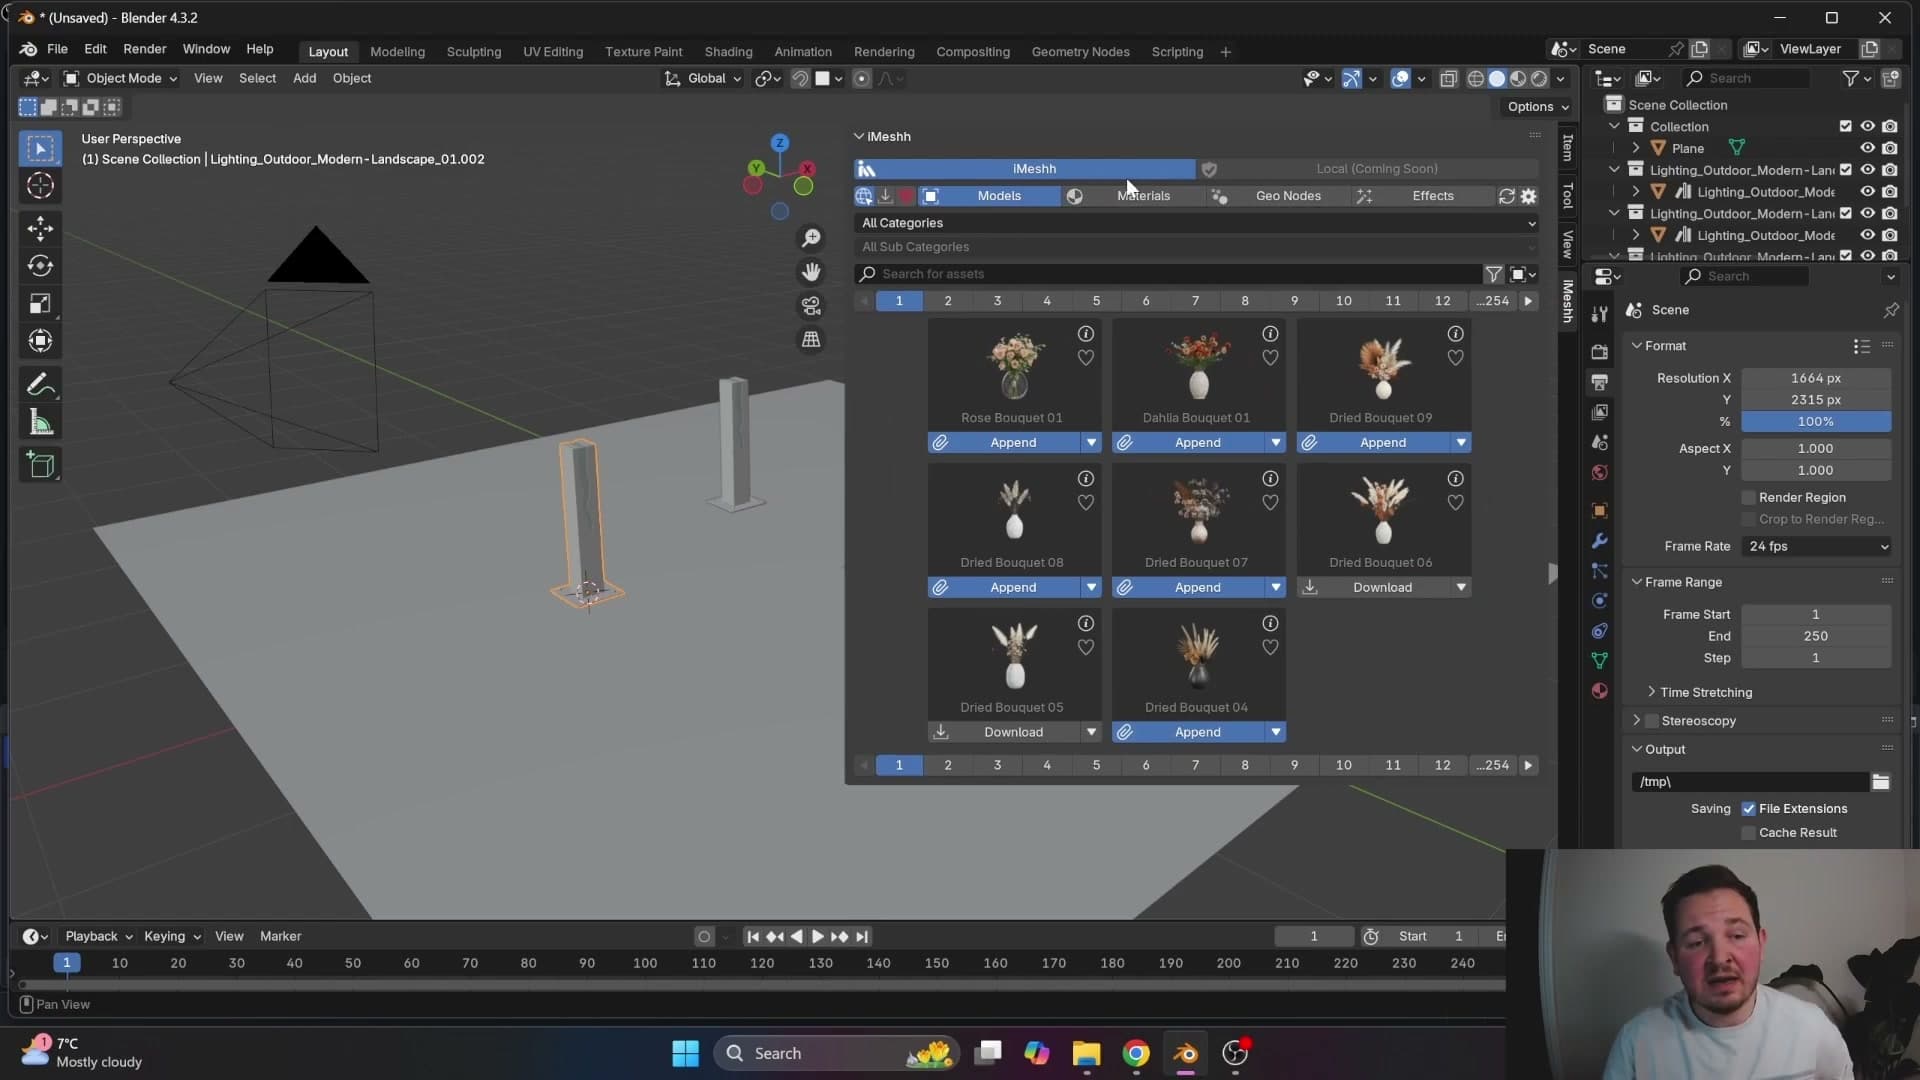
Because the asset spawns at the cursor rather than the world origin, it's worth positioning the cursor before you append. Snap it to a surface, a vertex, or the centre of a room, and the model lands where you want it on the first try instead of needing a follow-up drag.
Asset manager UI tour
Walk the four asset-type tabs (Models, Materials, Geo-nodes, Effects) and the three source icons (Online, Downloaded, Favourites), and learn what local-library and HDRI controls are still on the roadmap.
Tabs, source icons, and what's still on the roadmap
Stretch the N-panel wide enough and the four asset-type tabs reveal their labels along the top: Models, Materials, Geo-nodes, and Effects. Each tab is a self-contained browser. Switching between them swaps both the category list and the thumbnail grid underneath.
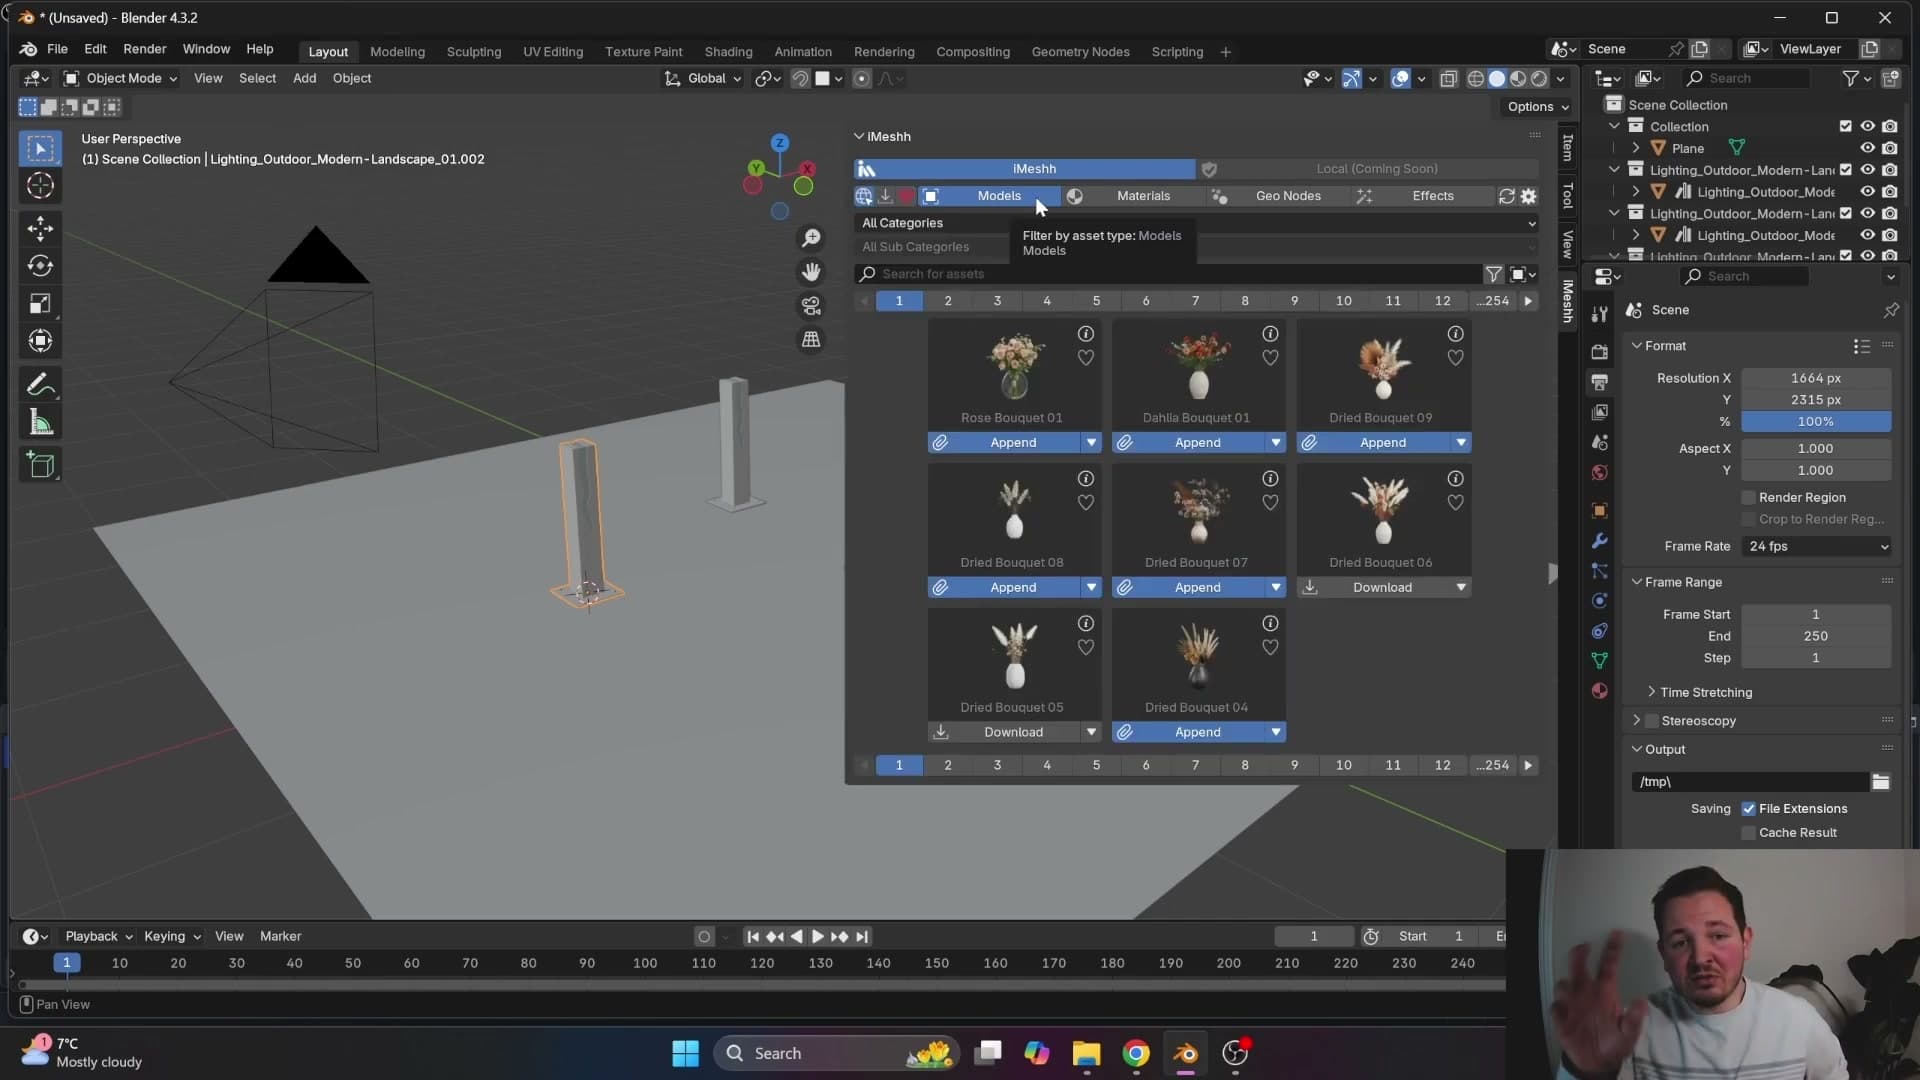
Down the left-hand edge sit three source icons that change where the grid is pulling assets from. The top icon shows online assets (the full iMeshh library streaming from the server), the middle icon shows assets you've already downloaded to disk, and the bottom icon shows your favourited assets. Charles hasn't favourited anything yet in this walk-through, so his Favourites view is empty. You'll learn how to heart an asset later in the post.
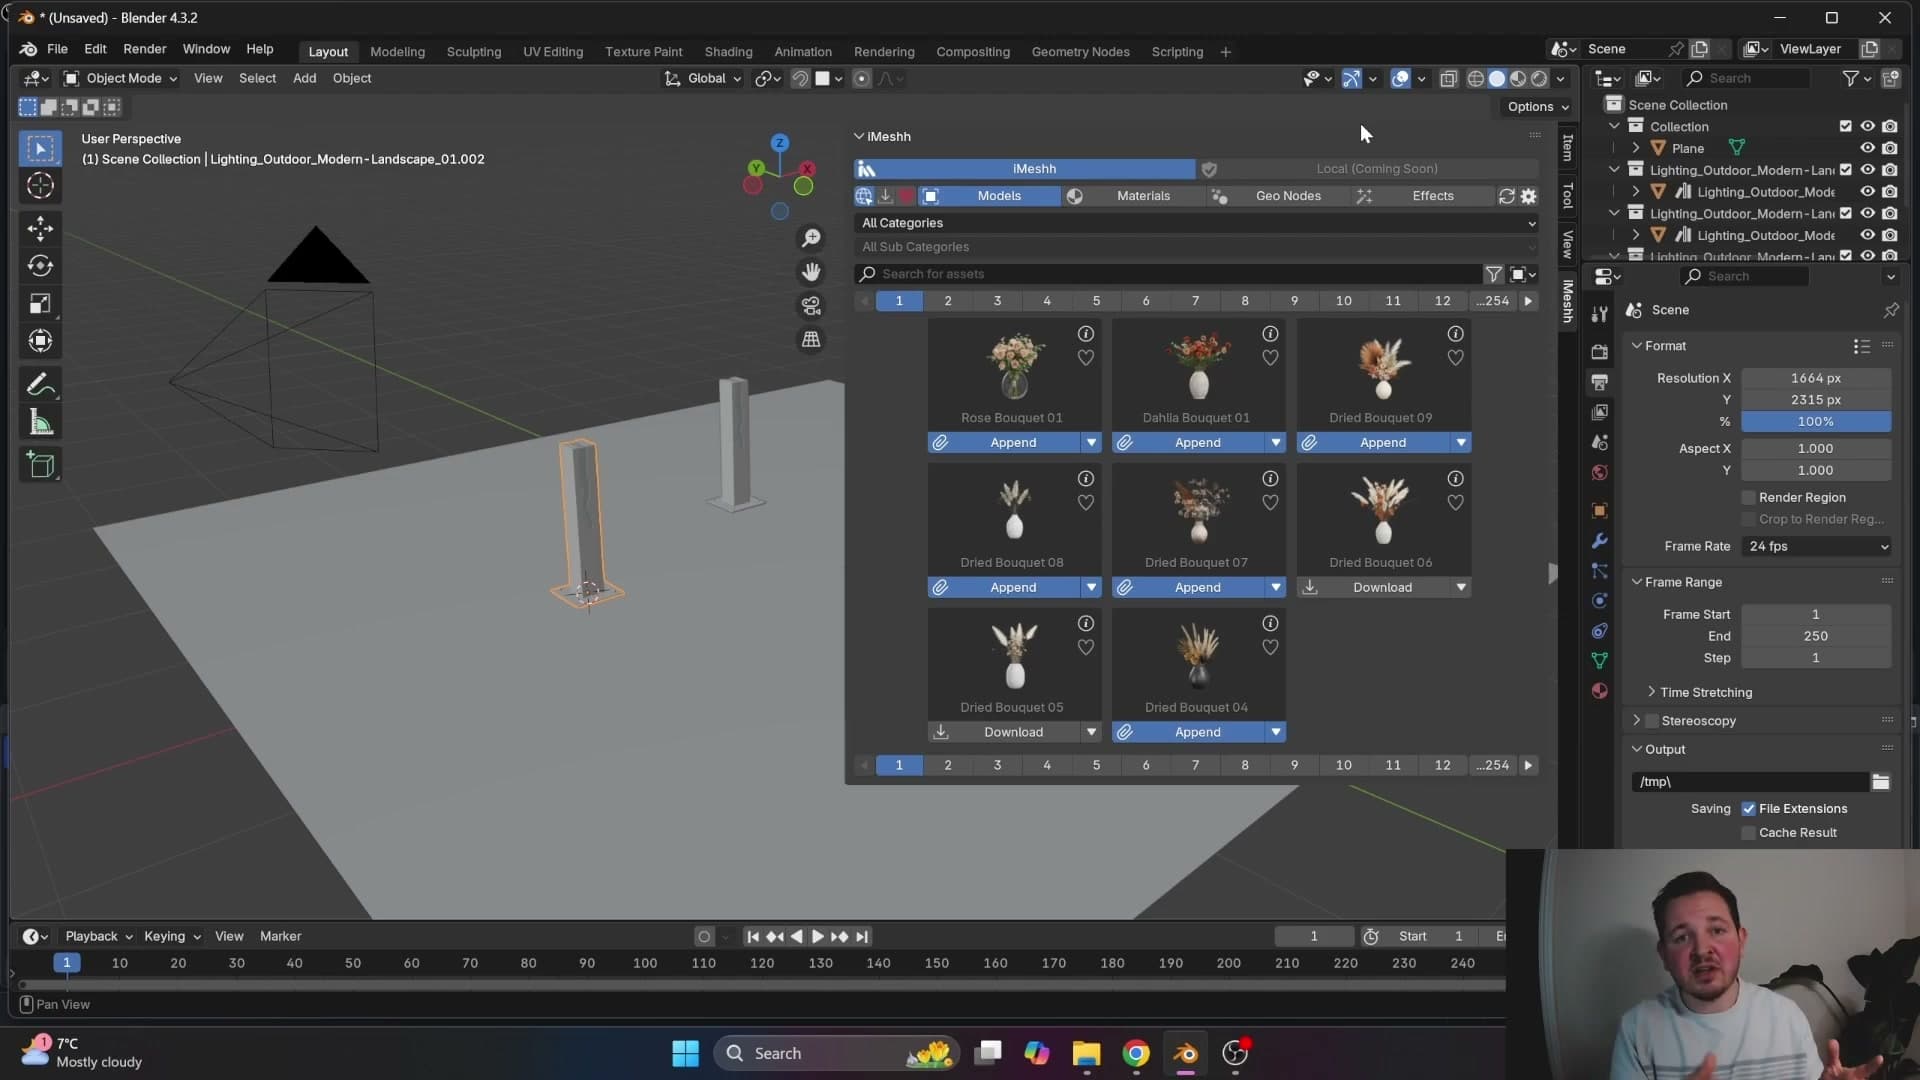
Two pieces of functionality are flagged as still on the roadmap. First, the browser currently only surfaces iMeshh assets; a local-library version is in development so you'll eventually be able to mix assets you've sourced elsewhere alongside the iMeshh catalogue inside the same browser. Second, HDRI controls are coming, a very popular request that the team is actively working on adding.
Browsing categories and searching the library
Drill into category and subcategory listings exactly as they appear on the iMeshh site, run a keyword search across the whole catalogue, and use the free section's 100+ professional archviz assets without a subscription.
The free section: over 100 archviz assets
Before getting into the paid catalogue, it's worth knowing that iMeshh ships a free section with over 100 professional-grade archviz assets. All you need to access it is an iMeshh account. Make one, log in through the asset manager, and the free tier opens up immediately.
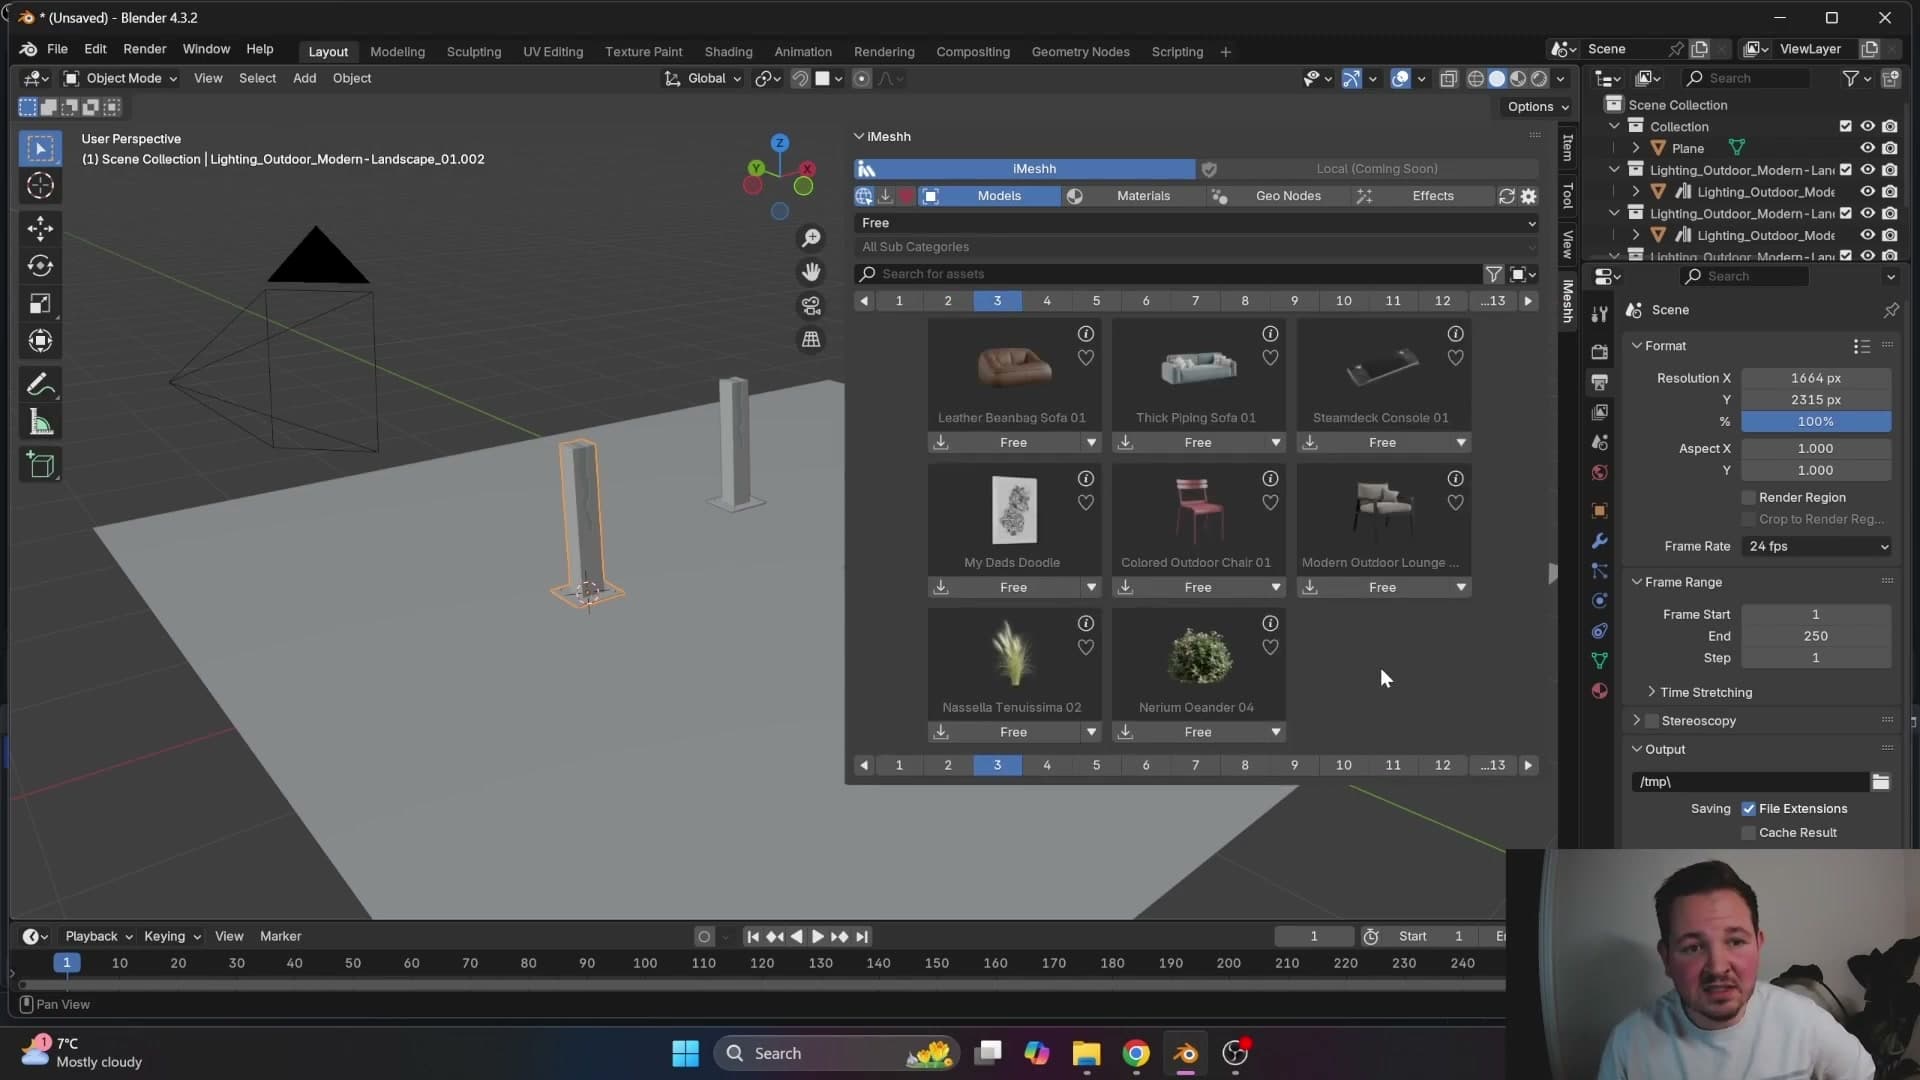
Charles is candid about it: "I don't know why we give away so much". For now though, the free pool sits at roughly 100 assets and behaves exactly like the paid library, so it's a good place to test the install before committing to a subscription.
Once you're inside, the asset manager mirrors the website's taxonomy. The category list on the left is the same set of top-level groupings you'd see browsing imeshh.com in a normal browser. Nothing has been renamed or reorganised for the Blender panel.
Drilling into categories and subcategories
Picking a category narrows the grid to just that group. Click Architectural and the thumbnails refresh to show only the architectural assets in the library.
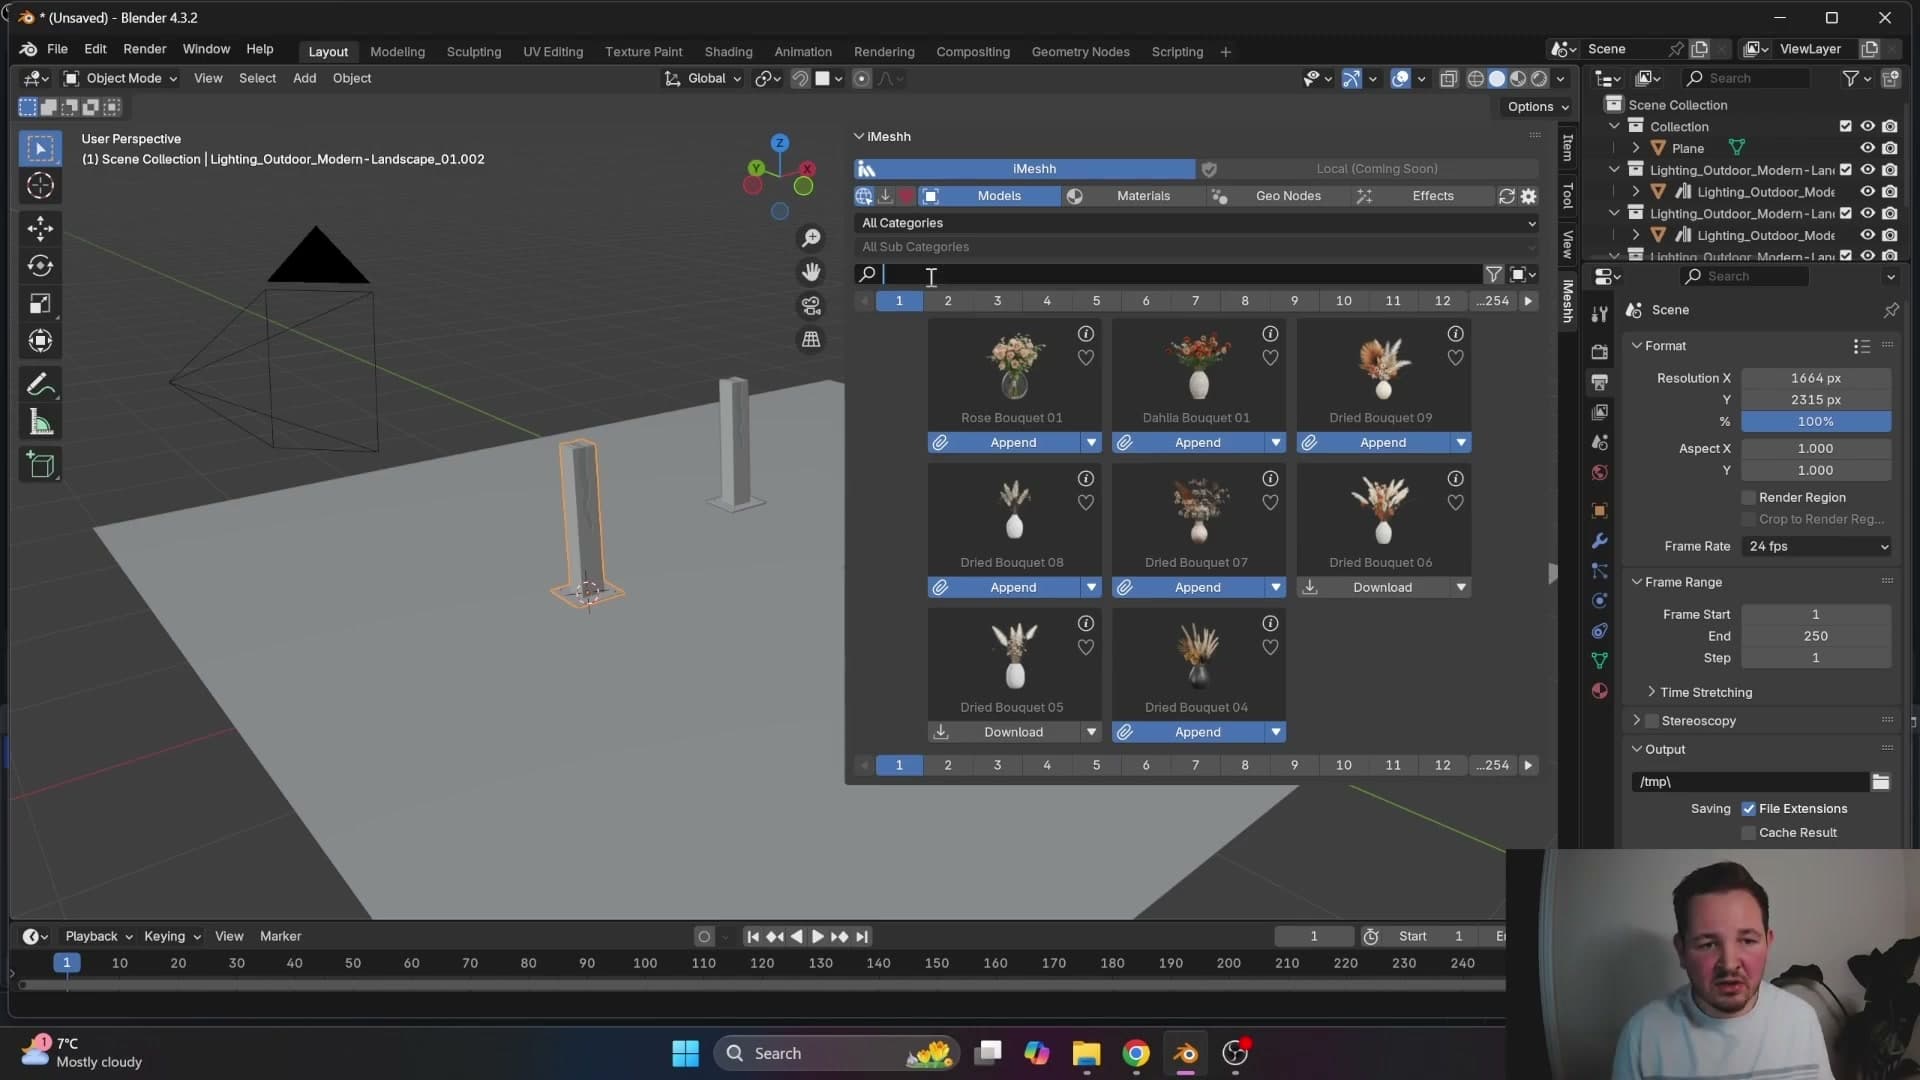
From there you can drill one level deeper into a subcategory. Selecting Doors under Architectural rebuilds the pages so only door assets are listed. It's the same filtering behaviour you'd get clicking through the website, only without leaving Blender.
This makes category browsing the right approach when you know roughly what type of object you want (a door, a chair, a piece of decor) and want to scan thumbnails until something fits the scene.
Searching across the catalogue by keyword
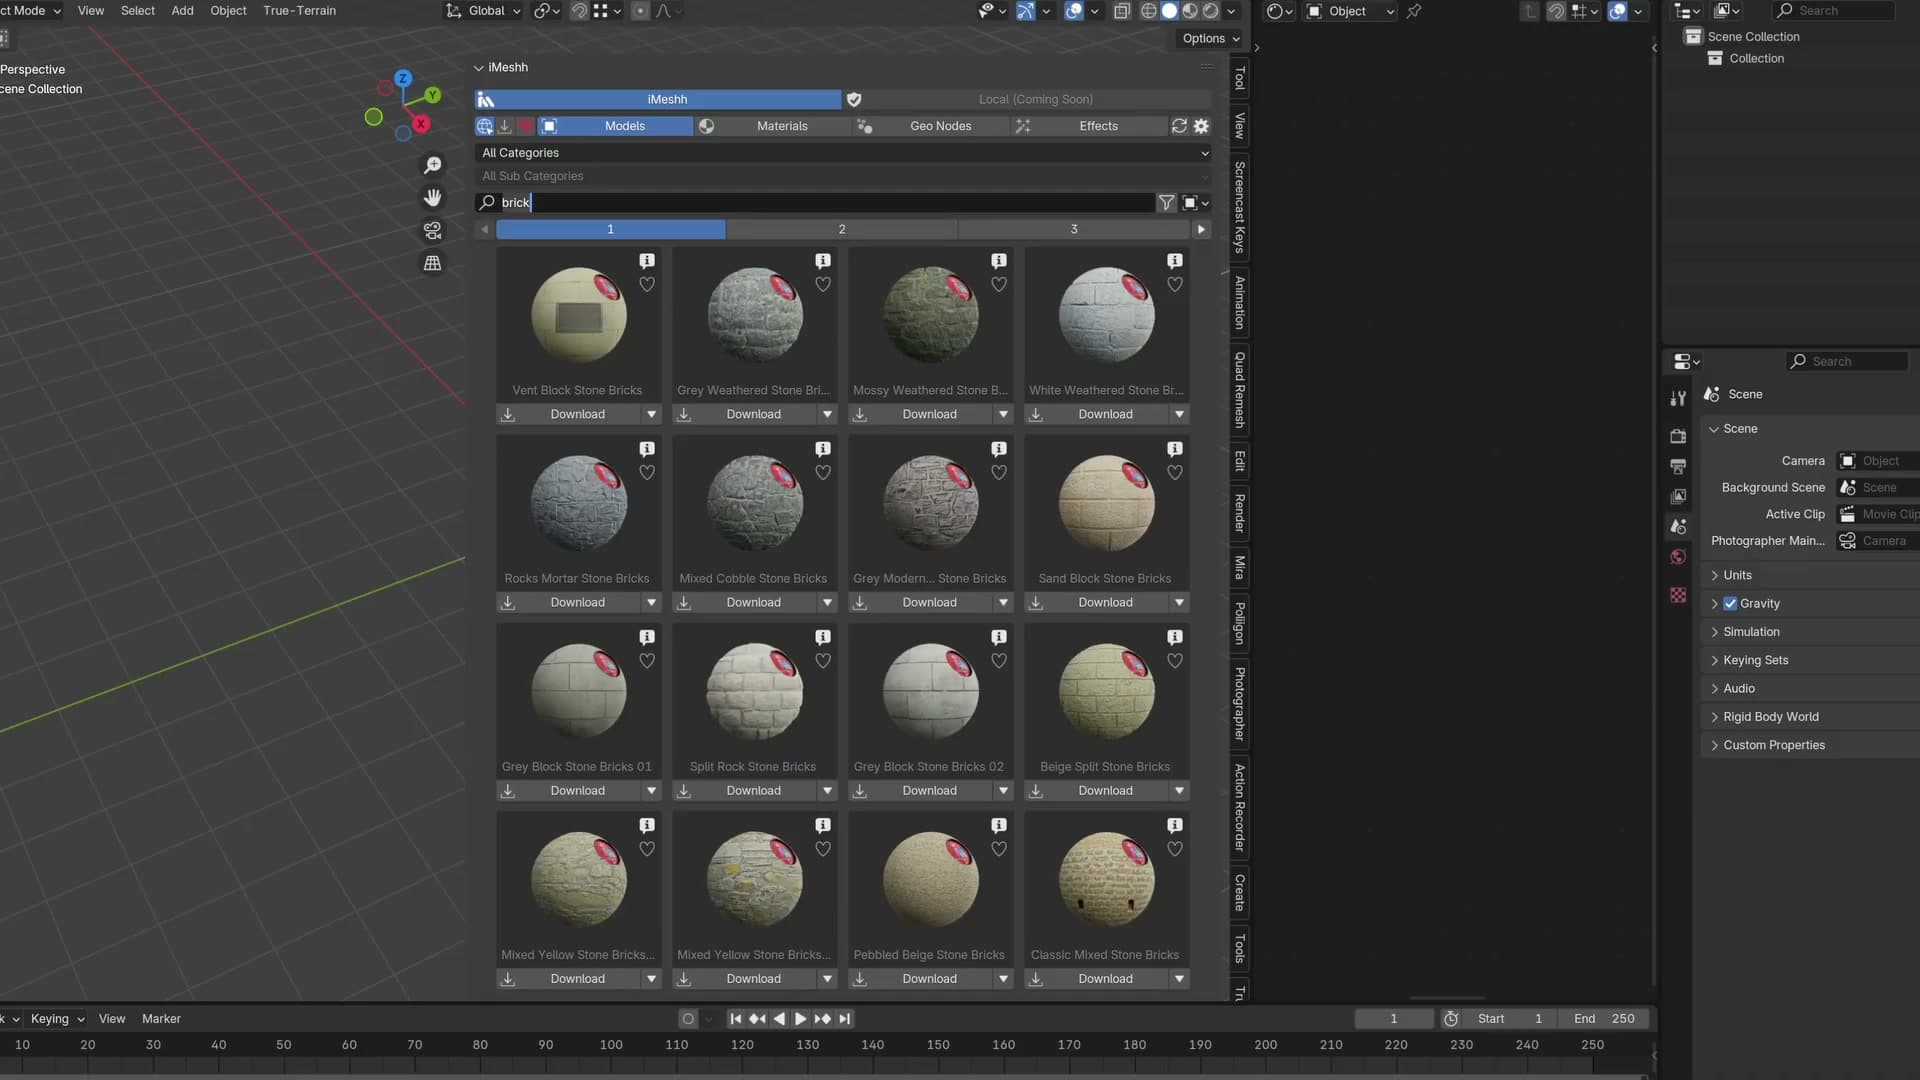
When you already know what you want by name, the search bar is faster than drilling through categories. Type a word, press Enter, and the grid returns anything in the catalogue with that word in its name.
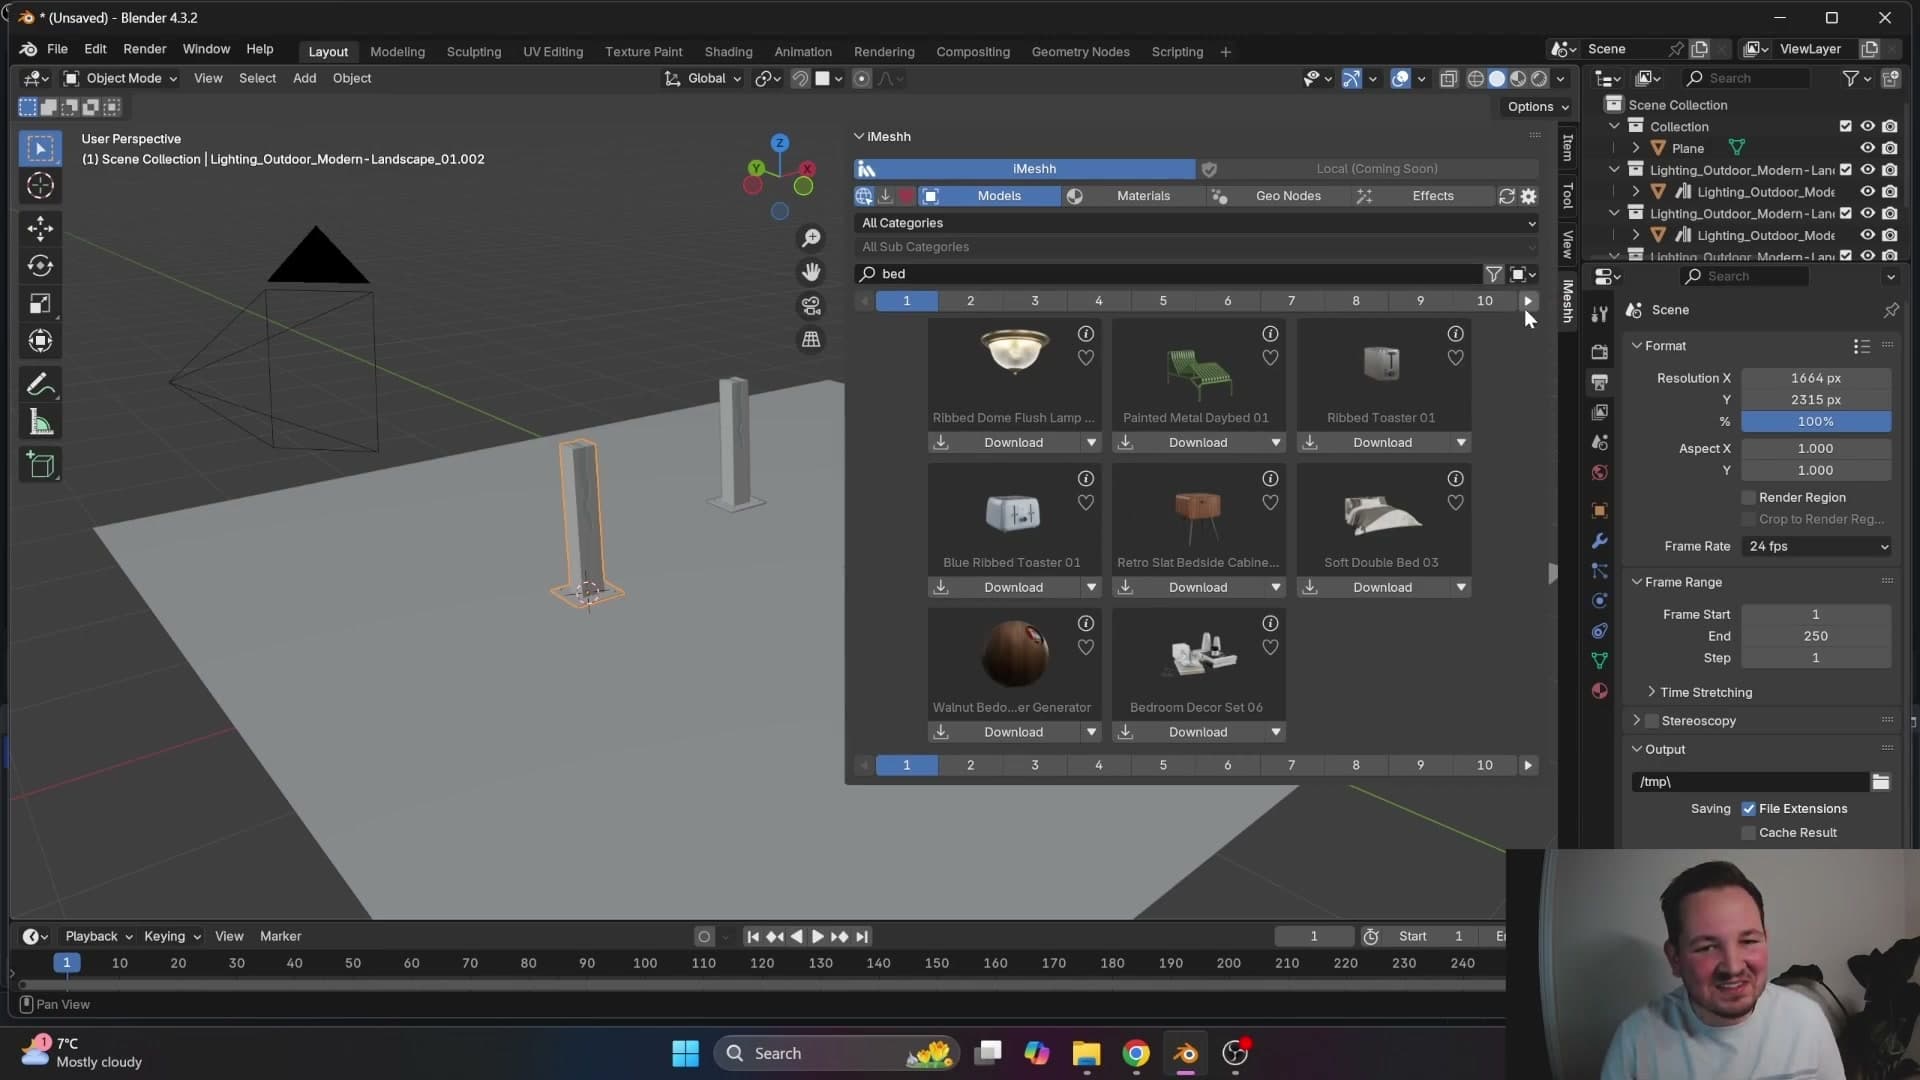
Searching frame, for example, surfaces every asset with "frame" in its title (picture frames included). Searching bed pulls back bedroom decor sets, bedroom units, and individual beds in the same results page, because the matcher looks for the literal substring anywhere in the asset name.
That literal-substring behaviour is the one quirk worth knowing about. The search isn't tag-aware or synonym-aware. It only finds assets whose name contains your exact query. Searching nightstand won't return a product called "Bedside Table", so try a couple of variations if the first search comes up short.
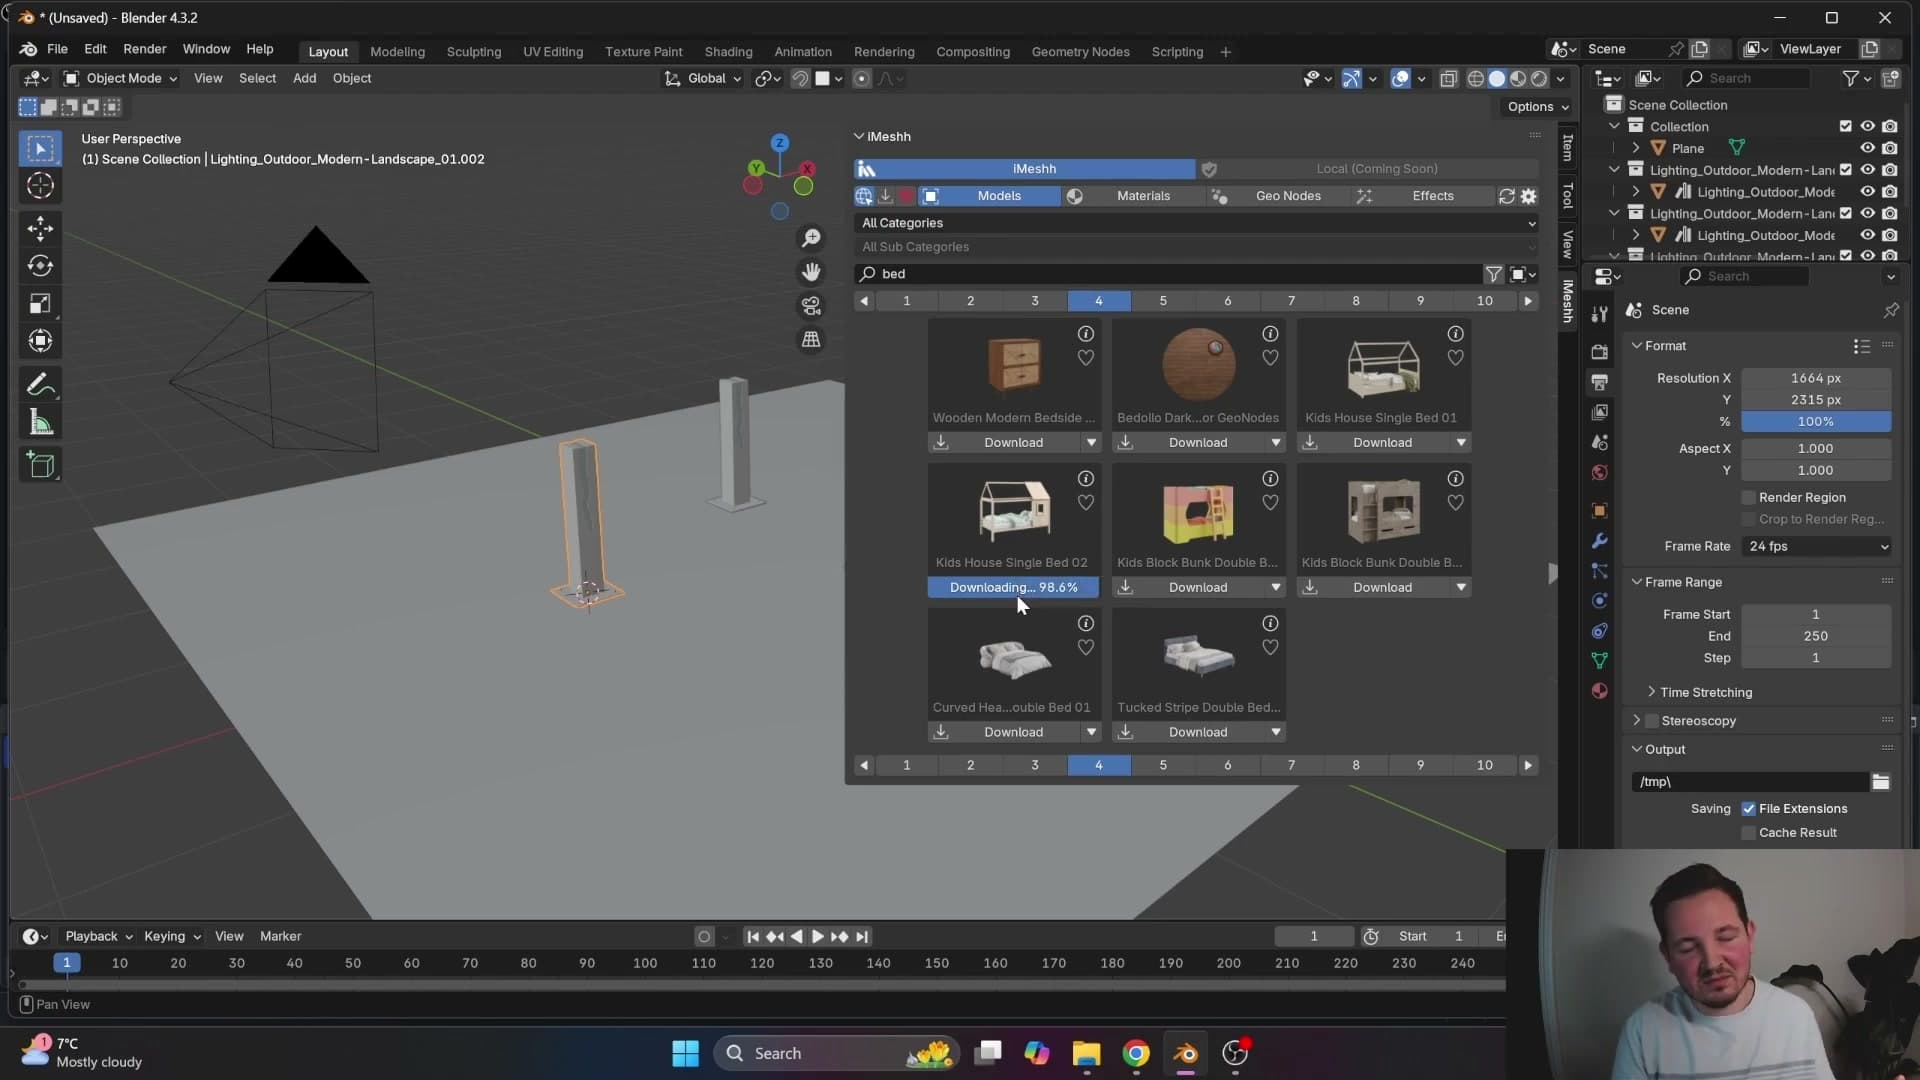
Thumbnails take a moment to populate as you scroll. The asset manager streams them from the website rather than caching everything locally, so a slower connection will show placeholders briefly before the previews resolve.
Appending the searched asset into the scene
Once you've found the asset you want, the workflow is two clicks. Click Download to pull it from the iMeshh servers (speed depends on your connection), then click Append to drop it straight into the current scene.
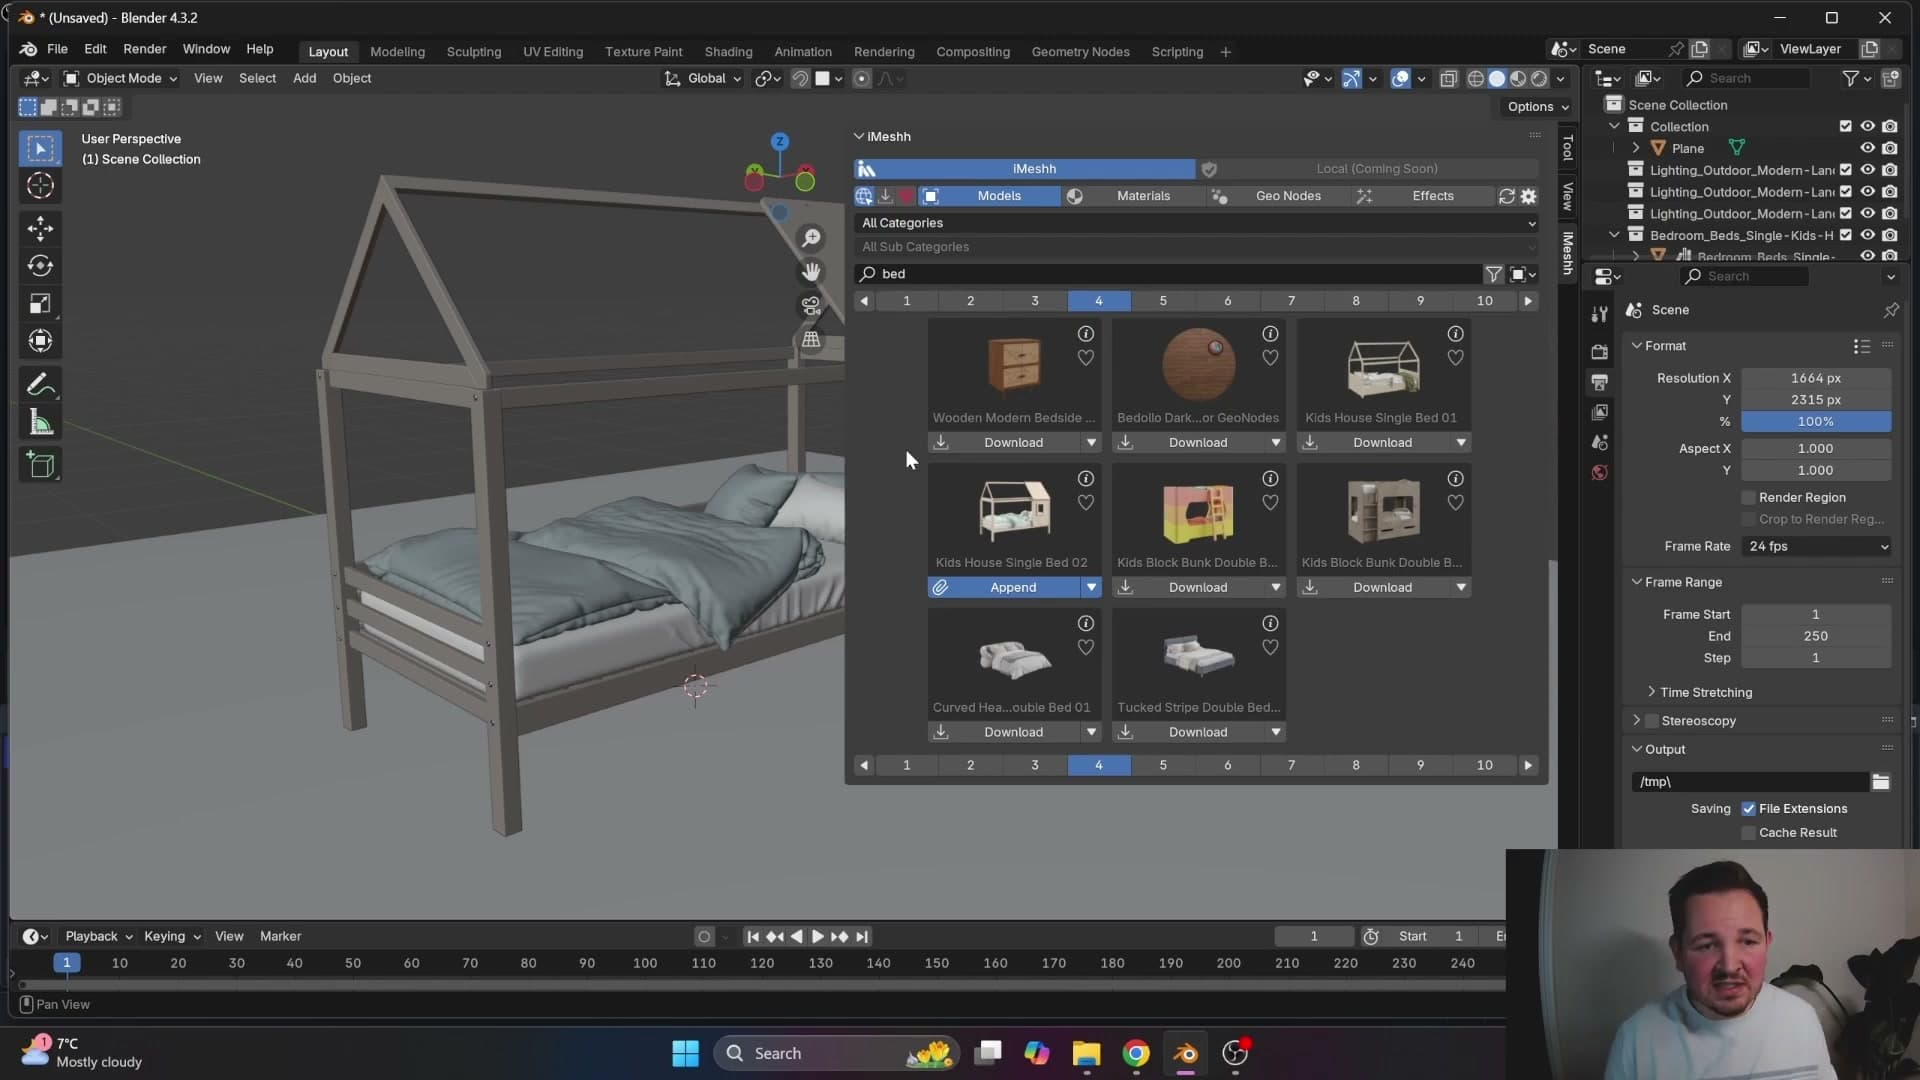
Behind the scenes the asset manager does the housekeeping for you: it fetches the zip, unpacks it into the correct folder structure under your configured models path, deletes the redundant zip archive, and leaves a single clean model on disk ready to append. No leftover archive files cluttering your library, no manual folder wrangling.
The result is a one-click round trip from "I want this bed in my scene" to having it sitting at the 3D cursor, with the model file properly filed for re-use later.
Favourites and the downloaded tab
Heart your most-used assets so they live in a Favourites tab you can re-append from forever, and switch to the Downloaded tab when you want the fastest possible local browse.
Hearting assets to build a Favourites shortlist
Every thumbnail in the browser has a small heart icon sitting next to it. Click the heart on any asset and it's added to a personal Favourites shortlist that lives across sessions. In the demo, Charles hearts three beds in quick succession to seed the list.
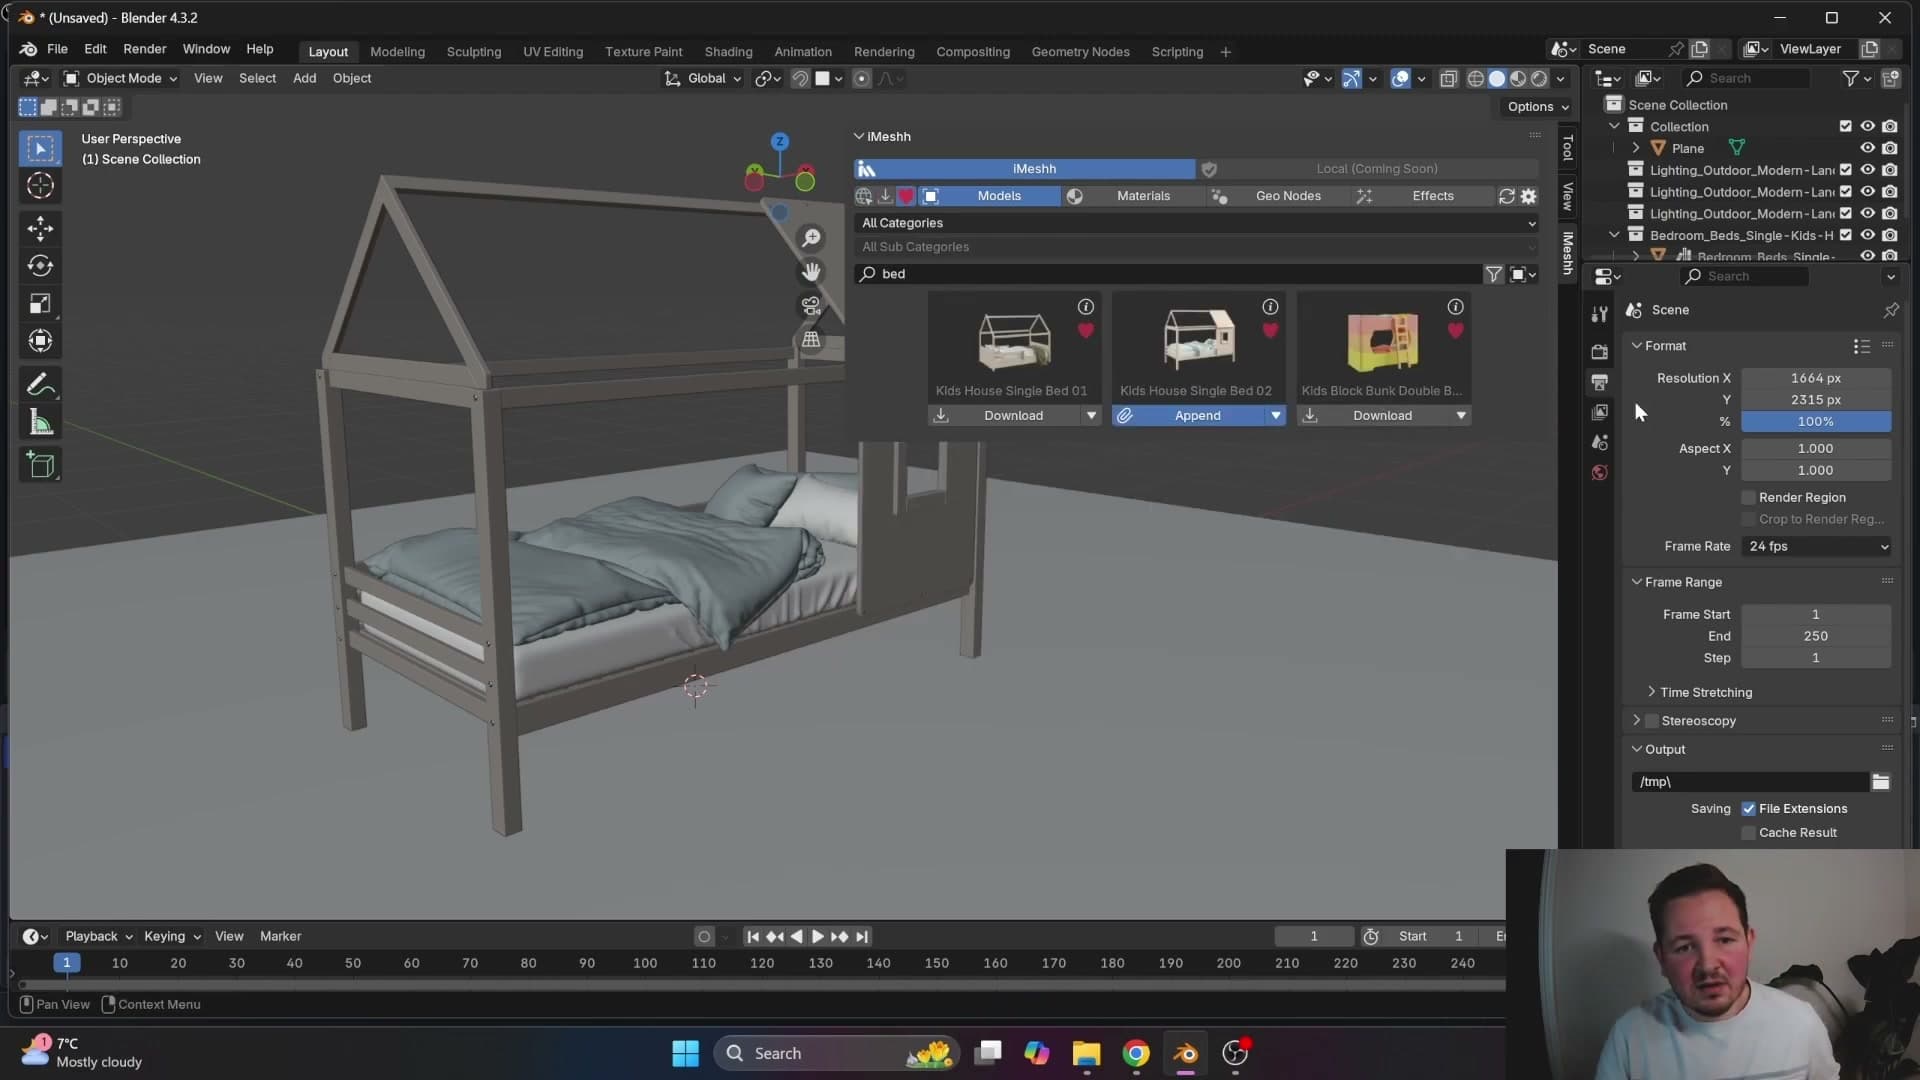
It's a one-click action with no confirmation step, so you can heart assets as you browse without breaking your rhythm. The same heart works from any tab, which means a great asset you stumble across mid-search becomes a permanent shortcut in seconds.
Re-appending from the Favourites tab
Switch to the Favourites tab and the grid collapses down to only the assets you've hearted. From there, Append behaves exactly as it does on the main Online tab. One click loads the asset into your scene wherever your 3D cursor is.
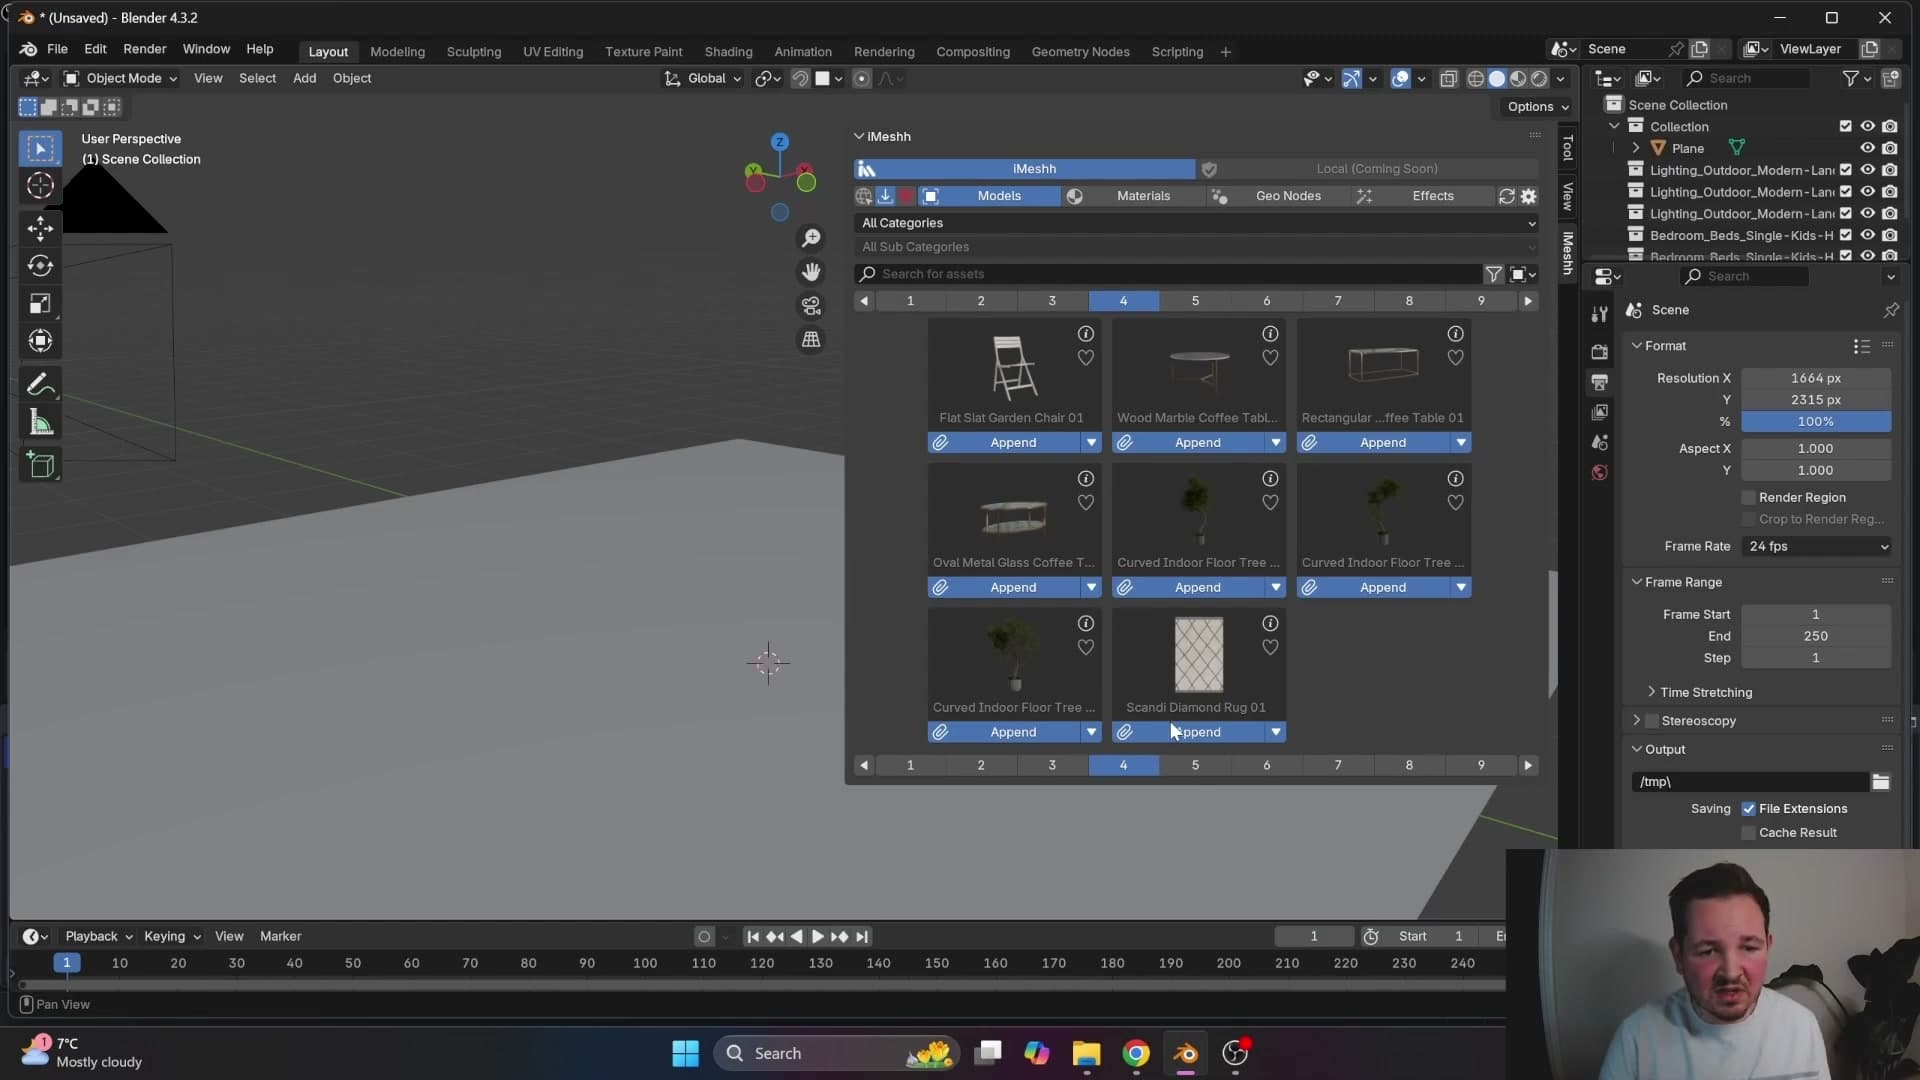
This is the workflow Charles recommends for the assets you reach for repeatedly. Heart the bed you use in every bedroom shot, the sofa that anchors every living-room scene, the planter that always fits the entryway, and you can re-append any of them in any future file without scrolling through pages of thumbnails.
Faster browsing with the Downloaded tab
Next to Favourites and Online sits the Downloaded tab, which restricts the grid to assets you've already pulled to your local drive. Because nothing has to fetch from the server, both browsing and appending feel noticeably snappier.
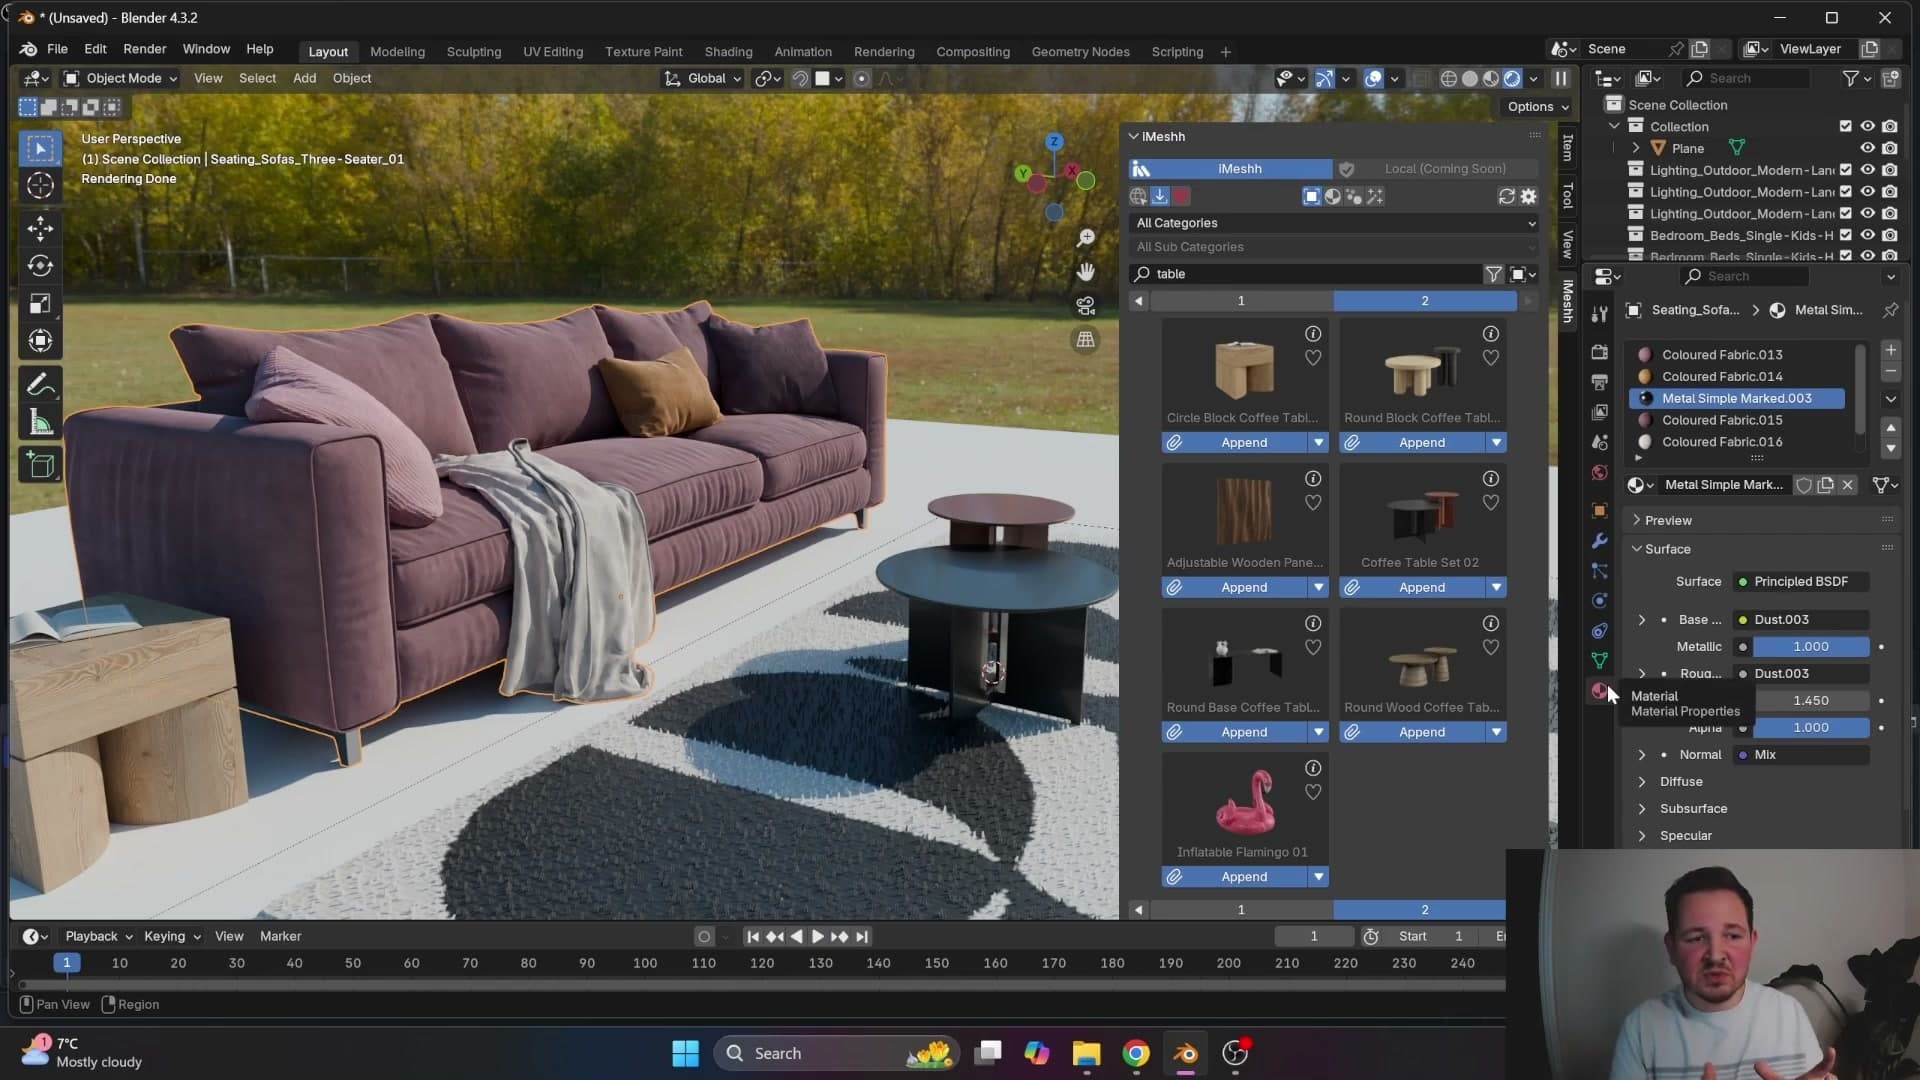
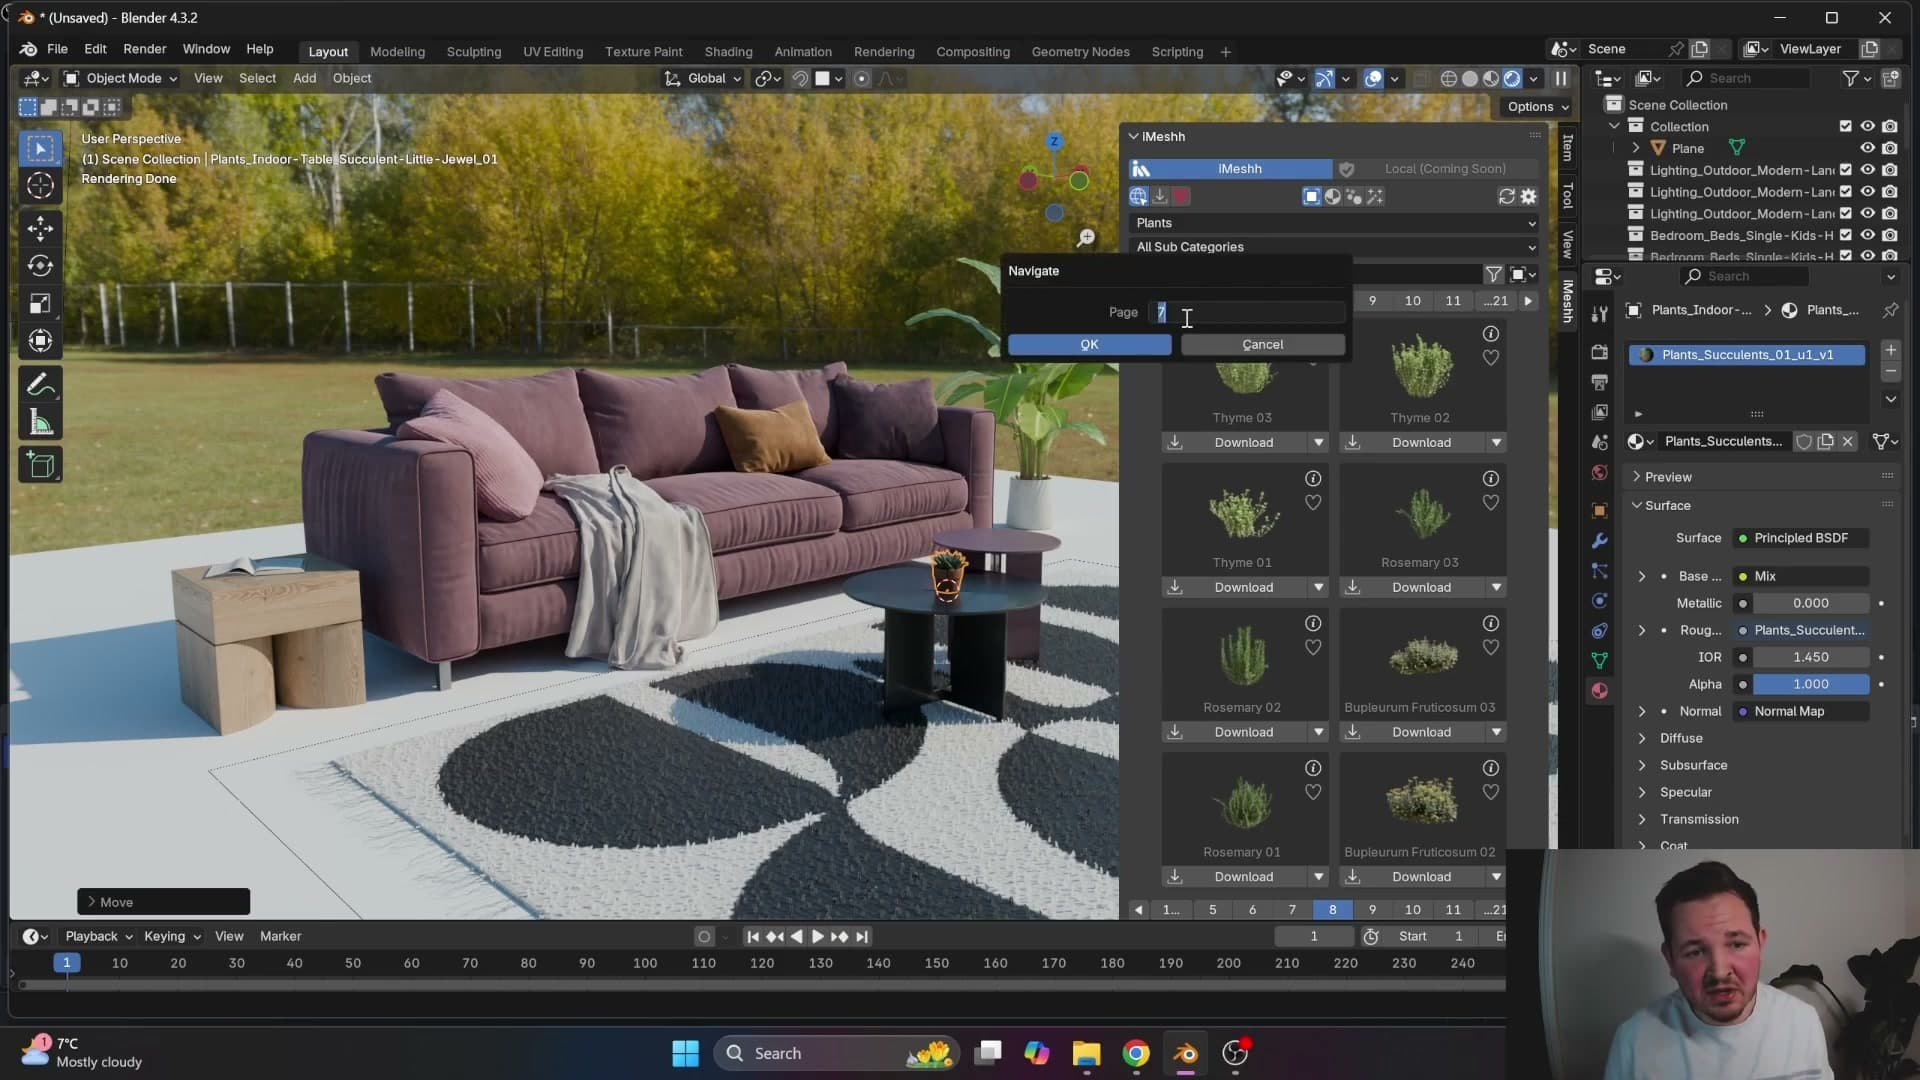
The keyword search still works inside the tab, so a query for sofa, table or rug filters your local library the same way it filters the full catalogue online. Charles demonstrates the pace by cycling through a rug, a table and a banana plant in a few seconds, dropping each one into the scene as he goes.
The trade-off is obvious: you can only browse what you've previously downloaded. For established scenes built from a familiar pool of assets, though, it's the fastest way to work.
Materials and fabric swaps
Browse and download fabrics, then apply them onto an existing iMeshh sofa by swapping its named material slot. No need to re-import the model when you change the fabric.
Browsing and downloading fabrics
Switch to the Materials tab to swap out browsing models for browsing fabrics. The grid fills with swatches from iMeshh's own library together with fabrics supplied through a third-party partnership, giving you a substantial catalogue to scroll through before you commit to anything.
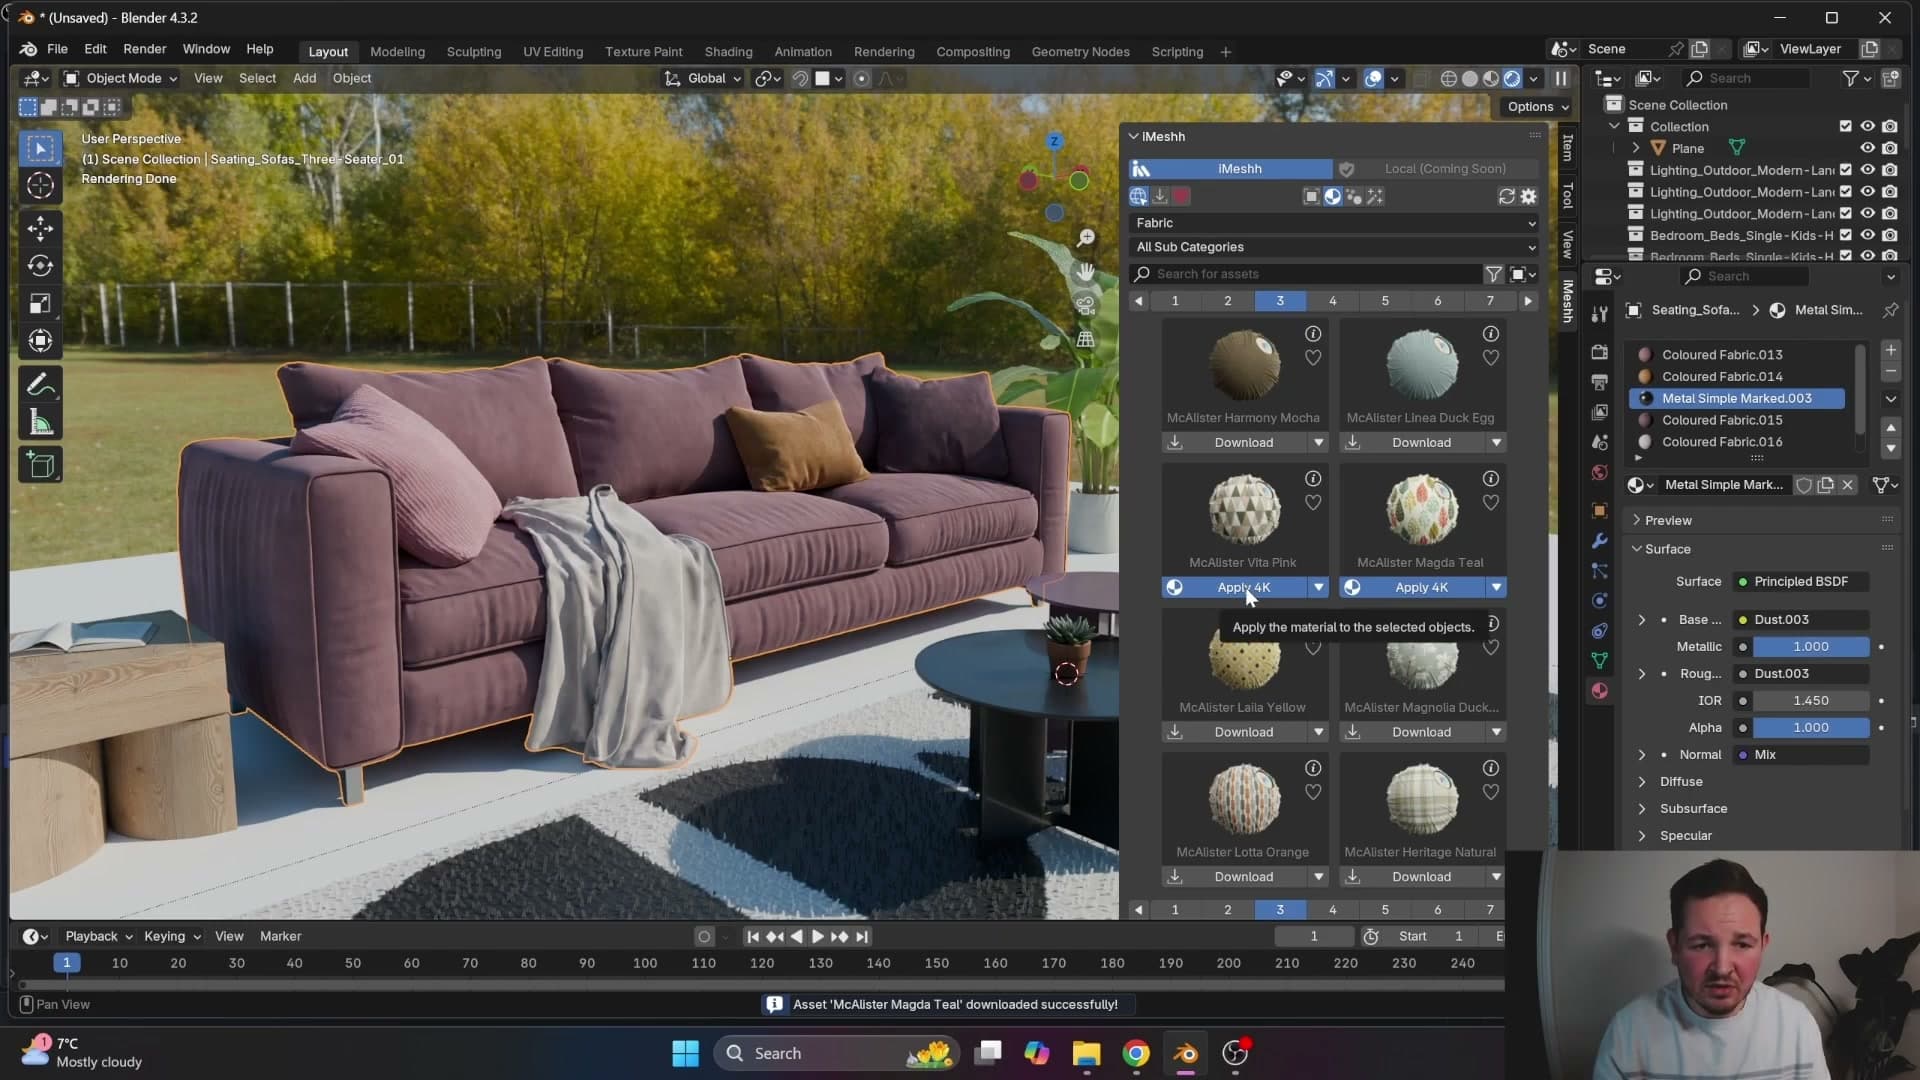
Browsing works exactly like the Models tab. Find a fabric you like (Charles deliberately picks a few funky options so the swap is obvious later) and click download on each. There is nothing new to learn here; the workflow mirrors models, geo nodes, and effects one-to-one.
Applying a fabric onto an existing sofa
Once a fabric is downloaded, select the sofa in the viewport, find your fabric in the Materials tab and click Apply. Rather than overwriting the existing material, this adds the fabric to the sofa's material slot list, ready to be assigned.
Open the material slot dropdown on the sofa and pick the fabric you just downloaded. Charles assigns one called McAllister and the sofa re-skins instantly. There is no re-import and no need to rebuild the shader graph; the iMeshh sofa was authored with swappable material slots so it accepts whatever fabric you drop in.
Because Apply adds rather than replaces, you can stack several fabrics onto the same slot and flick between them from the dropdown. It is a quick way to A/B test fabric choices against a client's brief without juggling separate files or reloading the model each time.
Geometry-node systems for archviz exteriors
Use iMeshh's geo-node systems (gutters, industrial pipework, fences, flooring patterns with adjustable lay direction, and lawn generators) through the same one-click append workflow.
Gutters, pipes, fences, and flooring generators
Beyond models and materials, the asset manager also ships a growing set of geometry-node systems aimed at the parts of an archviz exterior that take hours to model by hand. The idea is the same one-click workflow: browse, append, done.
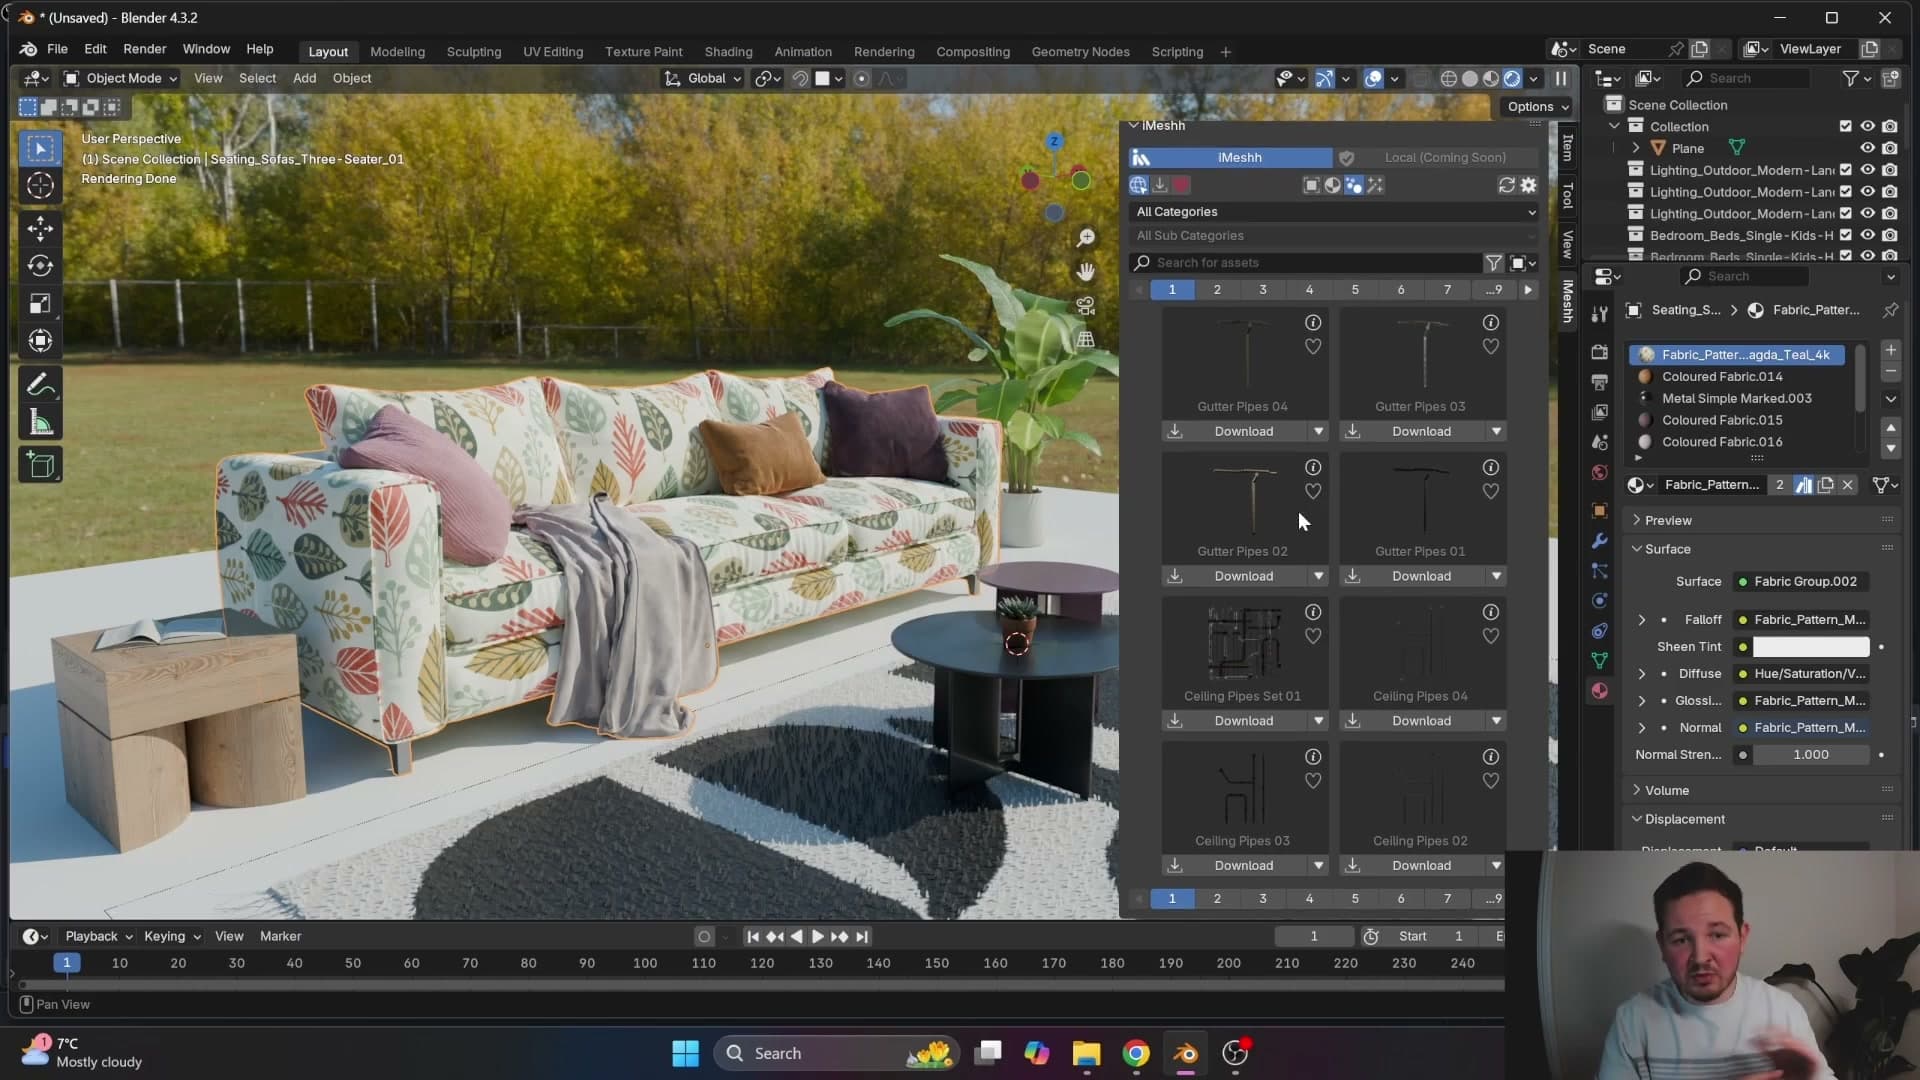
The current line-up covers gutters, industrial pipework, flooring generators (with a parameter to change the lay pattern of the boards), fences, and lawn setups. There are also dedicated wood-floor generators alongside the material library.
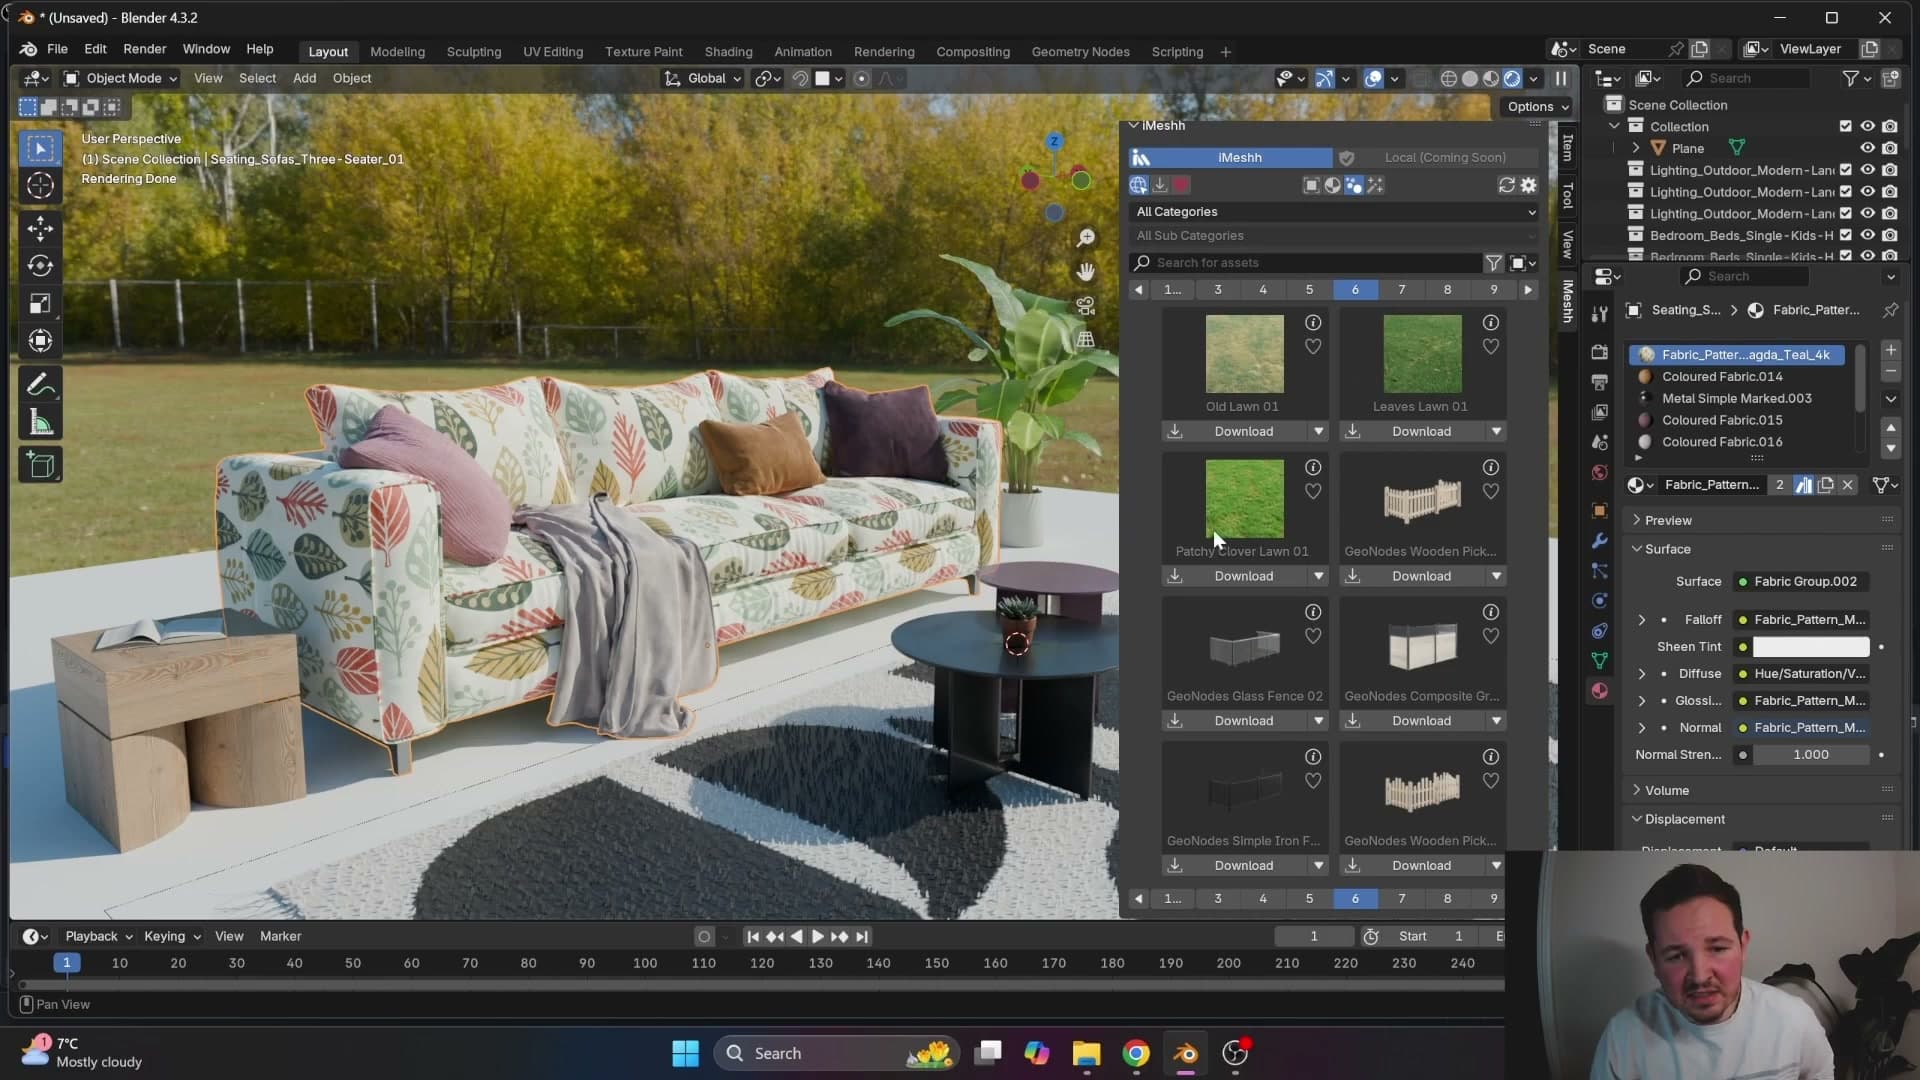
Roof tiles are on the roadmap and due to ship next. Another exterior element that becomes trivial once a geo-node setup handles the repetition for you.
Dropping a lawn into the scene
To show how fast it is, search the word lawn in the browser, pick a result, and click append. The geo-node setup drops in at the 3D cursor and instantly produces a patch of grass behind the demo sofa. No scattering setup, no particle system, no manual instancing.
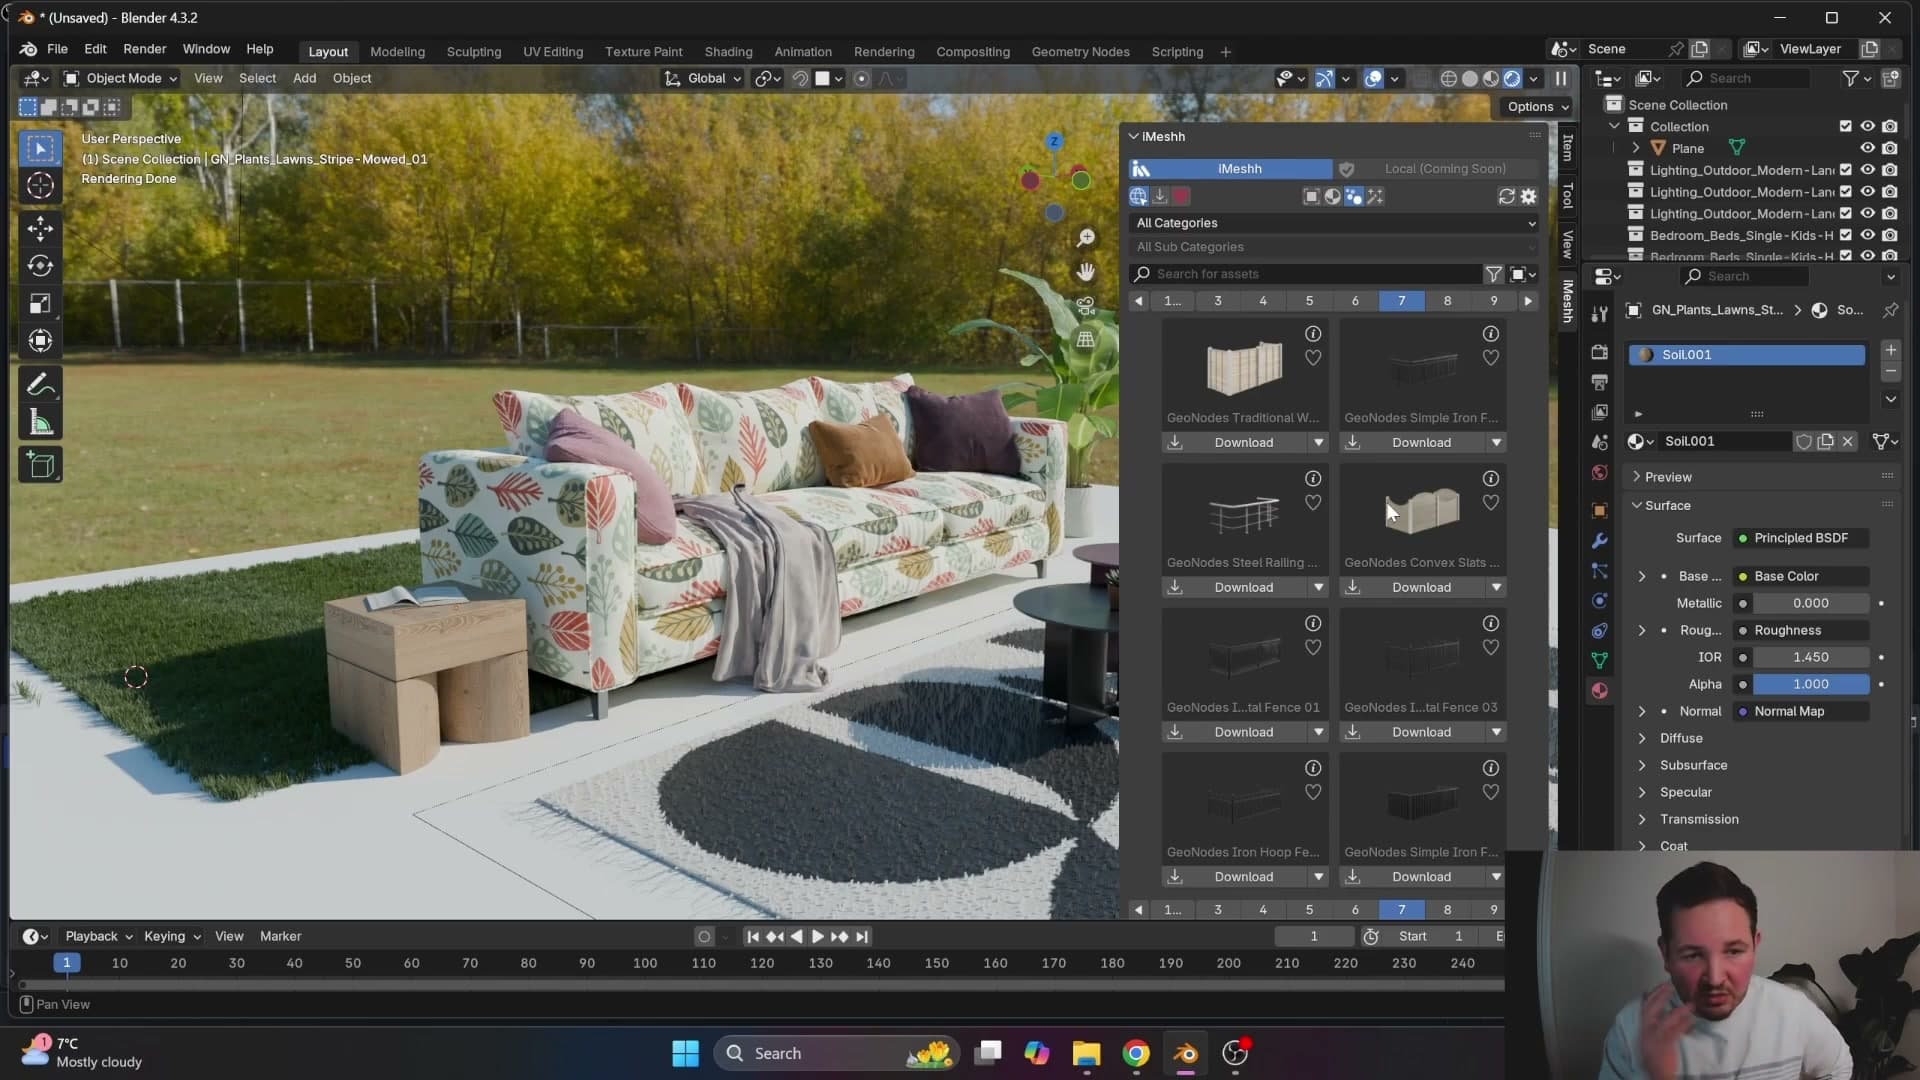
Charles's aside as he does it: "I don't judge me on this design. I do actually create professional CGI for a living, this isn't a representation of any of that." The point of the demo is the speed of the workflow, not the composition.
Gobo spotlights for shadow effects
Append a gobo spotlight to cast a shadow pattern (such as leaves) onto a surface, then tune the blend, power, and intensity to soften the edges.
Appending and tuning a gobo spotlight
Gobos are listed as a lighting option in the asset manager, and they ship as spotlights with a shadow pattern baked into the projection. Pick one from the browser, click append, and drag it into the scene above whatever surface you want the pattern to fall on. Charles drops his onto the grass so the leaf-shaped shadow reads clearly against a flat plane.
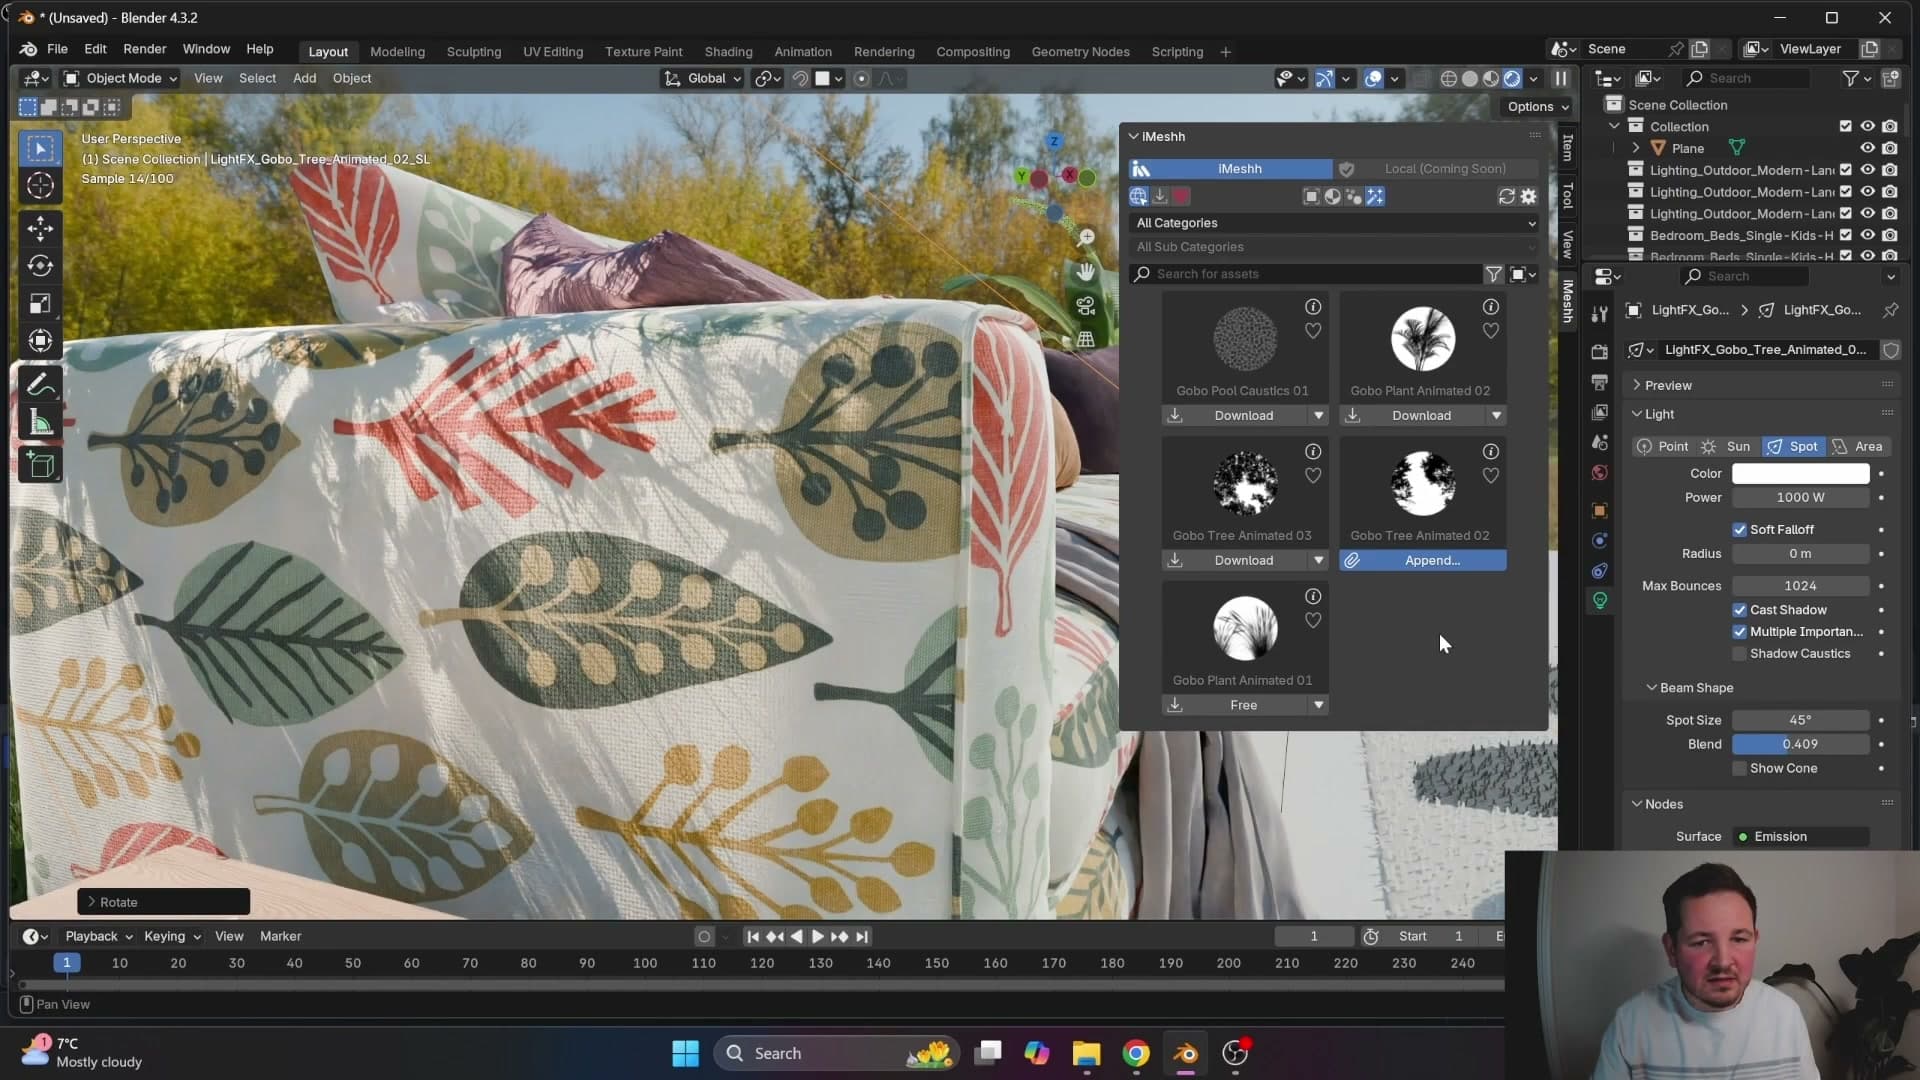
Because the asset is a standard Blender spotlight, every spotlight parameter is yours to tune. Adjust the blend to soften the edges of the cone, push the power up or down to brighten or dim the cast, and tweak the overall intensity until the pattern sits at the strength you want. The result is a quick way to throw a leaf shadow onto the side of a sofa, the floor, or any other surface that needs a little extra atmosphere.
Roadmap, feedback, and what's coming next
Charles points to the public Trello board for tracking suggestions and live development, and previews upcoming kitchen, bedroom, and bathroom render tutorials.
Trello roadmap and upcoming tutorial content
The link in the YouTube description points at a public Trello board where iMeshh tracks the asset manager's development out in the open. Use it for two things: drop suggestions for features or assets you'd like to see, and check the in-progress cards to see what's already being worked on before you submit a duplicate request.
Charles also previews what's next on his side of the channel: upcoming tutorials will move away from add-on walkthroughs and into kitchen, bedroom, and bathroom render breakdowns, with full YouTube videos and tutorials built around each room type.
The closing message is the one that has driven iMeshh from the start: the team wants to make Blender the industry standard for interior and exterior archviz. Feedback in the YouTube comments is genuinely read. If something in the asset manager feels off, or an asset category is missing, that's the channel to flag it through.
From annual-only to monthly access
iMeshh has dropped the annual-only barrier and introduced a monthly subscription, giving instant access to the entire asset library plus the new asset manager.
Monthly subscription unlocks the full library
Until this update, iMeshh ran on an annual subscription only. Charles is candid about why: the team worried that opening up a monthly tier would just invite people to pay for one month, bulk-download the entire catalogue, and disappear. That guardrail kept the library locked behind a year-long commitment.
That barrier has now gone. A monthly subscription unlocks the full iMeshh library and the new asset manager covered throughout this tutorial, so you can browse, favourite, and append every model, material, and geo-node system without committing to a year up front. The pricing card below shows the current rate.
Charles frames the shift as an experiment in offering no-barrier access for the wider Blender community, with the explicit hope that more artists will use the library to start producing renders at a professional level. He is also openly bracing for how it lands commercially.
Tools and credits
Everything mentioned in this tutorial, with links.
- Blender: the renderer this entire build runs in.
- iMeshh: studio platform (project management, client review, asset library, invoicing). The asset library used in this tutorial is included with every iMeshh Pro plan.
- Poly Haven: free CC0 textures and HDRIs.
Pillar guide: Imeshh Tools hub