Why the mirror modifier deserves a deeper look
This video is the next in a series of 'simple but not so simple' Blender deep-dives, alongside earlier ones on the 3D cursor, duplicating, and collections. The mirror modifier shows up in almost every model I build at iMeshh, so it's worth knowing every corner of it, including the bits that aren't obvious. I also point out that the floating-ball backdrop you see in shot is 100% CGI from another tutorial.
Why this is the next 'simple but not simple' tutorial
This tutorial is the next instalment in a run of videos that take a tool you probably think you already know and push it a little further. The 3D cursor, duplicating properly, organising scenes with collections. Each one looks like a beginner topic on paper, but each one hides a handful of features that change how you model once you find them. Going by the comments on those earlier videos, the format clearly resonates, so the series continues.

The mirror modifier is the perfect candidate for the same treatment. I use it on almost every single model I build at iMeshh, and even seasoned Blender users tend to lean on the same three or four options without realising what the rest of the panel actually does. The aim here is straightforward: even if you've used mirror a thousand times, by the end of this video there is a good chance you'll have picked up at least one technique you can drop straight into your next model.
Quick aside: the floating balls and backdrop are CGI
Quick aside before the actual lesson begins. The floating balls behind me and the soft, foggy backdrop they sit against are not a physical set. The whole thing is 100% CGI. The shot is rendered in Blender, composited behind the live-action footage to give the channel its signature look.
There's a separate iMeshh tutorial covering exactly how that backdrop was built, and the link sits in the description if you want to recreate the effect yourself. Worth flagging only because new viewers occasionally assume it's a real studio backdrop.
iMeshh asset library and subscriptions
A quick word on why this channel exists in the first place. The videos are produced by iMeshh, with no ads, no sponsorships, and no marketplace upsells baked into the tutorials. If you're working in architectural visualisation, trying to break into the field, or building out a portfolio, the iMeshh platform is what underwrites all of this.
Every asset in the library is modelled in-house, which means quality control runs across the entire catalogue rather than being delegated to thousands of independent uploaders. That's what I consider the real differentiator: on open marketplaces, anyone can list a model at any price and any quality, and there's no reliable way to tell whether a piece will hold up under a close-camera render until you've already paid for it. With an in-house pipeline, every model is built to the same standard before it ever reaches the library.
If you're just getting started, the library is designed to short-circuit the slowest part of an archviz project: finding good, render-ready assets. That frees up your time for lighting, materials and the parts of a scene that actually carry the image.
The origin point is everything
Before any of the clever stuff, I want to hammer home the single most important concept: the mirror modifier pivots on the object's origin point. If a perfectly symmetrical cube seems to do nothing when mirrored, that's why. Moving the 3D cursor and snapping the origin to it instantly changes the mirror pivot, and the cube starts duplicating across each enabled axis.
Adding the modifier to a centred cube: why nothing appears to happen
Before anything else, internalise this rule: the mirror modifier always pivots on the object's origin point. The origin is the small yellow dot you can see floating somewhere on (or near) the mesh in the viewport. If you can't see it, it's because the overlay is turned off, not because the object doesn't have one.
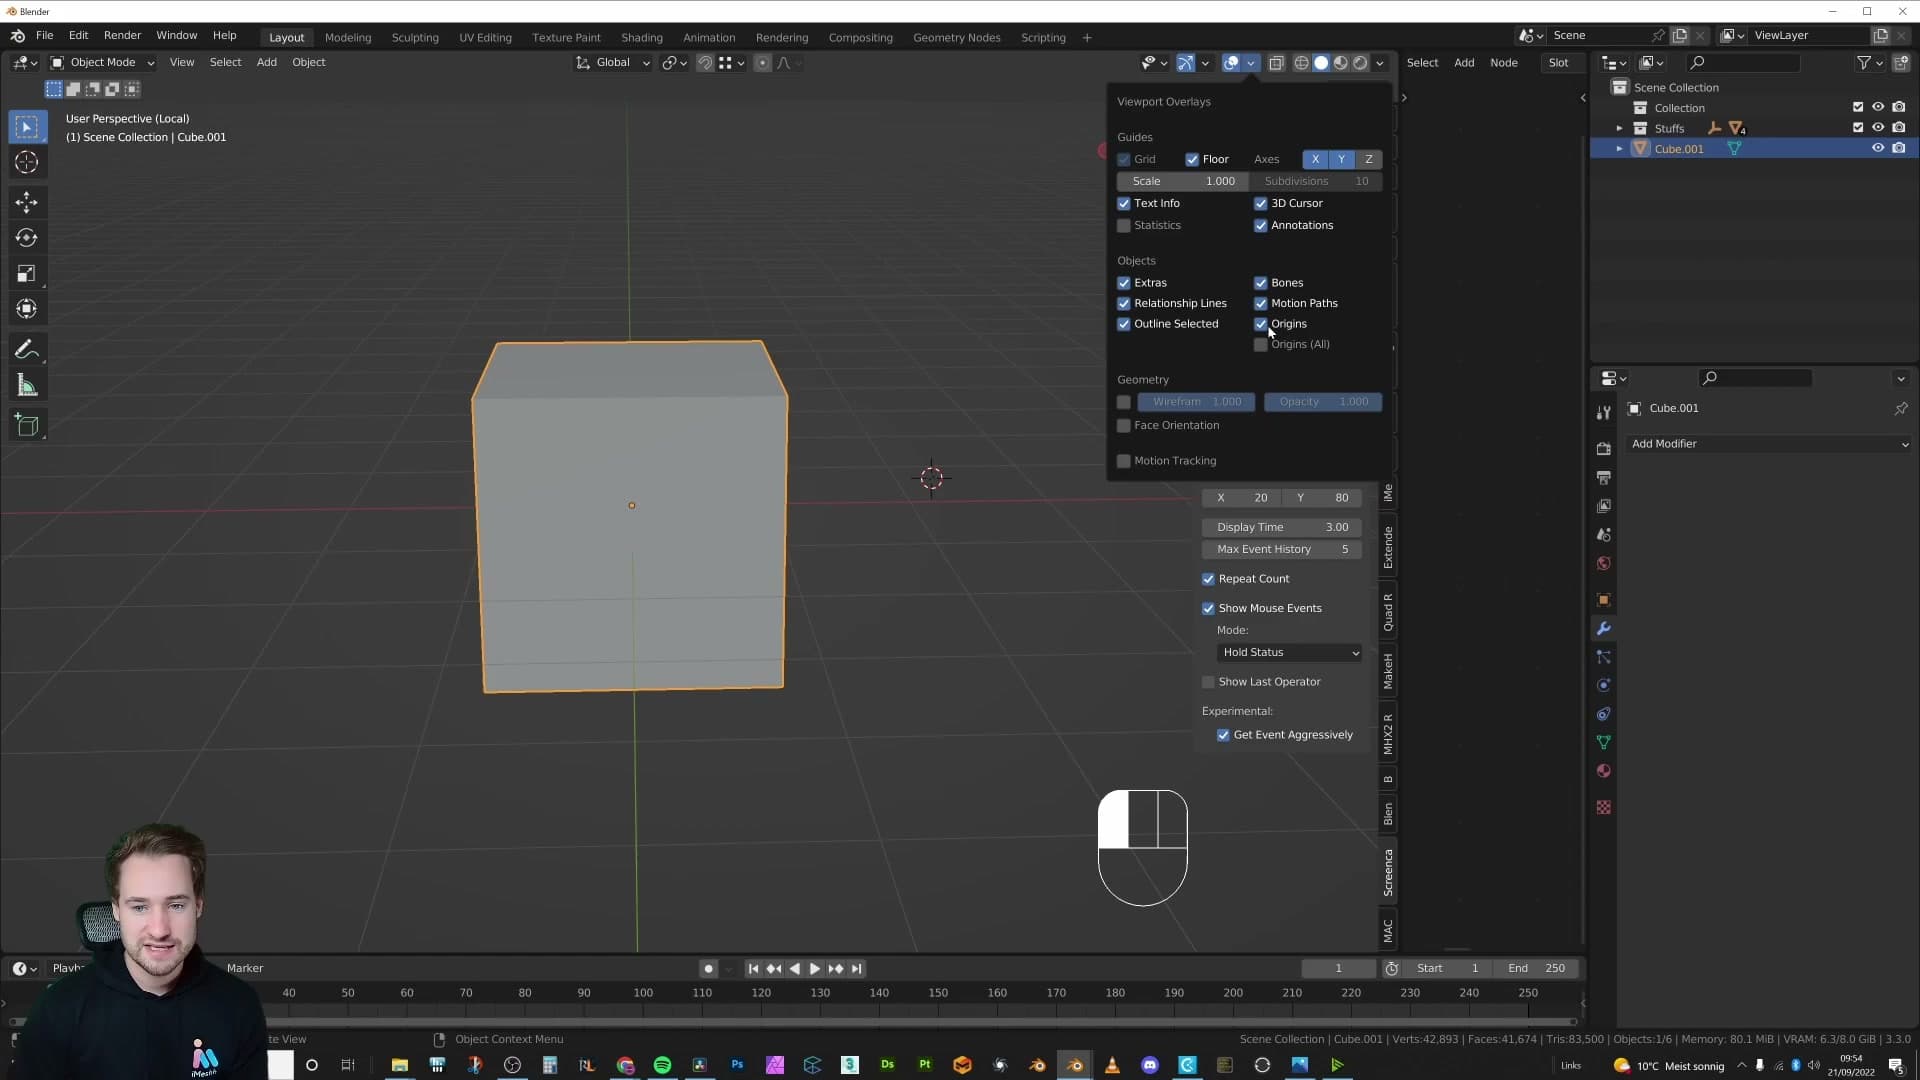
Drop a default cube into a fresh scene and add a mirror modifier. Visually, absolutely nothing changes. That's not a bug. The origin sits at the dead centre of the cube, the cube is one hundred percent symmetrical around that centre, so the mirrored half lands exactly on top of the original half. The modifier is doing its job. You just can't see it.
This is by far the most common "why isn't my mirror working?" trap, and it has nothing to do with the modifier settings. It's always the origin.
Moving the origin with Shift+Right-Click and Set Origin to 3D Cursor
To make the mirror actually do something, you need to move the origin somewhere other than the middle of the mesh. The fastest way is the 3D cursor:
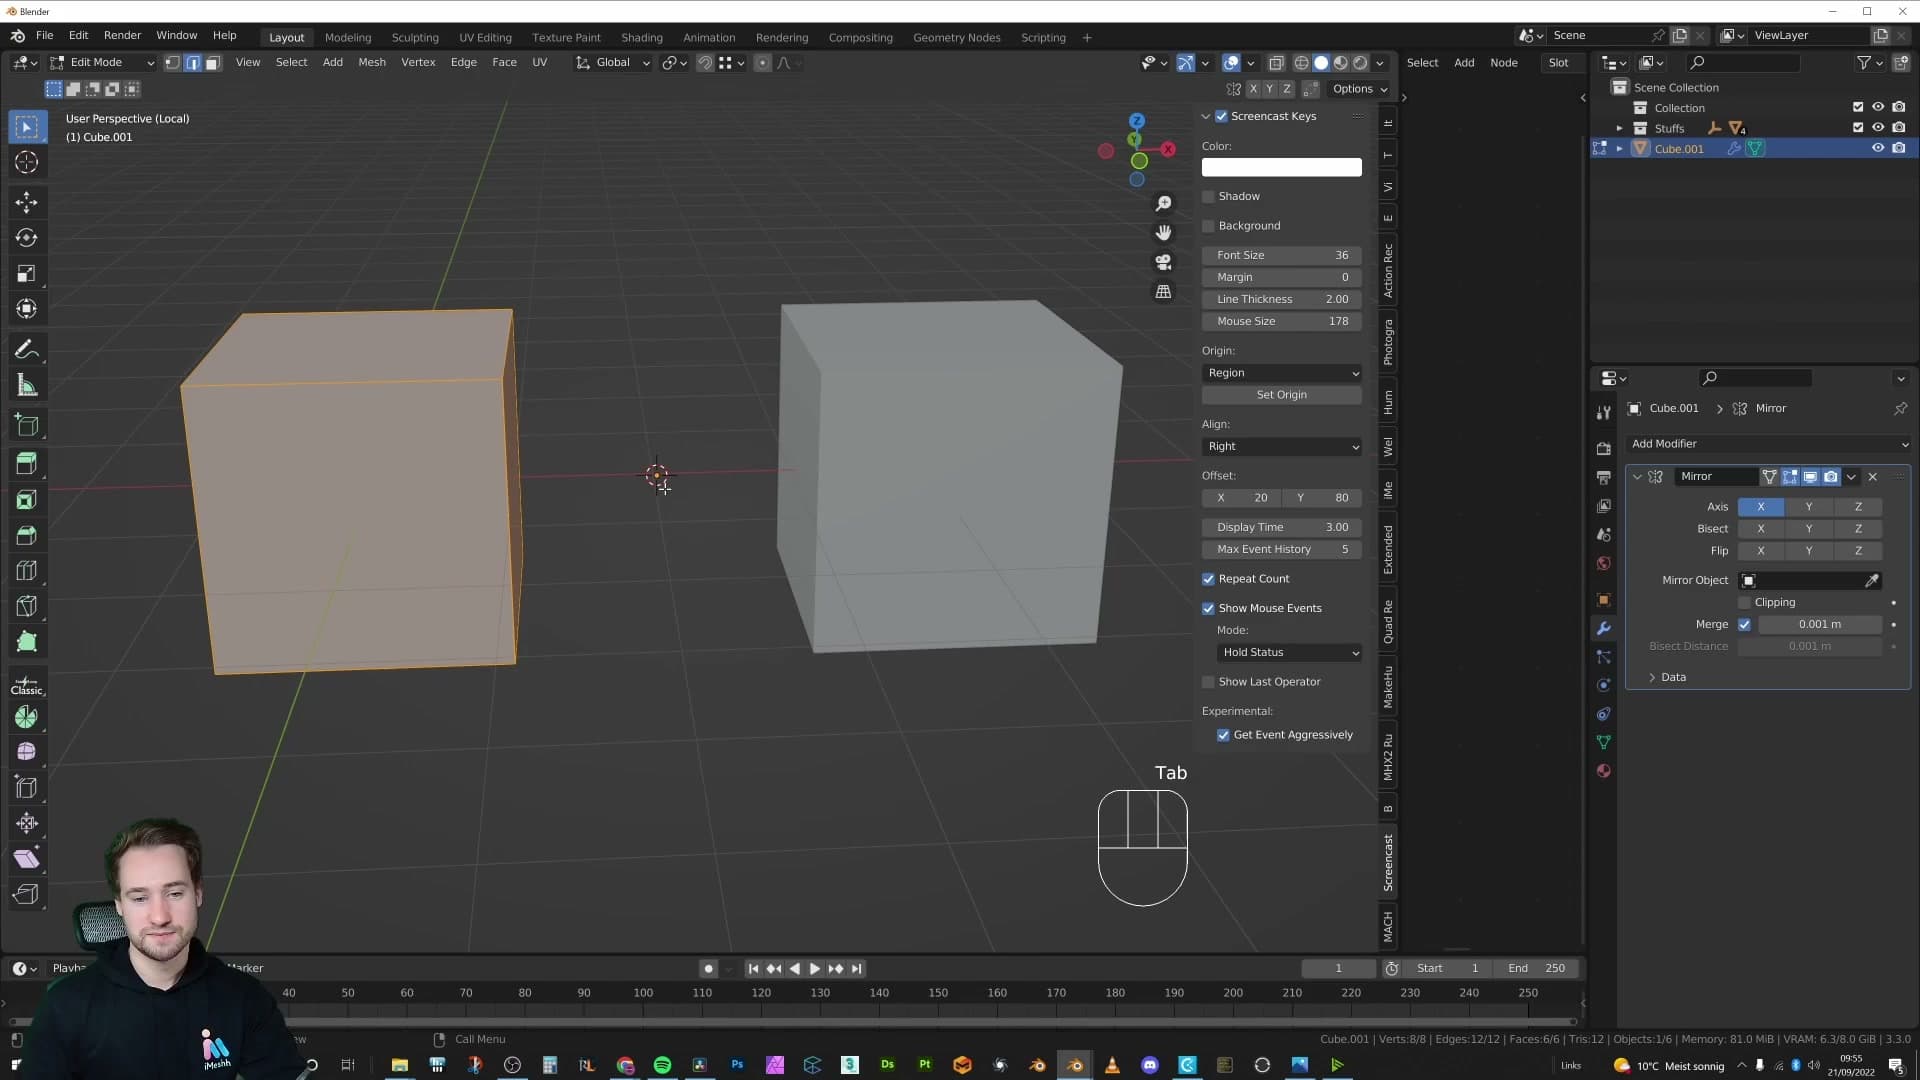
1. Position the 3D cursor where you want the new pivot by Shift+Right-Clicking in the viewport. 2. Go to Object > Set Origin > Origin to 3D Cursor.
The moment the origin lands outside the cube, the mirrored duplicate pops into existence on the opposite side. From here you can keep refining: Tab into edit mode and slide the geometry closer to or further from the origin, and the duplicate updates in real time. You're effectively dialling in how far apart the two halves sit by moving the original relative to the pivot.
Mirroring on X, Y and Z and what each axis does
By default the modifier mirrors along the X axis, which is why the duplicate appears side-by-side. The X, Y and Z buttons in the modifier panel each control one axis independently, and you can enable as many of them as you like.
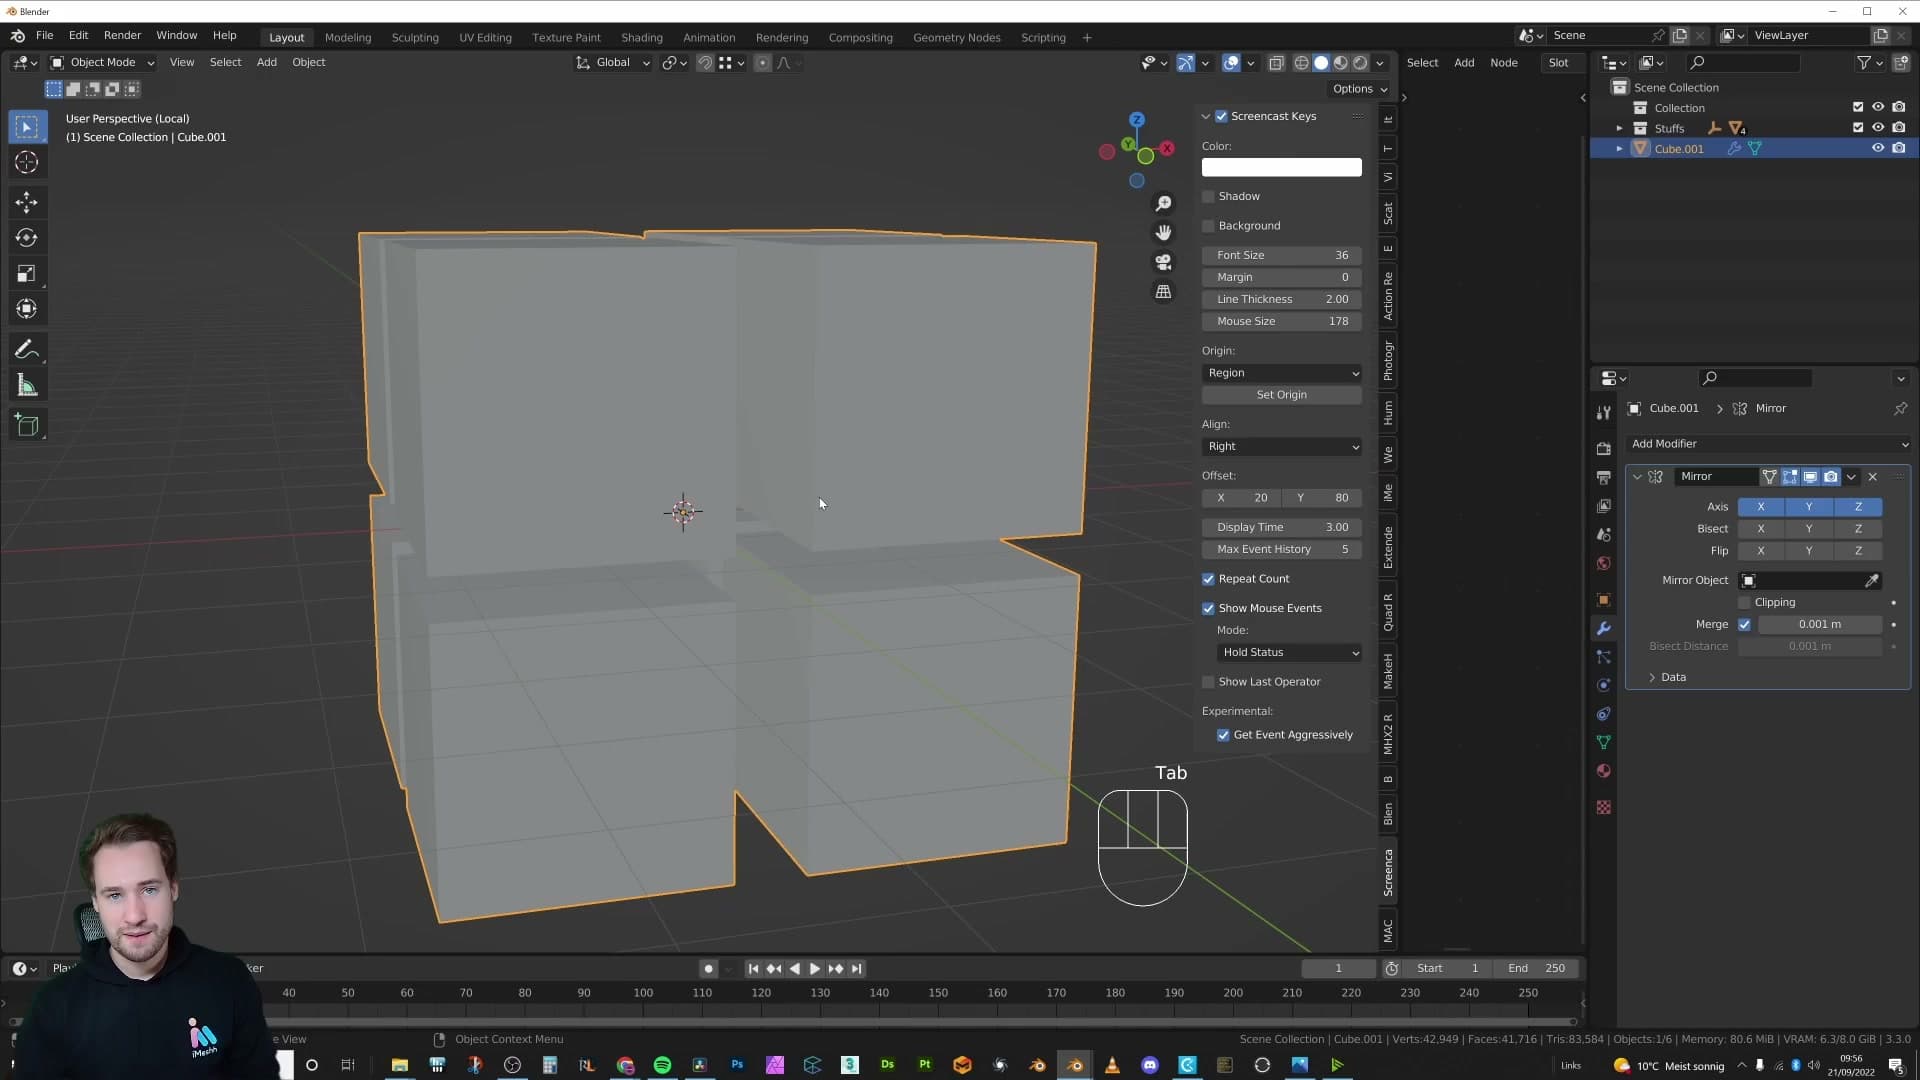
Tick the Y axis box, though, and you'll likely see nothing change. Same trap as before: even with the origin shifted on X, the cube is still perfectly symmetrical along the Y line that runs through that origin. Tab into edit mode, hit G then Y, and nudge the mesh off-centre on the Y axis. Now you're mirroring on two axes at once and you get four copies arranged in a square.
The Z axis behaves identically: enable it, then move the geometry up or down in edit mode to break the symmetry along that line. With all three axes ticked and the geometry offset on each, you end up with eight copies of the cube arranged around the origin point like a little 2×2×2 grid.
The takeaway from this whole module is one sentence: if the mirror modifier looks like it isn't doing anything, your origin is almost certainly in the wrong place, not your modifier settings.
Working on half an object: the classic workflow
The most common use of the mirror modifier: split a model in half, work on one side, let Blender keep the other side perfectly in sync. I demonstrate with a chest-of-drawers-style block and show the Boundary toggle that stops Inset from cutting along the mirror seam. It's a small option that fixes one of the most annoying mirror artefacts.
Splitting the mesh and concentrating on one side
This is the workflow most people actually use the mirror modifier for: split the mesh in half, work on one side, and let Blender keep the other side in perfect sync. Often you'll already have a model that's split down the middle with the origin sitting right at the centre of that split. Drop a mirror modifier on it and the missing half reappears live.
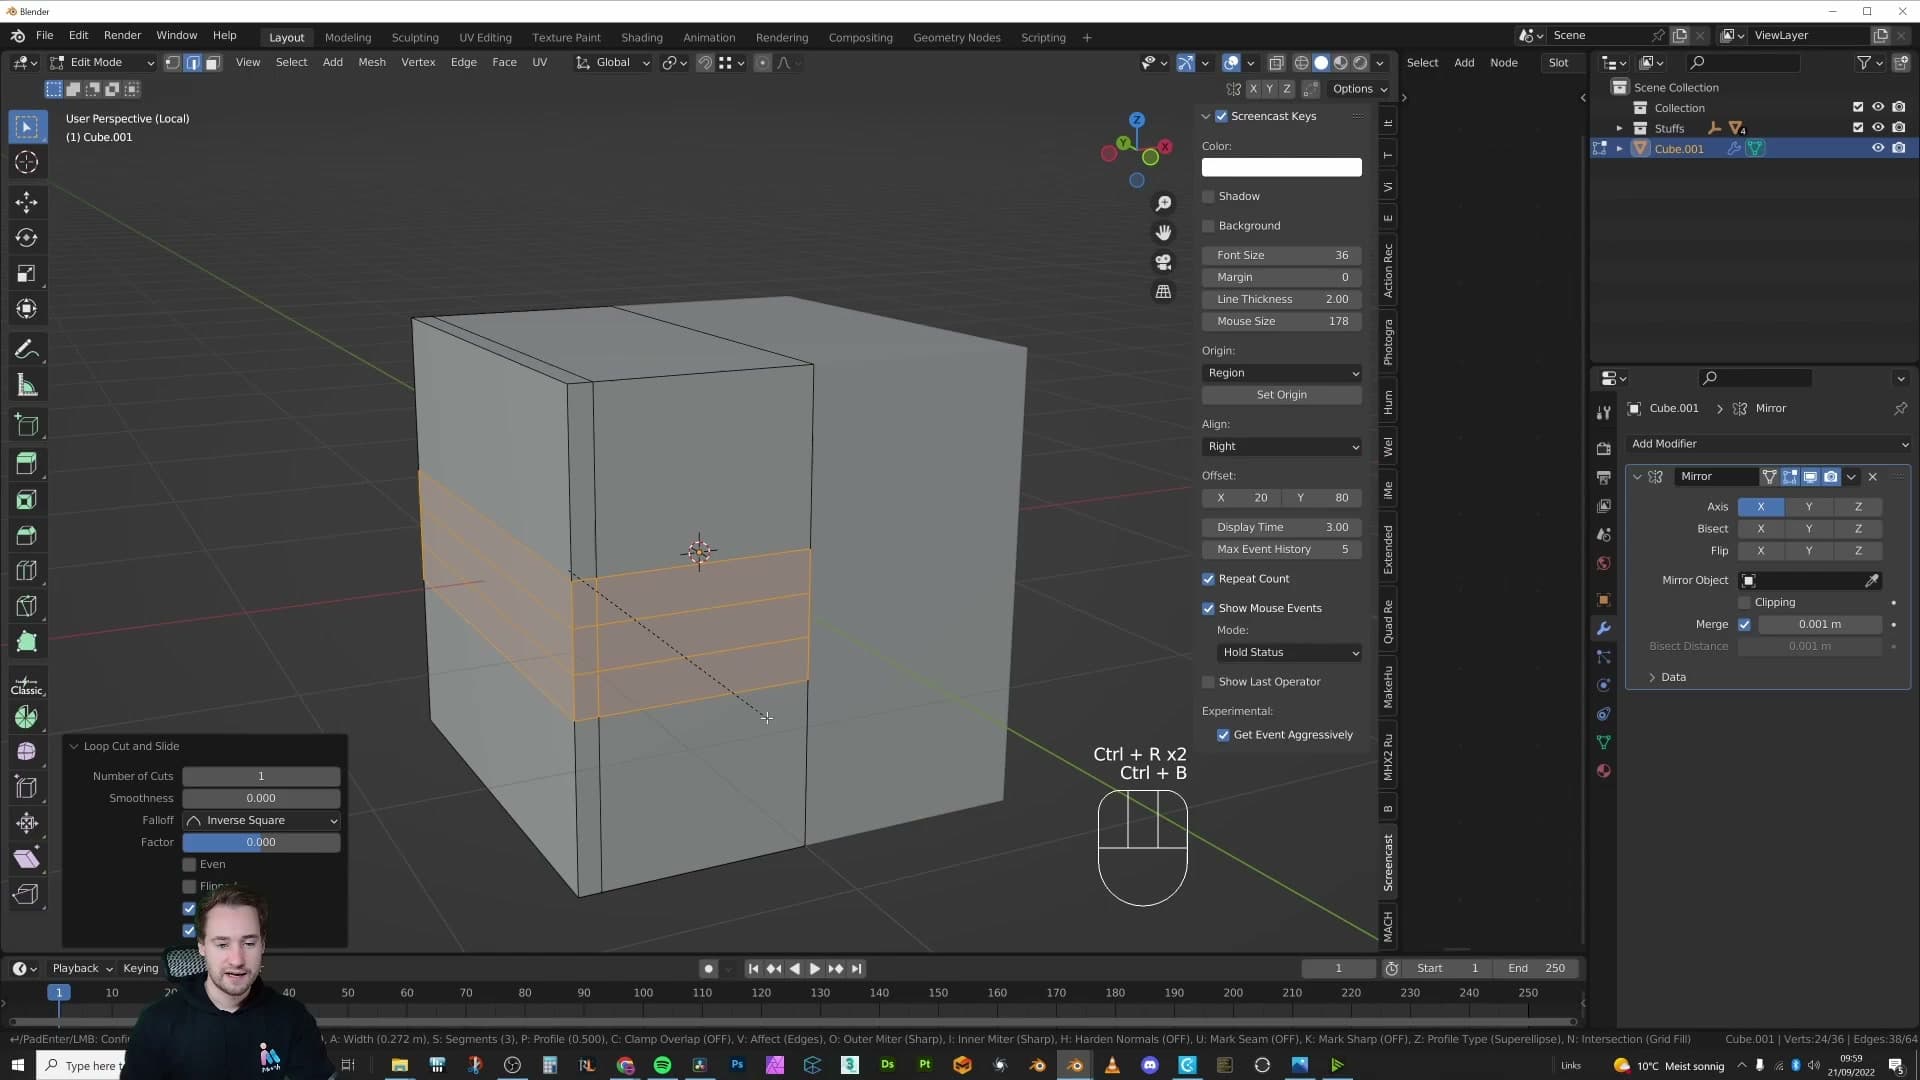
Once the modifier is on, you can visually concentrate on one side and forget the other exists. Every extrude, every bevel, every loop cut you make on the half you're working on is mirrored across instantly. There's nothing extra to do. Blender handles it.
My example here is a chest-of-drawers block. Model the drawers, handles and trim on one side of a simple cuboid, and the opposite half rebuilds itself automatically. A symmetrical piece of furniture from half the work.
Turning off Boundary so Inset respects the mirror seam
There's one classic gotcha with this workflow. The moment you press I to inset a face that touches the mirror seam, Blender treats the seam edge as a boundary of the mesh and the inset stops dead at that edge. The inset only appears on the half you're working on rather than continuing cleanly across both halves.
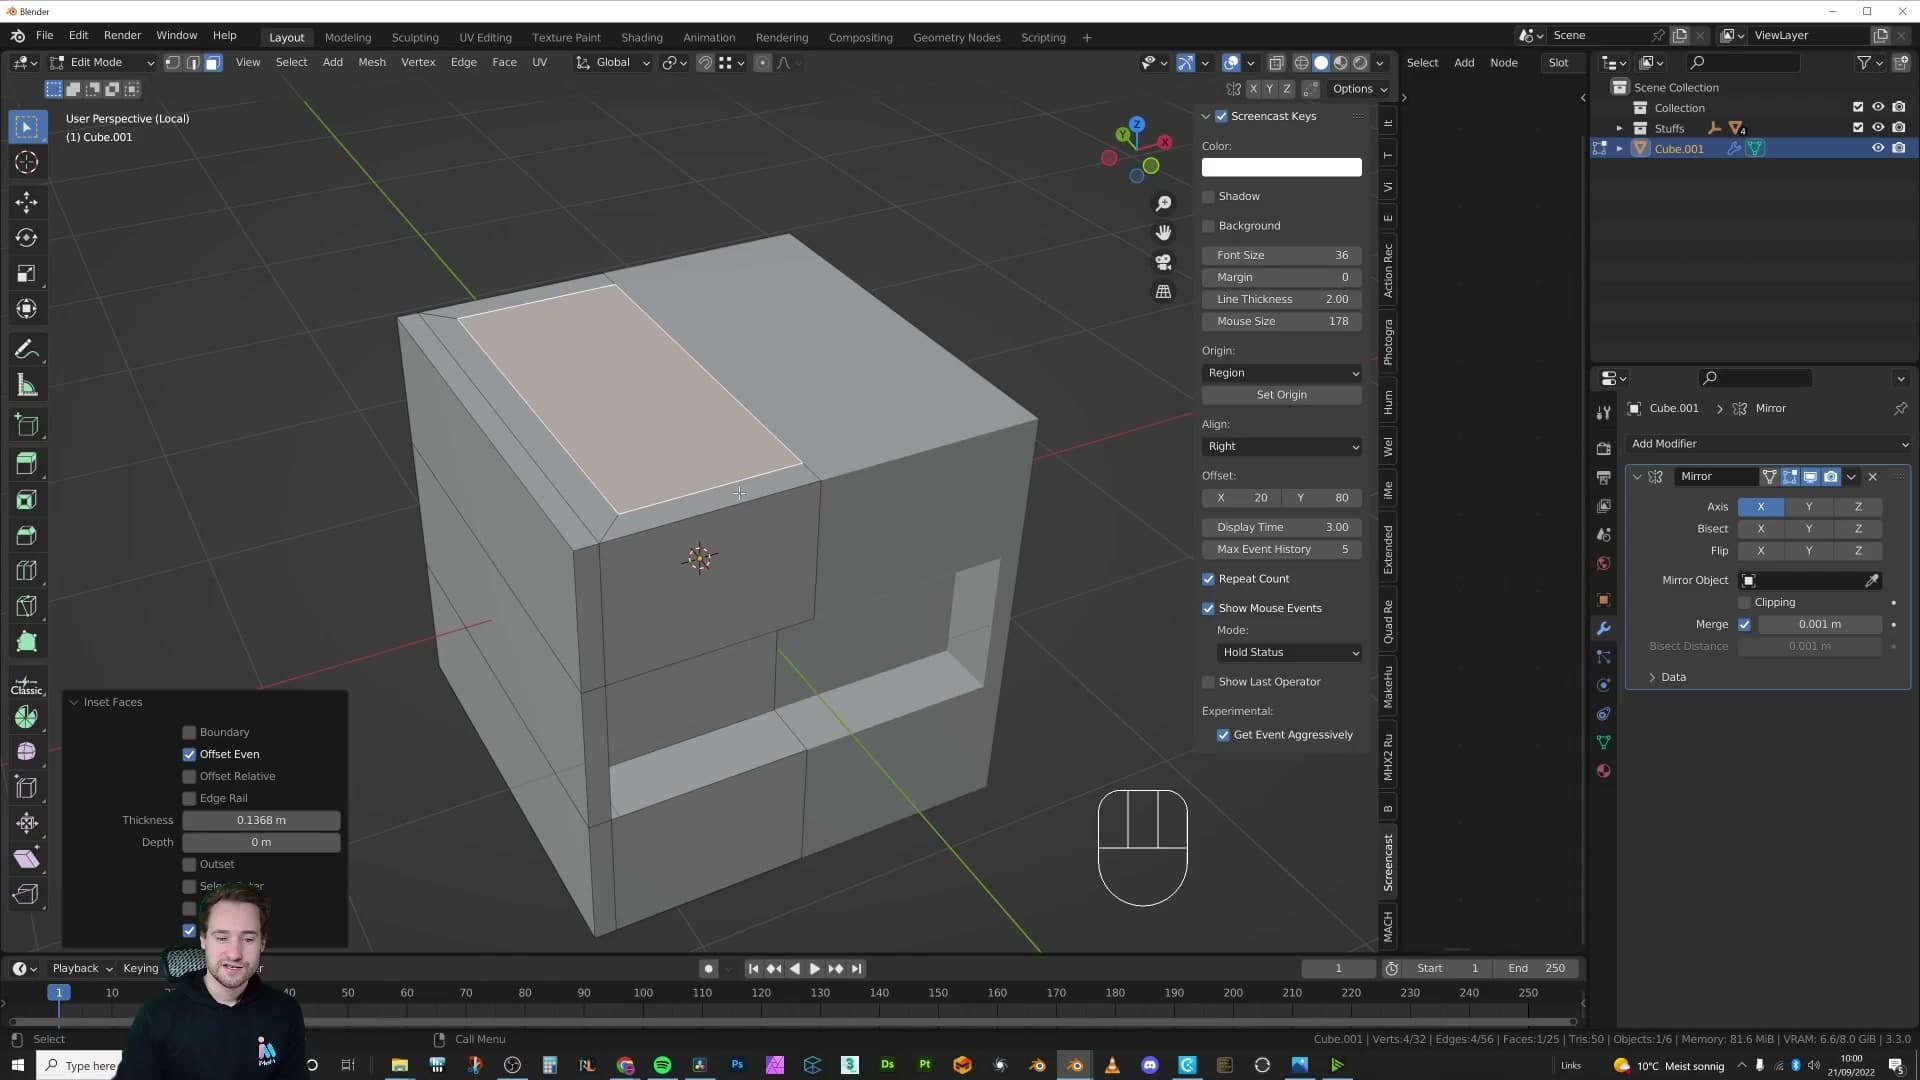
The fix is to turn off the Boundary option. With Boundary disabled, the inset stops treating the seam as an outer edge of the model and runs across both halves as one continuous shape, exactly what you'd expect from a symmetrical inset.
This should work in most cases. Once Boundary is off, Blender stops considering that mirrored edge as part of the mesh's outer boundary.
Clipping: locking vertices to the mirror plane
Clipping is the option I think should be on by default. With clipping enabled, vertices dragged across the mirror seam stick to it and weld the two halves together, which is perfect for symmetrical organic shapes. There's a gotcha though: if you add a sphere or sub-object that you later want to move away from the seam, clipping will hold it in place until you toggle it off.
Enabling clipping to snap geometry to the centre line
The next checkbox on the mirror modifier is Clipping. With it switched off, a vertex dragged across the X-axis seam happily overlaps into the mirrored half. Or, if you started from the centre and pulled outward, you get a gap straight down the middle of your mesh.
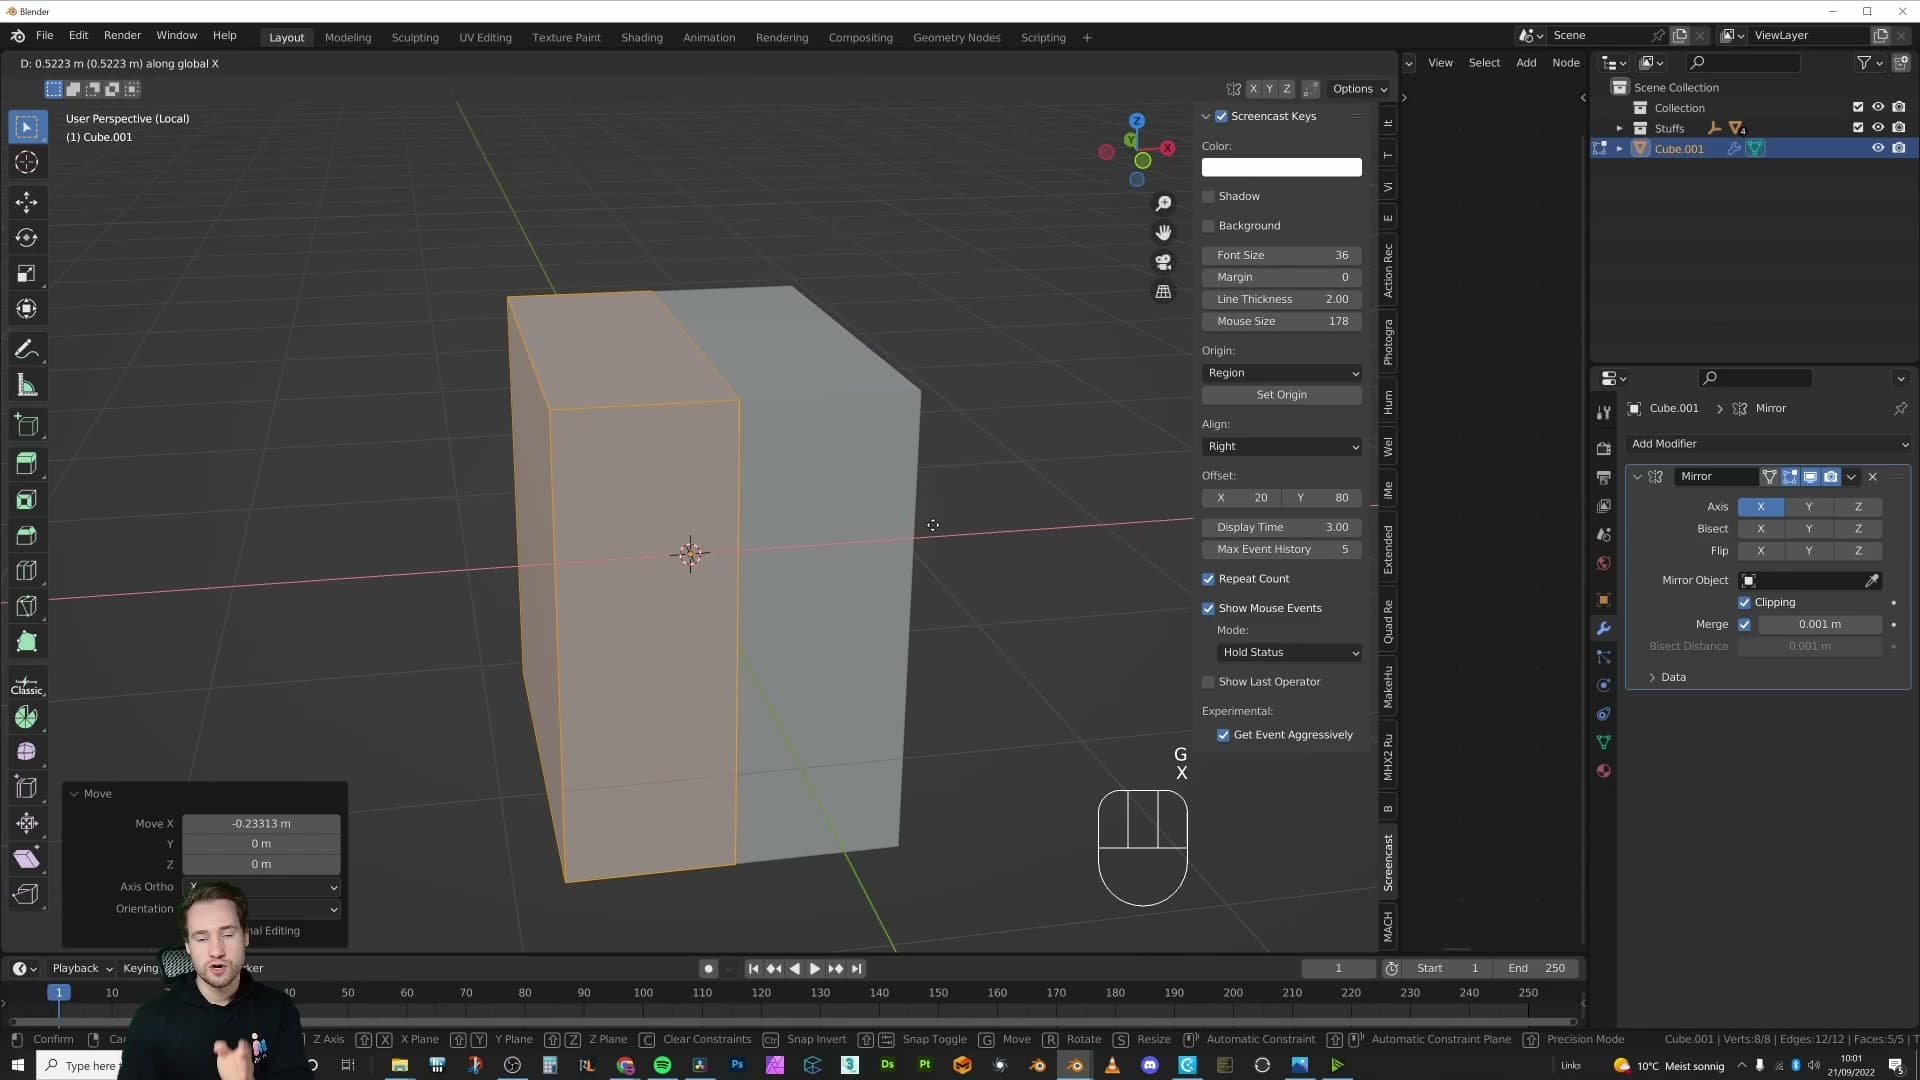
Enable clipping and that behaviour changes completely. A vertex pushed towards the mirror plane stops dead at the seam: it physically can't travel past it. Click any vertex onto the centre line and it welds there, locked to its mirrored twin on the other side.
For symmetrical organic shapes this is exactly what you want. You can sculpt, pull and tug geometry around the model knowing that anything sitting on the seam will stay joined down the middle rather than drifting apart by accident.
The clipping gotcha: stuck sub-objects
Clipping has one catch worth remembering: it doesn't only stop geometry crossing the seam, it stops it moving away from the seam too. Add a sphere or any other sub-object close to the mirror plane while clipping is enabled, try to drag it outward, and Blender simply refuses. The object pins itself to the centre line as if magnetised.
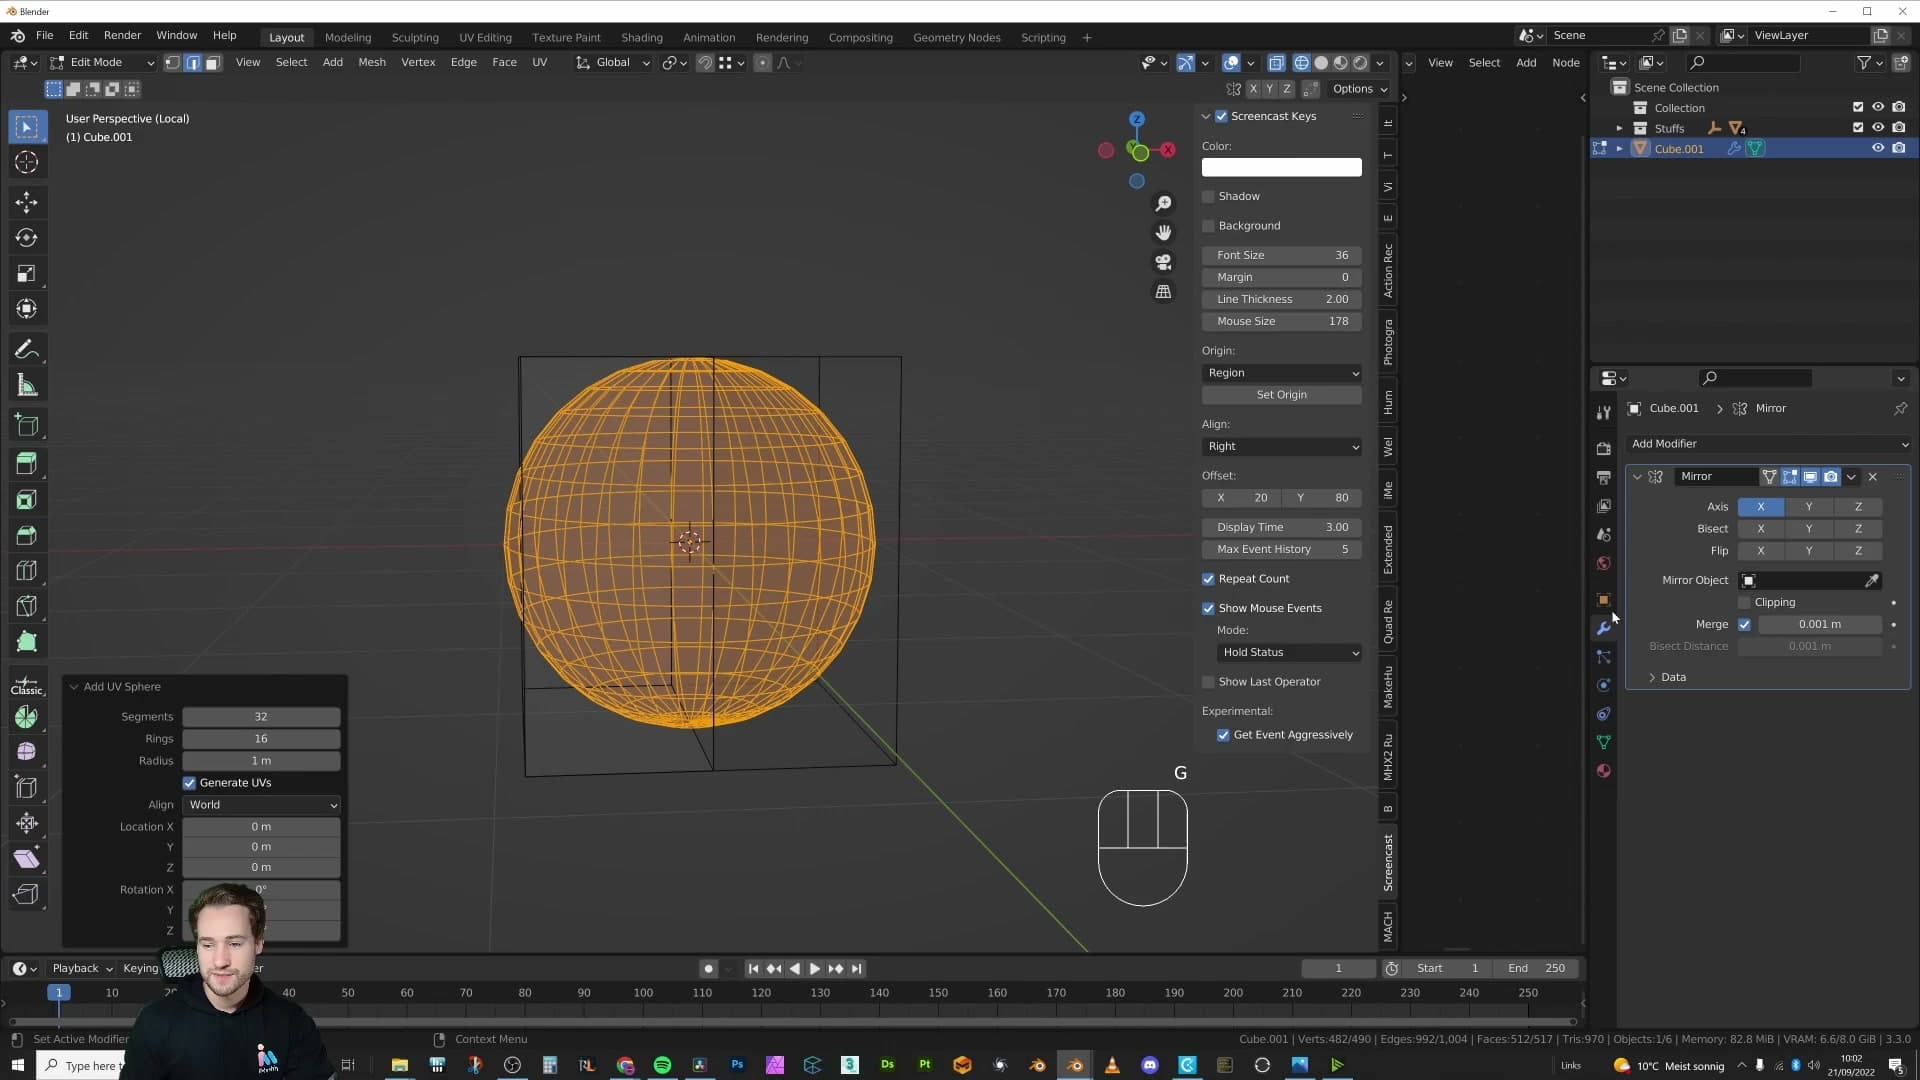
The fix is a quick toggle. Switch clipping off, move the sphere to where you actually want it, then turn clipping back on so the rest of your symmetrical modelling stays welded. I'll admit this is the trap I fall into most often when working with clipping.
Merge threshold: joining without destroying detail
The Merge option fuses vertices that cross the mirror plane within a threshold distance. Useful, but turn it up too high and Blender will start collapsing nearby geometry you wanted to keep. My rule of thumb: leave it around 0.0001 so the merge only catches the seam itself, or use clipping for a more deliberate weld.
What the merge slider actually does
Underneath the axis toggles sits the Merge option, with a threshold value next to it. When merge is enabled, any vertex on the original half that sits within the threshold distance of its mirrored counterpart gets fused into a single vertex along the seam. That is what stops you ending up with two coincident vertices everywhere your mesh crosses the mirror plane.
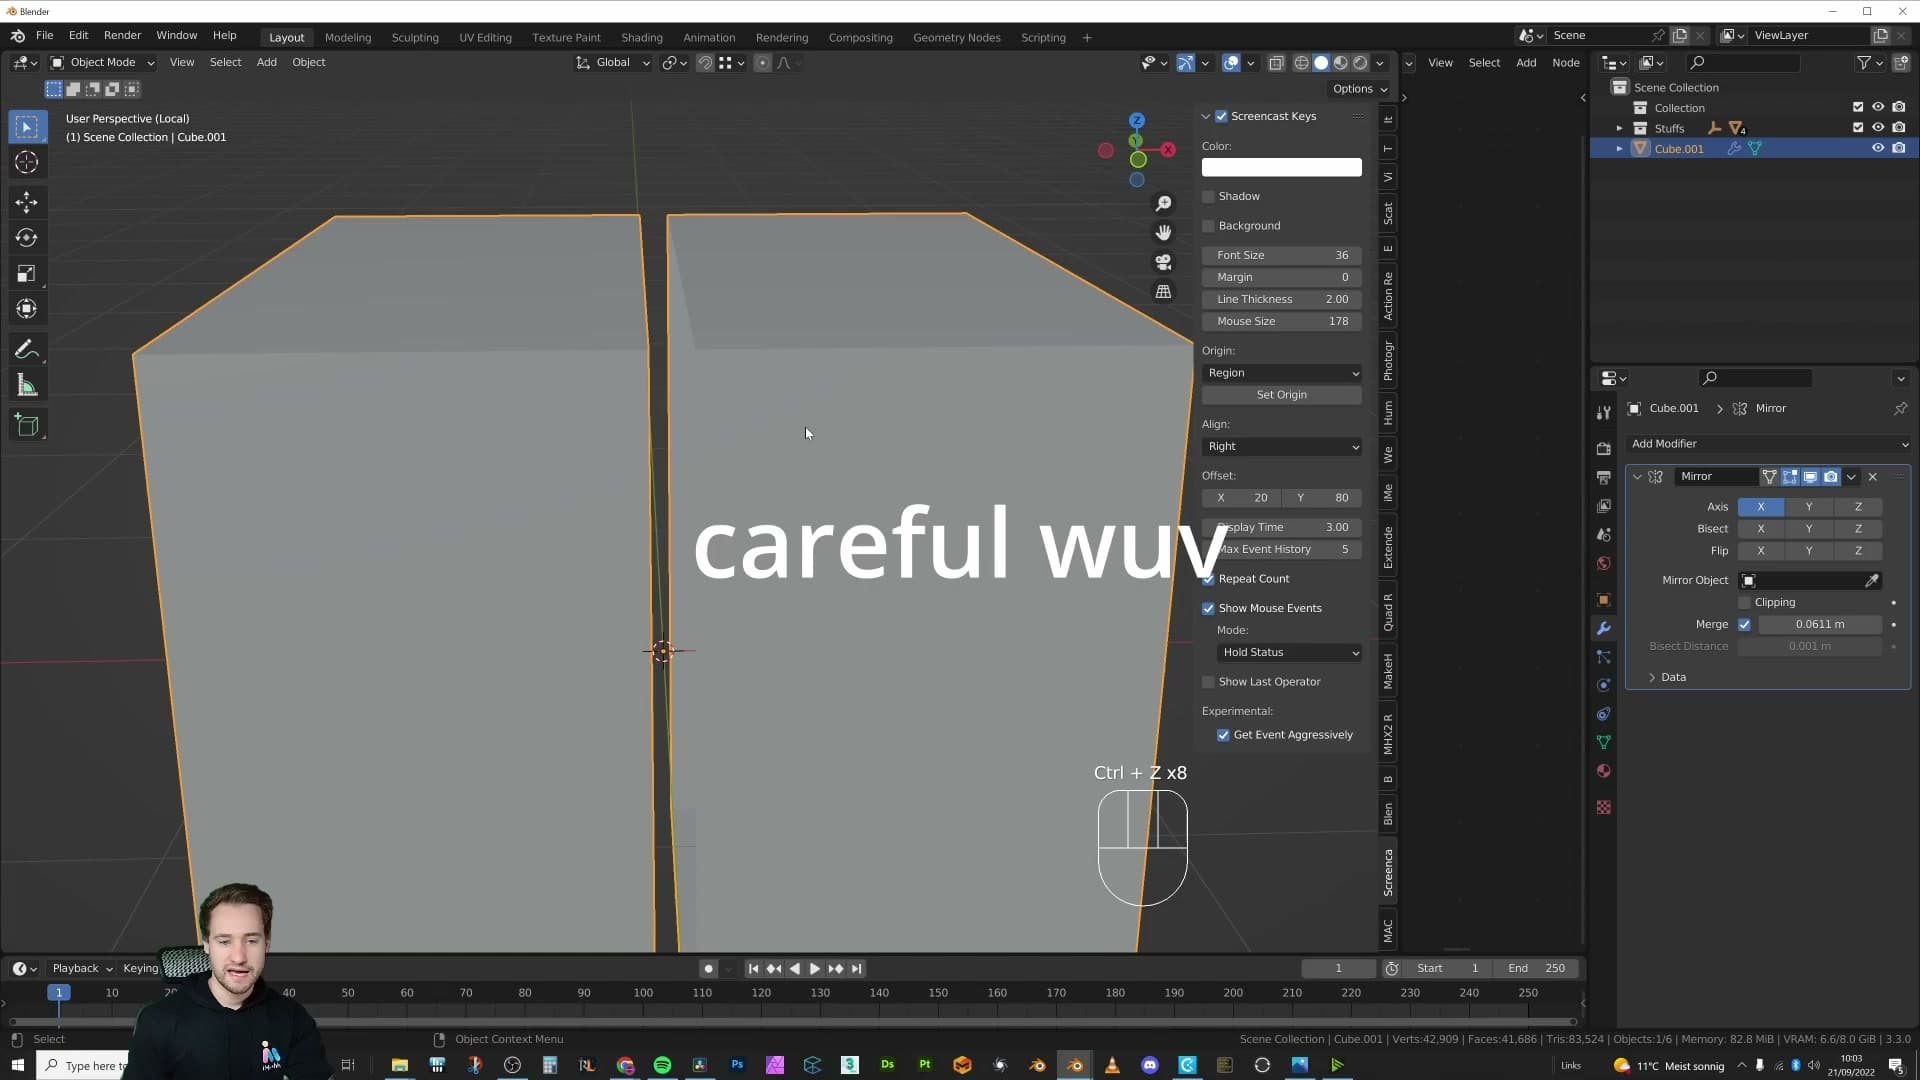
You can watch this happen in real time. Drag a vertex on the original half closer to the mirror axis and, once it crosses inside the threshold distance, it snaps together with its reflection. Push the threshold higher and the merge catches vertices from further away; lower it and only the points sitting right on the seam are welded. Apply the modifier and those welded vertices are baked into a single shared edge loop down the centre.
Why a low threshold (around 0.0001) is safest
The catch is that the threshold does not know which vertices you wanted to keep separate. If you push it too high and you happen to have geometry sitting close to the mirror plane (a thin lip, a tight bevel, a detail just inside the seam), those vertices fall inside the threshold too and get collapsed into the merge. Apply the modifier at that point and the detail is gone for good.
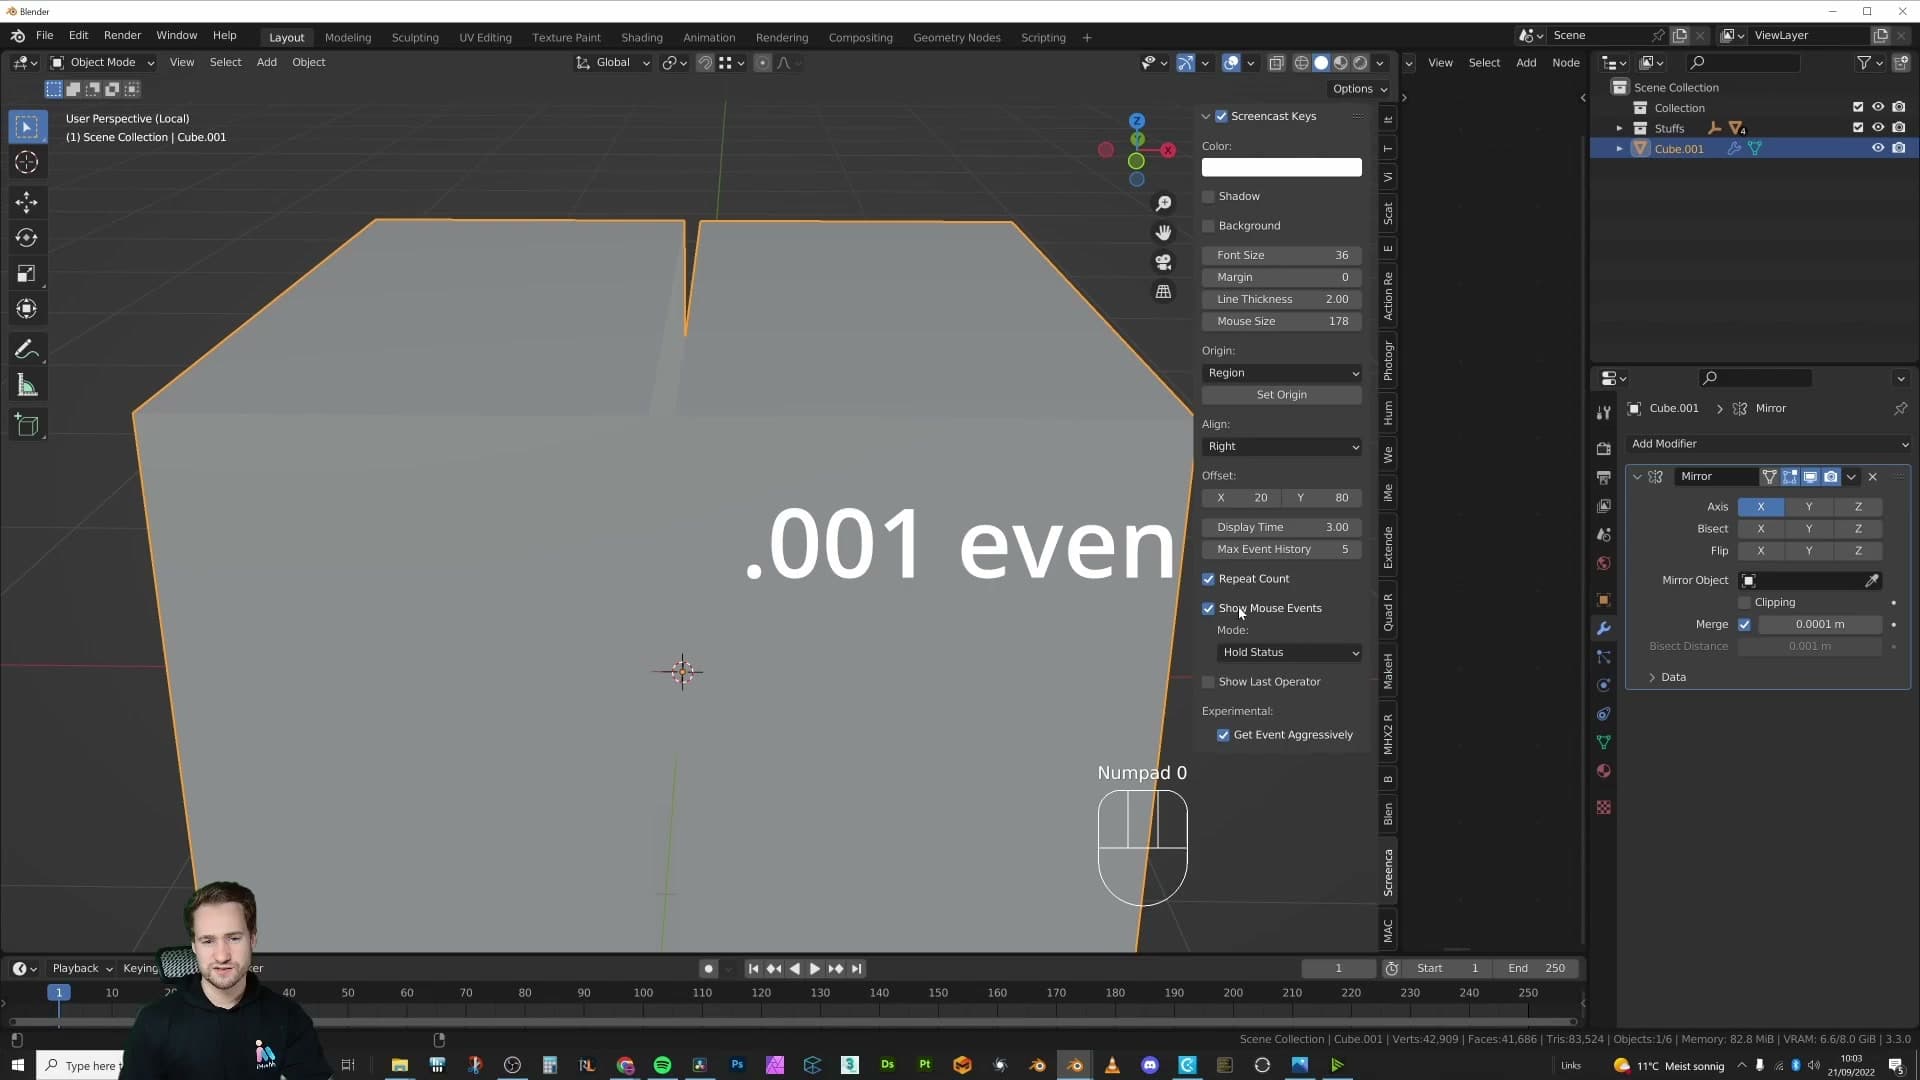
My rule of thumb is to leave the value very low. Around 0.0001 is usually fine: small enough that it only merges right at the very last second, when a vertex is essentially already on the seam, but still wide enough to clean up the join. If you want a more deliberate weld instead of a distance-based one, turn on Clipping. That locks vertices to the mirror plane as you drag them in, so the only points that merge are the ones you consciously snapped to the seam.
Either way, keep the threshold conservative. It is much easier to nudge a stray vertex onto the seam by hand than it is to rebuild detail that the merge silently ate.
Mirror object: pivoting from somewhere else entirely
Instead of using the mesh's own origin, you can point the modifier at any other object (usually an empty, because it adds no geometry and doesn't render). Move or rotate the empty and the mirror follows. Rotating an empty by 45° turns the mirror into a diagonal one, which sets up the geometric tricks in the next modules.
Adding an empty and assigning it as the mirror object
By default the Mirror modifier pivots on the mesh's own origin point, the yellow dot you've been chasing around in the previous module. The Mirror Object field lets you point the modifier at any other object in the scene and pivot from there instead. The mesh itself stays where it is; only the reflection reference changes.
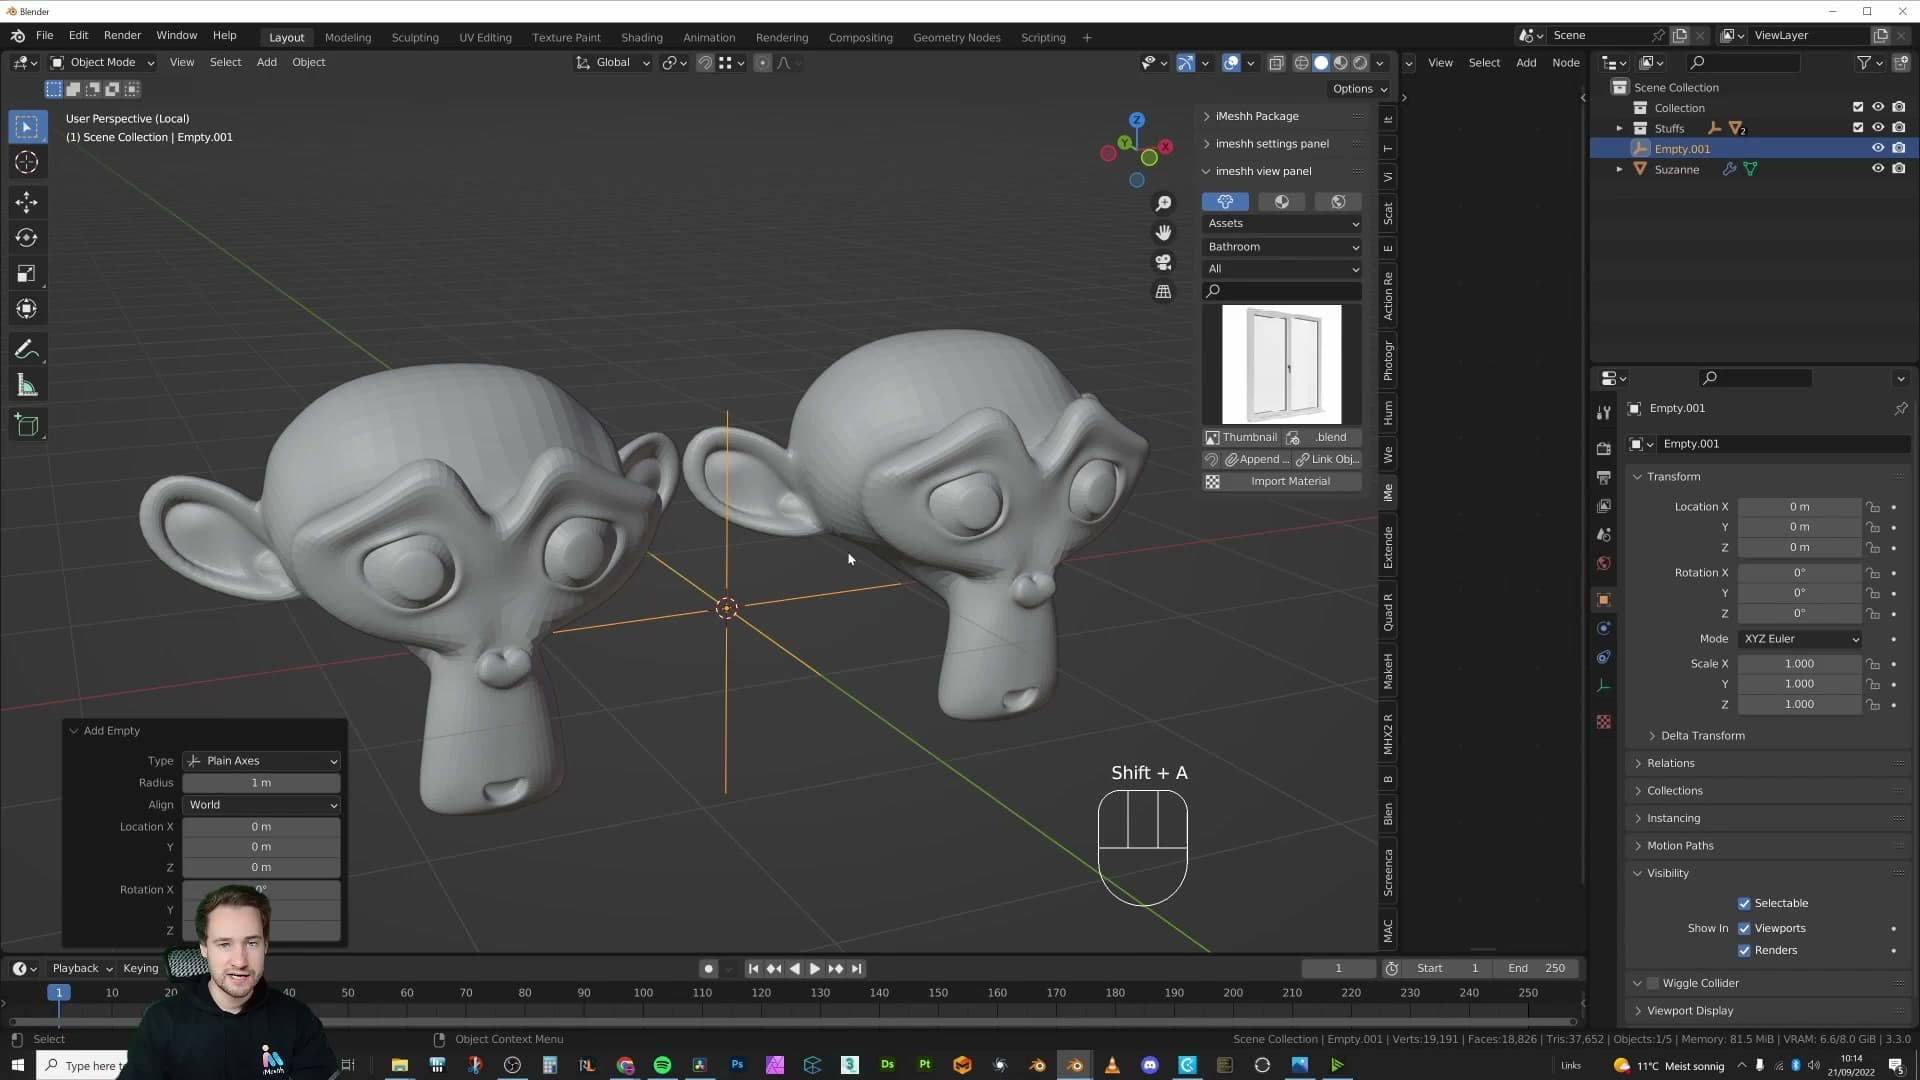
Press Shift+A and add an empty. Any object can sit in this slot, but an empty is the sensible choice: it adds no geometry to the scene and it doesn't render, so it has zero side effects on your final image. With the mesh still selected, open the Mirror modifier, click the Mirror Object picker, and choose the empty from the list.
From this point on, the mirrored copy is anchored to the empty rather than to the original mesh's origin. Drag the empty around the viewport and the reflection follows it live. Useful any time the symmetry seam sits somewhere the model's own origin can't reach without disturbing the geometry.
Rotating the empty to mirror at arbitrary angles
The modifier inherits the empty's rotation as well as its position. Rotate the empty by 45° on any axis and the mirror stops reflecting strictly along world X, Y, or Z. It now mirrors along whatever plane the empty is pointing at.
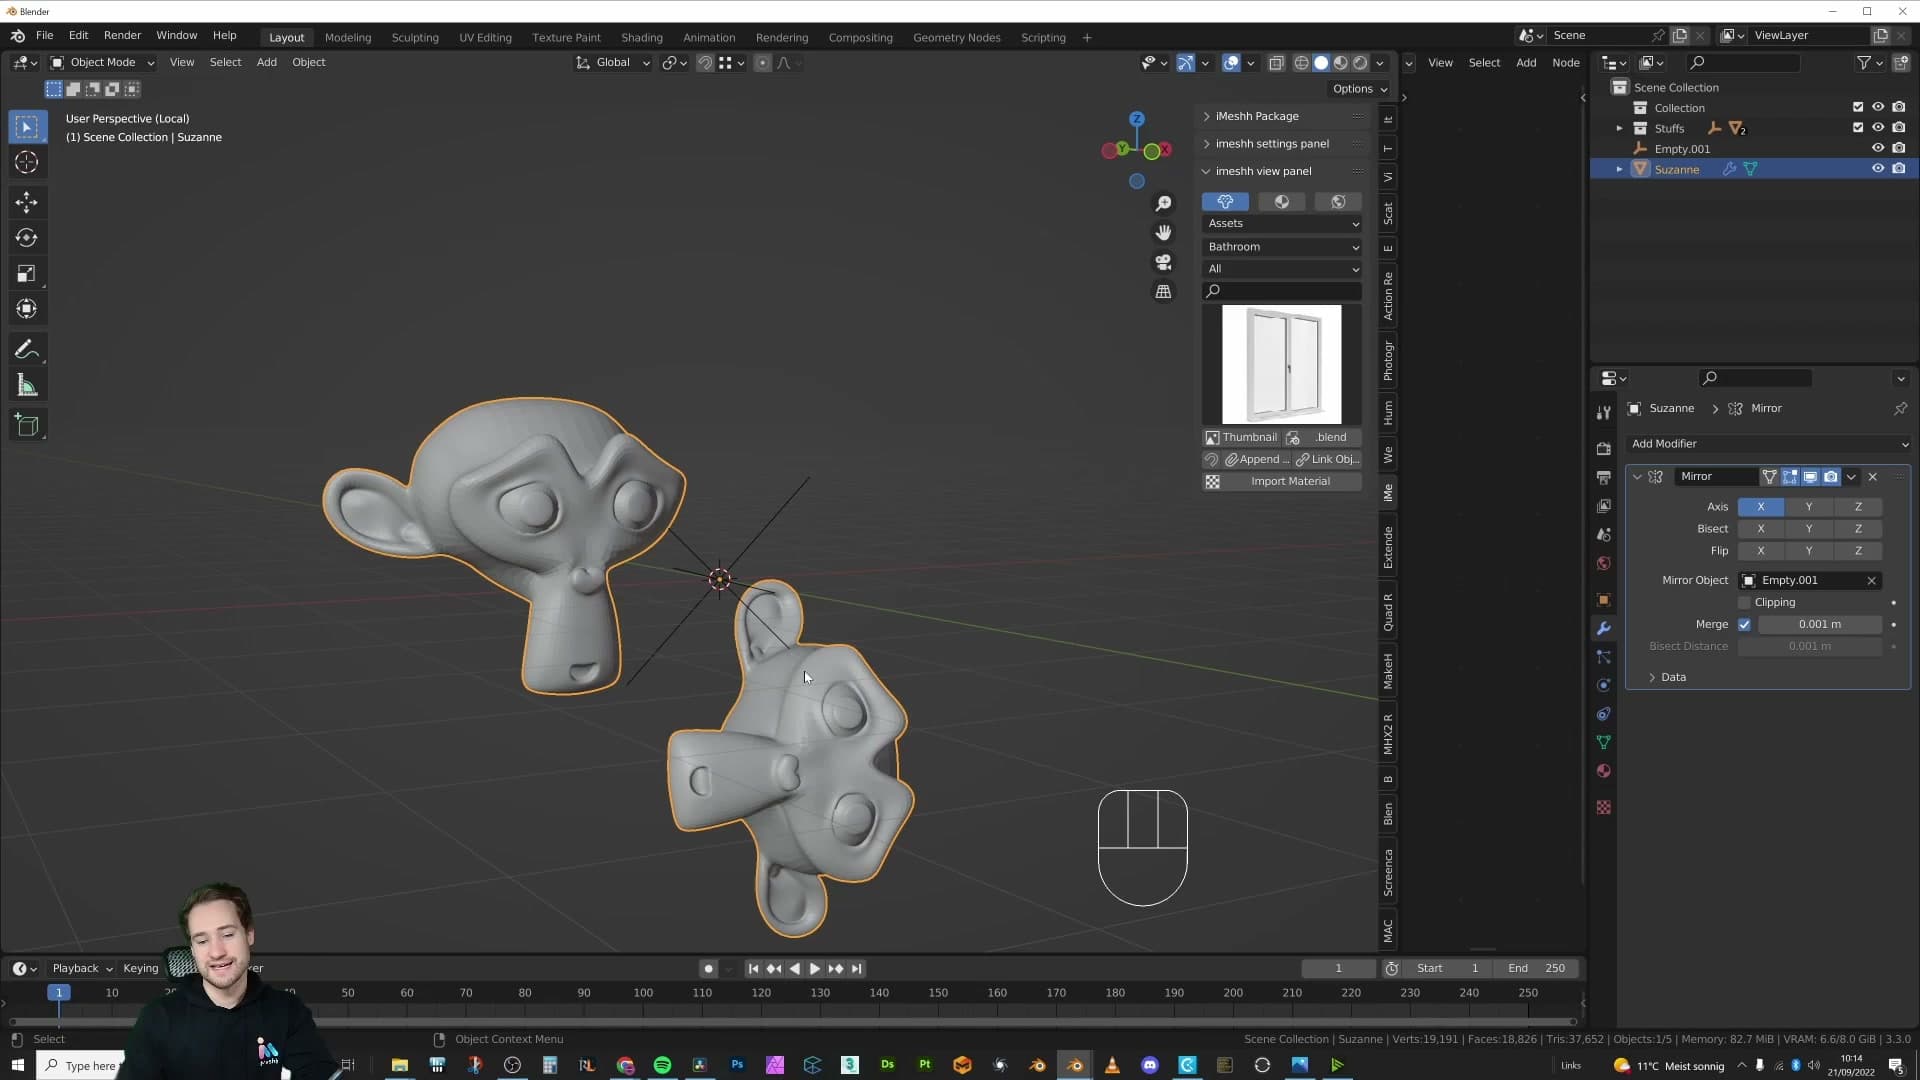
That single behaviour is the foundation for everything in the next two modules. Once a mirror can pivot at an arbitrary angle around an arbitrary point, you can stack a few of them on different empties and let geometry fall into place that would be fiddly to build by hand. That's the pipe trick coming up.
Bisect and Flip: automatic clean cuts
Bisect tells the mirror modifier to slice the mesh on the mirror plane for you, so you don't have to manually loop-cut and delete the overlapping half. Flip controls which side is kept. I demonstrate with a Suzanne head, then show the practical version: applying a mirror with Bisect leaves a perfectly closed half-mesh with no overlapping interior faces.
Enabling Bisect on a Suzanne head
Drop a Suzanne into the scene, apply any pending transforms, and add a mirror modifier. The problem is obvious the moment you try to clean the overlap by hand. Suzanne is dense enough that hunting for the right loop to cut along, then carefully deleting every vertex on one side without missing one, is fiddly. Bisect skips that step entirely.
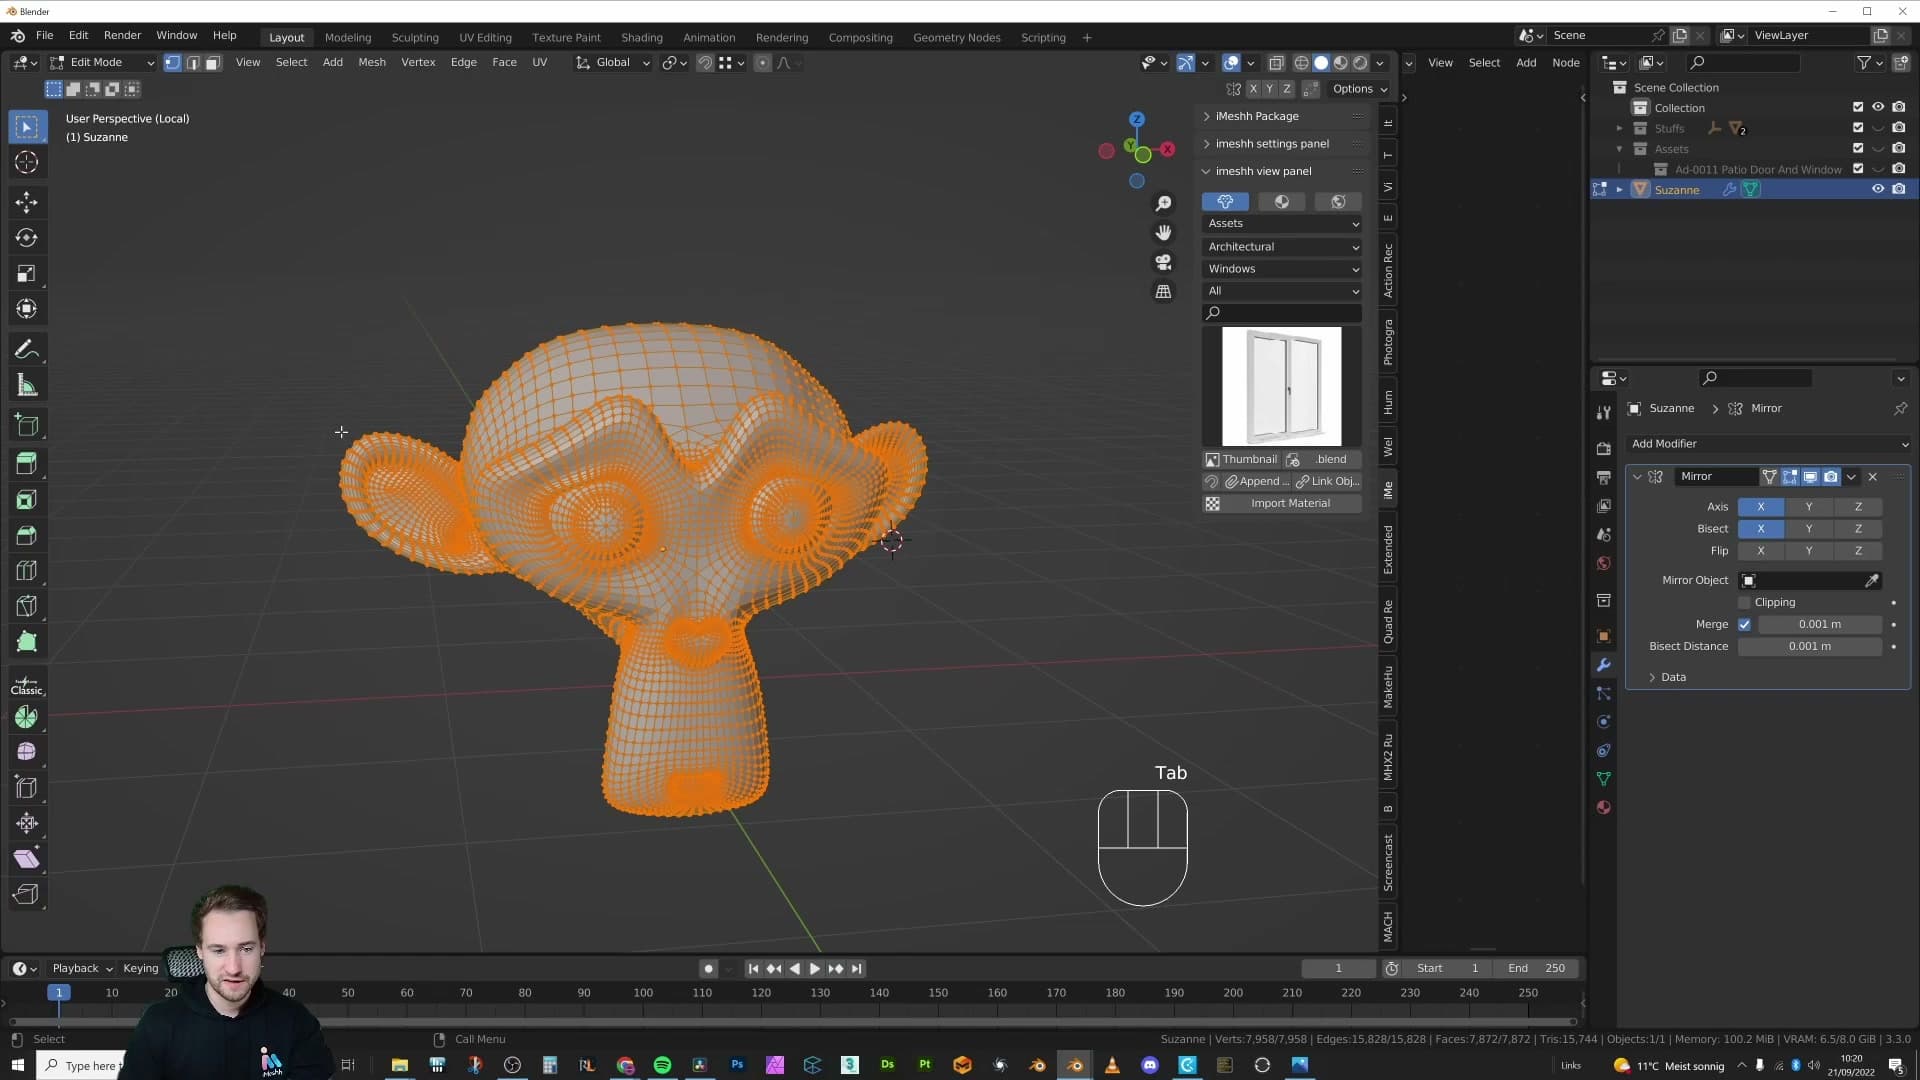
Tick the Bisect checkbox on the X axis row of the modifier. Nothing visibly changes in the viewport (Suzanne still looks like a complete head), but Blender is now slicing the mesh along the mirror plane behind the scenes and only mirroring the half you've kept.
Confirm it's working by tabbing into edit mode and nudging a vertex. Edit anything on the half being mirrored from and both sides update together. Edit anything on the other half and absolutely nothing happens. That geometry is being discarded every frame and rebuilt from the kept side. Slide the whole object sideways and you can briefly see the outline of where the cut-off geometry used to sit, hanging empty in space where the bisect plane sliced it away.
Using Flip to choose which half survives
Each axis row in the mirror modifier pairs Bisect with its own Flip toggle. Flip swaps which half of the mesh counts as the source. Tick it once and the half Blender was previously throwing away becomes the half being mirrored from.
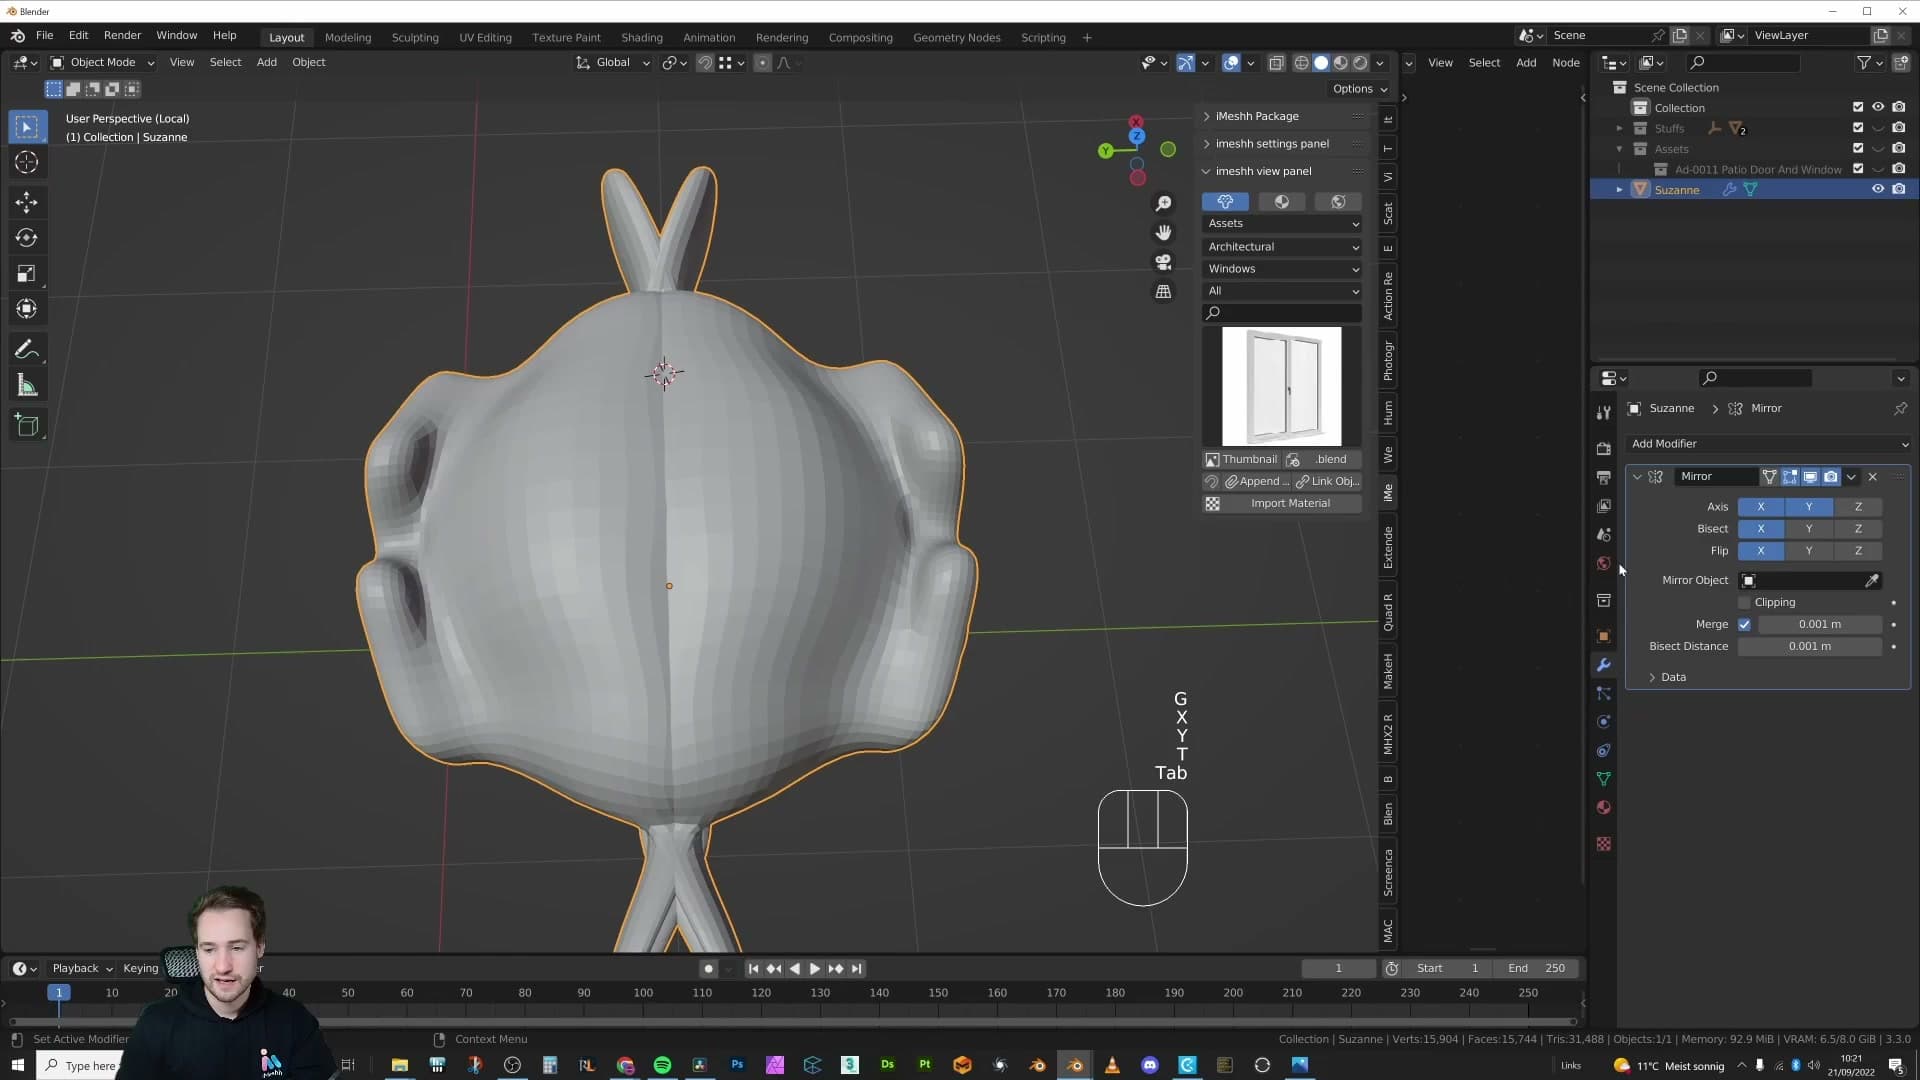
Toggle Flip on the X row and shift the object sideways to see what happened: the outline of the discarded half is now on the opposite side. Whichever half has the detail you actually want to keep, that's the side Flip needs to point at. Toggle it back and the original half returns as the source.
The same pairing applies on every other axis. Enable bisect on the Y row and the modifier slices on Y as well, handy when you want symmetry across two planes at once. Skip bisect and apply the modifier blind, though, and you'll be left with a thick layer of overlapping interior faces sitting along the seam, exactly the mess you were trying to avoid.
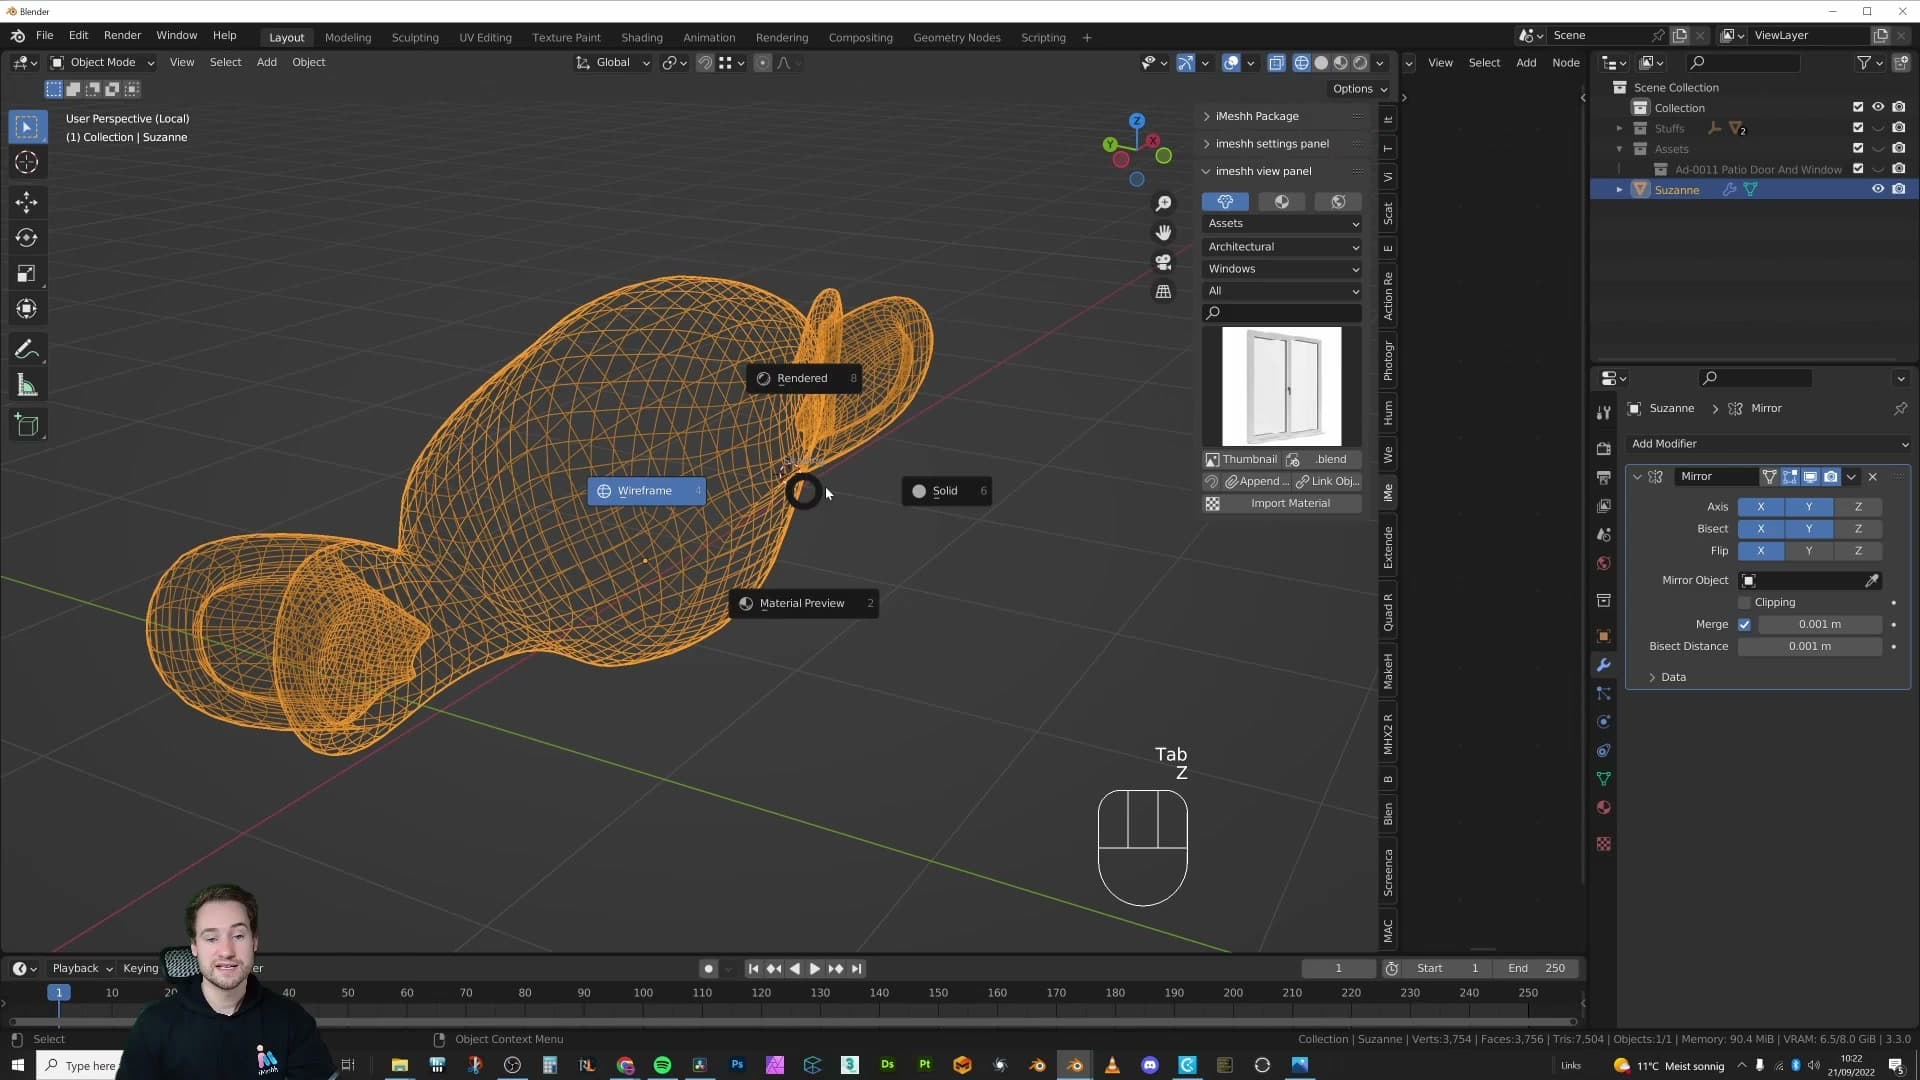
With bisect ticked on the right axis row and flip set so the half you care about survives, applying the modifier leaves a perfectly closed half-mesh. No double geometry hidden inside, no manual cleanup required. It's a clean cut every time.
Real-world example: turning a window into a single door
A common archviz problem: a client sends a plan, you have an asset that's close but wrong. I append a window model, isolate just the door half I need, and use an empty as the mirror object to position the mirror plane exactly where the door's existing edge is. Apply, delete the leftover faces, and you've reshaped an asset into a brand-new one in seconds instead of manually deleting and re-bridging geometry.
The 'I have a window but I need a door' problem
Here's a scenario every archviz artist will recognise. You're working on a scene and a client sends through a plan with a specific window or door. You dig through your library, find a model that's almost what you need, and append it in. But it's the wrong configuration. In this example, the appended asset is a full window unit, but the only part I actually want is the single door section on one side. The matching half on the other side has to go.
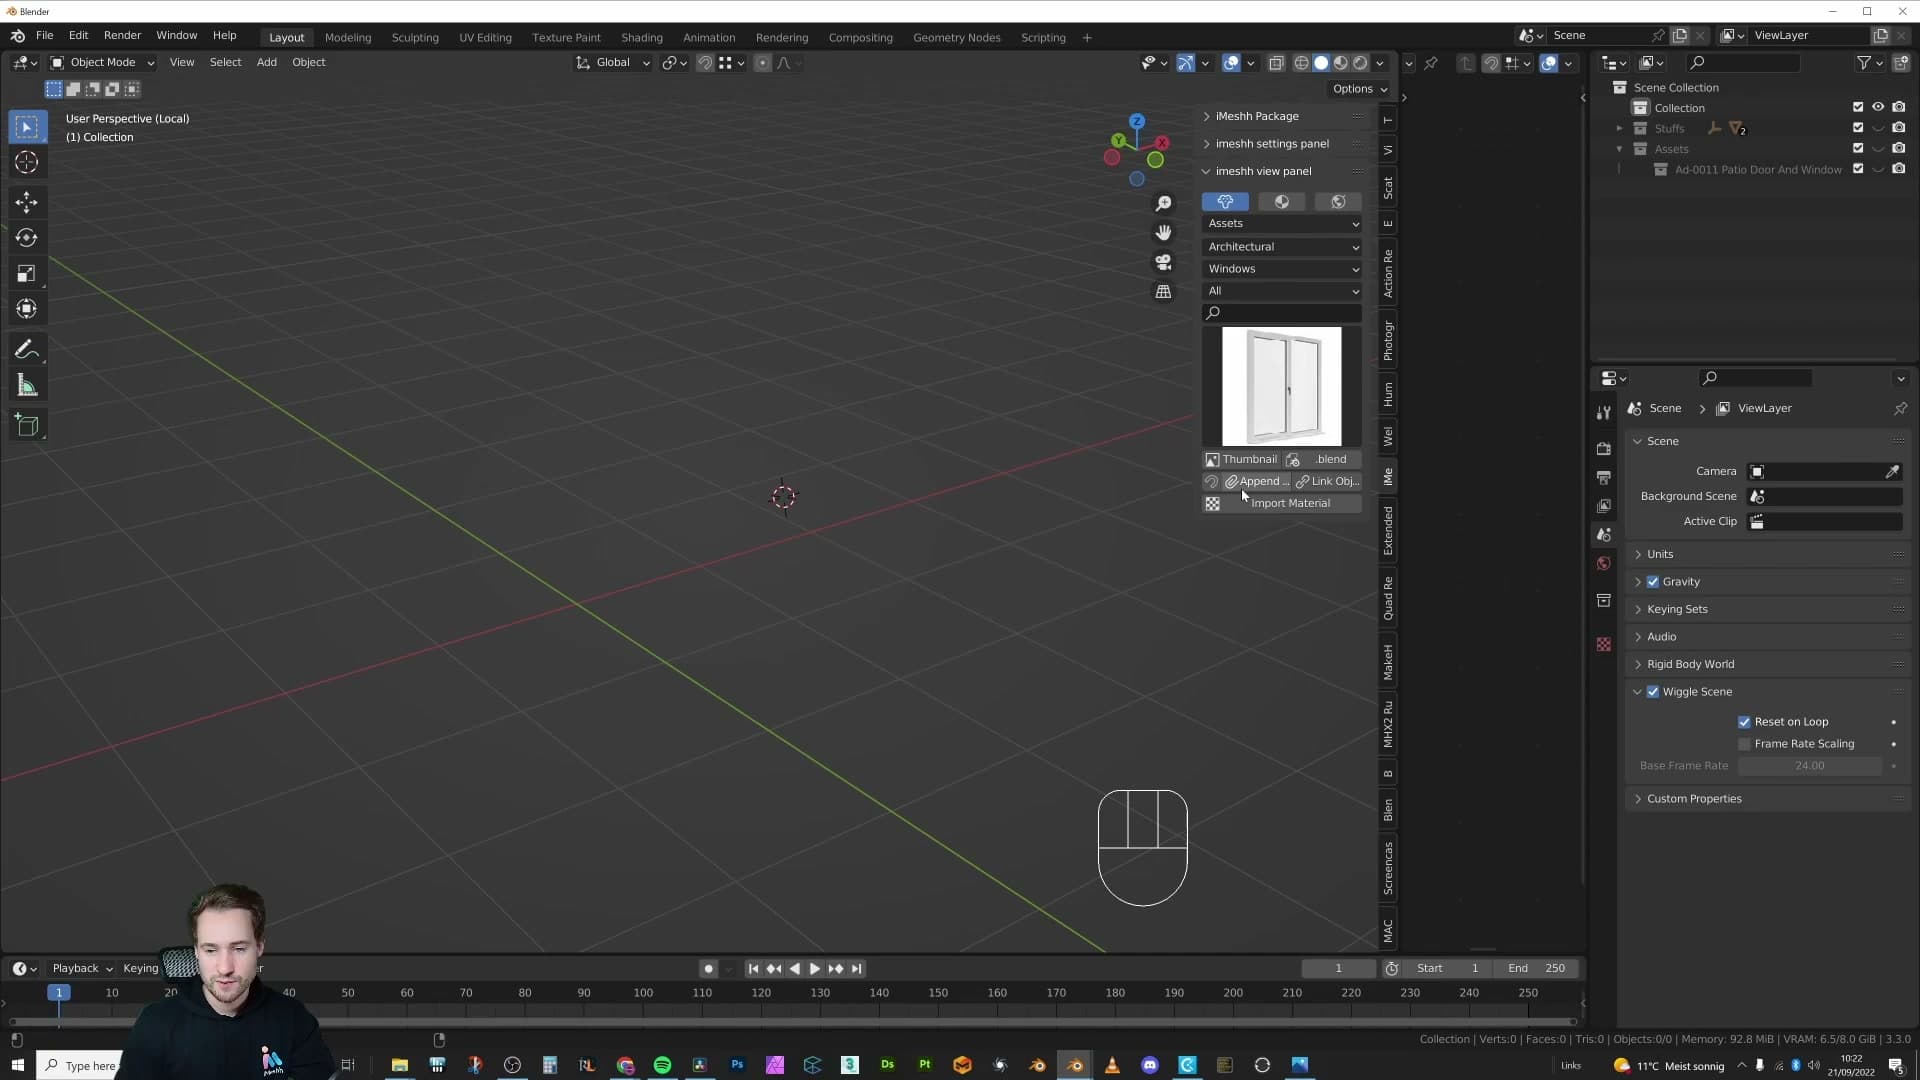
This is exactly the kind of close-but-not-quite problem the mirror modifier was built to solve once you stop thinking of it purely as a symmetry tool and start thinking of it as a way to reshape existing geometry around a chosen pivot.
Why deleting faces manually gets messy fast
The instinctive approach is brute force. You jump into edit mode, select all the faces belonging to the window half you don't want, and start deleting. Then you try to select the leftover faces on the door side and merge them across to close the geometry.
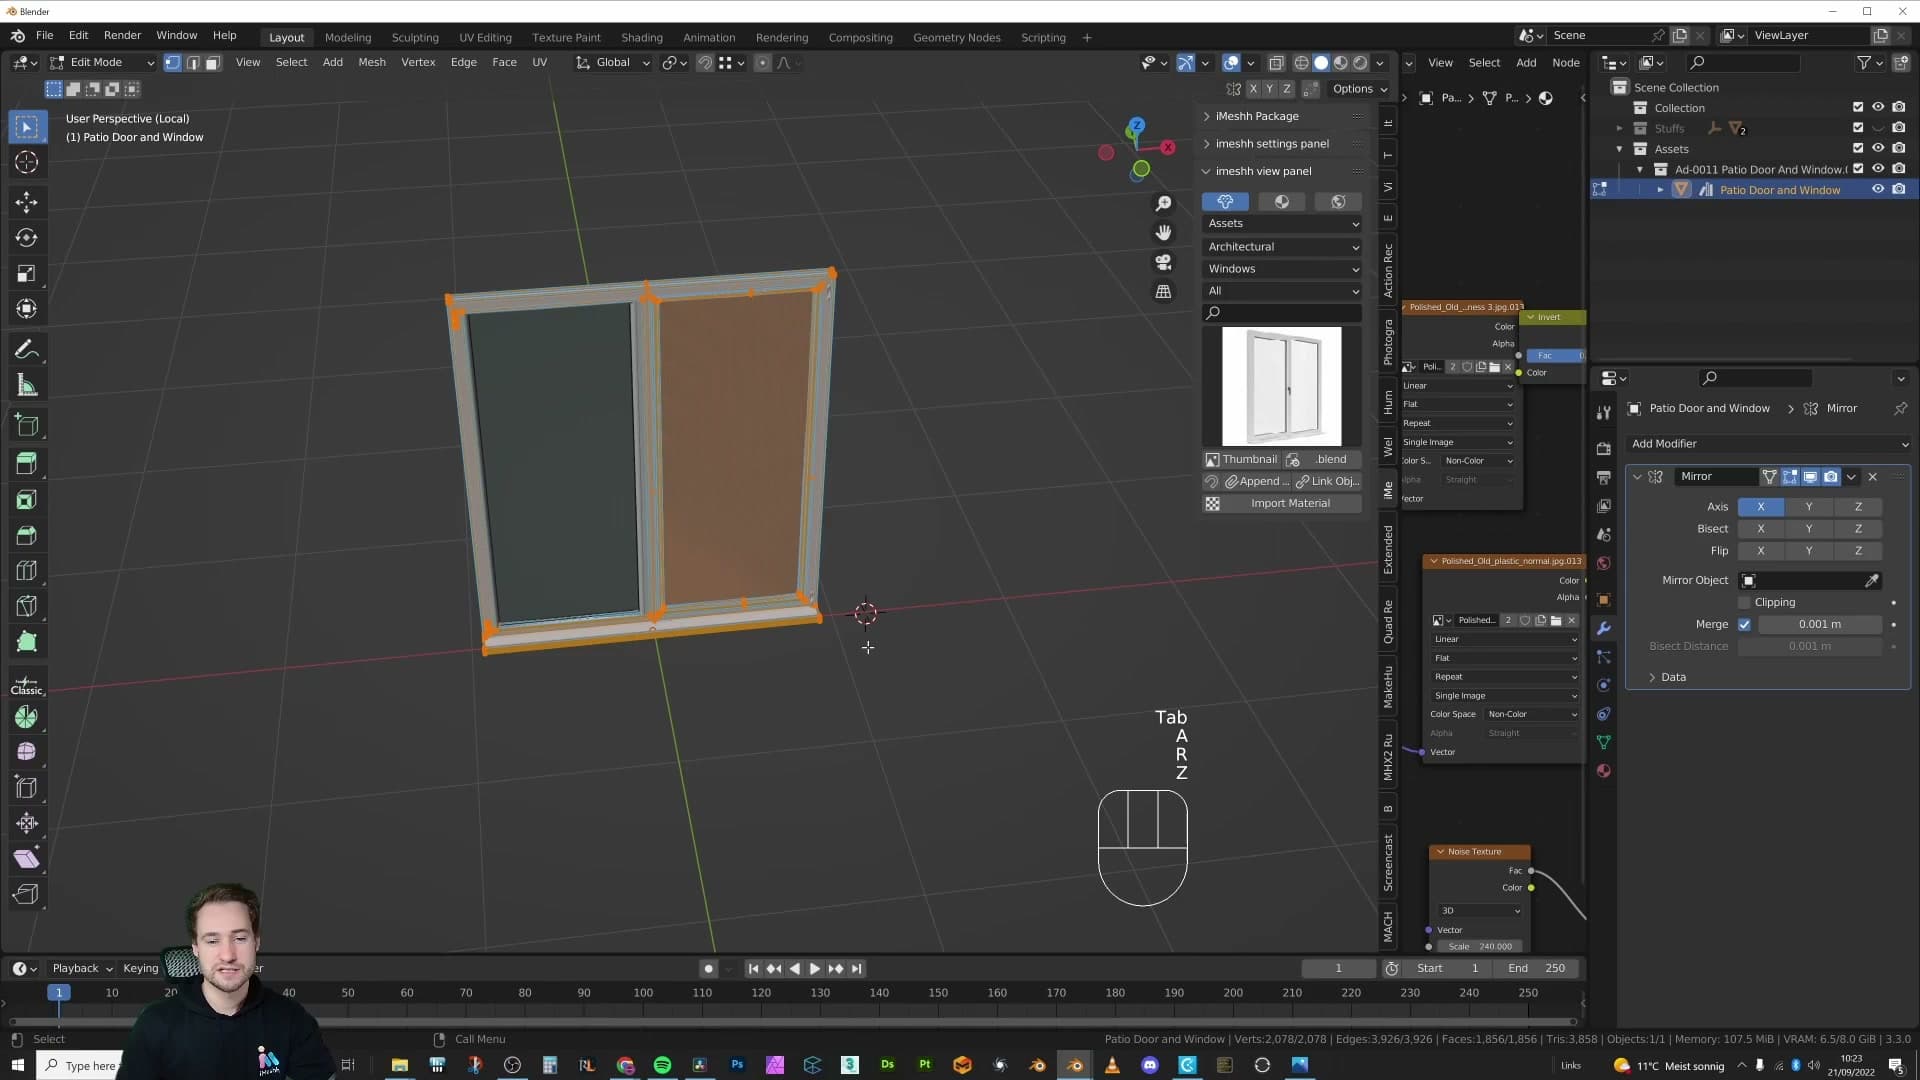
It rarely ends cleanly. You're left with overlapping faces, mismatched vertex counts and a seam that doesn't quite line up. A little bit higgledy piggledy. Even when the result looks acceptable in the viewport, the topology underneath is a mess, and any future modifier work (subdivision, bevel, UV unwrapping) will expose it.
Using an empty + bisect to mirror exactly at the door edge
The mirror modifier handles this in a fraction of the steps. Start by adding a mirror modifier to the appended window. Out of the box, it'll mirror both sides equally around the object's origin, which usually isn't where you want the cut. Enable Bisect on the relevant axis and Blender will slice the mesh along the mirror plane automatically, with no manual face deletion required.
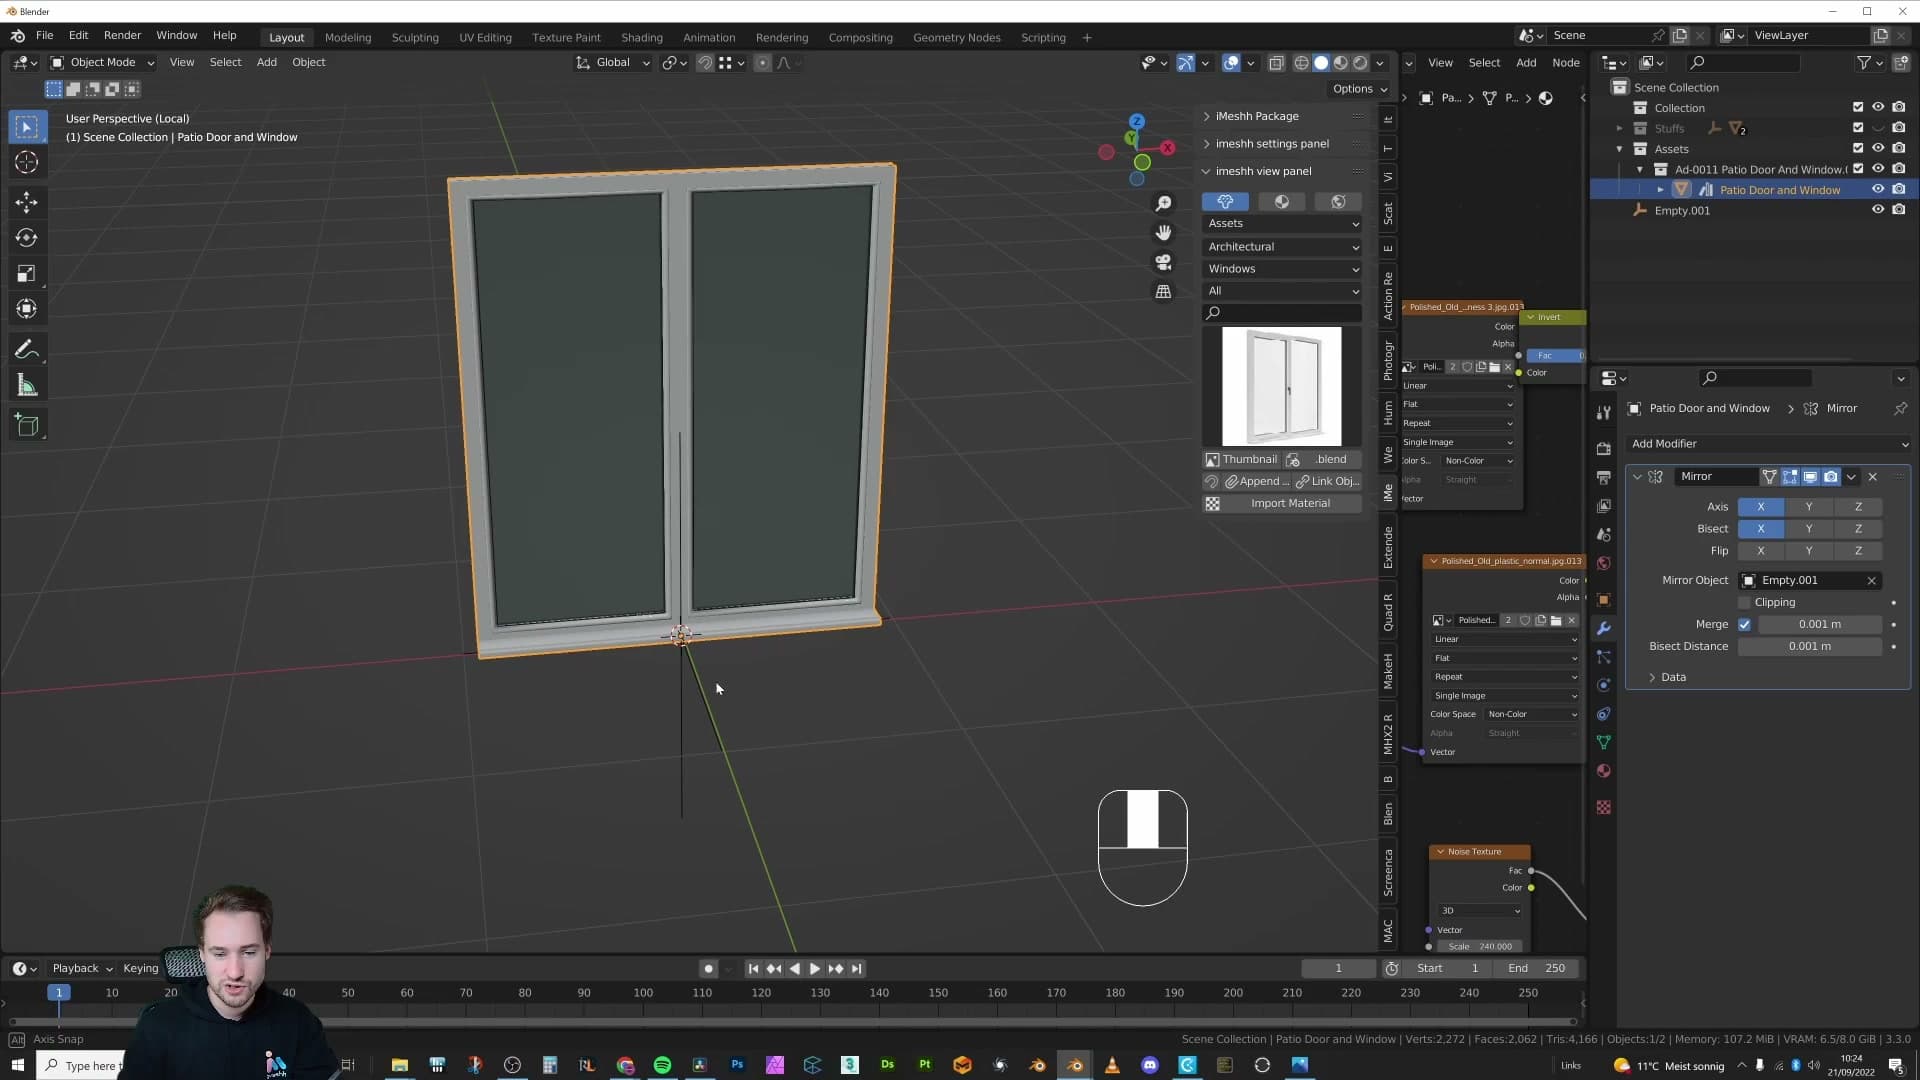
The trick is telling Blender exactly where that mirror plane should sit. Select the existing door edge in edit mode, press Shift+S and choose Cursor to Selected to snap the 3D cursor to that edge. Tab back out, add an empty (which spawns at the cursor), then in the mirror modifier point the Mirror Object field at that empty. The mirror now pivots around the empty's location instead of the object's origin.
If the wrong half ends up being kept, click Flip on the axis row to swap which side gets cut. Nudge the empty along the door edge if you need to fine-tune the seam, then apply the modifier. Delete any leftover faces from the original window half that the bisect didn't catch.
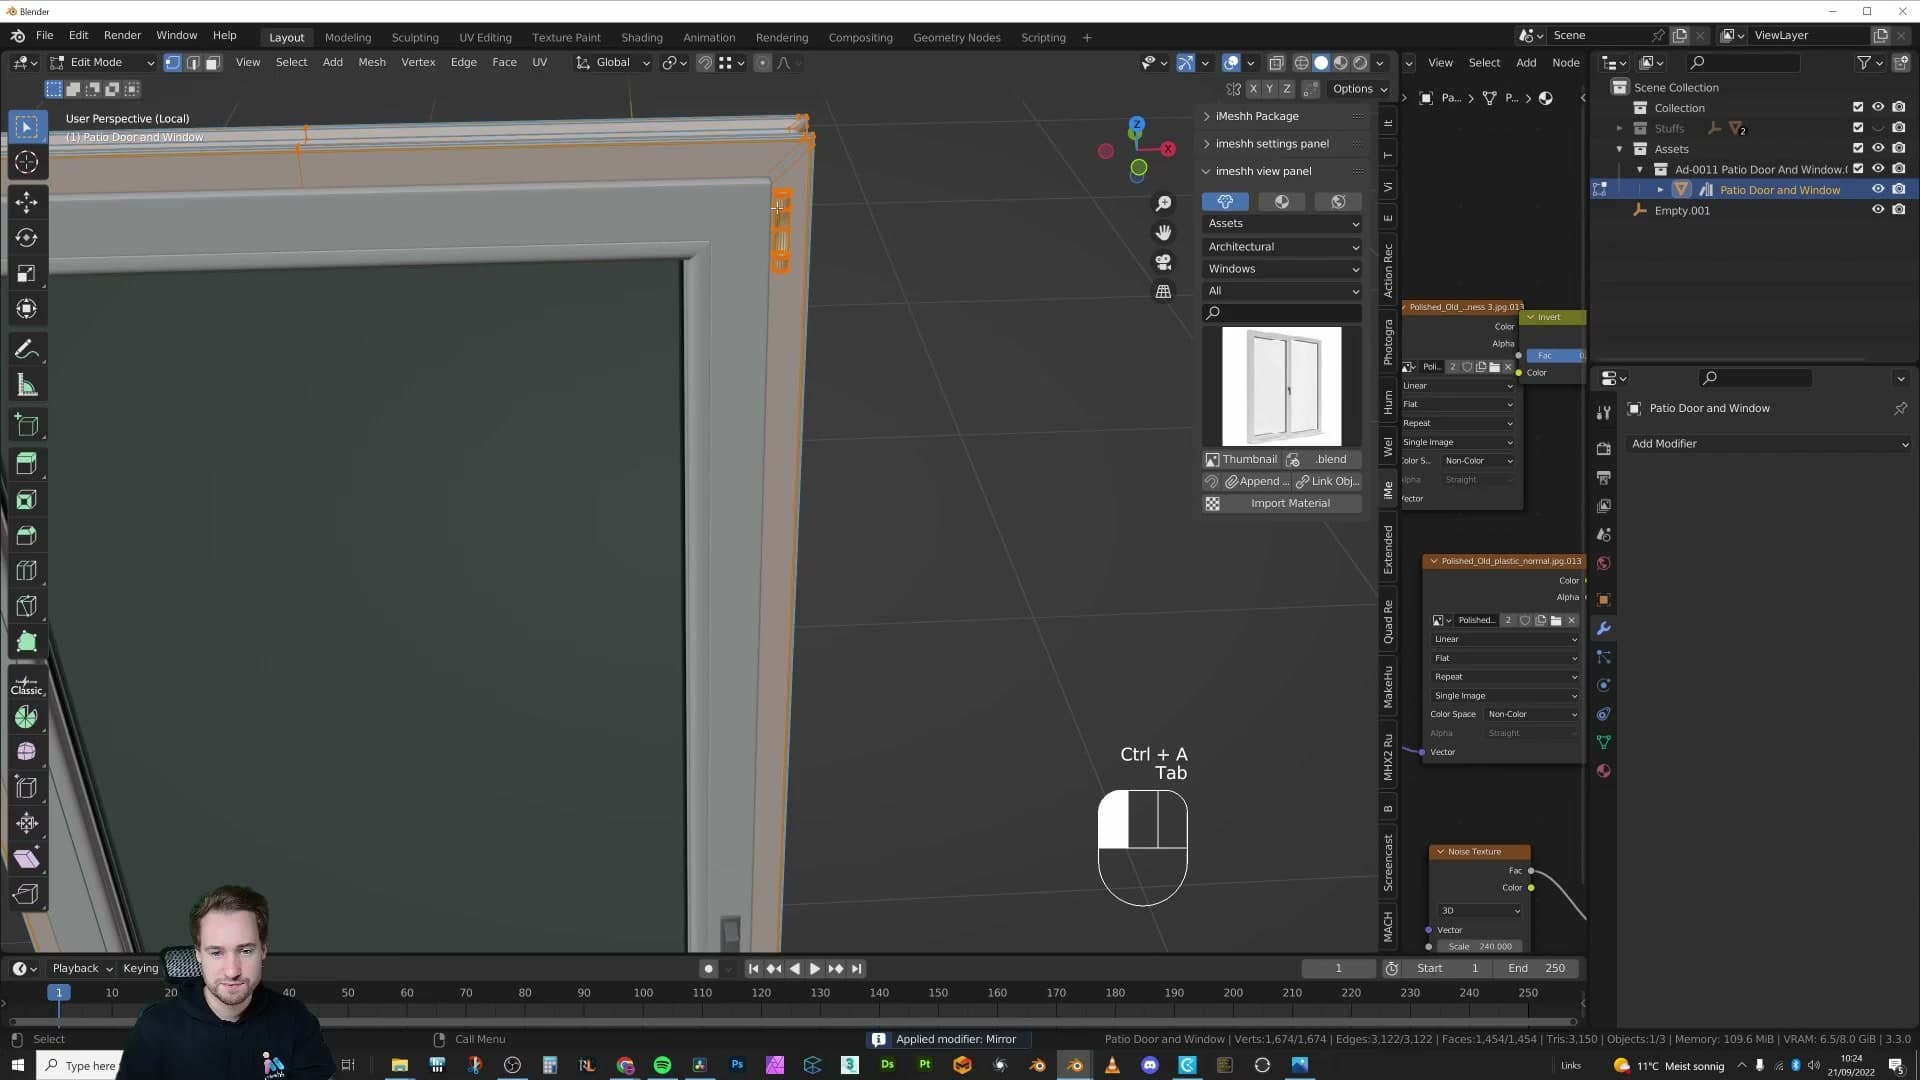
What you're left with is a single clean door, perfectly bisected through the middle, with no overlapping geometry and no merge artefacts. The whole operation takes seconds instead of the several minutes it would take to clean up a manual delete-and-bridge attempt.
Why this trick wins client revisions
This is the kind of workflow I rarely see other archviz artists using, and it's a genuine time-saver on client revisions. Clients send plans with specific window and door configurations all the time. Realistically, you're almost never going to have the exact asset on file, but you'll often have something close, or something that can be composited from a couple of different models.
Treating the mirror modifier as a reshaping tool rather than just a symmetry tool is what makes this possible. Instead of modelling from scratch every time, you can take what's already in your library, slice it where the client needs the cut, and deliver the revision in minutes.
The 30-second joined-pipes trick
How do you make perfectly joined cylinders meet at a corner without seams? I build the canonical pipe junction from a single cylinder using nothing but rotation, the 3D cursor and stacked mirror modifiers. Each mirror is bisected and flipped where needed, and a subdivision-surface modifier rounds it off into a smooth shape that previously felt impossible to model.
Adding a cylinder and the first mirror
After more than a thousand models built for the iMeshh library, the same shape keeps surfacing: two or more cylinders meeting cleanly at a corner, with no visible seam where they join. It looks fiddly, and most people's first instinct is to start with booleans or hand-modelled loops. There's a much faster way, using nothing but rotation, the 3D cursor and a couple of stacked mirror modifiers.

Blender does ship pipe primitives you can drop in from the Add > Mesh menu, which give you pre-built joints for free. That's a fine shortcut, but it doesn't help when you need to understand the shape or modify it later. Modelling it from scratch takes about thirty seconds once you've seen the trick.
Start by deleting the default cube and adding a fresh cylinder. Press S, then Shift+Z to scale on X and Y only. That thins the cylinder without changing its height. Lift it up off the floor so you have room to work, then add a Mirror modifier from the modifier panel.
Tab into edit mode and rotate the cylinder 45° on the Y axis. The mirror is firing on both sides of the origin, which is exactly what you want for the first cut. Apply the modifier, then in object mode rotate the whole thing another 45° so the V sits nice and level, and apply the rotation so the transform is clean for the next step.
Setting the pivot to 3D cursor for a second mirror
Now add a second mirror modifier on top of the first. Tab into edit mode and try to rotate the geometry by 45°. You'll notice the problem immediately. The rotation is no longer happening around the cylinder's centre, because the origin sits where it was when you applied the first mirror, not where the junction now lives.
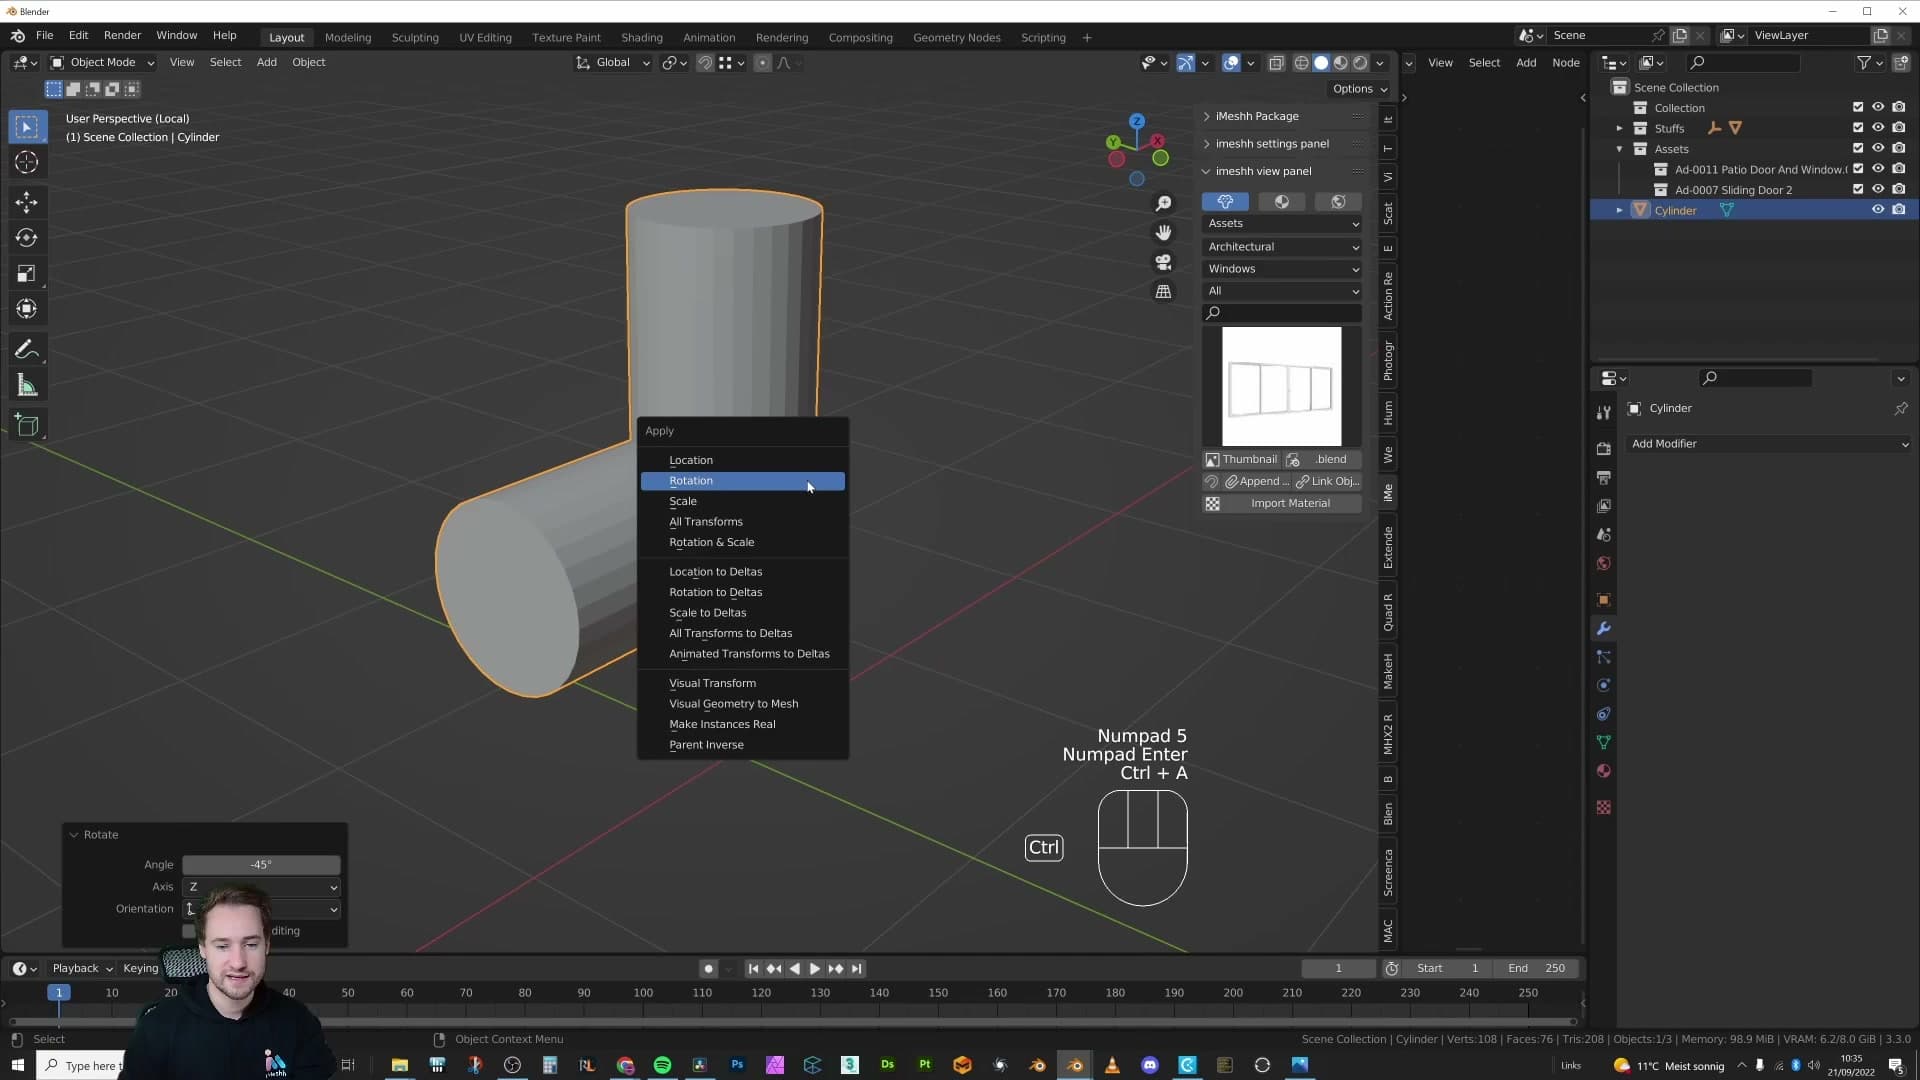
The fix is to drive the pivot from the 3D cursor instead. Tab out into object mode, snap the cursor to the geometry with Shift+S > Cursor to Selected, and switch the header pivot dropdown from Median Point to 3D Cursor. Tab back into edit mode and the rotation will now pivot around the exact point you wanted.
Bisect, flip, and adding subdivision surface
With the pivot now sitting on the junction, rotate the edit-mode geometry 45° and apply. You'll see the second mirror produces some overlap where the new arm crashes into the existing one. That's exactly the kind of mess the bisect and flip toggles are built to clean up.
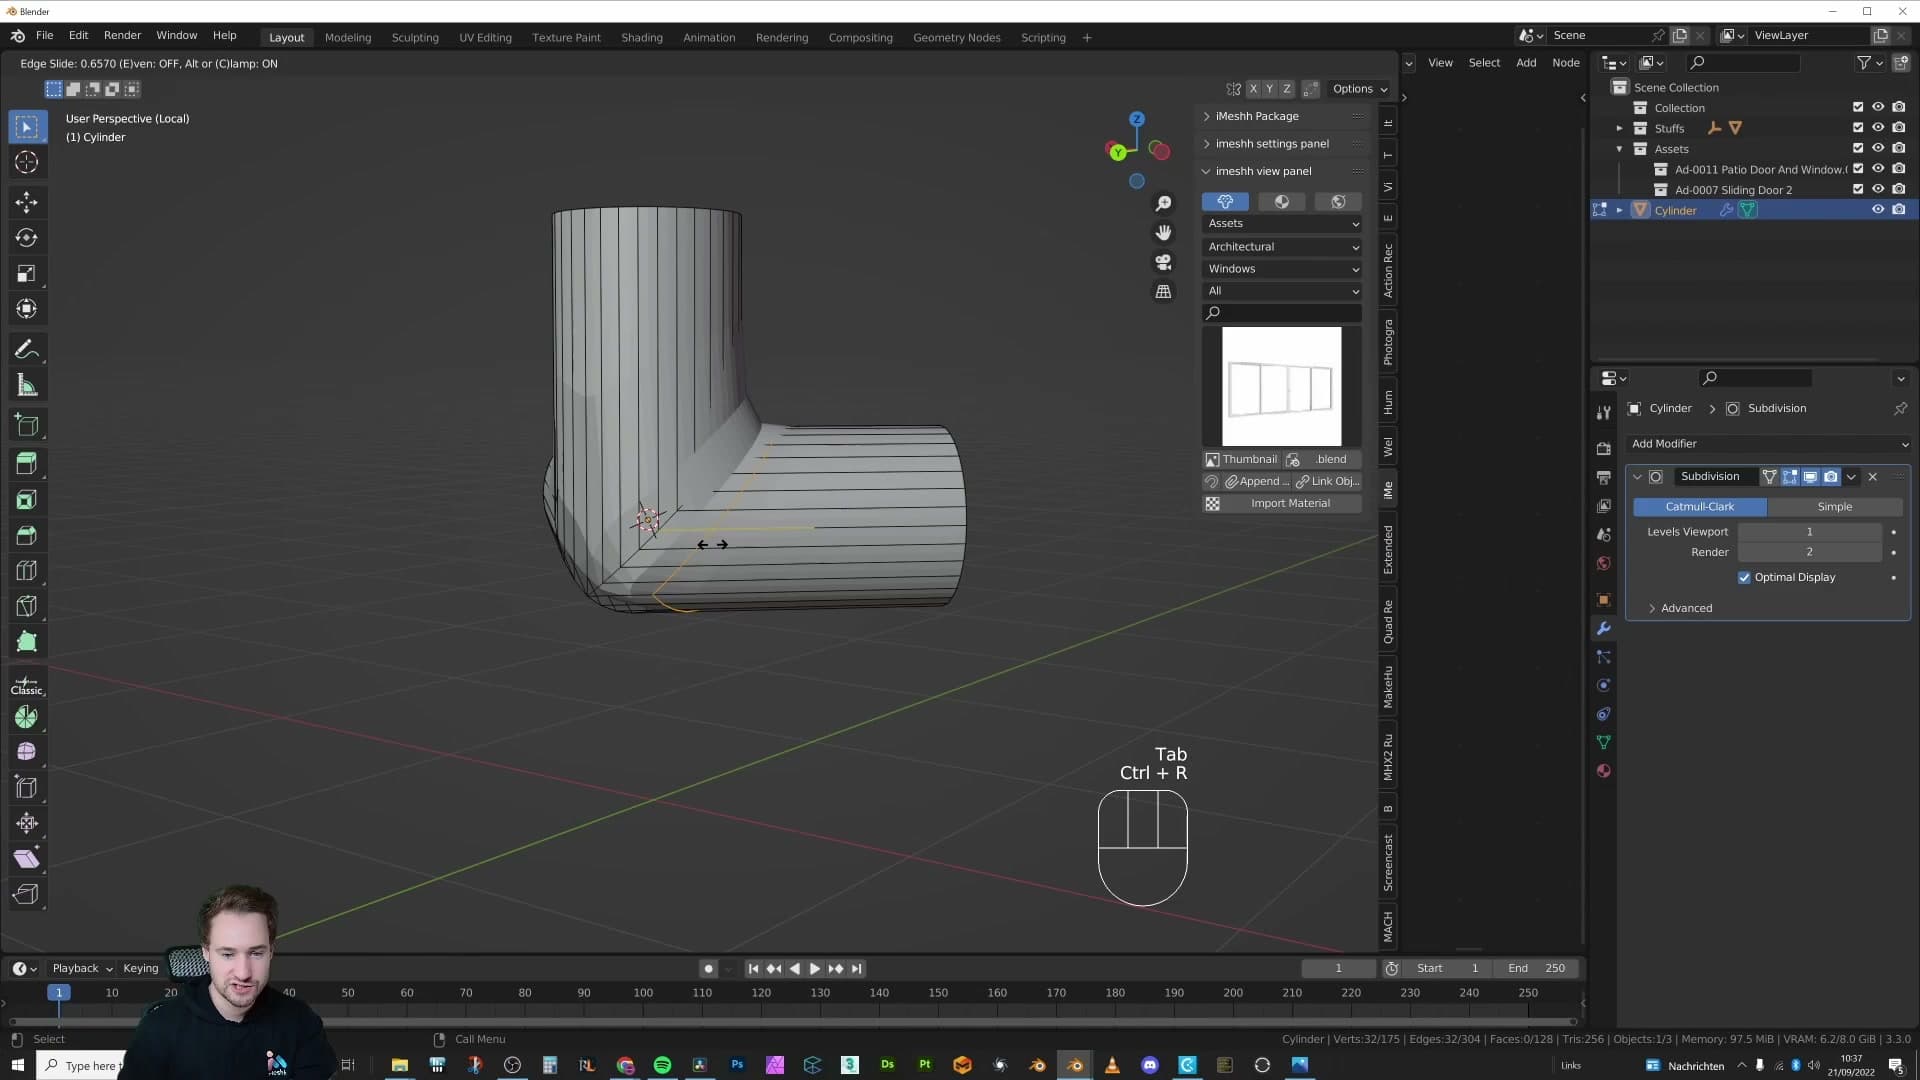
On the new mirror modifier, enable Bisect on the active axis and toggle Flip so the modifier keeps the half you actually want. The overlap disappears and you're left with a clean diagonal junction where the cylinders meet.
Apply that mirror too, then in edit mode delete the now-buried interior faces. They're hidden inside the join and would only cause shading artefacts later. Hit Ctrl+1 to drop a Subdivision Surface modifier on top, and tidy the edge loops around the seam so they pull the surface tight rather than ballooning it out.
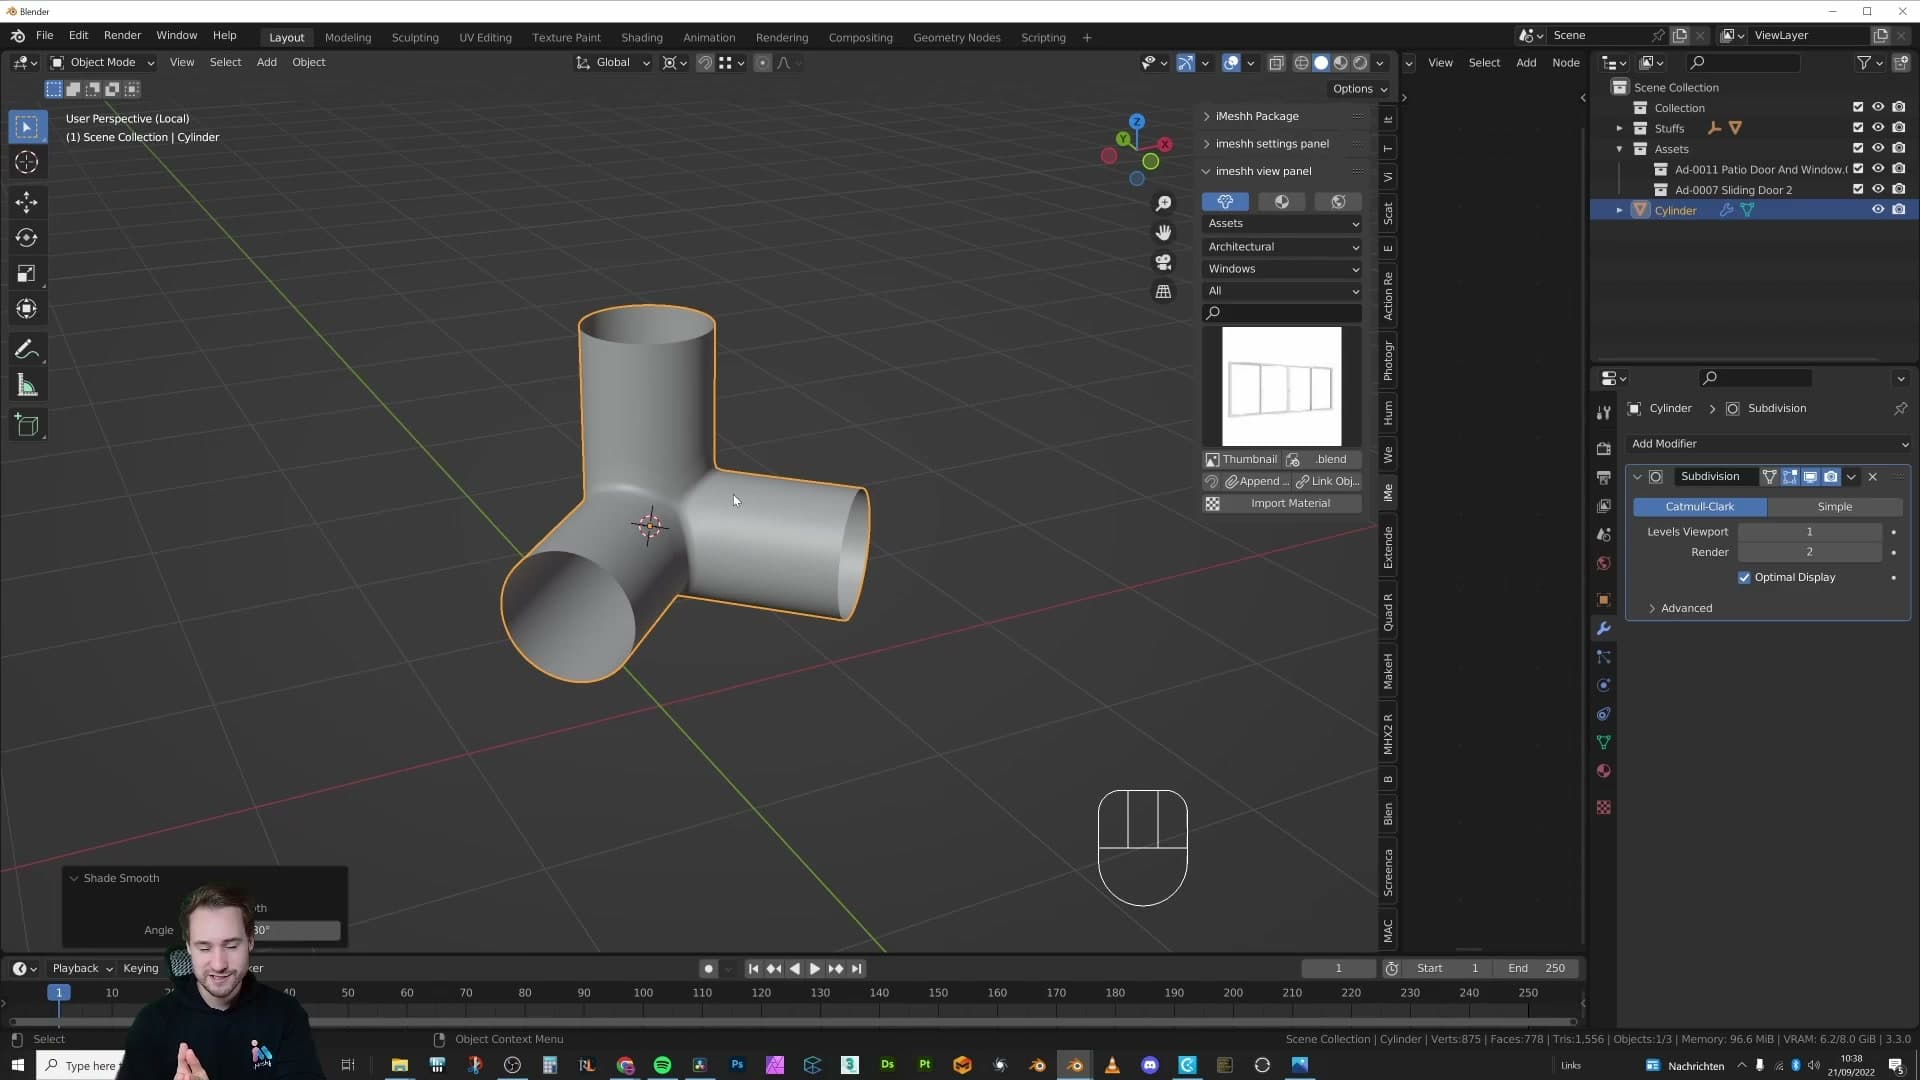
What you're left with is a smooth, watertight pipe junction that took maybe thirty seconds end to end. When I first hit this problem I stared at it for ages wondering how anyone modelled it. The answer was the mirror modifier the whole time. Stack two or three more mirrors on different axes with different empties as mirror objects, and you can build sprawling geometric pipe sculptures from a single starting cylinder.
Stacking mirrors to build a geometric pipe sculpture
Once one joint works, you can keep stacking mirror modifiers (different axes, different empties as pivots, clipping or bisect each time) until the cylinder explodes into the endless geometric pipe maze from the thumbnail. The recipe is intentionally repeatable: rotate, mirror, clip, apply, mirror again, change axis, repeat.
Mirror, clipping, apply, mirror again: building outward
Once you have one mirrored joint working, the same recipe can be repeated indefinitely on different axes to grow the shape outward. Start by rotating the existing piece 45° and apply the rotation so the next mirror has a clean origin to work from.
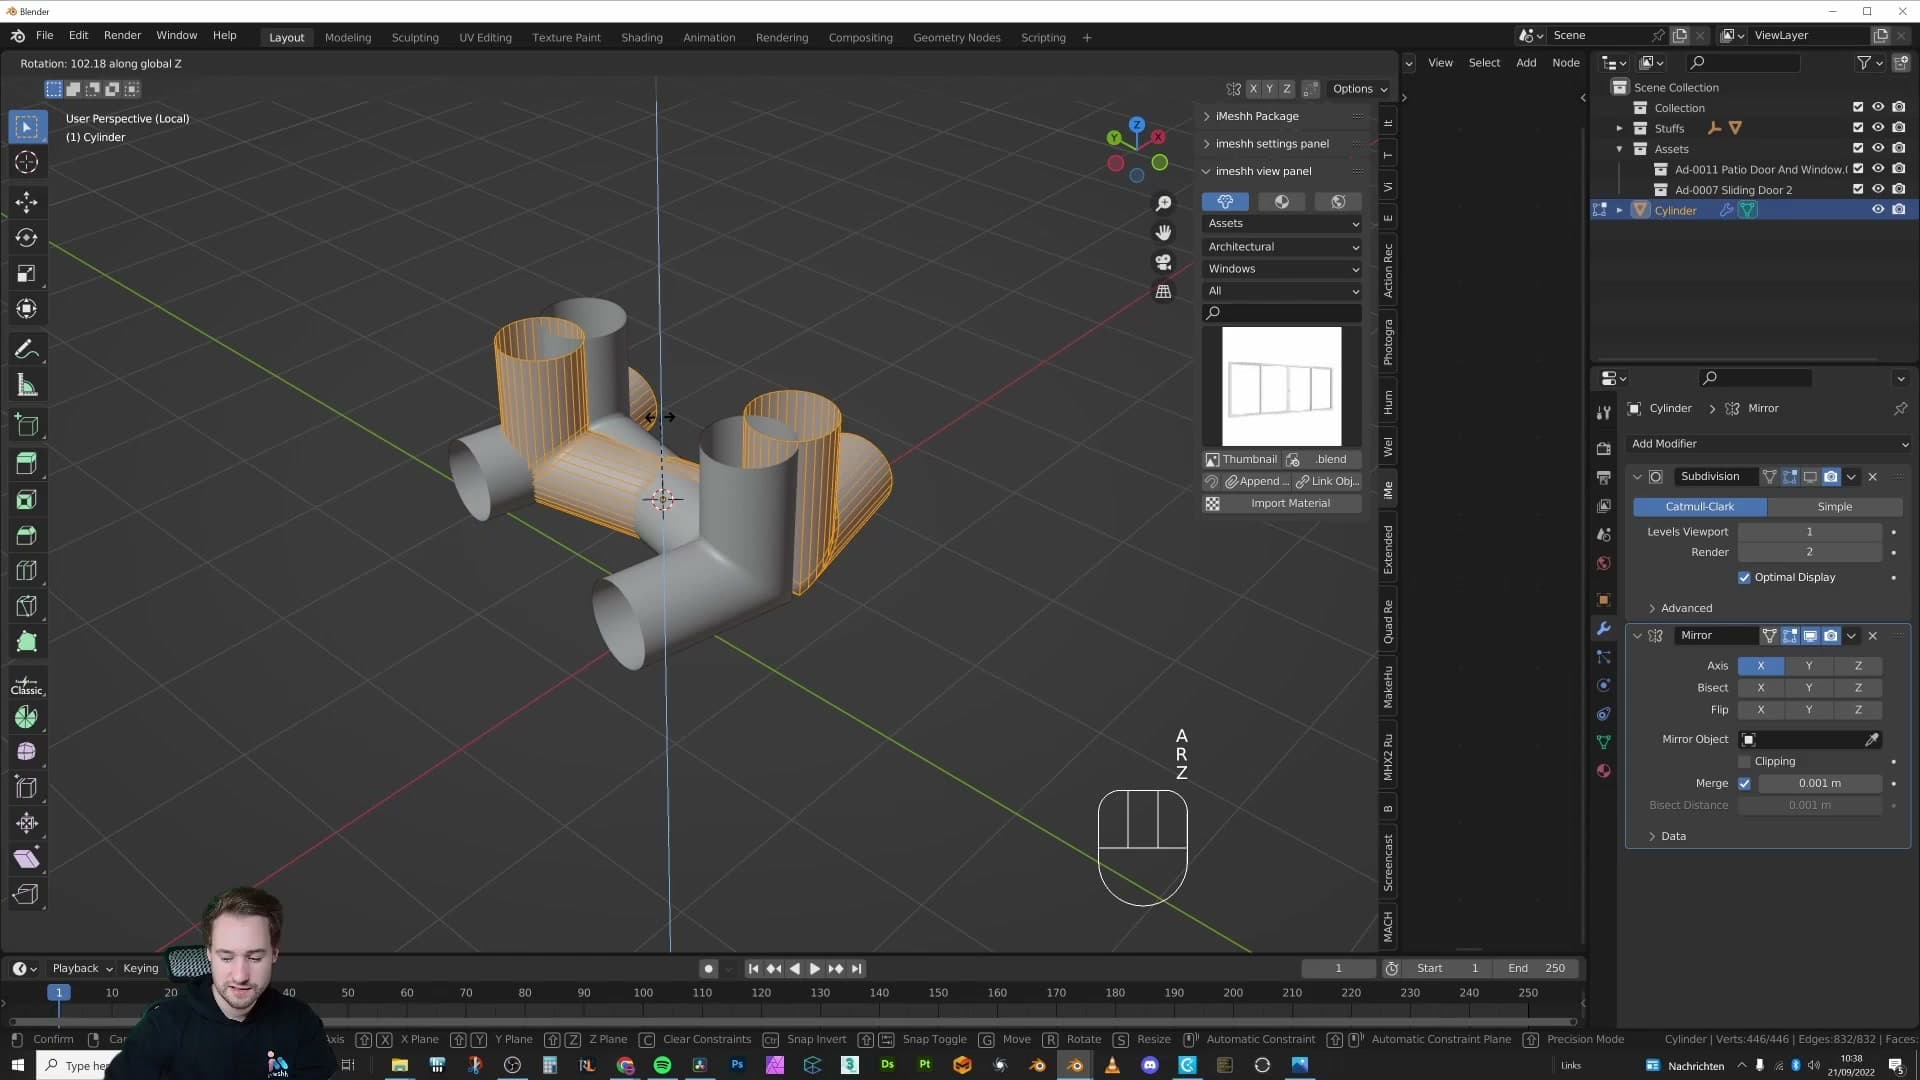
Add another mirror modifier and drag the geometry out until the two halves meet. Turn on Clipping, nudge the mesh in so the edges touch the mirror plane, then apply the modifier. Add another mirror, rotate the piece 90°, drag it out again, enable clipping, and apply.
For the next pass, add a mirror modifier set to the Z axis and bring the geometry down. Instead of turning on clipping this time, enable Bisect on that axis row. The modifier will slice the overlap automatically so you do not need to chase the seam manually.
At this point you already have a symmetrical sculpture growing on three axes from a single cylinder. The same three-step rhythm (add mirror, position, clip or bisect, apply) is all you need to keep building.
Bringing back the empty trick for off-axis mirrors
Stacking mirrors on the three default axes only gets you so far. To branch the structure off at an angle you need to bring back the empty trick from the door demo.
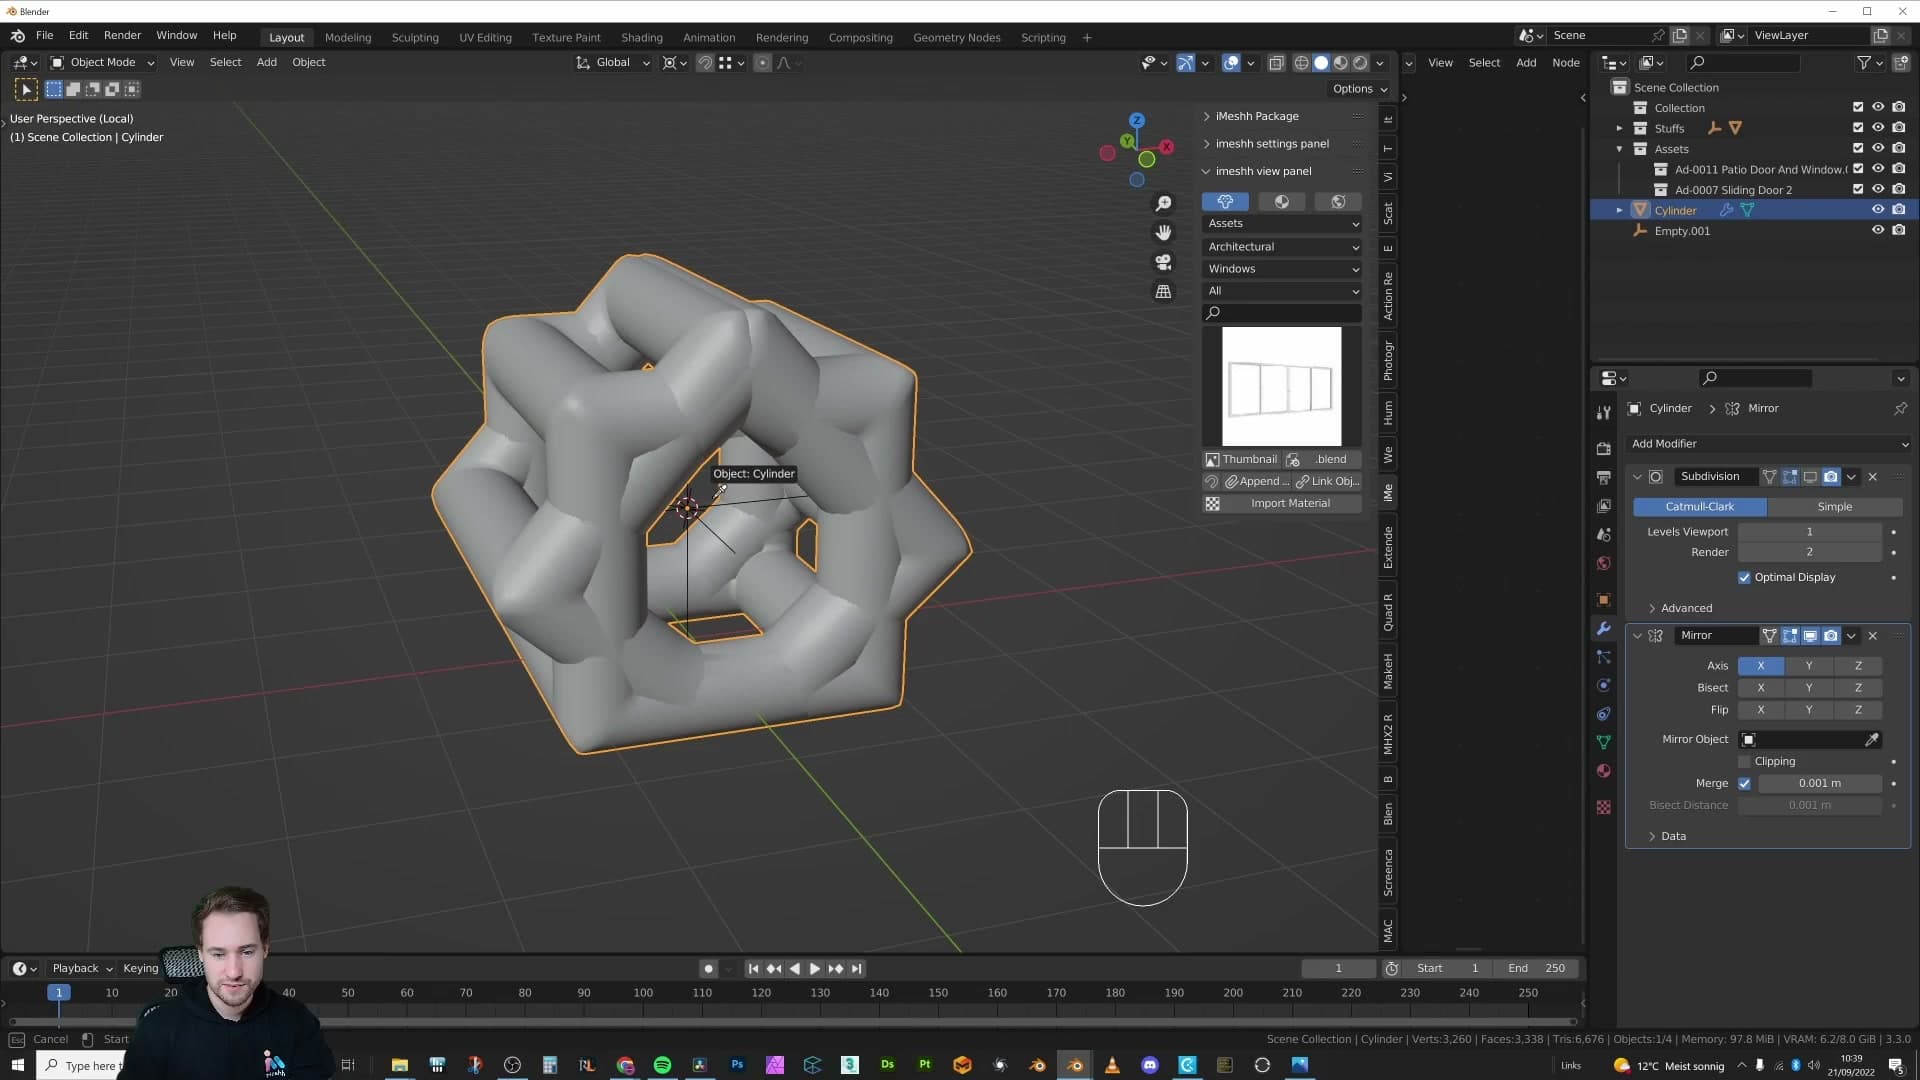
Add an empty into the scene, then select the pipe shape and add another mirror modifier. In the modifier's Mirror Object slot, pick the empty. Rotate the empty to whatever angle you want the new branch to grow at, then enable Bisect so the modifier cleanly cuts the overlapping half away. You will get a slightly odd new shape jutting off the existing sculpture.
To add yet another branch, repeat the trick: drop in a second empty, add a new mirror modifier, set the empty as its mirror object, position it so the geometry extends outward, and bisect again. Each empty gives you a fresh, freely-rotatable pivot to mirror around.
The final endless pipe maze
You can keep stacking mirrors, swapping axes, dropping in new empties and applying as you go. The geometry just keeps multiplying. What started as a single cylinder ends up looking like an endless maze of interlocking pipes, all perfectly symmetrical because every piece is descended from the same source mesh.
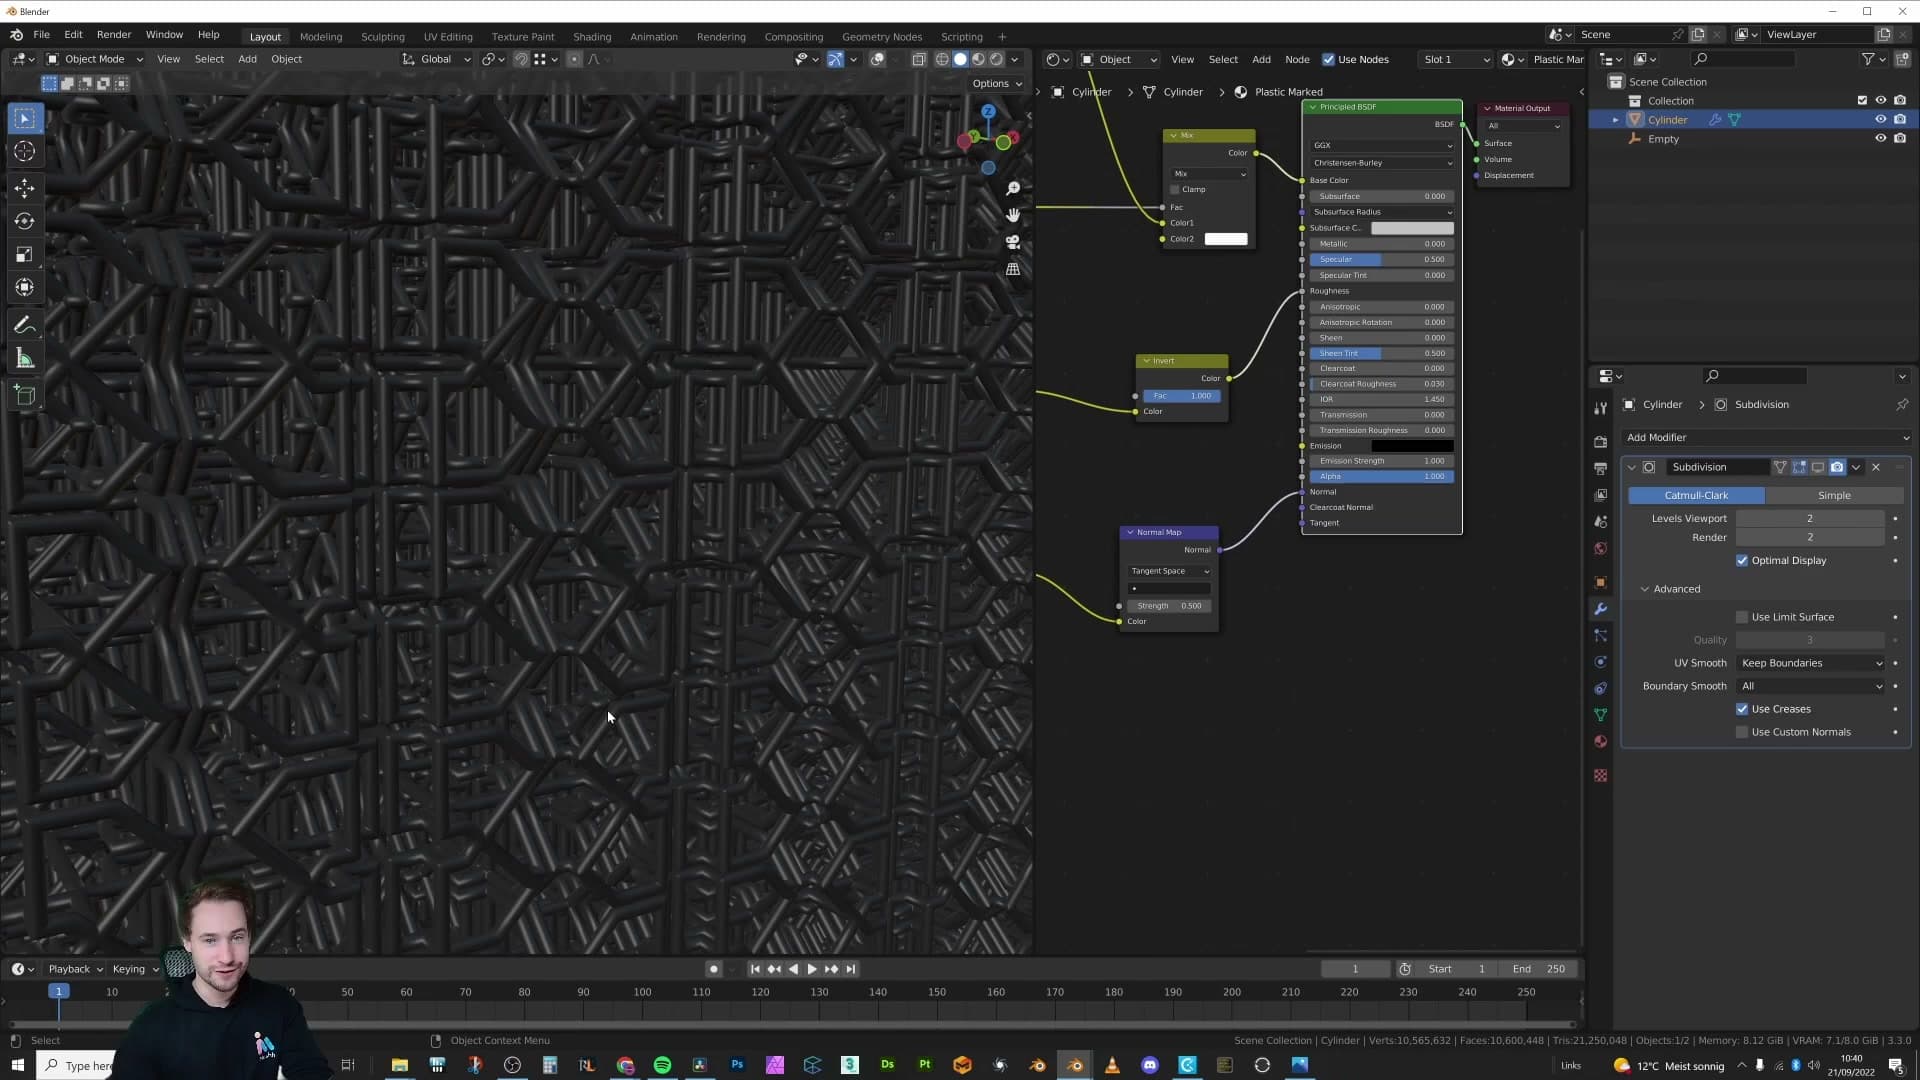
If you are ever stuck trying to model a geometric, symmetrical object, this is the workflow to reach for. Combine bisect with the mirror modifier, lean on empties whenever you need an arbitrary pivot, and let the stack do the work.
Data tab: fixing mirrored UVs
Mirroring geometry mirrors the UVs too, which usually means textures read backwards on the duplicated half. The Data section of the mirror modifier has a Flip V (and U) toggle plus offset sliders that let you keep the texture flowing continuously across the seam. This is the one thing I've burned myself on most: noticing the backwards UVs only at render time.
Why mirroring usually mirrors your UVs too
The mirror modifier doesn't just duplicate geometry. It duplicates the UVs too, and because the duplicated half is a mirror image, the texture on it reads backwards. On something abstract you might never notice, but on anything with directional grain (wood, fabric weave, brushed metal, lettering) it's instantly obvious once the material is on.
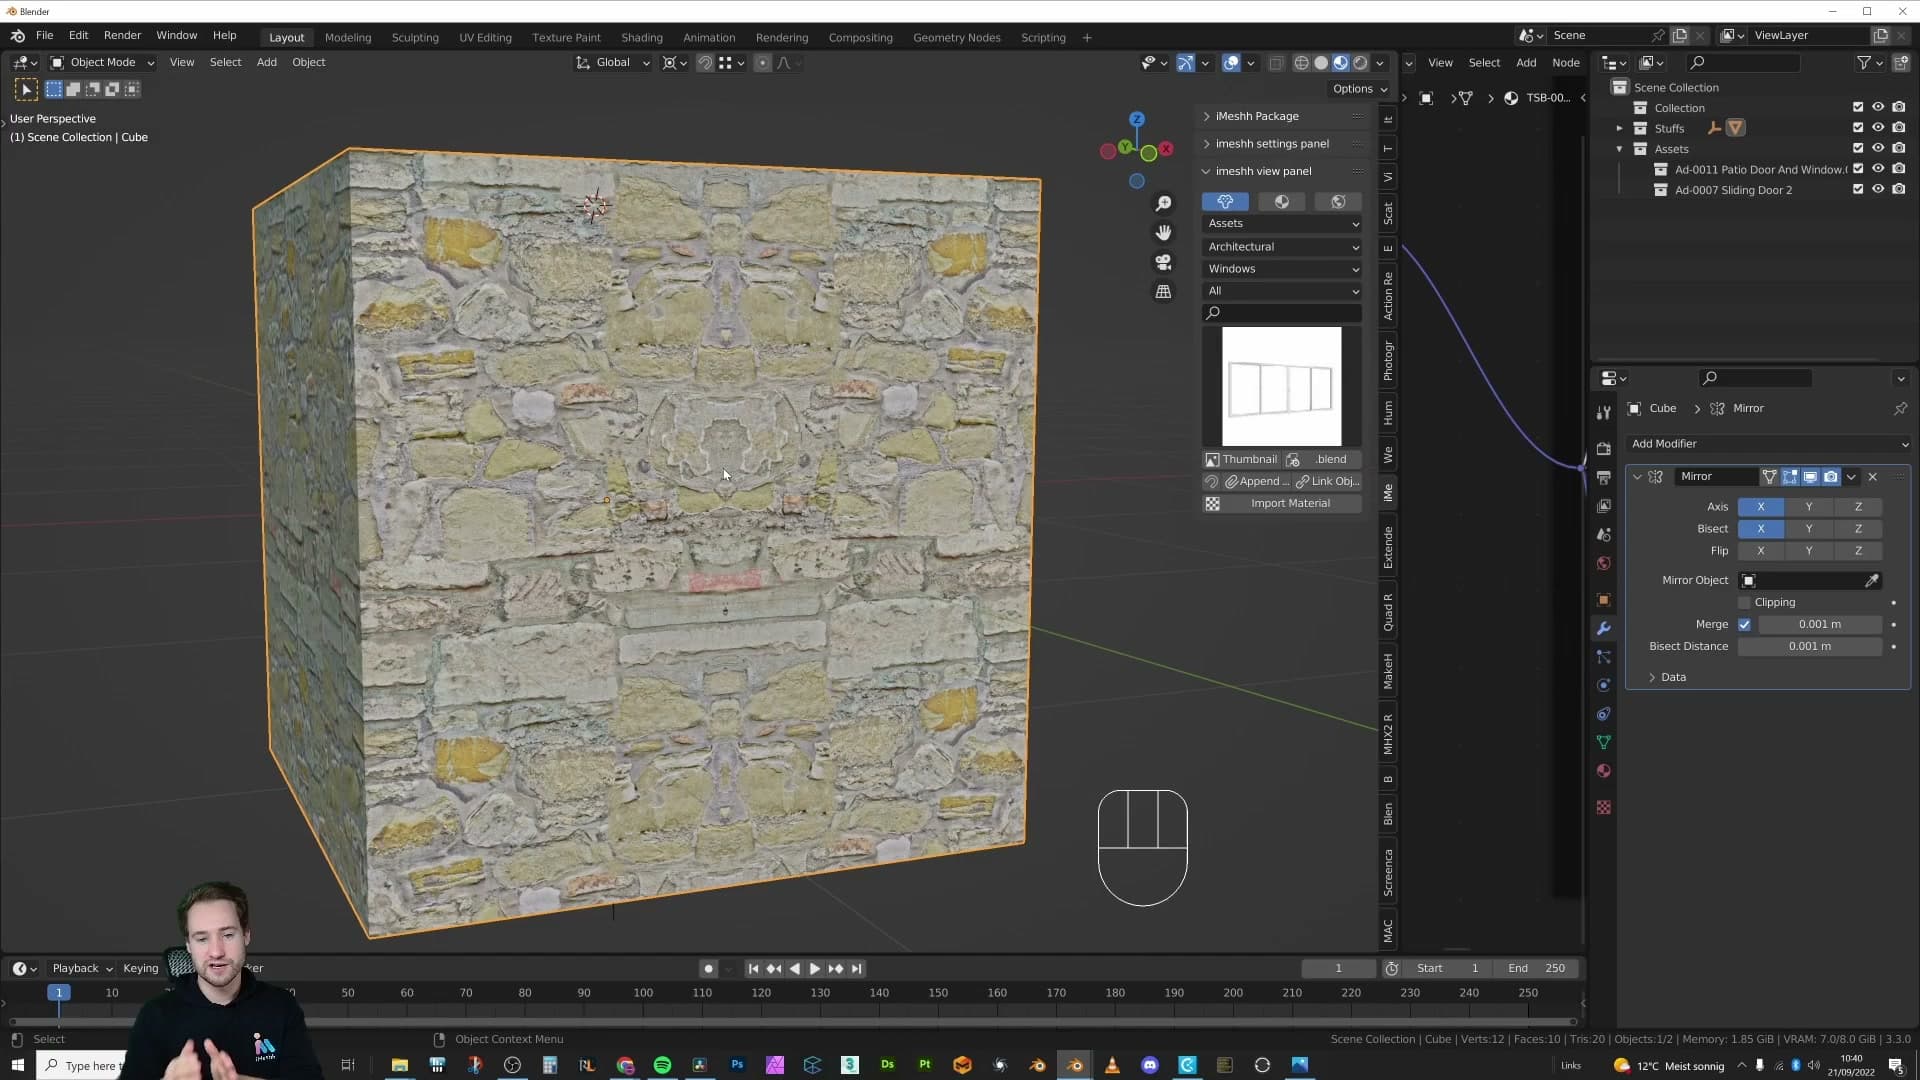
Set up the problem first so you can see it clearly. Add a mirror modifier with Bisect enabled on the axis you want, so the modifier cleanly cuts and duplicates the mesh rather than overlapping it. With a texture applied, you'll see the seam down the middle and the texture flipped on the mirrored side, a tell-tale symmetrical reflection across the mirror plane.
This is the moment that catches people out. The geometry looks fine, the modifier appears to be doing its job, and the UV problem only surfaces once you light and render the asset properly.
Flipping V and nudging the offset for a continuous texture
The fix lives inside the mirror modifier itself, under the Data section. There are toggles here for flipping the U and V axes on the mirrored half of the UV map, plus offset sliders to slide that mirrored copy along the UV grid. You don't need to touch your unwrap or duplicate the material.
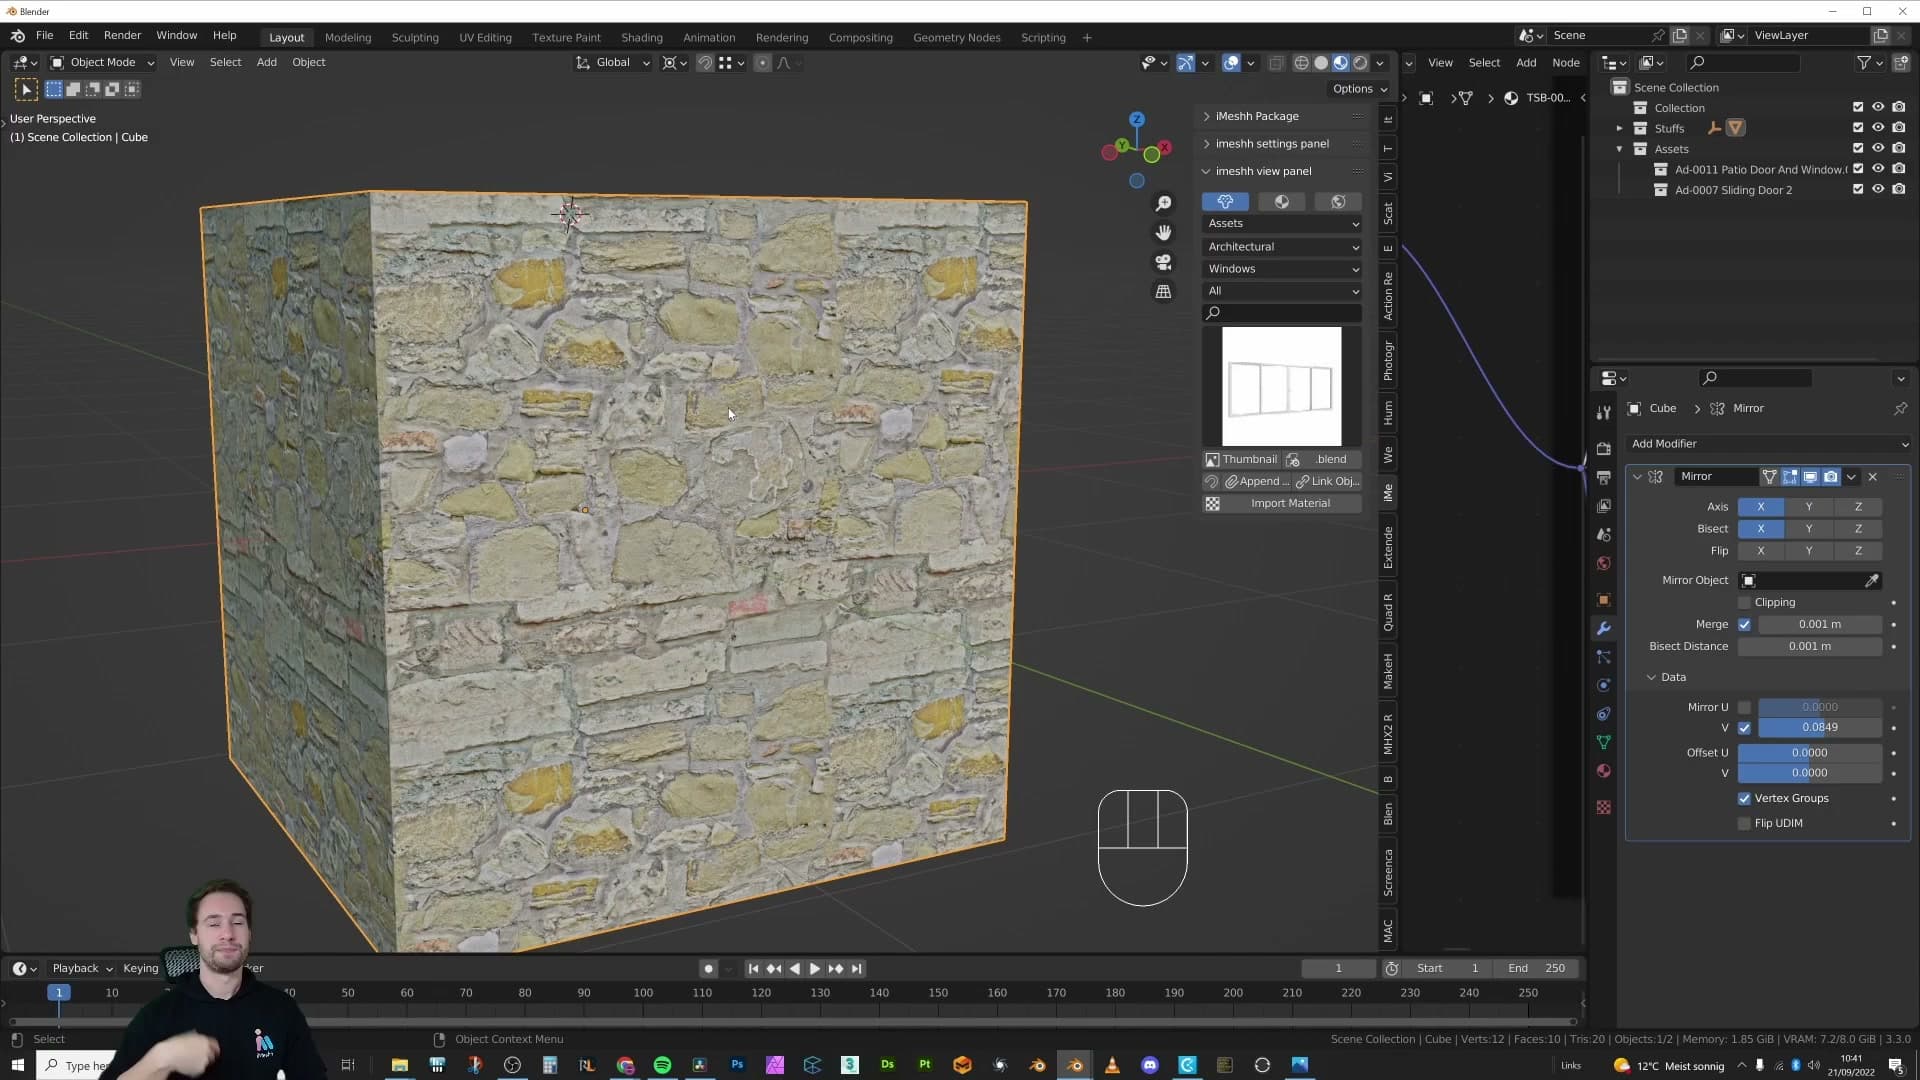
Toggle Flip V first. The reflection across the seam disappears immediately, but the texture on the mirrored half now sits in the wrong spot on the UV map. It's pointing the right way but starting from the wrong place, so the texture jumps at the seam instead of continuing across it.
That's what the offset slider next to Flip V is for. Drag it to slide the mirrored UVs along the V axis until the texture lines up at the seam. Hold Shift while dragging to fine-tune in small increments. You want the moment where the pattern on one side meets the pattern on the other without a visible jump.
When it lands, the geometry is mirrored but the texture flows continuously across the seam as if it were a single unwrap. The same Data section gives you a U axis flip and U offset if your texture happens to need the horizontal direction fixed instead, but in practice V is the one you'll reach for most of the time.
Wrap-up and freebies
The mirror modifier does far more than just mirror geometry. Bisect, clipping, mirror objects, and UV flipping together make it one of the most versatile modifiers in Blender. I also point back to iMeshh's free assets for anyone wanting to keep building.
The mirror modifier is more than mirroring
That covers most of what the mirror modifier can do. Between origin tricks, clipping and merge, bisect and flip, mirror objects, UV data flipping, and stacked-mirror pipe modelling, you have enough to handle the situations the modifier was actually designed for, not just the one-click symmetry that most tutorials stop at.
The single takeaway worth carrying forward is that the mirror modifier does not just mirror. It slices, welds, repositions around arbitrary pivots, fixes UVs, and stacks on itself to generate geometry you would never bother modelling by hand. Whenever you reach for it on autopilot, pause and ask whether one of the other toggles would save you a step.
iMeshh freebies and sign-off
Thanks for following along. If you want to keep building, head over to iMeshh. There are plenty of free assets you can download and drop straight into your scenes. New videos are landing weekly at the moment, so see you in the next one.
Tools and credits
Everything mentioned in this tutorial, with links.
- Blender (the renderer this entire build runs in).
- iMeshh (studio platform: project management, client review, asset library, invoicing). The asset library used in this tutorial is included with every iMeshh Pro plan.
- Poly Haven (free CC0 textures and HDRIs).
Pillar guide: Tips Tricks hub