What's new in this iMeshh Asset Manager update
A quick tour of the two-week-cadence release: a 2.79 asset crash fix in Material Preview, and the new HDR control panel that exposes World Shader settings directly inside the Asset Manager.
Crash fix for Blender 2.79 assets in Material Preview
This is the second iMeshh Asset Manager update inside a fortnight, and it focuses on HDR control. I built these settings because I reach for the same adjustments on most of my own projects, and the new panel makes them available directly inside the Asset Manager rather than buried in the World Shader.
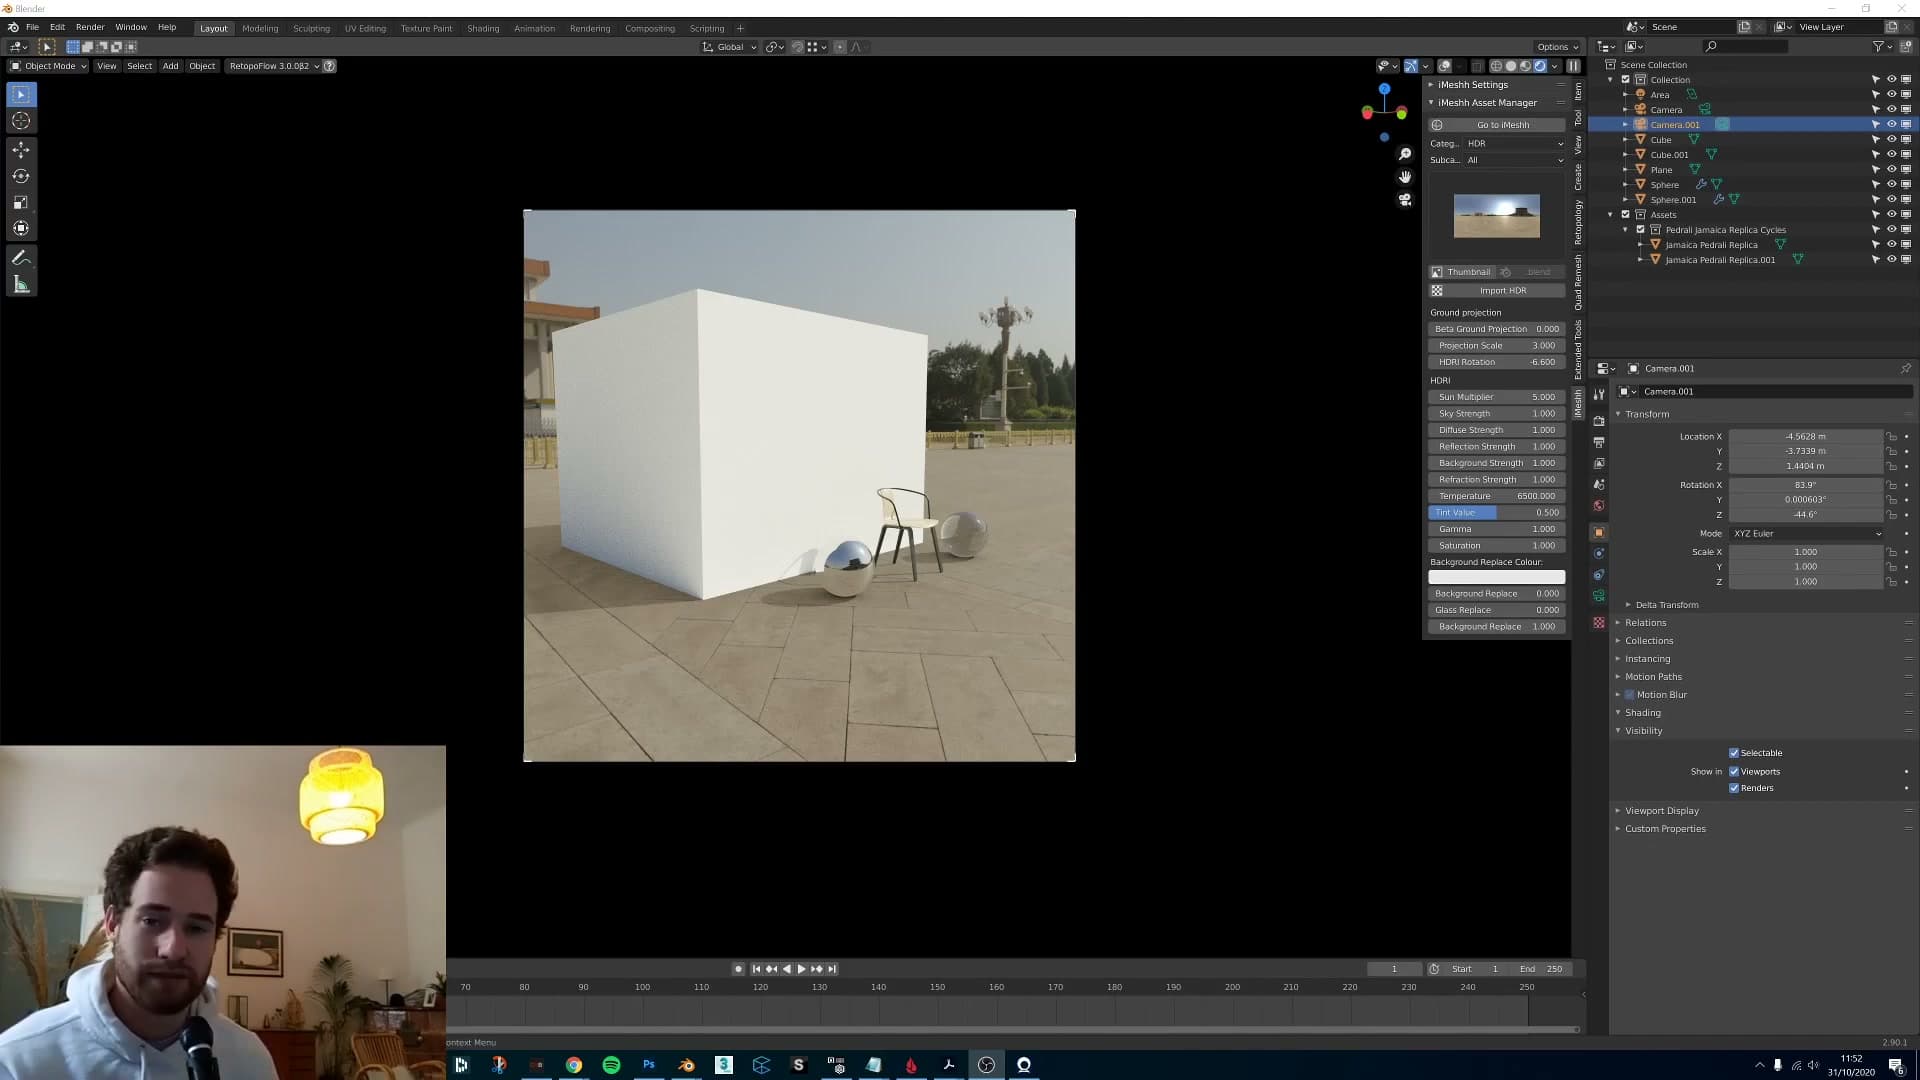
There's also a bug fix worth flagging before you start. Older assets imported from Blender 2.79 were crashing Material Preview in newer versions of Blender, because those legacy assets weren't telling the newer Blender what colour space their image textures used. Update the addon and the crash goes away, which is also what unlocks the new HDR controls described in the rest of this post.
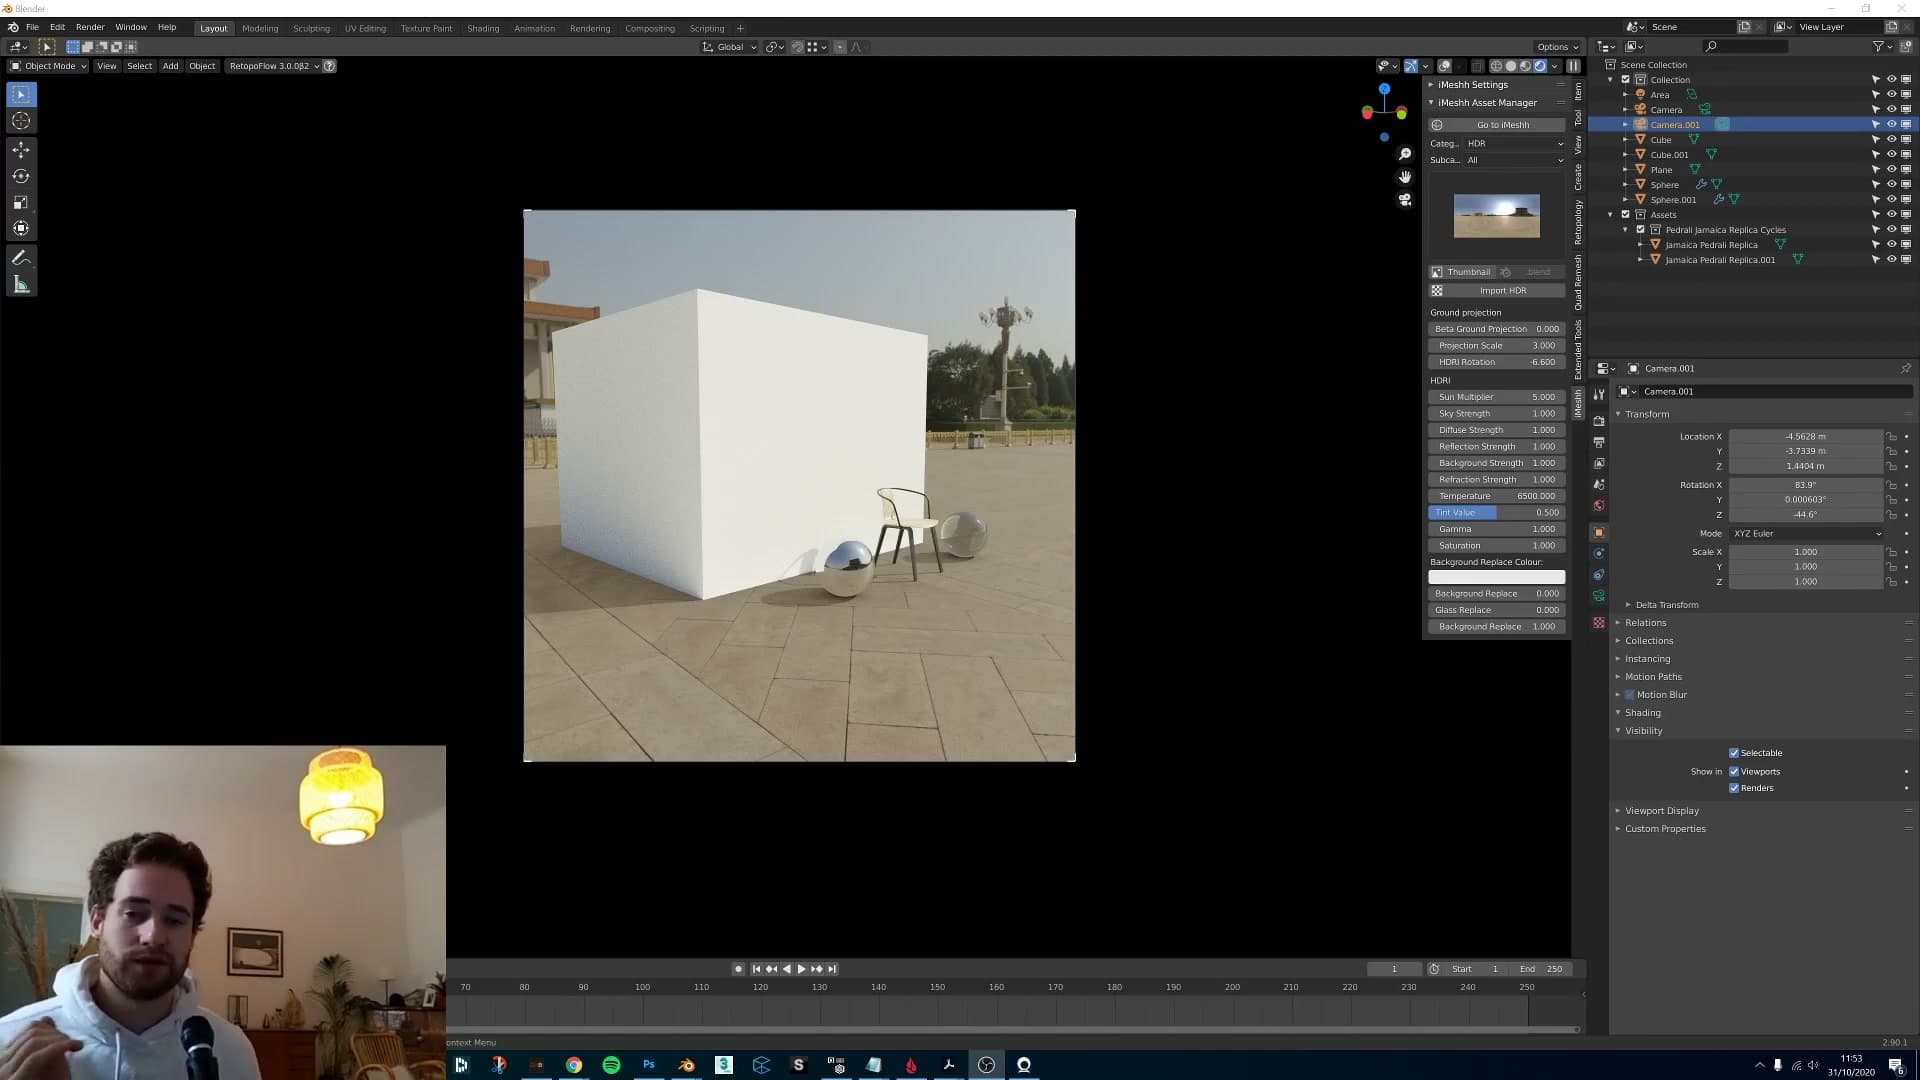
Where the new HDR settings appear
Open the Asset Manager and switch to the HDR category. Every other category (props, materials, models) still behaves exactly as before, listing assets the way you're used to. The HDR section is the only place that now surfaces an extra panel of world-shader controls alongside the preview.
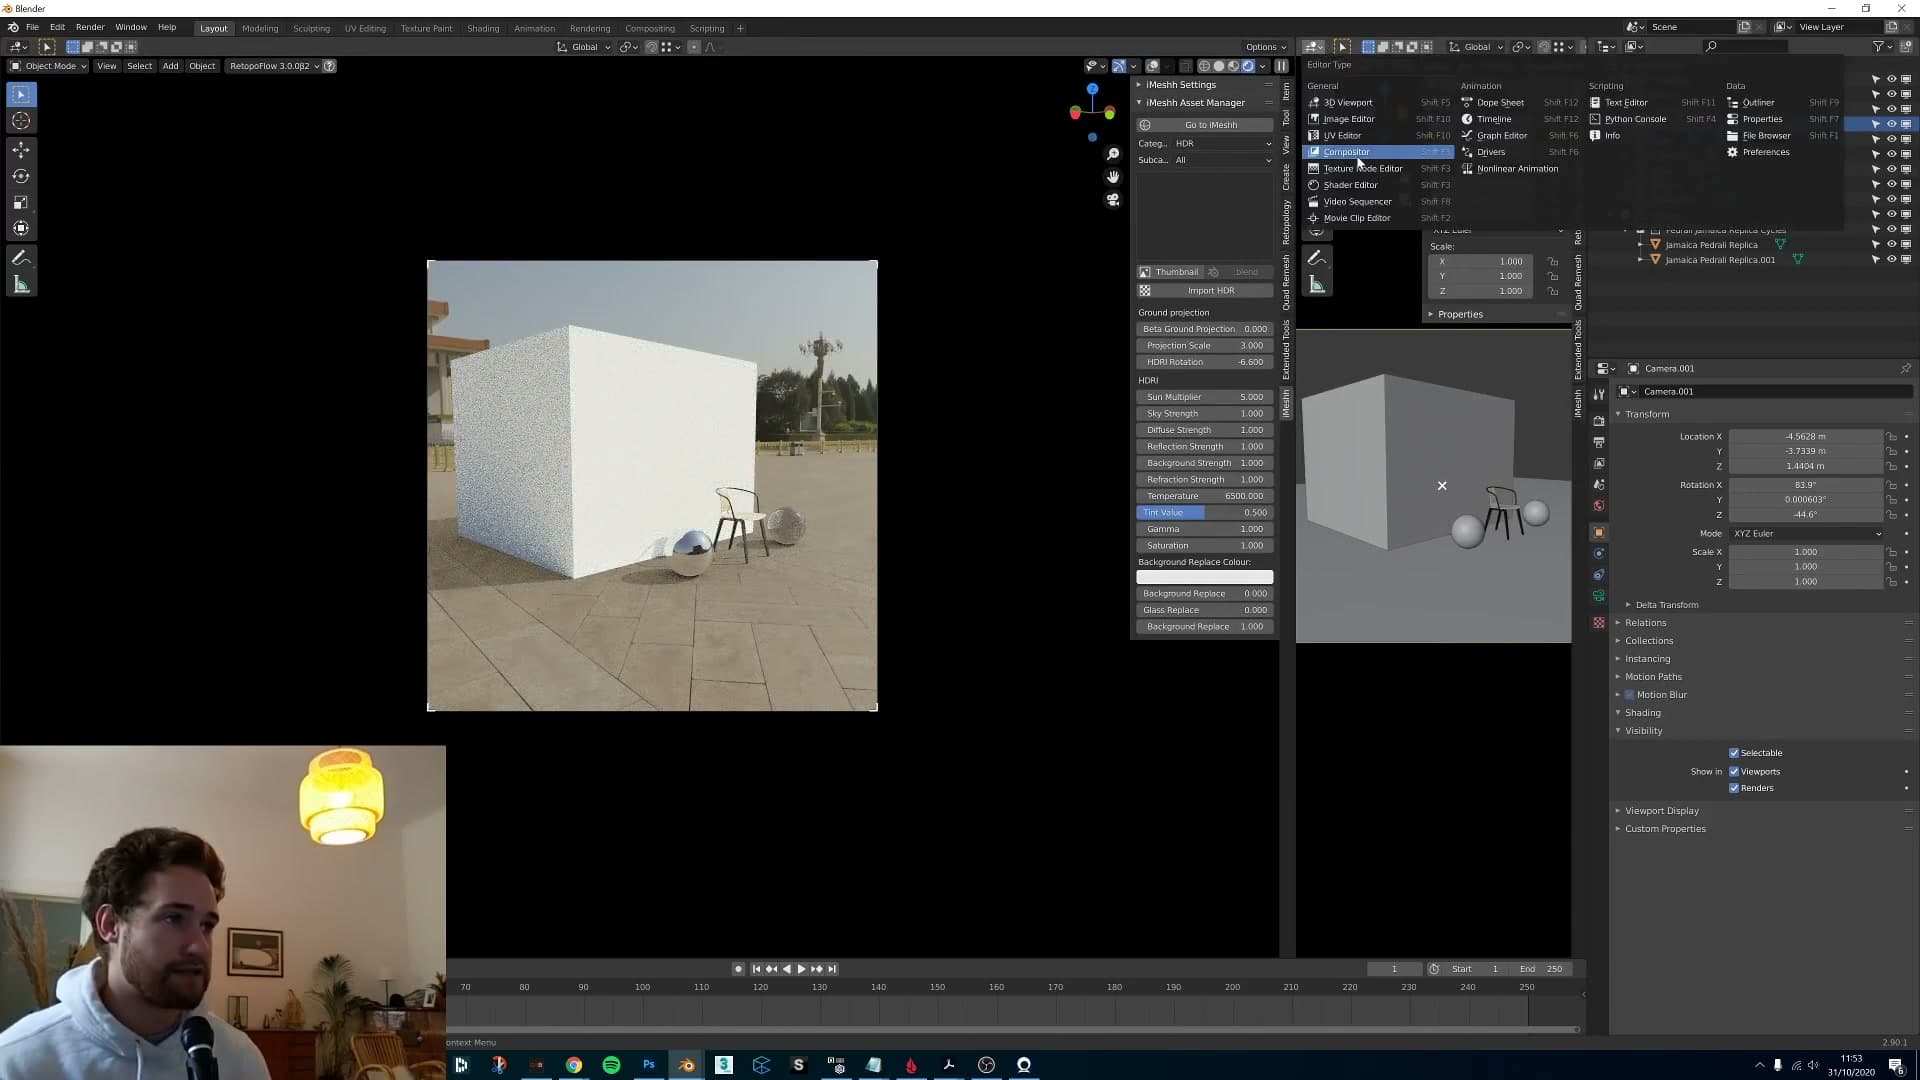
If that panel isn't visible yet, it just means the World Node Shader hasn't been wired into the current scene. Pick the HDR you want, hit Import, and the addon builds the node group for you. The settings populate the moment the group exists.
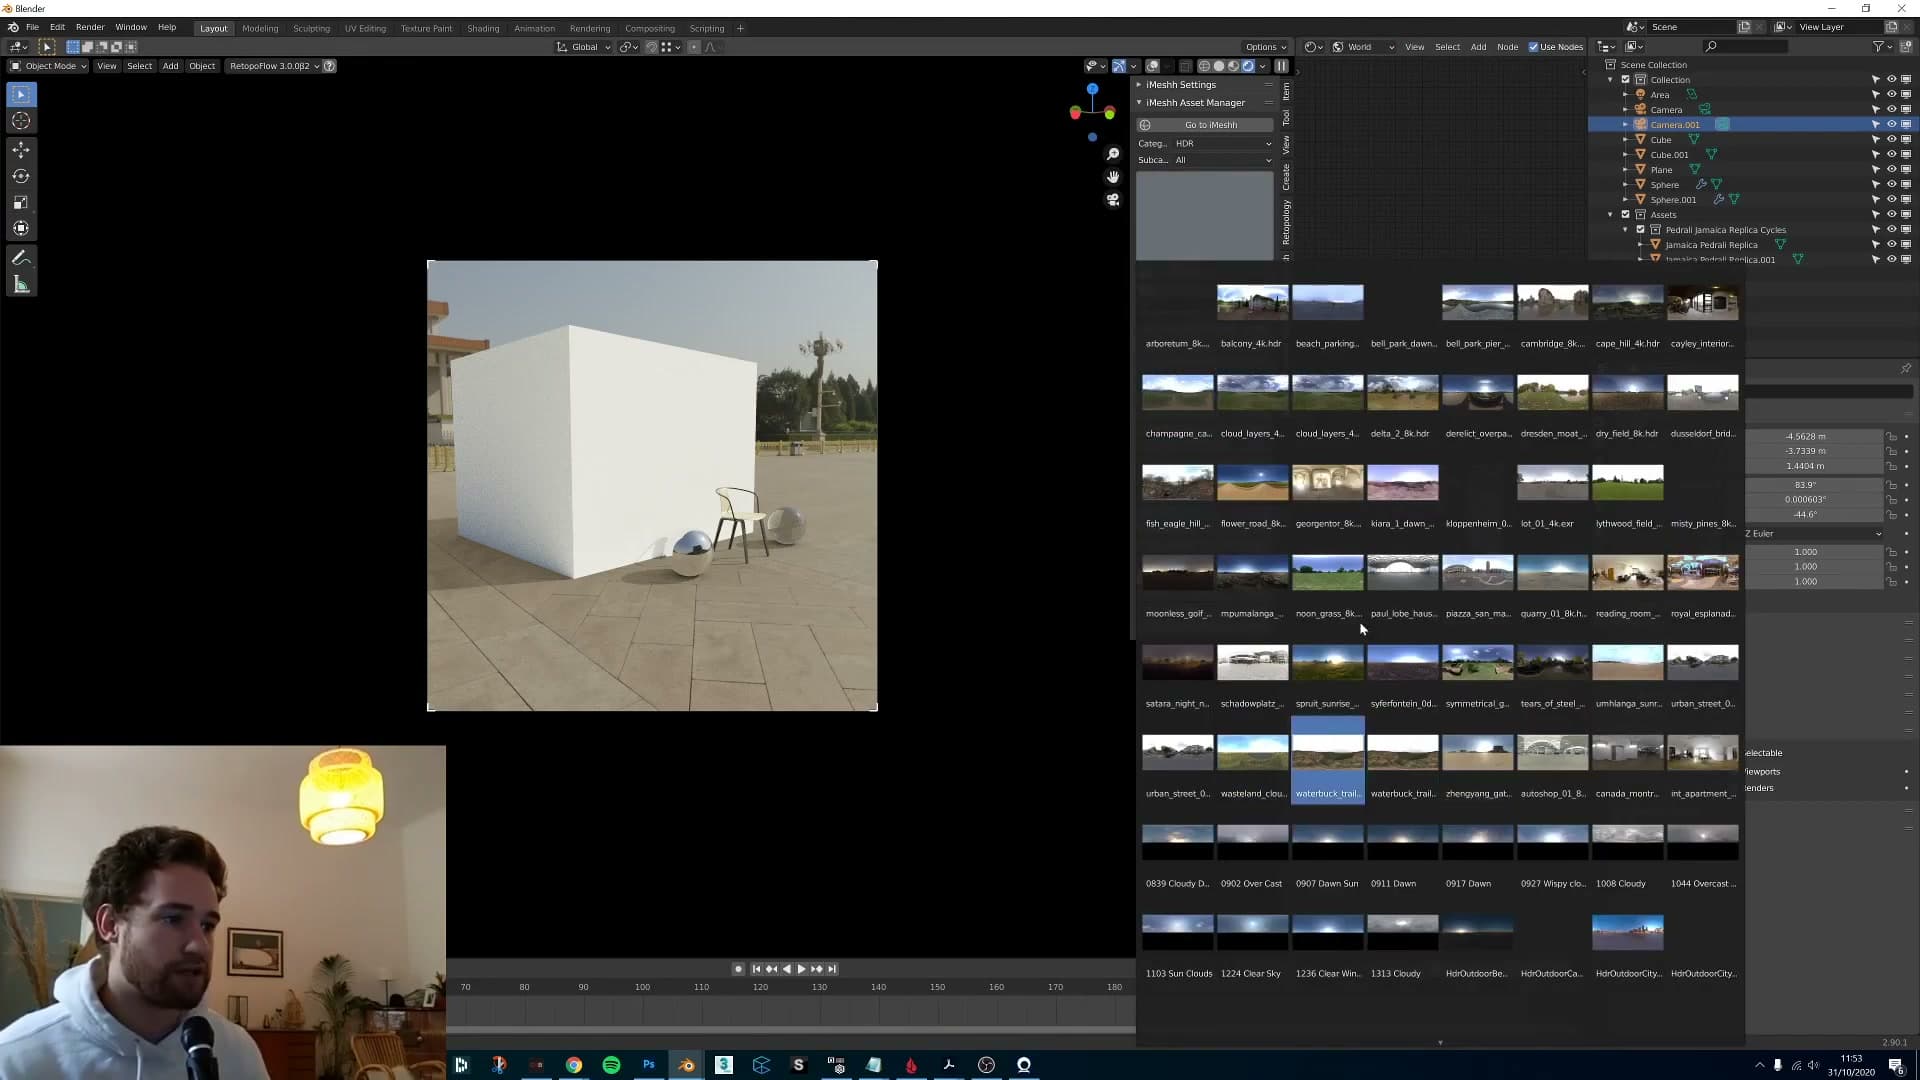
From that point on, the panel and the underlying shader stay in sync both ways. Every slider in the HDR settings drives a node inside the auto-generated group, so if you open the World Shader editor and tweak a value there, the slider in the panel updates to match. Any change you make in the panel writes straight back into the shader.
Ground projection: planting subjects on the horizon
A walkthrough of the beta ground projection feature: what it does, when distortion shows up, how scale interacts with sharpness, and a side-by-side of exterior and interior use cases.
Floating subject vs. planted subject
Ground projection is the first control on the new HDR panel, and probably the most fun one to play with. It's flagged as beta. In DCCs like 3DS Max you get a dome you can resize, with a fair amount of play around how the projection wraps; the iMeshh version takes a simpler route. The dome itself is infinite, and what you actually drop your scene onto is an infinitely large plane sitting at the horizon. You don't get the full set of knobs a proper dome projection would give you, but it does the main job.
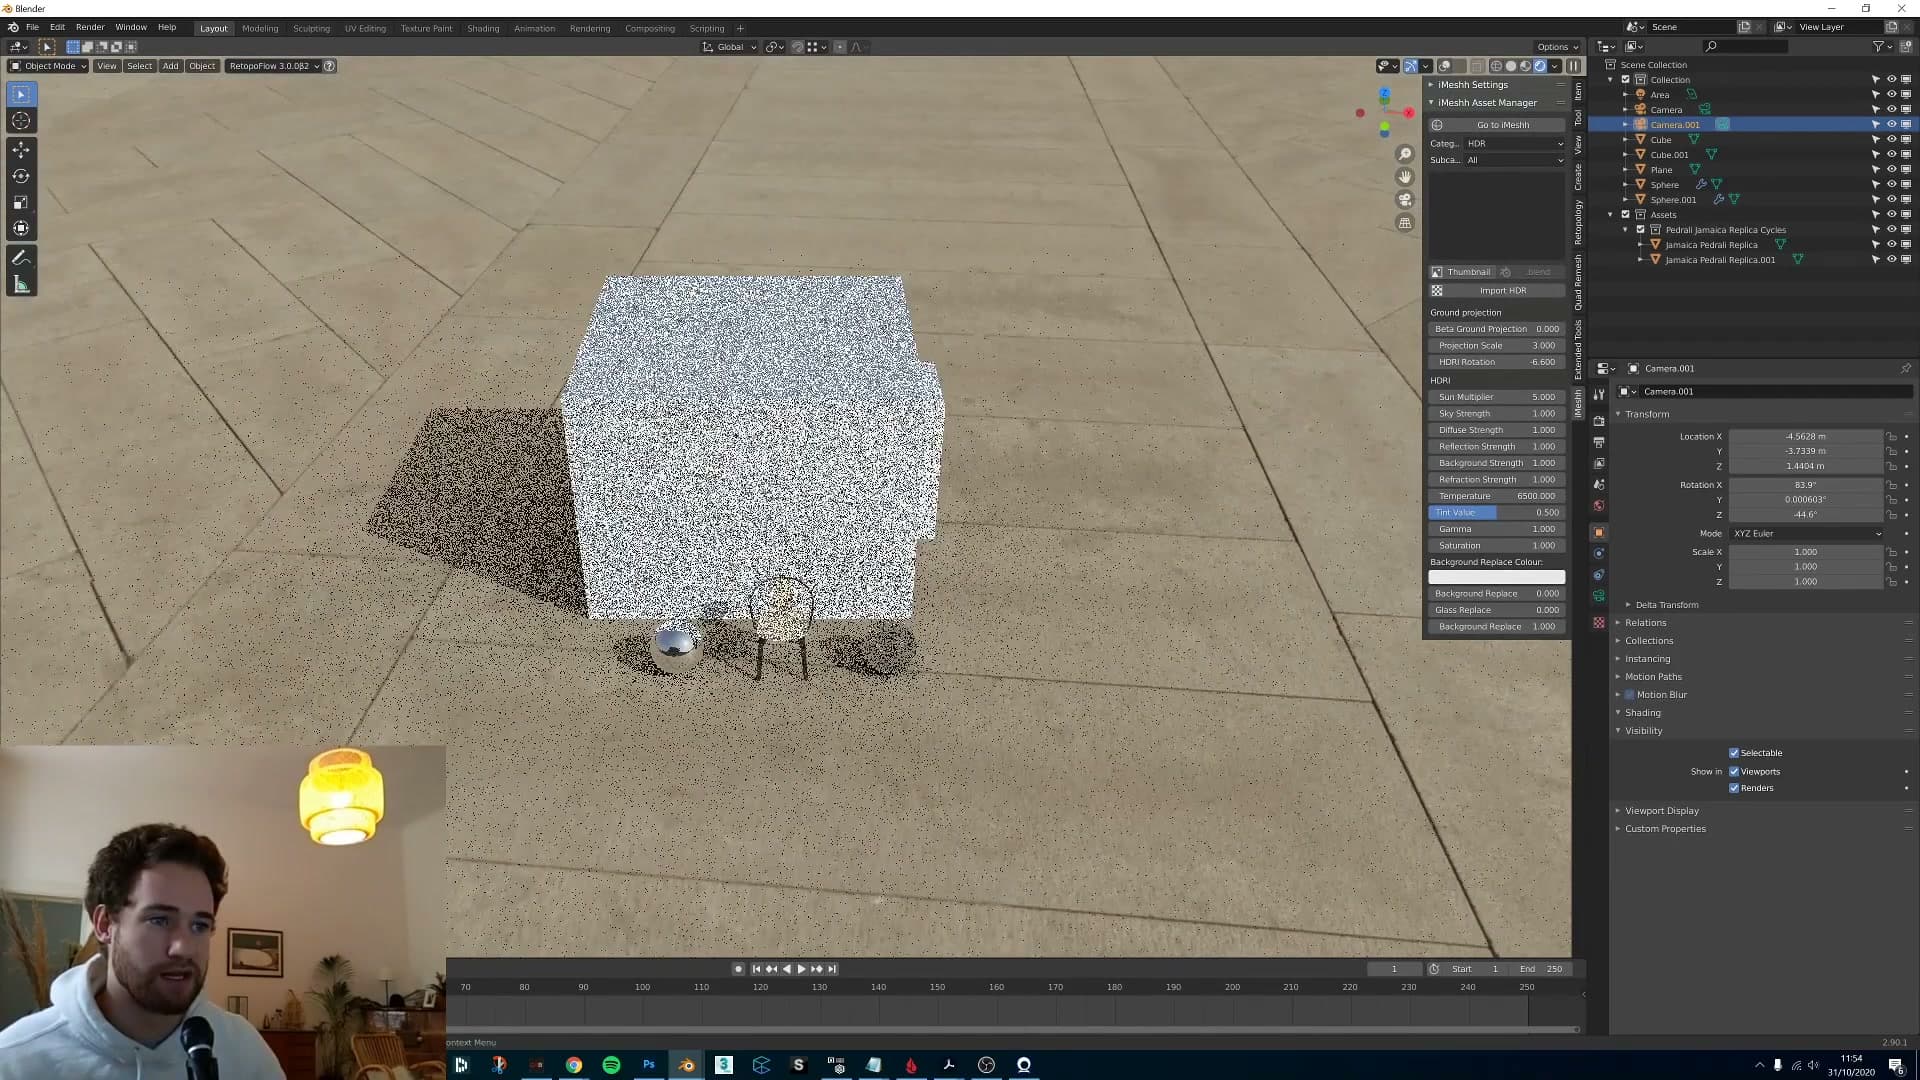
By default your subject sits inside the HDR sphere with nothing visibly anchoring it. In the demo scene there's also a plane with a shadow catcher hiding the HDR's ground, so the object effectively floats in mid-air the way you'd expect.
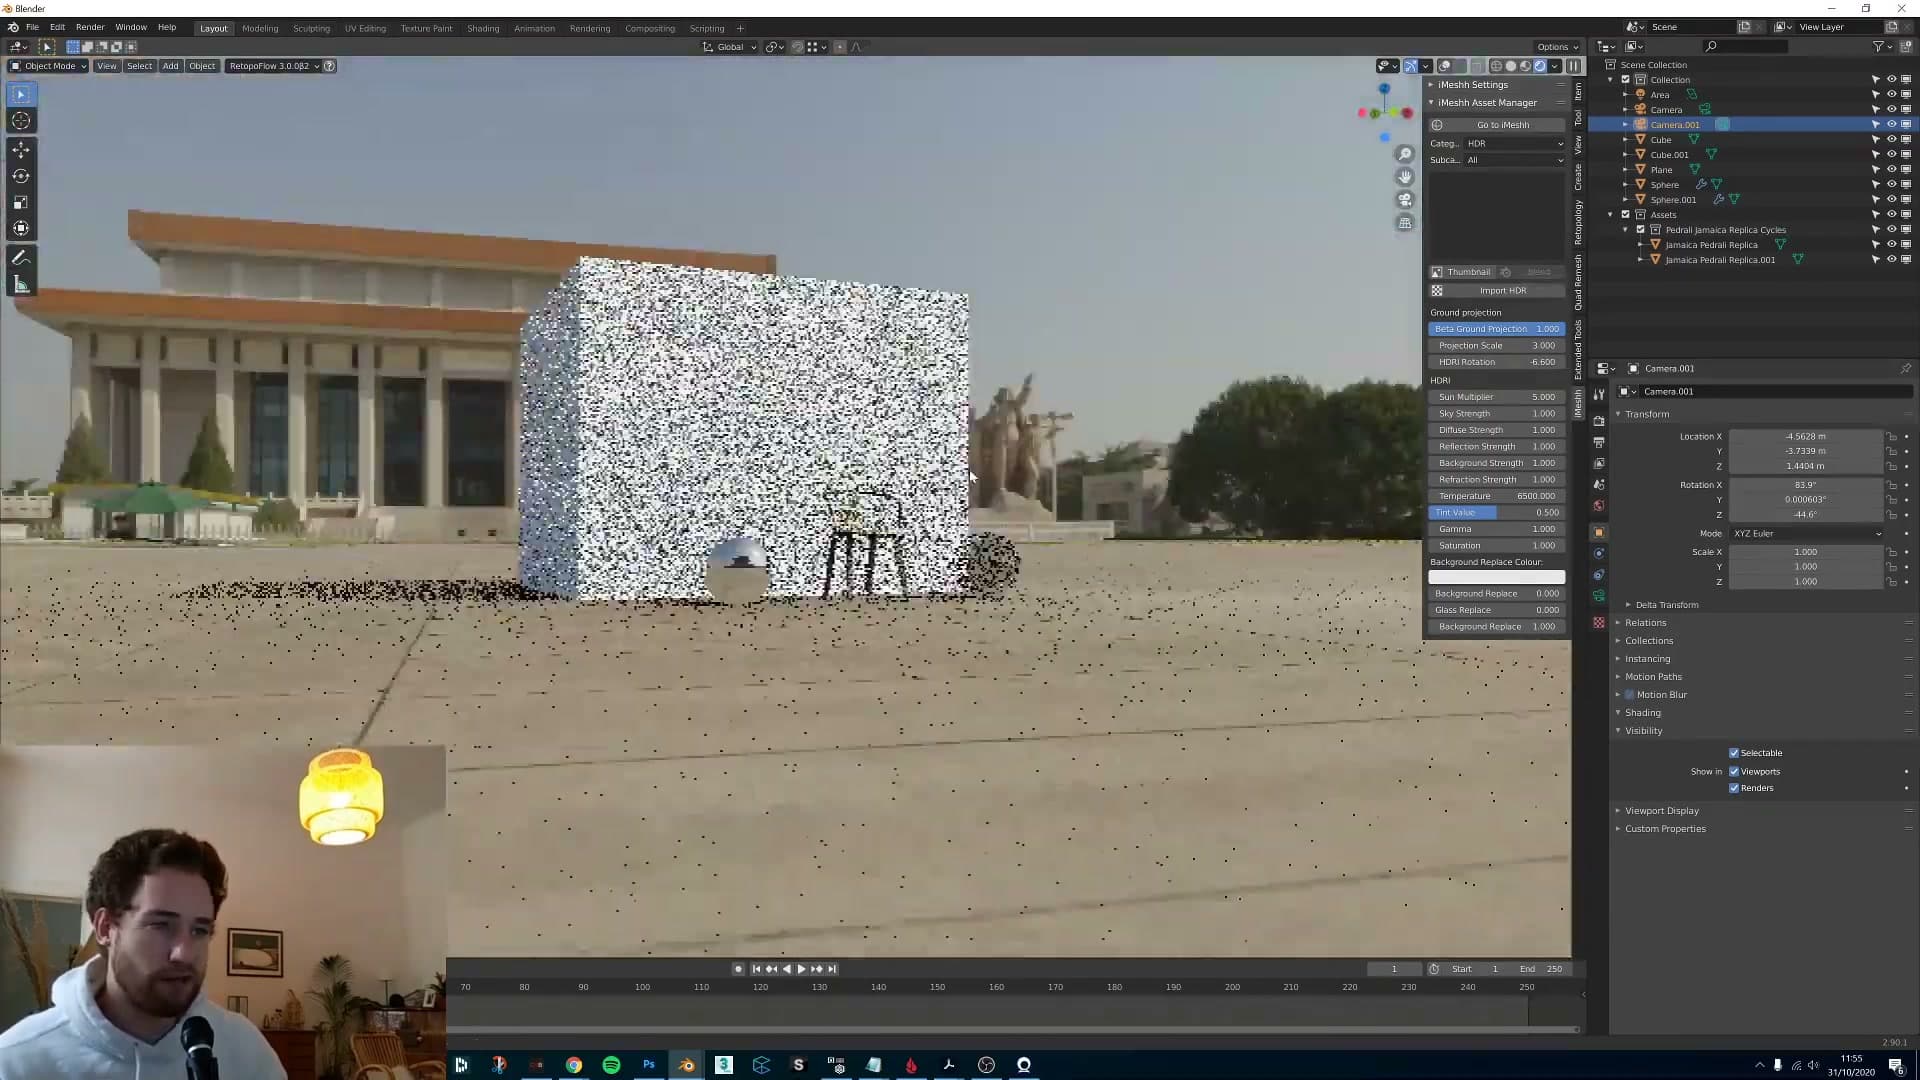
Flip the ground projection toggle on and the same subject is now planted on the HDR's ground plane. Drop the camera and the move reads as getting physically closer to the floor of the scene, rather than just dropping through empty space. That's the behaviour you want when you're trying to make a render feel grounded.
Trading texture sharpness for edge distortion
The trade-off with this technique is edge distortion. It's most forgiving on HDRs without big, close-in objects near the centre: landscapes, open exteriors, anything with plenty of breathing room around the camera. On a big open scene the warped edges push out of frame entirely, so you simply don't see them.
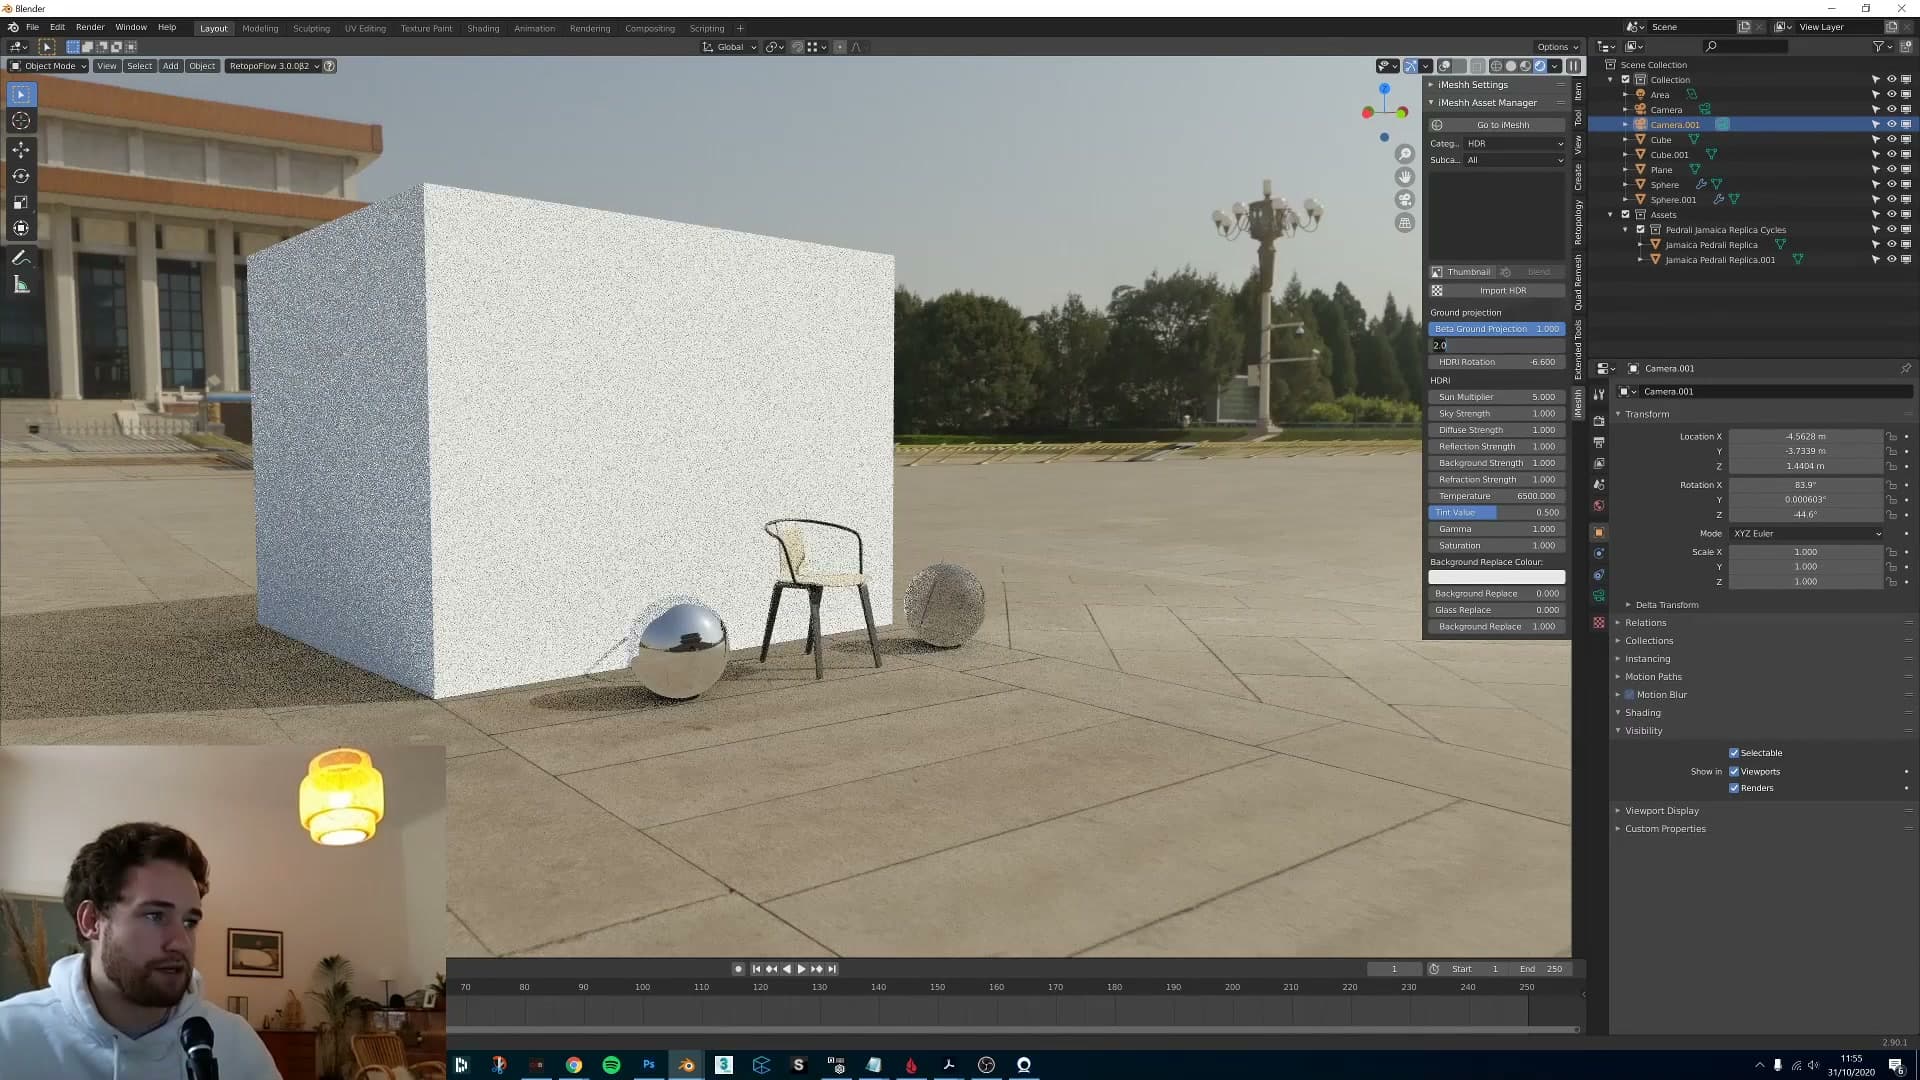
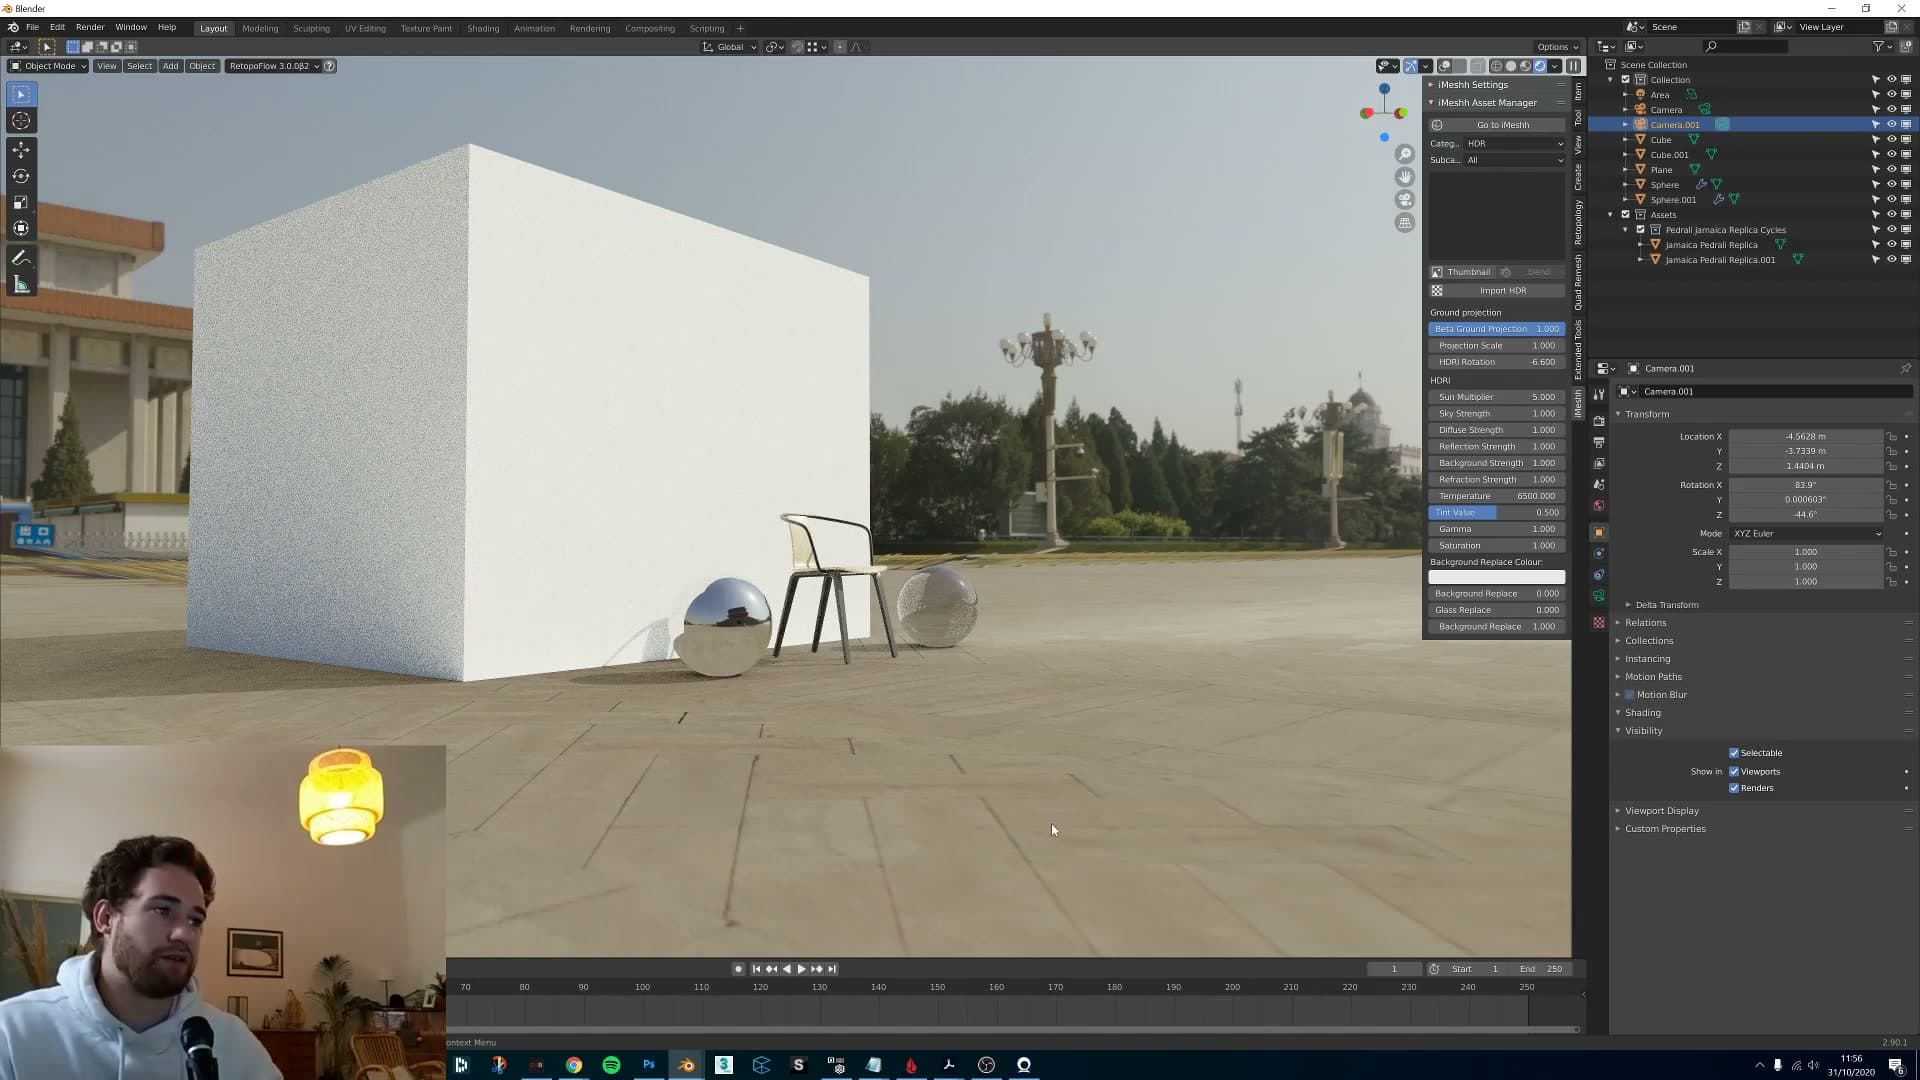
Out of the box the projected ground texture sits on the blurry side. There's a scale value on the panel that pulls the texture in tighter. Drop it and the ground sharpens, but the distortion at the edges starts creeping into the shot. It's a balancing act between detail in the centre and how visible those edges become.
Snapping interior camera height to the floor
The other place this feature earns its keep is interior shots. Without ground projection the HDR's floor sits well below your room, so the camera ends up feeling like it's hovering higher than it actually is. The height inside the room and the height implied by the world outside don't agree.
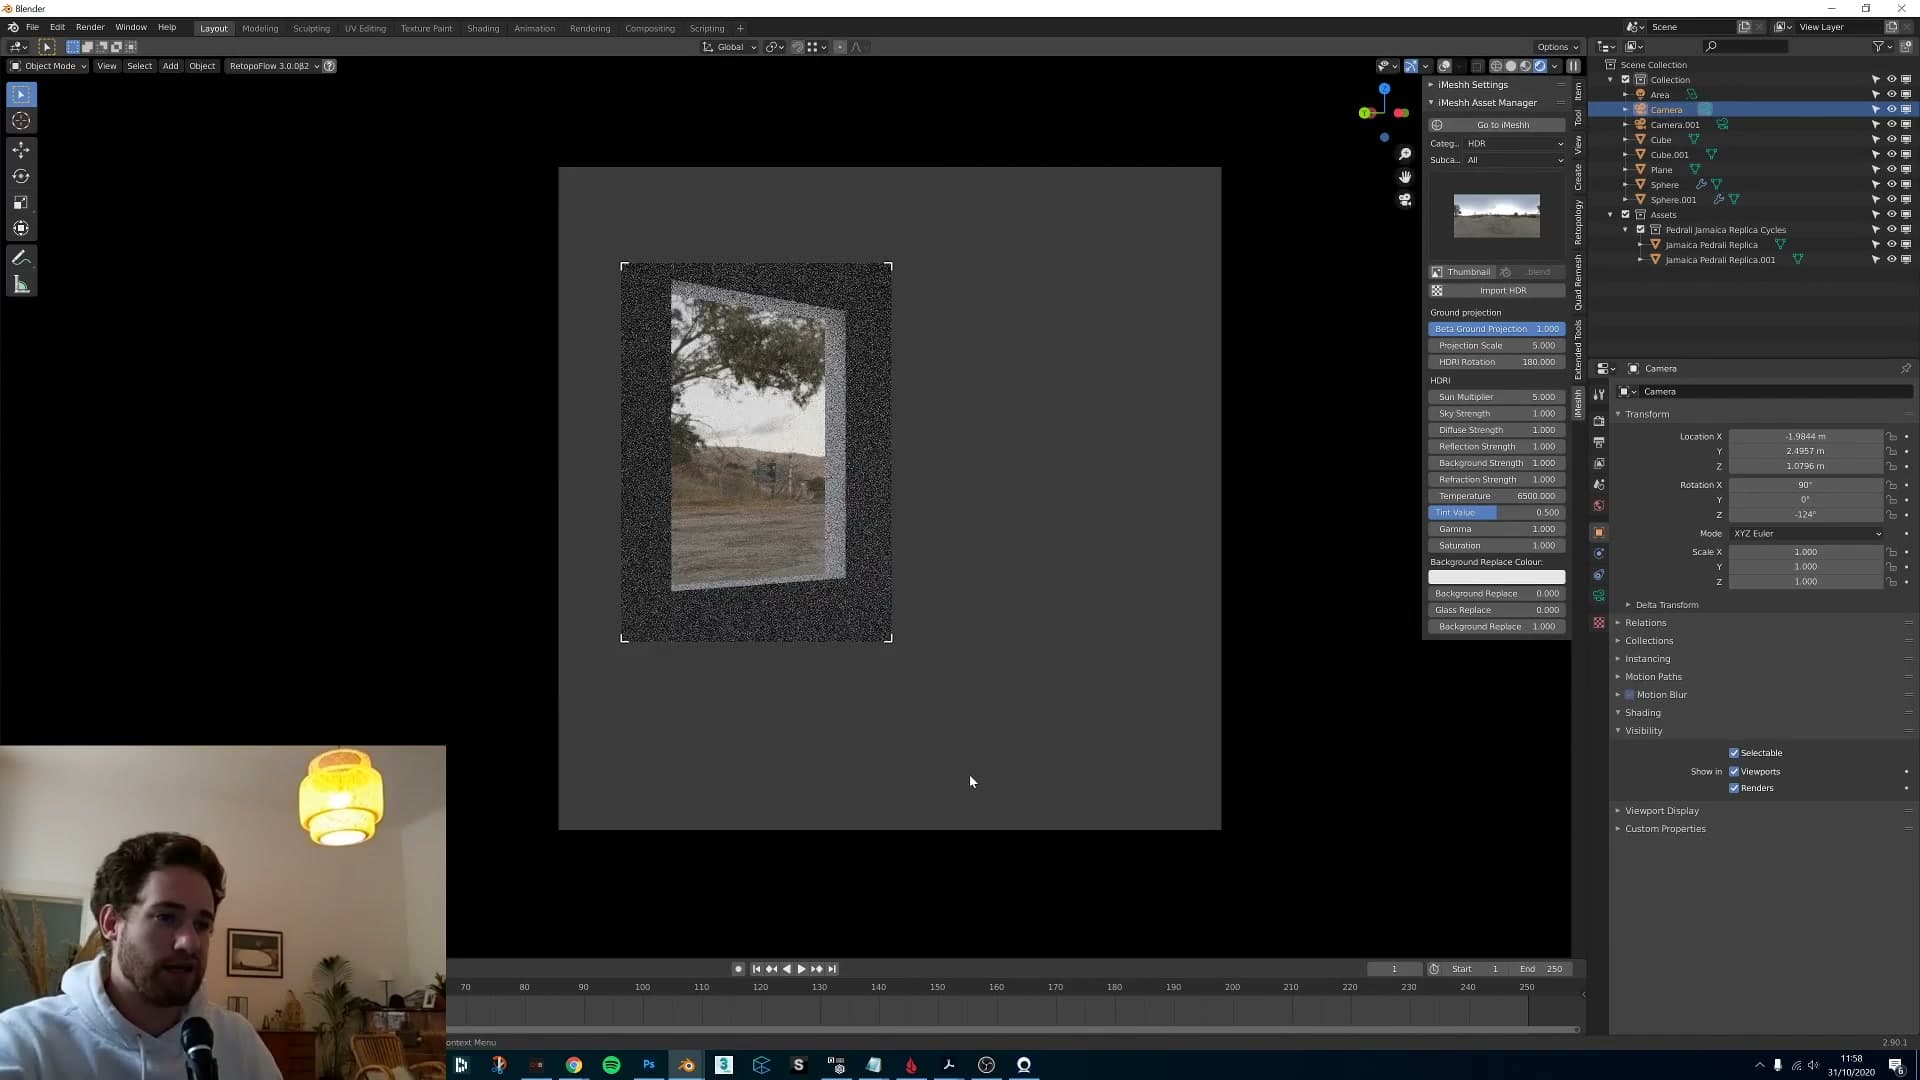
Turn ground projection on and the HDR's floor is pulled up to meet the interior floor. The two surfaces now read as one continuous ground plane, and the room is finally snapped onto the same horizon line as the exterior visible through the windows.
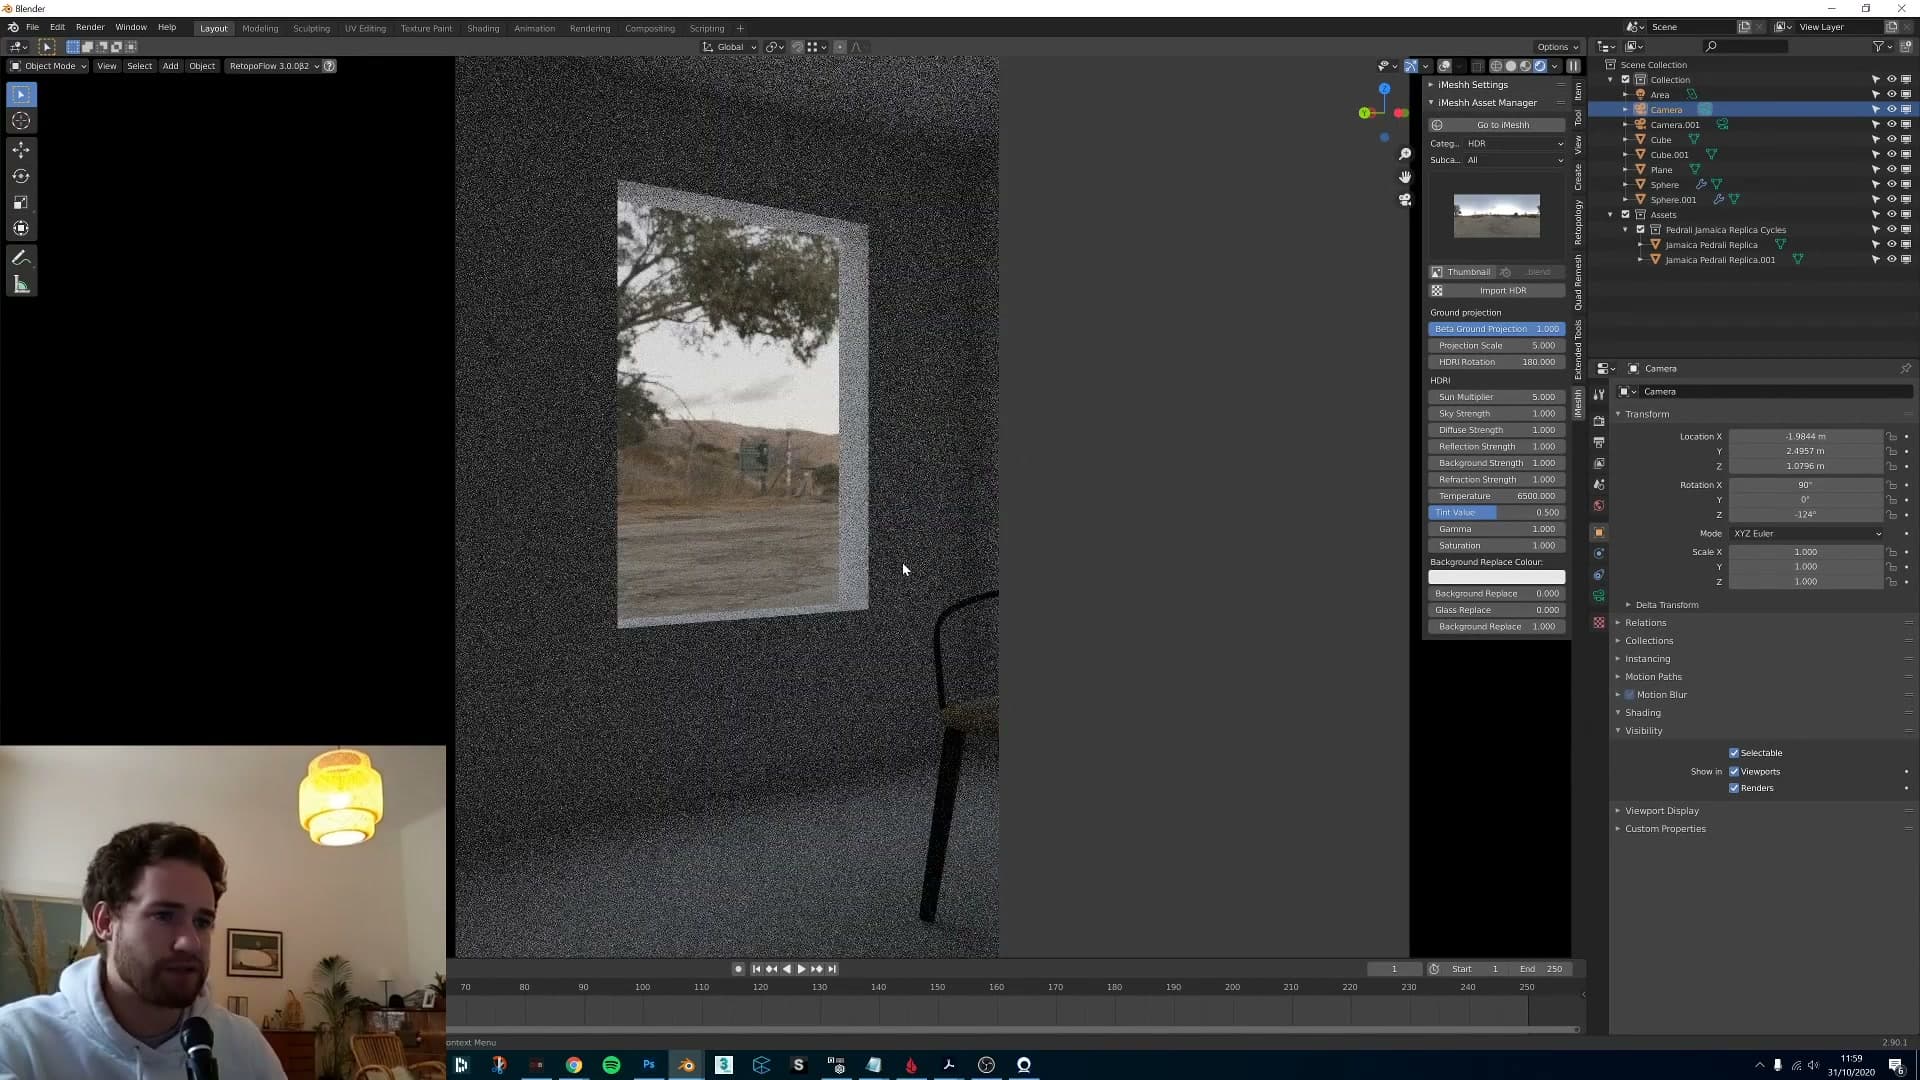
You'll usually need to dial the scale to get this looking right. At a value of around 20 the texture is enormous and the camera feels ant-sized. Pull it down to 4 or 5 and the texture is drawn in tight enough to snap the room to the ground. A setting of 5 works nicely for this interior. A higher-resolution HDR will hold up better than a standard one once you've scaled the projection in, since the same area of the image is being stretched over far less of your view.
Sun Multiplier and Sky Strength
Separating sun and sky control with a thresholded multiplier: pushing the sun brighter for harder shadows, or thresholding it out entirely to relight the scene with sky alone.
How the sun threshold works
The next pair of controls (Sun Multiplier and Sky Strength) are the two most important sliders on the panel. Sun Multiplier adjusts the strength of the sun itself, independently of the ambient sky illumination, so you can soften or harden direct light without rebuilding the rest of your lighting.
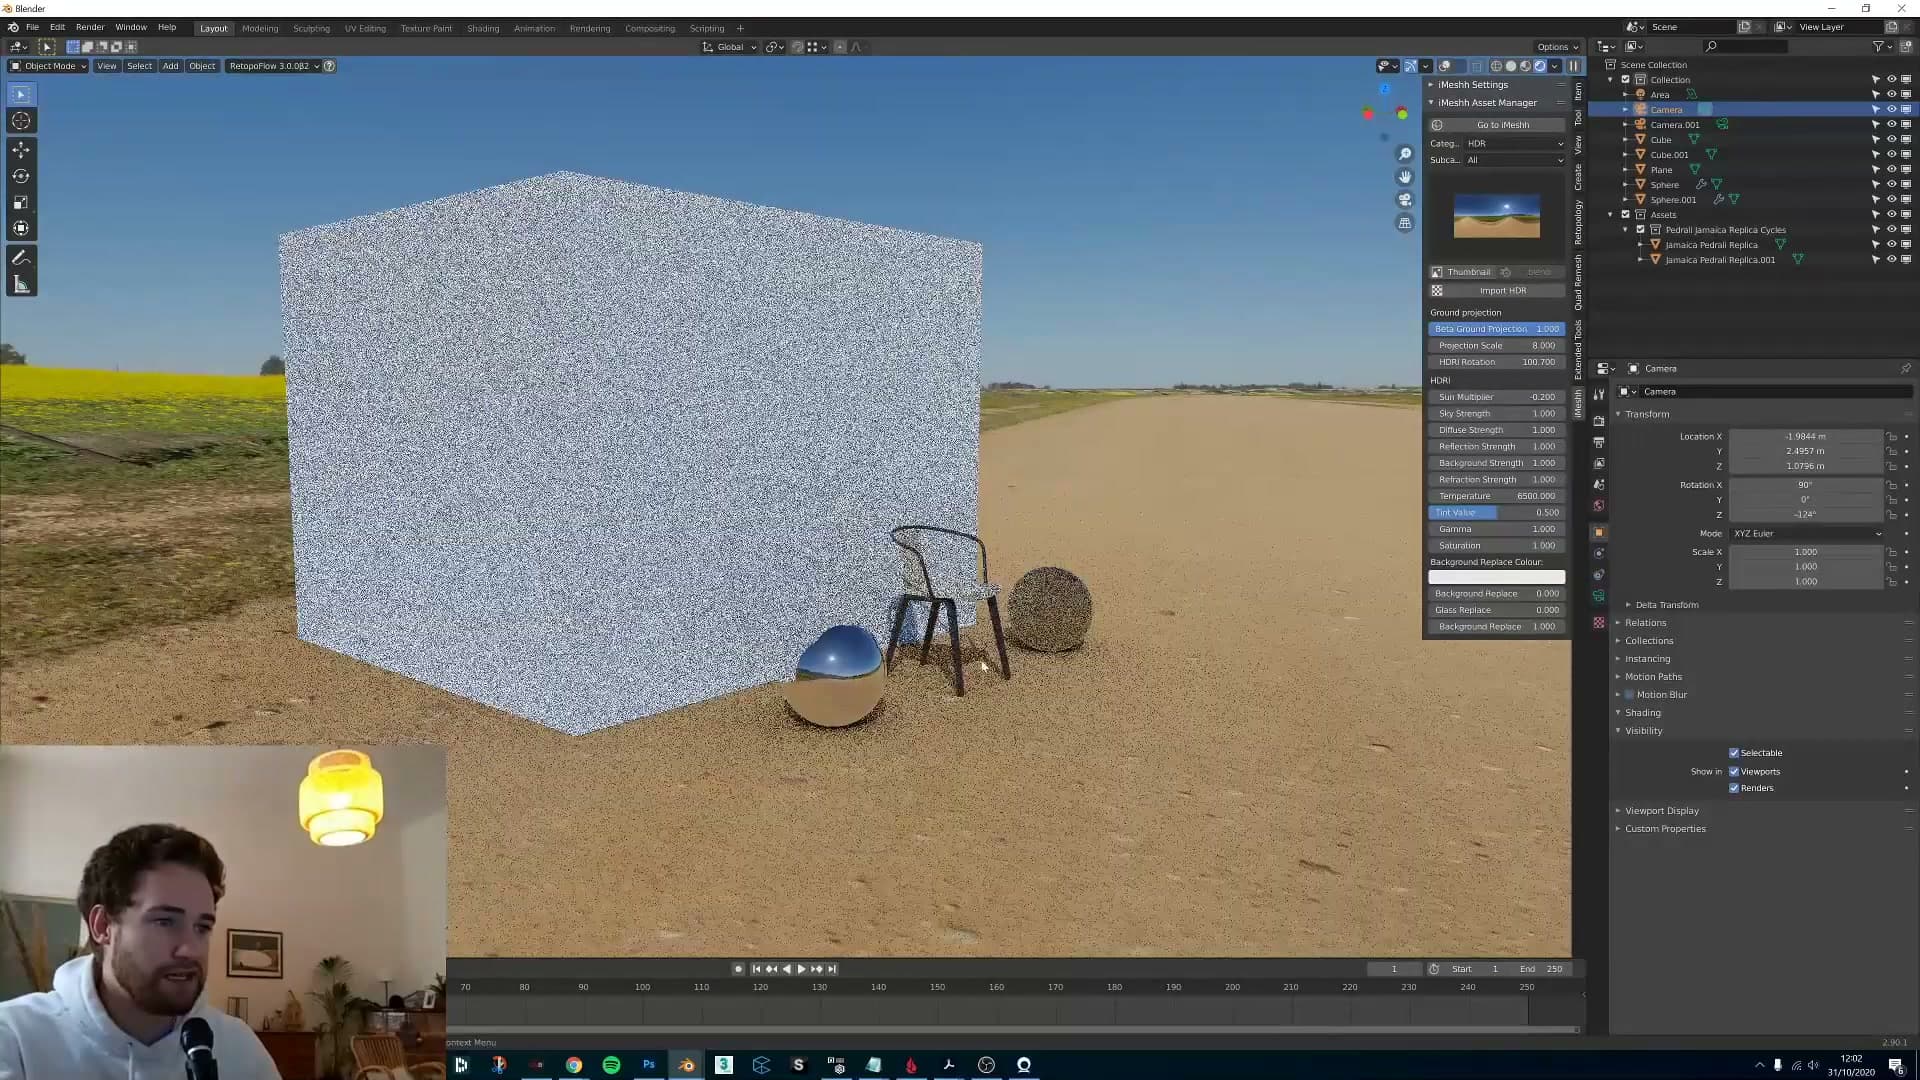
The way it works is threshold-based. The addon looks at the brightest pixels in the HDR and treats anything above a certain brightness as sun; the slider pushes that threshold up or down. Because every HDR's sun is a different brightness, the exact value that produces a given result changes from map to map. A setting that dims the sun on one HDR may switch it off entirely on another.
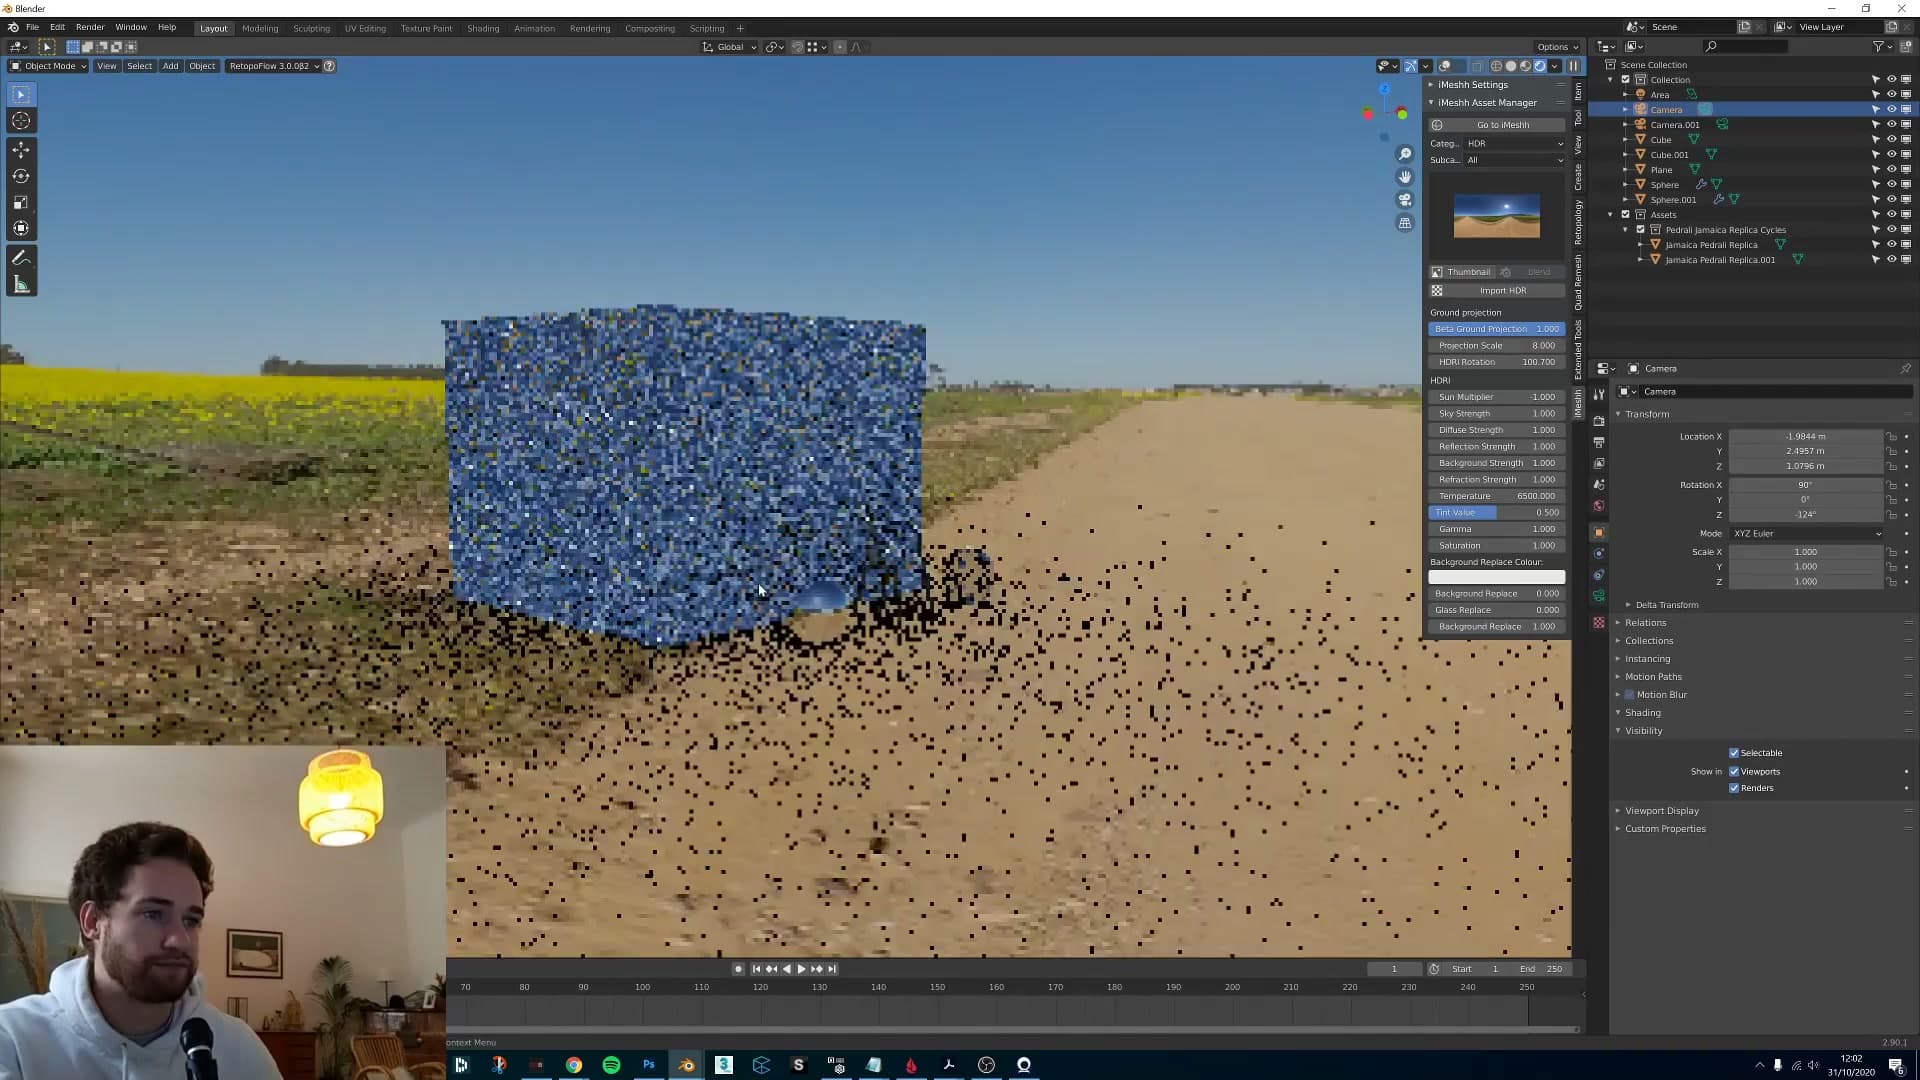
Push the Multiplier negative and the sun dims. At -0.2 the disc is visibly less bright and the shadow catcher receives softer, weaker contact shadows. Around -0.3 the sun is almost gone, and by -1 on this particular HDR the threshold has been crossed completely. The bright pixels are clipped out of the lighting calculation and the sun is fully switched off.
Push it positive and the opposite happens: the sun gets stronger, shadows harden, and the overall scene reads brighter. Returning the slider to zero brings you back to the HDR's native sun intensity.
Lighting with the sun alone (sky off)
Thresholding the sun out is half the trick. The other half is isolating it. With the Sun Multiplier dropped to -1 so the sun is off, drop Sky Strength to 0 as well and the scene goes completely black. There is no light source left in the world.
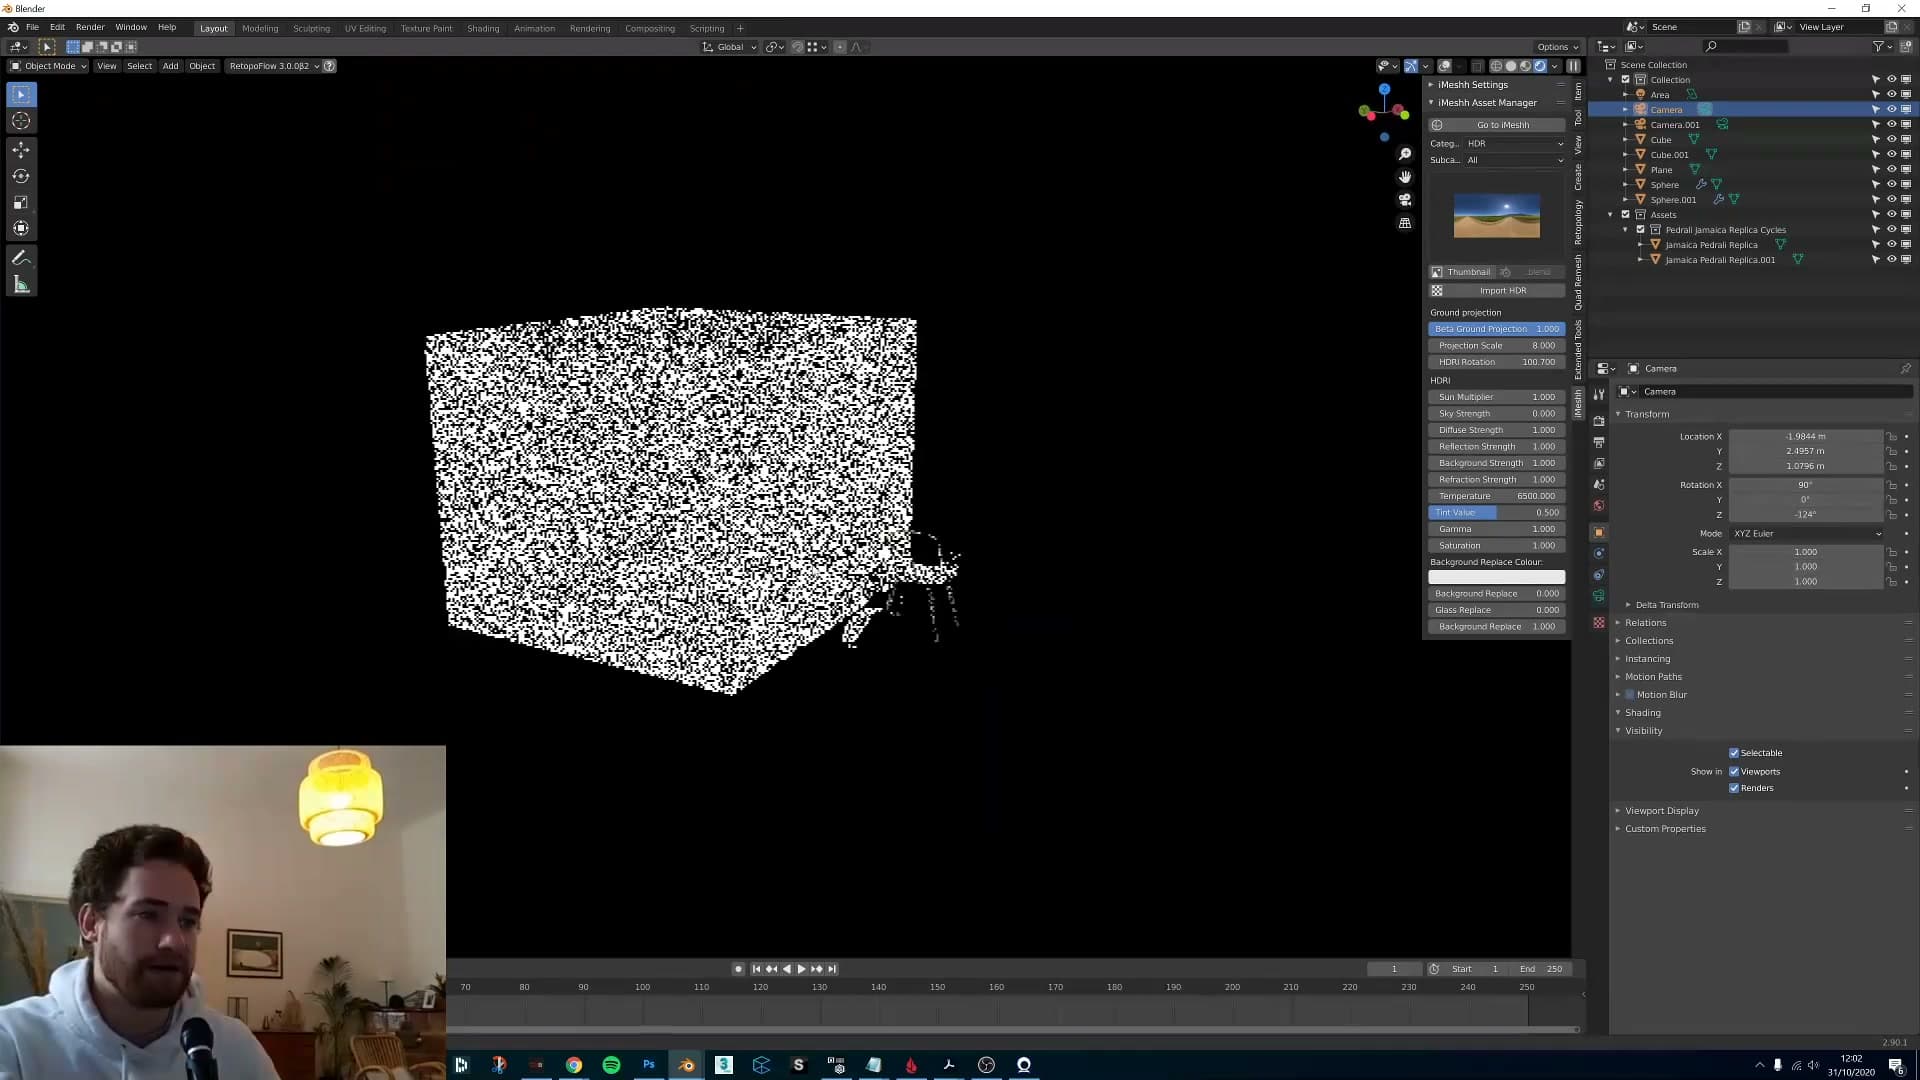
Now bring the Sun Multiplier back up to 1 and the sun returns on its own. You can see the brightness coming off the disc, and on your subject there is no sky illumination at all. Just the hard, directional light from the sun itself. It is a quick way to audition pure sun lighting on a model before deciding how much fill you want the sky to add back in.
From there, return the Multiplier to the default to restore normal behaviour.
Diffuse, Reflection, Background and Refraction strength
Four independent multipliers that let you bias the HDR's contribution to different shading components: useful for brightening an interior without blowing out the window, killing HDR reflections, or pushing refraction.
Brightening an interior without changing the exterior
If an interior is reading too dark but the view through the window is exposed exactly where you want it, pulling on overall world strength will brighten the room and blow out the exterior at the same time. Diffuse strength separates those two problems.
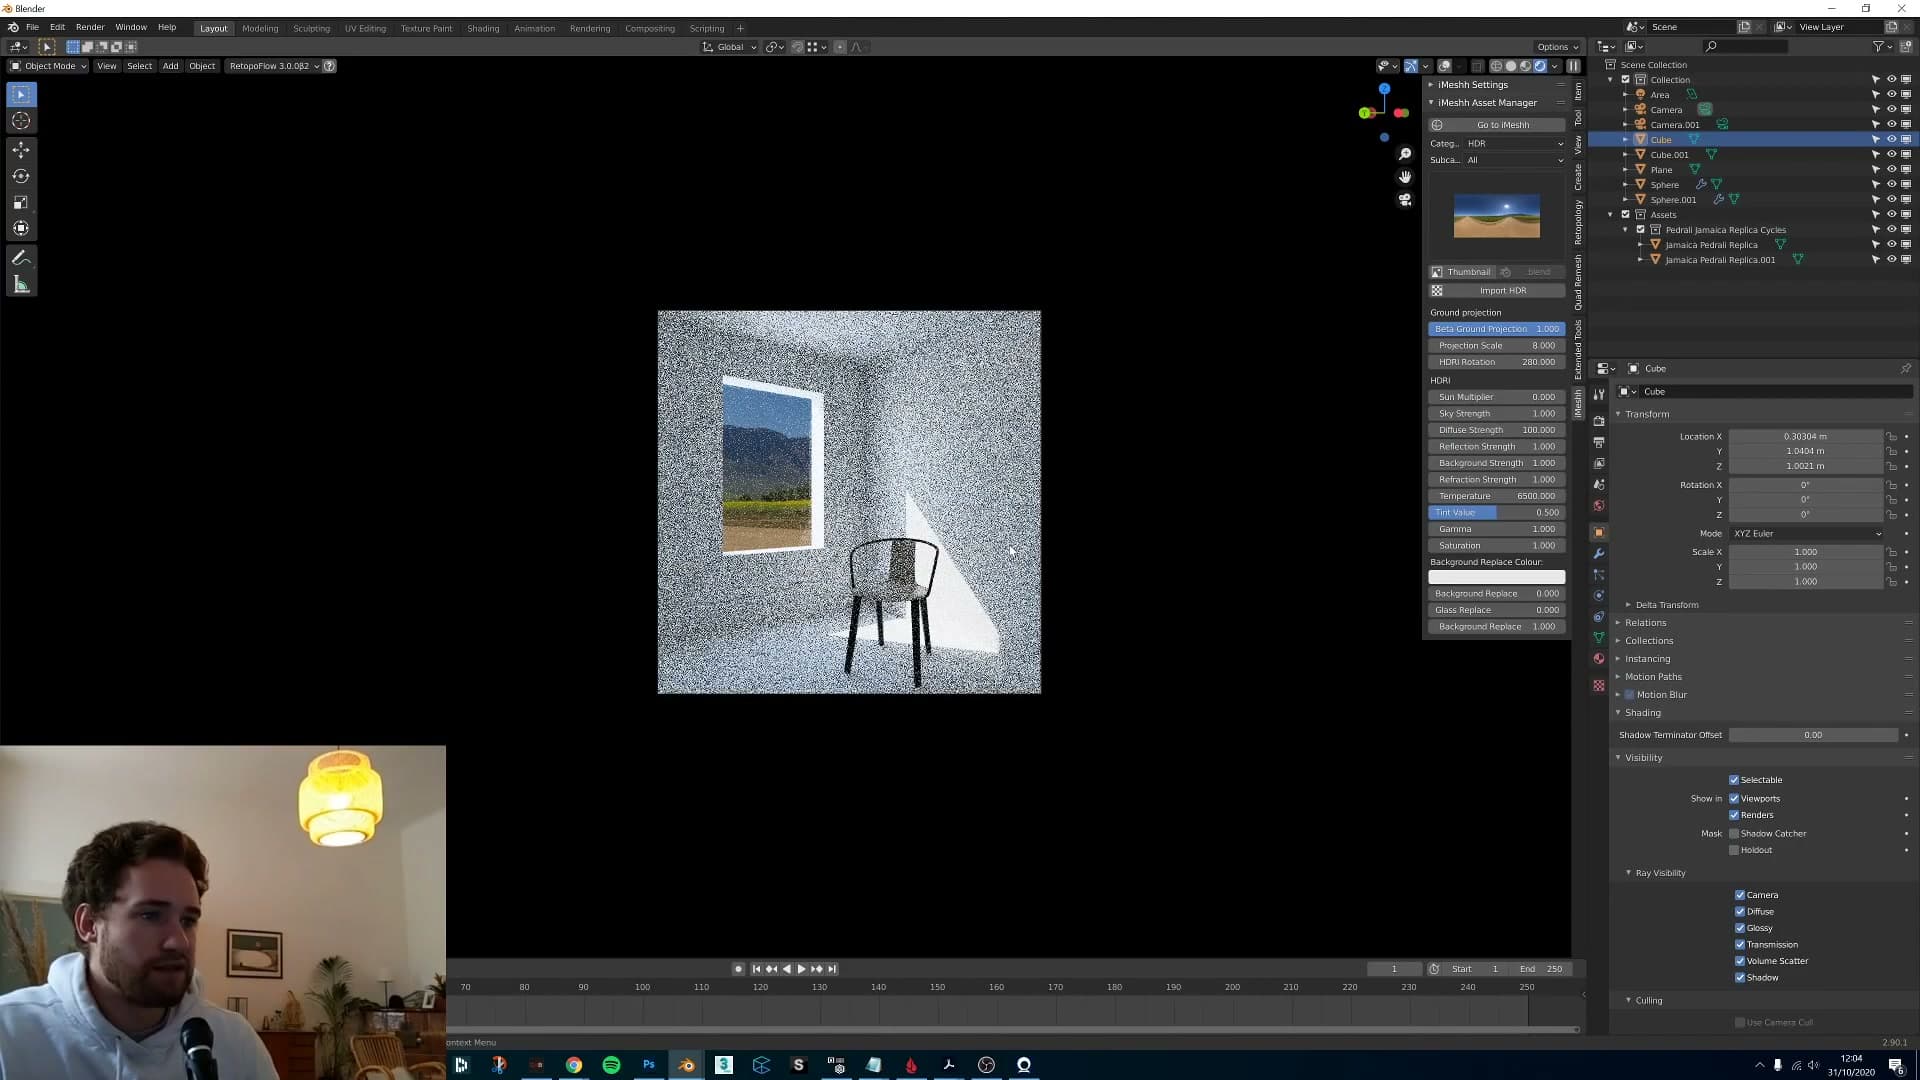
Push the diffuse value up to 100 and the bounced, ambient contribution from the HDR ramps up. The room lights up substantially while the visible sky through the window keeps its exposure. Drop it back to 1 when you're done comparing and the scene returns to its baseline.
It's the cleanest way to lift interior fill without rebuilding the lighting or stacking extra portals, and it's particularly useful for daylit rooms where the outside is already where you want it but the inside reads muddy.
Reflection strength and background visibility
The next slider is Reflection strength, and the chrome ball in the scene is the easiest way to read it. Drop the value to 0.5 and the HDR's contribution to glossy reflections darkens noticeably. Take it all the way to 0 and the ball stops reflecting the HDR entirely. Diffuse light still arrives, but there's nothing for shiny surfaces to mirror. The setting is global: it affects reflections on every object in the scene, not just the test ball.
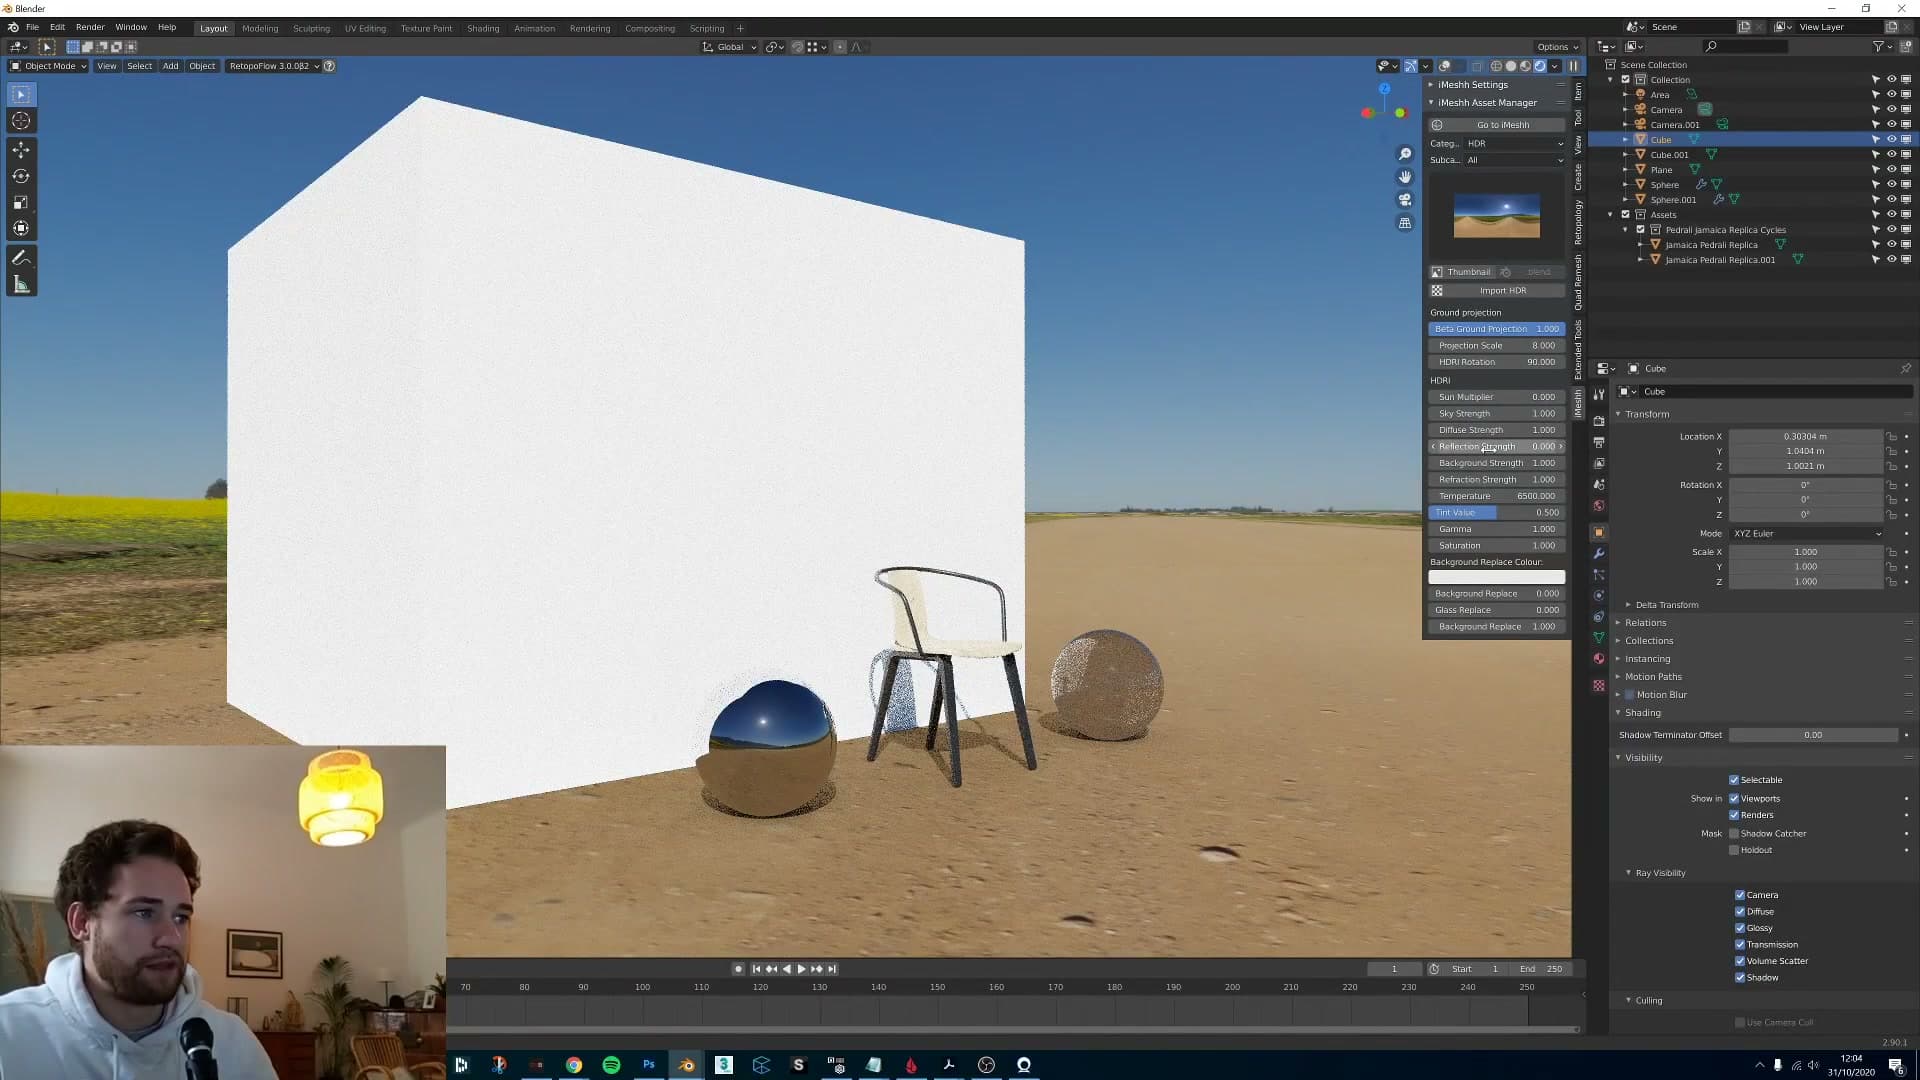
Set it back to 1 and move on to Background strength. Toggling this off hides the HDR from the camera's direct view. The dome disappears from the rendered background, but the scene stays lit exactly as it was. Lighting, reflections, and refractions all carry on as normal; you're only changing what the camera sees behind the geometry.
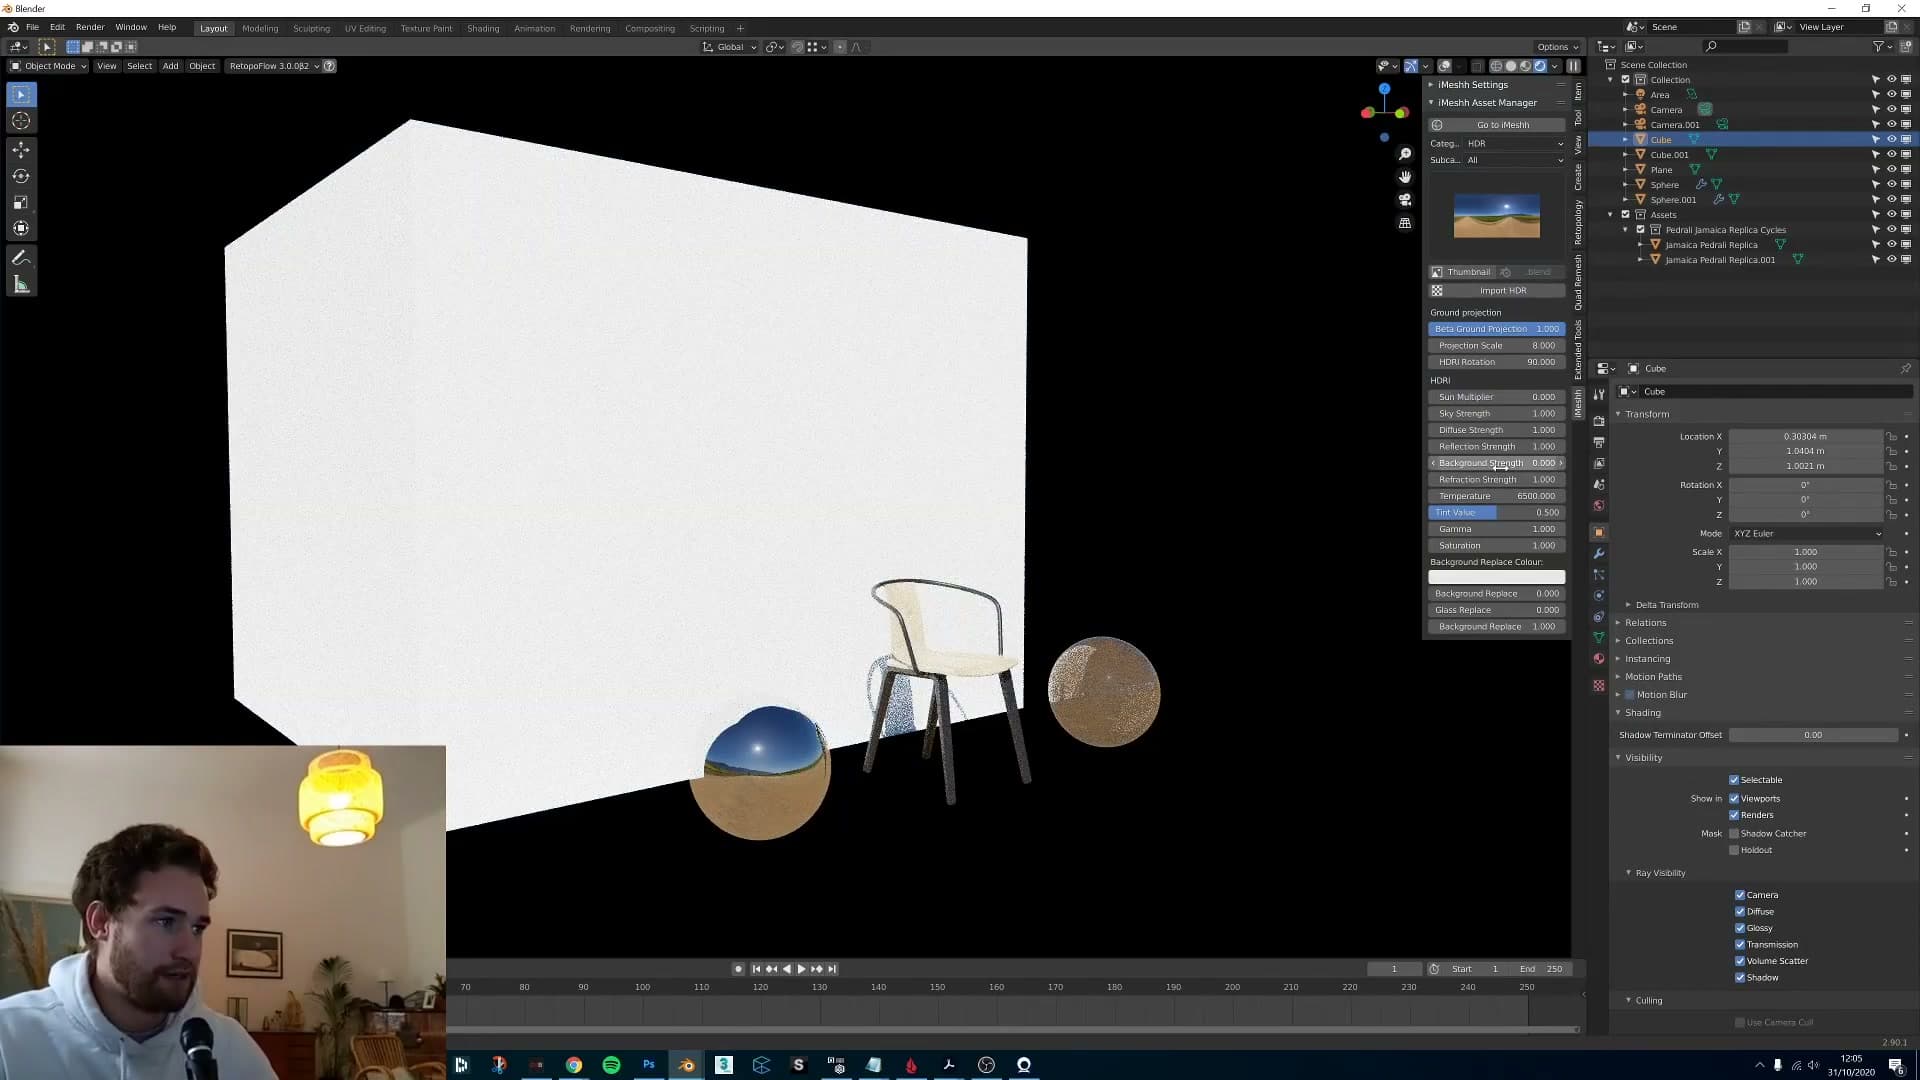
It works the other way too: push the background up if you want the visible HDR to read brighter without affecting how anything in the scene is lit. Useful when you like the lighting an HDR is giving you but the sky behind your subject is too dim or too bright on its own.
Refraction through glass
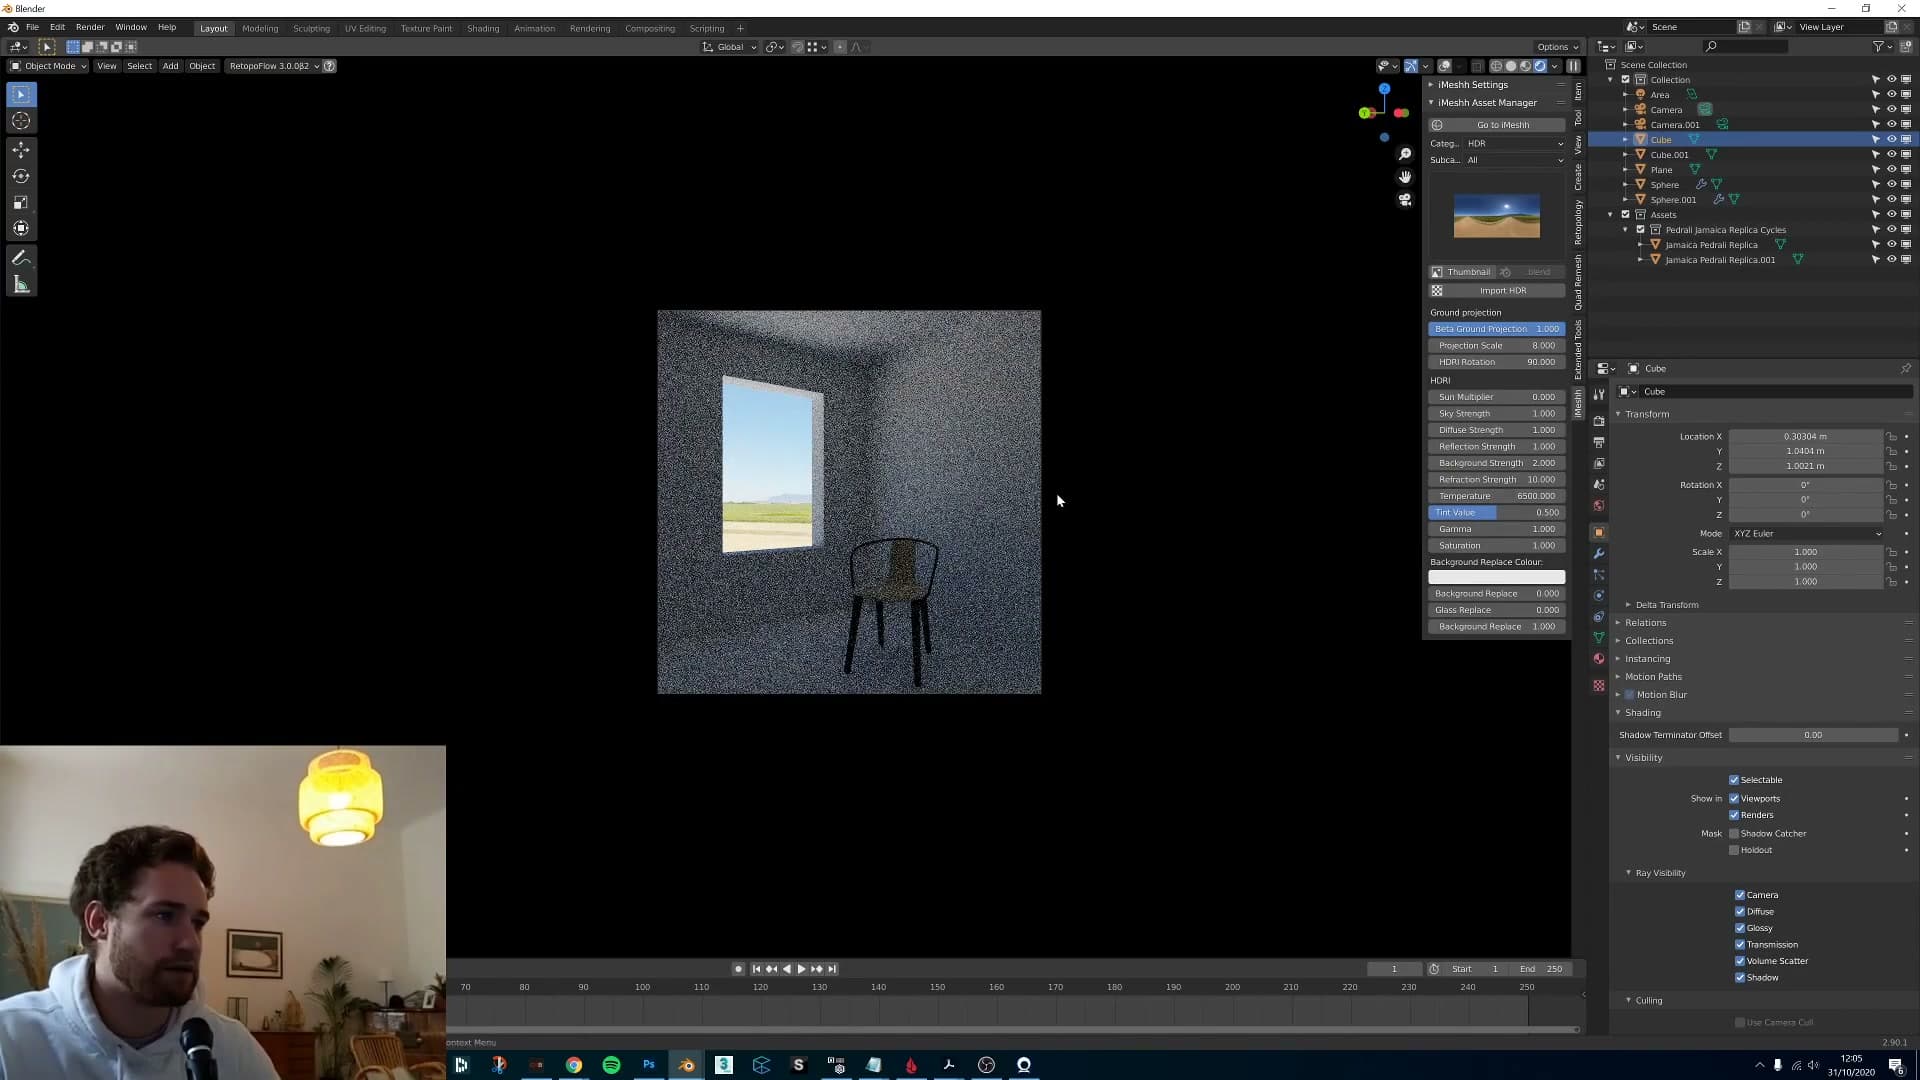
Refraction strength controls what the HDR contributes through transparent surfaces: glass, water, anything refractive. Set it to 0 with a glass ball in frame and the ball itself stays in place, the room around it stays lit, but anything you'd normally see refracted from outside goes dark.
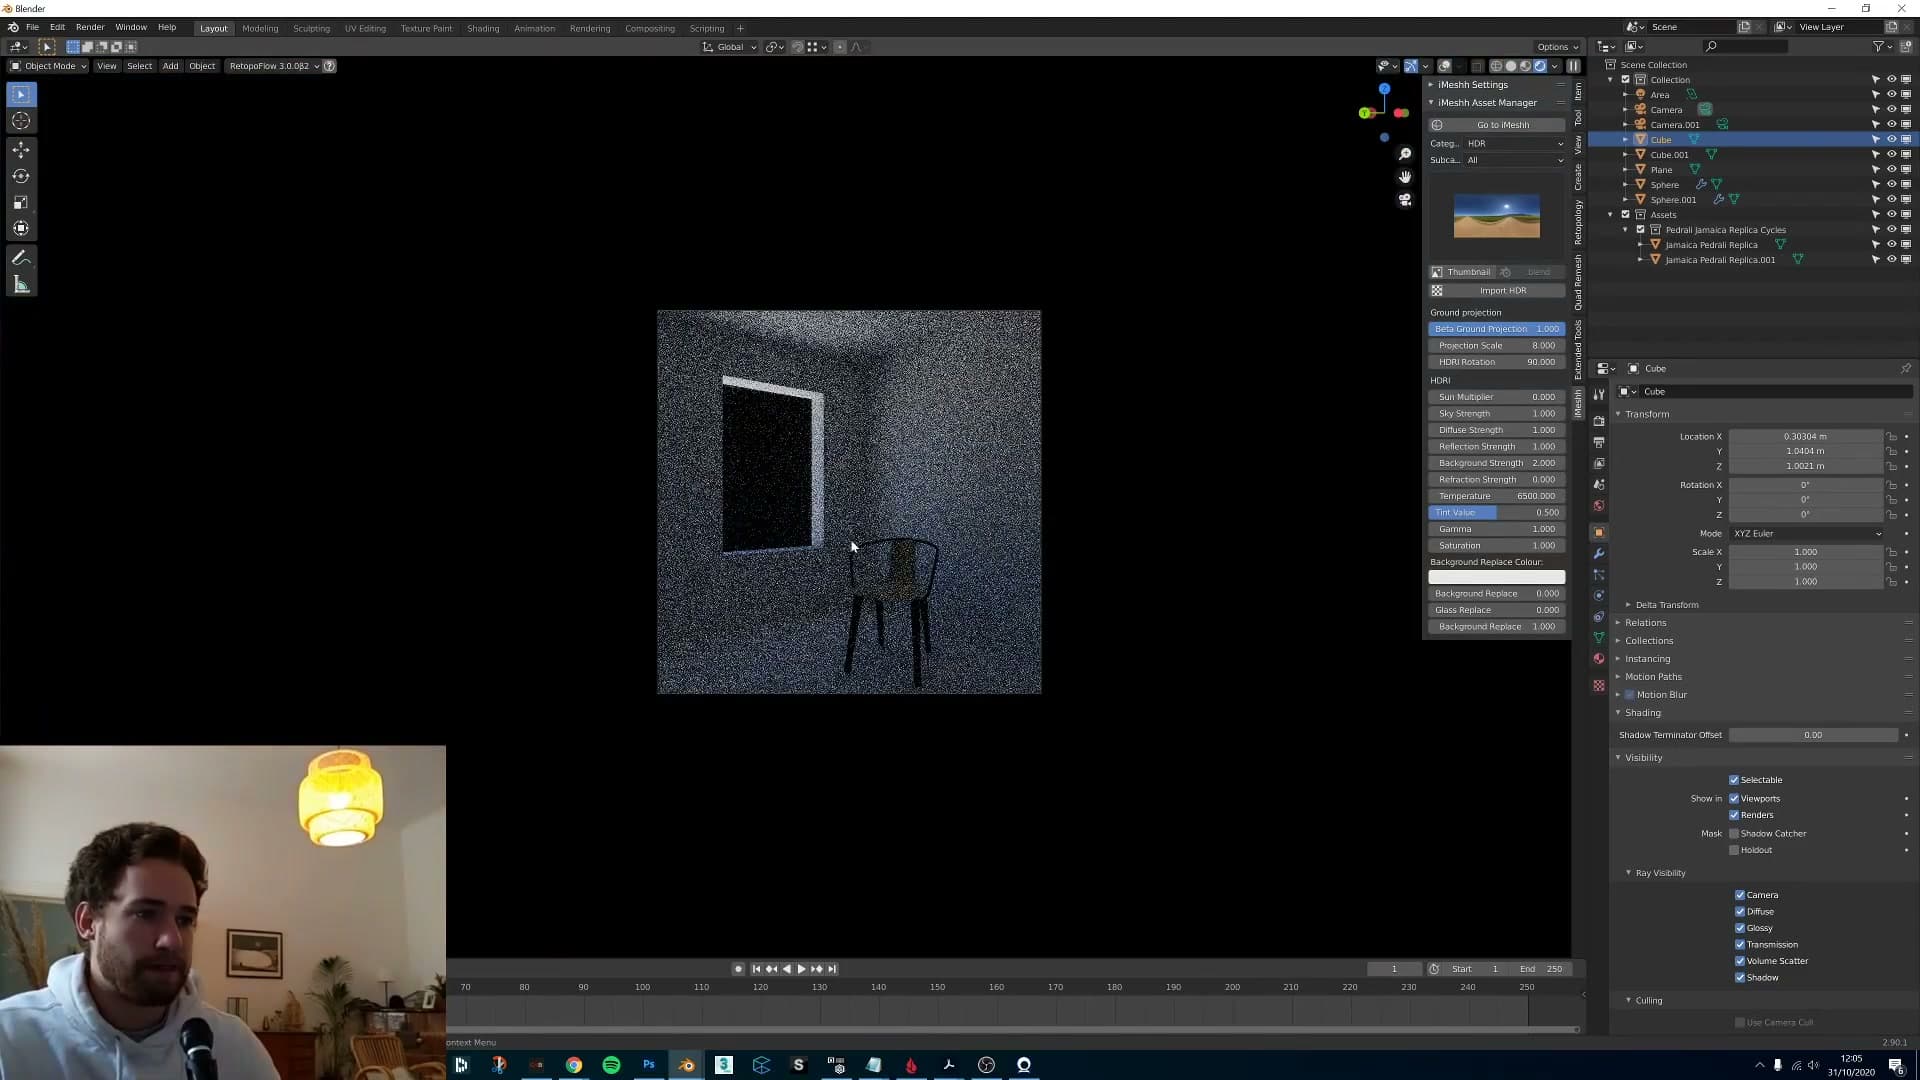
It cuts the other way too. Push refraction up to 10 and the exterior view through a window blows out. A deliberately high-key look that can sit nicely behind a daylit interior when you want the outside to feel washed-out and bright rather than detailed.
Temperature, Tint, Gamma and Saturation
The cosmetic side of HDR control: warming or cooling an HDR, pulling out purple/green casts, using gamma as a contrast and sun-strength shortcut, and stripping colour bleed with saturation 0.
Warming, cooling and shifting the tint
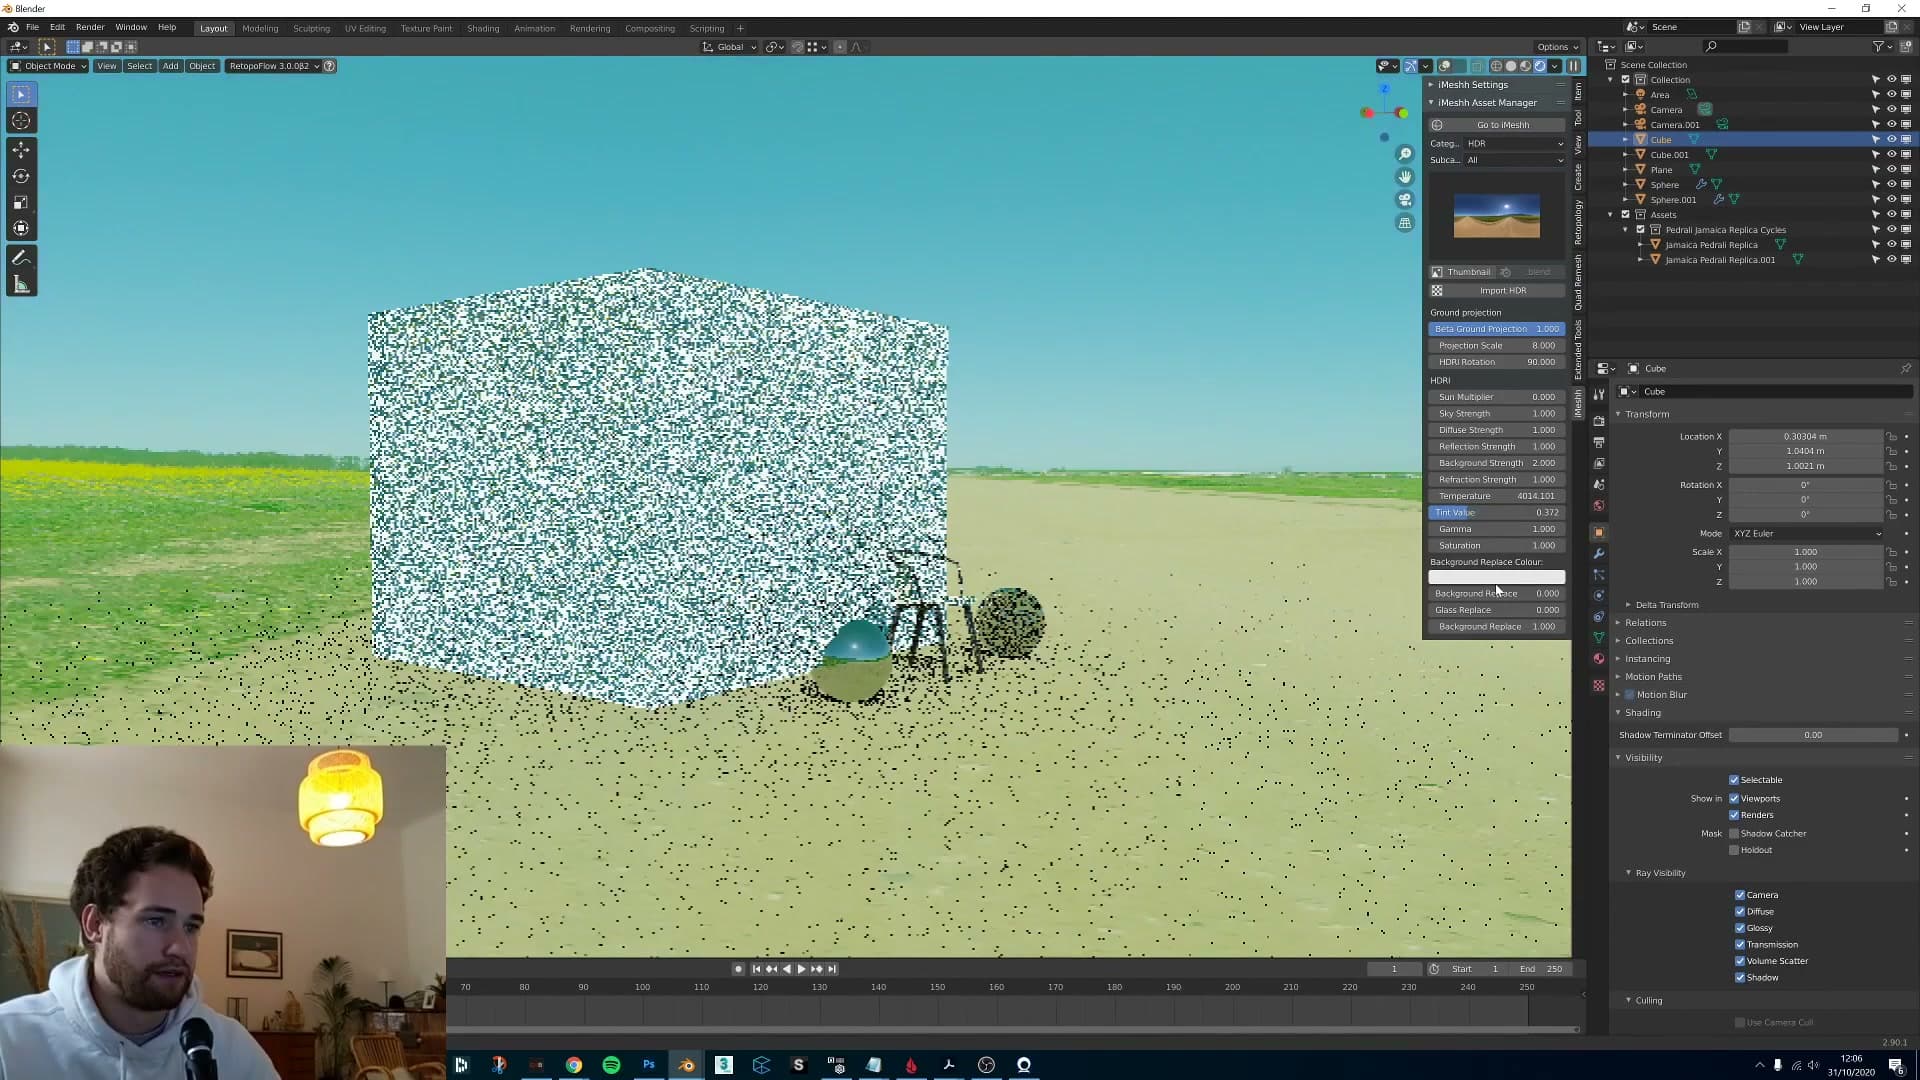
Temperature is the first of the cosmetic sliders. Push it up and the HDR gets warmer; pull it down and it cools off. It is the slider to reach for when an HDR's lighting direction is right but the colour just feels a touch too warm or too cold for the scene you are building.
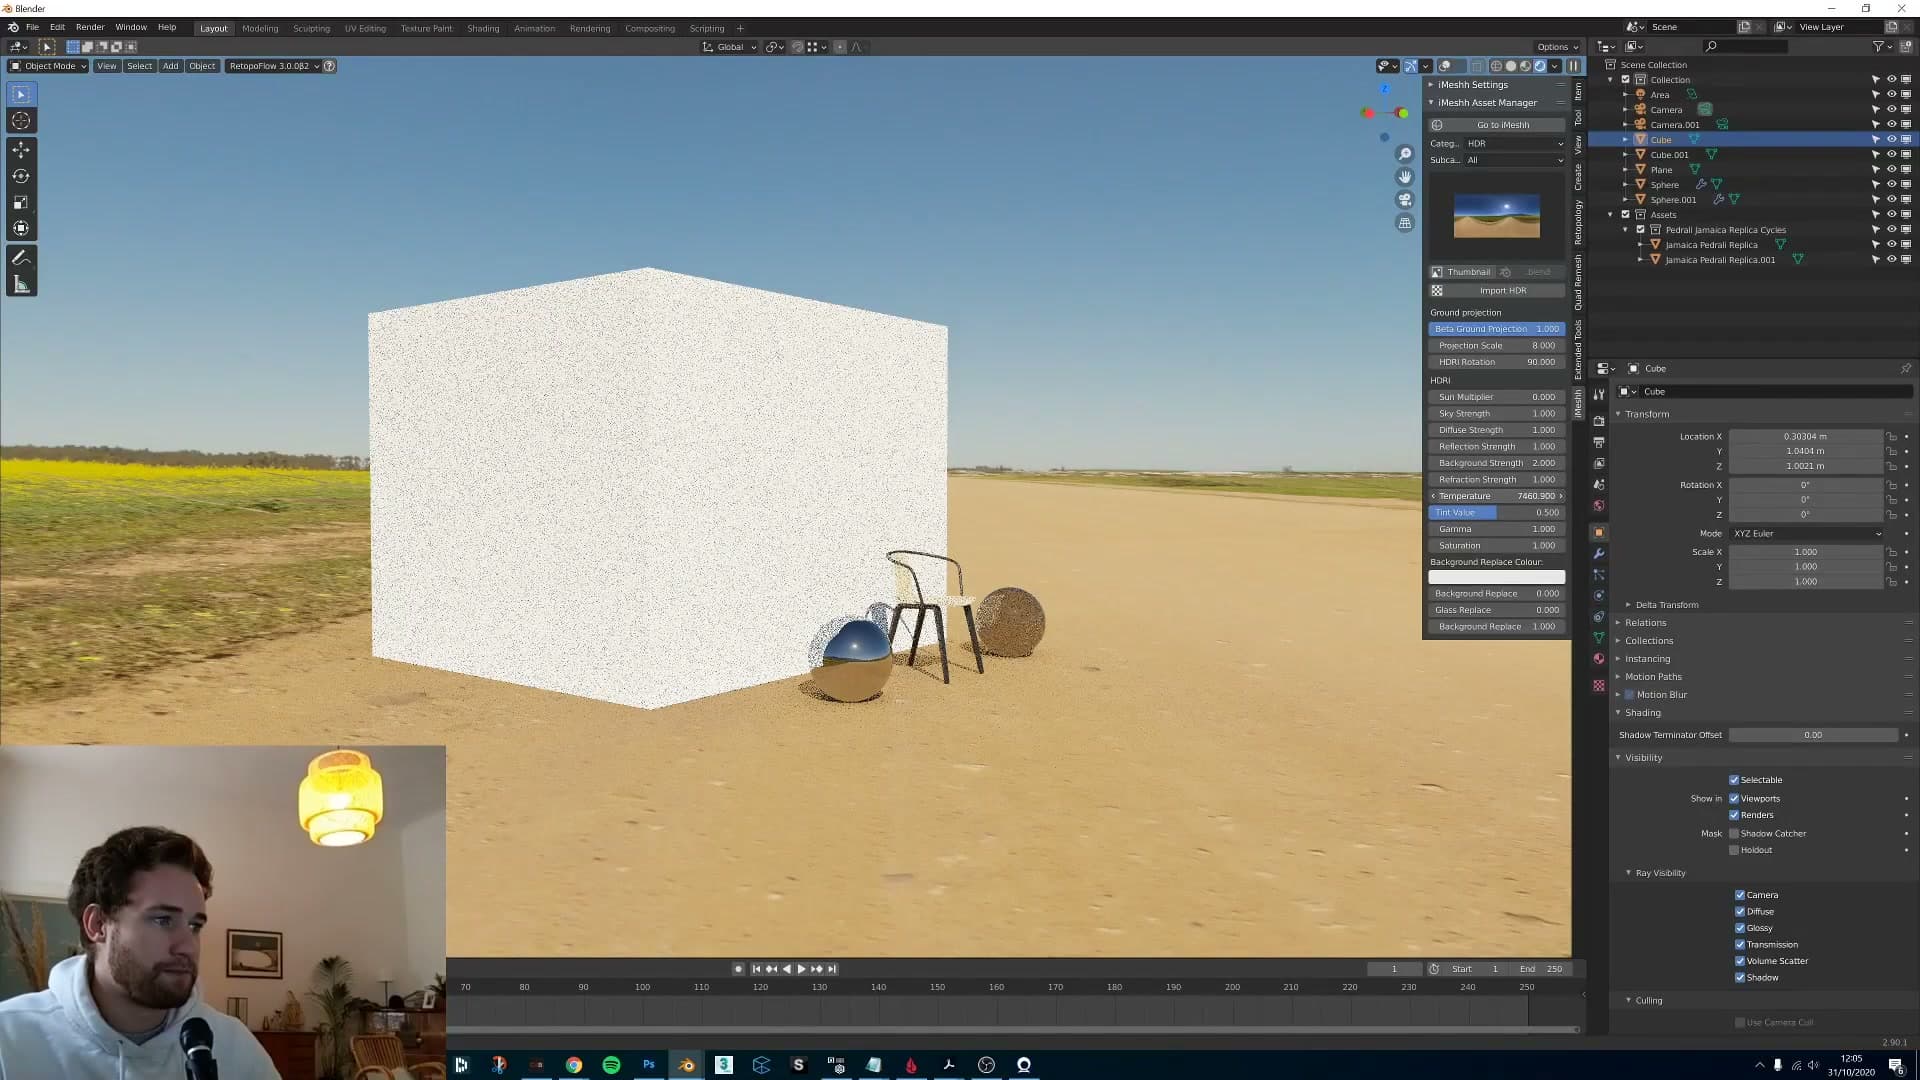
Sitting alongside is the tint slider, which runs between purple and green. If a render is reading too purple, push the tint towards green to neutralise it; if it is leaning green, push it back the other way. Together, temperature and tint cover the standard white-balance correction you would otherwise be doing in post.
Gamma: contrast and sun-strength in one slider
Gamma is the most interesting of the colour controls because it does not change colour at all. It changes contrast. Push it up to 1.2 and the sun reads brighter, the shadows deepen, and the whole HDR behaves as if you had cranked up the contrast on a photo. 1.2 is usually a bit strong, but the slider works the other way too: at 0.9 the HDR softens and flattens out.
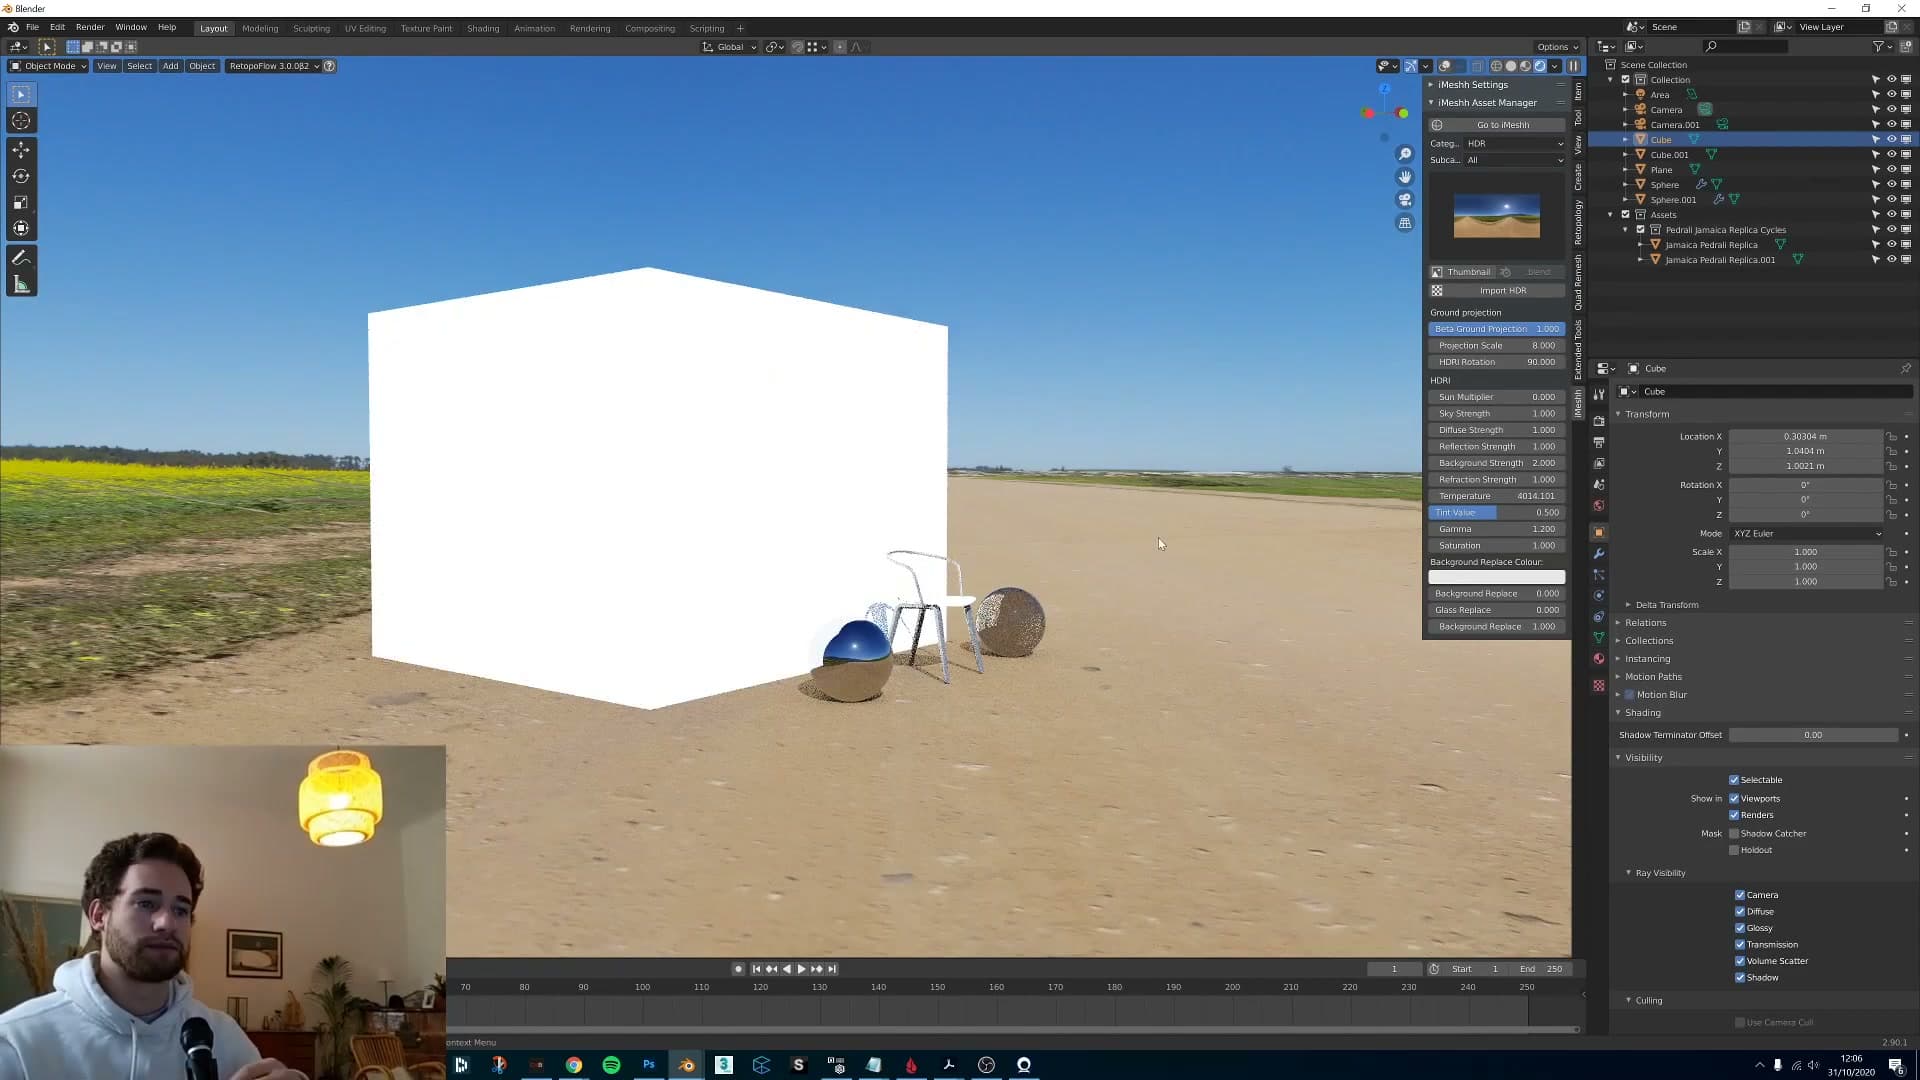
Where gamma really earns its keep is on exterior scenes. If you want the sun to feel stronger without rebuilding your lighting, nudge gamma up to 1.1 and the sun hardens with very little else needing to change.
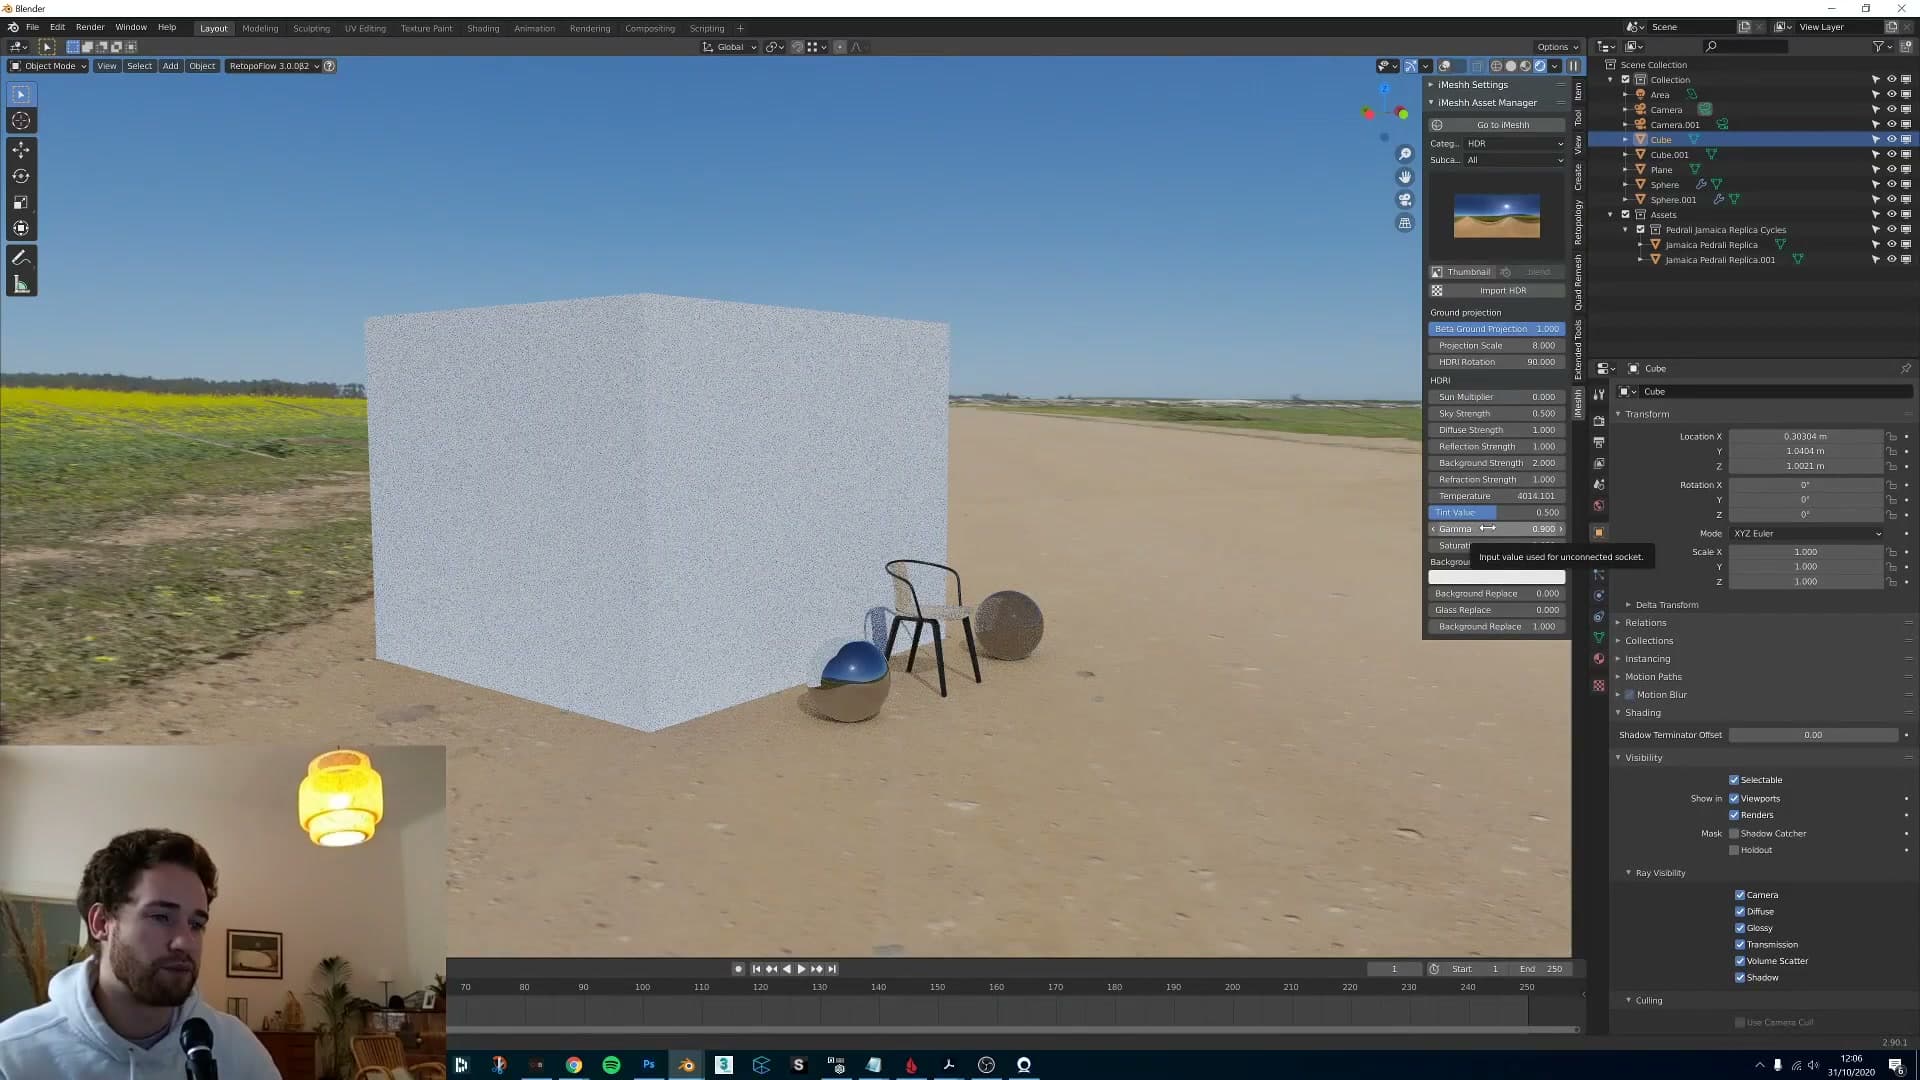
Killing colour bleed with saturation 0
Sometimes you will find an HDR with lighting direction you love, but the colour of the environment is bleeding into the scene in ways you do not want. A common example is a green exterior throwing green light onto a white ceiling: great lighting, bad colour cast.
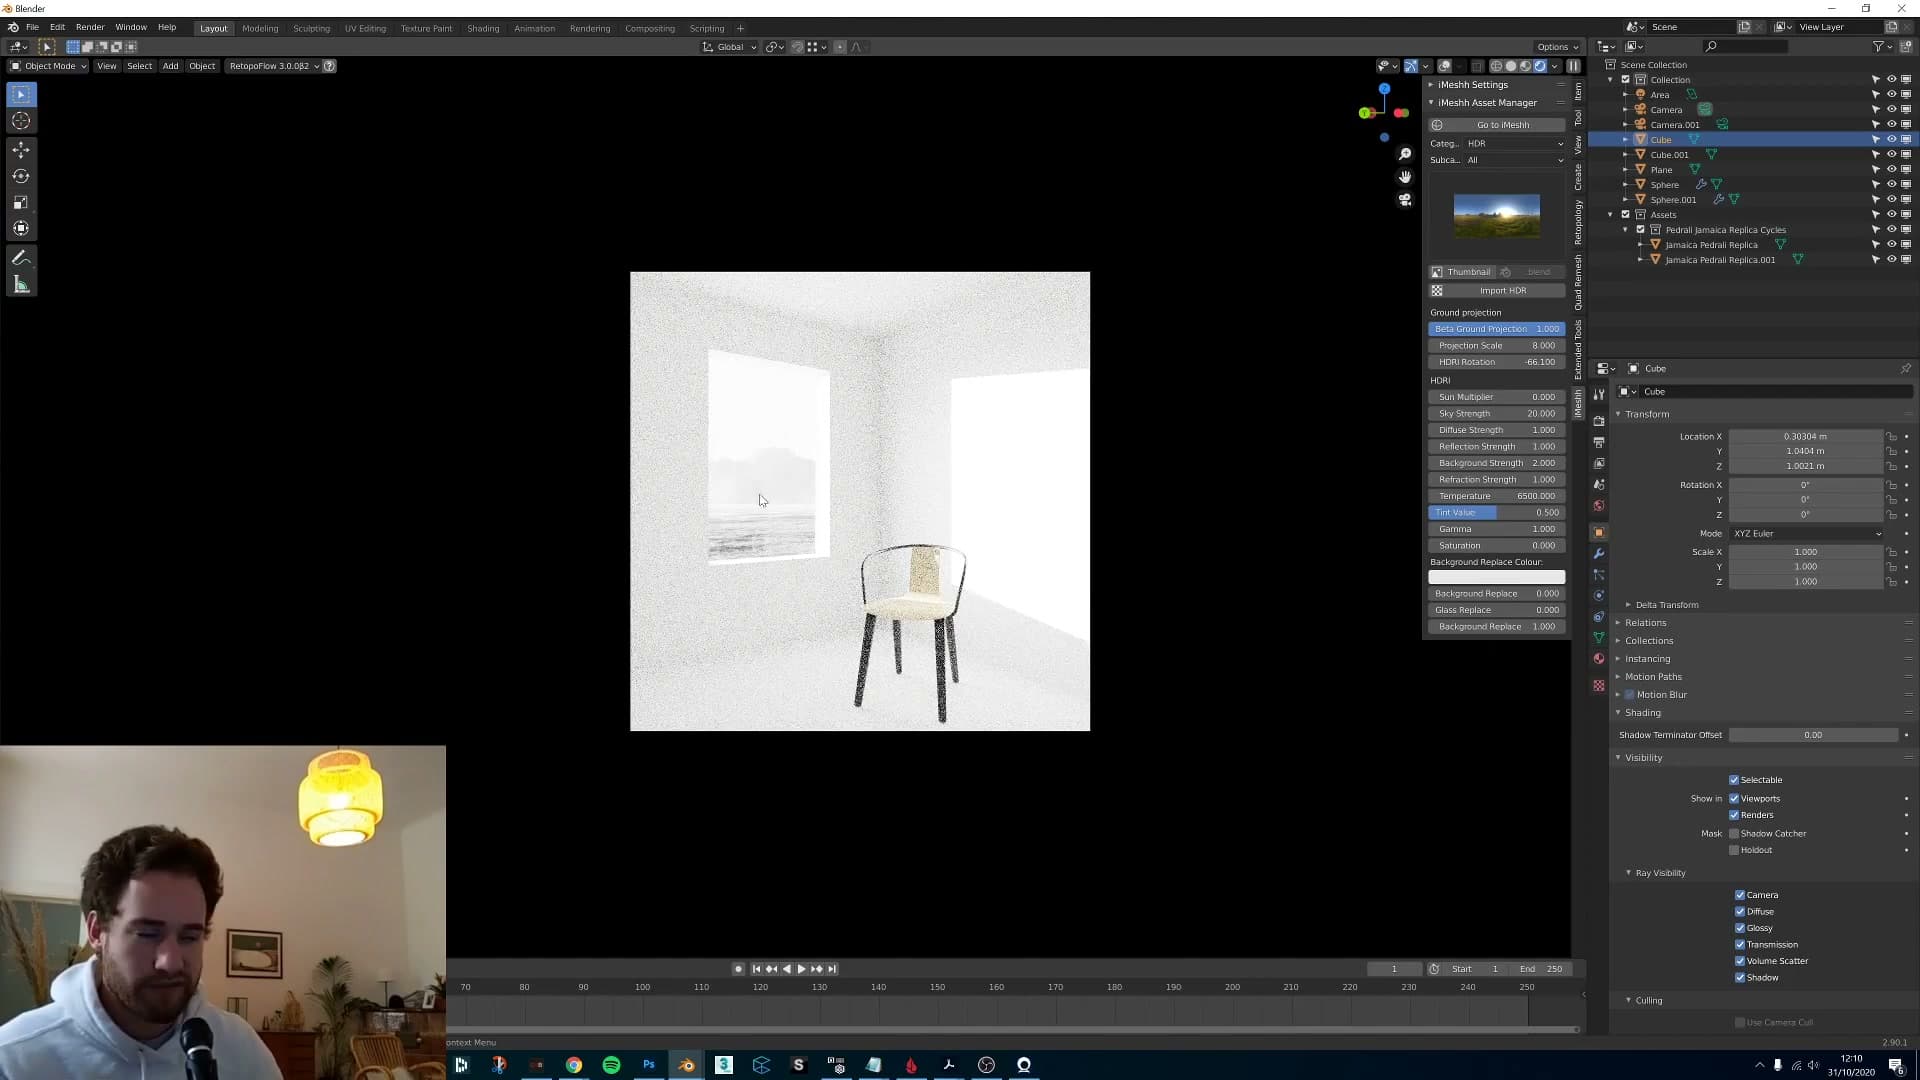
The fix is the saturation slider. Pull it down to 0 and the HDR becomes a crisp, neutral white light. You lose the colour cast entirely and gain a clean white-balanced base. You will need to replace the background separately, but for the lighting itself this is the quickest route to a render with good white balance.
The other benefit is freedom. Once the HDR is providing neutral light, you can layer your own coloured lights into the scene and experiment with the mood without fighting the environment's own tint.
Product-shot backgrounds and custom textures
Turning any HDR into a product backdrop: replacing the visible background with a flat colour, tinting it, and plugging a custom image into the world shader without losing the HDR's lighting.
Replacing the background with a flat colour
These are the settings I reach for on almost every product shot. Find the background replacement control in the panel and push it to 1. The visible background flips to pure white while the rest of the scene stays exactly as it was: same lighting direction, same reflections, same shadow contact. You've masked out the visible dome and put a flat colour in its place.
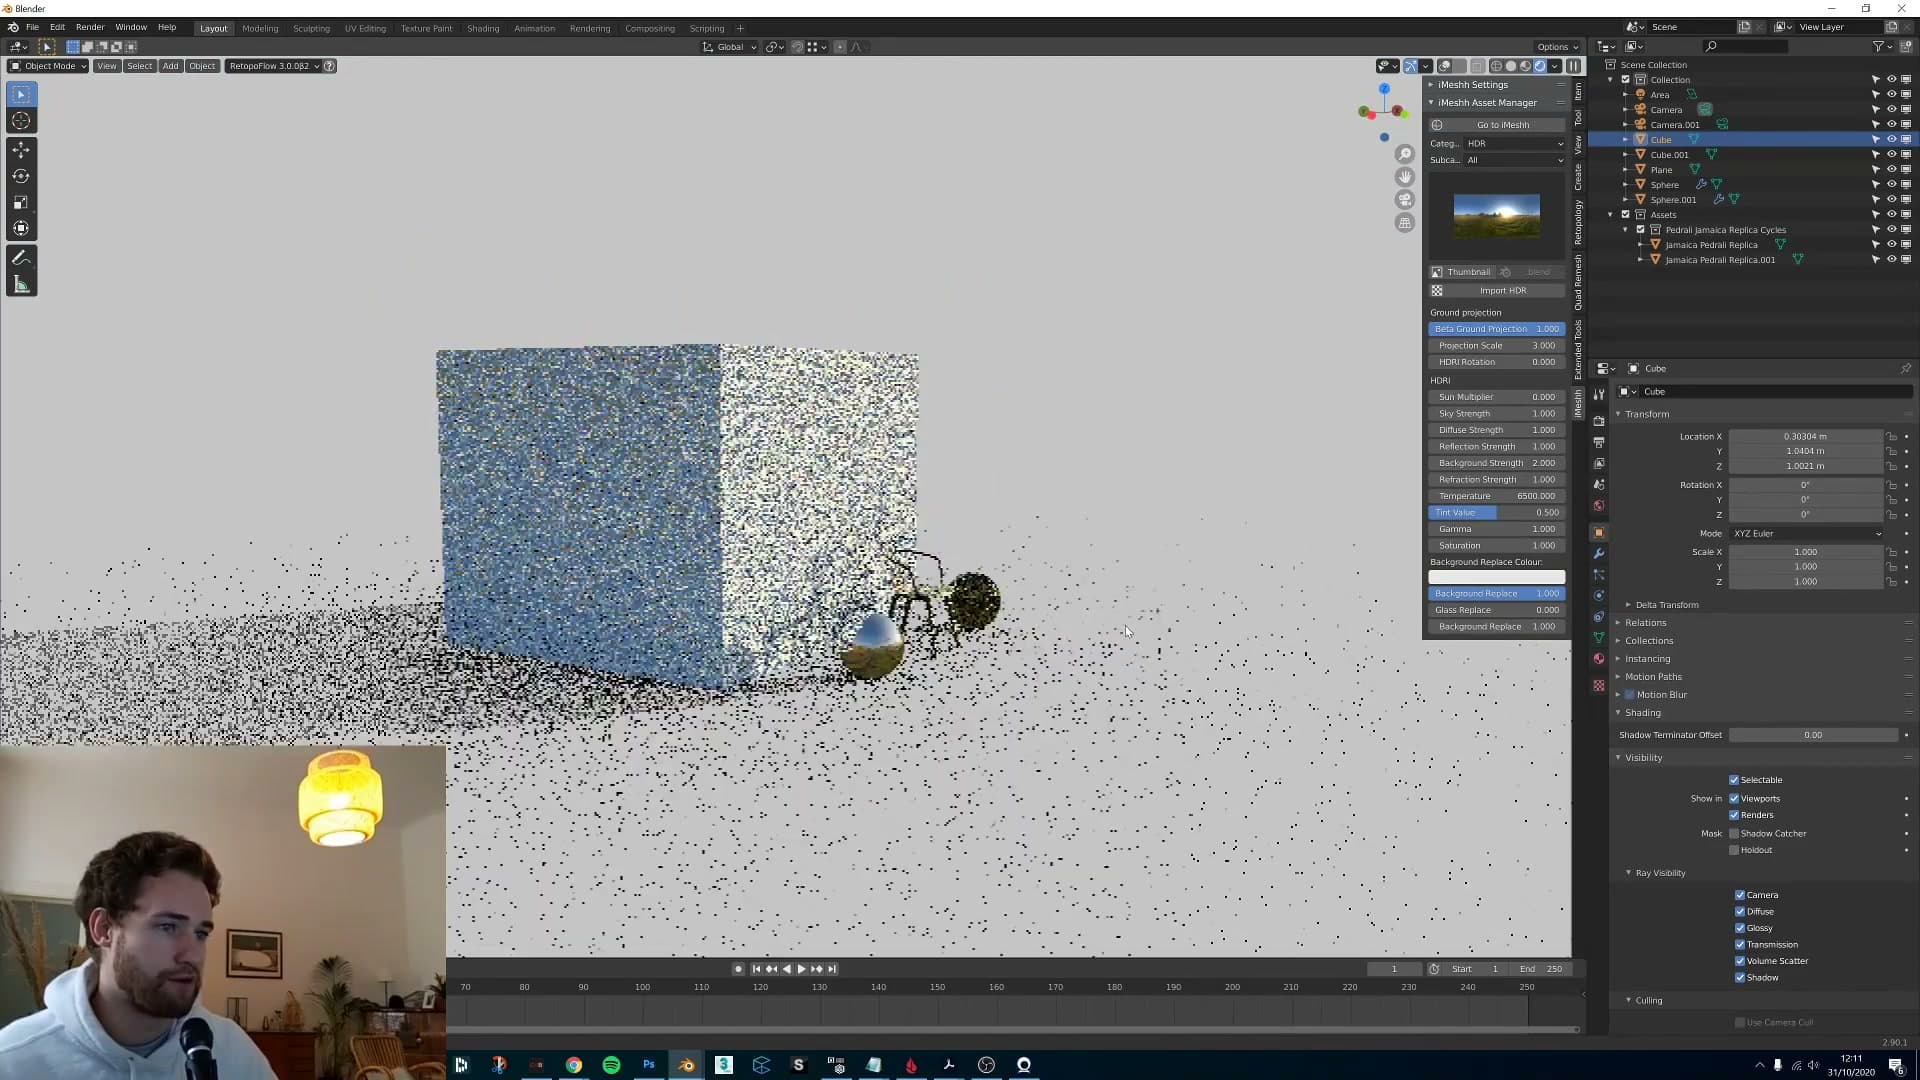
It's the right move for a product on a white sweep: the HDR is still doing the lighting work behind the scenes, but the camera reads a clean backdrop behind the subject. You can also push the brightness up if the white looks dull, although it tips into blown-out very quickly. A small nudge is usually enough.
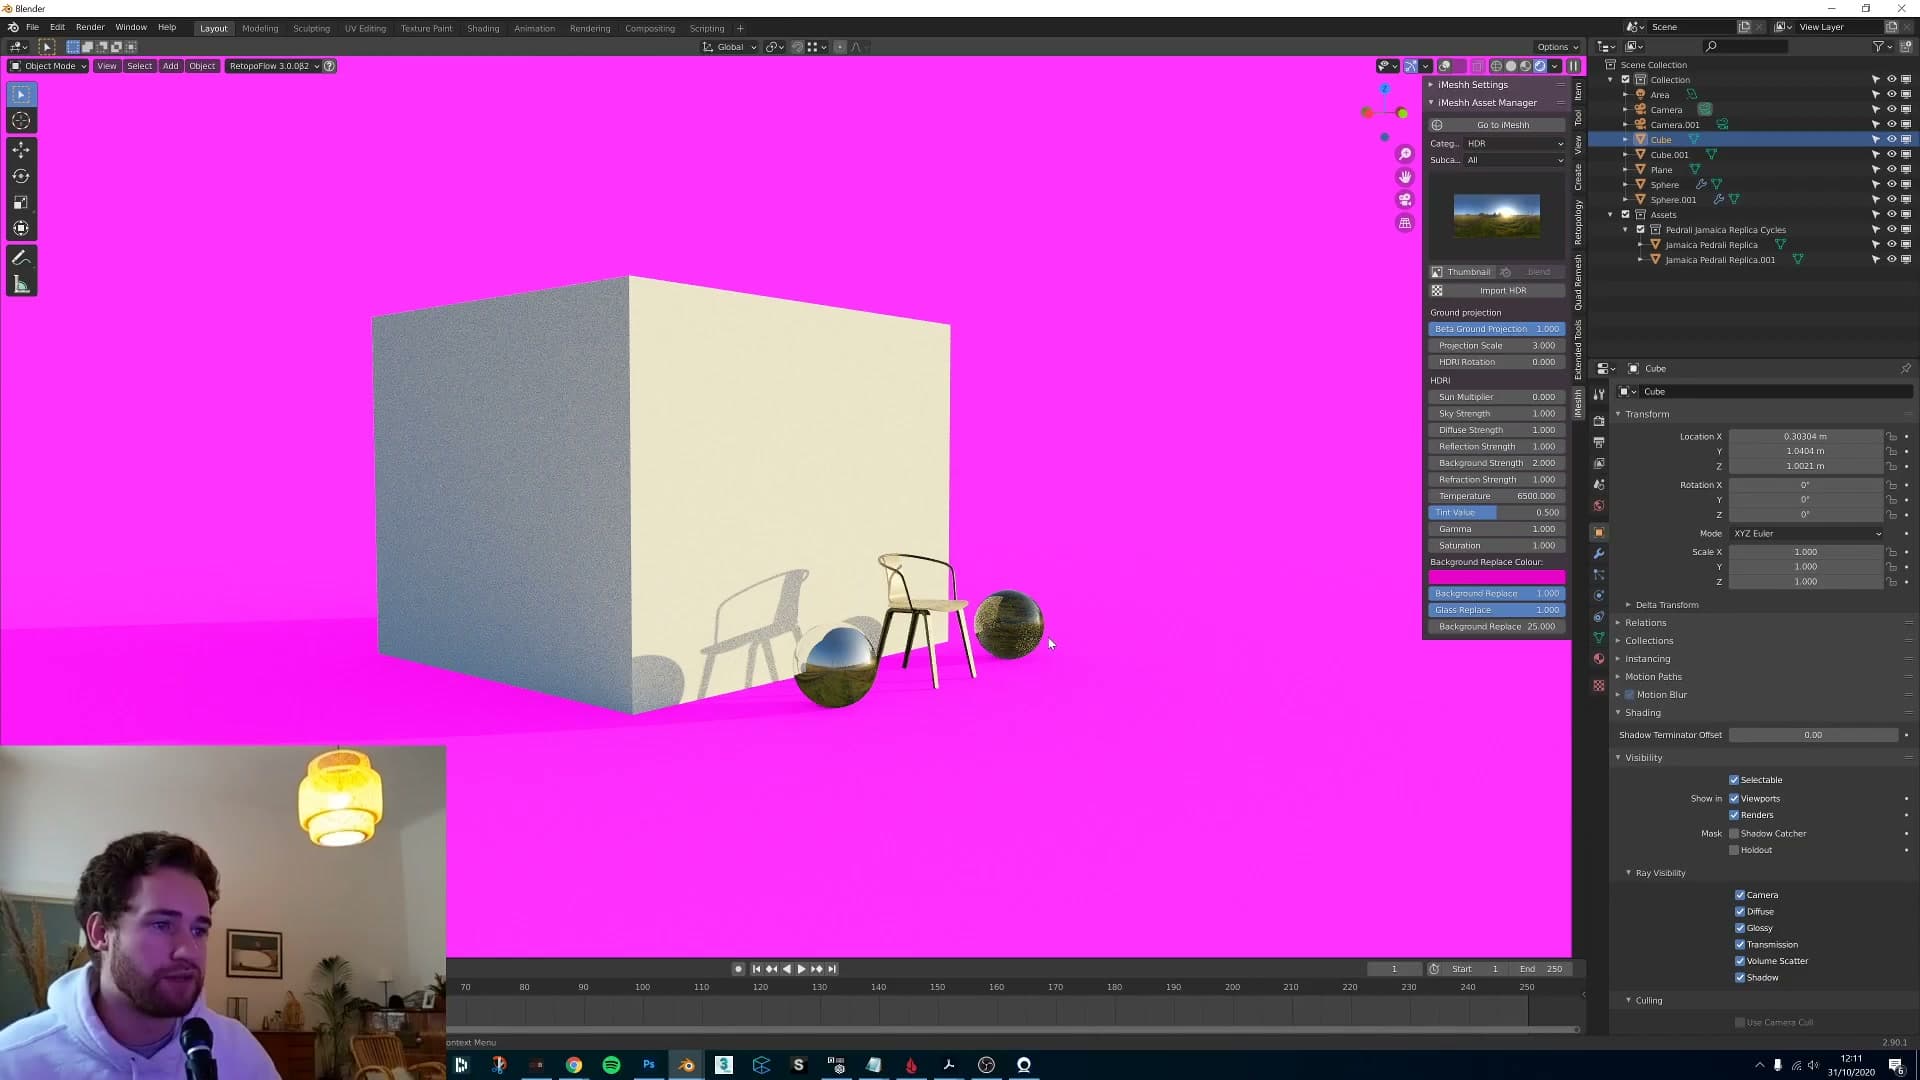
The colour is yours to set. Drop the value to a pink and the backdrop turns pink, and every glossy or refractive surface in the scene picks it up exactly like a real coloured paper backdrop would. The glass ball in the test scene catches the pink in its reflection and its refraction, because the world is still feeding the same physical light into the room. You've only replaced what the camera sees behind the subject.
Plugging a custom image into the world shader
A flat colour is not always the look you want. For some product shots you'd reach for a gradient, a soft filter, or a specific background image instead. I'd like to expose those directly in a future update, but Blender's world shader already lets you do it manually in about ten seconds.
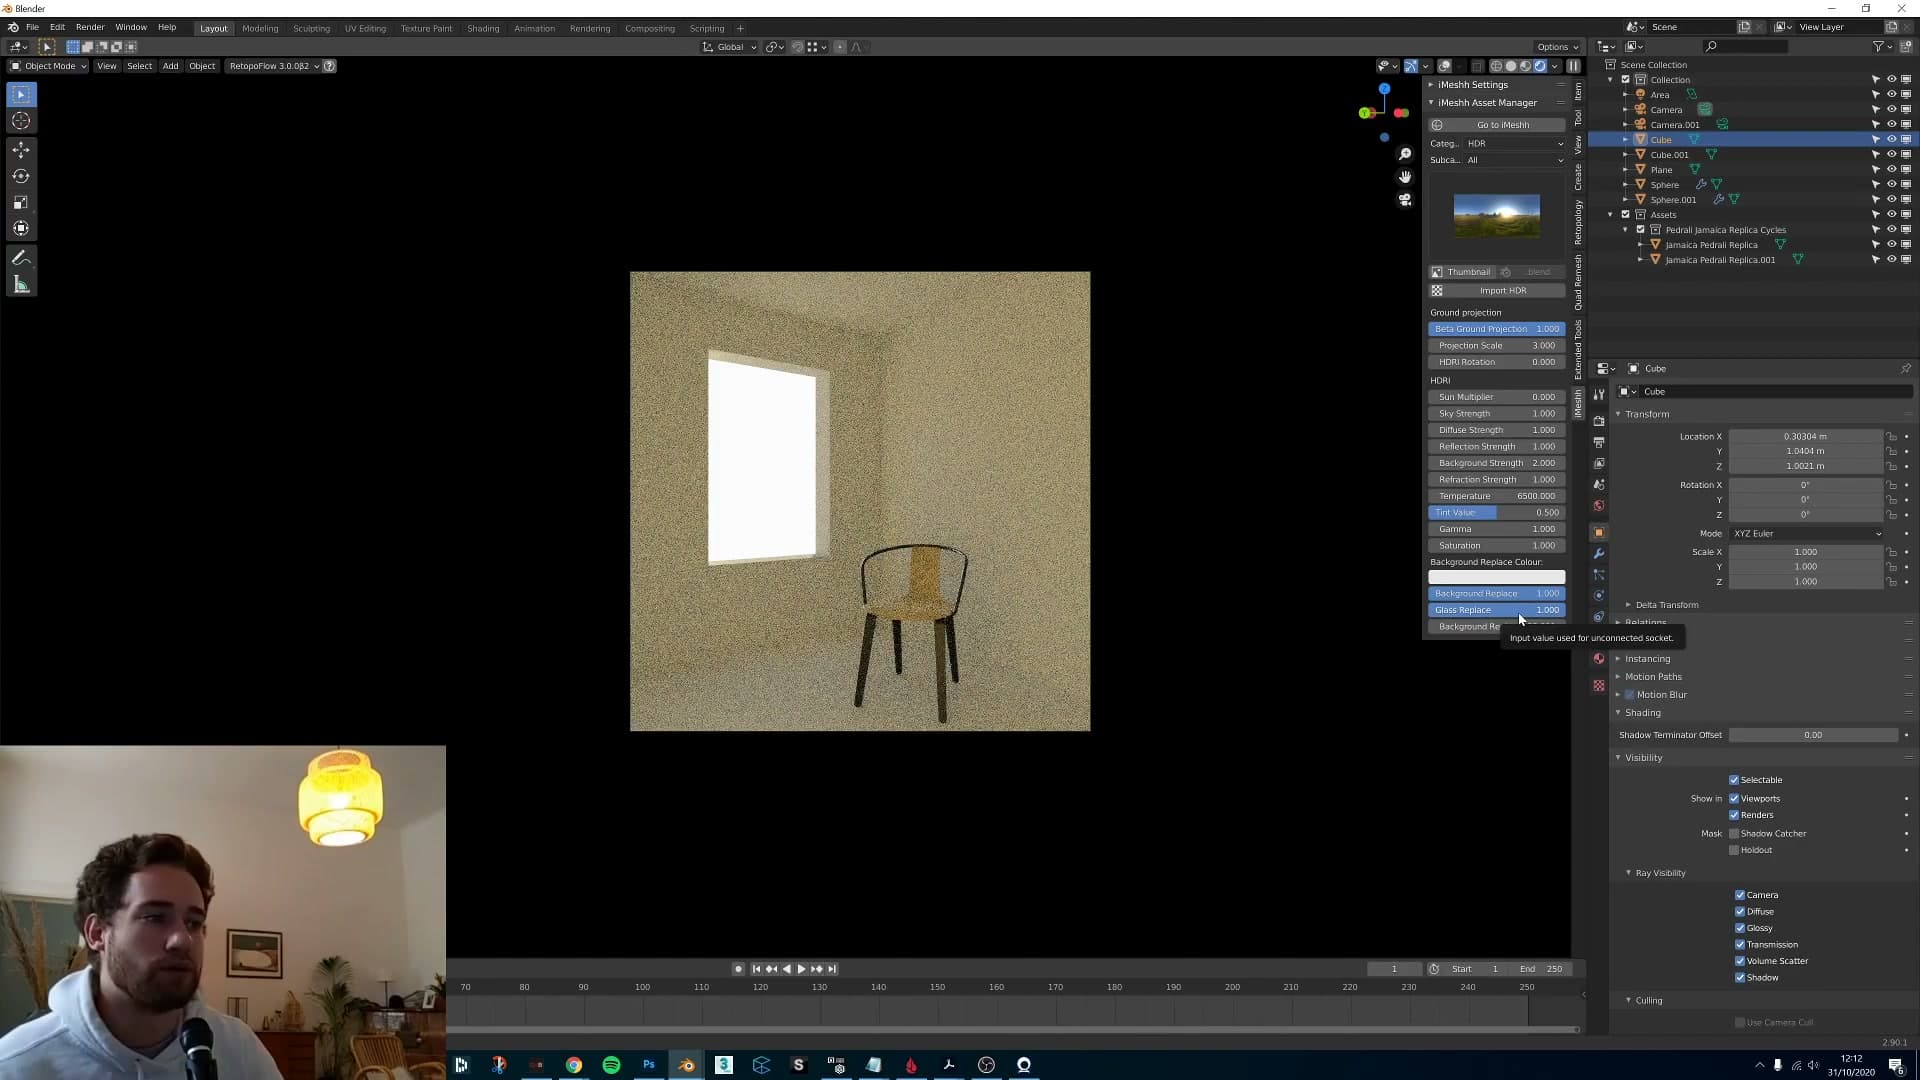
Open the Shader Editor and switch the dropdown from Object to World. You'll see the node graph the HDR controls have built behind the scenes. Plug your own image texture into the background slot the HDR is currently feeding, and that texture becomes what the camera sees, without disturbing the lighting setup the rest of the panel is doing for you. Plug the HDR back in and you're exactly where you started; swap in any other image and that image becomes the new backdrop.
The same control behaves the same way when you're inside a scene with glass between the camera and the exterior. Turn the background replacement off and you can see straight outside through the glass; push it back to 1 and that exterior view is replaced too. Useful when you'd rather show a clean backdrop through a window than the HDR's literal outside world.
What's coming next and how to update
Roadmap hints: separate tabs for Assets, Materials and HDRs, plus the exact steps to check for new versions of the Asset Manager from inside Blender's preferences.
Separate tabs and how to pull updates
The next update on the roadmap splits the panel into separate tabs for Assets, Materials and HDRs. Right now everything sits in one list, which gets awkward once you have your own HDR category alongside a materials category. They all compete for the same space. Dedicated tabs make each library easier to find, and the HDR tab will surface all the controls you just learned in this post the moment you open it, rather than asking you to drill back into the HDR category every time you want to nudge a slider.
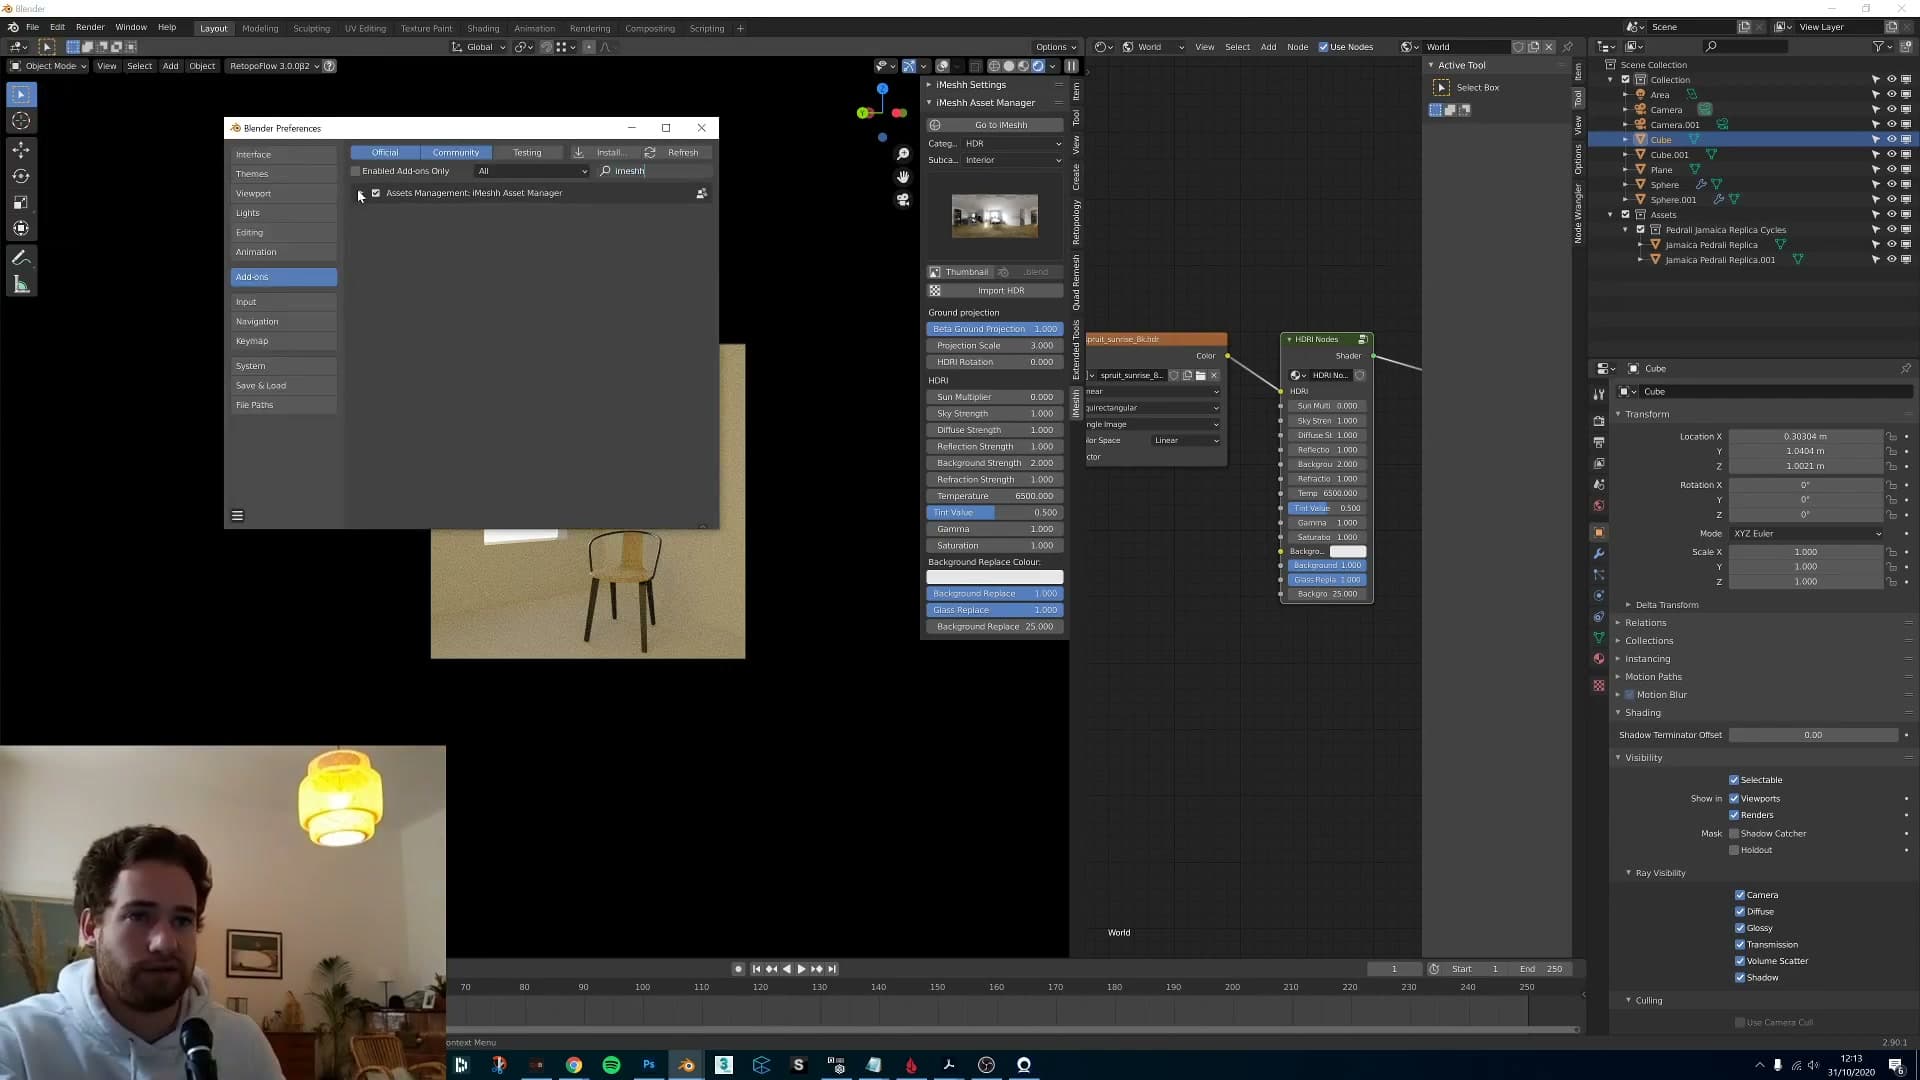
More updates are planned beyond that and they are already in the works, so it is worth keeping the Asset Manager current. To pull the latest release from inside Blender, open Edit > Preferences, find the iMeshh add-on in the list, and use Check for Updates. If a new version is available the panel will say so, and you can install it from the same place without leaving Blender.
That is the full tour of the new HDR controls. Download the Asset Manager, run it through a few of your own scenes, and check back in for the tab update. It should land soon.
Tools and credits
Everything mentioned in this tutorial, with links.
- Blender (the renderer this entire build runs in).
- iMeshh (studio platform: project management, client review, asset library, invoicing). The asset library used in this tutorial is included with every iMeshh Pro plan.
- Poly Haven (free CC0 textures and HDRIs).
Pillar guide: Imeshh Tools hub