Why iMeshh rebuilt the floor generator from scratch
How a 'quick performance pass' turned into a months-long rewrite by Kate White, and why the new generator is fundamentally different from the original.
Credits, scope creep and the months-long rebuild
iMeshh's original floor generator worked, but it was slow. The brief for this update was simple: do a performance pass and ship it. Many months later is where we ended up. Every fix surfaced another feature worth adding, until the team had to draw a line and release what they had before the to-do list grew indefinitely.

The new generator is the work of Kate White, the same contributor behind the iMeshh roof generator, with the credit link sitting in the original video description. I won't try to explain the underlying node tree on camera. Opened up in front of me, it is an insane masterpiece that I can't fathom how it is even put together.
What ships at this stage is broad enough to cover most cases you would hit in archviz: floor systems, wall systems and tile systems all built from the same modifier. This video is a feature tour rather than a build-along, so the goal here is to give you enough of a feel for the new controls to decide whether you want to drop the generator onto your own scene.
Old vs new: performance and live floor-type switching
Opening the old generator on a sample wall makes the case for the rewrite quickly. The panel exposes a limited set of settings and the viewport response is what I would politely call questionable. It still produces good renders (there are years of production scenes that prove that), but adjusting anything in real time was a fight against viewport lag.
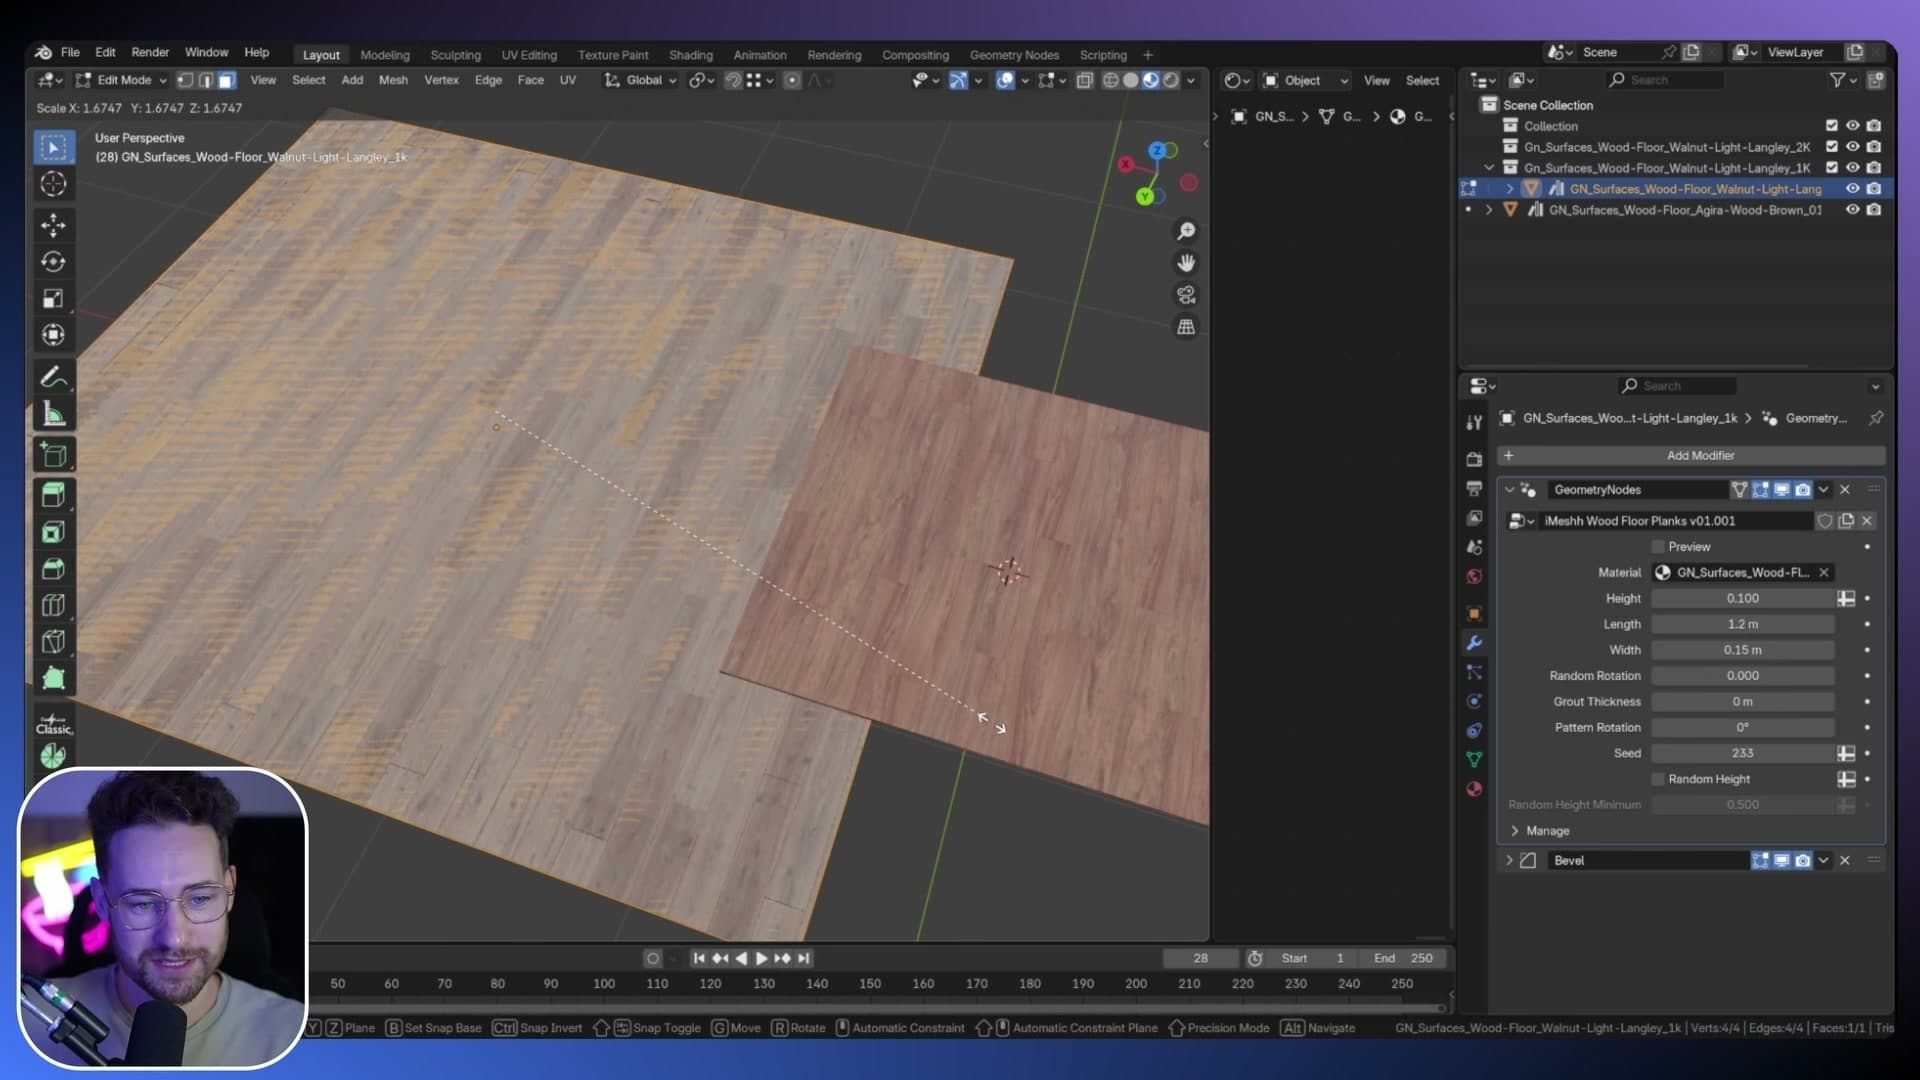
Loaded onto the same wall, the new generator is night and day. The settings panel is substantially richer, and every slider responds in real time instead of stalling the viewport while geometry rebuilds in the background.
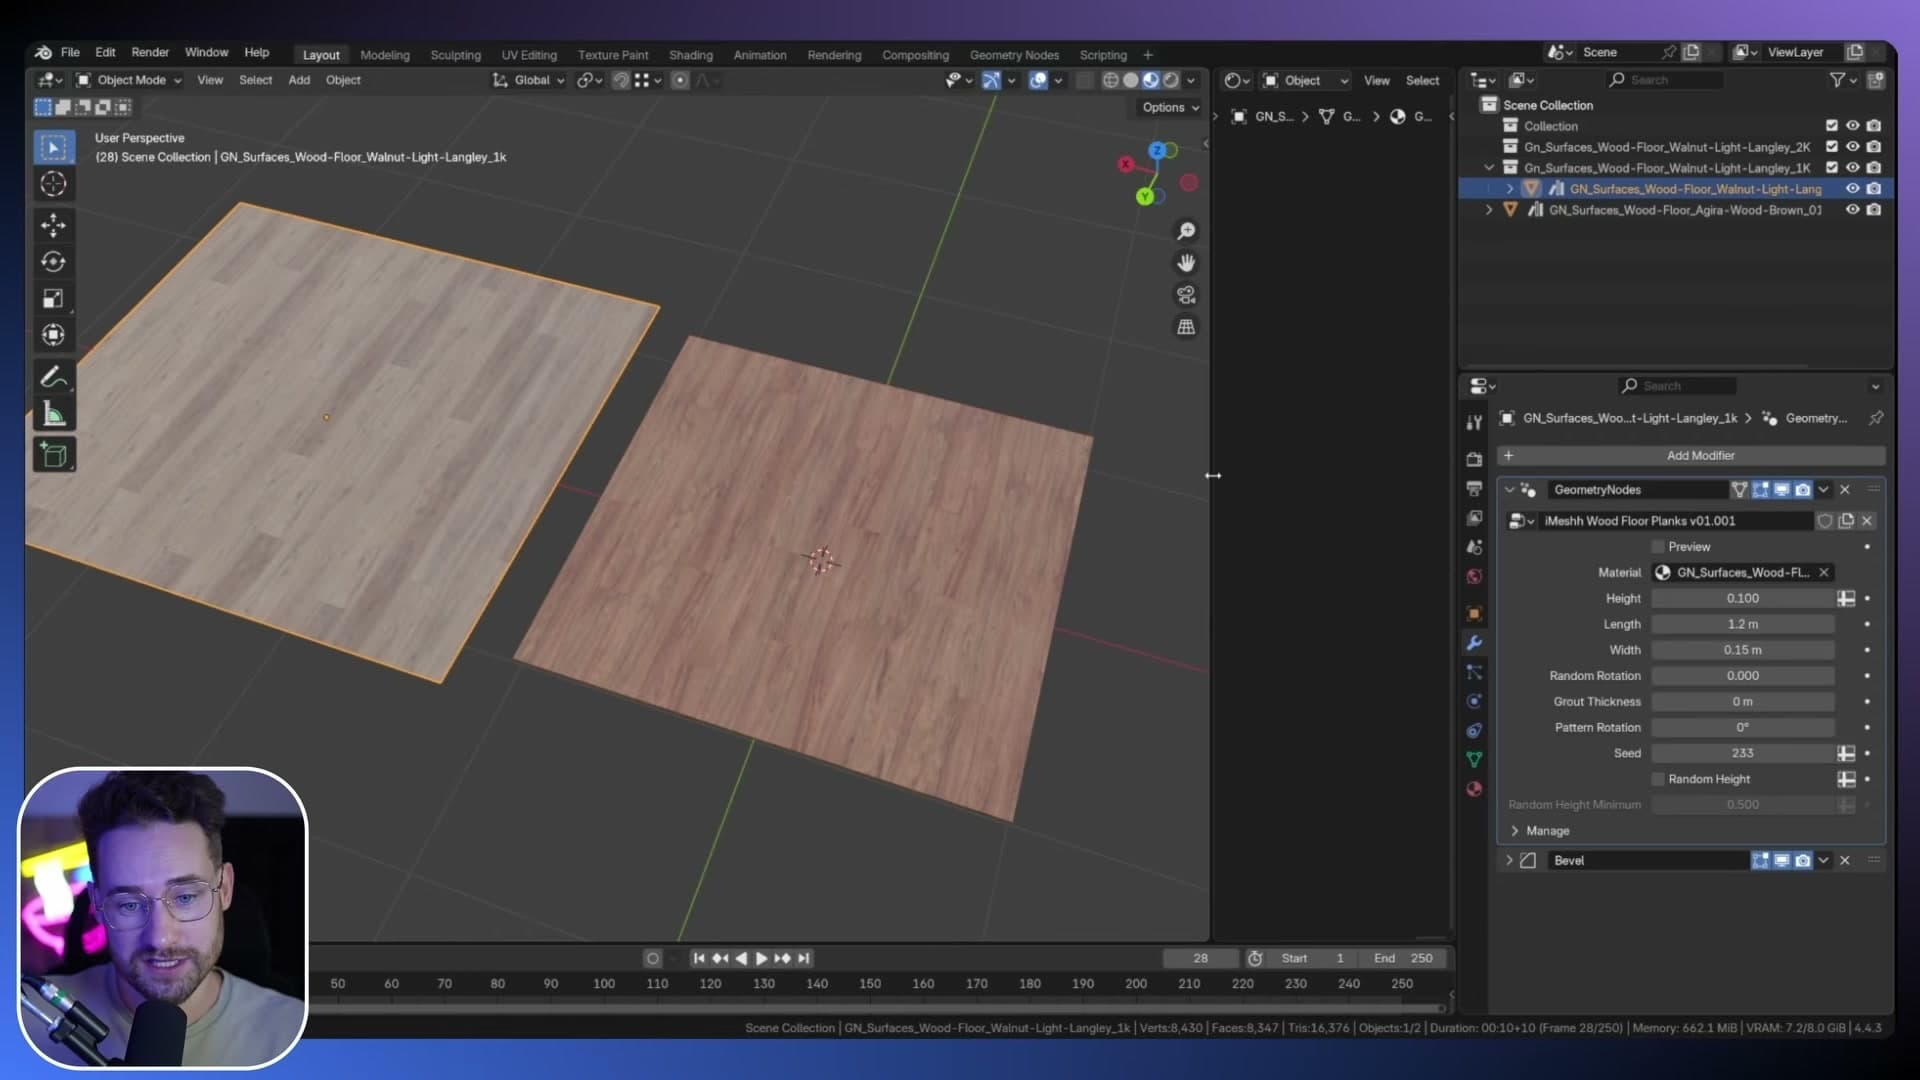
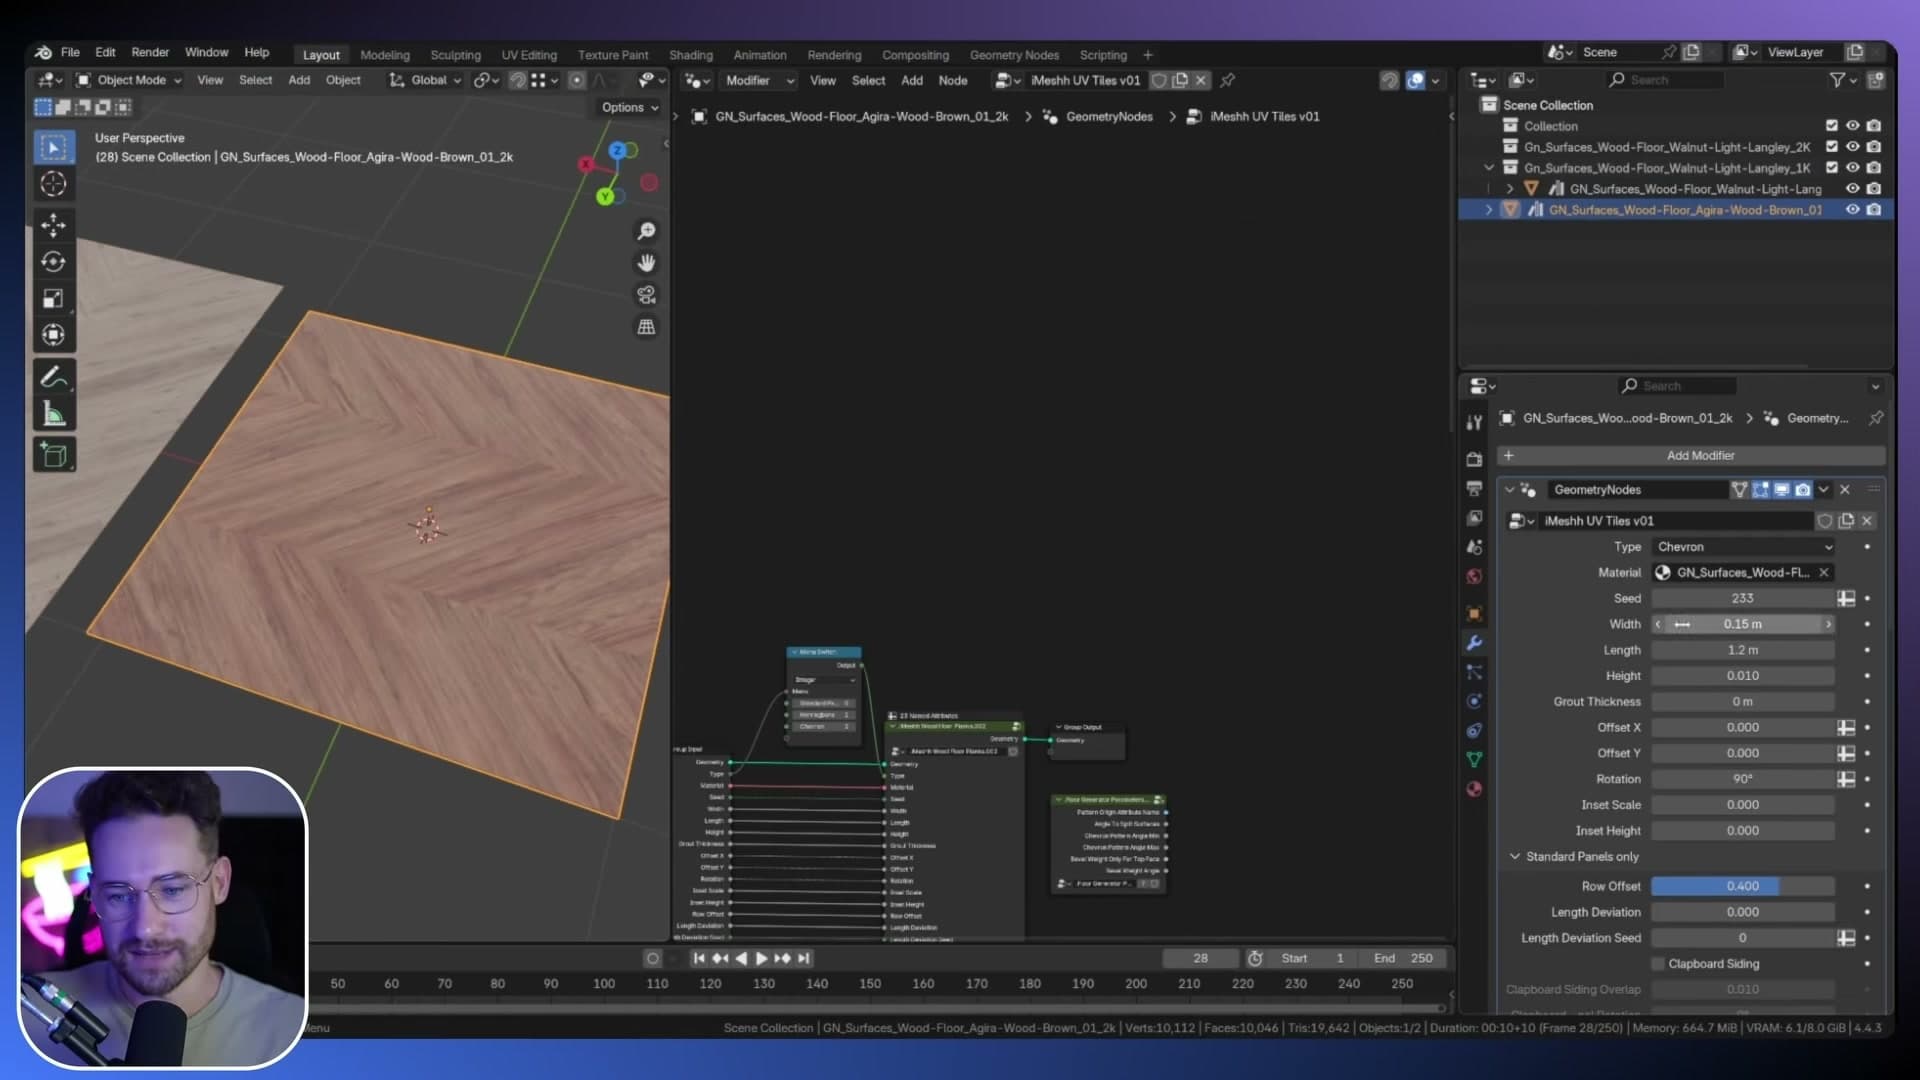
The biggest day-to-day win is how you change floor type. In the old version, swapping between, say, planks and tiles meant diving into the geometry node tree and rewiring the setup by hand. In the new version, floor type is a dropdown on the modifier panel itself, sitting next to length, height and the other shared parameters. Switching between systems and re-tuning their dimensions is now a click on the modifier rather than a node-editor session.
Clapboard siding for wall panels
Turn a flat wall panel into clapboard siding in one click and use randomized rotation to make it look like a weathered, real-world board.
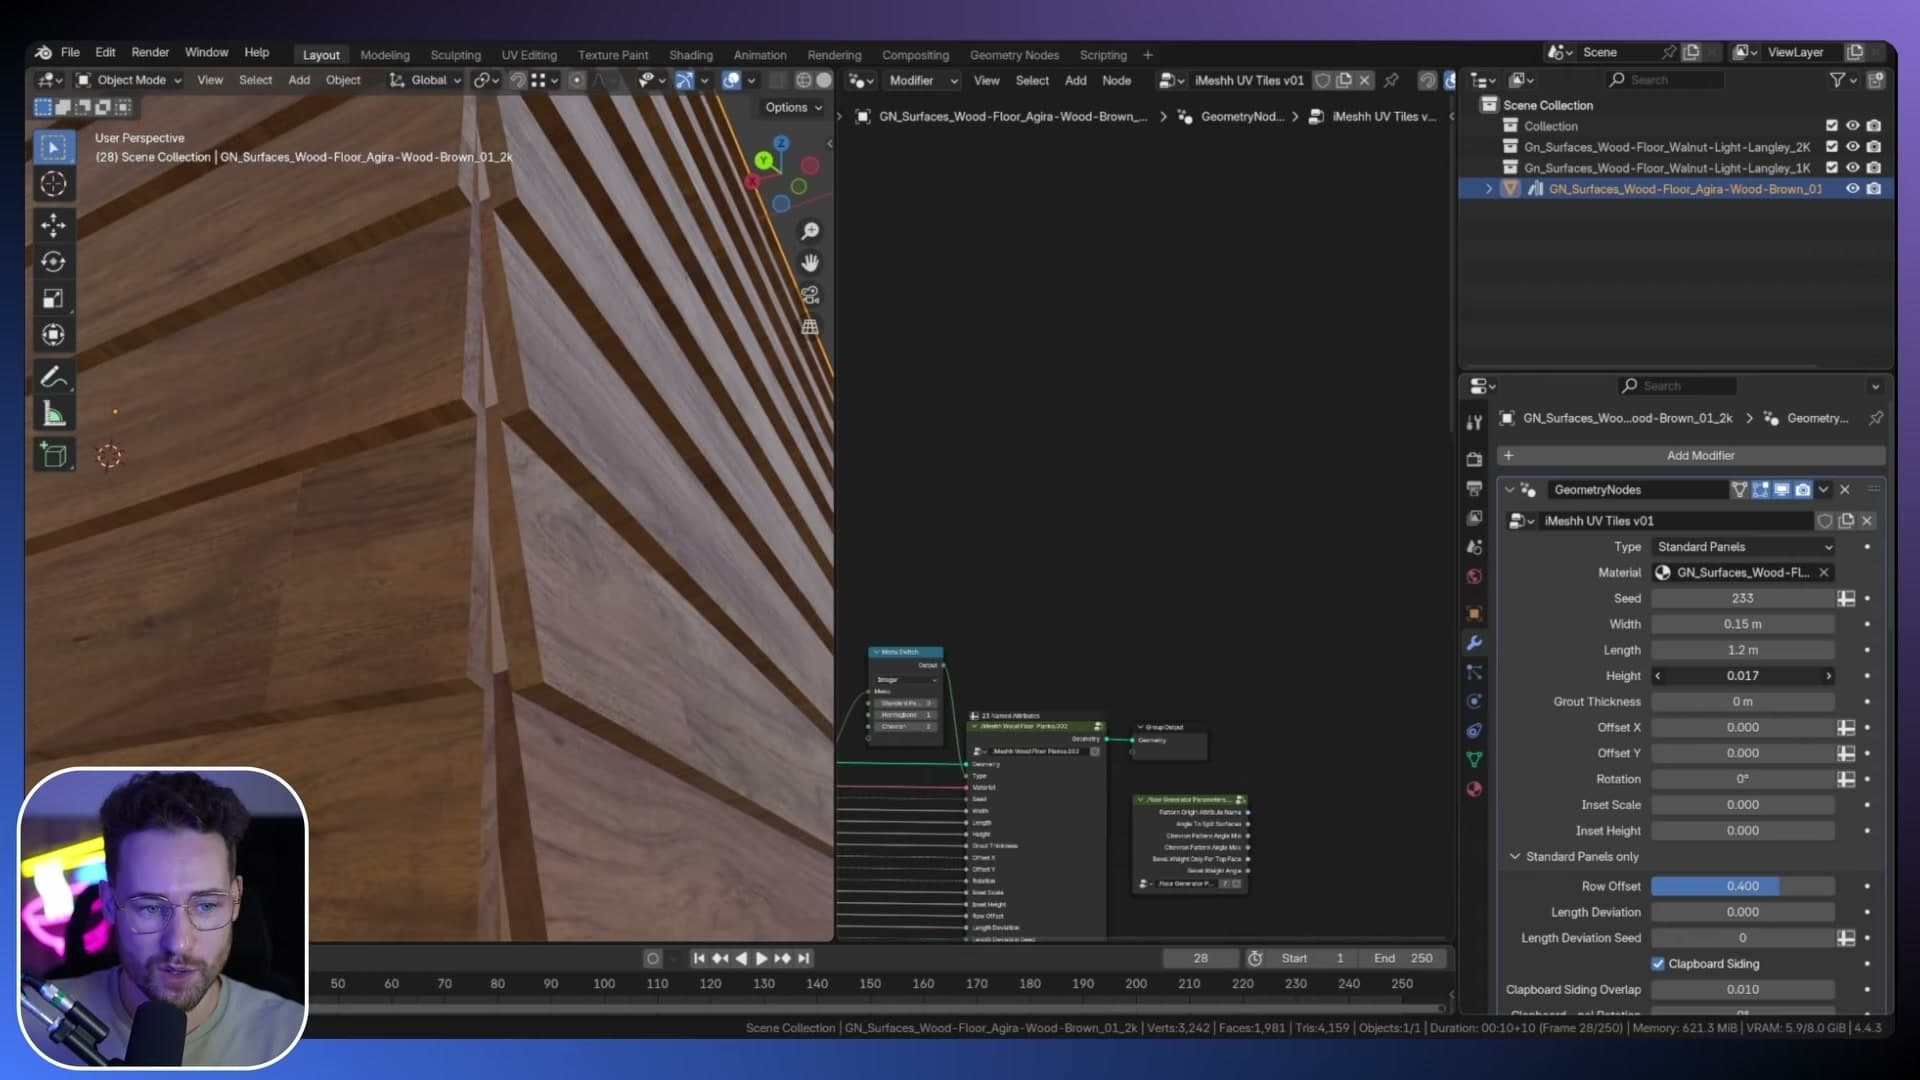
Enabling clapboard siding on standard panels
Open the Standard Panels Only section of the generator and flip on Clapboard Siding. The flat wall panel is replaced, in one click, with a stack of overlapping boards. No extra geometry to model, no manual offsets to wrestle with.
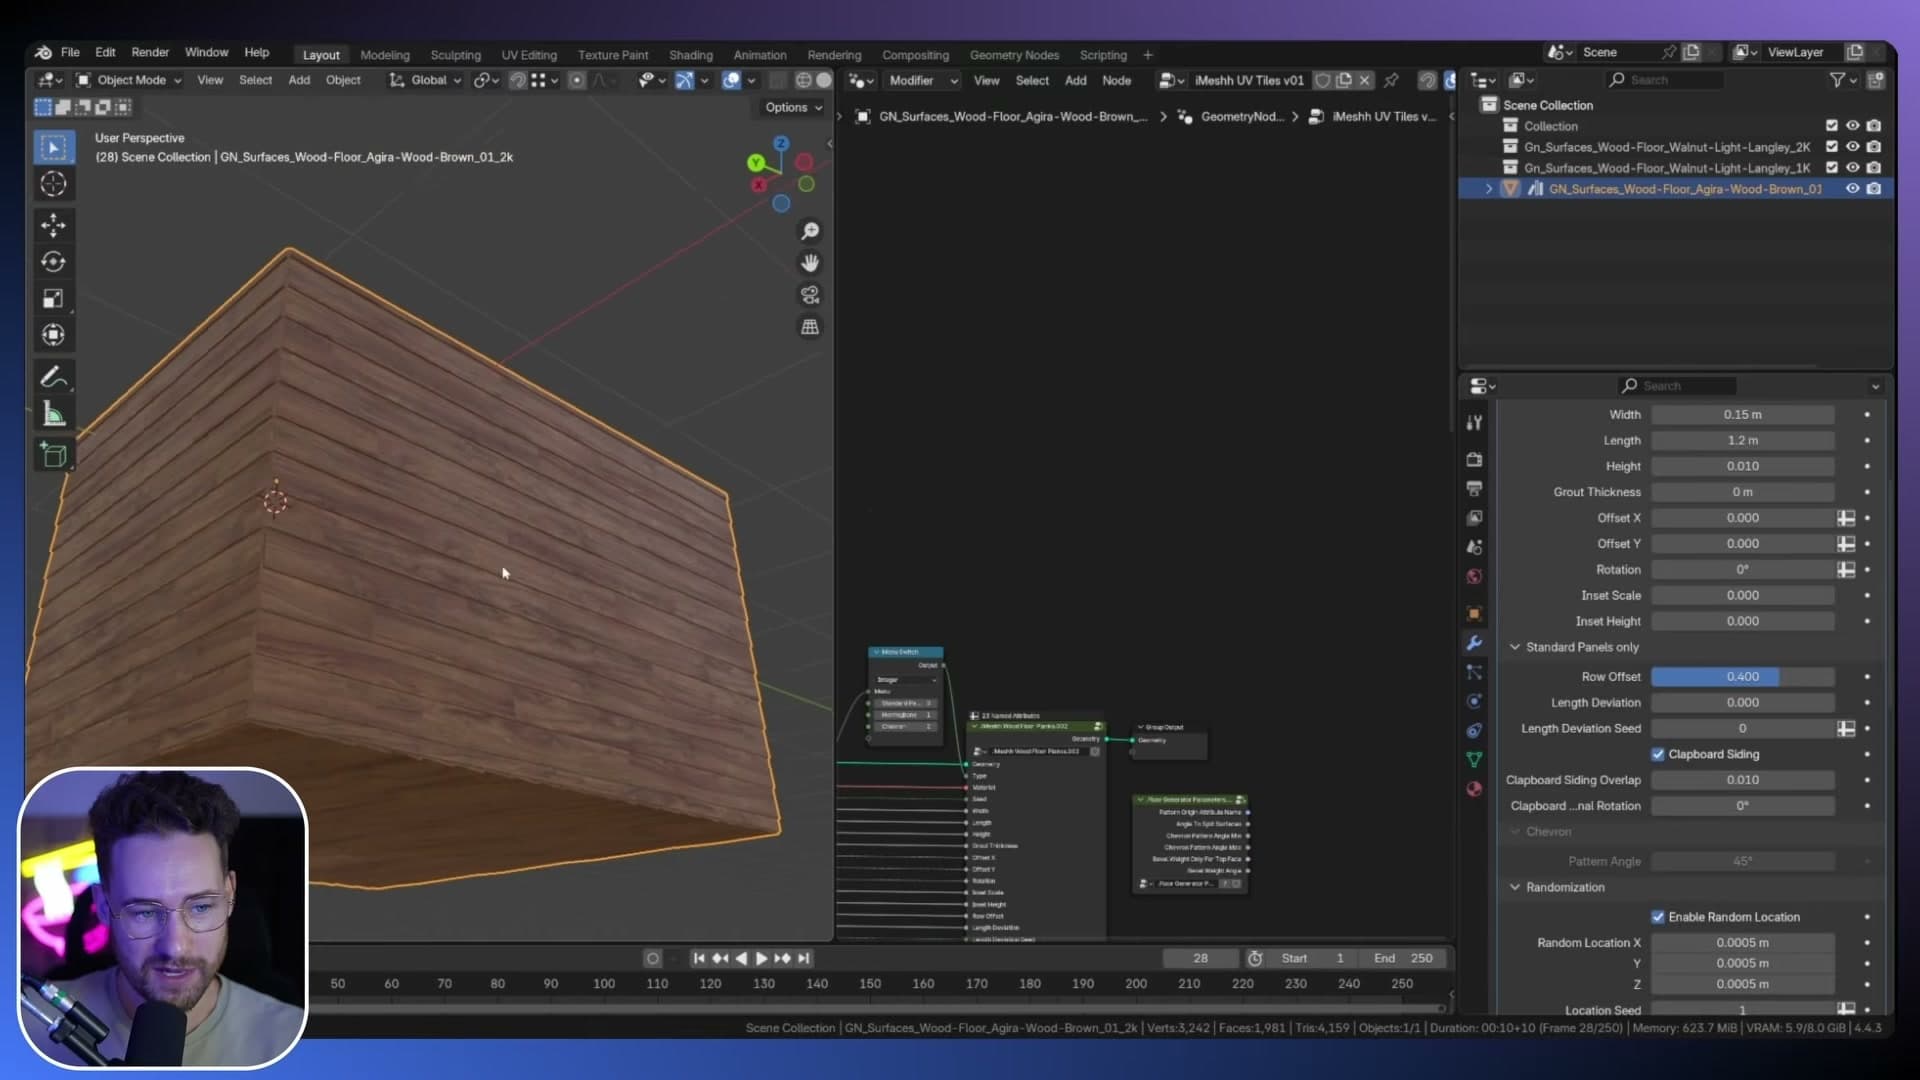
Drive the look with the height value: as you change it, the generator automatically rebuilds the widths and heights of the individual boards so the rows always fit cleanly across the wall. If you want a more exaggerated tilt on each board, the rotation is exposed as a manual slider so you can push it past the default.
Randomized rotation for an aged look
Enable Randomised Rotation and every board picks up a slightly different angle, so the wall reads as weathered timber rather than a perfectly machined panel. It's a one-toggle shortcut to the aged, slightly sagging look that would otherwise mean editing each board by hand.
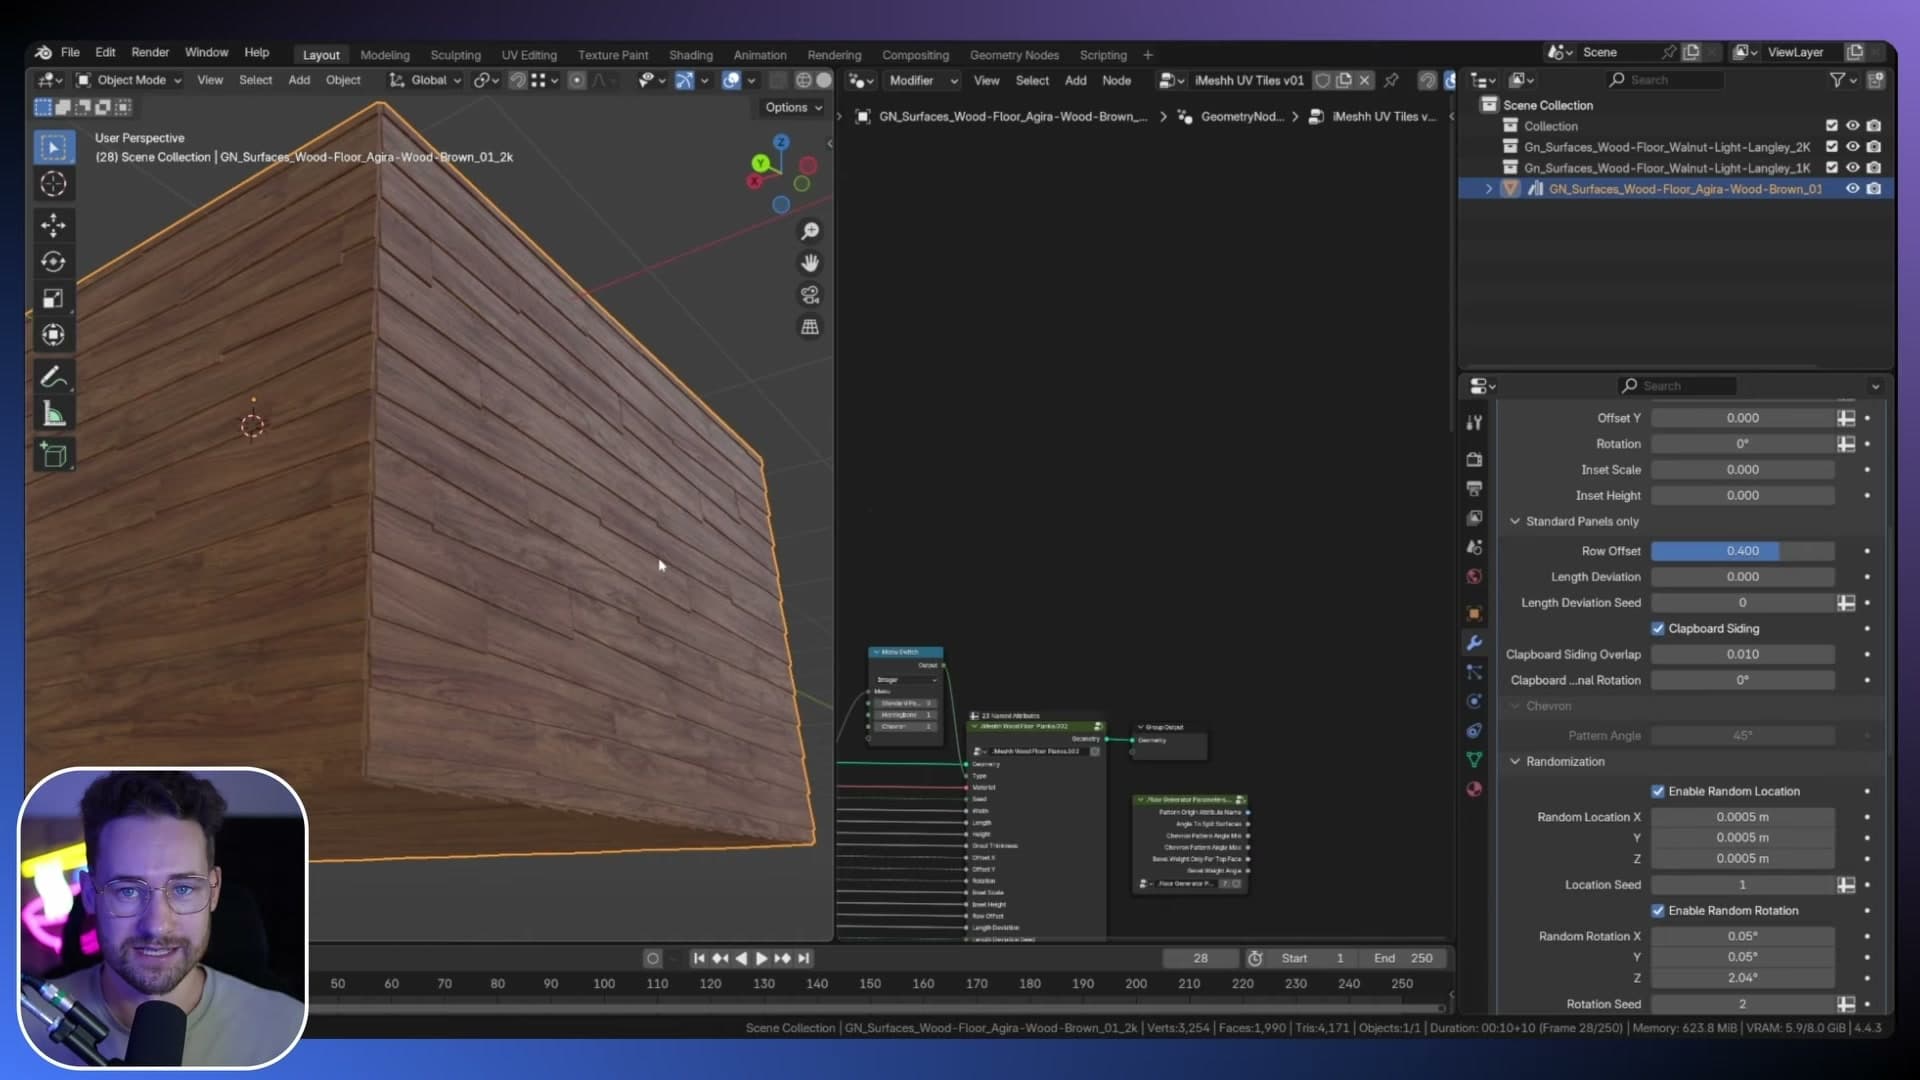
From here, the rest of the ageing happens in the shader editor. I recommend layering some moss through an ambient-occlusion mask, which pushes the growth into the gaps between boards where moisture would naturally collect. A couple of clicks on top of the geometry randomisation is enough to sell the surface as old.
Bathroom tile trim with edge attributes
Add a proper bathroom-grade trim around the outside of a tile layout, choose exactly which edges get it via a boolean attribute, then give it its own material and profile.
Enabling trim on every edge
In a real bathroom, the cut edge of a ceramic tile is sharp enough to catch you in the shower. Installers cover that exposed edge with a strip called a trim: a metal or plastic profile that wraps the corner so nobody snags a hand or a shin against it.
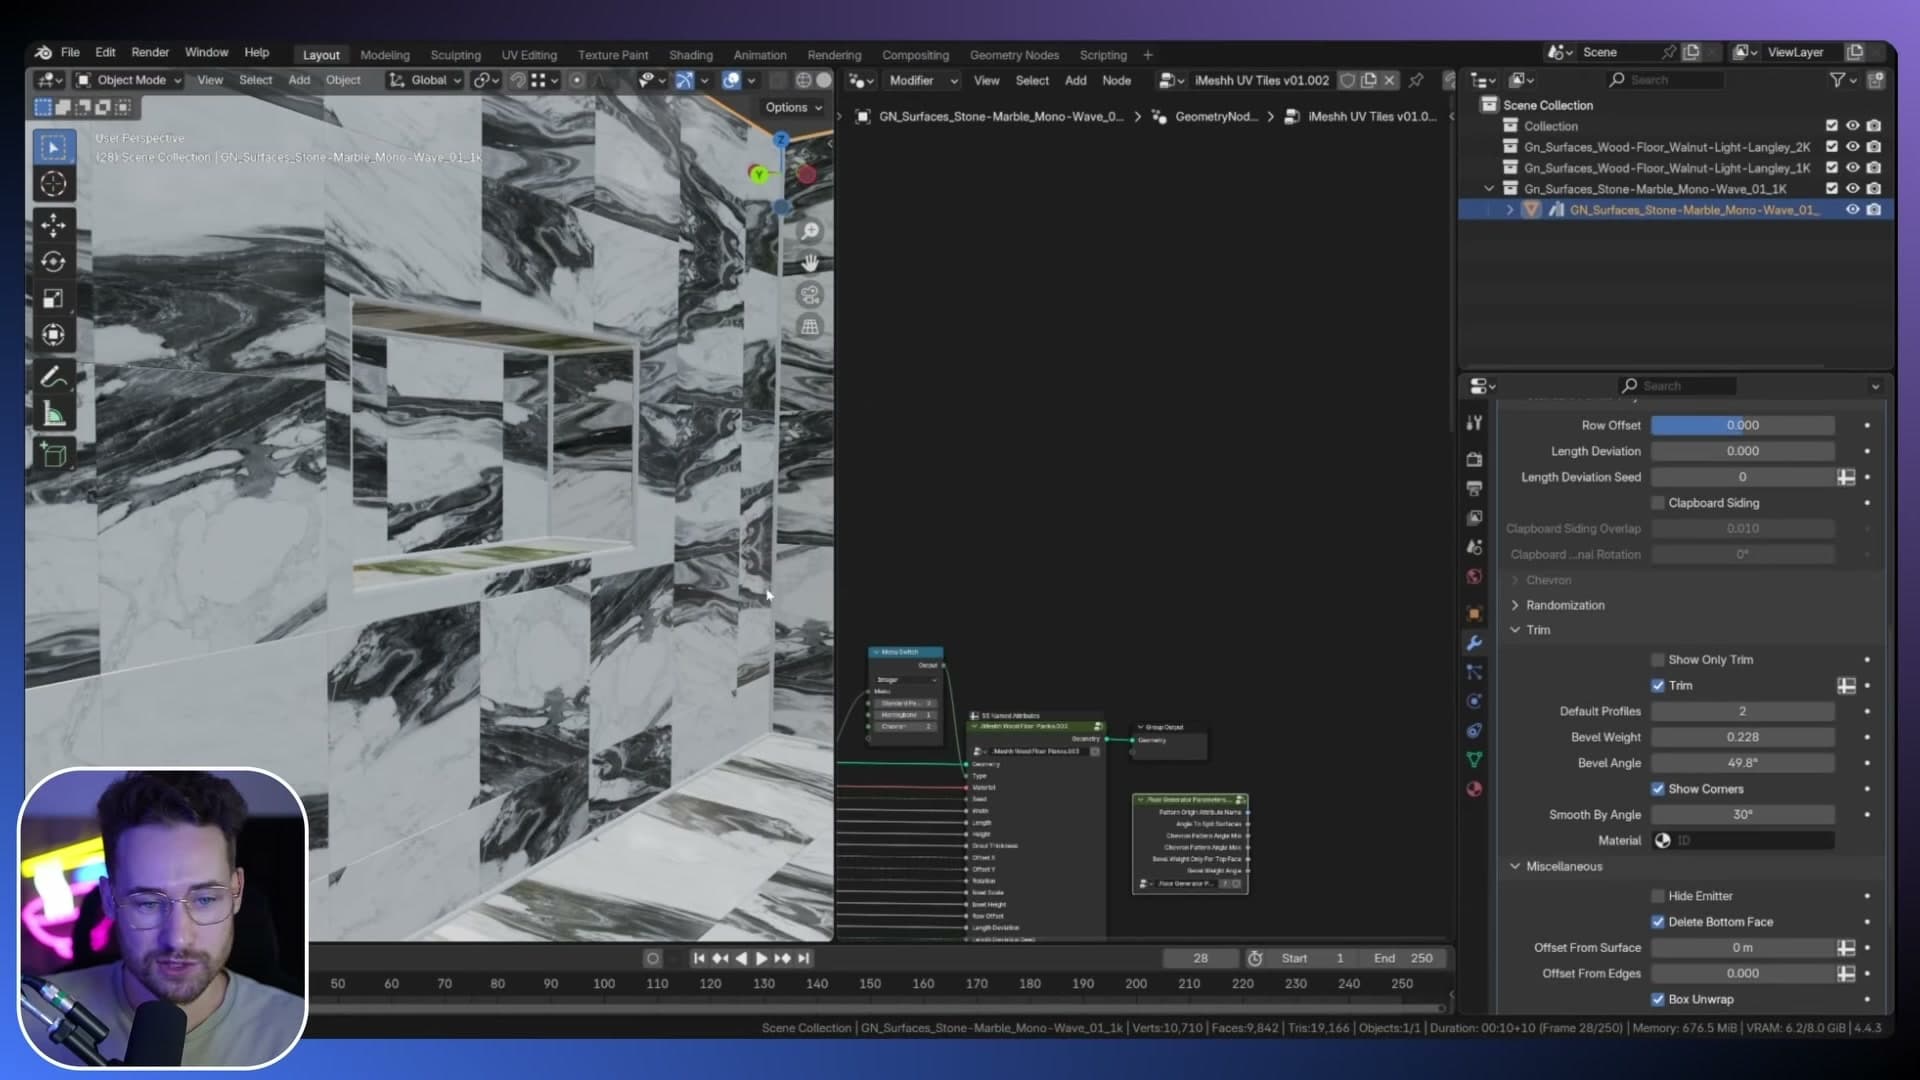
The generator builds the same thing for you. Flip on the trim toggle and a trim instantly appears wrapping every edge of every tile in the layout.
On its own that's too aggressive. Inside corners pick up a trim too, which is not how real tiling is fitted. Trim only belongs along the outside edges of the tiled area, never along the seams that run inward. The next sub-lesson is about telling the generator exactly which edges should carry it.
Creating a boolean 'trim' edge attribute
To control which edges get trimmed, the generator reads a boolean edge attribute on the mesh. The modifier exposes a small input where you type the attribute's name. It should be pre-filled with trim, but if it's blank you can just type the word trim in yourself.
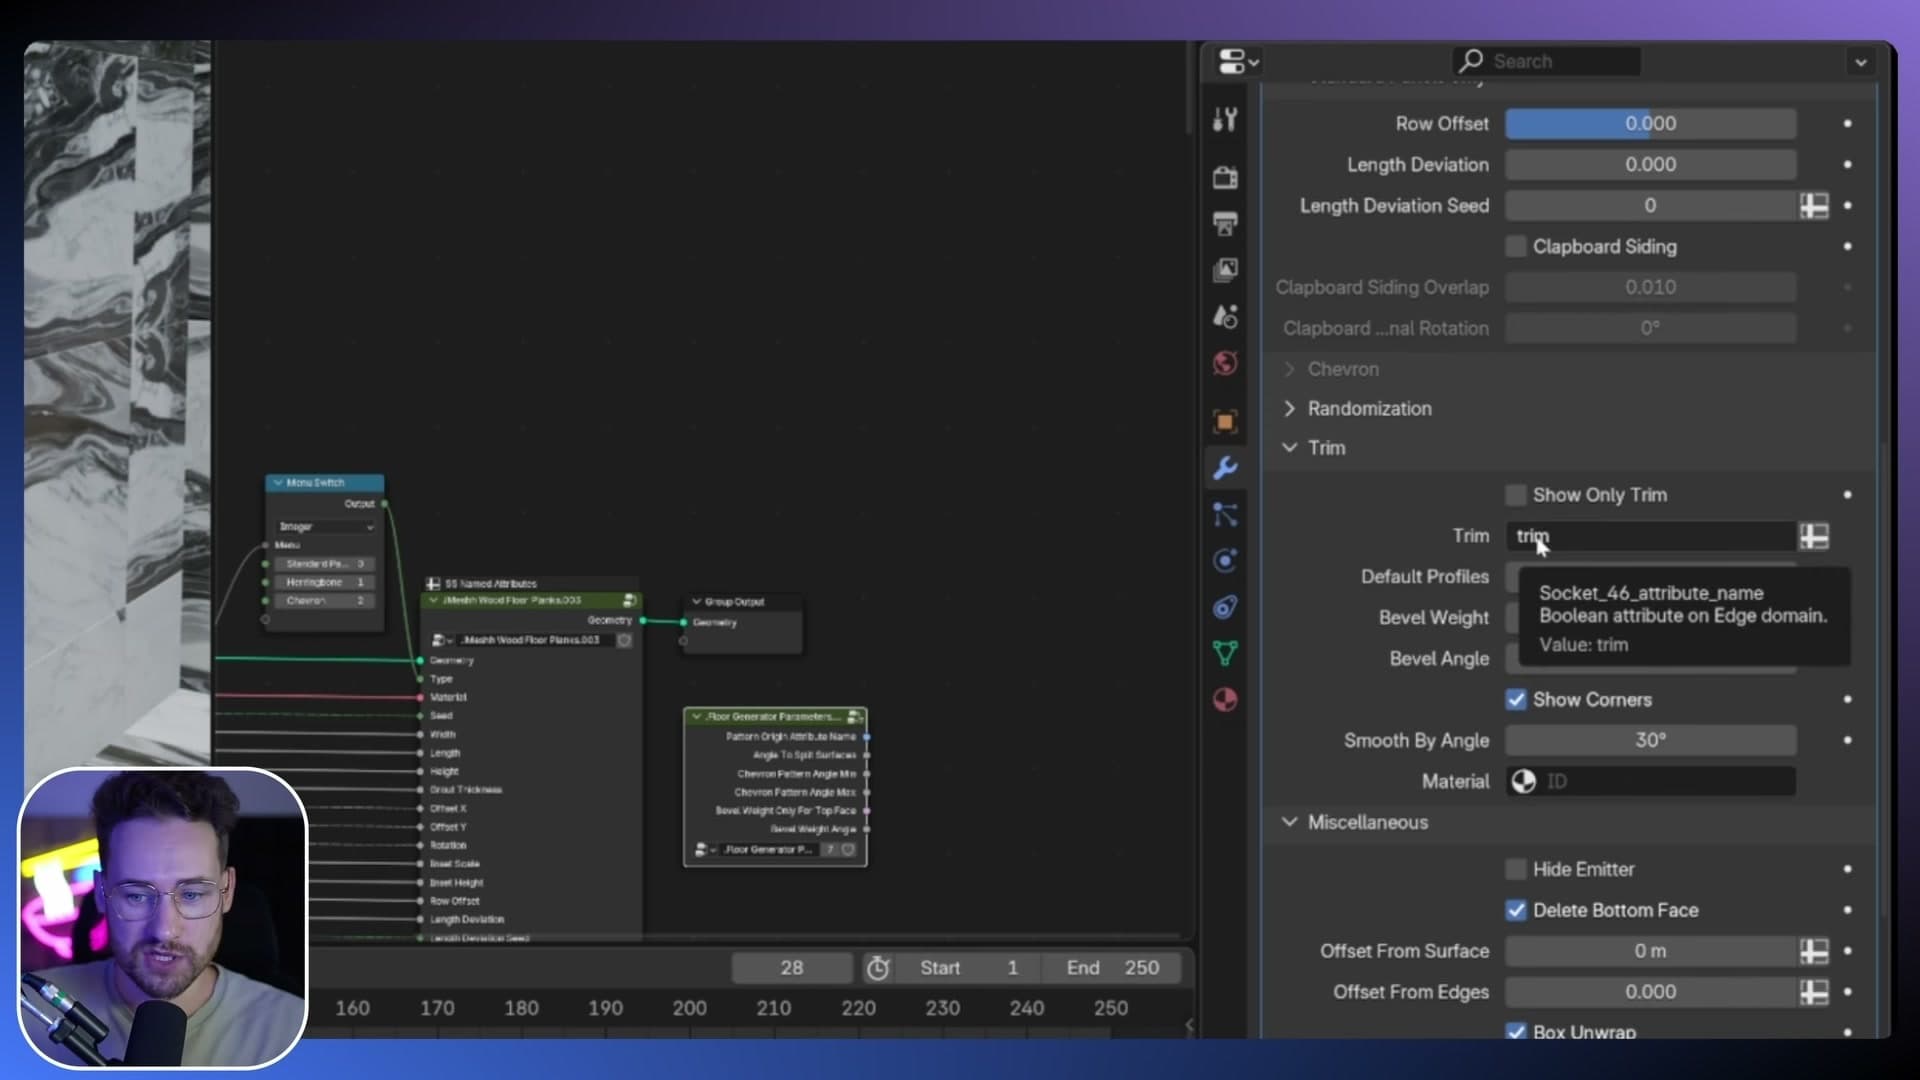
Next you have to actually create that attribute on the mesh. Open the Object Data Properties panel (the green mesh triangle) and scroll down to Attributes. There won't be a trim attribute listed yet, so add one: name it trim, set Domain to Edge, set the type to Boolean, and click Add.
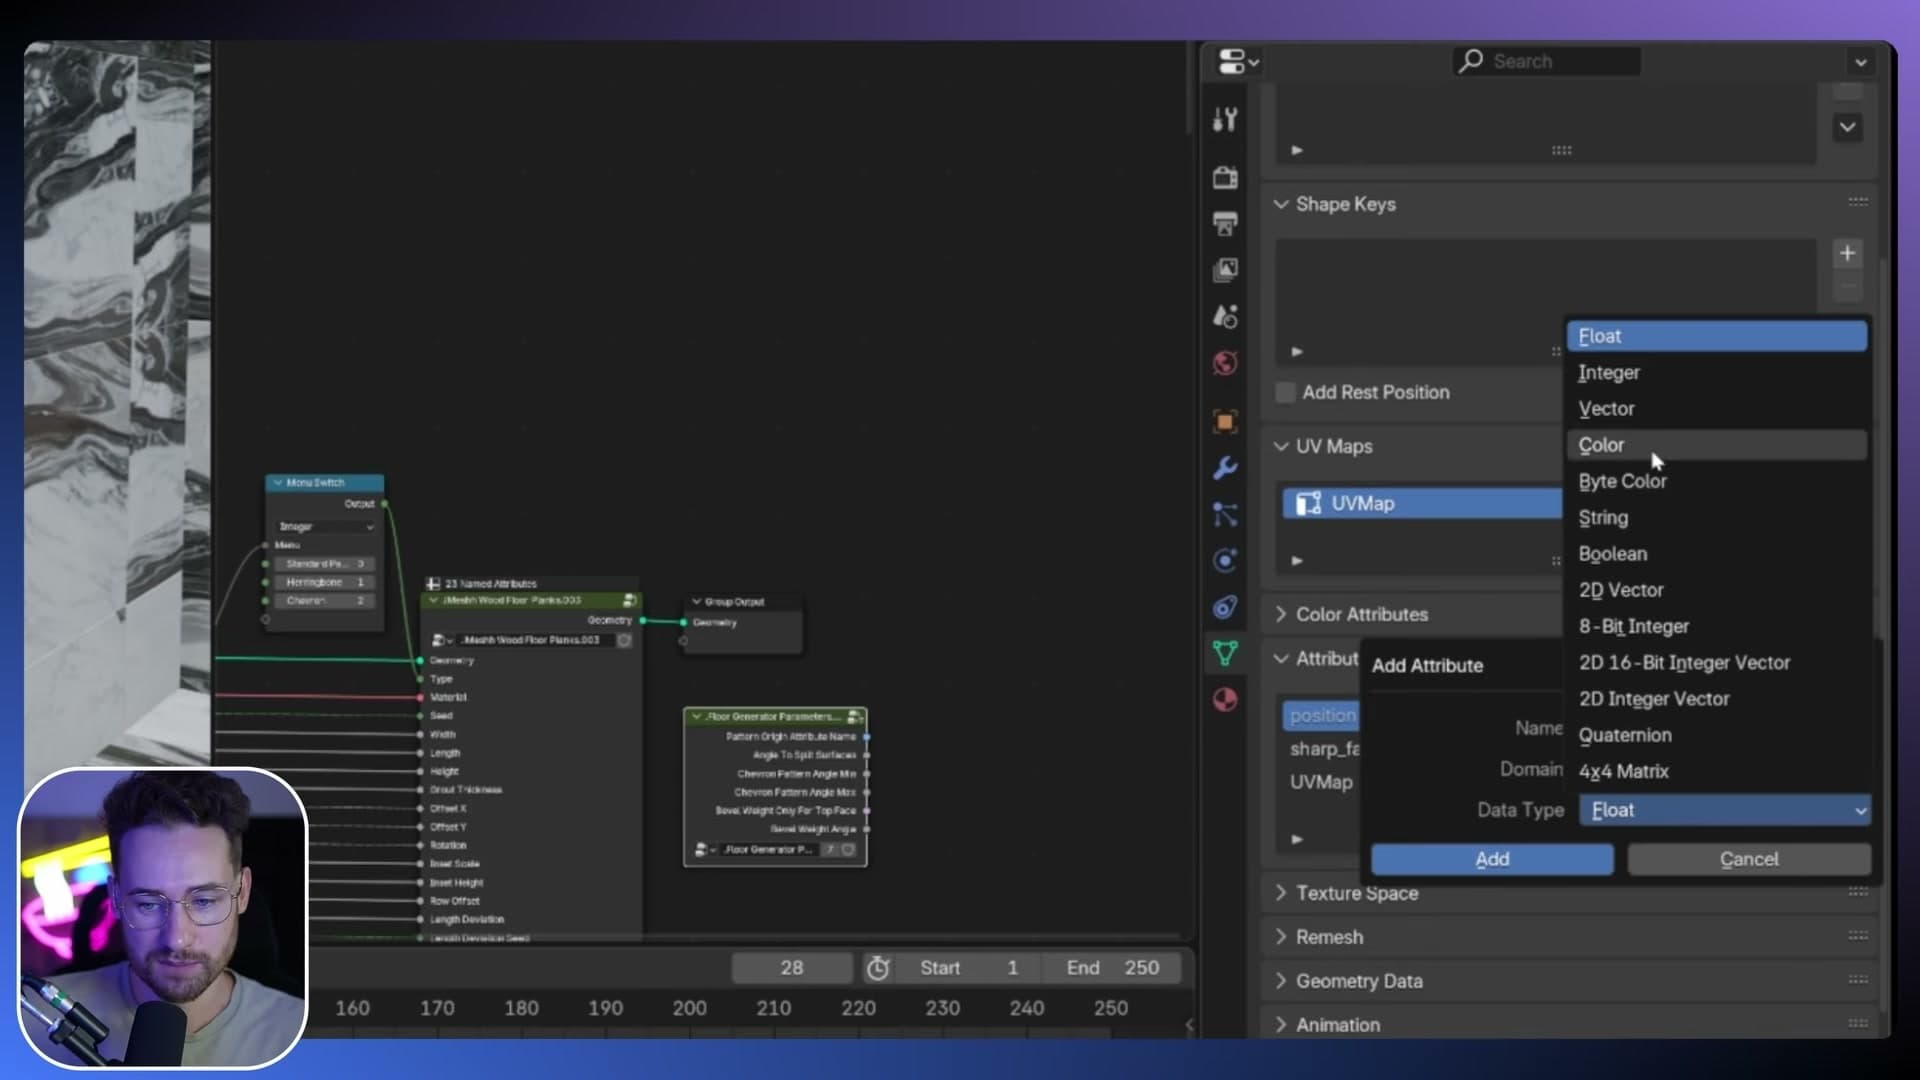
That gives every edge in the mesh a true/false flag that the floor generator can read. Right now every edge defaults to false, so no trim shows up at all. That is exactly where you want to start before painting it onto the edges that need it.
Setting trim only on the edges that need it
Drop into Edit Mode and pick the first edge that should carry a trim, typically one of the outer edges of the tiled area.
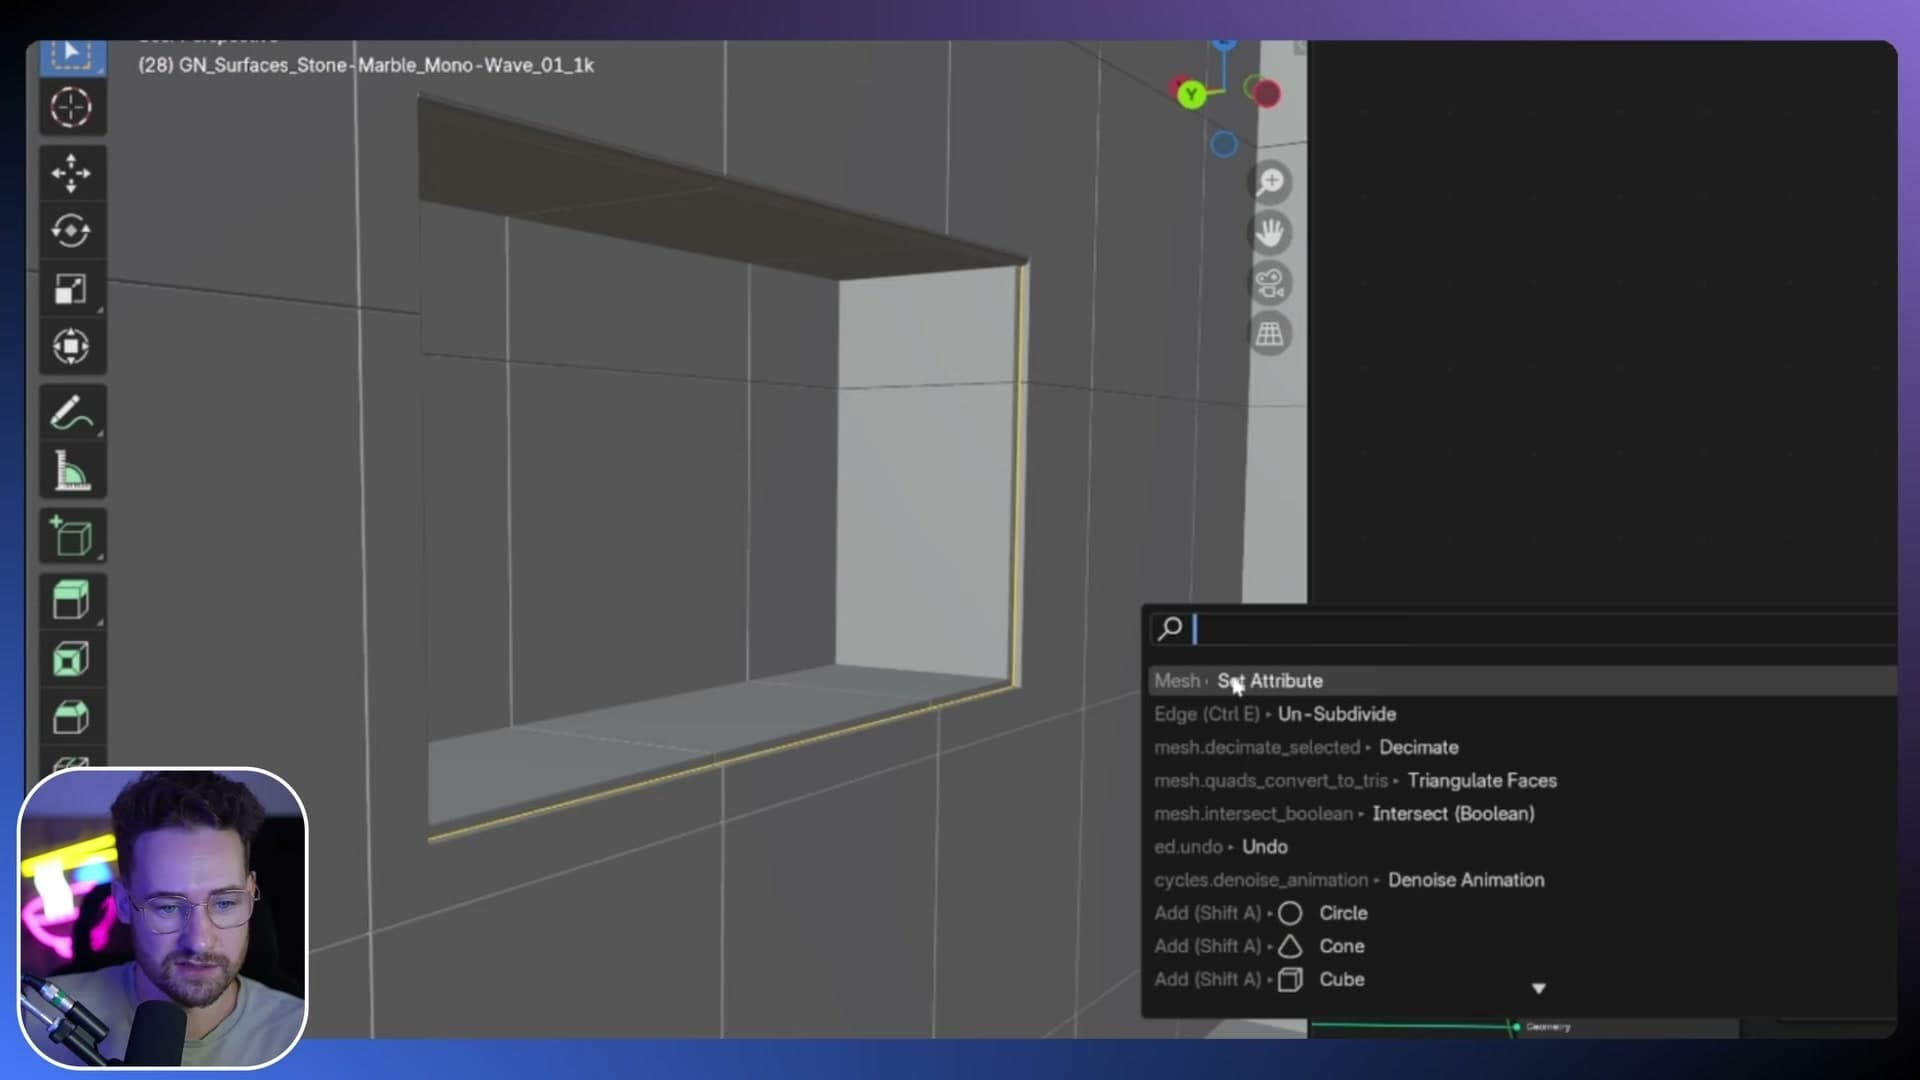
Press F3, search for Set Attribute, and enable the trim value for that edge. Repeat for the remaining outside edges. You can speed this up by selecting all the relevant outer edges first and running Set Attribute on them in one go rather than edge by edge.
Back in Object Mode the trim now follows only the edges you flagged. Inside corners stay clean, the outside perimeter wears the trim, and the layout finally matches how a real installer would fit it.
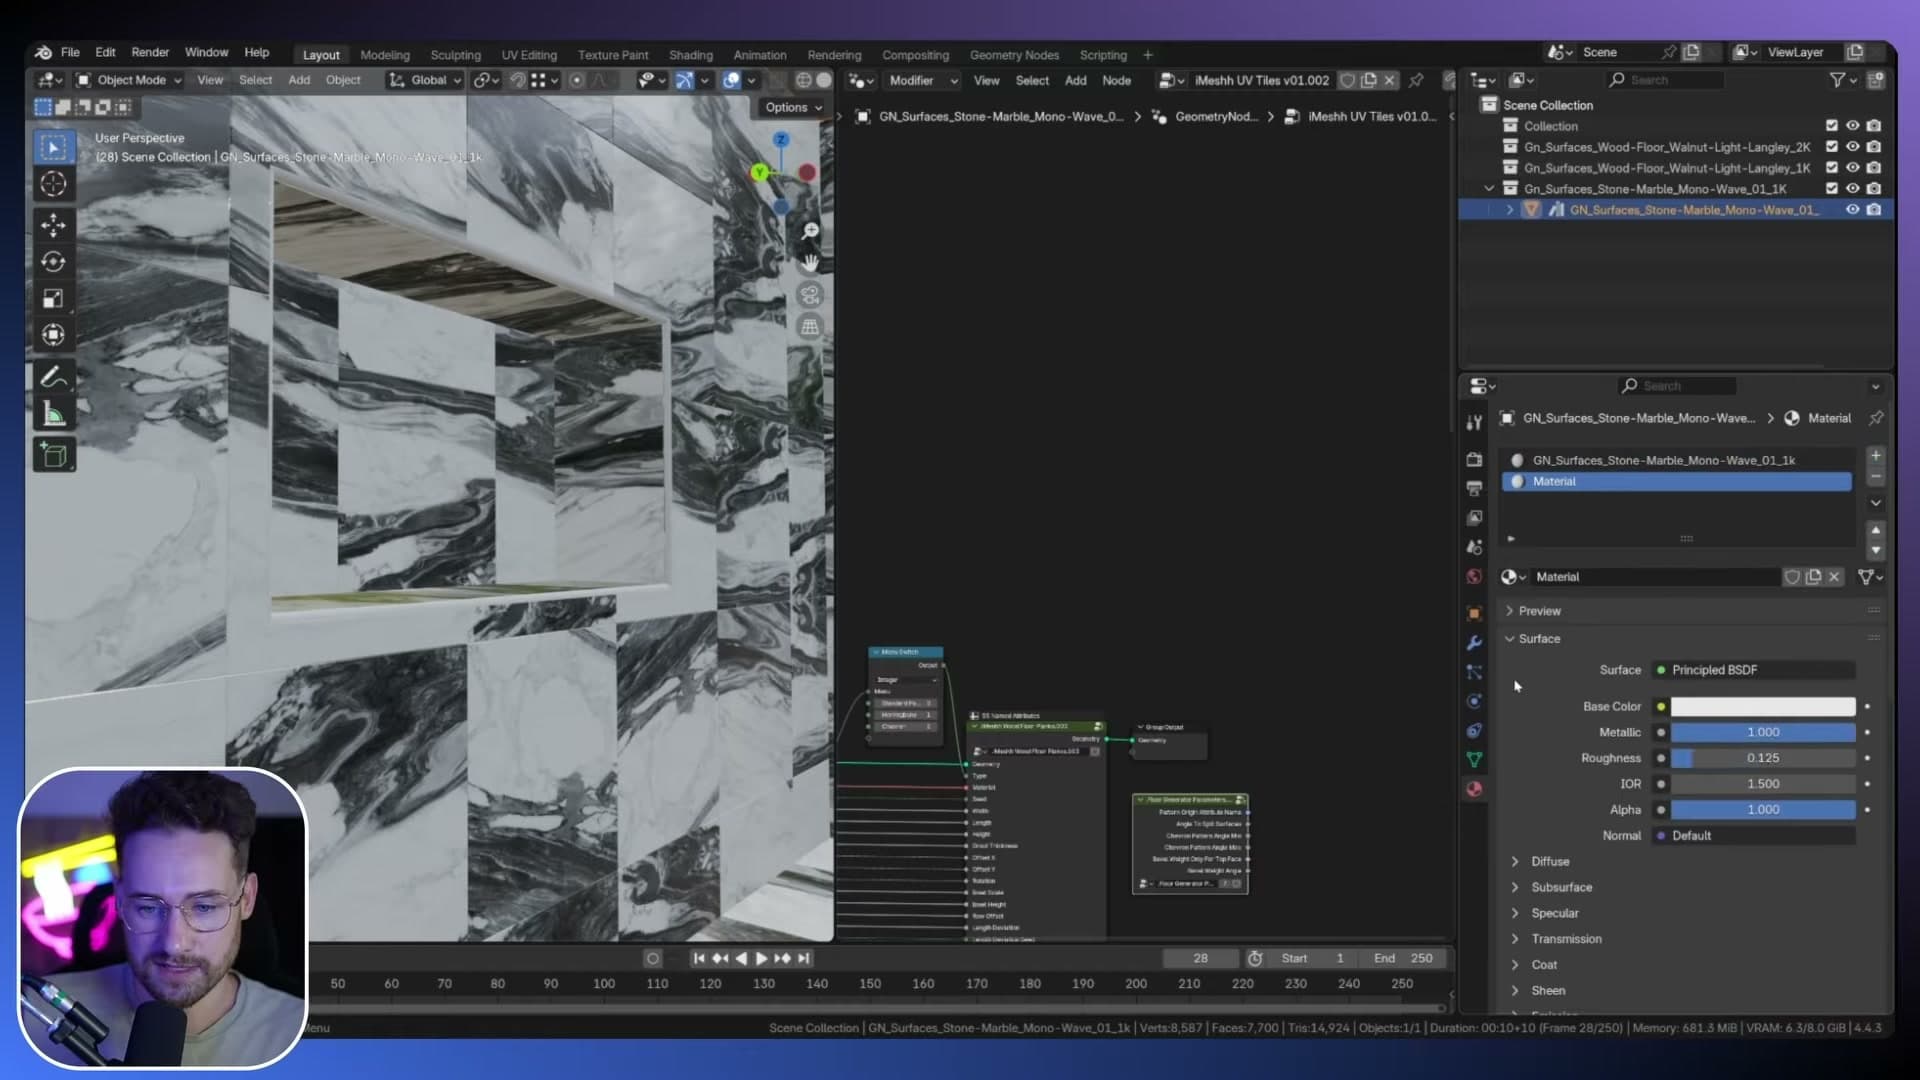
The same attribute is what lets the generator handle a freestanding tiled patch: a backsplash, a half-wall, a section that just stops. Anywhere the tiles end, you flag those edges and the trim wraps the boundary.
Trim materials and built-in profiles
The trim has its own material slot, separate from the tile itself. Build a quick metal (a glossy shader is enough for most bathroom installations) and assign it to the trim material input on the floor generator modifier. The trim now renders as a distinct metal edging against the ceramic tiles around it.
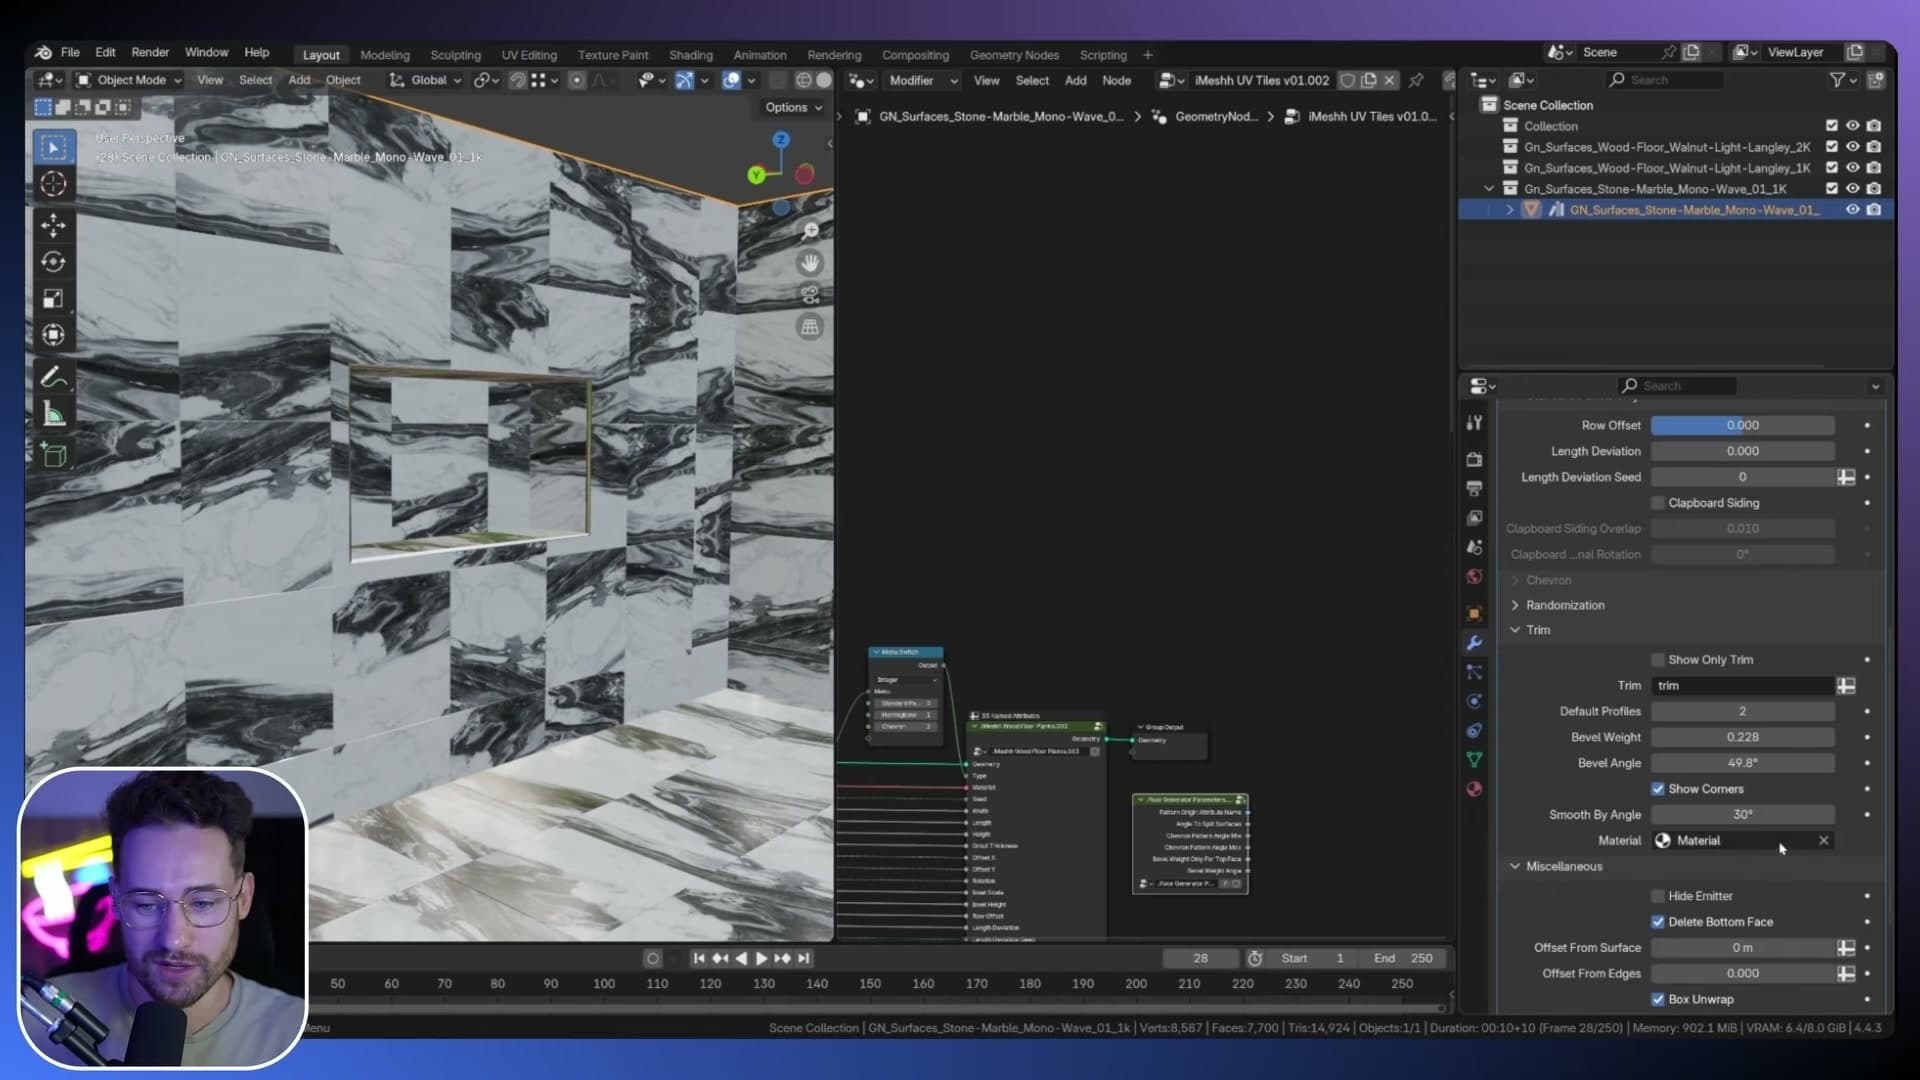
The same workflow works beyond tile. Wood floors that stop at a doorway or a step often need an edge trim too. Flag the outer edges, point the modifier at a material, and it works for any floor type the generator produces.
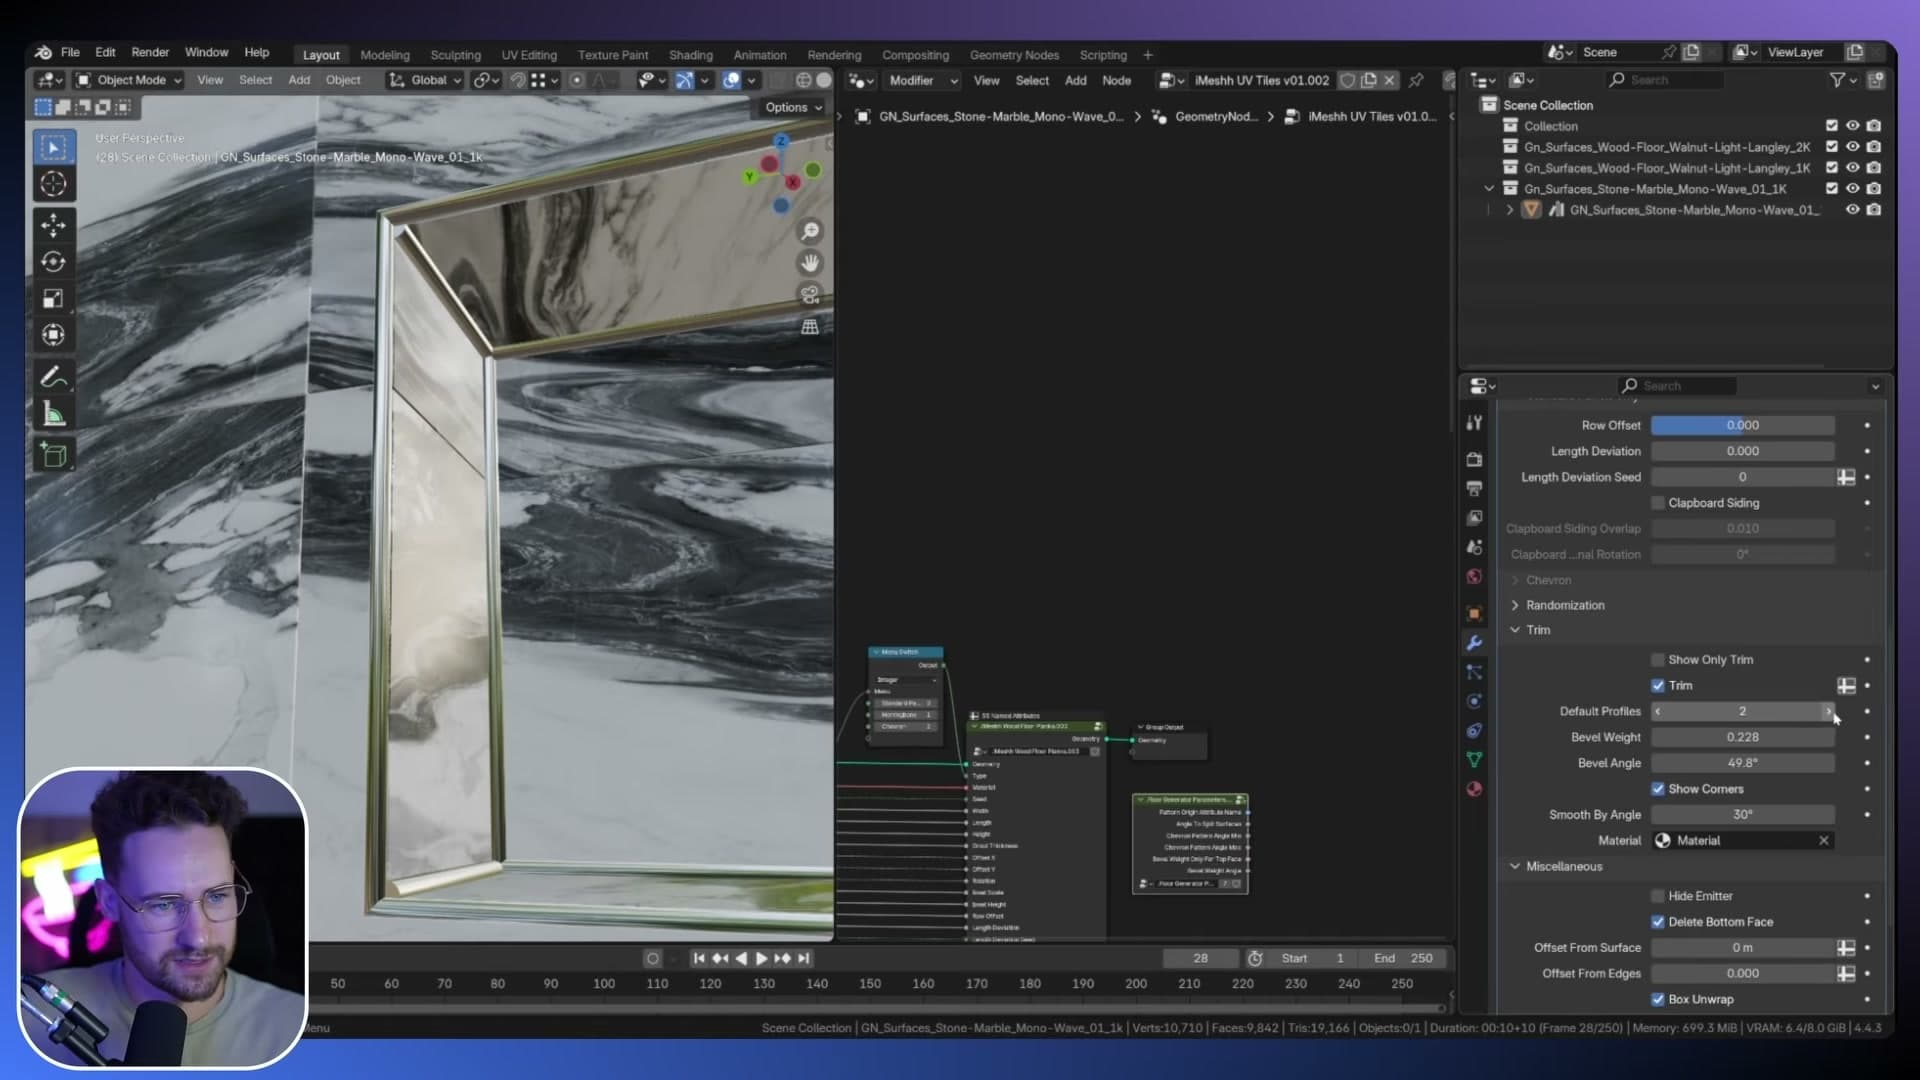
For the profile itself, the generator ships with a small set of bundled options you can cycle through directly in the modifier: a square trim, a slightly varied square, and a softer profile that is probably the one you'll reach for most in a real bathroom.
Aligning tiles with vertex anchors
Drop an extra vertex inside the source mesh and the generator uses it as a snap anchor so tile grout lines land exactly on corners and edges across all three axes.
Adding an alignment vertex inside the source mesh
Tile alignment was one of the most-requested fixes. In the old generator, nudging the layout so grout lines landed on a corner was a slow, fiddly job. The viewport lag meant you'd overshoot the edge almost every time you tried to dial it in. The rebuilt version is fast enough to react in real time, and on top of that it ships with a much cleverer way to anchor the grid.
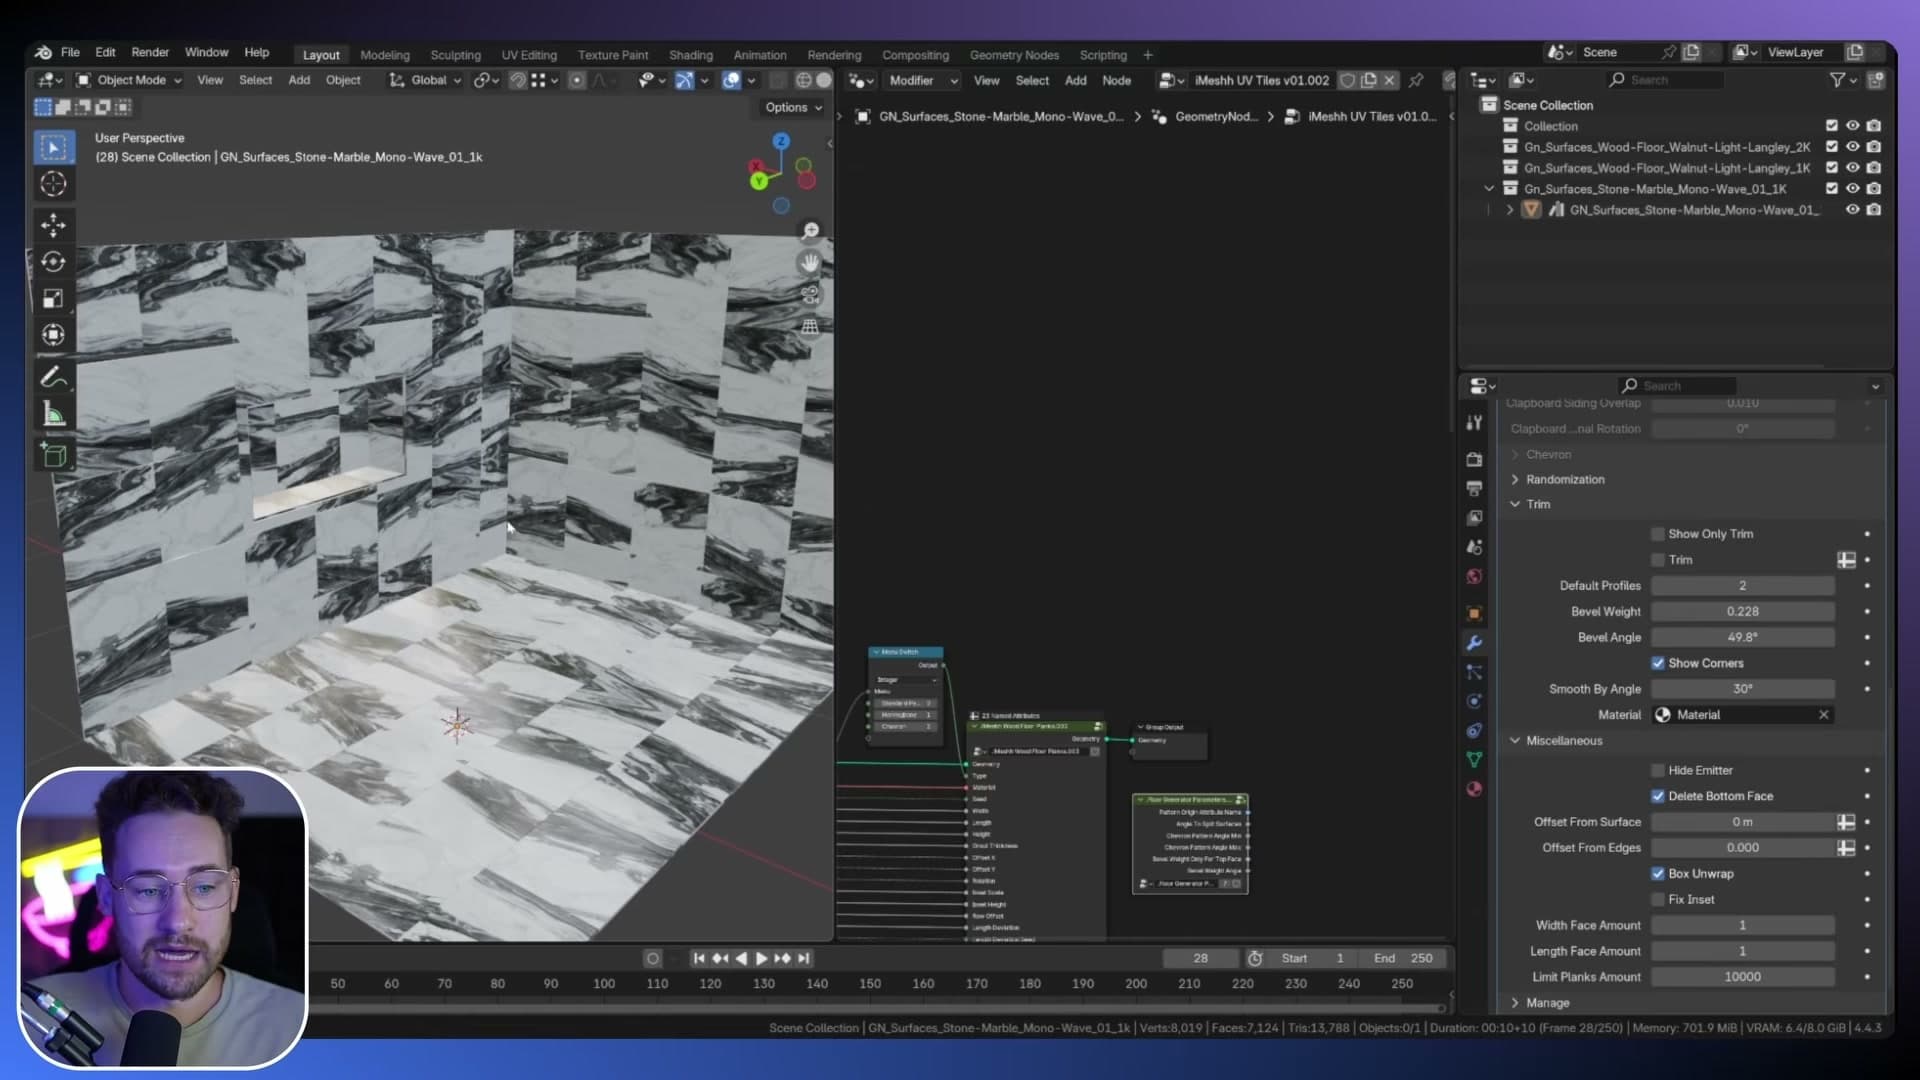
The trick lives inside the source mesh you're feeding into the generator. Drop into Edit Mode on that mesh. All of its vertices should be joined into one connected piece of geometry. That's correct, leave them welded.
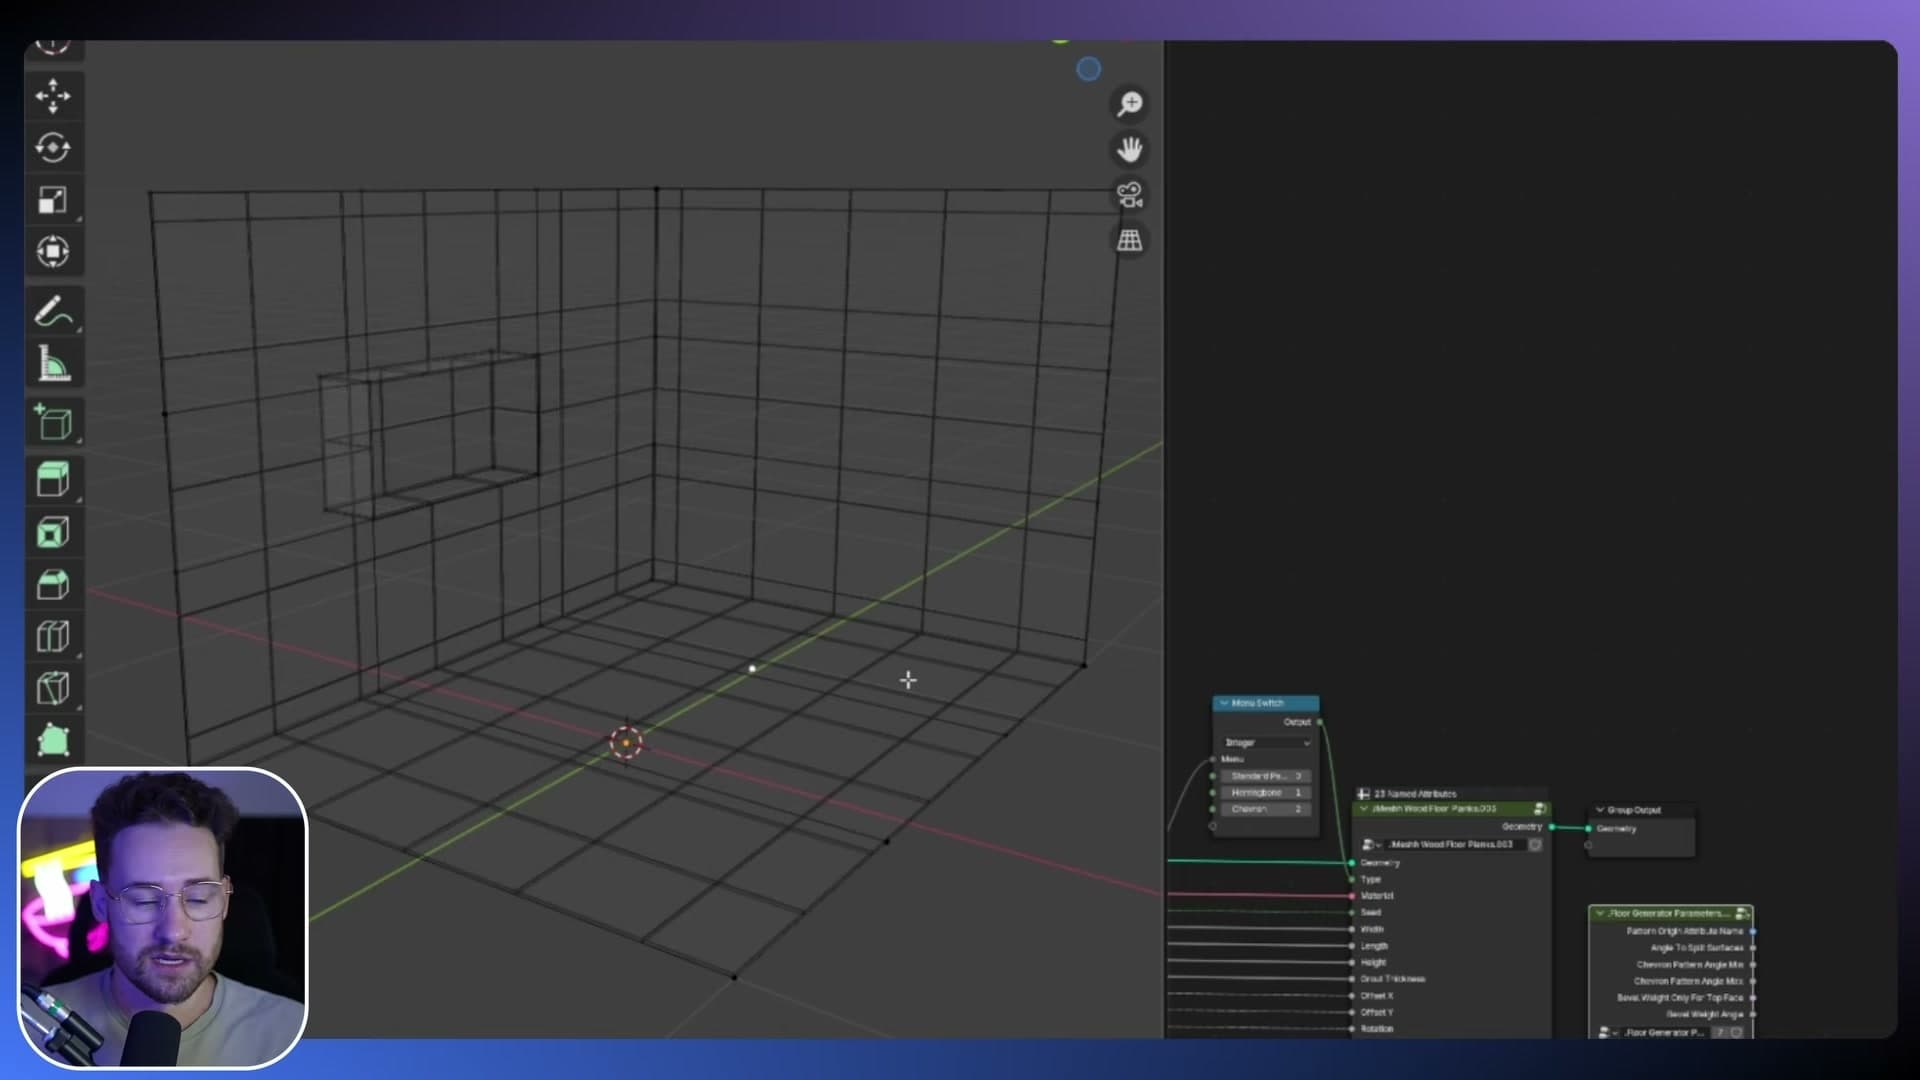
Select any single vertex on the surface, then press Shift+D to duplicate it. That extra vertex is now the alignment anchor: the generator reads its position and uses it to decide where the tile layout starts.
Snapping the layout to corners on X, Y and Z
With the duplicated vertex still selected, move it to the spot where you want a tile corner to land. Press G then Z to slide it down to the corner vertically, then G then Y to push it across into place. The tile grid follows the anchor as you move it.
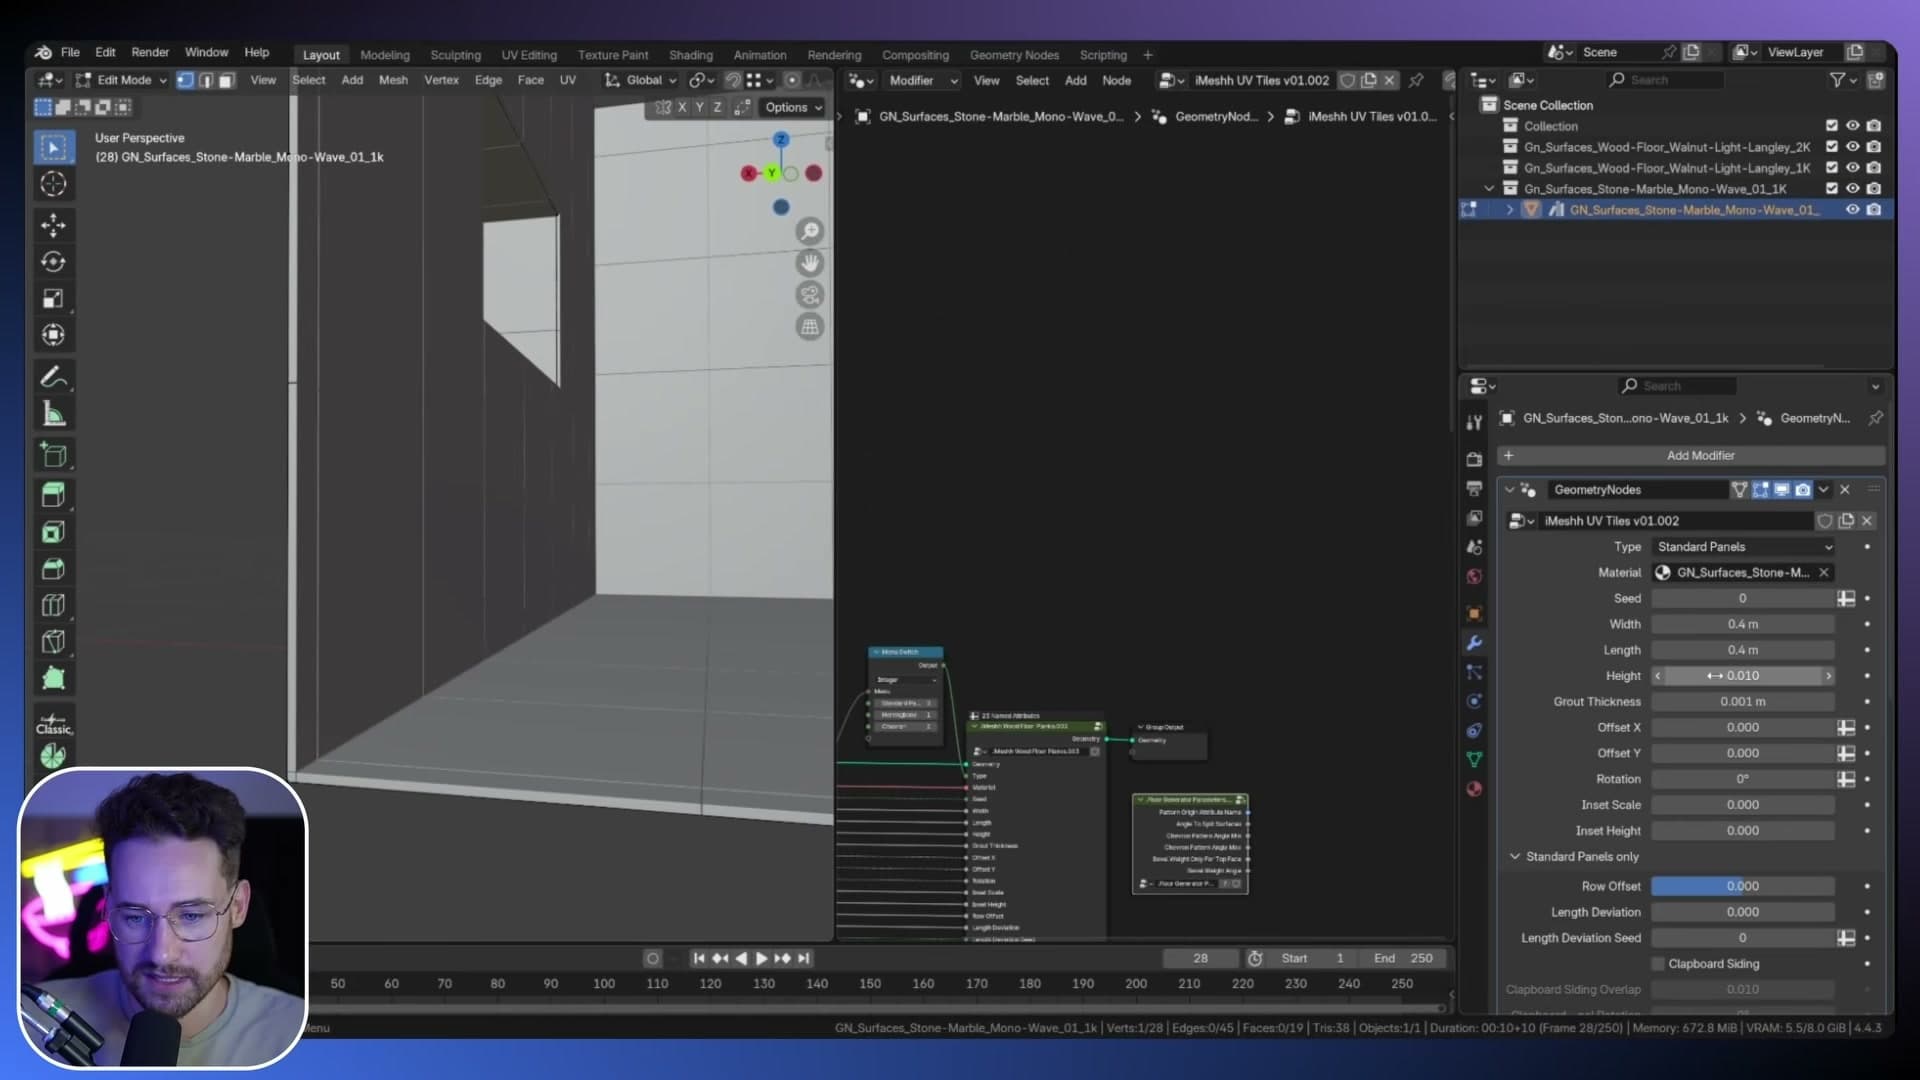
That's the whole alignment workflow. One anchor vertex, axis-locked moves, and full tiles landing exactly where they need to. The same technique works on the X, Y and Z axes, so you can pin the layout to a corner in all three directions without ever touching an offset slider.
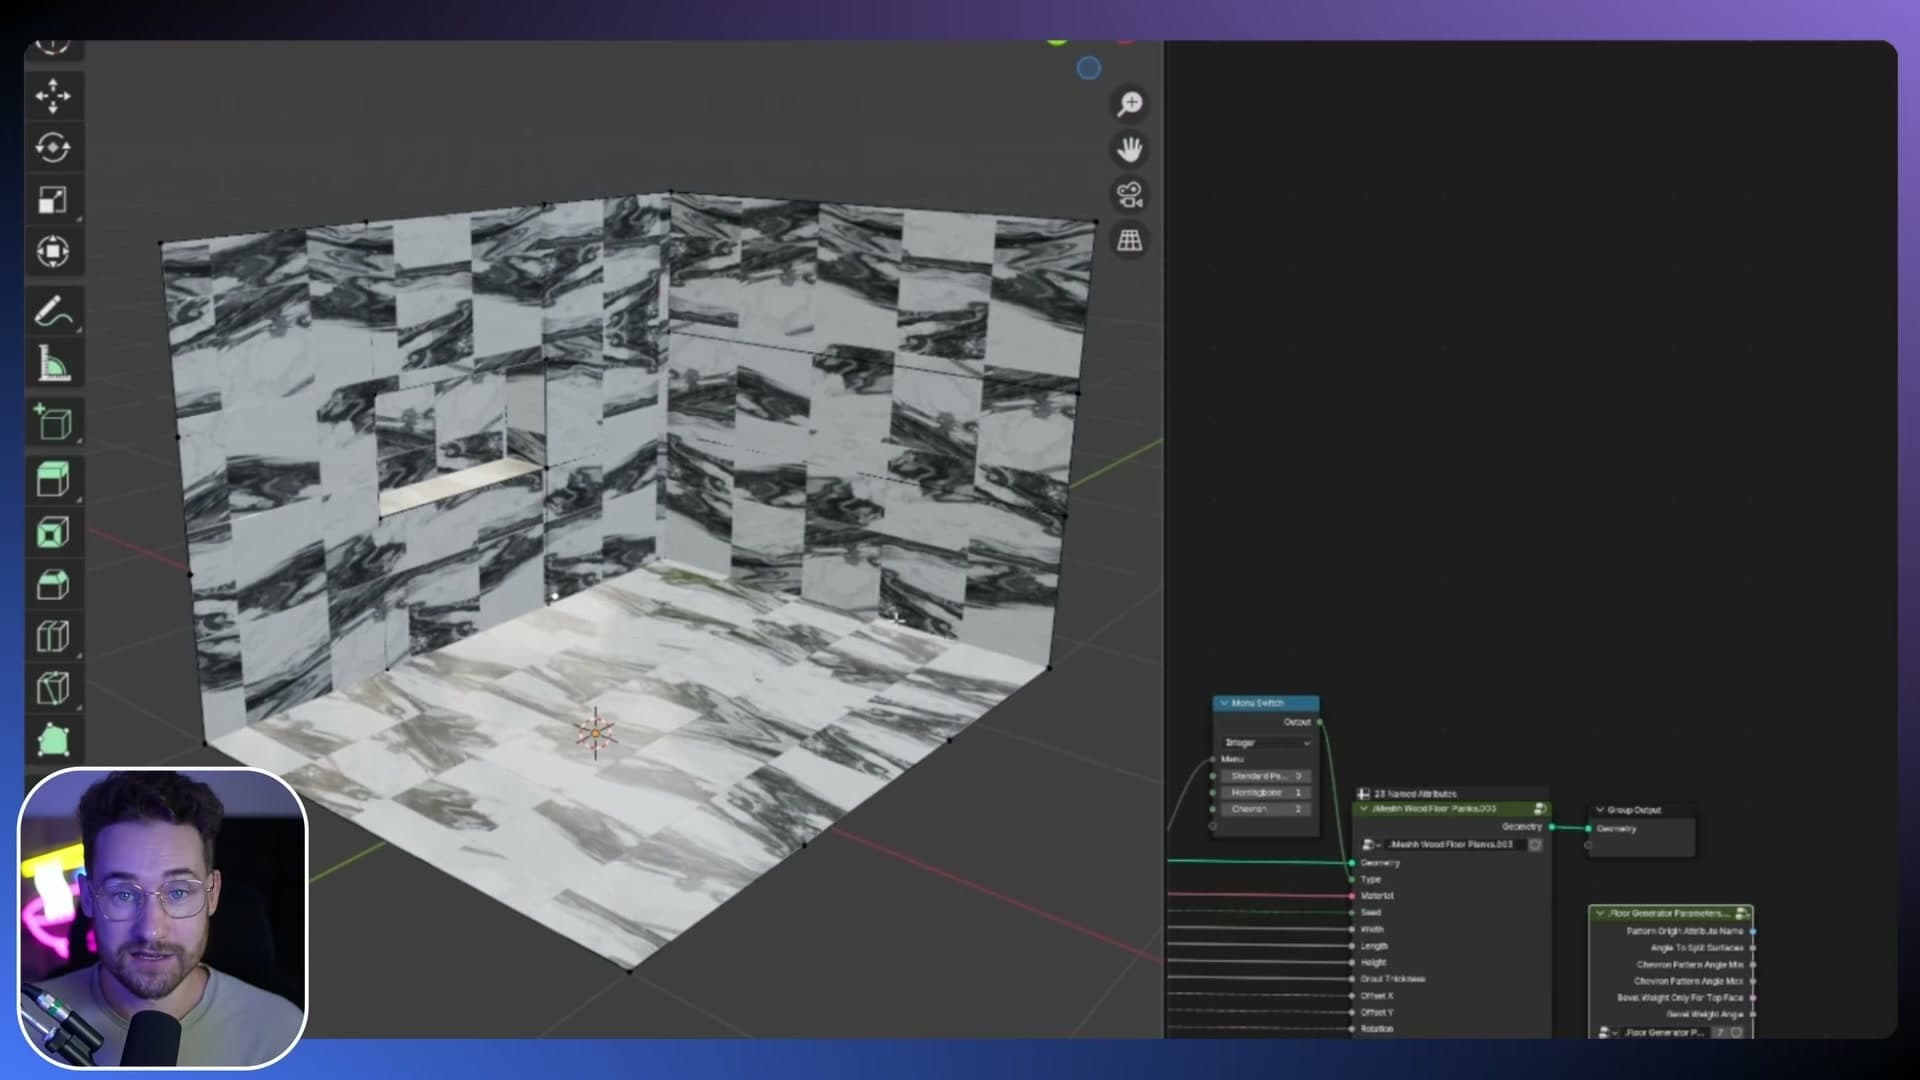
Worth remembering for bathroom work: real tiles will be a good deal thinner than the chunky demo blocks shown here, but the technique scales regardless. Once the anchor is positioned, the generator's randomisation and offset controls still layer on top of it.
UV Fit: randomizing non-tiling plank textures
When you've been given a non-tiling texture per plank, UV Fit randomizes them across the floor and lets you mask the top, the edge grain, the end grain and the Boolean cuts separately.
Randomizing manufacturer plank textures across the surface
The generator does not stop at geometry. It reaches into the shader editor too, because different texture packs need different shading strategies. If you are building a wood floor from a manufacturer pack, every plank usually arrives as its own non-tiling texture, and you need a way to scatter all of them across the surface without the join lines repeating.
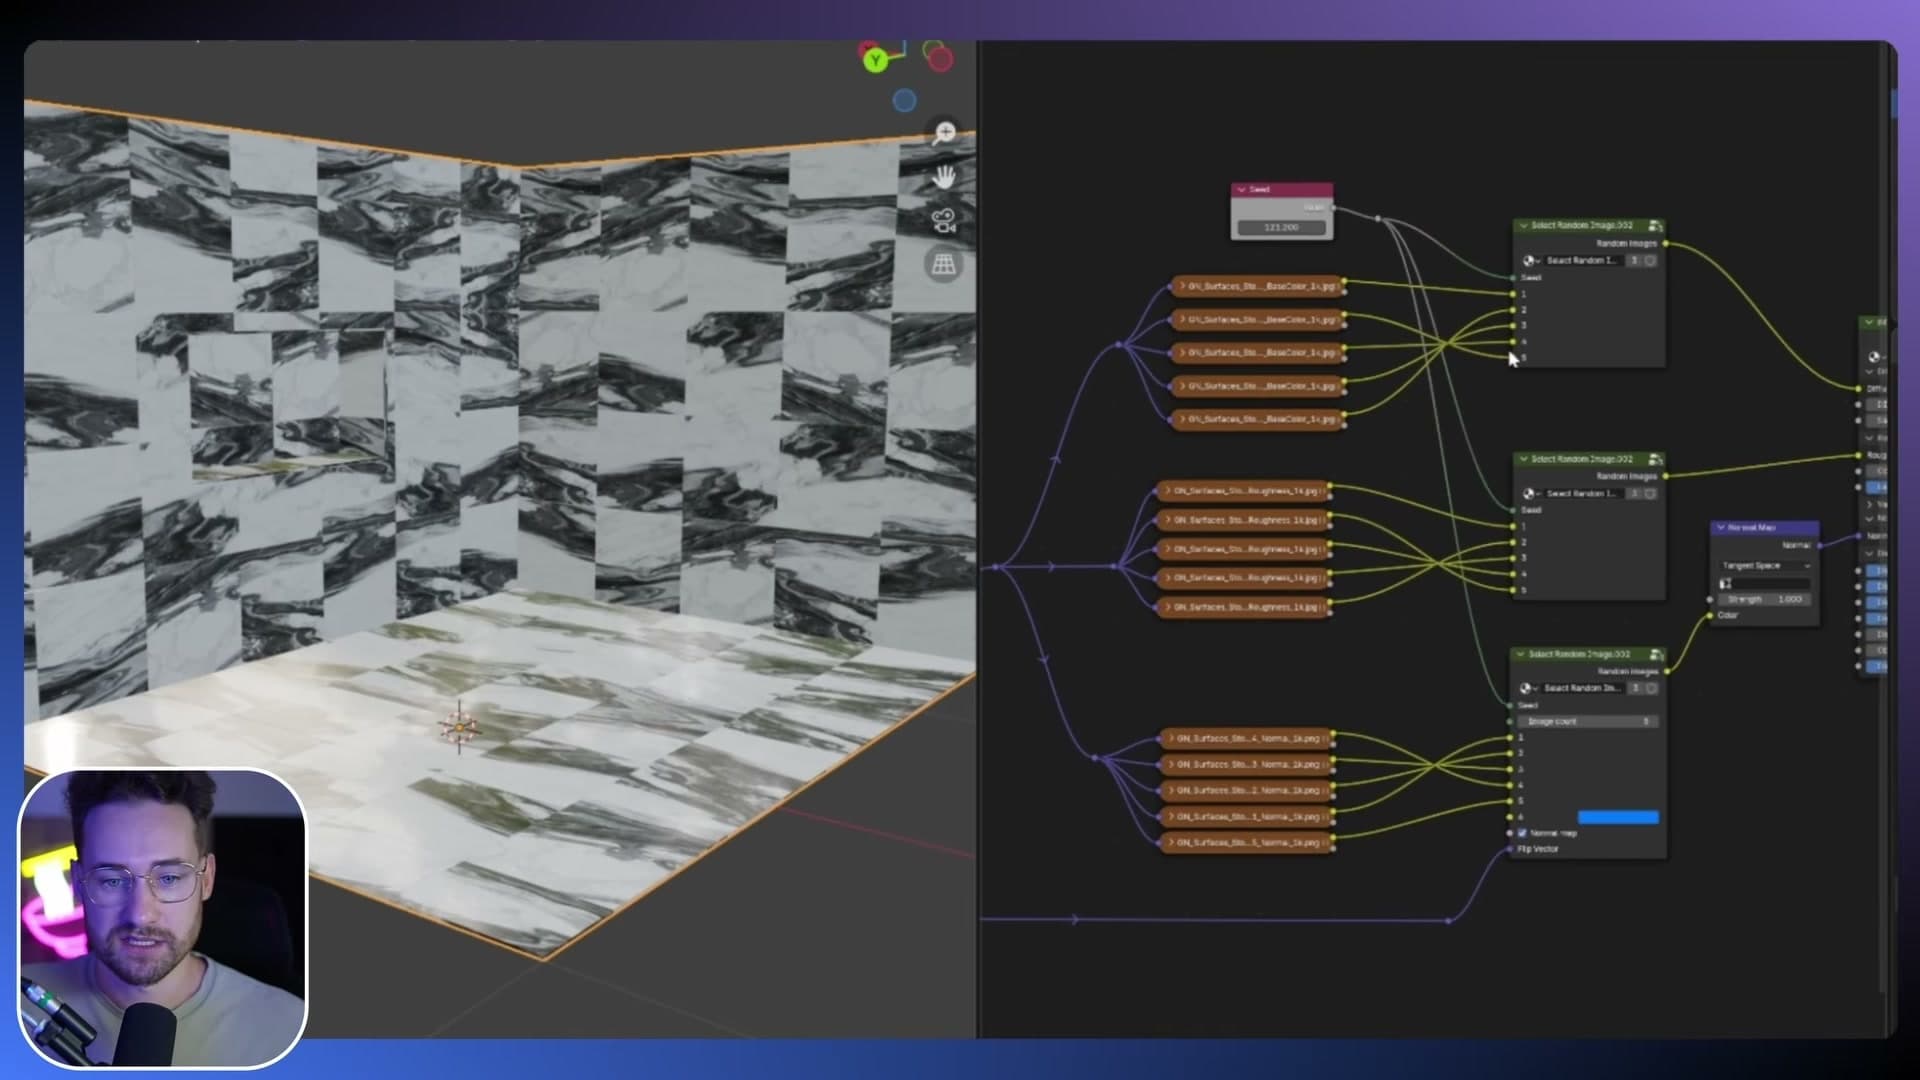
The shader handles that out of the box. There are slots for every map the manufacturer ships: base colour, roughness, and normal. Each plank texture you plug in becomes a candidate that gets randomised across the floor.
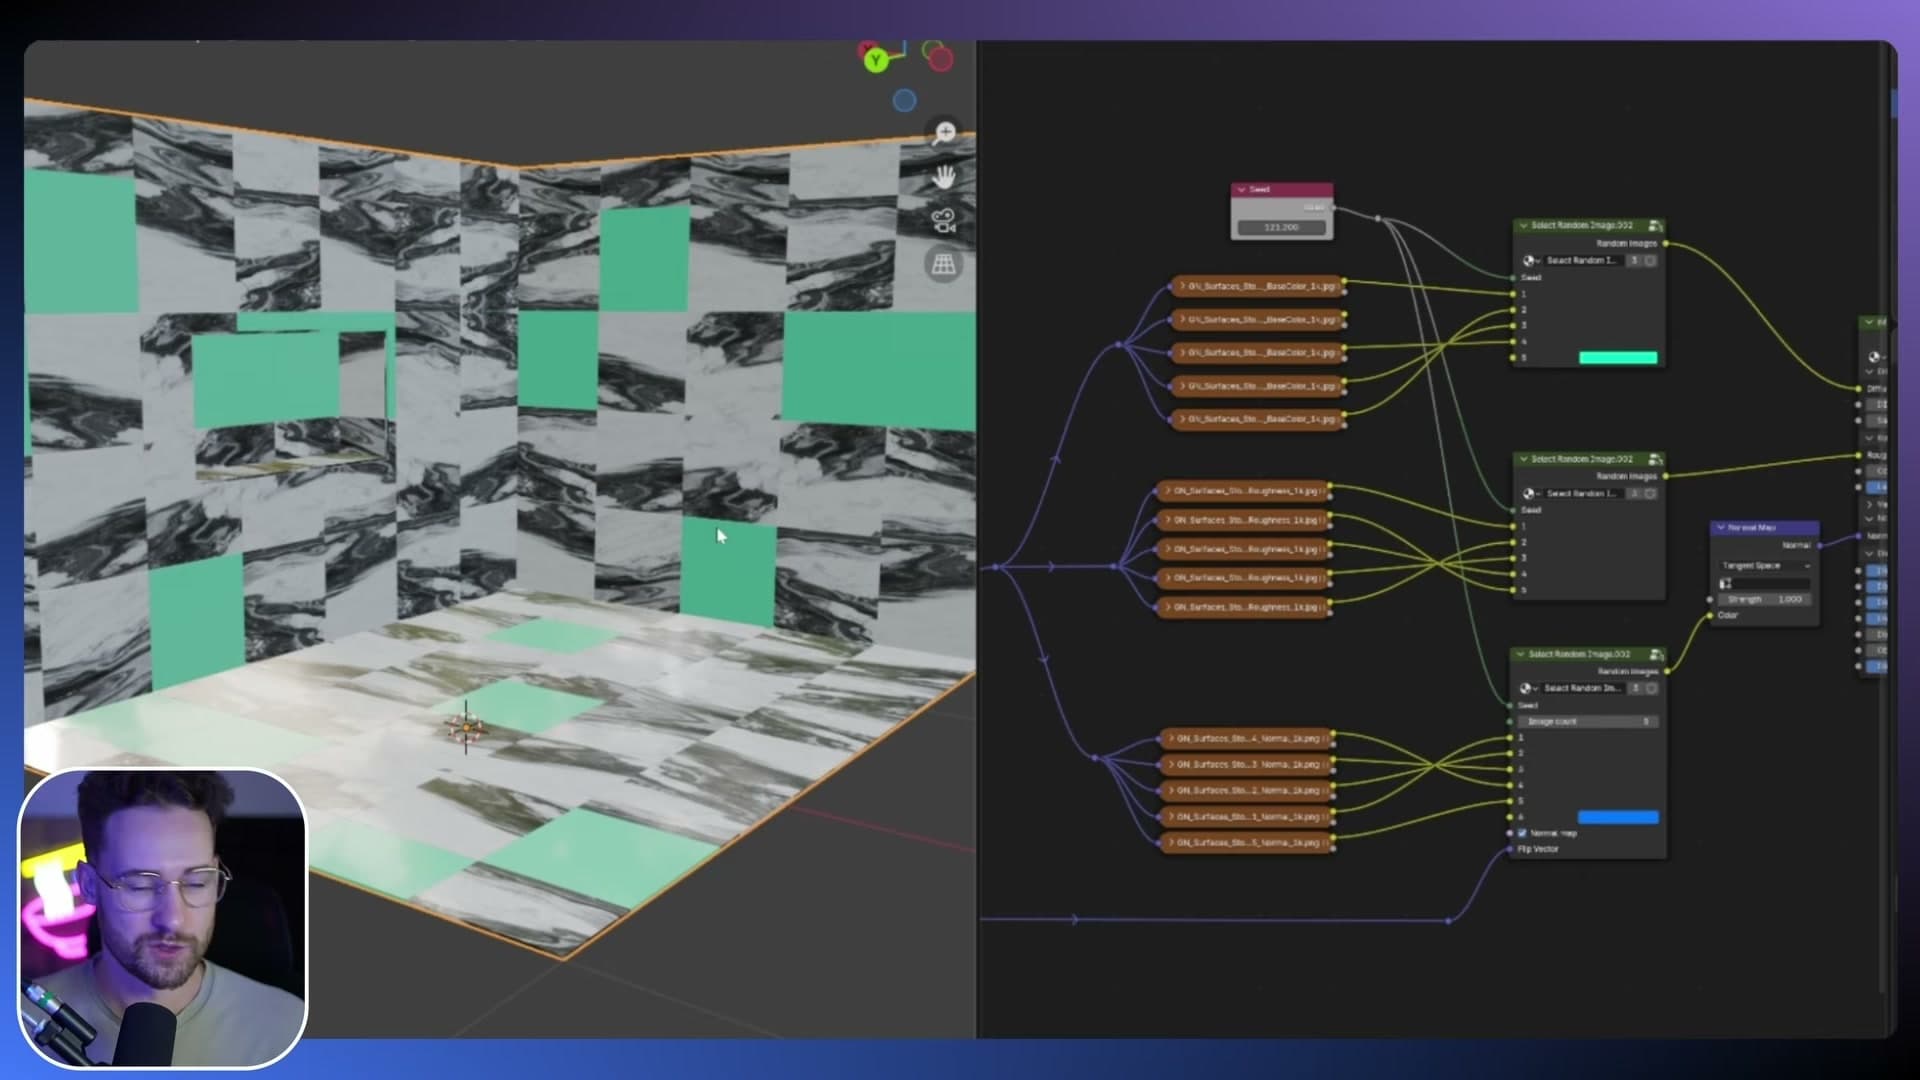
If you want to see which slot is doing what, unplug one. The plank that was filling that slot disappears from the rotation, and you can watch the floor reshuffle without it. That makes it easy to audit which textures are wired where before you commit the look.
Edge grain, end grain and Boolean cut masks
Inside the same node setup you get three masks that describe different parts of every plank, so you can drive the top face and the cut sides with different UV behaviour. The first is the edge grain mask, which covers the long sides of each plank.
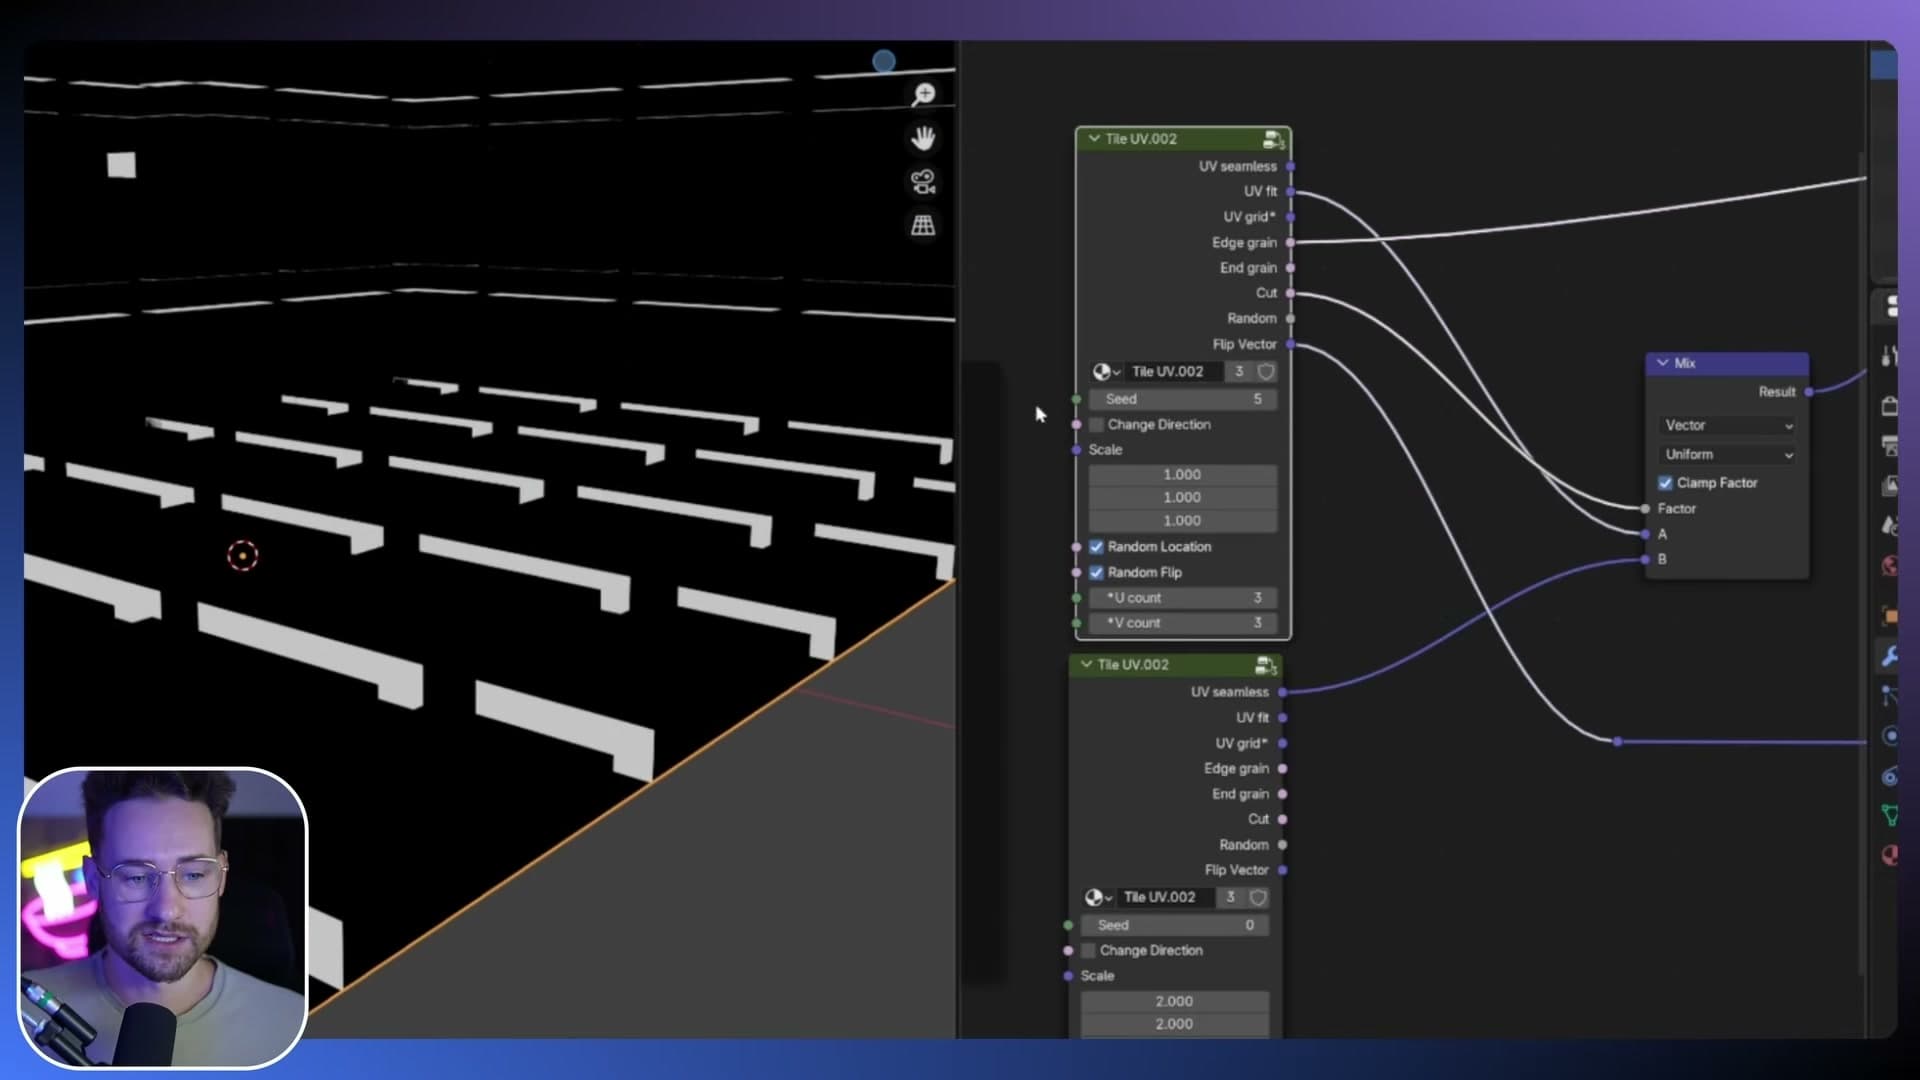
The second is the end grain mask (grain here referring to wood grain), which isolates the short ends. The third is labelled cut, and it picks up the faces that have been opened up wherever the Boolean trims the tile around the edges of the floor.
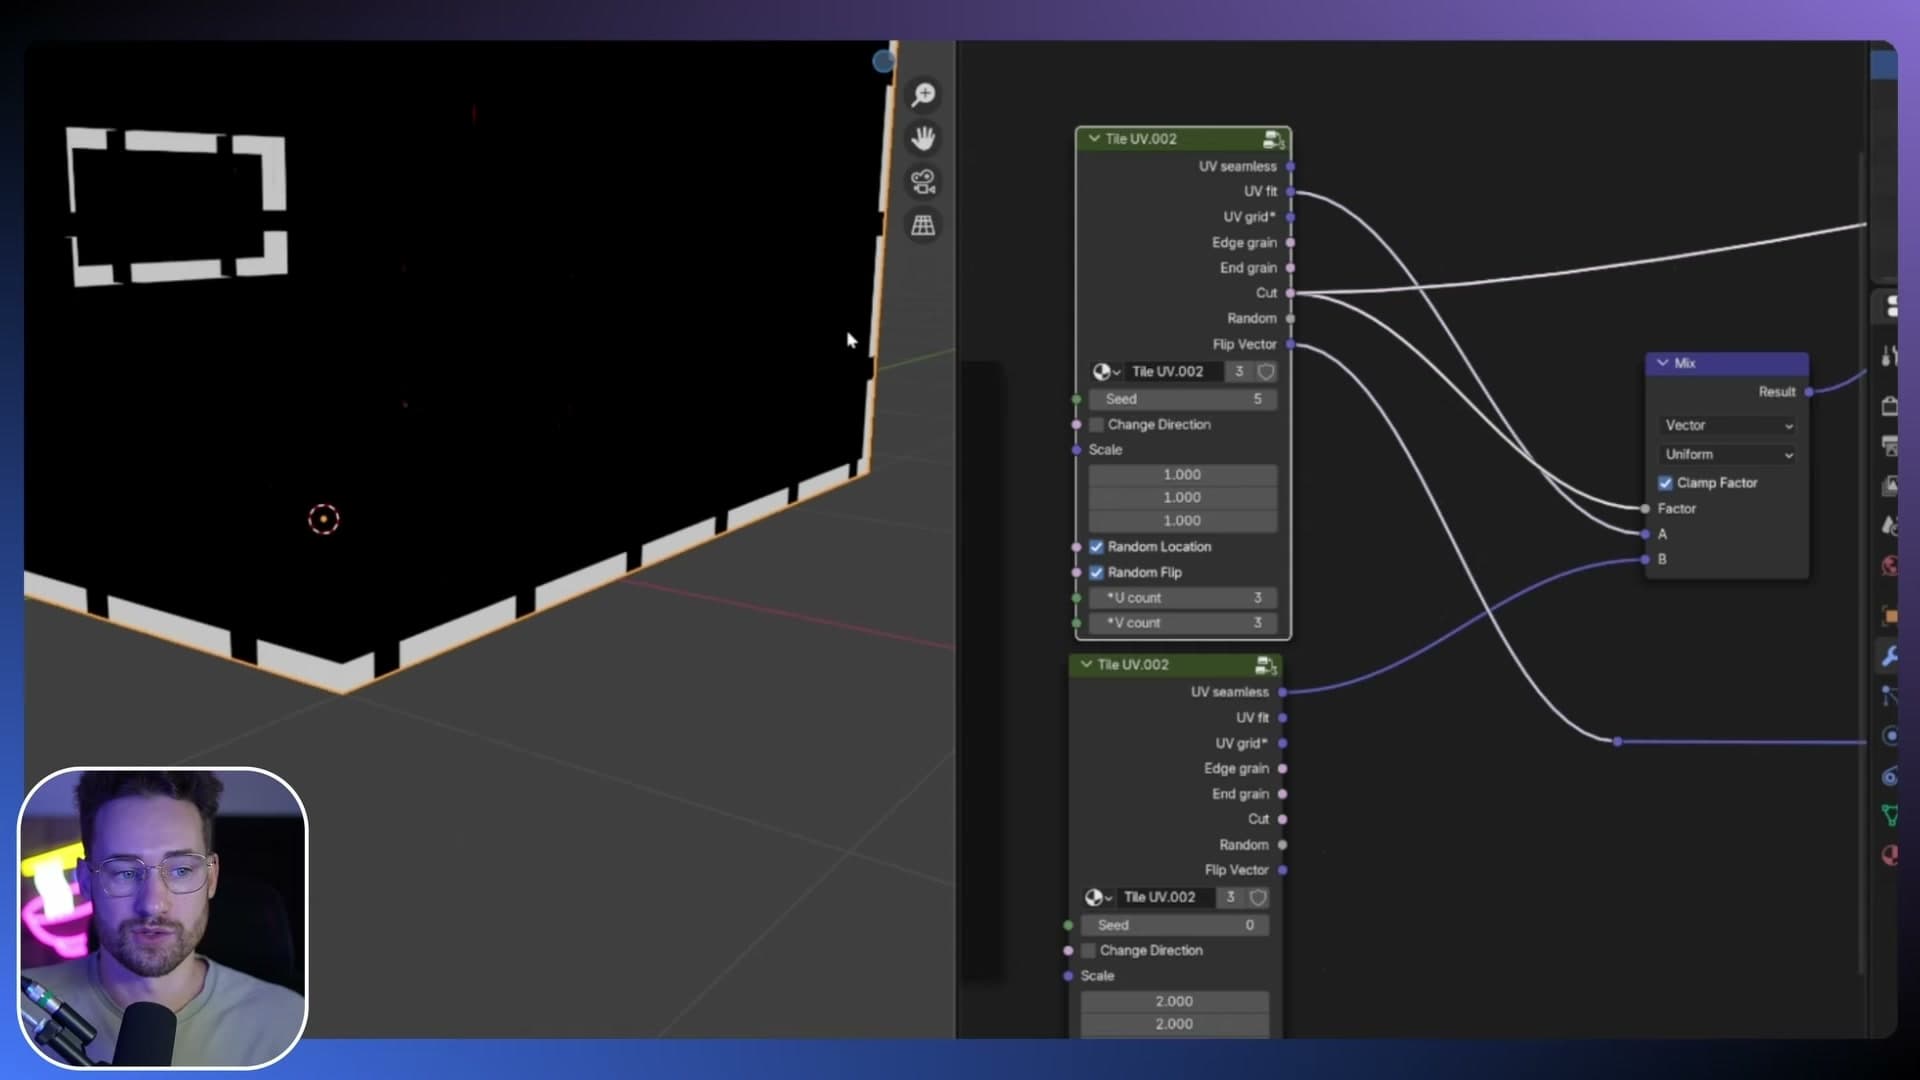
Having the three exposed separately is what makes the shader flexible. The top of each plank can take one texture, while the freshly cut sides and ends can be driven by a different unwrap entirely, so the join between them never looks like a stretched continuation of the surface texture.
Combining masks so textures wrap consistently around tile edges
If you want a single mask that covers all the cut areas of a plank (edges and ends together), add the masks together inside the node group. Plug the edge grain mask in, duplicate the node and plug the end grain mask in alongside it, and the result is one combined mask that captures every cut face on the tile.
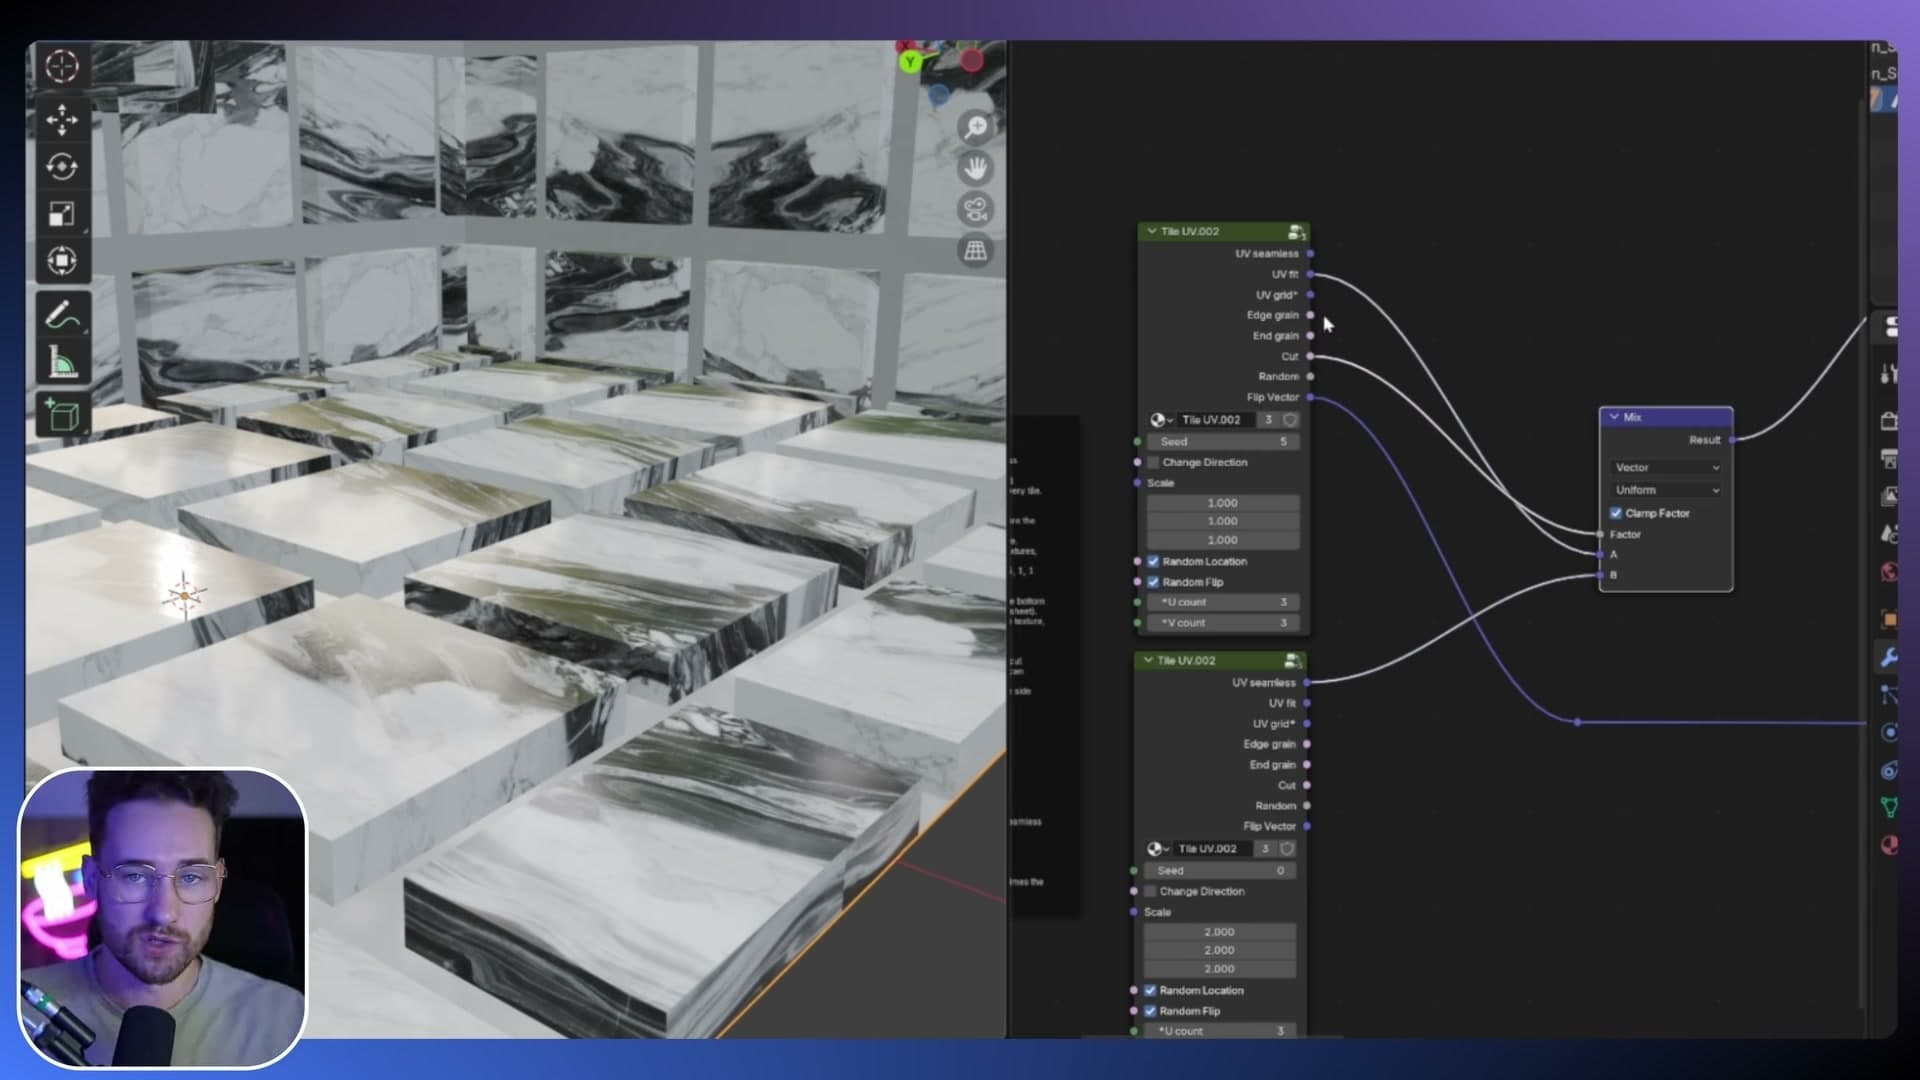
In the default setup, that combined mask drives a different UV unwrap to the top face. The top has its own unwrap, and the cut pieces wrap a separate texture around the sides of the tile.
For most floors you want exactly that: the same surface texture continuing over the sides. The shader is already wired that way. The whole UV travels around the tile so the side material matches the top.
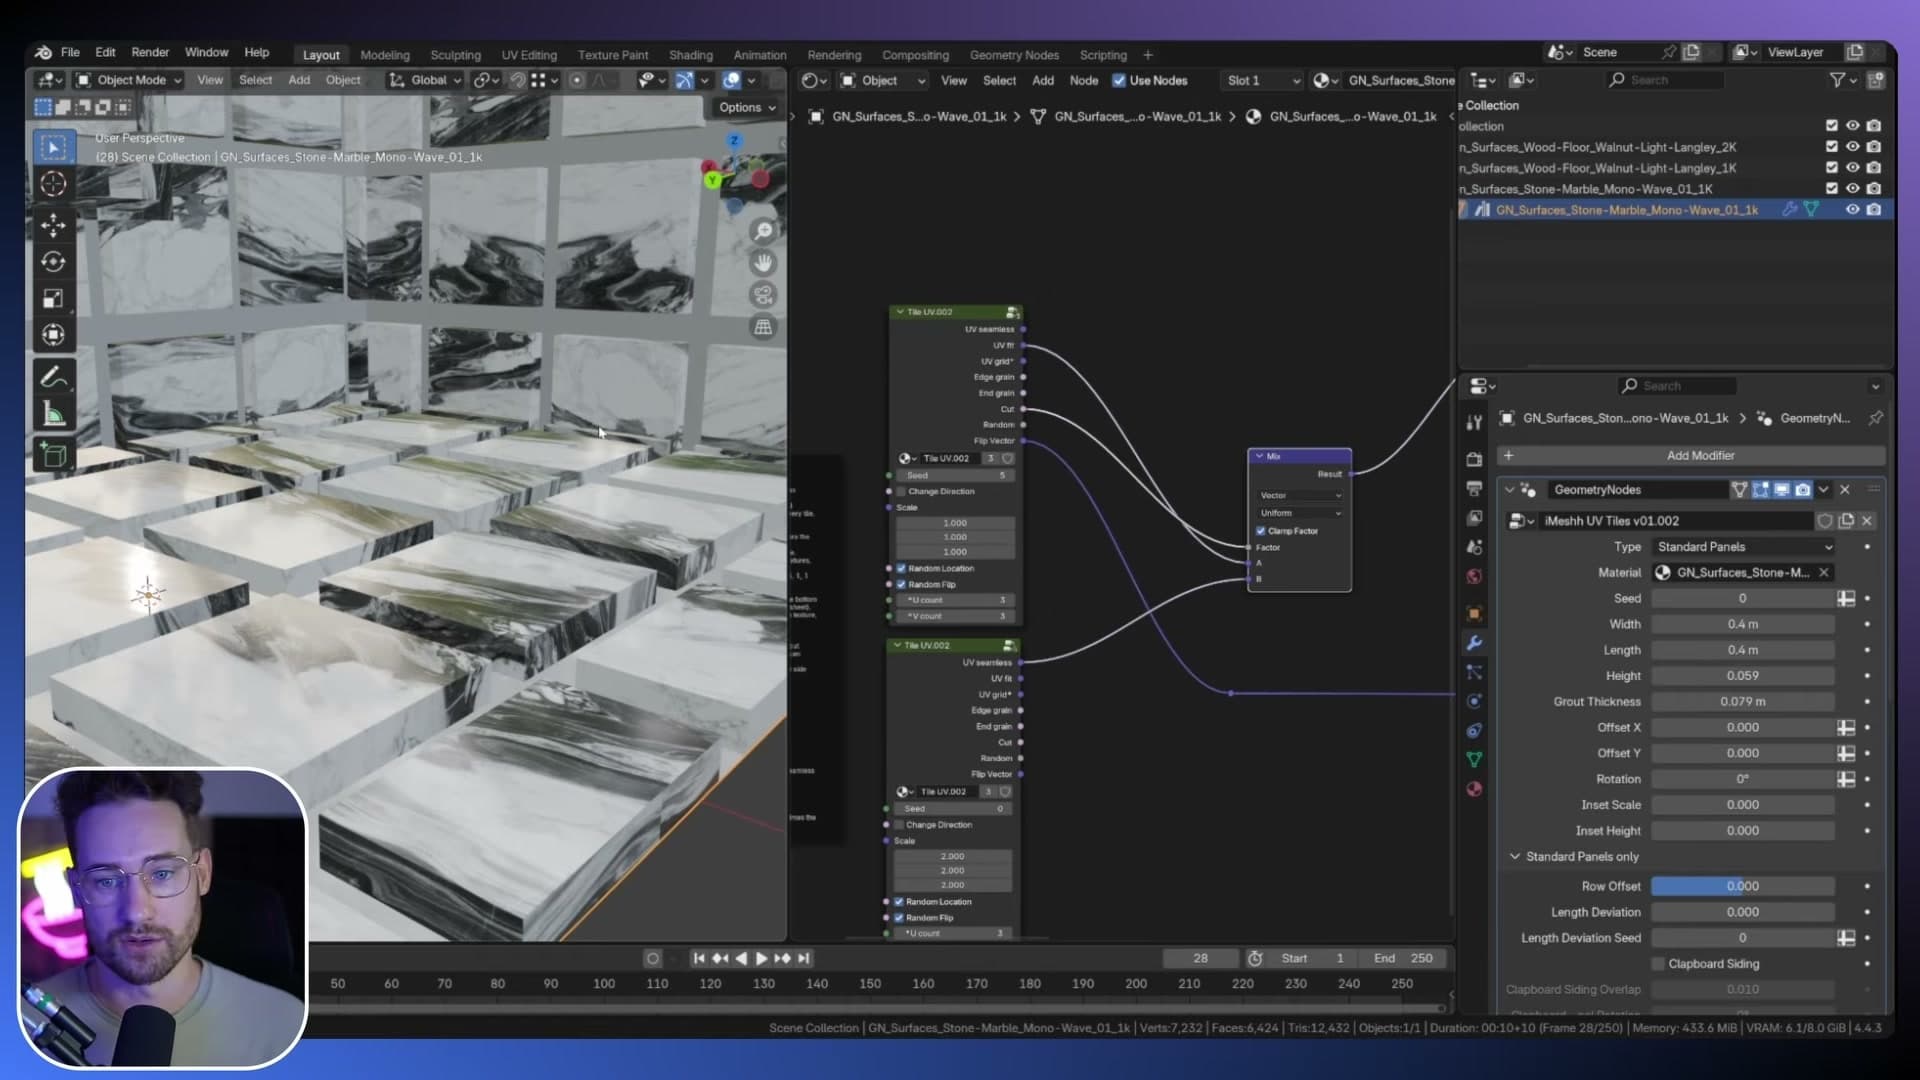
Where the split really pays off is in non-floor uses. Several customers have built sideboard-style pieces with the floor generator, and previously the edges were not unwrapped at all, which meant you had to unwrap manually before you could texture them. Now the side faces come pre-unwrapped, so a single texture flows consistently over the top and around the sides without any extra work.
All of this behaviour lives in the UV Fit shader mode. It is a fitted texture setup designed for per-plank manufacturer packs where each image fills exactly one tile rather than tiling continuously across the floor.
UV Seamless: random tiling across the whole surface
For a single tiling texture, plug it into the UV Seamless input and use random location, flip, direction and scale to break up repetition across the entire floor.
Plugging a tiling texture into UV Seamless
If you've got a single tiling texture and you want it to spread across the entire floor rather than being mapped per tile, plug it into the UV Seamless input on the shader. That tells the generator to treat the texture as one continuous sheet that flows across the whole surface.
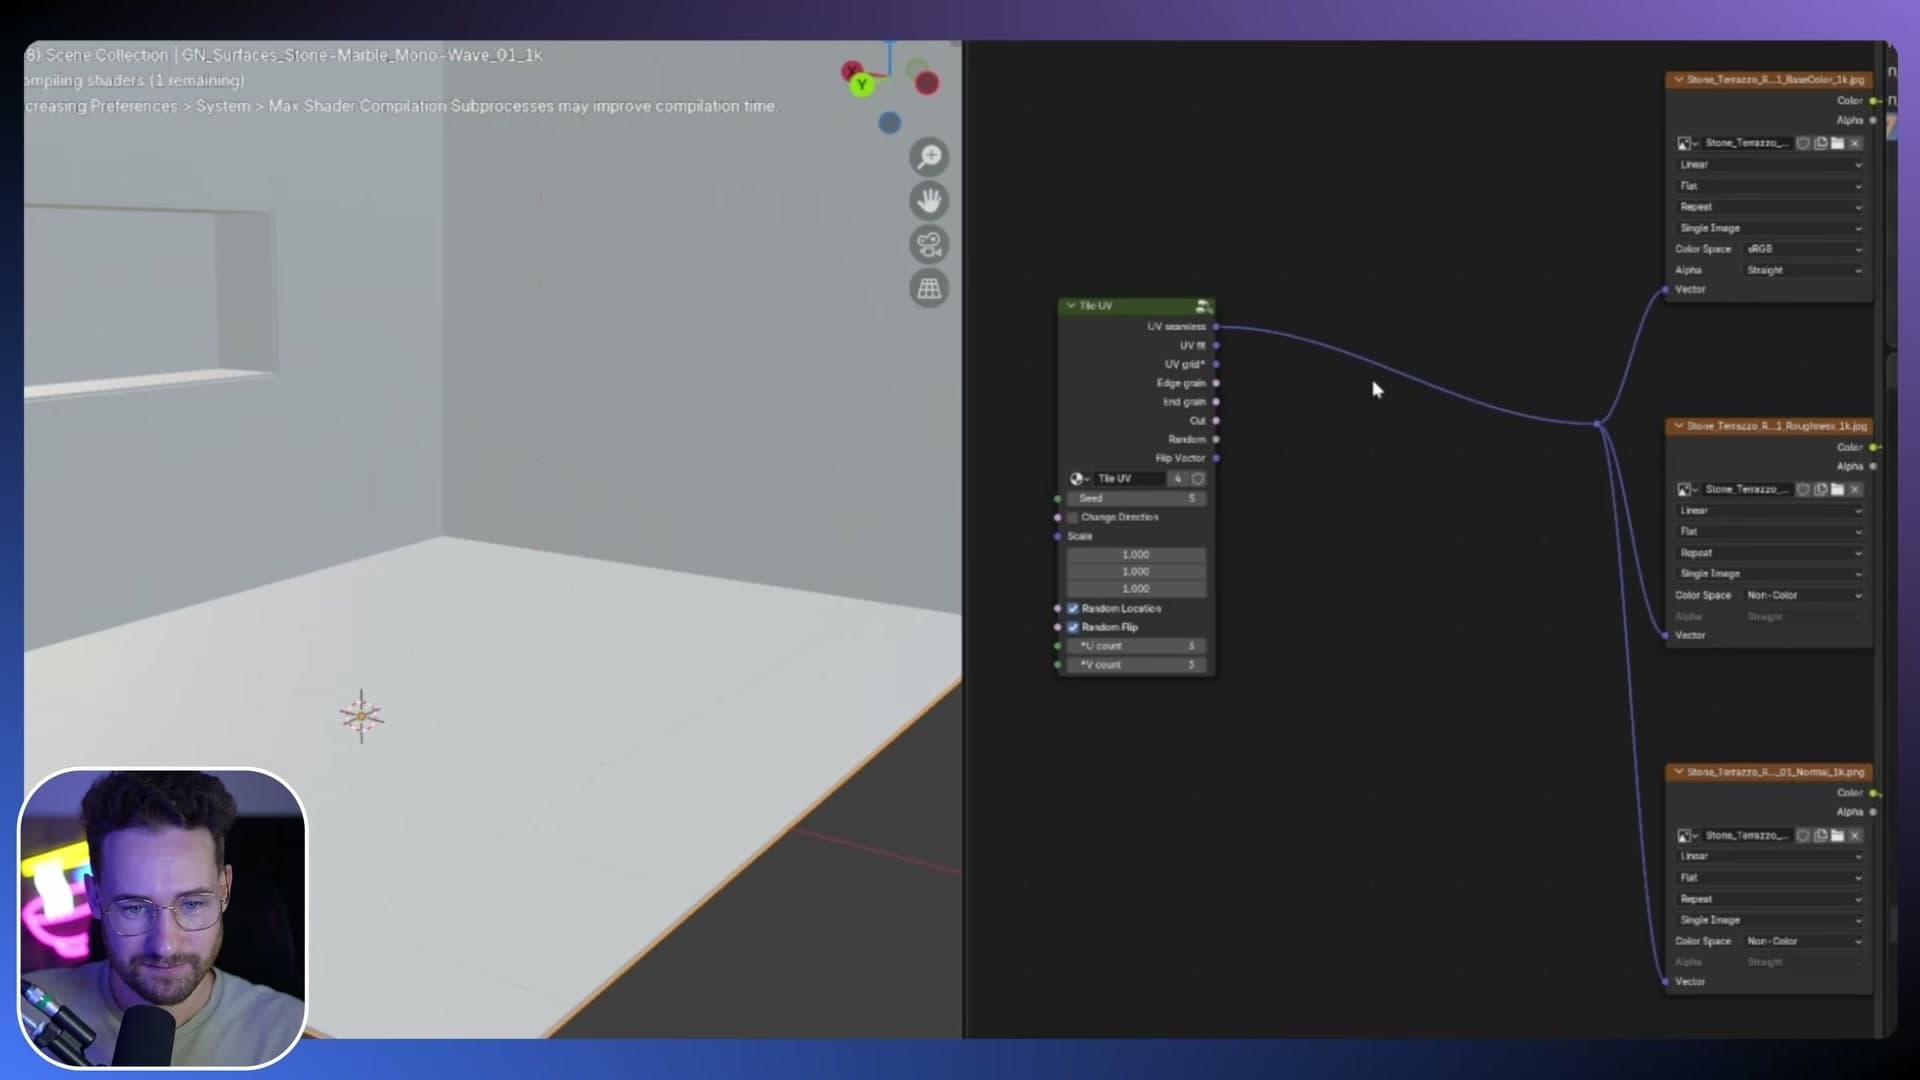
As soon as it's connected, the generator randomises that texture over every tile so the surface reads as a single, varied material instead of an obvious grid. From here, the controls right next to that input handle exactly how much variation you get.
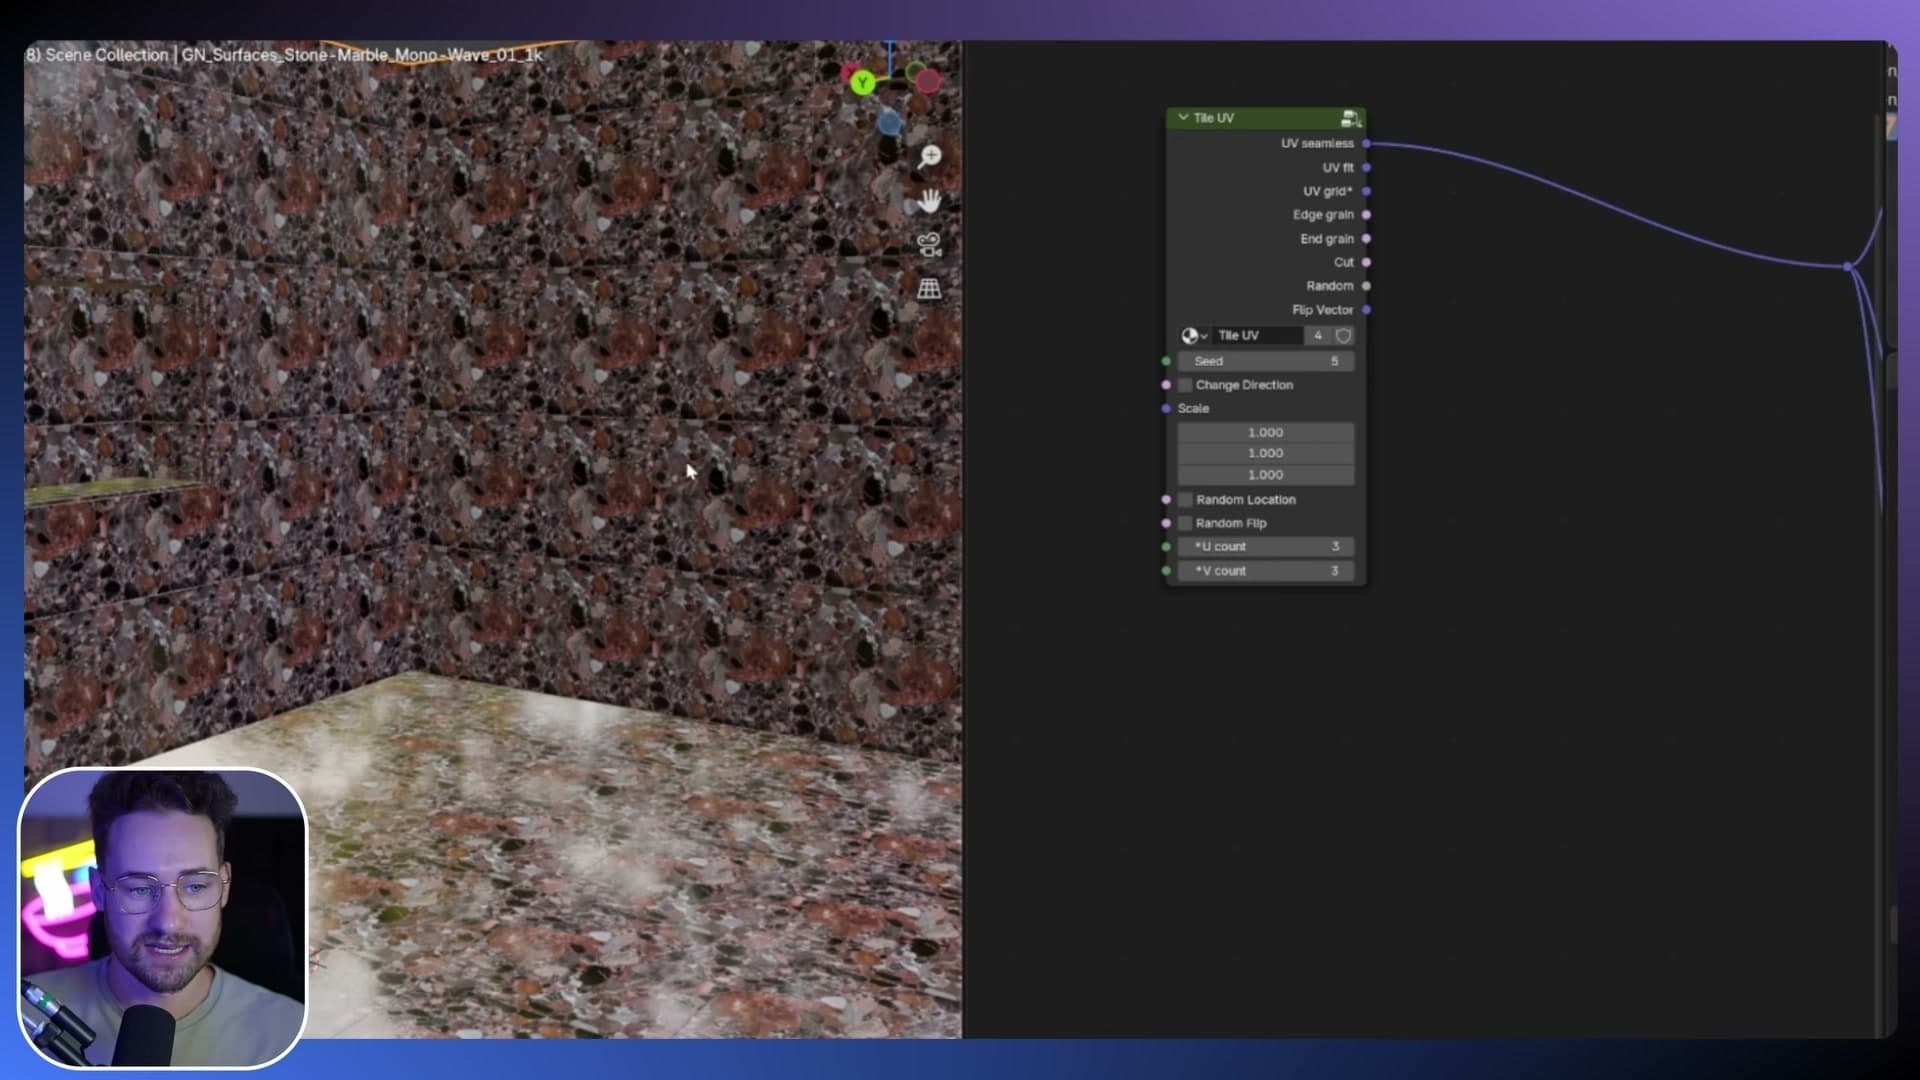
Random location, flip, direction and scale
The variation is driven by a stack of toggles on the shader. With Random Location switched off, every tile samples the texture from the same UV coordinates, so the pattern repeats identically across each one. Turn it on and the UVs shift per tile, which immediately breaks the repeat across the surface.
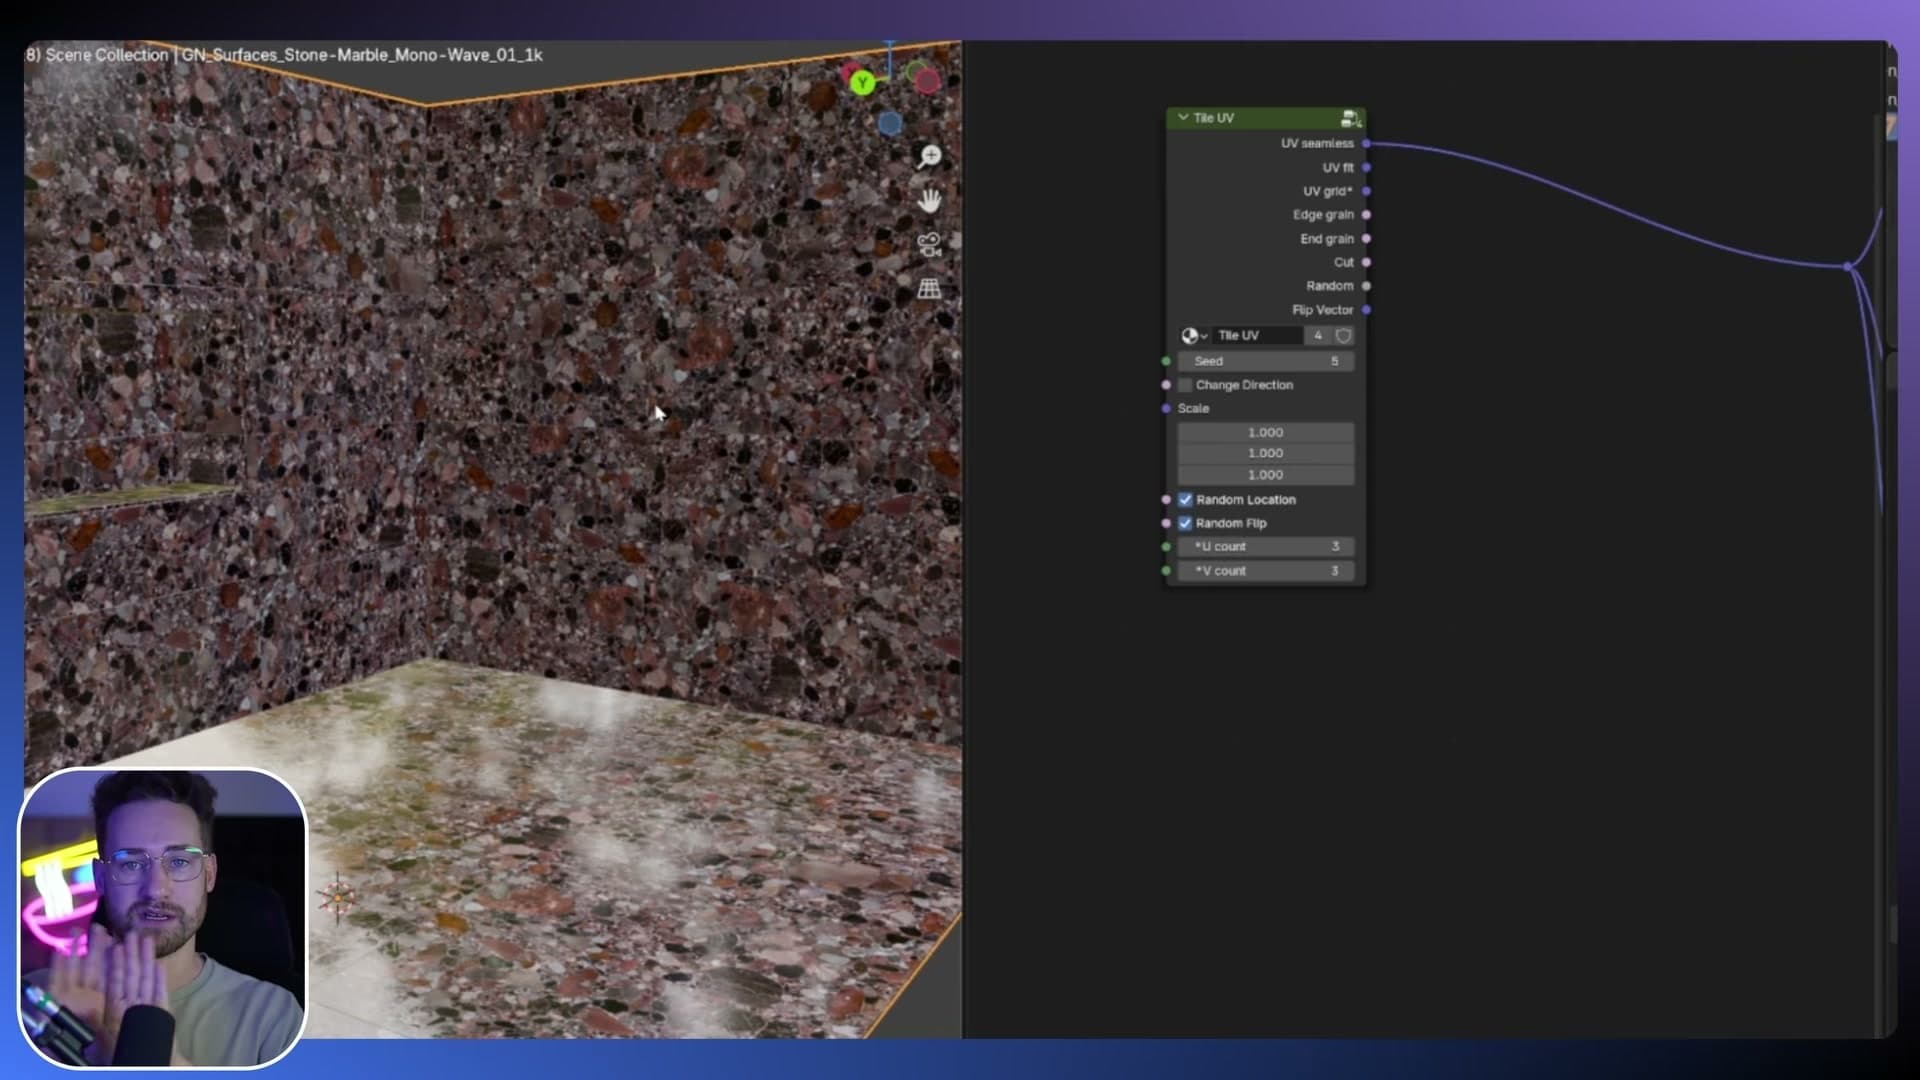
Random Flip adds another layer of variation by mirroring some of the tiles, and you can change the direction too if you want even more variety on top of that.
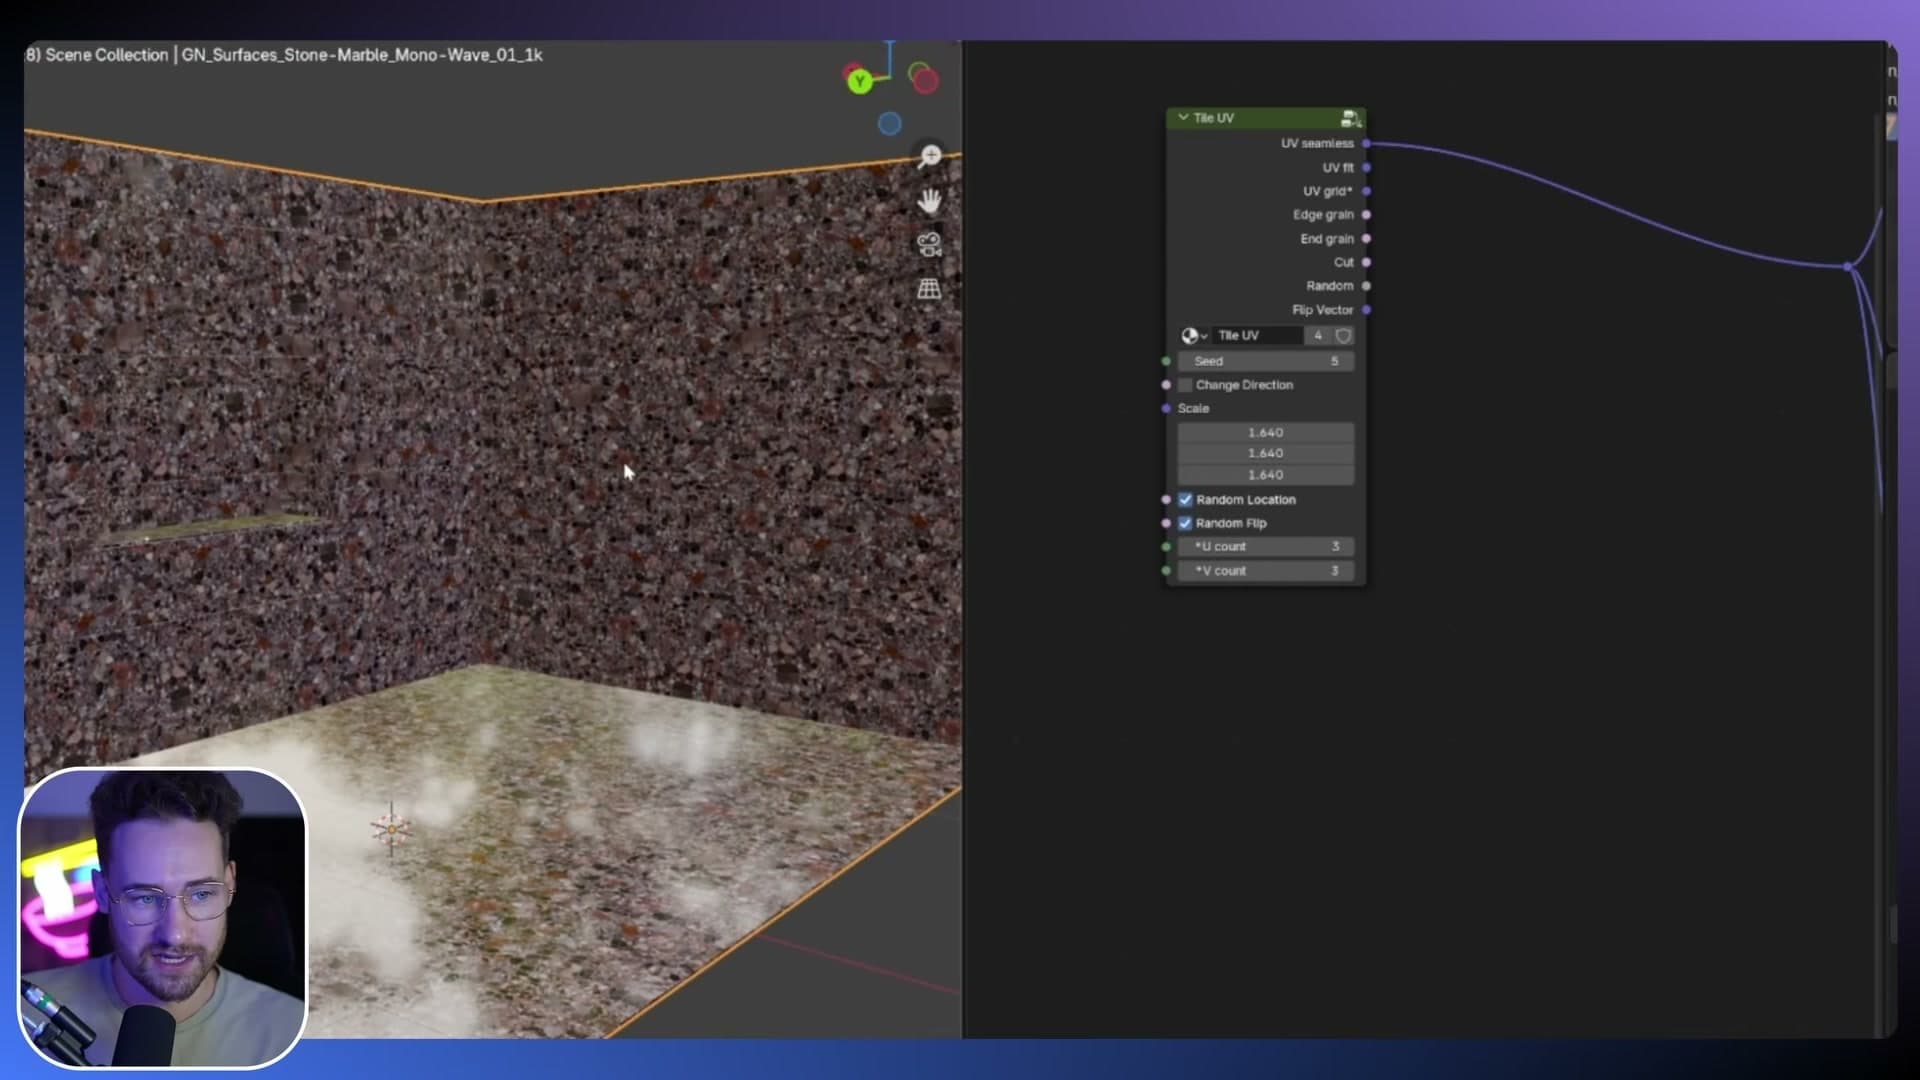
Scale works as well. Because the texture tiles cleanly, you can push it right out without breaking the mapping, though if you go too far you start running into the same tiling problem where the underlying repeat becomes visible again. Dialled in sensibly, the surface stops reading as tiled at all and looks like a genuinely randomised material.
UV Grid: sprite-sheet randomization for tile arrays
Feed a single grid texture into UV Grid, tell it your U and V count, and every cell is randomized as if it were its own tile. Ideal for pools and large mosaic surfaces.
Splitting a grid texture into a sprite sheet
UV Seamless works well for textures that tile cleanly, but on a large surface you will eventually start to spot the repeat. UV Grid sidesteps that by treating one image as a sheet of many smaller textures and then randomising those cells across the geometry, so the pattern never settles into a visible loop.
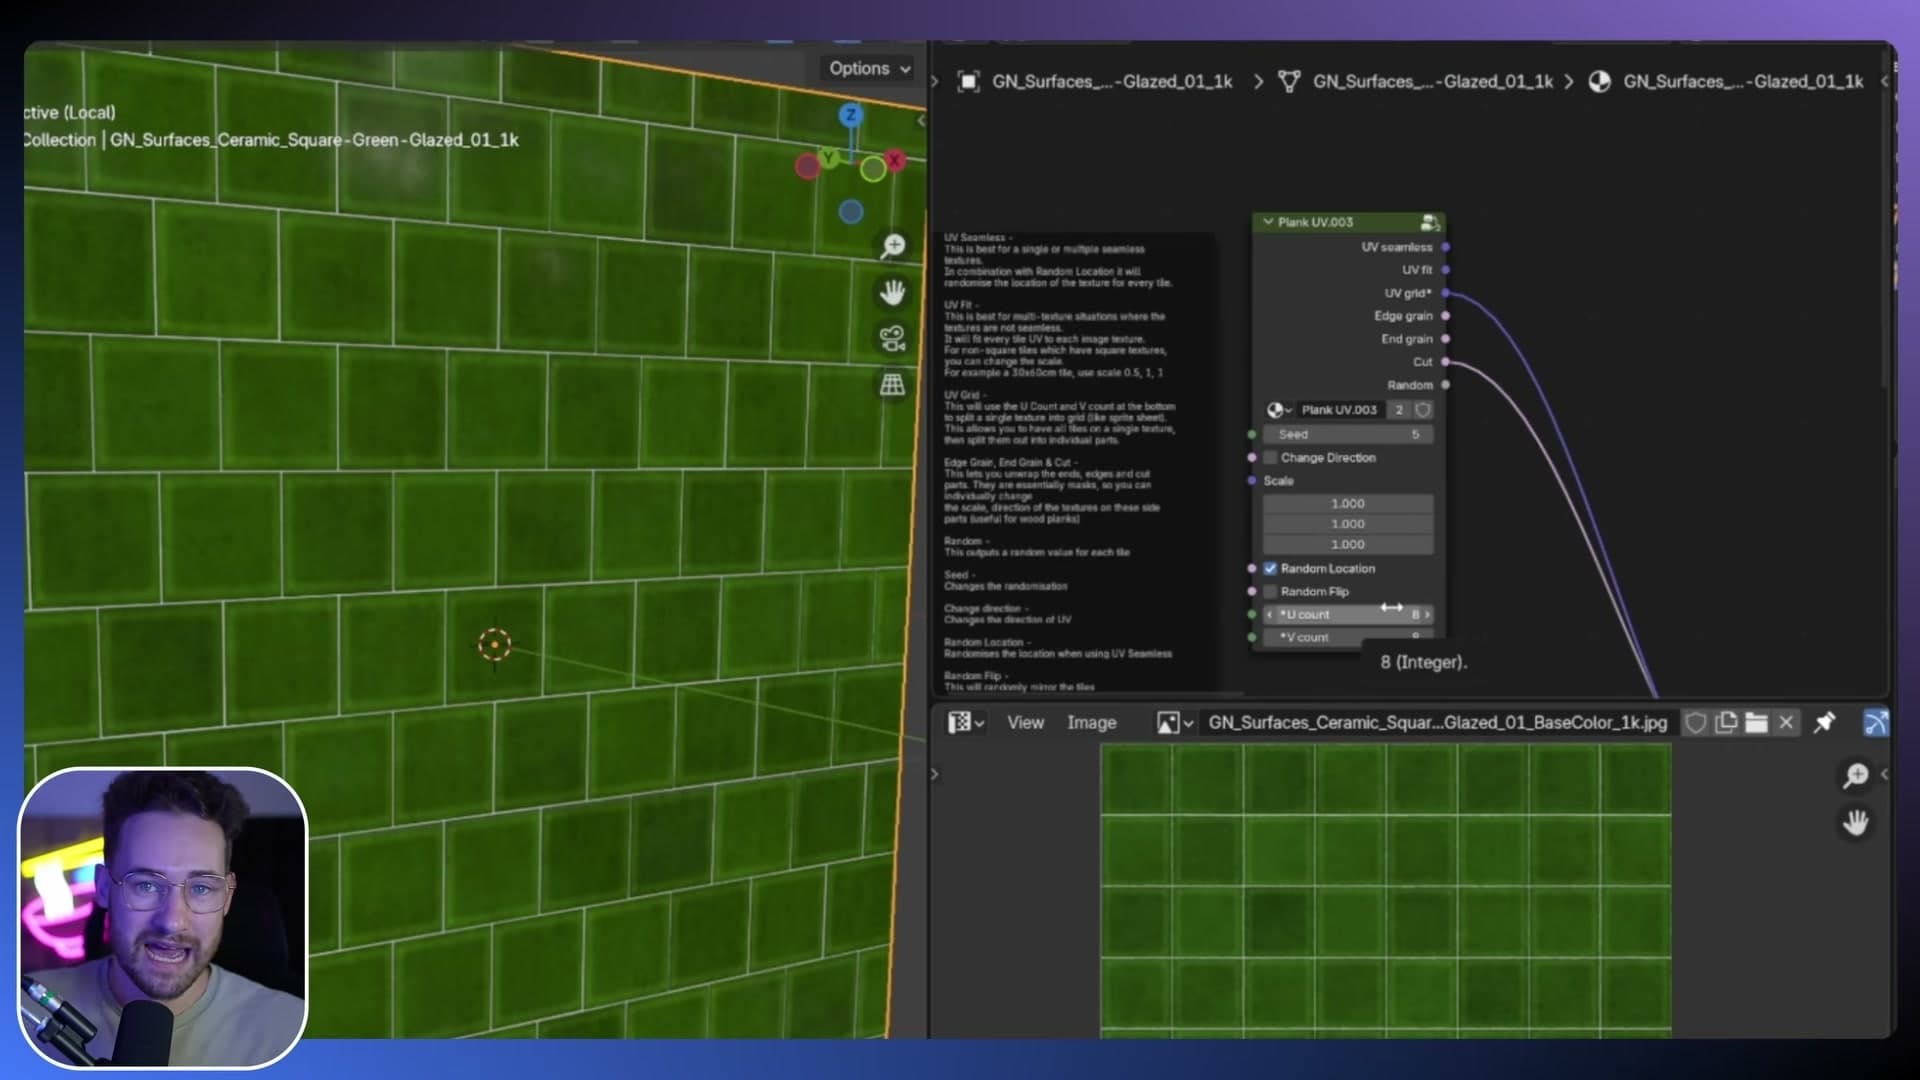
The texture loaded here is an 8×8 grid: sixty-four little tile thumbnails packed into a single image. To wire it up, switch the shader mode to UV Grid, plug in the grid texture, then tell the shader how the image is divided: set U Count to 8 and V Count to 8. The shader now treats every cell as its own tile and randomises all sixty-four of them across the surface.
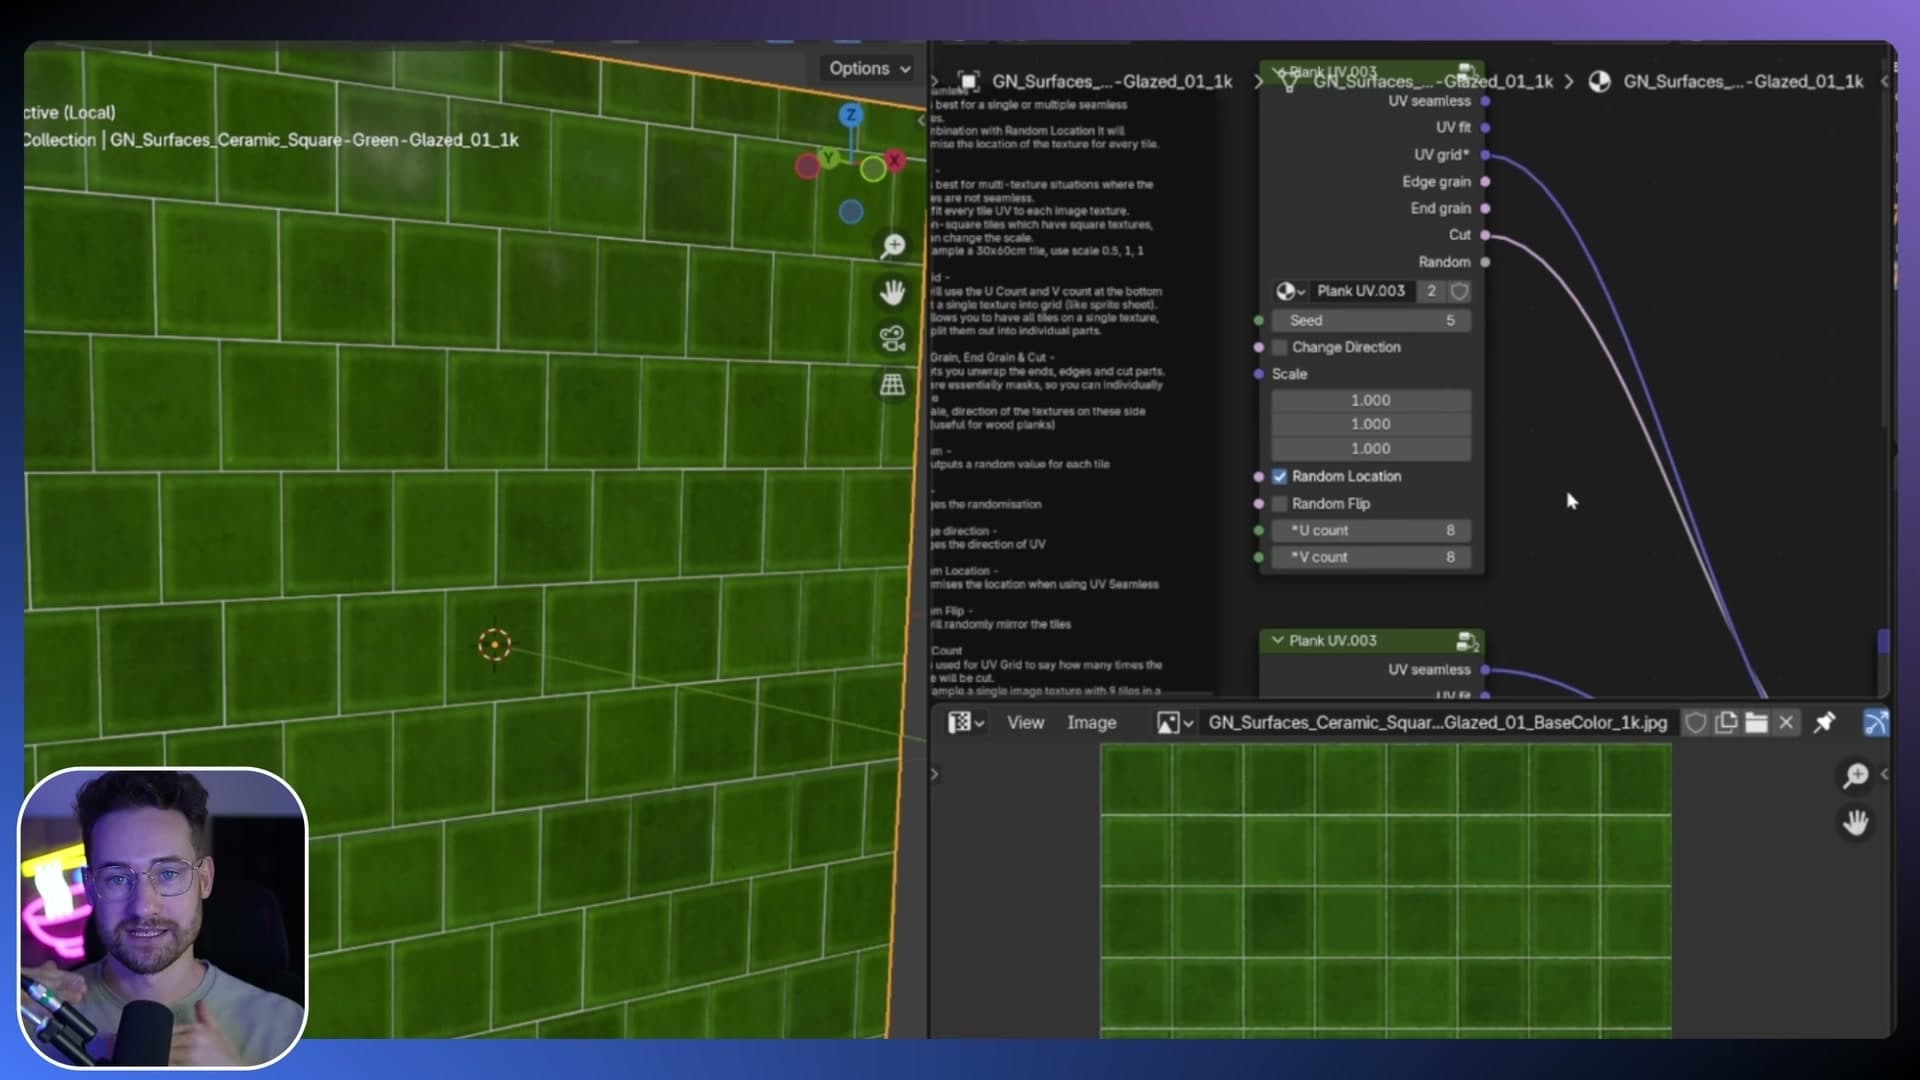
I call this a sprite sheet. It is the same idea borrowed from game art, where one image holds many sub-images that get pulled out individually at render time.
Randomizing pool tiles across a large surface
The use case where UV Grid really earns its keep is a large surface made of very small tiles. The inside of a swimming pool is the classic example. You have an enormous area covered in tiny squares, and any repetition in the texture would be glaringly obvious because the eye has so many tiles to compare side by side.
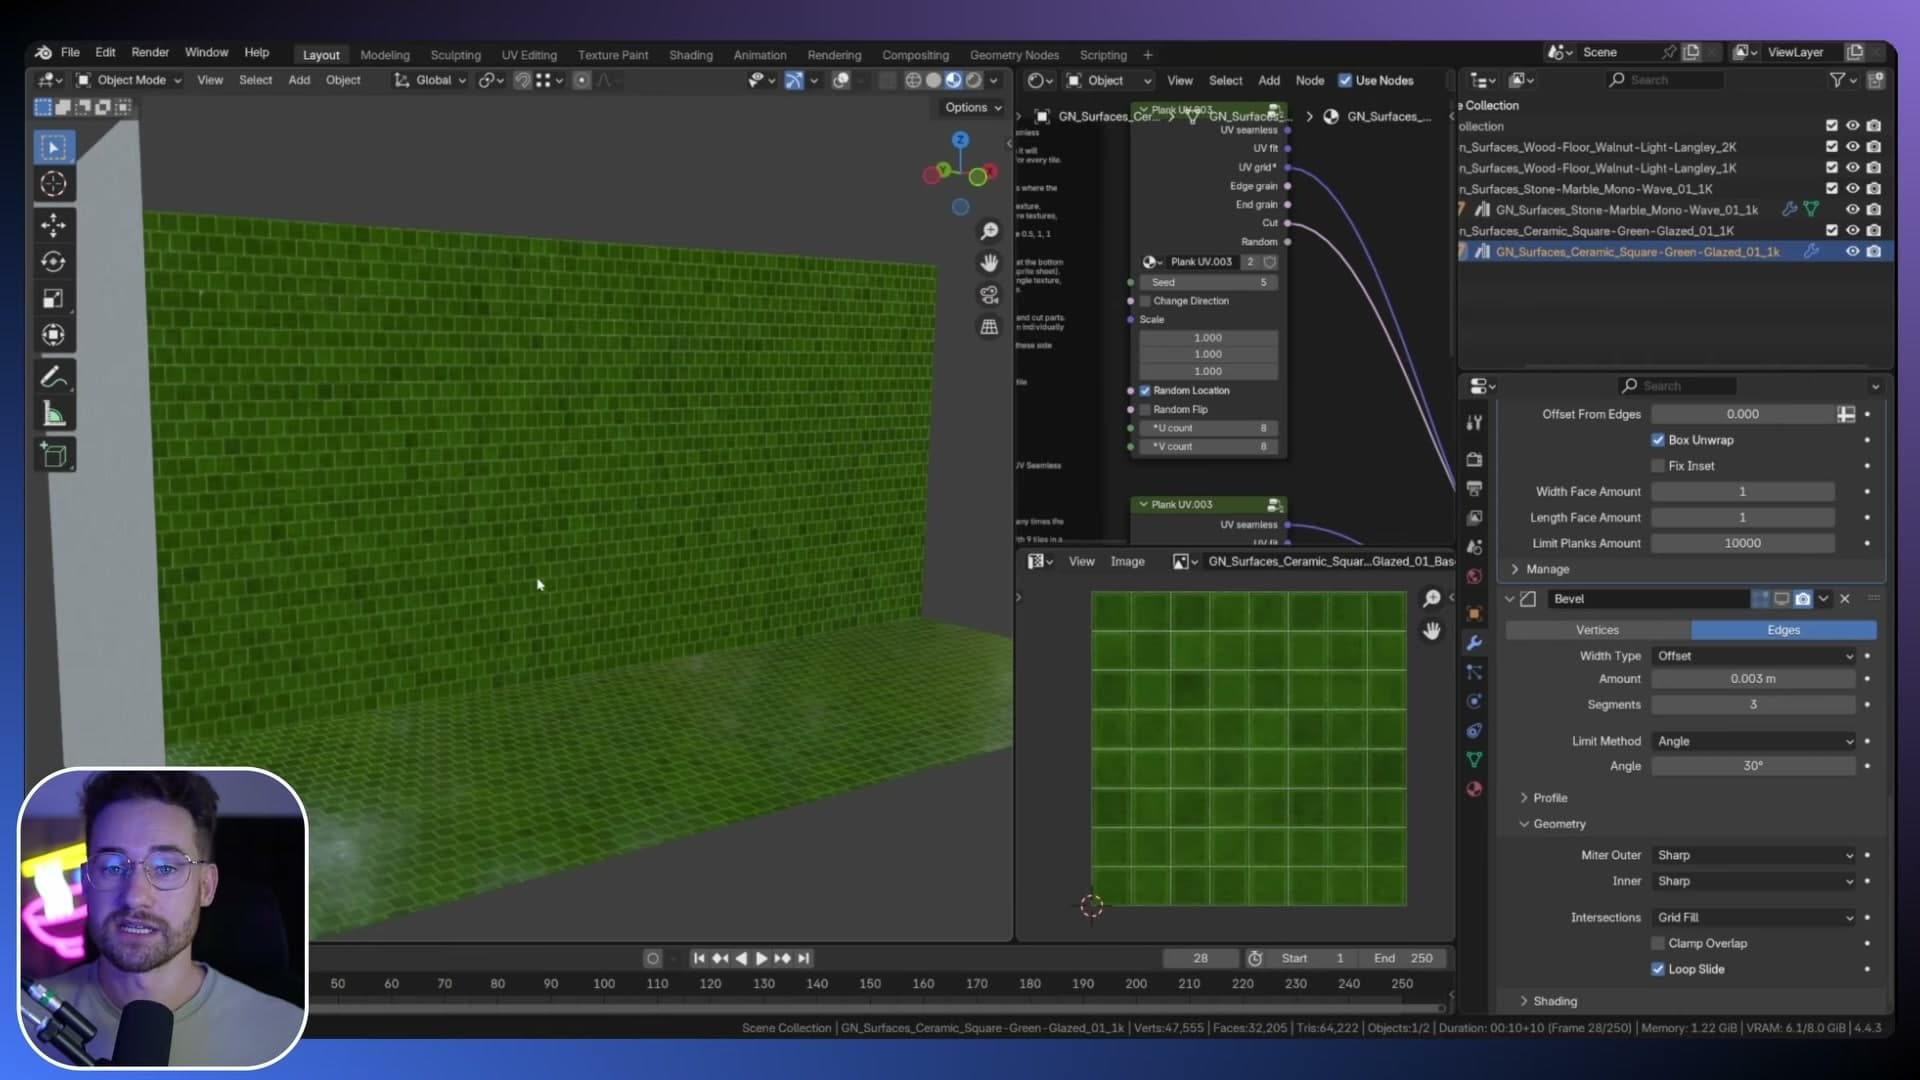
Drop the UV in the right place on the inside of the pool, point the shader at the 8×8 grid texture and the whole surface fills with randomised cells. You can also turn the bevel off for tiles this small so the geometry stays cheap.
From a single 8×8 source you get something close to perfect randomisation. You will occasionally spot what looks like a short repeat, but it breaks up again almost immediately because the shuffling keeps reshuffling. Nothing like the obvious tiling you would get from a single texture stretched across the same surface.
Beveled tile edges with inset scale
Use a built-in inset scale and height to create the raised, chamfered face of a metro tile without modelling extra geometry per tile.
Inset scale and height for metro-tile bevels
The generator has a setting called Inset Scale that recesses the edge around every tile face. Dial it up and you immediately see a margin appear around each tile, separating the raised face from the grout line.
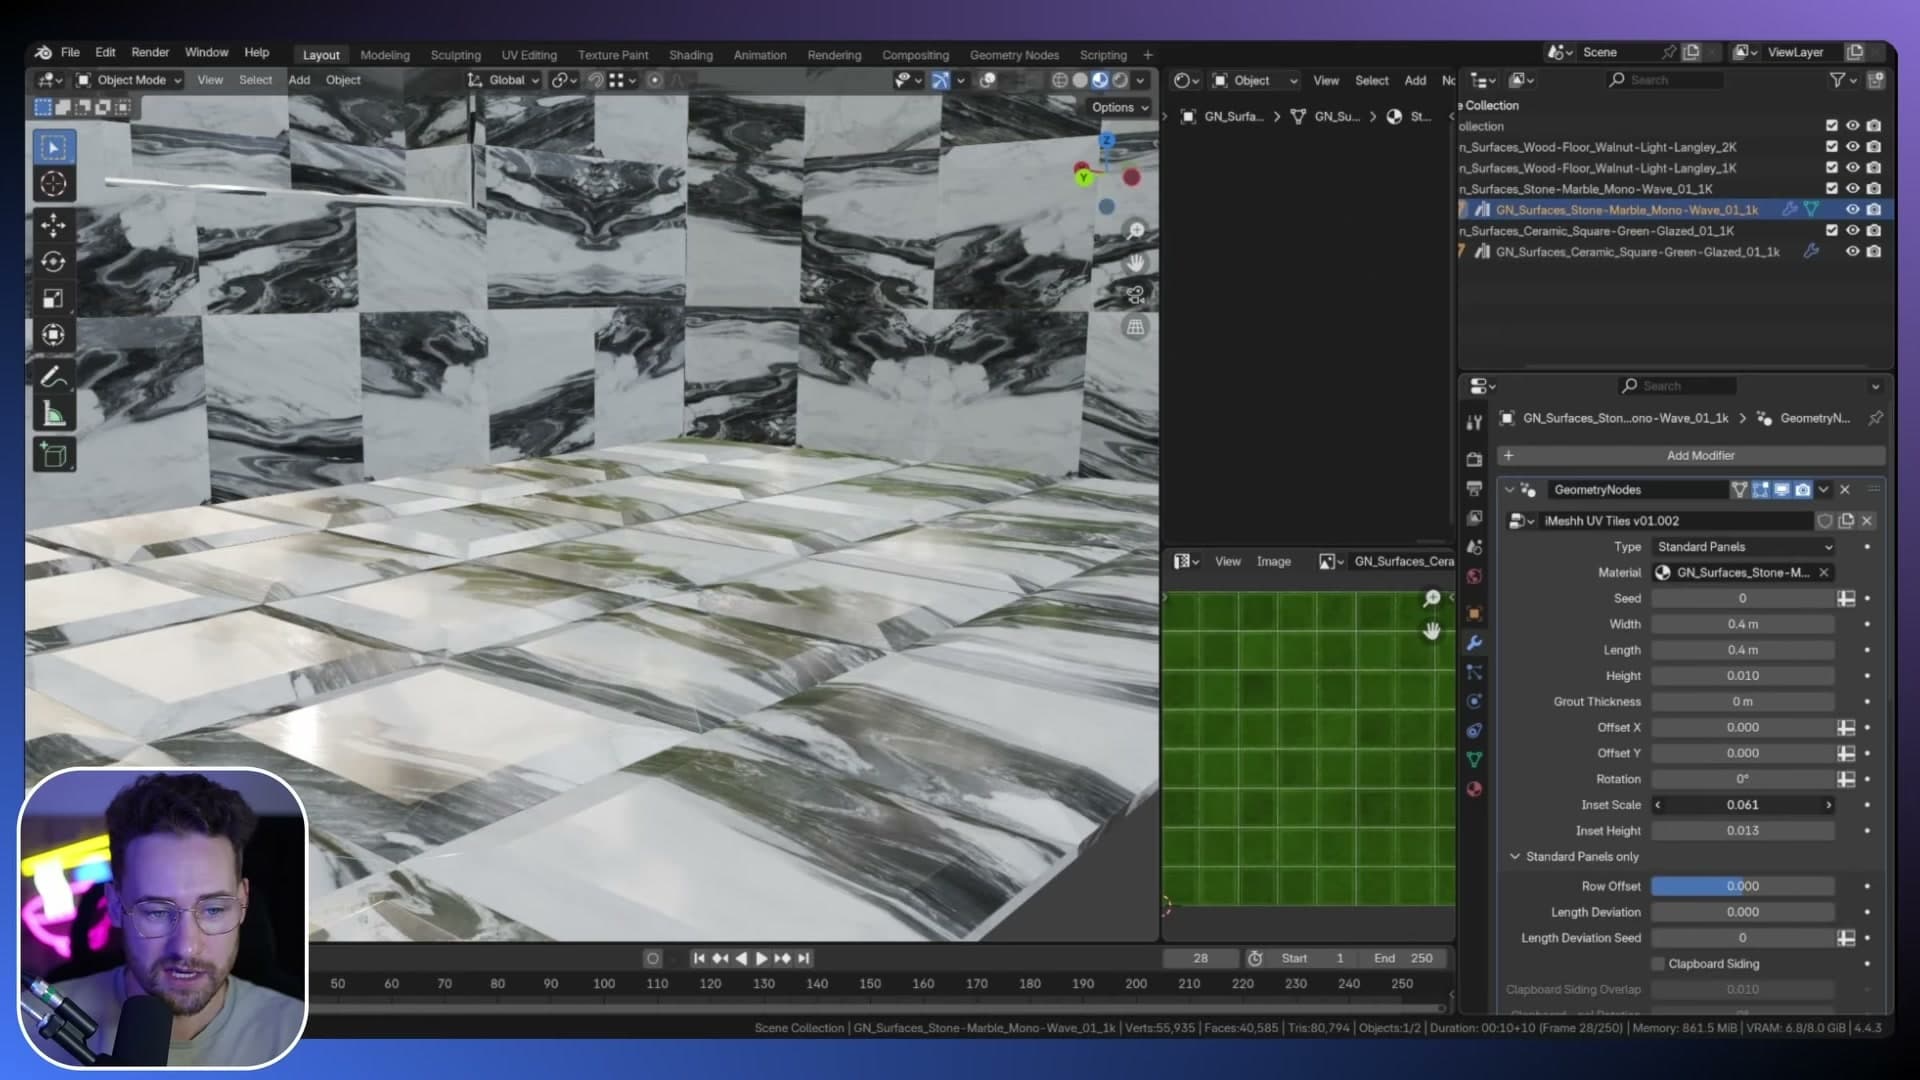
Once the inset is in place, increase the matching Height value to lift that inner face away from the base. The combination produces the chamfered, beveled edge that defines a classic metro tile, all without modelling any extra geometry by hand.
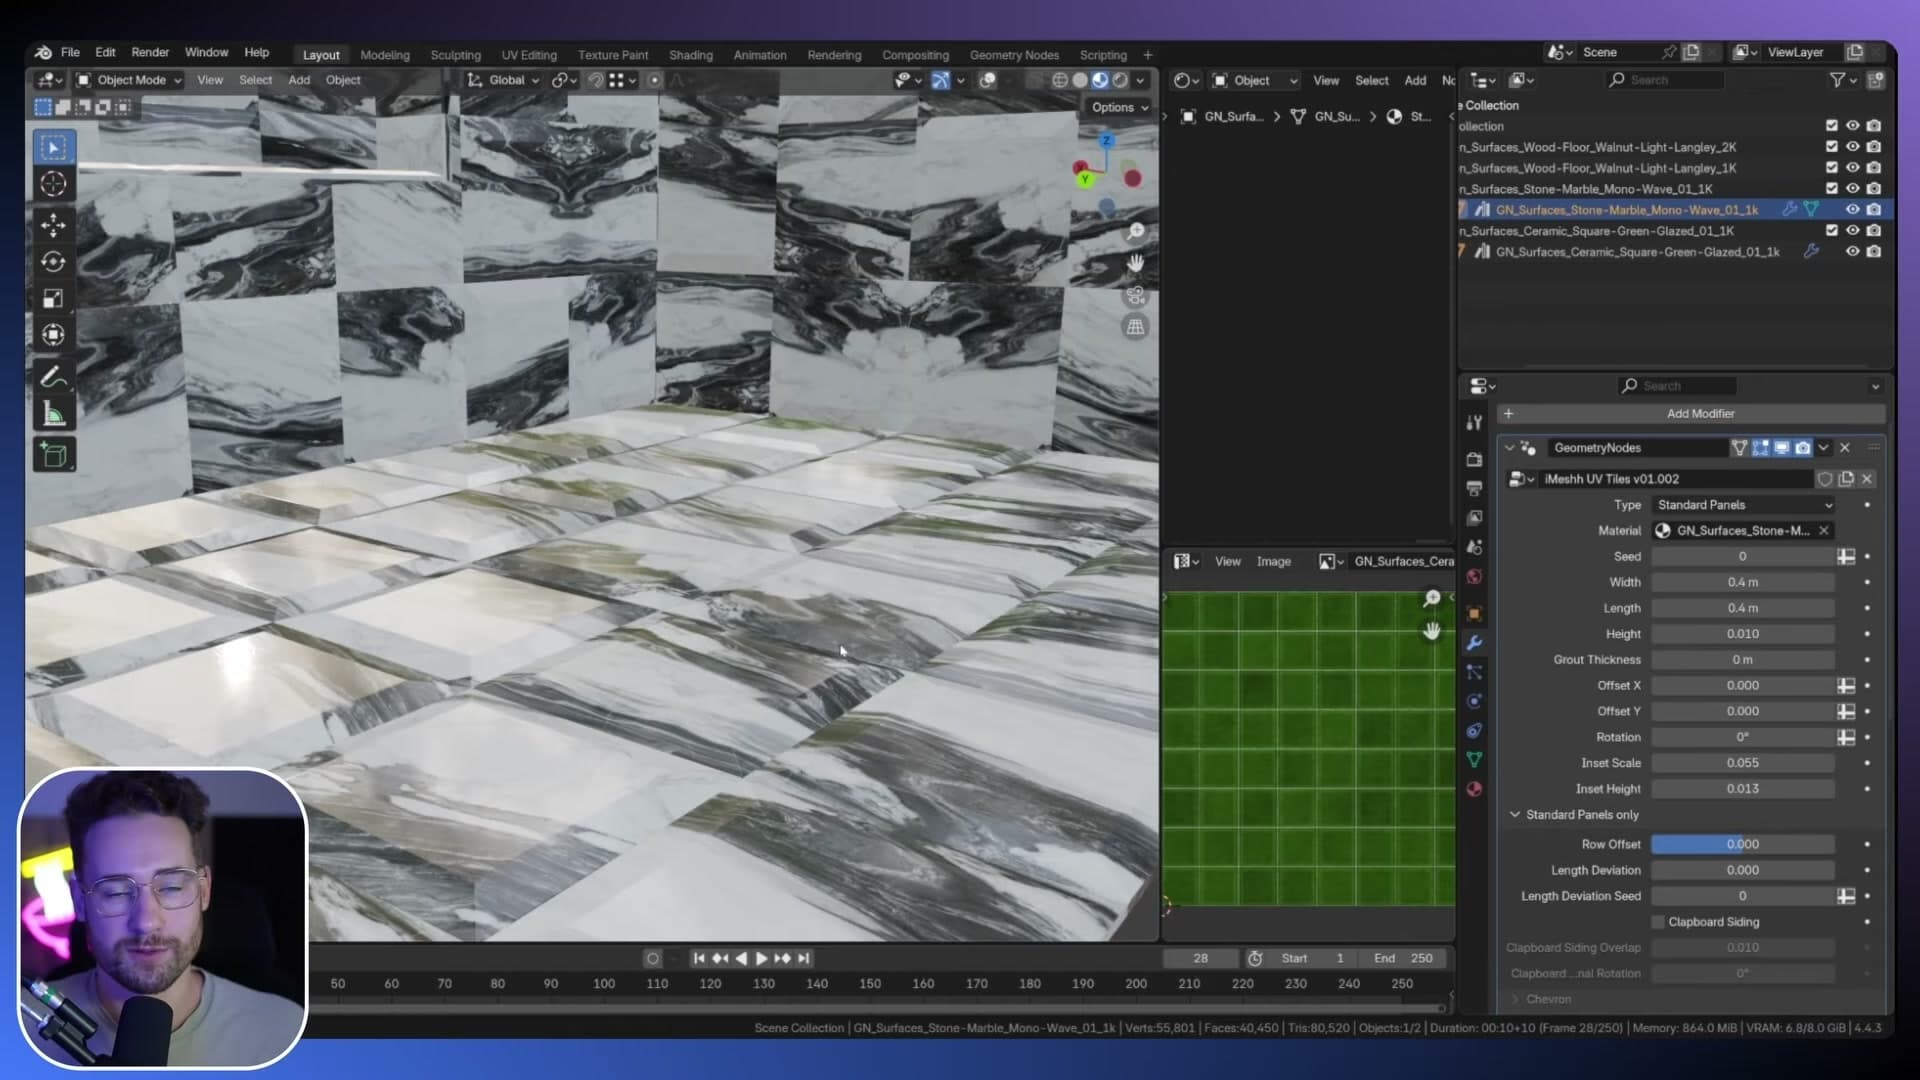
This is the exact system iMeshh uses for the metro tiles released for the floor generator, so if you want that look you can either build it from scratch here or grab the ready-made set from the library. It also means tiles can be far more interesting than flat rectangles whenever a project calls for it.
Choosing the right shader mode for your textures
With the metro-tile bevel covered, I'll recap the three UV modes and when each one is the right pick.
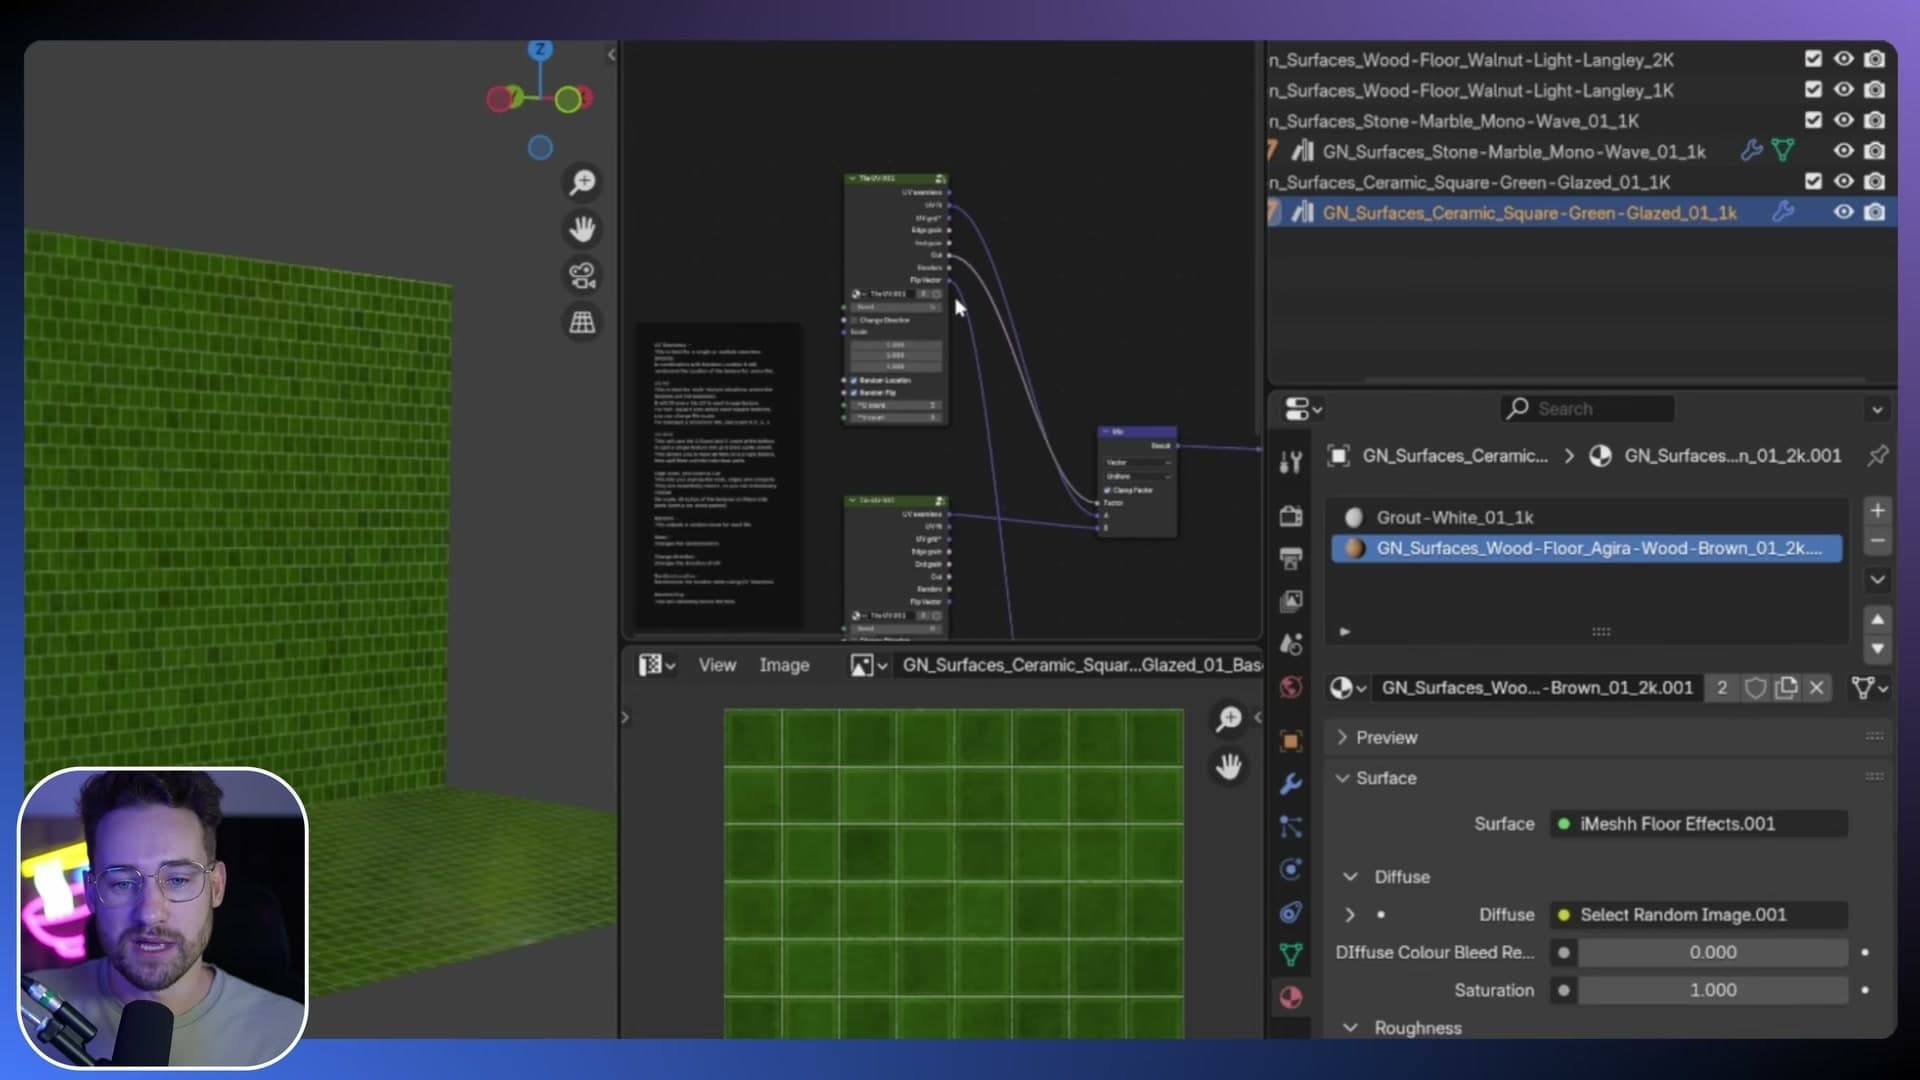
Use UV Seamless when you have a tiling texture set (base colour, roughness and normal) and want the generator to randomise that single texture across every tile so the repetition disappears.
Use UV Fit when you have a pack of non-tiling textures, the kind manufacturers ship as individual plank or tile images, and you want them randomised across the whole surface with the edges wrapped correctly.
Use UV Grid when the tile layout itself is the unit of randomisation: a sprite-sheet texture mapped across many small tiles so every single one picks up a different cell. Those three modes cover tiling textures, manufacturer packs and grid-based randomisation between them.
Tools and credits
Everything mentioned in this tutorial, with links.
- Blender (the renderer this entire build runs in)
- iMeshh (studio platform: project management, client review, asset library, invoicing). The asset library used in this tutorial is included with every iMeshh Pro plan.
- Poly Haven (free CC0 textures and HDRIs)
Pillar guide: Modelling hub · Get the Floor Generator