Starting the main project
Pick up where Part 1 ended and step into the real project. A quick reset on expectations: you won't understand every concept first time, and that's fine. The goal of this course is exposure to the core tools so you can experiment past it.
What to expect from the main course
Welcome to the main course. From here on you'll be building the final project, picking up where Part 1 left off. The earlier sections gave you a working introduction to navigating Blender and a general overview of the interface, so you should be able to follow along comfortably from this point. There's still plenty more to cover as you go, but the groundwork is already in place.
Some sections will get technical, and a few will feel genuinely complicated the first time through. Don't get disheartened or assume you're bad at this if a concept doesn't land straight away. Blender has a steep learning curve, and nobody is expected to grasp every idea on the first pass. It usually takes a few projects before things start clicking. UV unwrapping was the classic one for me; for a long time I was convinced I'd never understand it, and then at some point I realised it had quietly stopped being a problem. The same will happen for you with whichever topic feels impossible right now.
The aim of this course is to expose you to the key concepts and key parts of the software so you at least know they exist. If you can follow along and finish the project by copying what I do, that's more than enough. Once you've seen each tool in action, you've got a base understanding to experiment from on your own projects and push things further on your own. So let's get started.
Adding and aligning the camera
Drop a camera into the scene first, before any modelling. Use numpad shortcuts to face the right direction, then dial in a perfectly straight rotation through the N-panel instead of eyeballing it.
Numpad view shortcuts: 1, 3, 7 and 5
Before you drop the camera in, point the viewport at whatever you want the camera to see. Blender places a new camera facing whichever way the screen is looking, so a few seconds of framing now saves a rotation step later.
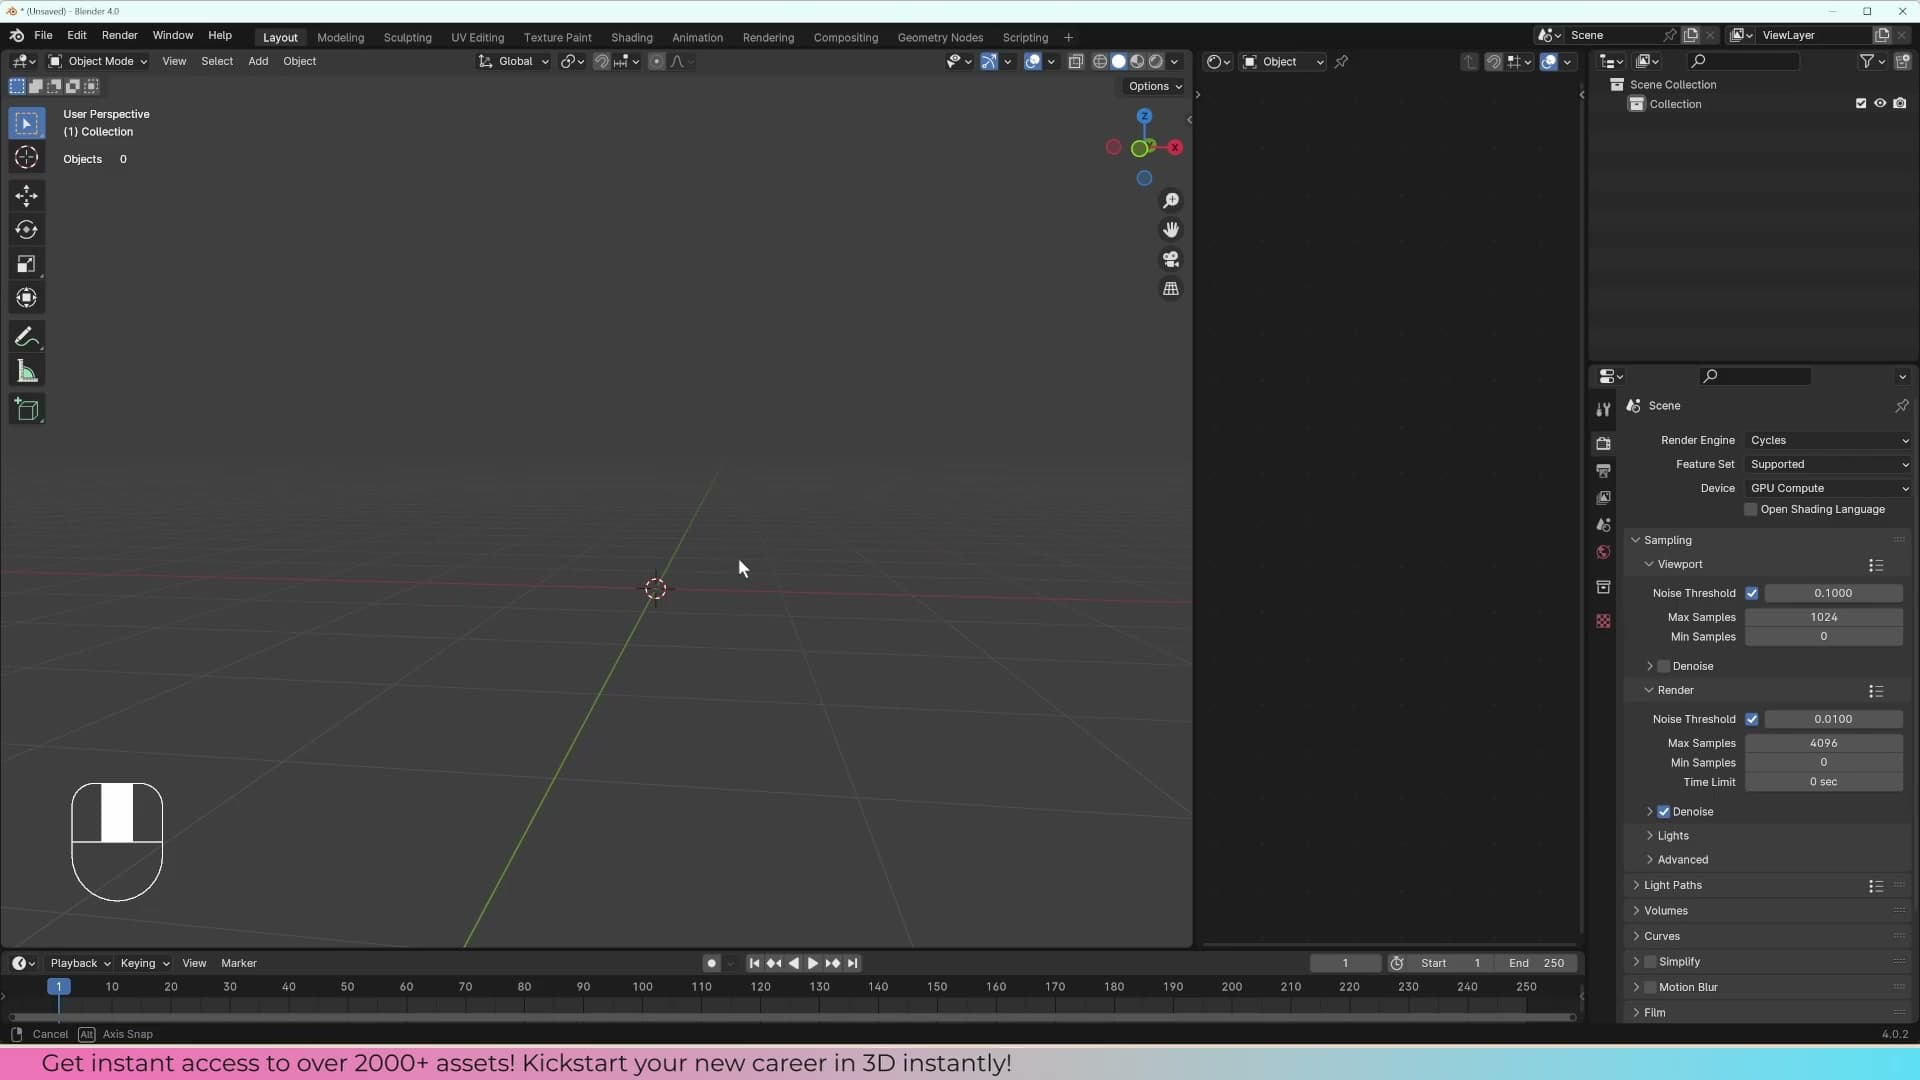
The numpad handles this faster than dragging the orbit gizmo. Press 1 for the front view, 3 for the side, and 7 to look straight down from the top. 5 toggles between perspective (where lines converge in the distance) and orthographic (parallel lines, no convergence). The little axis gizmo in the top-right corner of the viewport does the same job if you are working without a numpad.
Add a camera and fix its rotation in the N-panel
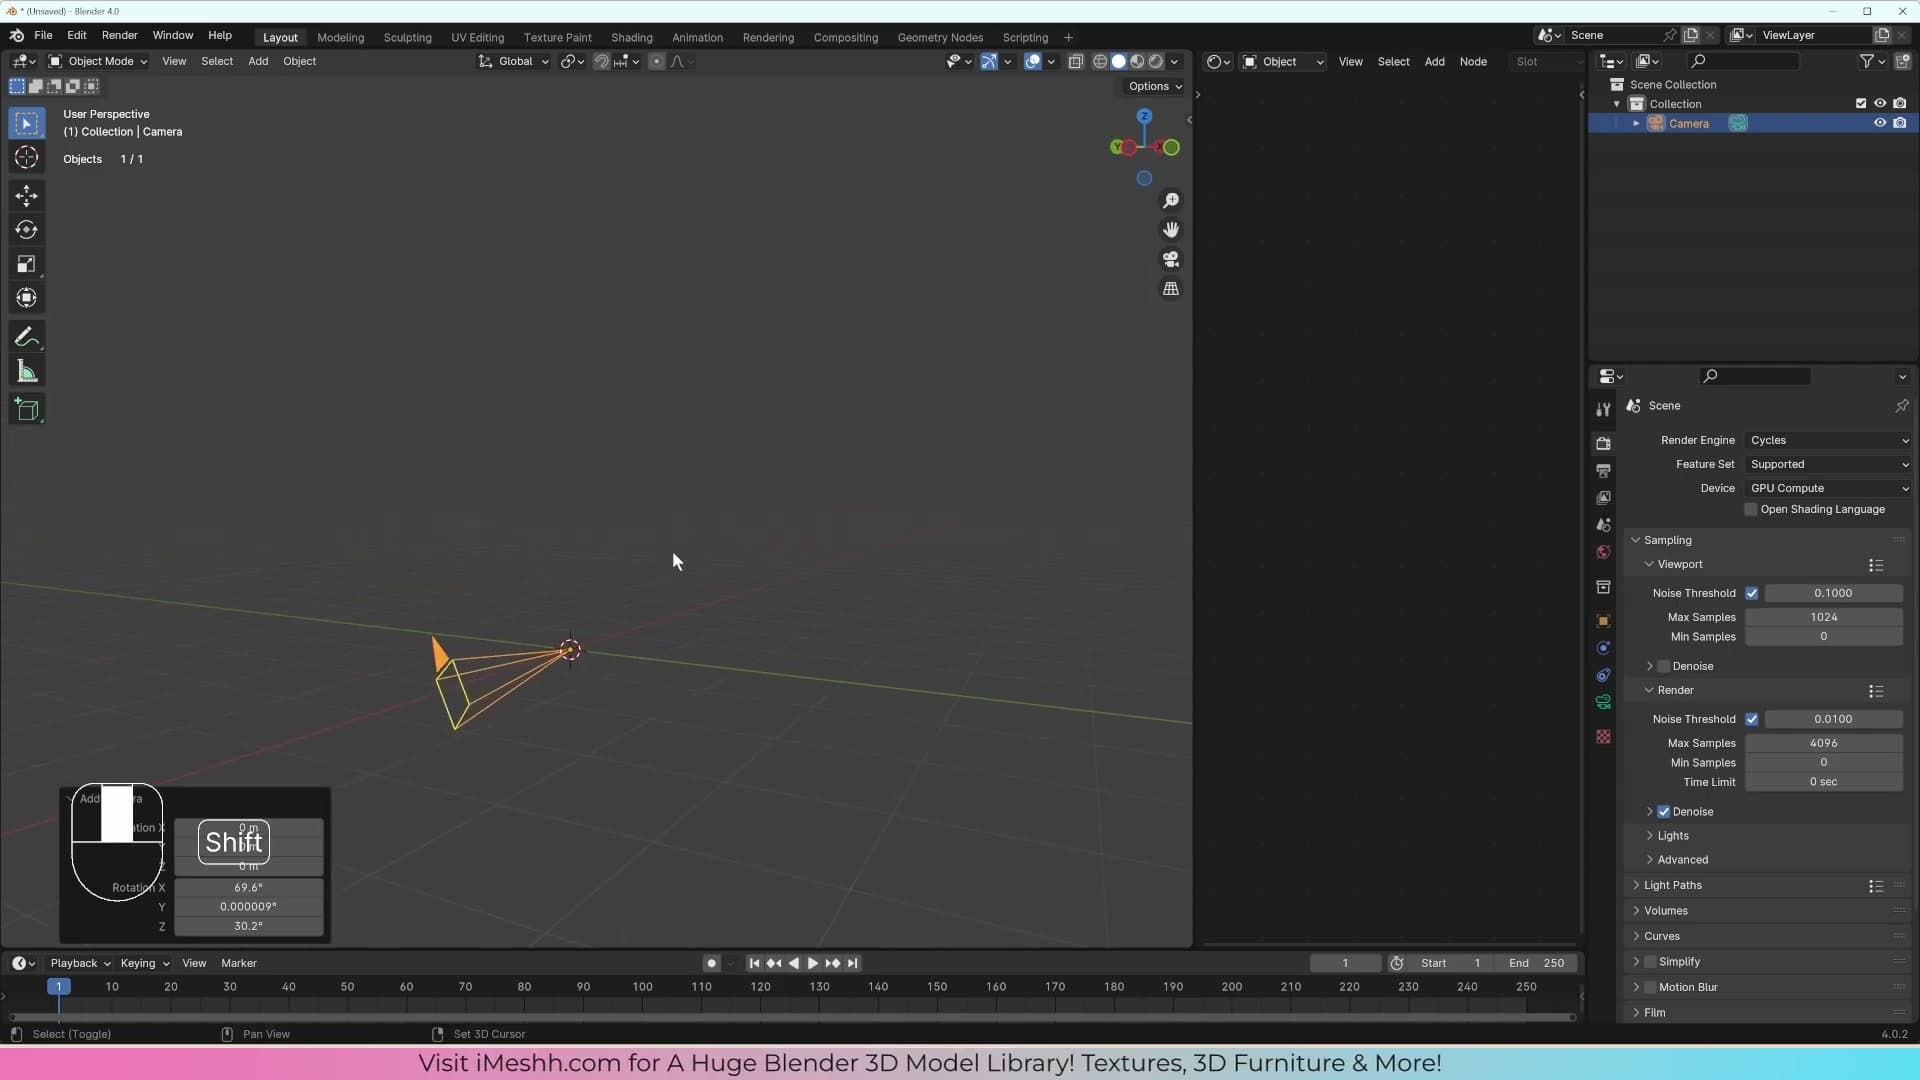
With the viewport facing the direction you want, press Shift+A to open the Add menu and choose Camera. The new camera arrives aligned to your current screen view rather than a default orientation, which is the whole reason you set the view up first.
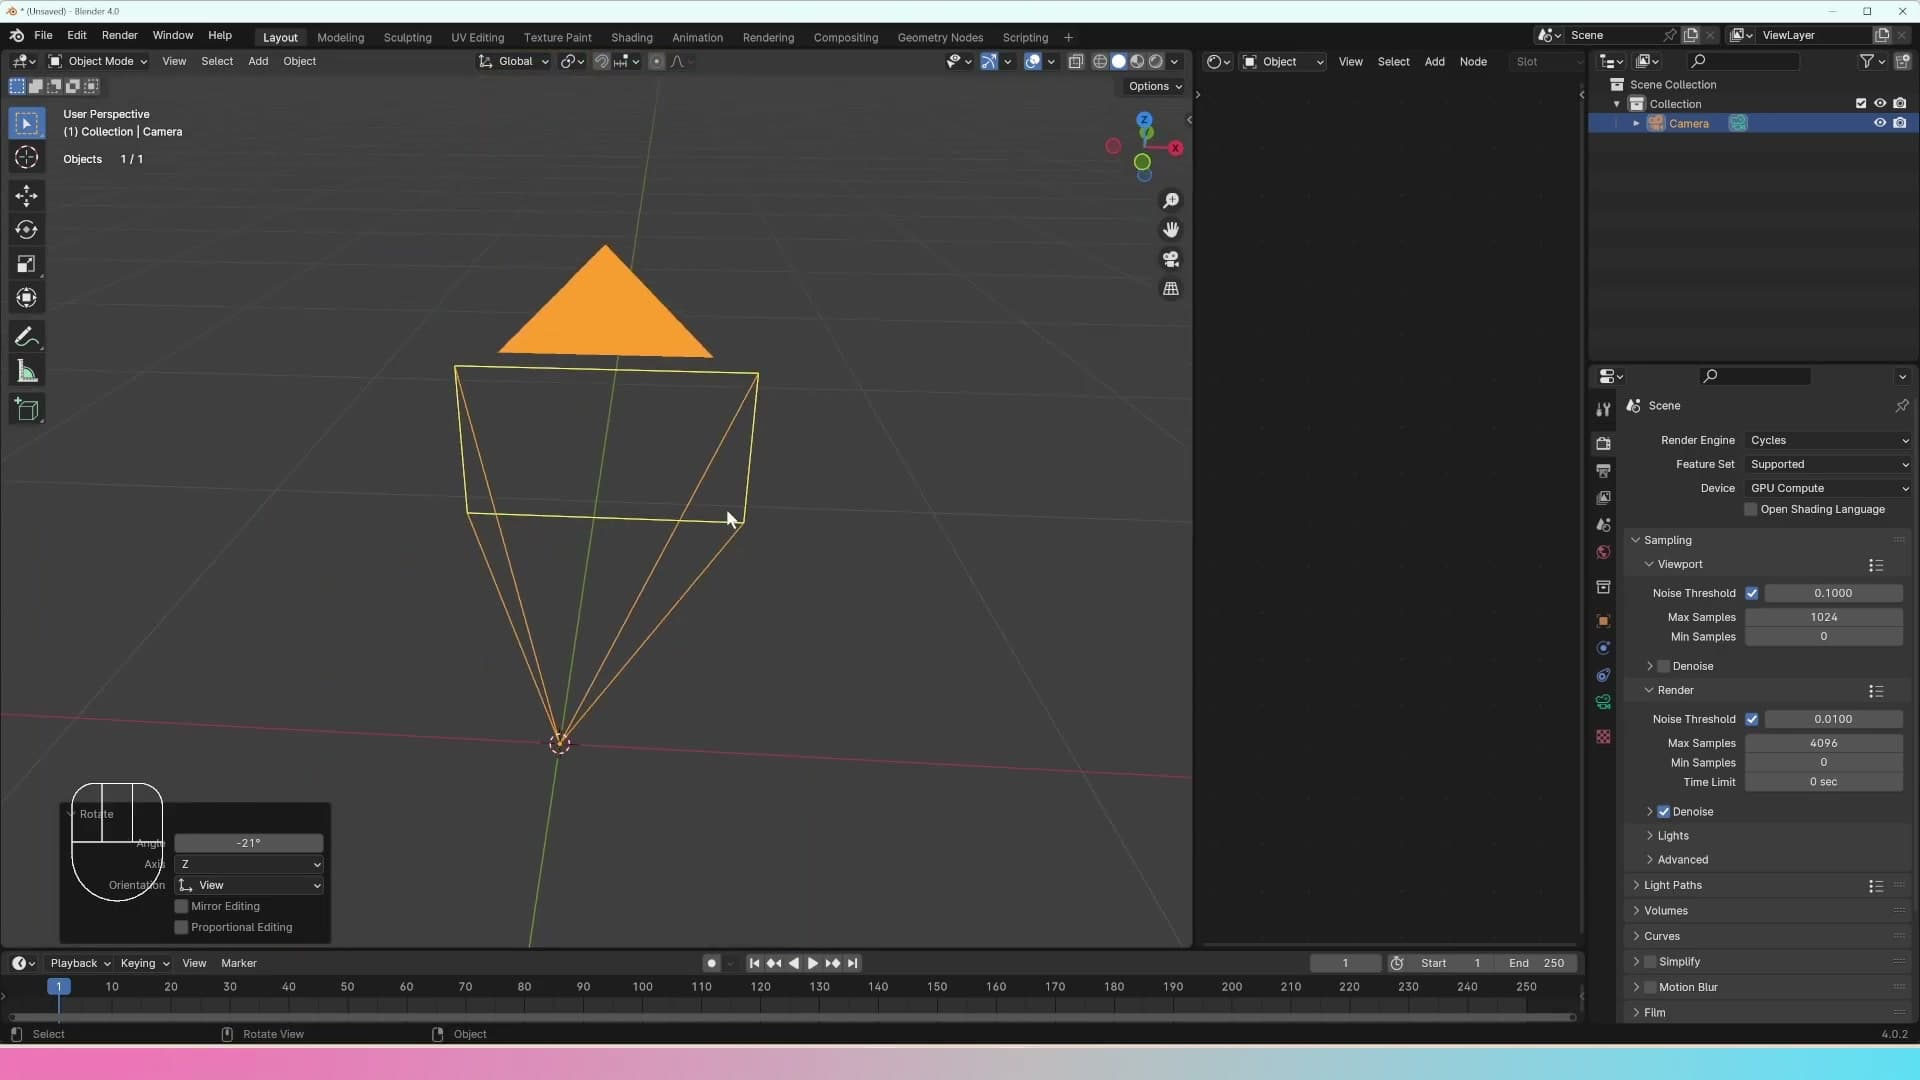
If the angle still is not quite right, do not try to fix it by eye. Pressing R and rotating in the viewport (even holding Shift for finer increments) will get you close but never perfectly straight.
Press N to open the Item panel on the right edge of the viewport. The rotation values will usually show a string of awkward fractional numbers. Set the two axes you do not want to 0 and the one you do want to 90 degrees. The camera now points exactly along an axis instead of being approximately aligned.
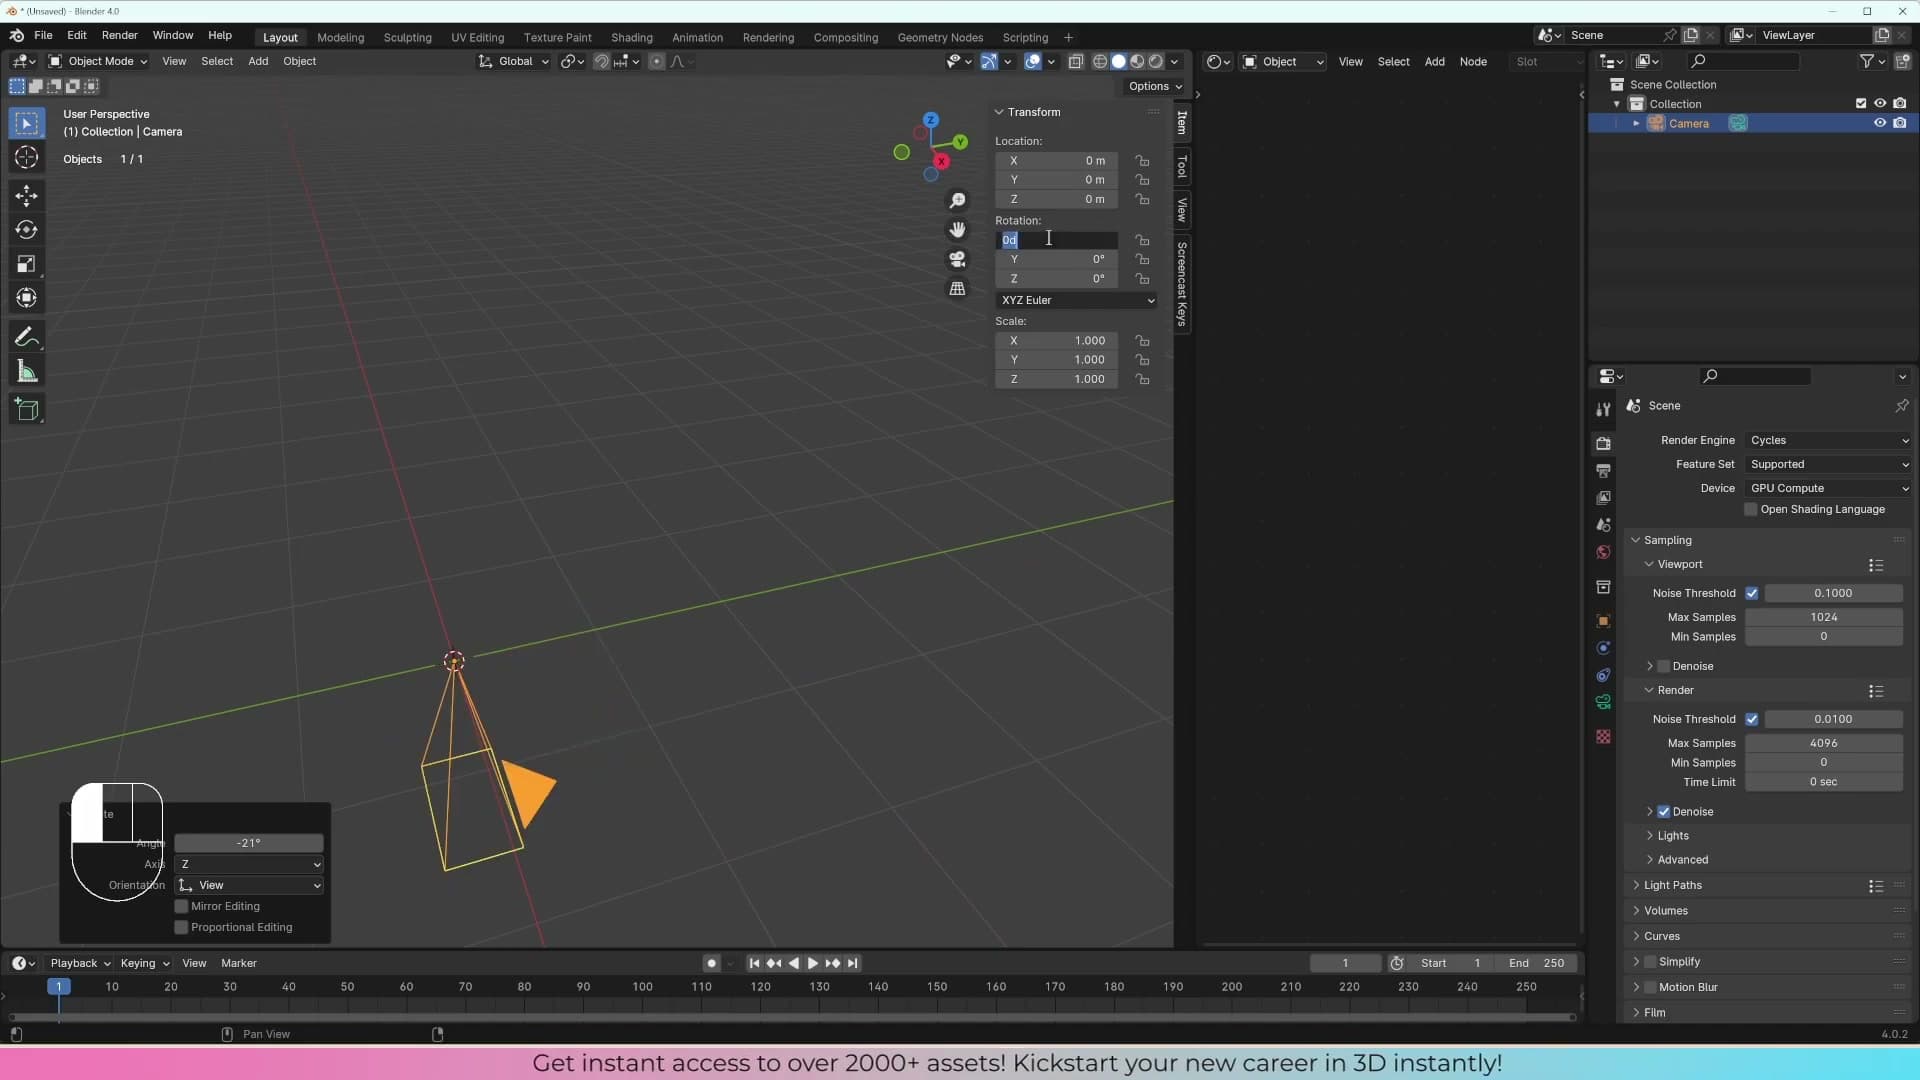
The same panel exposes location and scale in the same way. Whenever a transform needs to be exact rather than eyeballed, the N-panel is where you type the numbers in directly.
Camera view and switching the active camera
To look through the camera, press 0 on the numpad or click the small camera icon at the top of the viewport gizmo cluster. The view snaps to whatever the active camera sees.
If there is no camera in the scene, nothing happens: 0 has nothing to jump into. The first camera you add automatically becomes the active one. Add a second camera and you will see a small dark filled triangle next to one entry in the outliner; that triangle marks the active camera, the one numpad 0 targets.
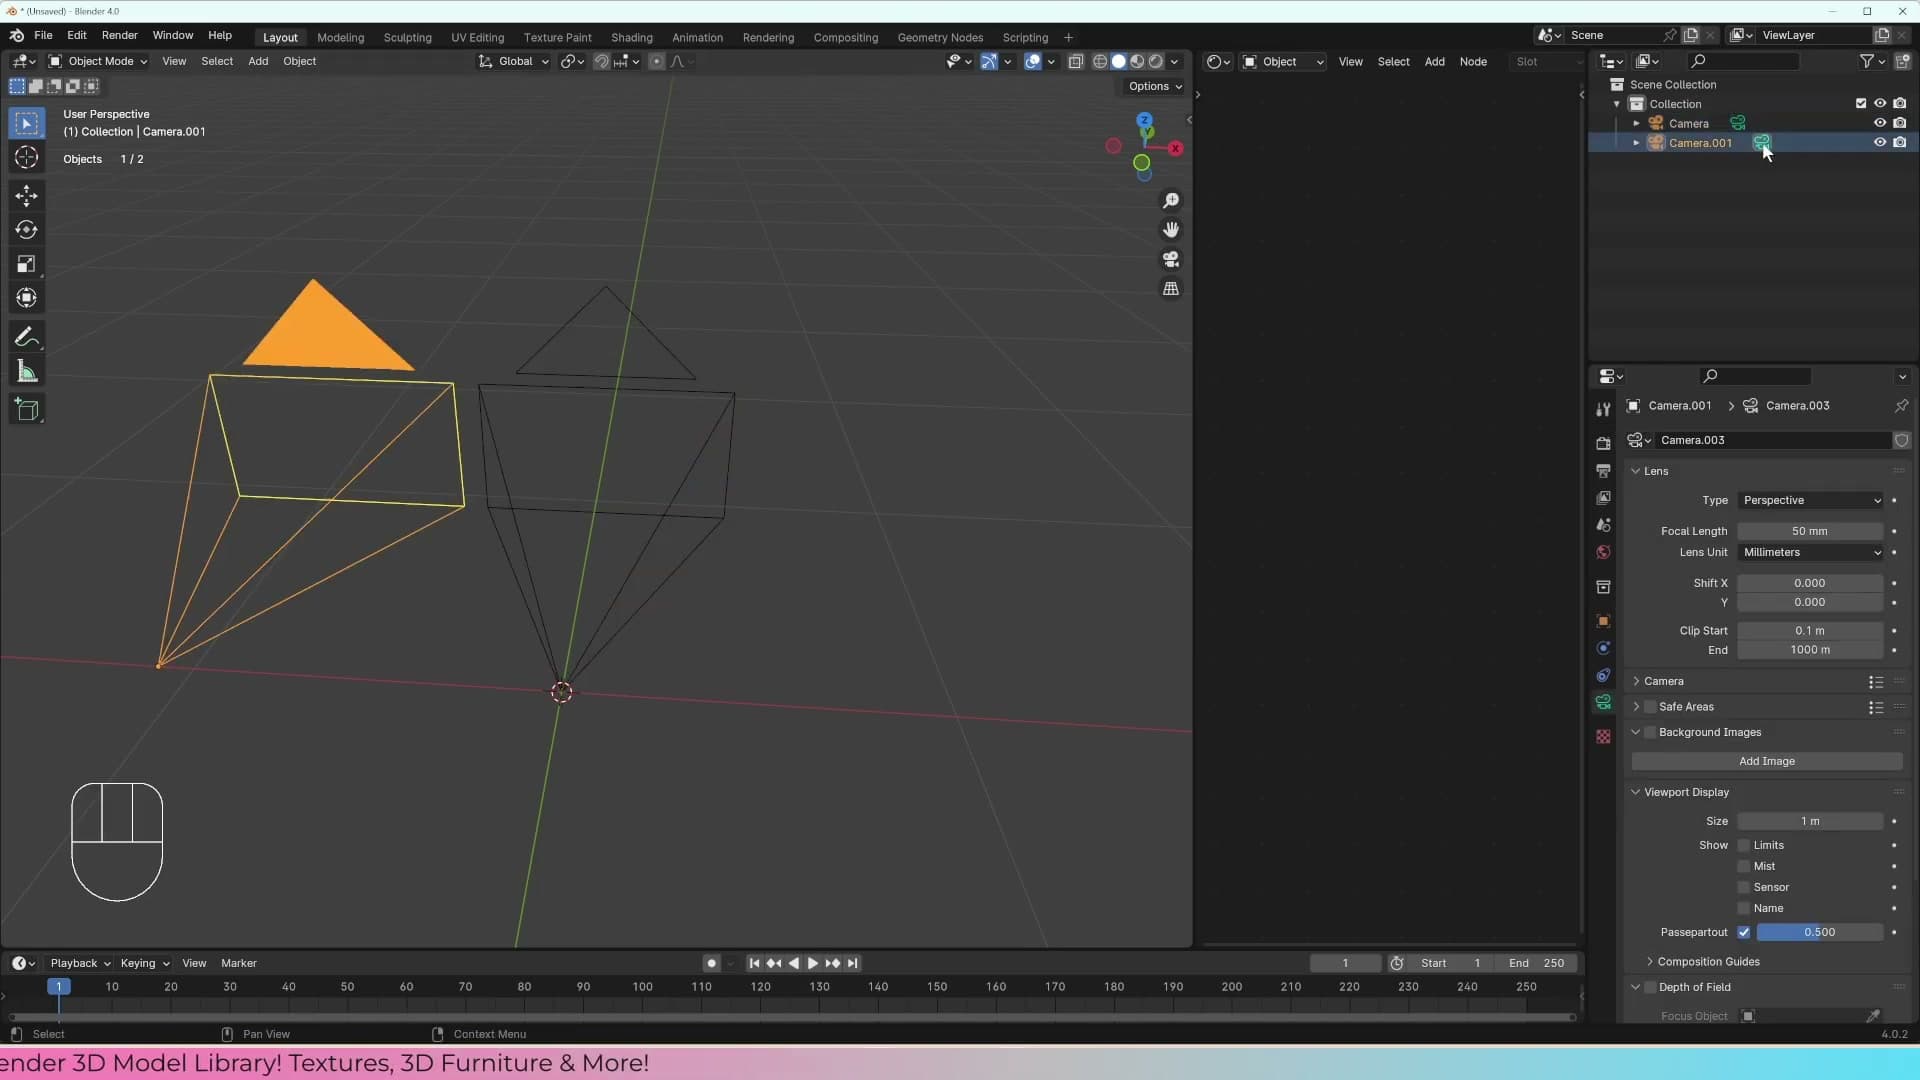
To promote a different camera to active, select it and press Ctrl+0. The menu equivalent is View → Cameras → Set Active Object as Camera, and the Camera properties panel exposes the same setting. For this project a single camera is all you need, so delete any extras before moving on.
Choosing the right starting primitive
Stairs from a cube means fighting hidden faces. Stairs from a plane means working only with what the camera will see. A quick detour through Local View and Ctrl+Space full-screen makes editing a single object much cleaner.
Pick the primitive that matches the object
Before you press Shift+A, stop and ask one question: of all the primitives Blender offers, which one already looks most like the thing you want to end up with? Pick badly and you'll spend the next ten minutes deleting geometry you didn't need; pick well and the shape is half-modelled before you've started.
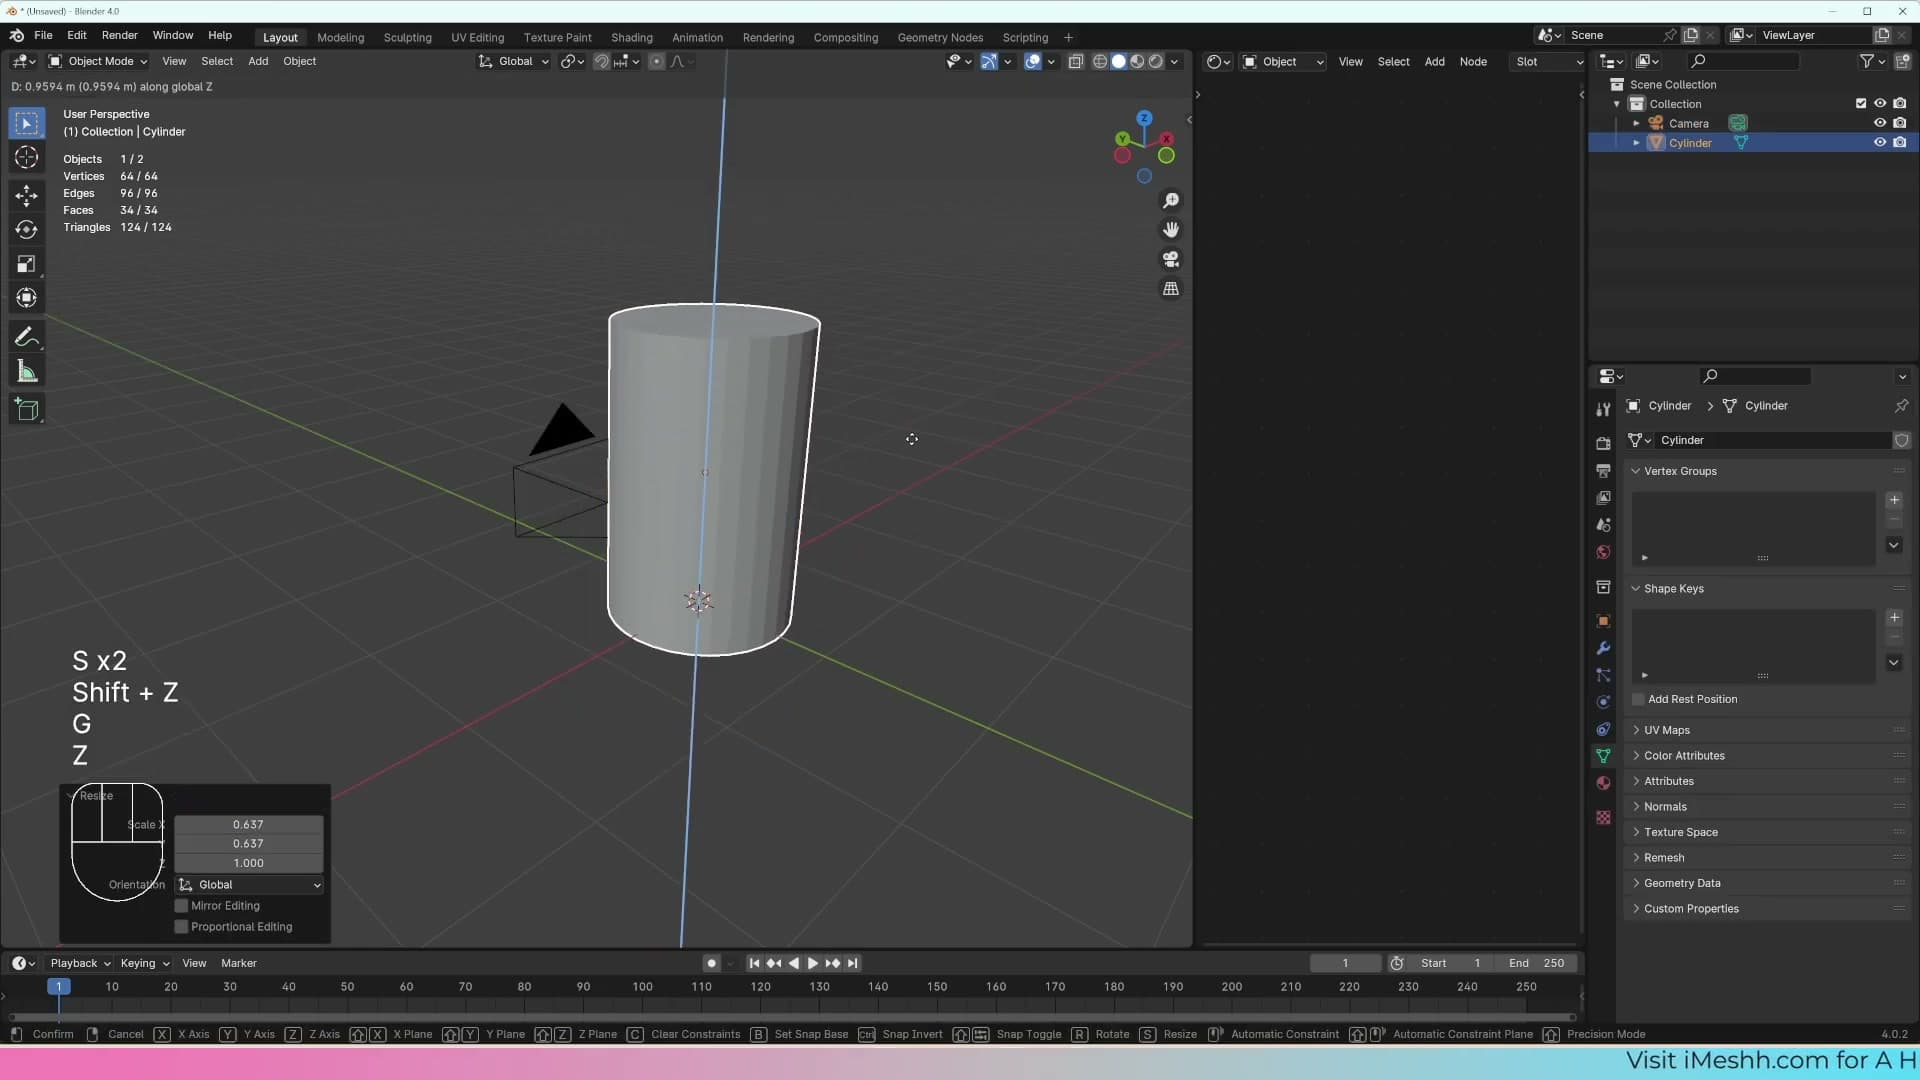
Take a vase as an example. Open Shift+A → Mesh and look down the list. A cylinder is the closest match. Scale it in, push a couple of loops around, inset the top face and you've already got something vase-shaped without fighting any extra faces.
Stairs are the opposite trap. Your first instinct might be a cube, because stairs feel solid. But a cube gives you a top face, a front face, and a bottom plus outside edges that you'll never see in the final render. All of those get in the way later. The only parts of the staircase the camera will see are the top surface and the side edge.
That's why a plane is the better starting point. A plane is the top side of a staircase, with no hidden geometry attached to it. The reference image for this scene uses a square stair footprint, so a single plane is exactly the right amount of mesh to begin with.
Local View and Ctrl+Space full-screen
Before you start editing the plane, two shortcuts are worth knowing because they make working on a single object far less distracting once the scene fills up.
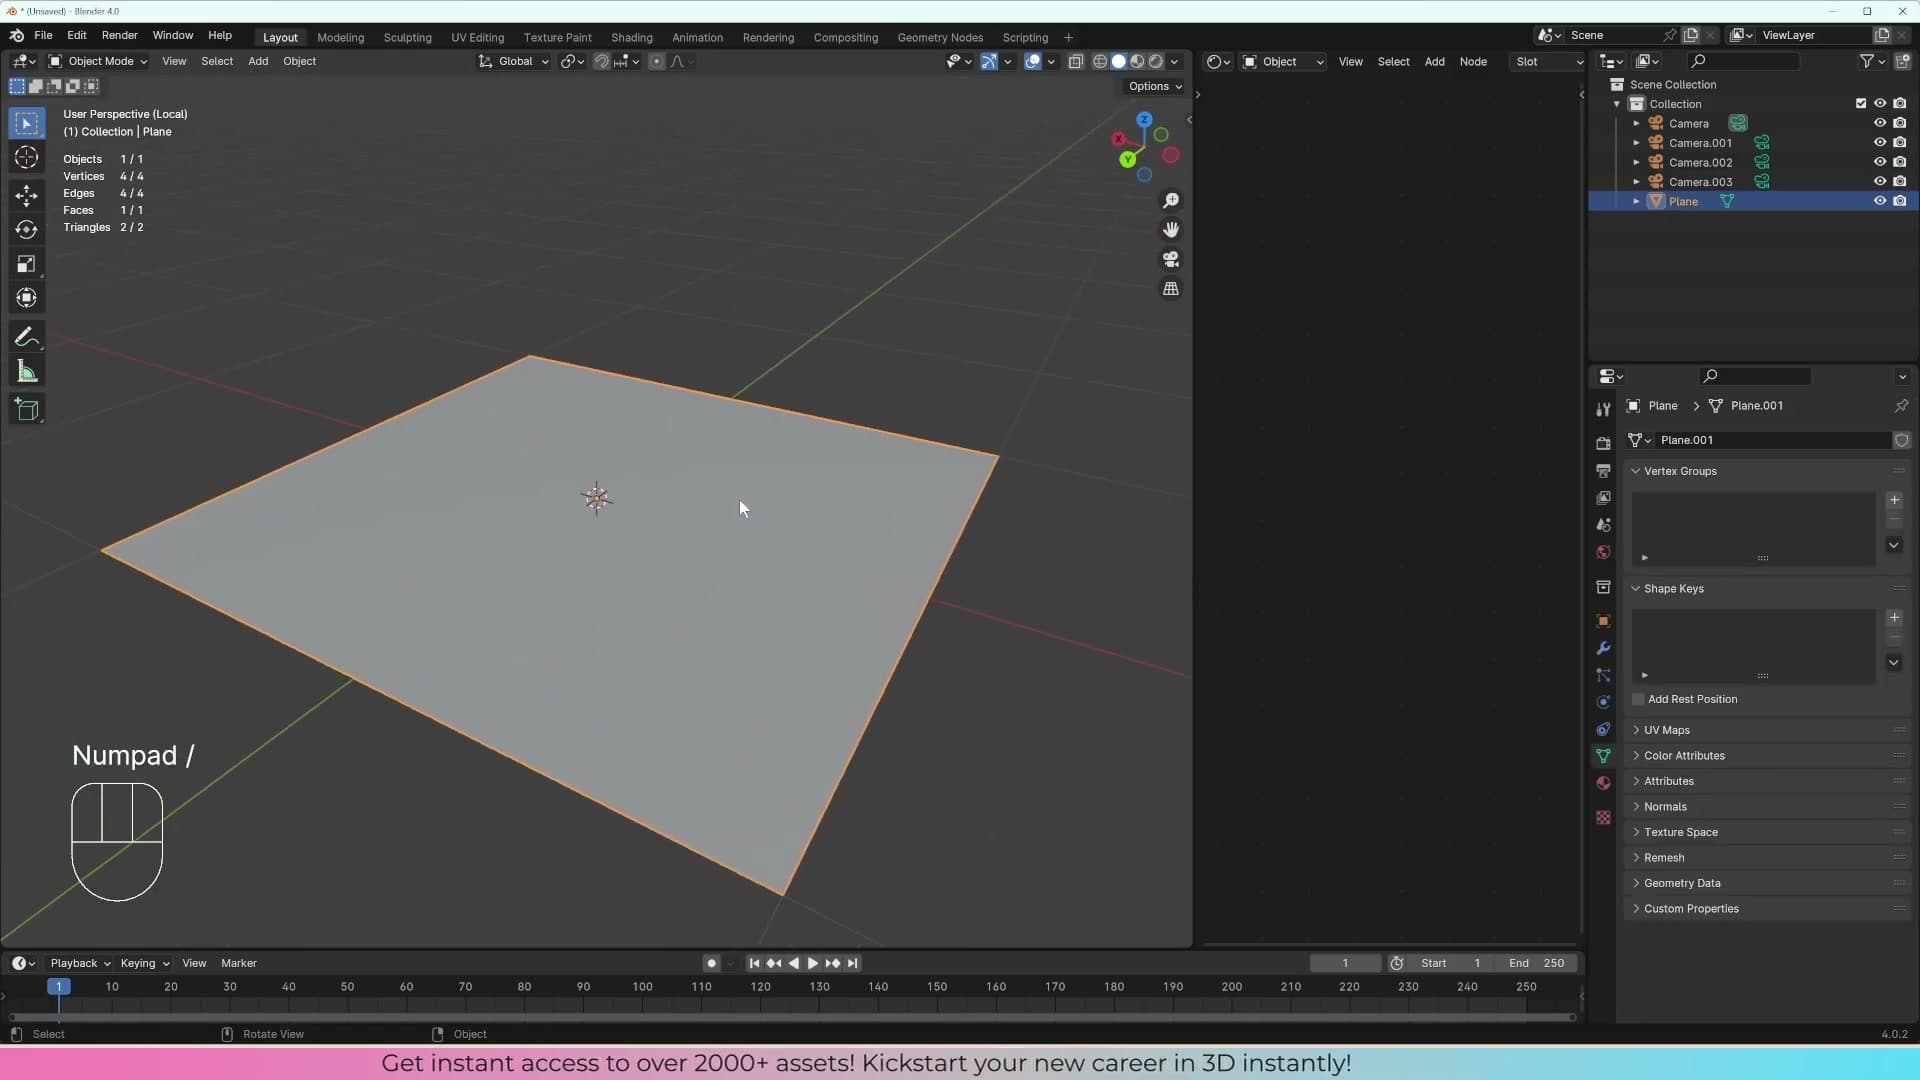
The first is Local View. With the object selected, press / on the numpad, or go to View → Local View → Toggle Local View. Blender hides everything except the selected object, so if the rest of the scene is in the way you can just solo the one thing you're editing. Press / again to bring everything back.
The second is full-screen editor. If you have lots of panels open and the 3D viewport still feels cramped, hold Ctrl+Space and the current editor maximises to fill the whole window. A small Back to Previous button appears at the top to restore the original layout, and Ctrl+Space again does the same thing.
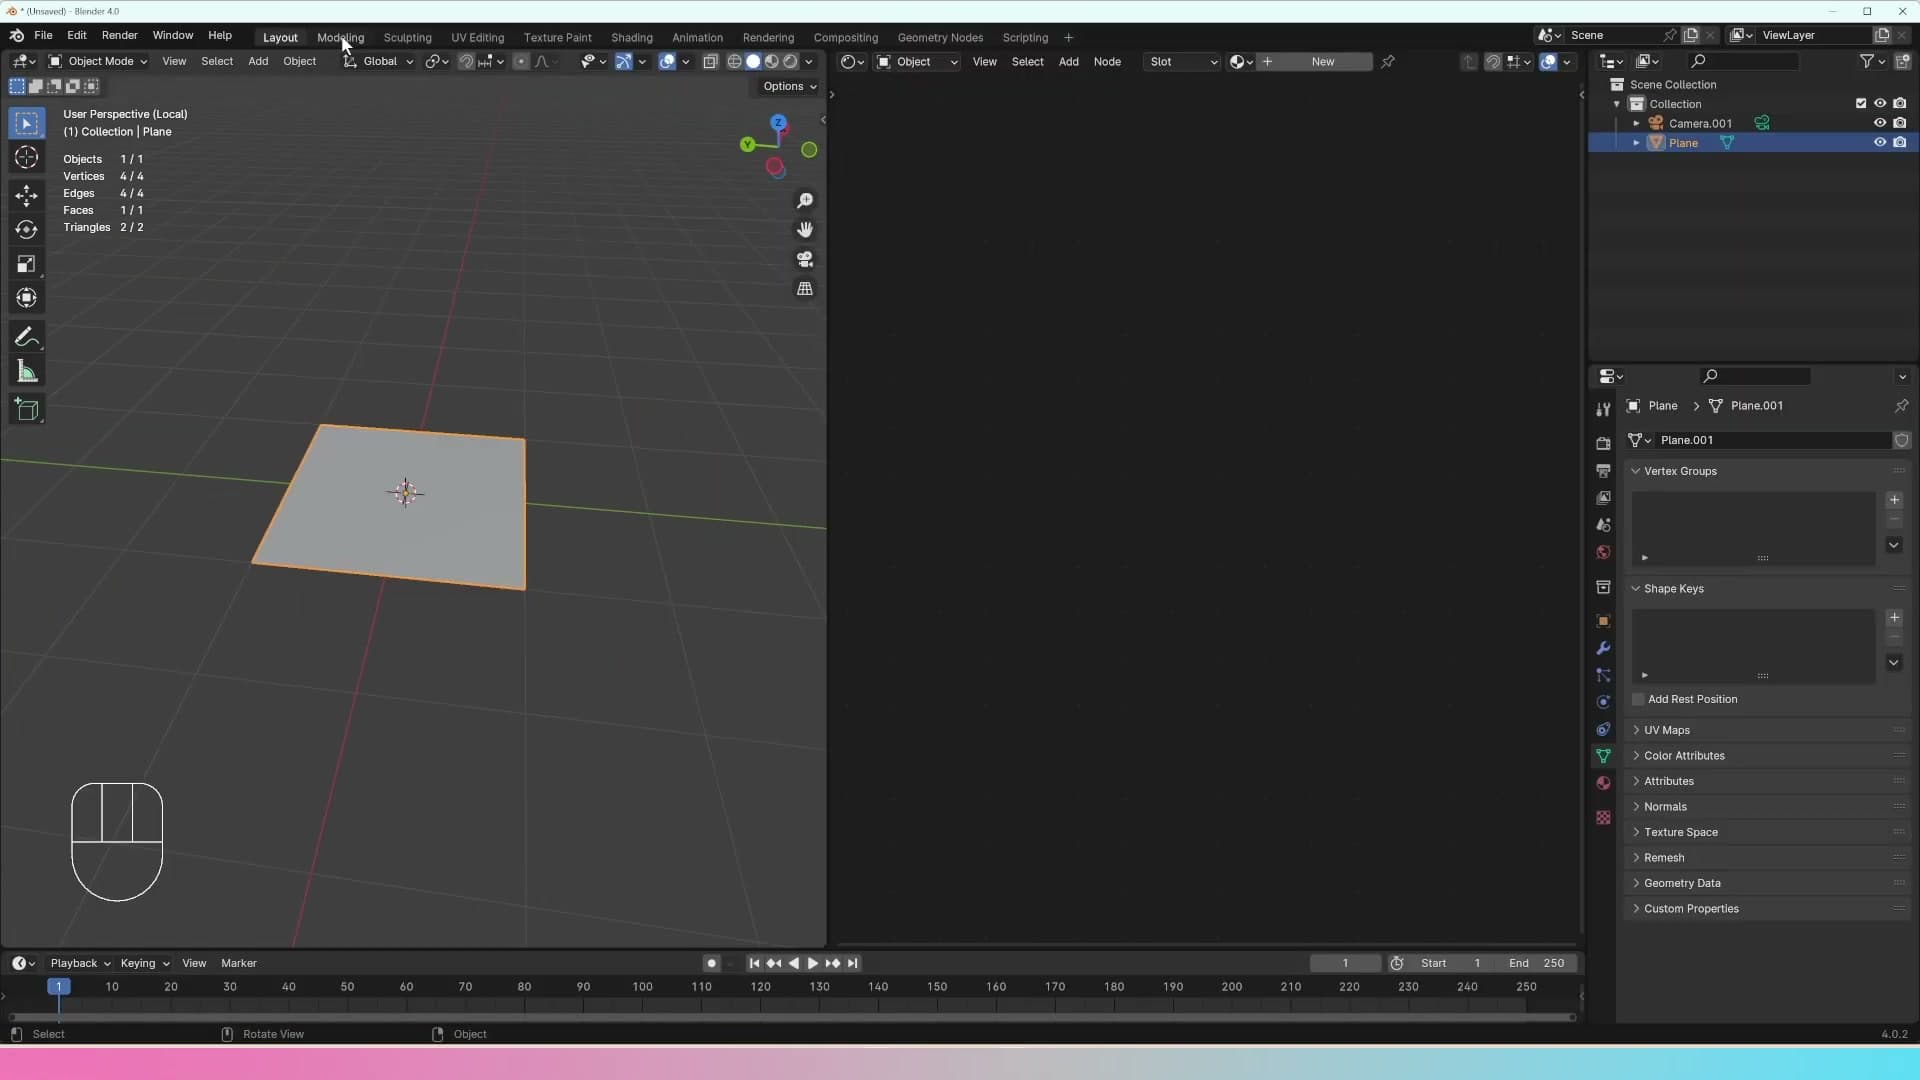
It's easy to forget Ctrl+Space exists. Most of the time you'll just drag a panel divider when one editor needs more room. But if you know you're going to be modelling a single object for the next couple of hours, soloing the viewport is a nicer way to work.
Building the staircase with inset and extrude
Tab into Edit mode and repeat the same two-step rhythm: <strong>I 0.15</strong>, <strong>E 0.15</strong>, over and over. Then loop-select the open bottom edge, extrude downward and fill it to close the mesh.
The I 0.15 → E 0.15 rhythm
Object mode only lets you push the whole plane around as a single unit. To edit the geometry itself you need to be inside it. Press Tab to drop into Edit mode. From here you could try a clumsy approach: duplicate the plane with Shift+D, rotate the copy 90 degrees, slide it into place, then use Ctrl+J to join the two halves. It would give you something that looks like a step. It is not the way you want to be working as soon as the tread count climbs above two.
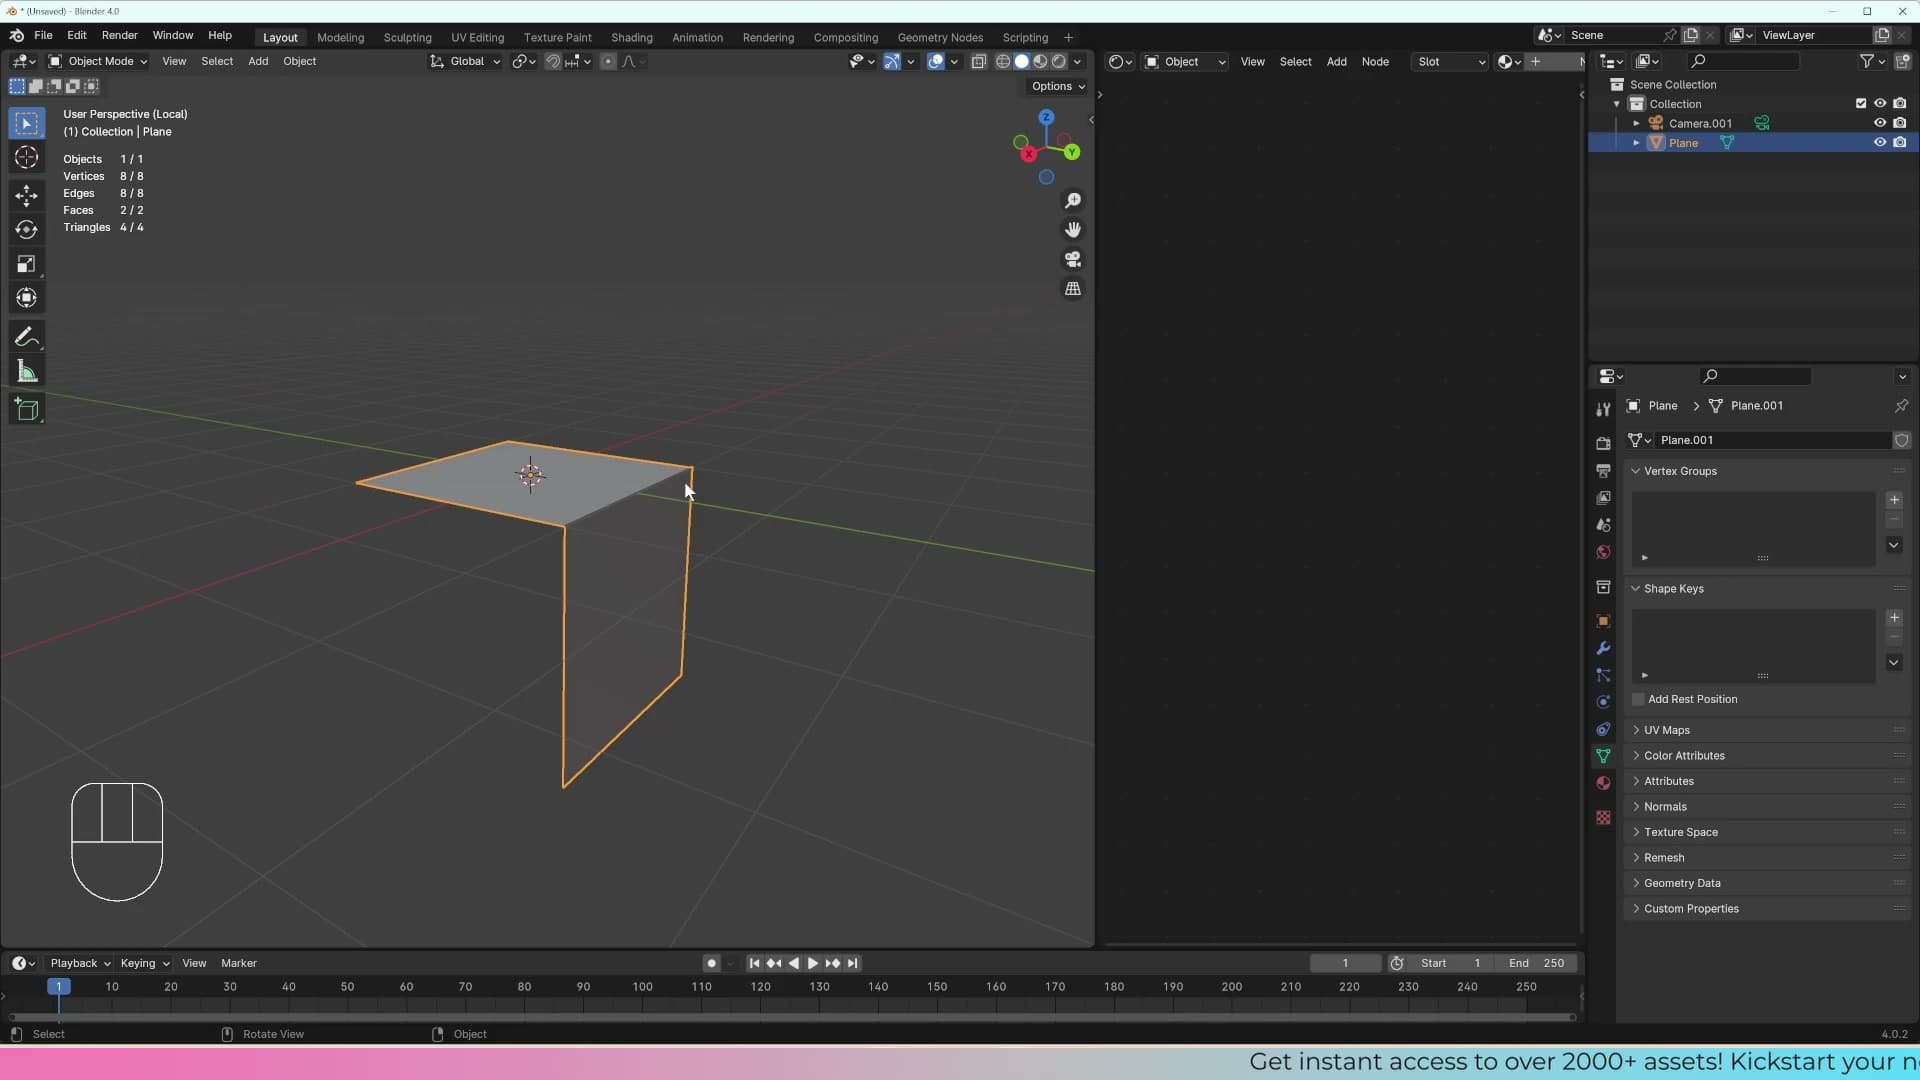
There are dozens of valid ways to model anything in Blender. Some are faster, some are slower, some you'll grow to prefer and others you'll never touch again. The end result is the only thing that matters. The approach used here happens to teach two of the most useful tools in the modelling toolkit at the same time: inset and extrude.
Switch to face select with 3 and click the single face the plane gives you. The rhythm is two key presses, repeated. Press I to inset, type 0.15, and press Enter: this shrinks a smaller face inside the existing one. Then press E to extrude, type 0.15, and press Enter: this pushes that smaller face upward. I 0.15, E 0.15. Again. And again. Each pair of presses produces one stair tread; do it three or four times and you have a clean stepped silhouette.
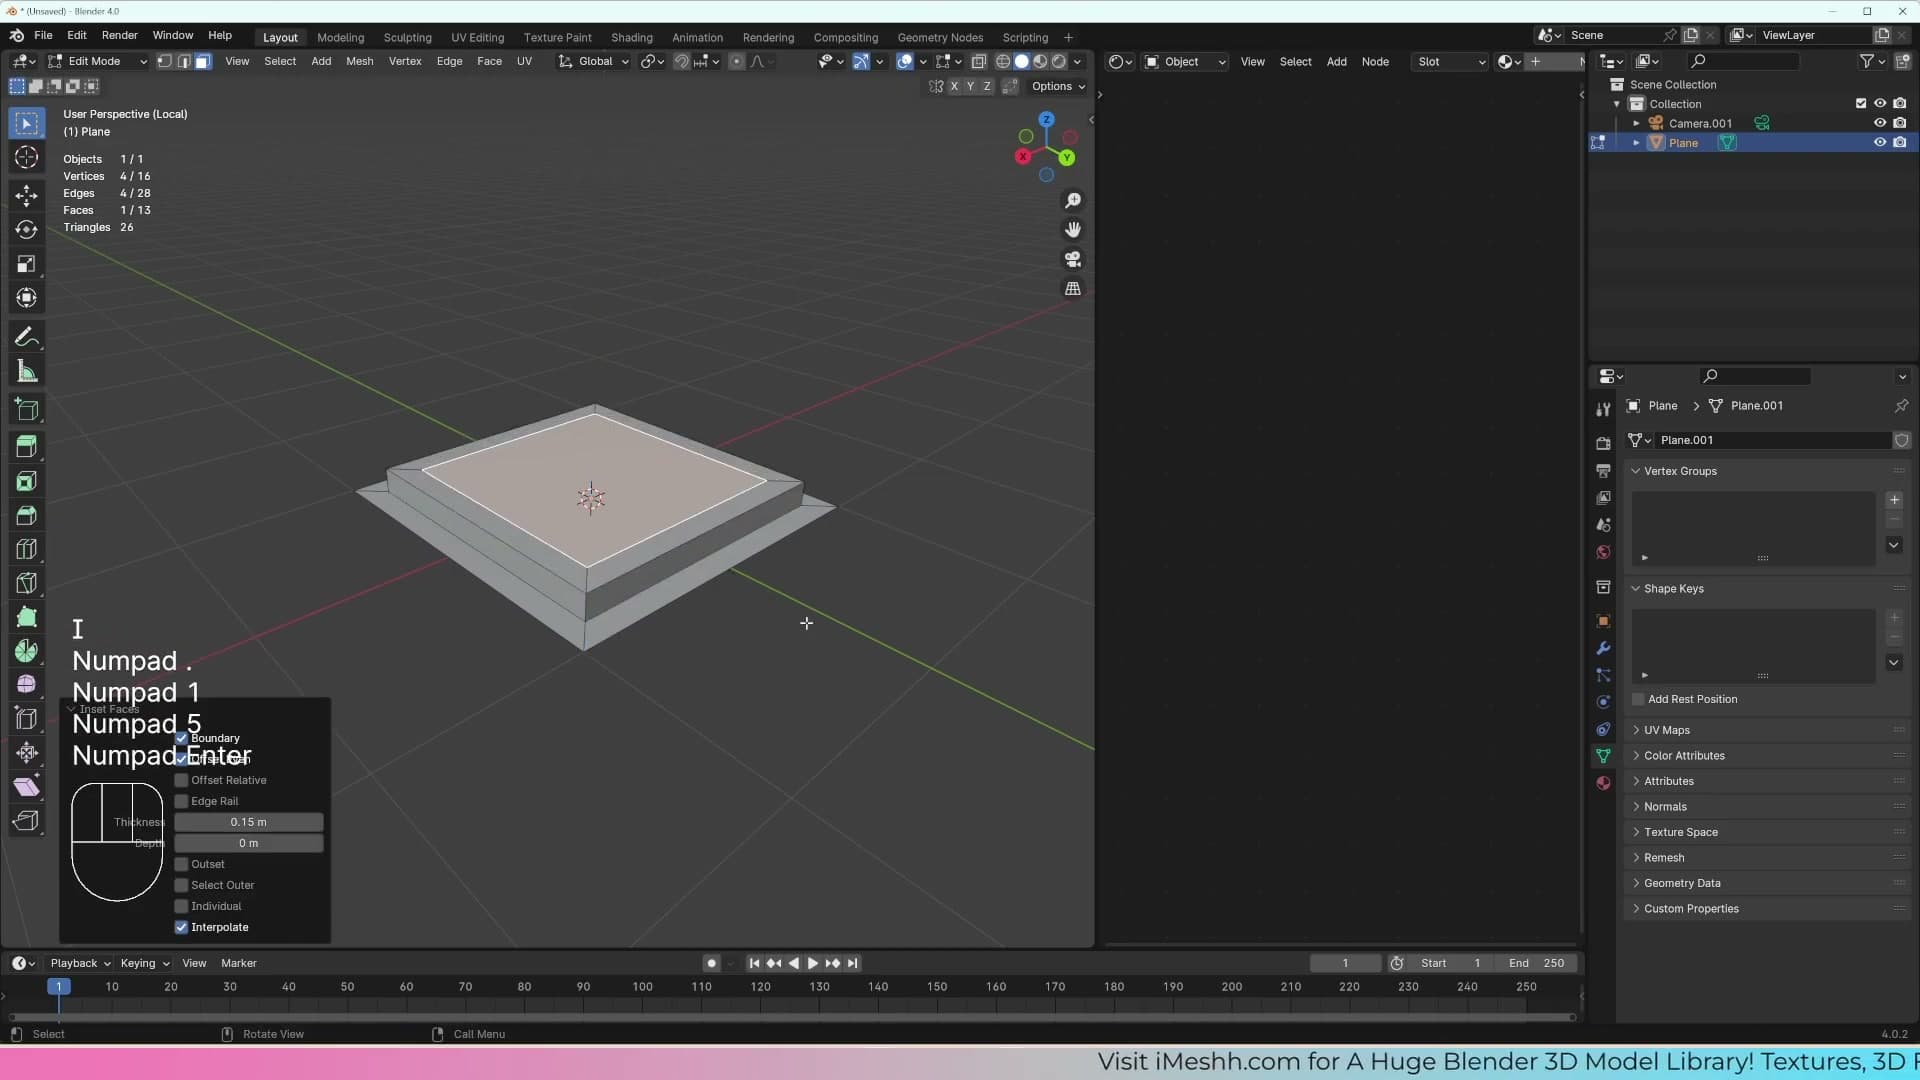
You'll notice the first extrude locks itself to the Z axis without you asking. That isn't a coincidence. Extrude follows the face normal, the direction the face is currently pointing. If the plane were turned on its side and you pressed E, the extrude would push sideways instead. The Z lock is just Blender obeying whichever way the selected face happened to be looking when the operation started.
Loop select with Alt+click
So far you've been working one face at a time. The next job is to bring the lower edges of the staircase down in a single move, which needs all the bottom edges selected at once. The slow way is to hold Shift and click each edge individually, then press E followed by Z to lock the extrude to vertical. That works, but every extra click is another place a mistake can hide.
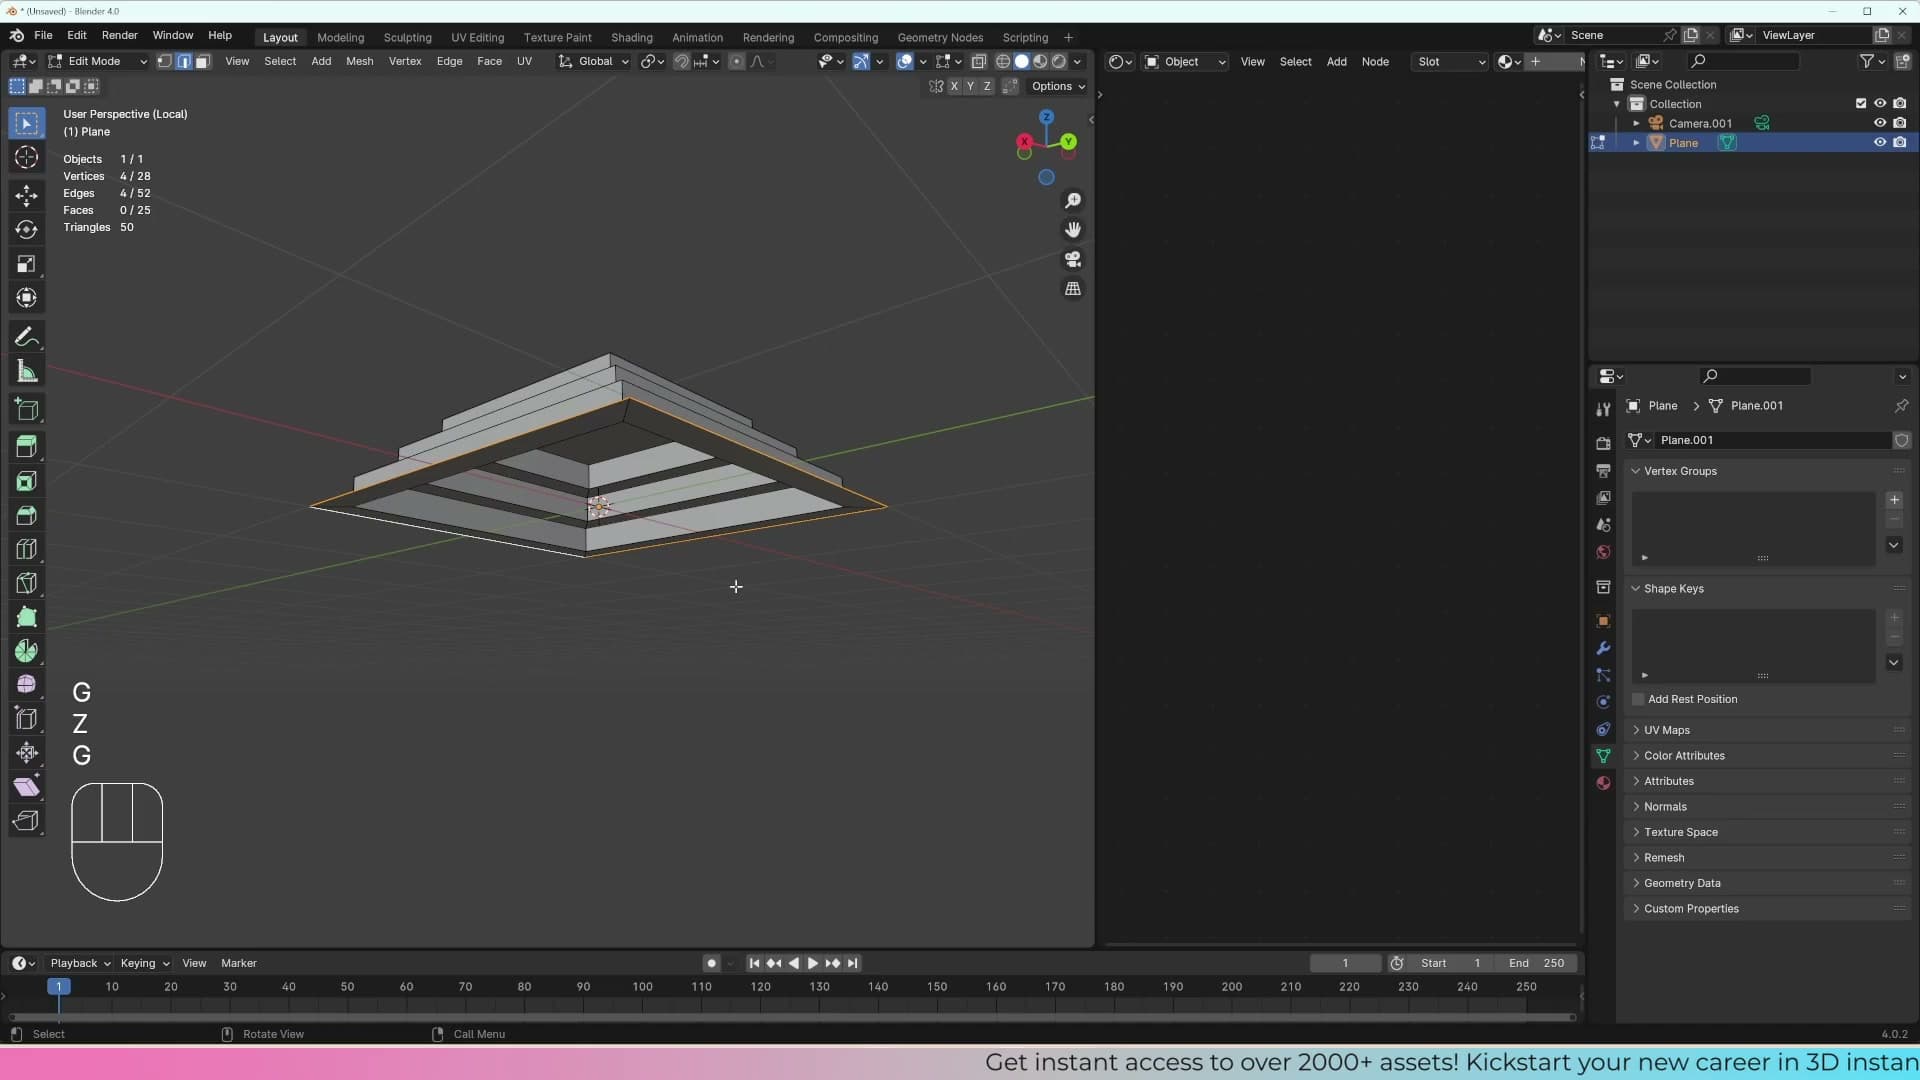
The faster way is the edge loop. Blender treats a continuous run of edges that share clean four-way intersections as a single loop, and gives you a shortcut to grab the whole thing at once: hold Alt and click any edge inside the loop. Try it on a vertical edge of one of the steps and the entire vertical ring lights up in one click.
Try the same trick on the very top edge of the staircase, though, and Blender hesitates. It picks up part of the loop and stops. That's because the staircase geometry includes T-junctions: points where three edges meet instead of four. Loop select needs to know which direction the flow continues, and at a three-way junction there's no single right answer, so Blender gives up rather than guess.
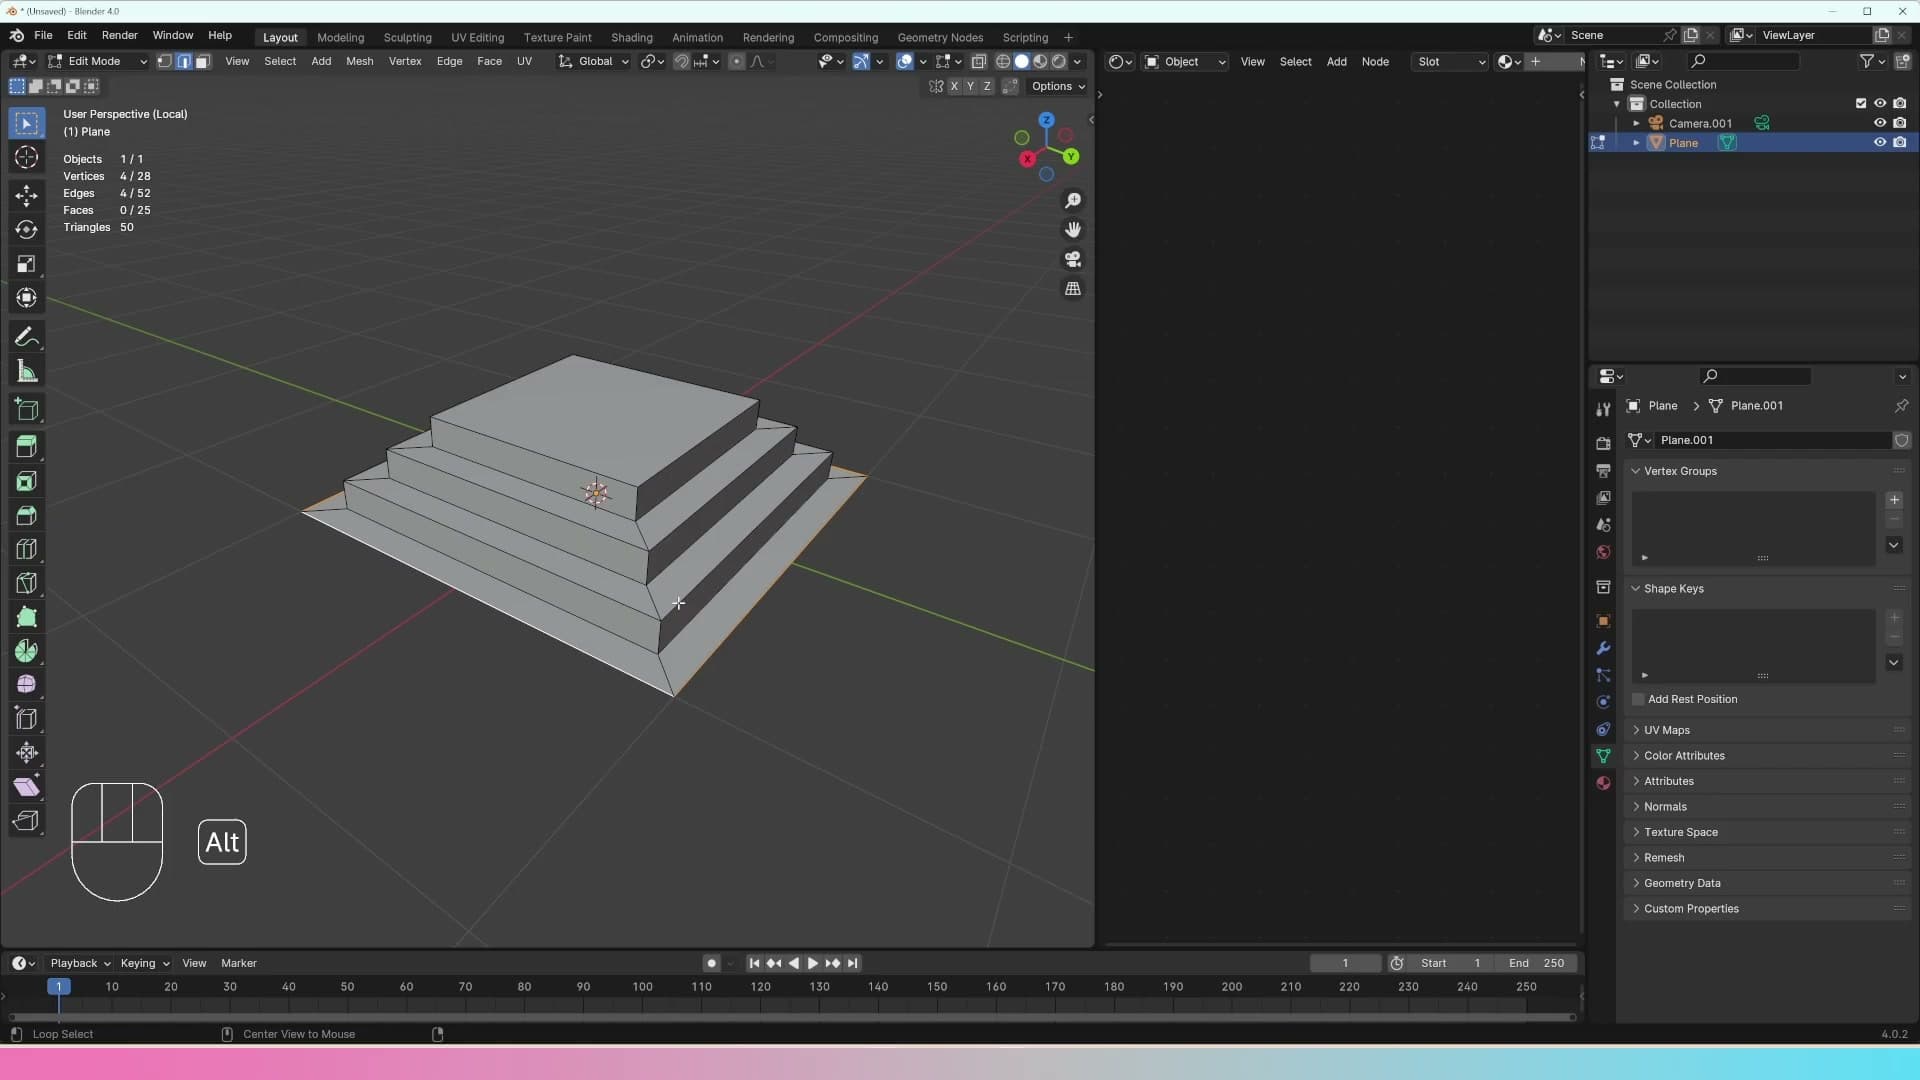
The fix is to give Blender a four-way intersection to work with. Extrude that troublesome top edge upward, even slightly, and you've created a corner with four connecting edges. Loop select starts working again on that ring straight away. It's a useful diagnostic: if Alt+click is misbehaving, look for the T-junction nearby.
Close the bottom edge with extrude and F
The staircase is currently an open shell with no underside. To close it, first hold Alt and click the bottom edge to grab the whole bottom loop in one go.
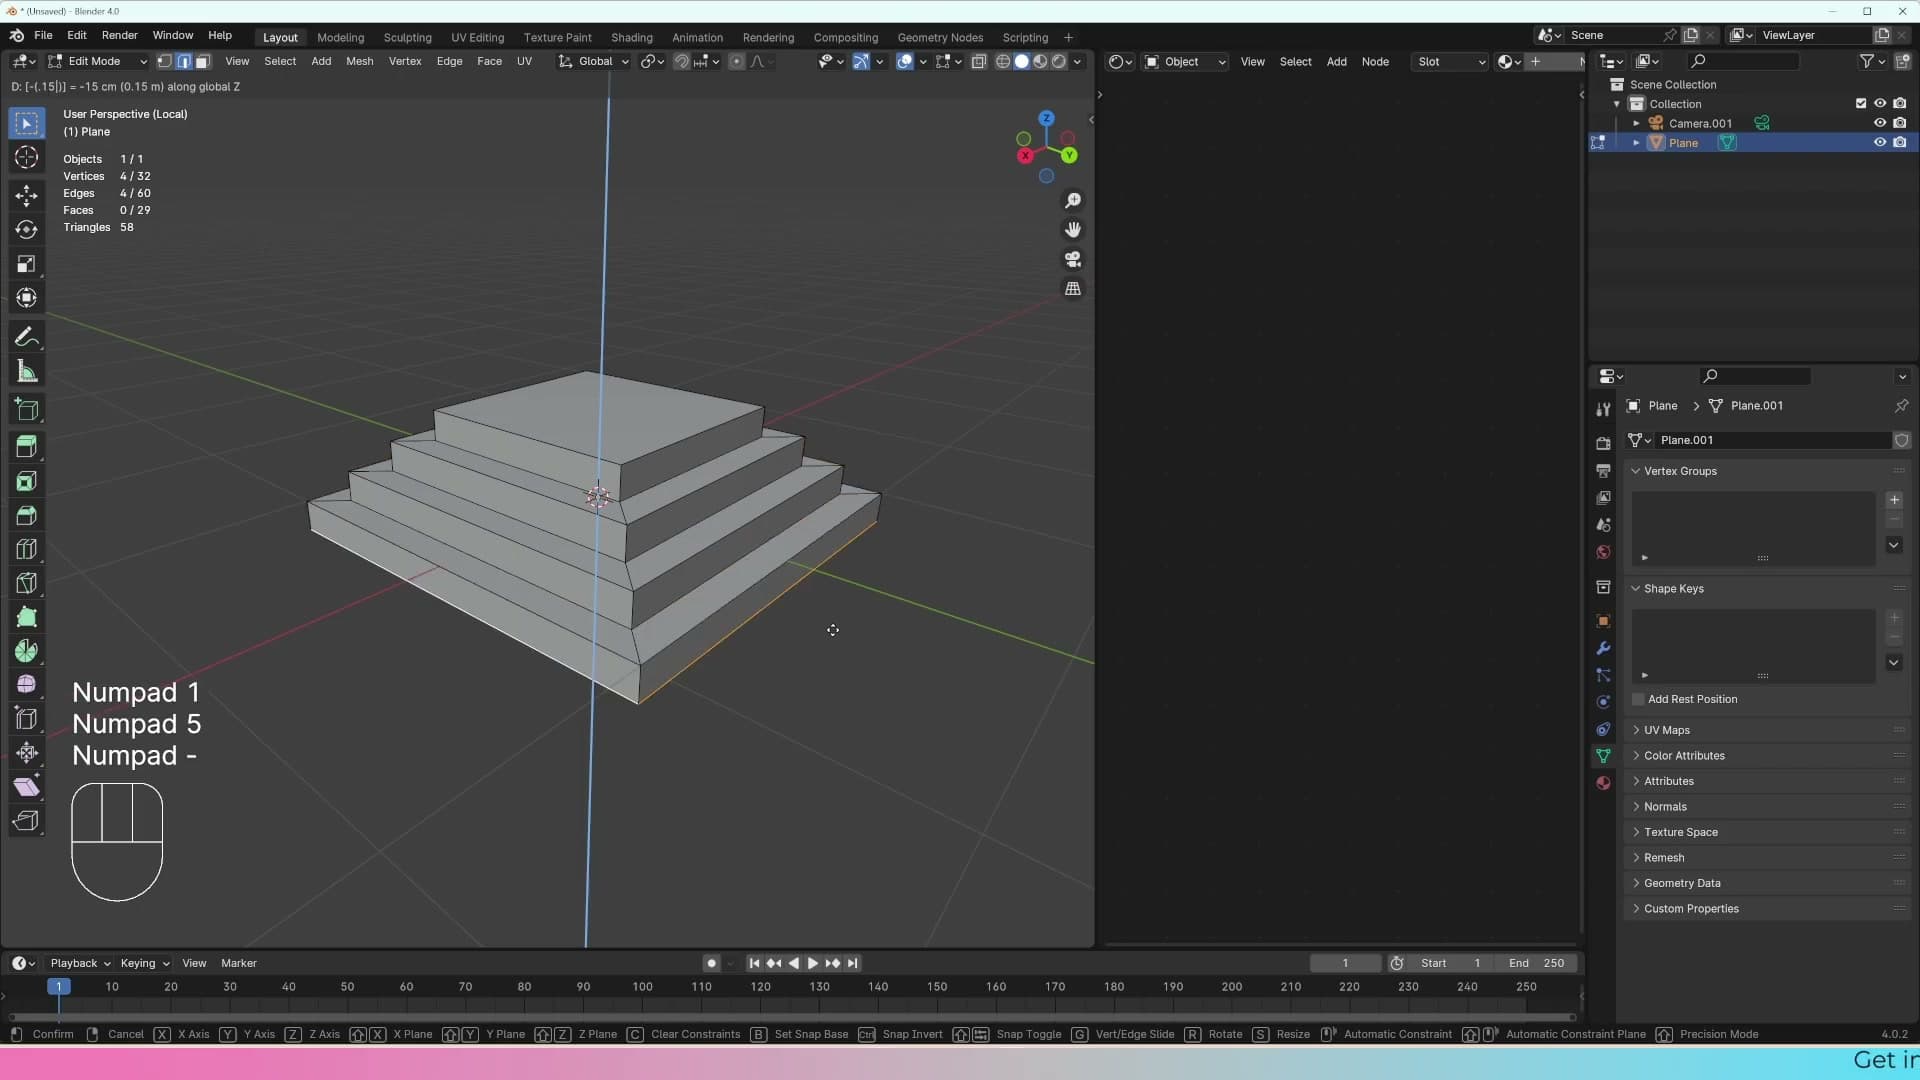
Press E to extrude, then Z to lock to vertical, and type 0.15. The extrude will go up, because positive Z is up. Press - (minus) before confirming to flip the value to -0.15 so it travels downward instead, then Enter. You now have a ring of edges sitting flush with the bottom of the staircase, but the hole inside that ring is still open.
Press F to fill it. Blender bridges the loop with a single face and the staircase becomes a closed, solid object, ready for the bevel and mirror modifiers that come next.
Non-destructive bevel with a modifier
Every real-world edge has bevel, so add one in Blender. Use the bevel modifier, not the Ctrl+B edit-mode tool. The modifier stays editable; edit-mode bevel is baked in the moment you commit it.
Why edit-mode bevel is the wrong call
Every real-world edge has bevel. No matter how close you zoom in on a physical object, the corner is always slightly rounded. Even the sharpest knife in the world goes blunt under enough magnification. The default Blender cube, by contrast, has razor-perfect mathematical edges that meet at an infinitely thin point, and that single detail is enough to make any render look fake. So you need to add some bevel to your staircase.
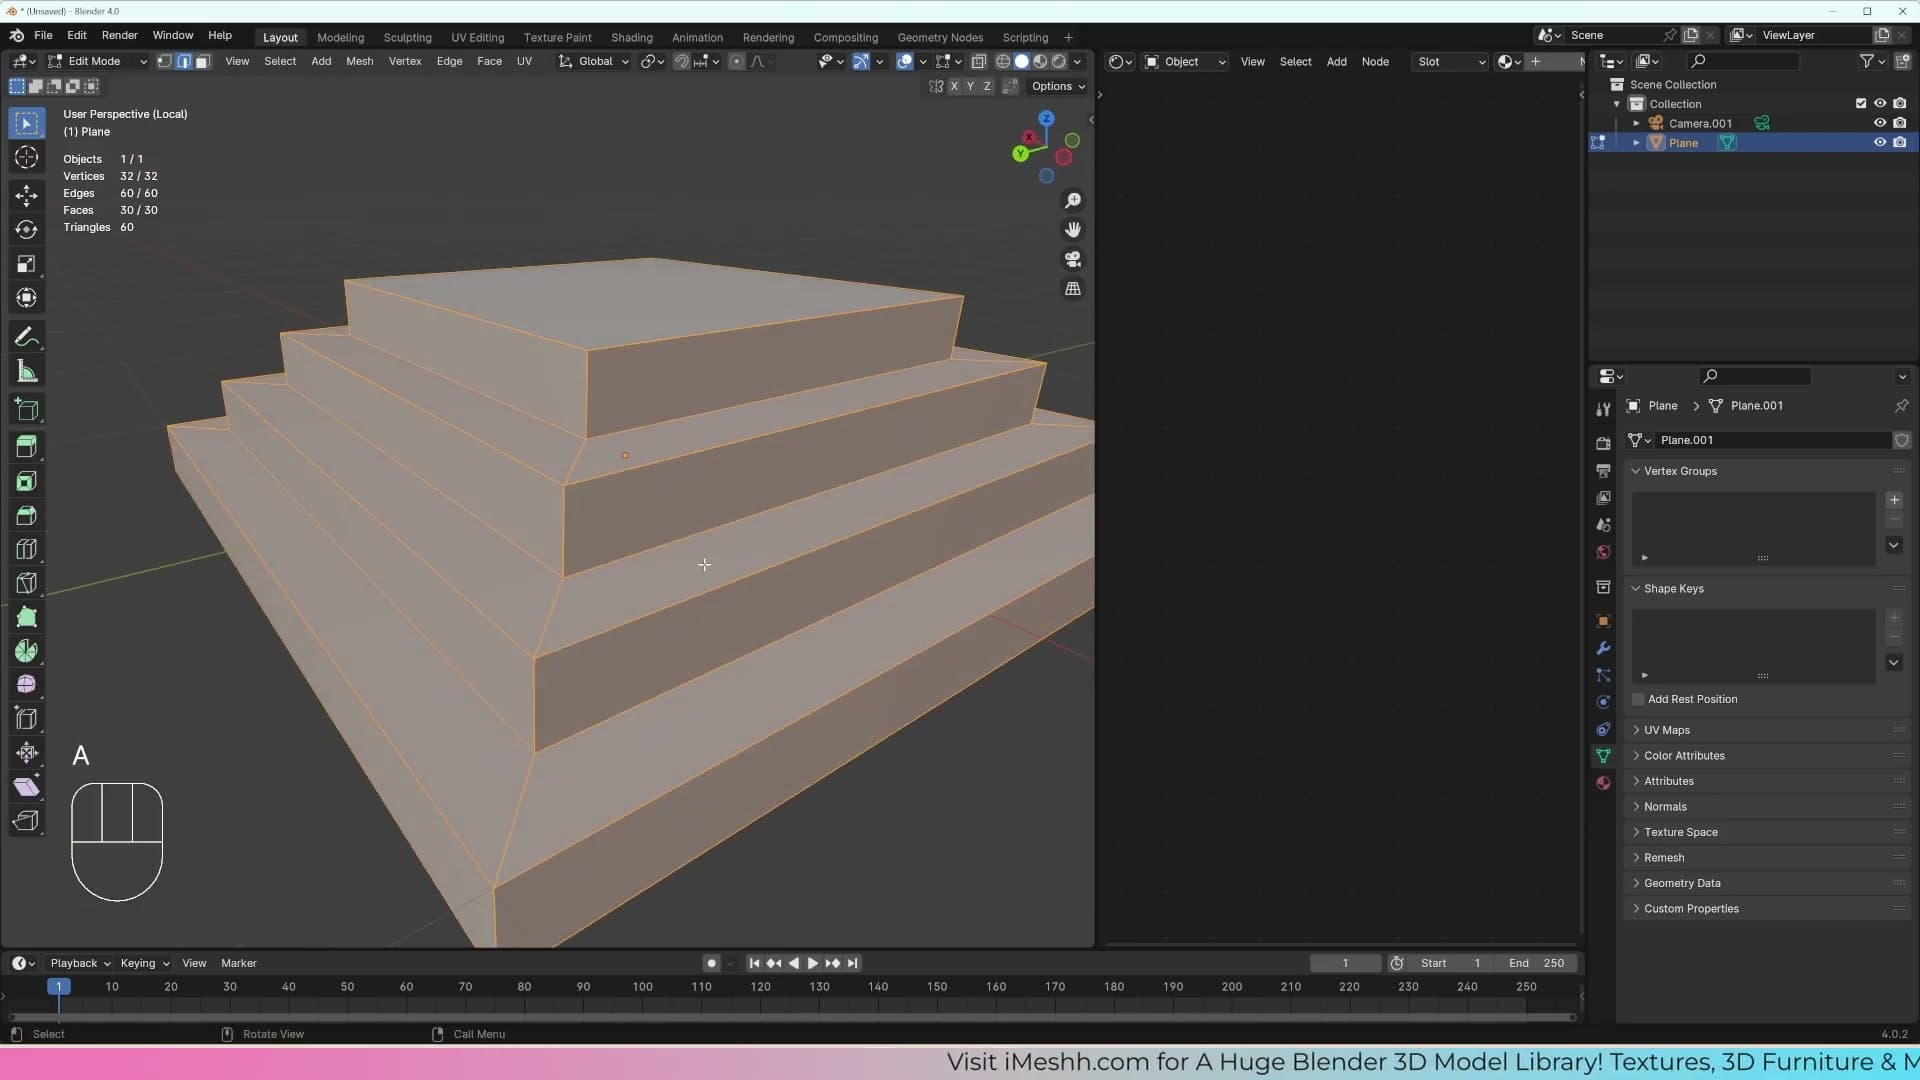
There are two ways to do it, and only one of them is the right call. The wrong way is to drop into edit mode, select your edges, press Ctrl+B and scroll the mouse wheel to add segments. It works in the moment and you get a nice rounded edge, but the second you commit and move on to something else, that bevel is baked into the mesh. Come back an hour later thinking the bevel should be a bit thicker, and you'll find you can't change it. It's permanent geometry now.
The right way is to use the bevel modifier. Modifiers add geometry to your object non-destructively, which means the bevel stays editable forever. You can come back tomorrow, next week, or halfway through lighting the final render and dial the width up or down without touching the underlying mesh.
Tune width and segments
Open the modifier menu on the right-hand properties panel, click Add Modifier, and either pick Generate → Bevel from the submenu or hit search and type bevel. Both land in the same place.
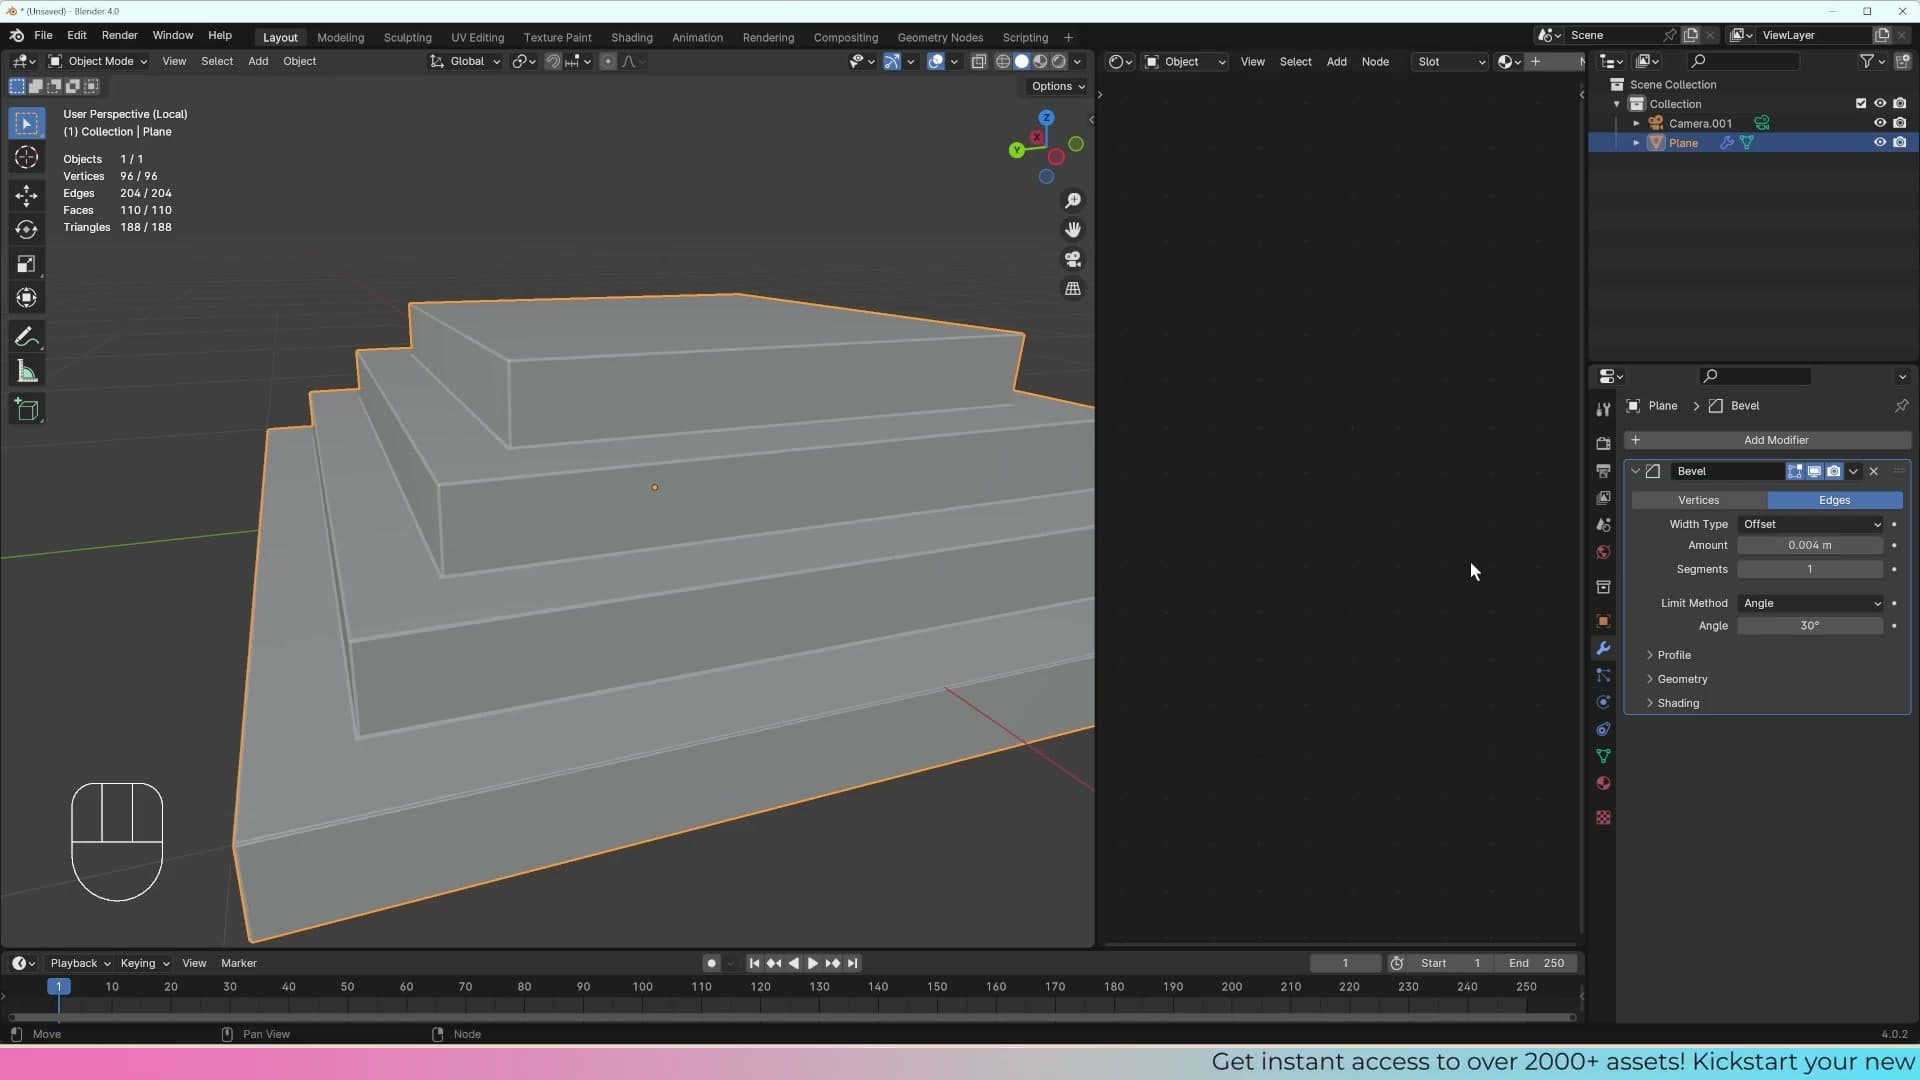
When the modifier first appears, the default width is way too large and your staircase will balloon outwards. Drag the width slider down to bring it under control. Hold Shift while you drag for finer, slower movement so you can settle on a subtle value rather than overshooting.
Once the width feels right, scroll down a touch and add a few more segments to smooth out the rounded edge. A handful is plenty on hard-surface geometry like this. You don't need dozens. And because everything lives on the modifier, you can come back and adjust the width or segment count as much as you like later on.
Auto Smooth and Harden Normals for clean shading
Shade Smooth alone curves the flat faces of the staircase. The fix is Harden Normals on the bevel modifier paired with Auto Smooth on the mesh data. That combination keeps round edges round and flat faces flat without adding extra geometry.
Why Shade Smooth bends flat faces
Right now your staircase has sharp, faceted edges. The instinct is to right-click and pick Shade Smooth. You should do that, but on its own it produces some strange shading. Look closely at the top of a step and you will see that the supposedly flat face has picked up a subtle curve, as if the edge bows slightly inwards. Switch back to Shade Flat and the face snaps to dead flat again; toggle Shade Smooth and the curve returns.
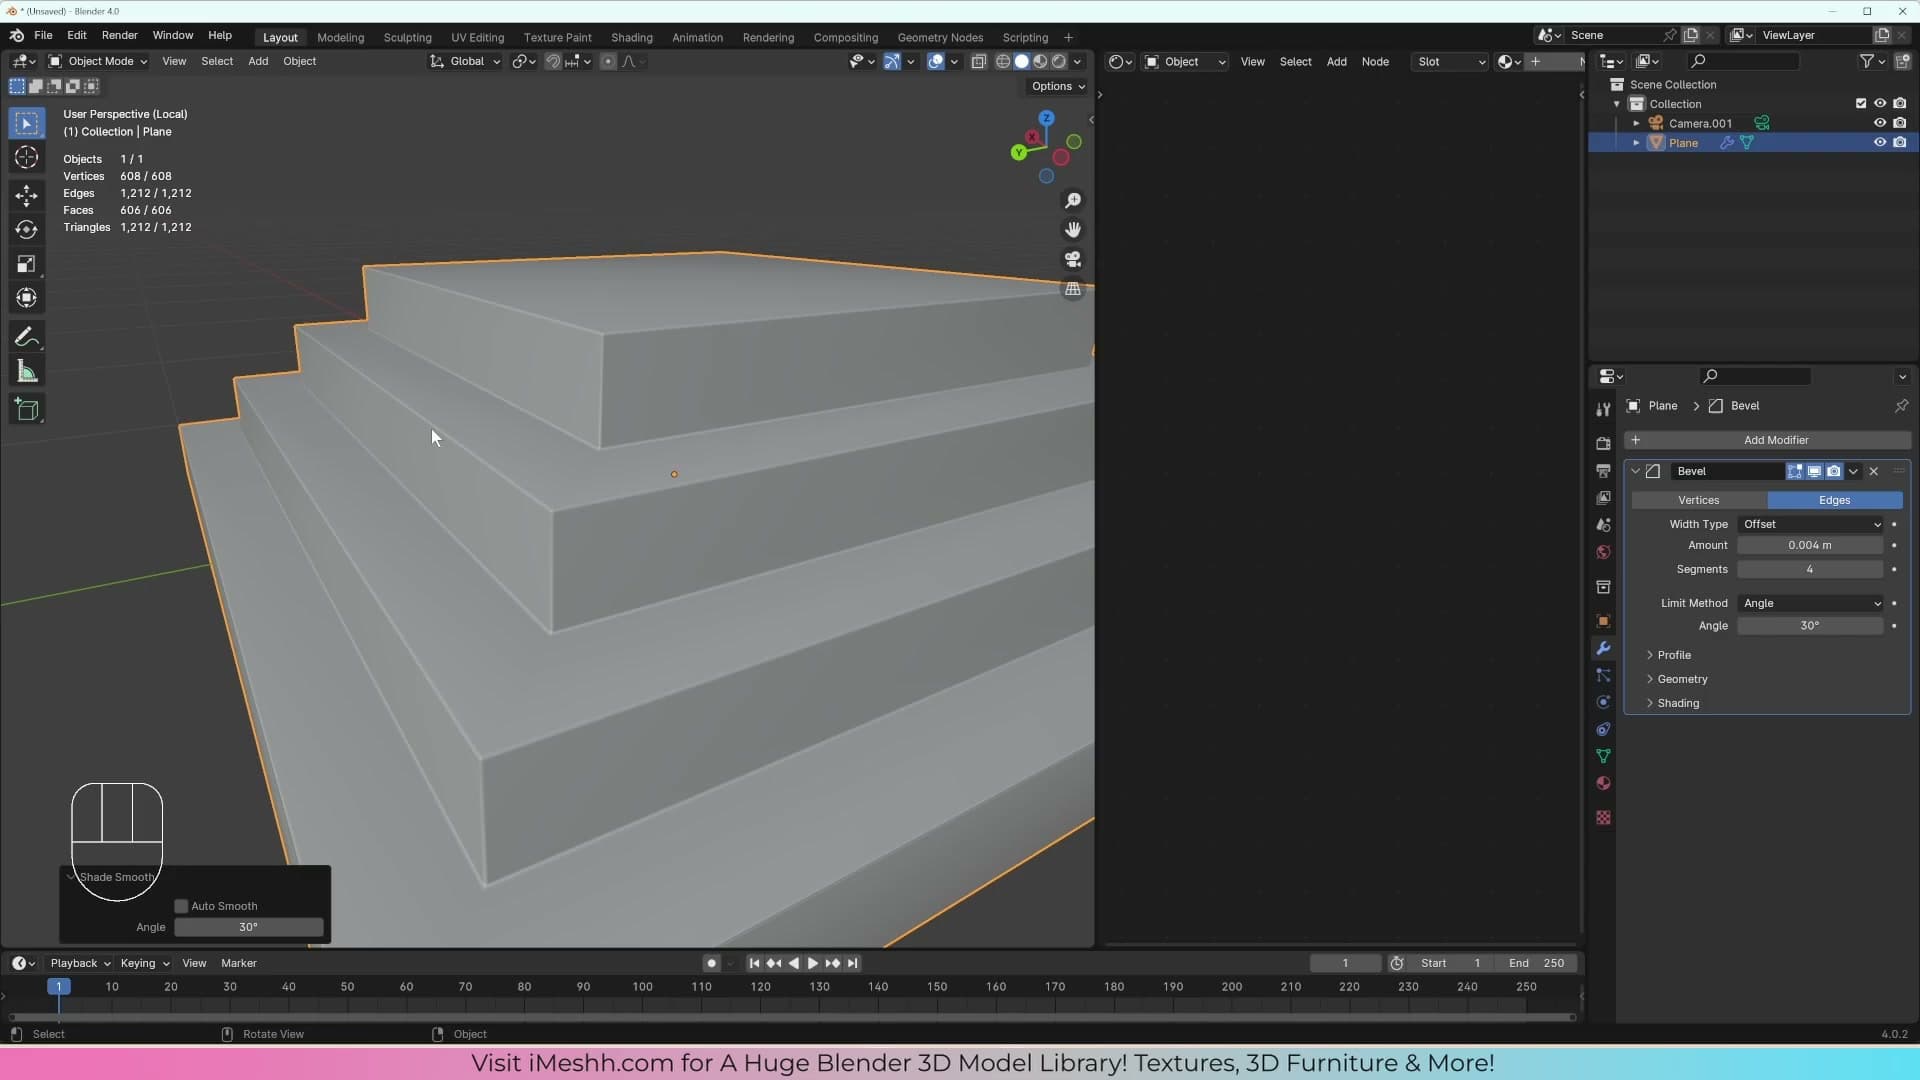
That curvature is Blender doing exactly what Shade Smooth is meant to do: it averages the normals across neighbouring faces to hide the polygon edges. On a round object that is perfect, but on the top of a step you do not want any averaging. The face should be flat and the bevelled corner should be smooth, with a clean break between them.
One way to force the issue is to add extra edge loops with Ctrl+R, click to drop a loop in, and drag it tight against the corner. With more geometry sitting right next to the bevel, Blender has more information about where the flat should start, and the bright averaged band gets squeezed into a much smaller area. It works, but you are adding loops to every step on every surface. That geometry adds up fast and slows Blender down. There is a much cleaner way.
Harden Normals + Auto Smooth
Open the bevel modifier and scroll down to the Shading section. Tick Harden Normals. Blender will immediately flash a warning telling you that Auto Smooth needs to be enabled in Object Data Properties. That is the other half of the fix.
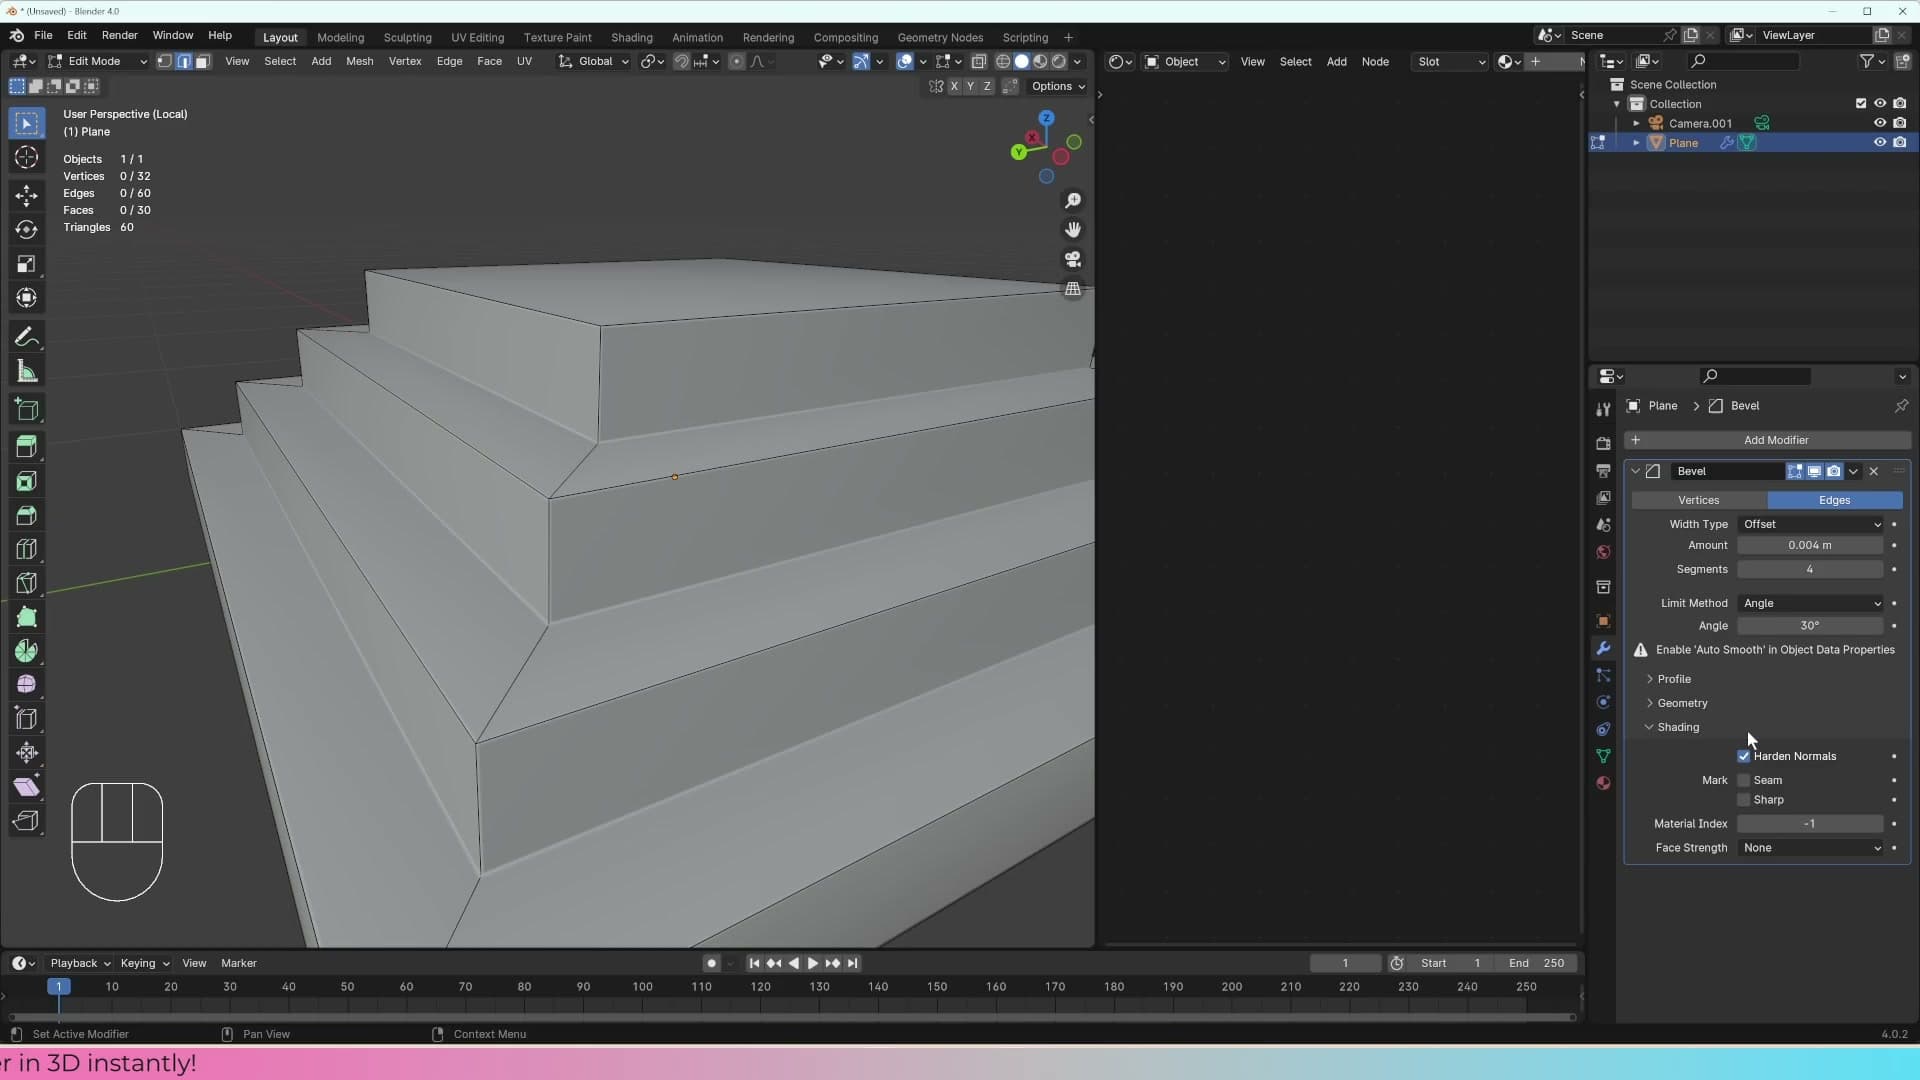
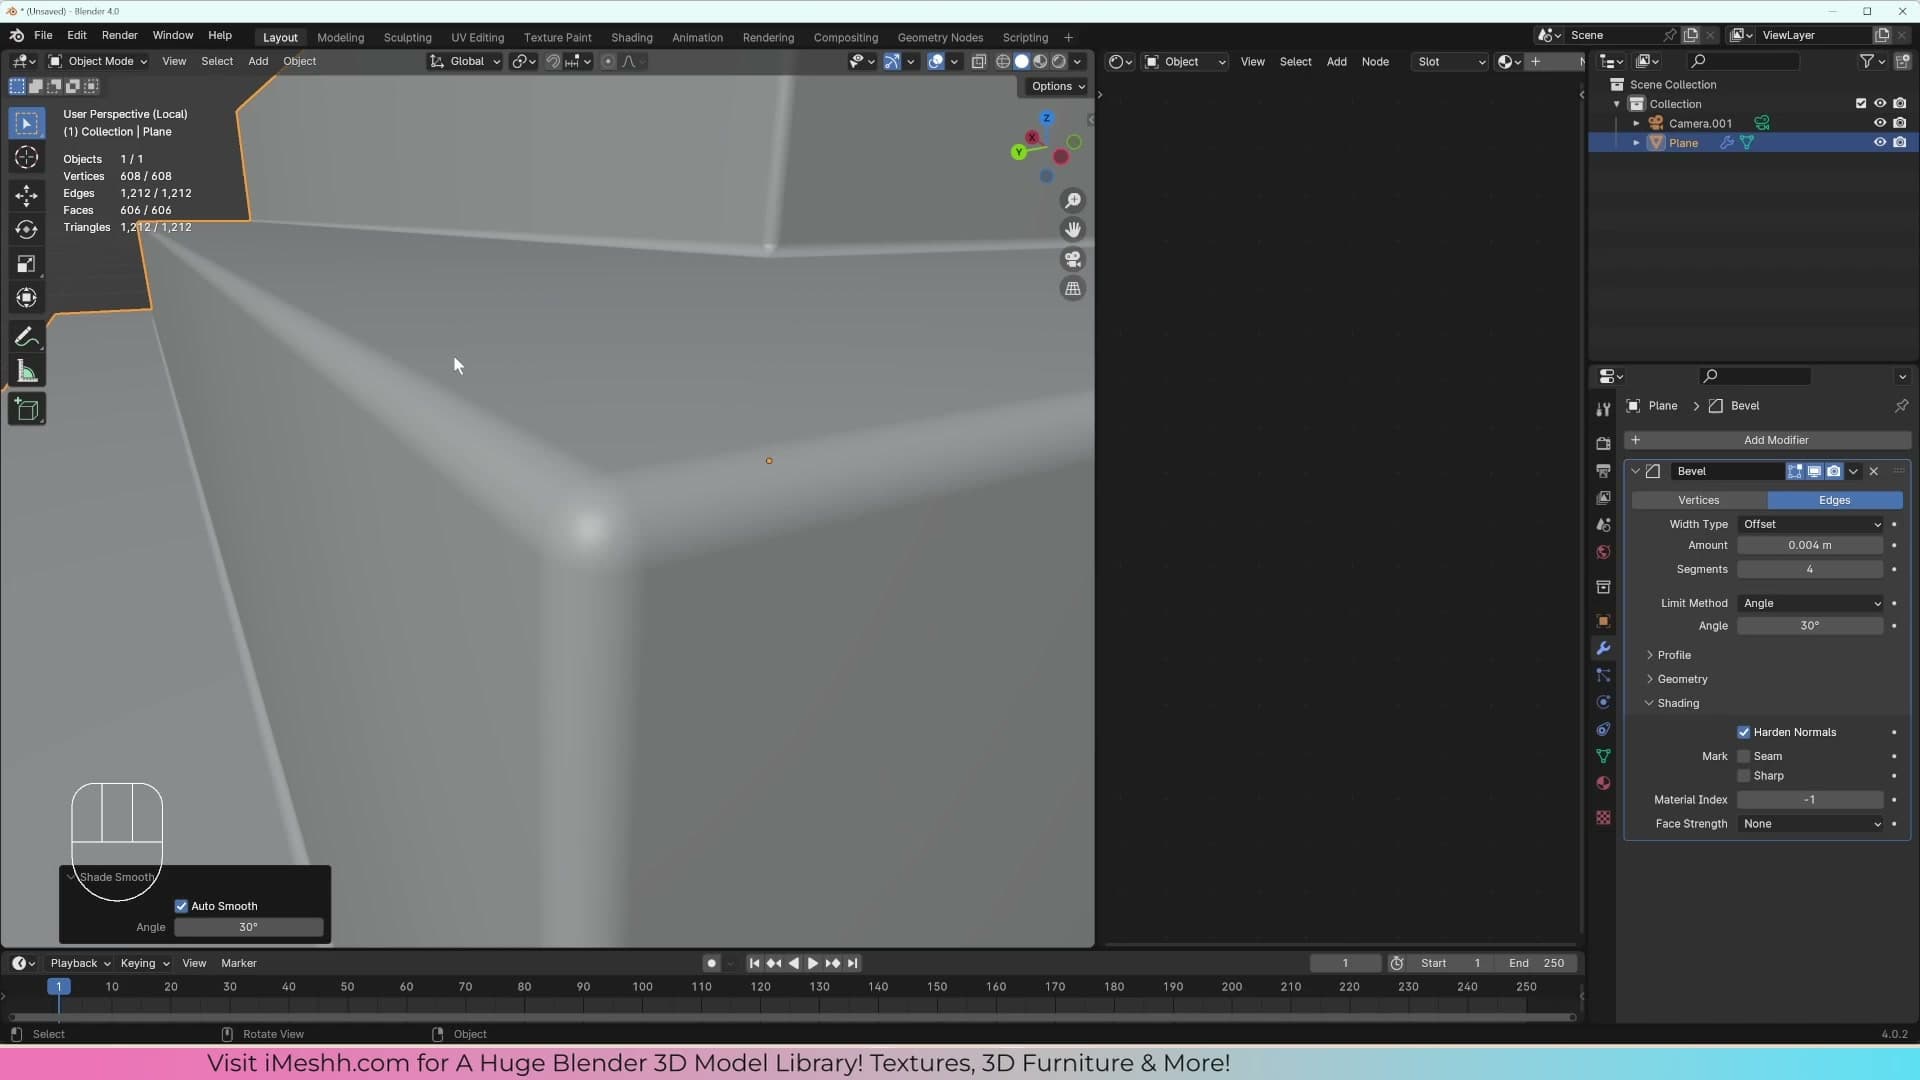
Head to Object Data Properties (the green triangle icon in the Properties editor), expand Normals and switch on Auto Smooth. As a shortcut you can right-click in the viewport and choose Shade Auto Smooth instead, which gives the same result. Auto Smooth tells Blender to smooth any edge whose angle is under 30°, and to treat anything sharper than that as a hard edge that should not be smoothed.
Harden Normals on the bevel modifier hooks into that system. It tells Blender that at the very outer edge of the bevel effect, the shading should break. Anything past the bevel needs to be flat. Auto Smooth reads that instruction and respects it. The result is exactly what you want: the rounded corner stays smooth, and the top and front of each step snap back to perfectly flat, with no extra loops anywhere in the mesh.
If you skipped this step and tried to fix the shading by adding loops everywhere instead, you would end up packing the mesh with so much geometry that Blender would start to slow down. Harden Normals plus Auto Smooth gives you the same clean look for free.
Portrait output and a distraction-free viewport
Swap the render dimensions to portrait (1340 × 1920) so the final render works as a vertical wallpaper. Then crank Passepartout to 1.0 so the off-camera world disappears from the viewport. You compose what the camera actually sees, nothing more.
Recenter the scene and open a second 3D viewport
Before you start arranging the staircase against the rest of the scene, get everything back onto the world origin so alignment is predictable. Press Shift+C to send the 3D cursor to the centre, select the object you want to move, then press Shift+S and choose Selection to Cursor. The object snaps to the origin point.
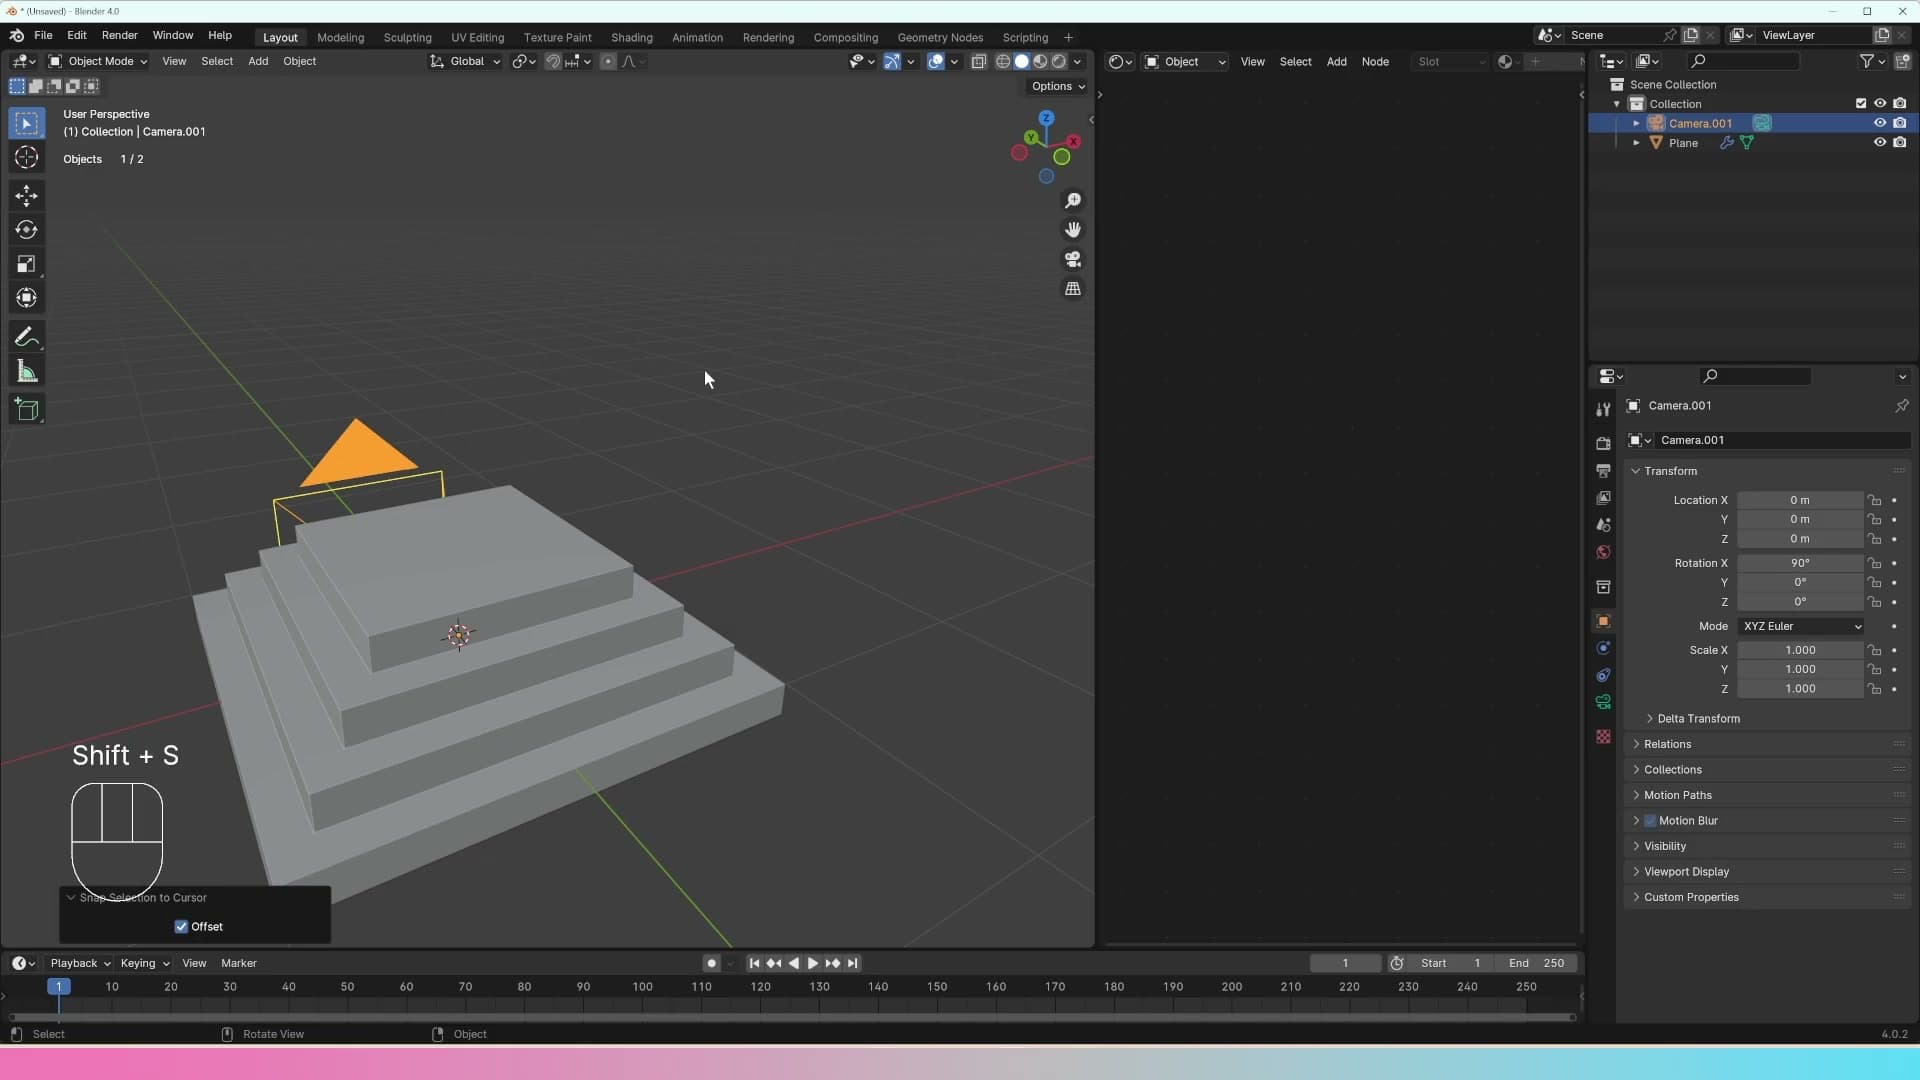
From there you can nudge it back into position with G followed by Z to move along the vertical axis. Because both the staircase and the camera now share the world centre as a reference, everything else you bring into the scene will line up to the same point.
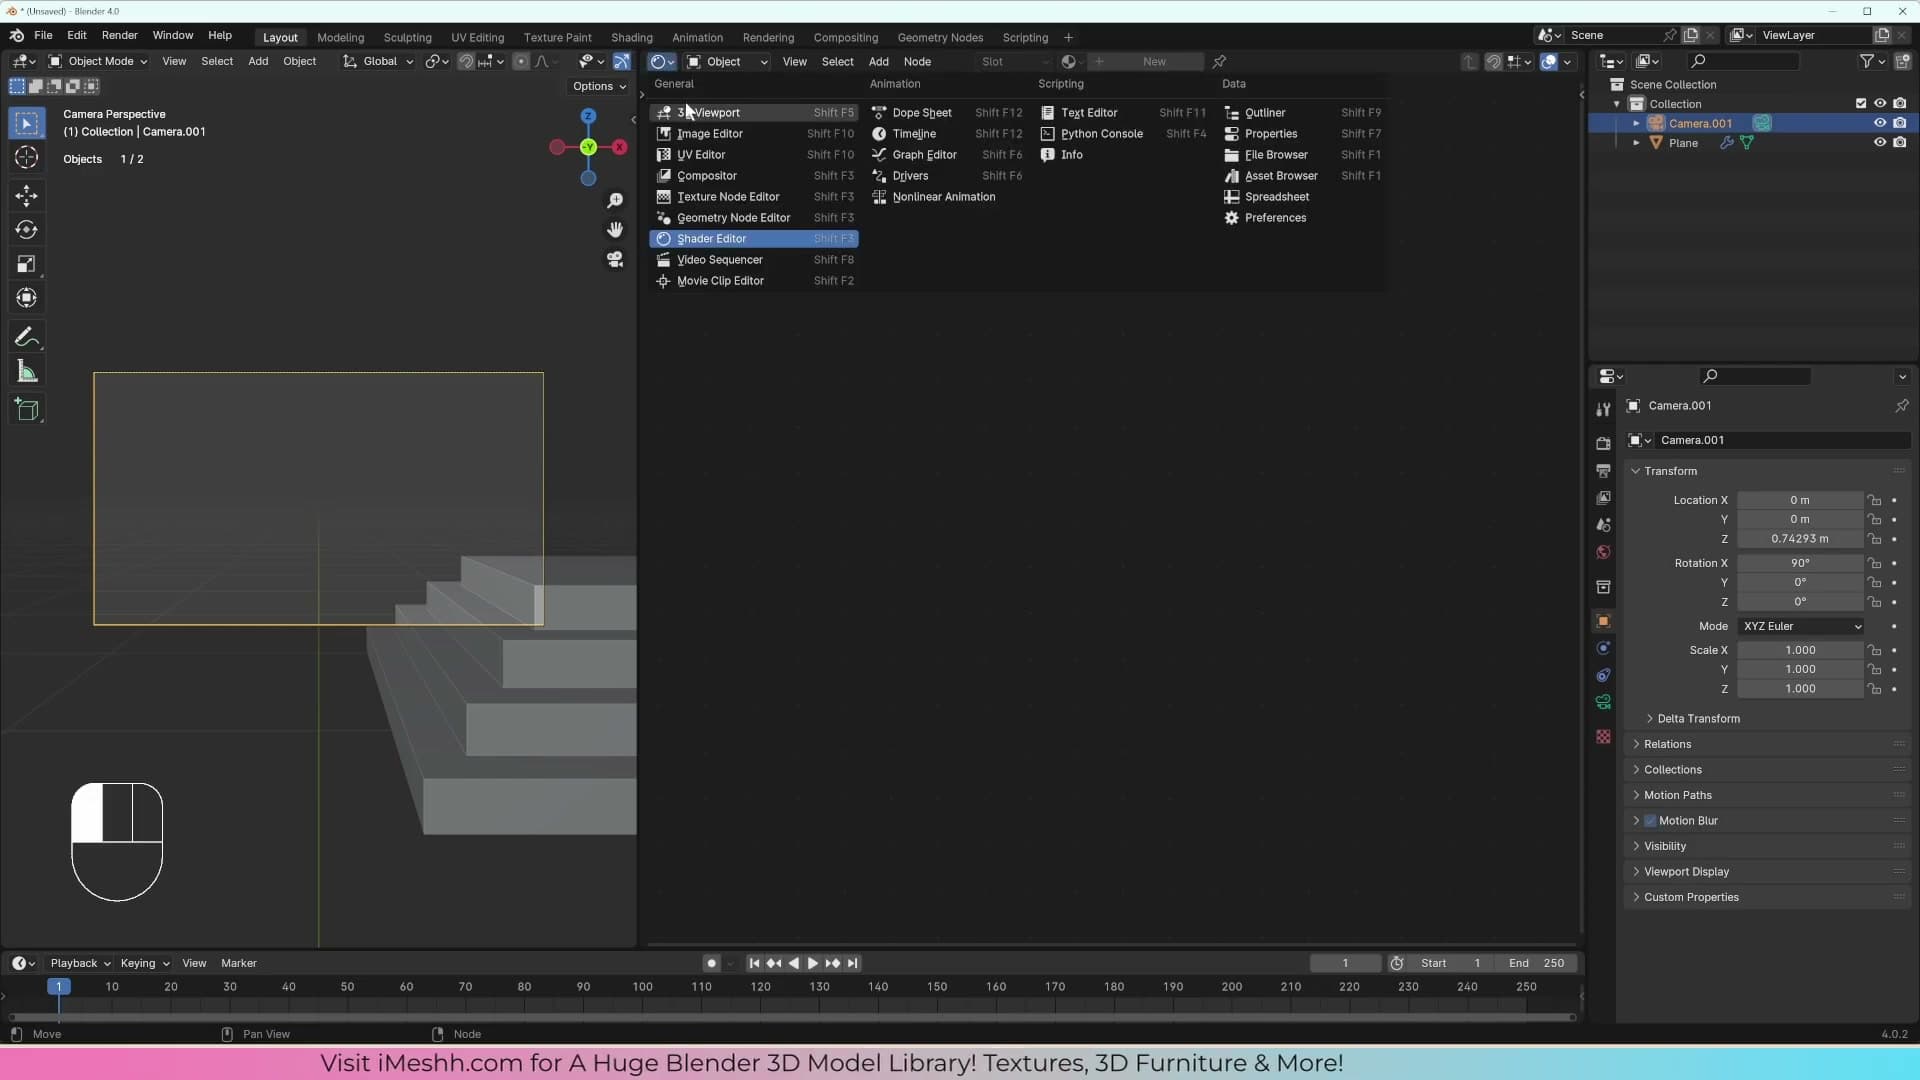
The other piece of housekeeping is splitting the editor so you have two 3D viewports open at once. Keep one locked to the camera view (the framing you'll be composing for) and change the other to a regular 3D viewport. Anything you move in the freeform viewport updates live in the camera view, so you can drag geometry into place without fighting the camera's perspective.
This is the workflow you'll fall back on for the rest of the project: camera on one side, working viewport on the other.
1340 × 1920 portrait render dimensions
Blender's default render dimensions are landscape: wider than tall. For this project you want the opposite, because the final image is going to live on social media or as a mobile phone wallpaper, both of which are portrait surfaces.
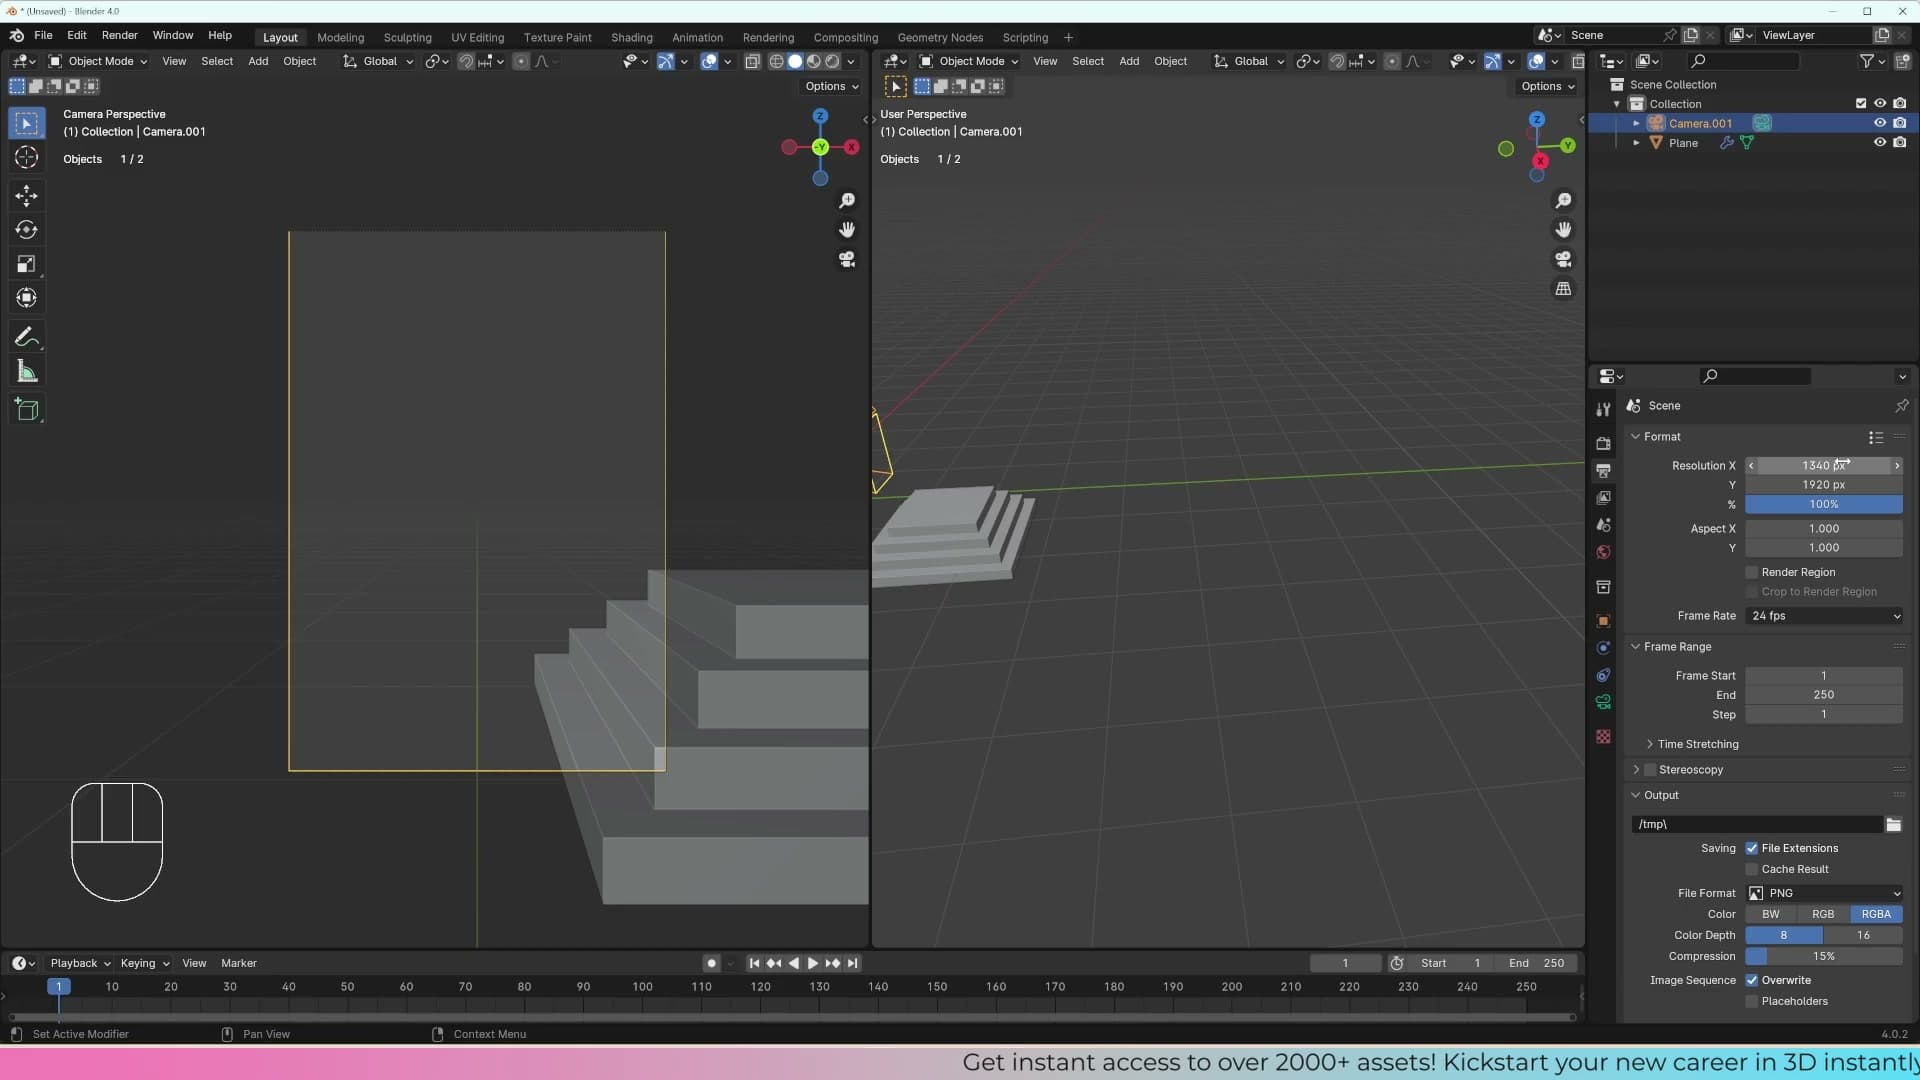
Open the Output Properties and swap the X and Y values around. A straight flip gives you 1080 × 1920, but that ends up feeling a little narrow for an interior shot. Bump the width to 1340 instead. That's roughly the aspect ratio of a photo straight out of a phone camera, which keeps the framing comfortable without going so wide that the composition loses its vertical pull.
You're not locked to these exact numbers. If you'd rather match a specific Instagram aspect or a 9:16 reel, set it to whatever you need. The point is to decide on the output shape before you start composing. The framing rules change completely between landscape and portrait.
Passepartout 1.0 hides off-camera geometry
When you look through a camera viewfinder in real life, you only see what's going to end up in the photo. Everything outside the frame is hidden. Blender's 3D viewport doesn't behave that way by default: even with the camera active, you can still see the geometry sitting outside the rendered area, which makes composition harder than it needs to be.
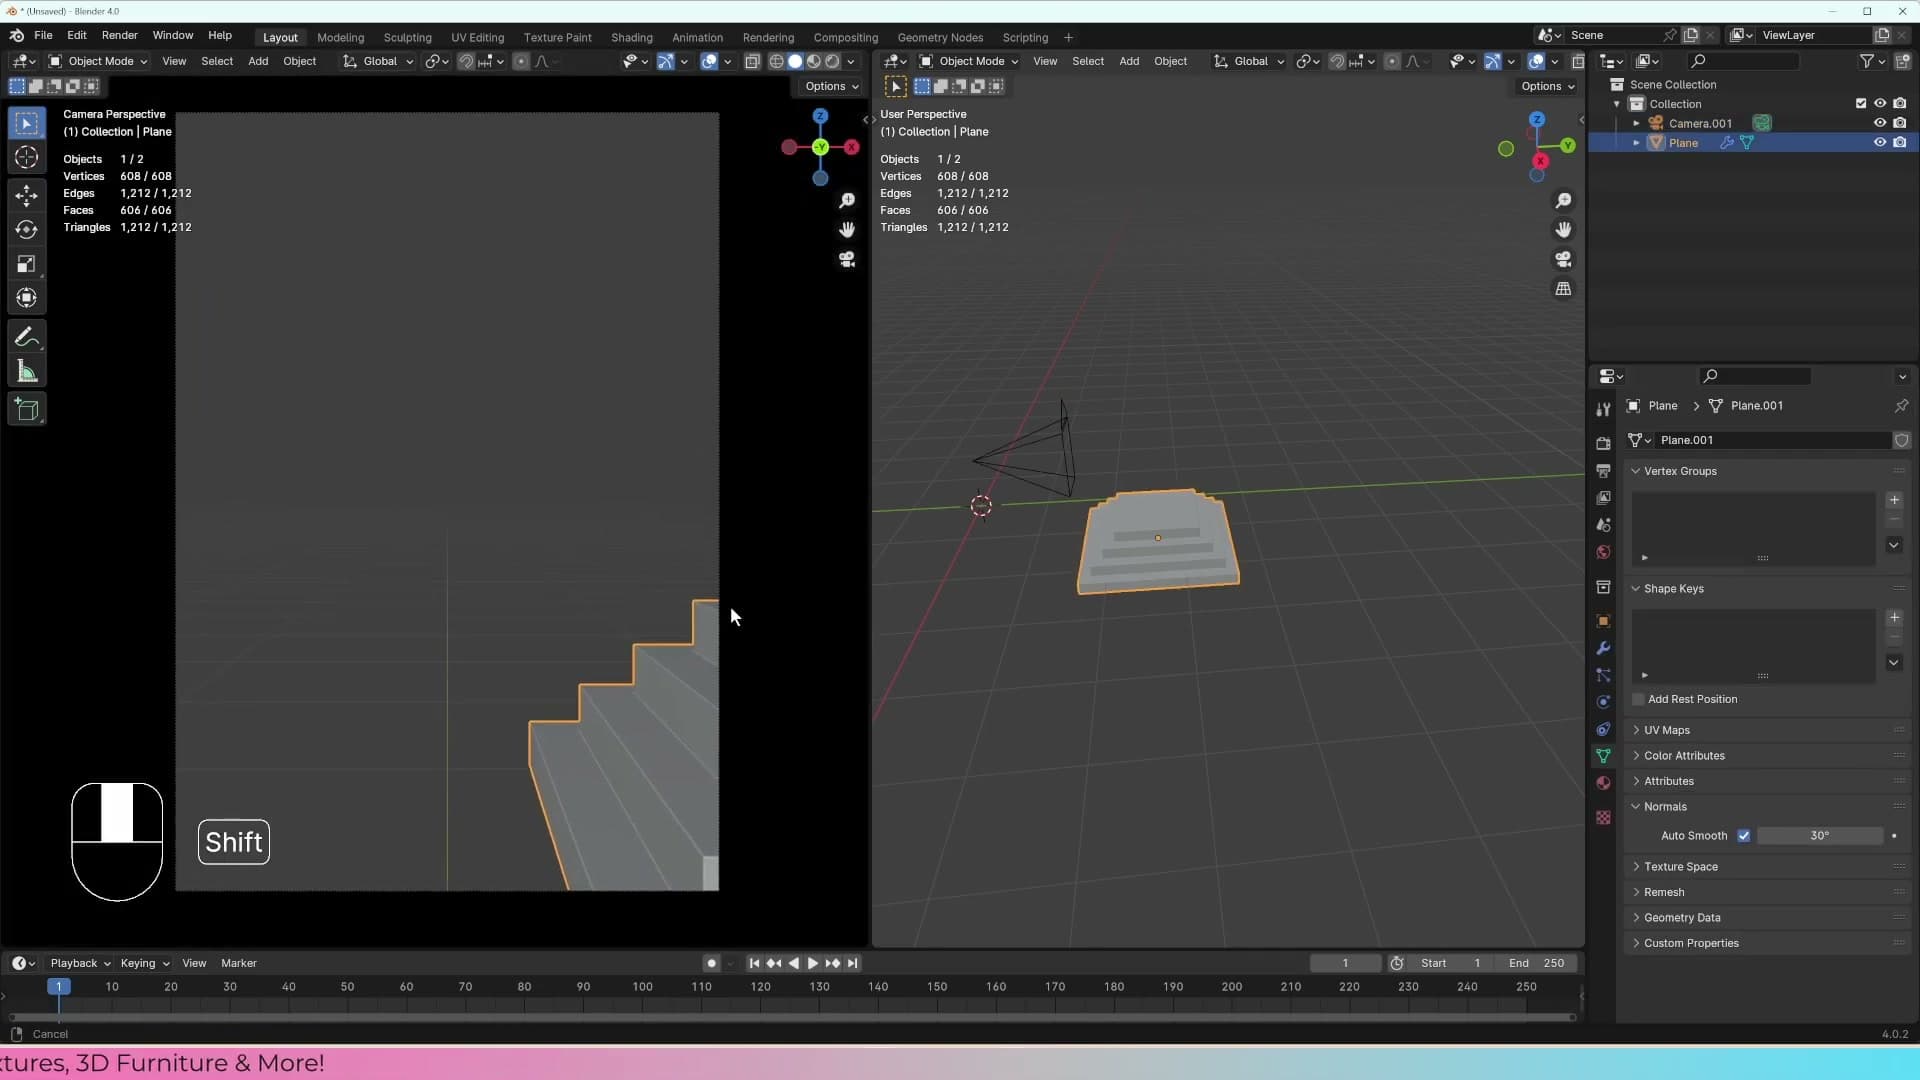
To match real-camera behaviour, click the camera so it has the orange outline, then open the camera properties and find Viewport Display → Passepartout. (Passepartout is the white border around a framed photograph, the mat that surrounds the image inside the frame.) Drag the slider to 1.0 and the area outside the camera frame goes solid black. Now the only thing you can see in the viewport is what the camera actually sees.
While you're tidying up the workspace, switch off the Statistics overlay in the second 3D viewport. It takes up real estate you don't need at this stage. You're now ready to start positioning the staircase against the rest of the scene without anything off-frame pulling your eye away from the composition.
Mirroring the staircase with an Empty
Build one half, mirror the other. The trick: parent the Mirror modifier to an Empty instead of the staircase's own origin. That way you can drag the mirror plane around freely without resetting the object's origin point.
How Mirror reads the origin point
You've built one staircase. You now need a second one on the opposite side of the scene, and you want them to stay identical. If you tweak the step height on one, the other should update too. Duplicating the object would give you two independent copies that drift apart the moment you edit either one. The Mirror modifier solves this: it generates the mirrored half live from the original mesh, so any edit you make is reflected on both sides automatically.
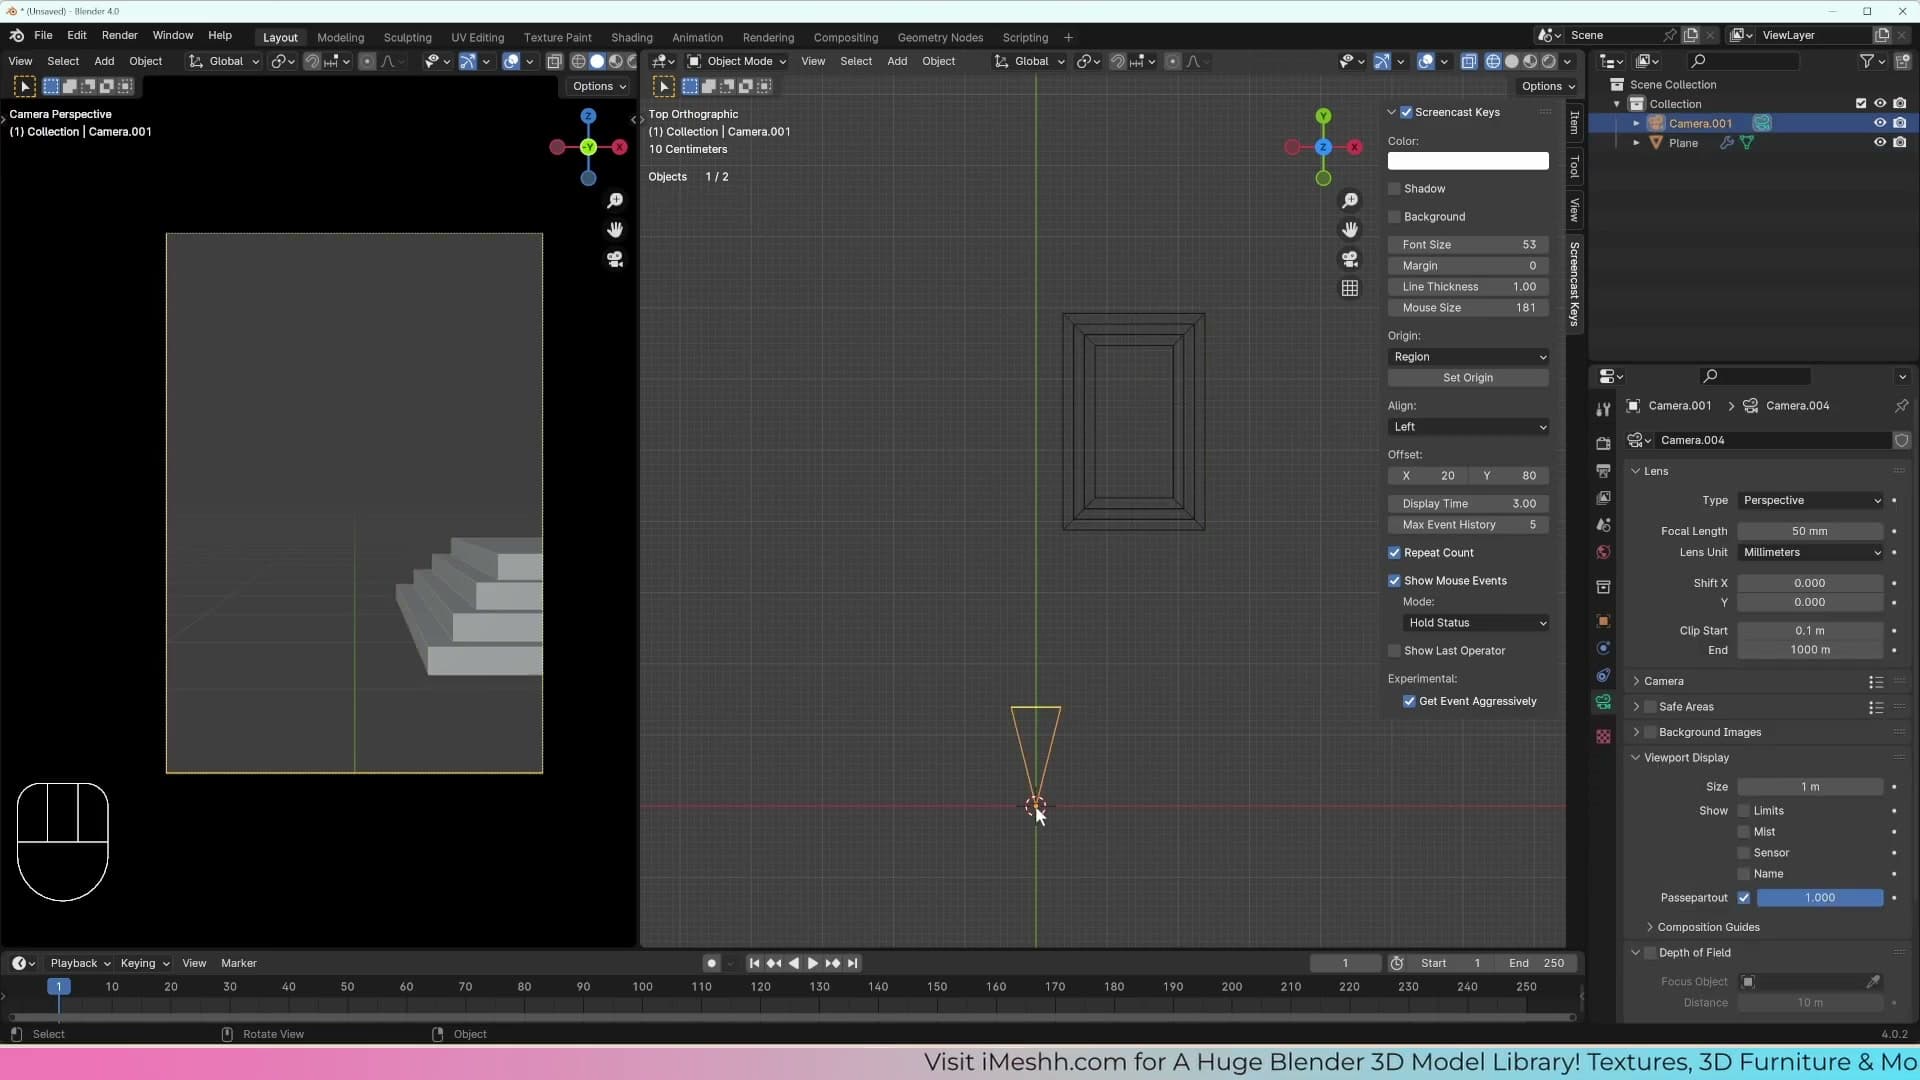
Before you add it, take a moment to look at the small orange dot sitting on your staircase. That's the object's origin point, and it tells Blender where the centre of the object is. Several modifiers (Mirror included) use that point as their reference. Add a Mirror modifier with the X axis enabled and nothing visible happens, because the origin is already sitting in the middle of the mesh and the reflection is being generated directly on top of the existing geometry. Switch to the Y axis instead and you'll see the mirrored copy appear; the Z axis flips it vertically.
Moving the origin moves the reflection with it. To reposition it, hover where you want the new pivot, hold Shift and right-click. The 3D cursor jumps to that spot. Right-click the staircase, choose Set Origin → Origin to 3D Cursor, and the origin snaps to the cursor's location. The mirrored copy now reflects across the new position.
For a clean, predictable mirror line, send the cursor back to the world centre first. Shift+C snaps the 3D cursor exactly to the world origin, after which Set Origin → Origin to 3D Cursor places the staircase's origin at 0, 0, 0. The staircase shifts very slightly as it re-aligns, and now the mirror reflects symmetrically across the world centre rather than wherever you happened to click.
Using an Empty as the Mirror object
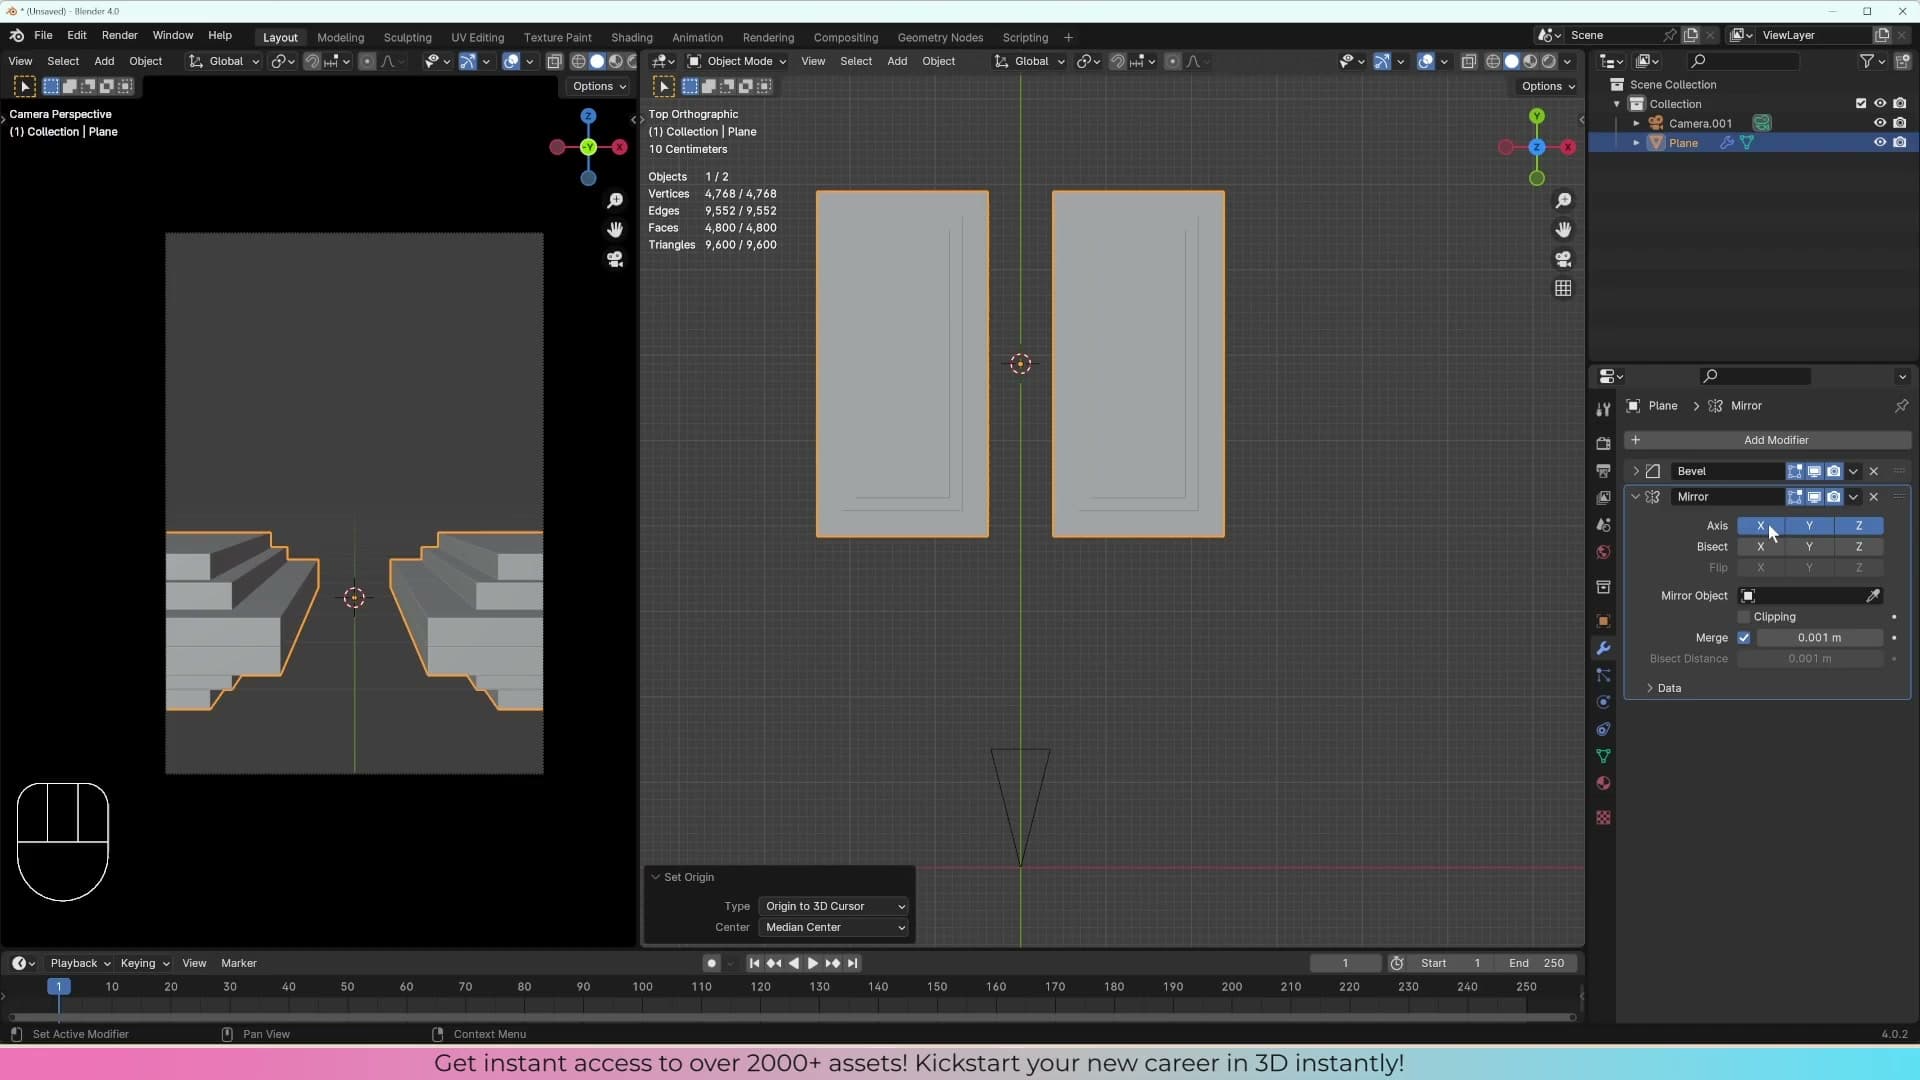
Setting the origin manually works, but it locks you in: every time you want to slide the mirror plane somewhere else, you have to reposition the cursor and re-run Set Origin. A more flexible approach is to point the Mirror modifier at a separate object and use that object as the mirror reference. The cleanest choice is an Empty, an invisible placeholder that doesn't render but can be selected, moved and parented like any other object.
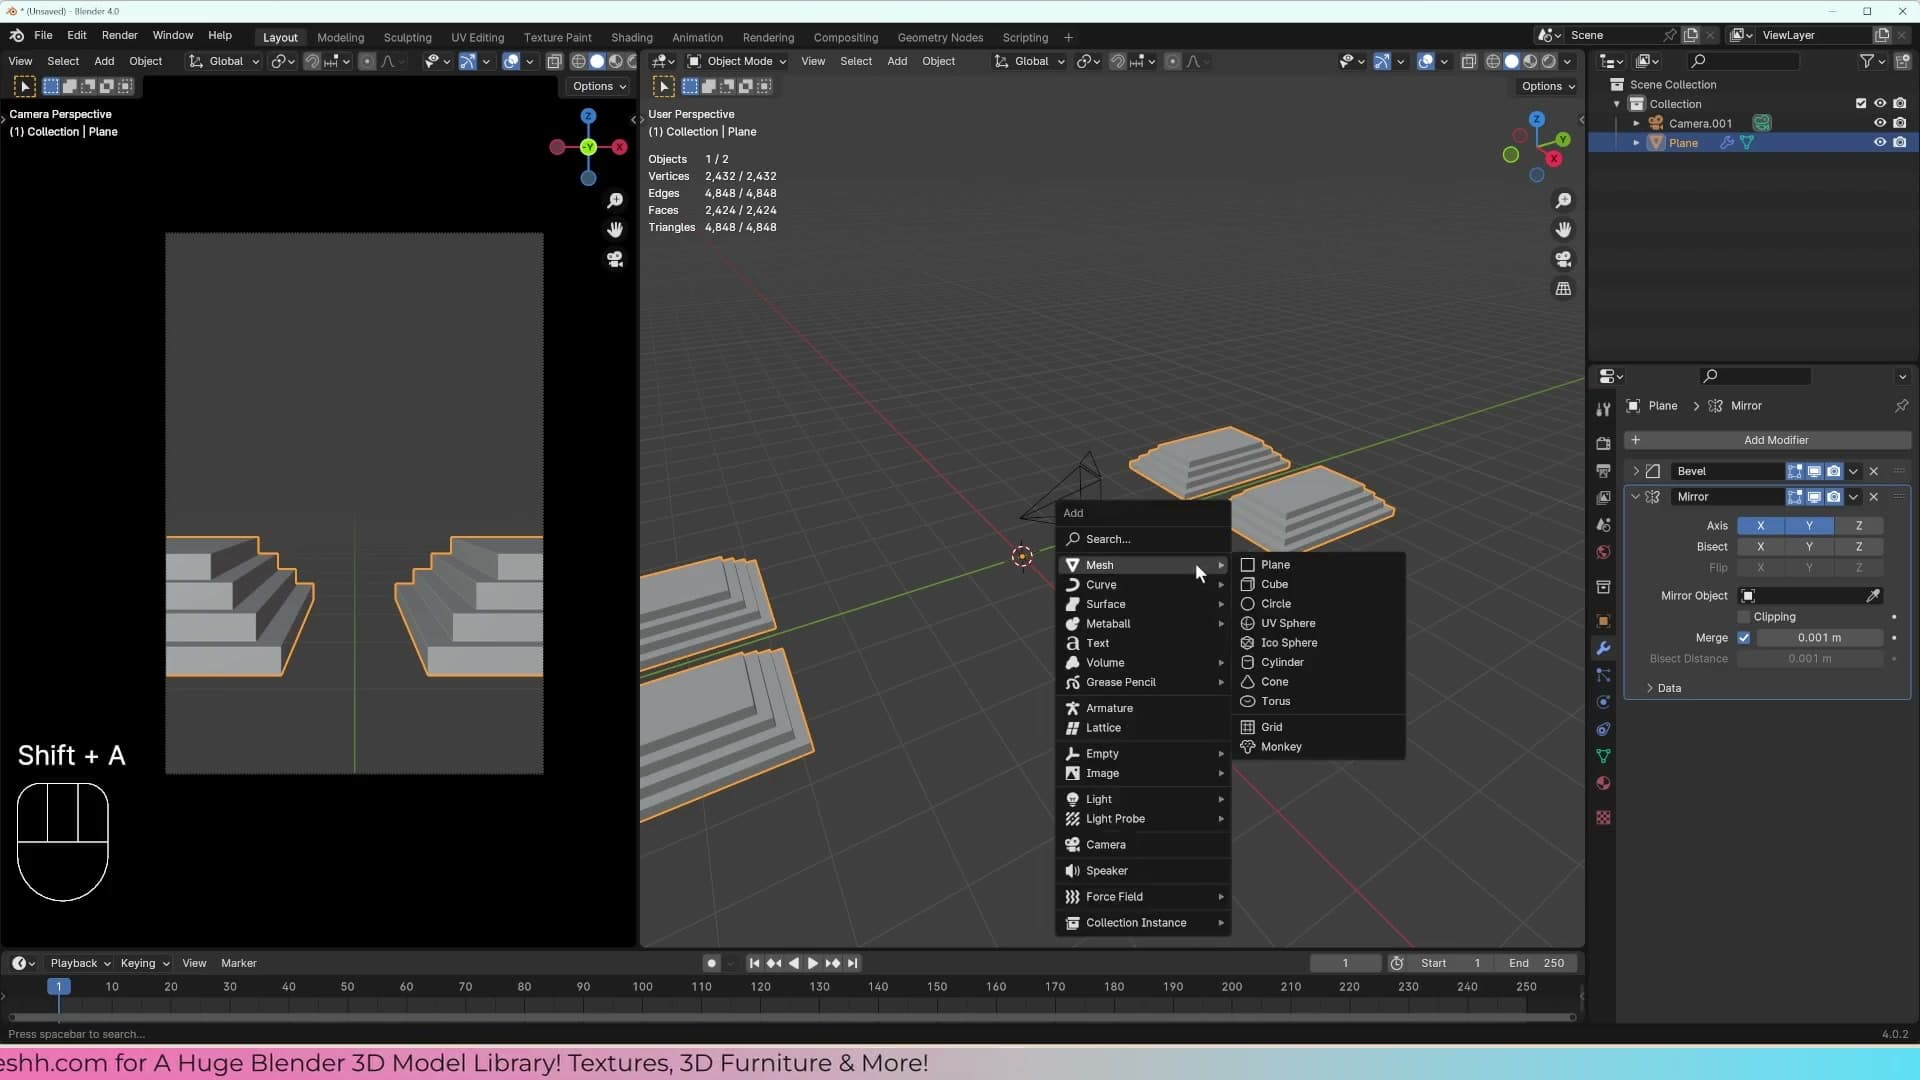
Drop one into the scene with Shift+A → Empty → Plain Axes. Slide the Empty roughly to the centreline between where your two staircases need to sit. Then select the staircase, open the Mirror modifier and click the eyedropper next to the Mirror Object field. Pick the Empty. The mirror plane now follows the Empty rather than the staircase's own origin point.
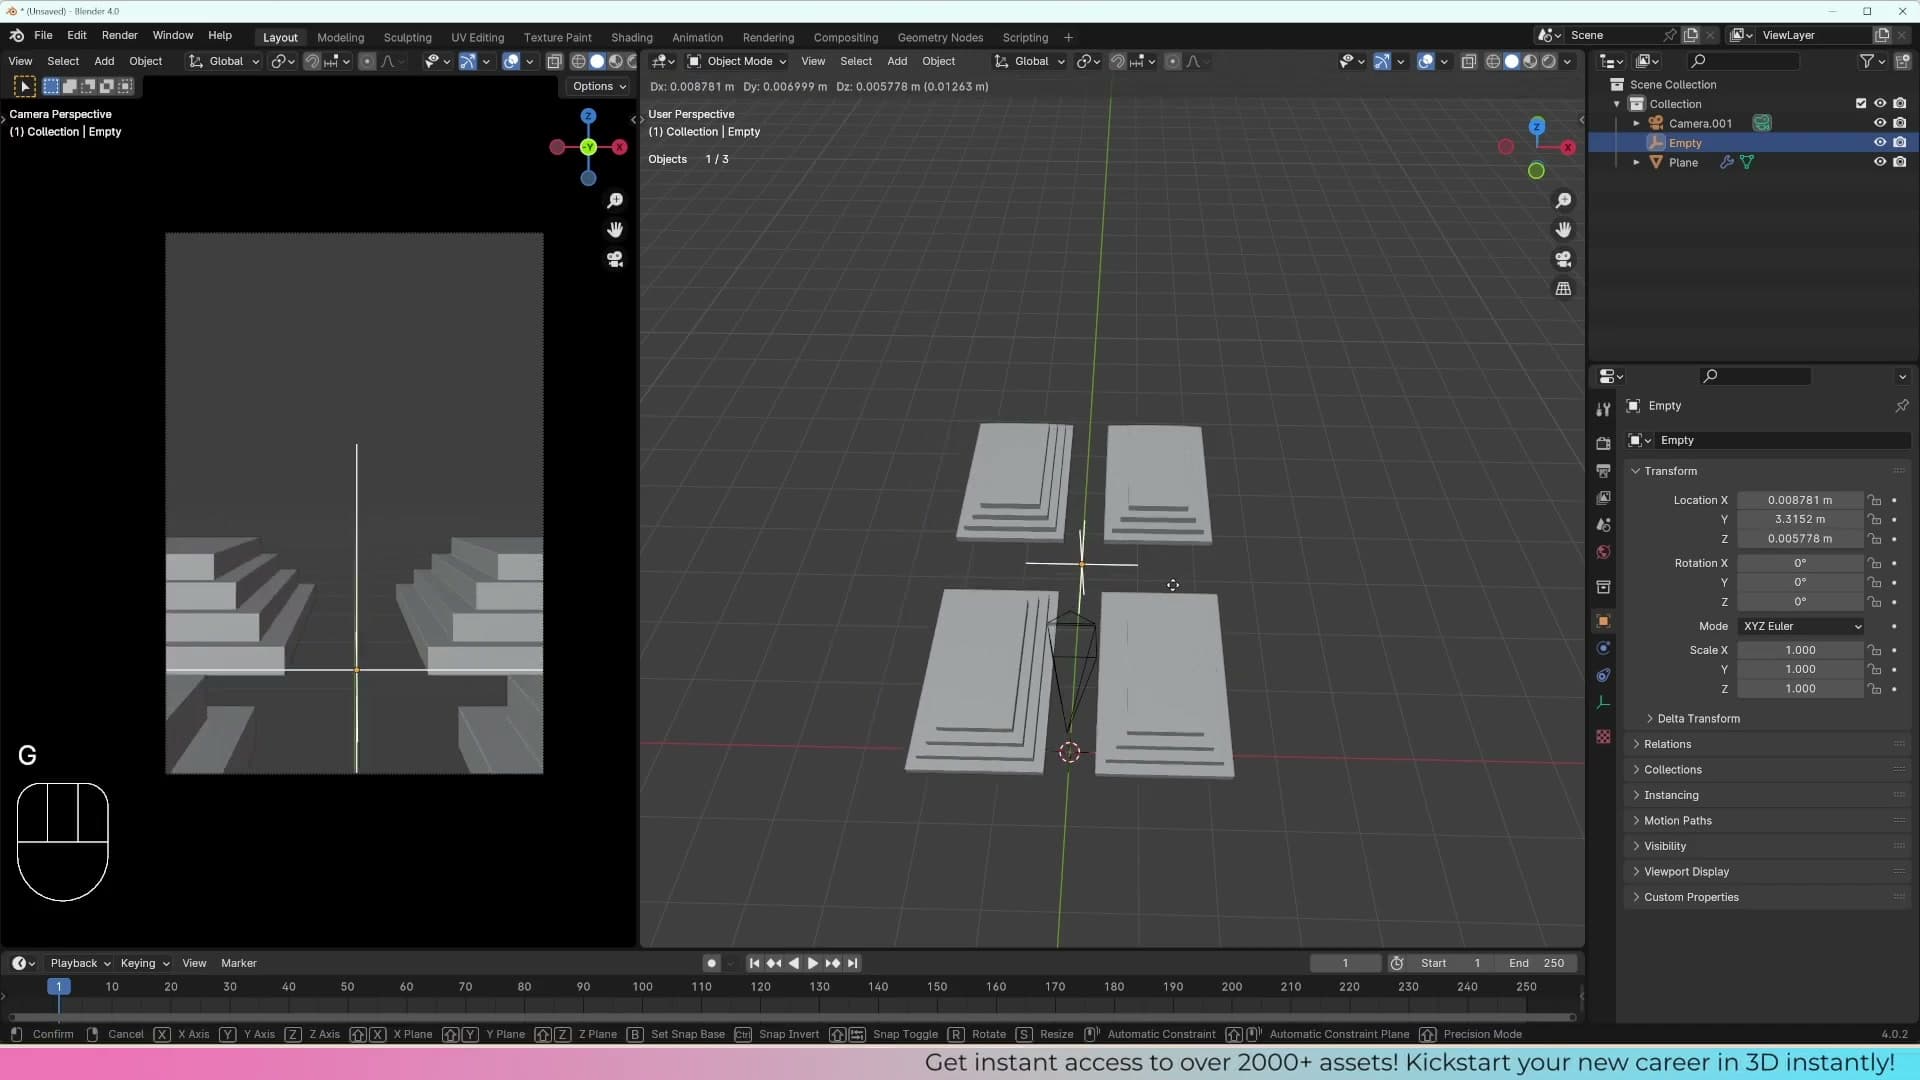
The benefit is freedom. Drag the Empty along the Y axis and the mirrored copy slides with it in real time. No origin edits, no resetting the cursor. Empties are useful far beyond mirroring too: you'll see them again as parent objects, as pivot points for rotations, and as drivers for other modifiers. Getting comfortable using one as a Mirror reference is good practice for the rest of the course.
Position the finished stairs
With the Empty driving the mirror, the final placement is a matter of nudging things until both staircases sit evenly inside the camera frame. Select the staircase and the Empty together (click one, hold Shift, click the other) so they move as a pair. If you grab the staircase on its own without bringing the Empty along, the reflected copy will swing wildly because the mirror plane stays put while the geometry shifts.
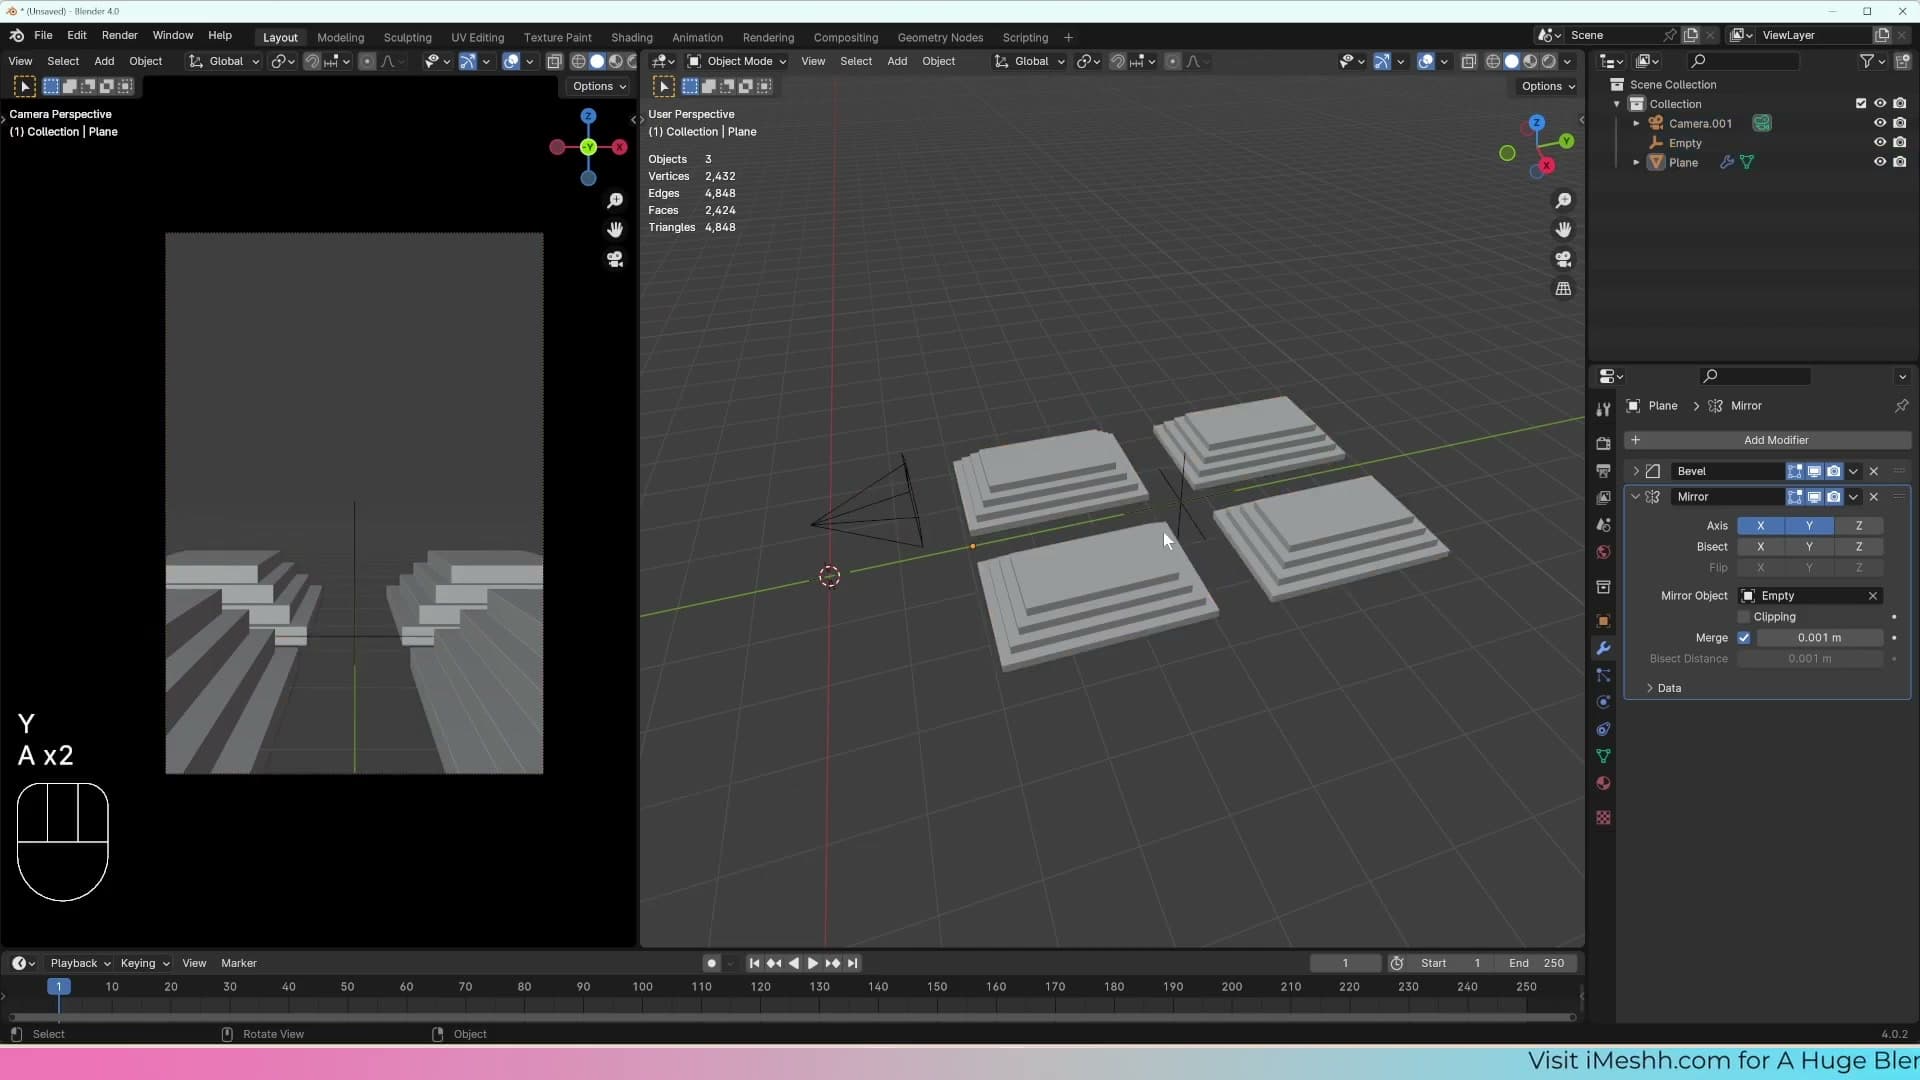
Slide them along the Y axis until you've got a clean, even gap between the two staircases. Nudge the camera up a touch if the perspective feels low. That's the staircases done. Next up is the archway that sits between them.
Tools and credits
Everything mentioned in this tutorial, with links.
- Blender (the renderer this entire build runs in).
- iMeshh (studio platform: project management, client review, asset library, invoicing). The asset library used in this tutorial is included with every iMeshh Pro plan.
- Poly Haven (free CC0 textures and HDRIs).
Pillar guide: Beginner Course hub