Why try a foil balloon in vanilla Blender
Walkthrough of the goal: replicating a wrinkled, foil-style balloon (normally a Marvelous Designer job) using only Blender's cloth simulation, plus an honest preview of where the workflow gets fiddly.
The plan and the trade-offs
This build walks through a foil-style bobbing balloon (the kind that drifts behind a moving object on a length of string) using nothing but Blender's stock cloth simulation. Fabric work like this is usually a Marvelous Designer job, and to be upfront about it, Marvelous will always give you a more accurate fabric result. The point of this tutorial is to see how close vanilla Blender can get without leaning on a dedicated cloth tool.
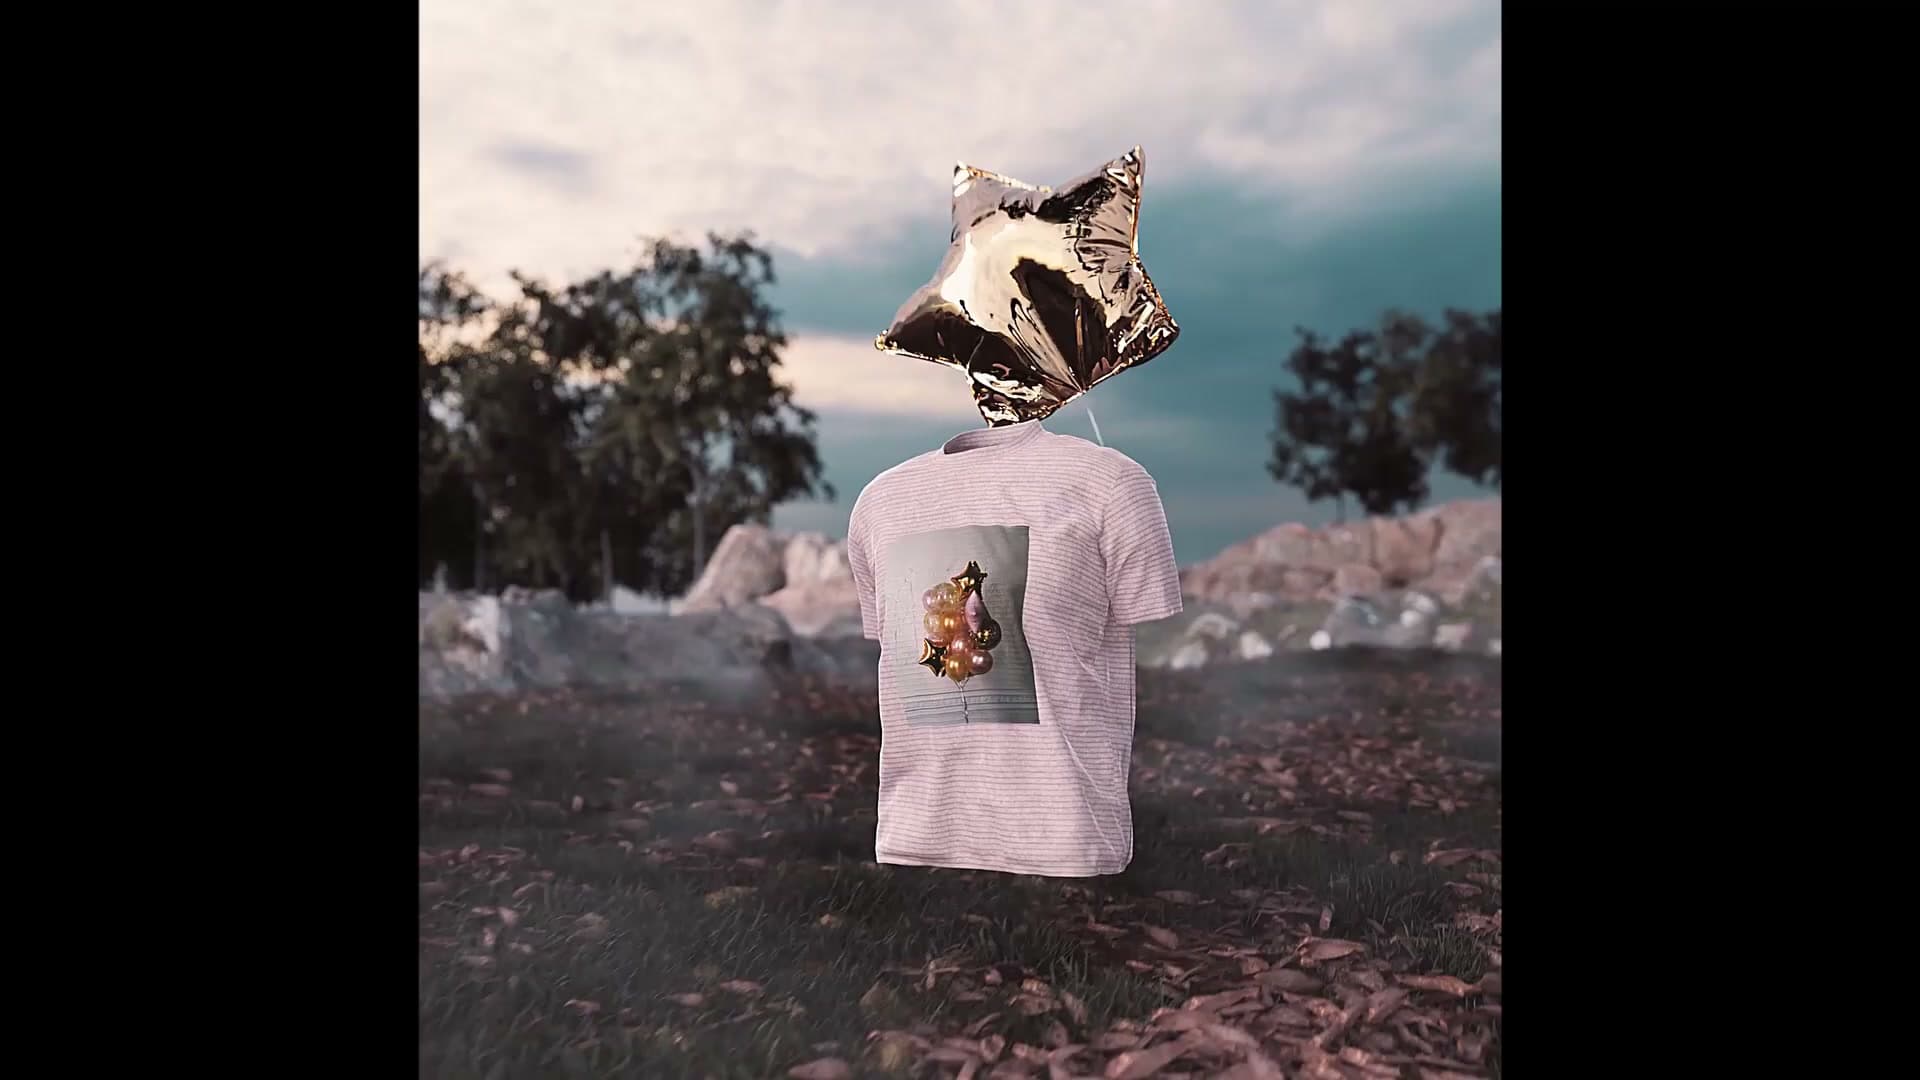
Be warned that Blender is a generalist, not a fabric specialist. The first attempt at this scene was half-built in Blender, then handed back to Marvelous after failing at almost every corner. Cloth simulations are not the most predictable thing to work with, and the workflow below is what survived once the dead ends had been thrown out. Expect to babysit settings rather than press a button and walk away.
The visual target is the same family of foil-style balloons you might have seen made in Marvelous: rounded but lightly creased, with the kind of soft wrinkles you only get from inflating a fabric shell rather than modelling one by hand. Reaching that look in Blender comes down to two cloth passes (one to inflate the shape, a second to crease it), followed by a normal-map bake and a final bobbing simulation.

There is now an add-on for Blender that mimics Marvelous Designer's pinch-and-pull approach to fabric, but this tutorial deliberately stays in vanilla Blender. The aim is to see what the stock cloth modifier and its pressure setting can produce on their own, with no extra add-ons in the stack.
Modelling the star-shaped balloon base
Start with a 10-vertex cylinder, pinch alternating vertices inward to form a wide star (not a sharp one, as sharp points get too thin once inflated), then cap and subdivide into quads.
Pinch a 10-vertex cylinder into a wide star
The original star was built from the Add Mesh: Extra Objects add-on, but I found a quicker, more controllable approach: pinch the shape out of a low-poly cylinder so you control exactly how wide the points sit.
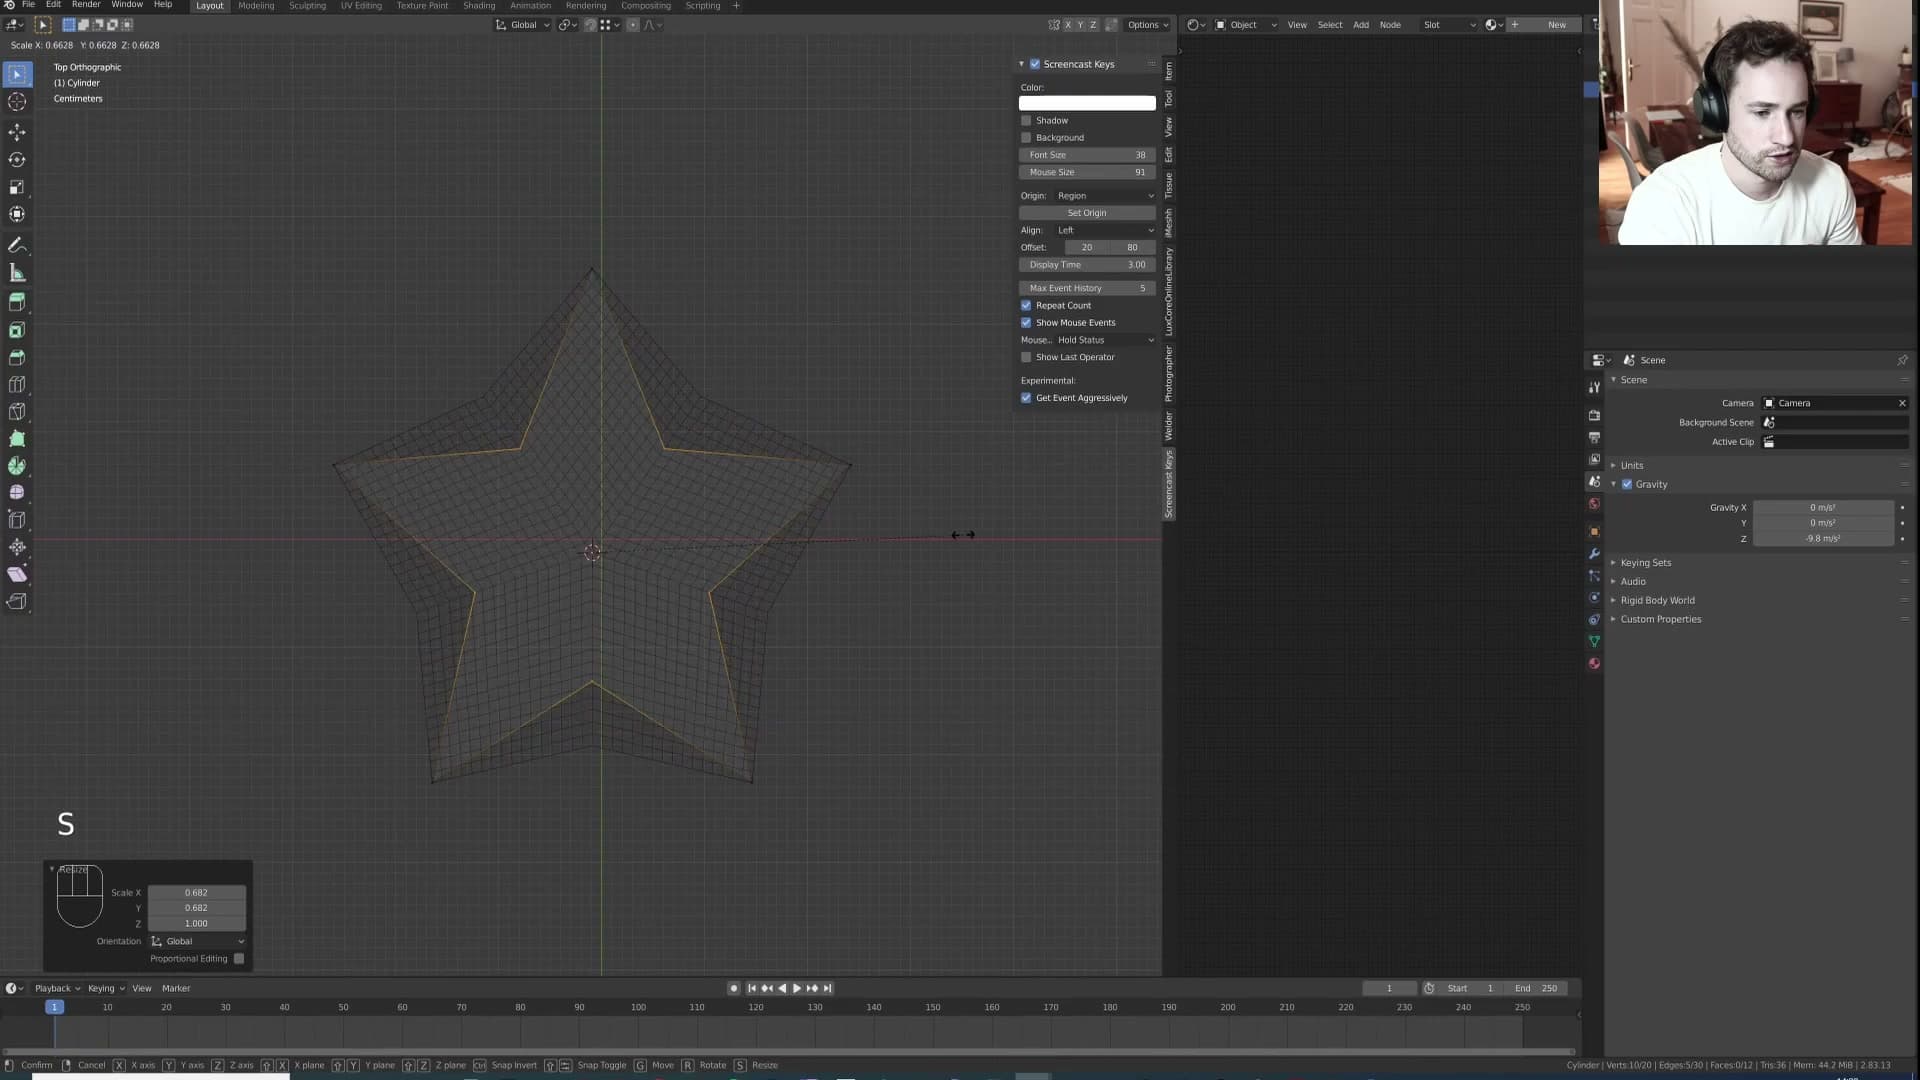
Add a cylinder and set Vertices to 10 in the operator panel. Drop into edit mode and scale the whole thing down to roughly the size you want the finished balloon to be. With the cylinder still selected in edit mode, pick every other vertex around the ring and scale them inward toward the centre. That gives you five wide arms separated by five shallow notches, the classic puffed star silhouette rather than a sharp five-pointed star.
The width of those points is the whole reason for doing it this way. A sharp star with narrow arms looks correct on paper, but once the cloth simulation inflates the mesh, the arms thin out further and end up scrawny. The wider, blunter star leaves enough surface area in each point to hold its shape under pressure.
Extrude, merge to centre and cap the base
With the outline shaped, tidy up the geometry that came along with the primitive. Delete the leftover top vertices so you're working with an open star-shaped ring rather than a fully capped cylinder.
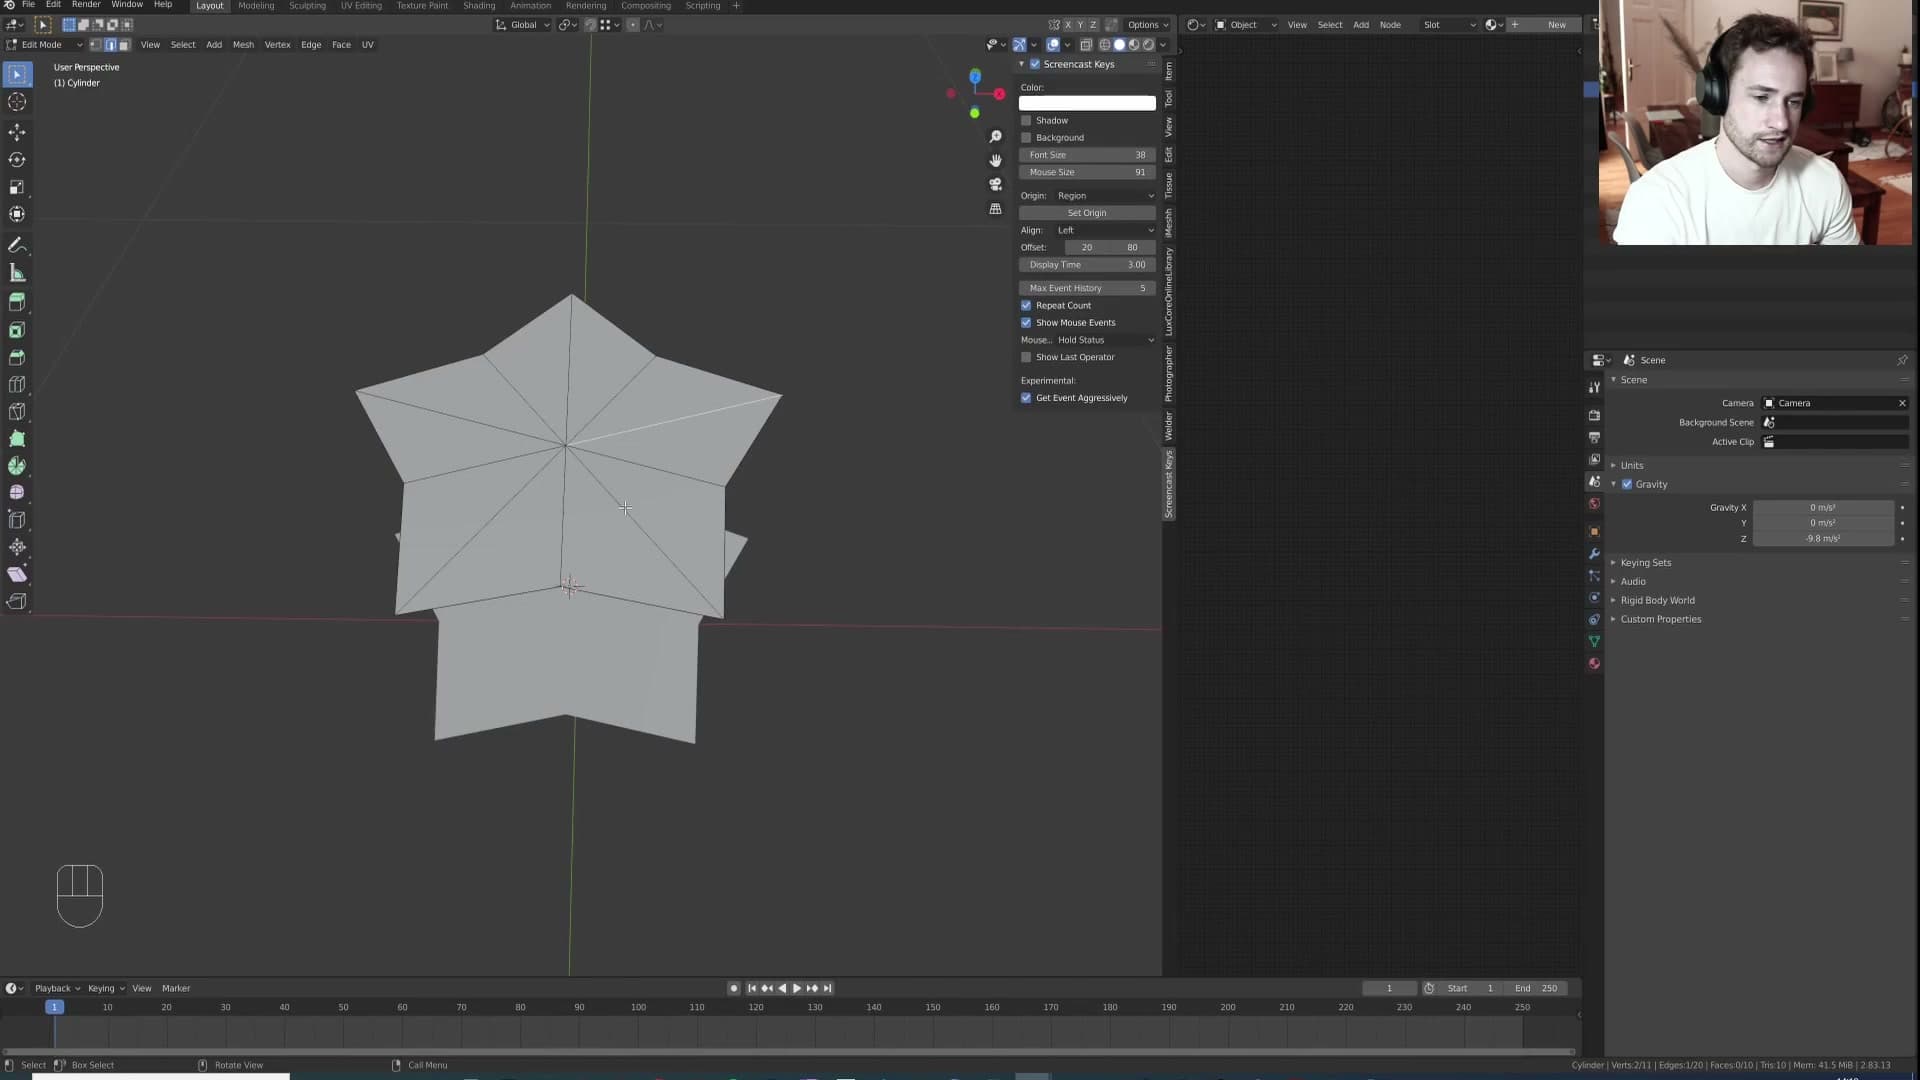
Now cap the top with a clean centre point. Press A to select everything, then E to extrude, S followed by 0 to scale the extrusion to zero, and run Mesh → Merge → By Distance to weld the collapsed vertices into a single point. That leaves you with a triangle fan radiating out to the star points.
Select the face on the bottom and press X → Face to delete it. You only need the top cap for now, because the second half of the balloon will be mirrored on later.
The triangle fan is fine geometry on its own, but it makes for awkward simulation topology, so swap it for quads. Select the radial edges that fan out from the centre vertex and delete them with X → Edges. Dissolve doesn't behave correctly here, so the explicit delete is the safer call. Select the open outline and press F to fill it as a single n-gon face ready to be subdivided.
Rebuild quads and subdivide twice
With the star capped as a single n-gon, right-click and choose Subdivide to break the face into a grid. Run the subdivide a couple of times until the surface has enough resolution to deform smoothly under cloth pressure without faceting visibly at the points.
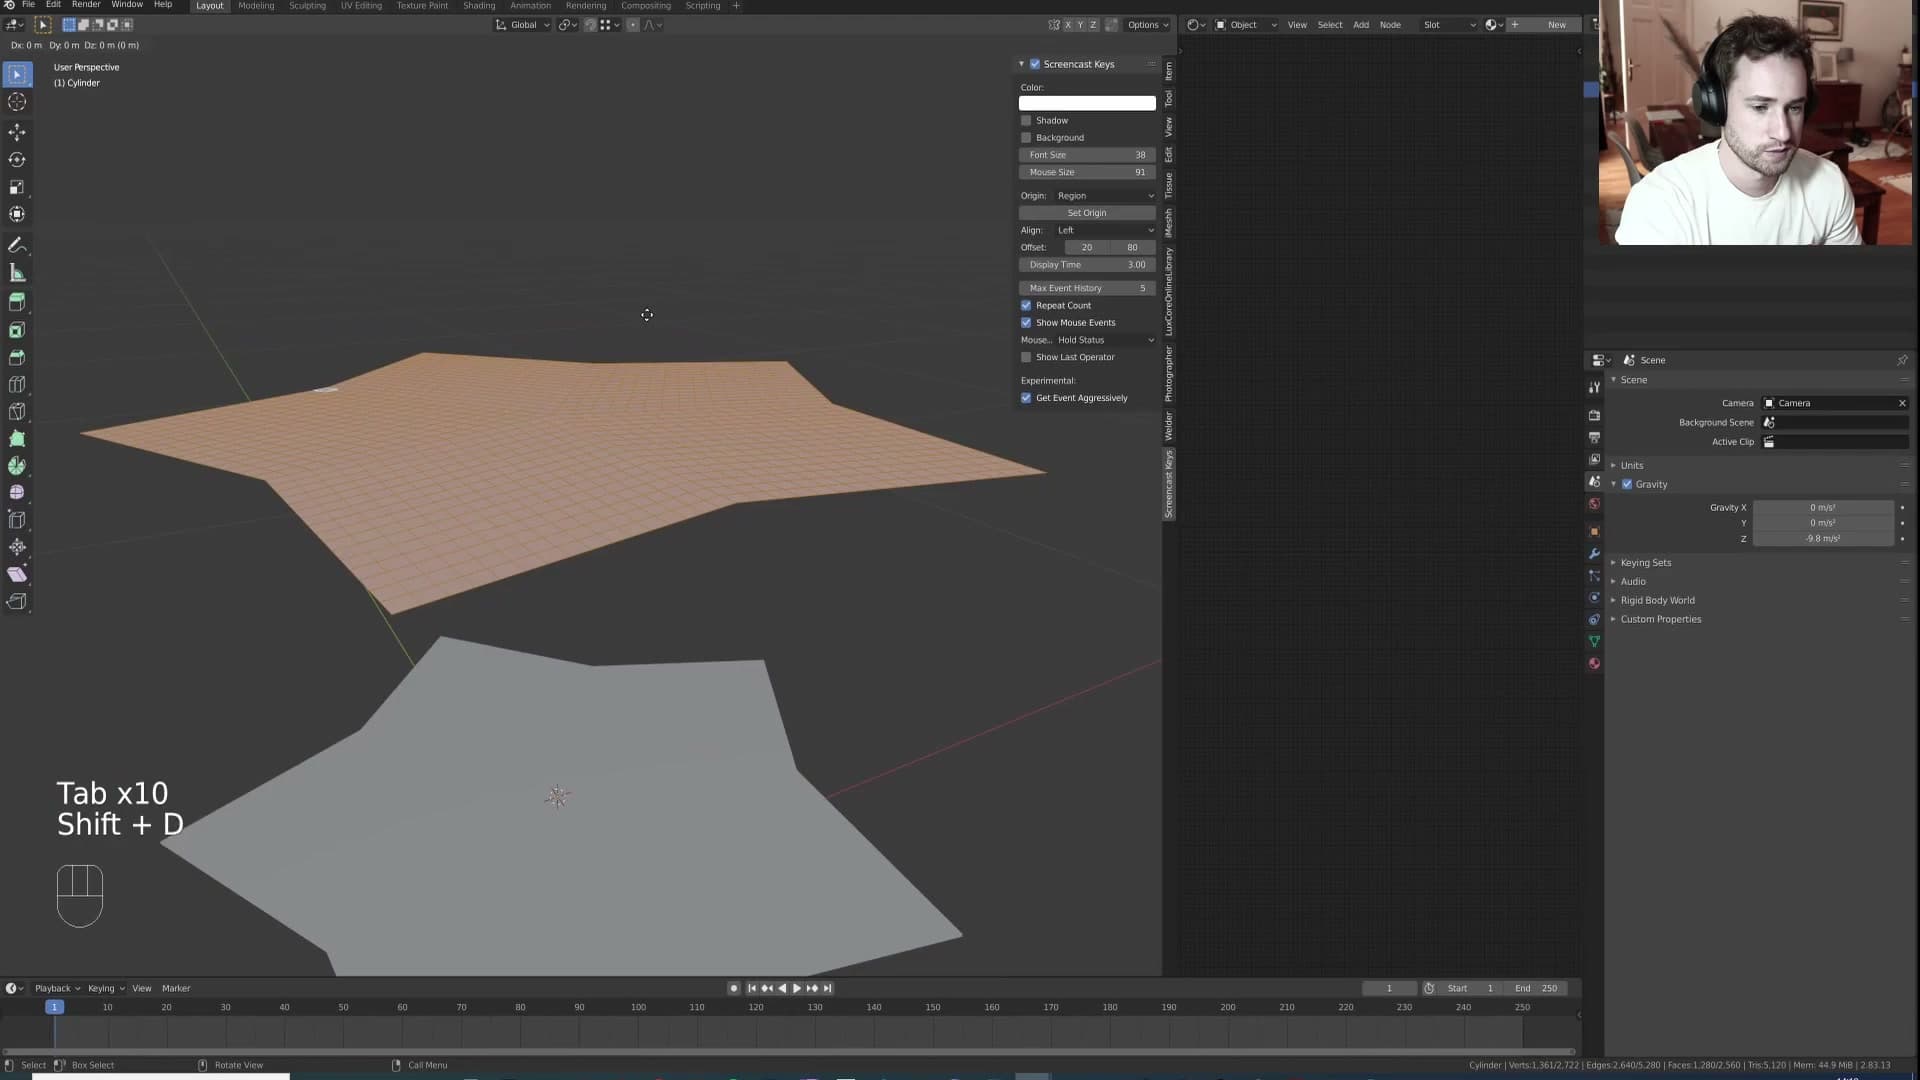
That gives you the working topology for the base half of the balloon: a star outline with a quad-based interior. It's heavy enough for the simulation to wrinkle convincingly later, but still light enough to mirror, bridge and edit without slowing the viewport.
Joining the two halves into a sealed shell
Duplicate the star, flip it 180 on Y, position it lip-to-lip, then bridge the open edges using Bridge Edge Loops with Merge to fuse both rings into a single closed surface.
Duplicate, rotate 180 and align
With the cupped half of the star modelled, duplicate it and flip the copy 180° so its open face points back at the original.
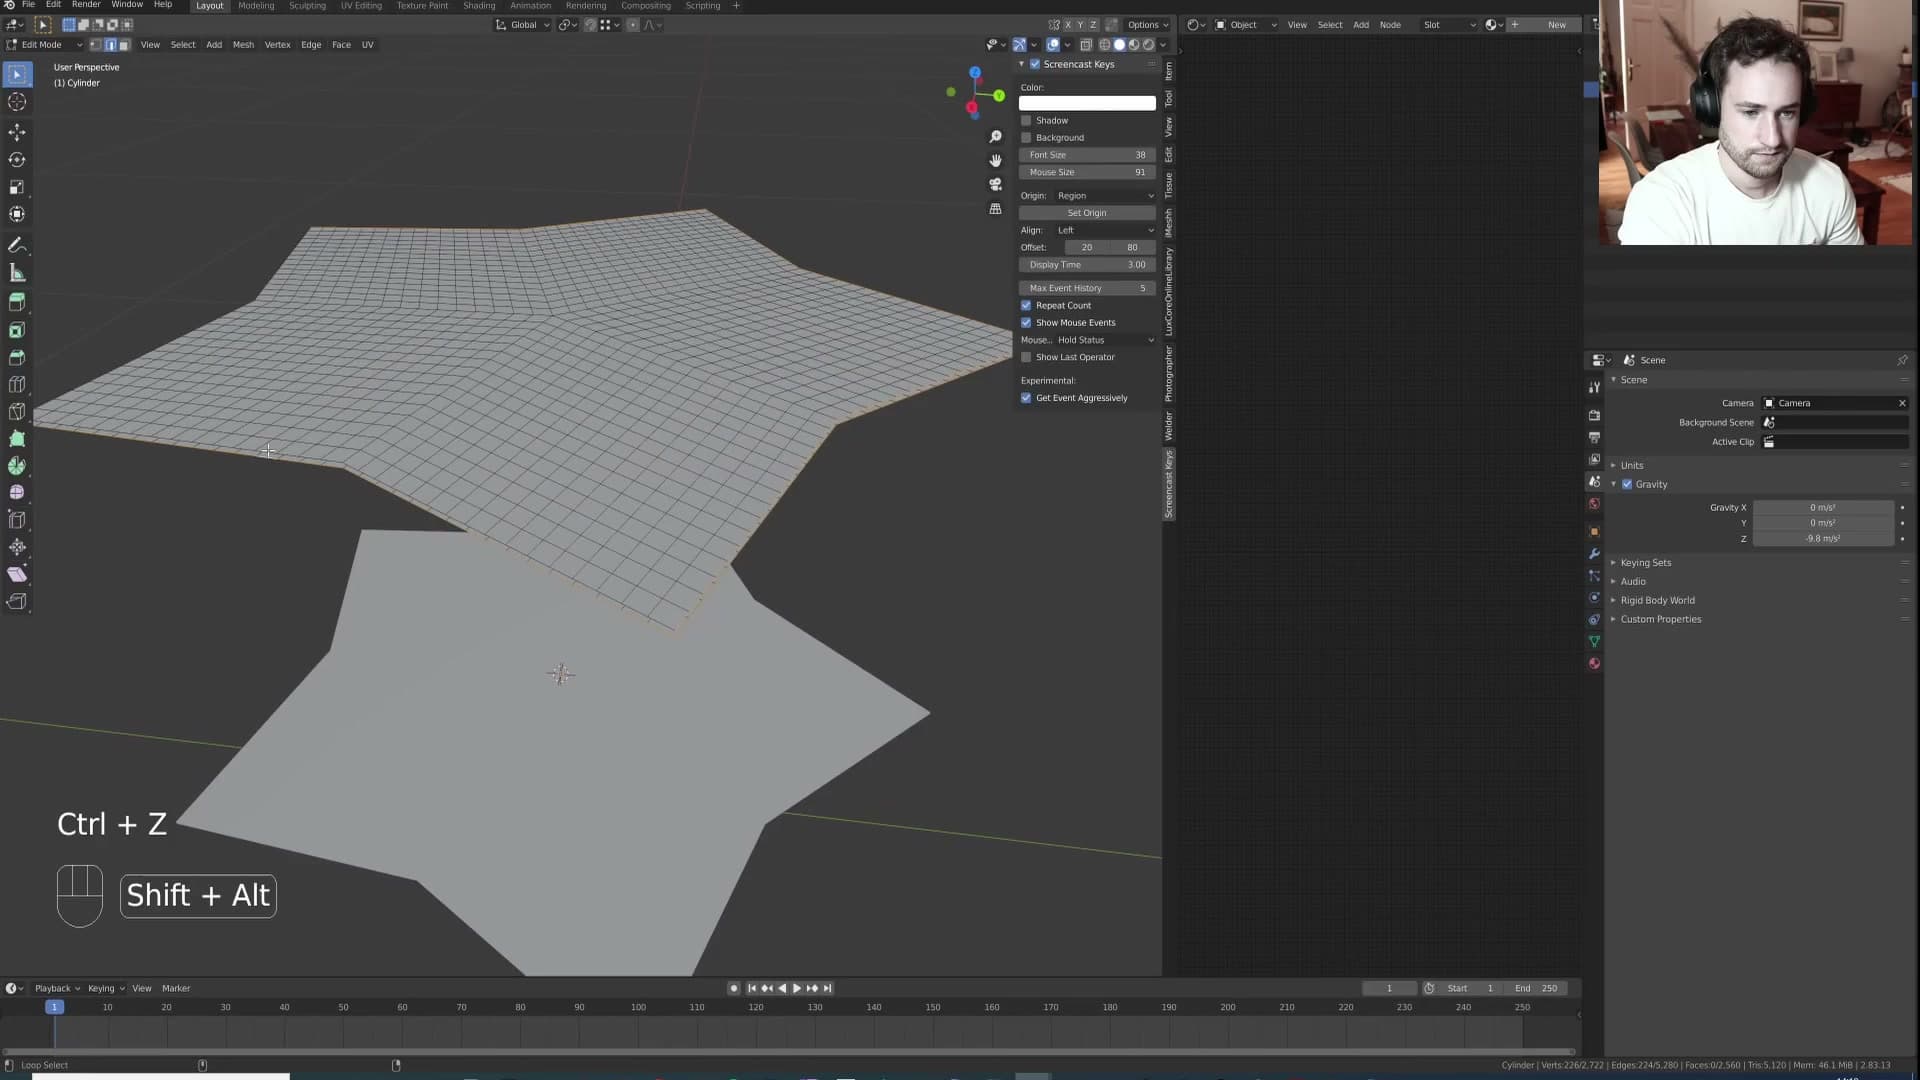
Slide the mirrored half into place lip-to-lip with the first, so both open rings sit on the same circle in space. You now have two cupped halves with their mouths facing each other, ready to be stitched into a single closed shell.
Bridge Edge Loops with Merge
Drop into Edit Mode and select the edge loop running around the top half's opening, then extend the selection all the way around the matching loop on the bottom half so both rims are highlighted together.
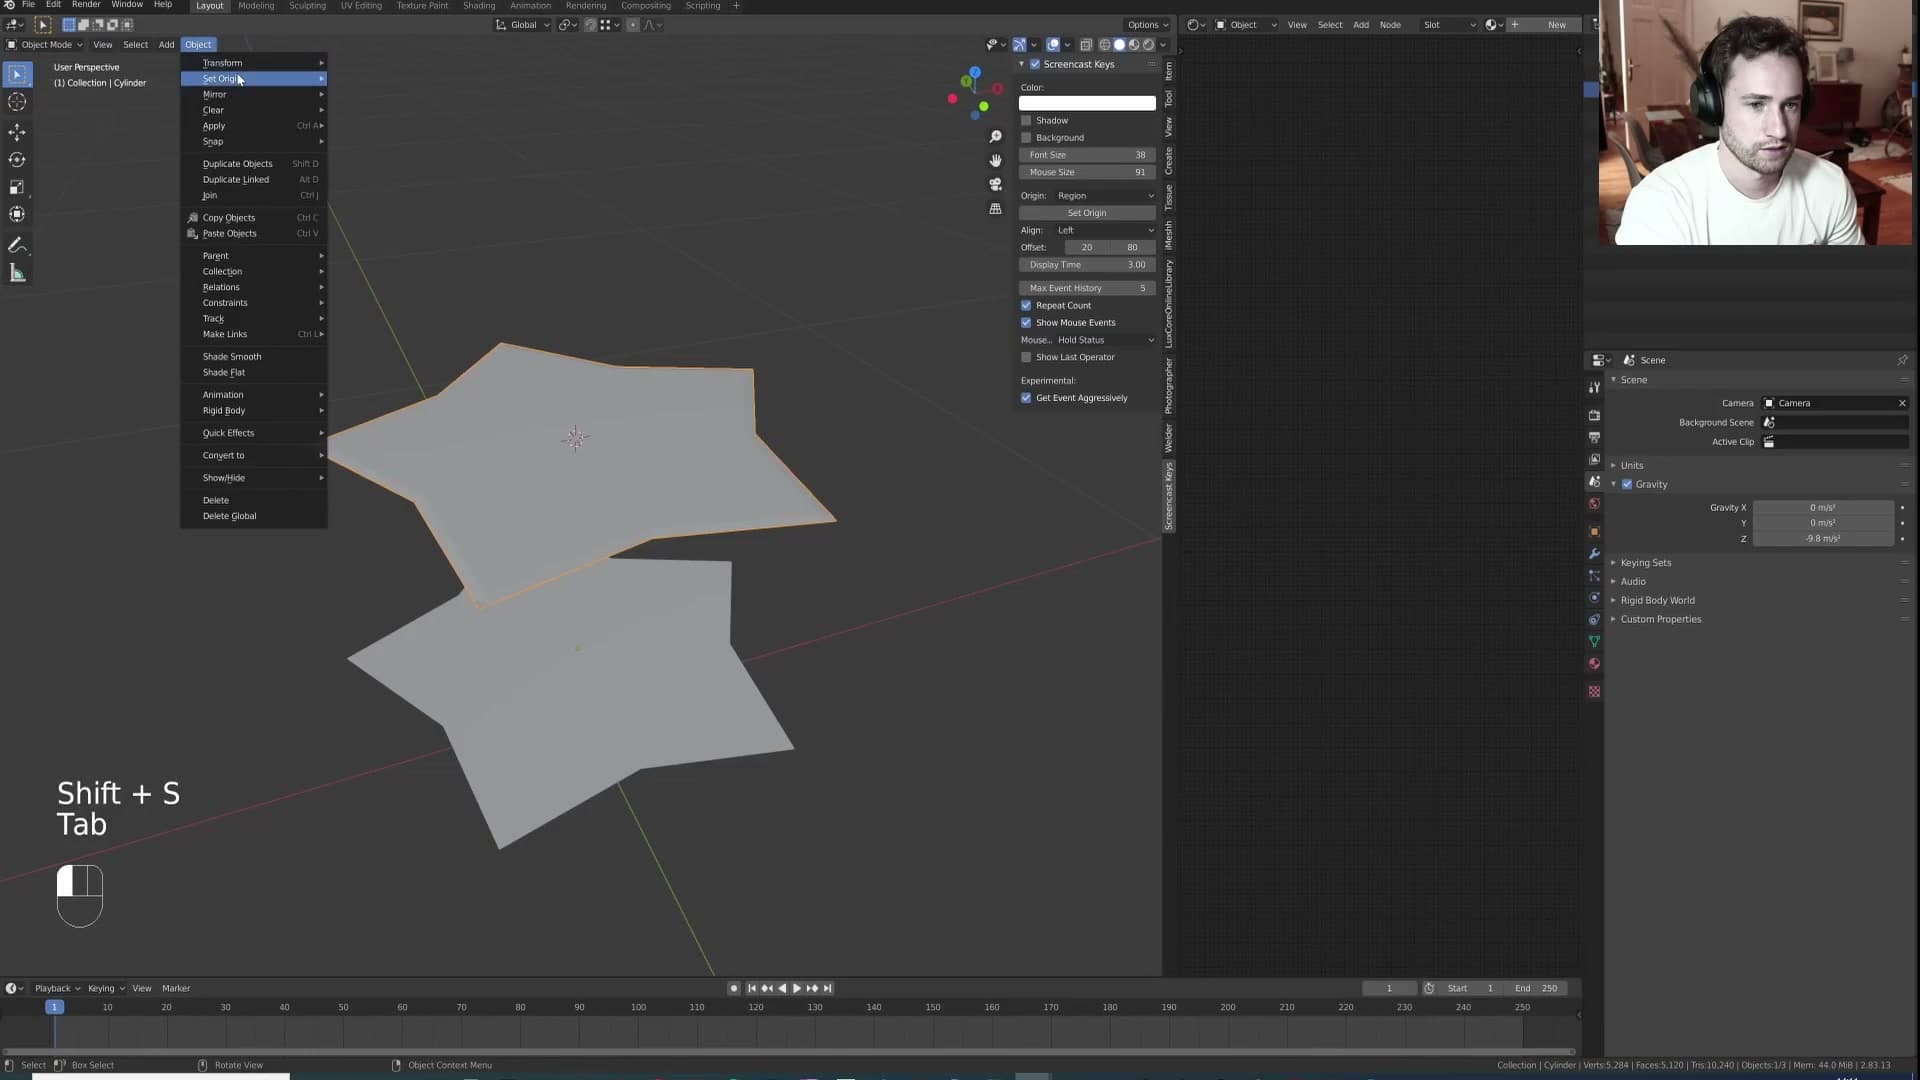
Right-click in the viewport and choose Bridge Edge Loops. In the operator panel that appears in the bottom-left, switch on Merge. Instead of stitching the two rings together with a new band of faces, this collapses them into one shared edge.
The two halves are now a single continuous surface, joined cleanly through the middle. The balloon shell is sealed and ready for the cloth pressure pass to inflate it into a rounded pillow.
First cloth pass: inflating the shell
Disable gravity, apply the Silk cloth preset, and use a low pressure value to gently puff the flat star shape into a recognisable balloon volume. Then pause and apply before the wrinkle pass.
Zero gravity and the Silk cloth preset
With the sealed star ready, add a Subdivision Surface modifier. If the edges feel a touch too tight after the bridge, select the mesh, hit F3 and run Unsubdivide once to relax it back a step. A single pass is usually enough.
Drop the subsurf's viewport quality to 1. You'll bump it back up later for the final bake; for now the lower density makes the simulation much quicker to scrub through while you're dialling settings in.
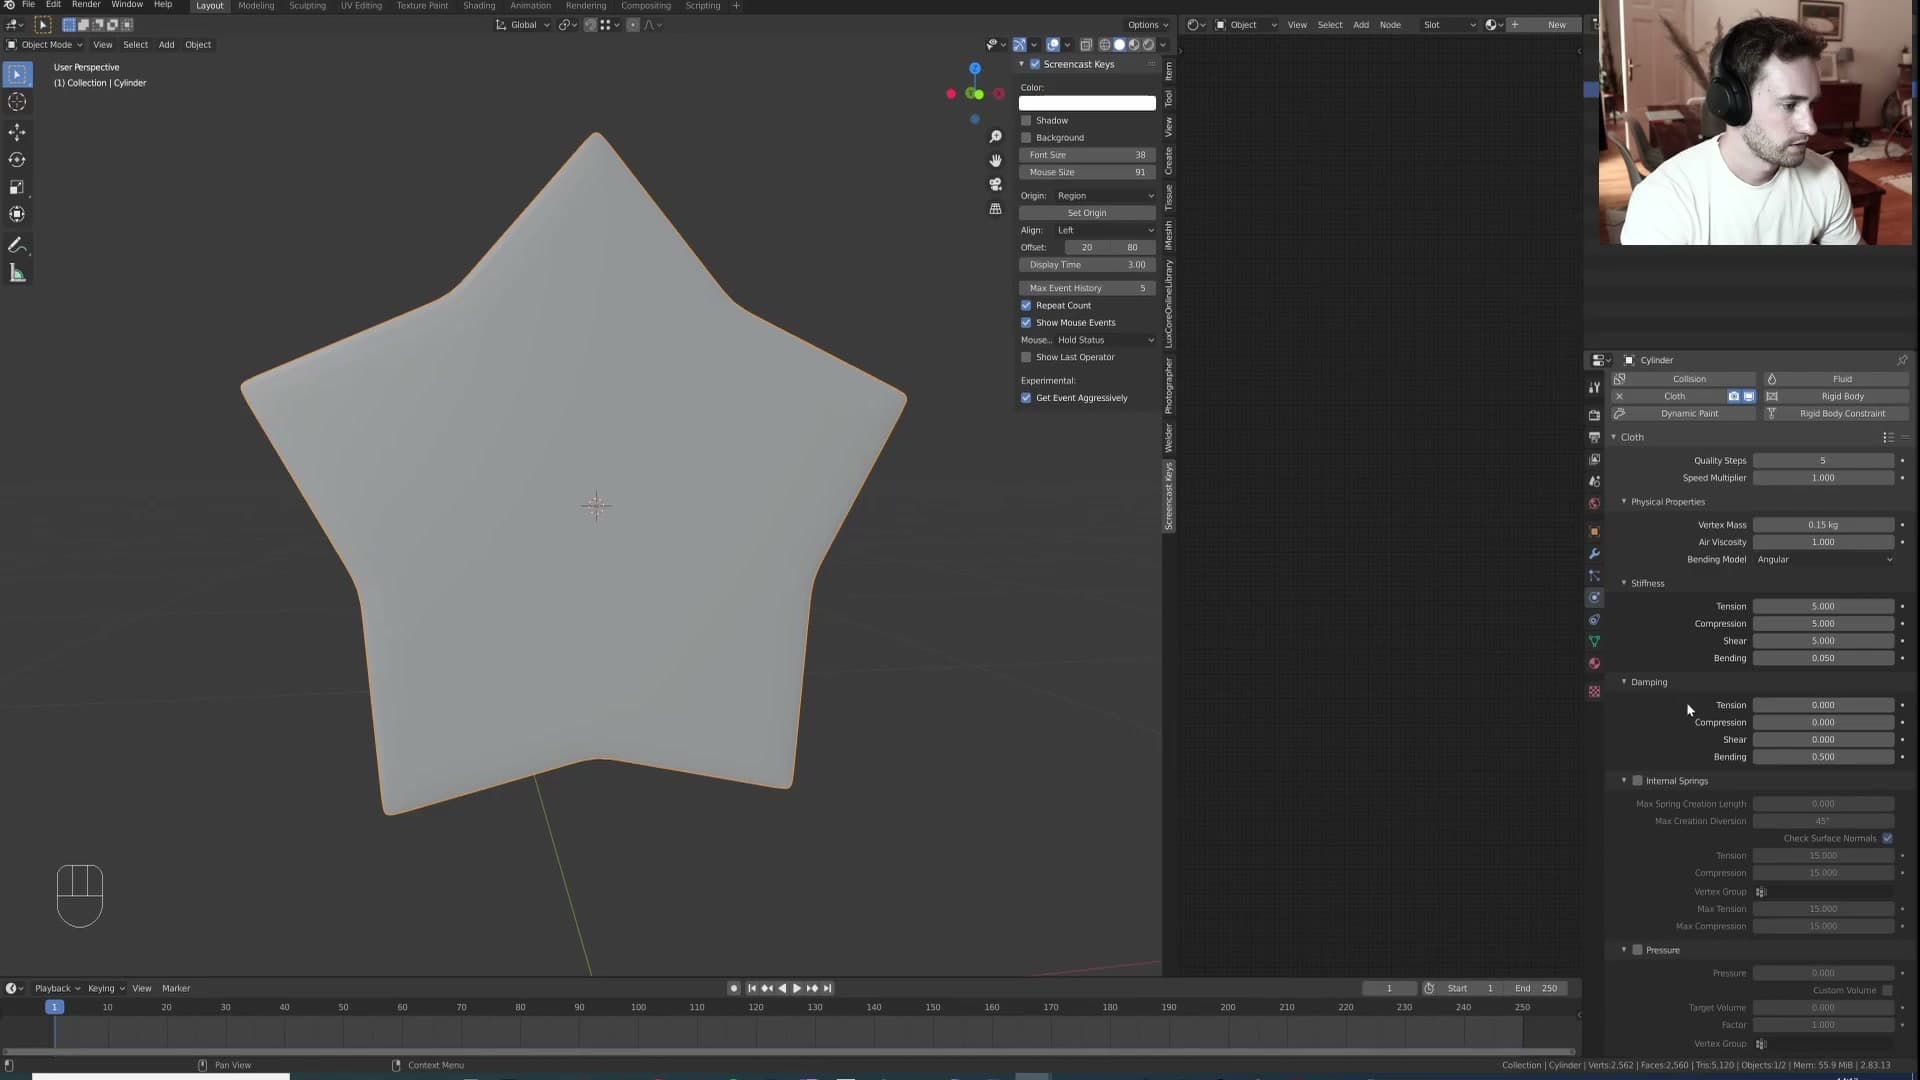
Open Scene Properties and zero out the Z gravity (or just untick the gravity checkbox entirely, either approach works). For this first inflation pass you want the pressure value to do all the work without the cloth drooping while it's puffing out.
Back on the mesh, add a Cloth modifier and load the Silk preset from the Cloth Presets dropdown. Silk gives a soft, slightly stretchy fabric that responds nicely to pressure without immediately blowing apart at the seams.
Pressure 2 and pausing at the right shape
In the Cloth modifier's settings, enable the Pressure sub-panel and set the value to 2. That's the only setting you need to touch for this first pass. The Silk preset handles everything else.
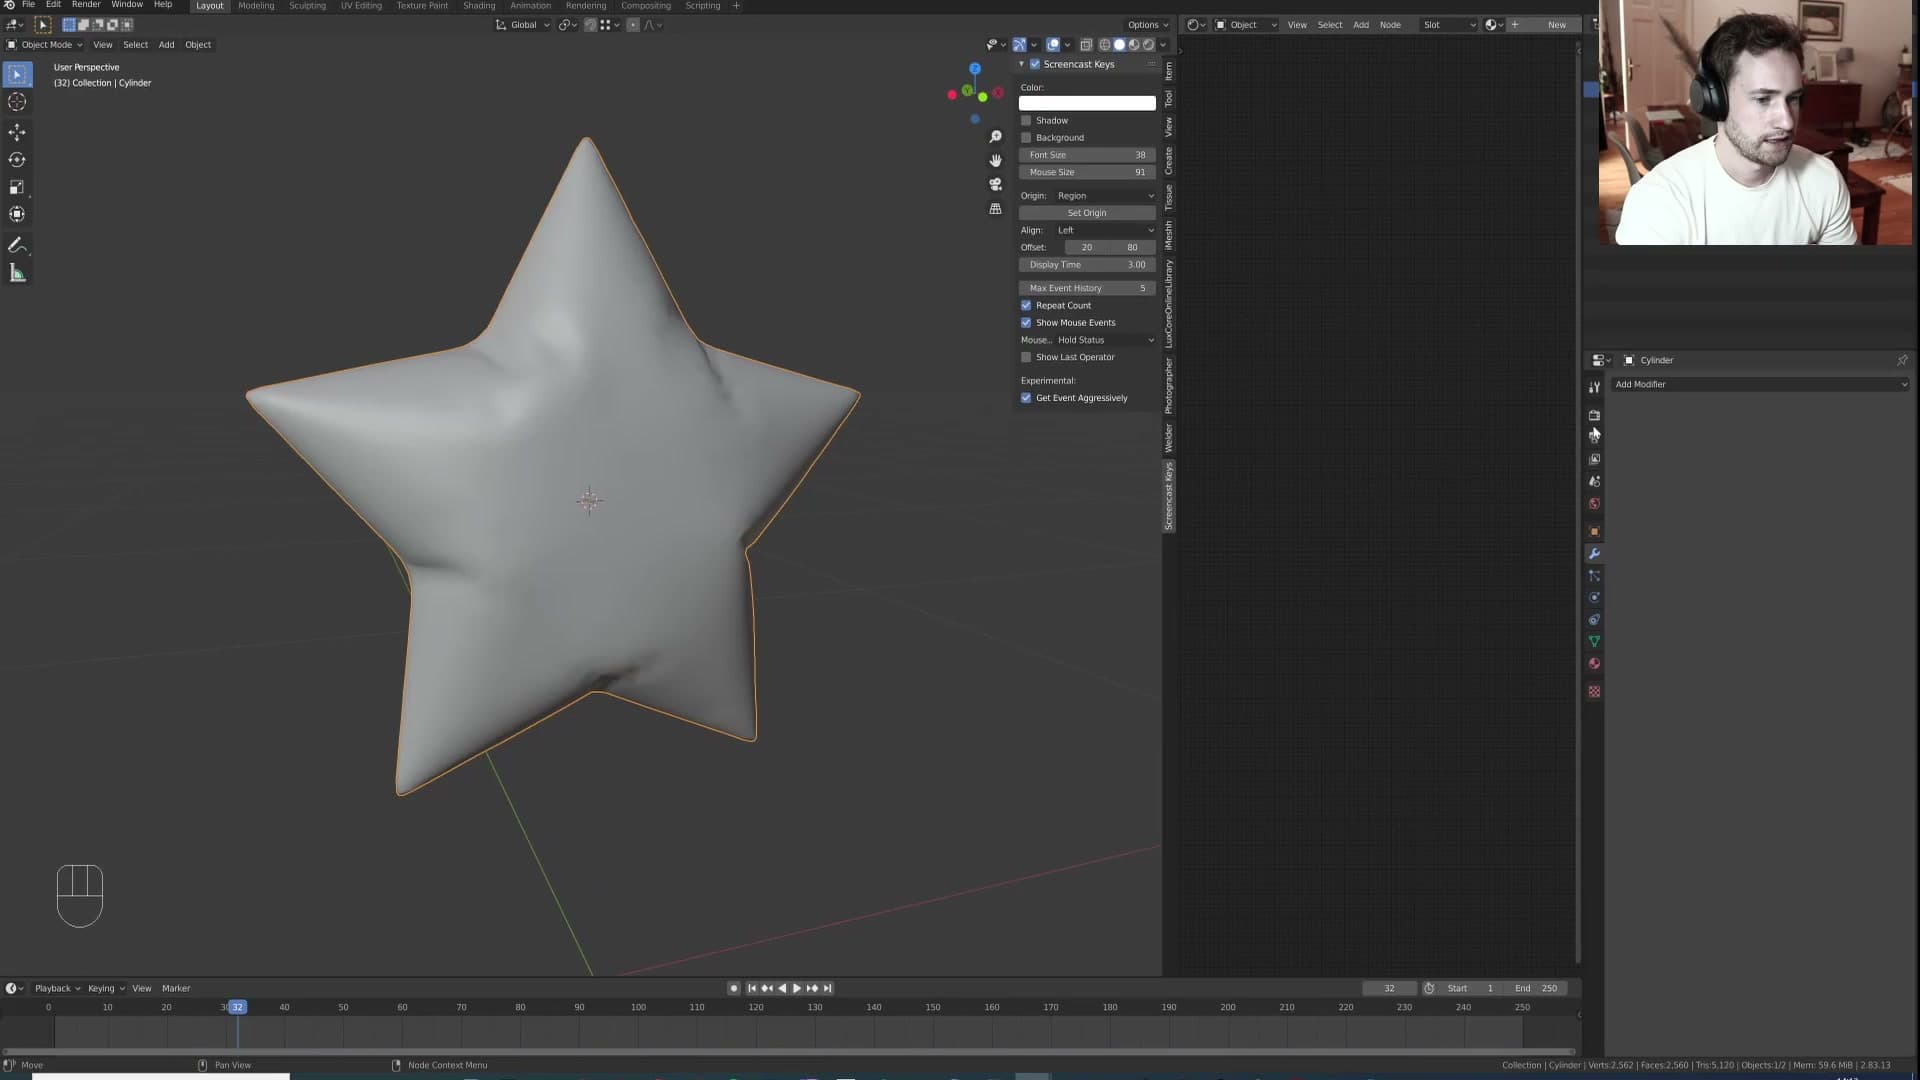
Press Spacebar to play the timeline. The flat star puffs outwards as the solver runs. Watch it for a few frames. You're looking for the moment it's rounded into a recognisable balloon volume but still slightly tight, not fully blown up like a beach ball.
Right-click and Shade Smooth so the silhouette reads properly while you judge the shape. The faceted look from the subdivided star can fool you into stopping too early.
Once you're happy with the shape, apply both modifiers: the Cloth first, then the Subdivision Surface. The rounded mesh you're left with becomes the starting geometry for the wrinkle pass that follows, so it needs to be a clean, baked-in shell rather than a live simulation.
Wrinkling the balloon with a shrinking empty
The clever bit: pin the outer edge as a vertex group, hook that group to an empty using a Copy Scale constraint, and keyframe the empty to scale down over time. The contracting edges plus pressure on the body produce natural creases. The values need a lot of tuning, though.
Apply the first sim and start a second cloth pass
With the first cloth pass giving you the rounded base, apply that Cloth modifier so the inflated shape is locked into the mesh. From here you're starting over: the next pass is the one that will actually produce the creases.
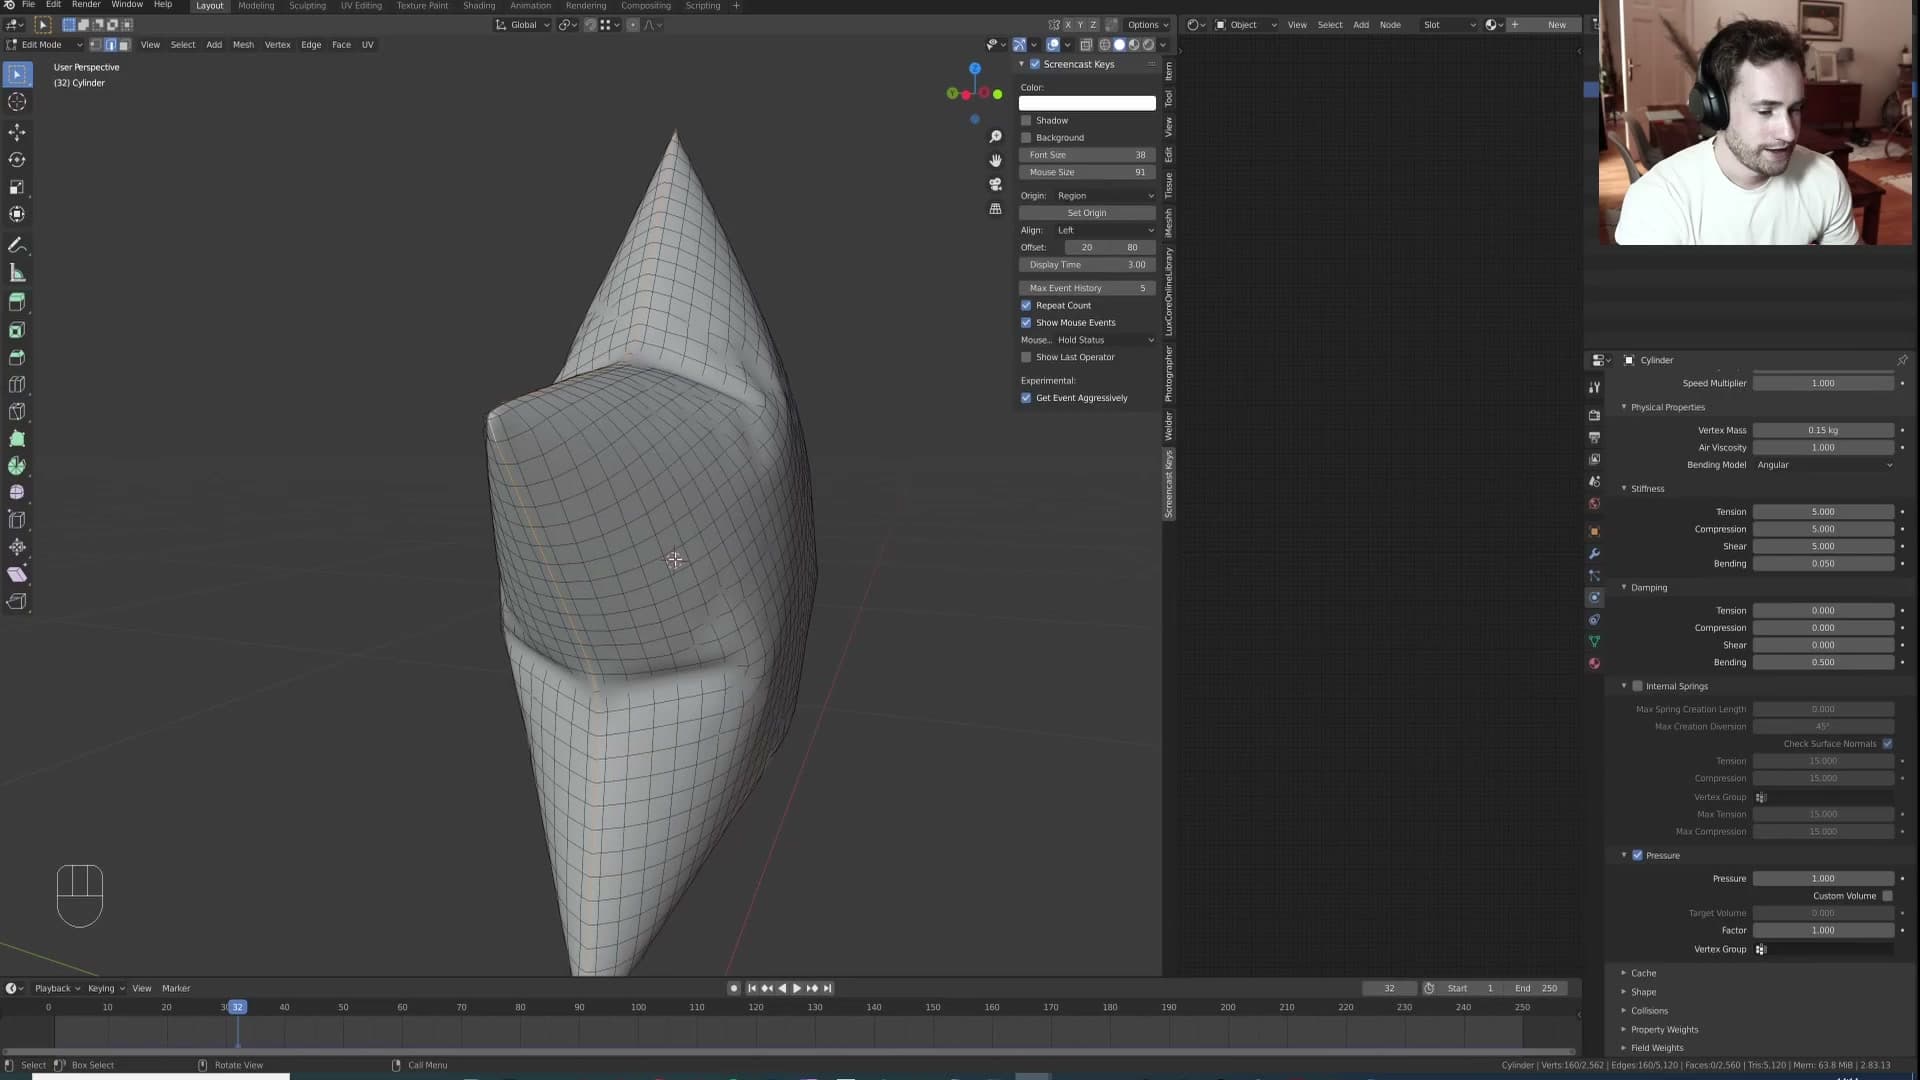
Add a Subdivision Surface to give the surface enough geometry to fold, then add a fresh Cloth modifier on top. Set Quality Steps to 10 and a Pressure of 1. You want it loose this time, not tight, because you're about to introduce contraction and the body needs slack to wrinkle into.
Make an edge vertex group and assign it as the pin
Drop into Edit mode and select the outer edge loop of the balloon. Hover over an edge along the rim and Alt+Click to grab the whole loop in one go.
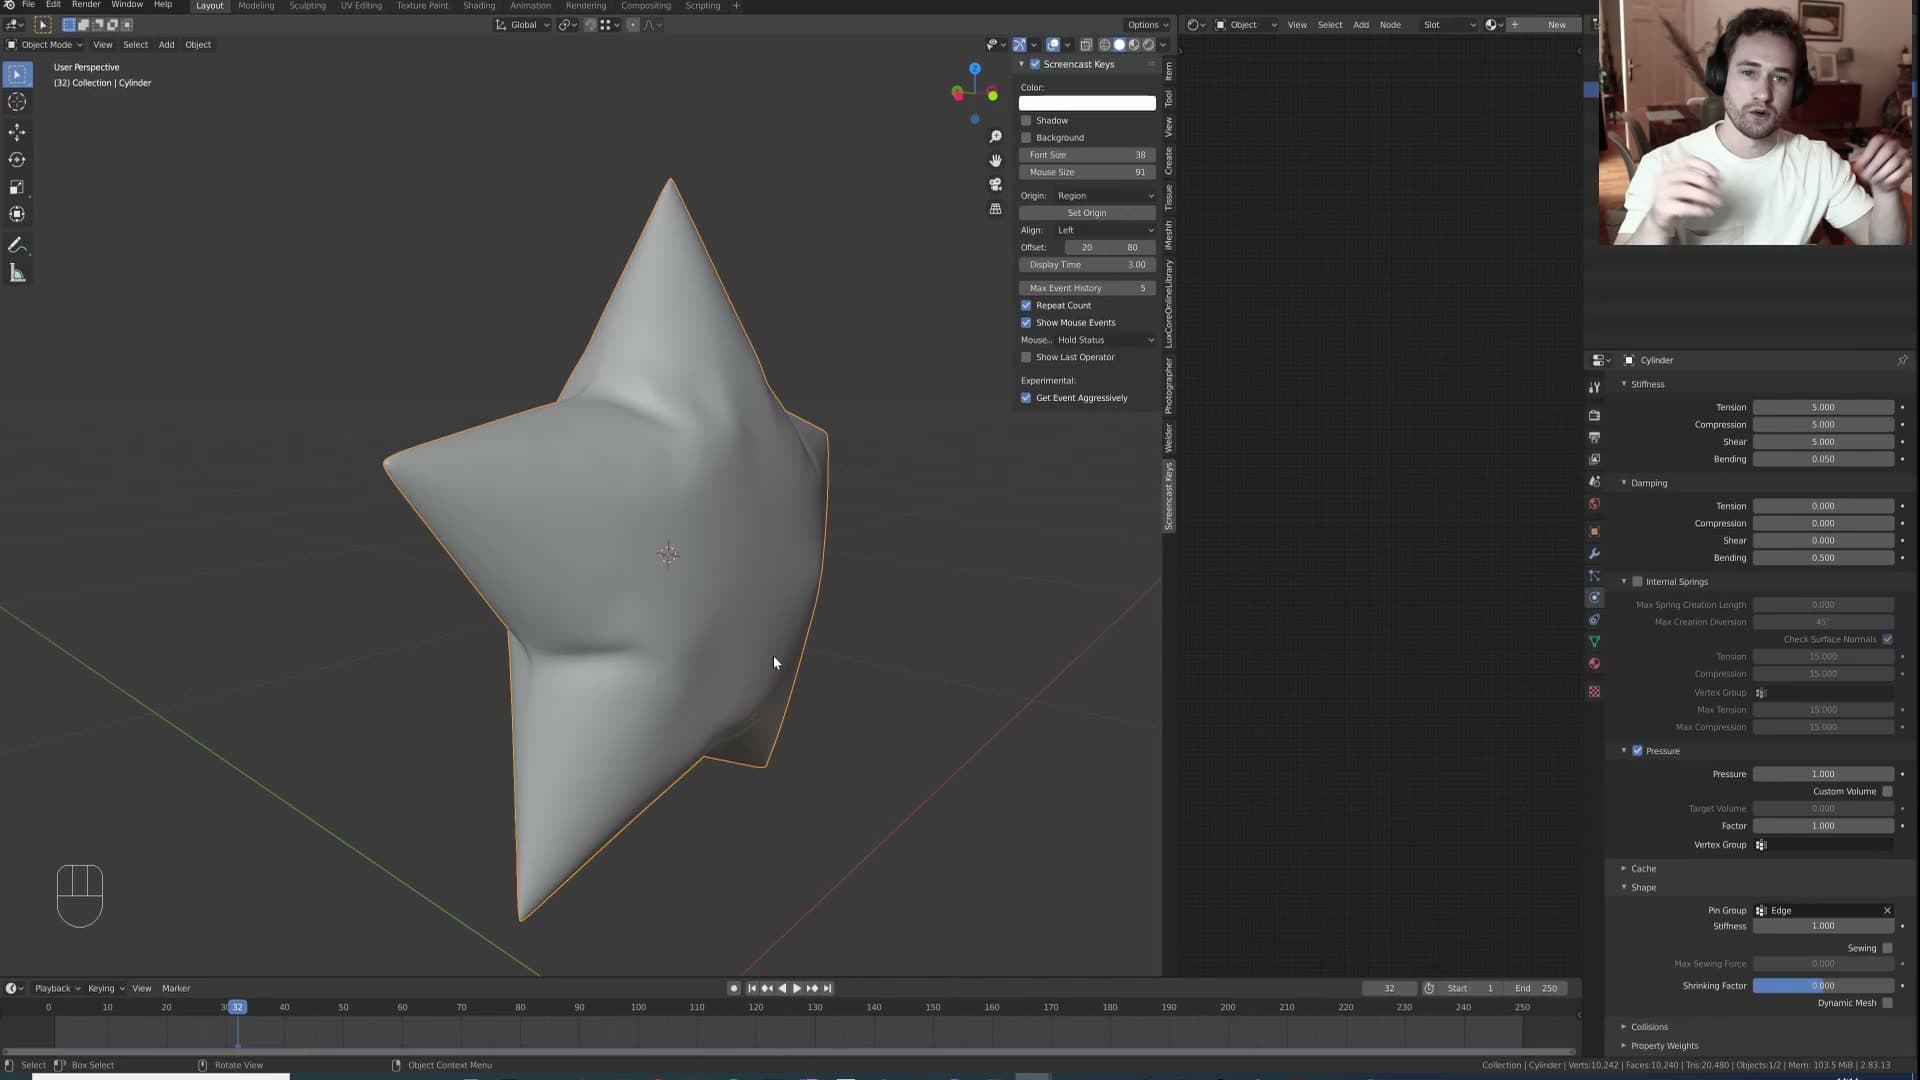
Open the Object Data Properties tab, add a new vertex group, and rename it edge. With your loop still selected, click Assign. You can verify it took by deselecting everything and clicking Select on the group. The rim should highlight again.
Back in the Cloth modifier, open the Shape sub-panel and set Pin Group to edge. That tells the simulator: leave these vertices alone, they follow the mesh transform; everything else is fair game.
Empty with a Copy Scale constraint
This is the trick that produces the wrinkles. In Marvelous Designer you'd use weft and warp shrinkage to pull the fabric in along its grain, then let the rest of the cloth crease as it loses room. Blender has no direct equivalent, so you fake it by physically shrinking the mesh while the pin group does the work.
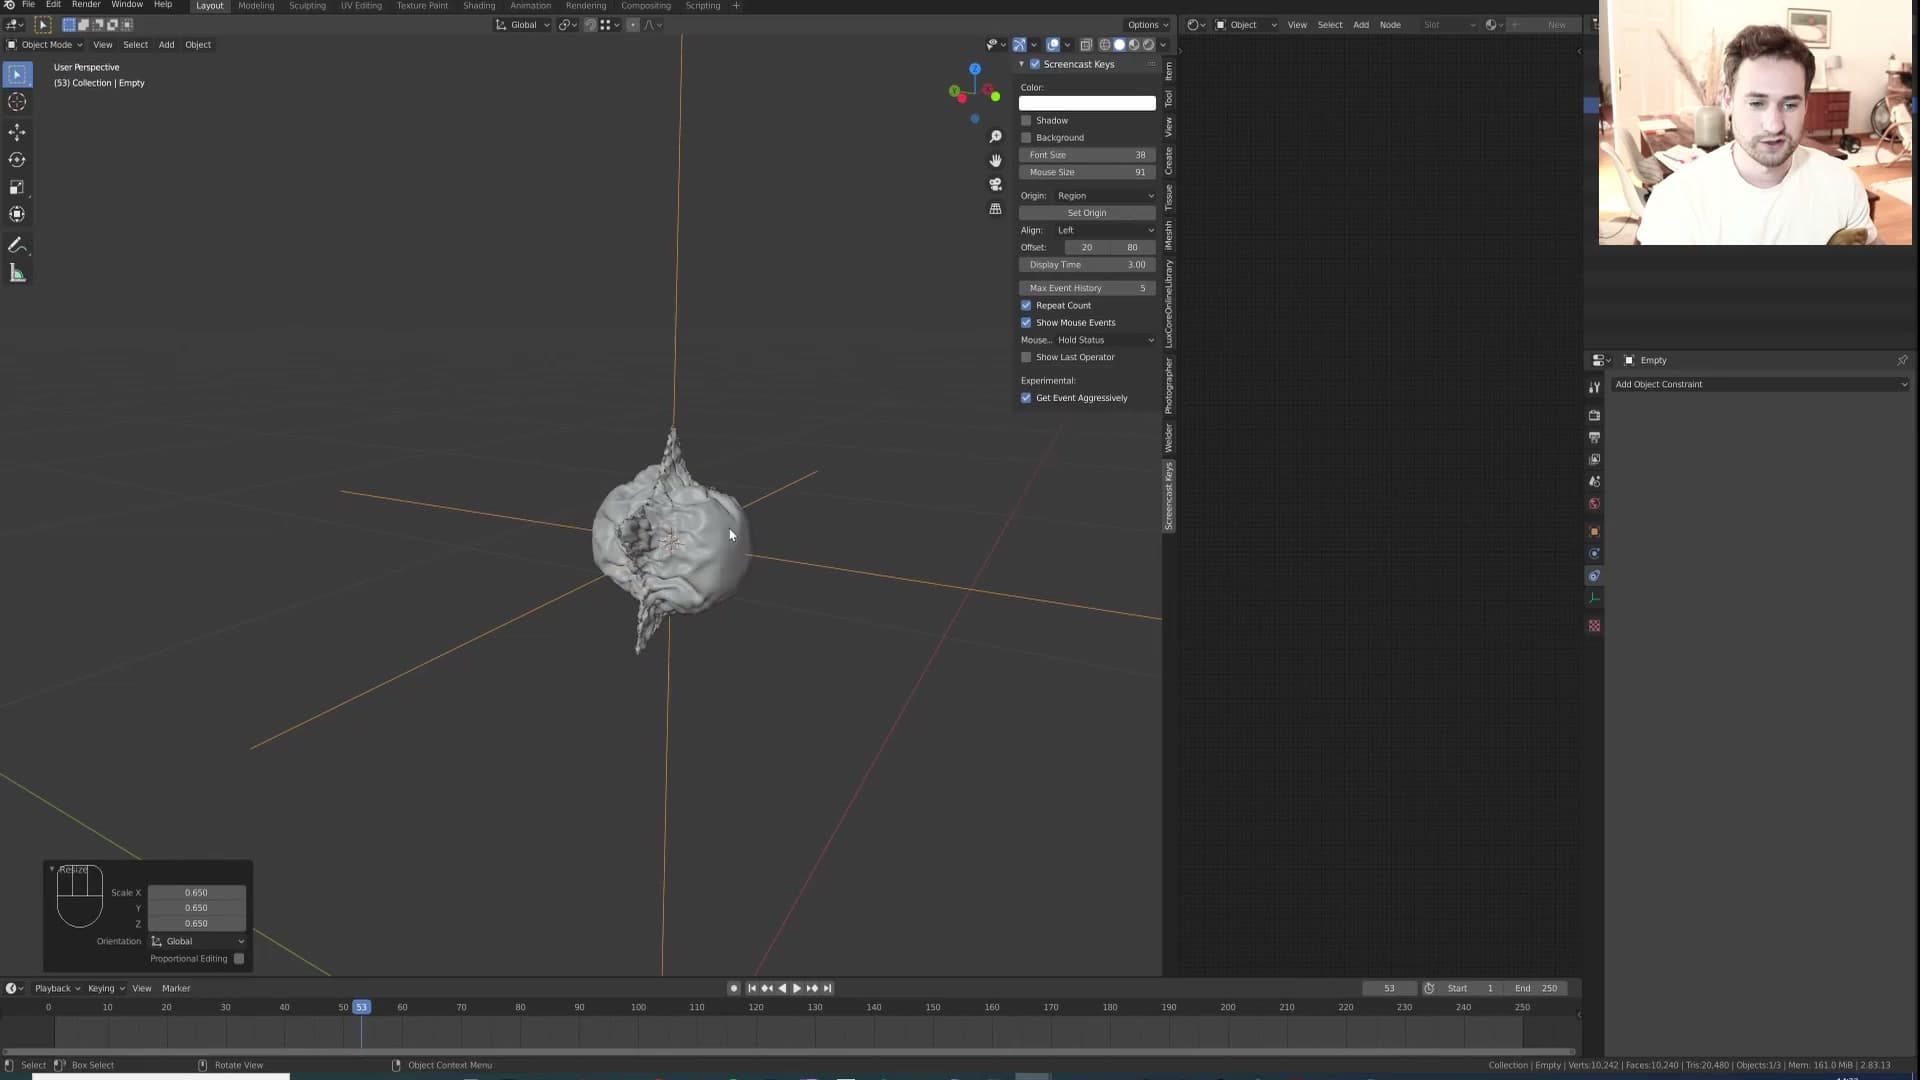
Add an Empty (Plain Axes is fine, you just want a transform handle). Select the balloon, open the Object Constraints panel, and add a Copy Scale constraint with the empty as the target.
Now scaling the empty scales the balloon, but only the pinned edge vertices actually follow that scale on the simulated mesh. The rest of the body is being held outward by pressure. The mismatch is what creates the wrinkles. Scrub the timeline forward, drag the empty's scale down a touch, and you should see the rim pulling inward while the surface bunches up to meet it.
Keyframe the empty to shrink over time
Now animate the scale instead of dragging it by hand. Go to frame 1, select the empty, press I and choose Scaling to set a keyframe at 1.0.
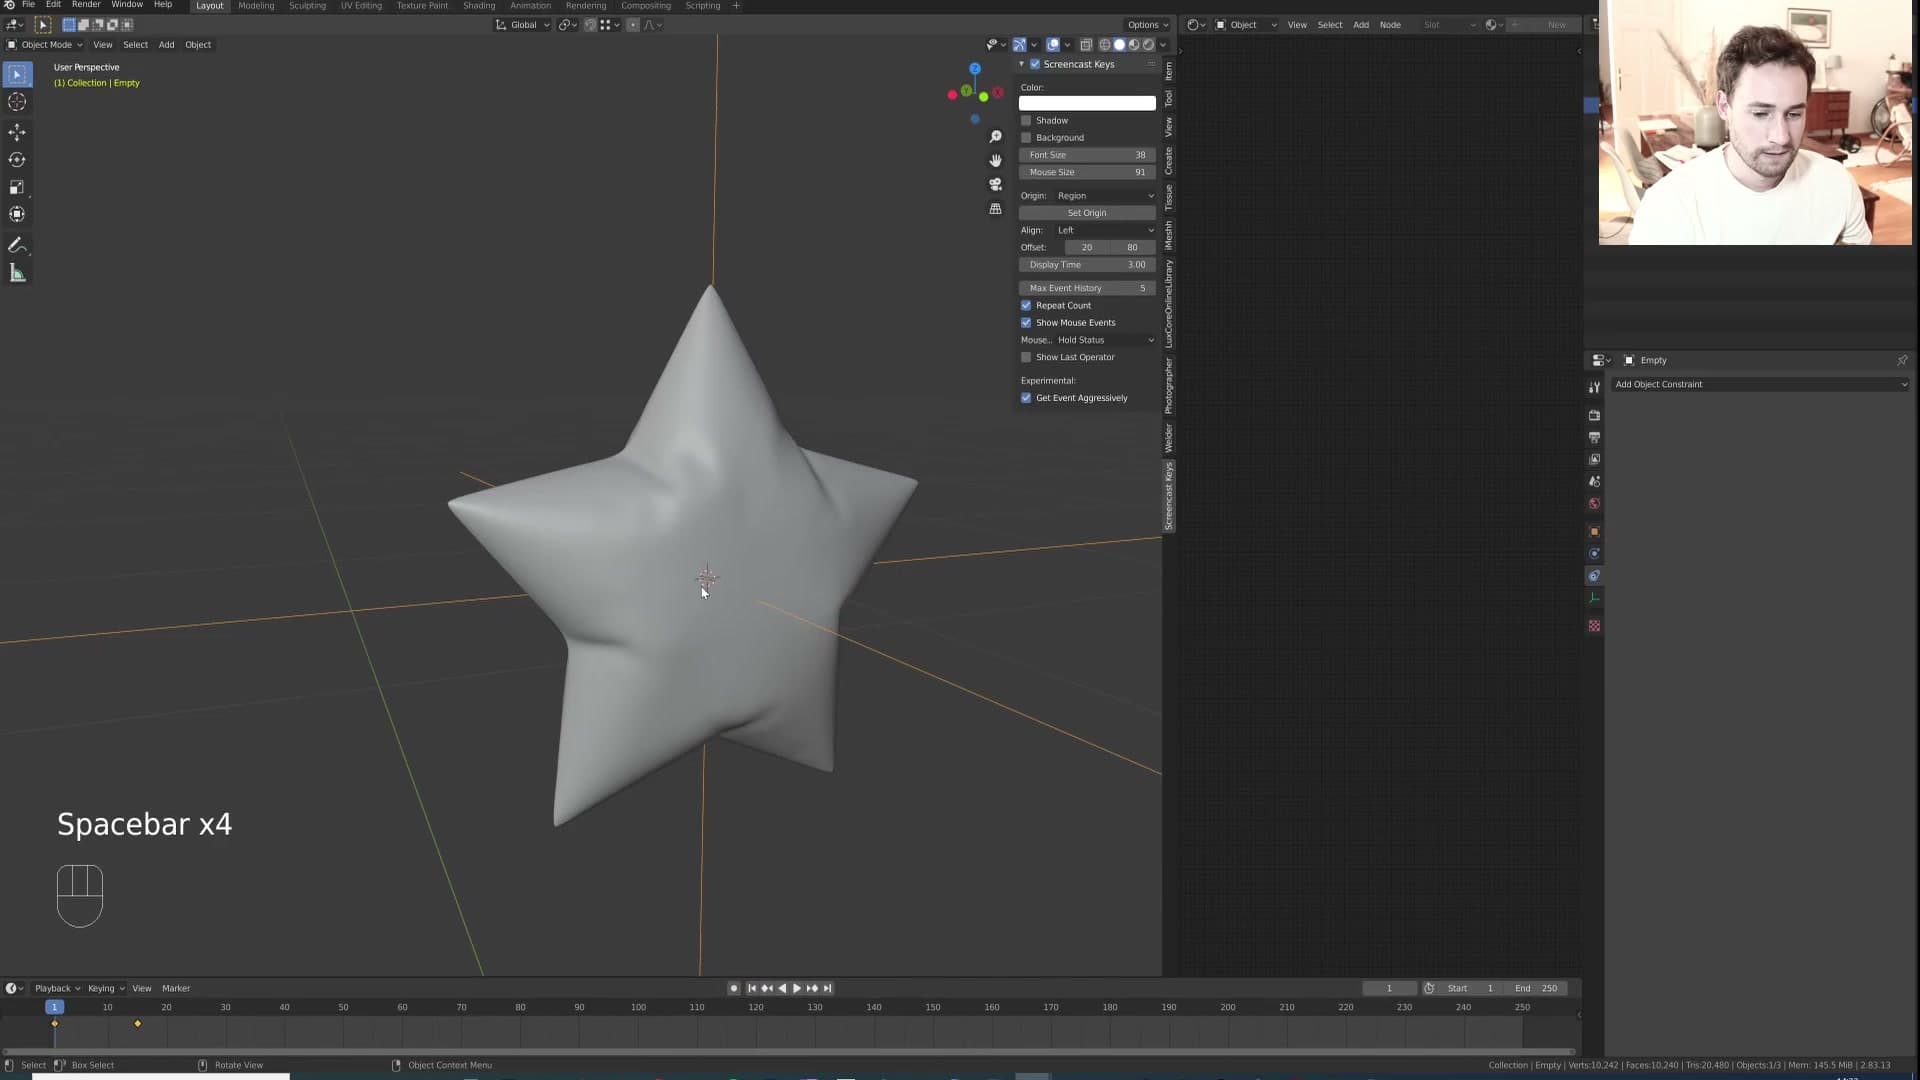
Jump to frame 15. Press S, type 0.98, and confirm. Press I again and choose Scaling. That's a 2% contraction over 15 frames. Small, but enough.
Press Play and watch the rim pull inward while pressure keeps the body inflated. The first wrinkles should already be forming along the edges. From here it's all about tuning the pressure value so the body reads as full rather than collapsed.
Tuning pressure: from too flat to 300
The first bake out of the gate looked too flat. Wrinkles existed, but the whole body sagged like it was deflating rather than puffing up against the contracting edge. Pressure was the lever to fix it.
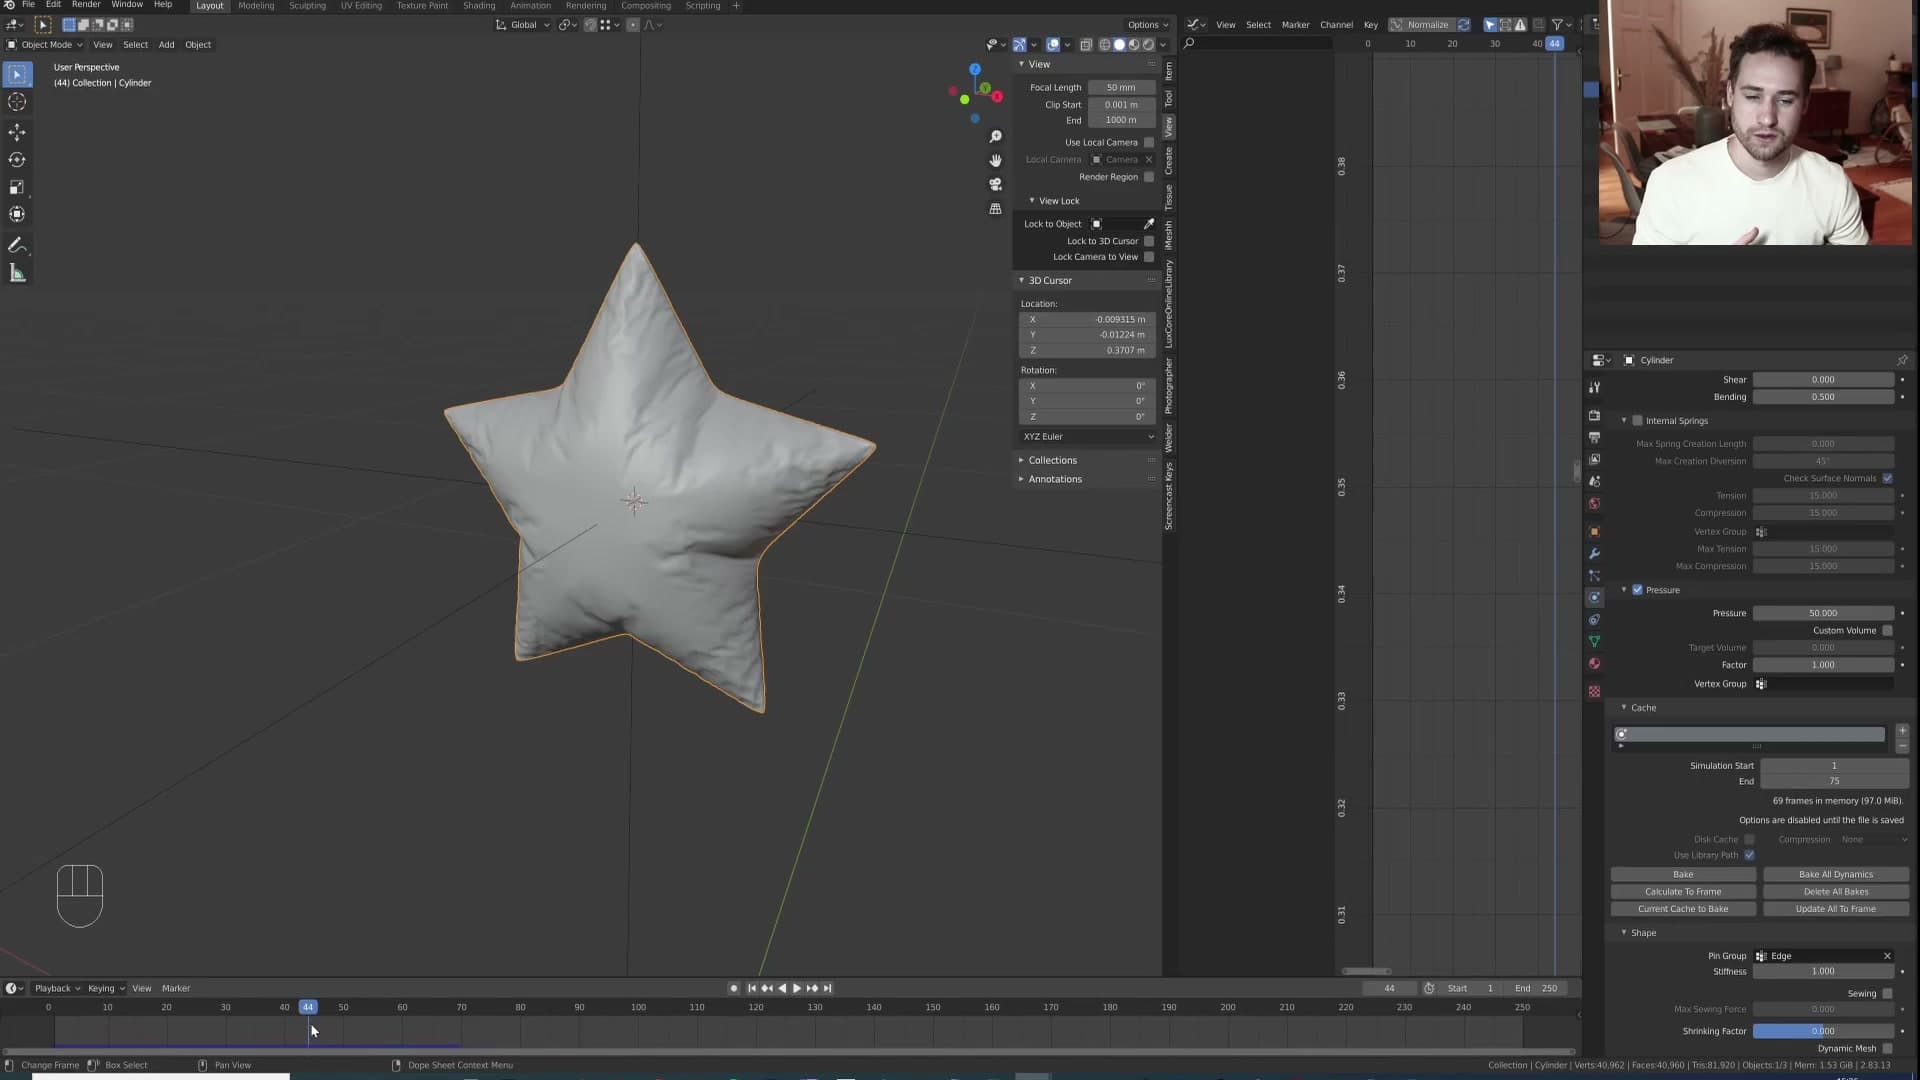
Bumping pressure to 10 didn't move the needle. Wrinkles concentrated at the edges, but the centre still looked deflated. Pushing to 50 got closer but still wrong: a real foil balloon (think of those metallic number balloons) is taut and tight in the middle with crinkles only at the corners and rim. The cloth needed to push out harder against the shrinking edge before the body would read as inflated.
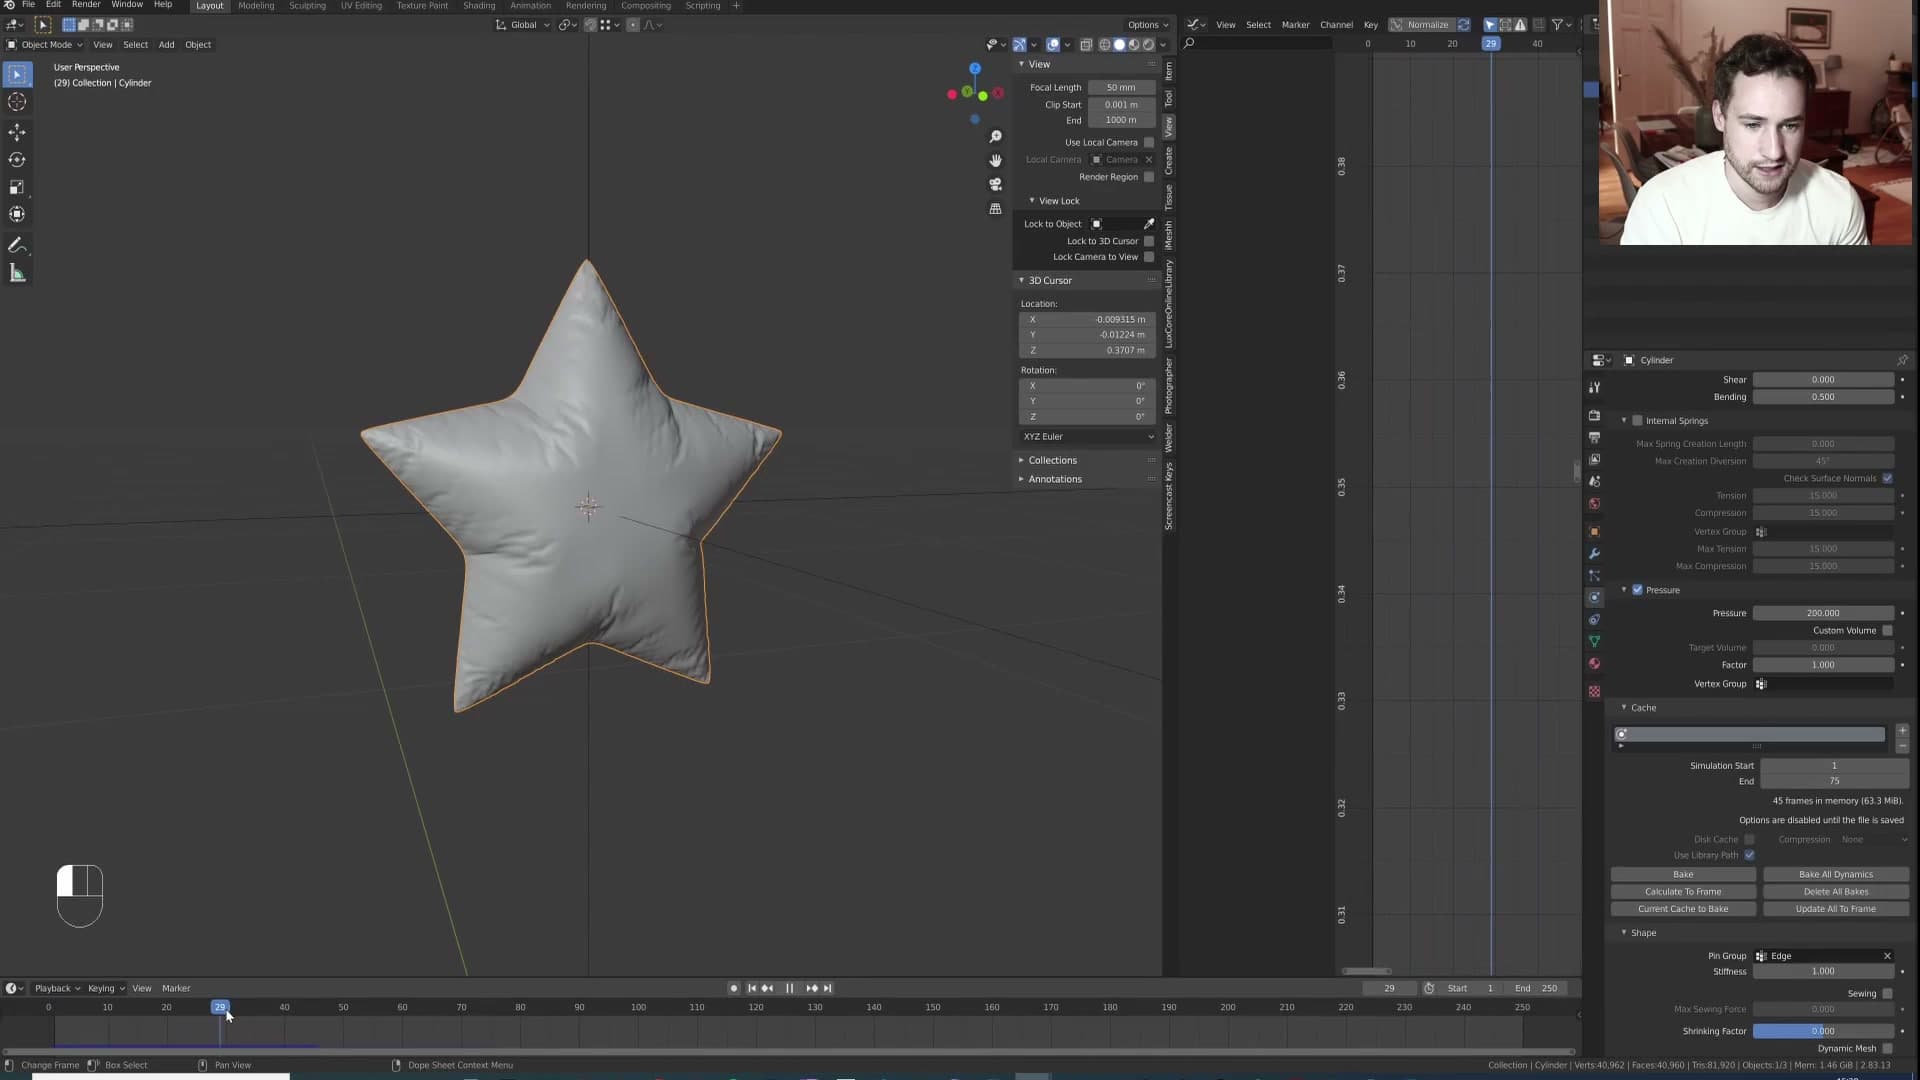
Going aggressive paid off. At pressure 200 the body finally inflated against the contracting edge and the wrinkles tightened into the rim where they belong. The simulation also has a habit of coming to rest before it really pushes all the slack out, so you need enough pressure to overcome that and keep expanding throughout the bake.
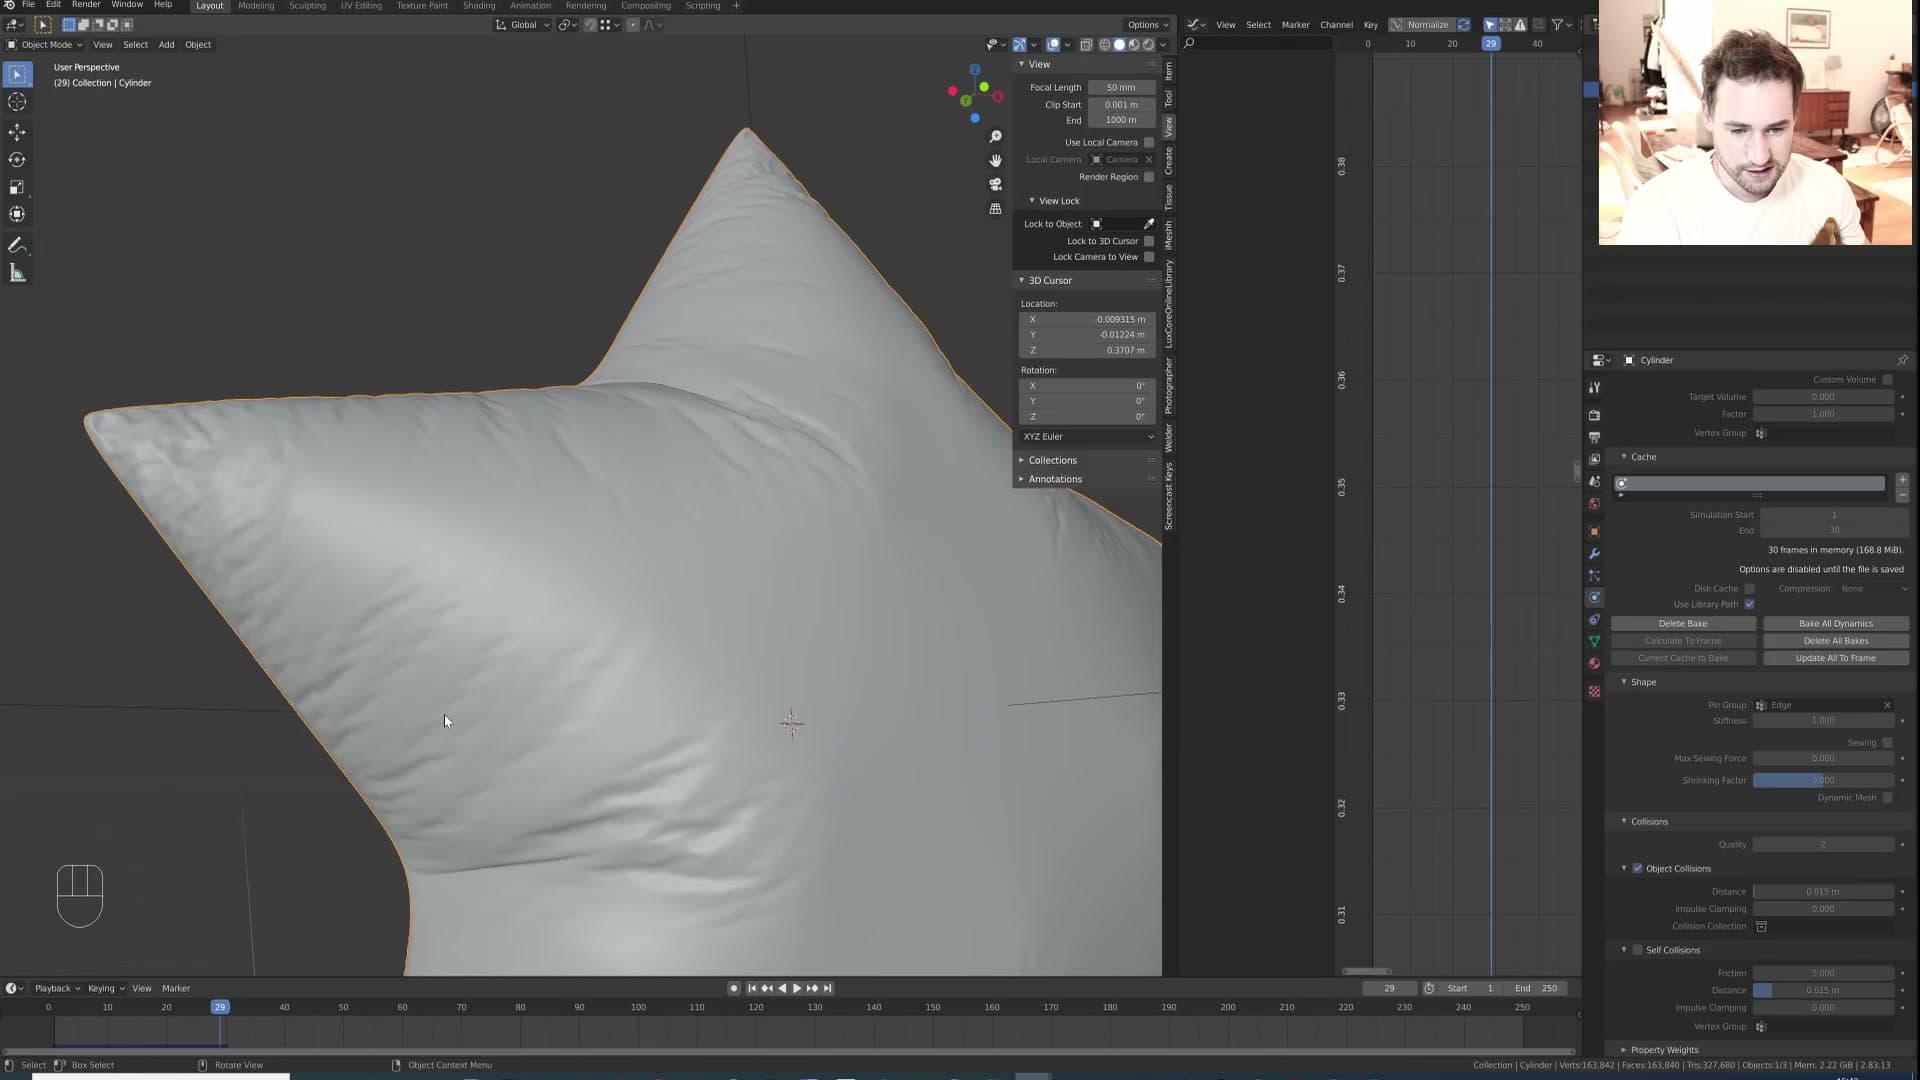
For the final bake, push Pressure to 300 and bring Subdivision back up to 3 for fine wrinkle detail. The result reads cleanly as a foil balloon: taut surface, crinkled edges, no deflated middle. The wrinkles are still running in a single direction rather than radiating naturally, but inside a render preview it absolutely sells as a balloon.
Baking the wrinkles to a low-poly normal map
The high-poly cloth result is too heavy for the bobbing pass, so duplicate it, unsubdivide twice to a manageable low poly, UV unwrap, and bake the wrinkle detail across using Selected to Active normal baking.
Duplicate and unsubdivide to a low-poly mesh
The wrinkled balloon looks great, but the underlying mesh is far too dense to hand off to a second cloth simulation for the bobbing pass. The fix is straightforward: bake all that surface detail onto a much lighter version of the same mesh. Before duplicating anything, lock the wrinkle result in place by applying both the Cloth modifier and the subdivision on top of it. The bake needs a static, finished mesh, and anything still being evaluated on the modifier stack will throw the projection off.
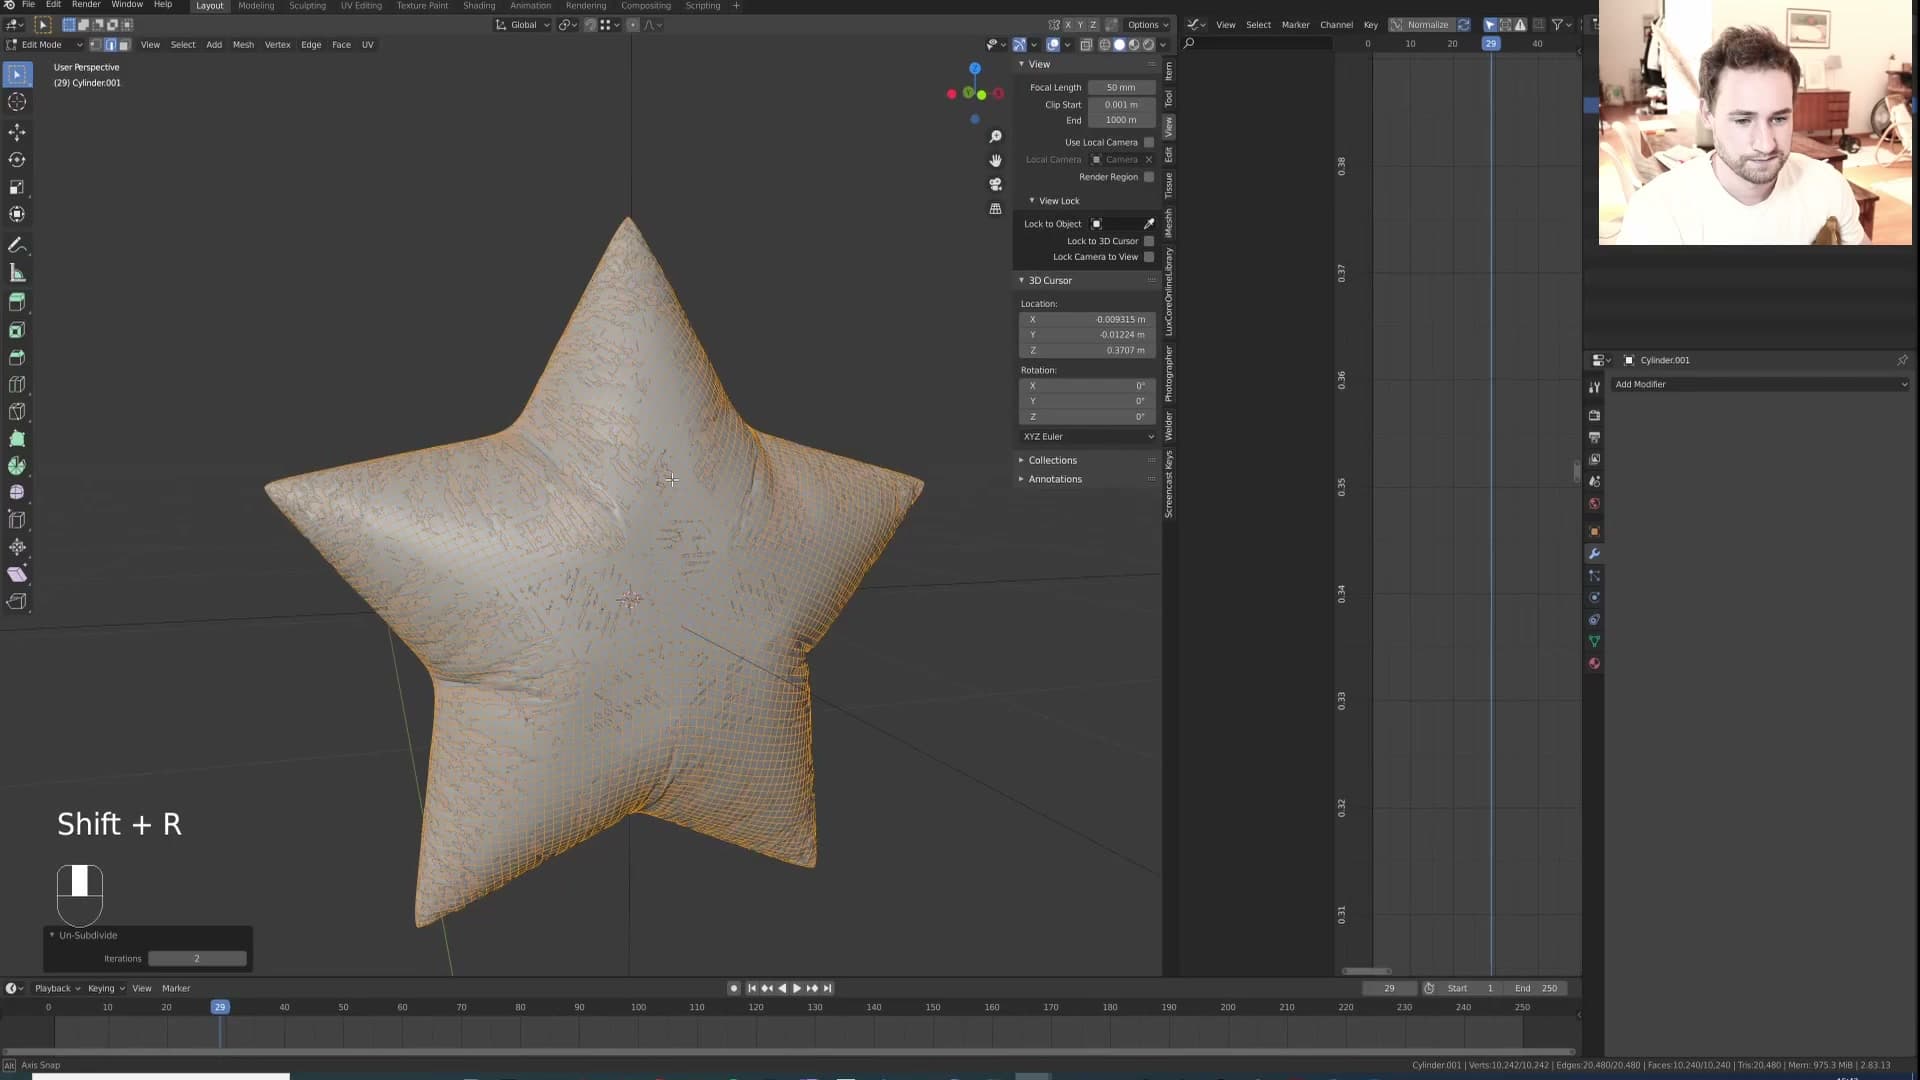
With the high-poly balloon selected, apply the cloth and subdivision modifiers, then press Shift+D and right-click to drop a duplicate exactly on top of the original. The duplicate is the one that will become your low-poly bake target.
Tab into edit mode on the duplicate, select all geometry, and run Mesh → Clean Up → Un-Subdivide. Run it a second time. Two passes drop the polycount enough to make the cloth sim later in the project workable, without losing the rough silhouette of the balloon. You now have two stacked balloons: the original heavy mesh holding the wrinkle detail, and a low-poly duplicate ready to receive the bake.
Mark a seam and UV unwrap the low poly
A normal bake needs somewhere to write its output, which means the low-poly mesh needs UV coordinates before anything else. Solo the low-poly so the high-poly isn't getting in the way visually, then tab into edit mode.
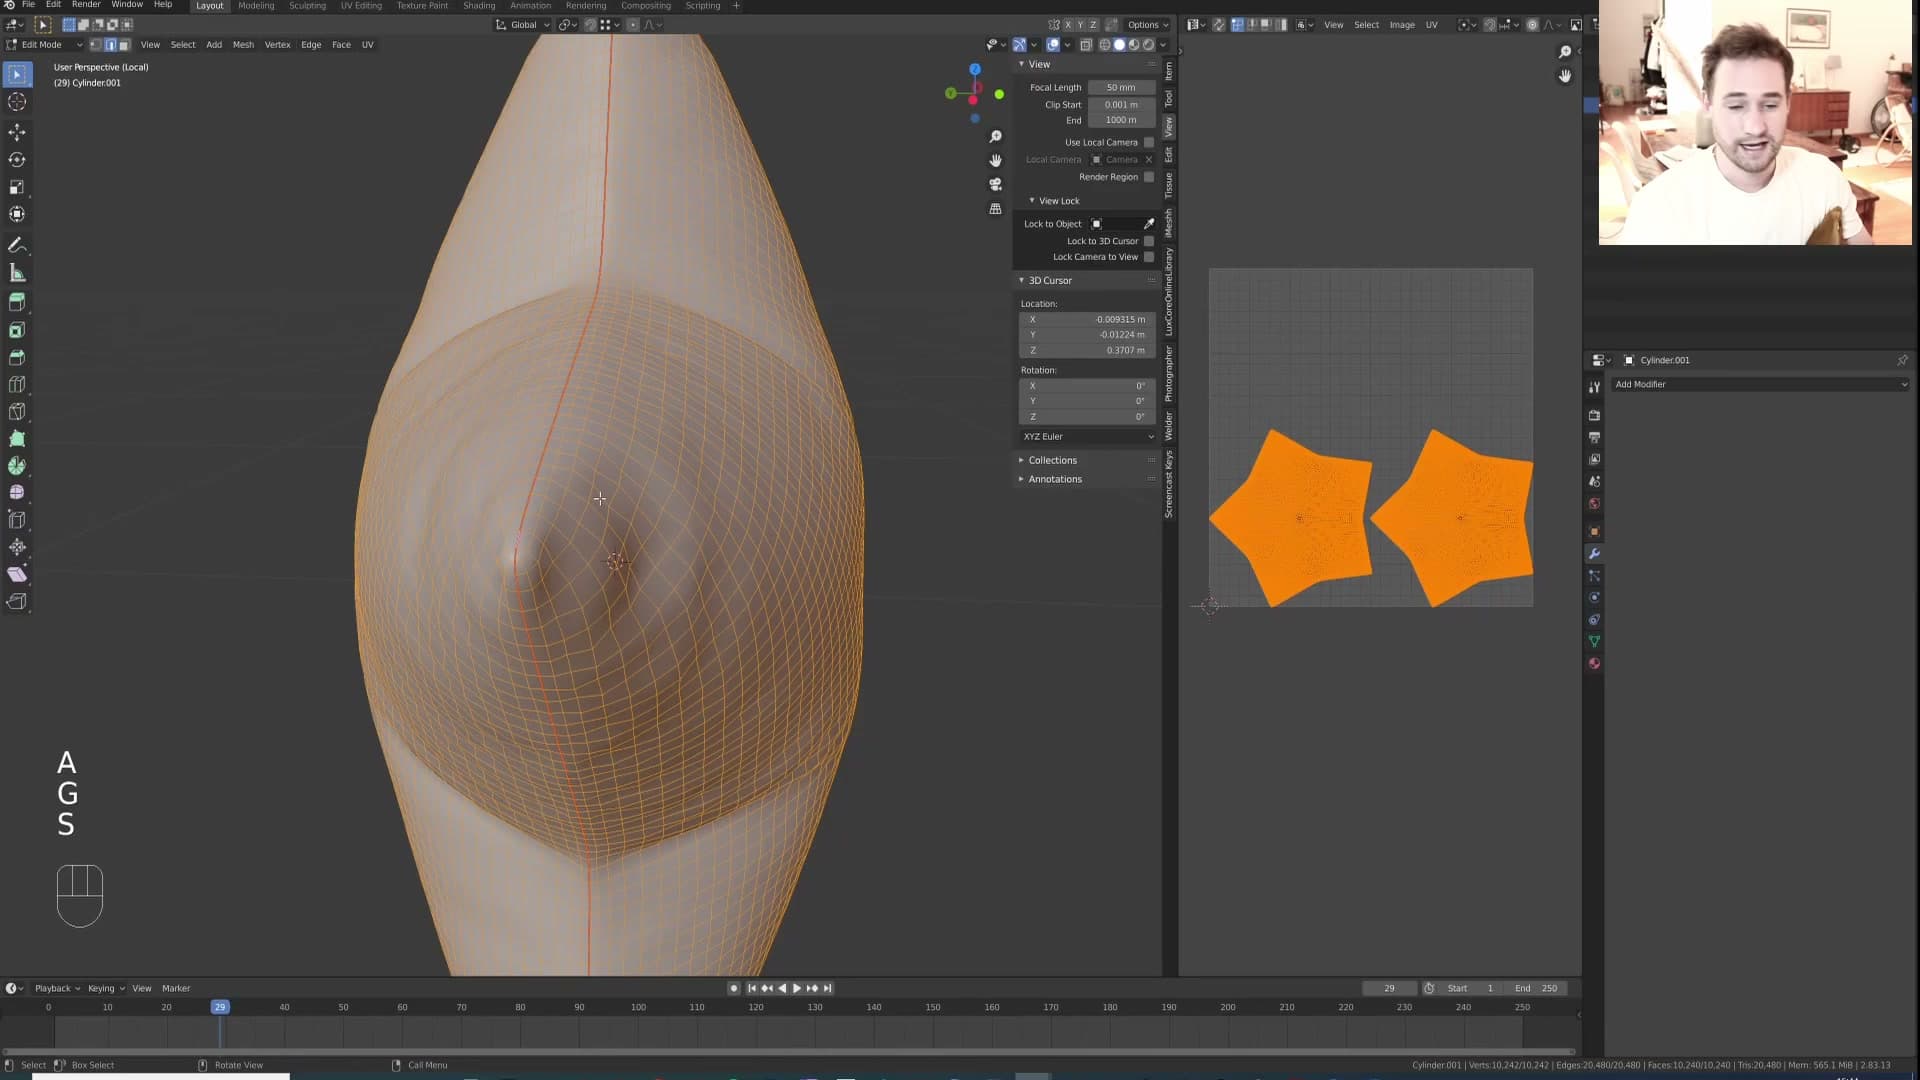
Alt+click the equator edge loop running around the middle of the balloon, right-click, and choose Mark Seam. That single seam is enough to let the two halves flatten cleanly when you unwrap. Select all faces and press U → Unwrap.
Open a UV editor next to the 3D view to check the result. You should see the two halves laid out as a pair of roughly circular islands. To squeeze the most resolution out of the bake, select everything in the UV editor and run UV → Pack Islands. The islands rescale and rotate to fill as much of the 0 to 1 space as they can manage.
Selected to Active with Normal bake
With the low-poly unwrapped, switch to the Shader editor and add an Image Texture node to its material. Click New, set the resolution to 4096, and give the image a name you'll recognise later, something like balloon_normal_bake. Make sure that Image Texture node is the selected (highlighted) node in the shader graph; the bake writes into whichever Image Texture node is selected on the active object's material, not whichever one happens to be plugged into the BSDF.
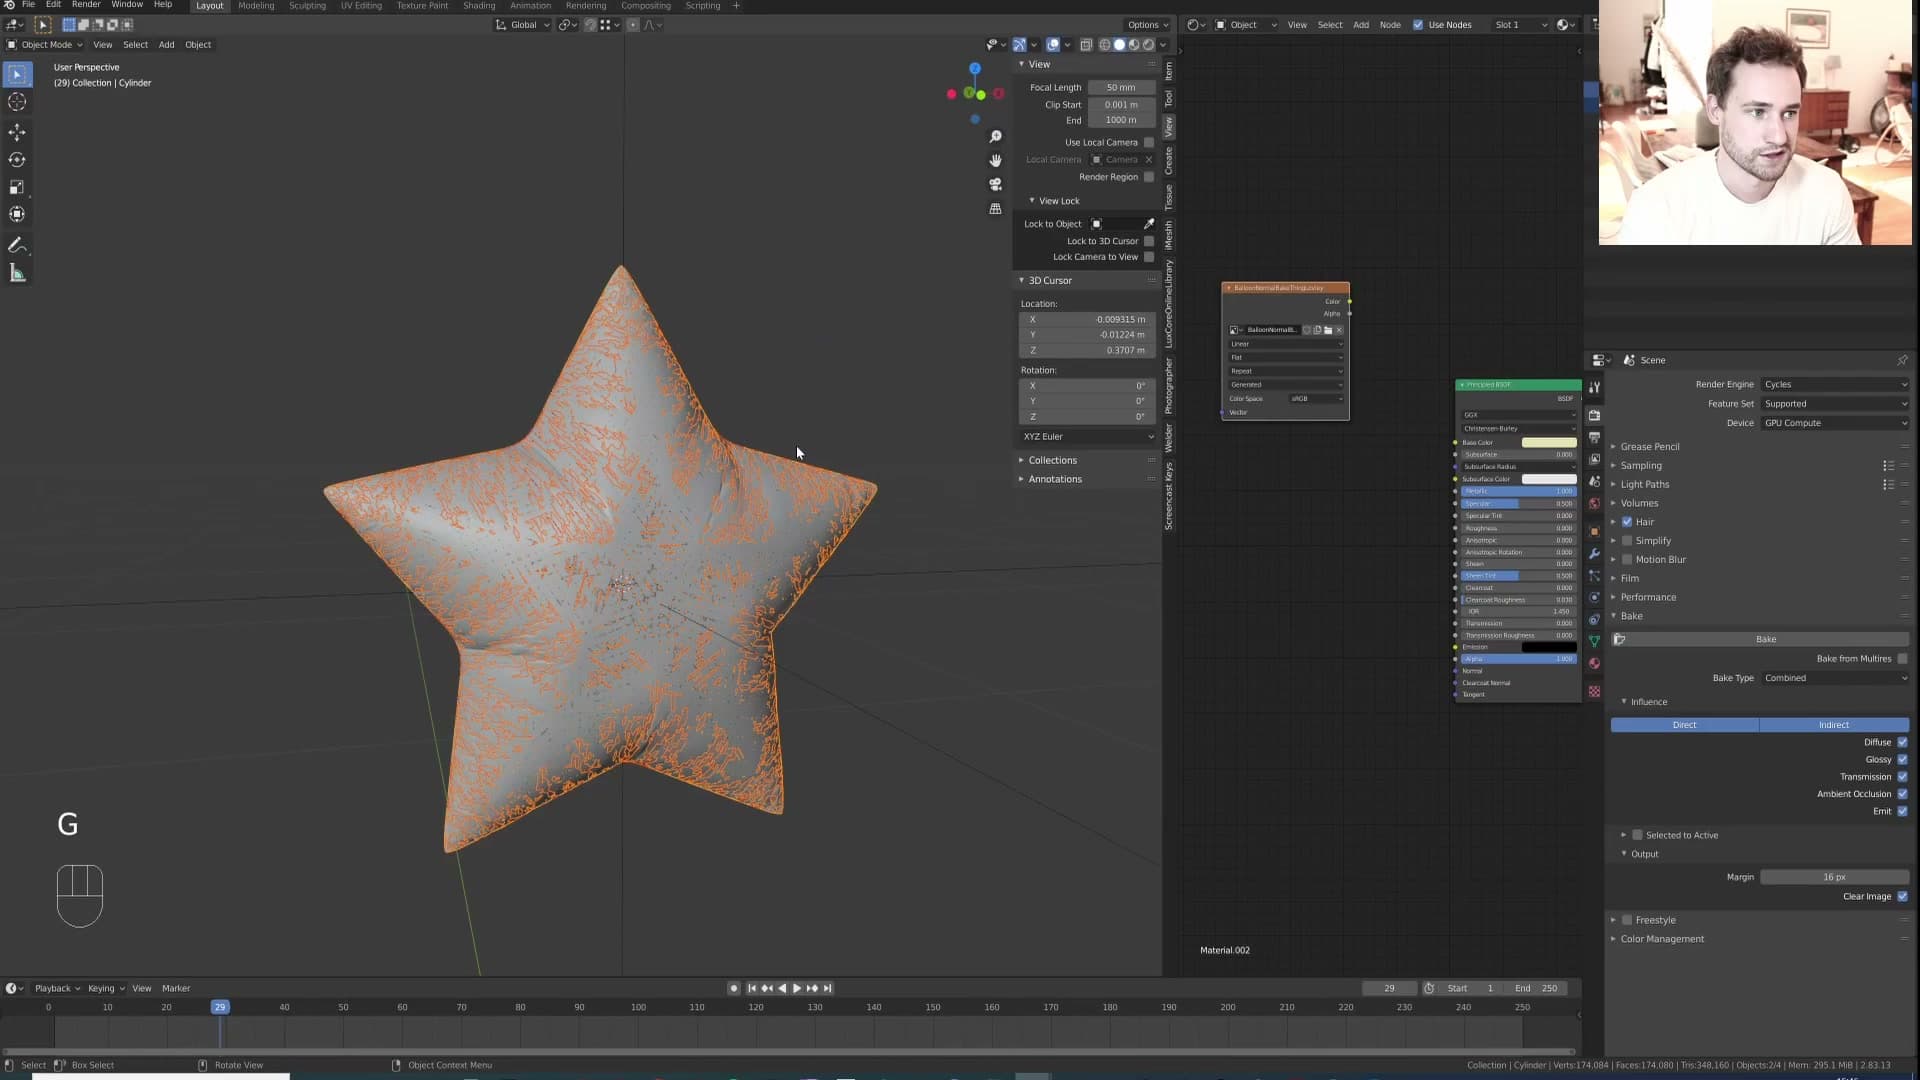
Head to the Render Properties panel and check your device. The Bake panel only appears when Cycles is set to CPU, or to GPU with CUDA. If you're on GPU + OptiX, Blender hides the bake controls entirely. Switch to CUDA temporarily so the options reappear.
Open the Bake panel and set Bake Type to Normal. Then enable Selected to Active. The tooltip describes exactly what's about to happen: "bake shading from the surface of the selected object to the active object." In other words, the high-poly is the source, the low-poly is the destination.
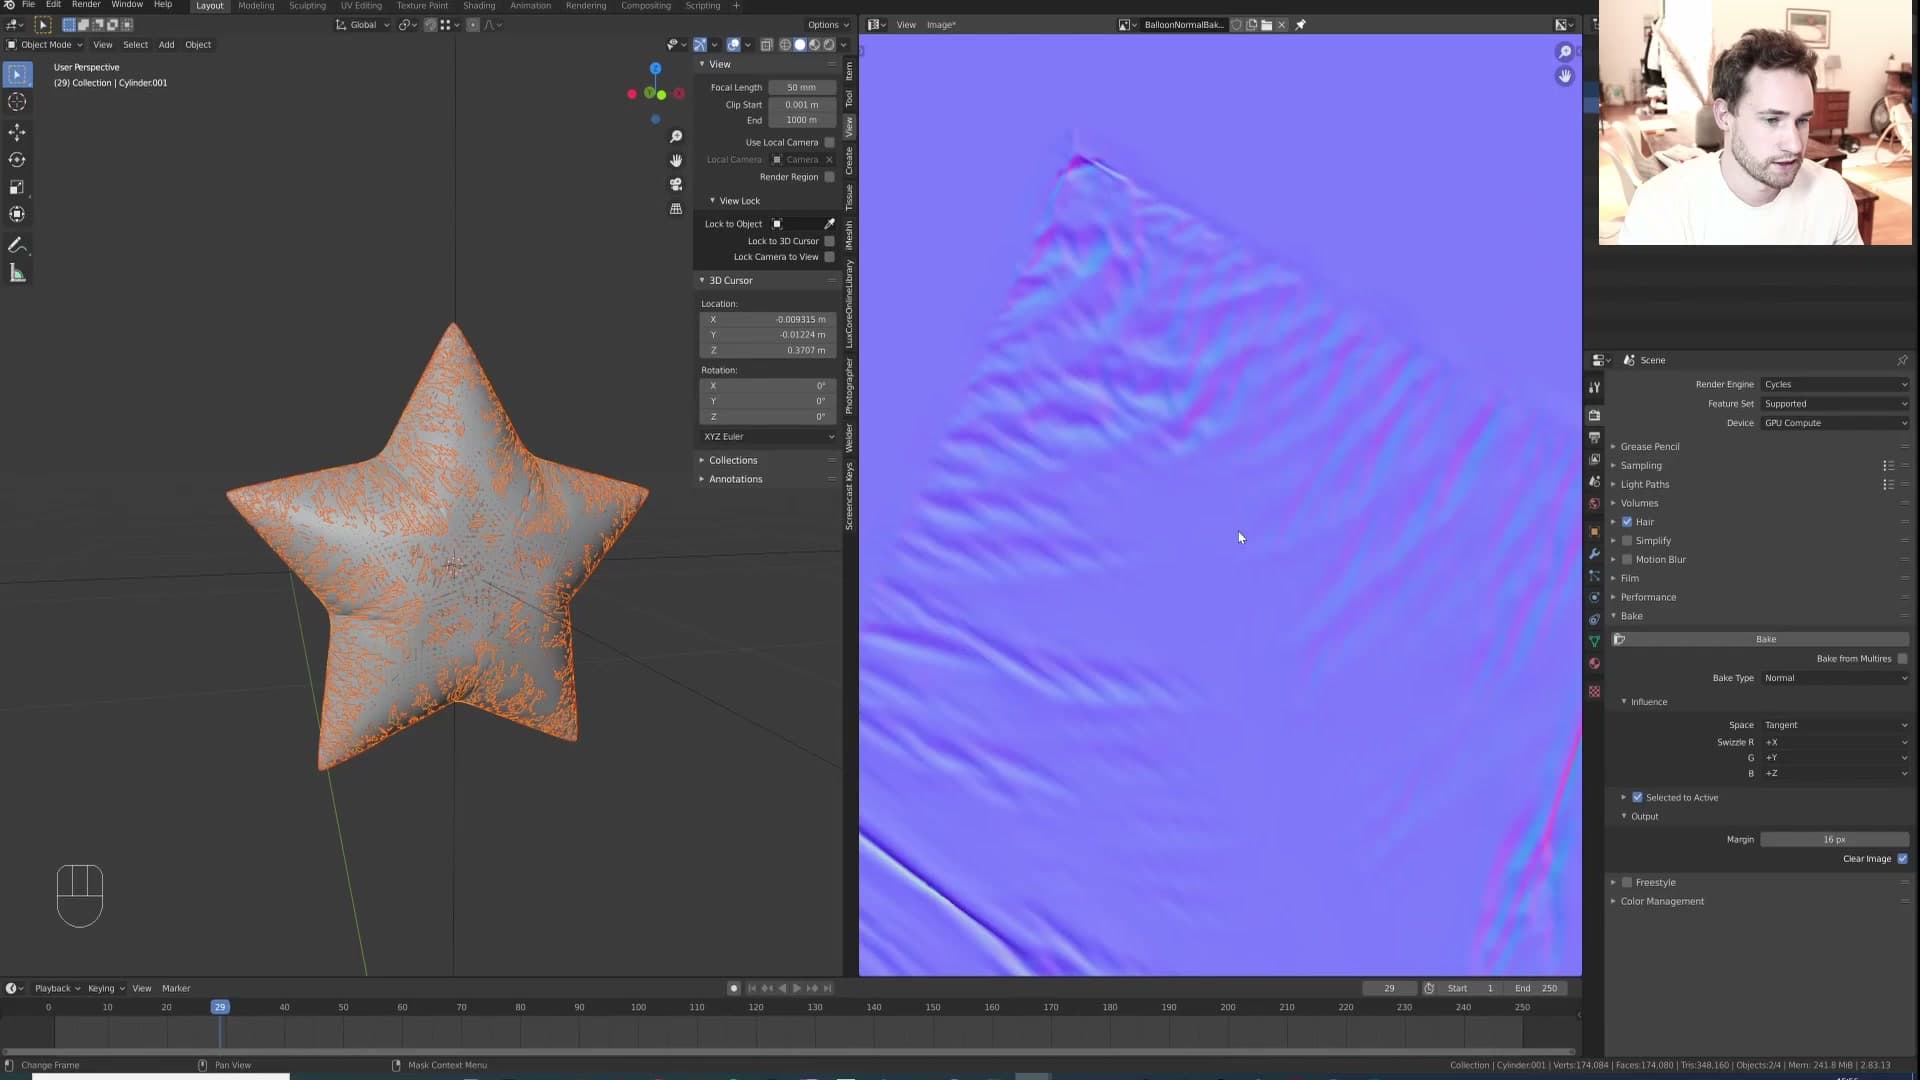
Selection order matters here. Click the high-poly first, then Shift+click the low-poly so it ends up as the active object (the brightest outline). Hit Bake and let Cycles work. It's usually quick.
If the result comes back tinted green or full of weird coloured blocks, the high-poly is poking through the low-poly surface in places and confusing the projection. Open the Cage section, tick Cage, and raise Cage Extrusion in small steps starting from 0.01. That offsets the projection so it cleanly surrounds the high-poly from the outside instead of sampling from inside the model.
Hook the baked normal into the shader
Once the bake finishes, save the result to disk straight away. In the UV editor, choose Image → Save As and write the file out. Baked images only live in memory until you save them, and losing one means re-running the whole bake.
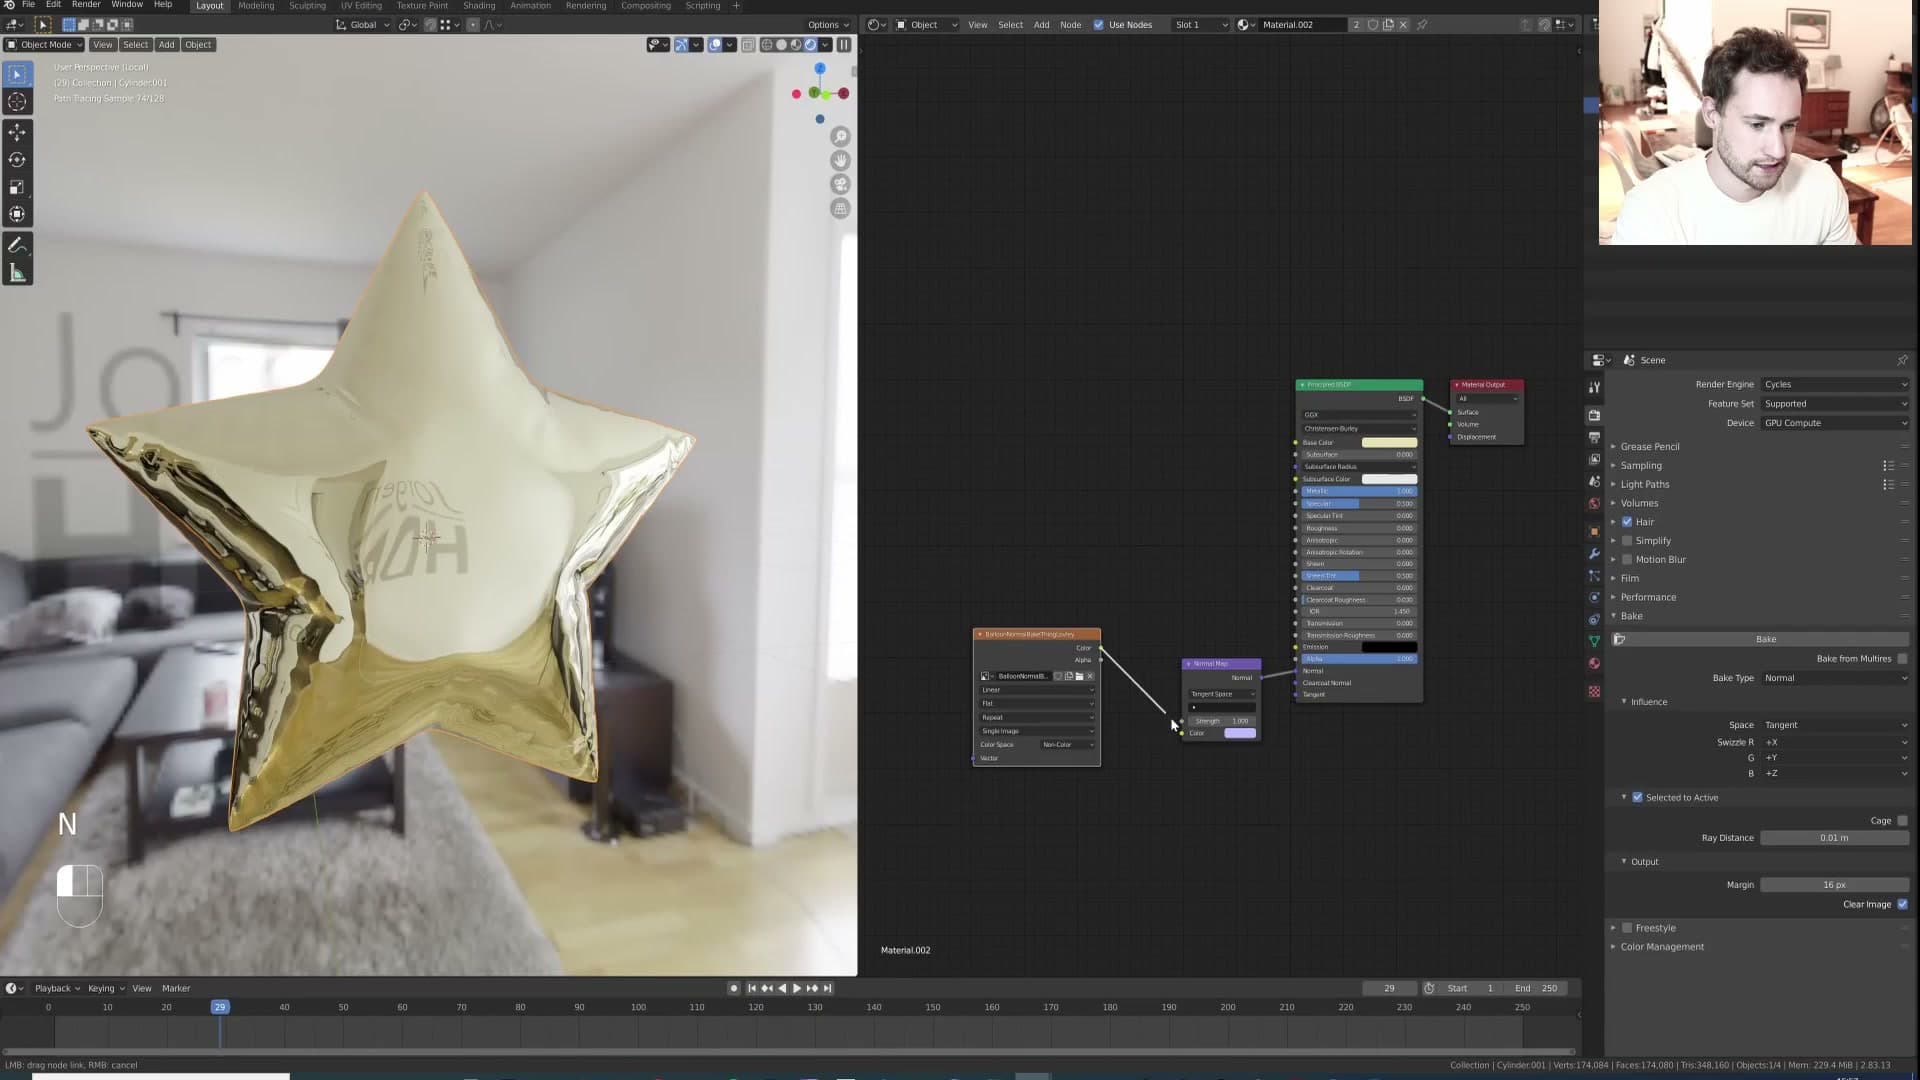
Back in the Shader editor on the low-poly, hook the baked image into the material properly. Change the Image Texture node's colour space from sRGB to Non-Color. Normal maps store direction vectors, not colour, and treating them as sRGB will warp the result. Add a Normal Map node with Shift+A → Vector → Normal Map, plug the Image Texture's Color output into the Normal Map's Color input, then plug the Normal Map's Normal output into the Normal socket of the Principled BSDF.
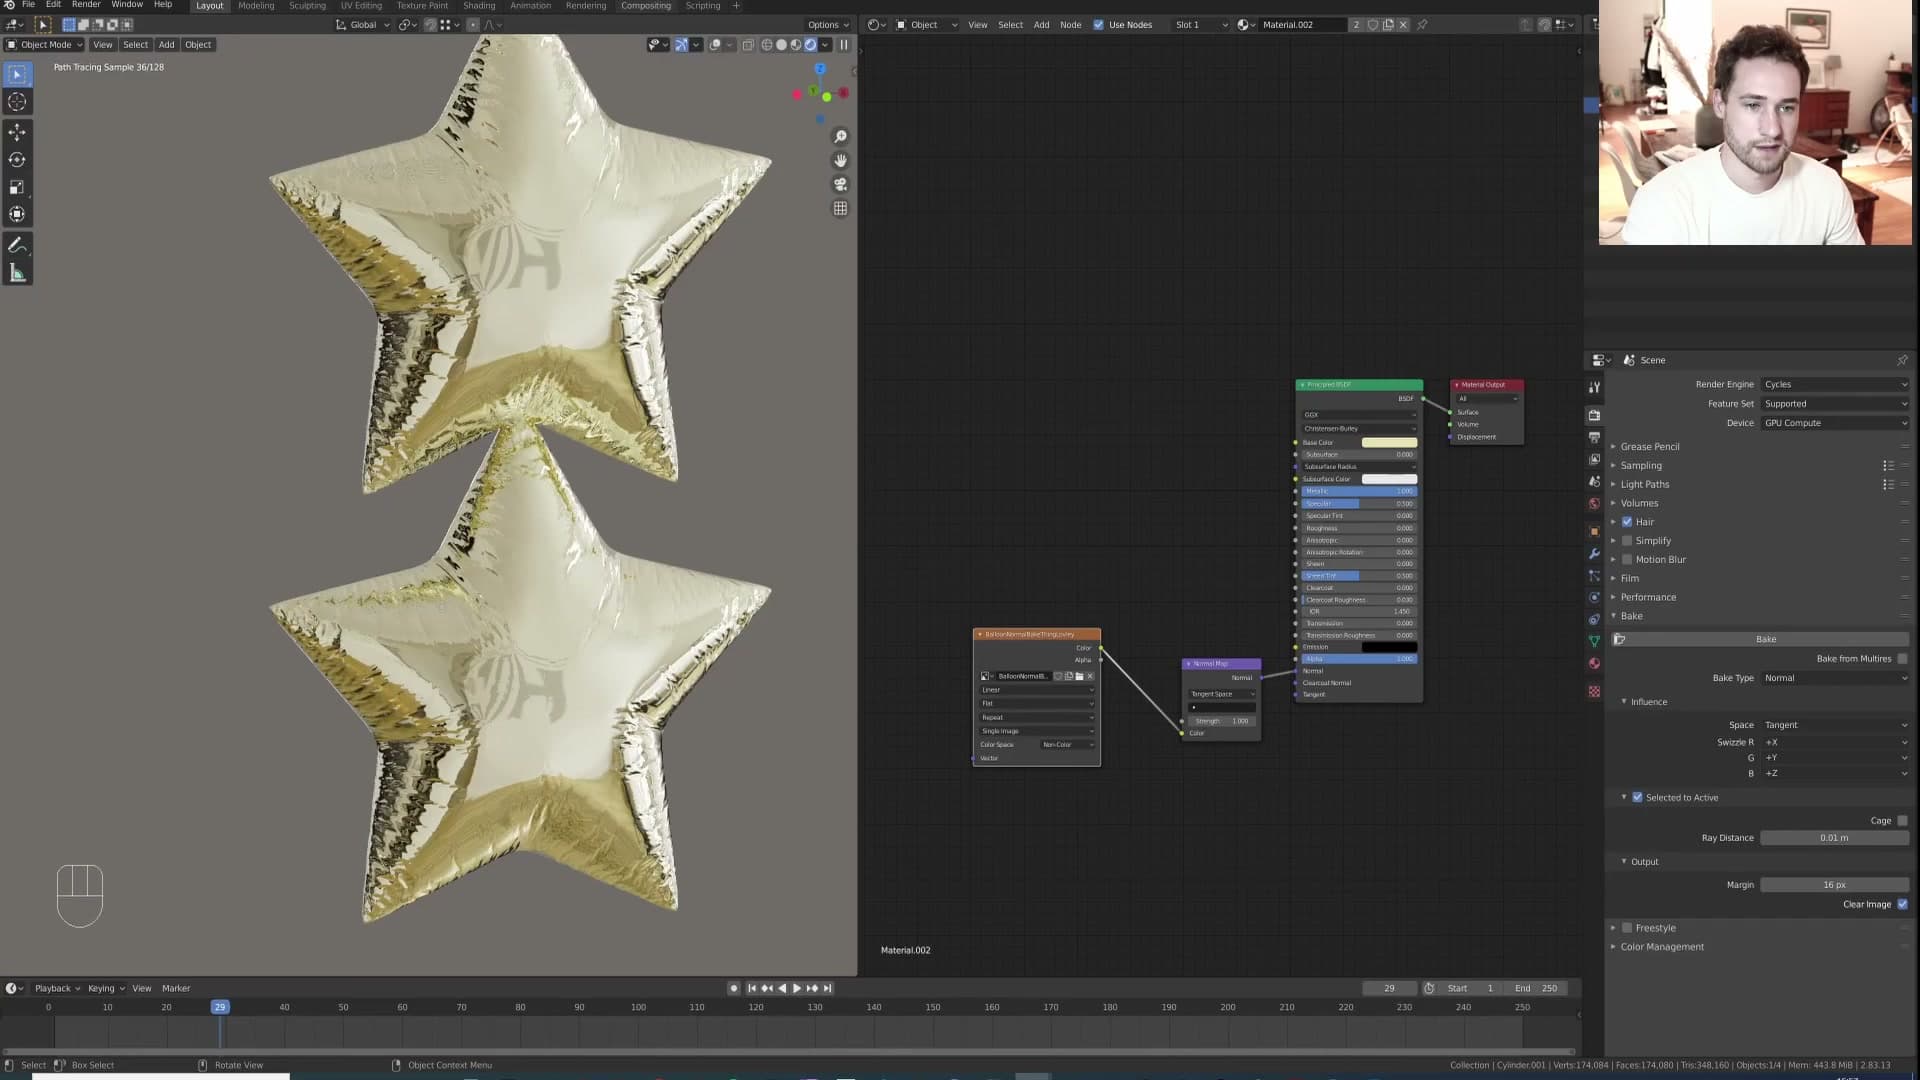
Move the original high-poly off to one side and compare. The low-poly should now read almost identically to the heavy simulation result: same wrinkle pattern, same metallic glint, a fraction of the geometry. That low-poly with the baked normal is the version that will go into the second cloth sim for the bobbing animation. If you ever decide you need even fewer polygons, the same mesh will keep reading correctly as long as the UVs survive.
Sculpting the wavy edge ring
Real foil balloons have a flat lip running around the seam. Extrude the equator outward, then use Randomize Transform plus a Select Random scale-in to break up the perfect circle so it reads as crinkly fabric rather than a CAD ring.
Extrude the seam outward into a flat ring
Before adding more geometry, take a moment to decide whether your machine can handle a second cloth pass on the current poly count. If it struggles, click the balloon, press F3 and run Unsubdivide a few times. The UVs you baked in the last module carry across, so dropping resolution here does not break the normal map. I stayed on the high-poly mesh, but the option is there if you need it.
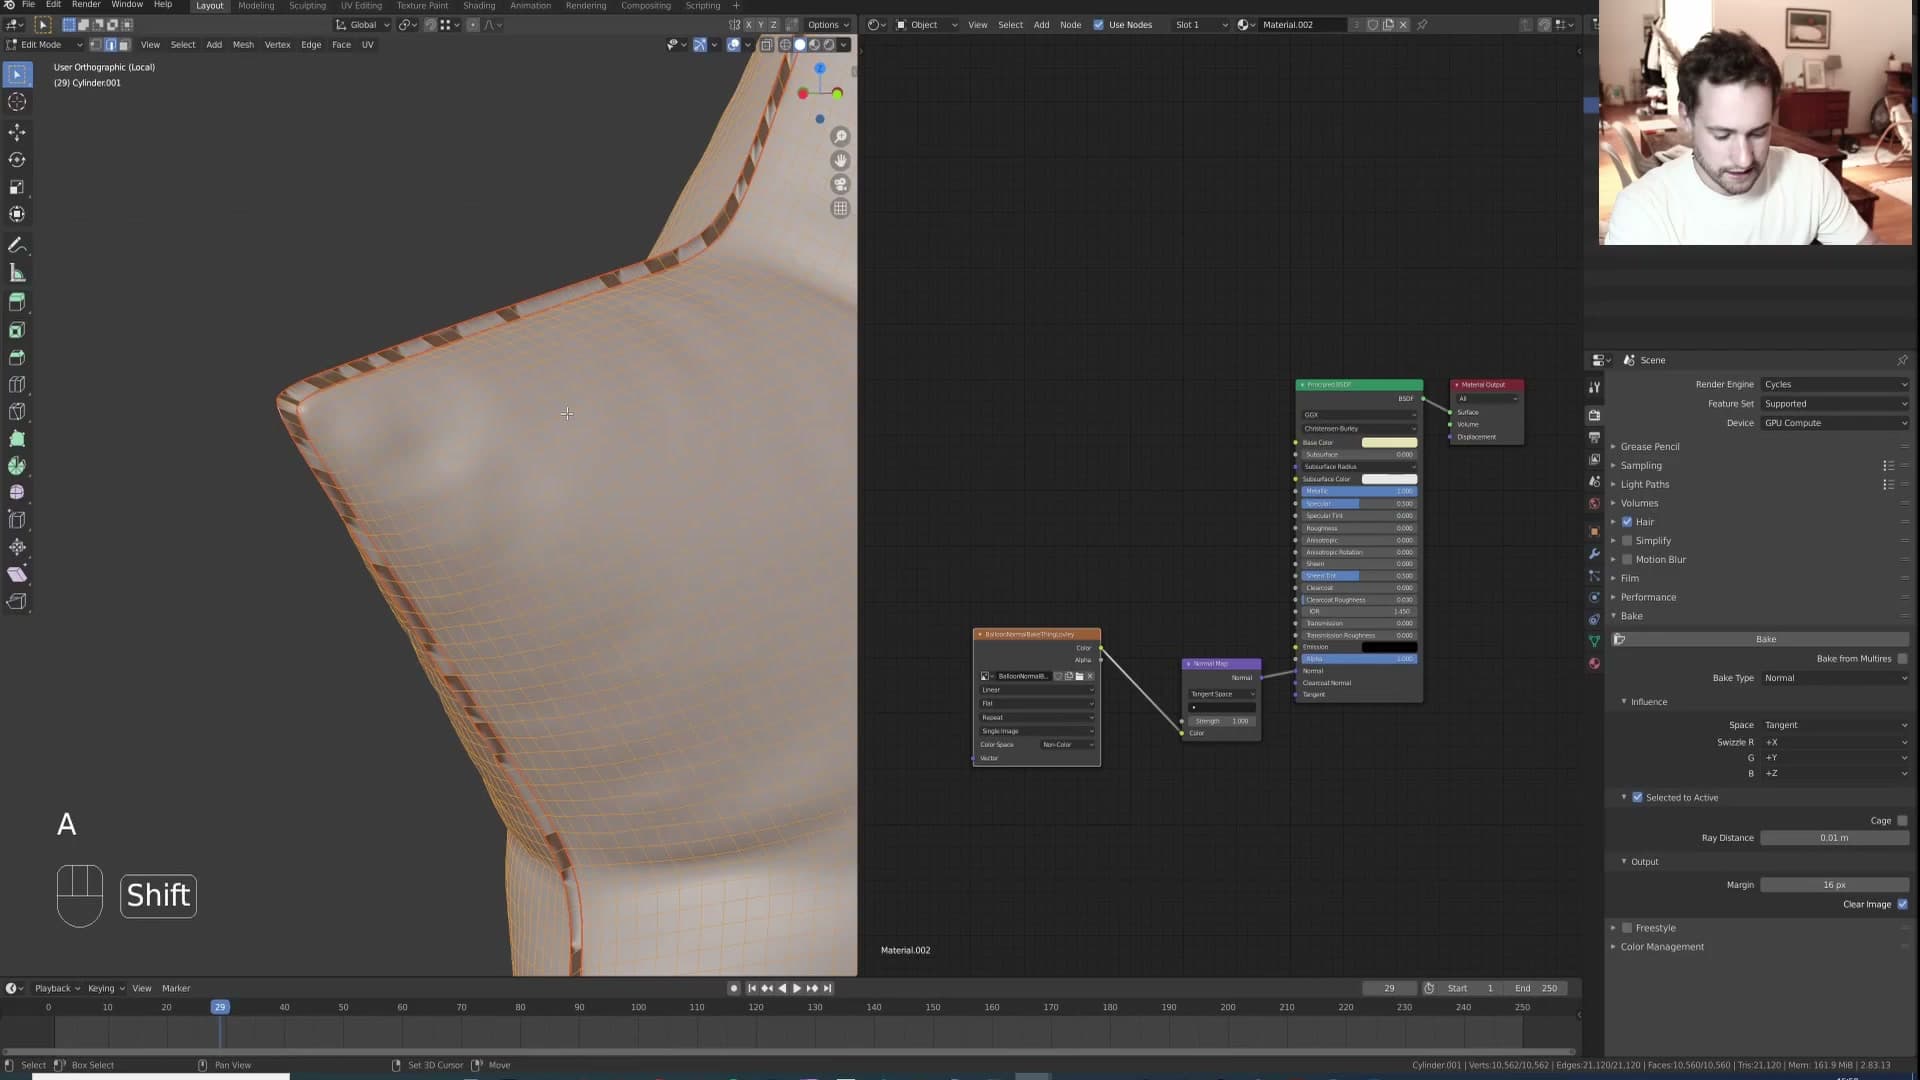
Switch to edge select mode and Alt+Click the loop that runs around the balloon's widest point (the seam where the two halves meet). Press E to extrude, then S to scale the new ring outward into a flat lip that sticks out from the body. This is the foil-style edging you see on real party balloons. I first tried E followed by Alt+S (Shrink/Fatten) but abandoned it in favour of a straight scale, which gave a cleaner flat ring.
With the new geometry in place, press A to select everything, then Shift+N to recalculate normals. That stops the freshly extruded faces from rendering with inverted shading against the rest of the shell.
Randomize Transform for natural waviness
The extruded ring is geometrically perfect, which is exactly what you do not want. Real foil balloons have a slightly wonky seam. The heat-sealed edge ripples as it cools, and the lip never sits on a clean plane. A perfect circle reads as a CAD part rather than fabric.
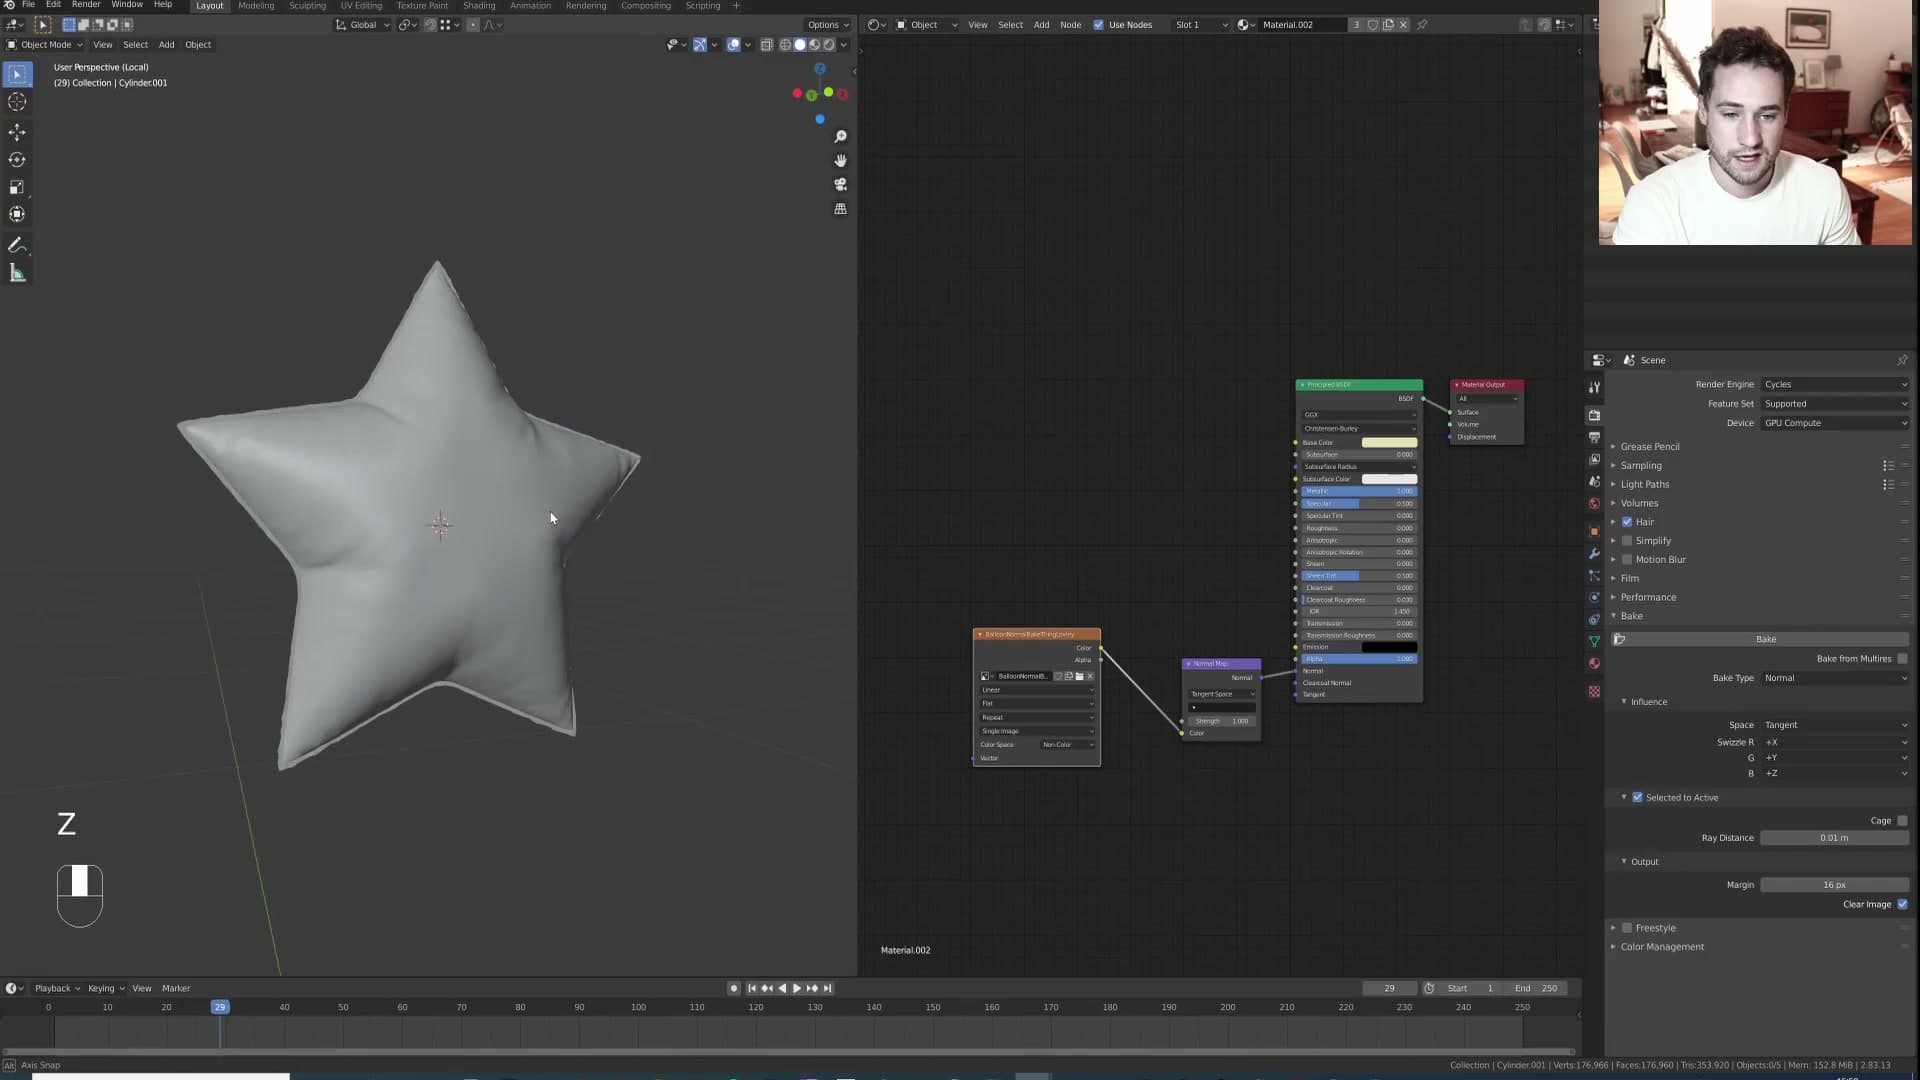
Keep the ring faces selected, press F3 and search for Randomize Transform. Set the amount to roughly 0.01 and confirm. The ring picks up a gentle wobble, still recognisably circular but no longer mathematically round. Switch to material preview and orbit around to check the silhouette; it should look hand-made rather than lathed.
Select Random and scale for irregularity
One more pass adds the crinkled, pinched-in look you get where the foil bunches between heat seals. Open the Select menu and pick Select Random. Change the action mode to Deselect so that, instead of grabbing fresh faces, Blender drops a scattered subset of the currently selected ring faces.
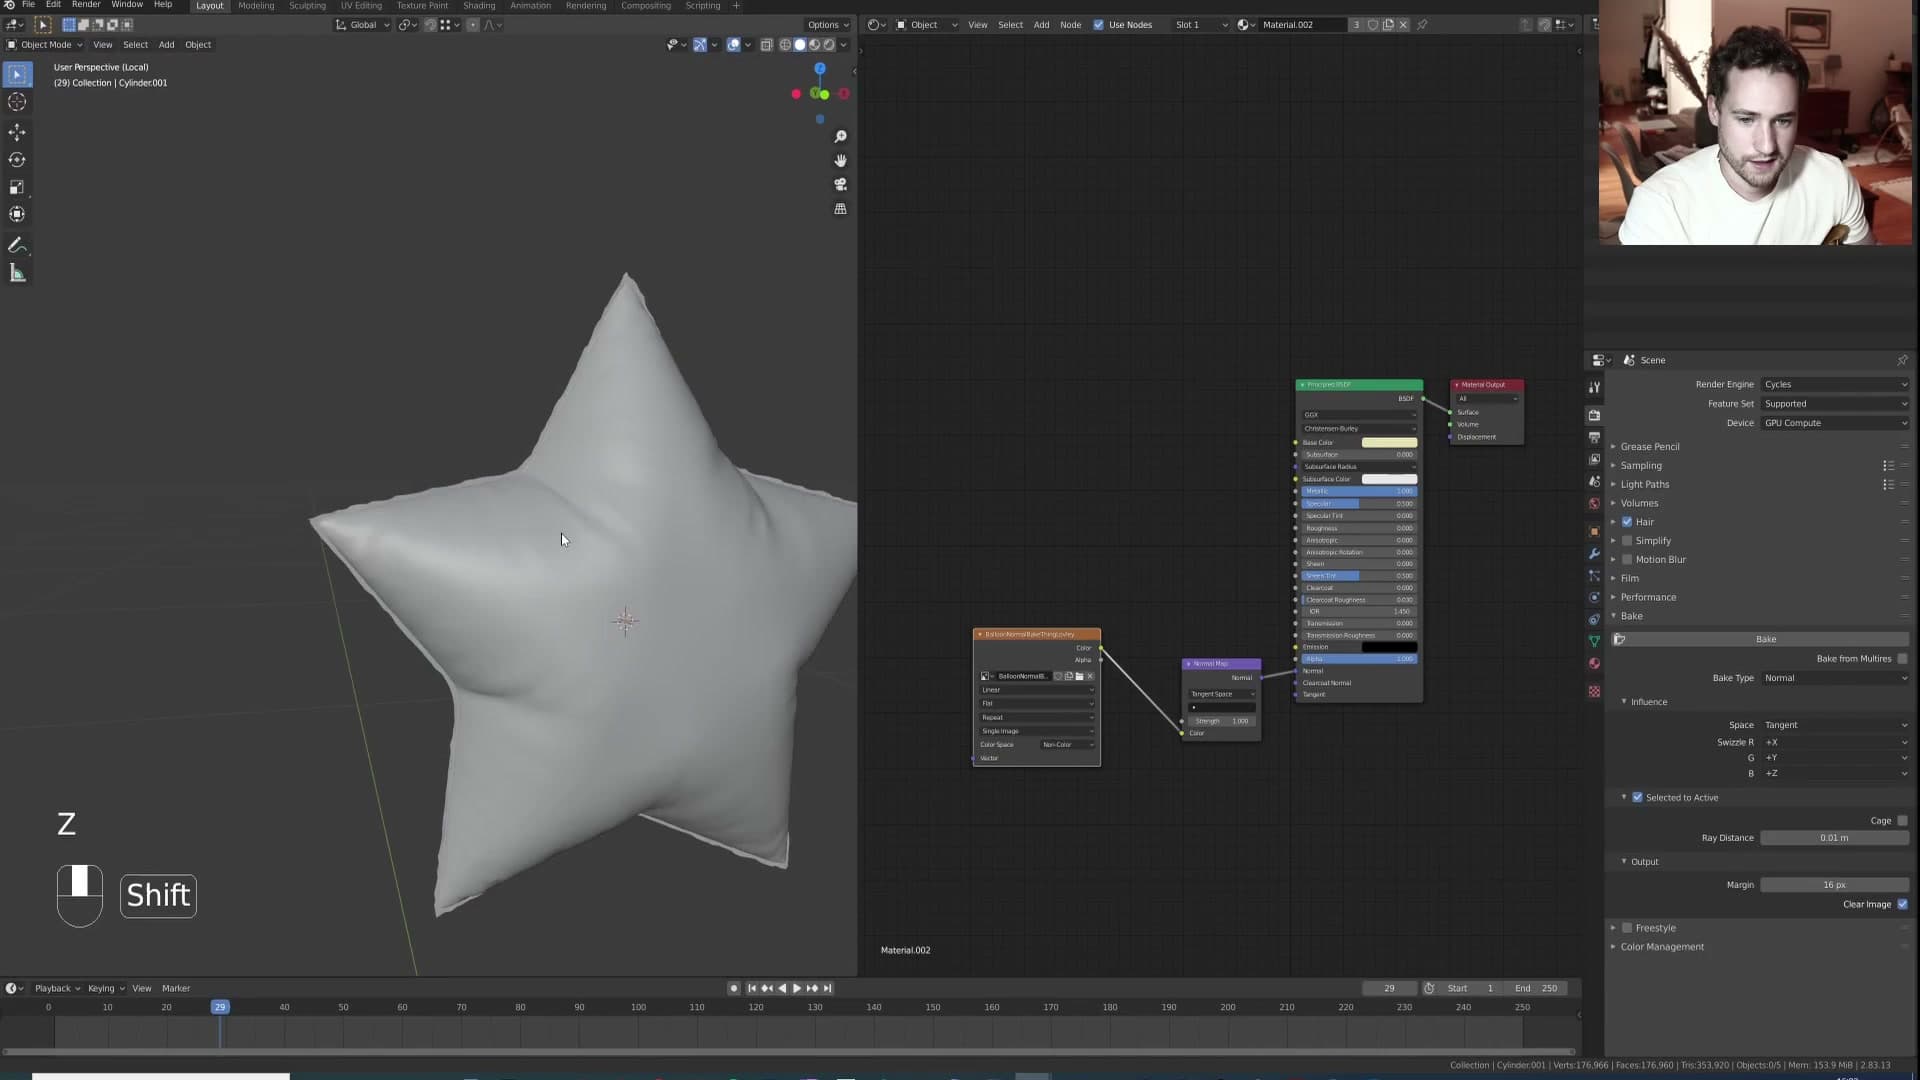
With the remaining random faces still selected, press S and scale inward just a touch. Far less than you might think, only enough to pull a few faces shy of the rest. The lip now reads as uneven and crinkly rather than uniformly thick all the way around the equator.
That finishes the modelling work on the shell. Save, and move on to the second cloth pass, the one that gives the balloon its lazy, buoyant bob.
Animating the cube and connecting the string
Set up the thing the balloon will follow. Auto-keyframe a simple walk-cycle path on a cube, extrude a string down from one balloon vertex, and use the Hook modifier with a 'bottom string' vertex group to attach the end to the cube.
Auto-keyframe the cube along a walk path
First you need something for the balloon to follow. Add a cube as a stand-in for whatever would carry the balloon in your final scene: a character's hand, the roof of a car, a bunch of party balloons tied onto something. The geometry doesn't matter, only its motion.
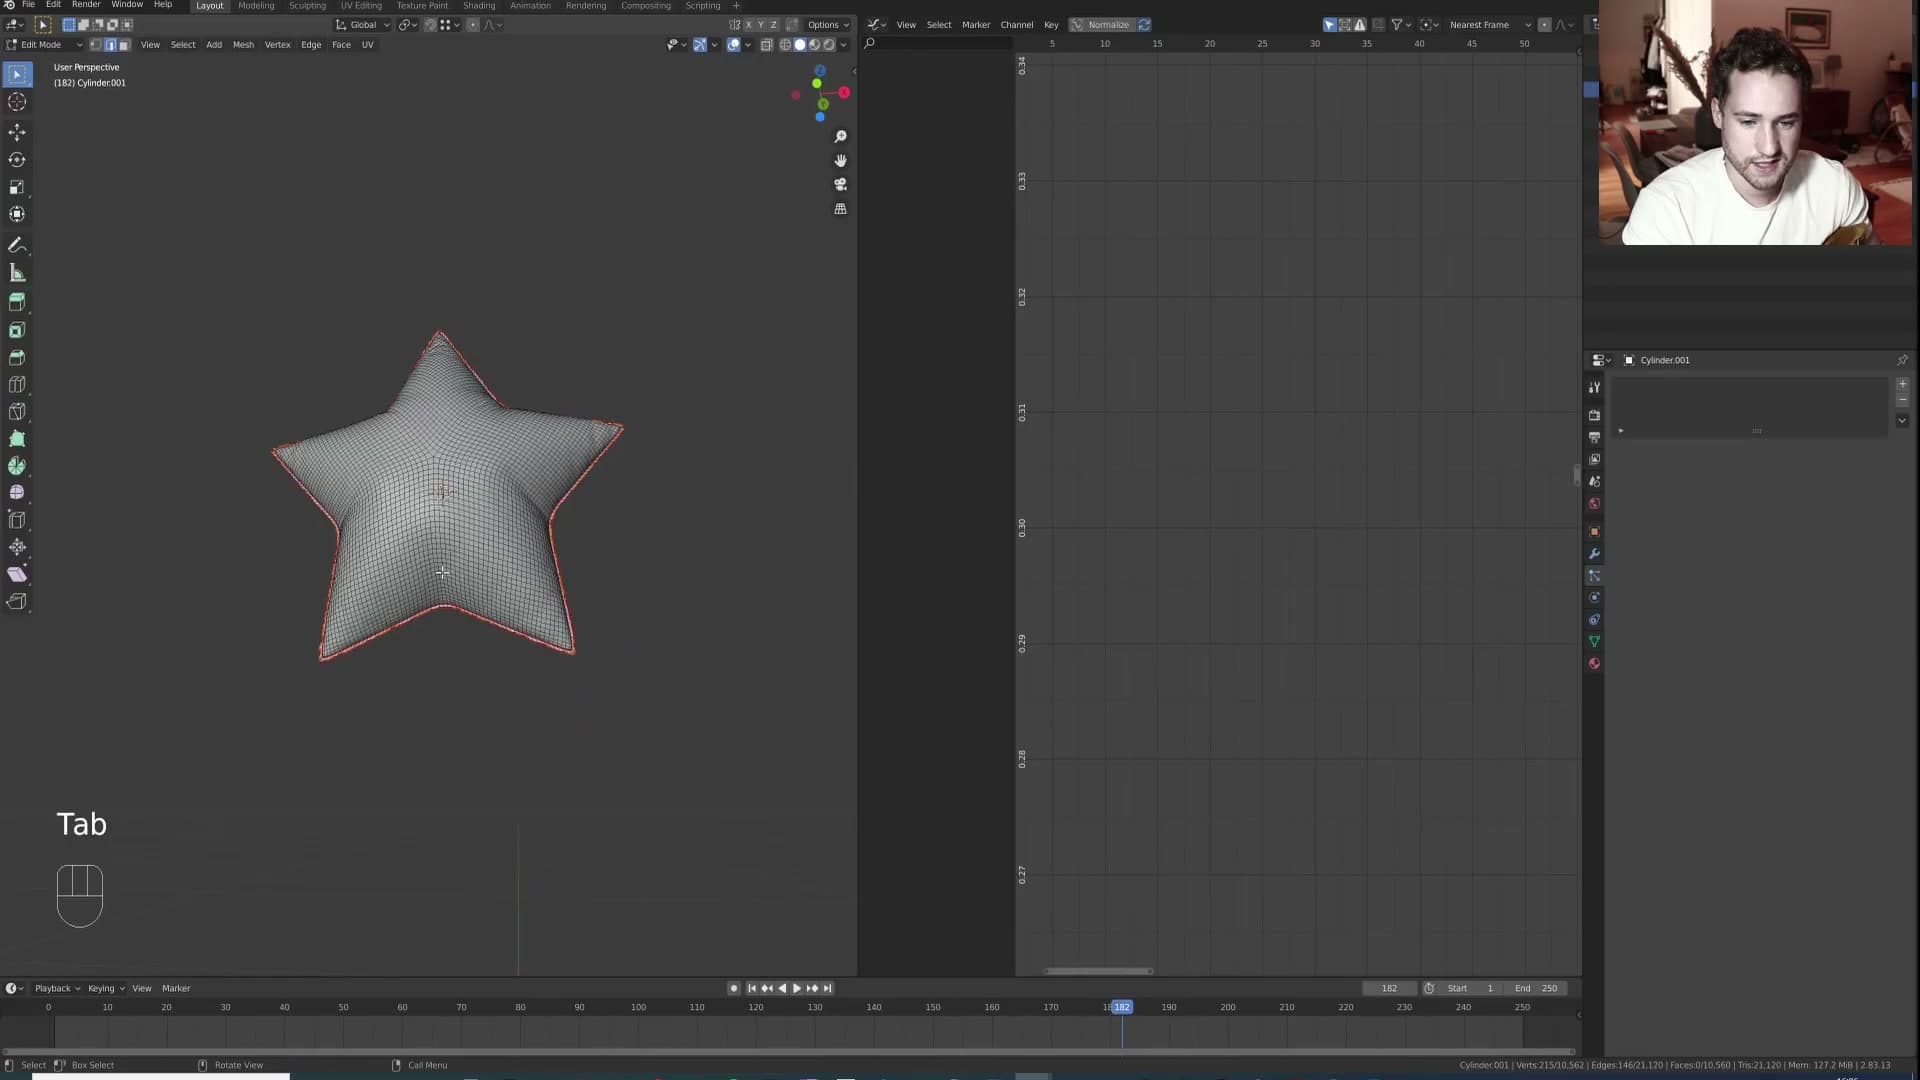
Move the cube off to one side of the scene, then enable auto-keyframe (the round record button on the timeline header). Scrub forward a few frames, nudge the cube along, scrub forward, nudge again. Keep it loose, like somebody walking with a box. The balloon's bob is what sells the shot, not the precision of the cube's path.
Play it back. If the motion looks blocky, check the keyframe interpolation on your new channels. Blender's auto-key defaults to Bezier curves, which gives you a smooth ease in and out between poses. That's all you need here.
Extrude a string from one balloon vertex
Hop into edit mode on the balloon and switch to vertex select. Pick a single vertex on the underside where you'd like the string to anchor.
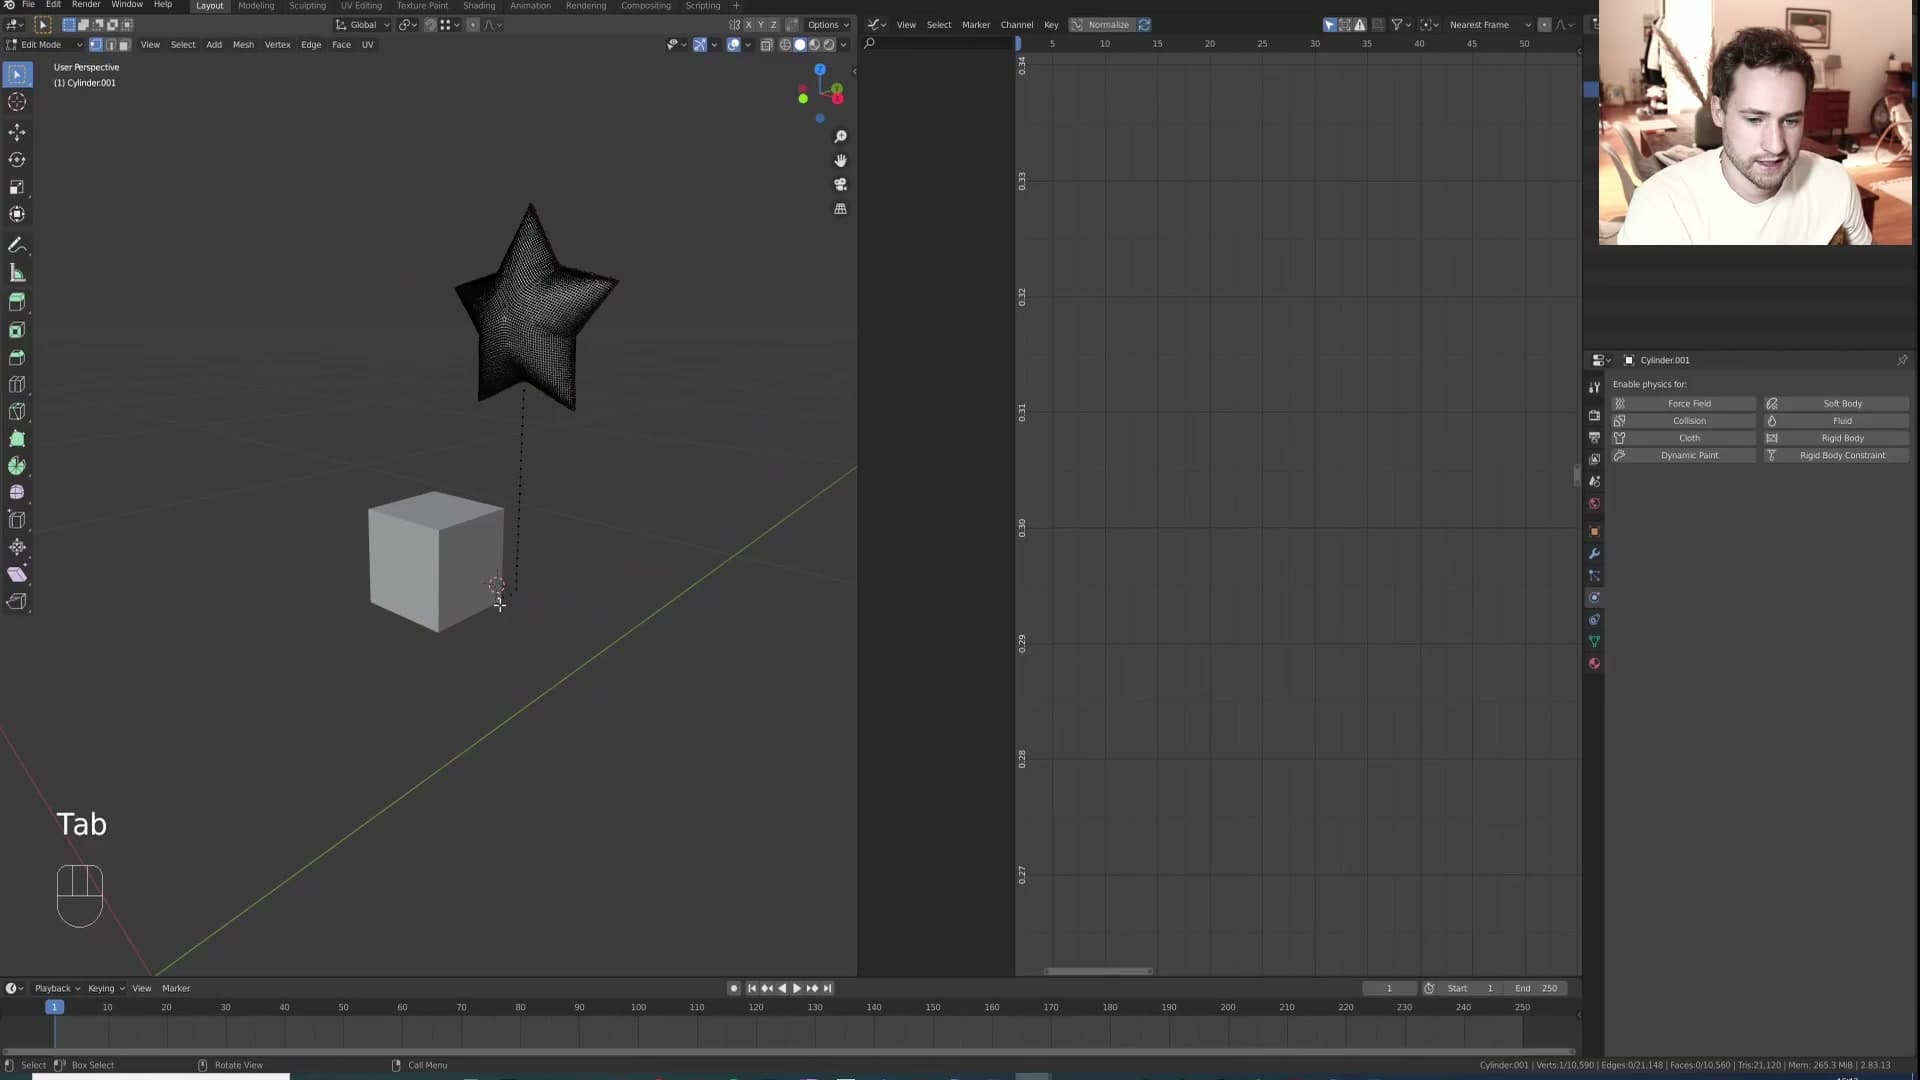
Switch to front view (numpad 1), then press E followed by Z to extrude that vertex straight down along the Z axis. Drag it towards the cube and click to confirm. Do a second short E Z extrude near the bottom to leave a small tail. That last edge is what you'll hook to the cube in the next step.
With the string in place, drag the whole balloon over so the bottom of the string sits roughly next to the cube, ready to be attached.
Hook the string's bottom vertex group to the cube
Back in edit mode on the balloon, select the bottommost edge of the string (the pair of vertices closest to the cube). This is the bit that's going to be glued to it.
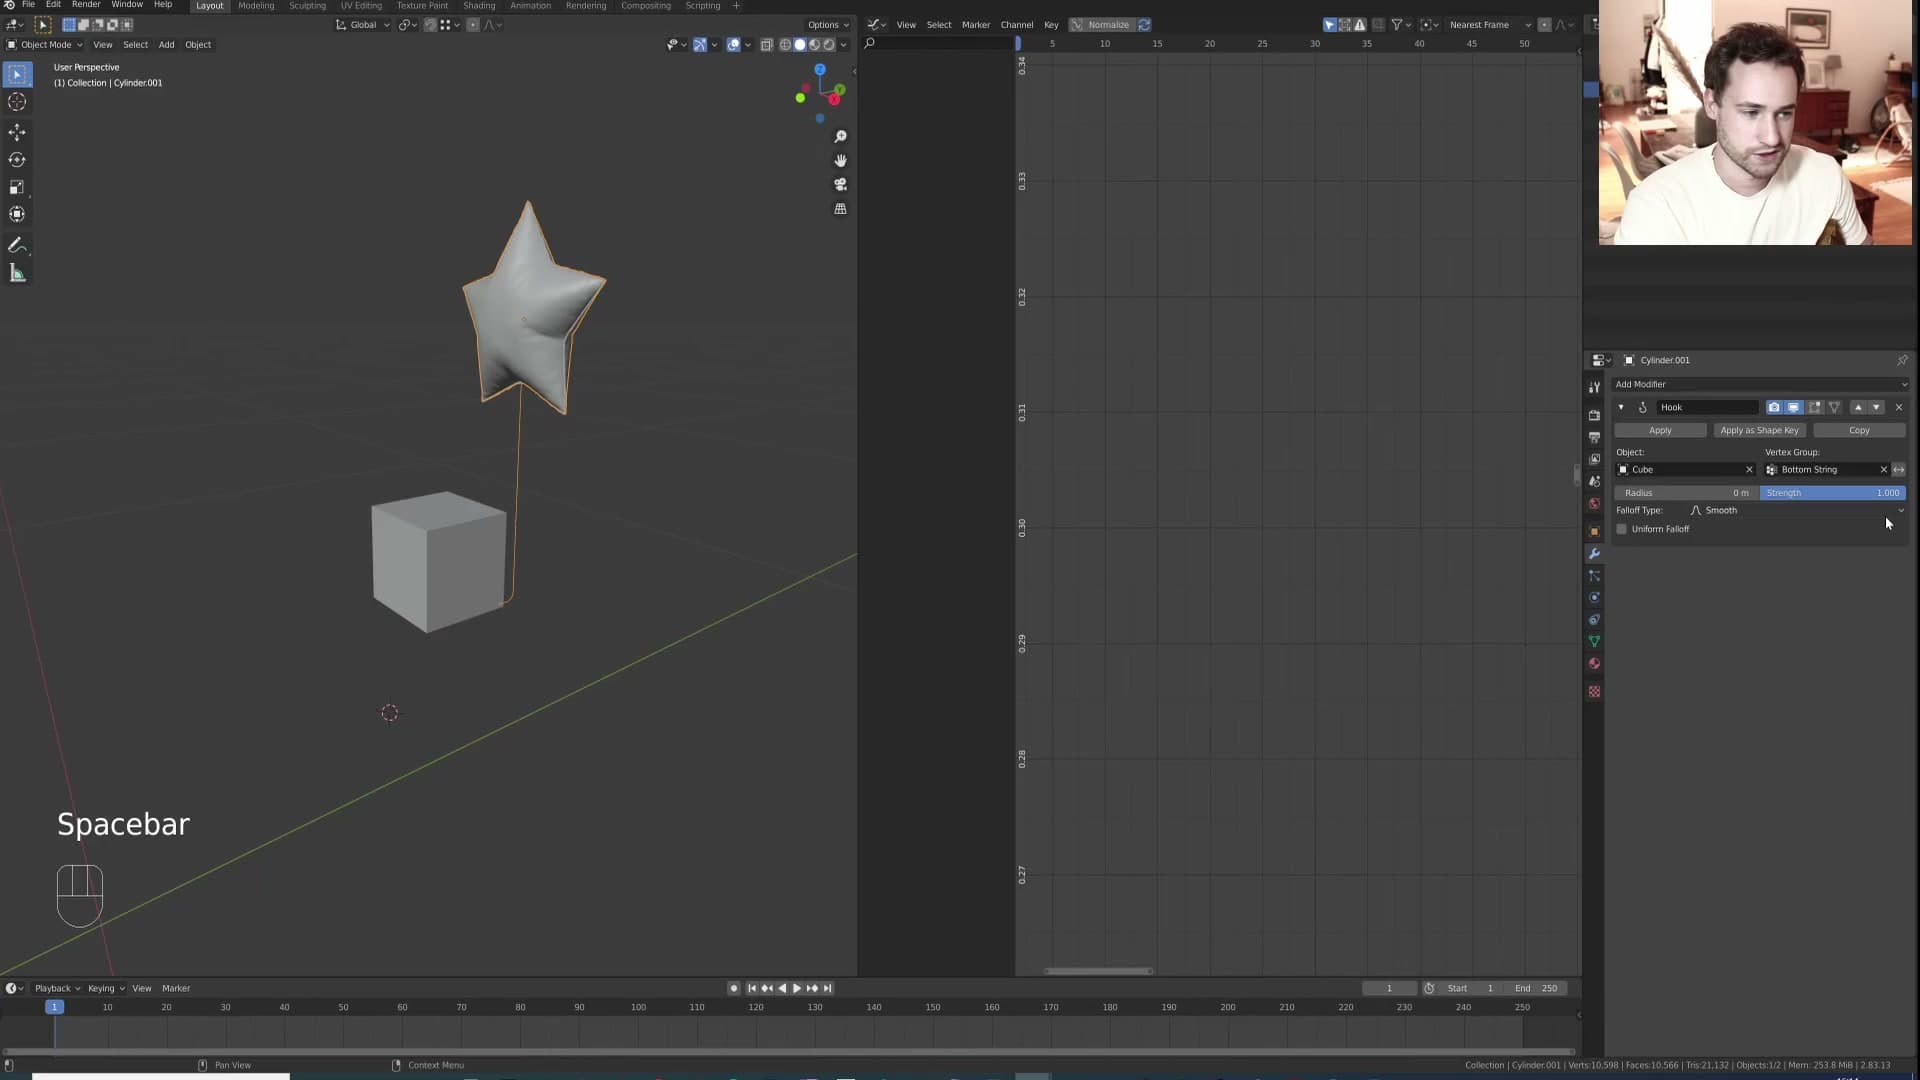
Open the Object Data Properties panel, create a new vertex group, rename it bottom string, and click Assign with that edge still selected. To check it worked, deselect everything and hit Select on the group. Only those two vertices should light up.
Drop out of edit mode and go to the modifier stack. Add a Hook modifier, set its Object to the cube, and set its Vertex Group to bottom string. The bottom of the string is now parented to the cube.
Hit play. The string follows the cube around, but the balloon itself just drags along behind it as a rigid lump with no bob and no give. That's the cue to bring the cloth simulation back in for the final pass.
Vertex groups, internal springs and reverse gravity
Finishing the bob: split the mesh into 'main balloon' and 'main balloon minus edging' vertex groups so pressure only pushes the body (an open edge would jet sideways), add Internal Springs to the upper half, then flip Z gravity to +9.8 with a very low cloth mass so the balloon floats and trails behind the cube.
Main balloon and edge vertex groups
The cloth solver needs three different vertex groups on the balloon mesh to behave correctly: one for pinning the string, one for the pressure target, and one for the internal springs. The pin group already exists from the Hook setup in the previous module, named bottom_string. The remaining two are both subsets of the top half of the balloon, and you build them now in Edit Mode.
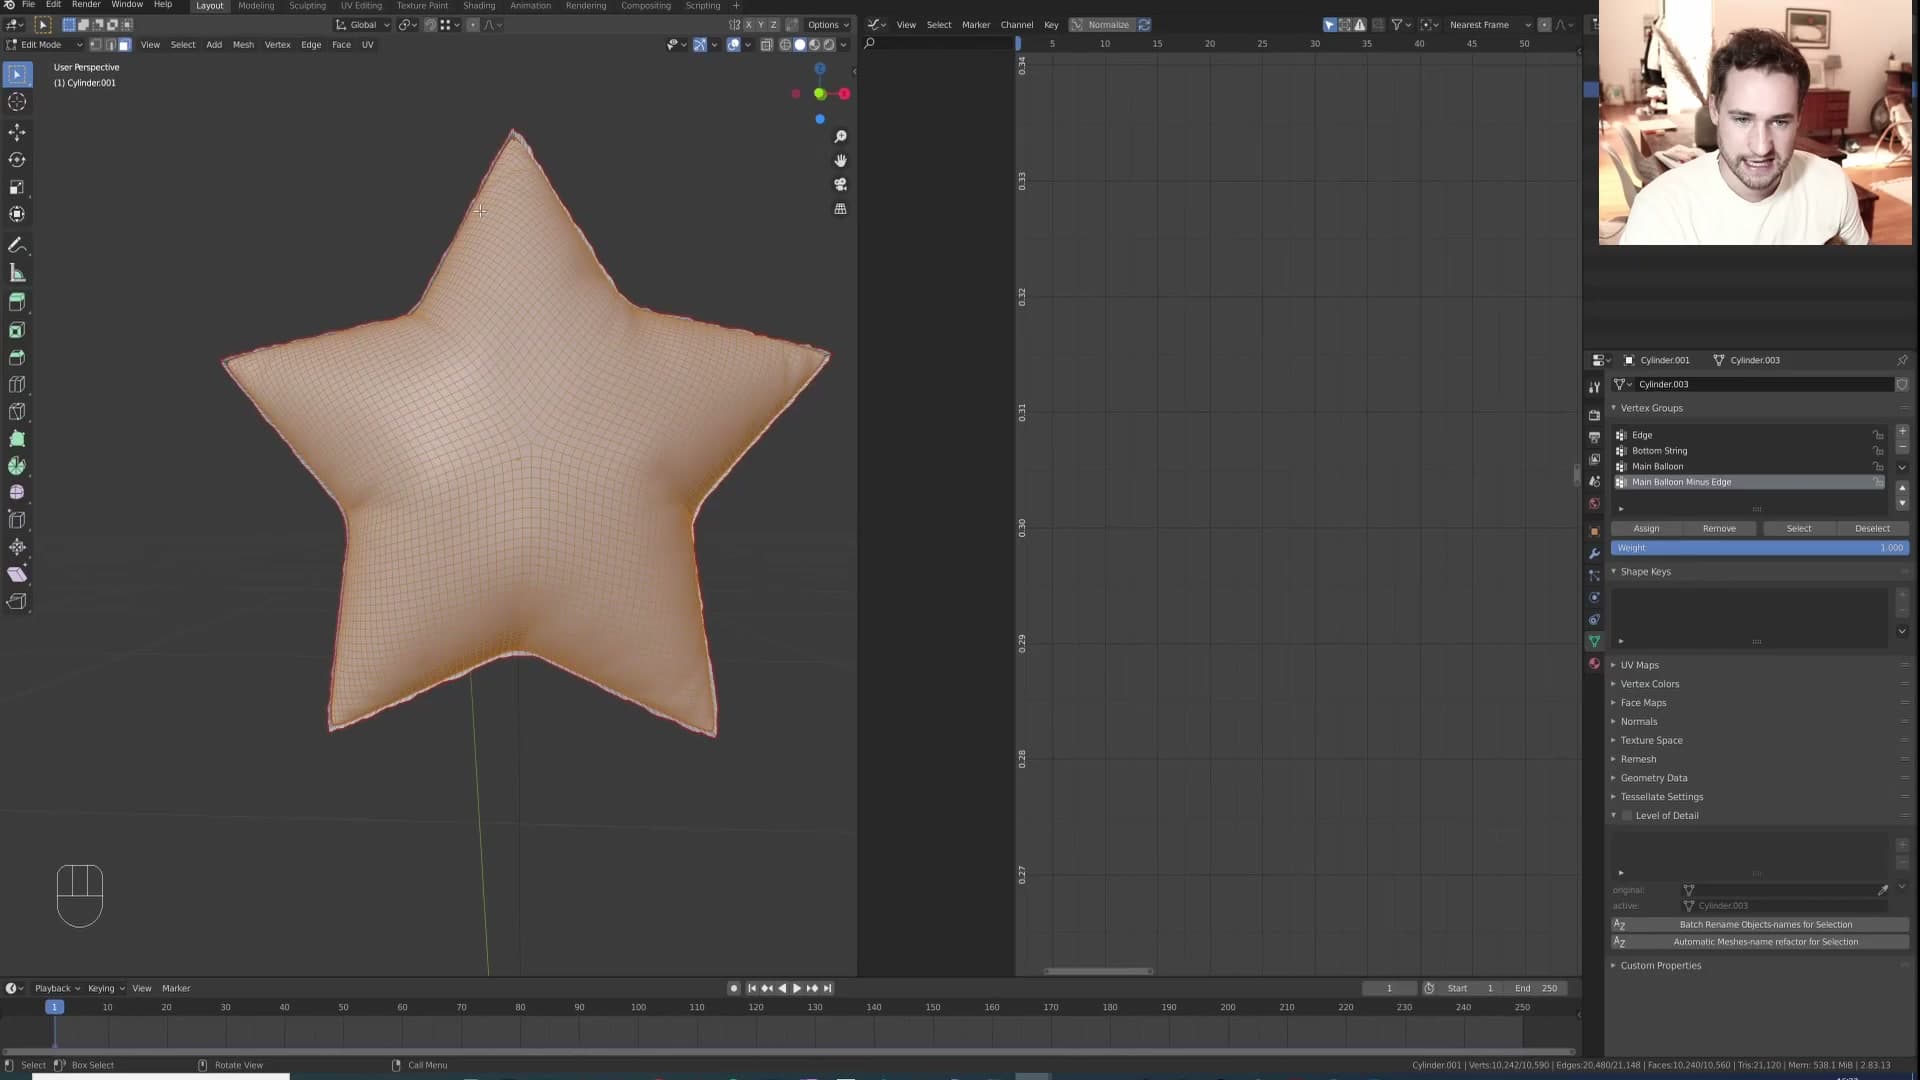
Select the entire top half of the balloon: all of the inflated body plus the small ring of verts around the open mouth where the string emerges. Add a new vertex group, name it main_balloon, and assign the selection. Then deselect just the open edge ring and add a second group, main_balloon_minus_edge, with that slightly smaller selection assigned. Two groups covering nearly the same area, with the only difference being whether the open edge ring is included. The reason for the split becomes obvious in the next step.
Pressure on the body, not the open edge
Open the Cloth modifier's Pressure sub-panel and set the Vertex Group to main_balloon_minus_edge. Bump the Pressure value to 250. Leaving the open edge ring out of the pressure group is the trick that makes this whole setup work.
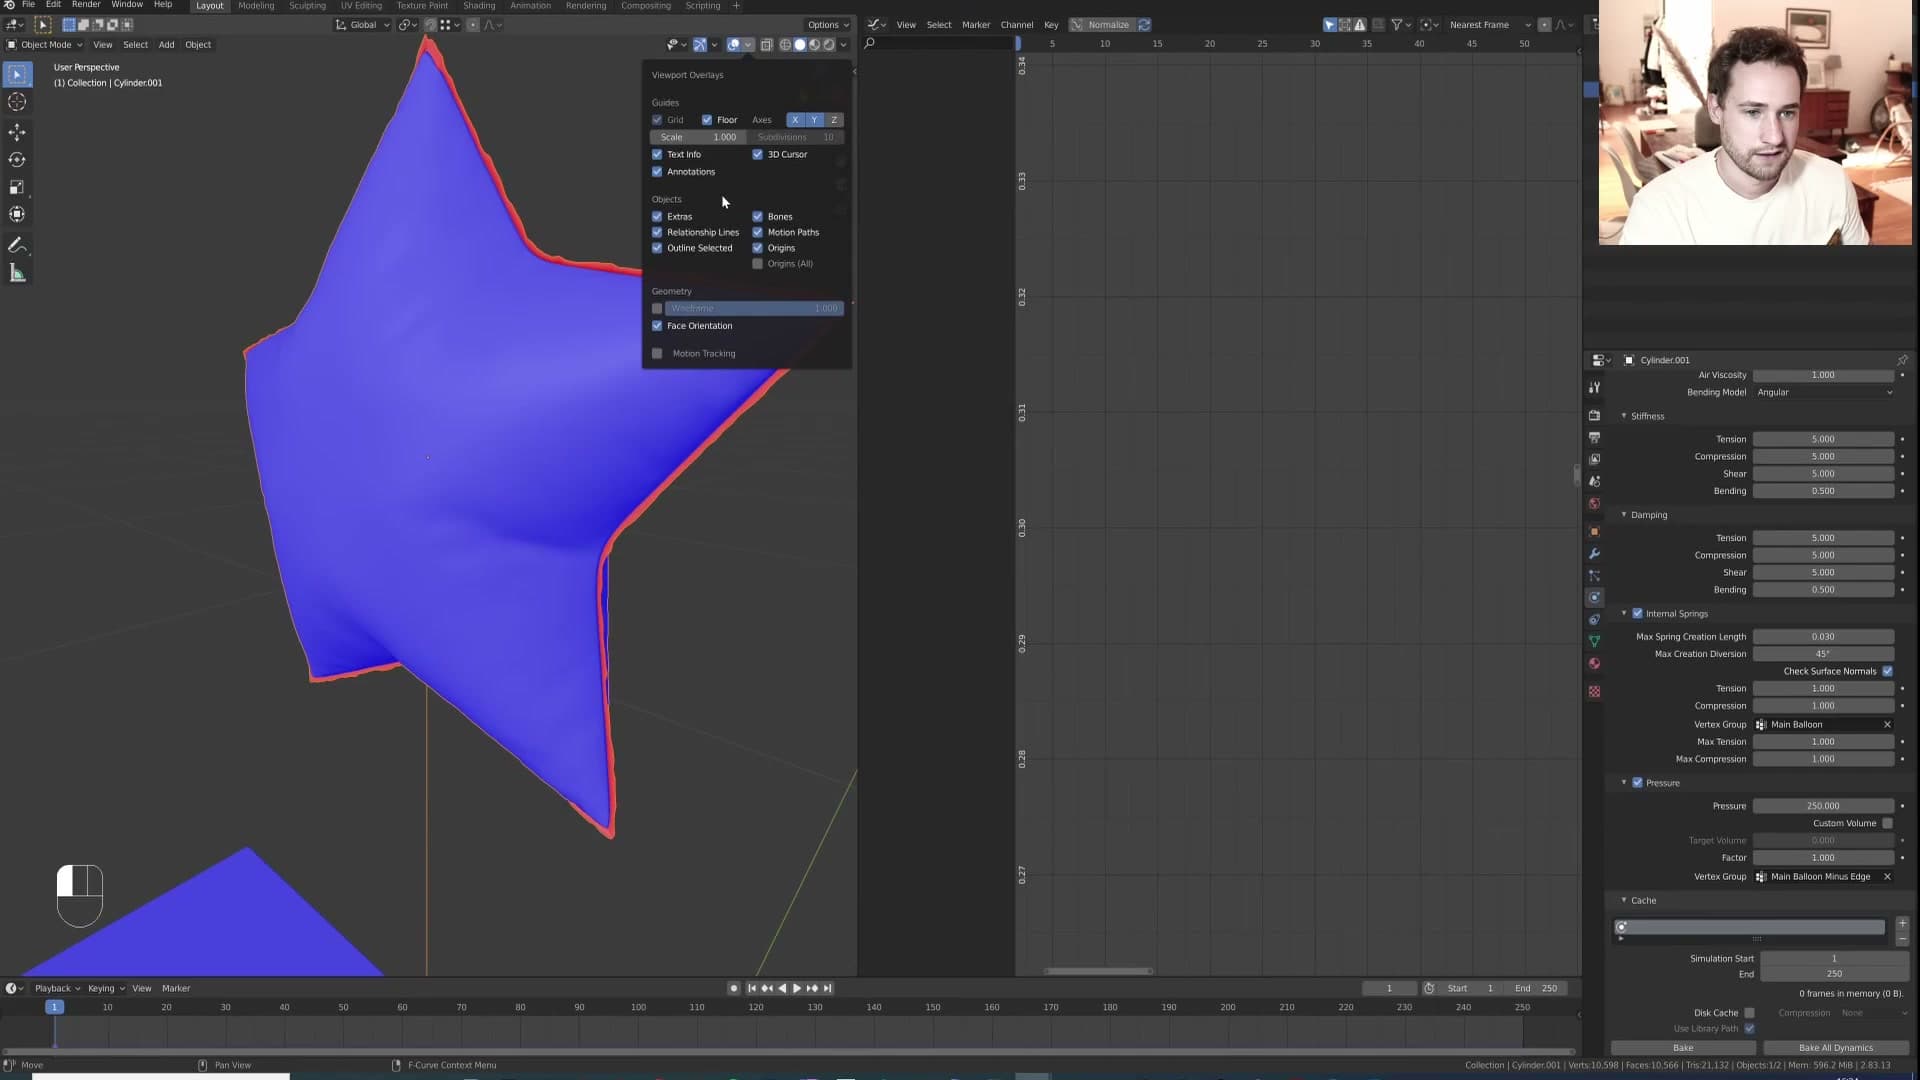
The balloon mesh has an open hole where the string meets the body. Those faces don't close off into a sealed shell. If the open edge ring has pressure assigned to it, the solver treats it like the nozzle of a jet engine: pressure pushes outward through the hole, and the whole balloon launches sideways across the scene. By restricting pressure to the sealed body verts only, you keep the inflation purely inward and the balloon stays where the string is anchoring it.
Pressure inflates outward against whatever is holding the verts in place. On a sealed surface that resolves as a round, taut shape. On an unsealed surface it resolves as thrust. Dramatic, but not what you want here.
Internal Springs on the main body
In the same cloth modifier, tick Internal Springs on. Open its sub-panel and set the Vertex Group to main_balloon, which is the full top half including the edge ring. Internal springs run between paired interior vertices and resist the body collapsing in on itself.
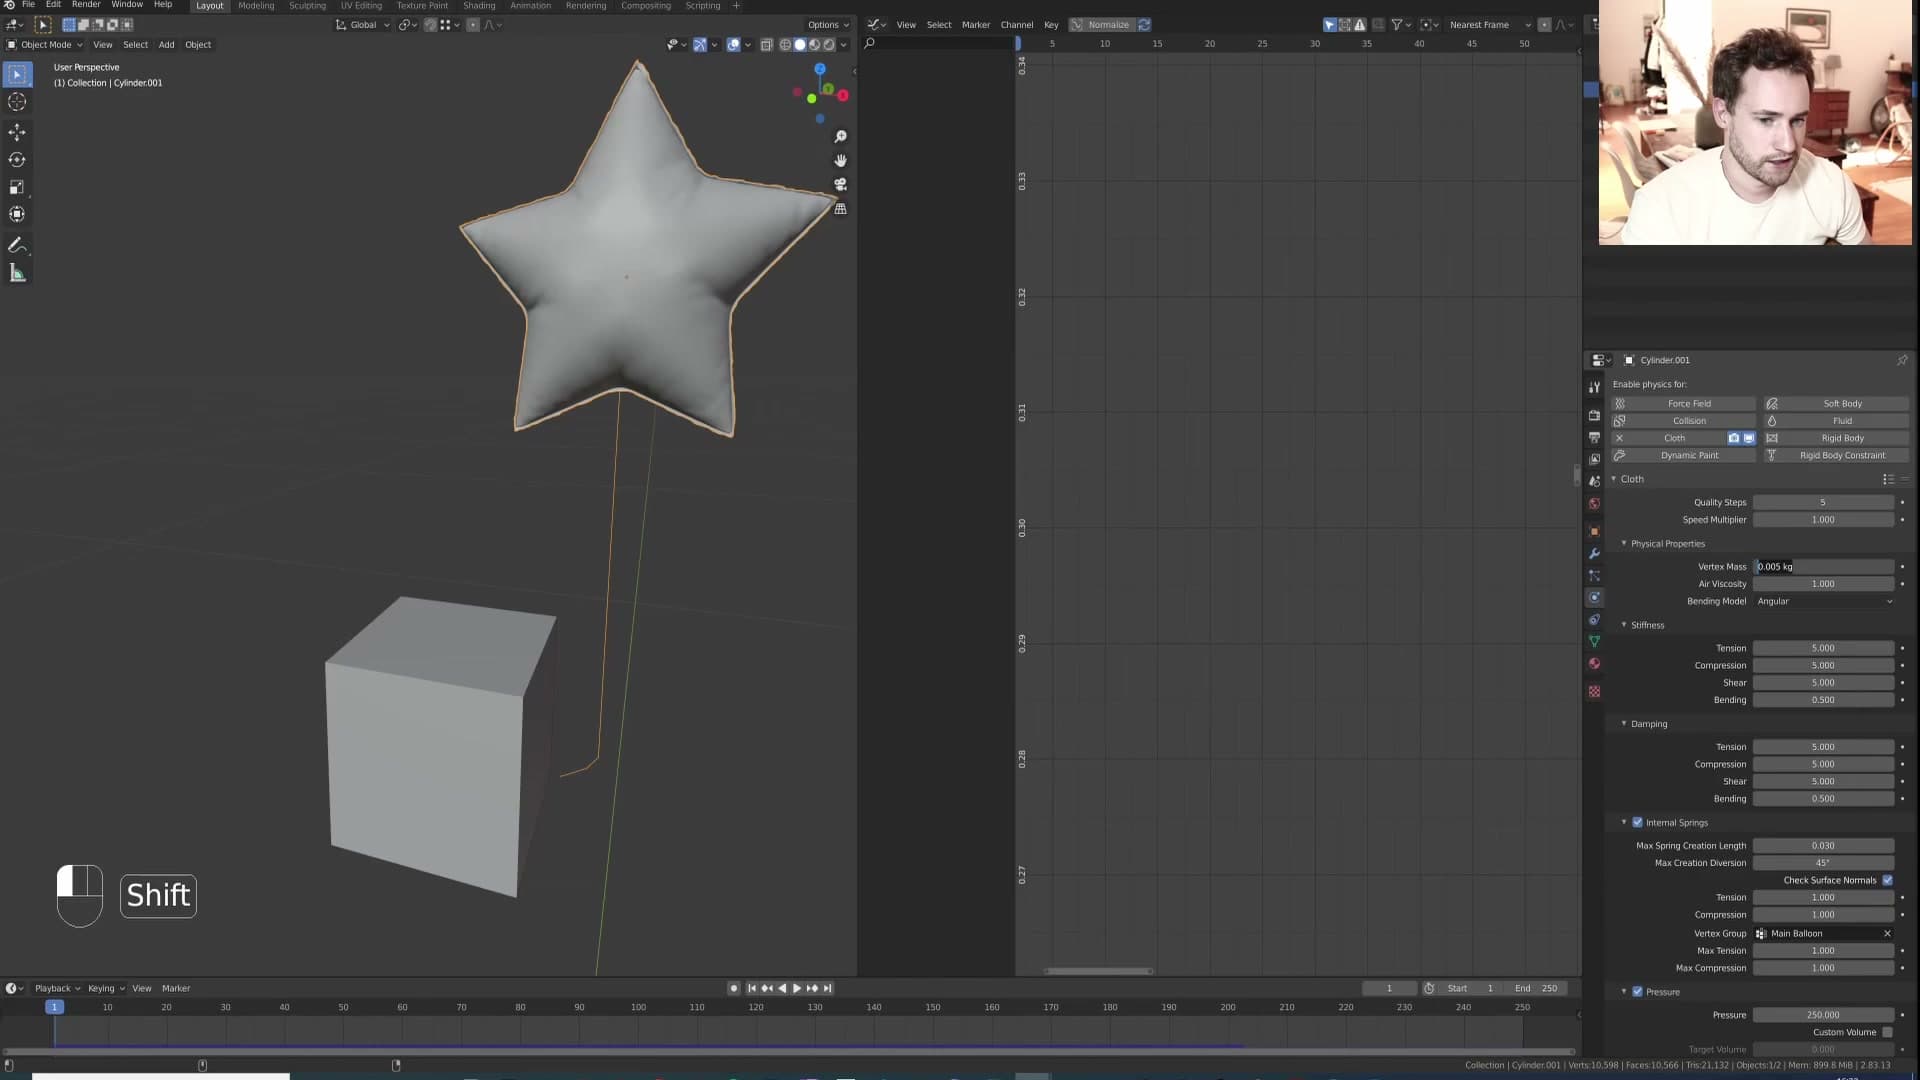
You need them because the moment gravity flips upward in the next step, the balloon wants to float. Without something fighting deflation, the pressure alone won't hold the volume as the cube drags it around. The internal springs are what give the balloon its memory of its inflated shape under tension.
Reverse gravity and tweak cloth mass
Scene gravity defaults to -9.8 m/s² on Z, the value Blender ships with, and it's what every physics system in the scene reads from. For the balloon to rise against the string tension instead of falling to the floor with the cube, flip the sign: open Scene Properties, find the Gravity field, and set Z to +9.8. Same magnitude, opposite direction.
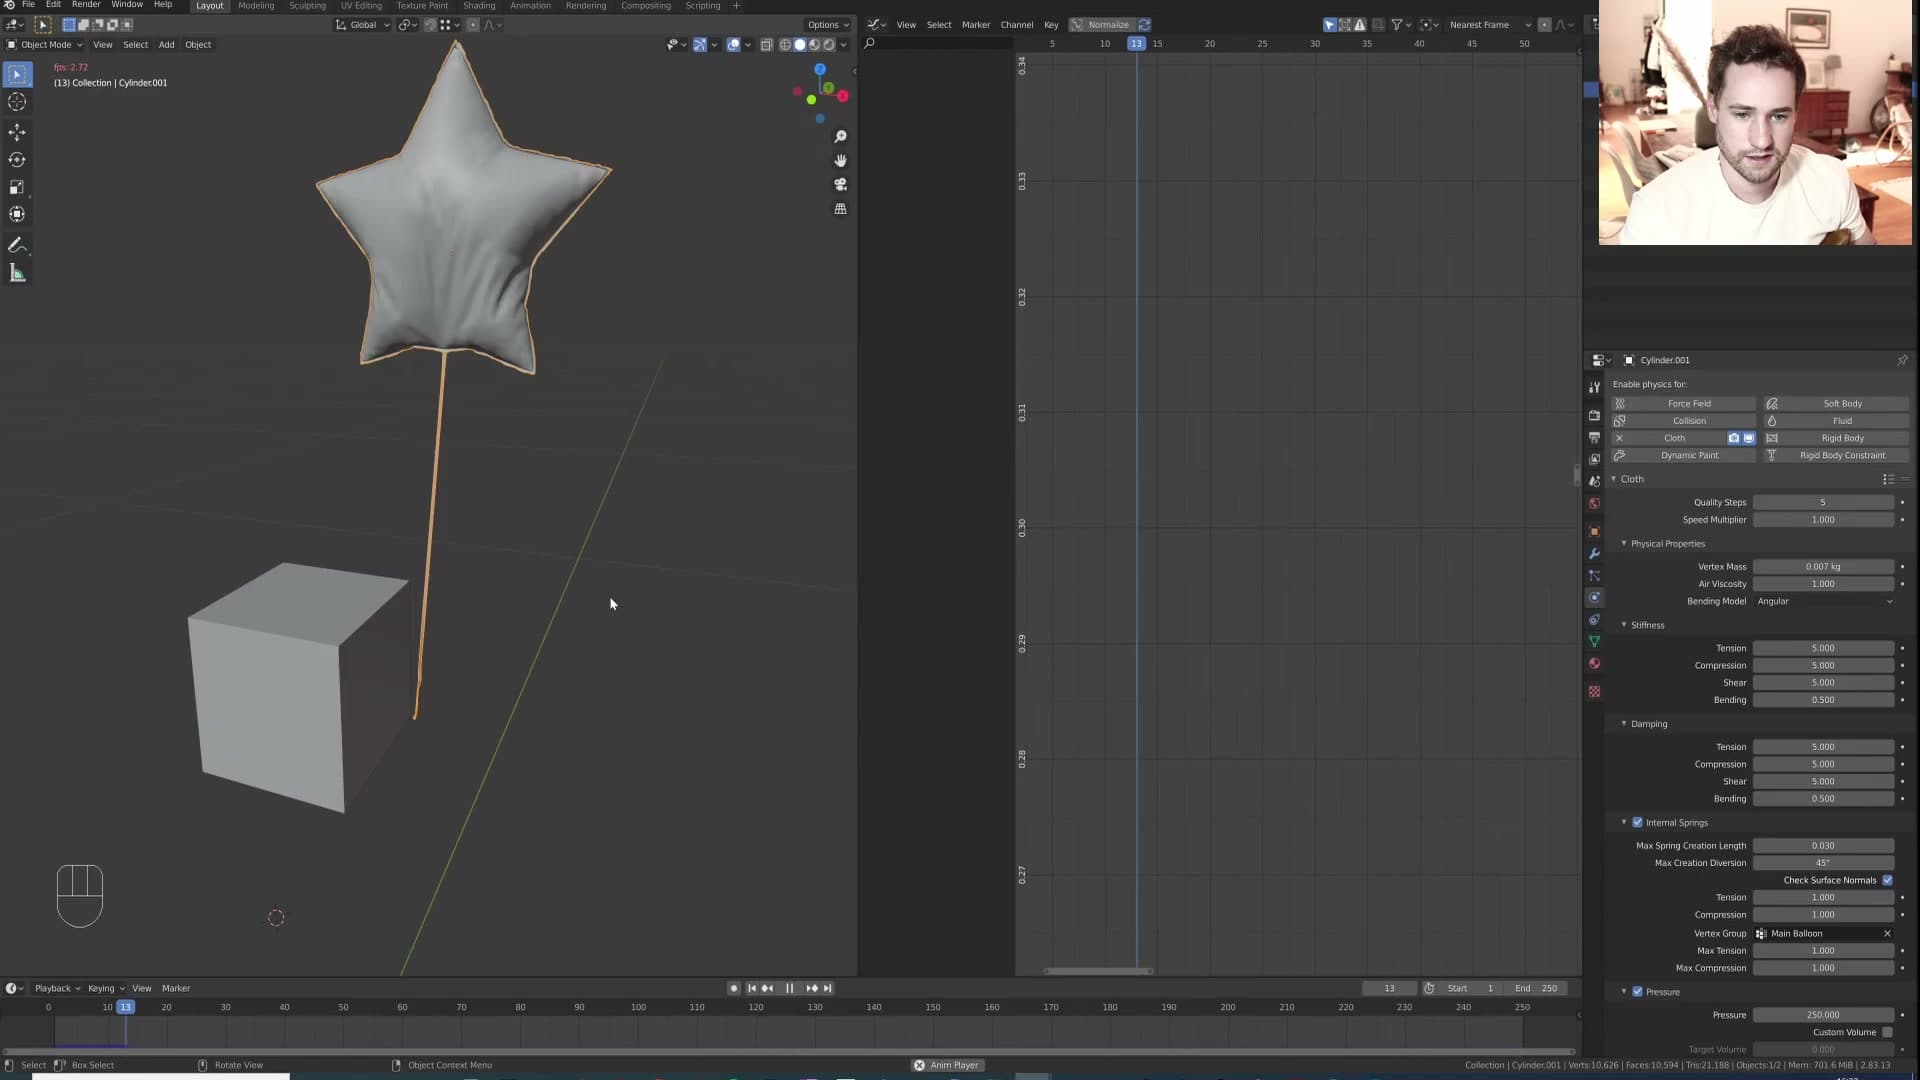
With gravity reversed, the balloon now needs to be light enough for the upward force to overcome the cloth's own mass. In the cloth modifier's Physical Properties, drop Mass to 0.007. That's far lower than the default and roughly in the ballpark of a foil balloon. Enough mass for the sim to still feel like it has weight and tension, but light enough that gravity-up actually lifts it.
While testing the bob, you may notice the string is a single line of verts with no real thickness, which looks wrong when it's the only object visibly holding the balloon down. Jump into Edit Mode on the string, select the bottom verts, press E then X to extrude a tiny amount along X, and merge the extruded pair with M → At Last. That gives the string a touch of dimension at the base without breaking the cloth sim.
Final bobbing result and where to go from here
Press play. The balloon now trails behind the cube with believable lag. It floats upward against the string tension, dips when the cube changes direction, and recovers without collapsing in on itself. The cube animation itself looks a little jittery and robotic at this stage, but that's a separate problem with the keyframes on the cube rather than anything wrong with the cloth sim. The balloon half of the rig is doing exactly what you want.
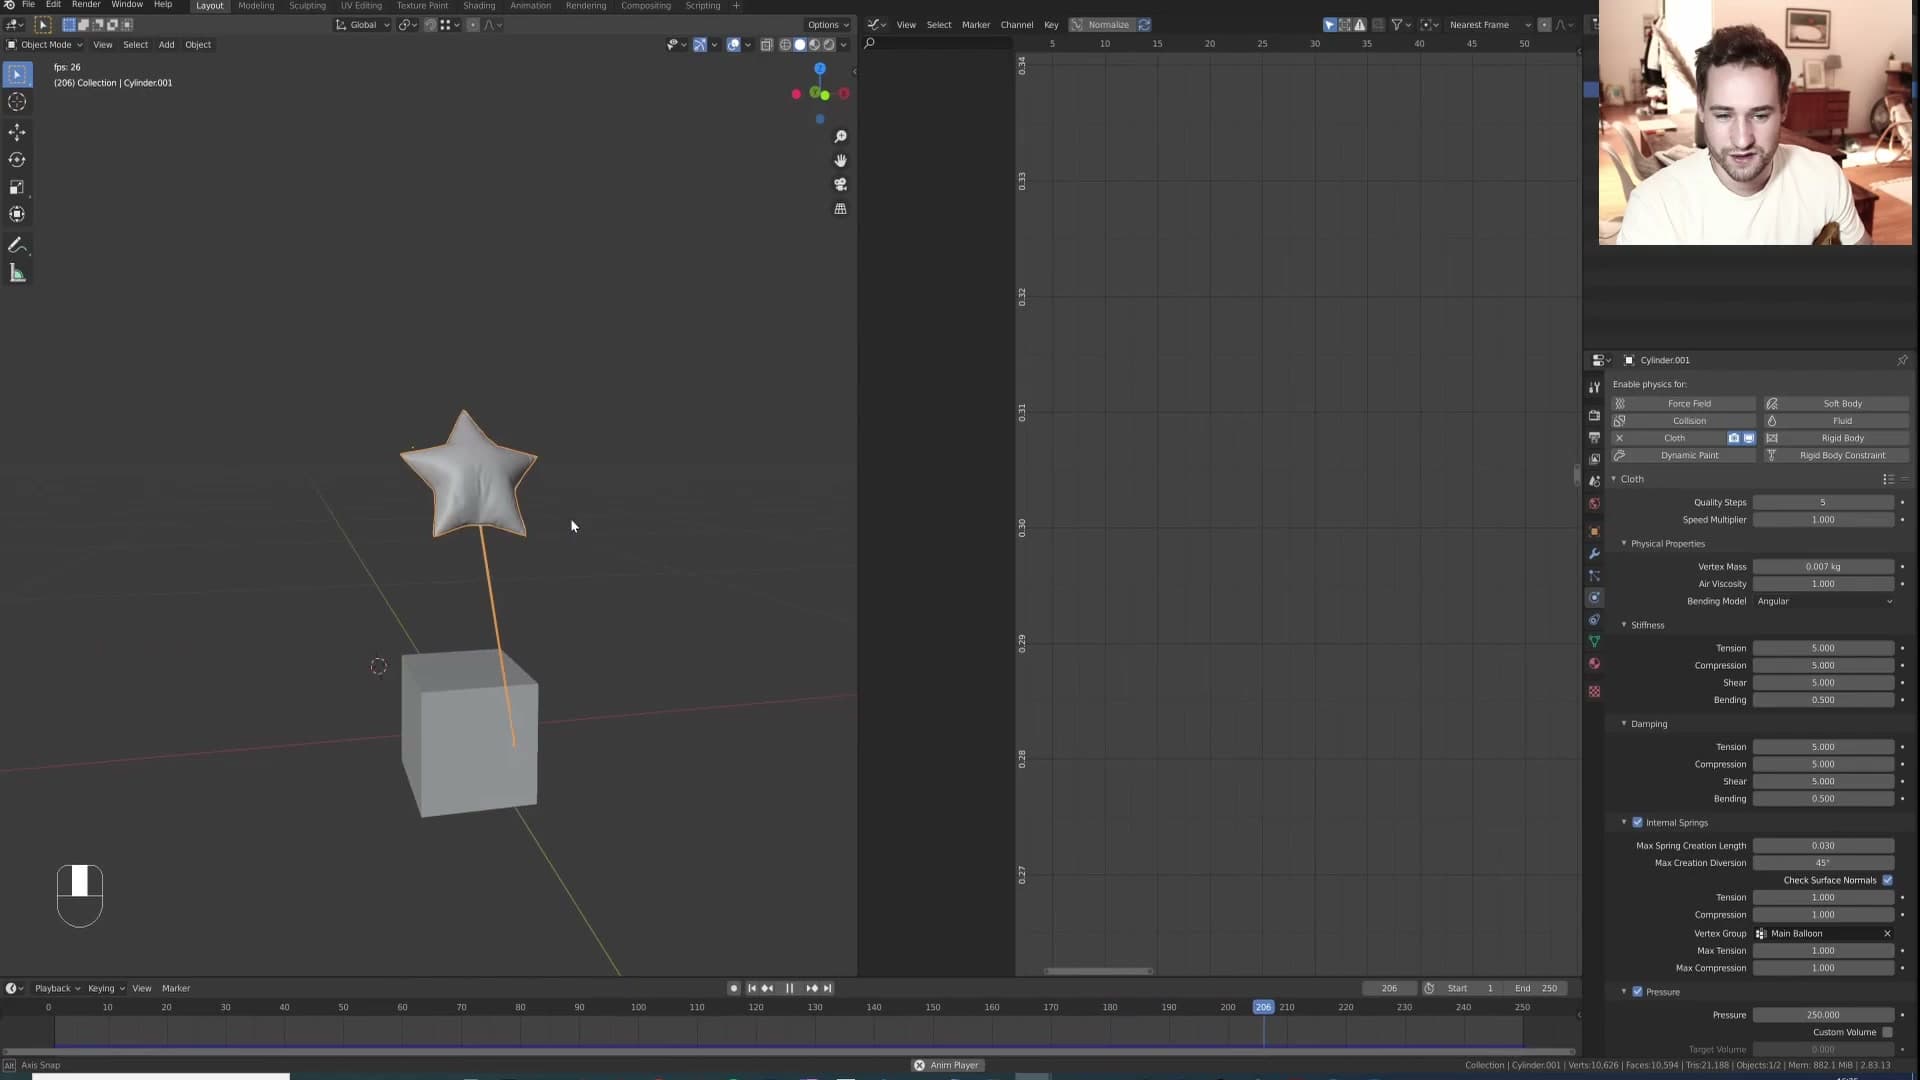
That's the technique. You can spend more time refining the cube's motion curves, dial in the bob amplitude with further mass and pressure tweaks, and push the design further. There's no reason to stop at a generic balloon shape. The same approach (sealed body, edge-excluded pressure group, internal springs on the body, reverse gravity, Hook to an anchor) works for any tethered floating object: a foil heart, a star, a numbered birthday balloon, a cluster of grapes-of-balloons, anything you can model as a cloth shell with one open edge.
For archviz scenes specifically, this lands as a nice incidental touch when a client wants something playful in the frame: a cyclist passing the house with a balloon trailing behind, or a child's birthday set dressing in a garden render. It reads as movement and life without becoming the focus of the shot. Now that you've seen the full pipeline (cloth pressure to inflate, an empty driving wrinkles, normal baking onto a low-poly mesh, Hook for the string, reverse gravity for the bob) you can adapt any piece of it independently. Thanks for watching.
Tools and credits
Everything mentioned in this tutorial, with links.
- Blender is the renderer this entire build runs in.
- iMeshh is a studio platform (project management, client review, asset library, invoicing). The asset library used in this tutorial is included with every iMeshh Pro plan.
- Poly Haven provides free CC0 textures and HDRIs.
Pillar guide: Animation hub