Why this archway is the perfect modifier lesson
The archway looks complicated, but it's a deliberately chosen exercise. It forces you to use the four modifiers you'll lean on for the rest of your Blender career (mirror, solidify, bevel and subdivision surface) and to see how stacking them lets you build complex shapes from a single circle.
The four modifiers you'll use forever
The archway is the first piece in this part of the course that looks genuinely complicated, and that is exactly why it is here. It is a deliberately chosen exercise: complex enough that you cannot model it with one or two destructive edits, but simple enough that the right combination of modifiers makes it almost trivial. Follow along step for step and you will end up with the shape on screen even if the logic only clicks later.
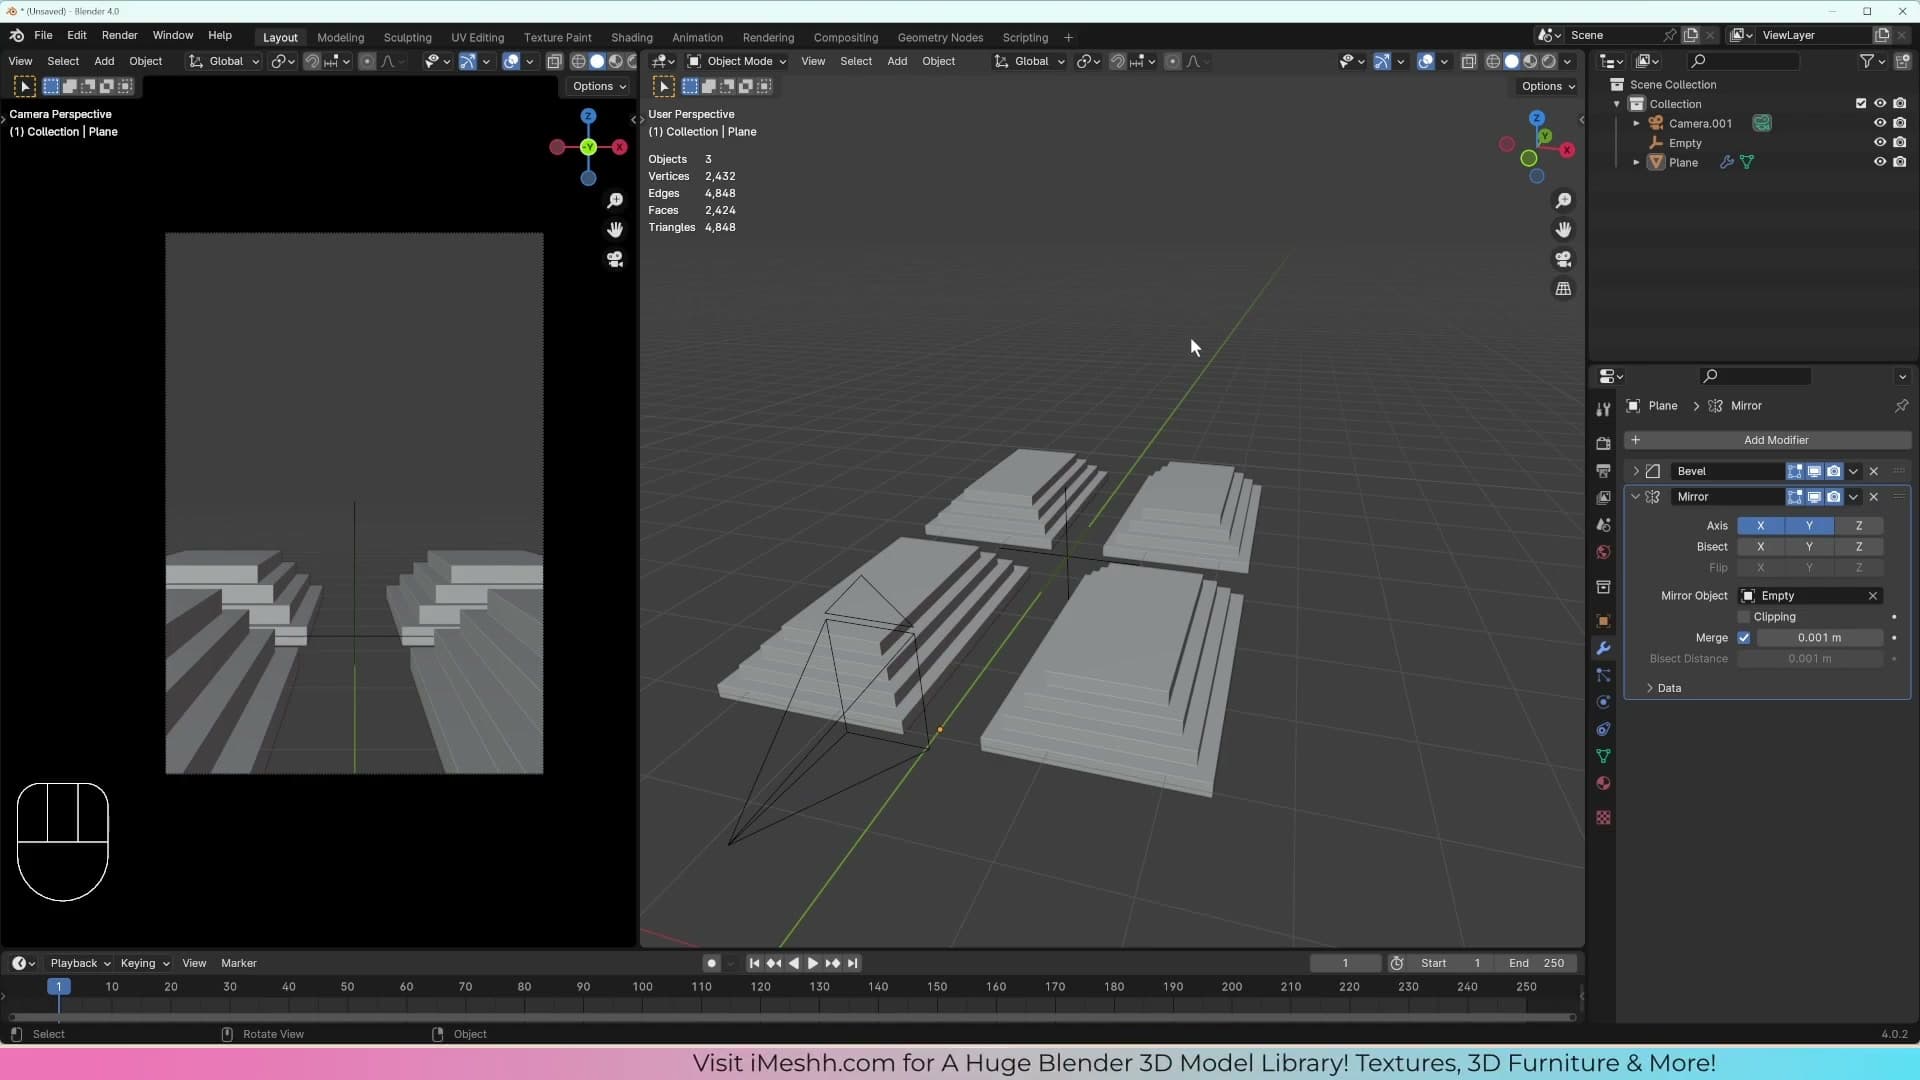
There are four modifiers you will reach for again and again for the rest of your Blender career: mirror, solidify, bevel and subdivision surface. This archway uses all four together. Stacking them in combination is an incredible way to build complicated shapes very easily. That is the real lesson of the chapter, more than the archway itself.
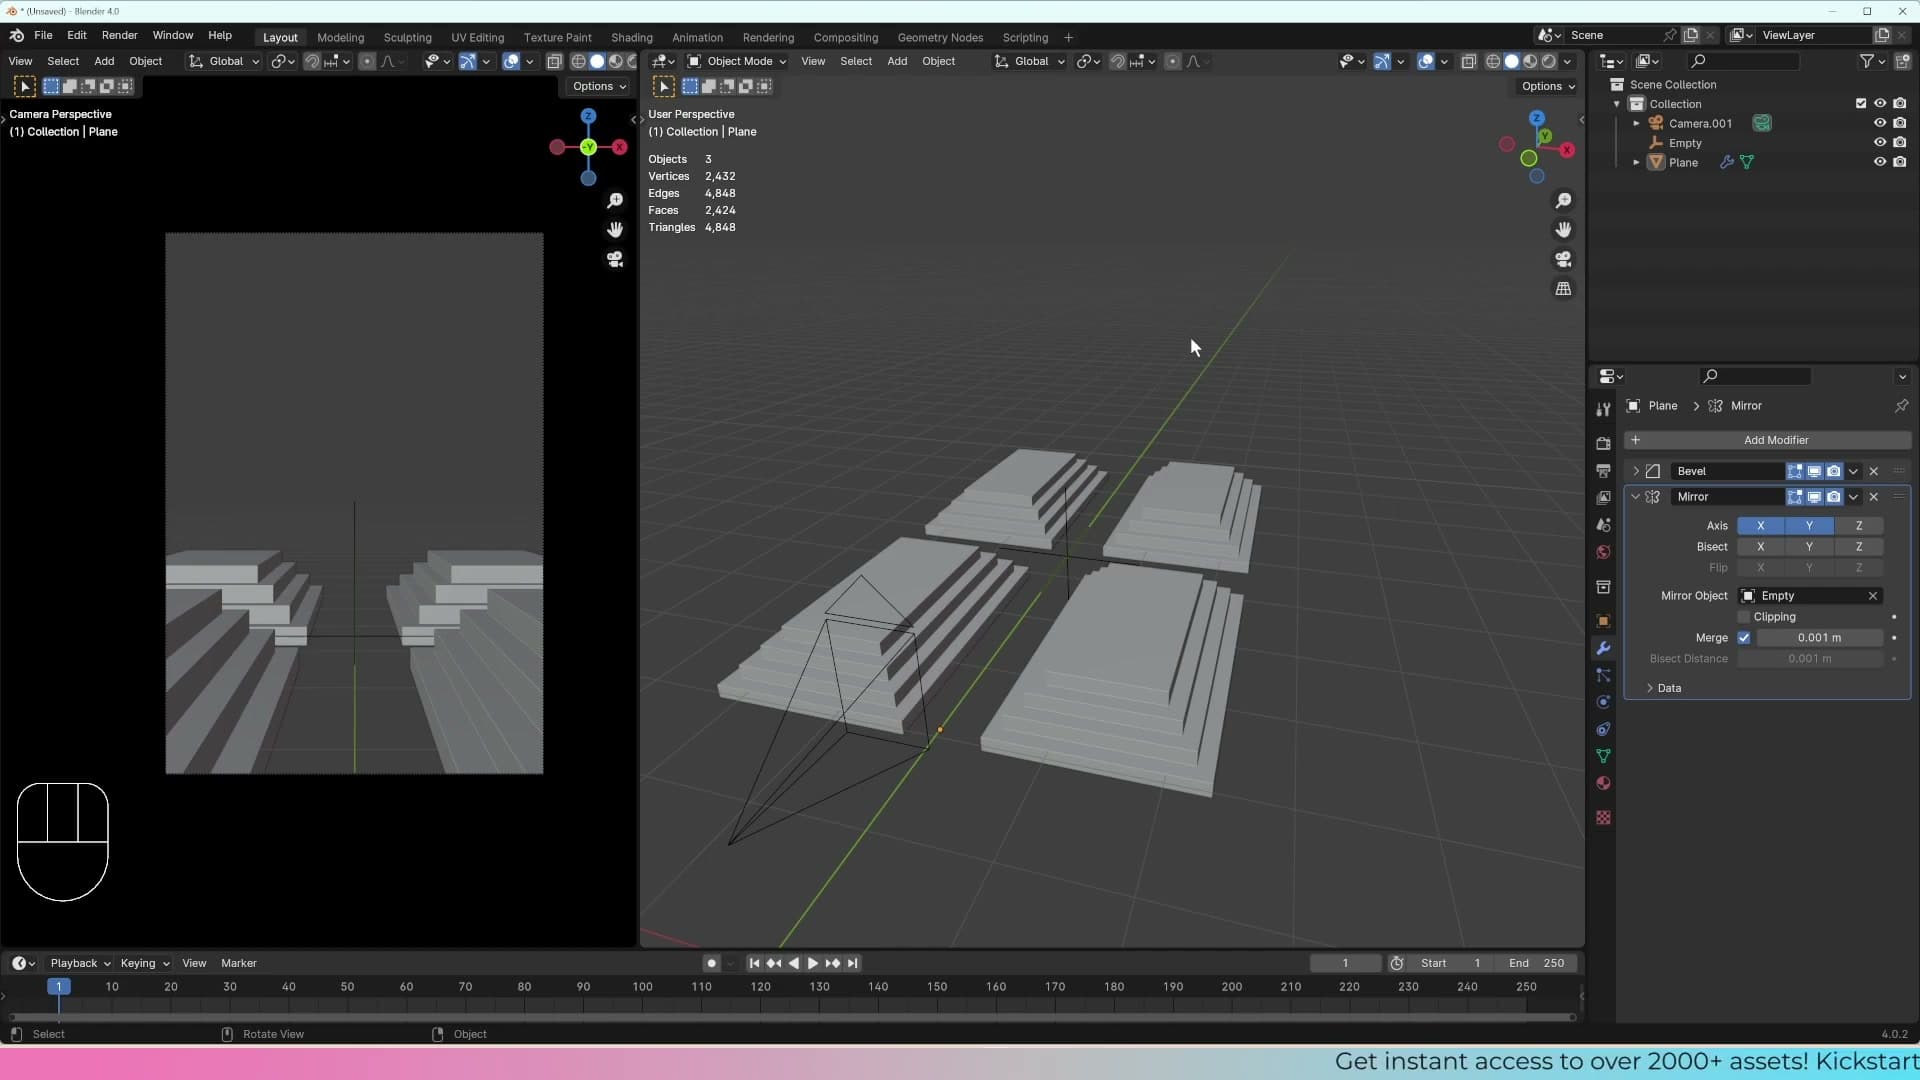
Do not worry if the steps that follow feel opaque on a first pass. The goal here is to copy exactly what is on screen and to leave knowing that these modifiers exist and roughly what each one does. The intuition for when to reach for them comes from repetition on later projects, not from understanding every click on this one.
Starting the archway from a circle primitive
Every complex shape in Blender starts somewhere simple. We reset the 3D cursor, add a 32-vertex circle, rotate it upright on the X axis, then drop into local view and front view to extrude the cross-section that will become the arch.
Adding and orienting the circle
Start clean. Press Shift+C to snap the 3D cursor back to the world origin so the next primitive lands in the centre of the scene.
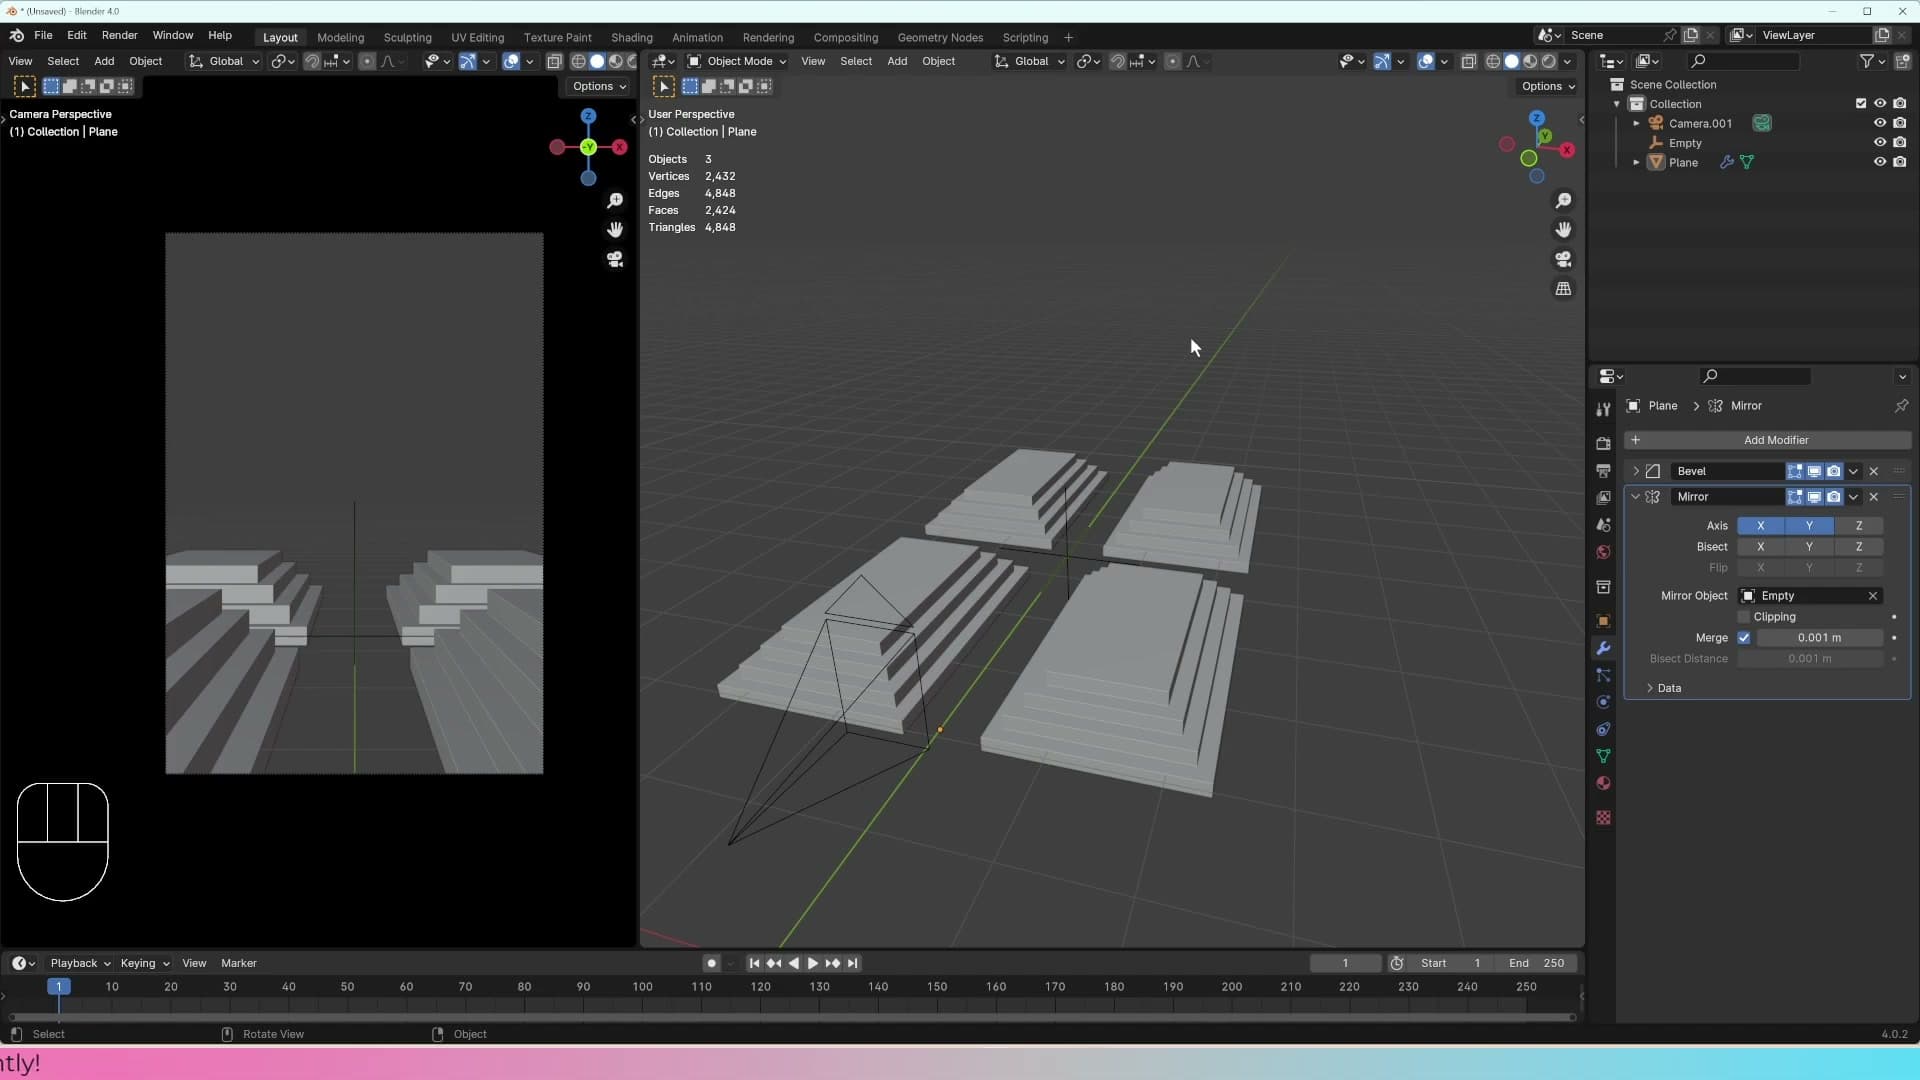
Press Shift+A, open the Mesh submenu and add a Circle. You're scanning the primitive list for the shape closest to what you want to build. A cylinder and a torus are both candidates, but a circle is the easiest starting point because you can shape its cross-section into the archway yourself.
Check the operator panel that pops up in the bottom-left of the viewport. Leave the Vertices at 32. That's the number of points spaced around the circle, and 32 keeps the curve smooth without bloating the mesh.
Move the circle roughly to where you want the arch to live, rotate it 90° on the X axis with R, X, 90 so it stands upright, then lift it up in Z so you have room to work underneath it.
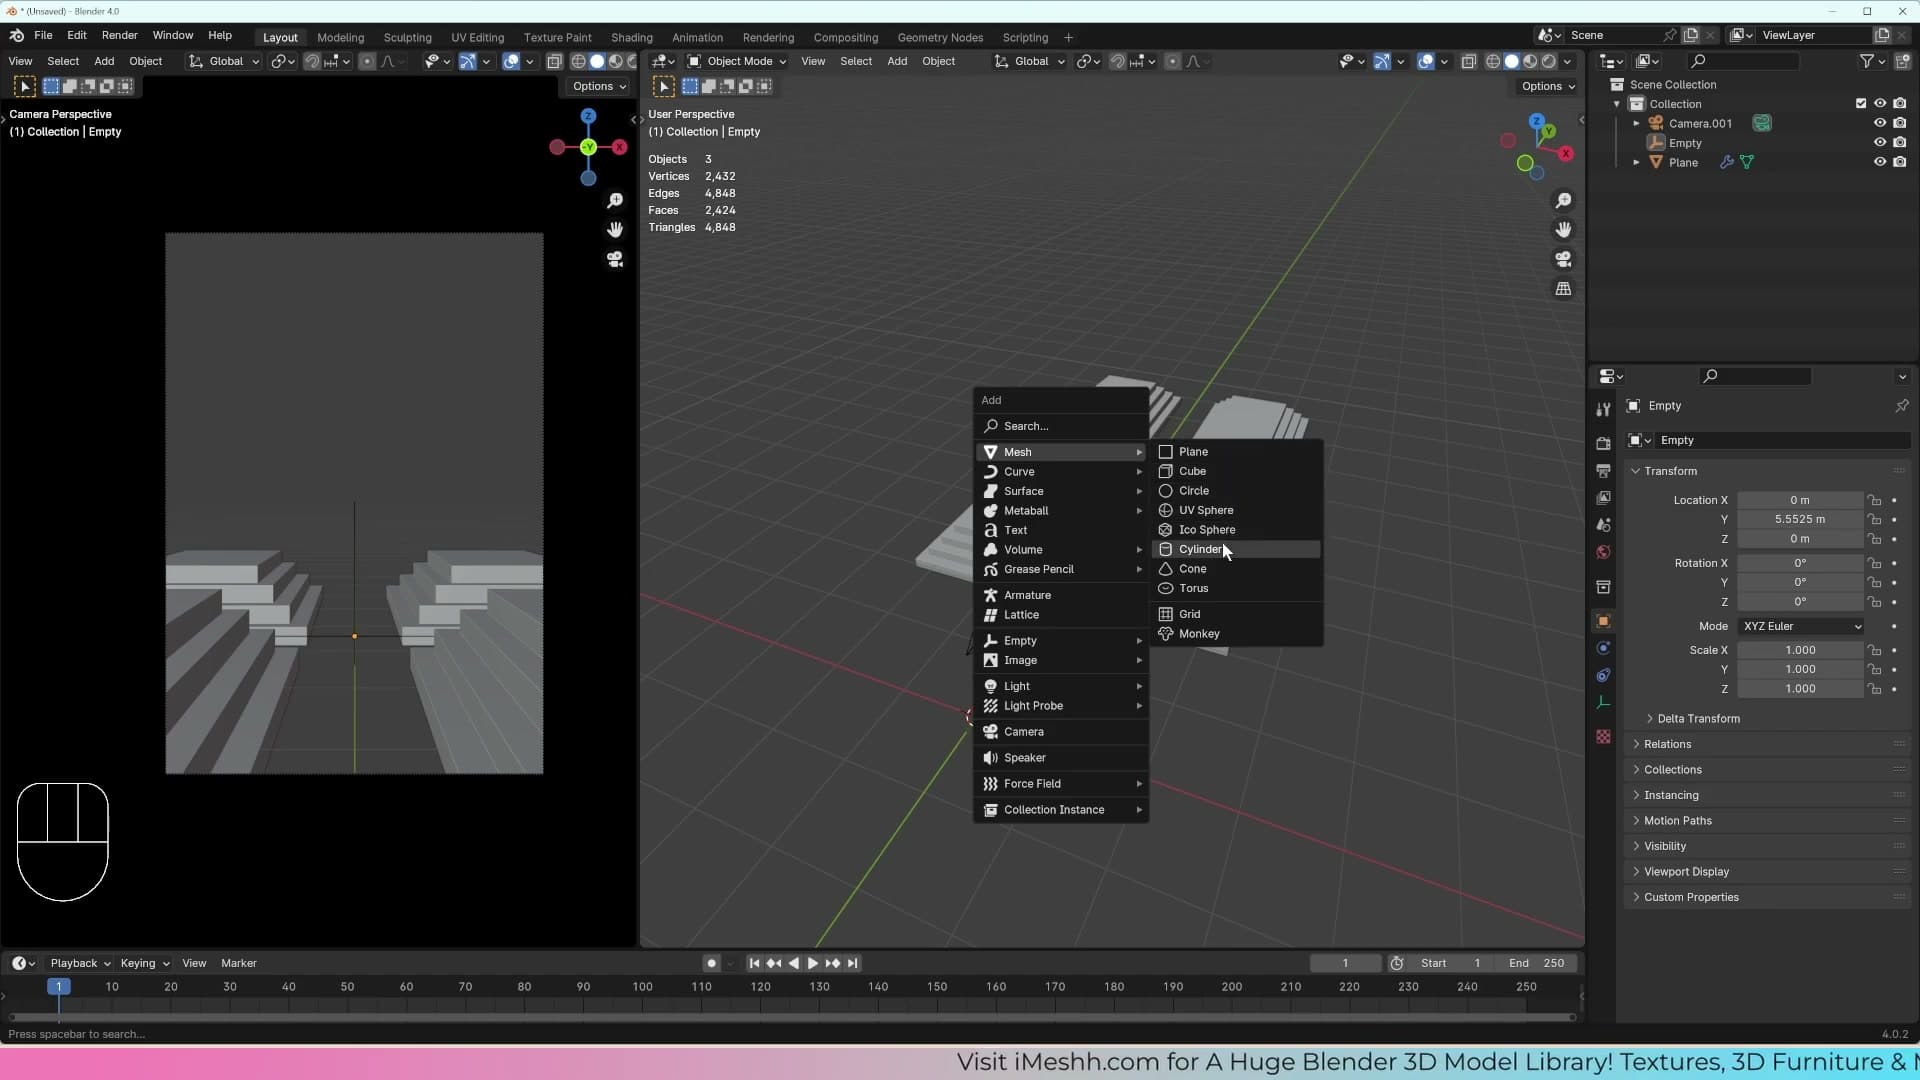
Local view and extruding the arch profile
With the circle still selected, press numpad / to drop into local view. That isolates the circle from everything else in the scene so you can model without other meshes getting in the way. Then press numpad 1 for front view, which is the angle the archway will actually be read from.
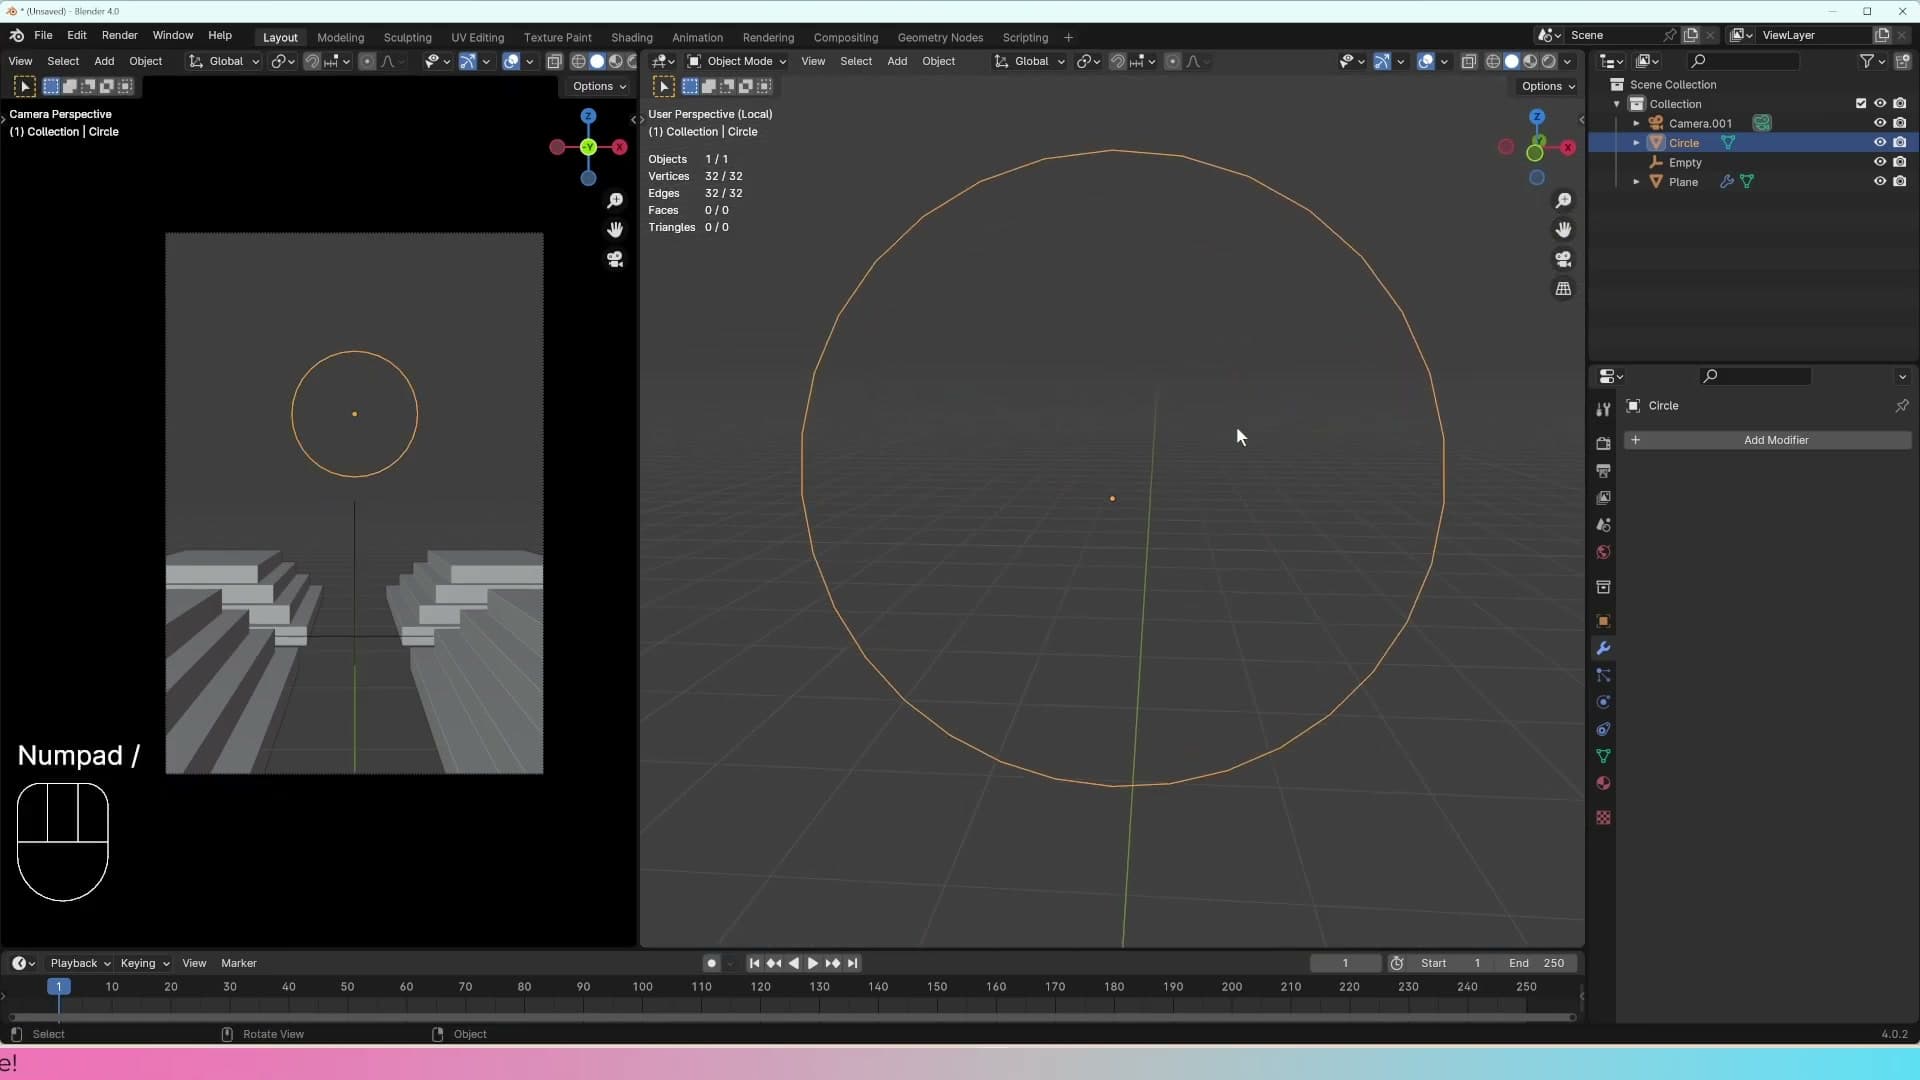
Tab into Edit Mode with the full circle selected. Press E to extrude, then S to scale the new geometry outward. That extruded ring is the cross-section the rest of the archway will be built from in the next steps.
First mirror modifier and extending into walls
An archway isn't a full circle, so we delete the lower faces, add the first mirror modifier so anything we do on one half reflects to the other, then extrude the open edges down and out, using scale-to-zero to keep the floor and the wall ends perfectly flat.
Delete the lower half and add the mirror modifier
An archway isn't a closed circle: there's an opening underneath where the doorway sits. Switch to face select mode with 3, click the lower faces of the circle to select them, then press X and choose Delete Faces to leave just the arch shape behind.
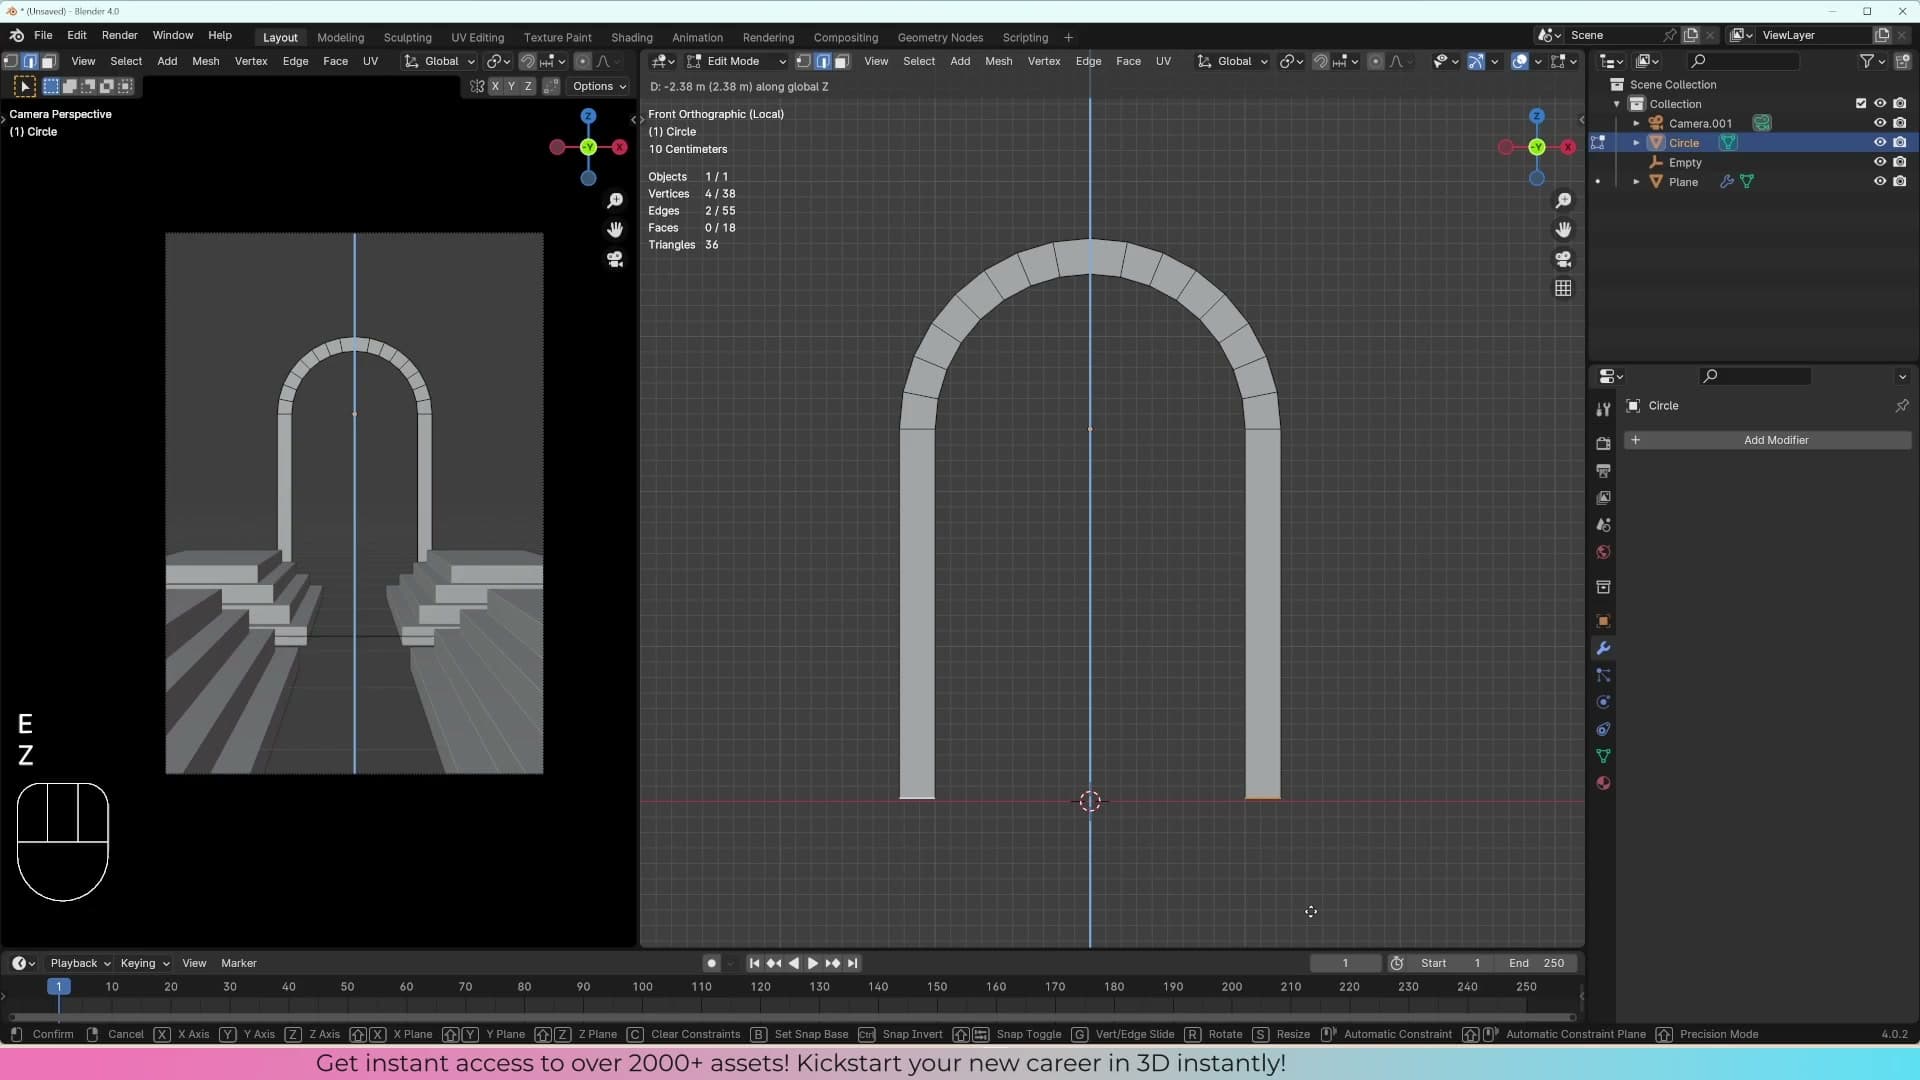
Drop into edge select mode and you can pull the open bottom edges straight down with E to start forming the legs of the arch. The problem becomes obvious almost immediately though. Every click on the left side needs a matching click on the right, and the geometry is only going to get more complicated from here.
That's the cue for the first modifier on the stack. In the Properties panel open the wrench (Modifier Properties) and choose Add Modifier → Generate → Mirror. With the modifier in place, you can delete every face on one whole side of the arch and the remaining half is reflected back across the X axis in real time.
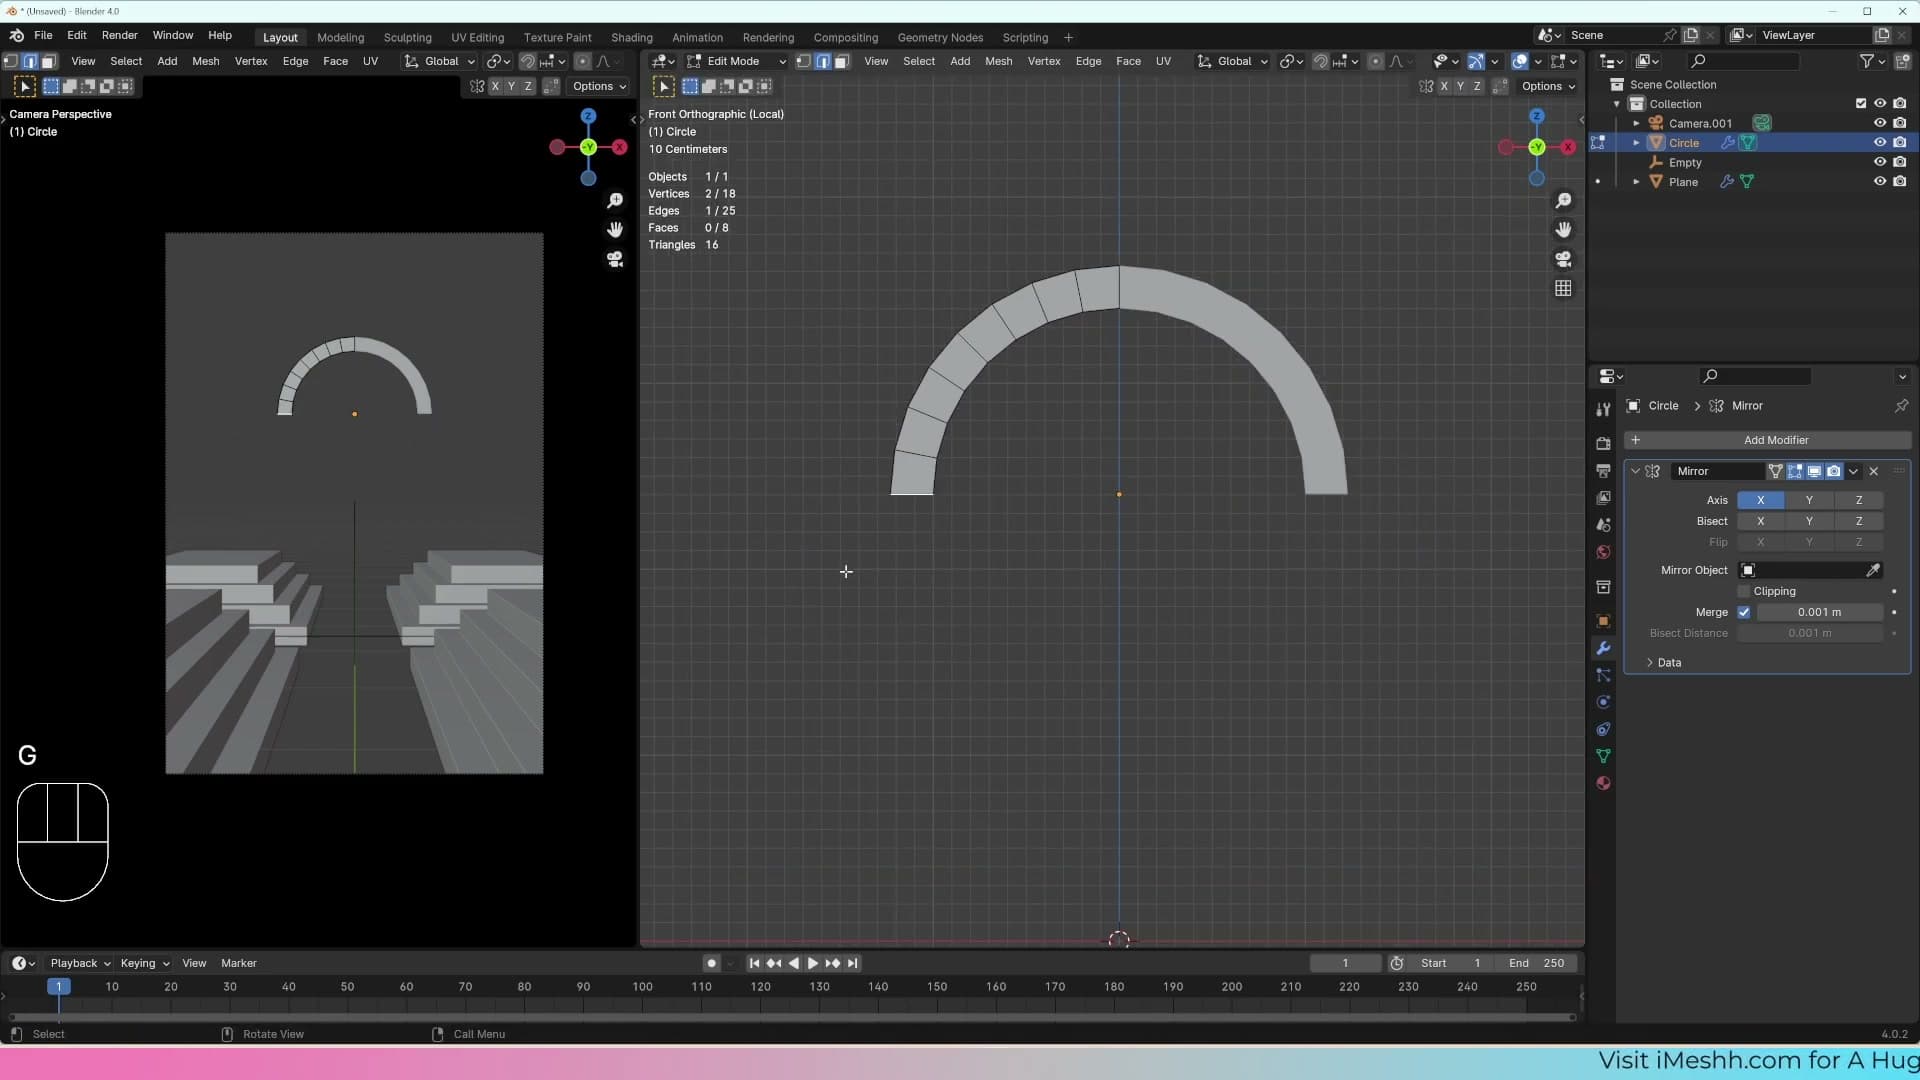
From this point on, every edit you make to the visible half is mirrored live to the other side. A single E → Z on the open bottom edge now drops both legs of the arch downward at once, which makes the rest of the modelling considerably faster.
Extrude the wall edges with scale-to-zero
A standalone archway isn't the goal. You want walls running off either side, like a doorway set into a real wall. The extra geometry left over from the original circle already points in the right direction, so you can extend it outward rather than starting fresh.
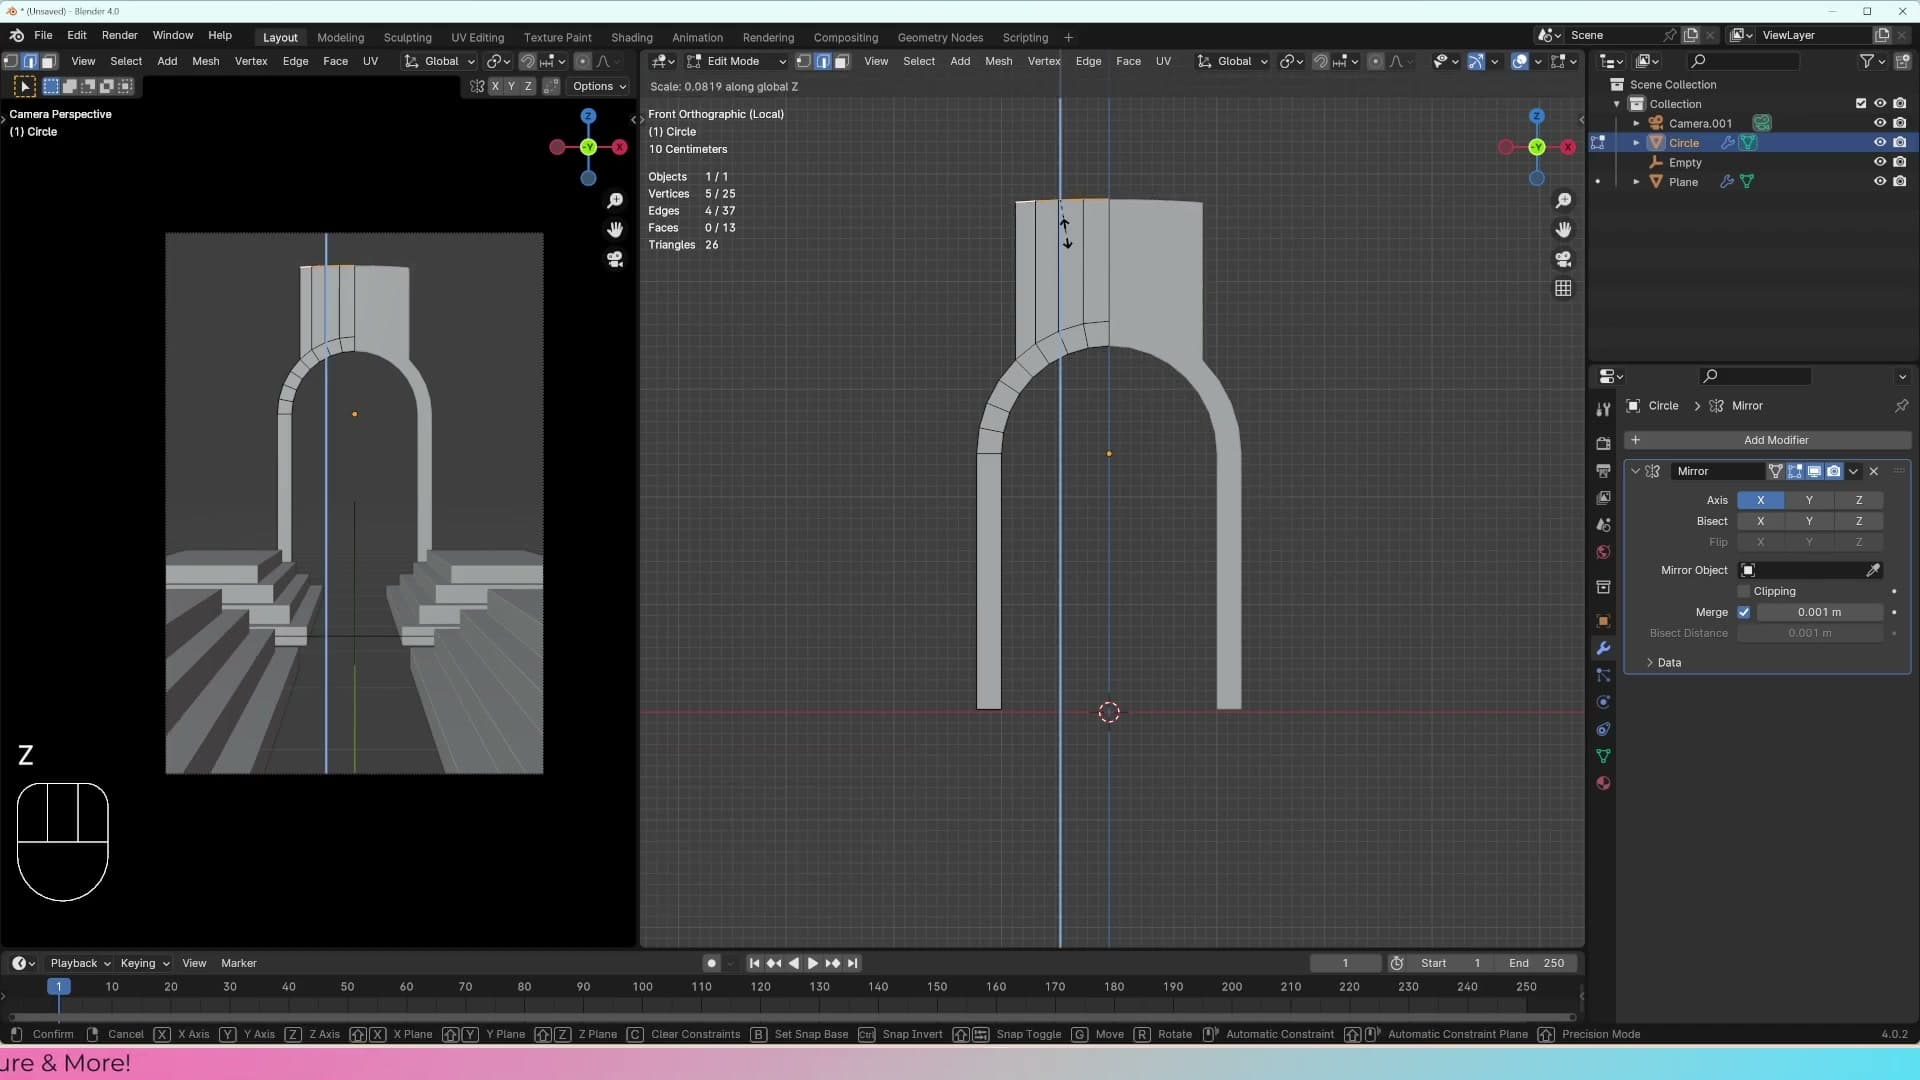
Select the open edges at the bottom of the arch leg and press E then Z to extrude them downward. Before clicking to confirm, type S → Z → 0. Scaling the new edge by zero on the Z axis collapses every selected vertex to the same height, so the bottom of the wall sits perfectly flat and level instead of drifting wherever your cursor happened to land.
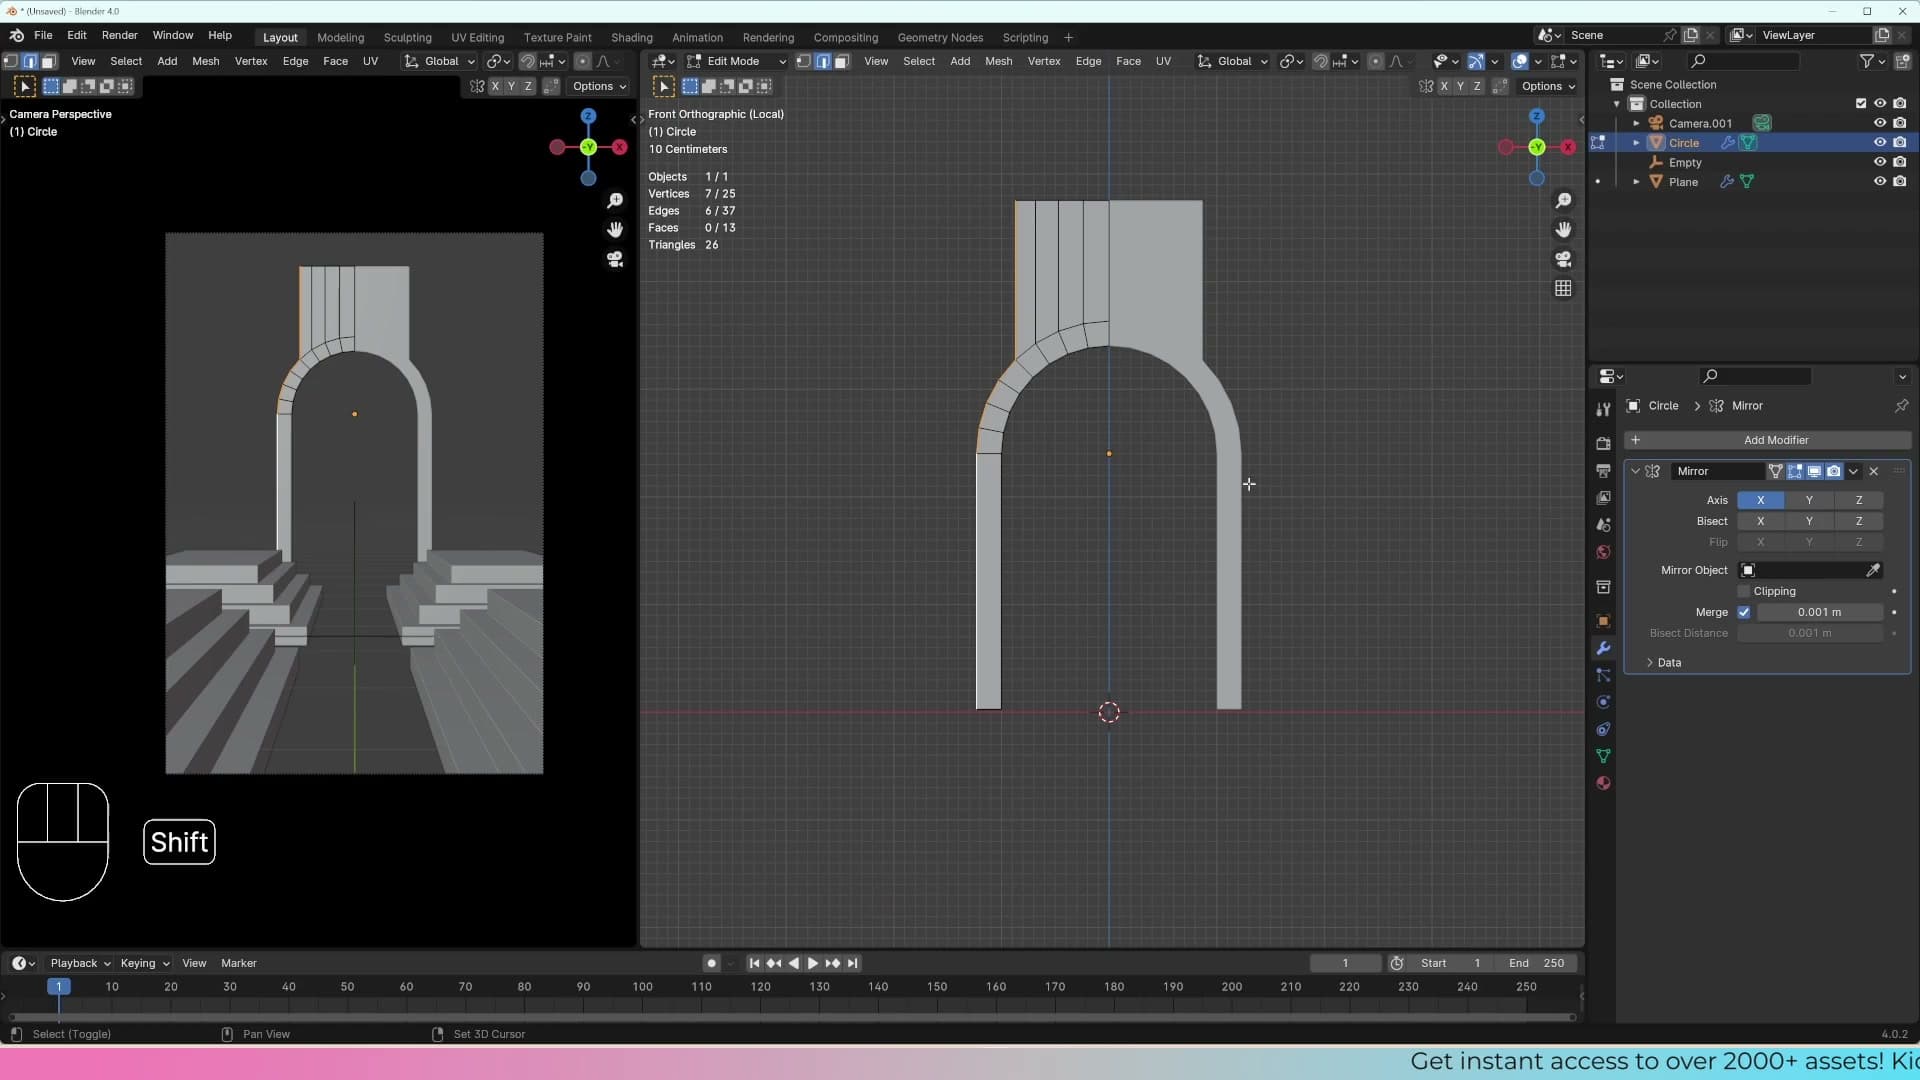
The same trick works on the X axis. Select the outer edges of the leg, press E → X to extrude horizontally, then S → X → 0 to flatten the end of the wall into a perfectly vertical face. The mirror modifier handles the matching wall on the opposite side automatically.
Stacking mirrors with an empty as the pivot
One mirror gave us left/right symmetry. A second mirror (this time targeting an empty as the mirror object) lets us reflect the whole archway on the Z axis to create a pill shape. We hit the classic gotcha where rotations break the mirror axis, fix it with Apply Rotation, and see why the order of two mirror modifiers completely changes the result.
Mirror around an empty on the Z axis
One mirror gave you the left-and-right symmetry of the archway. Now you'll stack a second one and reflect the whole shape on the Z axis to turn the arch into something more interesting. The trick is to mirror around a custom pivot rather than the archway's own origin, and the cleanest way to do that is with an empty.
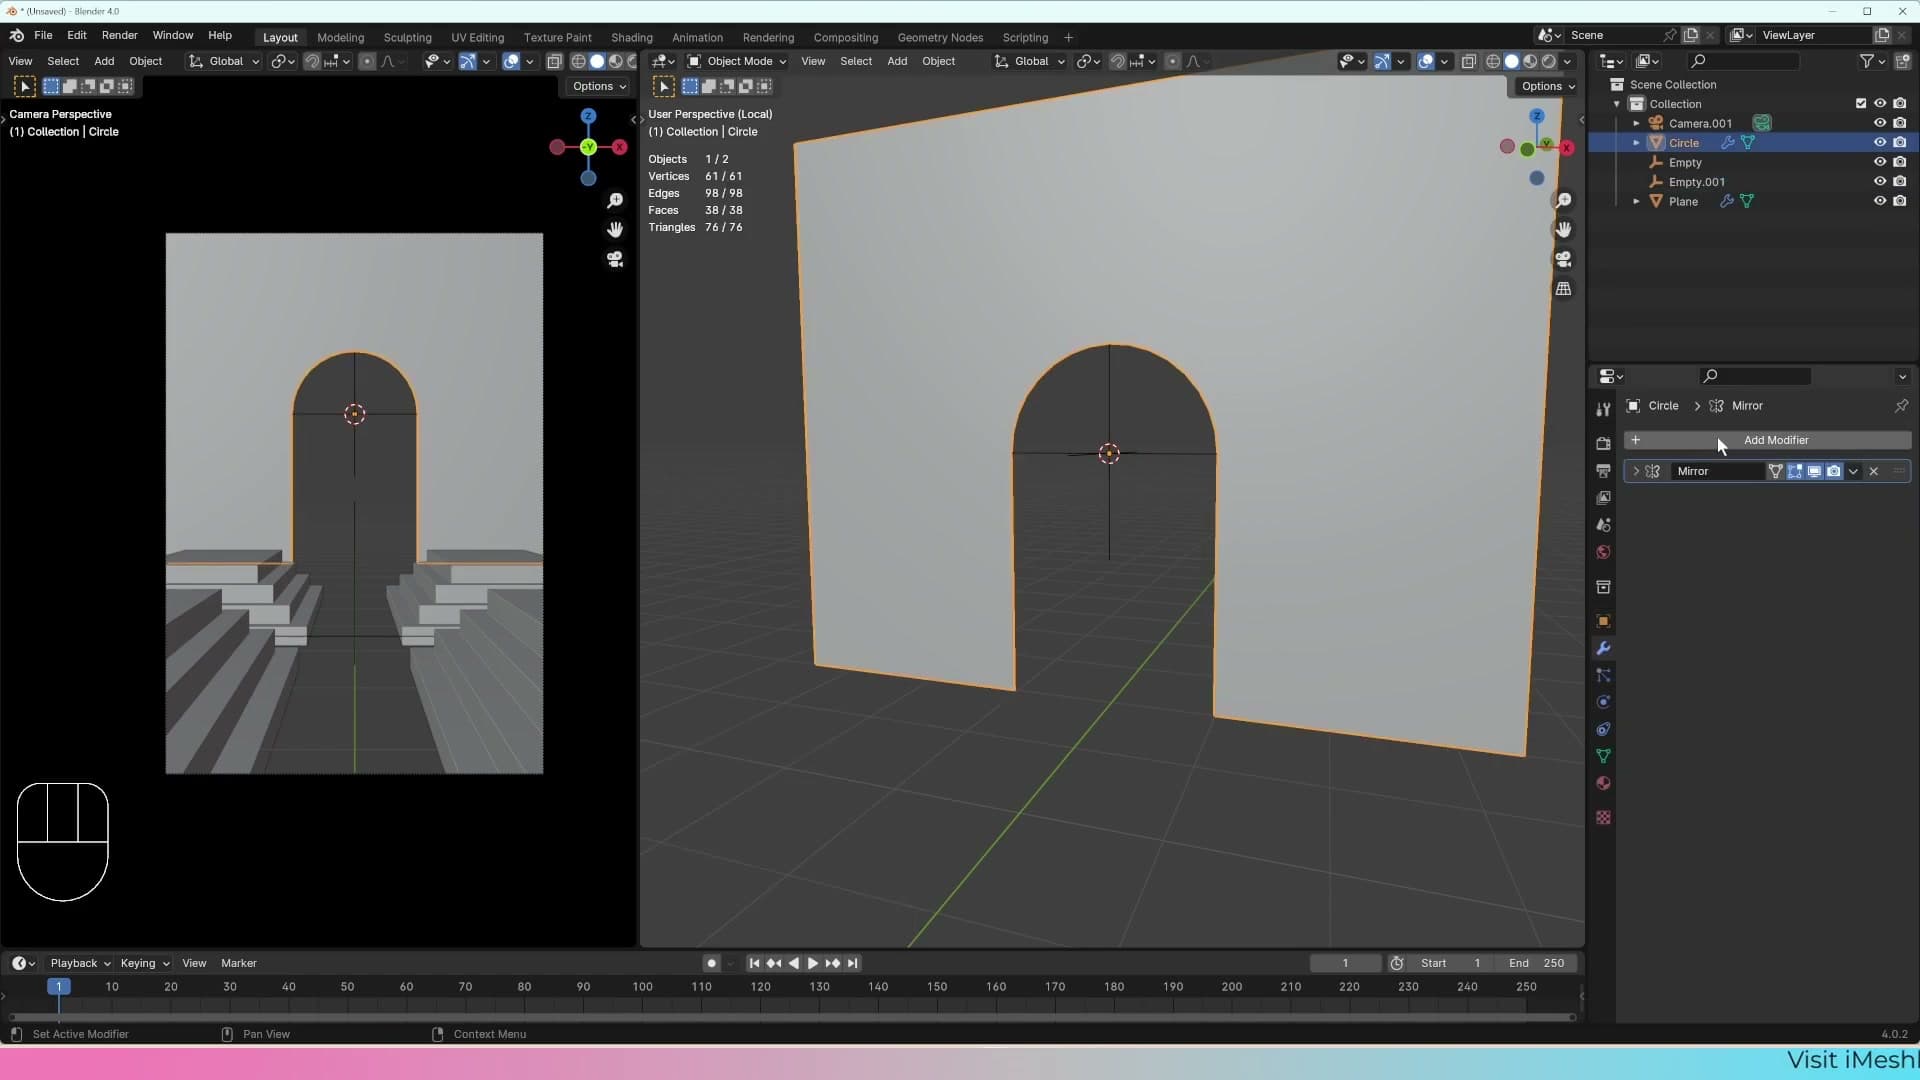
With the archway still selected, press Shift+S and choose Cursor to Selected so the 3D cursor snaps to the centre of the geometry. Then press Shift+A and add an empty. The empty drops in at the cursor position, which means it sits exactly where you want the new mirror axis to be.
Select the archway again and add a second Mirror modifier from Generate → Mirror. In the modifier panel, set the Mirror Object field to the empty you just added. Nothing visible happens yet. The modifier is still using its default X axis, which is already covered by your first mirror, so the second one is just multiplying the same reflection and stacking overlapping geometry on top of itself.
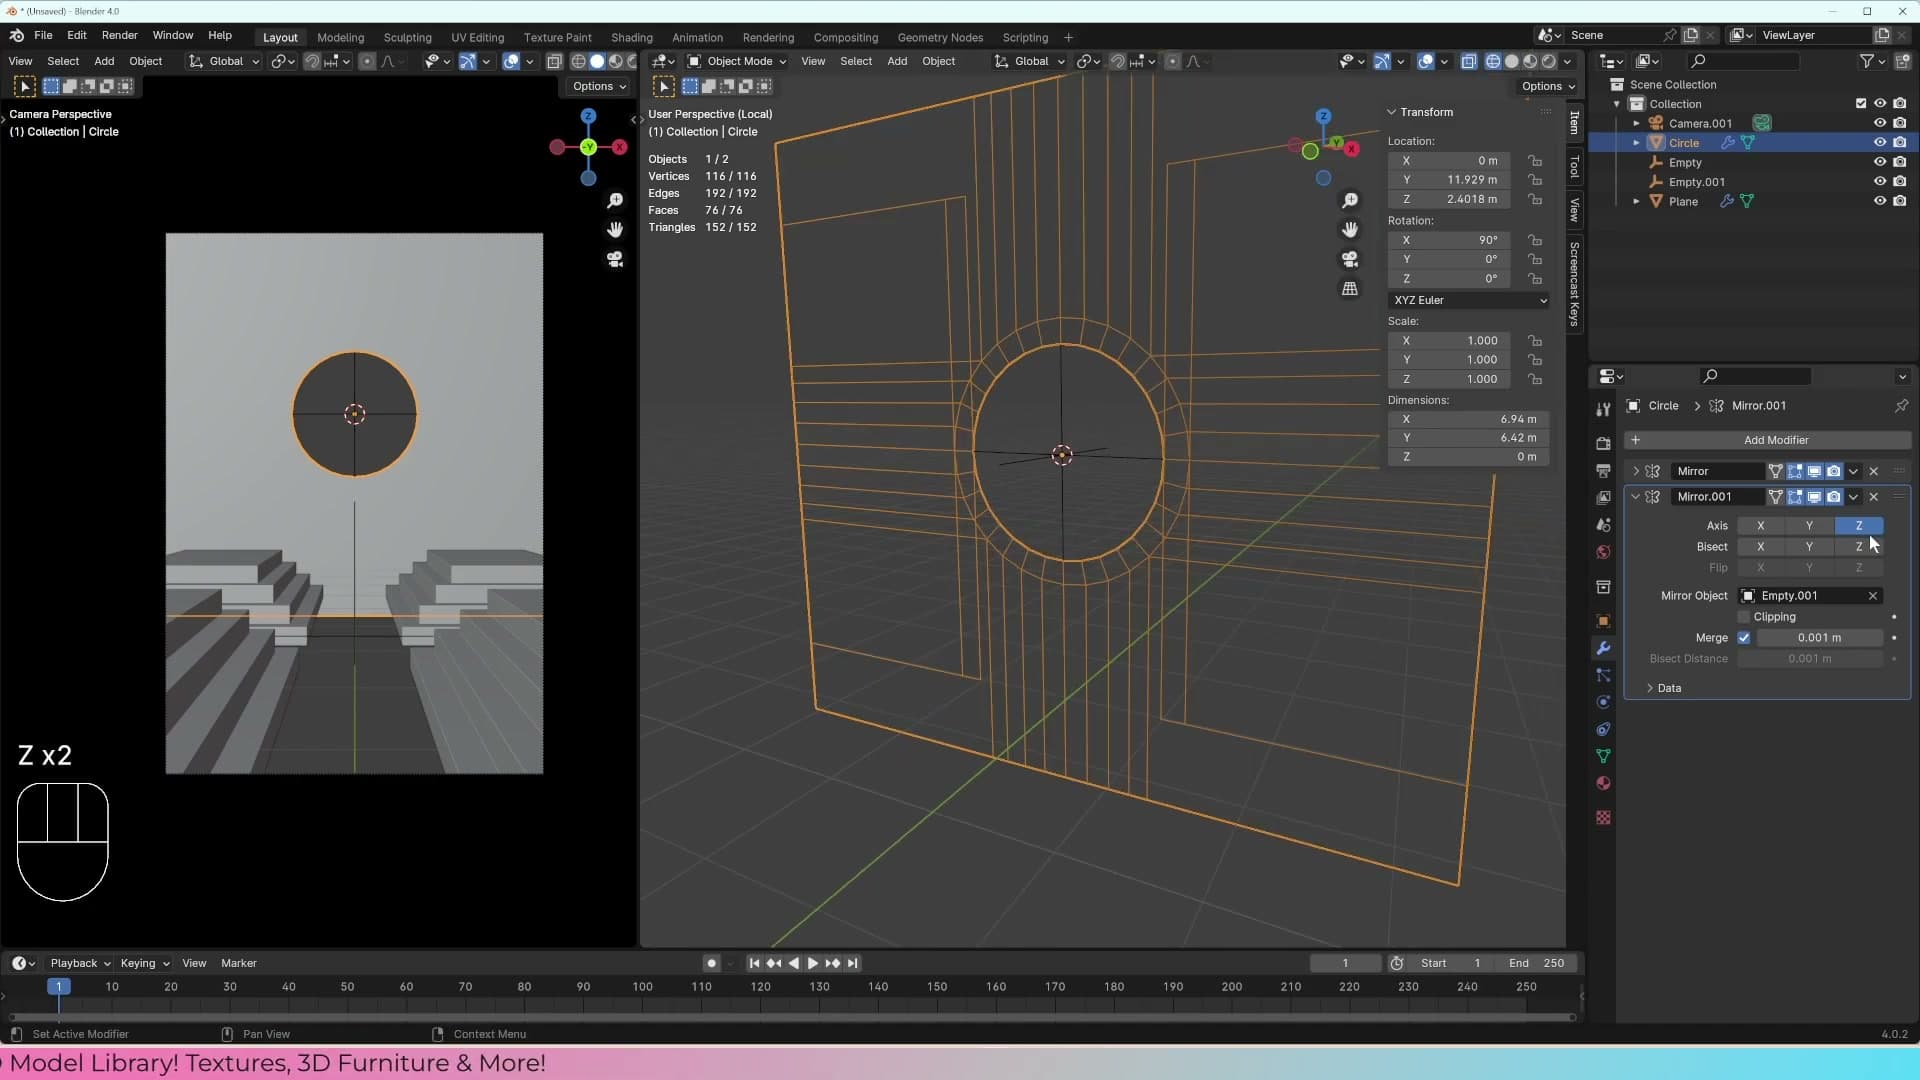
Switch the modifier off X and on to Z. You'll get a reflection along Z but with overlapping faces along the seam. Enable Bisect on the Z row to slice through the centre and discard the duplicated half. The arch now reflects cleanly into a circle-like shape that meets at the empty.
Because the mirror is locked to the empty rather than the archway's own origin, you can grab the empty and slide it on Z to push the reflected half further away or pull it closer. That single drag lets you sketch out very different silhouettes in seconds without touching the mesh.
Apply rotation before mirroring on the object's own origin
The empty-driven mirror gave you a circle. Next you'll add a third mirror that uses the archway's own origin as the pivot, so the circle gets reflected again into a stacked, pill-like shape. Before adding it, get the origin into a sensible place: drop into object mode, press Shift+S → Cursor to Selected, then choose Object → Set Origin → Origin to 3D Cursor. The object's origin now sits at the centre of the shape.
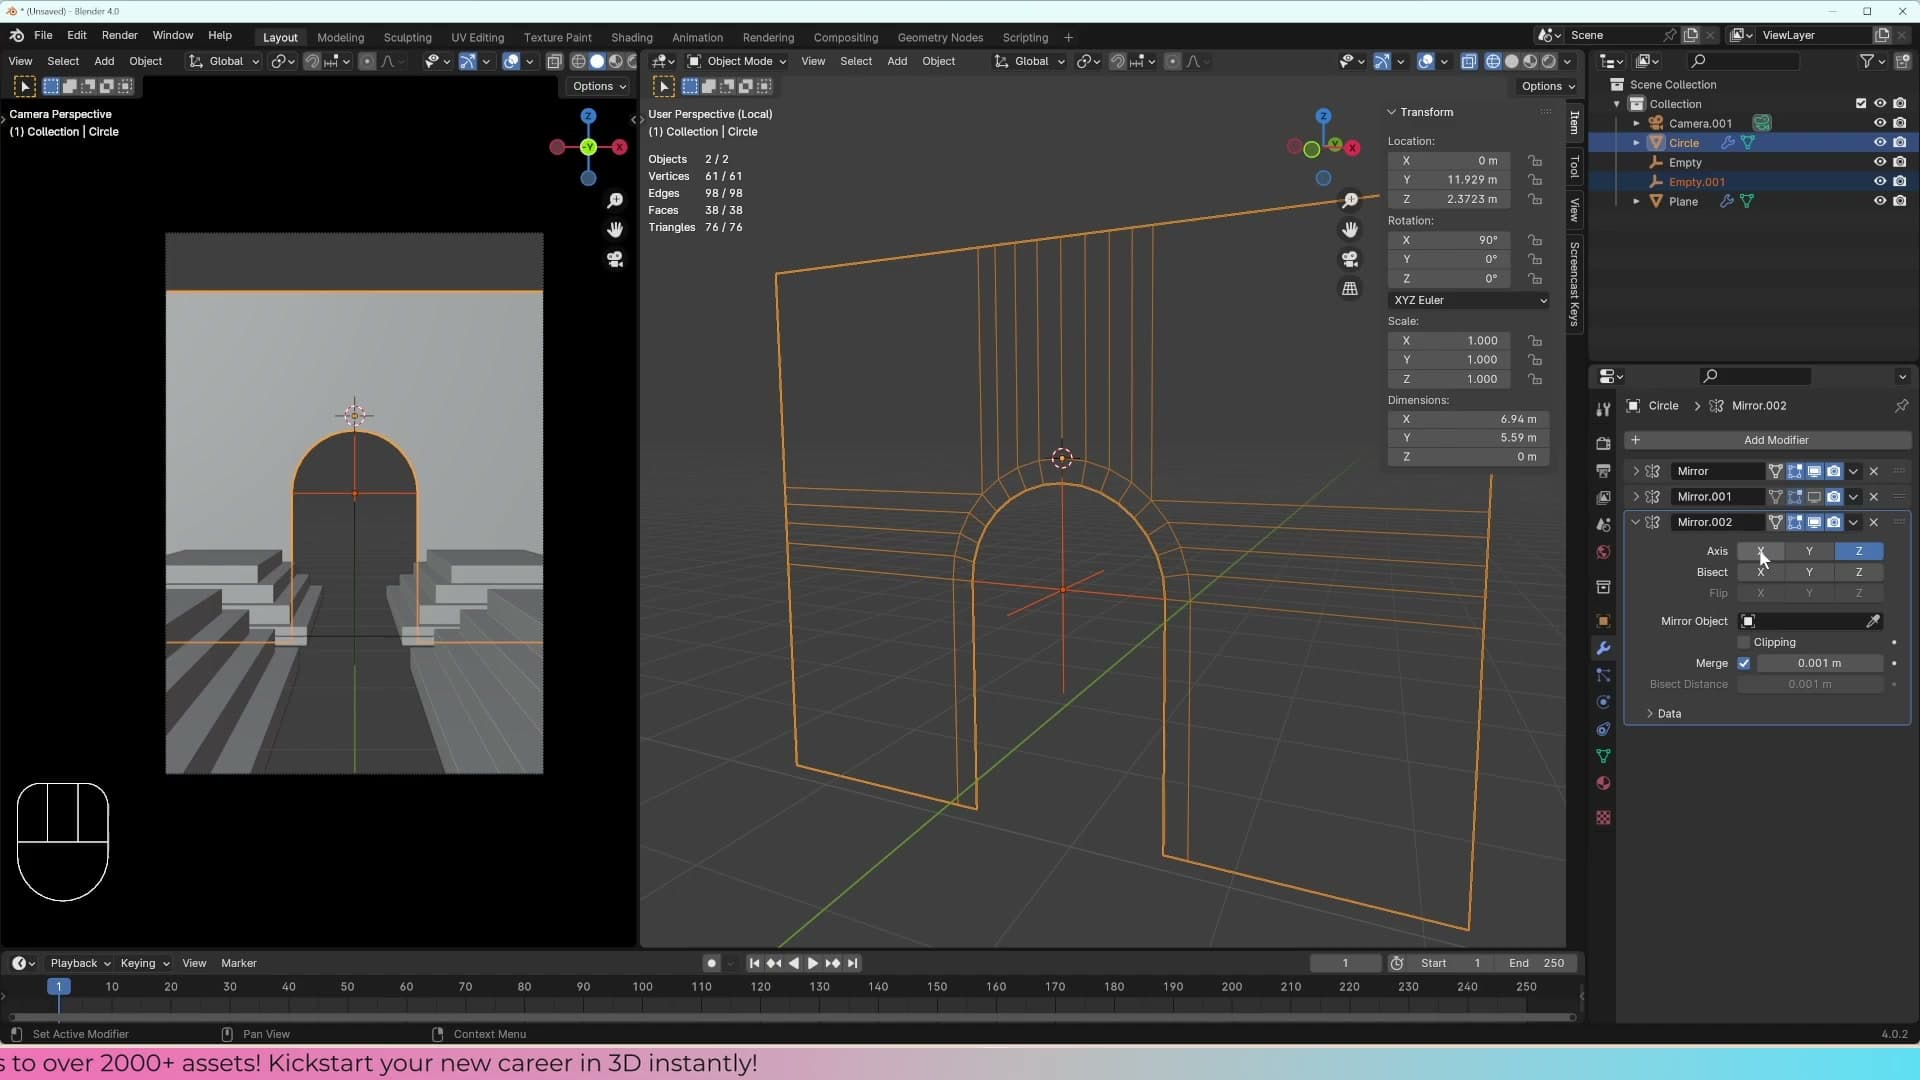
To keep the viewport readable while you build the next modifier, temporarily disable the empty-driven mirror's viewport display by clicking its monitor icon in the stack. With that out of the way, add another Mirror modifier and enable the Z axis. Nothing happens.
The reason is the rotation you applied back when you first stood the circle up. Blender remembers that the mesh was originally drawn flat and then rotated 90° to face the camera, and the mirror modifier reads the object's local axes, so the axis you think is Z is actually pointing somewhere else. Press Ctrl+A and choose Rotation to flush the rotation into the mesh data. The mirror now snaps into place on the correct axis.
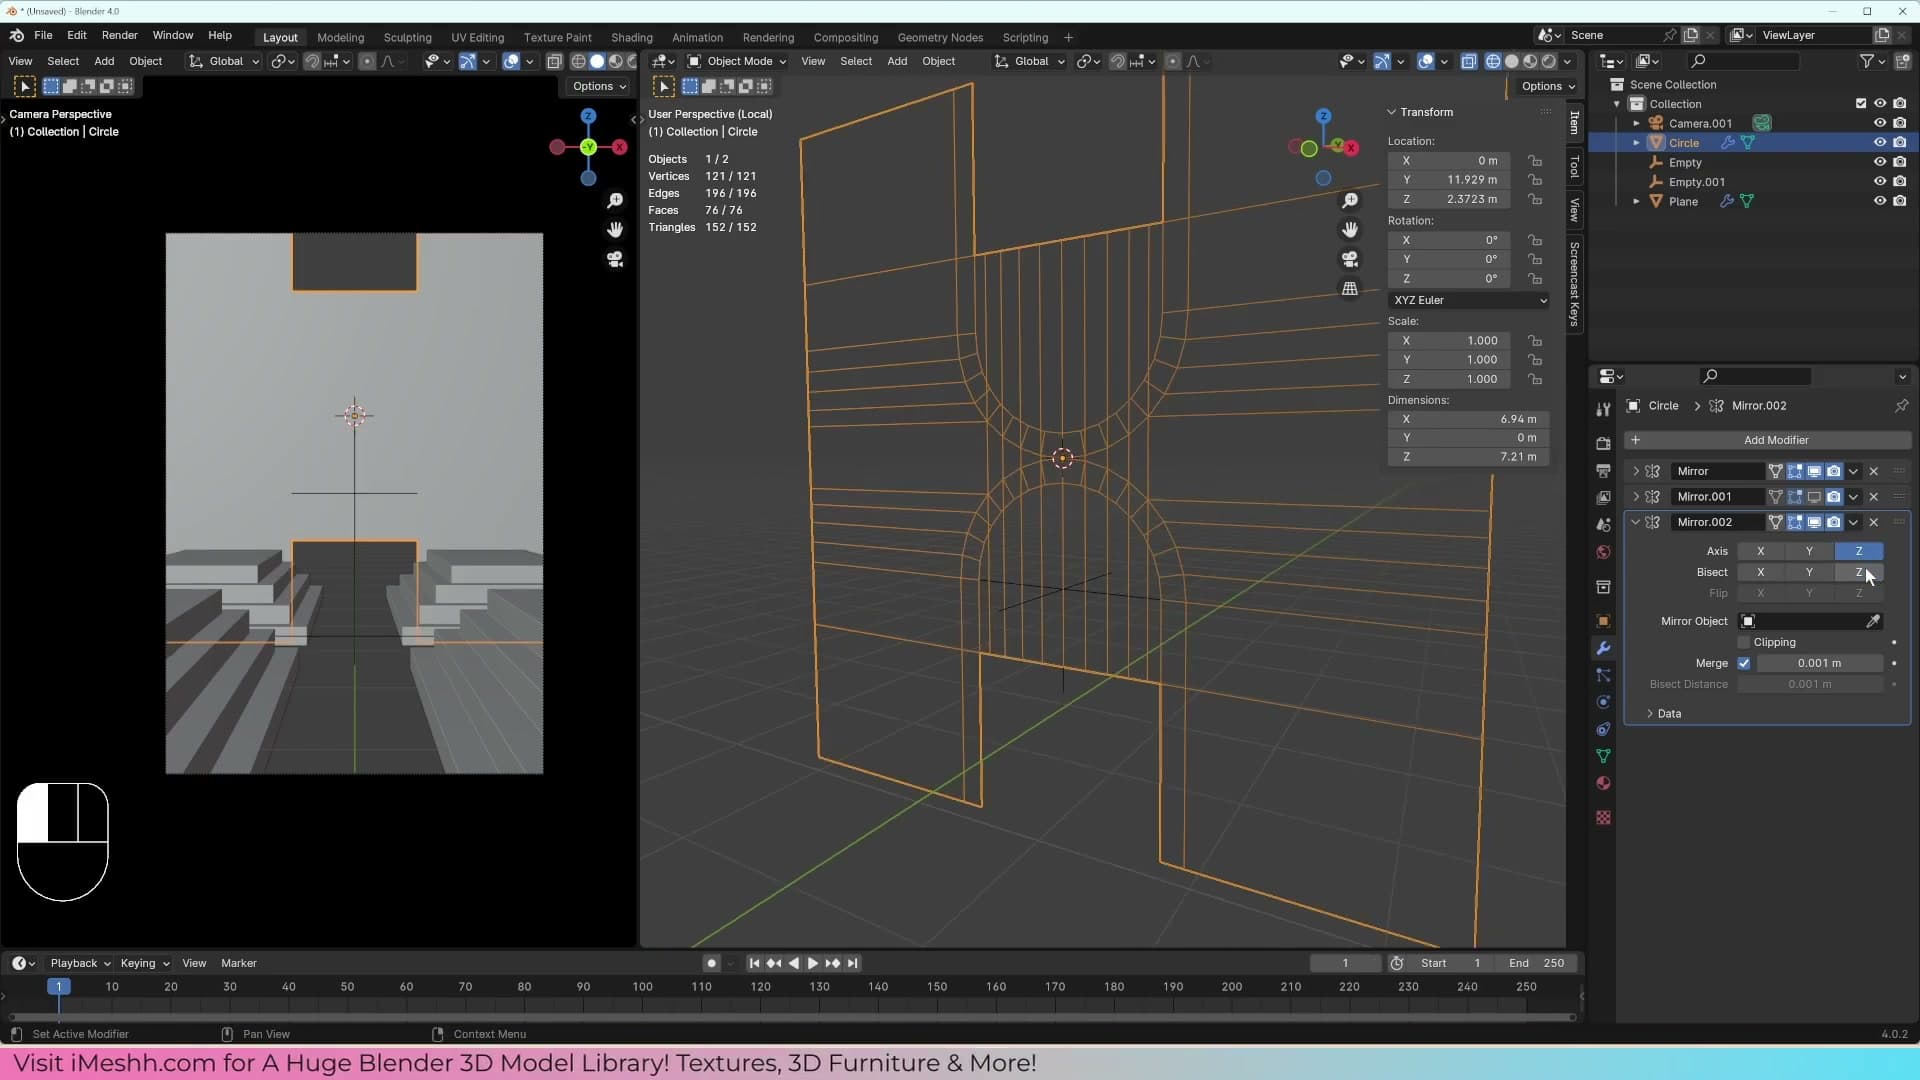
Finally, enable Bisect and Flip on the active Z row. Bisect tells the modifier to slice the overlapping geometry away, and Flip reverses the direction of the reflection so the new half lands where you want it. Re-enable the empty-driven mirror's viewport display and you'll see the full stacked silhouette.
Why modifier stack order changes the result
With both extra mirrors active you've built the final silhouette, but the stack is doing something worth pausing on. Modifiers run top to bottom, and each one operates on whatever the previous one has produced, so reordering them rewrites the result entirely.
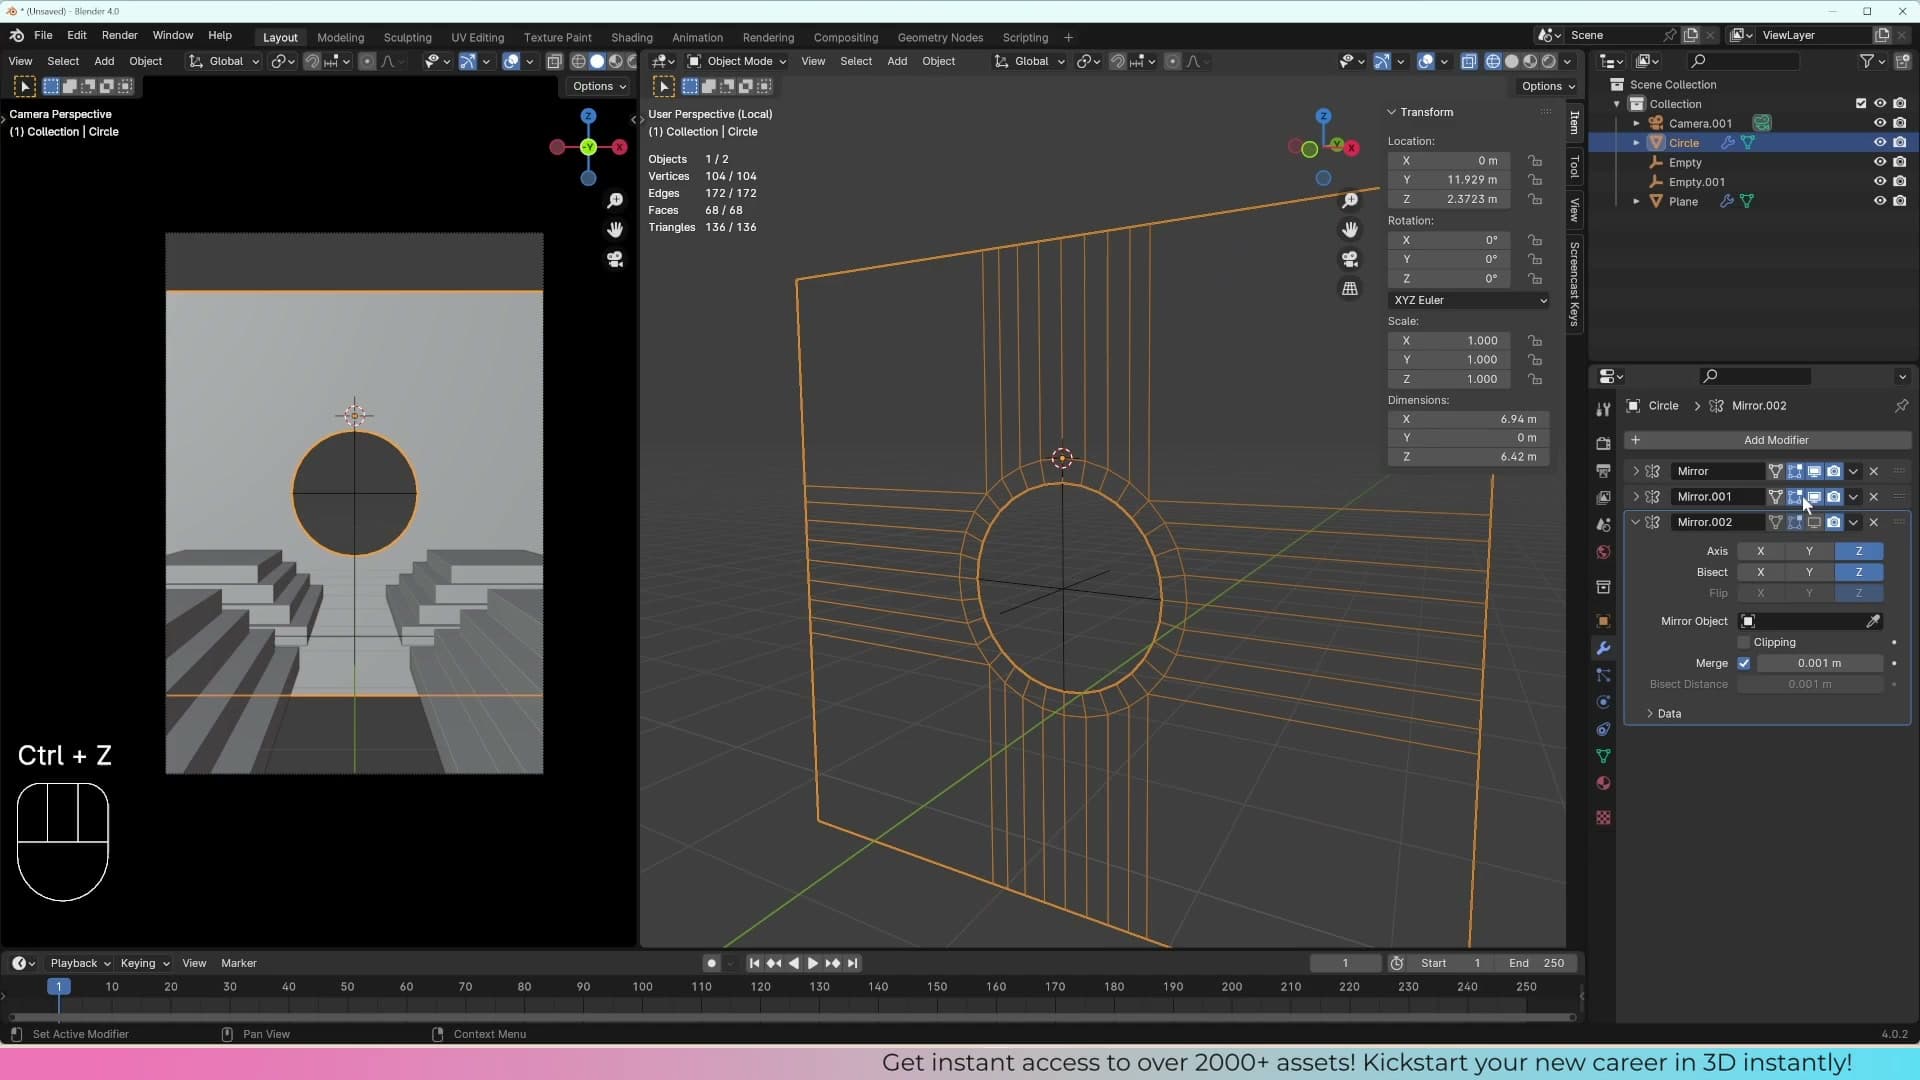
Read the stack from the top. The first mirror reflects the half-arch into a complete archway. The second mirror takes that finished archway and reflects it around the empty, turning it into a circle of arches. The third mirror then takes that circle and reflects it again around the object's own origin, stacking the circle on top of itself to form the final pill shape.
Drag the third mirror above the second one and the picture flips. Now the circle isn't being mirrored. The archway is being mirrored first around the object's origin, and only then does the empty-driven mirror reflect that result. The pivot points stay the same; only the order changes, and yet the silhouette is completely different.
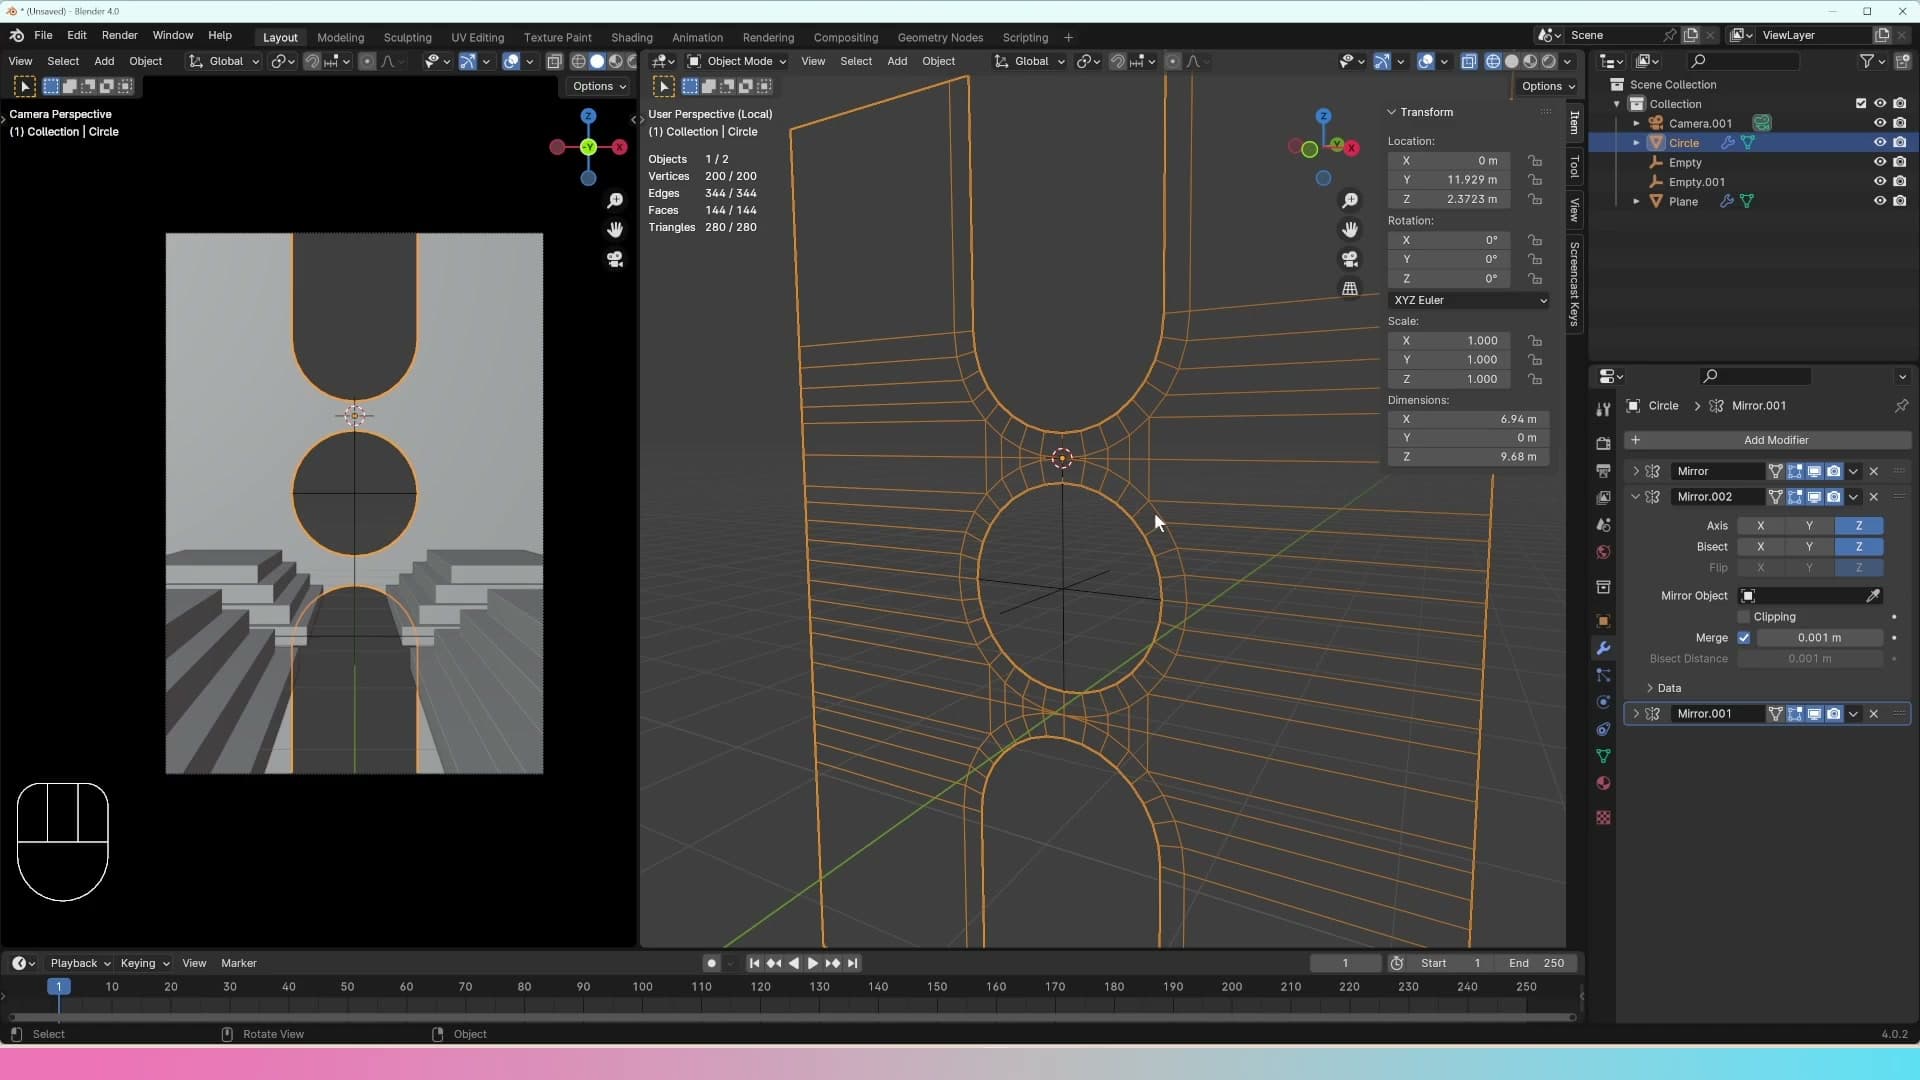
If the chain of three reflections is hard to hold in your head, don't worry about pinning it down on the first pass. The mirror modifier rewards experimentation more than memorisation. Flip axes, drag the empty, reorder the stack, and watch the shape rebuild itself live.
Solidify, bevel and subdivision surface: the finishing stack
With the silhouette locked in we add the three modifiers that turn a flat shell into a render-ready object: solidify gives the walls thickness, bevel rounds every sharp edge, and subdivision surface smooths the whole thing, with Shade Auto Smooth and Harden Normals keeping the shading crisp.
Solidify for wall thickness
With the mirrored silhouette locked in, the mirror modifiers are done and the next job is to give the archway some actual wall thickness. Add a Solidify modifier. Either go to Add Modifier → Generate → Solidify, or just hit the search field at the top of the modifier panel and start typing solidify.
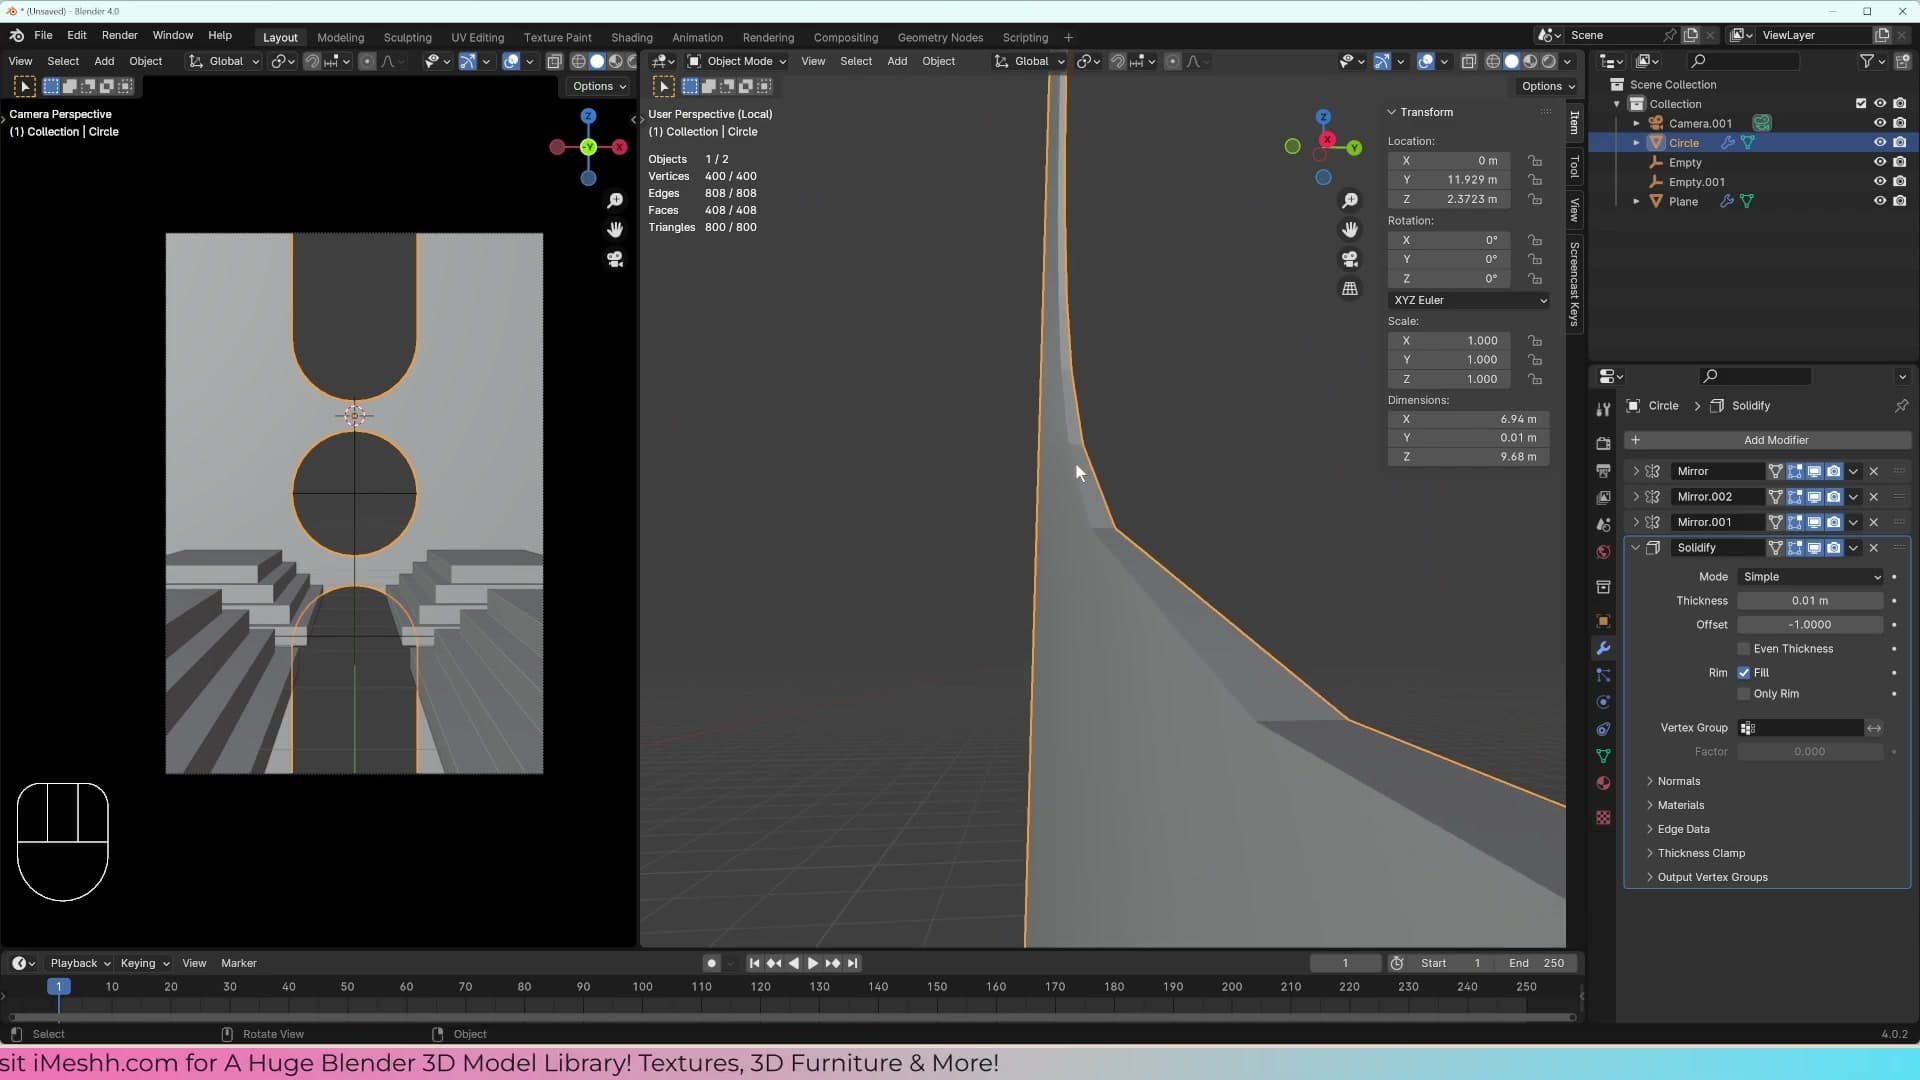
At first glance it looks like nothing has happened. That's because the default thickness is so small it doesn't read on screen. Slide the Thickness value out until the walls have enough depth to read clearly in the camera. That's all this modifier needs at this stage.
Bevel with Shade Auto Smooth and Harden Normals
Hard-surface objects look wrong with razor-sharp edges, so the next modifier in the stack is a Bevel. Add it the same way as the solidify: start typing bevel into the modifier search and pick it from the list.
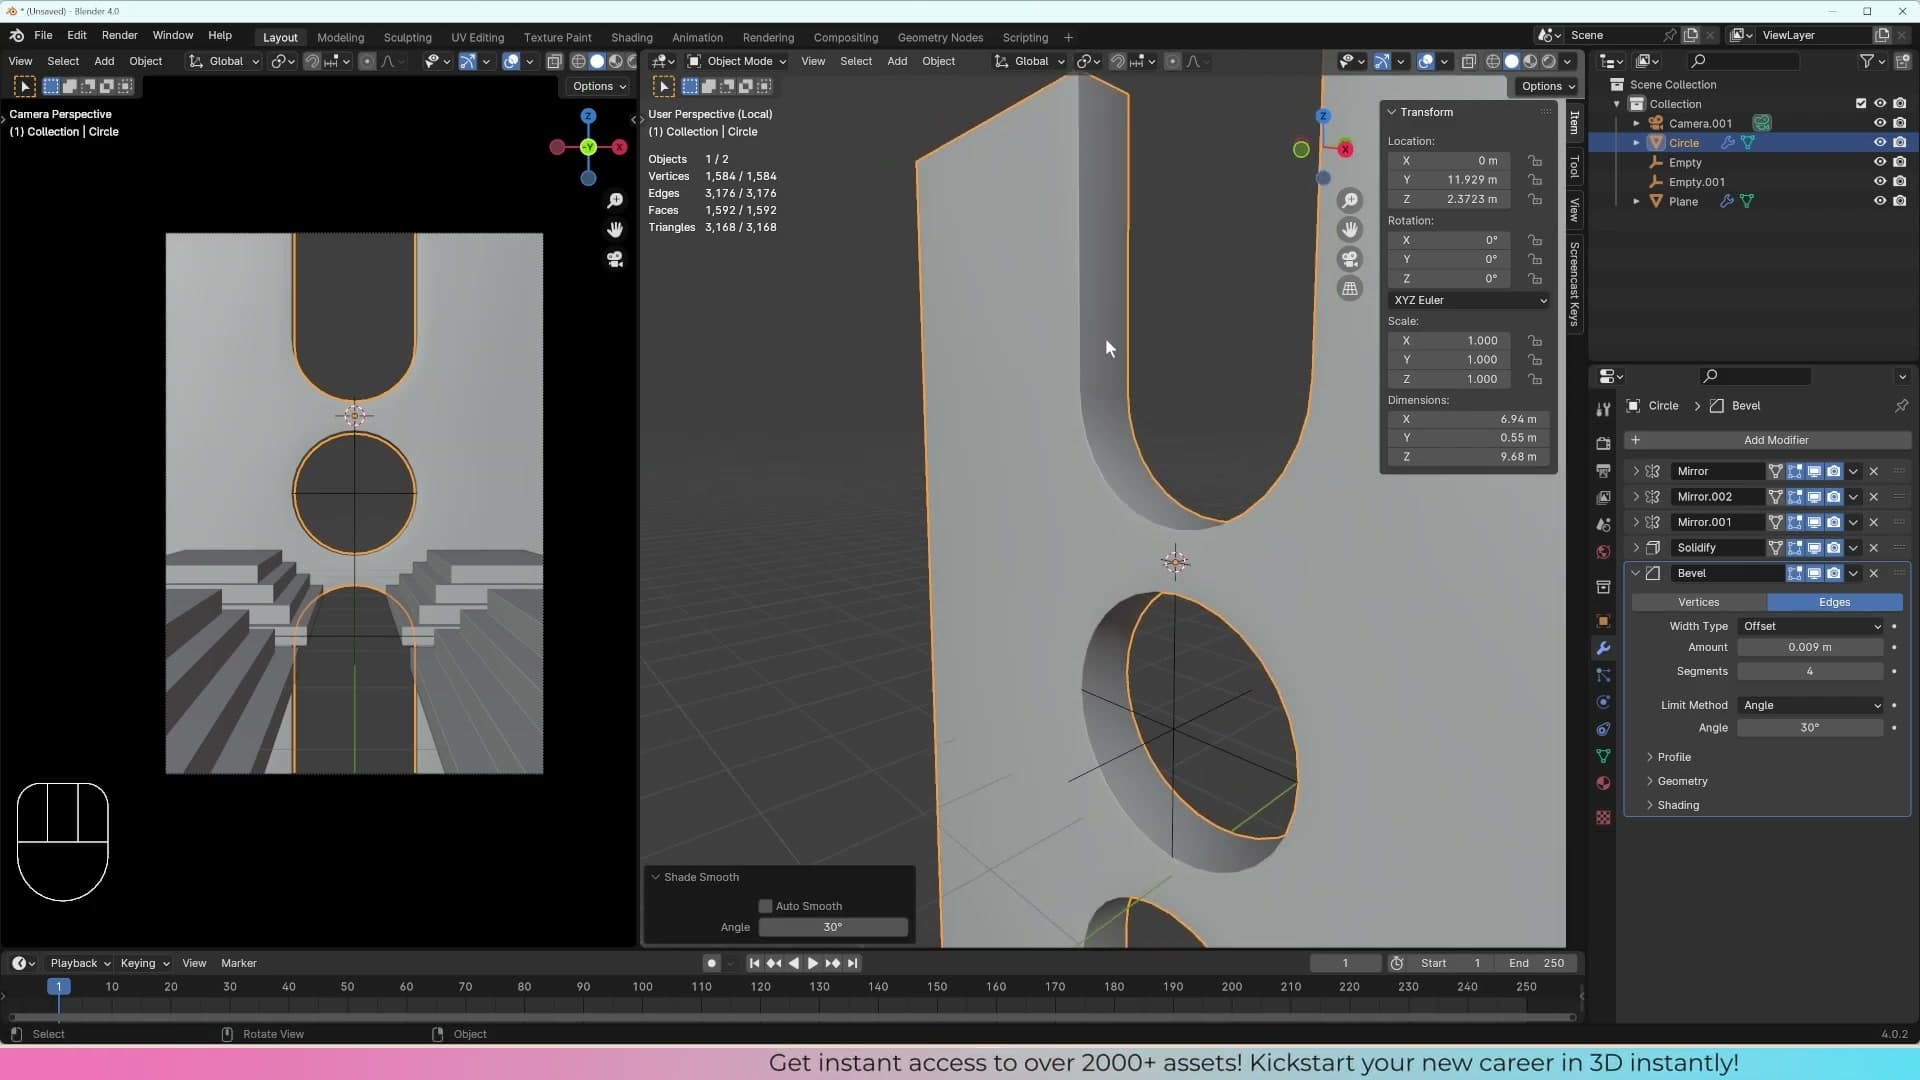
Bring the bevel Amount down to something subtle (hold Shift while dragging to slow the slider down for finer control), then bump the Segments up a few notches so the fillet reads as a soft rounded curve rather than a single hard chamfer.
The result is a nicely smoothed edge, but there's still a shading problem left over from earlier. Plain Shade Smooth also smooths across the flat faces of the object, which softens areas you actually want to keep crisp. To fix it, right-click the object and pick Shade Auto Smooth instead. That keeps the flat panels flat and only smooths the parts that should be curved.
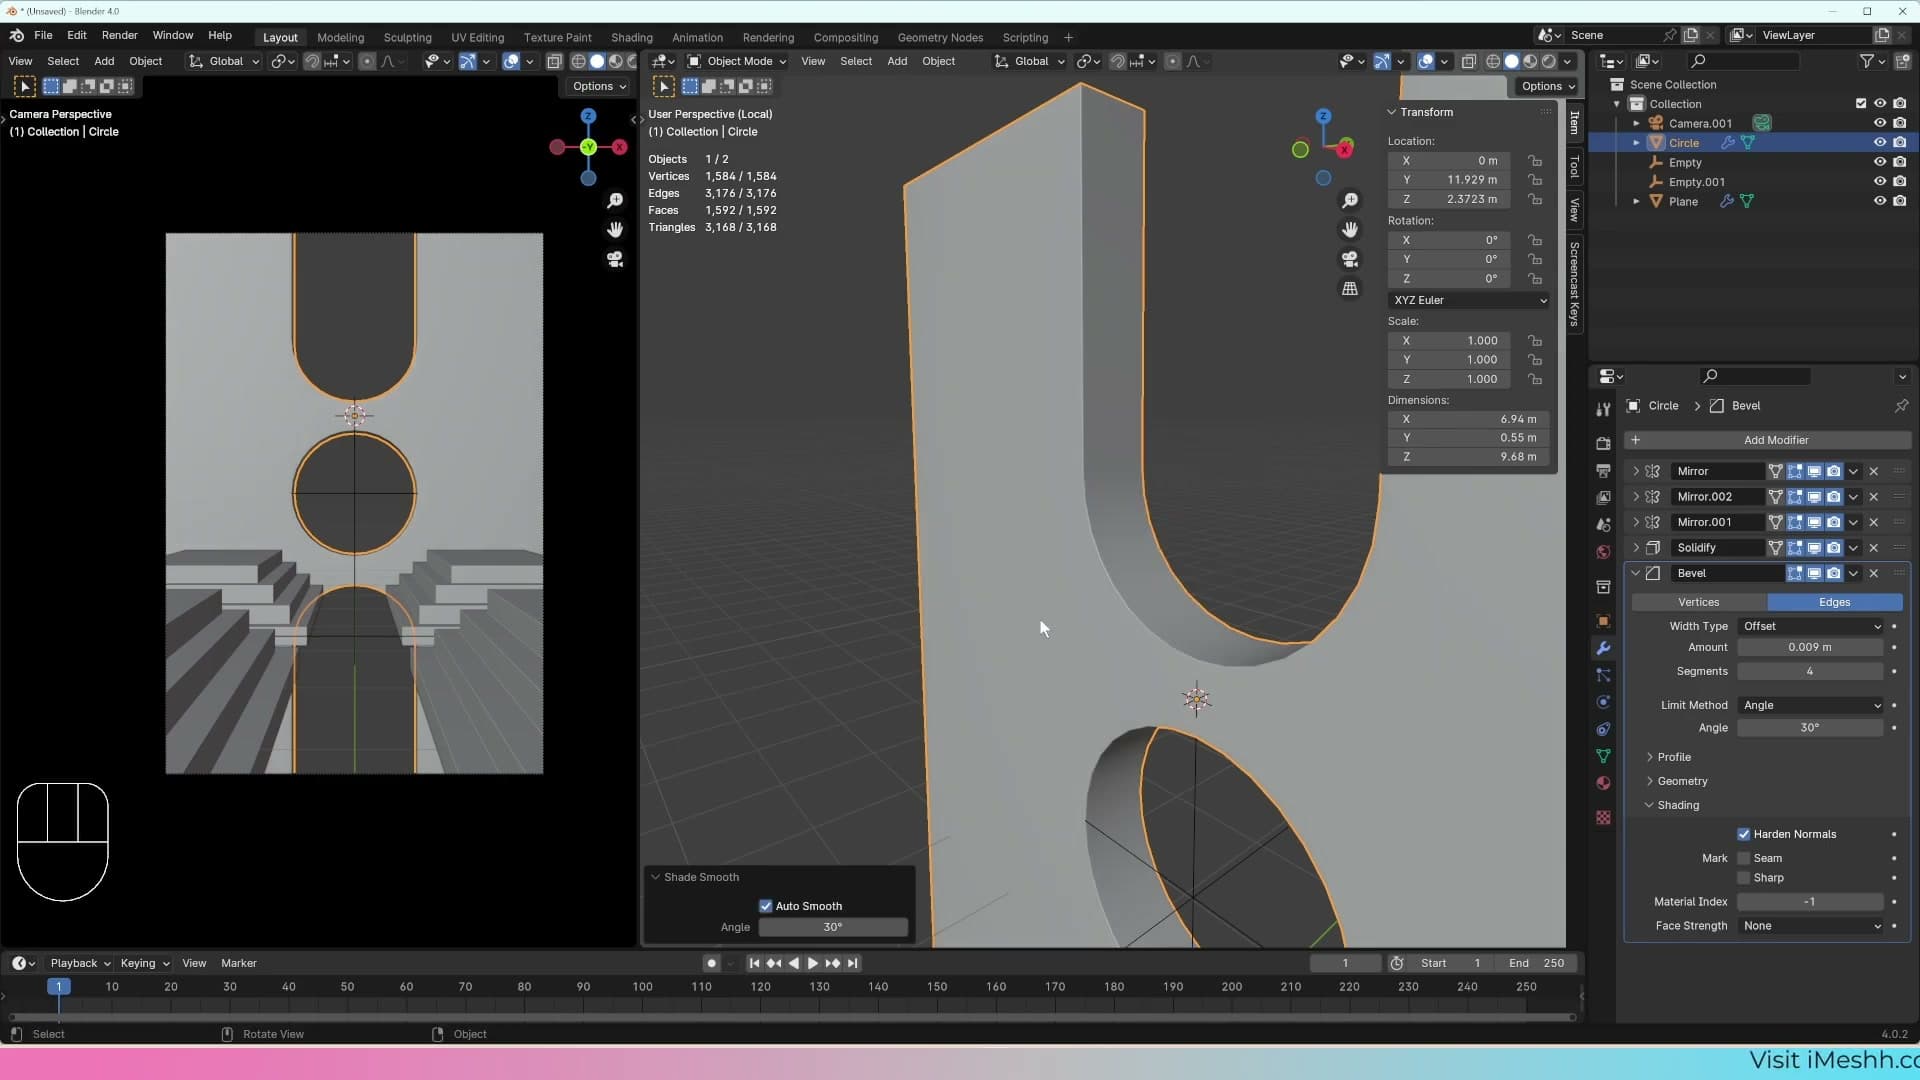
Then jump back into the bevel modifier and tick Harden Normals. Now the rounded edge stays nice and smooth, the flats stay crisp, and the whole object reads cleanly from any angle.
Subdivision surface for smooth curves
Even with auto smooth and harden normals dialled in, you'll notice the archway still has some strange jagged lines running across the curve. There isn't enough underlying geometry for the arch to read as a true curve yet. It's still a low-poly approximation.
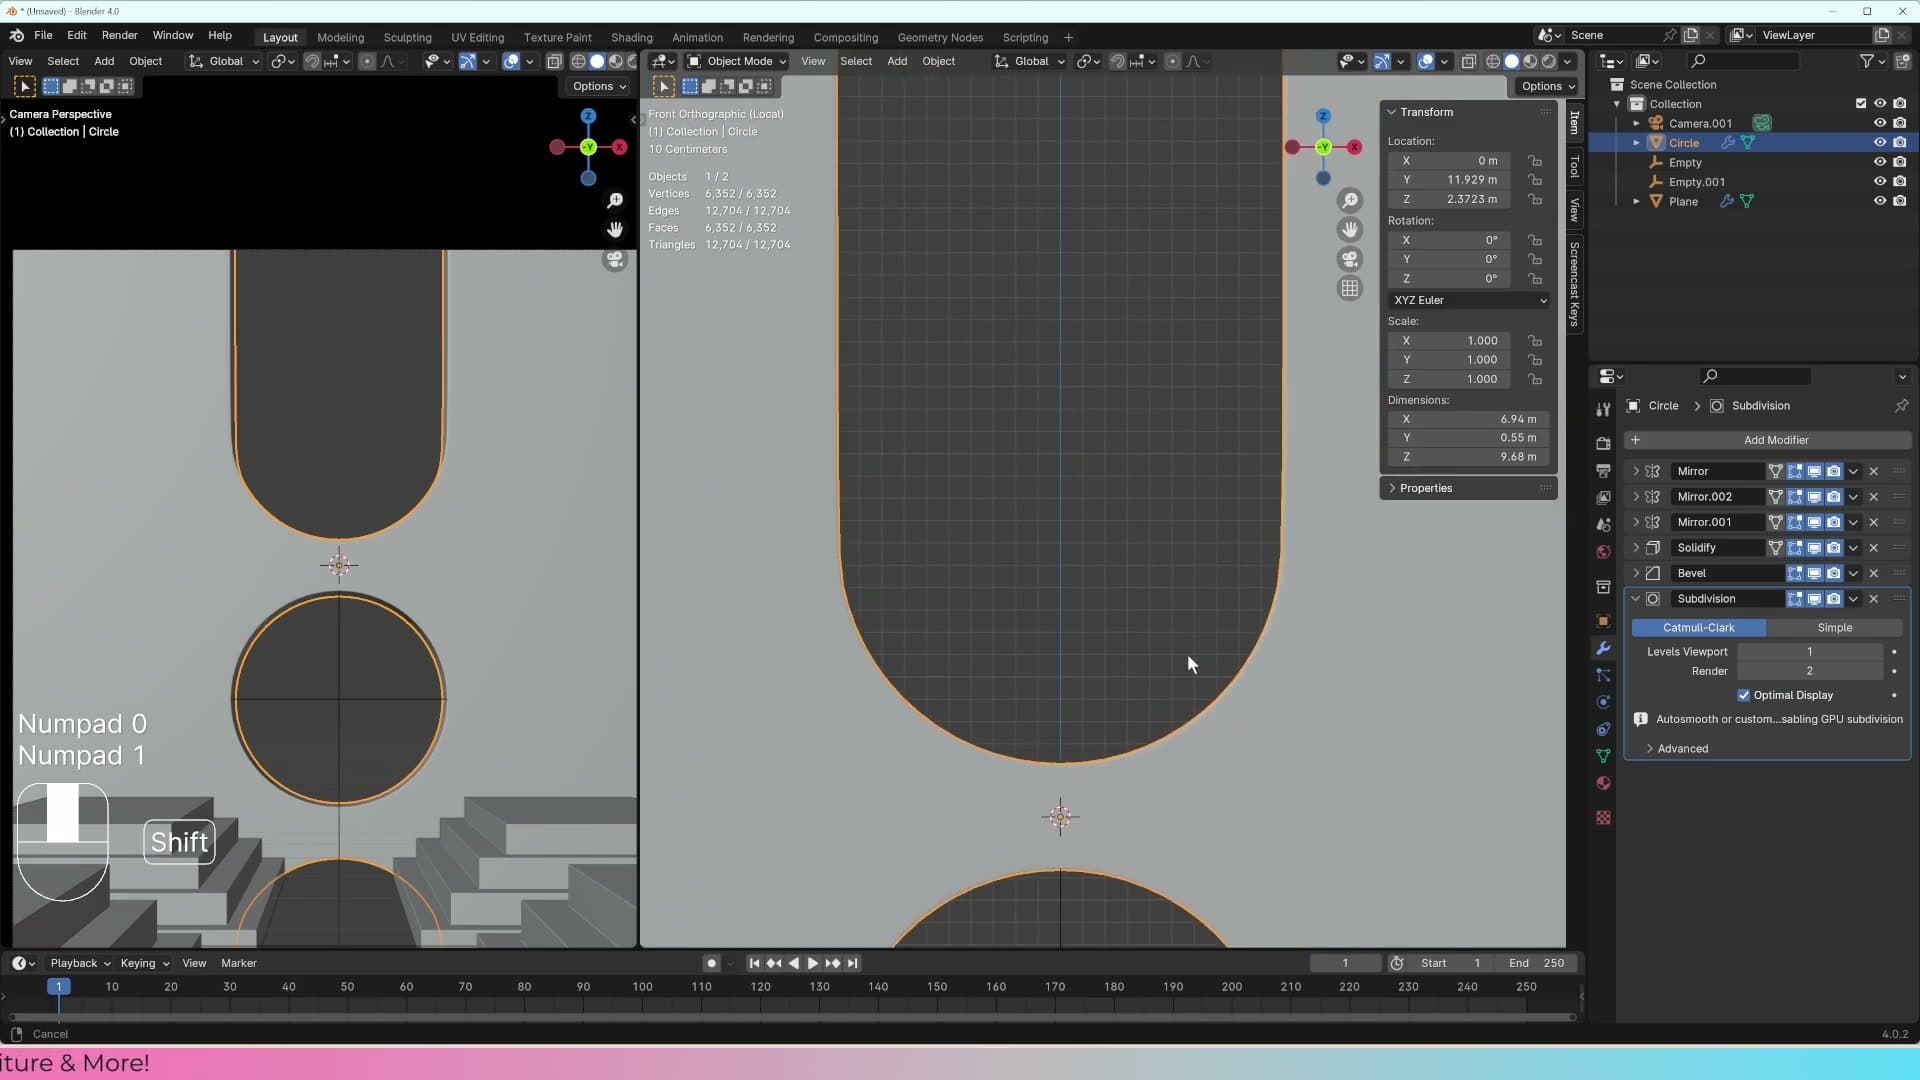
Collapse the bevel modifier panel to keep the stack tidy, then add a Subdivision Surface modifier. It splits each face into four and each edge into two, then averages the result. The previously jagged arch immediately reads as a clean smooth curve, and the rest of the silhouette tightens up along with it.
Loop cuts and finalising the stack
Subdivision surface tries to even out every edge, including the walls that should stay perfectly straight. A single loop cut near the corner tells subsurf where to bend and where not to. We close with a recap of stack order and a demo of what applying the modifiers permanently does to your editable geometry.
Loop cuts to control where subsurf bends
Subdivision surface rounds every edge it can find, including the long straight wall edge where it meets the corner of the arch. That softening is wrong for architectural geometry. The wall should stay dead straight and only the arch itself should curve. A single control loop near the corner is enough to fix it.
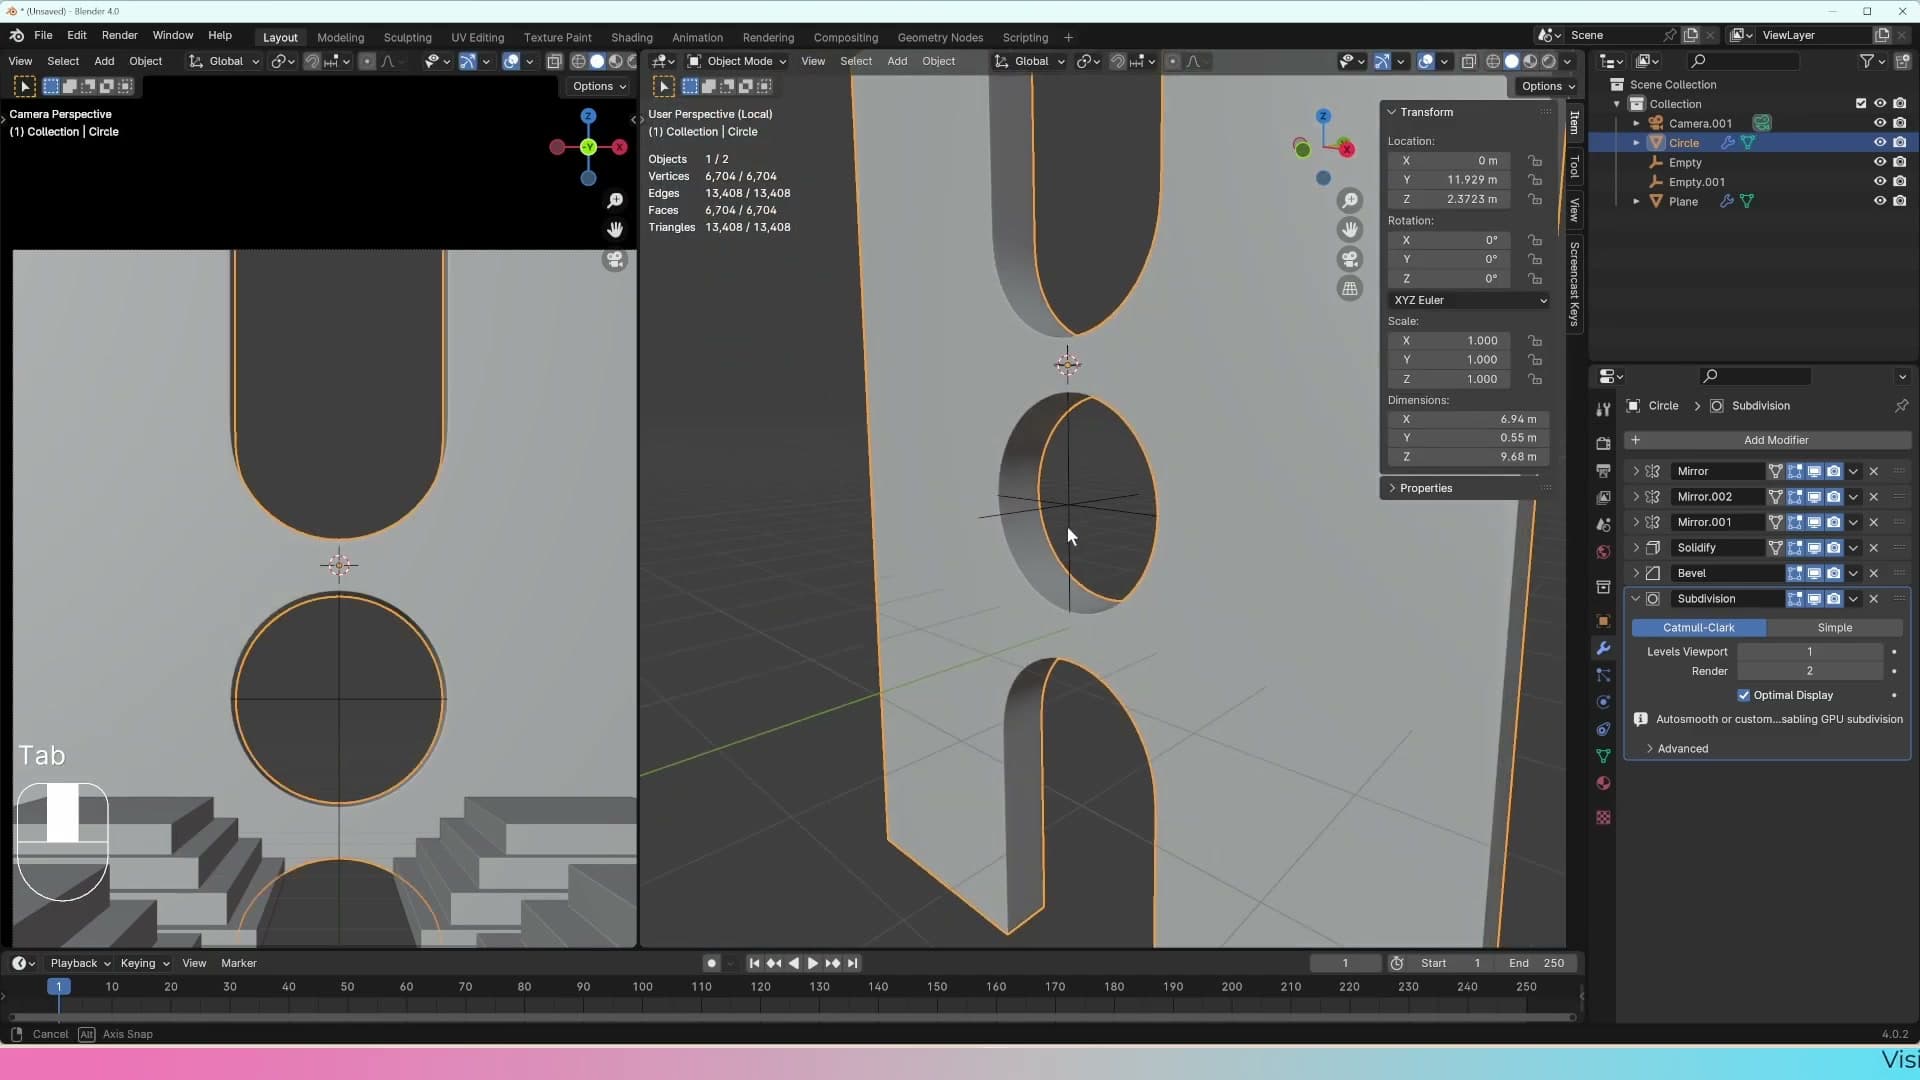
Hover over the straight wall edge and press Ctrl+R. A yellow preview loop appears, running parallel to the corner. Left-click to confirm the cut, then right-click (or hit Escape) to drop it at the centre of its parent edge rather than sliding it in place.
Now press G twice (G G) to slide that new loop along the edge. Push it toward the mirrored seam so it sits close to the corner. The closer the loop is to the corner, the more it pinches subsurf back toward the original shape, sharpening the flat wall while leaving the arch curve smooth.
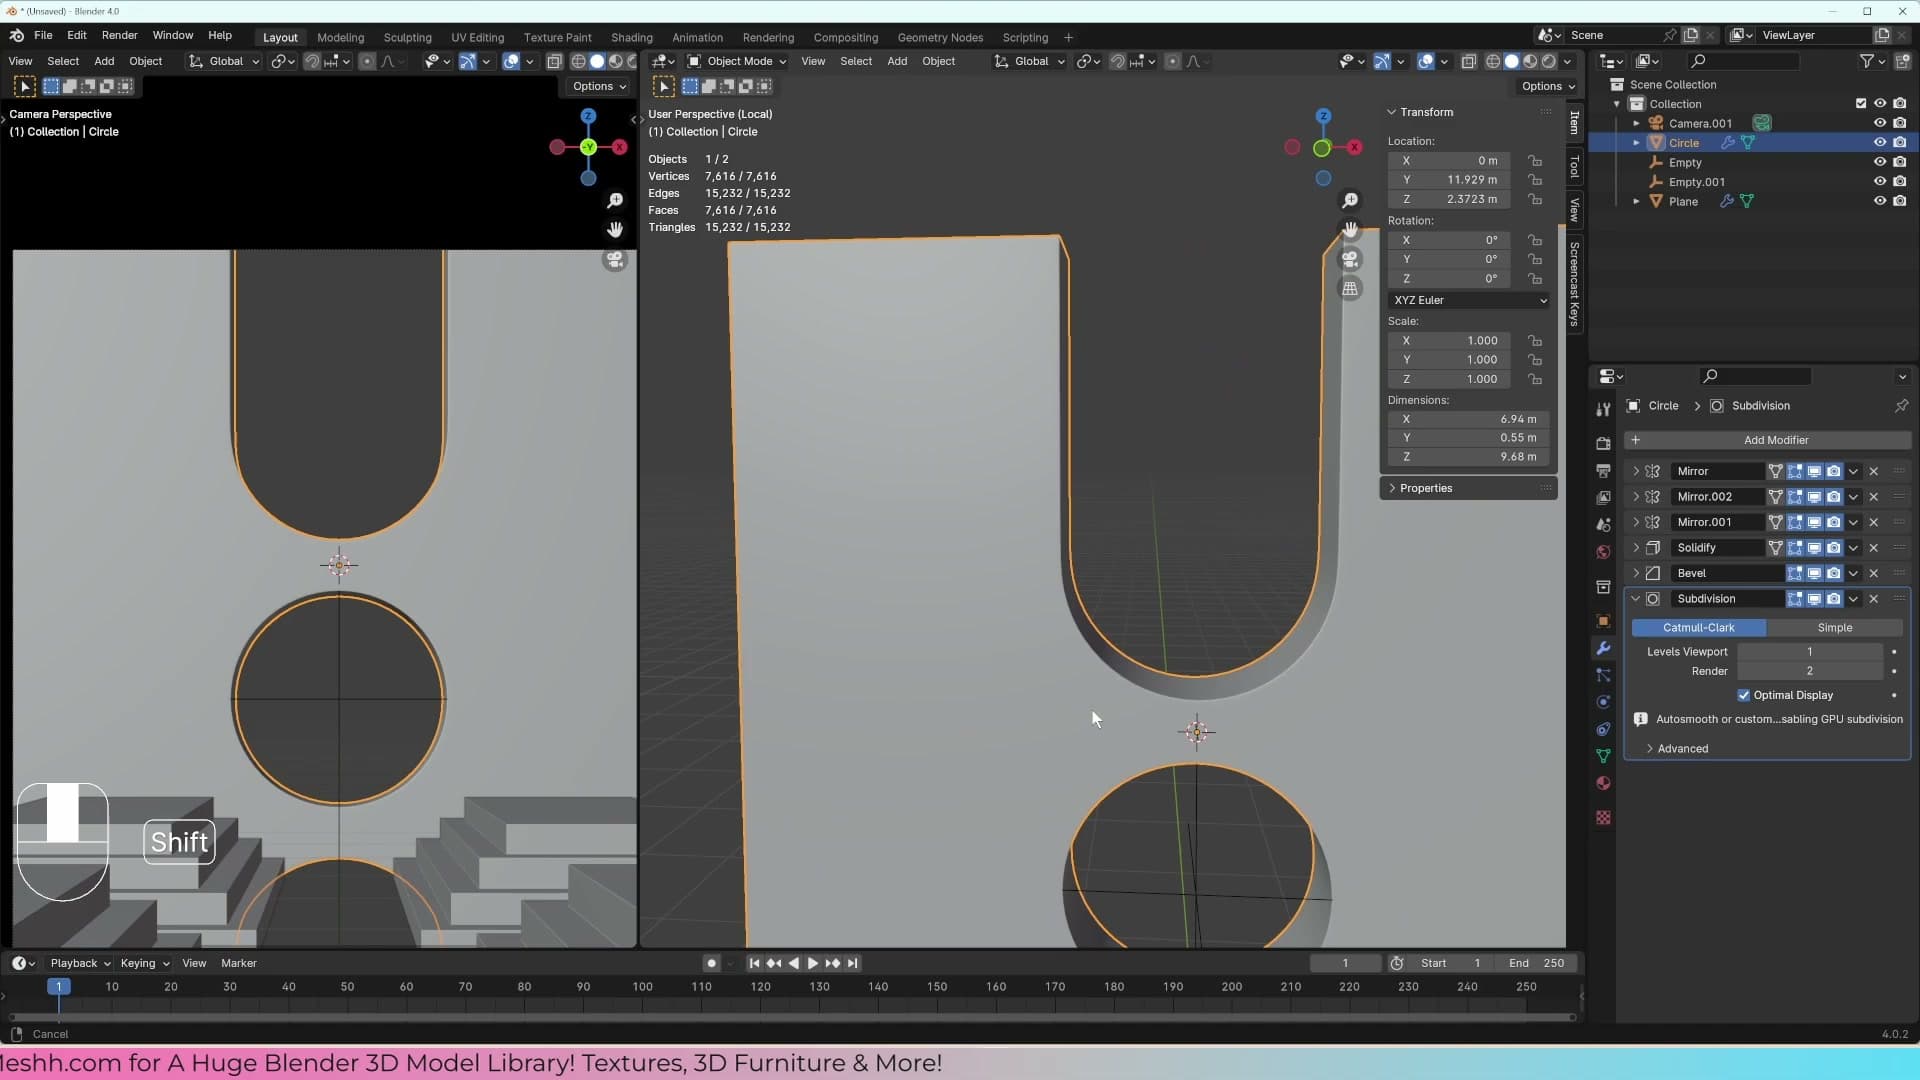
The change is subtle in the viewport, so don't worry if it looks almost identical at first glance. It's the kind of detail you only really notice once it's gone, but it's a habit worth getting into. Any time subsurf rounds an edge you wanted sharp, a loop cut sorts it.
There's one other artefact in the same area: a patch of strange shading where the top of the arch meets the wall. You can clean it up the same way: drop into edit mode and add a couple more loop cuts in that region. For this build I leave it as-is, since the final camera angle won't see that face anyway.
Stack order recap and applying the modifiers
The archway is now a properly complicated-looking pill shape, built entirely from four stacked modifiers without a single permanent edit to the underlying mesh. Drag the object around in the viewport and you can see the mirrors, solidify, bevel and subsurf all updating live.
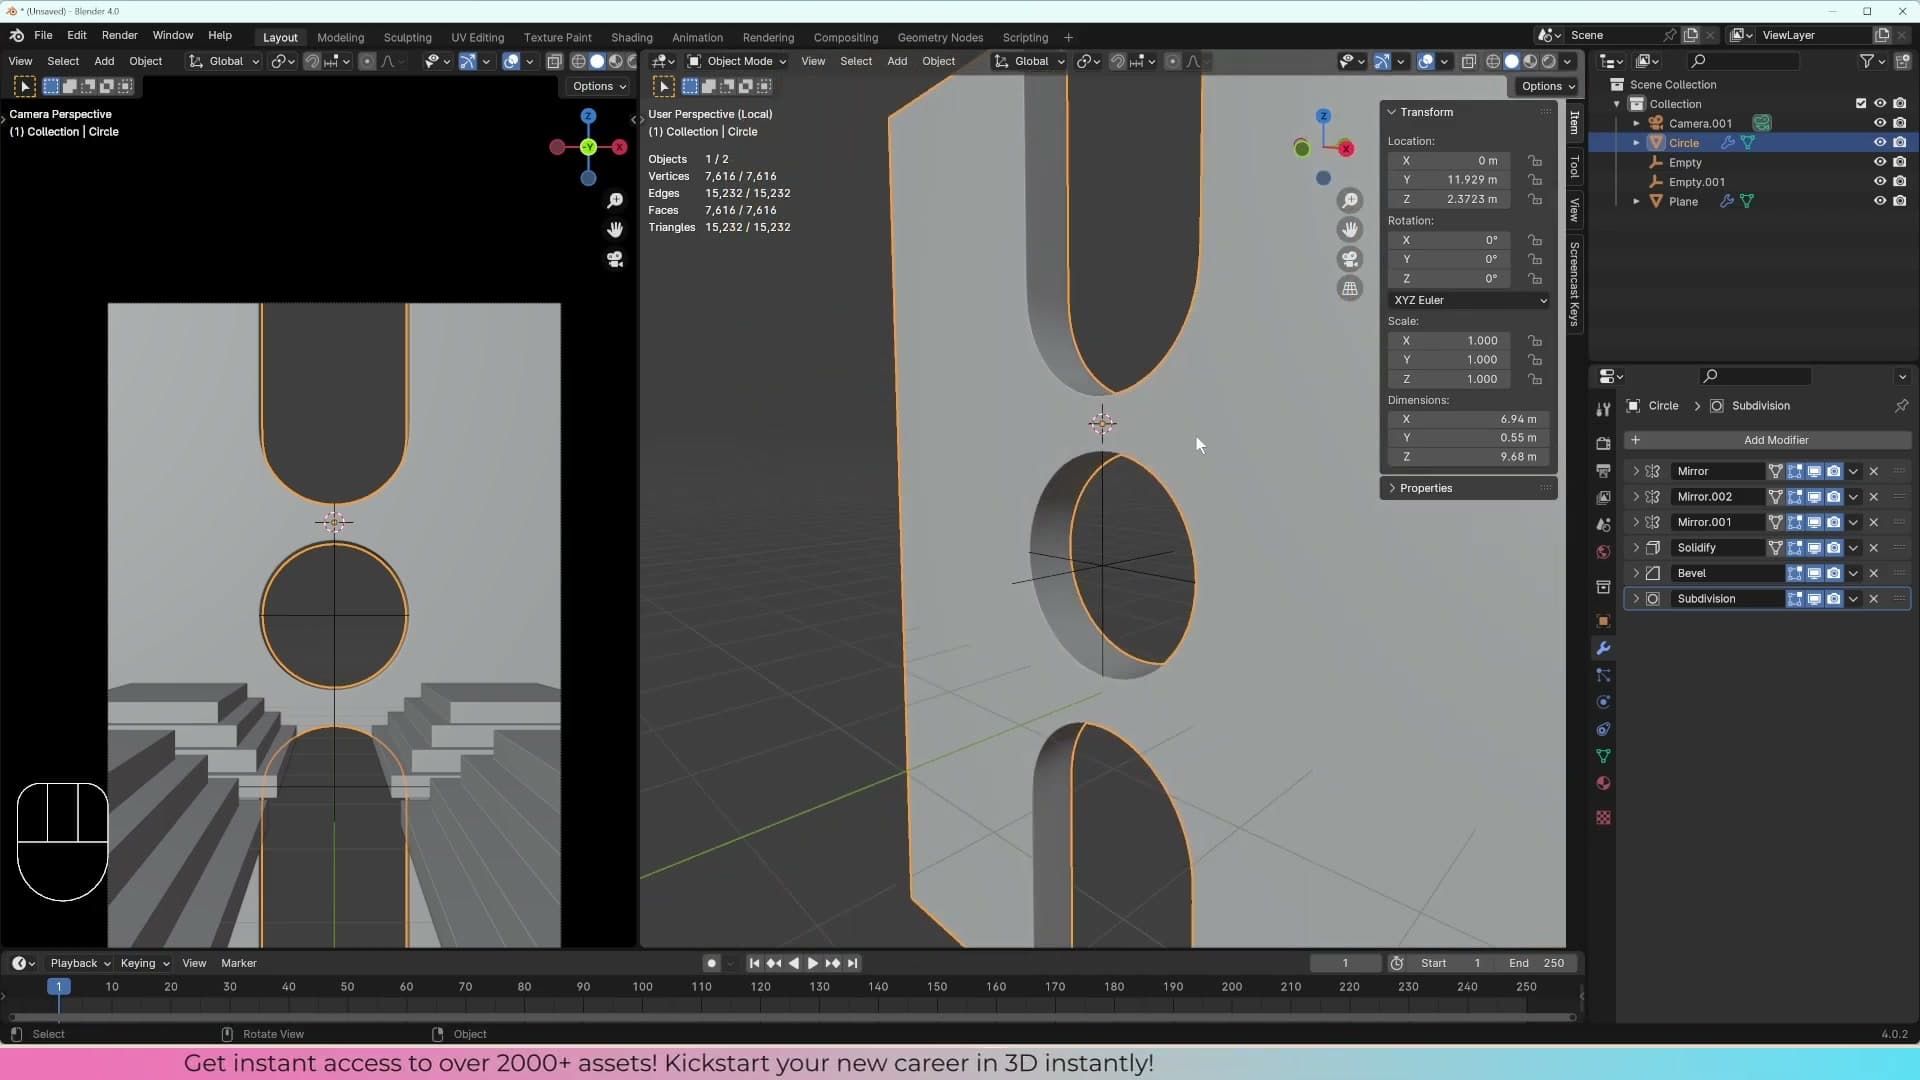
That chain is called the modifier stack, and the order in which the modifiers run matters. The rule of thumb to carry forward through the rest of the course is simple: Subdivision Surface goes at the end, and Bevel goes immediately before it. Reorder the stack and the result changes. Subdividing a bevelled mesh is not the same operation as bevelling a subdivided one, and the same logic applies to the mirrors lower down.
If you decide the shape is genuinely final and you'll never want to tweak the parameters again, you can bake the whole stack down into real geometry. Select the object and press Ctrl+A to apply every modifier at once, or click the dropdown arrow on any individual modifier in the Properties panel and choose Apply.
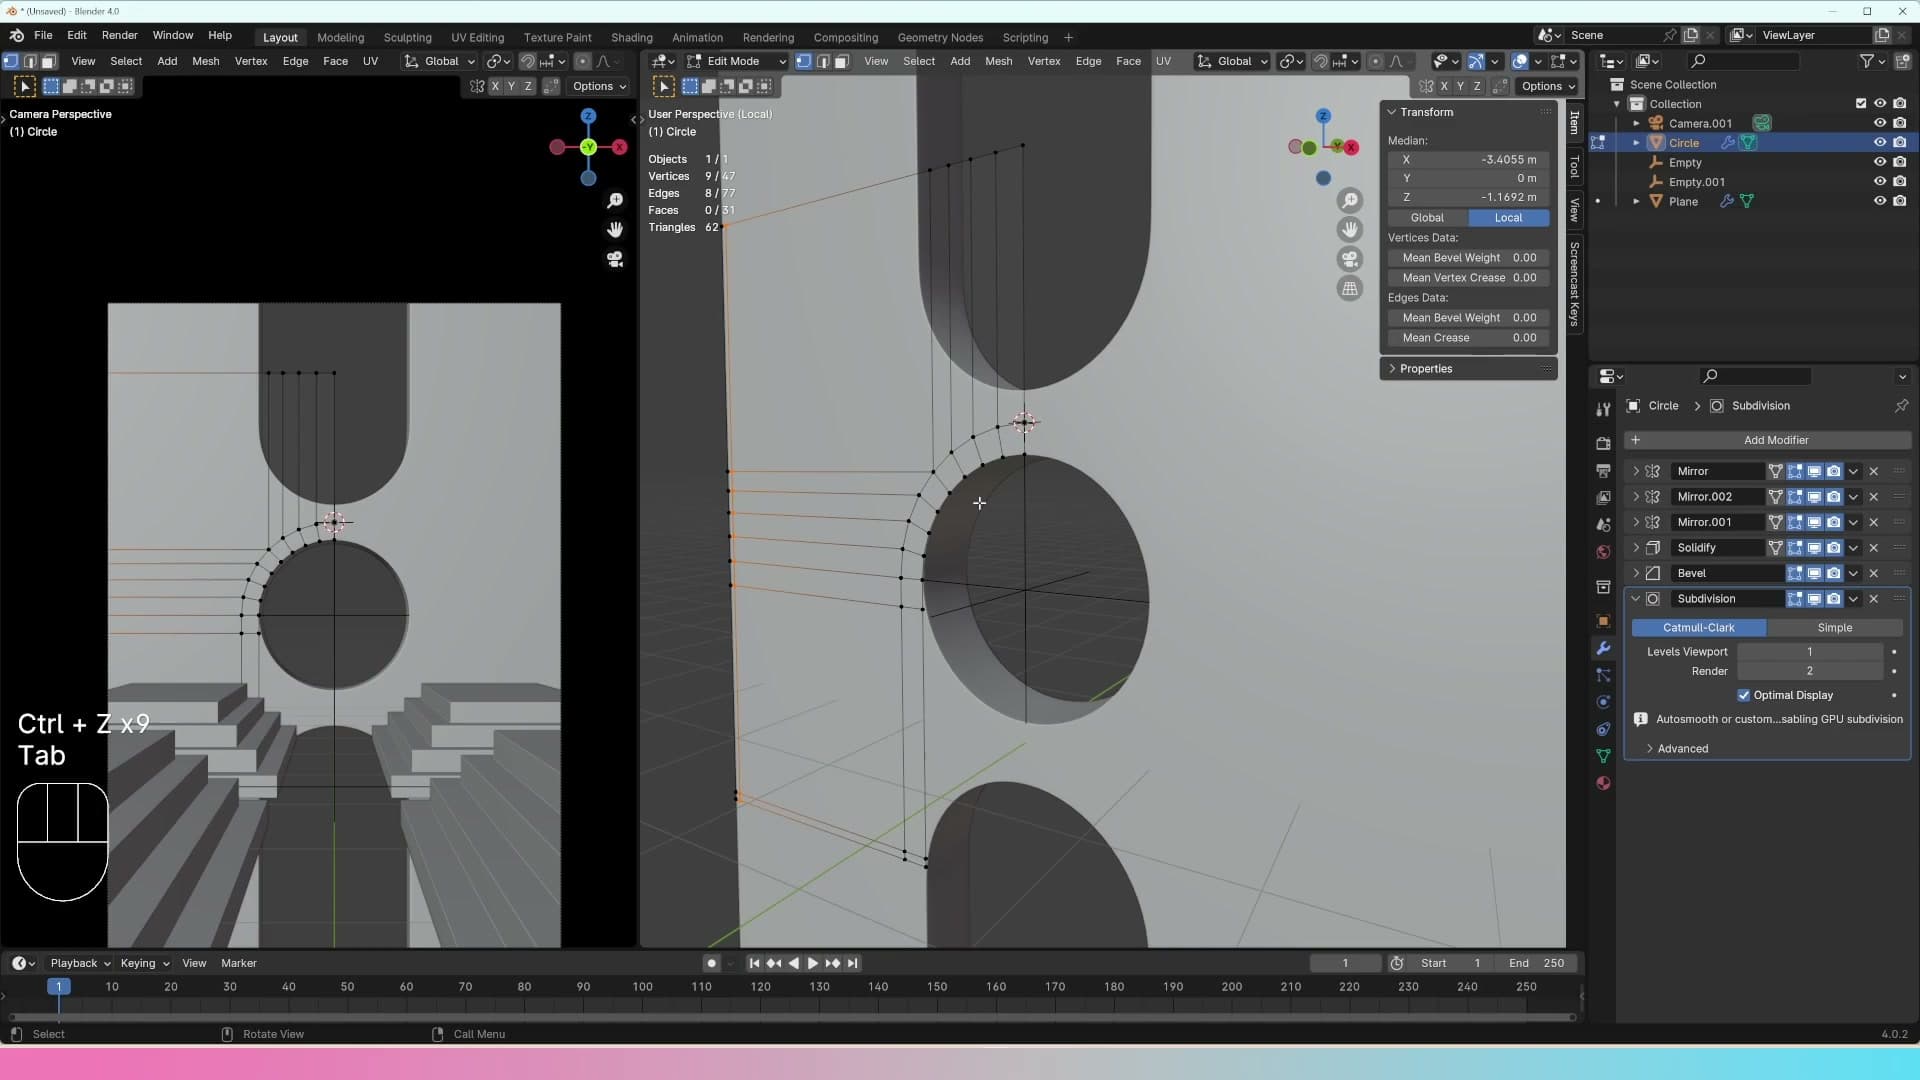
Dropping into edit mode after that reveals what you've committed to. The mesh that started as a handful of vertices is now packed with hundreds of subdivided faces, every one of them editable manually. Useful if you need to carve unique details into the geometry, but a one-way trip away from the parametric version you had a moment ago.
For this build I undo the apply and keep the stack live. Editing a parametric four-modifier shape is dramatically easier than wrestling with a fully-baked mesh, and there's no reason to commit to permanent geometry until something forces your hand. We'll carry the live stack into Part 4.
Tools and credits
Everything mentioned in this tutorial, with links.
- Blender is the renderer this entire build runs in.
- iMeshh is the studio platform (project management, client review, asset library, invoicing). The asset library used in this tutorial is included with every iMeshh Pro plan.
- Poly Haven provides free CC0 textures and HDRIs.
Pillar guide: Beginner Course hub