Modelling the starter cushion shape
Block out the base cushion from a cube, add loop cuts where the seams will sit and inflate the top and bottom faces so the cloth sim has something to grip.
Approach: drop a cloth onto a force field
Welcome to the next step of the sofa build. By now you should be looking at a finished sofa frame from the previous parts, with no cushions on it yet. This part covers the fabric: the seat cushion, the back cushion, the bolsters and the seams that tie them together.
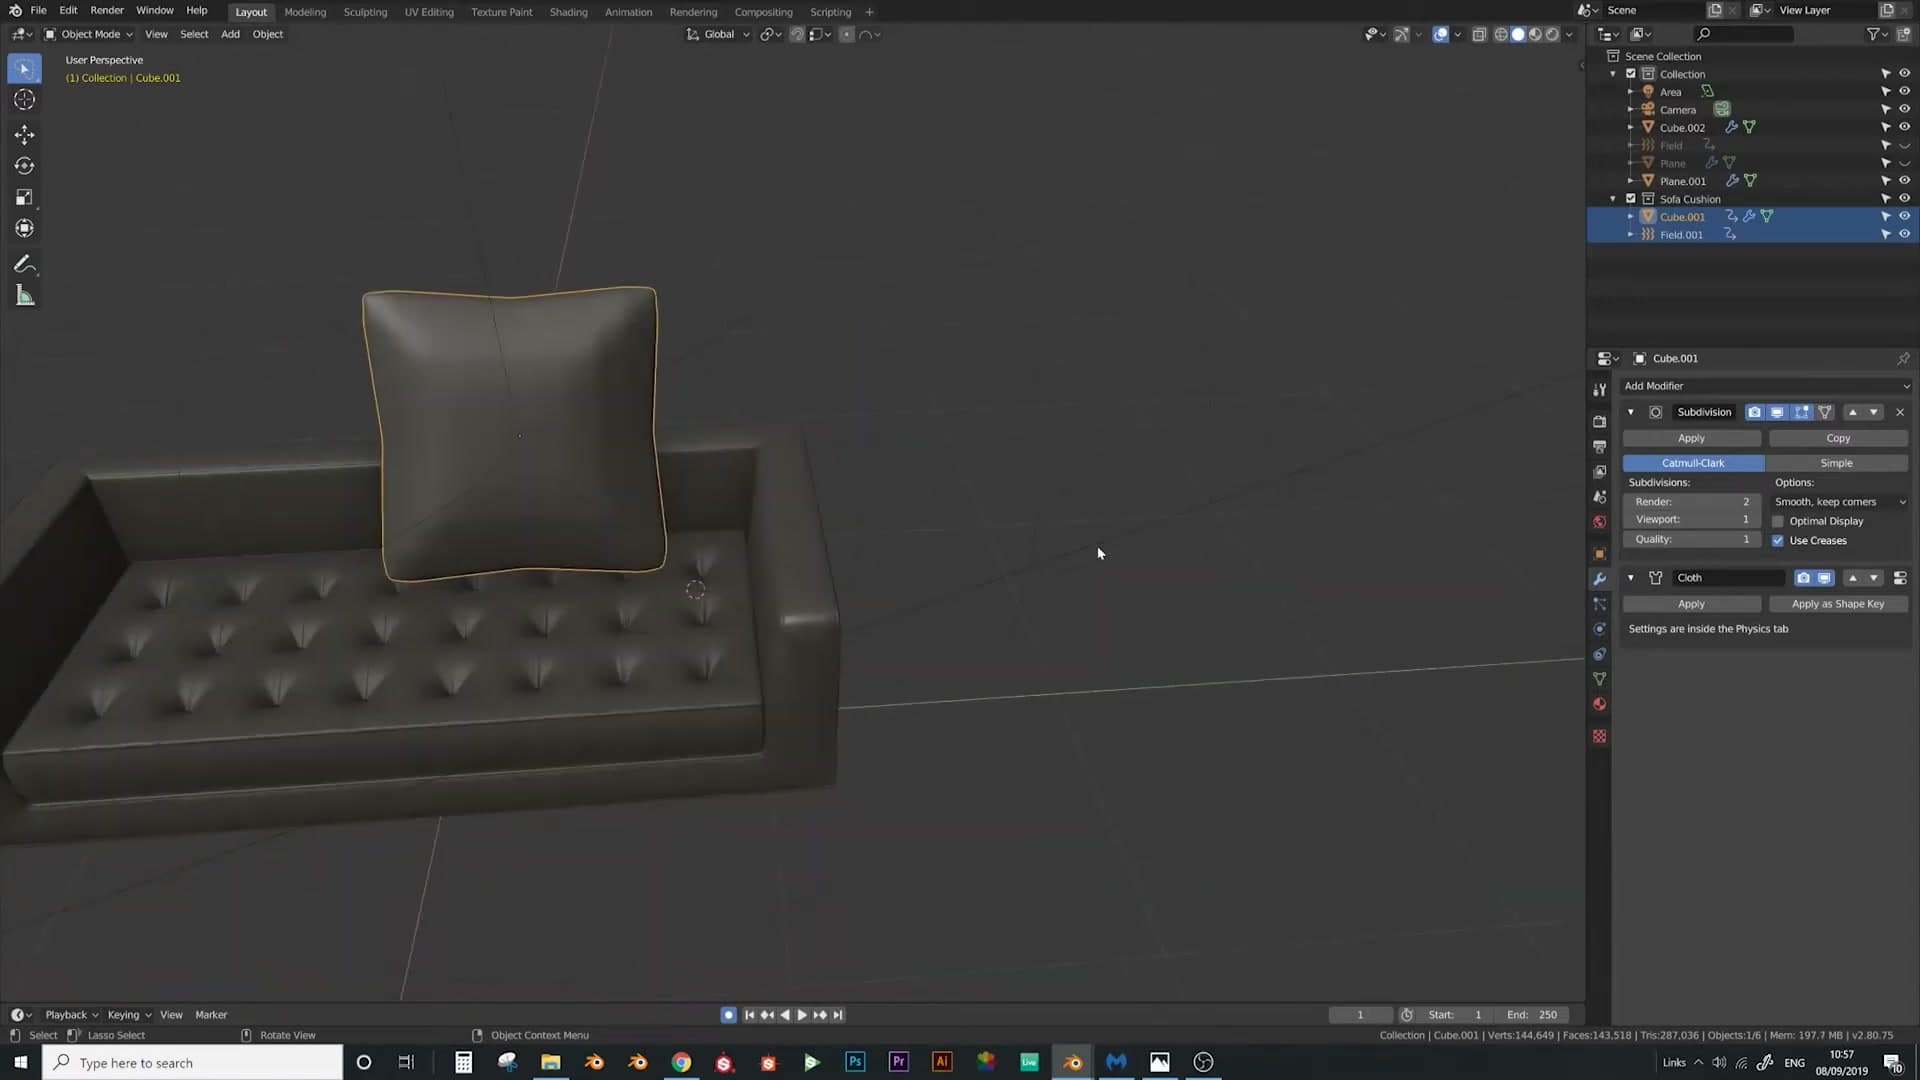
The whole approach hinges on one trick: instead of sculpting cushions by hand, you model a flat cushion blank, drop it onto a force field sitting inside the sofa, and let Blender's cloth simulator inflate the mesh until the silhouette looks right. When it does, you stop the sim and bake the shape. Everything in this module is about getting that flat blank ready.
Loop-cutting a flat cube into a cushion blank
Pop into local view so the sofa frame is out of the way, then start the cushion from a plain cube. Scale it down on every axis and squash it flat in Z until it reads as a thin, rectangular pad, roughly the footprint of a single seat cushion on the sofa.
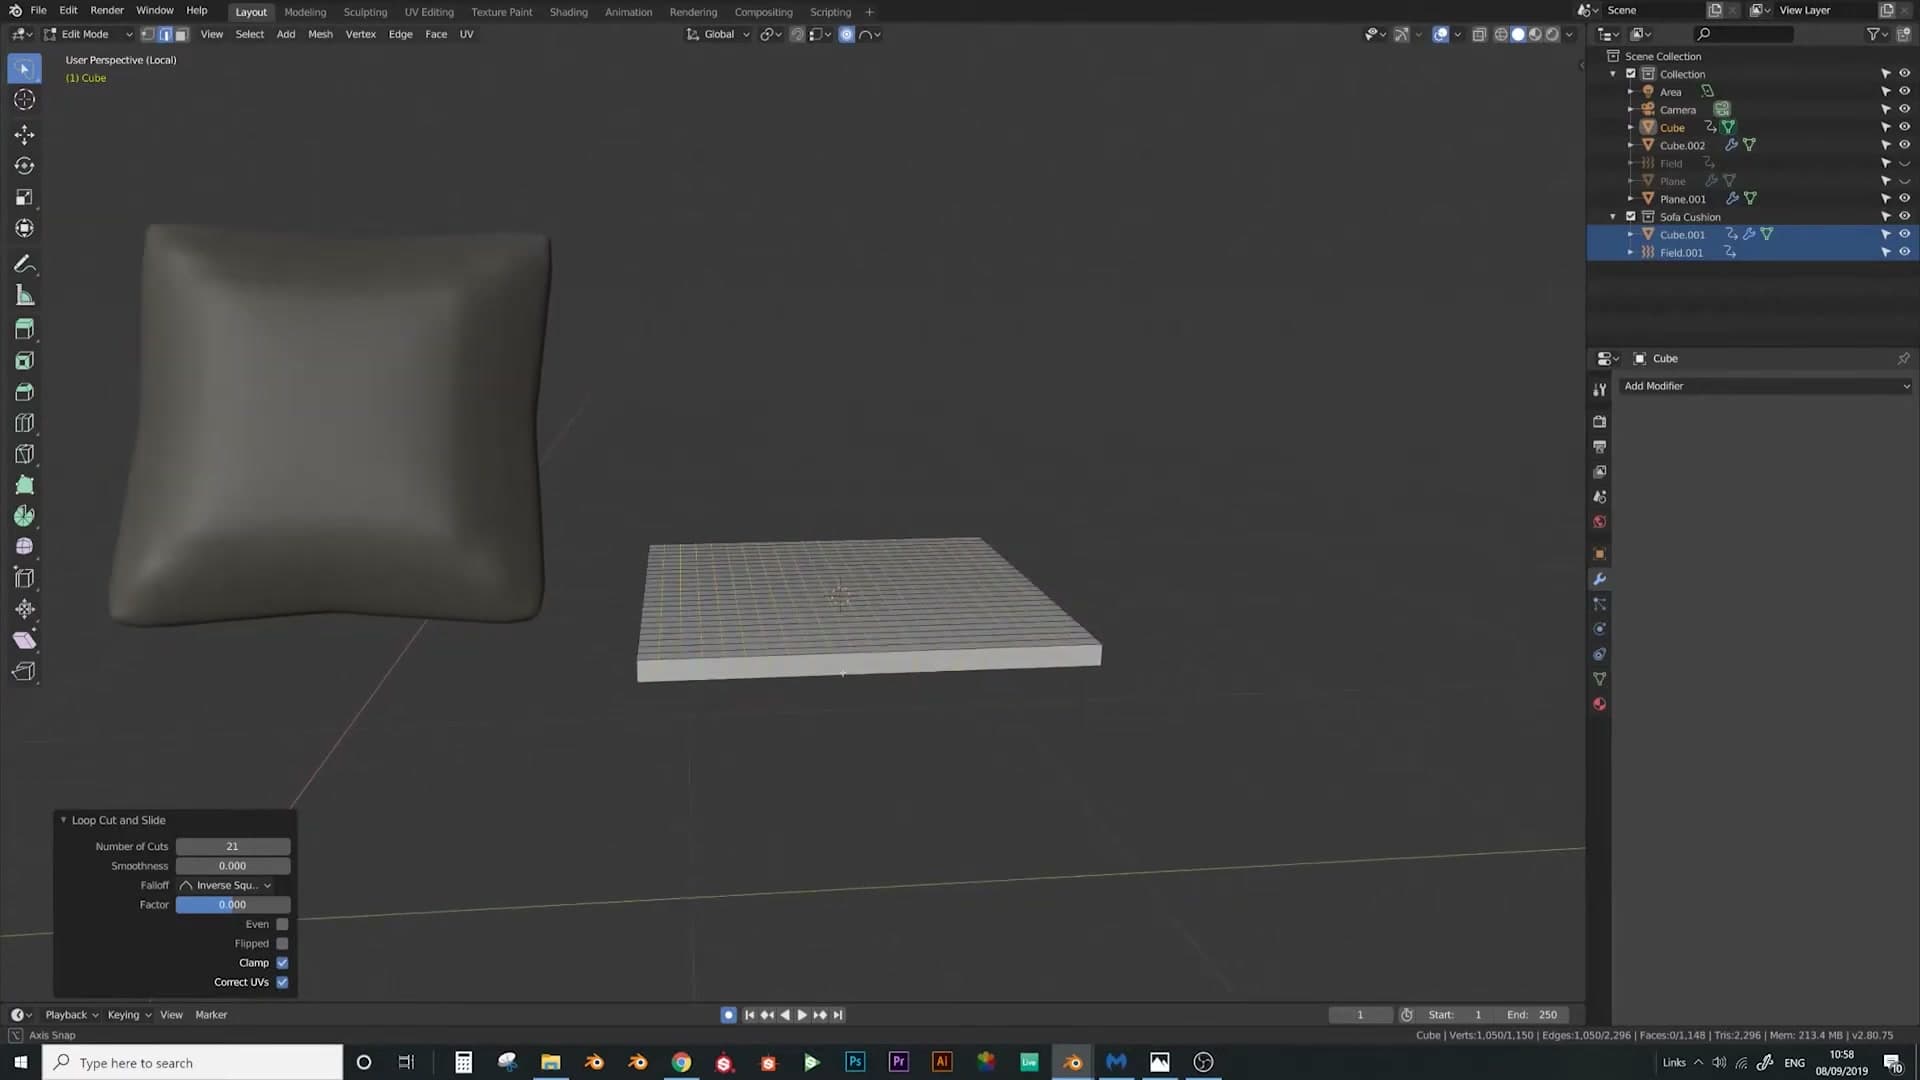
Tab into edit mode, switch to face select, and pick the top and bottom faces of the cube. You're about to add the loop cuts that give the eventual cloth somewhere to fold:
1. Run a loop cut across the long axis of the cube. Add a second a little further along. Keep going until you have four or five evenly spaced cuts across the top and bottom faces.
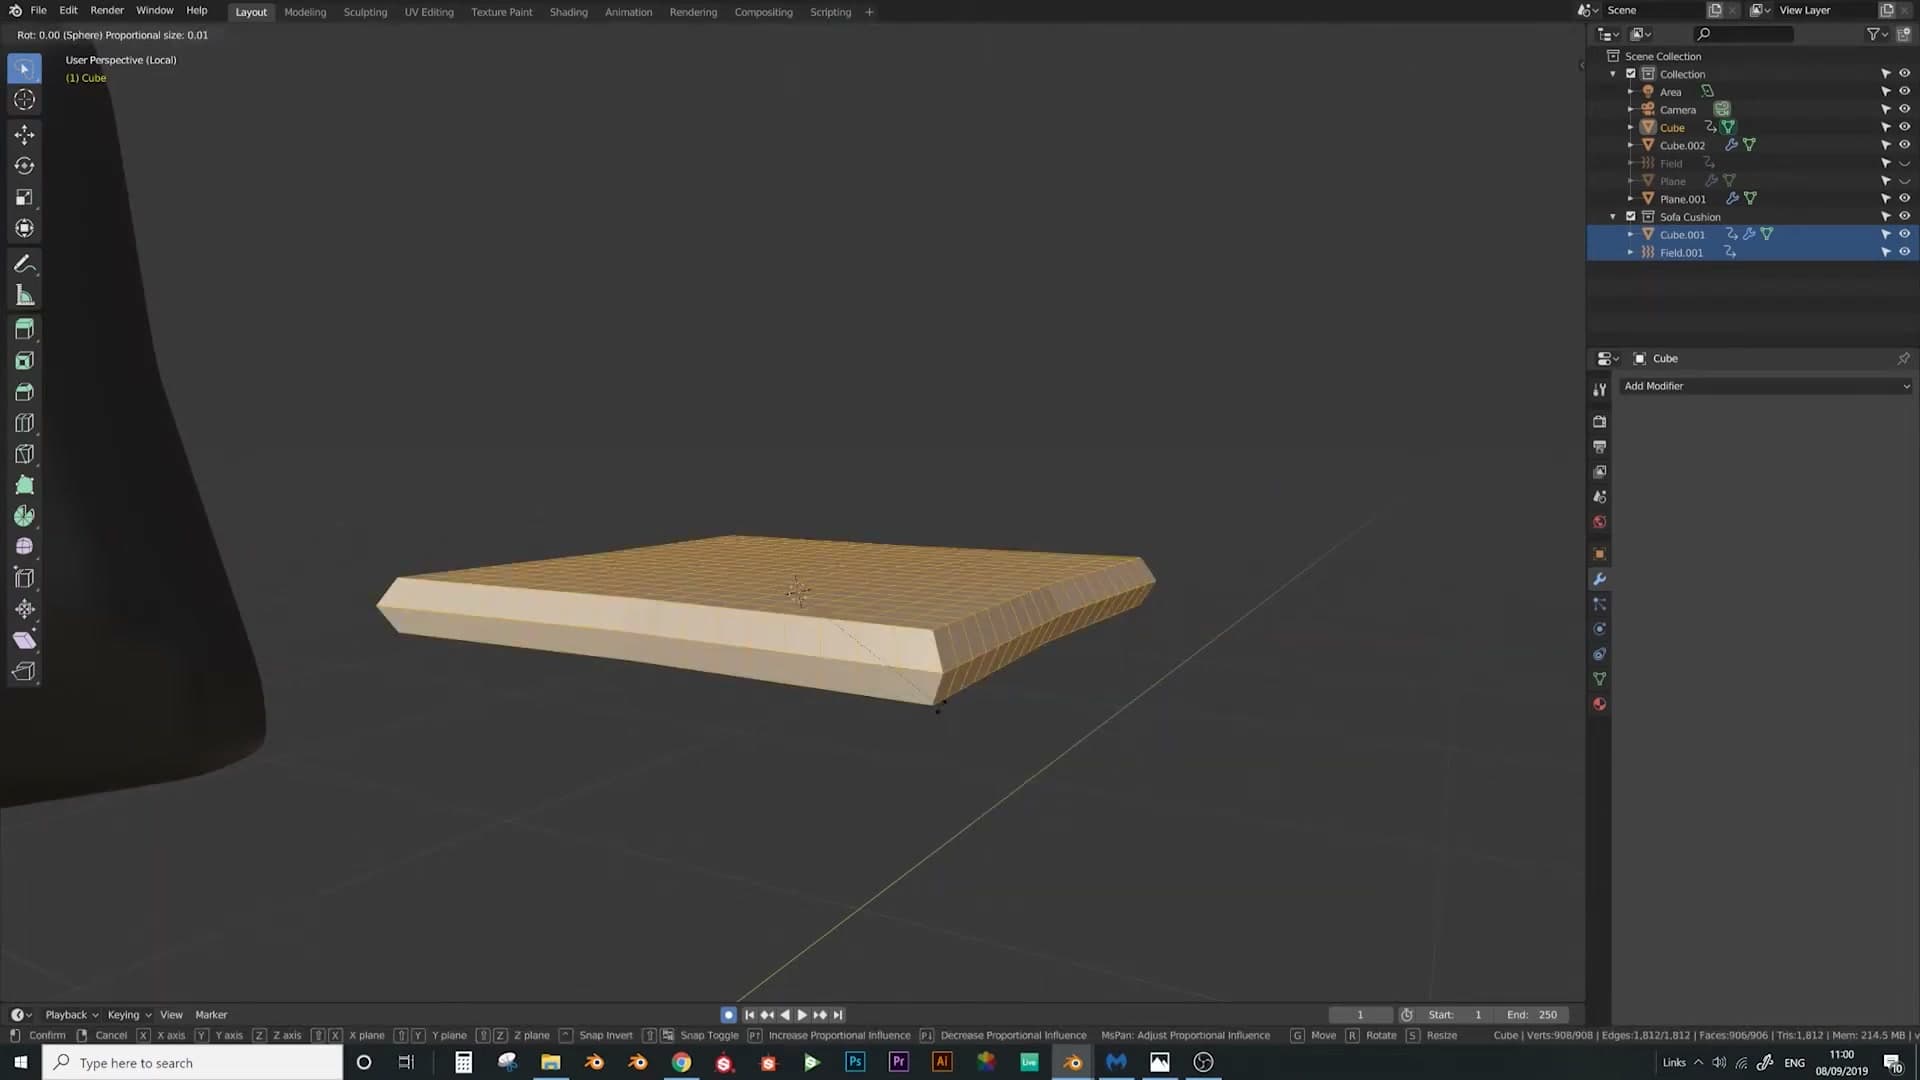
2. Grab the perimeter edge loop that sits just inside the corners, press S, then Shift+Z to scale it on every axis except Z. Nudge it inward a touch. This puts a subtle step around the edge of the cushion that the simulated fabric will tuck against.
3. Add one more loop cut close to a short edge and scale it on the X axis, pinching it in slightly. This is the line that will eventually become the seam at the front of the cushion.
Marking the perimeter seam and a quick unwrap
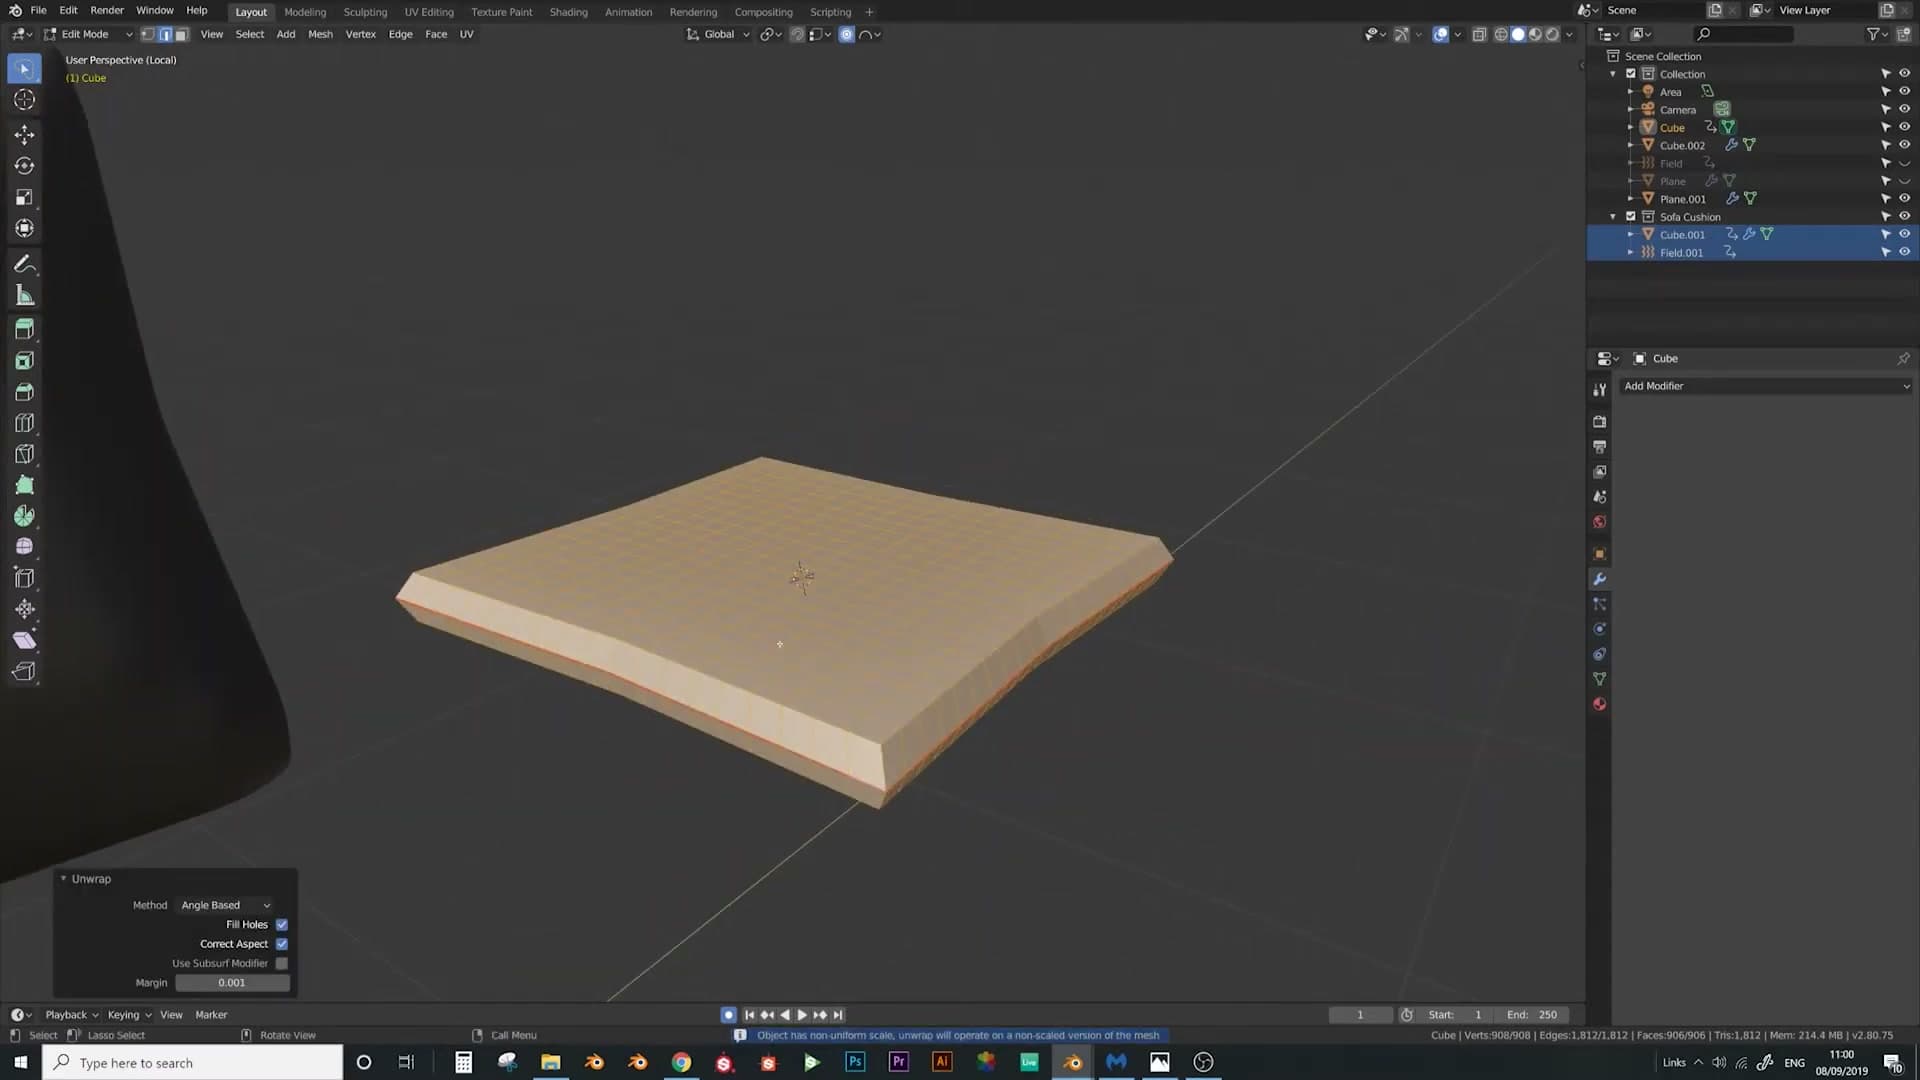
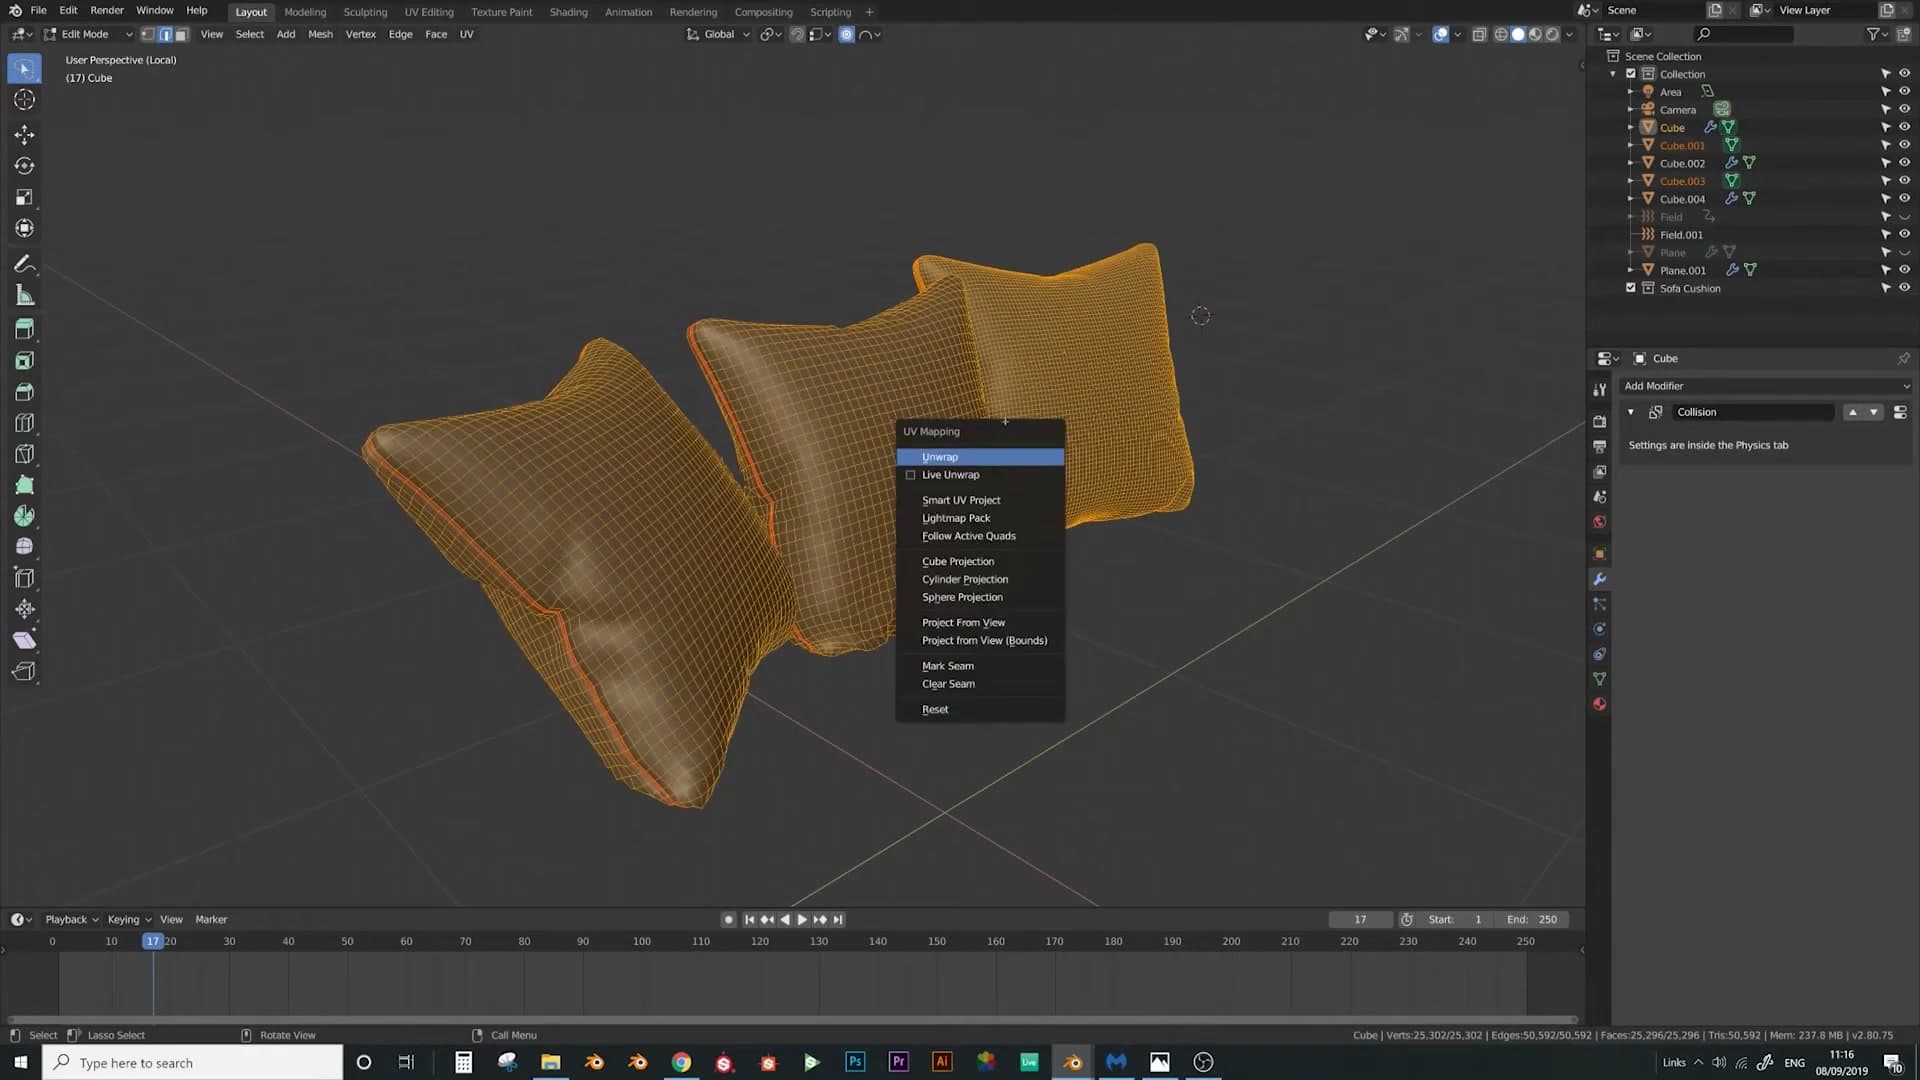
Select the edge loop running around the perimeter of the cushion (the line where the top and bottom panels of fabric would meet on a real cushion) and Mark Seam. Then press A to select everything and unwrap. It doesn't need to be perfect; you can come back and tidy the UVs once the simulation is baked.
Inflating the top and bottom faces with Shift+G normal
The flat cube is too thin to give the cloth sim much to grip, so the next job is to inflate the top and bottom faces outward along their own normals to fake a bit of thickness.
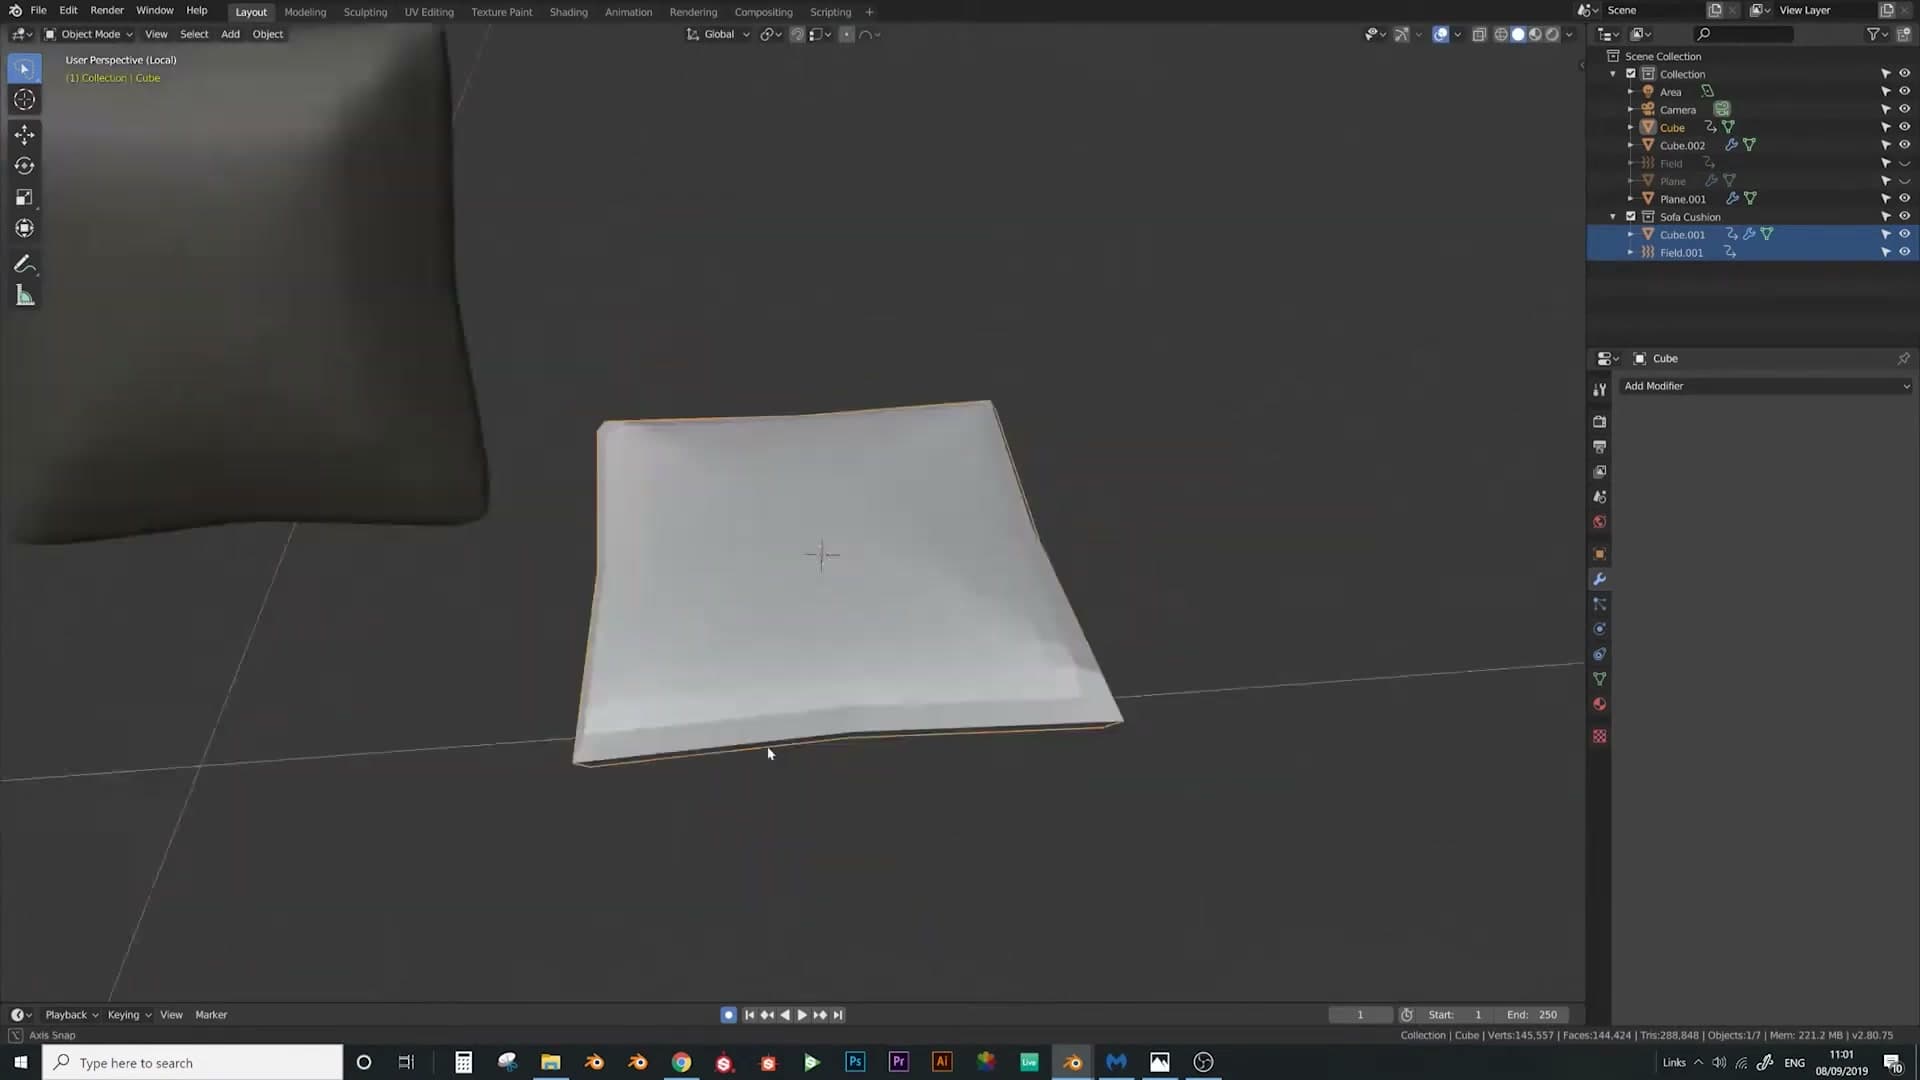
Select the top face first and pull it upward along its normal direction. Then select the bottom face. The quick way is to hover over the top face, press Shift+G, and pick Normal from the Select Similar menu, which grabs the matching face by normal direction. Push the bottom face out the same distance in the opposite direction.
It doesn't need to be precise. You're just bulking the blank out so it looks vaguely cushion-shaped before the simulator takes over and finishes the job. Right-click and Shade Smooth when you're done so the silhouette reads as soft fabric rather than faceted geometry.
Optional: soften the corner vertices
This step is optional, but the cushion in the reference render has slightly rounded corners rather than sharp ones. If you want the same look, grab the four corner vertices on the top and bottom faces and scale them inward a touch. The corners now sit a fraction further in than the rest of the perimeter, which reads as a softer cushion silhouette once the cloth sim runs.
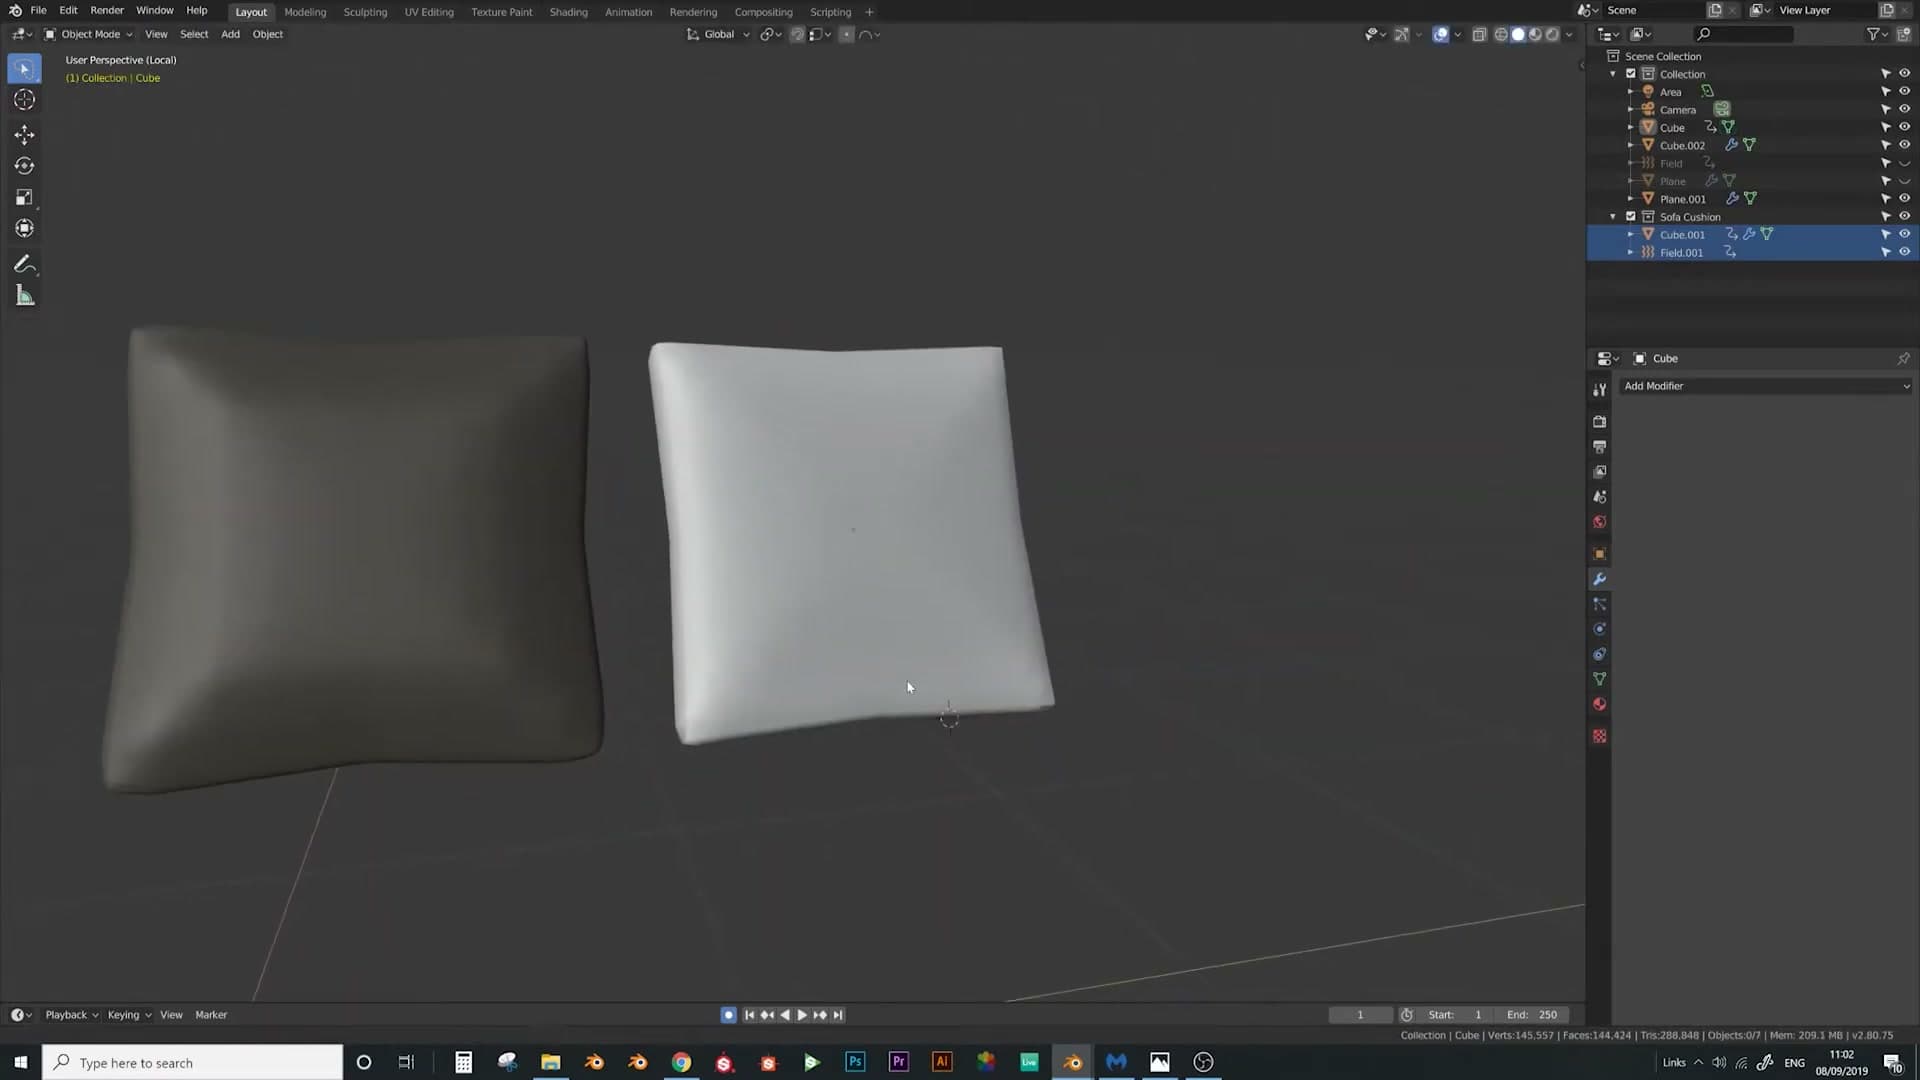
Cloth physics settings that actually work
Add subdivision surface and a cloth modifier, then dial in the stiffness, damping, self-collision and gravity values that produce believable fabric instead of an explosion.
Subdivision surface first, then cloth
With your cushion mesh selected, open the Physics tab. Resist the urge to click Cloth straight away. Add a Subdivision Surface modifier first so the simulator has enough geometry to fold and crease properly. A blocky base cage will simulate like cardboard.
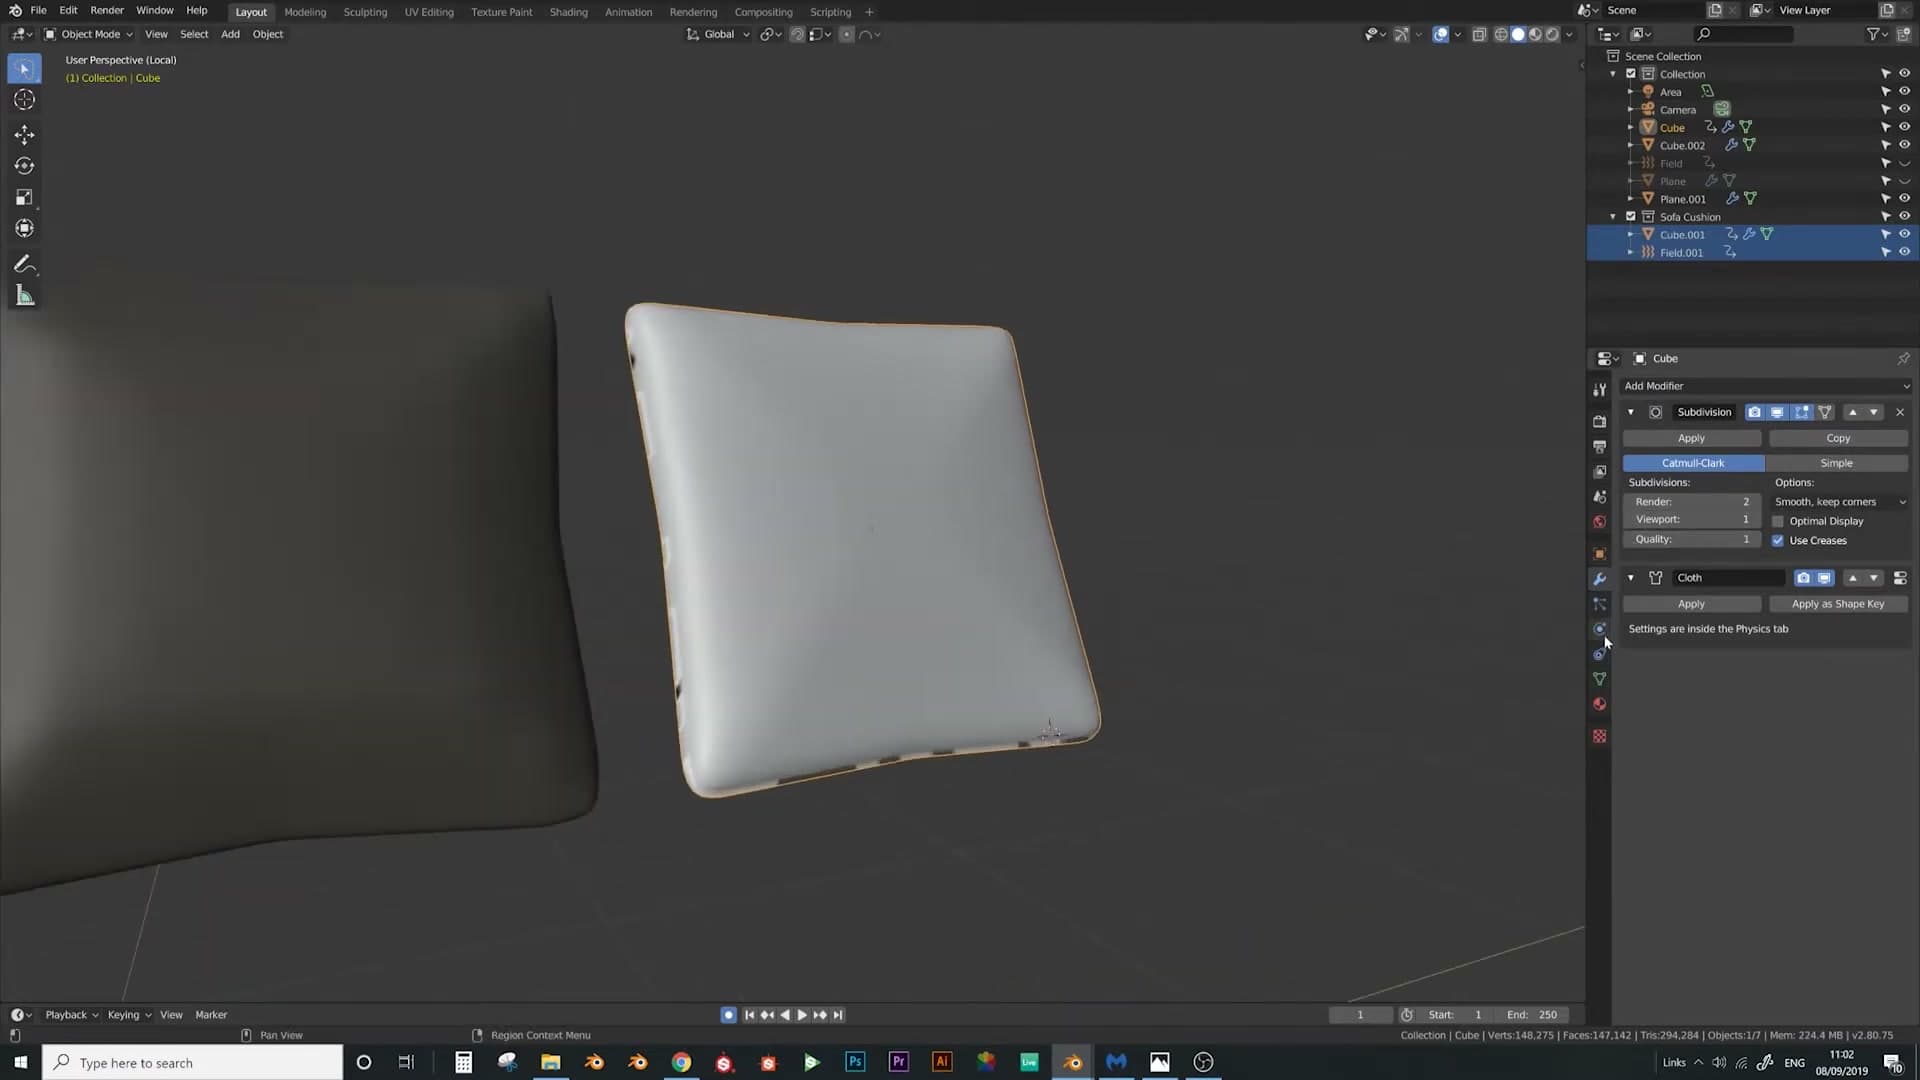
Drop the subsurf Viewport level to 1. That is plenty of resolution for a cushion and keeps the solve fast enough to iterate on. With subsurf sitting at the top of the stack, now click Cloth in the Physics panel so the cloth modifier lands underneath it and runs on the smoothed mesh.
Stiffness 2/2/0.5 and damping baseline
Open the cloth settings panel. Before touching anything, a word of warning: these numbers are the ones I landed on after a lot of trial and error, and every cushion you ever sim will want a slightly different mix. Treat them as a starting point, not a recipe.
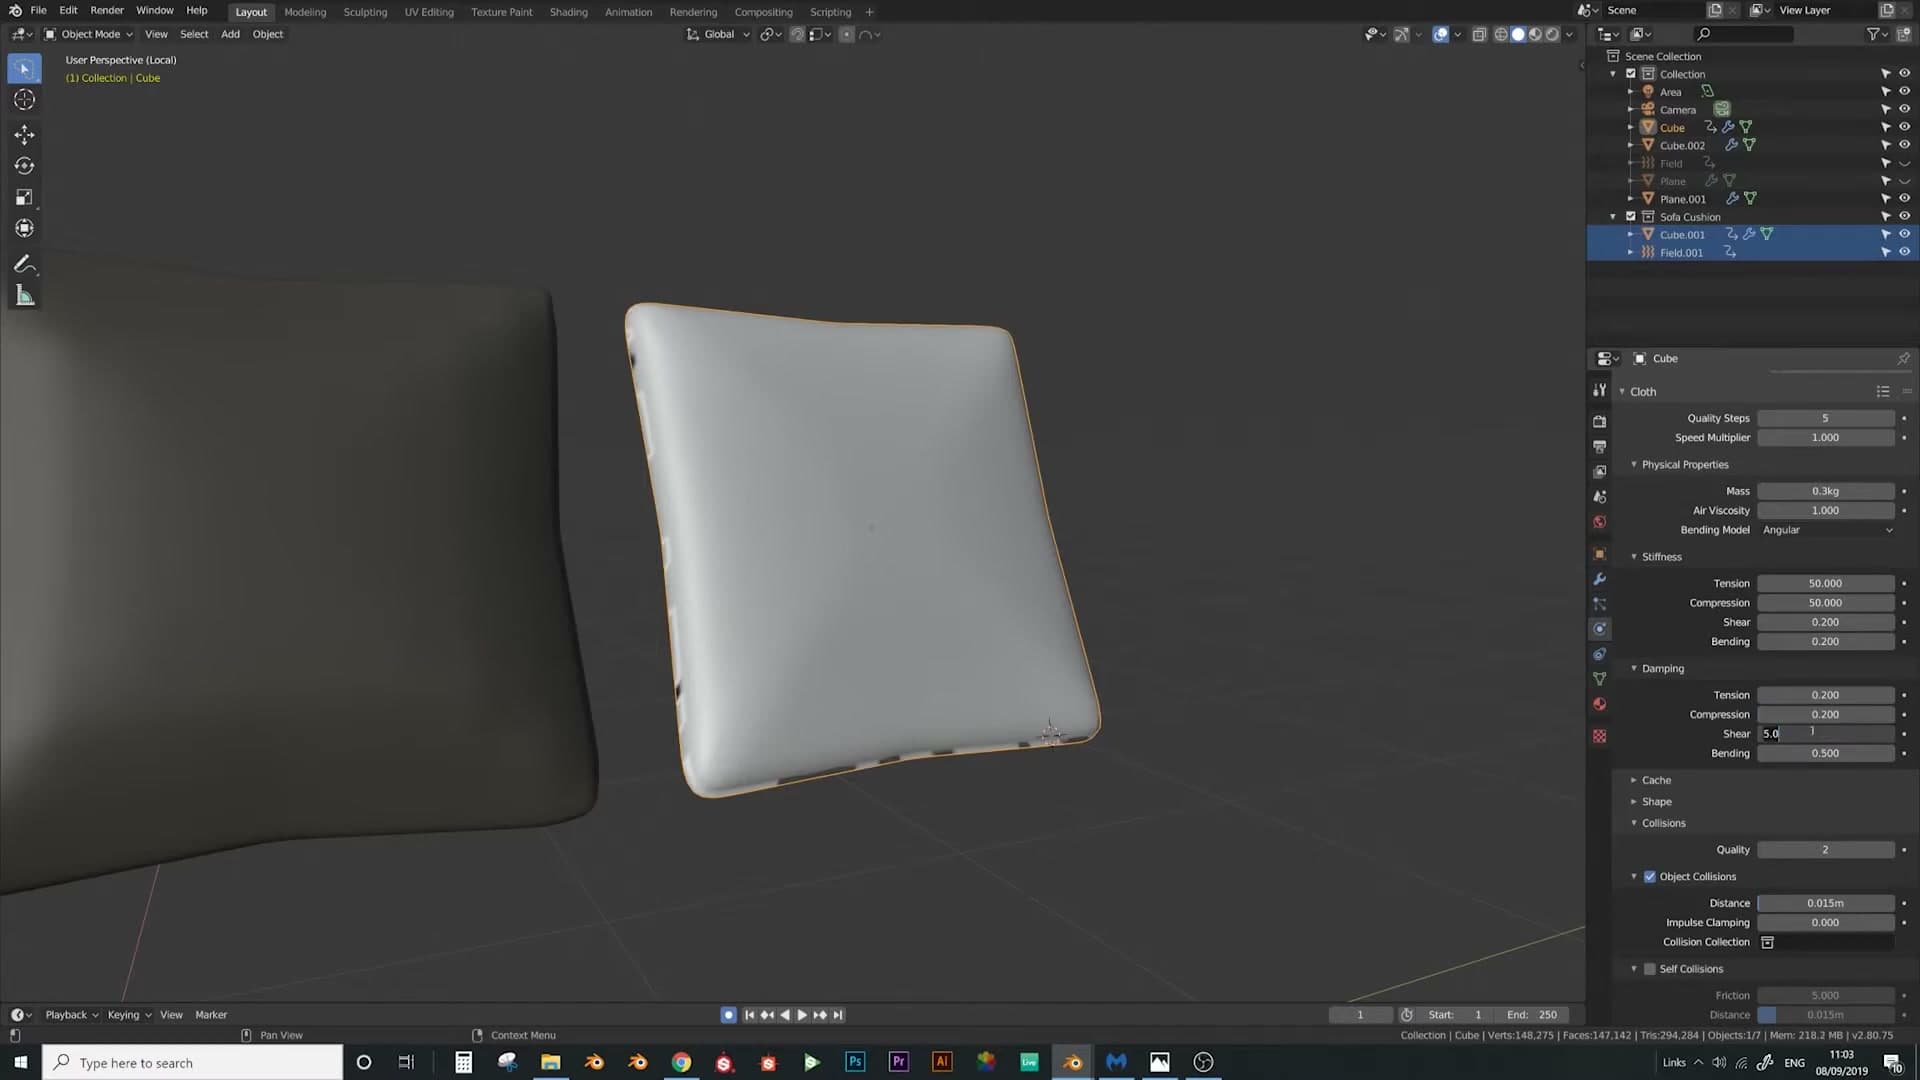
Under Stiffness, set Tension to 2, Compression to 2 and Shear to 0.5. The matched tension and compression hold the cushion's overall shape against the inflating force field, while the lower shear value lets the fabric give on the diagonals so folds form naturally where panels of cloth meet.
Self-collisions, friction and dropping gravity to 0.13
Scroll down to the Collisions sub-panel and tick Self Collisions. This is non-negotiable for an inflating cushion. Without it the fabric will pass straight through its own surface the moment the force field pushes outward, and you will end up with a horrible knotted mess instead of folds.
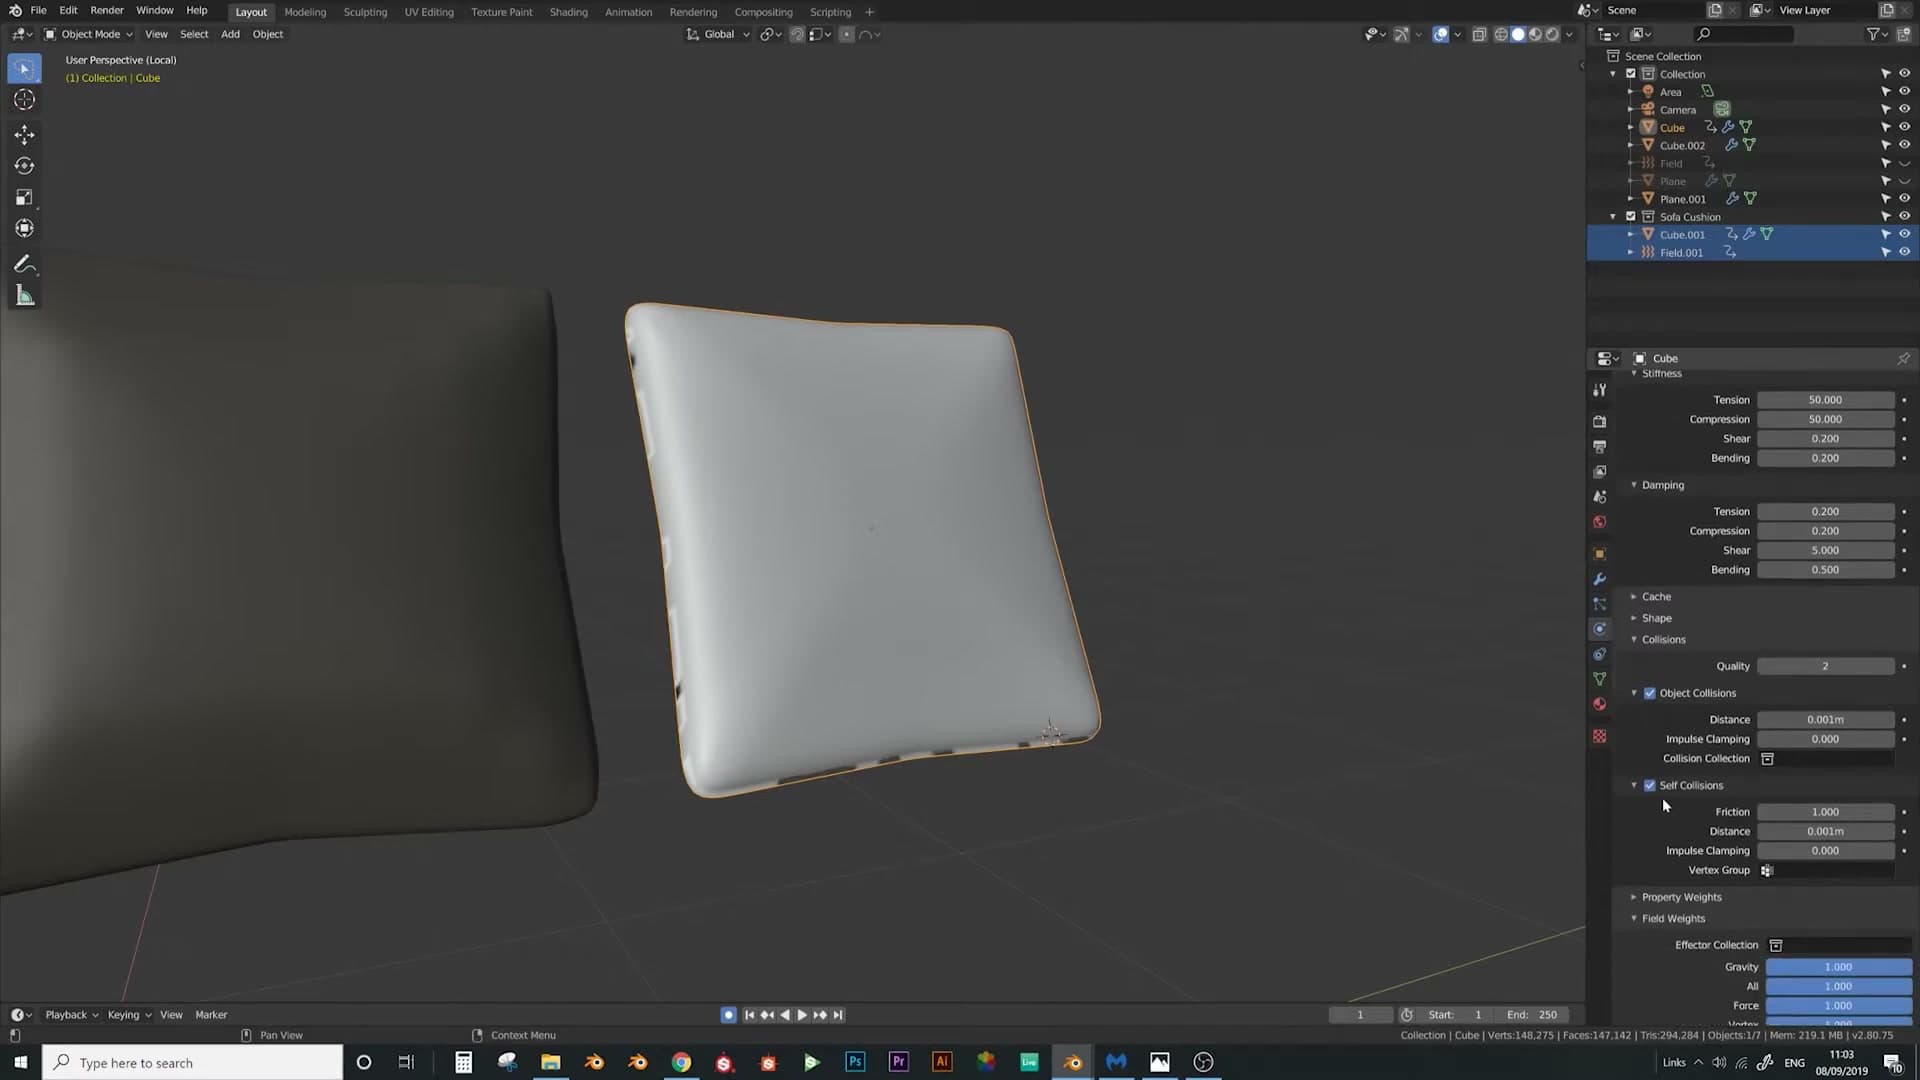
Set Friction to 1 and Damping to 0.01. Then set the self-collision distance to 0.001. That tiny buffer is what keeps adjacent faces from clipping into one another as the cloth bunches and creases on itself.
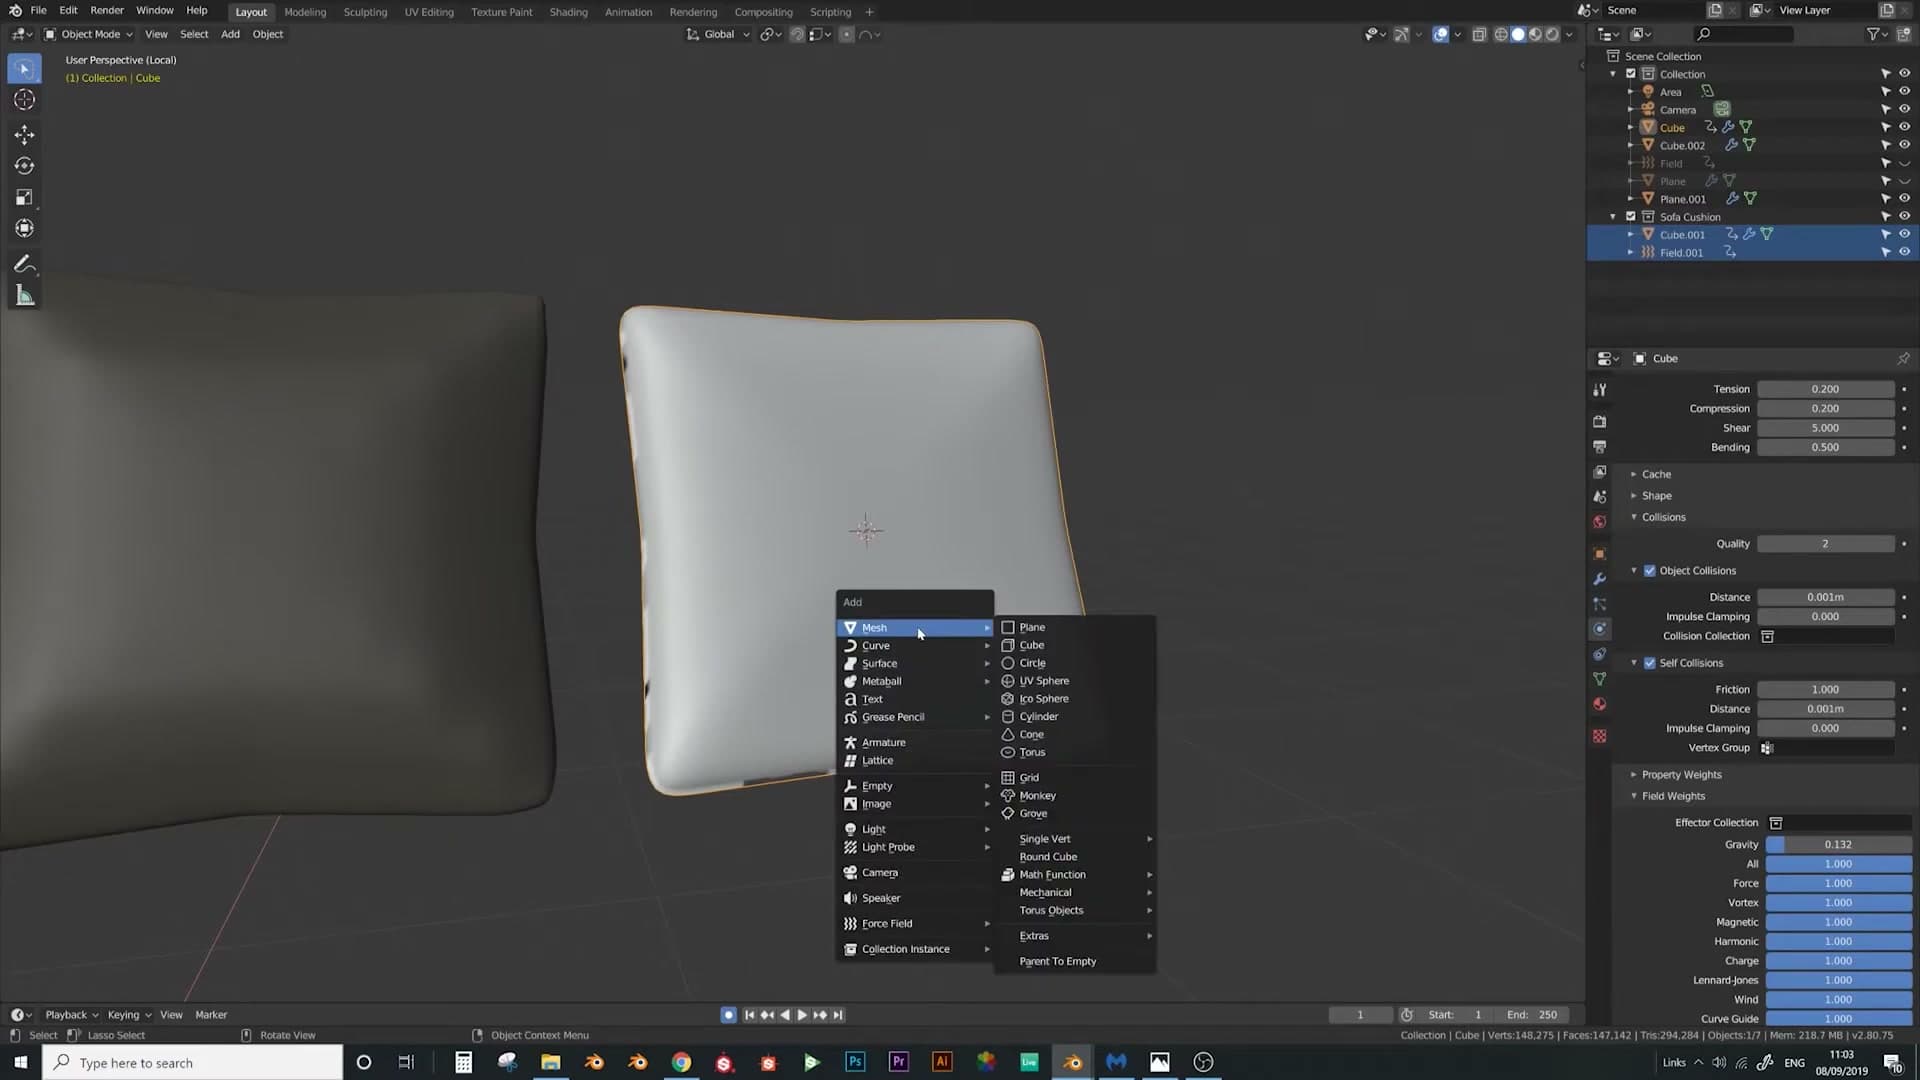
Last setting before you can hit play: drop Gravity all the way down to about 0.13. You want almost no downward pull on this cushion. The force field is going to do the work of inflating the fabric outward, and a full 1.0 of gravity fights that lift the entire way. Pulling gravity to a fraction lets the force field shape the cushion without dragging it through the floor.
Force field and collider setup
Snap a force field to the cushion centre, set its strength to 500 and turn the sofa body into a collider so the cloth has something to land on.
Adding a force field at strength 500
With the cushion still selected, press Shift+S and choose Cursor to Selected so the 3D cursor snaps to the centre of the mesh. That gives the force field somewhere clean to spawn from, right in the middle of the cushion where you want the outward push to originate.
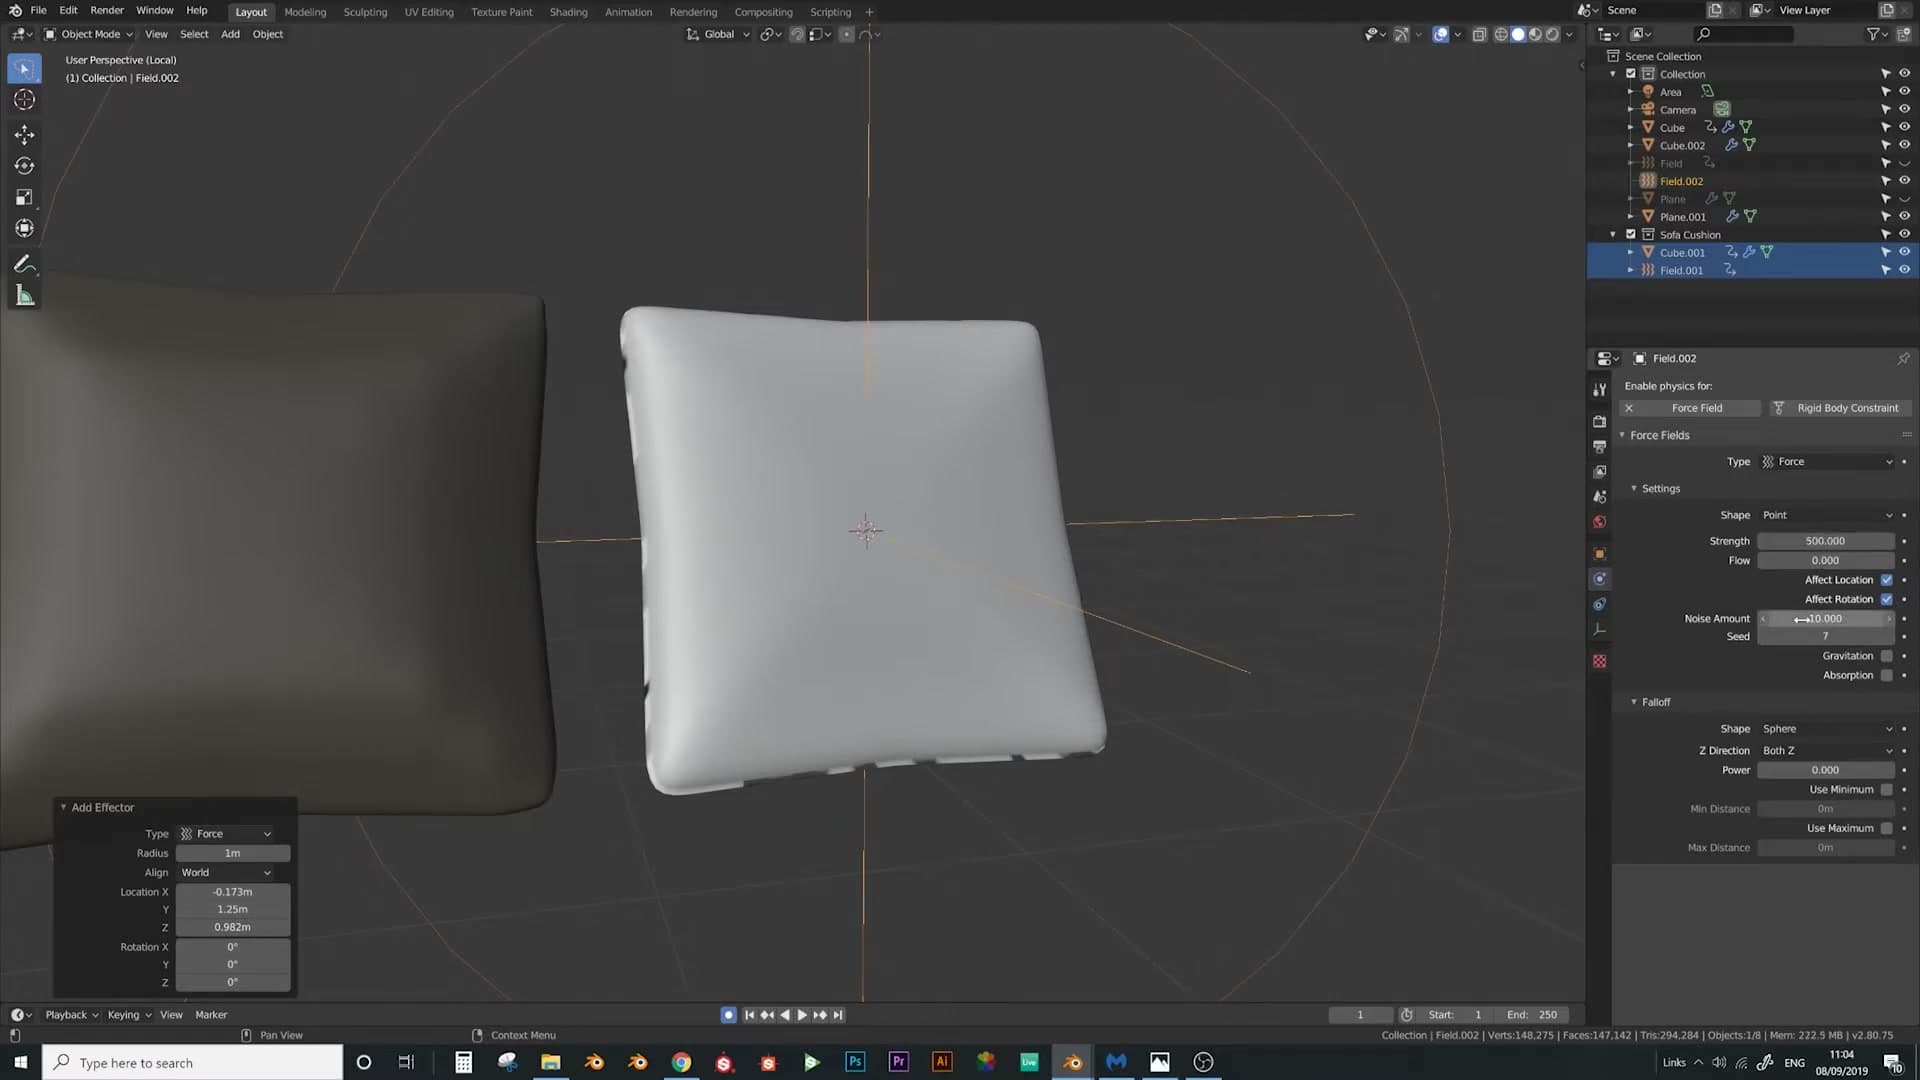
Add a force field from the Add menu and set its Strength to 500. Bump the Noise amount up to around 10 as well. The noise value isn't critical at this stage. It just adds a little jitter to the inflation so the surface doesn't end up perfectly smooth, but you can tune it later if anything looks off.
Tagging the sofa body as a collider
The cushion now has something pushing it outward, but nothing telling it where to stop. To fix that, the sofa body itself needs to act as a collider so the cloth rests on the frame rather than passing straight through it.
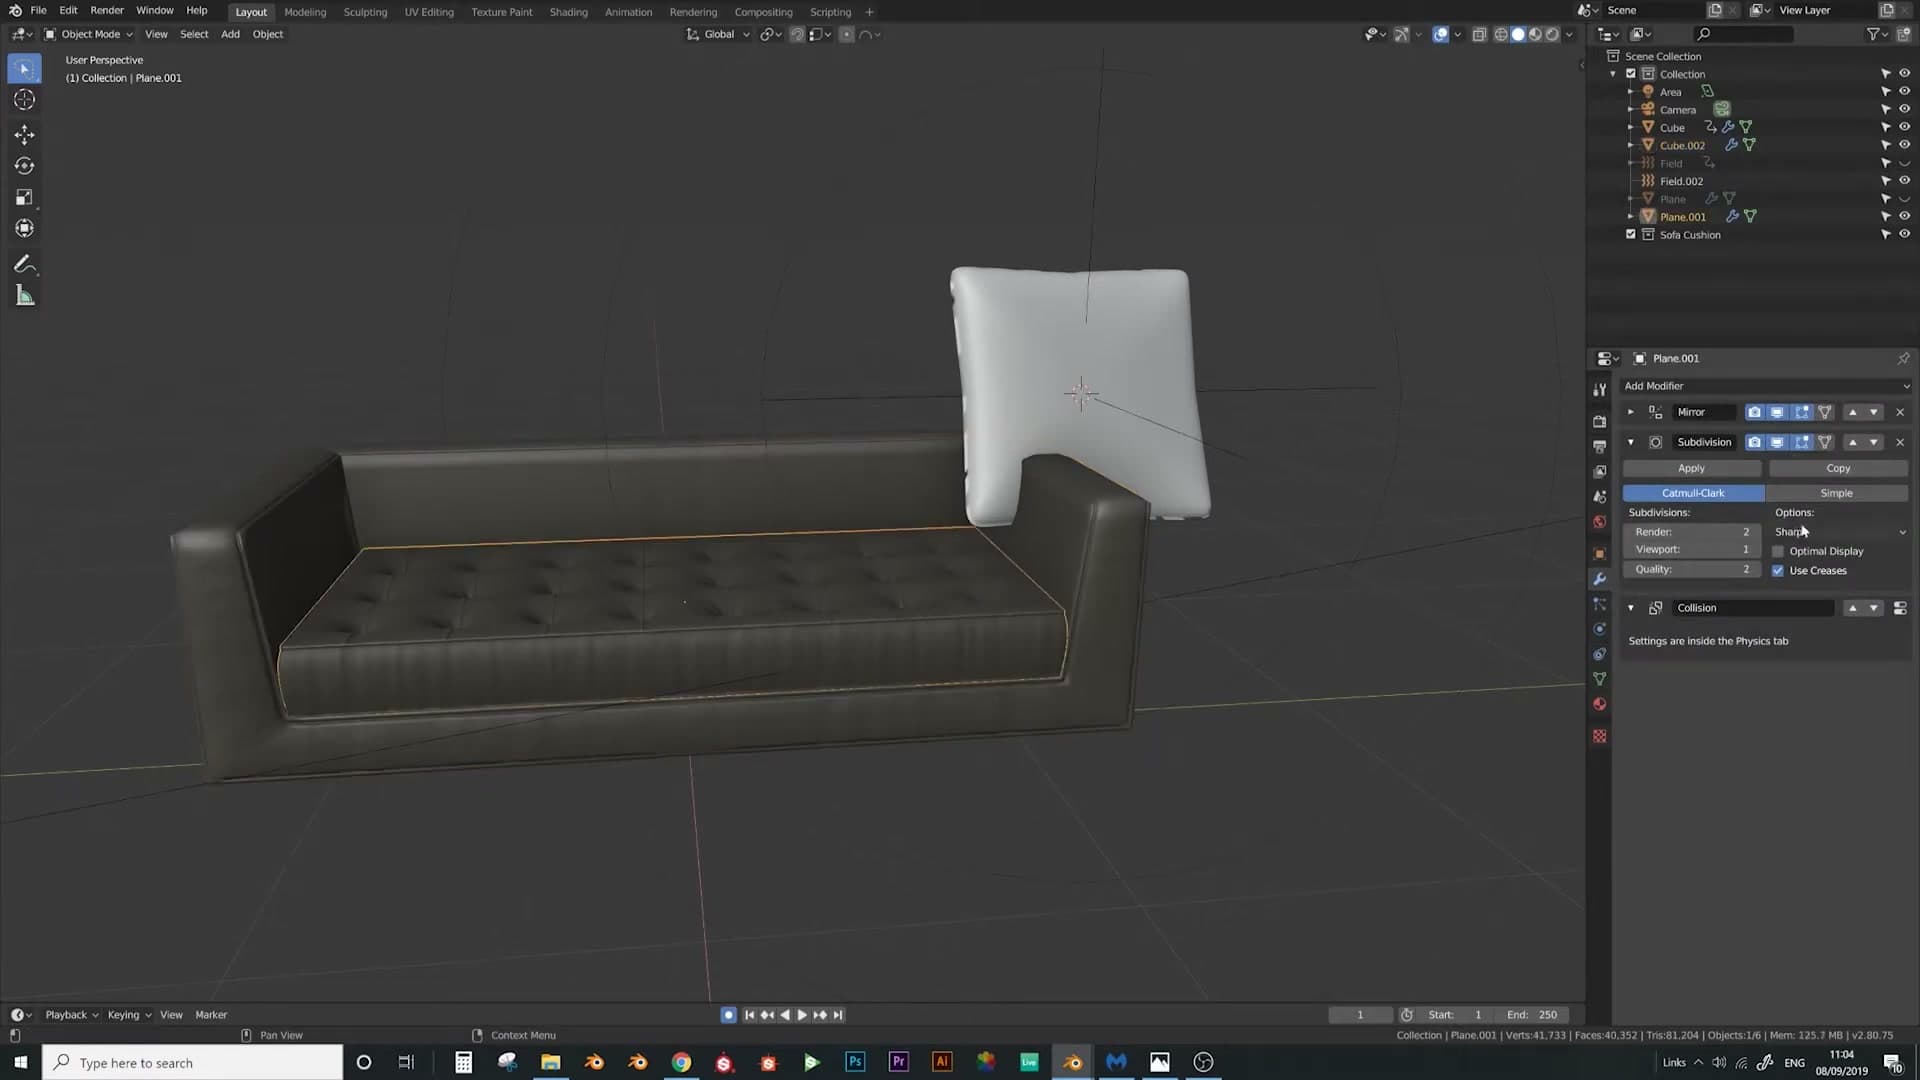
Click on the sofa mesh, head into the Physics properties tab and click Collision. Because the sofa is built from two mirrored halves, repeat the step on the second half so both pieces of the frame block the simulation. Once both are tagged, the cushion has a proper surface to land on.
Disabling subdivision on the colliders for speed
One last housekeeping step before you press play. Open the modifier stack on each collider and switch the Subdivision Surface modifier off in the viewport. Collision is evaluated against the visible mesh, so leaving subsurf active forces Blender to compute collisions against a far denser surface than it needs to. The sim crawls as a result.
Disabling subsurf on the colliders keeps the cushion's contact behaviour identical for the purposes of this drop but lets the timeline scrub at a usable speed while you dial in the settings.
Running the first cushion simulation
Hit play, fix the inevitable duplicated-vertex glitches and find the force strength that gives a properly stuffed but not exploded cushion.
Merge by Distance to clear the explosion
With the cloth modifier, subdivision surface and force field all in place, there's nothing left to set up. The rest is experimenting. Hit play in the timeline and watch what the simulator does.
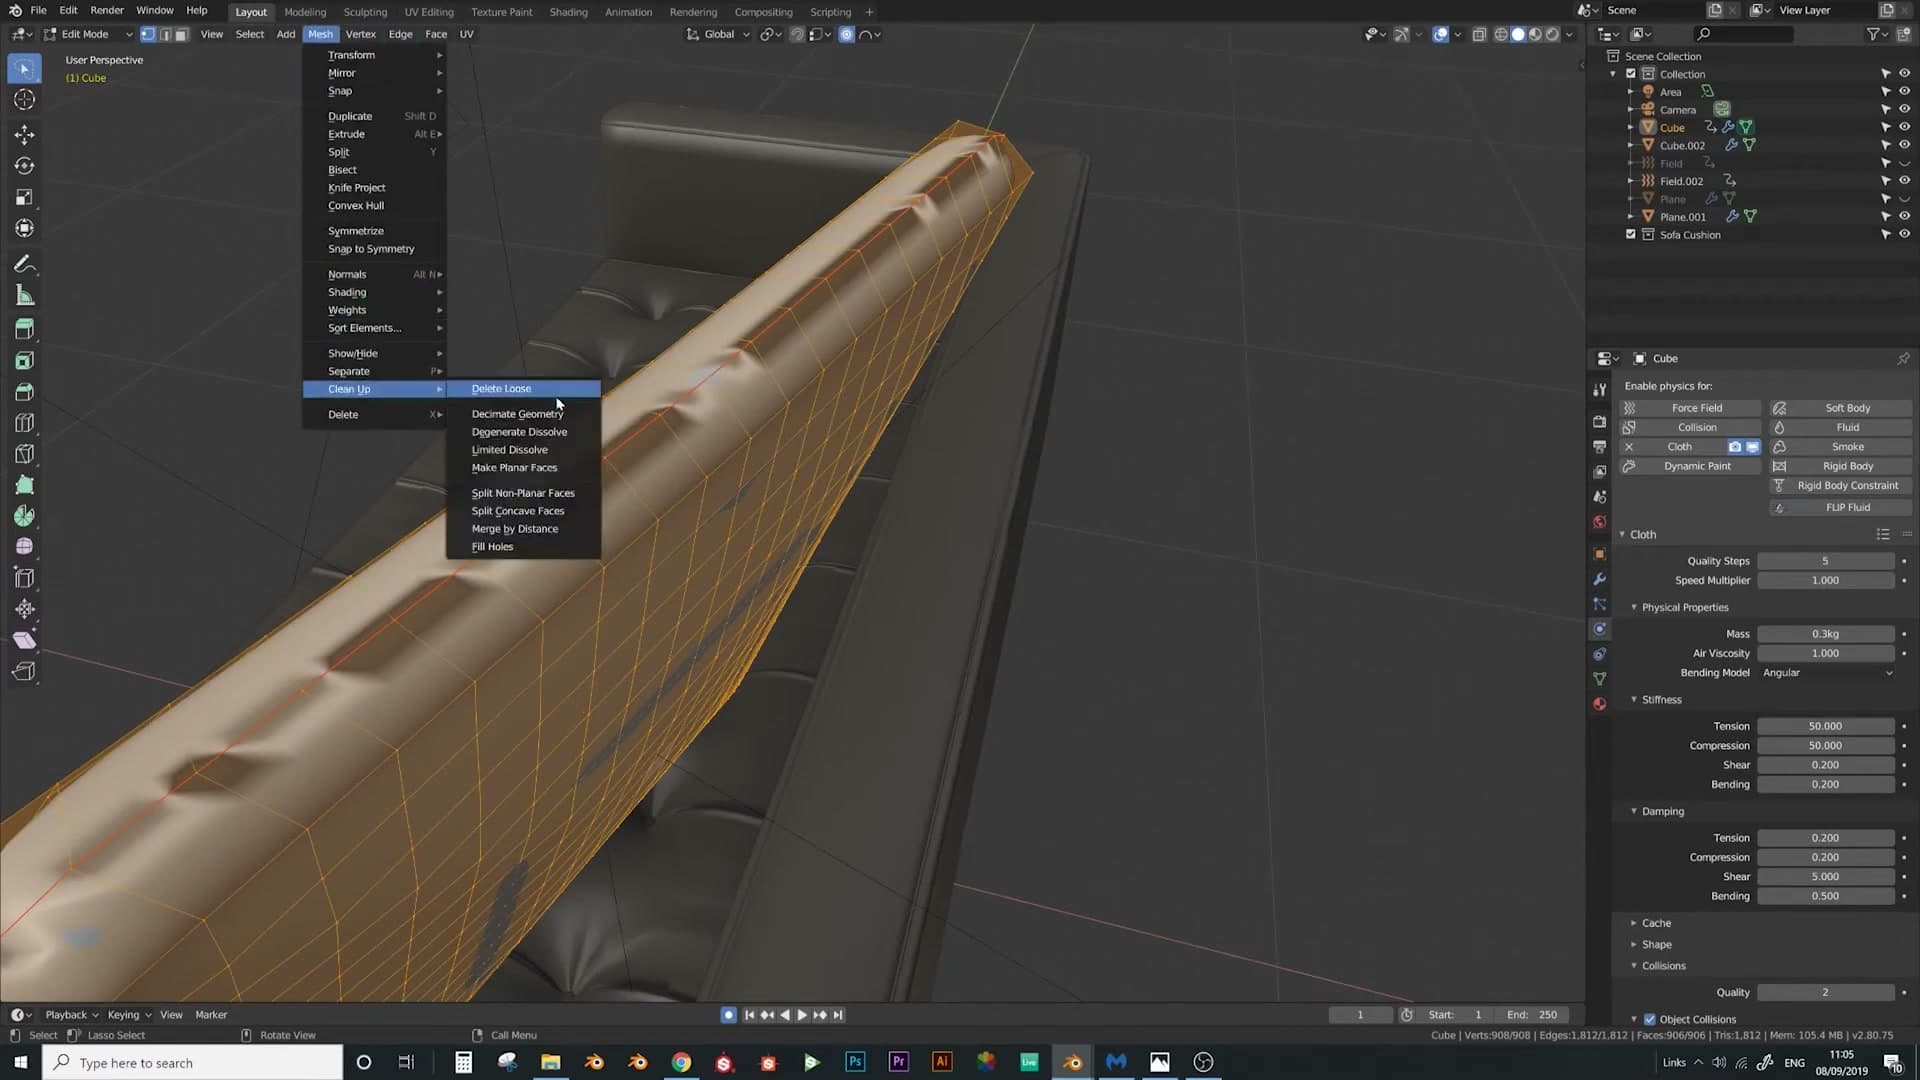
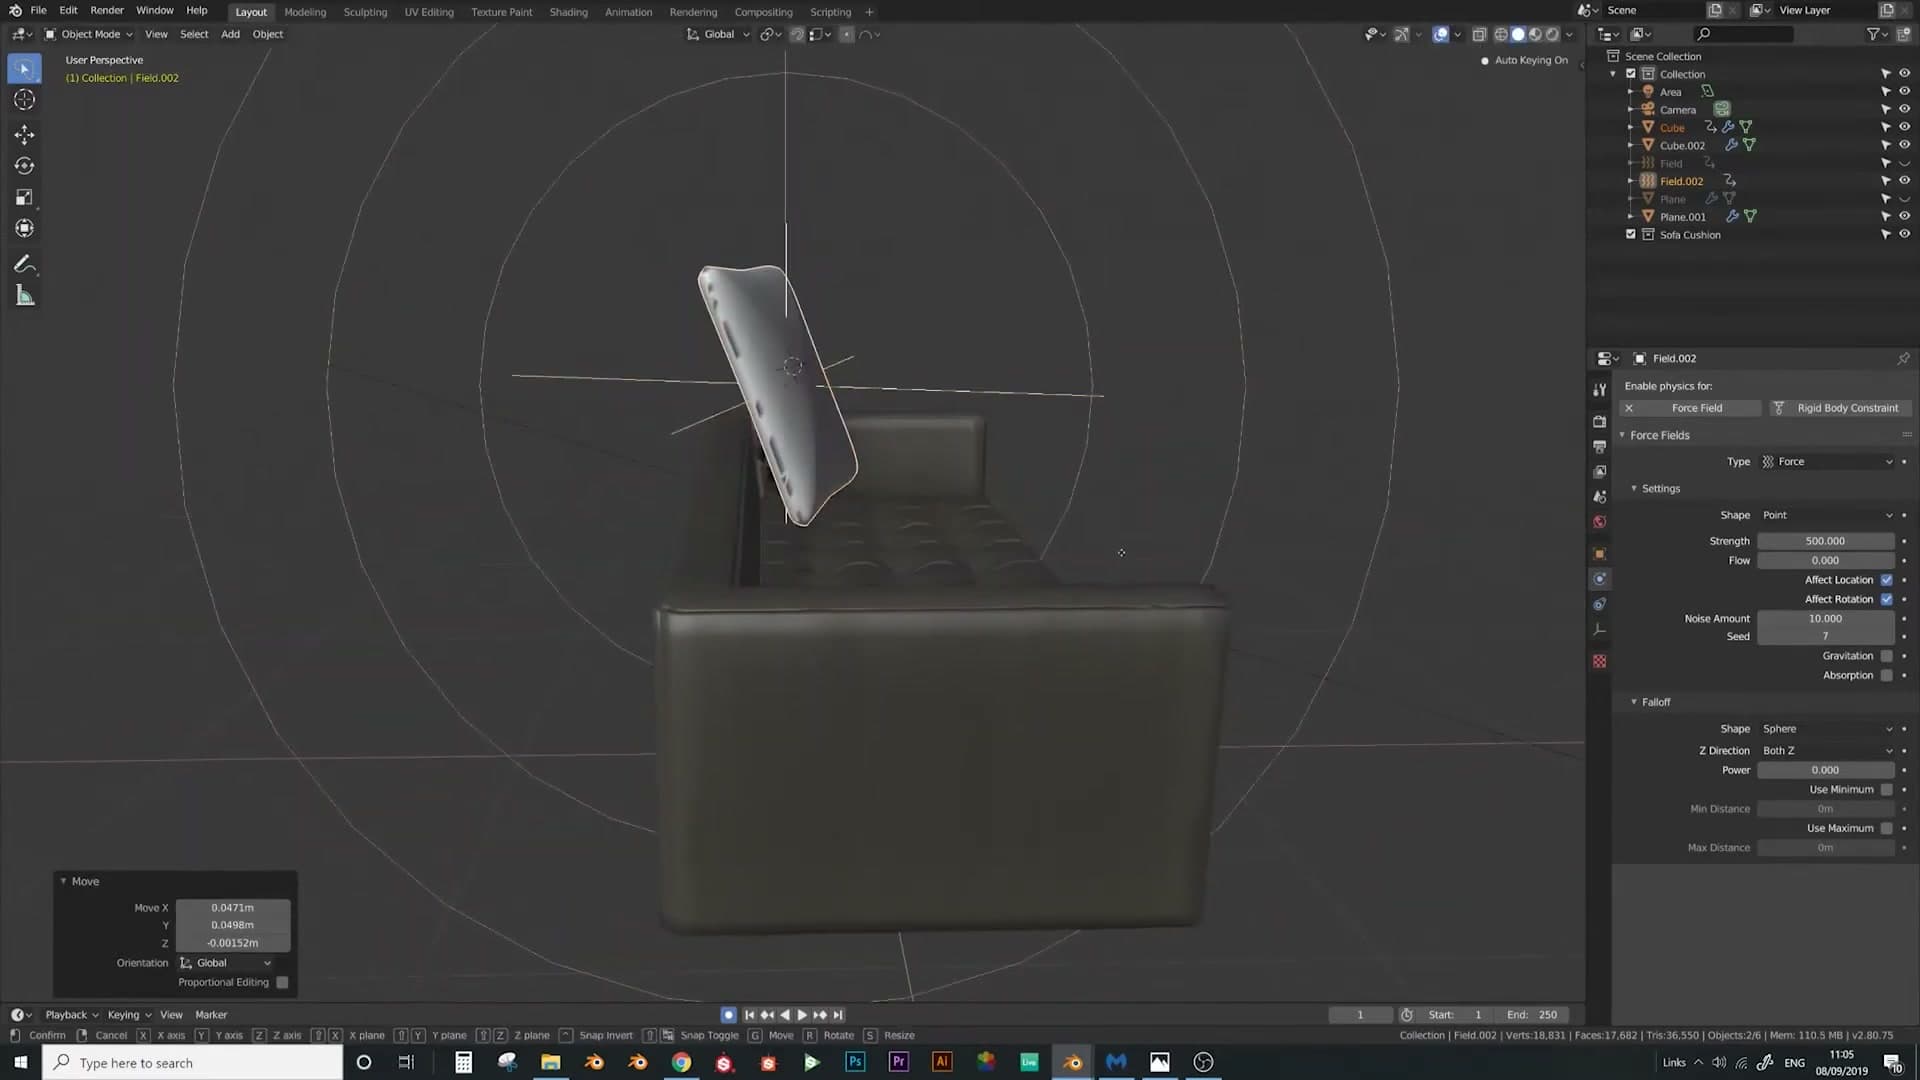
Don't be surprised if the first run looks completely wrong. A common glitch on the opening frame is the mesh inflating outward in strange, spiky stabs as if the fabric is tearing itself apart from the inside. That's almost always overlapping vertices in the cushion mesh.
Drop into Edit Mode, select everything, and run Mesh > Clean Up > Merge by Distance. Blender welds any duplicated points back into single vertices. Hop back to Object Mode, press play again, and this time the cushion should inflate cleanly, pushing evenly outward against the force field instead of exploding.
Dialling force strength between 400 and 500
Now that the simulation is behaving, you can dial in how fluffy the cushion ends up. The single value that controls that is the force field's Strength, sitting under the empty's physics properties.
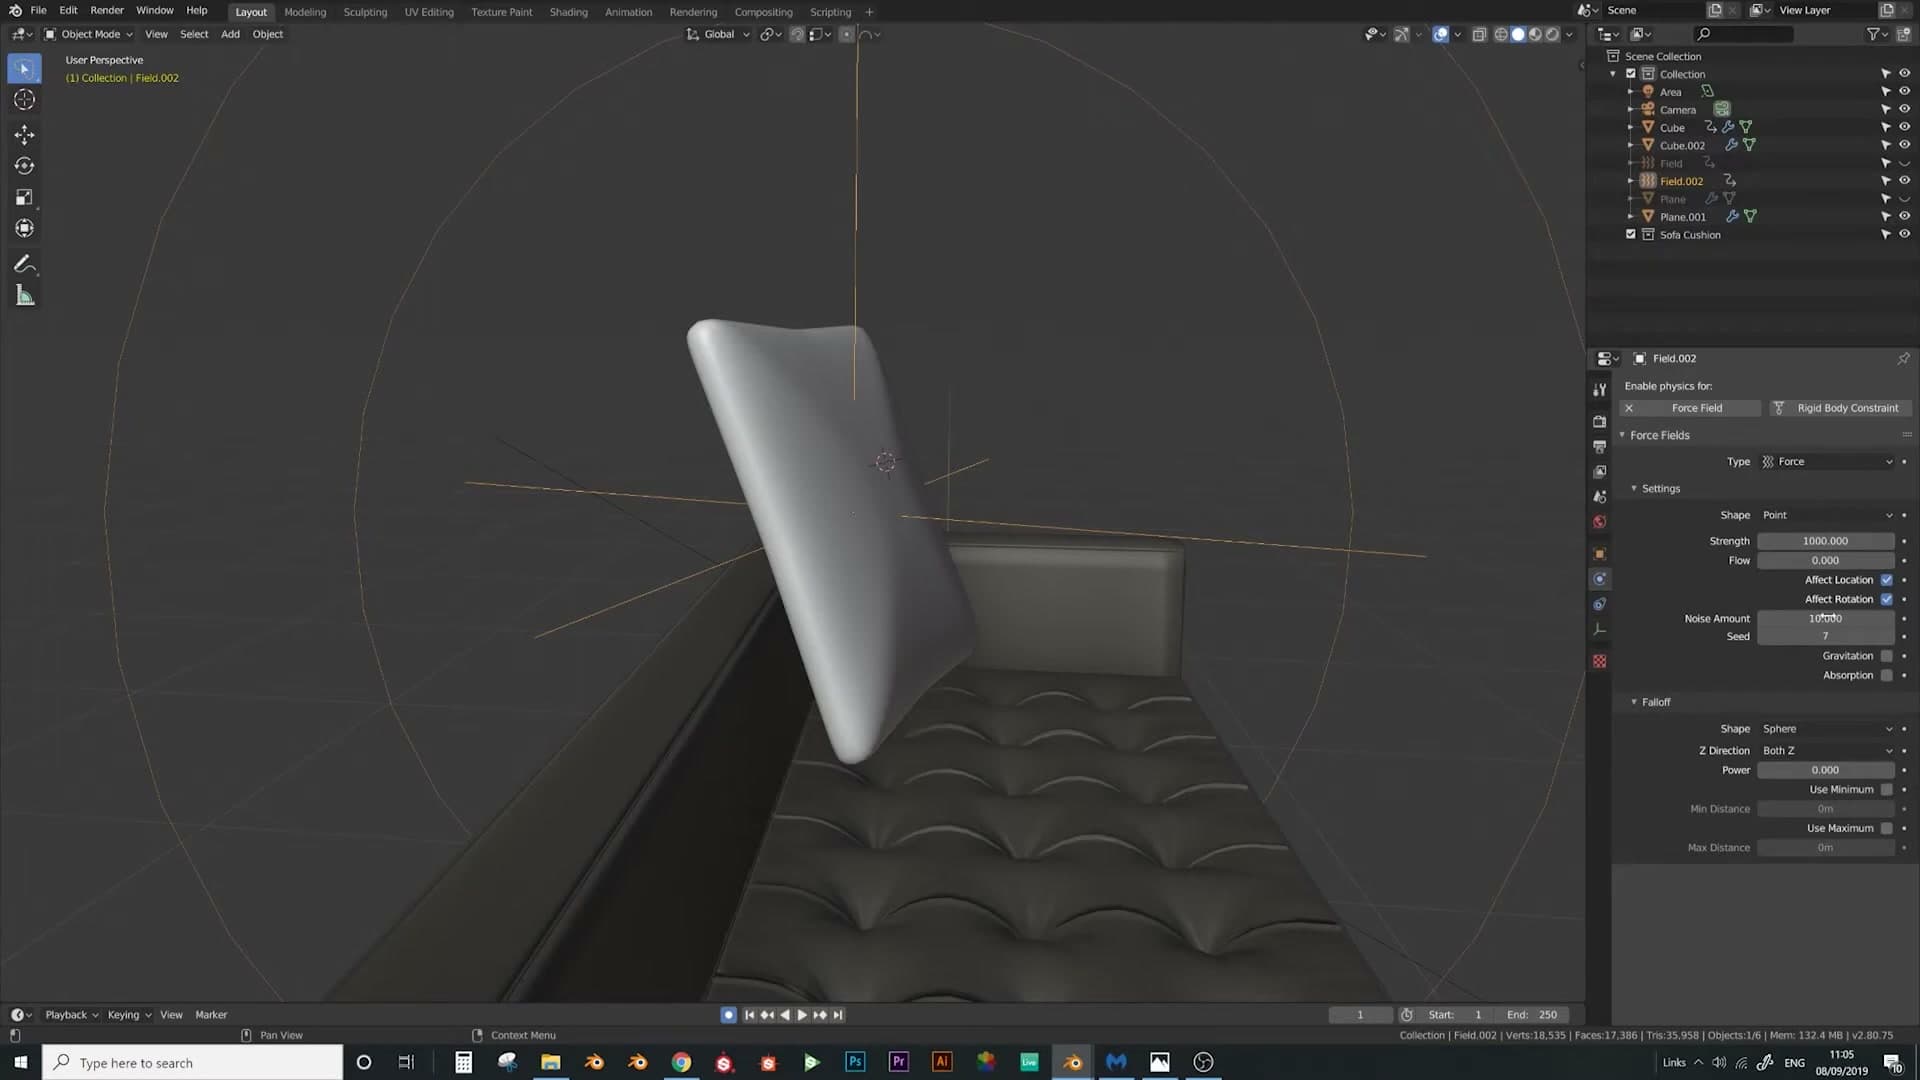
Push the strength up and the cushion gets thicker as the force shoves harder against the inside of the fabric. Overdo it and the mesh balloons out unnaturally, exploding through itself at the seams. Drop the strength down to something like 100 and you get the opposite problem: there's not enough push to hold the cushion's shape, so the fabric just sags and falls straight down with hardly any volume.
What you want is somewhere in between. A value of 400 or 500 tends to give a properly stuffed seat cushion without ballooning it out. Full enough to read as upholstery, restrained enough to look like fabric and not a beach ball.
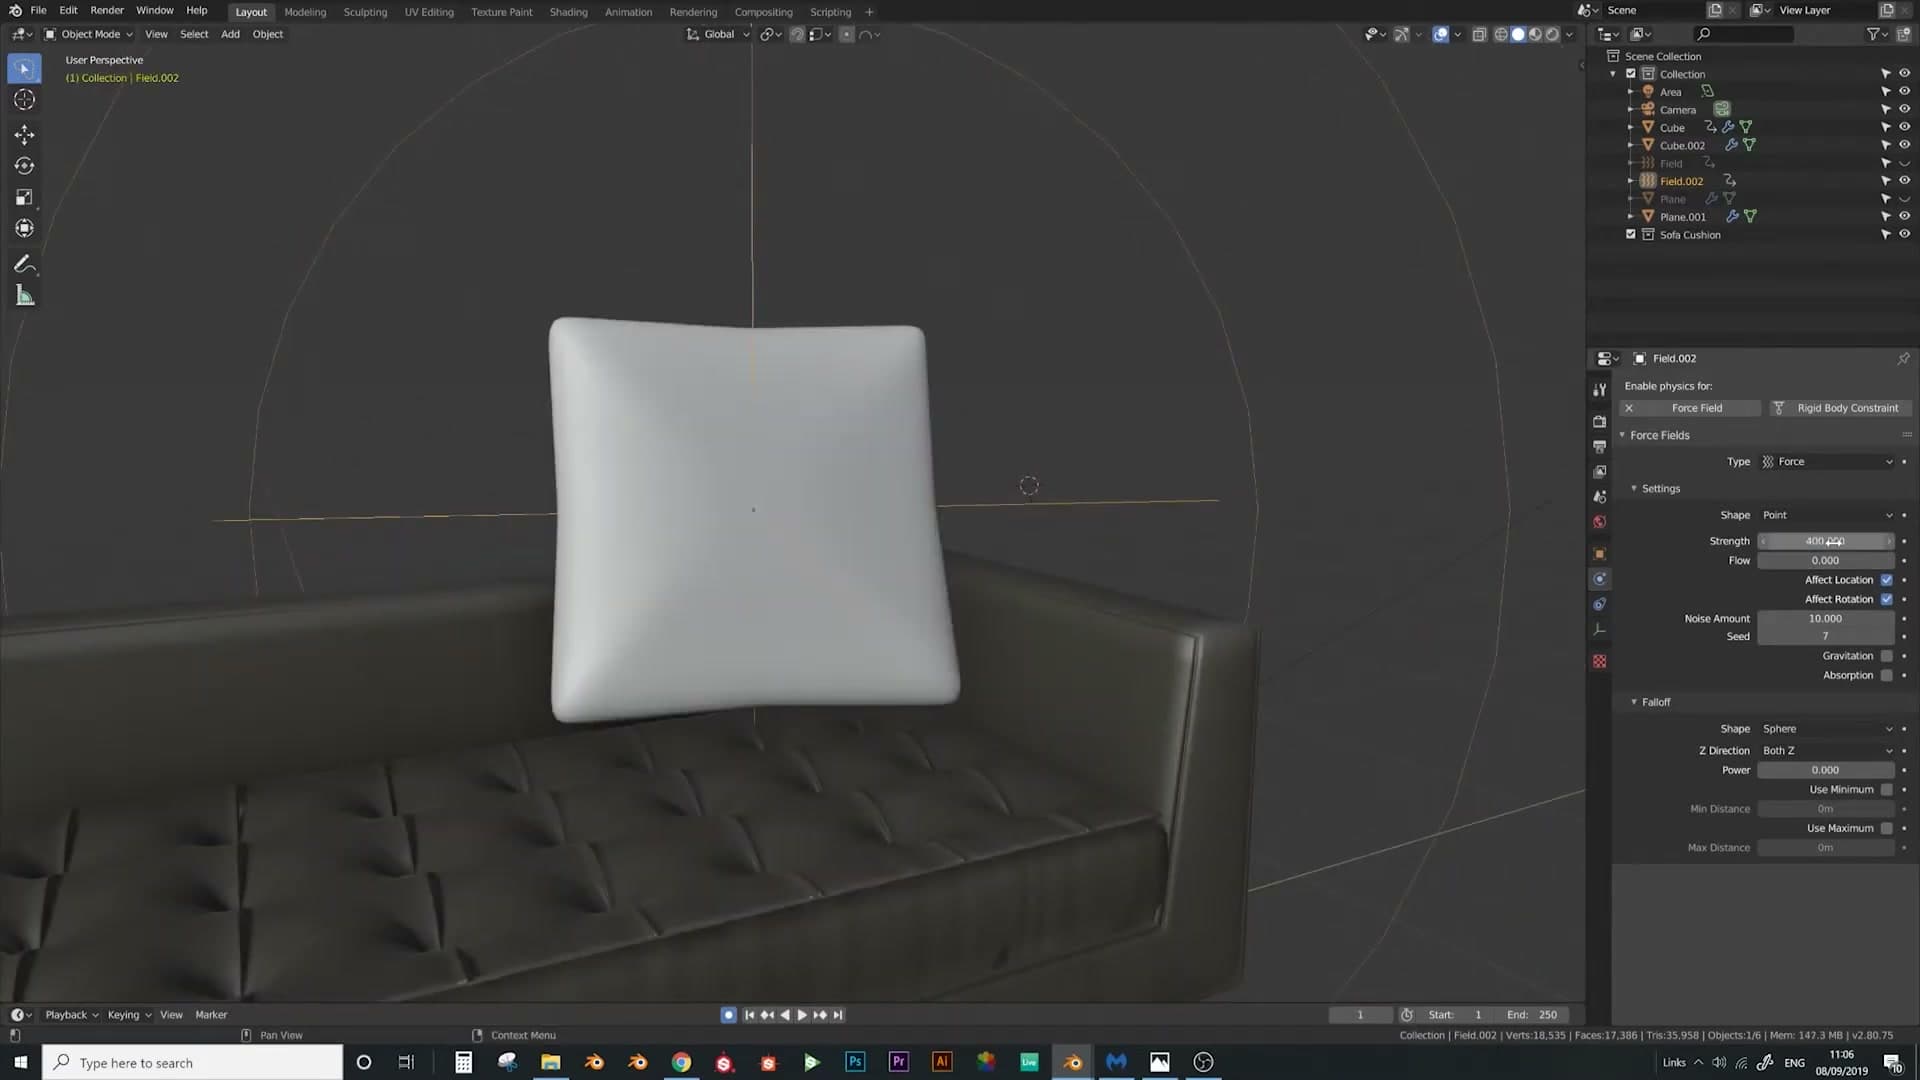
If the cushion drifts slightly off the sofa frame while it inflates, scrub back, nudge it into position with G, and let the sim re-run. There's no penalty for iterating. Each pass only takes a few seconds.
Stop the sim and apply the cloth + subsurf
When the cushion looks right (properly stuffed, sitting evenly on the frame, holding its shape against the force field) stop the simulation. That paused frame is your finished cushion.
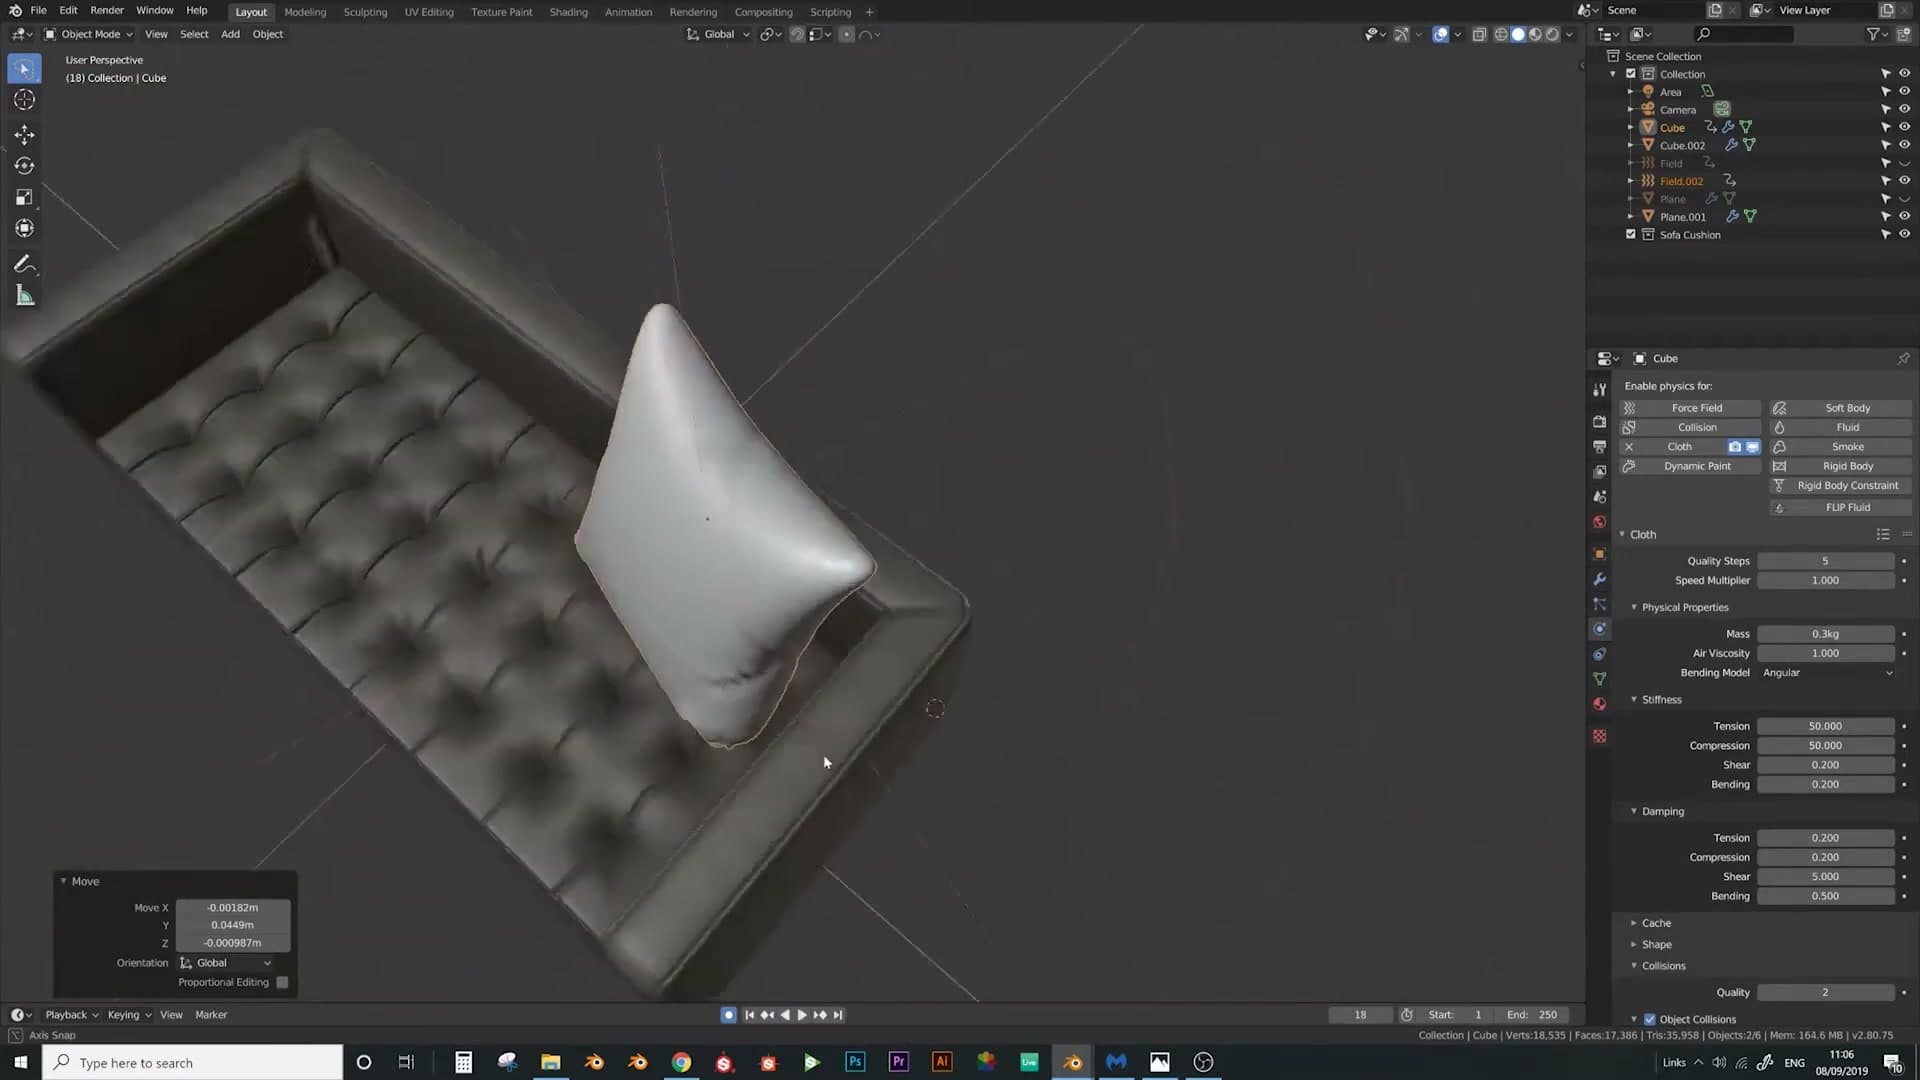
From here on you'll treat the mesh as static geometry. The next step is duplicating this cushion across to the second seat so the pair matches, which is where the following module picks up.
Duplicating the cushion for the second seat
Copy the simulated cushion, re-enable the cloth and force field, and re-run for the middle position with a fluffier strength setting.
Duplicate, reposition and resimulate
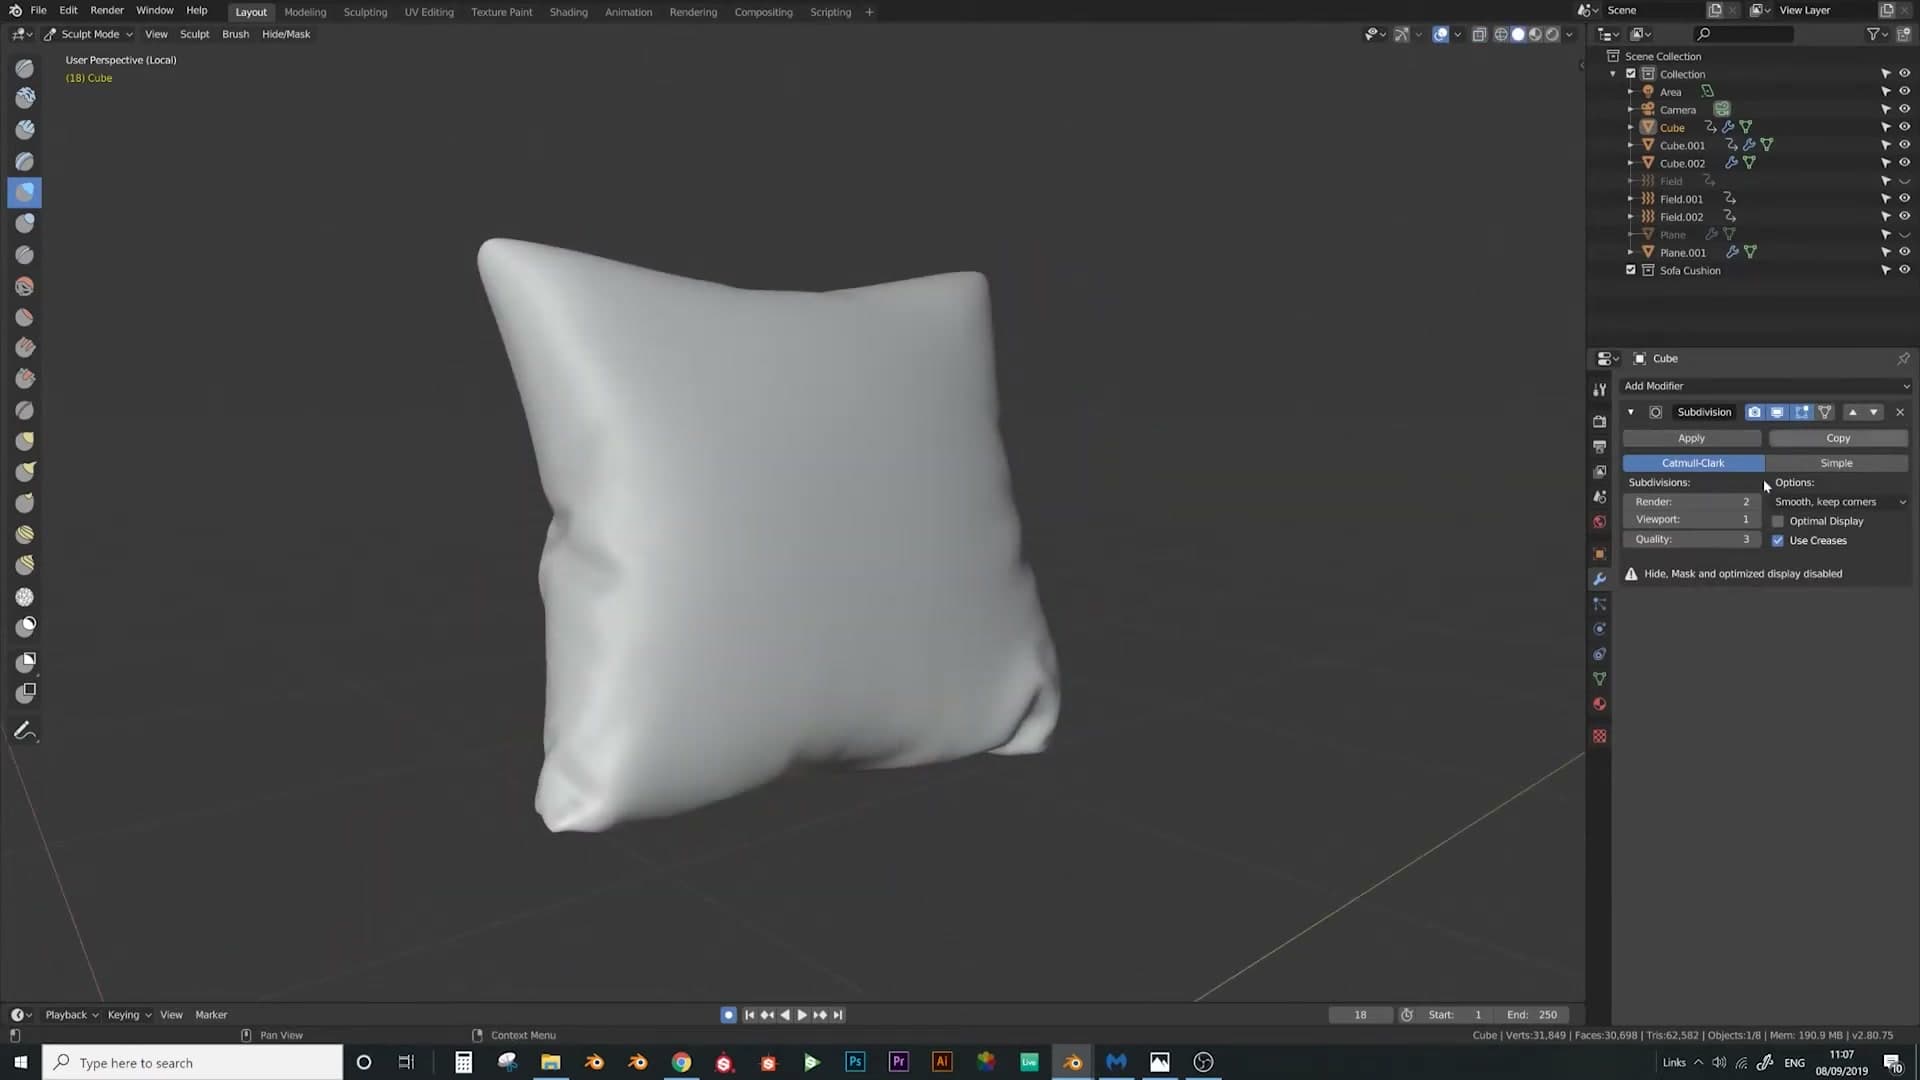
With the first cushion looking right, apply both the subdivision surface and the cloth modifier to bake the shape down. Then slide the cushion across so it sits flush against the sofa arms and back. Even with the collision distance pushed down to 0.001, the cloth solver always leaves a small visible gap between fabric and collision object, so nudging the result in by eye is the normal finishing move.
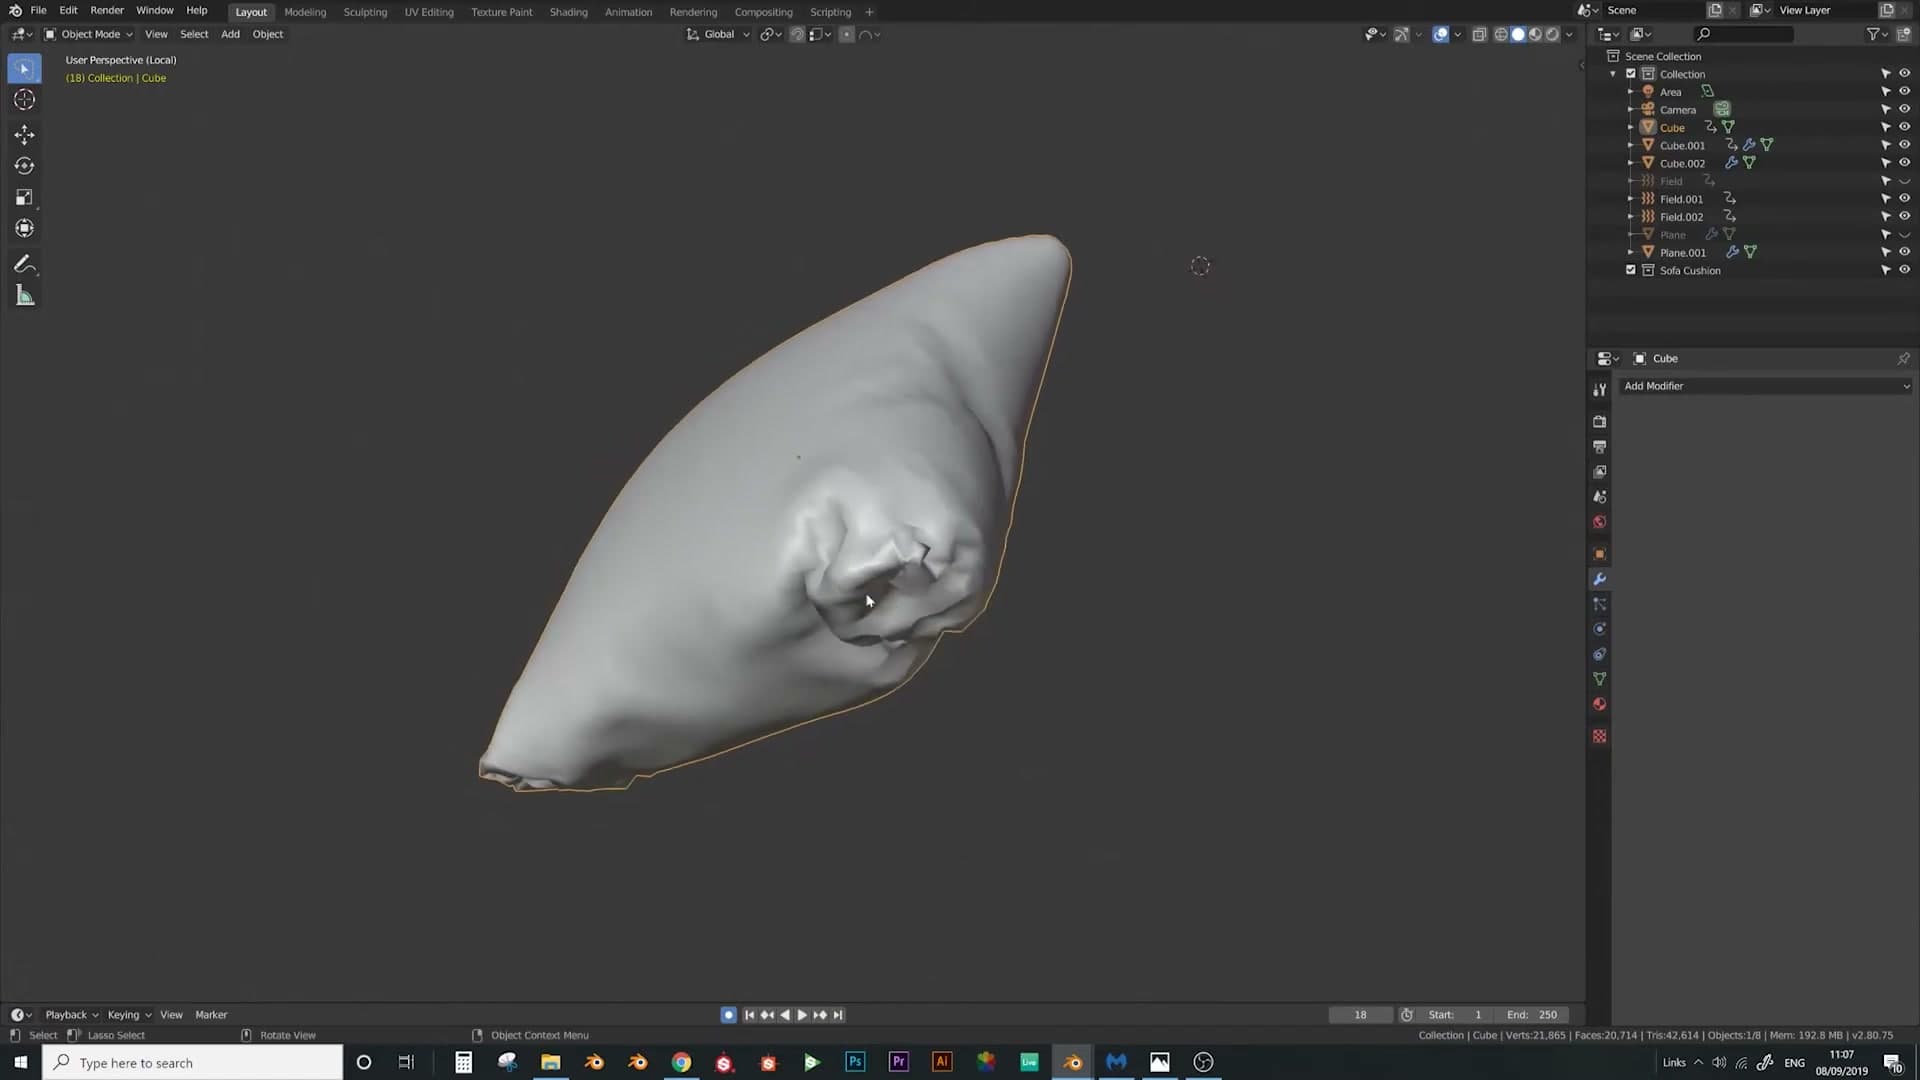
If the perimeter is misbehaving (sharp creases where you wanted a soft roll) drop into Sculpt mode and brush over the worst spots with the Smooth tool (hold Shift while you drag to temporarily activate it). You can drop another subdivision surface on top if the silhouette still reads as low-poly, but be aware the polycount climbs quickly.
Now grab the unsimulated duplicate of the cushion, select it on its own, and scrub the timeline back to frame 1 so the cloth solver starts from a clean state.
Slide the duplicate into the middle seat, somewhere above the sofa so the sim has room to drop. Then assign a Collision modifier to the first cushion as well, so the new one bumps against its neighbour rather than passing through it. Press play and let it fall.
Pushing strength to 650 for a fluffier cushion
Run the simulation the same way you did for the first cushion. The duplicate drops onto the seat, inflates against the force field and settles between the sofa back and its neighbour.
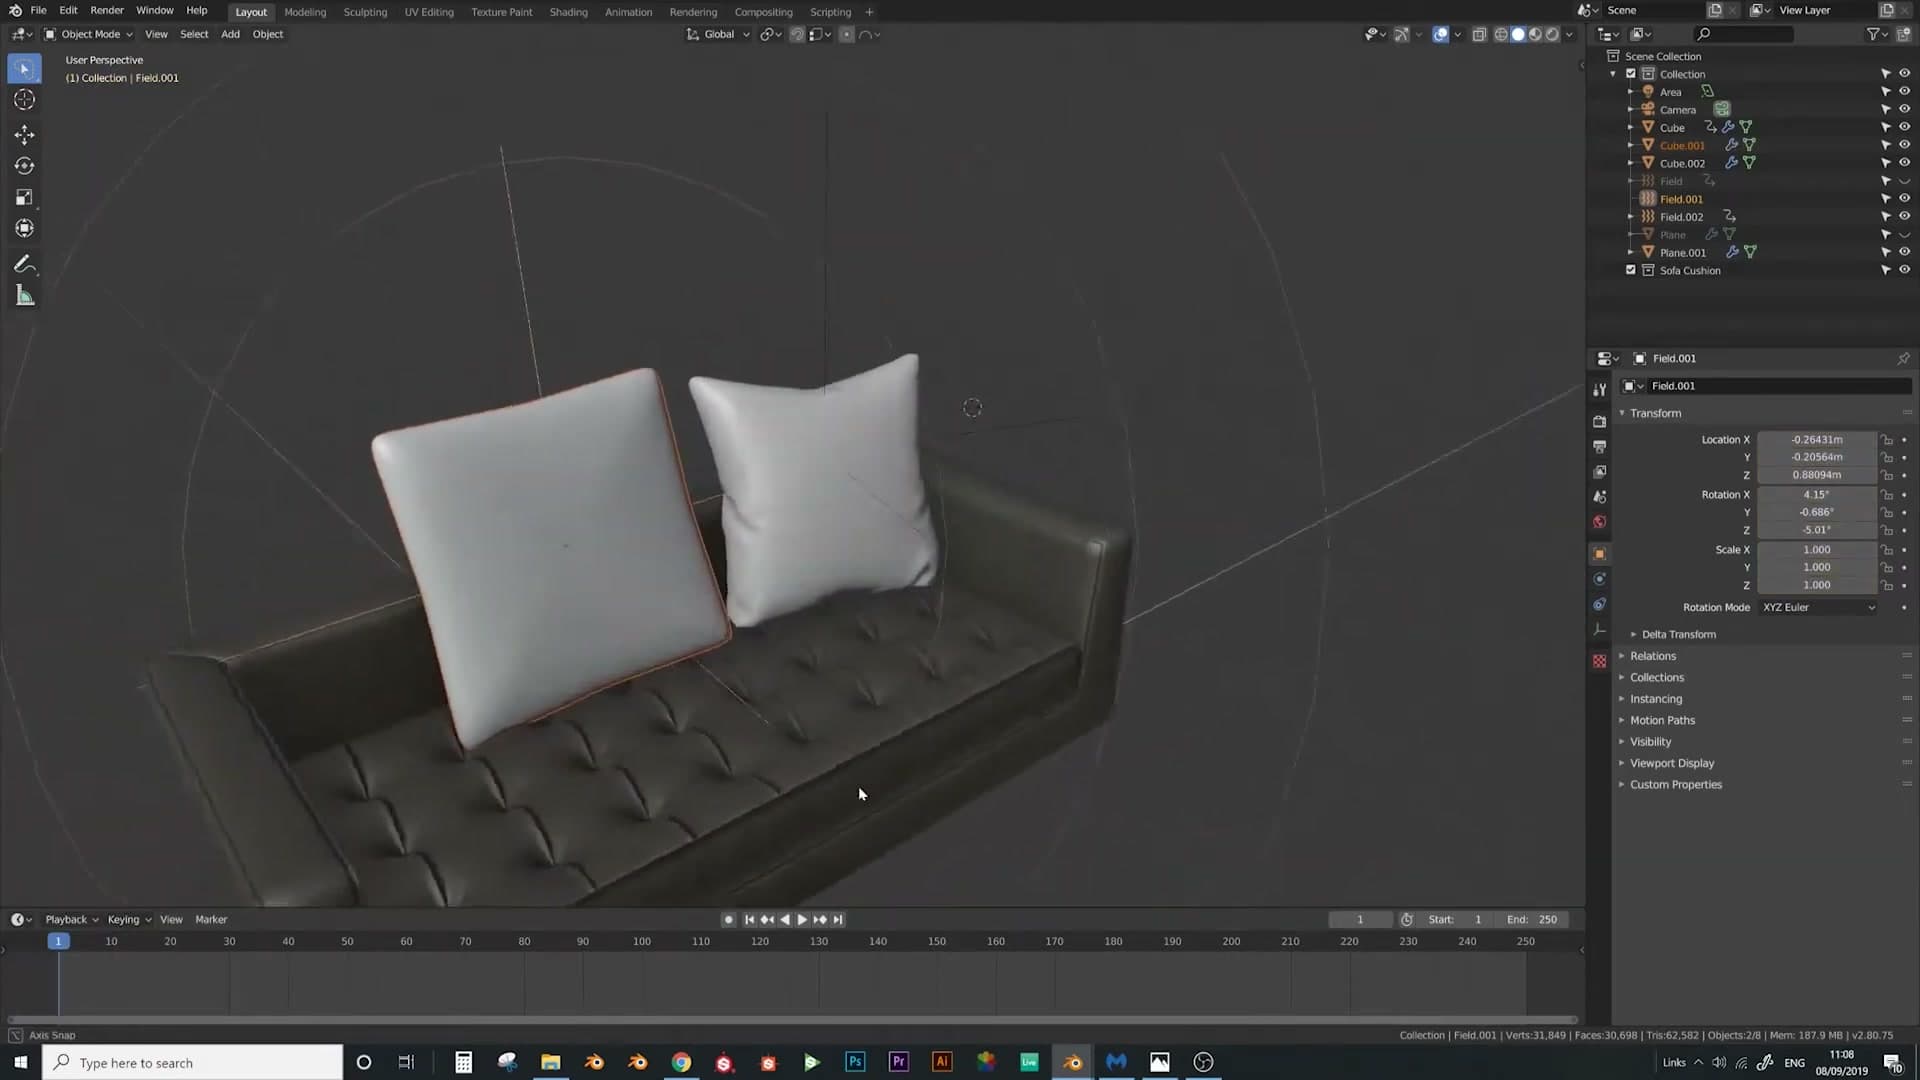
For the middle seat, push the force field's Strength noticeably higher than the previous pass, around 650, so the cushion ends up visibly fuller and more upholstered than the one beside it. Stop the sim and apply once the silhouette looks the way you want.
Corner cushion that falls into the arm
Move the existing cushions out of the way so the corner piece can settle naturally against the sofa arm, then re-introduce the neighbours.
Letting the corner cushion fall into place
With two cushions sitting happily on the seat, it's time to drop the third one into the corner where the back meets the arm. Duplicate the last cushion across to roughly the corner position, then on the new copy apply the subdivision surface and cloth modifiers from the previous bake and clear any leftover keyframes so it starts clean.
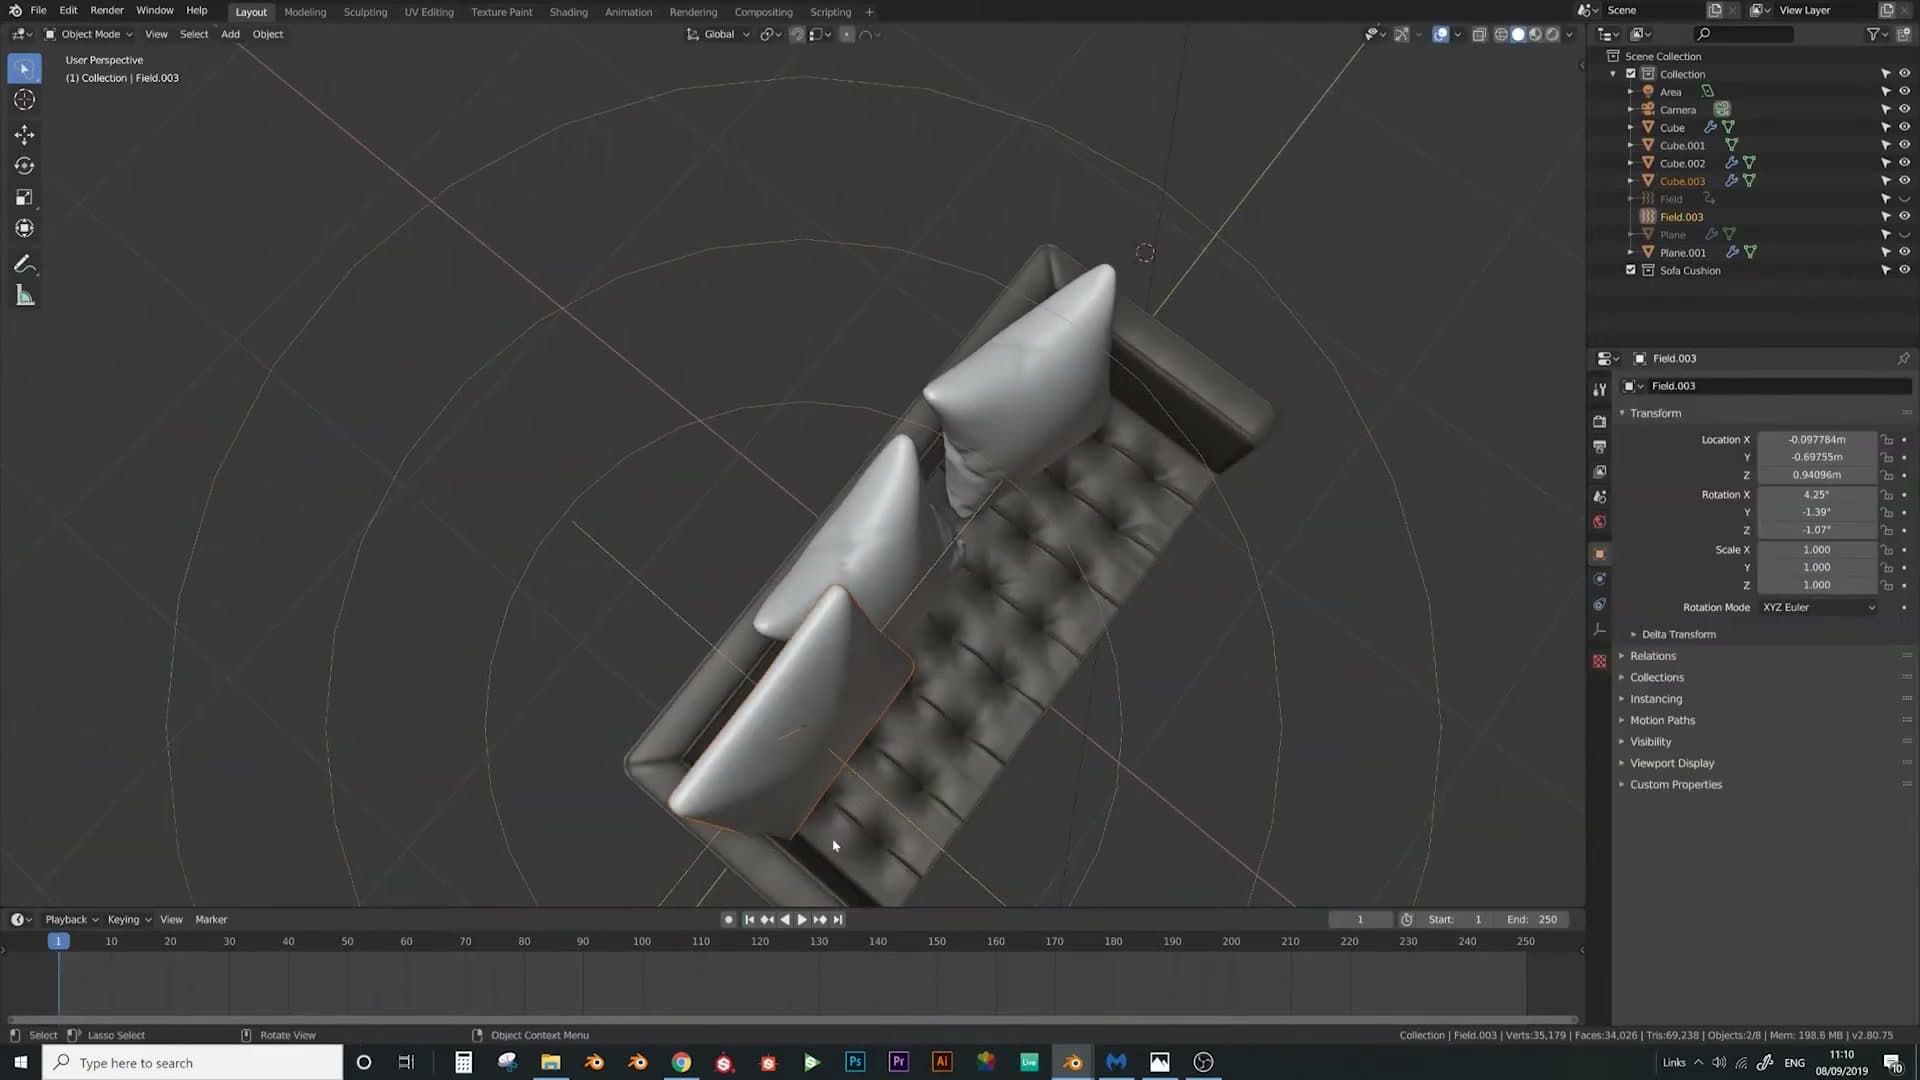
Scrub back to the beginning frame and nudge the duplicate into the corner, somewhere above where you want it to land, with a little vertical clearance so gravity has room to work. Don't worry if the mesh overlaps the neighbouring cushion at this stage; you'll fix any interpenetration after the sim settles.
The neighbouring cushion is the bigger problem. Left in place it blocks the corner piece from falling cleanly into the angle of the sofa, so move it right out of the way for now. Drop it below the seat or push it off to the side. With nothing in the corner to fight against, you can run the simulation and let the third cushion fall straight into the gap and pick up the shape of the arm and back.
Tweaking the position so it drapes over the edge
A cushion that lands flat in the corner looks placed rather than lived-in. You want a little of the fabric to spill over the top of the arm so it reads as soft and weighty. Go back to the start frame and shift the cushion outward toward the arm, so part of its volume hangs over the edge before gravity takes hold.
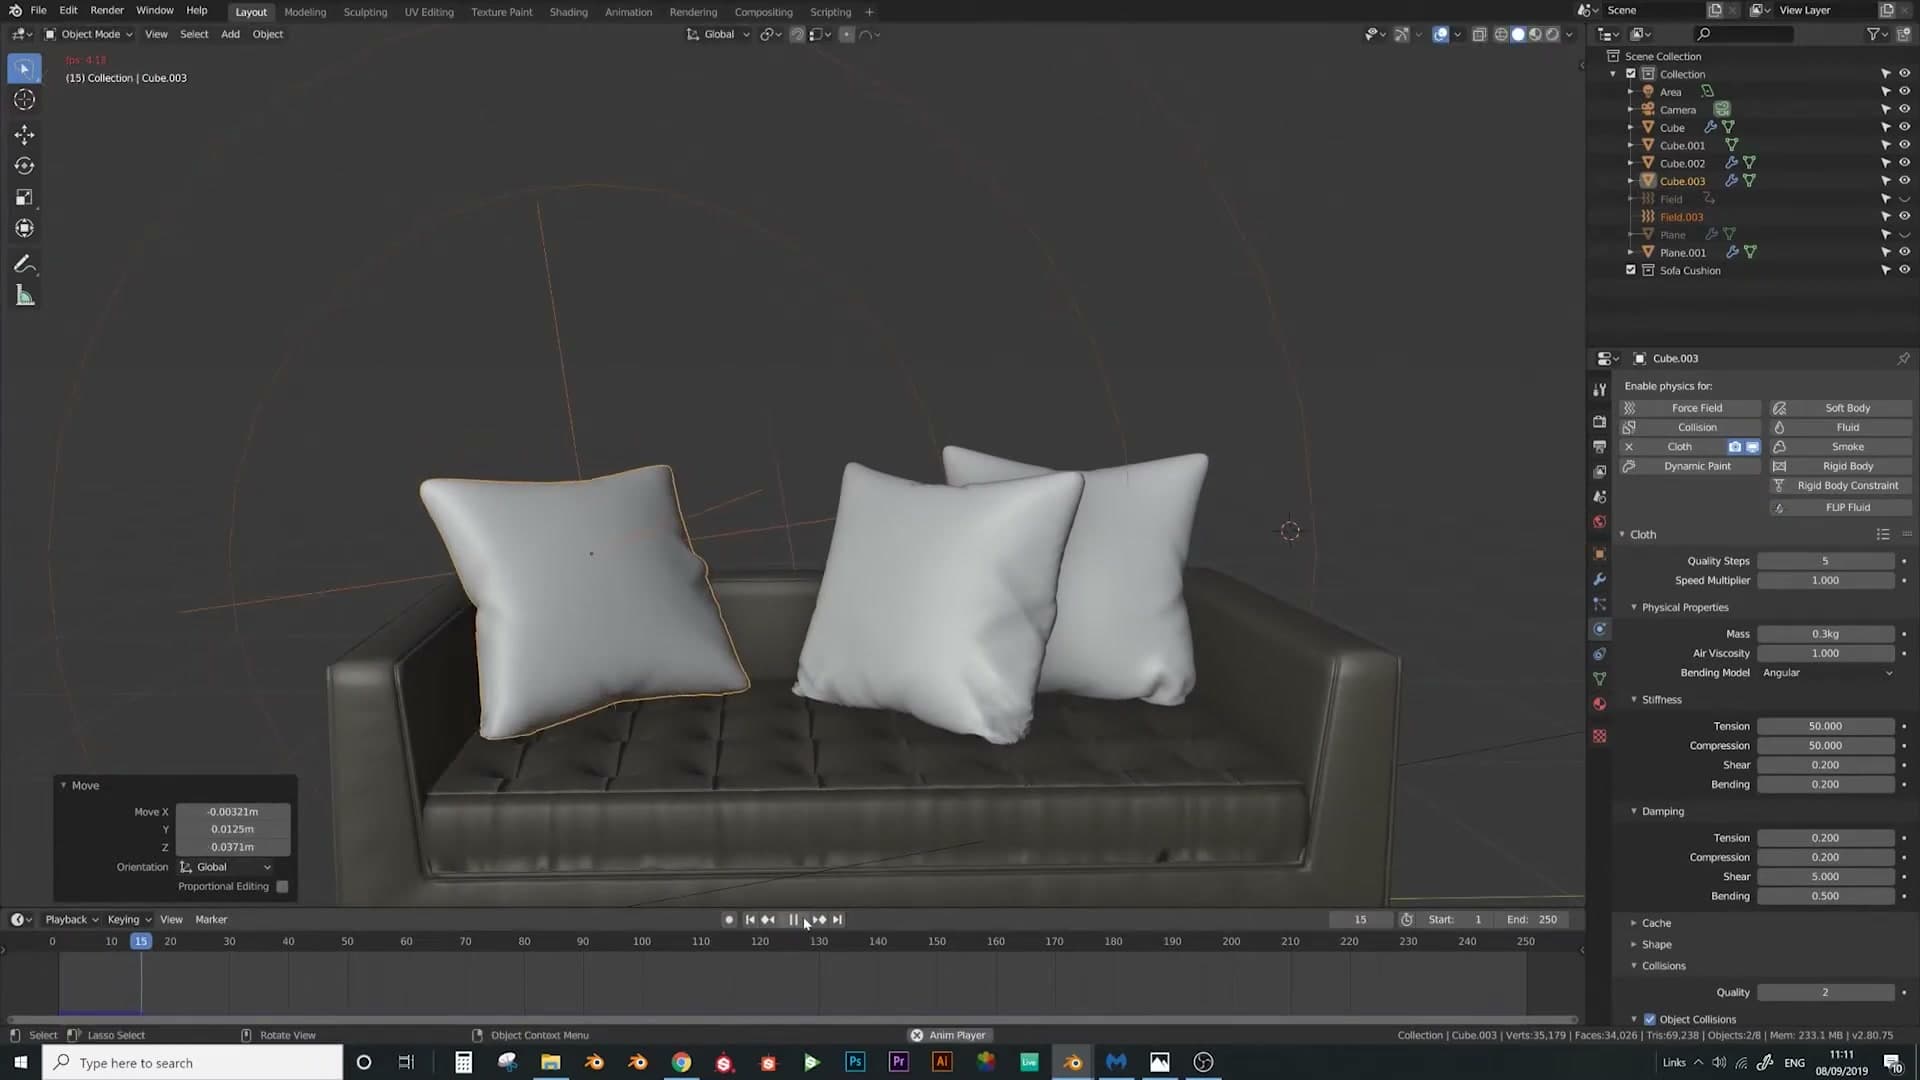
Play the simulation again and watch how the fabric folds over the arm as it settles. If the drape is too subtle, scrub back, push the cushion a touch further over the edge and re-simulate. A couple of passes is usually enough to get a natural-looking fall.
Once the corner cushion is sitting nicely, stop the sim on a frame you like and apply the cloth modifier to lock that shape in. You can now bring the neighbouring cushion back to its original position. With the corner piece baked into geometry, the two will sit alongside each other without needing to fight inside the simulator.
Adding tucked seams to every cushion
Smooth the edges, bevel the perimeter loop with five segments and use Alt+S with proportional editing to push the centre of the seam outward into a tucked piping line.
Smoothing rough sim edges in sculpt mode
With the rectangular cushion sim looking right, duplicate the simmed object with Shift+D and apply the cloth modifier on the copy so the inflated shape becomes real, editable geometry. Move the applied mesh back into position on the sofa frame, then copy the fabric material across from the original by selecting the new cushion last and pressing Ctrl+L → Materials so every cushion ends up sharing the same shader.
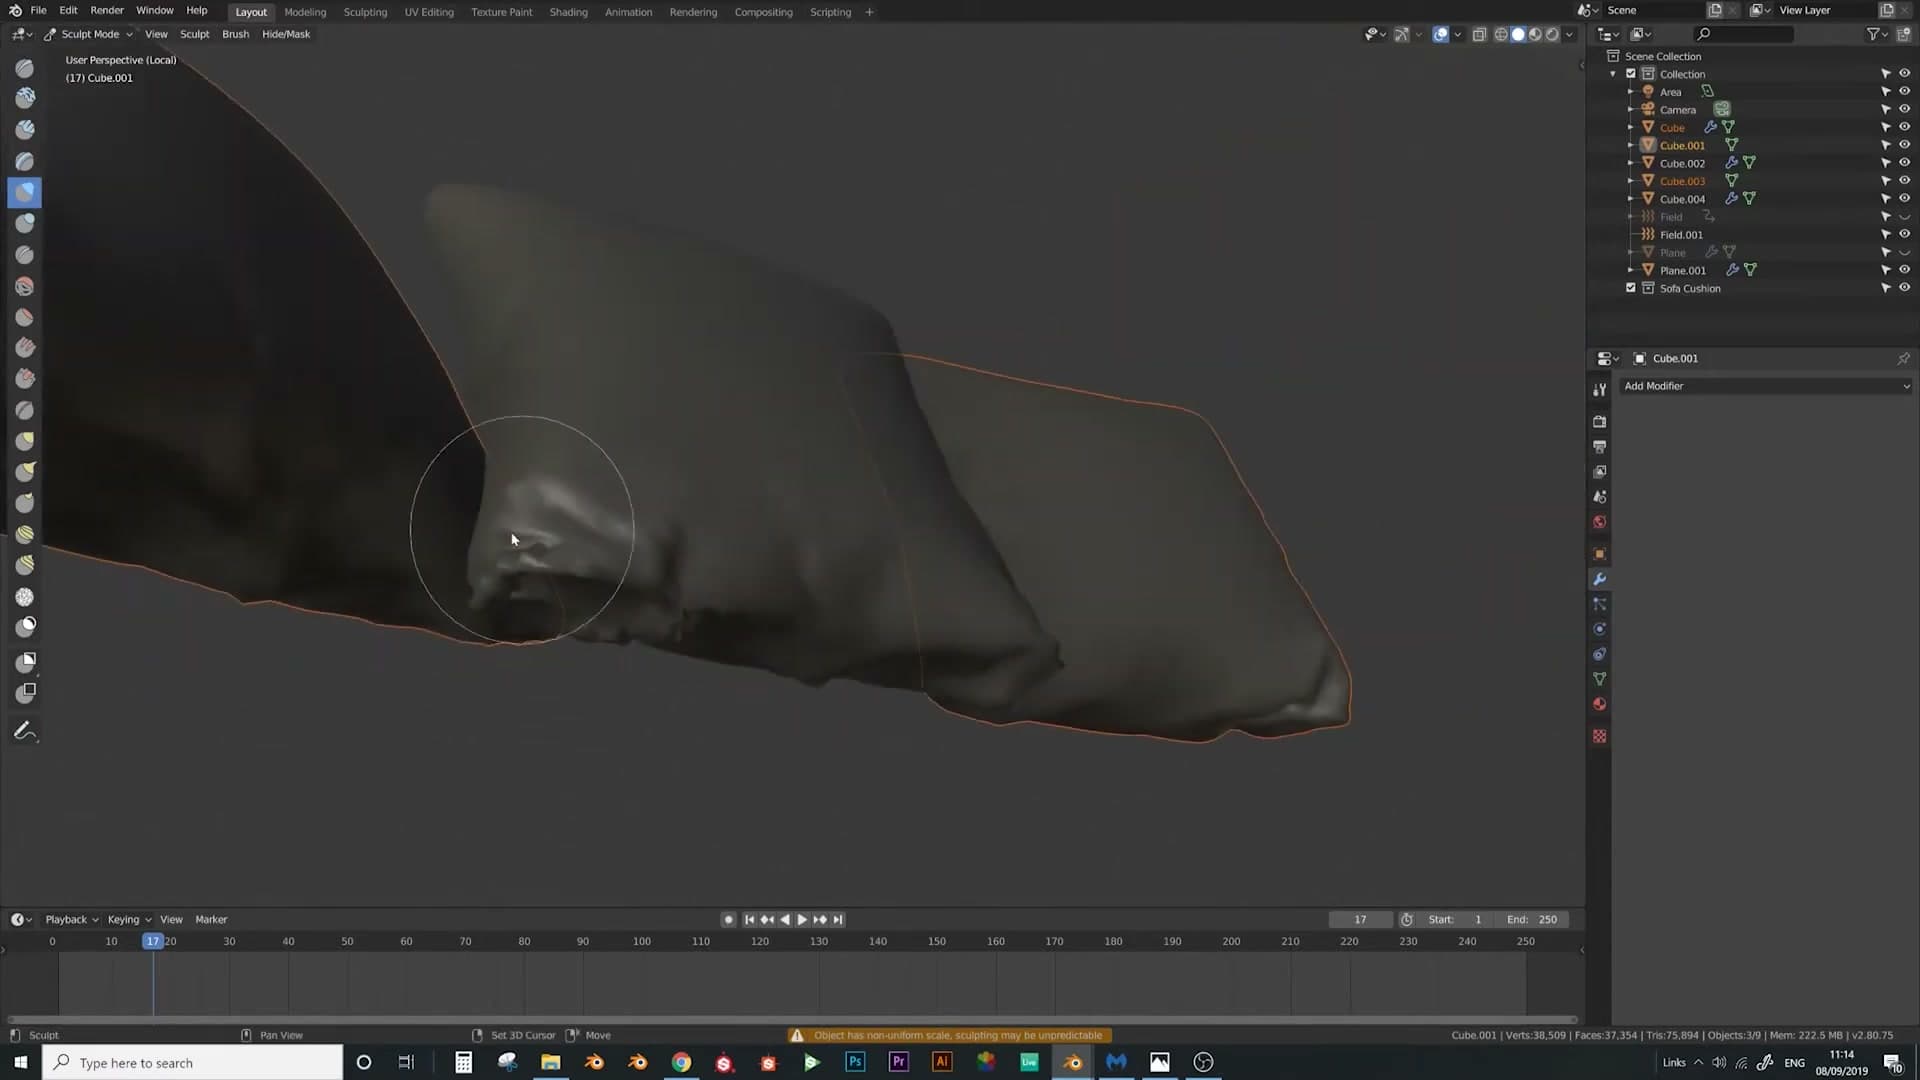
Before you start adding seams, the perimeter needs to be clean. Cloth simulations almost always leave the outer edges slightly jagged or wavy, and that roughness will telegraph through the bevel you are about to add and ruin the seam line.
Switch the cushion into Sculpt mode and run the Smooth brush around the entire edge. Hold Shift and stroke along each side until the silhouette settles into a soft, even outline with no harsh kinks and no sim-jagged sections. Once the edges read clean from every angle, drop back into Object mode.
Ctrl+B bevel with five inner segments
Back in Object mode, press Ctrl+A and apply the scale. Skipping this step bites you a few seconds later: the bevel will come out uneven on each side of the cushion if the object's scale is non-uniform.
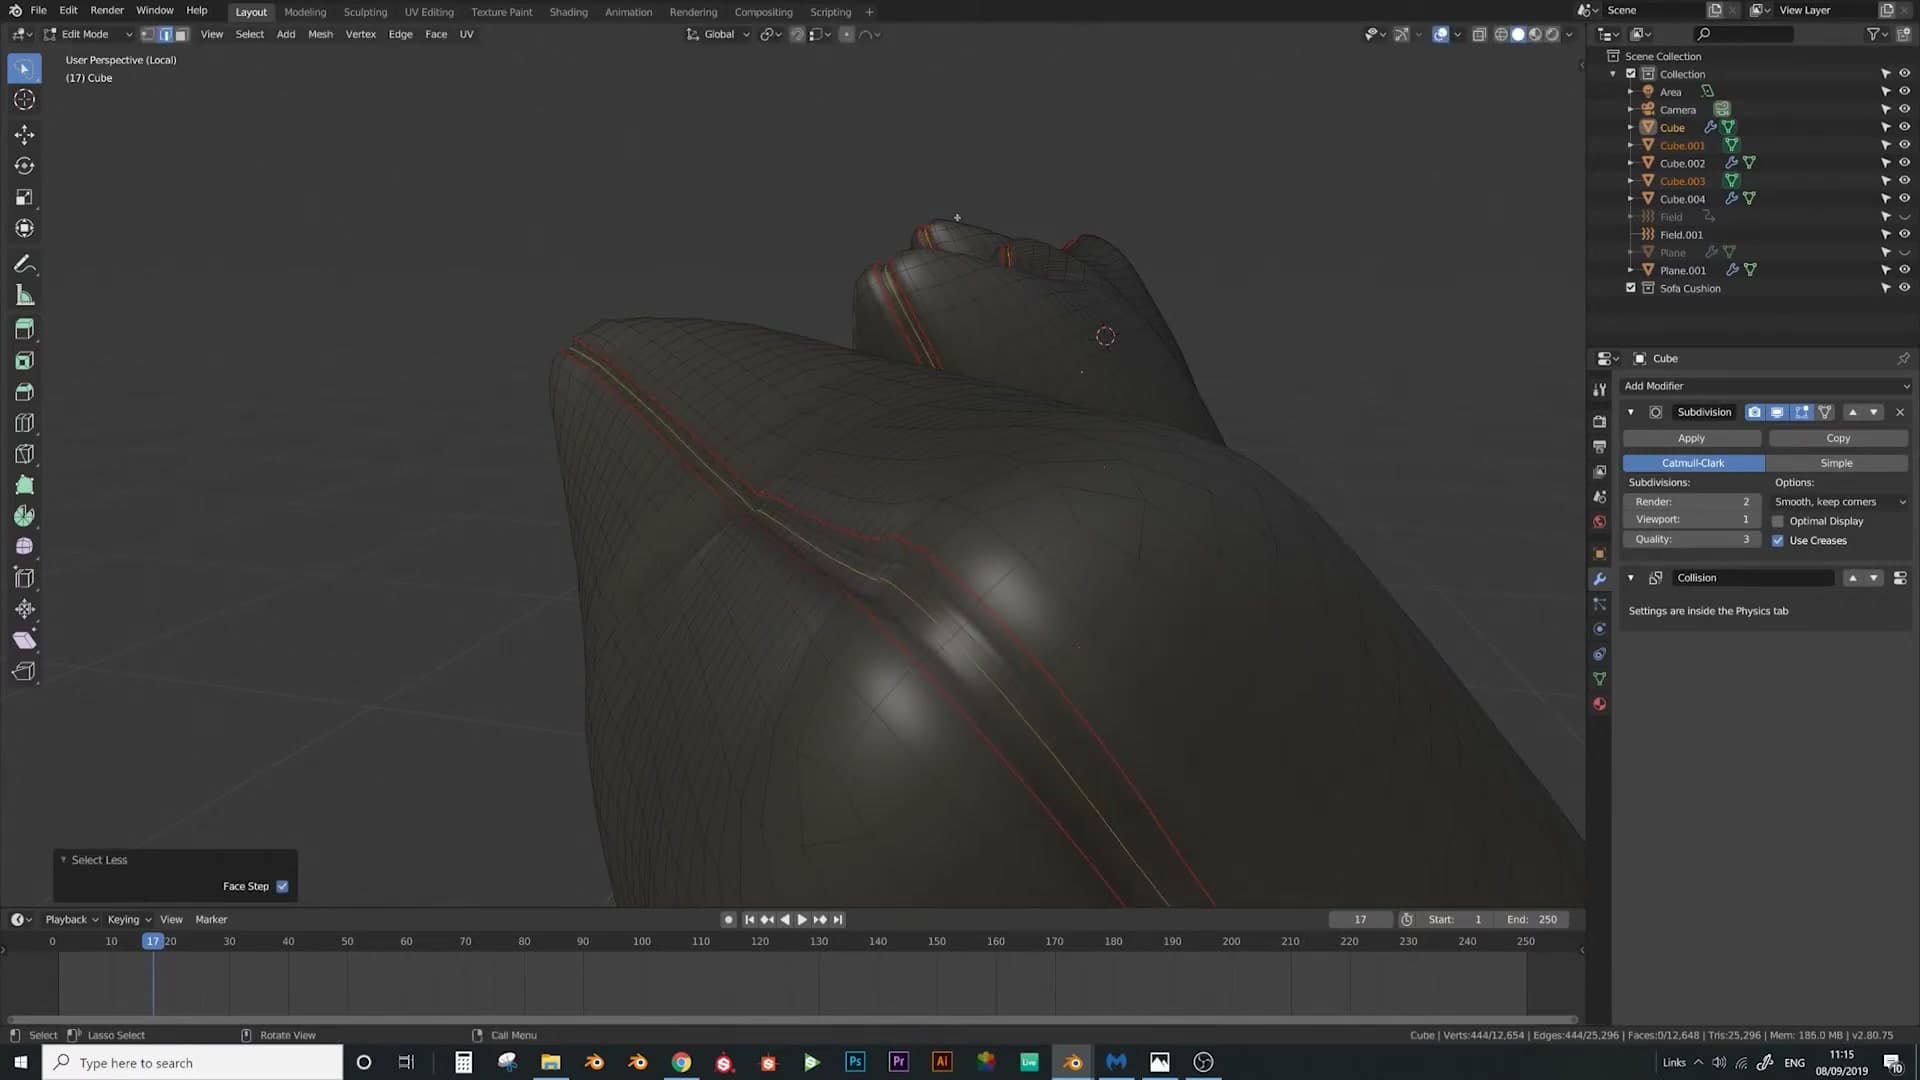
Drop into Edit mode and select the loop of edges that runs around the perimeter of the cushion (the line where the top and bottom faces meet). Hit Ctrl+B to start a bevel, slide your mouse to set the width, and scroll the wheel up until you have five segments inside the bevel. That gives you a flat band of geometry around the entire seam, which is what the tuck step needs to work against.
With the bevel still selected, press Ctrl+Numpad - to Select Less, which trims the selection down towards the inner loops of the band. Then press Alt+S to shrink along the normals and pull that inner ring inwards quite firmly. You are starting to sink the seam line into the fabric.
Alt+S with proportional editing to tuck the seam
Now you need proportional editing so the next push affects the surrounding fabric, not just the inner loop. Tap Ctrl+Numpad - a couple more times to shrink the selection down to the central edge of the band, then press O to turn proportional editing on. Make sure the falloff is set to a soft, rounded option in the header dropdown so the pull blends gradually into the surrounding mesh.
Press Alt+S a second time. This time you are pushing in the opposite direction. Drag outward so the centre of the seam band lifts away from the cushion body. As you move the mouse, scroll the wheel to dial the proportional radius up or down until the bulge feels like a real piped seam rather than a thin ridge.
Finish with one more Alt+S pass, this time using it to fine-tune the overall width of the tuck. Bring it in or push it out until the seam reads cleanly against the rest of the cushion. The result is a fabric edge that dips into a recessed groove and then rises into a soft piped line, which is the look you get on a real upholstered cushion.
Re-unwrap and preview in Eevee
Drop back to Object mode and apply the scale one more time so the new seam geometry bakes in clean. Jump into Edit mode, press A to select everything, then U → Unwrap so the freshly tucked perimeter gets a fresh set of UVs that match the new topology.
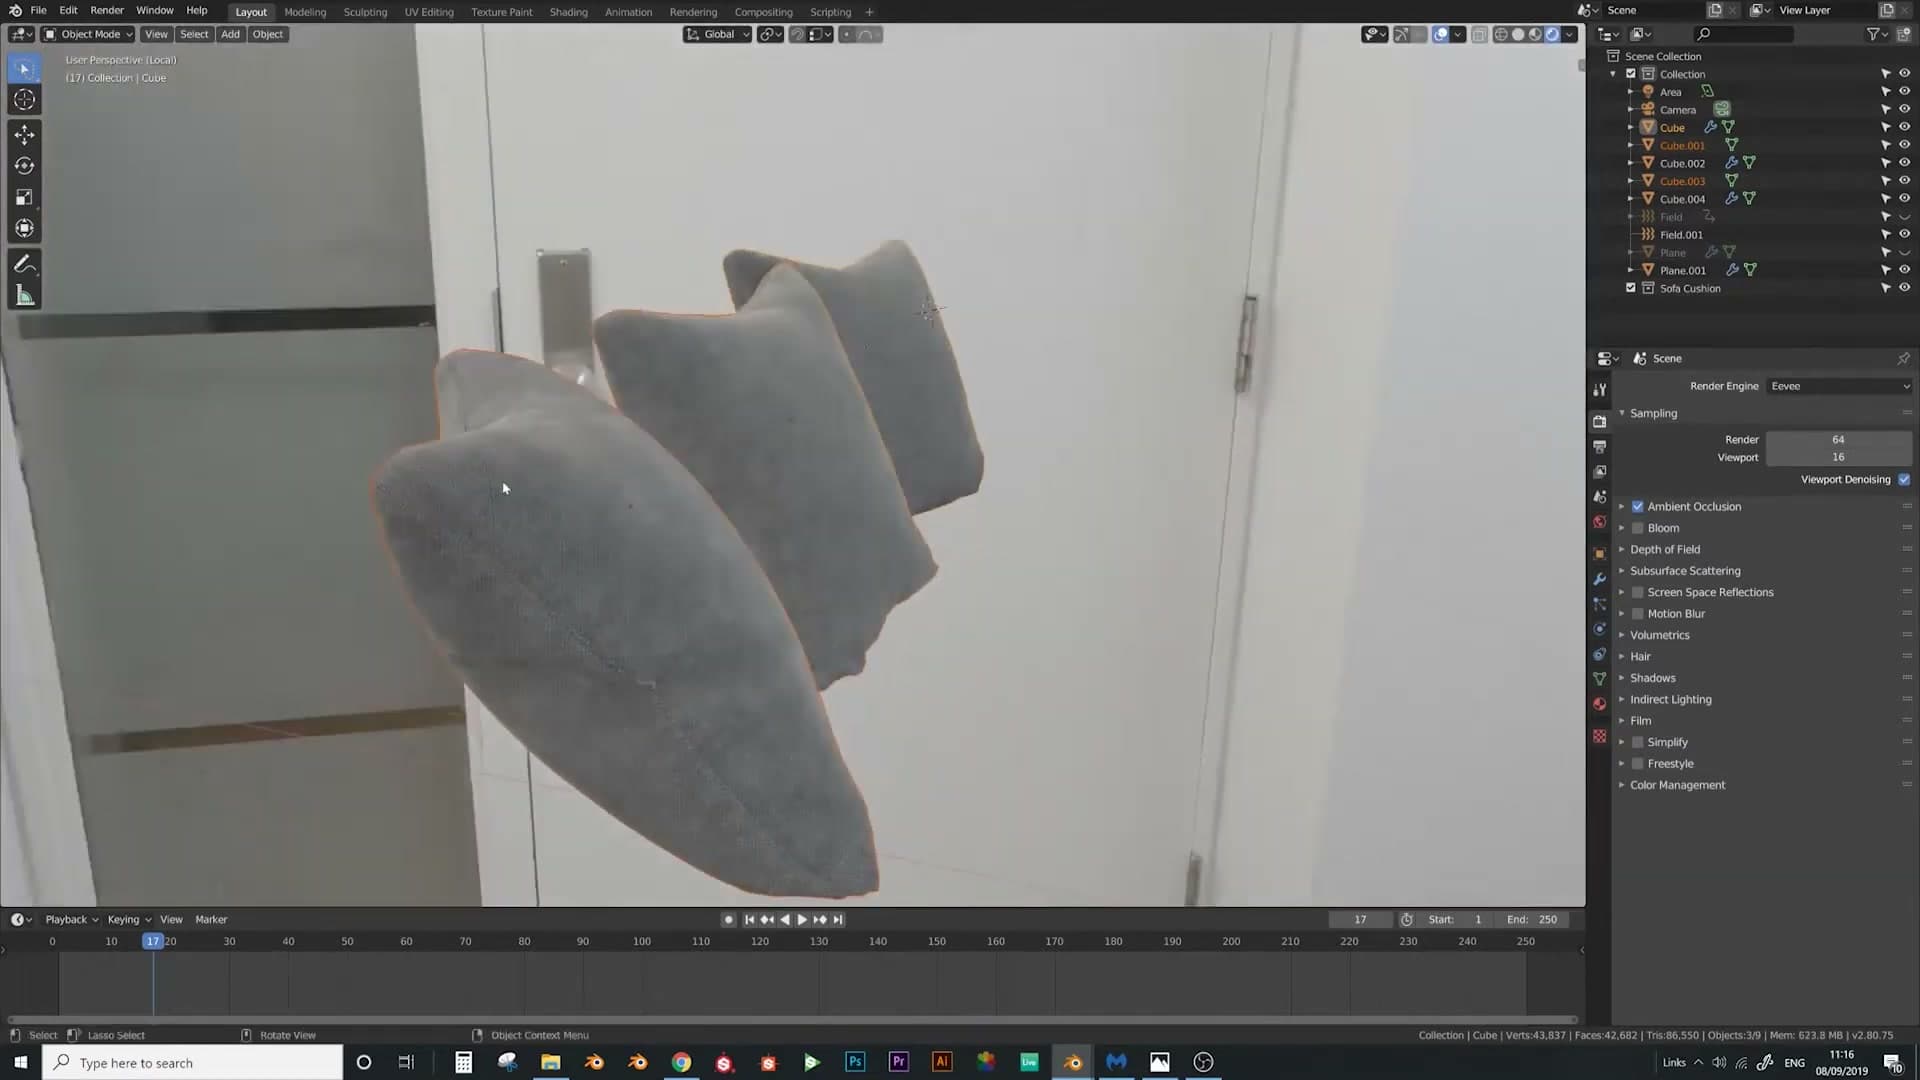
Switch the viewport shading back to Eevee and orbit around the sofa. You should now see a row of cushions with crisp, tucked seams running around each one: the simulated softness of the cloth pass with the structural detail of a sewn edge on top.
Round bolster cushions with grid fill
Build the bolster from a cylinder, grid-fill both ends, then re-tune the cloth solver for the higher curvature and run a fresh sim.
Cylinder base and end seams
With the rectangular cushions positioned and looking right, switch your attention to the round bolsters that sit along the back of the sofa. Add a new cylinder via Add → Mesh → Cylinder and scale it down to roughly the proportions of a bolster. Long enough to span part of the seat, slim enough to read as a tube rather than a barrel.
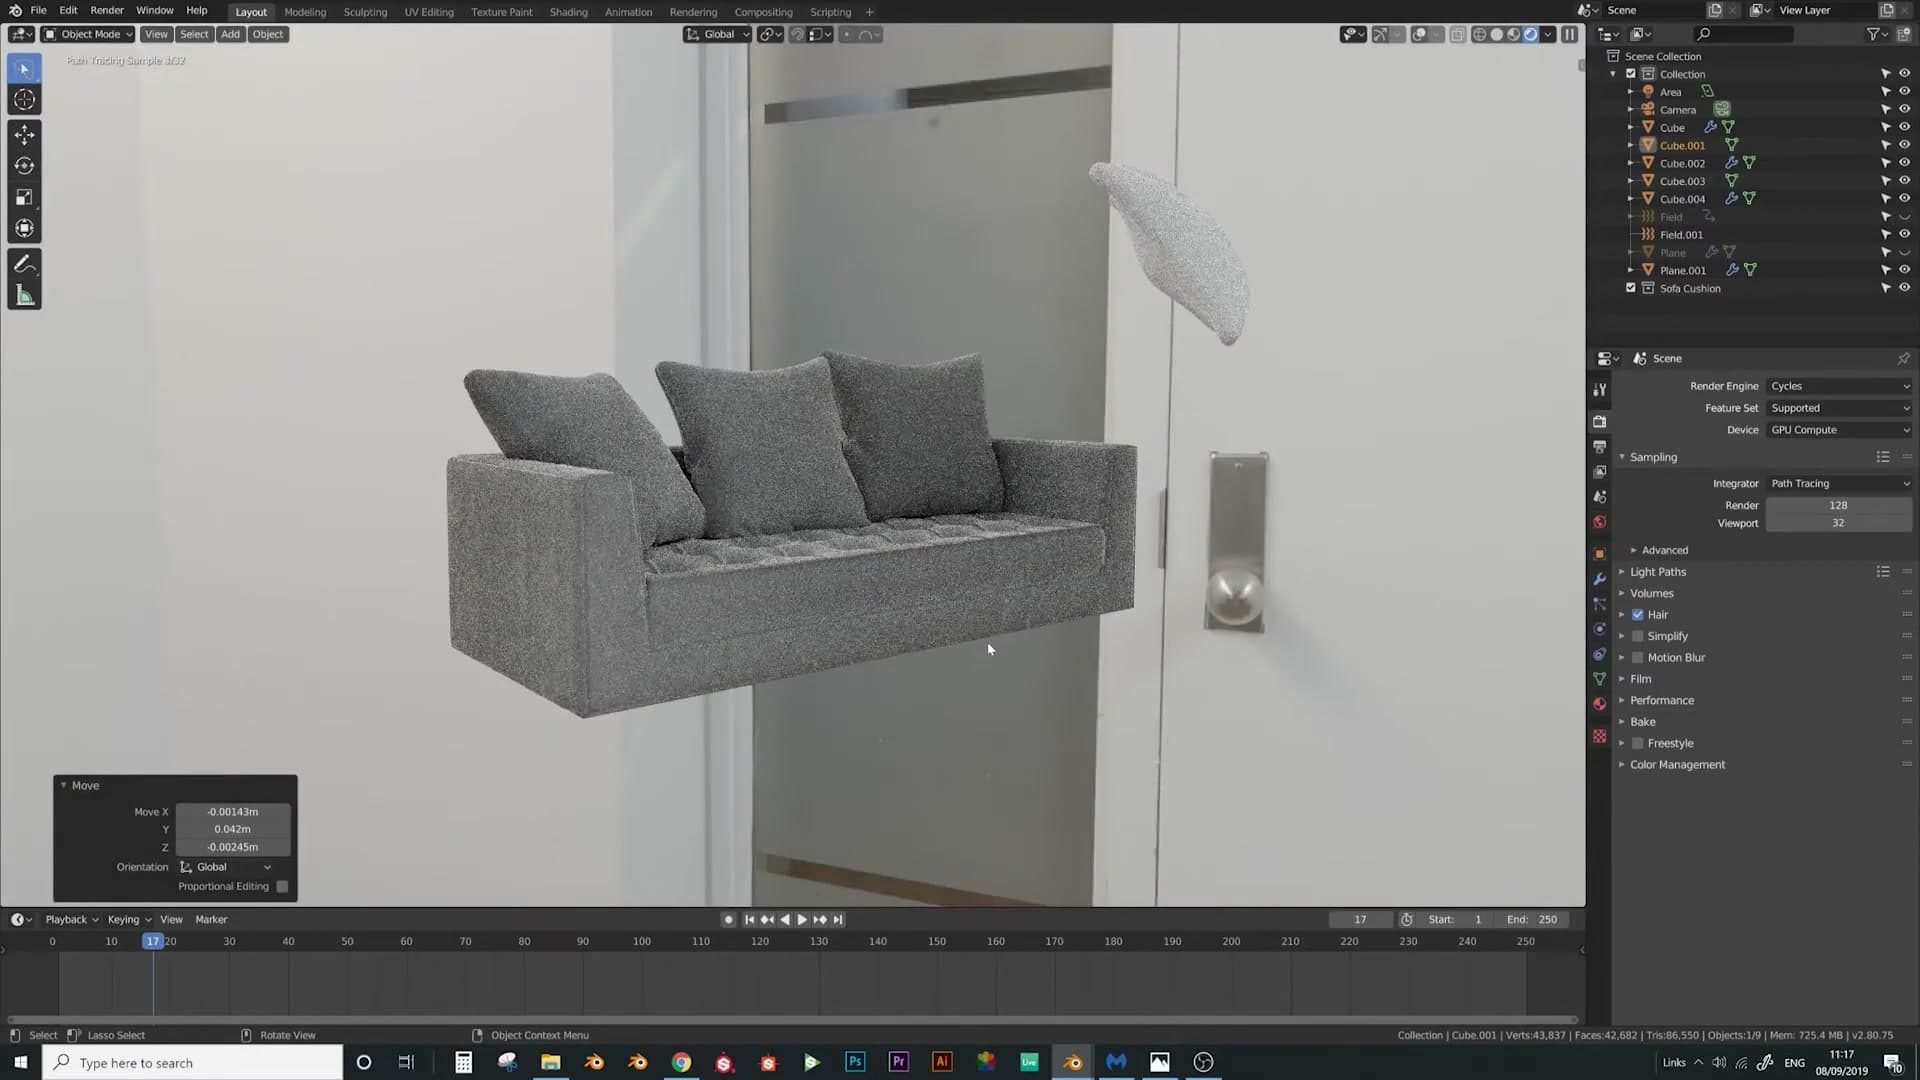
Drop into Local Mode with / so the rest of the sofa stops distracting you, then jump into edit mode. Select both end faces of the cylinder and run Mark Seam from the edge menu. Add one more seam running along the length of the cylinder so the unwrap has a clean line to open along later.
Grid Fill the open ends
The flat end caps that come with a default cylinder are a single n-gon, which the cloth solver won't deform cleanly. Replace them with quads. Select both end faces and delete them with X → Faces, leaving two open loops.
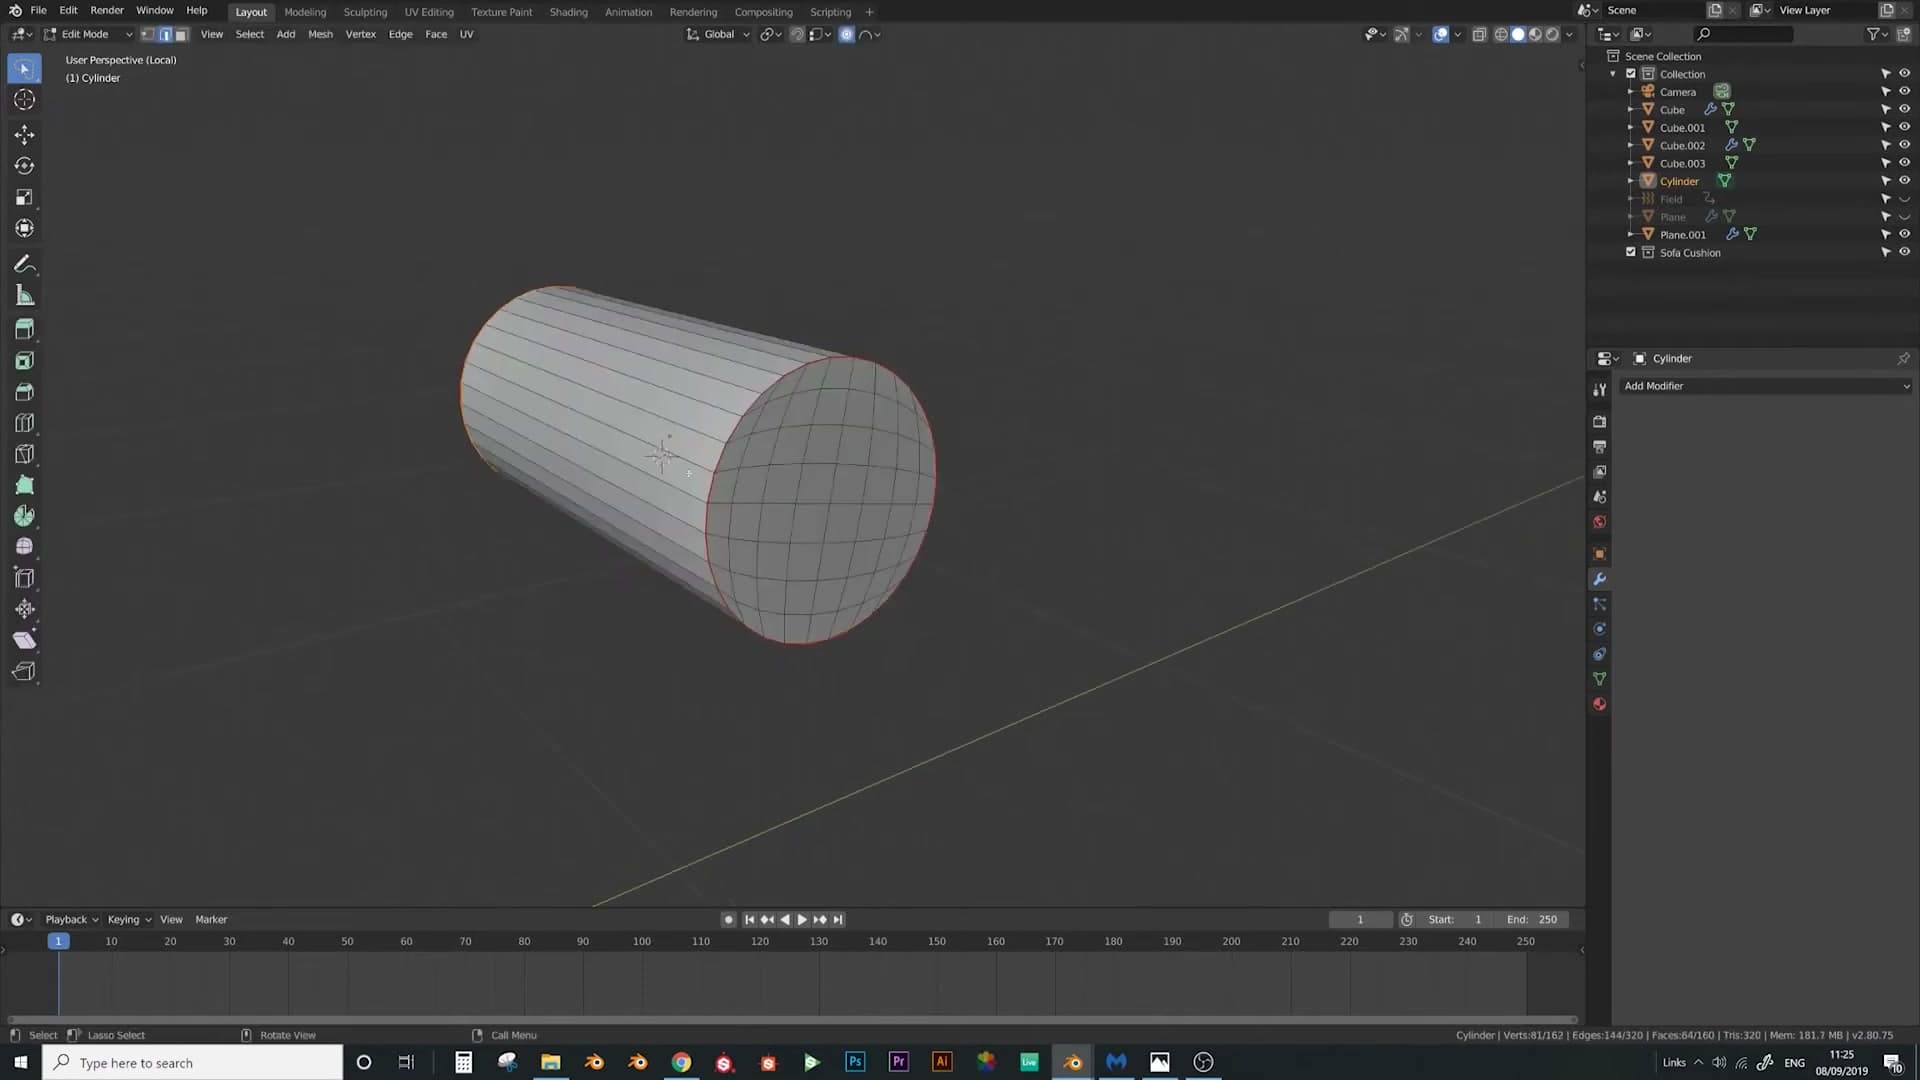
Select the boundary edge loop of one open end and run Face → Grid Fill. Blender stitches the hole shut with a tidy grid of quads. Repeat for the other end. Both caps are now made of even, cloth-friendly geometry that will inflate evenly when the simulation runs.
Cloth + force settings tuned for a round shape
Drop out of edit mode and add a Cloth modifier to the cylinder. The settings that work for a flat seat cushion don't translate directly to a tightly curved tube, so you need a different recipe. Dial in 150, 0.5, 50 and 2 in the stiffness panel. These values can be fiddly. You may need to tweak them later for your exact cylinder size, but they're a solid starting point.
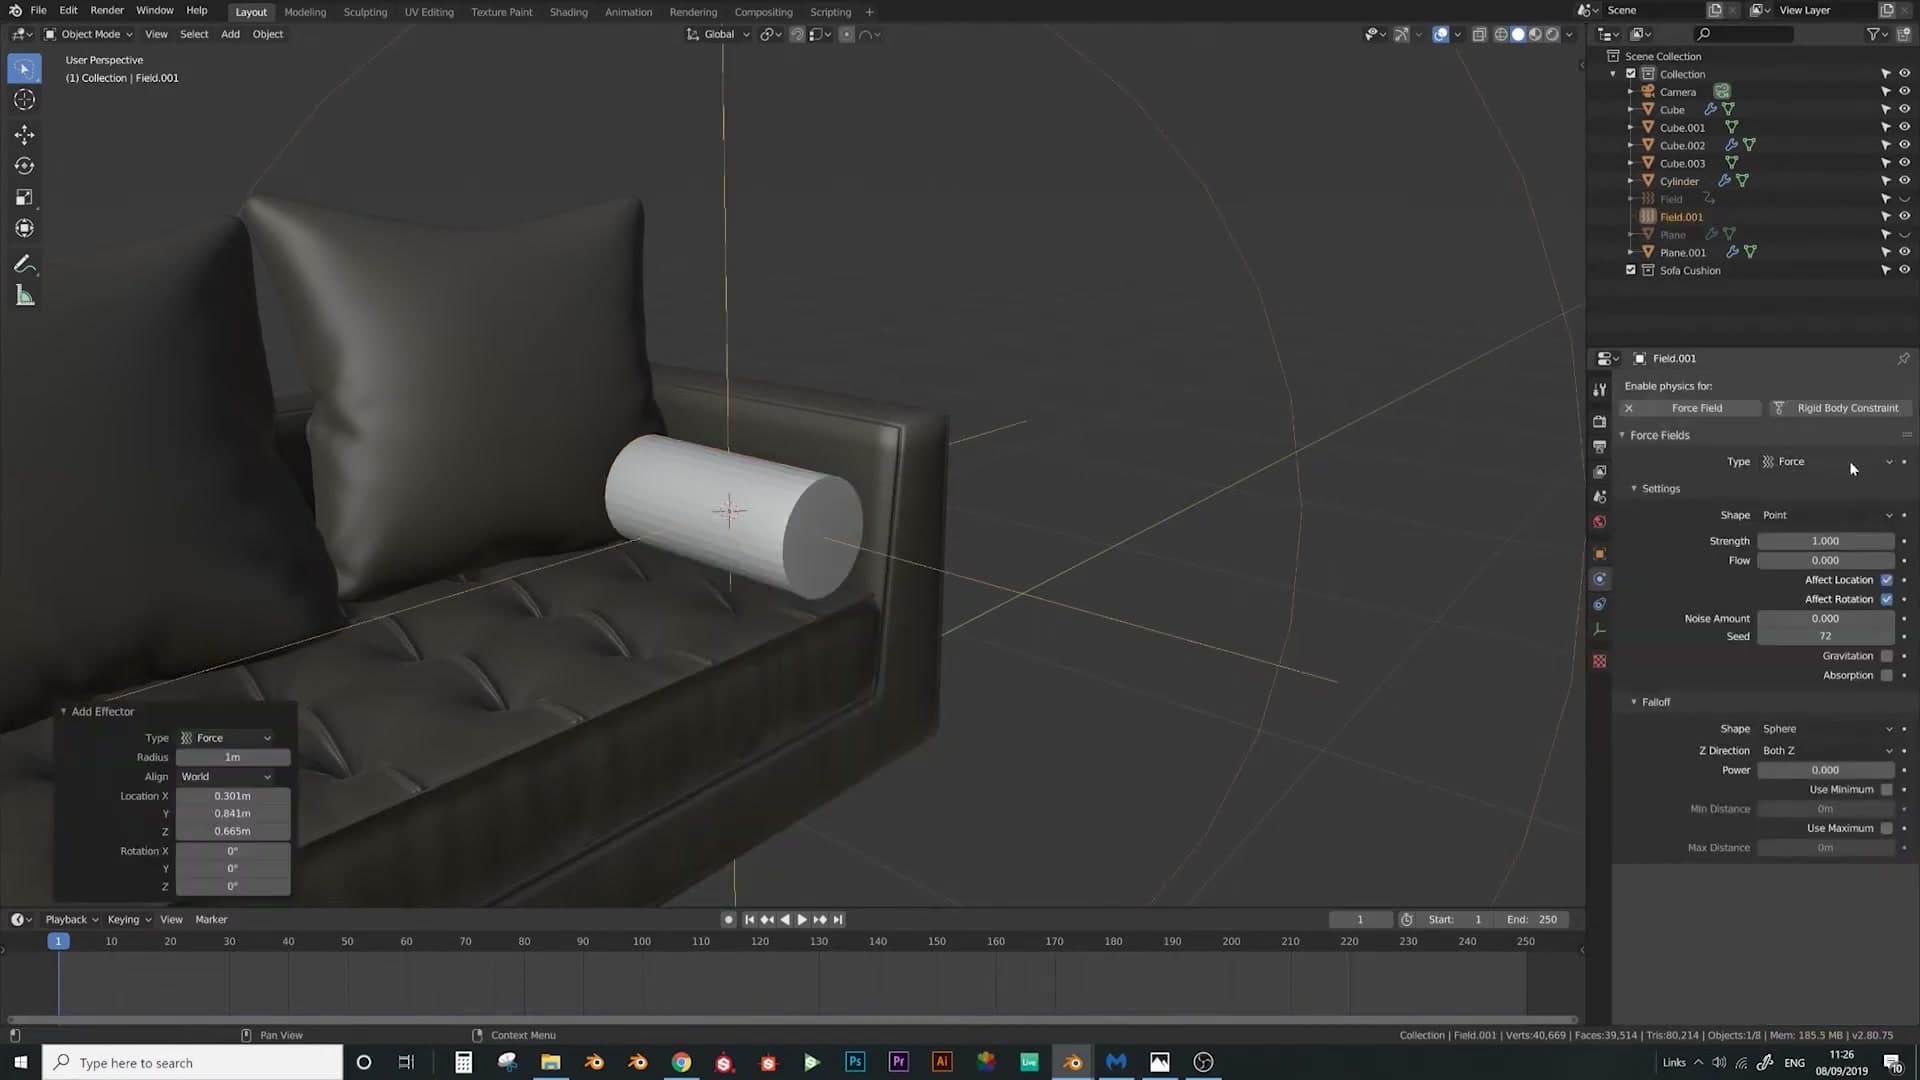
Set the collision distance to 0.001 so the bolster can rest tight against the seat cushions without phasing through them. Push the Quality Steps a bit higher than the default to keep the higher curvature stable, and drop the gravity weight right down so the cylinder doesn't collapse before the force field has a chance to inflate it.
Place the 3D cursor at the centre of the bolster with Shift+S → Cursor to Selected, then add a Force field at that point. Set the strength to 1000. The round shape needs significantly more push than the flat cushions did. Add a touch of noise so the inflated surface gets a bit of organic variation rather than reading as a perfect tube.
Loop cuts, sim and apply
Before scrubbing the timeline, add a Subdivision Surface modifier above the cloth so the sim sees the smoothed geometry. Then jump back into edit mode and add a couple of loop cuts along the length of the cylinder with Ctrl+R. Without them the bolster pinches at the seams when it inflates.
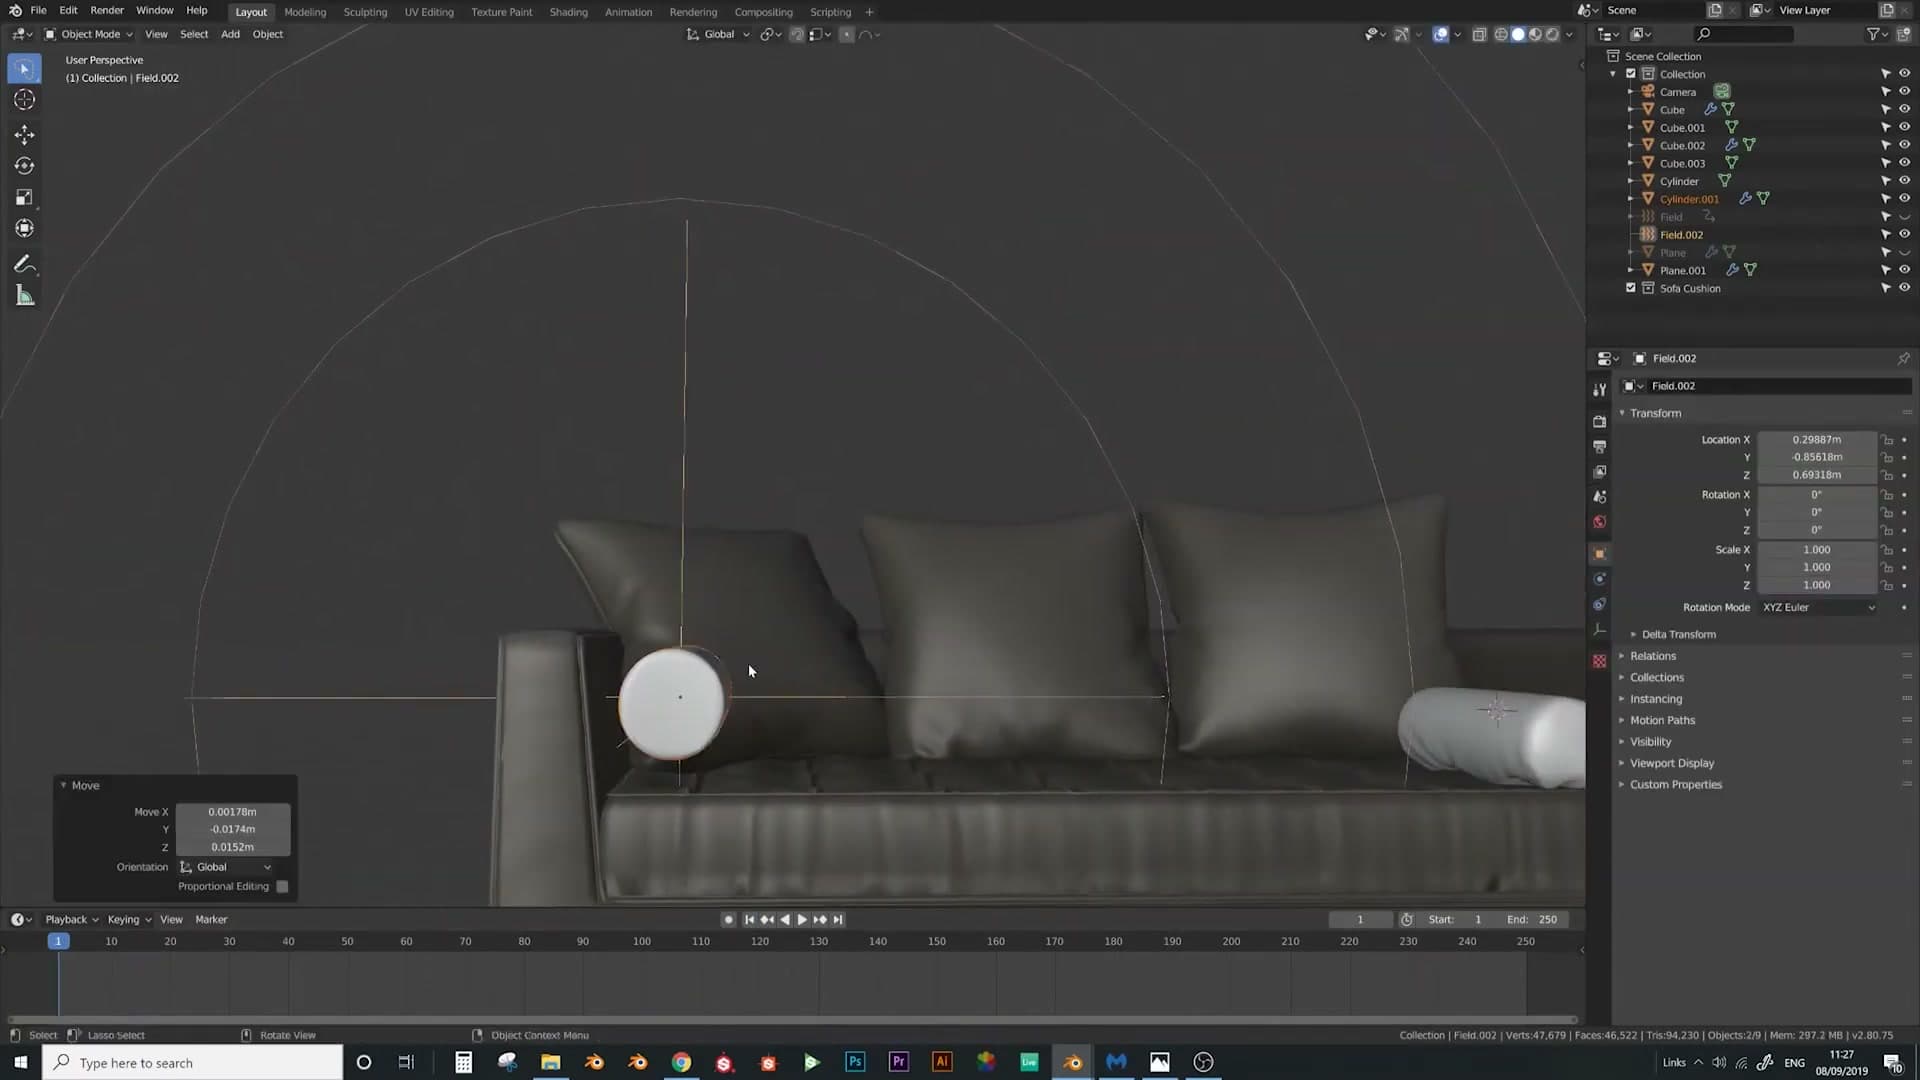
Play the timeline and watch the force field push the mesh outward into a plump round cushion. Stop the simulation when the silhouette looks right, apply some smooth shading, then apply the cloth modifier to bake the shape.
Duplicate the finished bolster with Shift+D and drag the copy along the sofa to where the second cushion should sit. Position it so it overlaps the first one slightly. That way, when you re-sim, the two bolsters press against each other and compress naturally rather than floating in space. Press play, let the second one settle, and stop the sim once it looks right. Apply the cloth modifier again.
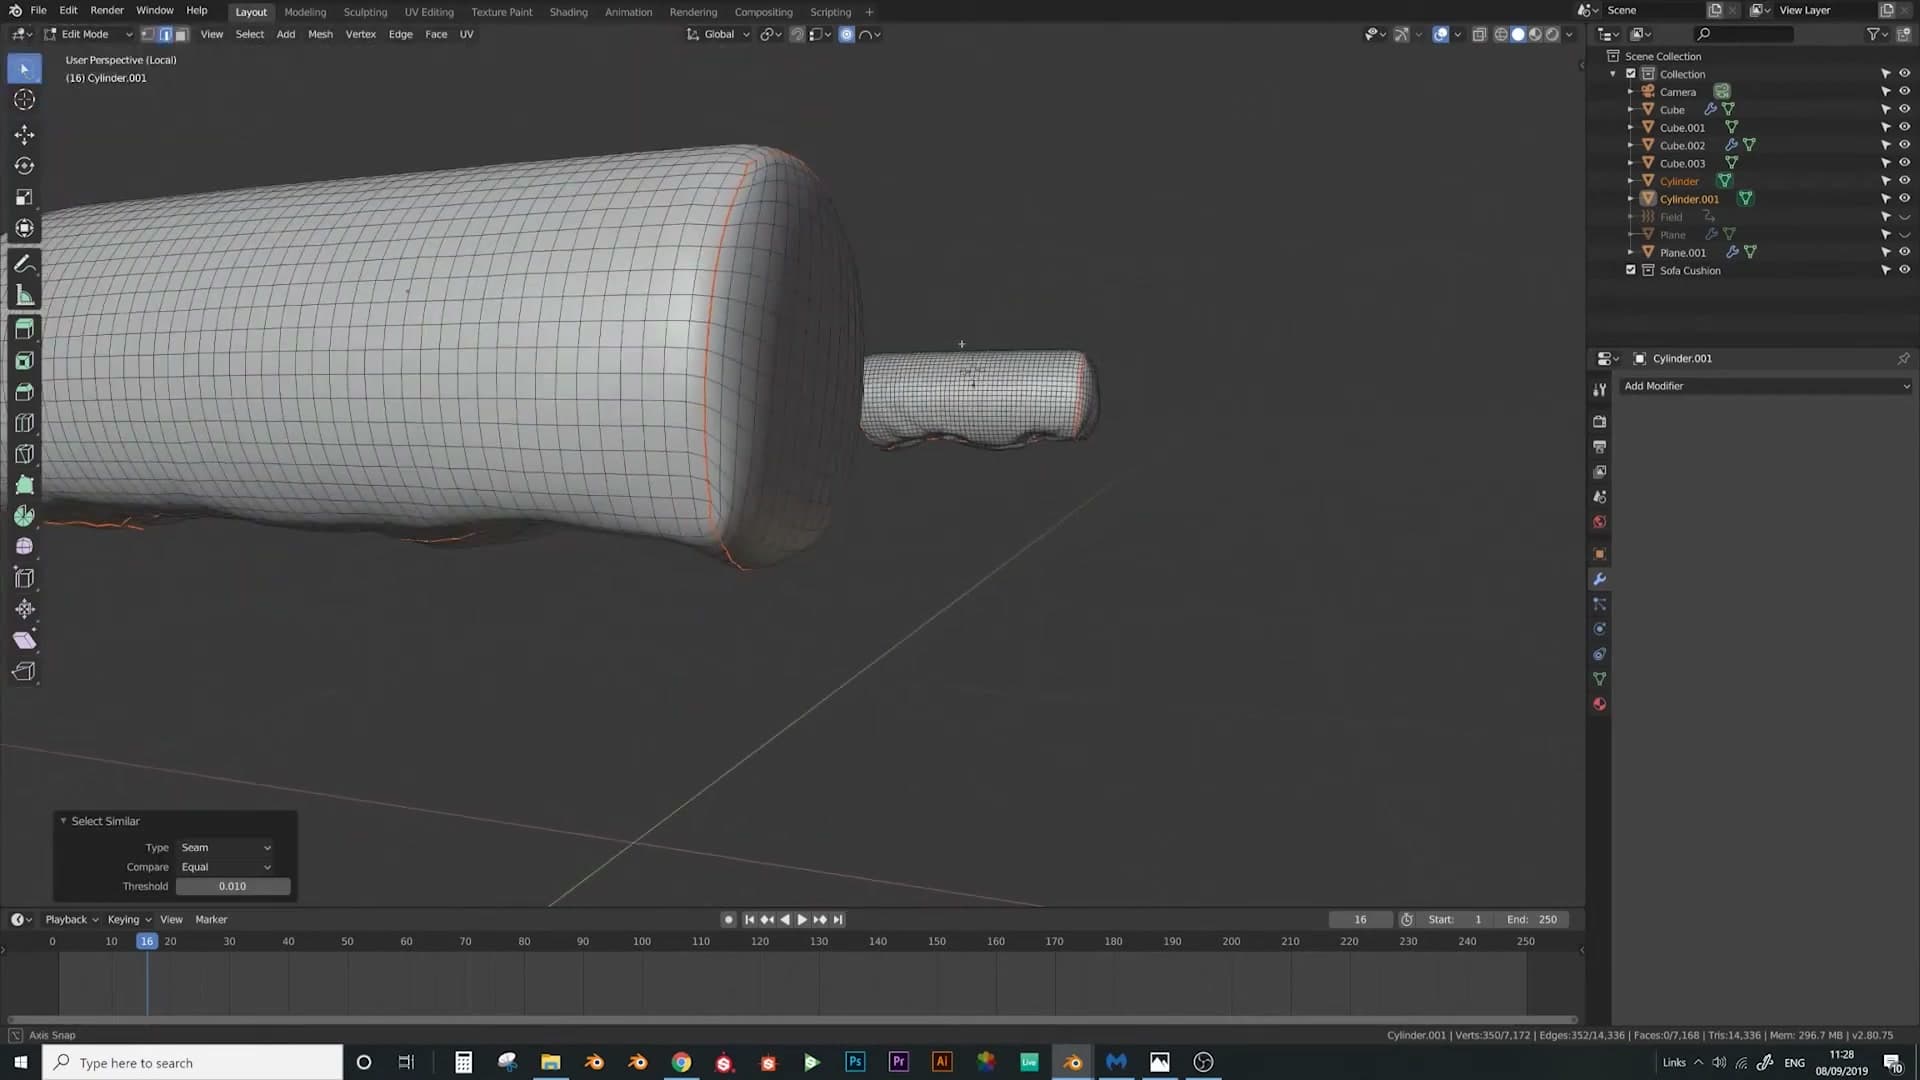
With both bolsters baked, jump into edit mode on each one in turn to add a tucked seam loop. It's the same finishing pass you ran on the rectangular cushions. Select one of the seam edges, press Shift+G → Seam to grab every edge marked as a seam, then run Ctrl+B to bevel with five segments. Scale the new loop in with Ctrl+Numpad- followed by Alt+S so the seam tucks into the fabric instead of sitting flush.
Seams for the round cushions
Use Shift+G to grab every marked seam at once, then run the same Bevel + Alt+S workflow to add piping all the way around both bolsters.
Shift+G > Seam to grab every seam edge
Both round cushions already have their seam loops marked from the previous module, but selecting them one loop at a time would be painful. Instead, hover over any single marked edge, press Shift+G, and choose Seam from the menu. Blender selects every edge in the mesh that shares the Seam mark in a single click. Both bolsters' perimeter loops light up at once, ready for the bevel.
Bevel + Alt+S sequence on the round seam
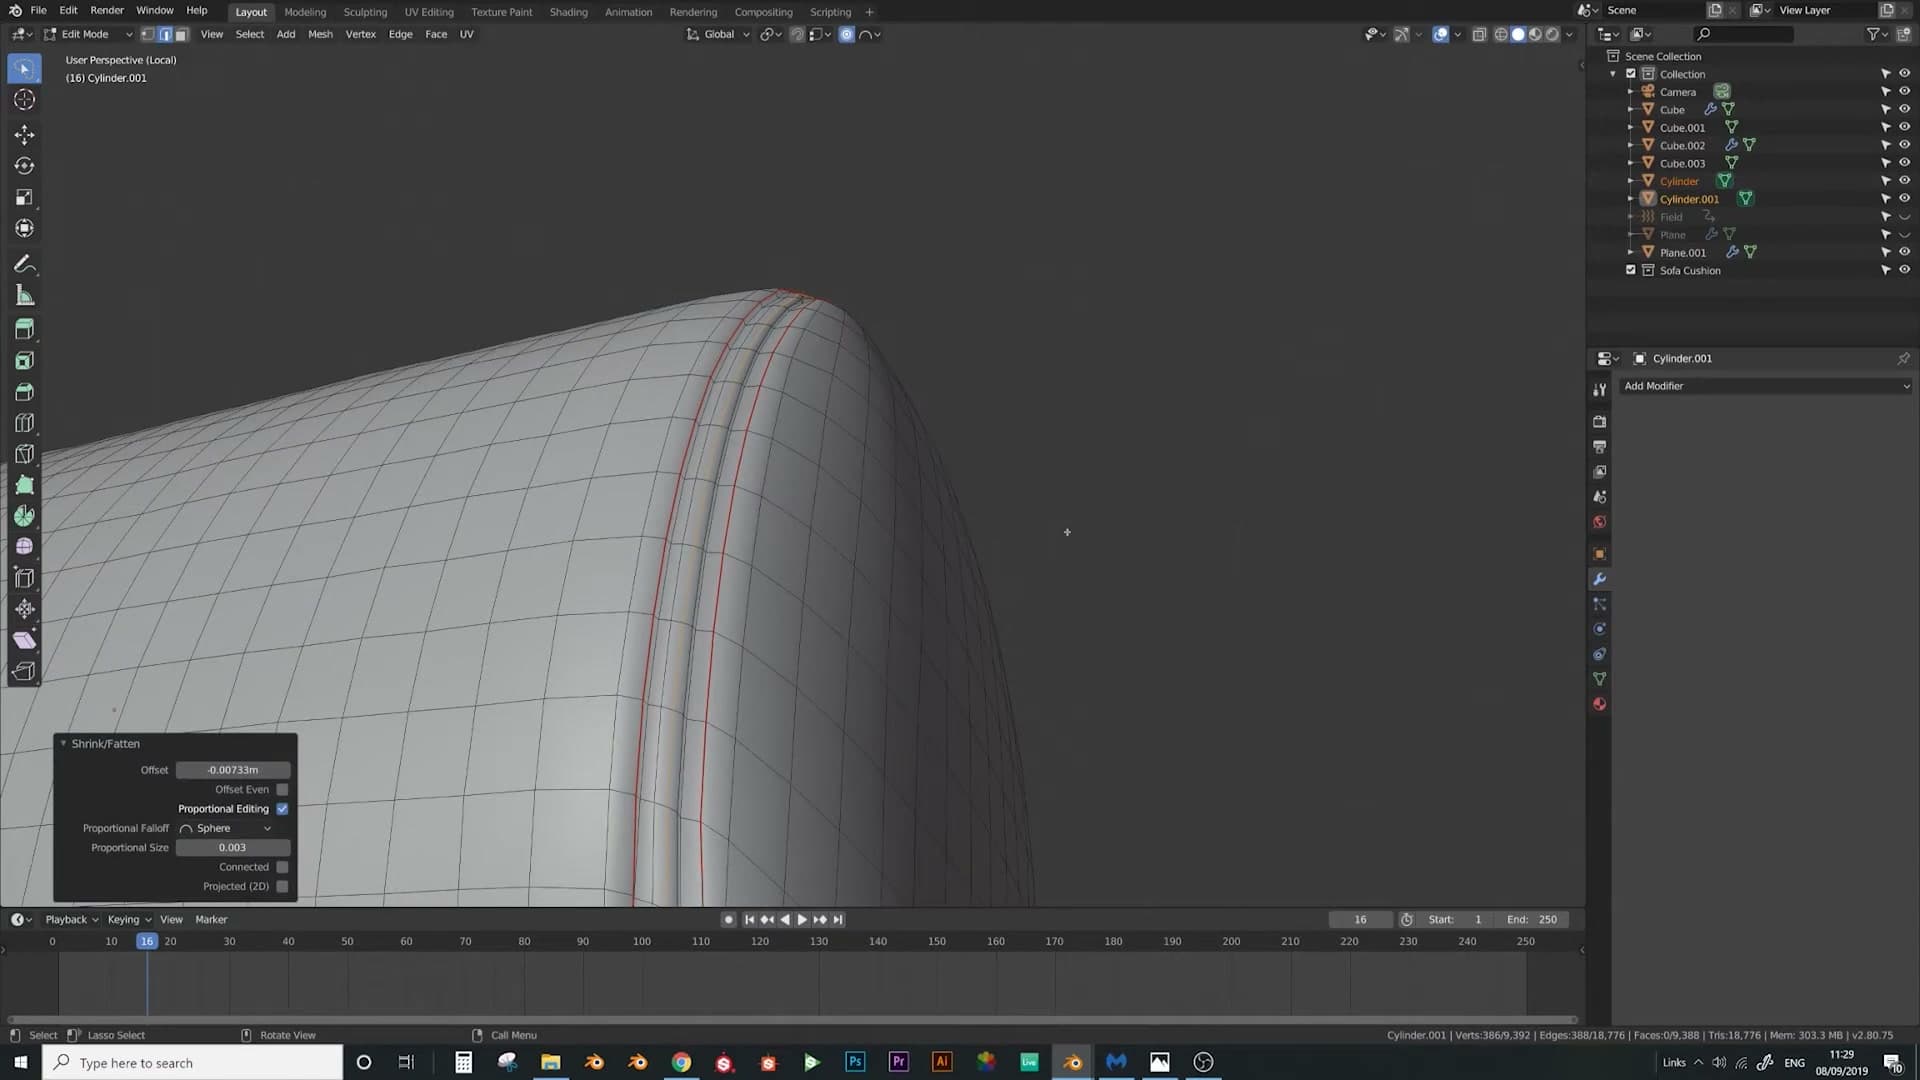
Run the same piping recipe you used on the rectangular cushion. Press Ctrl+B to bevel the selected seam loops, scroll the mouse wheel until you have five segments, and click to confirm. That gives each seam enough resolution to read as a piped edge rather than a sharp crease.
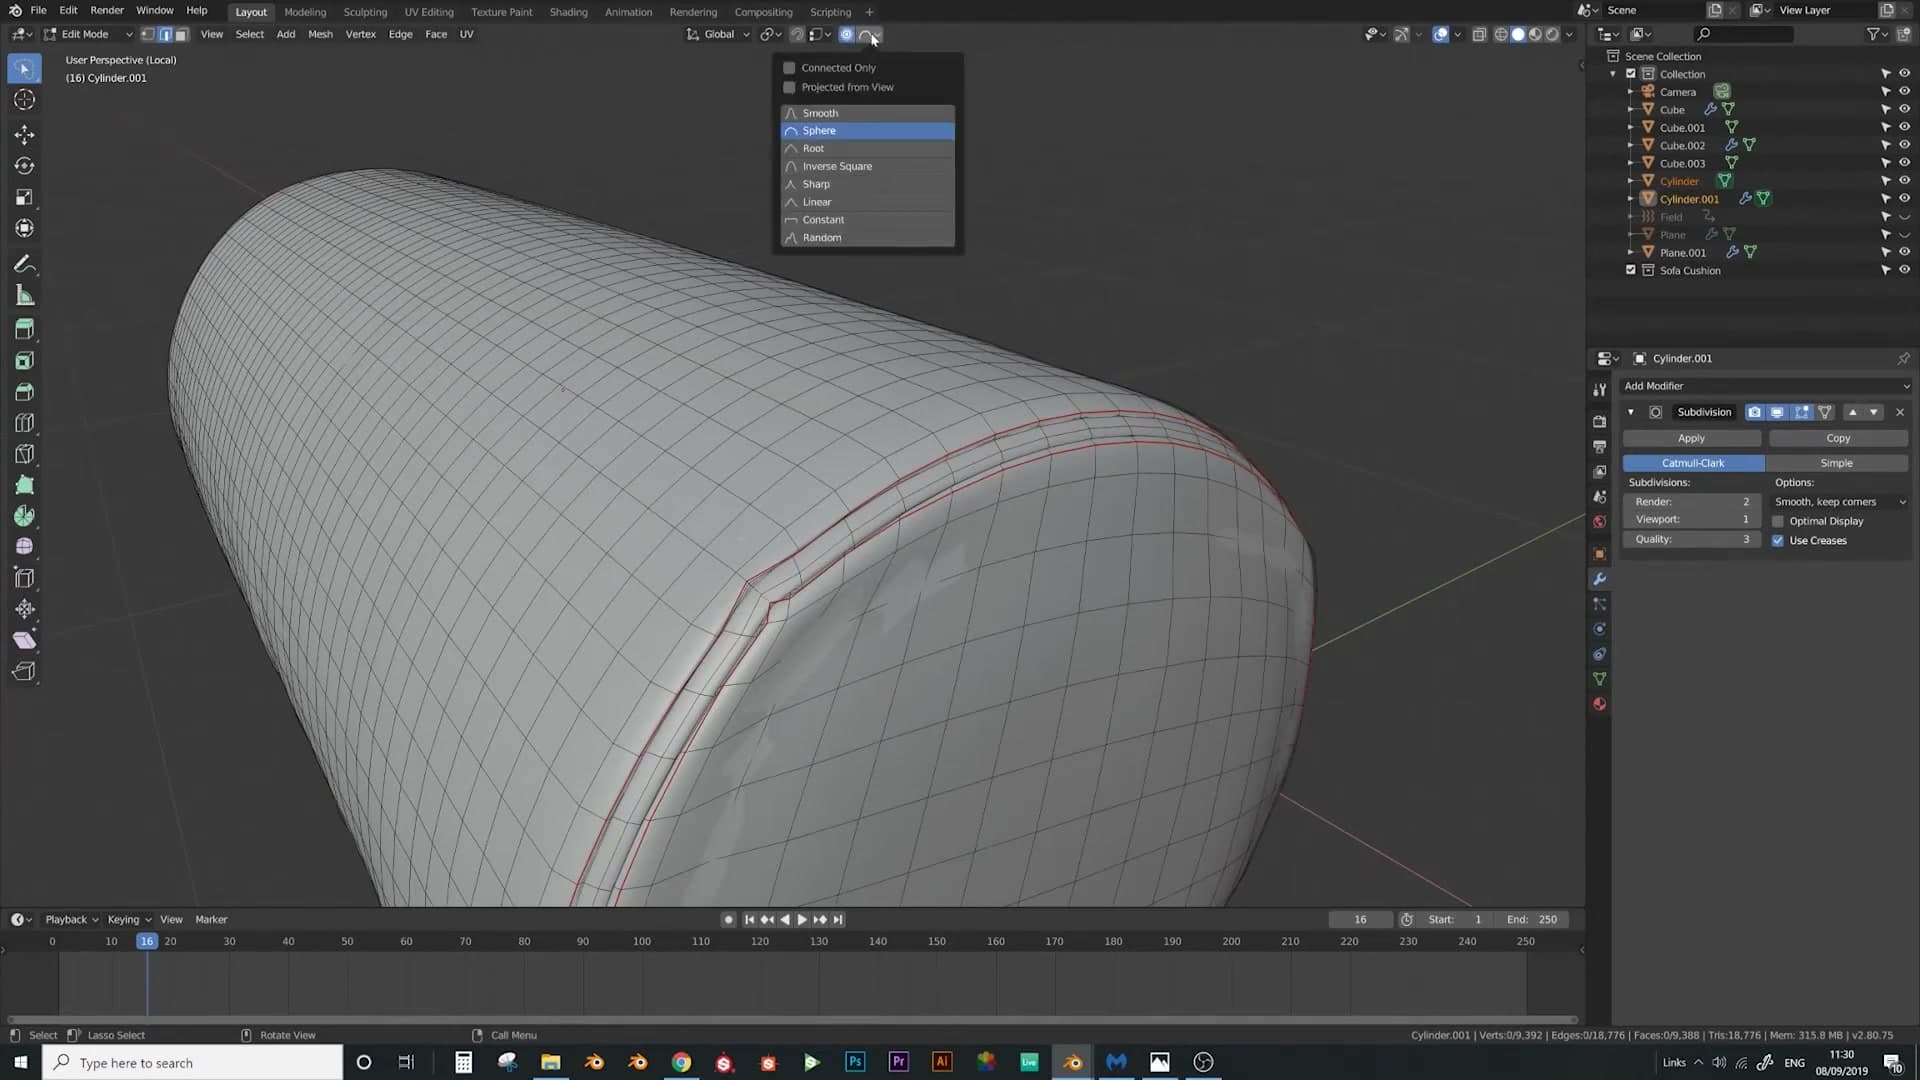
With the bevelled strip still selected, press Alt+S to shrink/fatten it inward. The whole seam tucks down below the surrounding fabric, which is the depression you want the raised piping to sit in.
Now push the centre row back out so it reads as a raised lip. Tap Ctrl+Numpad - twice to shrink the selection down to just the middle row of the bevel, press O to turn on proportional editing, and scroll the falloff radius right down so the influence stays in a tiny area. Press Alt+S again and drag outward. The centre row pops up out of the tuck on either side.
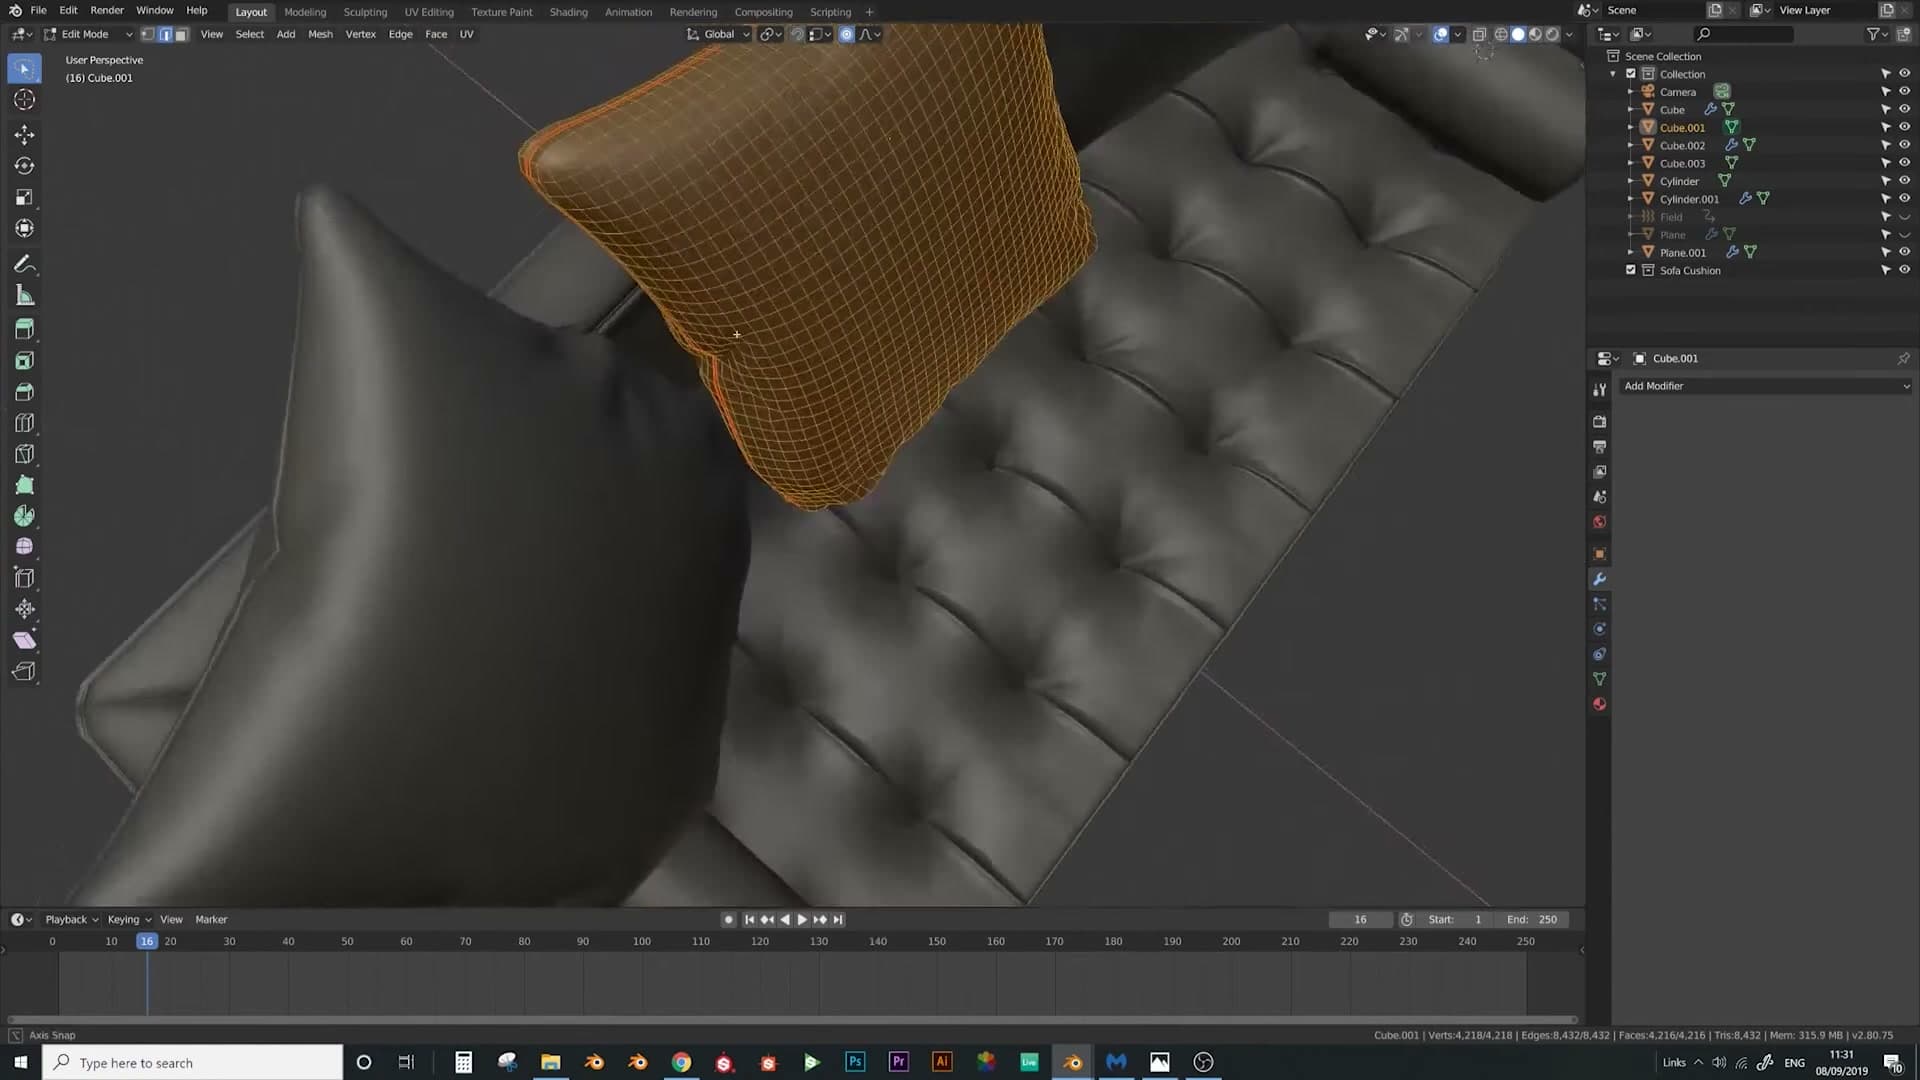
One more Alt+S, scrolling the mouse wheel out as you go, exaggerates the centre lip a touch more. Both bolsters should now have a continuous, raised seam wrapping all the way around their perimeters.
Fixing the boxy corner artefacts
The bevel-and-tuck pass leaves a few rough edges to clean up. Each seam ends in a hard square corner where the loop meets itself, the round cushions clip through the back cushions in places, and the overall silhouette can look a little slack once you turn the subdivision surface back on. Walk around the geometry and tidy these up one at a time.
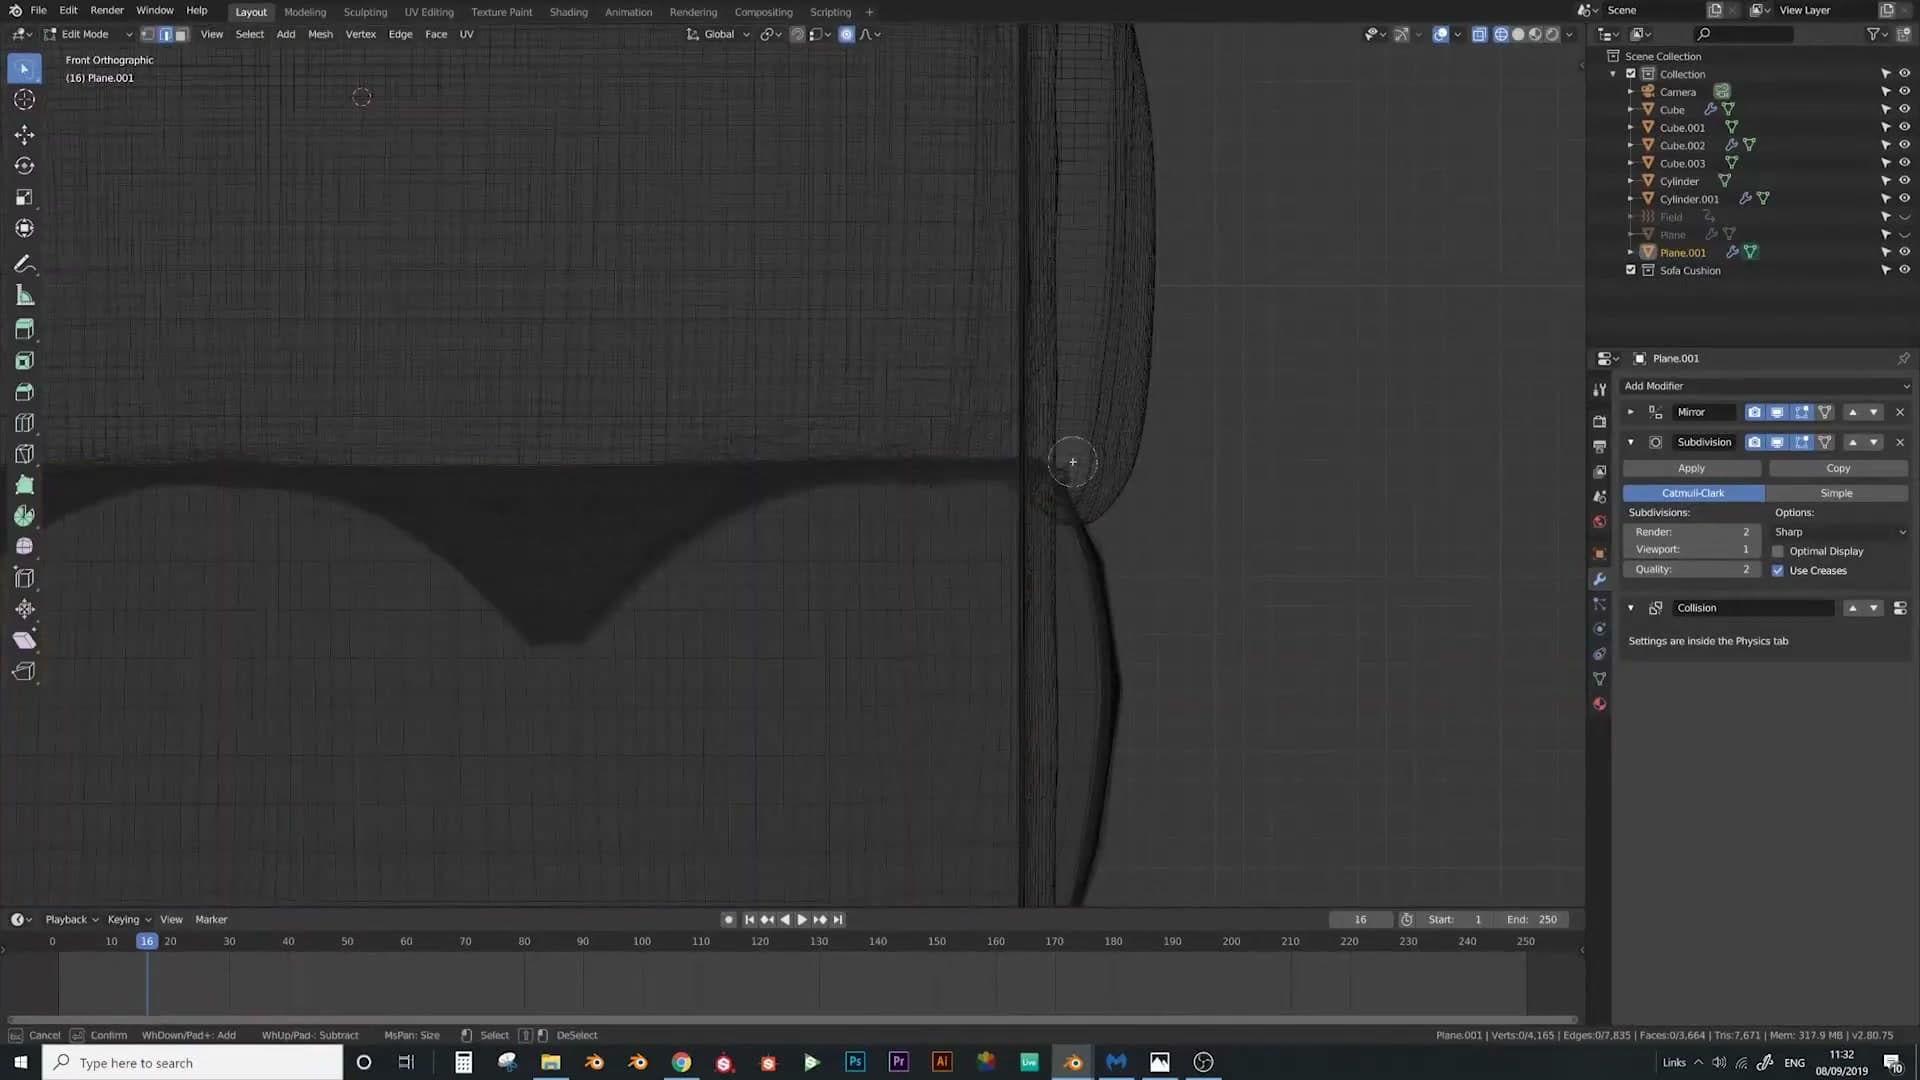
For each square corner, turn on proportional editing, grab the corner vertex, and nudge it slightly in whichever direction makes the join read less geometric. The proportional falloff drags the surrounding mesh with it and softens the boxy intersection into something rounder. Repeat for every corner on both cushions.
Where a round cushion is clipping through one of the back cushions behind it, drop into Edit mode, click the offending edge, press O, and slide the edge across by a small amount until the poke-through is gone.
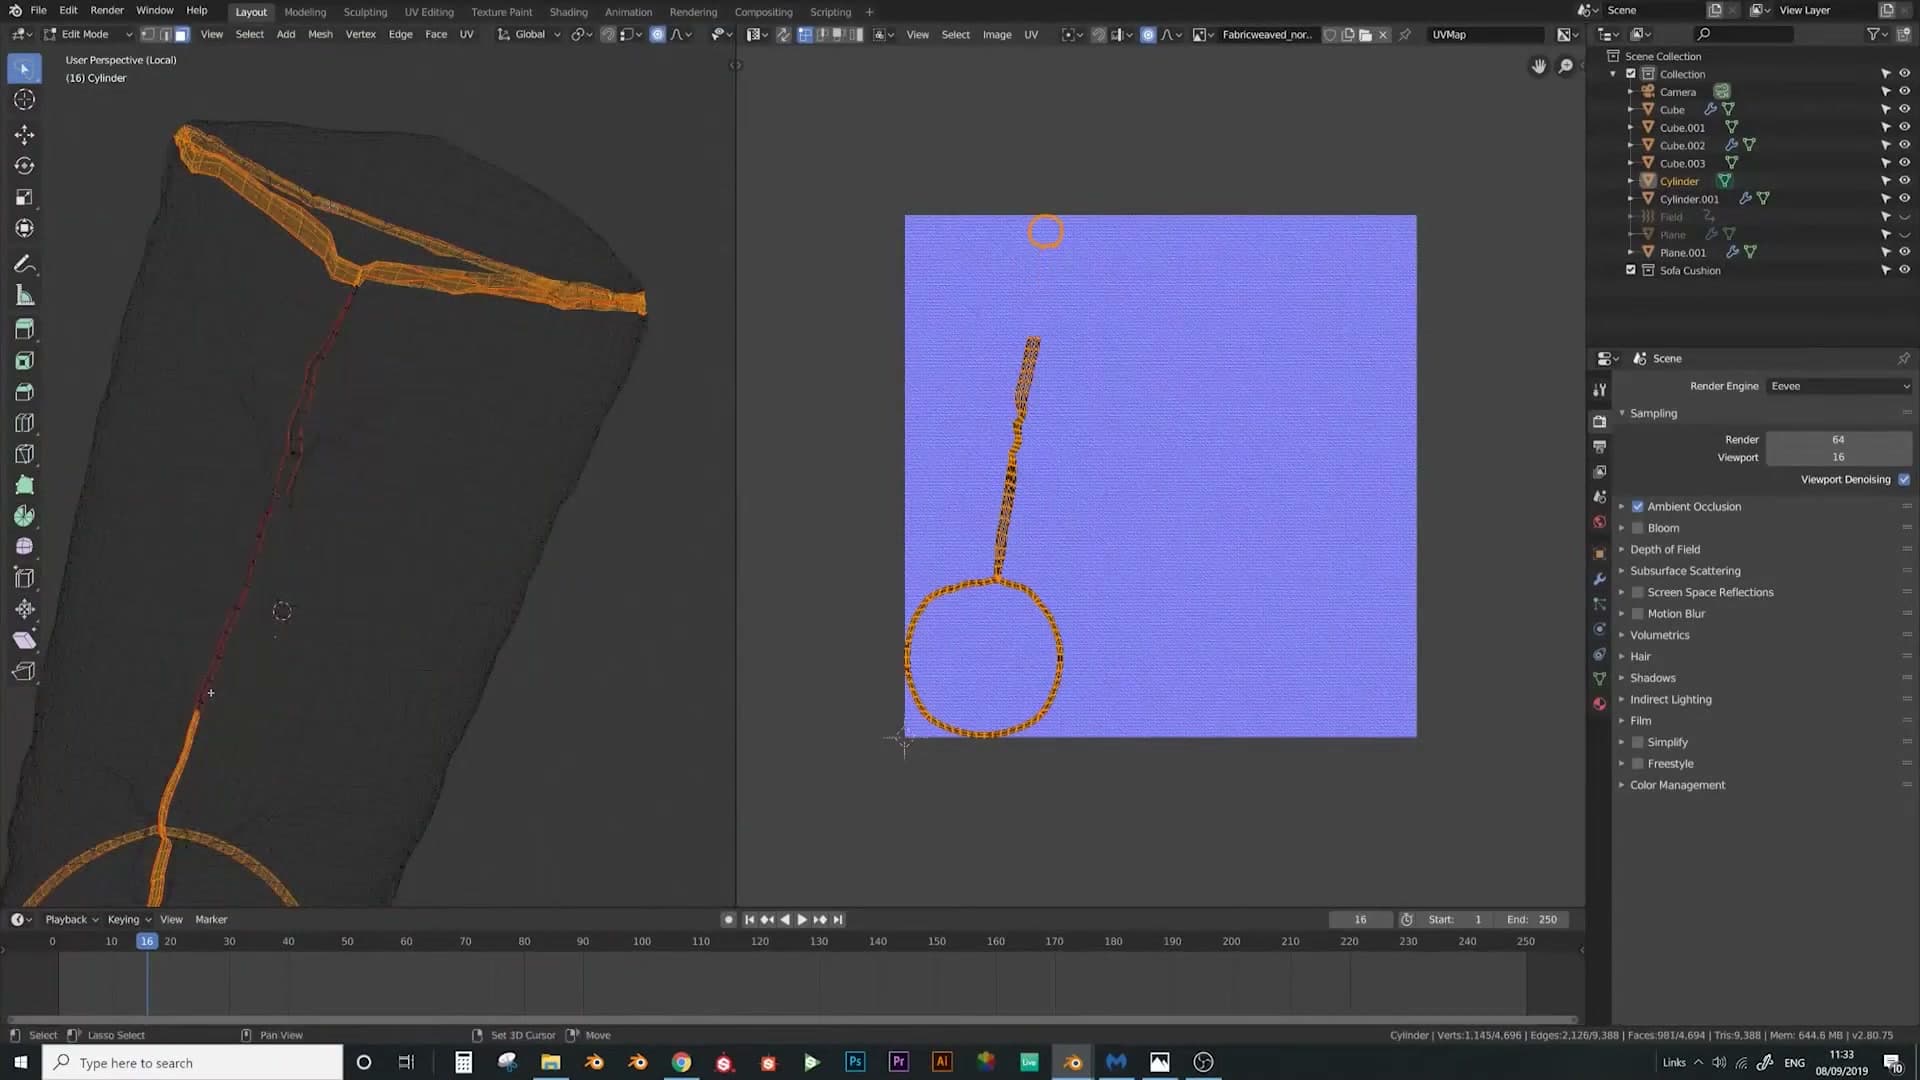
Turn the subdivision surface back on for both round cushions and the shape will shift slightly. If the cushion looks too thin, select the middle row of vertices and inflate it a touch to fill it out; if the profile reads badly, grab the top edge and pull it down a little, or grab the bottom edge and bring it up, with a wide proportional falloff so the change is gradual.
Finally, the UV unwrap can get lost when you re-edit the geometry. Select each cushion, press U and unwrap it again. The centre piping has its own UV island. Switch to Face Select, click a face on the piping strip, press Ctrl+L to grow the selection to all linked faces, and unwrap that strip on its own so the material doesn't smear across the raised seam.
Modelling the sofa legs
Block out one leg from a cube, mirror it across the sofa, sweep an inner profile with extrude and finish with a bevel and UV seams.
Cube with a mirror modifier
With the sofa body finished, snap the 3D cursor to your selection with Shift+S and pick Cursor to Selected so the next object spawns in the right place. Add a cube, drop into edit mode and scale it right down. This is the rough blockout for one leg, which you will mirror across to the opposite side once the shape is right.
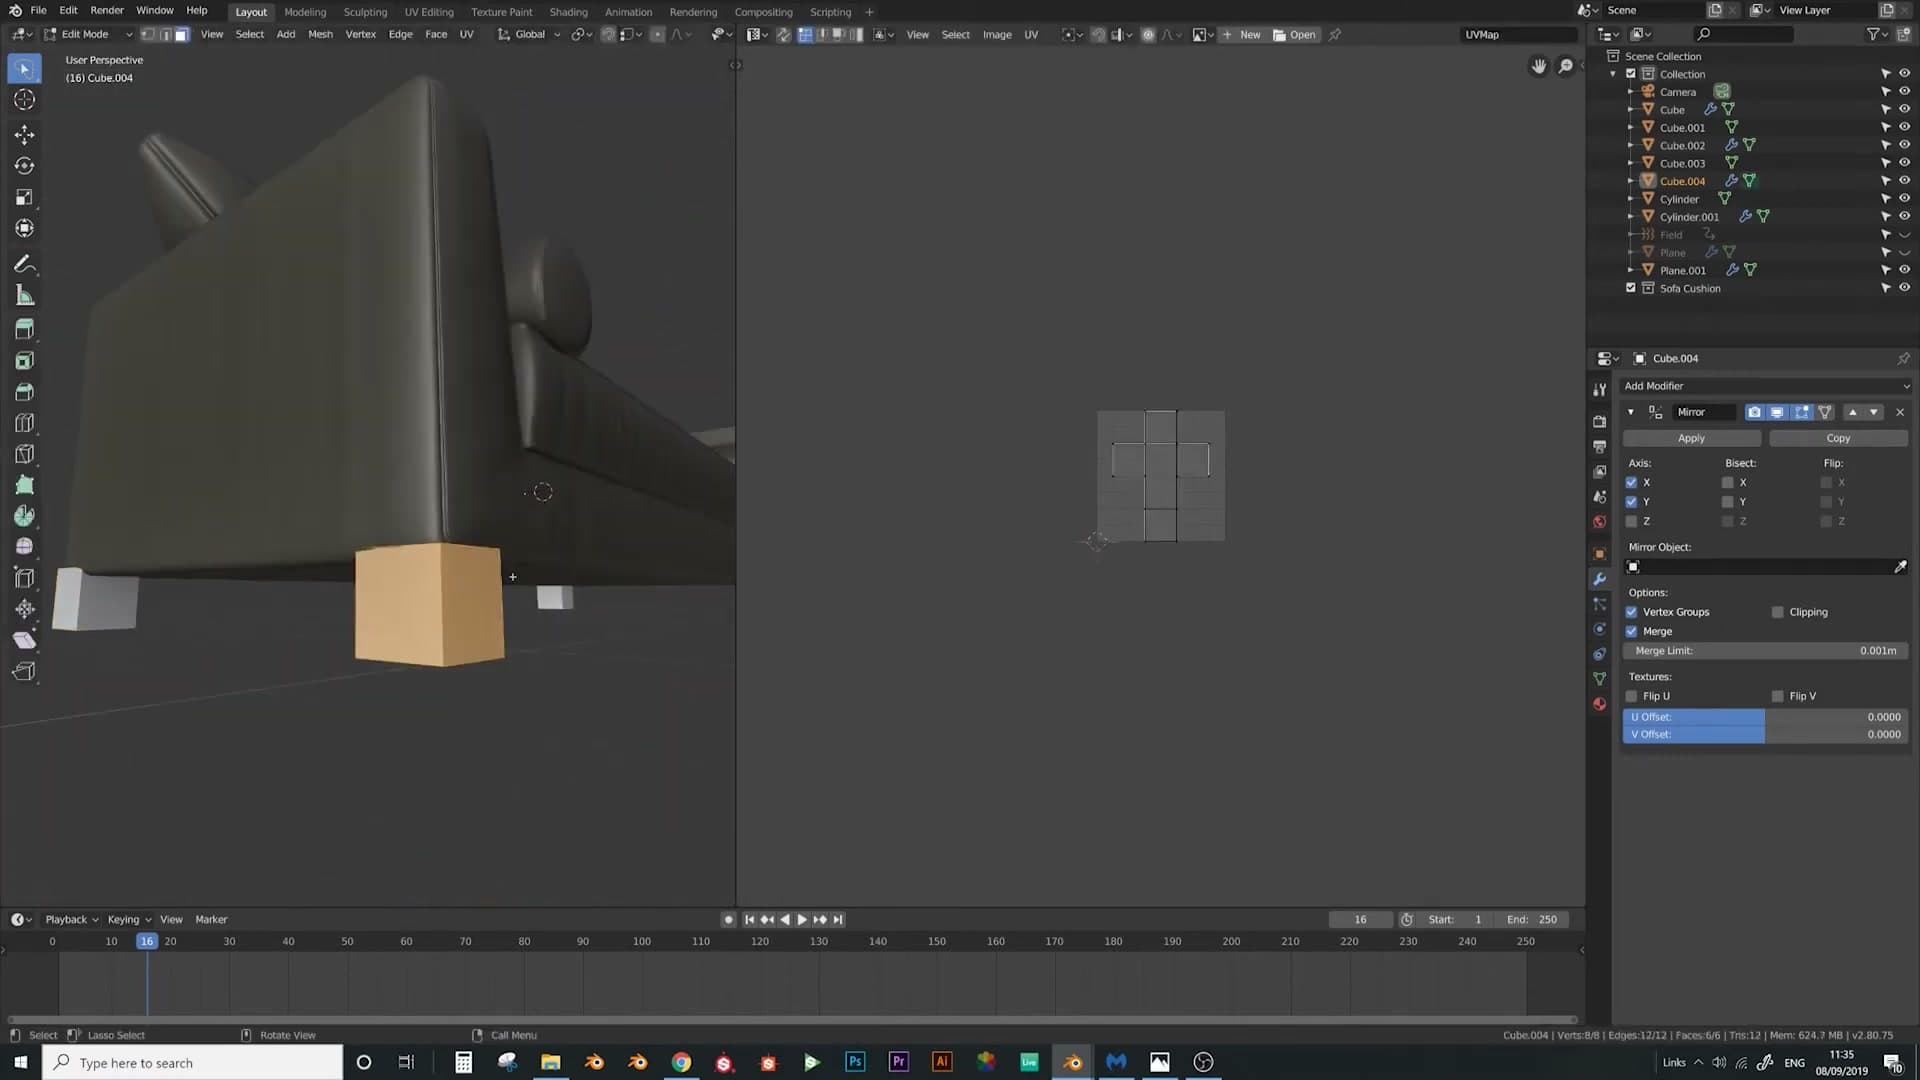
Turn off proportional editing before you start nudging vertices, otherwise neighbouring edges will drift while you work. Then add a Mirror modifier so the leg you sculpt on this side is reflected to the other.
Drop to the bottom view and pull the leg outwards from the centre line until it sits roughly under the corner of the sofa. Hop back into object mode and slide the whole leg so it reads as centred against the sofa frame above it.
Shaping the outer leg profile
Still working from the bottom view, scale the leg inwards a touch and start dragging individual edges into the shape you want. The goal is to follow the corner of the sofa loosely: not a perfect rectangle, but a soft outline that hugs the body above it.
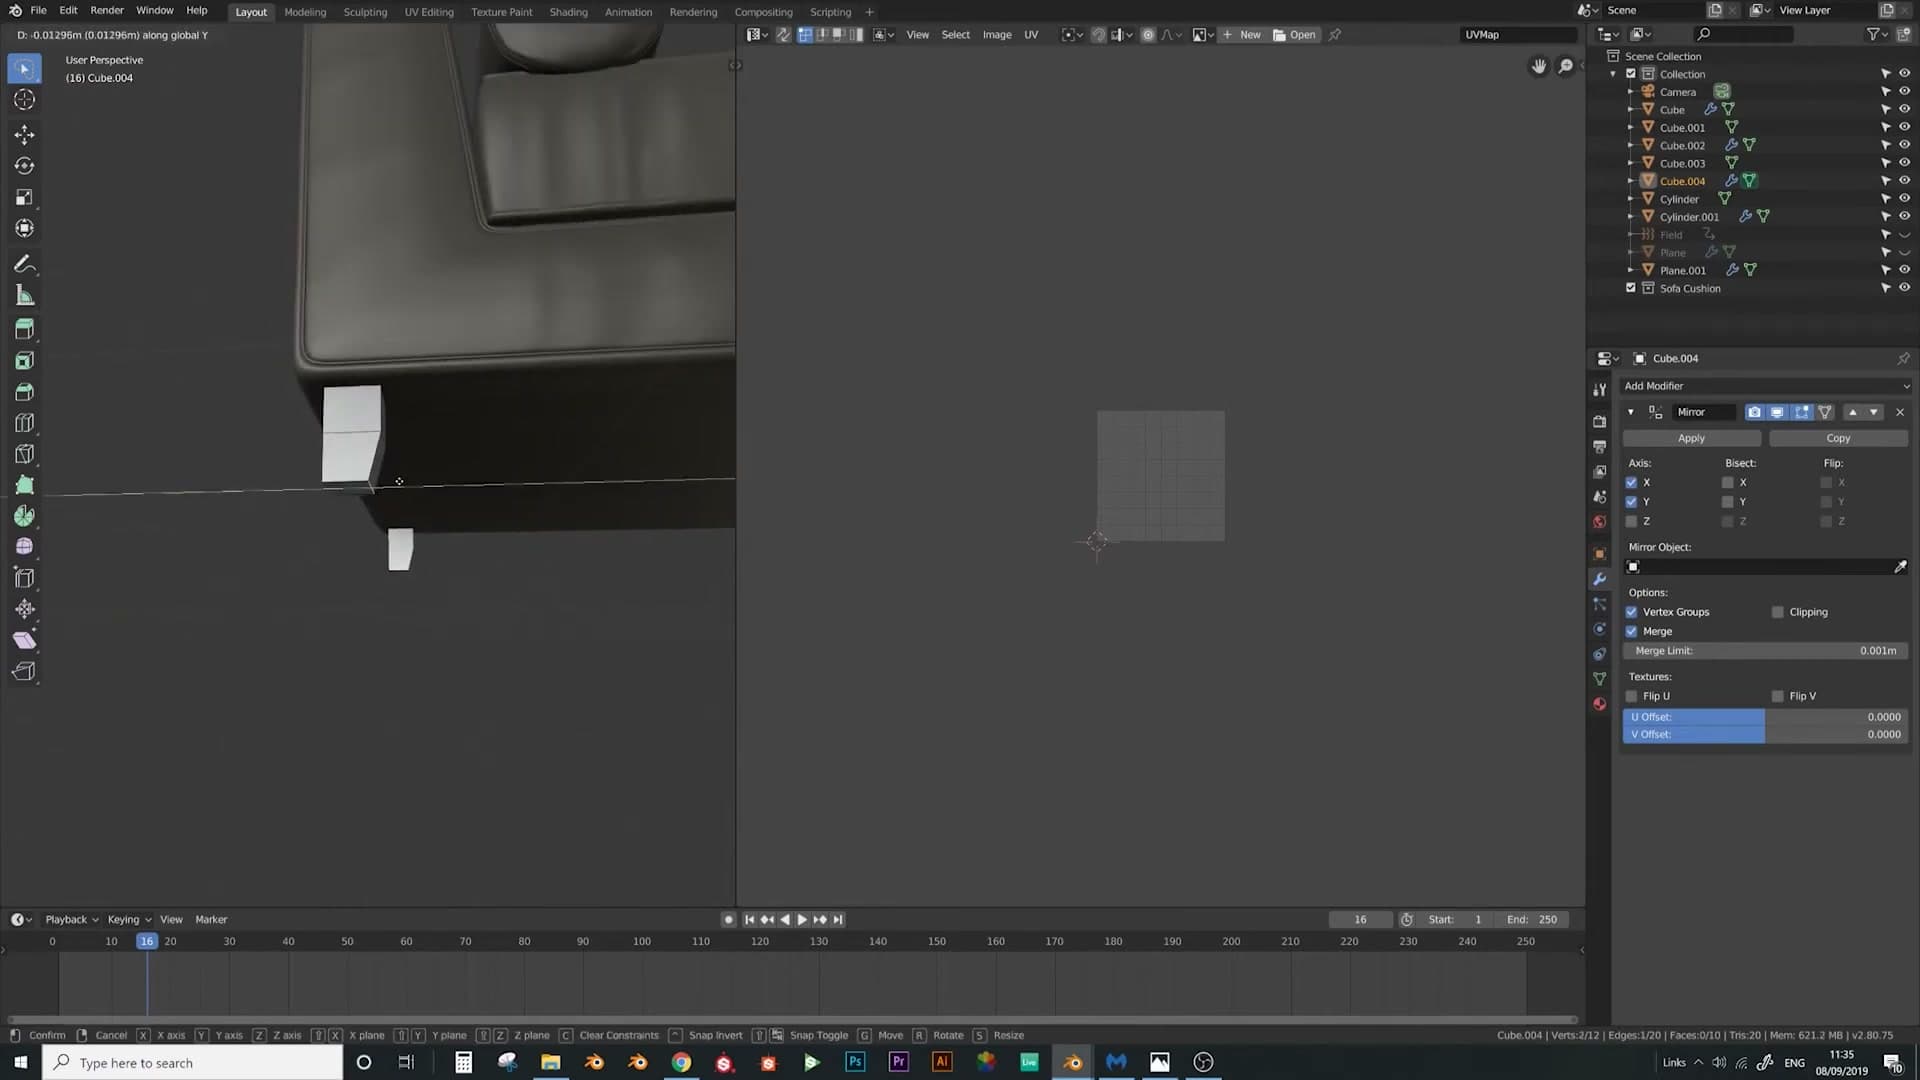
Pull one edge over, then the opposite edge, then bring the top edge down a little so the leg has some taper. Keep moving edges one at a time until the silhouette feels right from below. There is no exact number here, it is purely shape-by-eye.
Inset and extrude for the inner cut
Press I to inset a face on the inside of the leg. Make sure clipping is enabled in the inset options so the inner edge stays welded to the mirror line and does not punch through the centre.
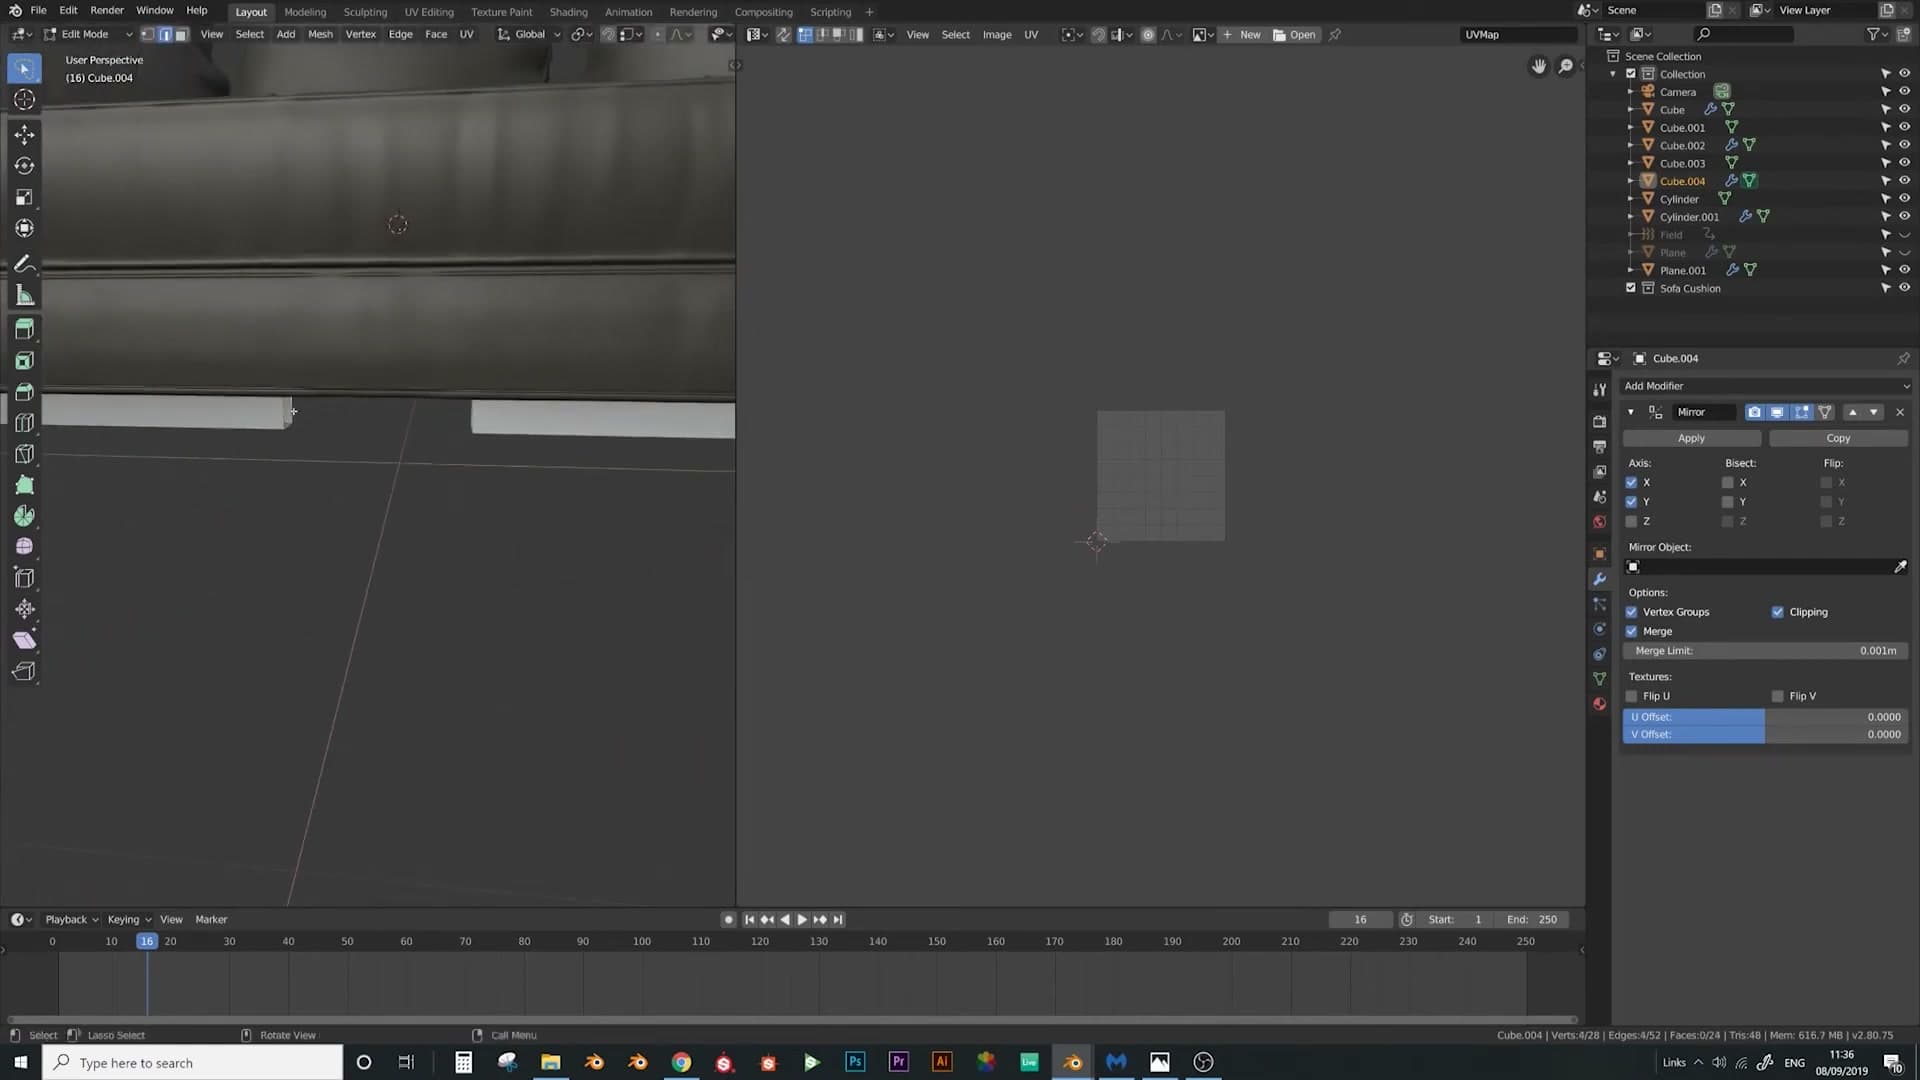
With the inset face still selected, press E to extrude, then delete the face this creates so the inside opens up. Grab the edge that is left and drag it over to shape the recessed cut.
Repeat the same move on the matching side: extrude, delete the new face, then nudge the remaining edge into place. The result is a leg that reads as a solid outer wall with a hollowed inner profile, the classic upholstered-furniture foot.
Bevel, UV seams and clean topology
Apply the scale before you add the bevel modifier, otherwise the bevel width will read unevenly across the leg's axes. Add a Bevel modifier and switch the limit method to Angle so only the hard outer corners round off and the flat faces stay clean.
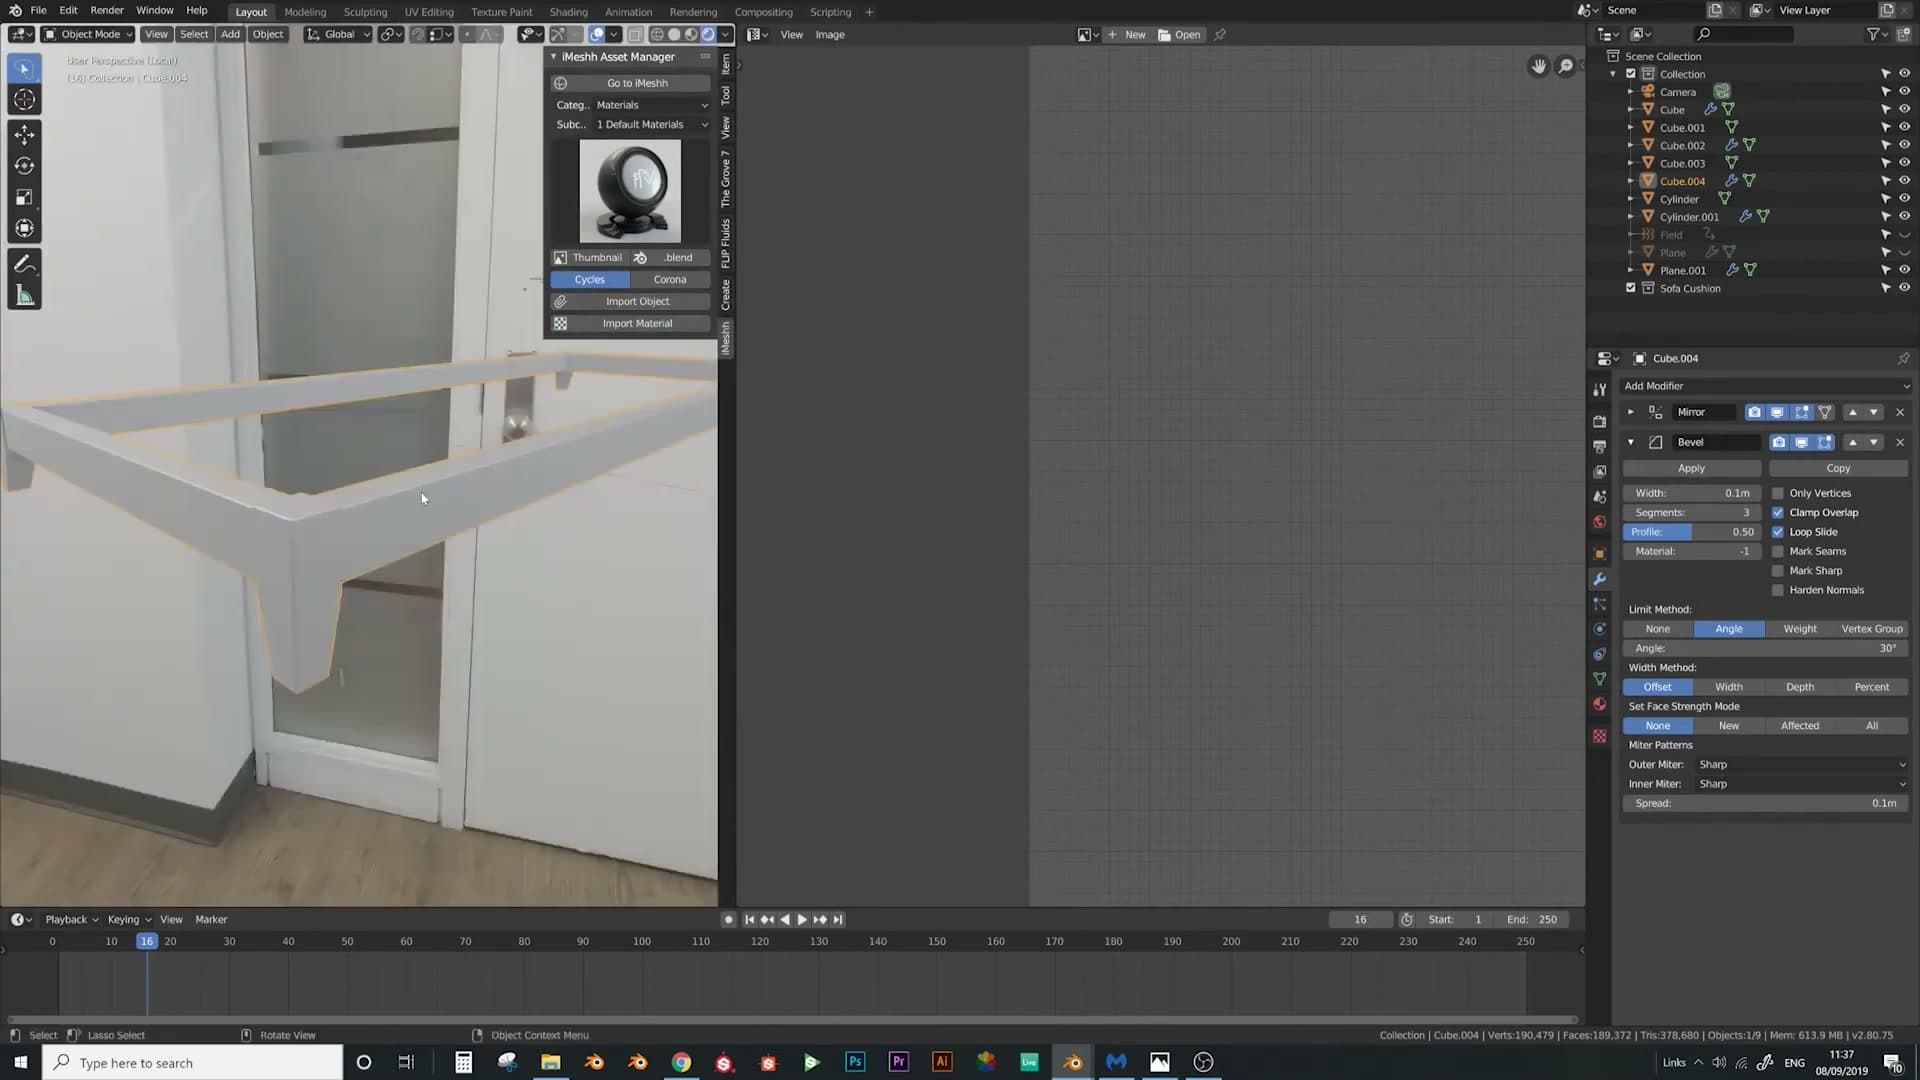
Now mark the UV seams. Temporarily disable the bevel display so you can see the underlying edges, then click along the seam edges one at a time: the corner where the inset meets the outer wall, the edge running across the top, and the edge running down the side of the leg. Together these split the leg into panels the unwrap can lay flat.
Re-enable the bevel once the seams are in. Then jump into the iMeshh Asset Manager, open Materials → Default Materials and drop a clear-coat plastic onto the leg as a placeholder shader so you can sanity-check the shape under light.
Check the leg from a few angles. If one face still reads oddly (usually a stretched or pinched UV island) that is the cue to mark one more seam along the offending edge and re-test. Once the legs sit cleanly under the sofa, the modelling pass for the frame is done.
Materials, camera and tufted buttons
Pull a clear-coat plastic shader from the iMeshh Asset Manager for the legs, frame the camera with walk navigation and add a row of tufted UV-sphere buttons.
Clear-coat plastic from the iMeshh Asset Manager
With the legs modelled and mirrored, open the iMeshh Asset Manager and grab the clear coat plastic shader from the default materials library, then drag it onto the leg in the viewport. Both mirrored legs pick up the material in one go because they share the same object data.
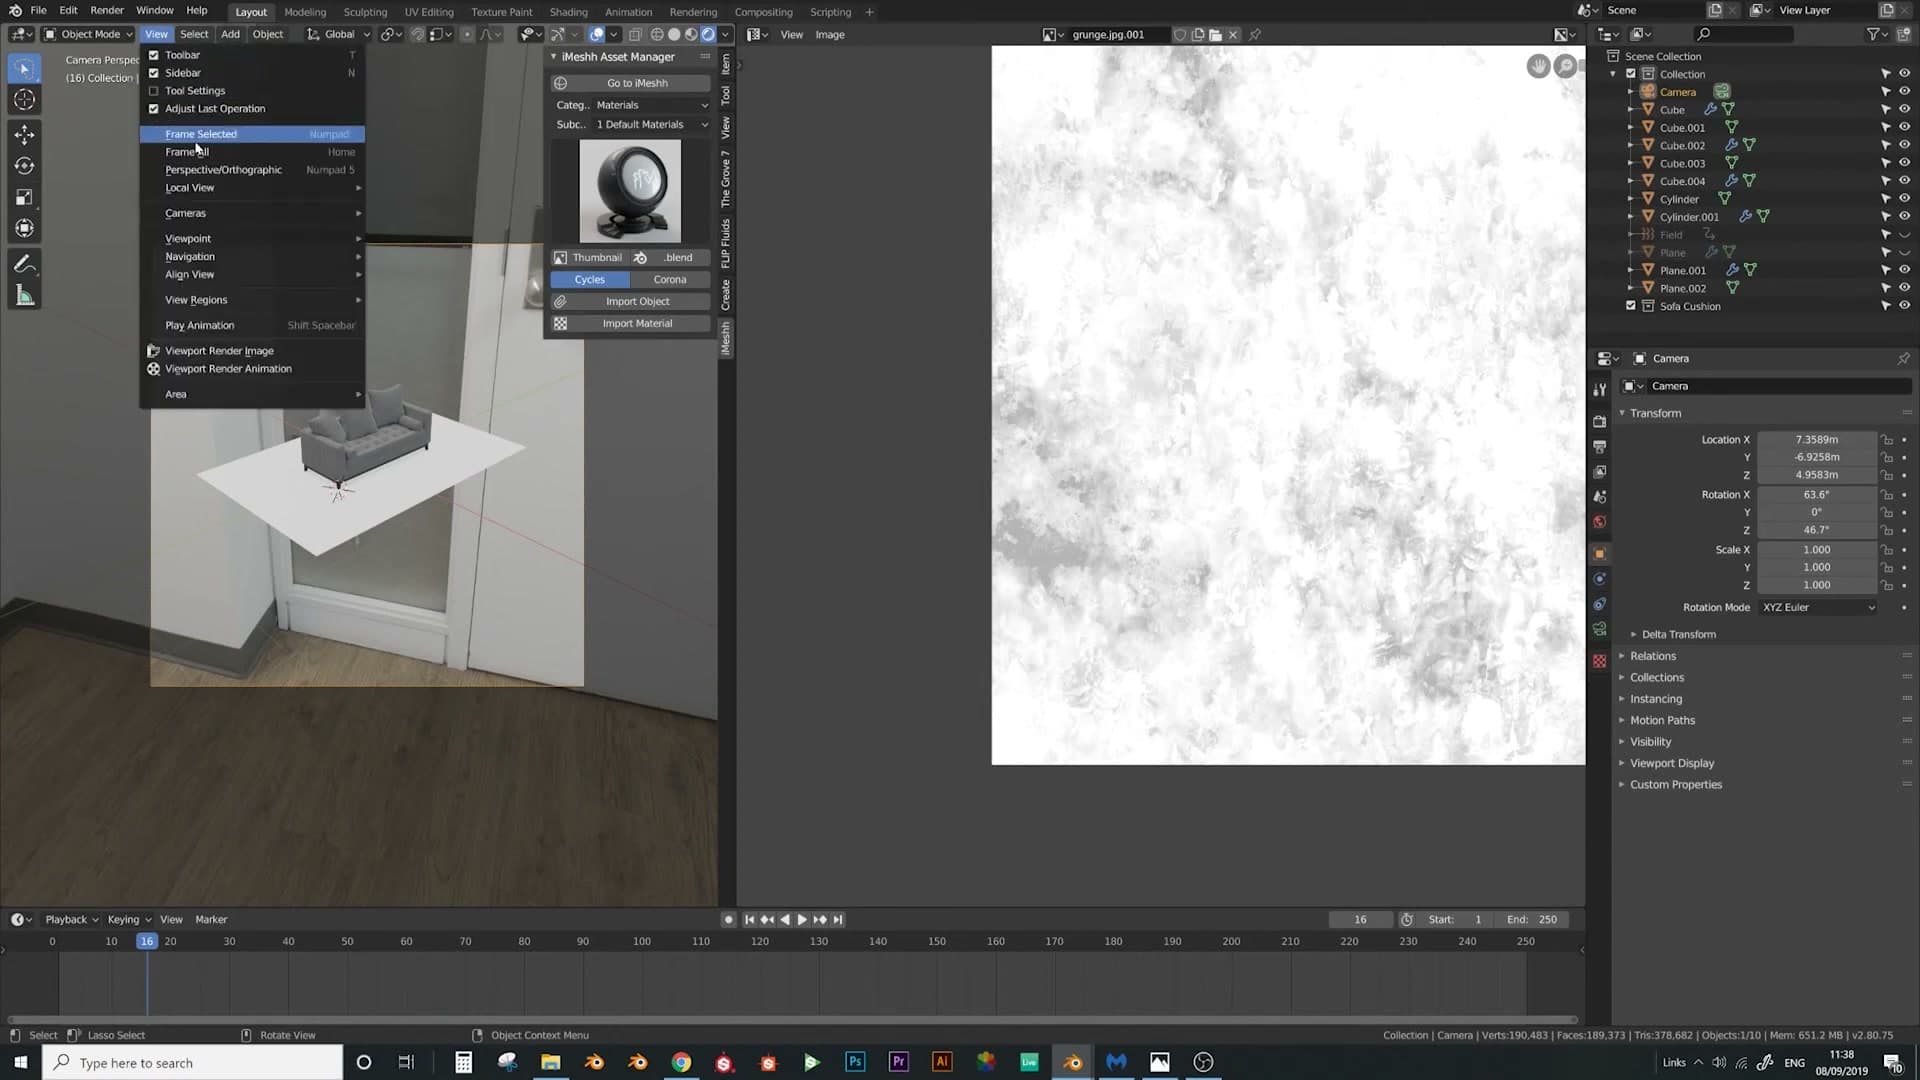
Clear coat is worth using on the legs because of how it behaves at grazing angles. View the leg from a high angle and the reflection ramps up noticeably, which is the look you want on moulded plastic feet rather than the flat diffuse you get from a generic plastic shader.
Before moving on, drop into edit mode on the leg and trace the perimeter loop. A small section of the bevelled seam goes missing along one edge here, so re-mark the loop along the affected edge so the bevel reads cleanly all the way round.
Camera with focal length 80 + walk navigation
Drop a ground plane in with Shift+A → Mesh → Plane and move it into position under the sofa so the legs have something to sit on. Then jump into camera view with Numpad 0 ready to frame the shot.
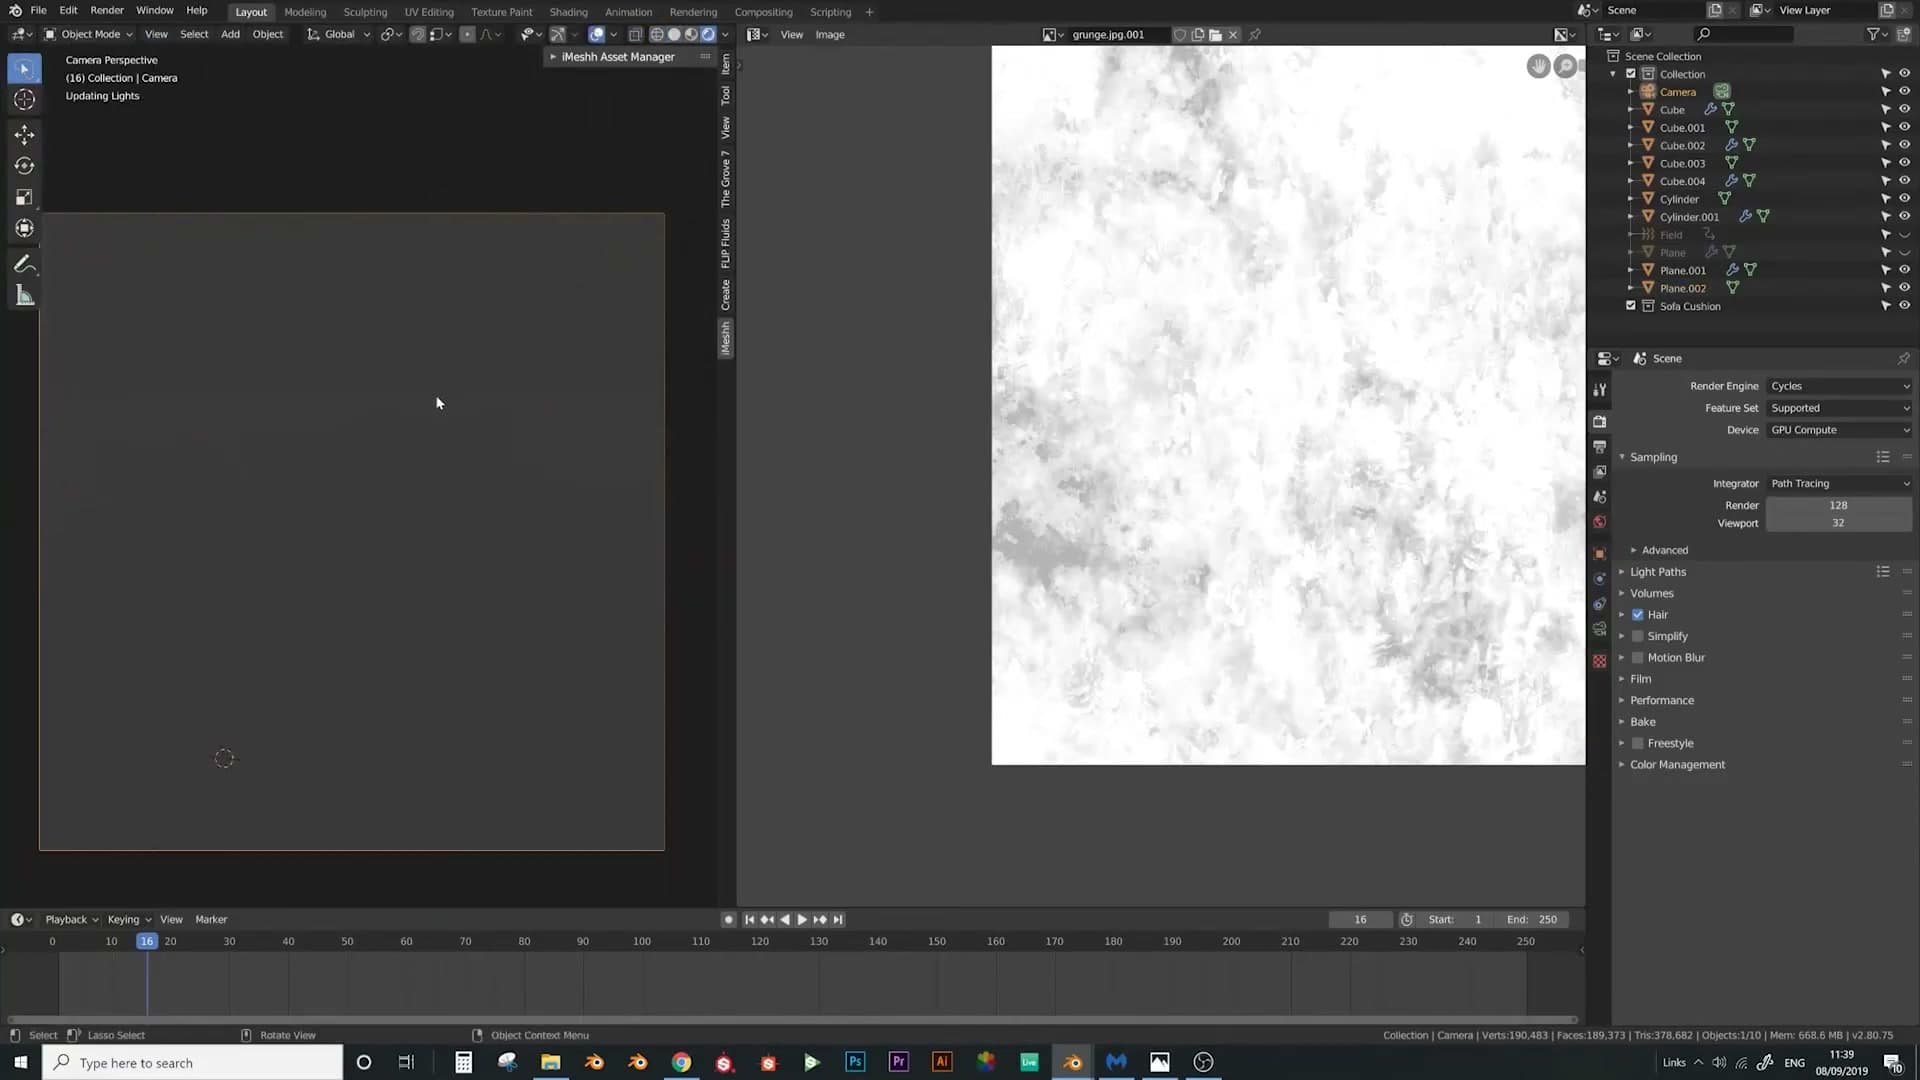
Select the camera and head to View → Navigation → Walk Navigation. The WASD keys now fly the camera through the scene exactly like a first-person game. Forward, back and strafe to nudge the camera into the angle you want on the sofa. Shift+F is the shortcut for the same operator if you prefer the keyboard to the menu.
Once you are happy with the position, jump to the camera data properties and set Focal Length to 80. The longer lens flattens perspective and tightens the framing on the sofa, which reads more like a product shot than the wide, distorted 50 mm default.
UV sphere buttons duplicated across the seat
Tufted buttons are quick. Add a UV sphere with Shift+A → Mesh → UV Sphere, then scale it down and press it slightly into the cushion so the bottom half disappears into the fabric. That sunken look is what sells the tufted effect without any extra geometry.
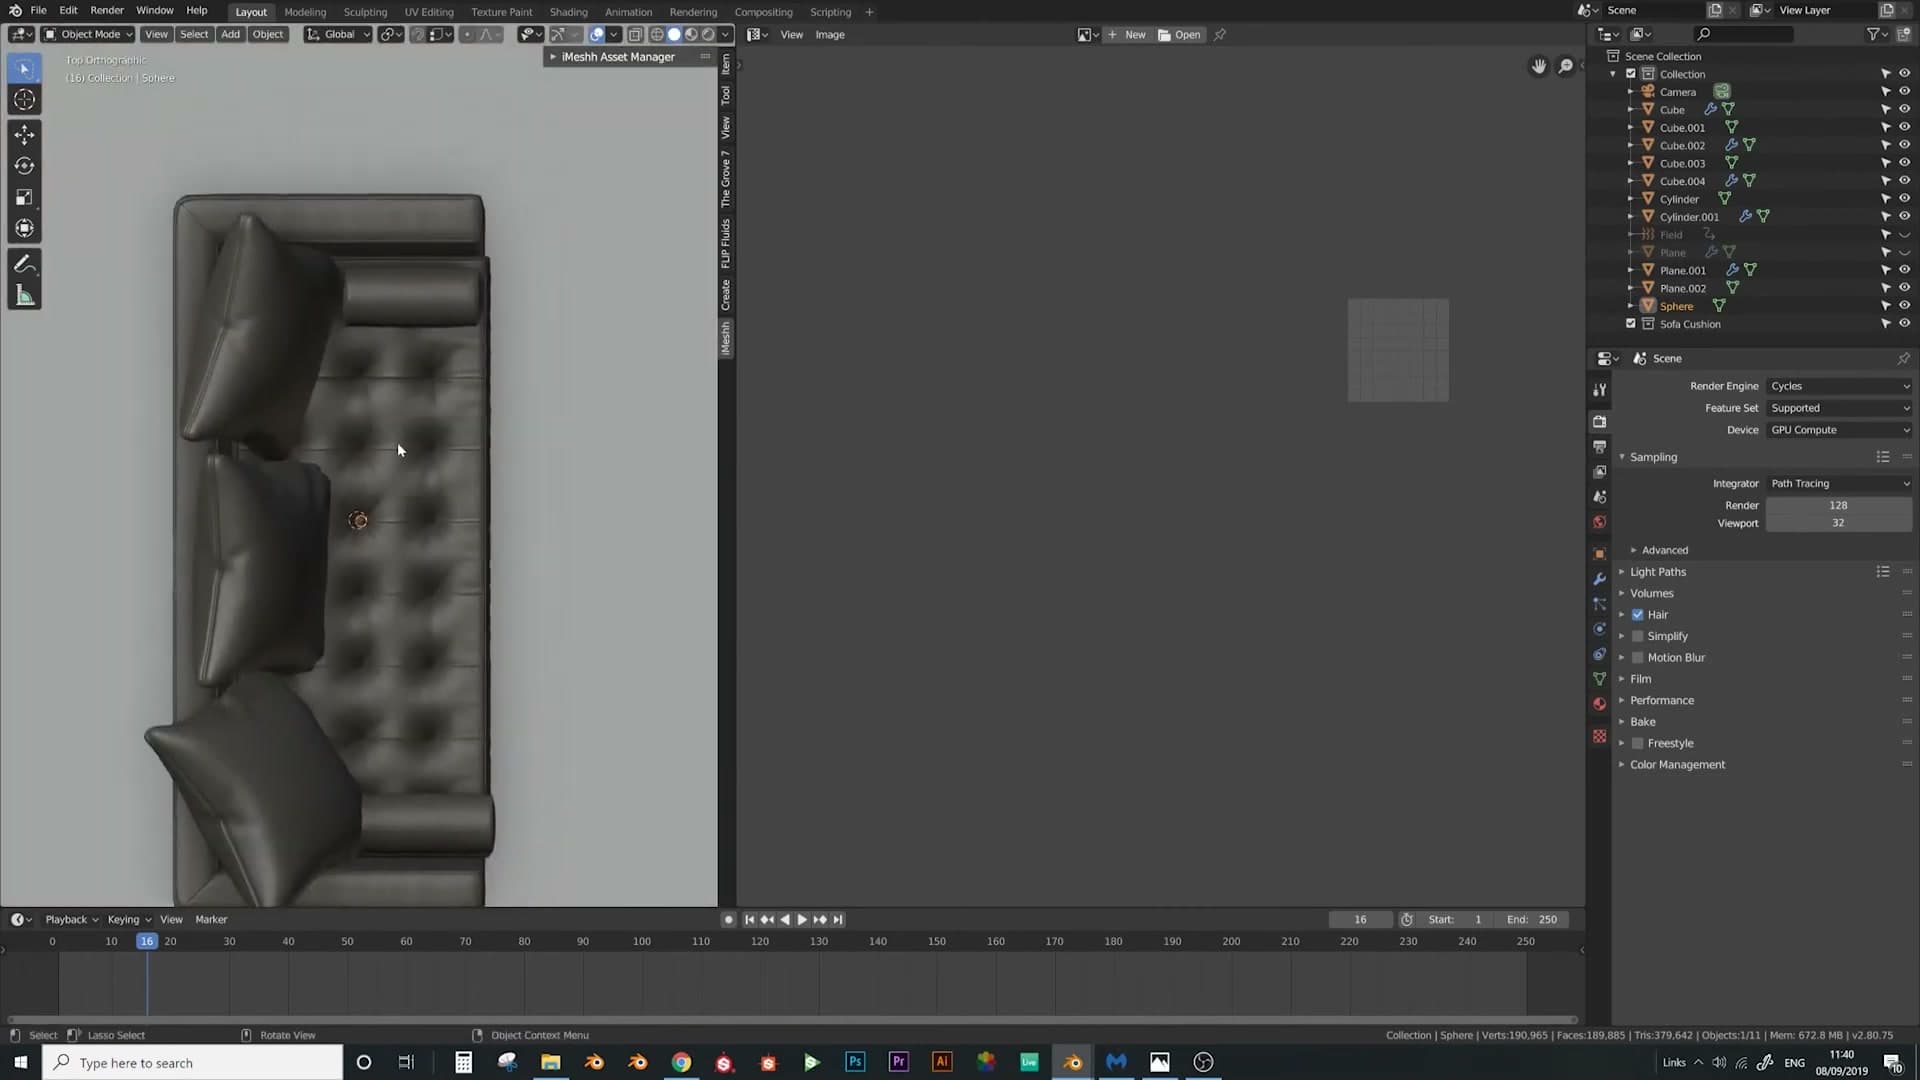
Borrow a material from one of the existing objects so the button picks up the same fabric shader, then right-click and choose Shade Smooth so the sphere reads as a soft, rounded button rather than a faceted ball.
With the first button placed, drop into edit mode on the sphere and duplicate it along the seam line of the cushion. Space the copies evenly across the seat so each one lines up with the tucked piping you ran earlier, giving you a continuous row of buttons across the cushion.
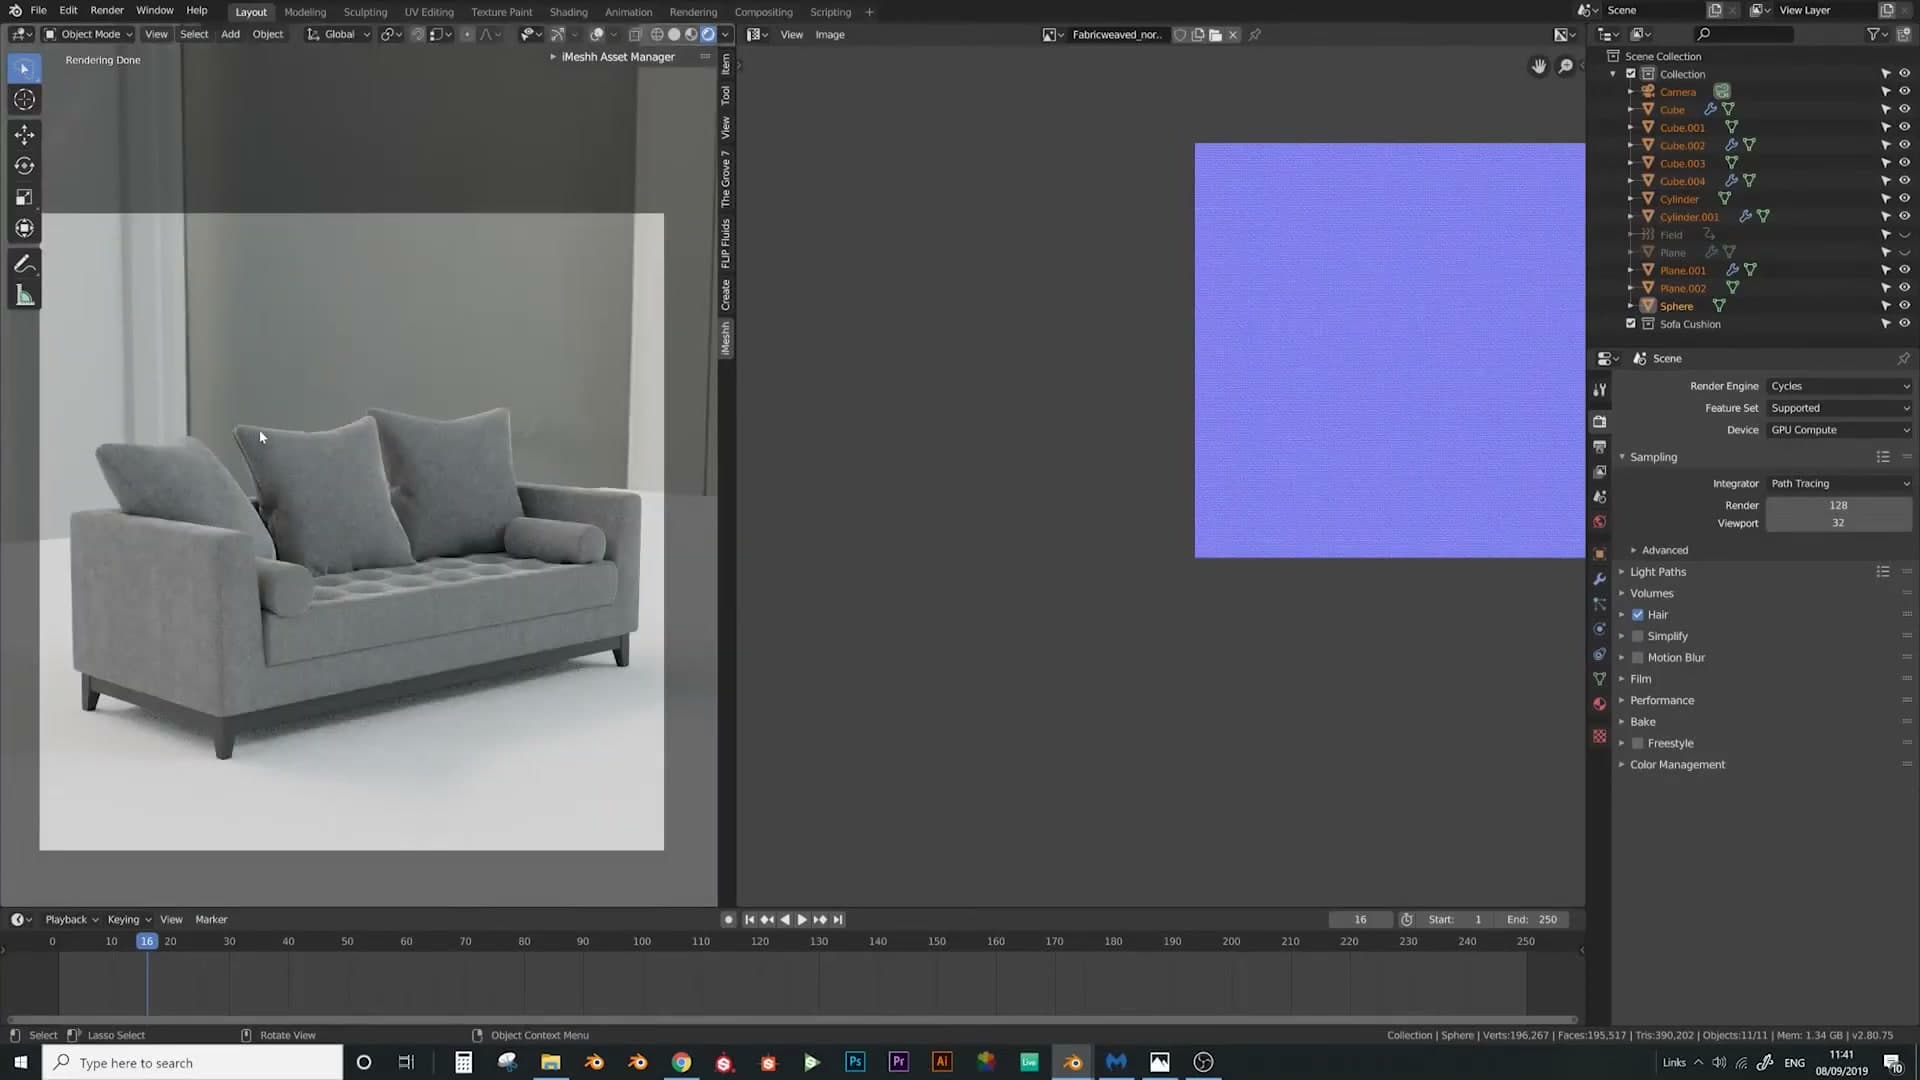
Switch into rendered viewport to check the result. If the buttons read too prominently against the fabric, scale them down a touch. They should sit as a subtle detail along the seam rather than dominate the cushion.
Sculpting wrinkles with the crease brush
Load a creasing texture into a sculpt brush and click across each cushion to fake fabric folds without re-running the cloth sim, then fix any UVs that broke when subsurf was applied late.
Loading a creasing texture into the Draw brush
The cloth sim gives you the big folds, but real fabric has dozens of finer creases that no simulator will produce reliably. The fastest way to fake them is with a sculpt brush driven by a creasing texture. One click drops in a credible fold, and you never have to re-run the sim.
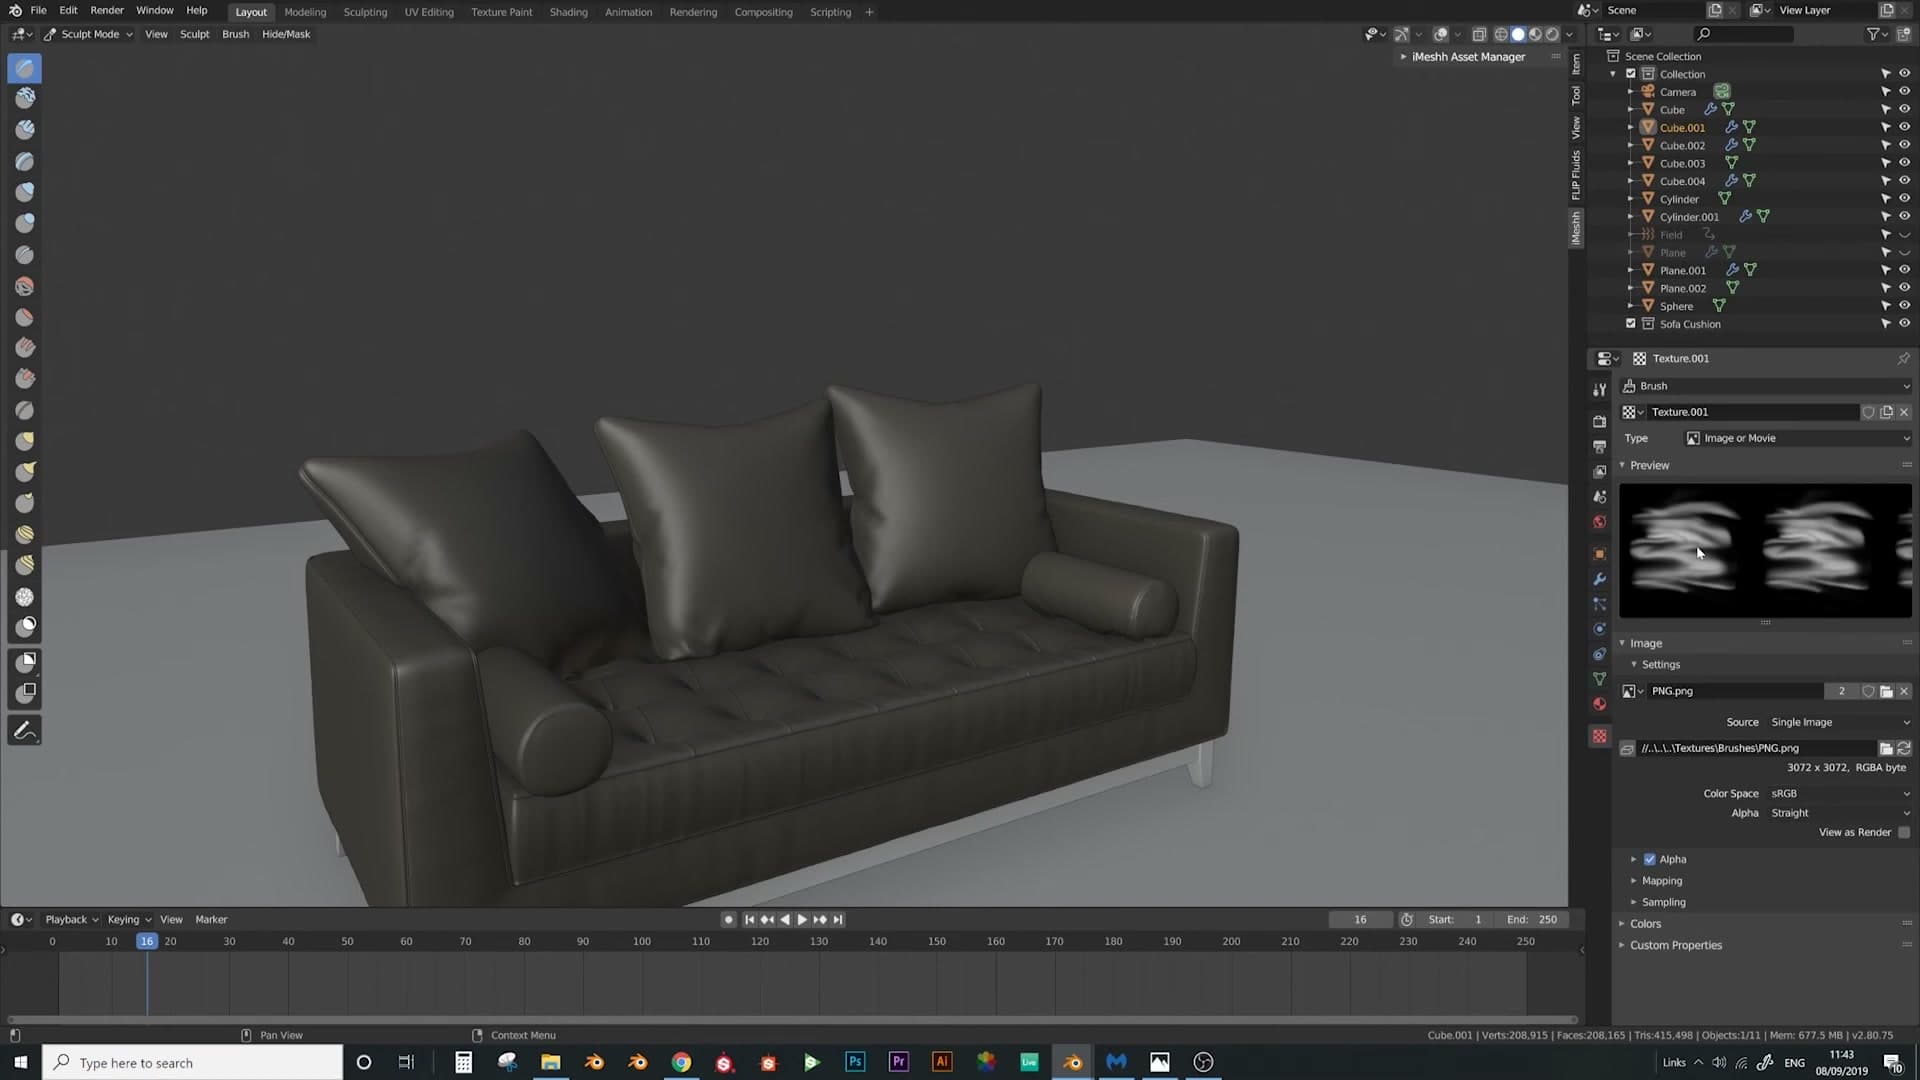
Before you start, add another subdivision surface to whichever cushion looks a bit ragged along its seam. The extra density gives the brush something to push against. Once the surface is smooth, select the cushion and switch into Sculpt Mode.
Open the brush Texture panel and load a creasing texture into the texture slot. With the texture assigned to the brush, switch to the Draw brush. You're now painting creases rather than displacing geometry generically.
Clicking creases across every cushion
From here it's just clicking. Move around the cushion and tap the surface anywhere a fold would naturally appear: along the front edge, around the seams, wherever the cloth would gather. Each click stamps the texture into the mesh and gives you an instant wrinkle.
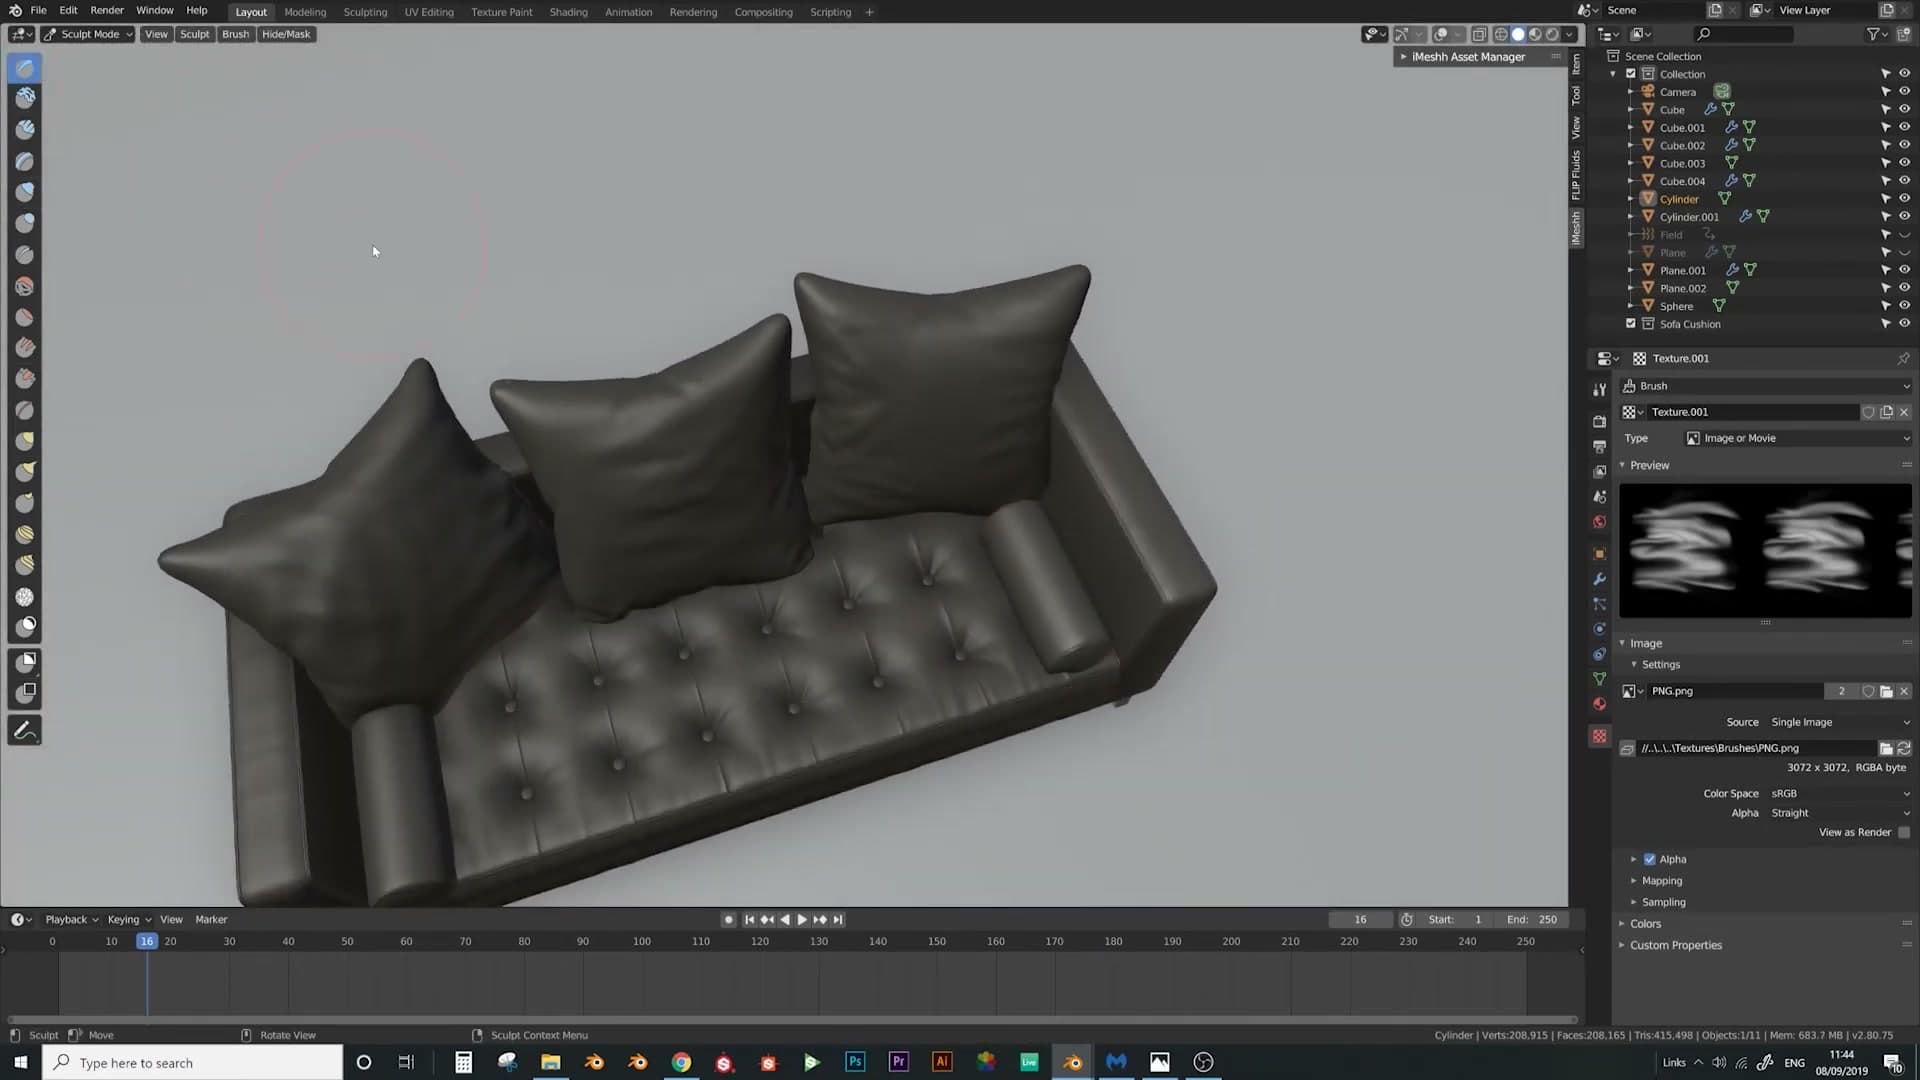
Repeat on every cushion in turn. Pick the next object, switch to Sculpt Mode, and orbit to a fresh angle before clicking. Varying the viewing angle stops every cushion from creasing in the same direction. The bolsters and seat pads all benefit from the same treatment.
If a stamp lands too heavy, dial the brush Strength down a notch and click again. Heavier strength on one cushion, lighter on another, helps each piece read as its own bit of fabric rather than a copy-paste.
The catch with this brush technique is that it needs geometry to work with. Low-poly cushions won't take the detail. The texture has nowhere to bite into. Keep this trick for the hero cushions where the subsurf has given you a dense enough surface to sculpt on.
Apply mirror + subsurf then re-unwrap
Before you call the cushion done, flip into Eevee and switch the viewport to Rendered shading. If some of the seam edges look wrong (stretched, mis-aligned, or showing visible texture breaks) it's because the subdivision surface was added after you unwrapped the UVs, so the smoothed geometry no longer matches the UV layout you generated earlier.
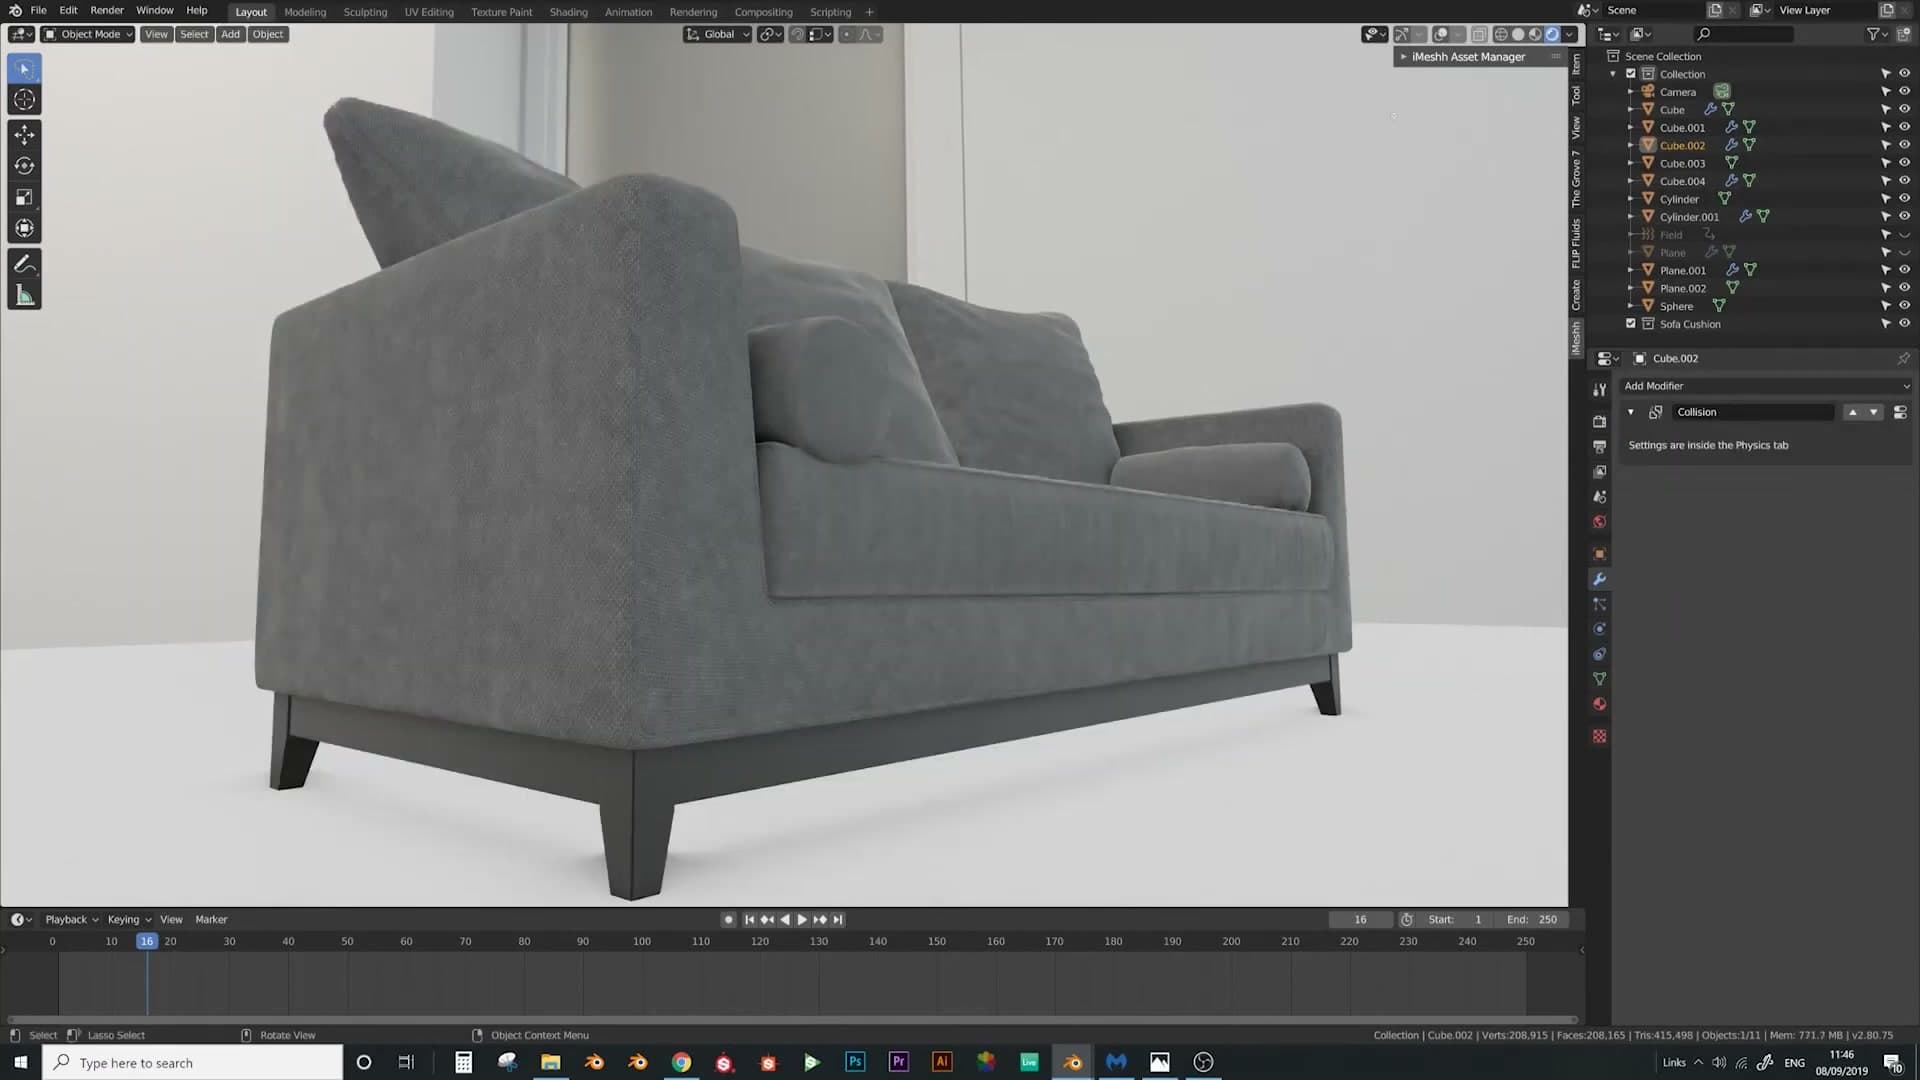
The fix is to commit the modifier stack and re-unwrap. Apply the Mirror modifier, then apply the Subdivision Surface modifier so the smoothed mesh becomes the real geometry. Drop into Edit Mode, select everything with A, and run Unwrap again to regenerate a clean UV map across the finalised surface.
With the UVs rebuilt against the actual rendered geometry, the texture seams disappear and the cushion is ready to ship into the final scene.
Accent cushions, infinity plane and lighting
Drop in two smaller accent cushions, build the infinity-plane studio backdrop and finish with a back rim light, two side lights and a low HDRI.
Two smaller cushions for the front corners
With the main cushions in place, one final pass fills out the corners. Duplicate the front cushion twice, scale each copy down a touch and slide one to either end of the sofa. The seat now reads as a fully dressed piece of furniture rather than three lonely cushions floating in the middle.
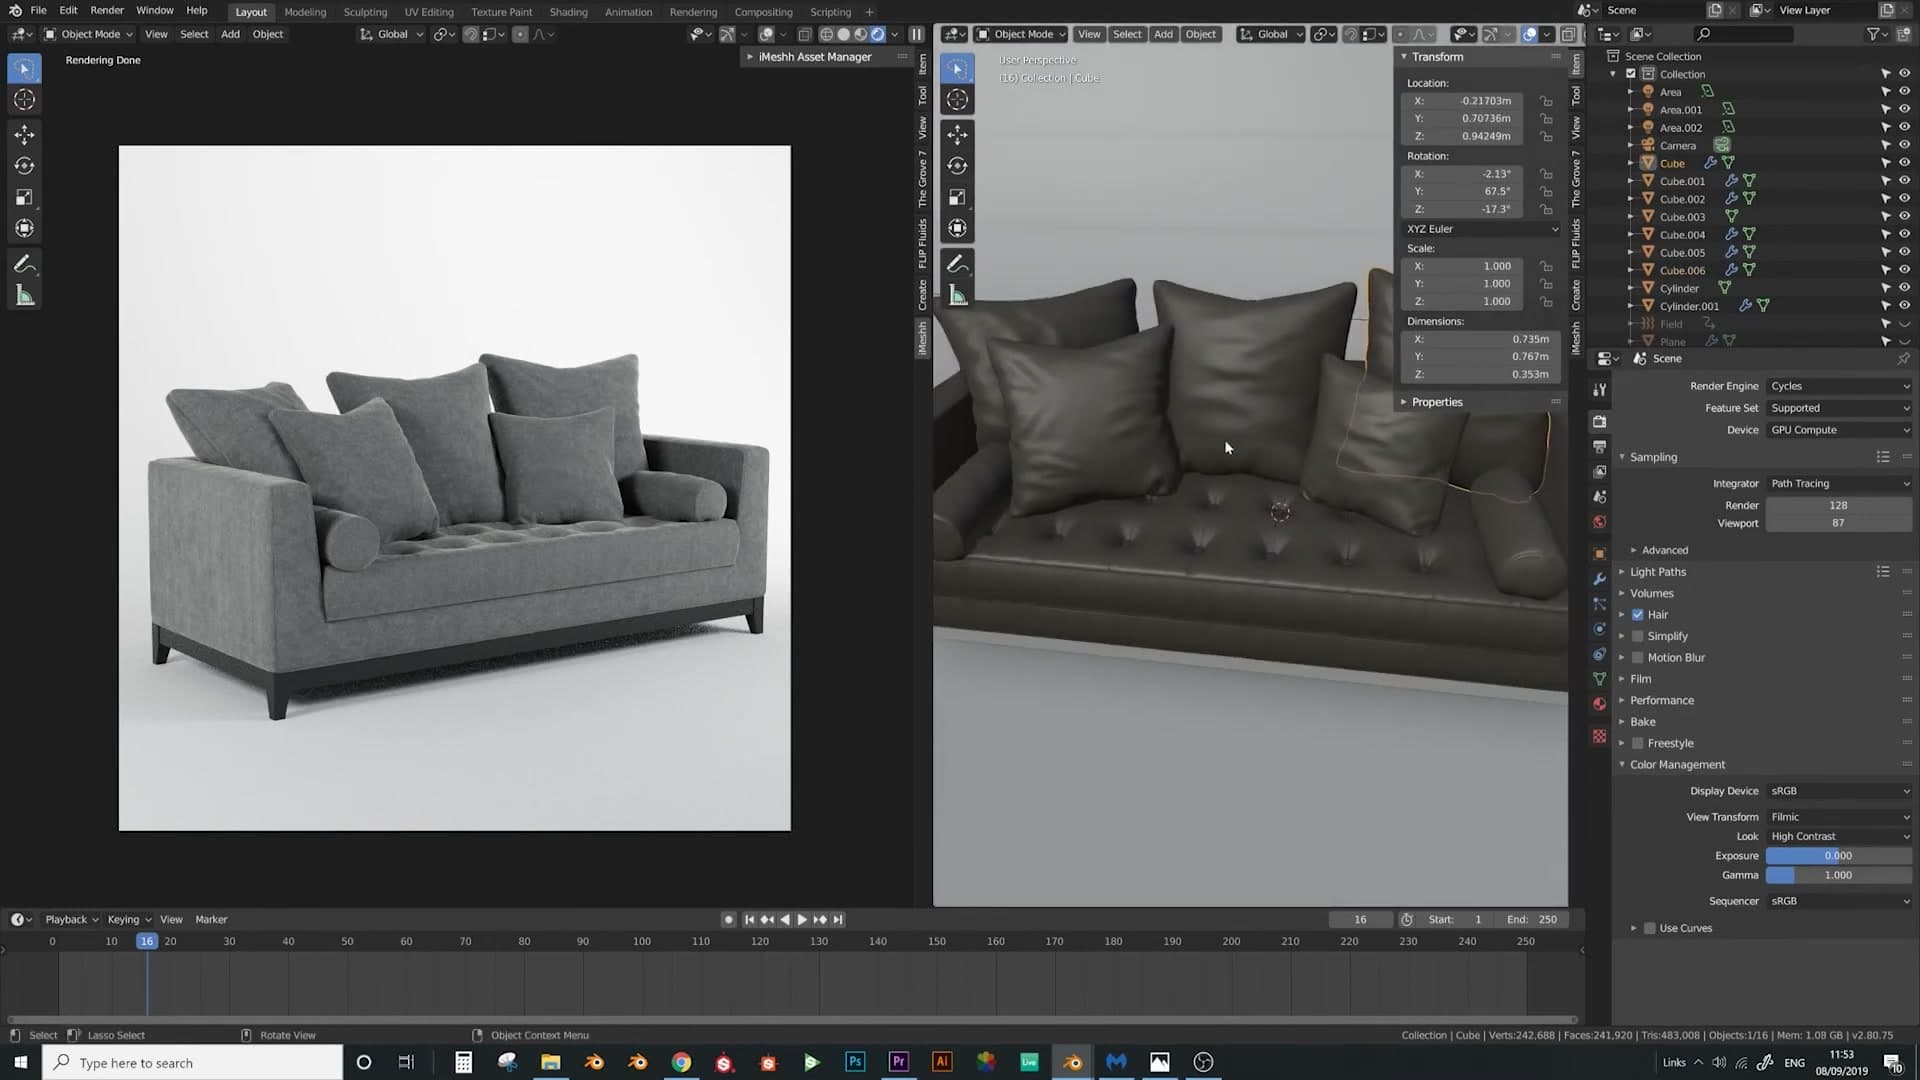
These smaller accents are also a good place to vary the look. Assign different materials to them so the colour or weave shifts from cushion to cushion instead of repeating the same fabric across the whole sofa.
Infinity plane backdrop + three-point lighting
For the hero shot, drop the sofa onto an infinity plane. Start with a basic plane, add four loop cuts running across it and apply a subdivision surface modifier. The subsurf rounds the cuts into a smooth floor-to-wall sweep so there is no visible seam where the ground meets the backdrop.
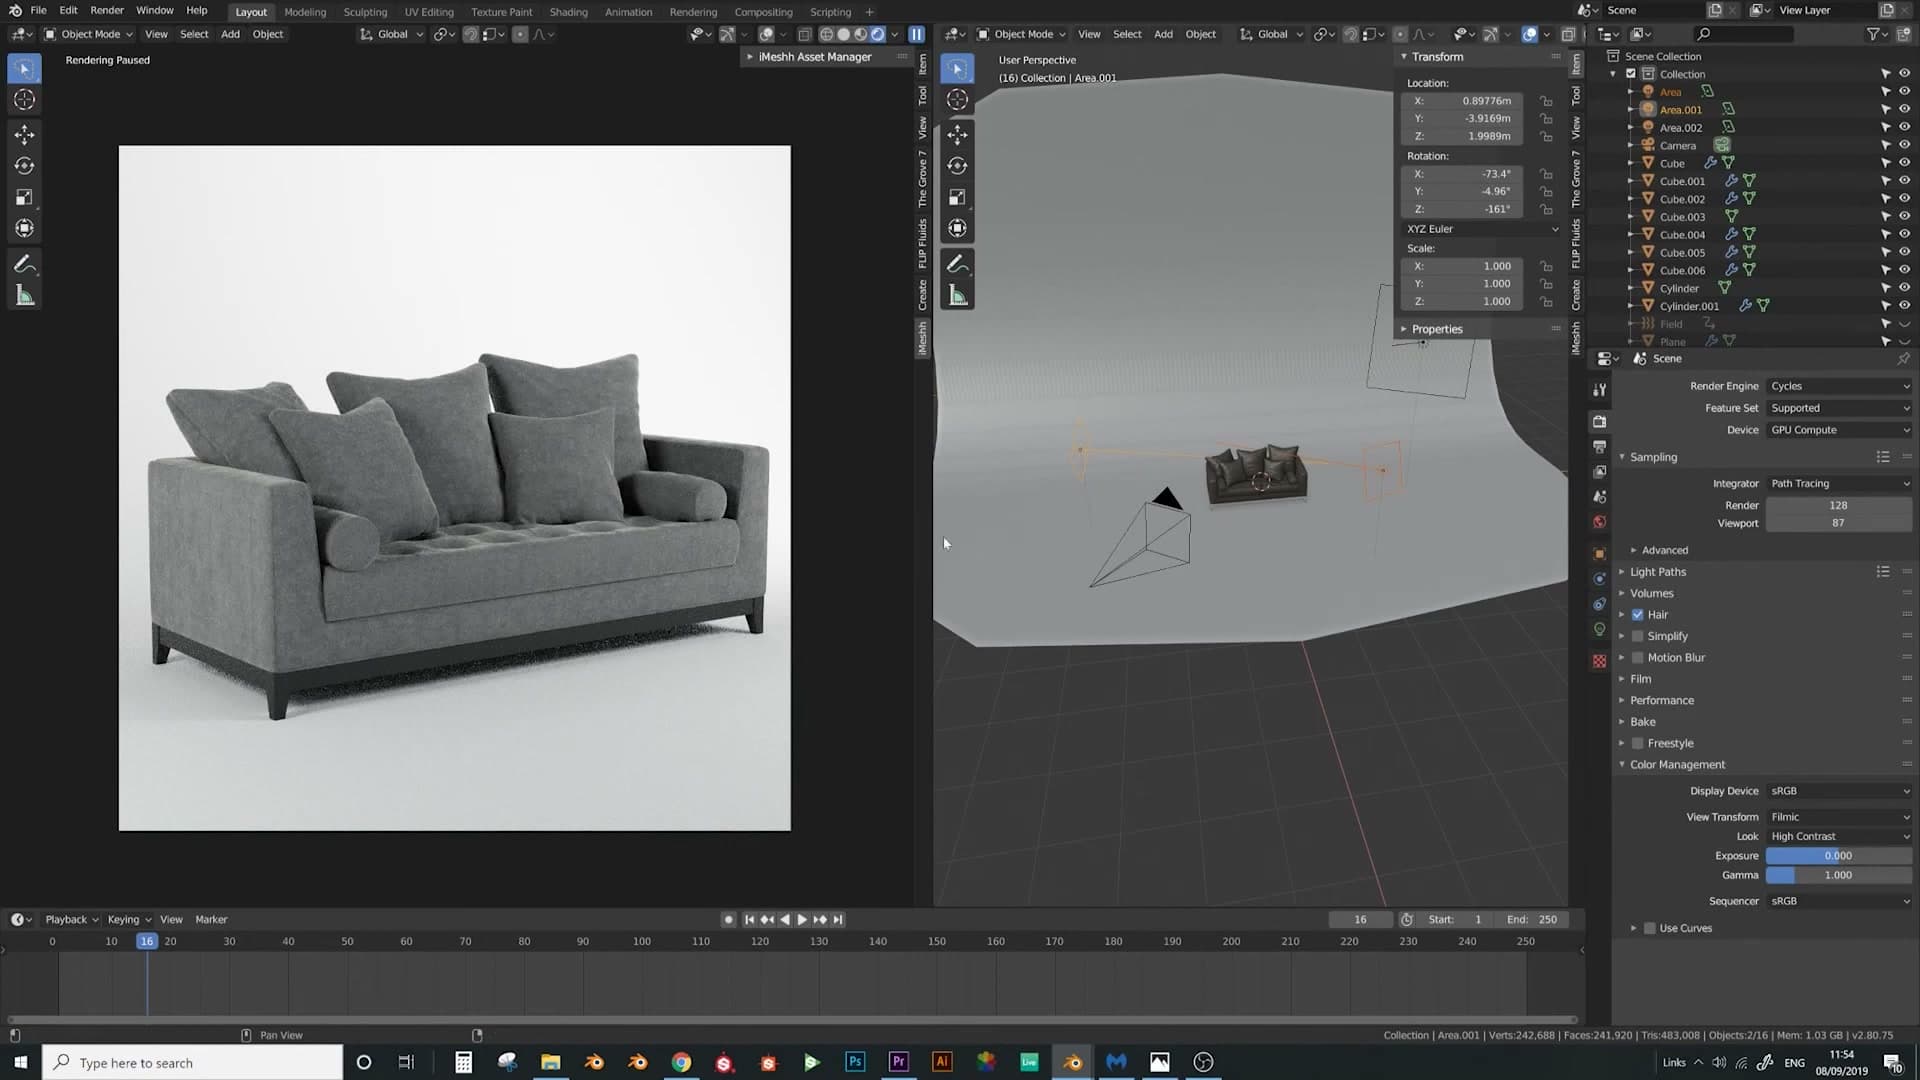
Lighting is a simple three-light setup with an HDRI for fill. Aim a powerful light at the backdrop directly behind the sofa to push a soft glow up the curve, then add one light on each side to wrap light around the cushions and pick out the fabric folds.
Finally, turn the world HDRI on at a low strength. It is not doing the heavy lifting here. The three artificial lights are. But it adds a layer of background colour and ambient noise that stops the shot from feeling sterile. That is the finished sofa you saw at the very start of the tutorial.
Tools and credits
Everything mentioned in this tutorial, with links.
- Blender (the renderer this entire build runs in).
- iMeshh (studio platform: project management, client review, asset library and invoicing). The asset library used in this tutorial is included with every iMeshh Pro plan.
- Poly Haven (free CC0 textures and HDRIs).
Pillar guide: Animation hub