Why cloth simulation beats soft body for animation
The case for adding physics to architectural walkthroughs, and why cloth with internal springs is a more reliable hero-shot tool than soft body for use cases like a flamingo float landing on water.
Why archviz walkthroughs need physics moments
This is a soft body tutorial, except it doesn't use Blender's soft body solver at all. It uses cloth, with internal springs enabled, and for the kind of hero moment you'd drop into an architectural walkthrough it works better than the dedicated soft body modifier.
If you work in archviz, you've probably skipped over Blender's simulation tools entirely. Most people in this space get very good at lighting, rendering and camera composition, but sculpting and physics rarely come up because there's rarely an obvious need. The result is that the same kind of walkthrough keeps appearing: a slow camera move through a bedroom, a bathroom or a garden, some nice music underneath, and that's the whole shot.
A small physics moment is what lifts a walkthrough out of that loop. Something floating on the water as the camera drifts past. A teddy bear sat on a shelf that topples off and bounces on the floor as you walk through the bedroom. Little touches like that add life to an otherwise static scene and give the viewer something to follow, and they're worth learning the simulation tools for even if you only ever use them as set dressing.
Cloth with internal springs as a soft body replacement
So why not just use soft body? Two reasons. For this kind of shot it was noticeably slower to solve, and far more janky. The simulation would blow up and the object would simply disappear mid-bake more times than was reasonable. After enough of that, I dropped soft body entirely and reached for cloth with Internal Springs instead.
With springs enabled, cloth behaves essentially like a soft body. There are a few things it can't do that the dedicated soft body solver can, but for the use case in this tutorial, a flamingo float landing on water, cloth handled it perfectly and without the constant blow-ups.
Prepare the flamingo asset
Append the free flamingo from the iMeshh Asset Manager, strip its modifiers, join the handles to the body and separate the wings into their own objects ready for simulation.
Appending the free flamingo from the asset library
Open the iMeshh Asset Manager and type Flamingo into the search field. Several variants will appear in the results. The one you want is labelled free, so you can follow along without a subscription. Click download, then append the flamingo into your scene.
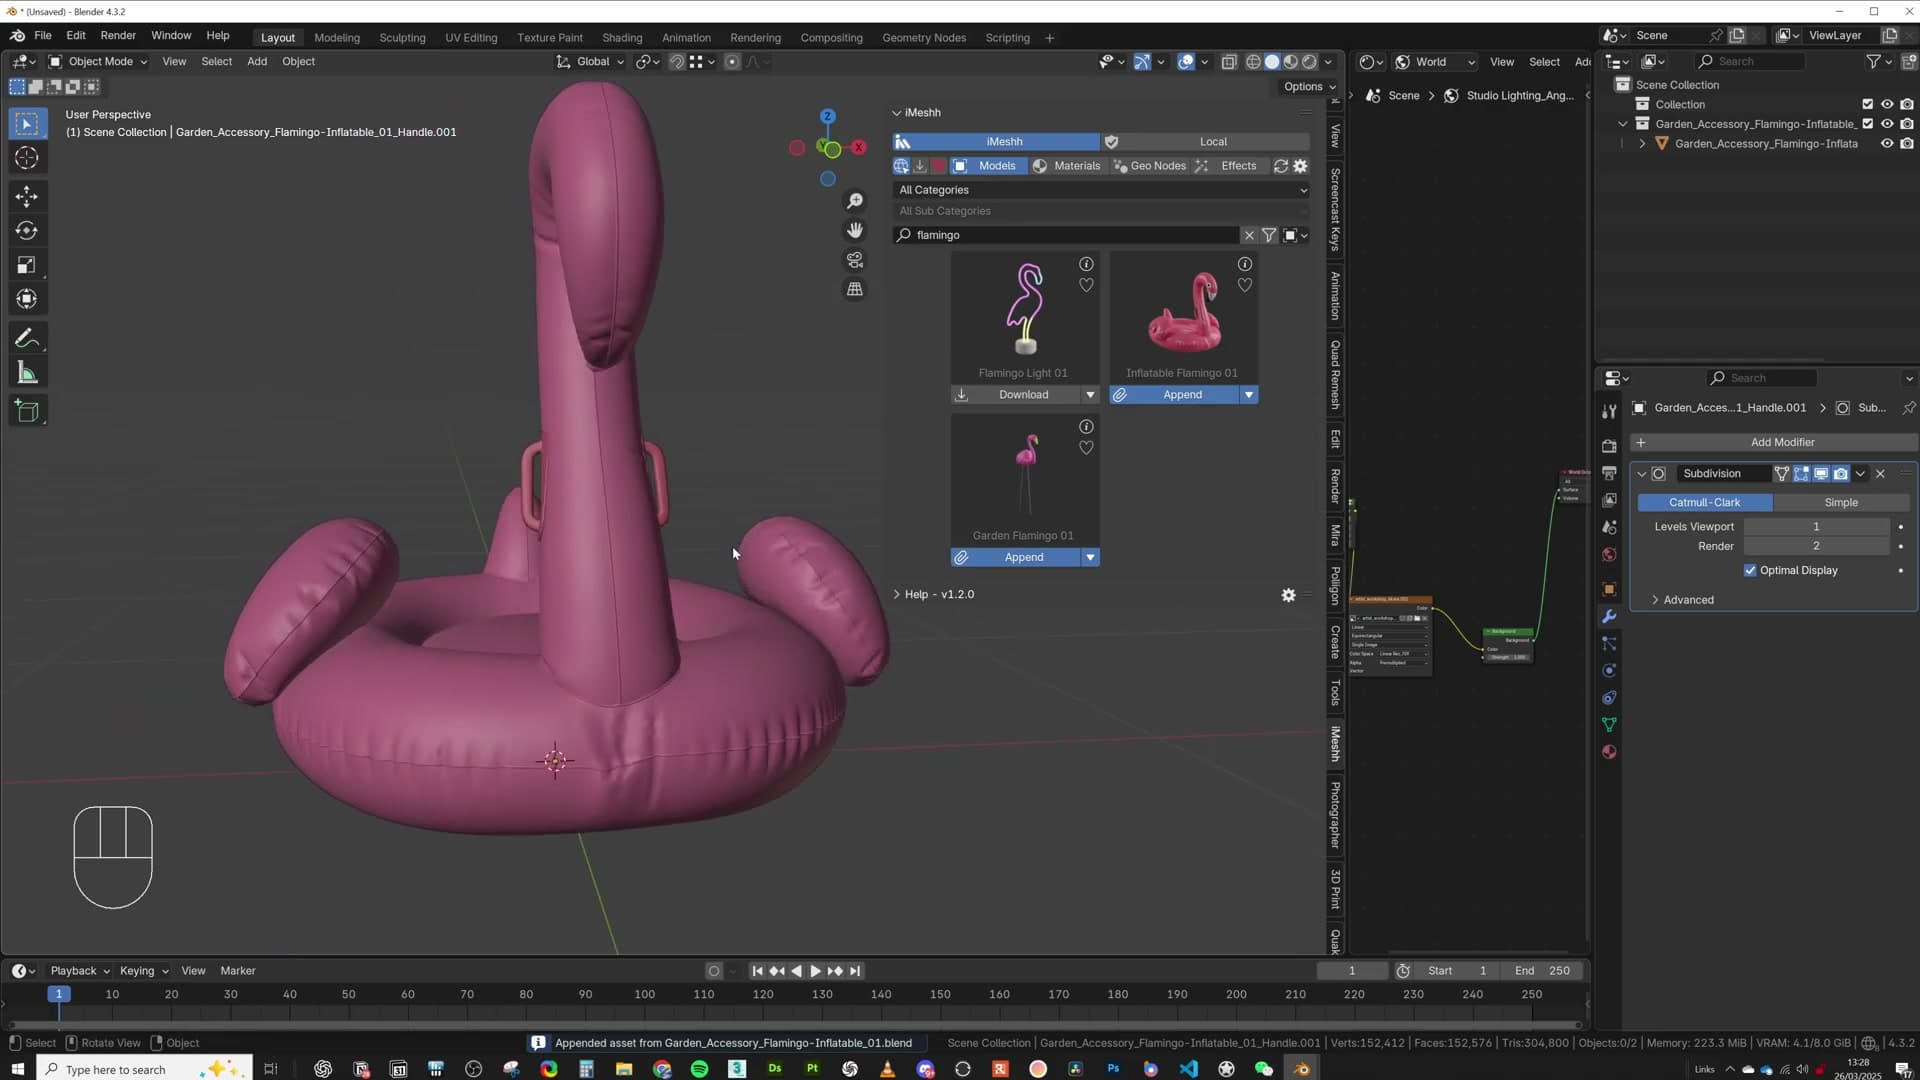
What lands on the canvas is a high-poly hero asset built for renders, not physics. Running a cloth or soft body solve on a mesh at this density would be painfully slow, and the more polygons the solver has to chew through, the more likely it is to misbehave.
The workaround is the pattern this whole tutorial is built around: simulate a low-poly proxy, then let the high-poly version follow it. You'll build that proxy in the next module. For now, the goal is just to get the hero mesh into the scene and tidy it up.
Joining handles and separating the wings
Before doing anything else, strip the modifiers off the appended object. You can always add them back at the end of the workflow if you need them. Keeping the mesh clean now makes the remesh and the simulation prep much easier to reason about.
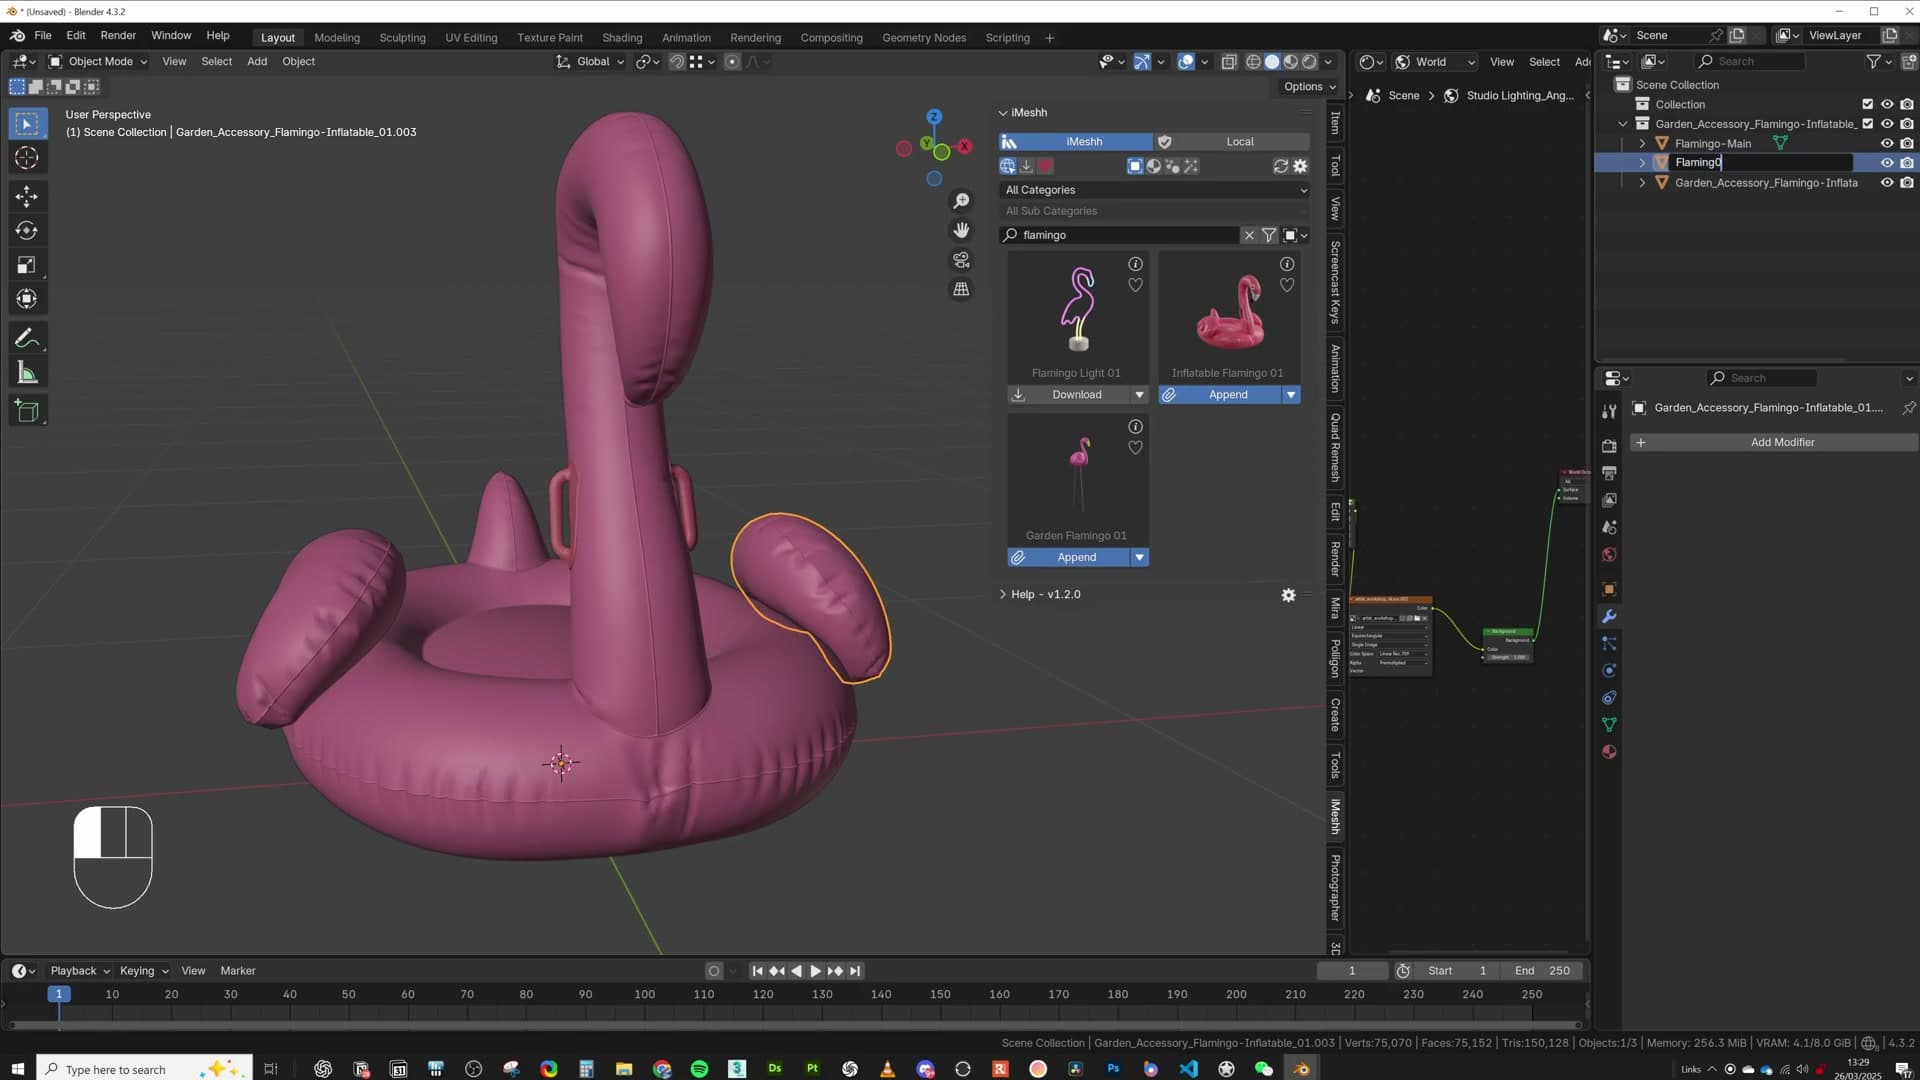
Next, join the two handle pieces into the main body so the float reads as a single object. Then go the other way on the wings: separate them out into their own objects, because each wing needs to be its own cloth simulation later in the build.
Finally, rename the three resulting objects in the outliner so the rest of the tutorial is easy to follow. Call the body Flamingo Main, and name the two wings Flamingo Wing 1 and Flamingo Wing 2. You now have a clean, properly organised asset ready for the low-poly proxy step.
Build a low-poly proxy with Quad Remesher
Run Quad Remesher over the three pieces, target ~5,000 polys for the body and ~2,000 for the wings, and clean the source mesh whenever the remesher produces janky edges so the simulation has clean geometry to solve.
Installing Quad Remesher and the remesh panel
The low-poly proxy starts with Quad Remesher, a paid Blender add-on from Exoside. There's a free 30-day trial, which is plenty of time to follow this tutorial. Head to Exoside's site, download the trial, and follow their install instructions from the Quad Remesher tutorials section.
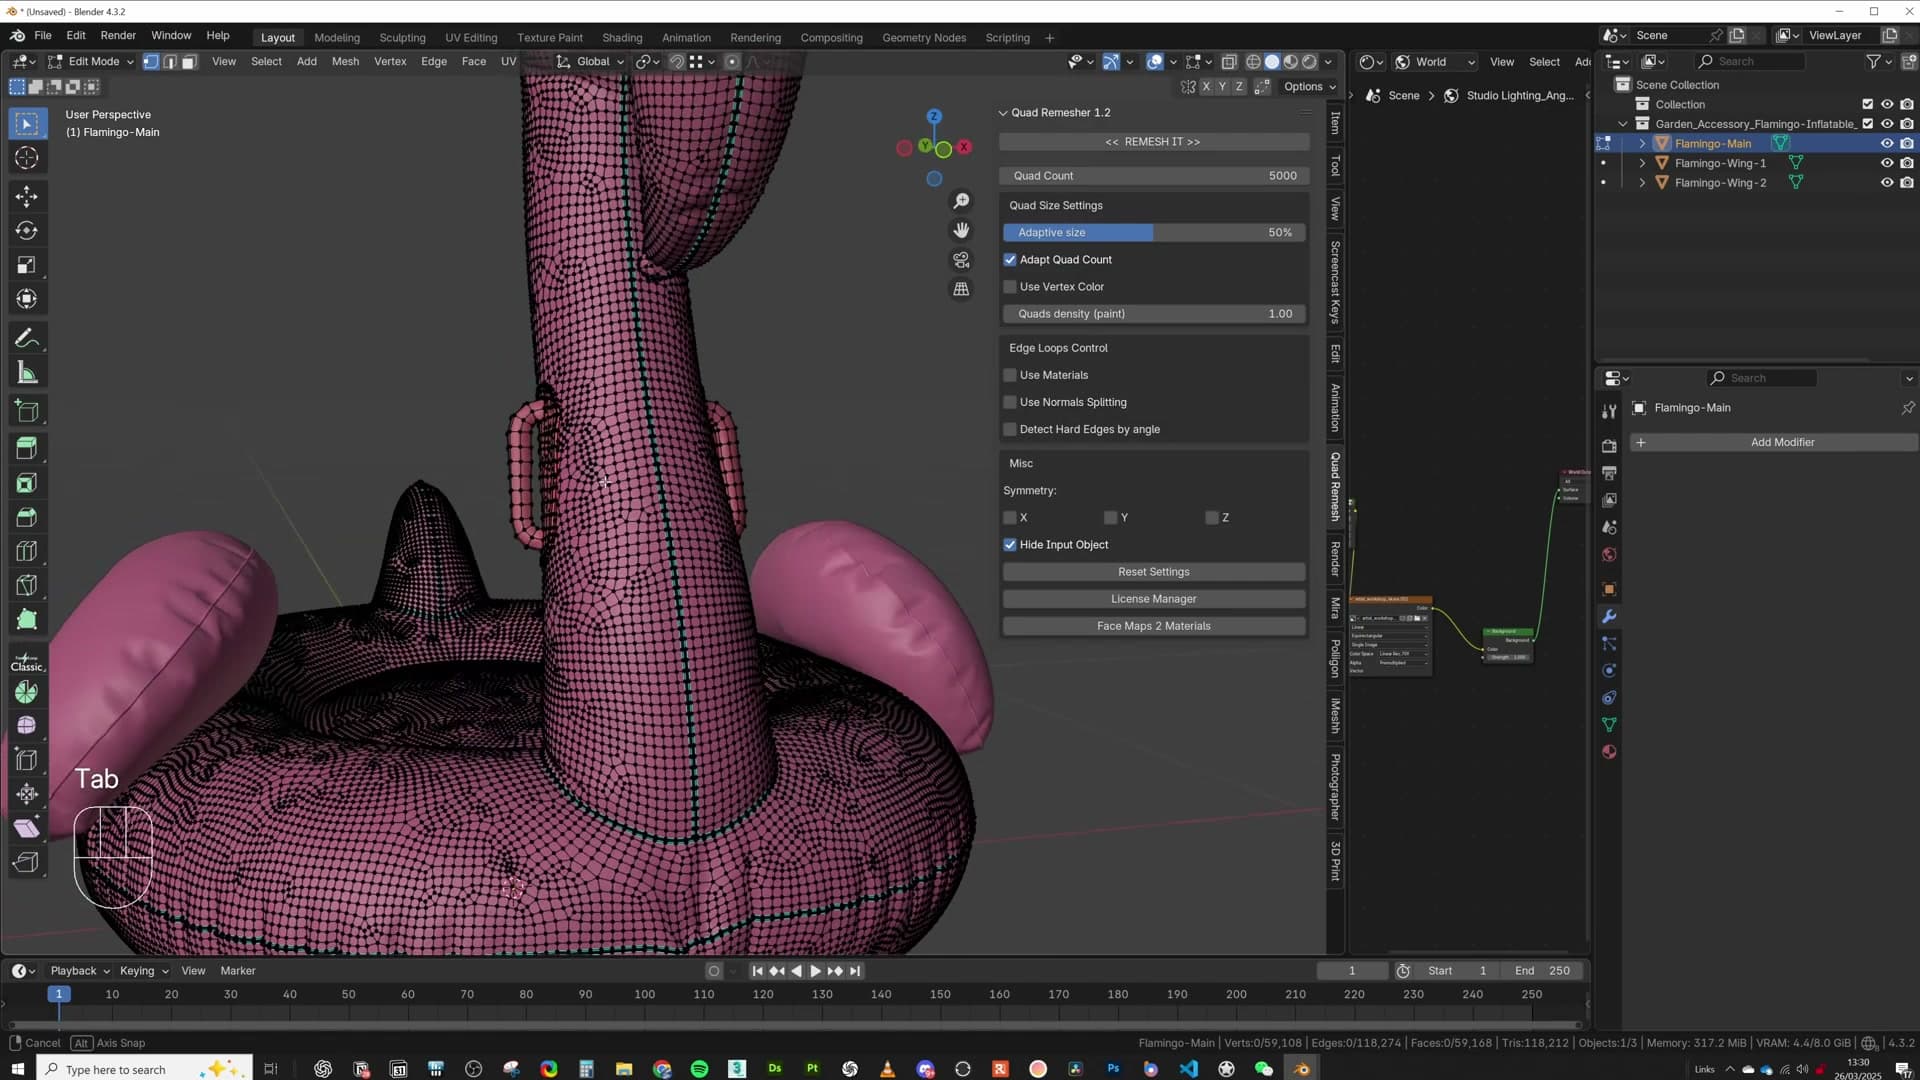
Once installed, Quad Remesher adds a panel to the N-panel on the right of the 3D viewport. The two controls you'll touch most are the target polygon count at the top and a short stack of toggles below it for things like sharp edges, symmetry, and material handling.
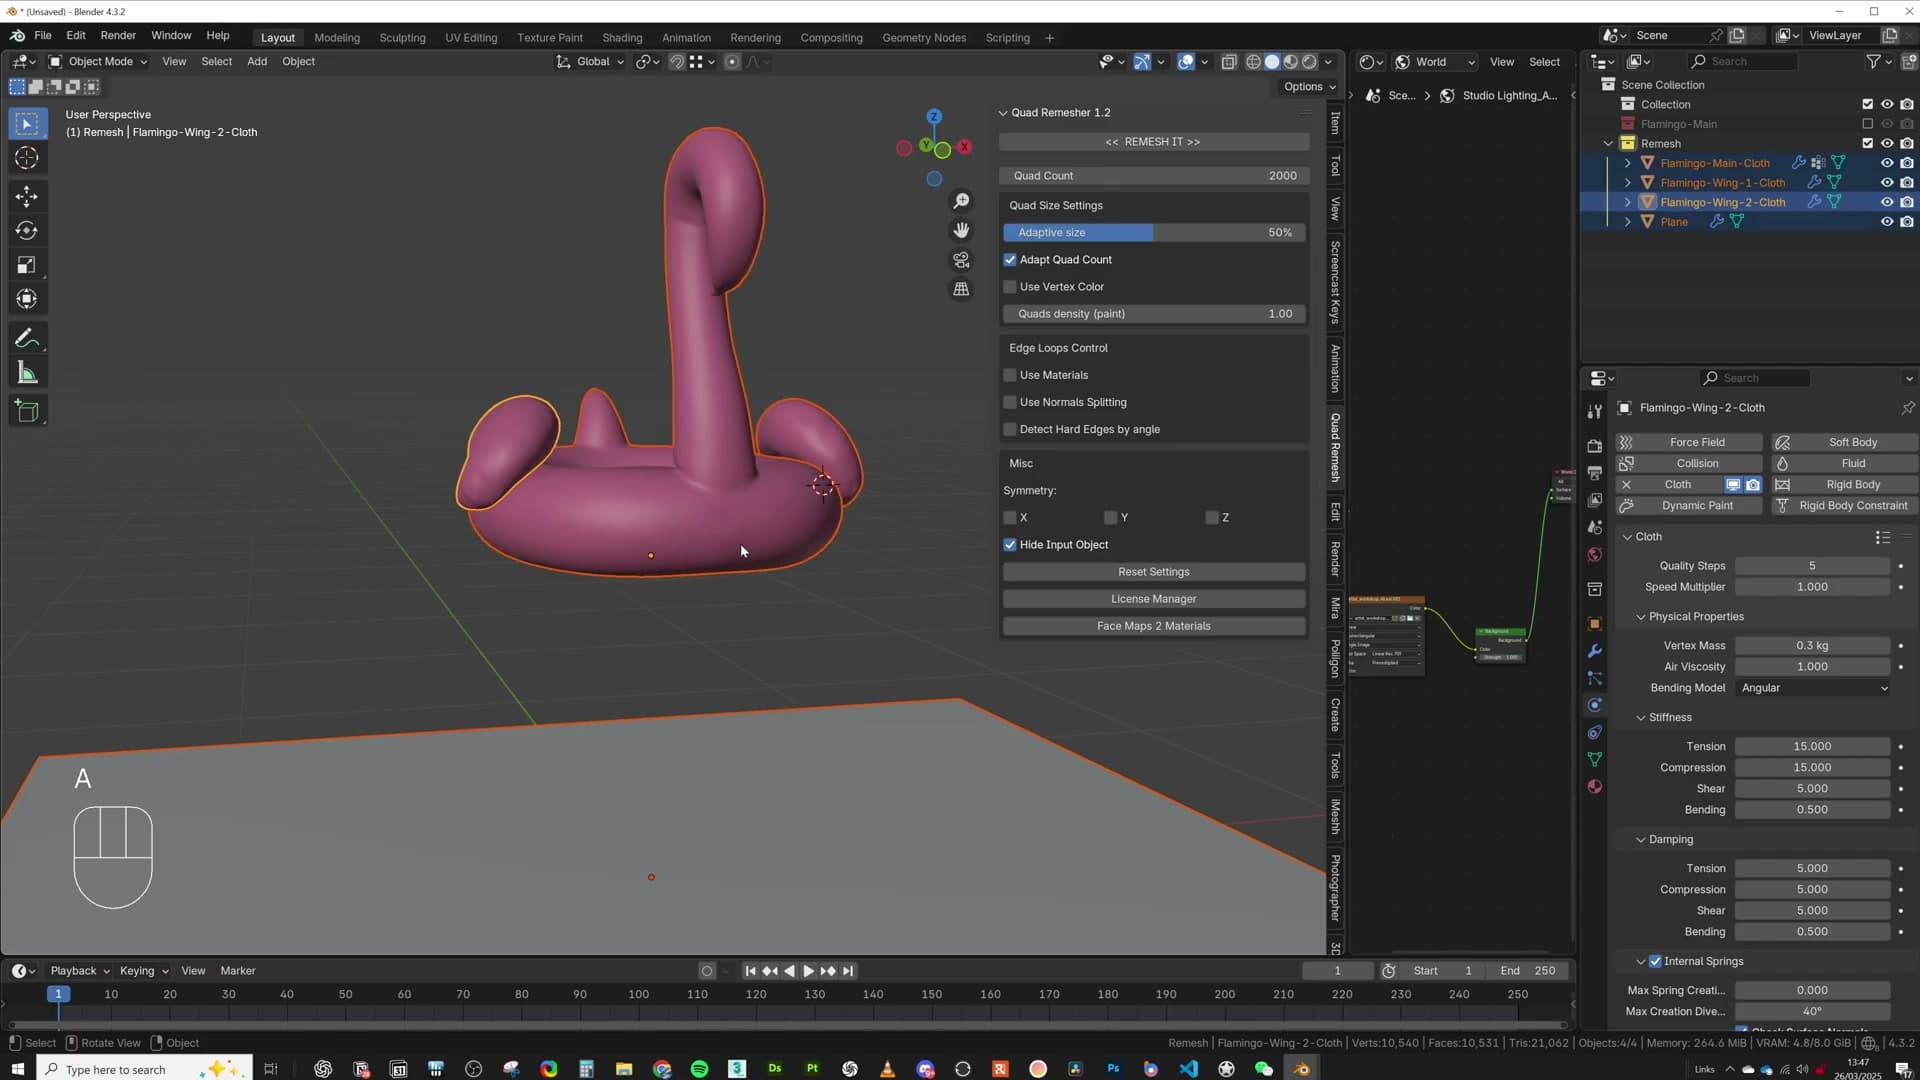
Before running the first remesh on the flamingo body, switch off the sharp-edges detection toggle. The source asset has hard creases that you don't want carried over into the simulation mesh. Leave the target poly count at 5000 for the main body and click Remesh.
Remeshing the flamingo body to 5,000 quads
Drop into edit mode on the remeshed body and check the result. The quads should flow cleanly across the surface with no tearing, stretched faces, or pinched corners. If you spot any stray internal faces left over from how the original asset was constructed, select and delete them so the cloth solver only has the outer shell to chew on.
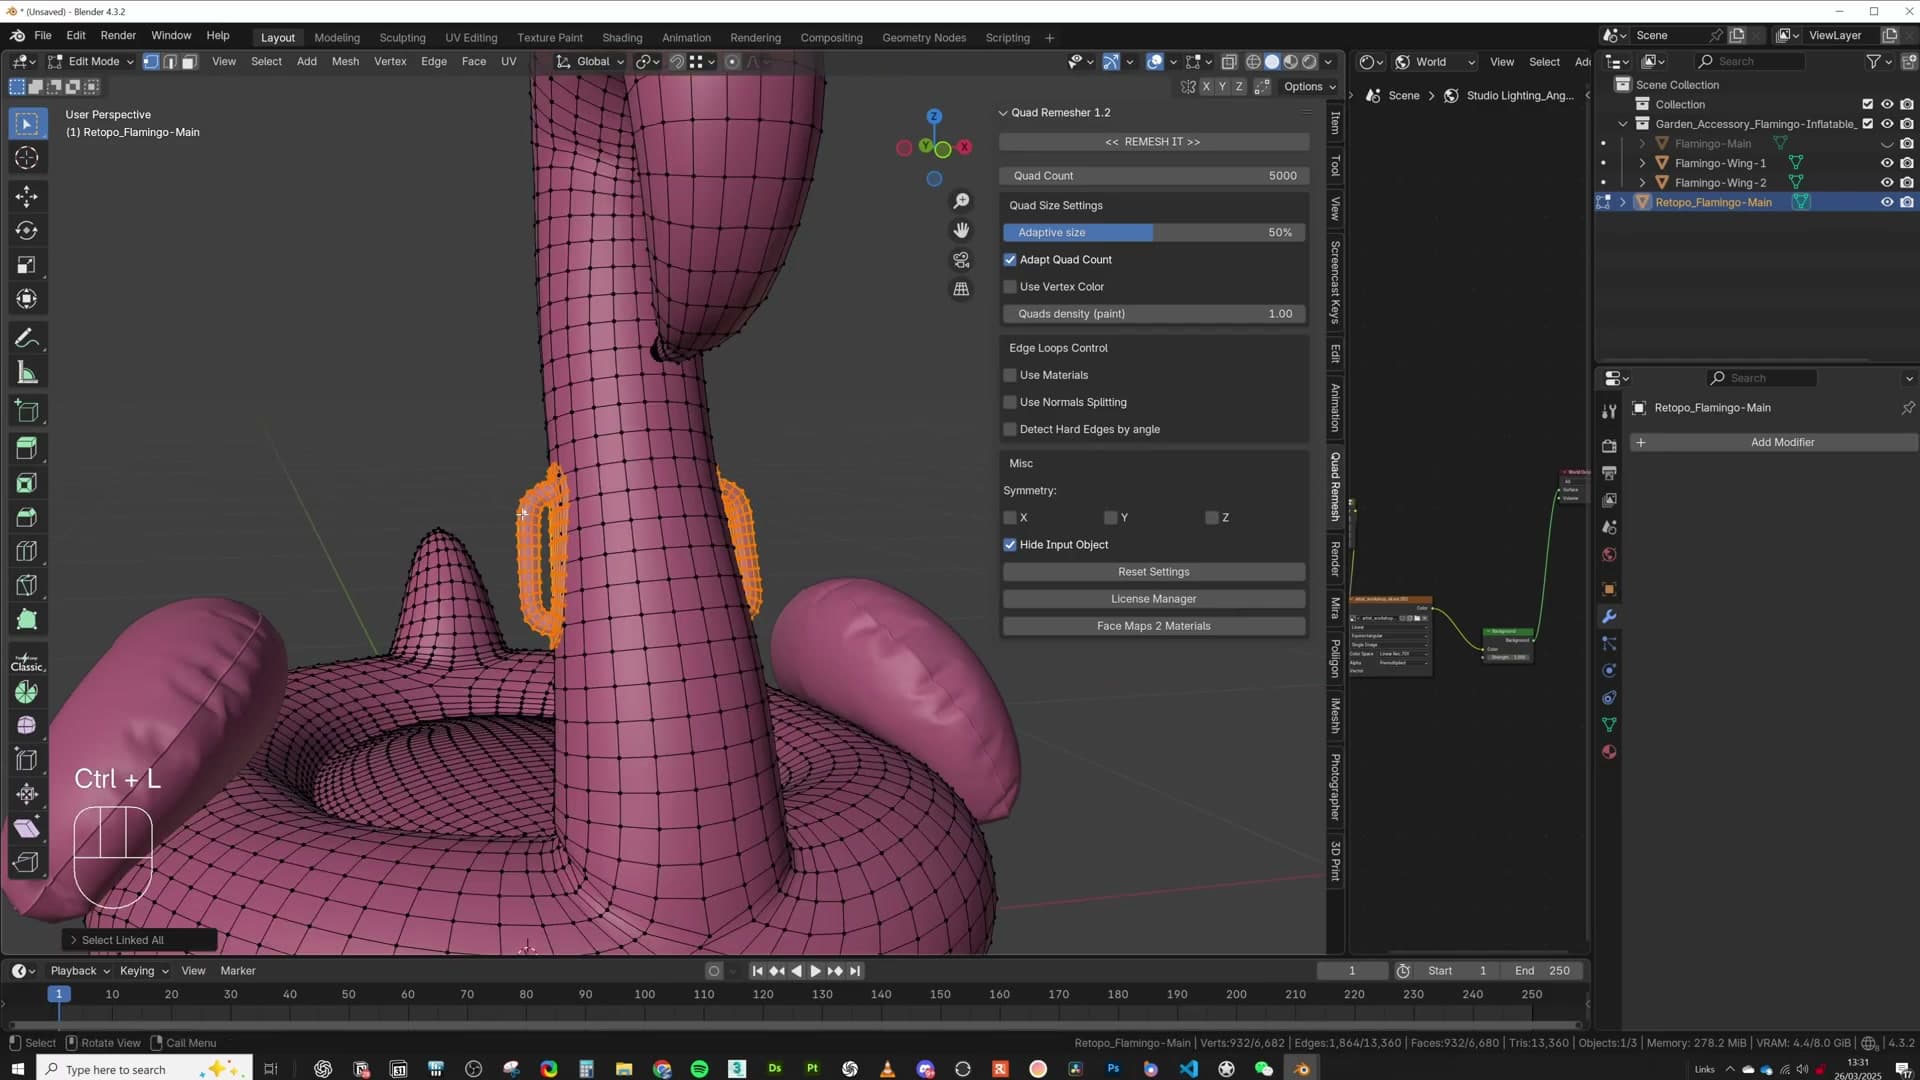
The 5,000 figure is a target, not a guarantee. Quad Remesher usually lands close but won't hit it exactly. For a hero asset driving cloth physics, that density is plenty: high enough for the solver to deform smoothly, low enough that solve times stay short.
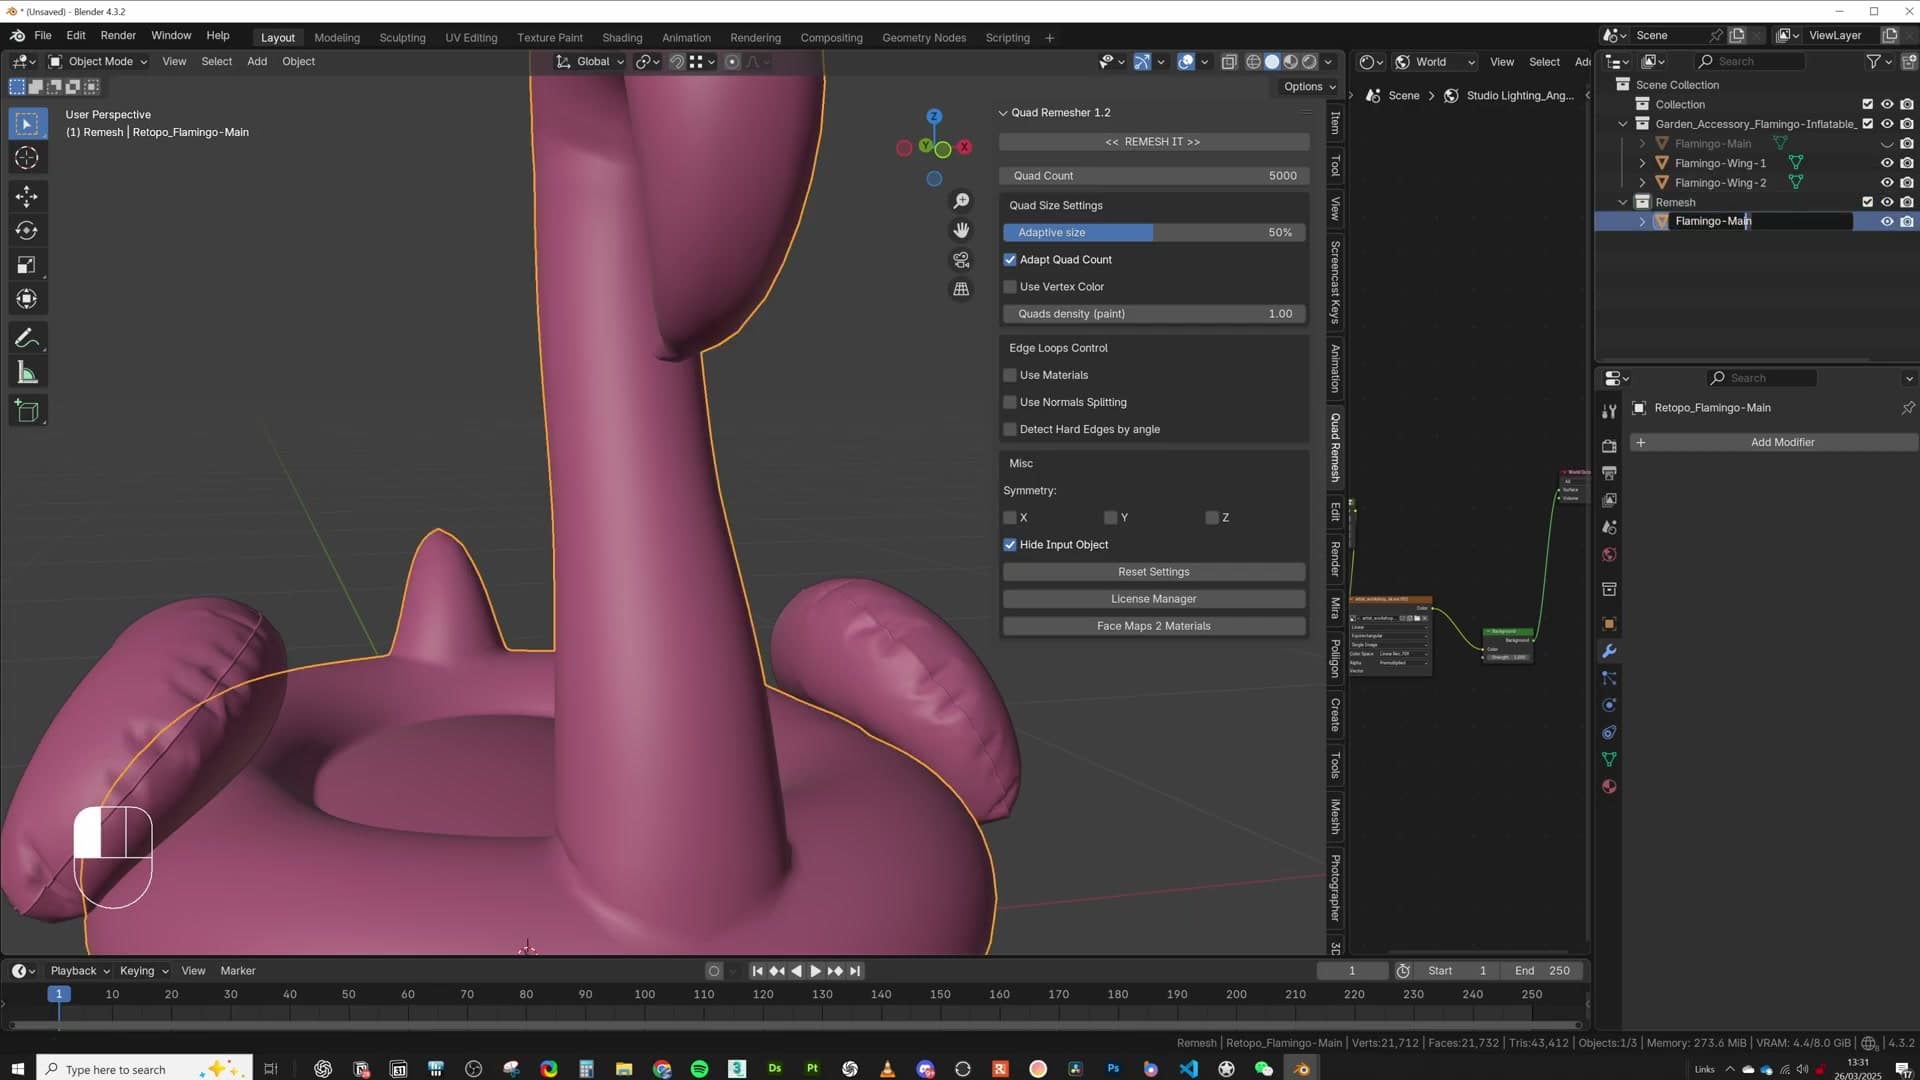
Make a new collection called Remesh and drop the remeshed body into it. Rename the mesh to flamingo_main_cloth. By the end of this module the Remesh collection will hold three pieces (the body and both wings), so consistent naming saves grief later when you're wiring up Surface Deform binds, hook modifiers, and pin groups.
Cleaning bevels and remeshing the wings
The wings are much smaller than the body, so they don't need anything like 5,000 polys. Drop the Quad Remesher target to 2000 and run a remesh on each wing in turn.
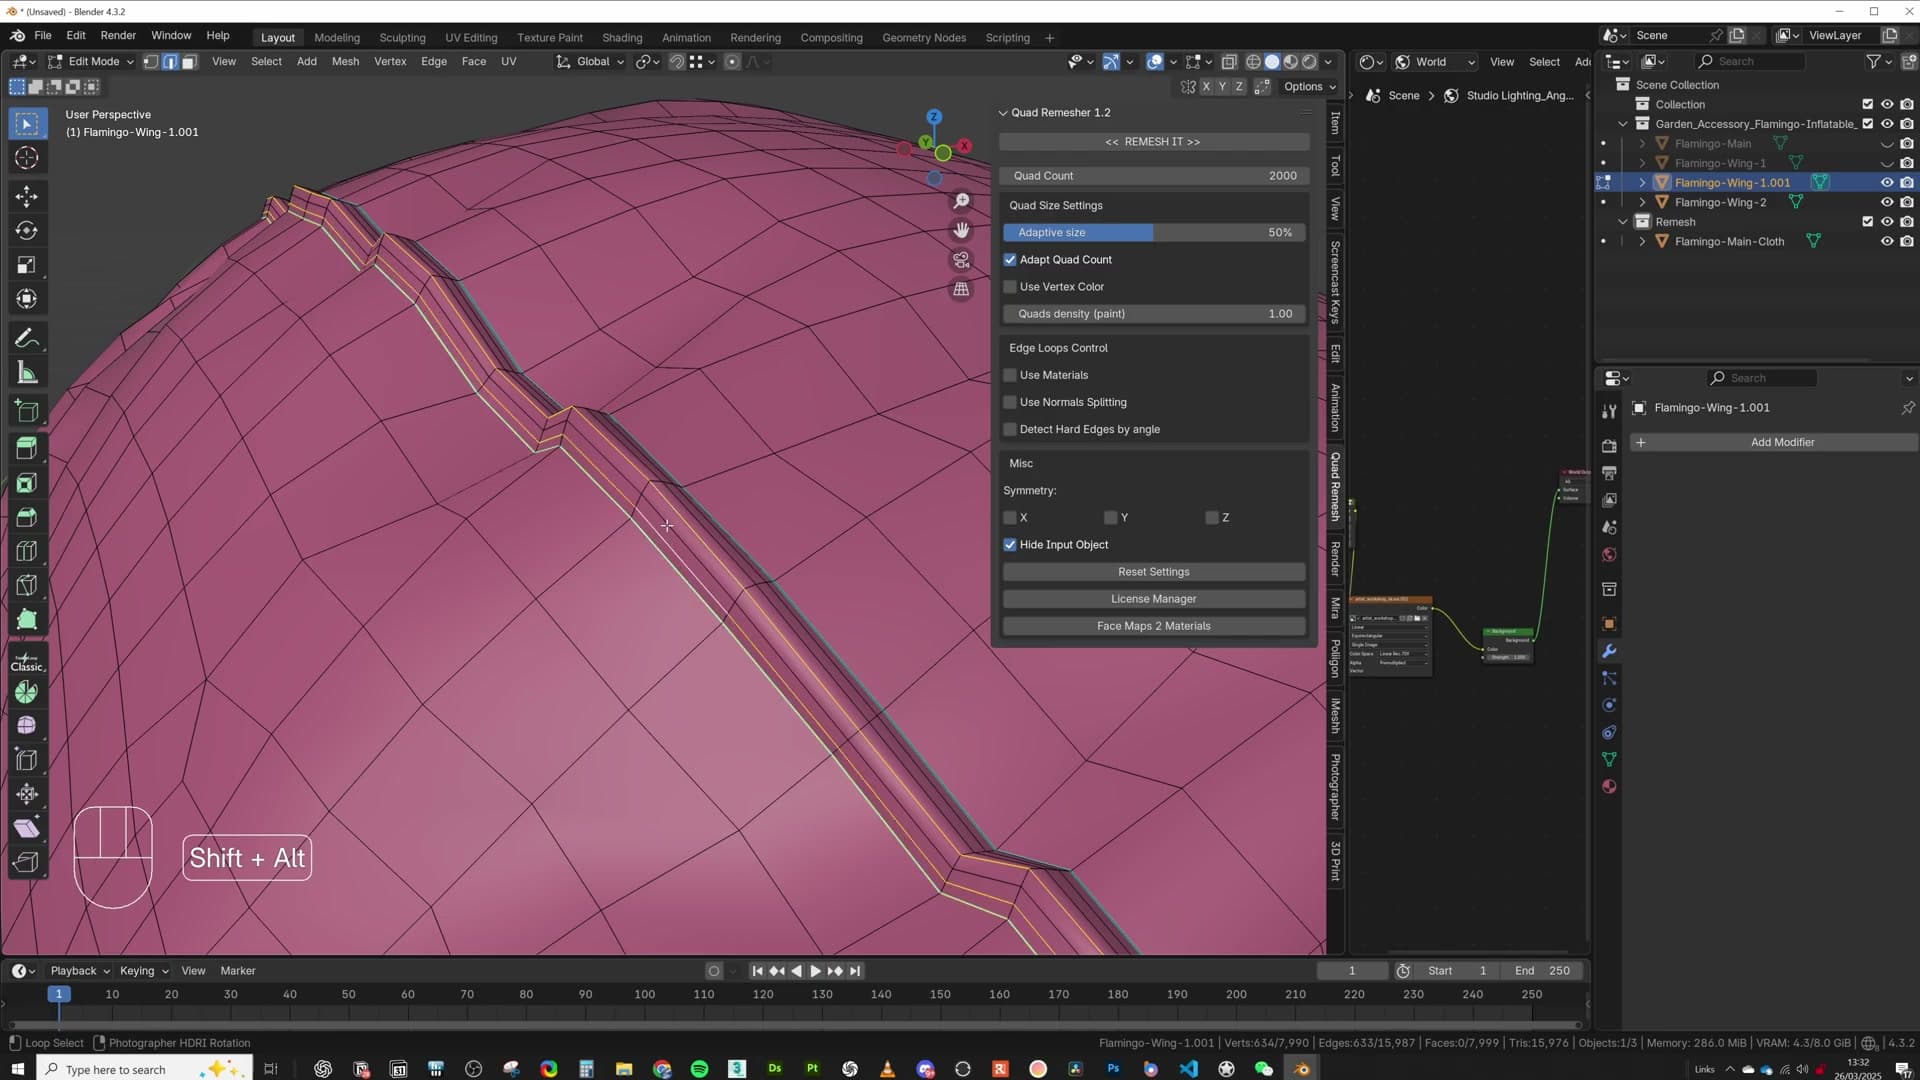
The first wing comes out janky along its outer edge. The original geometry has a thin bevel running around the perimeter, and Quad Remesher tries to preserve that detail in ways the cloth solver won't appreciate. Rather than push the simulation through messy topology, clean the source mesh first.
For each wing, duplicate the original and hide the source so you've got a backup if anything goes wrong. Enter edit mode on the duplicate, hold Alt+Shift and click one of the bevel edges to grab the whole loop. The loop selection usually misses a few edges where the bevel curves, so Shift+click any stragglers to add them. Then press X and choose Dissolve Edges.
With the bevel gone, run Quad Remesher again on the cleaned wing at the 2,000-poly target. The new result comes out smoother and much more even: clean topology the cloth solver can work with. Rename the remeshed wings to flamingo_wing_one_cloth and flamingo_wing_two_cloth, and drop both into the Remesh collection alongside the body.
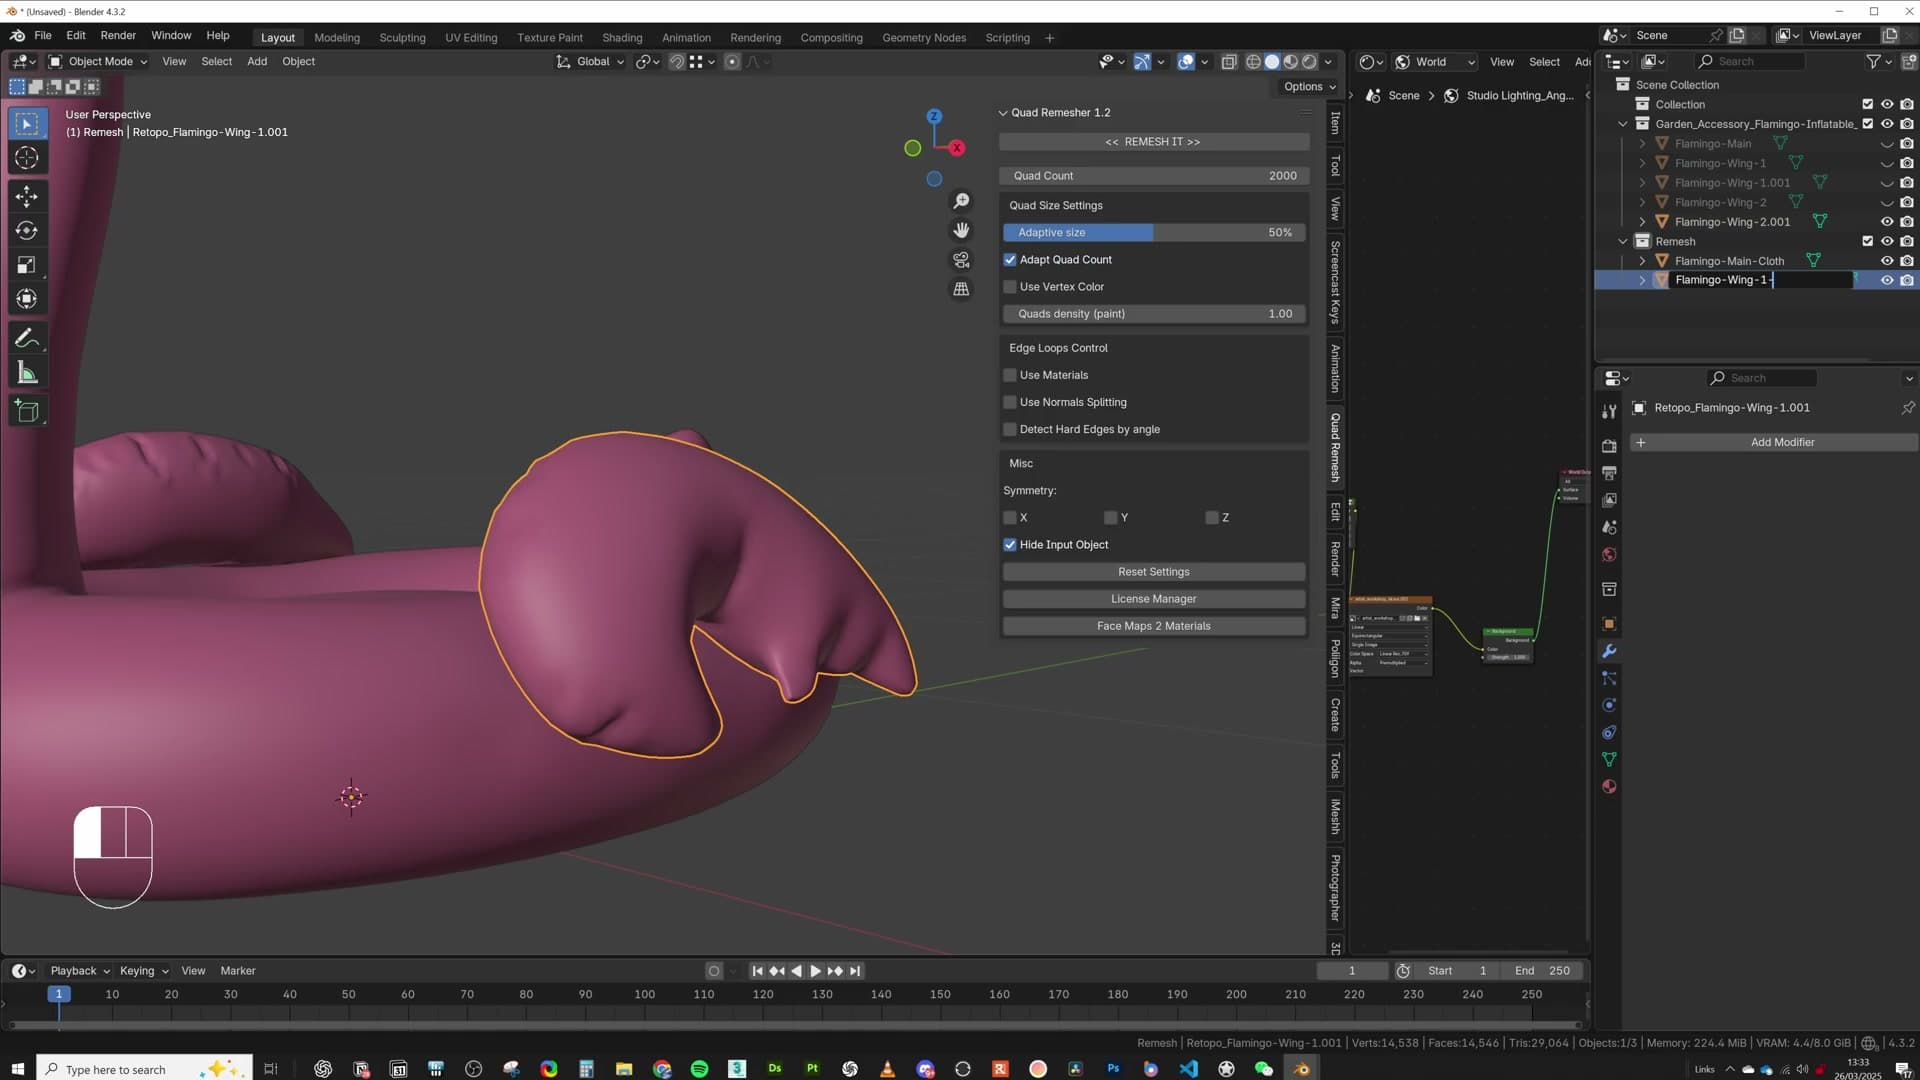
Once both wings are remeshed and named, hide or delete the cleaned duplicates. You only need the low-poly versions for the simulation. The original high-poly meshes still sit in their own collection, untouched, ready to be driven by the low-poly proxies via Surface Deform later in the build.
Cloth modifier and internal springs
Add a collision plane, drop a cloth modifier onto the low-poly body, then enable Internal Springs and tune the stiffness: 40 for firm hold, 5 for a much softer drop.
Adding a collision plane and the cloth modifier
Before any physics solves, the cloth pieces need somewhere to fall and something to land on. Select all the flamingo parts and lift them above the world origin so they have room to drop. Then press Shift+A → Mesh → Plane to add a ground plane underneath, jump to the Physics tab with the plane still selected, and add a Collision modifier. That single click turns the plane into the floor the simulation will hit.
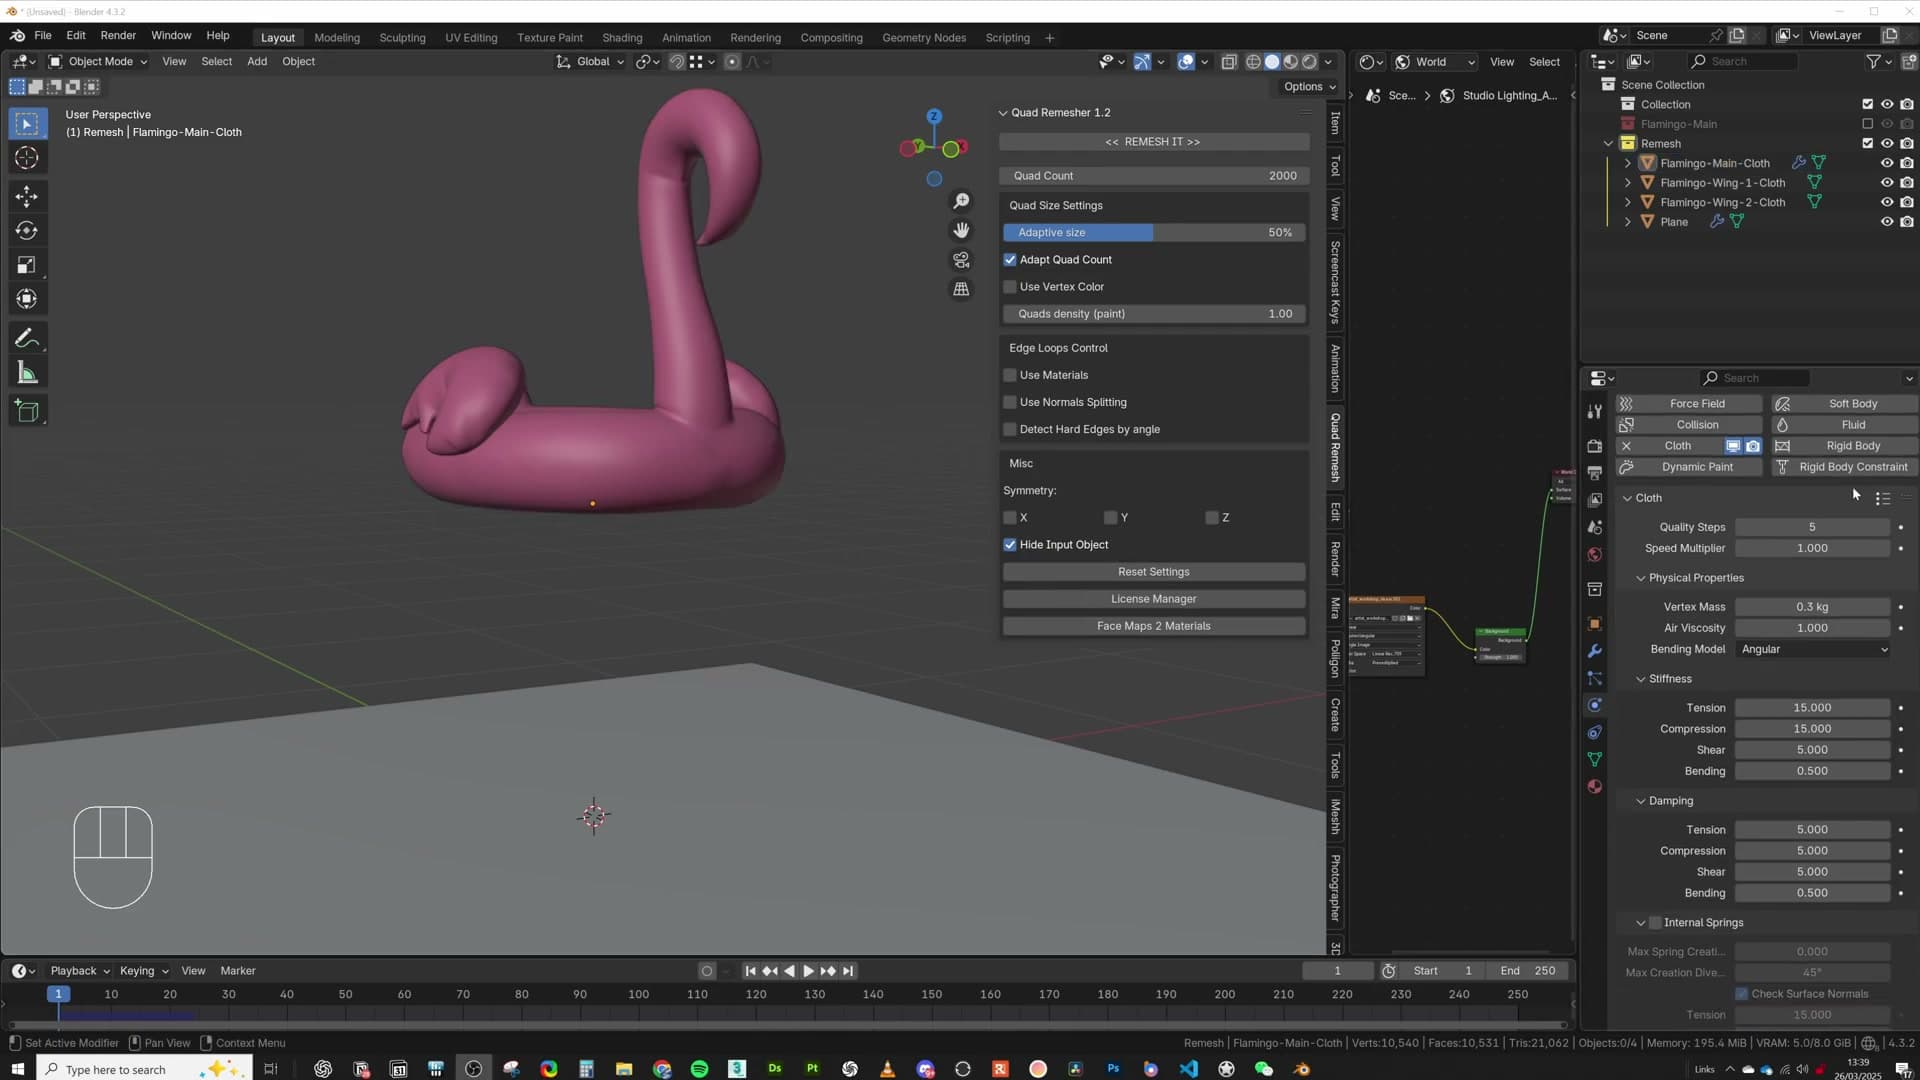
My first instinct on this scene was a Soft Body modifier. The flamingo is, after all, behaving exactly like one. In practice the cloth modifier turned out to be easier to set up and more stable, so select the low-poly proxy you remeshed earlier, head back to the Physics tab, and click Cloth.
Hit play and watch the failure mode that the next sub-lesson exists to fix. With the cloth defaults, the flamingo falls, makes contact with the plane, and then completely deflates and disappears into itself. A closed cloth volume has no internal structure holding it open. The moment it lands, there is nothing pushing the inside surfaces apart, so the shape collapses flat.
Tuning internal springs stiffness
The defaults at the top of the Cloth panel are fine as a starting point. The fix lives further down. Scroll to Internal Springs and tick the checkbox to enable it. After some experimenting I settled on 40. Press play and the difference is immediate: the flamingo lands and holds its shape, behaving exactly like a firm soft body rather than collapsing.
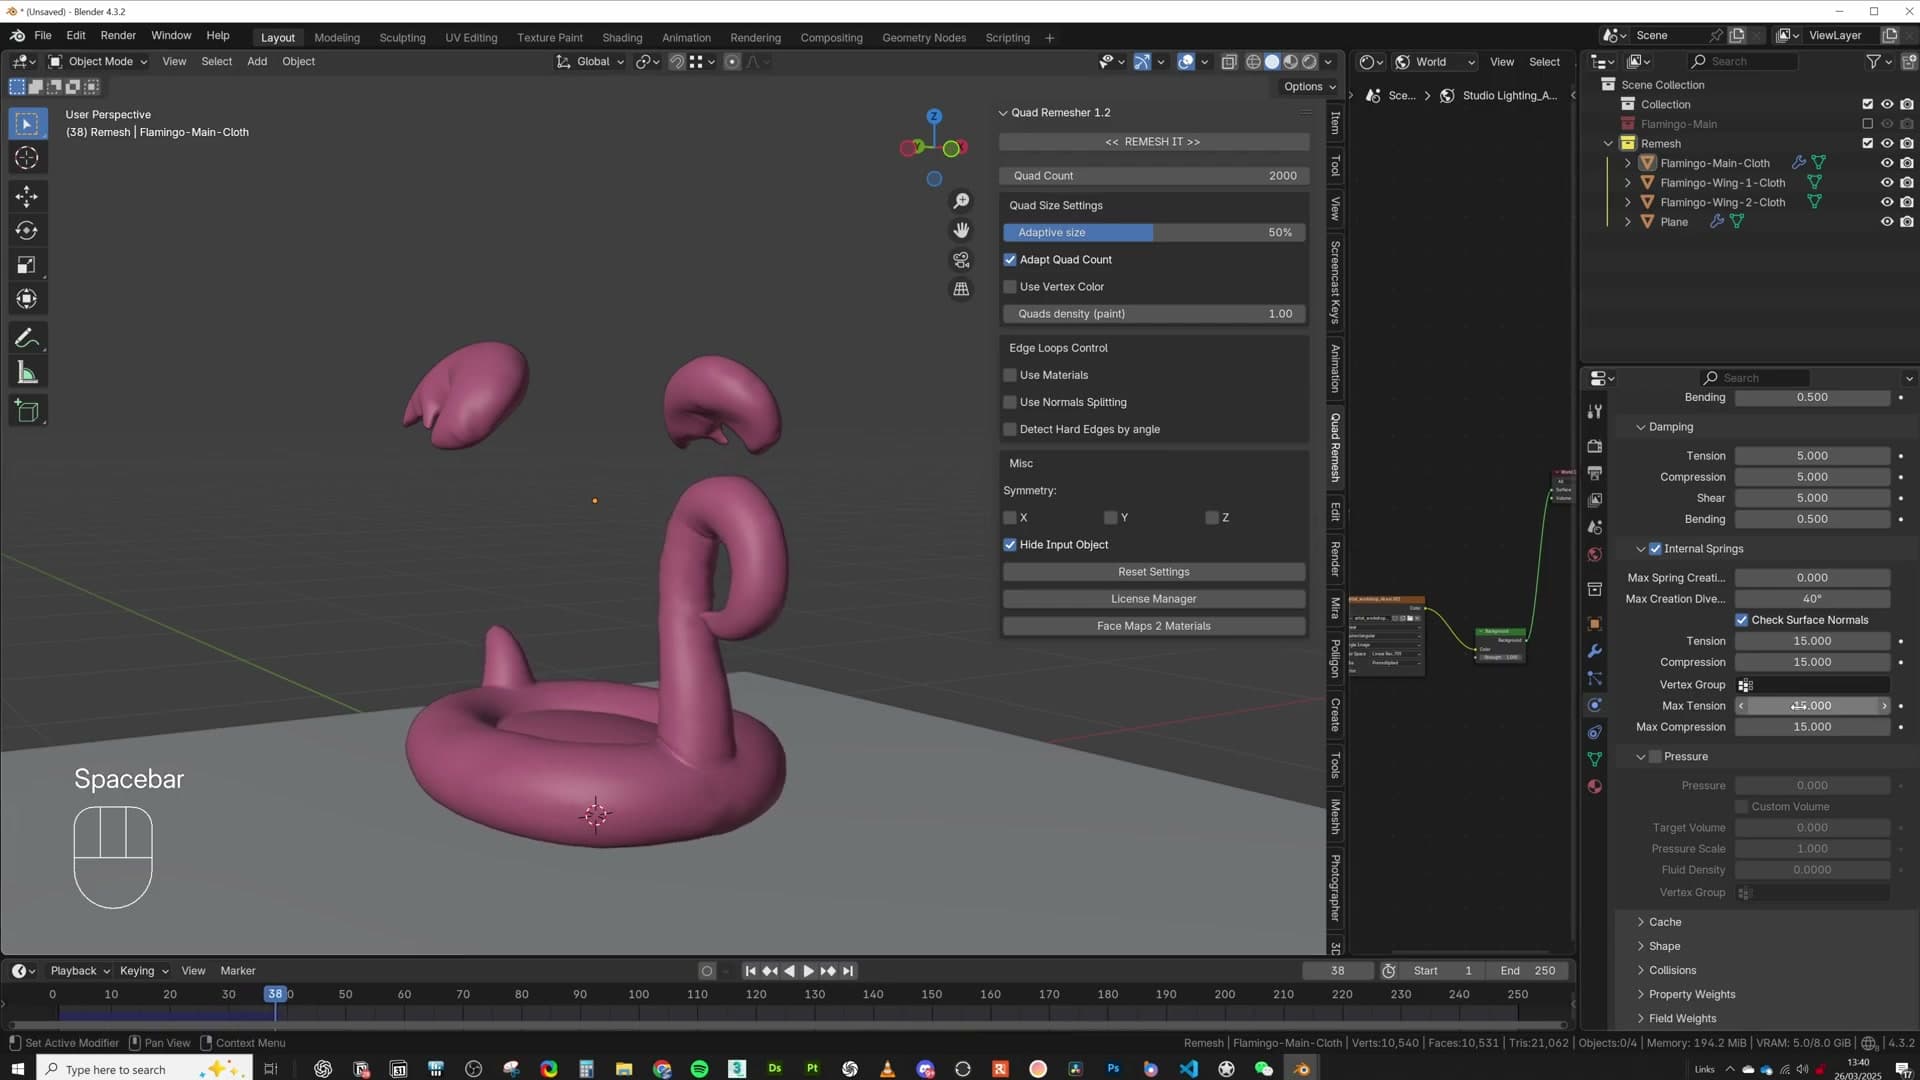
For a softer drop, drop the value to 5 and play it again. The shape squishes more on impact and recovers more slowly, but it still keeps its volume. It never deflates the way the unmodified cloth did. Treat that slider as your firm-to-squishy dial: tune it by eye for the mass and behaviour your asset needs.
There is one remaining problem you may notice on the softer setting. As the cloth deforms, parts of it pass straight through other parts of itself: the body clips into the head, the wings disappear inside the body. To stop that, enable Self Collisions further up in the same panel and reduce the distance to 0.005. The mesh now respects its own surfaces on landing and the intersections clear up.
Self-collision via inverted vertex groups
Global self-collision pinches itself in tight crevices. Paint the body areas you don't want self-colliding, invert the selection with Ctrl+I, and assign the inverted group as the cloth self-collision vertex group.
Enabling self-collision and tuning distance
Without self-collision, the cloth body folds straight through itself as it falls. Wings tuck into the torso and the neck passes through the chest. Enable Self Collision in the Cloth panel to give the solver a chance to keep those surfaces apart.
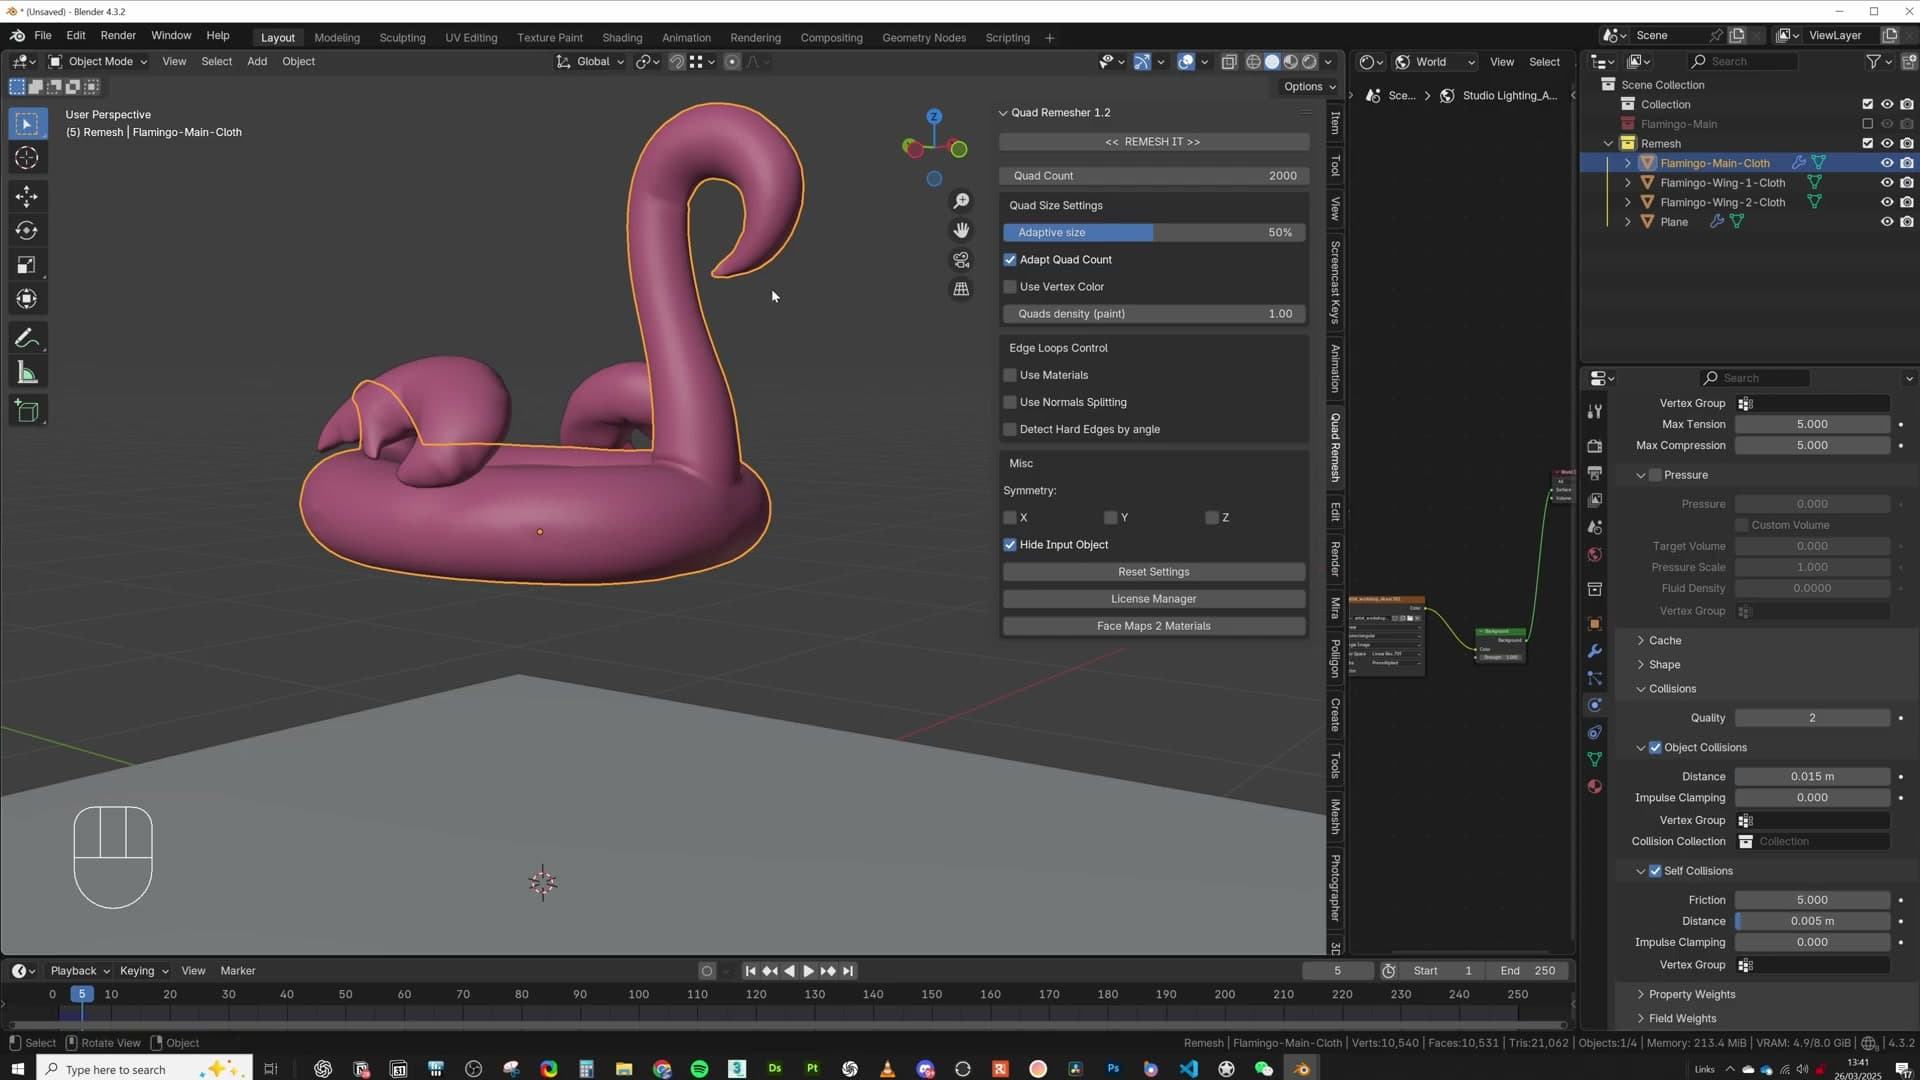
Drop the Distance field to 0.005. At the default value the body still finds ways to overlap; at 0.005 it holds itself apart cleanly during the fall.
Global self-collision works, but it has a habit of triggering in places you don't want. Tight crevices (areas where two parts of the body sit naturally close together) can read as a collision and start pinching the mesh apart from the inside. The fix is to mask those areas out with a vertex group.
Painting and inverting a self-collision vertex group
Enter edit mode on the cloth body and switch to face select. Brush over the crevice region you want excluded from self-collision, anywhere the geometry naturally folds against itself and shouldn't be treated as two separate surfaces.
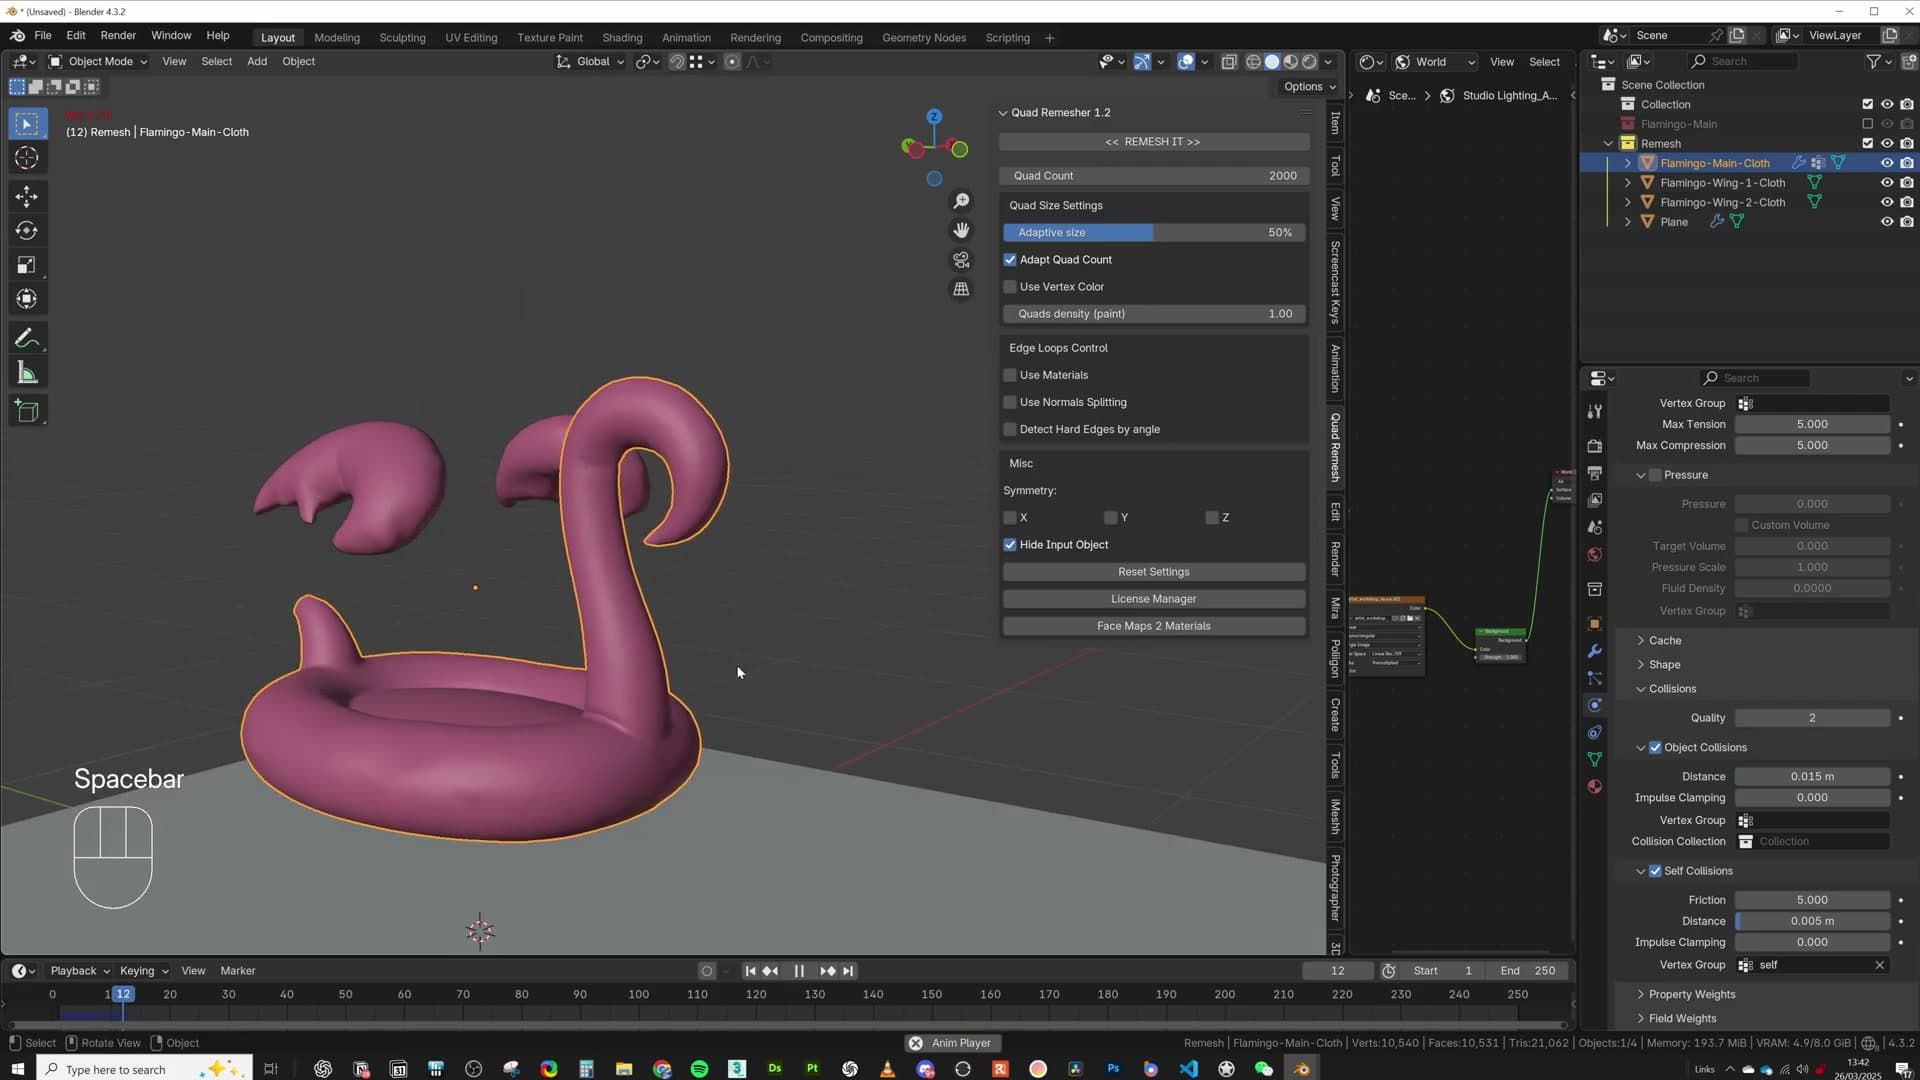
With those faces selected, open the Object Data Properties, create a new vertex group, and click Assign. Back in the Cloth panel, set the Self Collision Vertex Group field to your new group.
Play the simulation and you'll see the opposite of what you want. The body passes straight through itself exactly where you painted, while the rest of the mesh continues to collide. The field is read as "self-collision is active on these faces", not "excluded on these faces". It feels backwards at first, but it isn't. You just need to flip the selection.
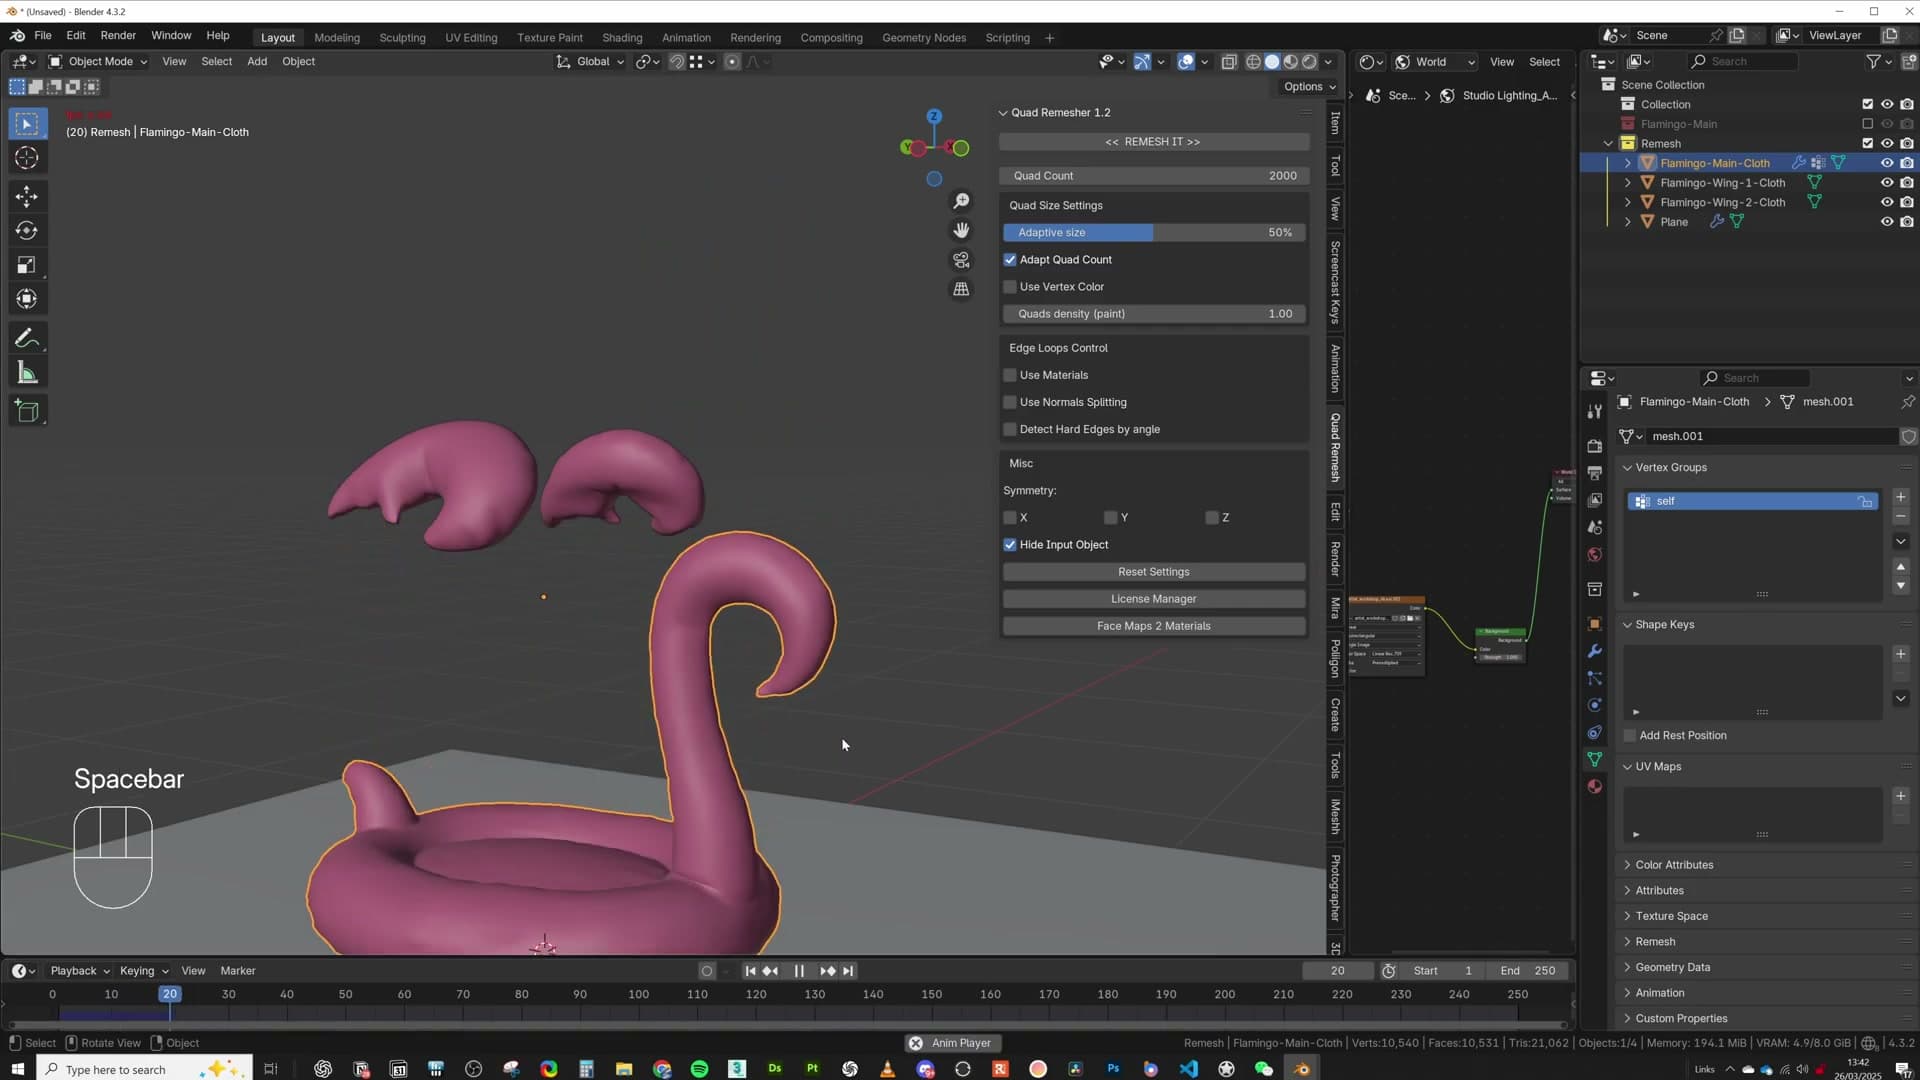
Back in edit mode, remove the painted faces from the group, then press Ctrl+I to invert the face selection. The new selection covers every face except the crevice. Click Assign again and reassign the group in the Cloth panel. Self-collision now applies everywhere except the area you painted. That's what you wanted in the first place.
Copy cloth modifiers to the wings
Use Ctrl+L Copy Modifiers to share cloth settings across the wings, then strip self-collision and collision on the secondary pieces to keep the simulation fast. The wings will be hidden from view anyway.
Linking cloth settings across wing meshes
With the cloth modifier dialled in on the main flamingo body, the same setup needs to live on both wing meshes. Select the two wings first, then shift-select the body last so it becomes the active object, and press Ctrl+L > Copy Modifiers. The cloth modifier, along with every value you just tuned on the body, propagates onto the wings in a single step.
From there, go through each wing in turn and disable Self Collision under its cloth settings. The wings are small enough that they won't pinch into themselves in any way that matters, and skipping the self-collision pass keeps the solver moving quickly on the pieces that need the least scrutiny.
Setting origins to centre of mass and disabling extra collision
Before pressing play, tidy up the origins. Select all three cloth pieces, right-click in the viewport, and choose Set Origin > To Centre of Mass. Then press Ctrl+A and apply the scale. I treat both as a 'just in case' habit worth doing on every cloth object before running a simulation.
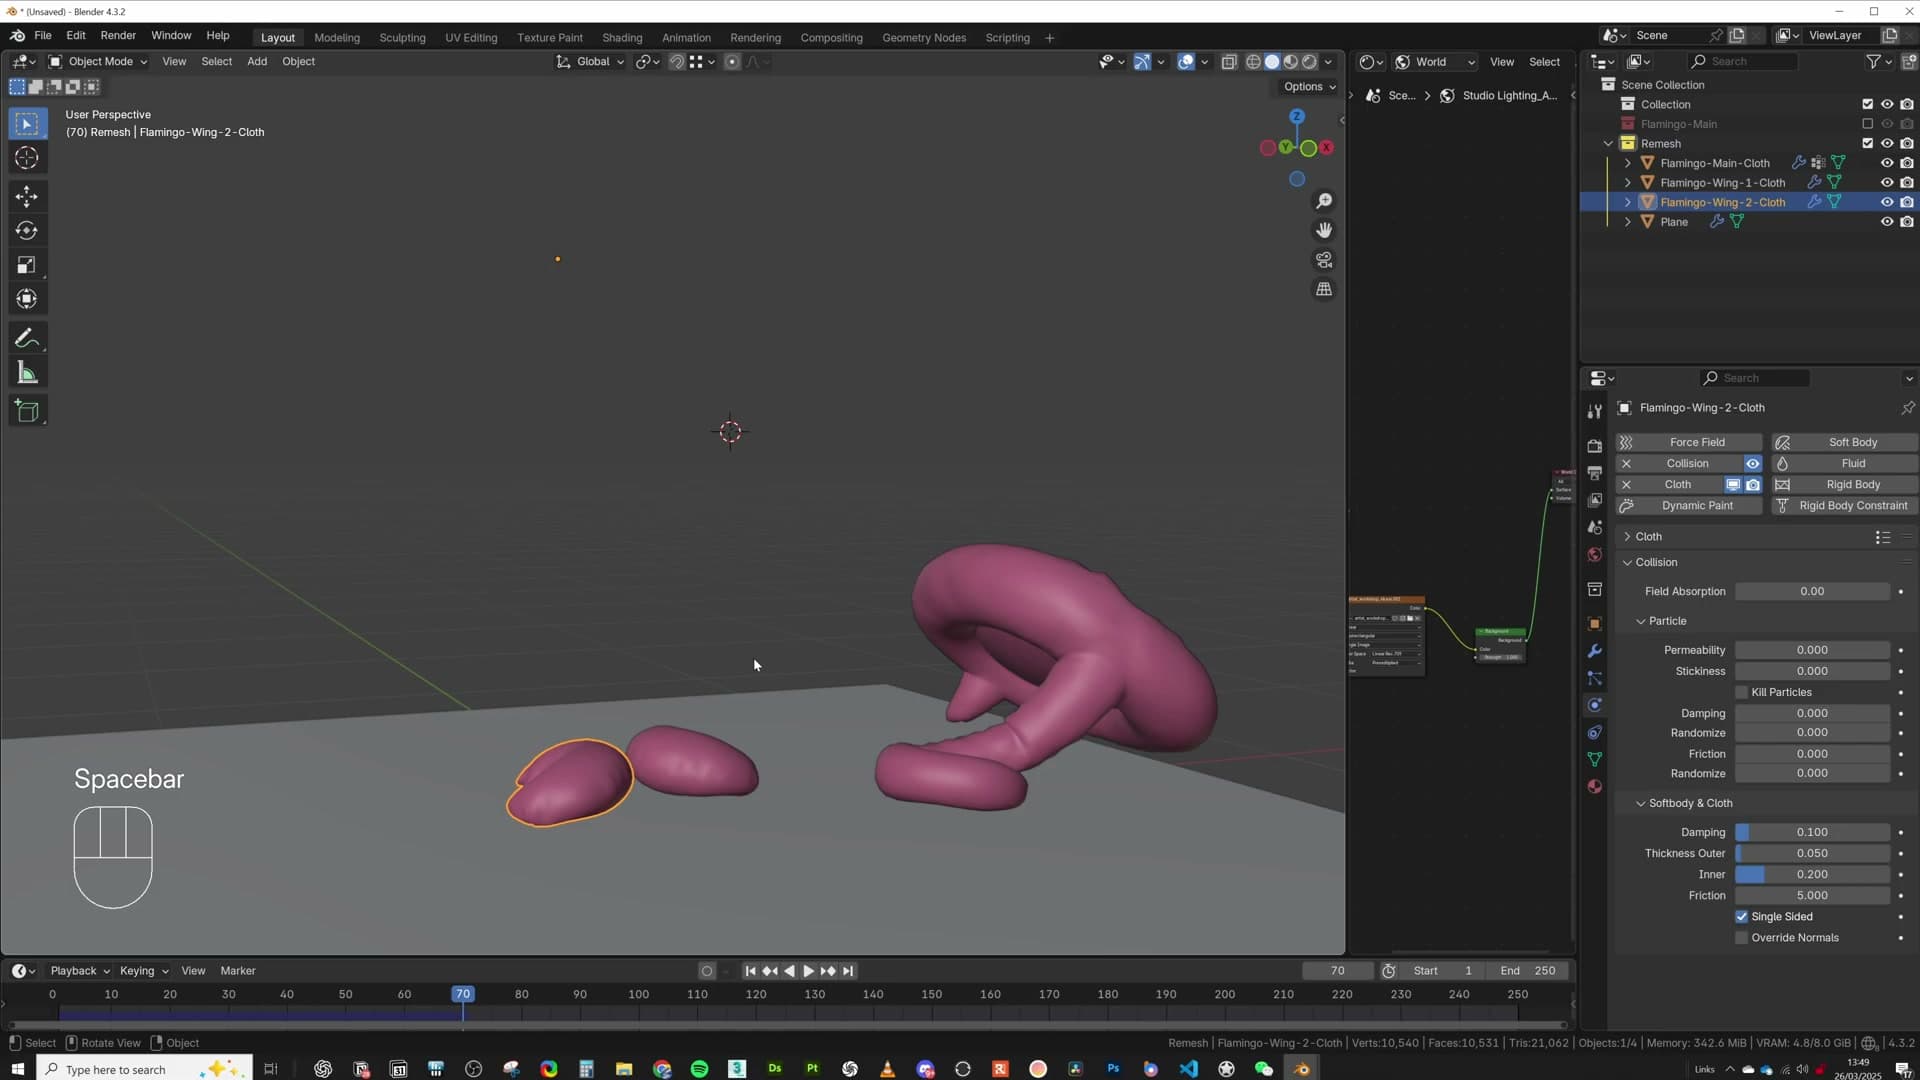
Hit play. Everything falls together, but the cloth pieces pass straight through one another. Nothing is interacting yet. To make the wings react to the body, you can select the body and enable the Collision physics. Play it again and the body starts shoving the wings around as it drops through them.
I tried exactly this and found it over-complicated the simulation. With so many cloth pieces moving at once, the body's collision was throwing the wings off rather than driving them anywhere useful. The cleaner approach is to leave Collision off the body entirely and pin the wings to it with hooks in the next module. The wings end up hidden against the body in the finished shot, so the missing physical interaction between them never reads on camera.
Parent the wings with Empties, Hooks and Pin Groups
Cloth simulations don't move object origins, so straight parenting fails. Parent an Empty to three vertices on the main cloth, add a Hook modifier on the wing cloth pointing at that Empty, then mark the hook vertex group as a Pin Group in the cloth shape settings.
Why direct parenting to cloth doesn't work
The obvious move is straight parenting. Select the wing, shift-click the body, press Ctrl+P, then play. The wing still drops through itself. The reason is fundamental: cloth simulations move vertices, not origins. Blender's parent relationship tracks the parent's origin point, and that origin stays exactly where the solve started, no matter how dramatically the mesh deforms around it.
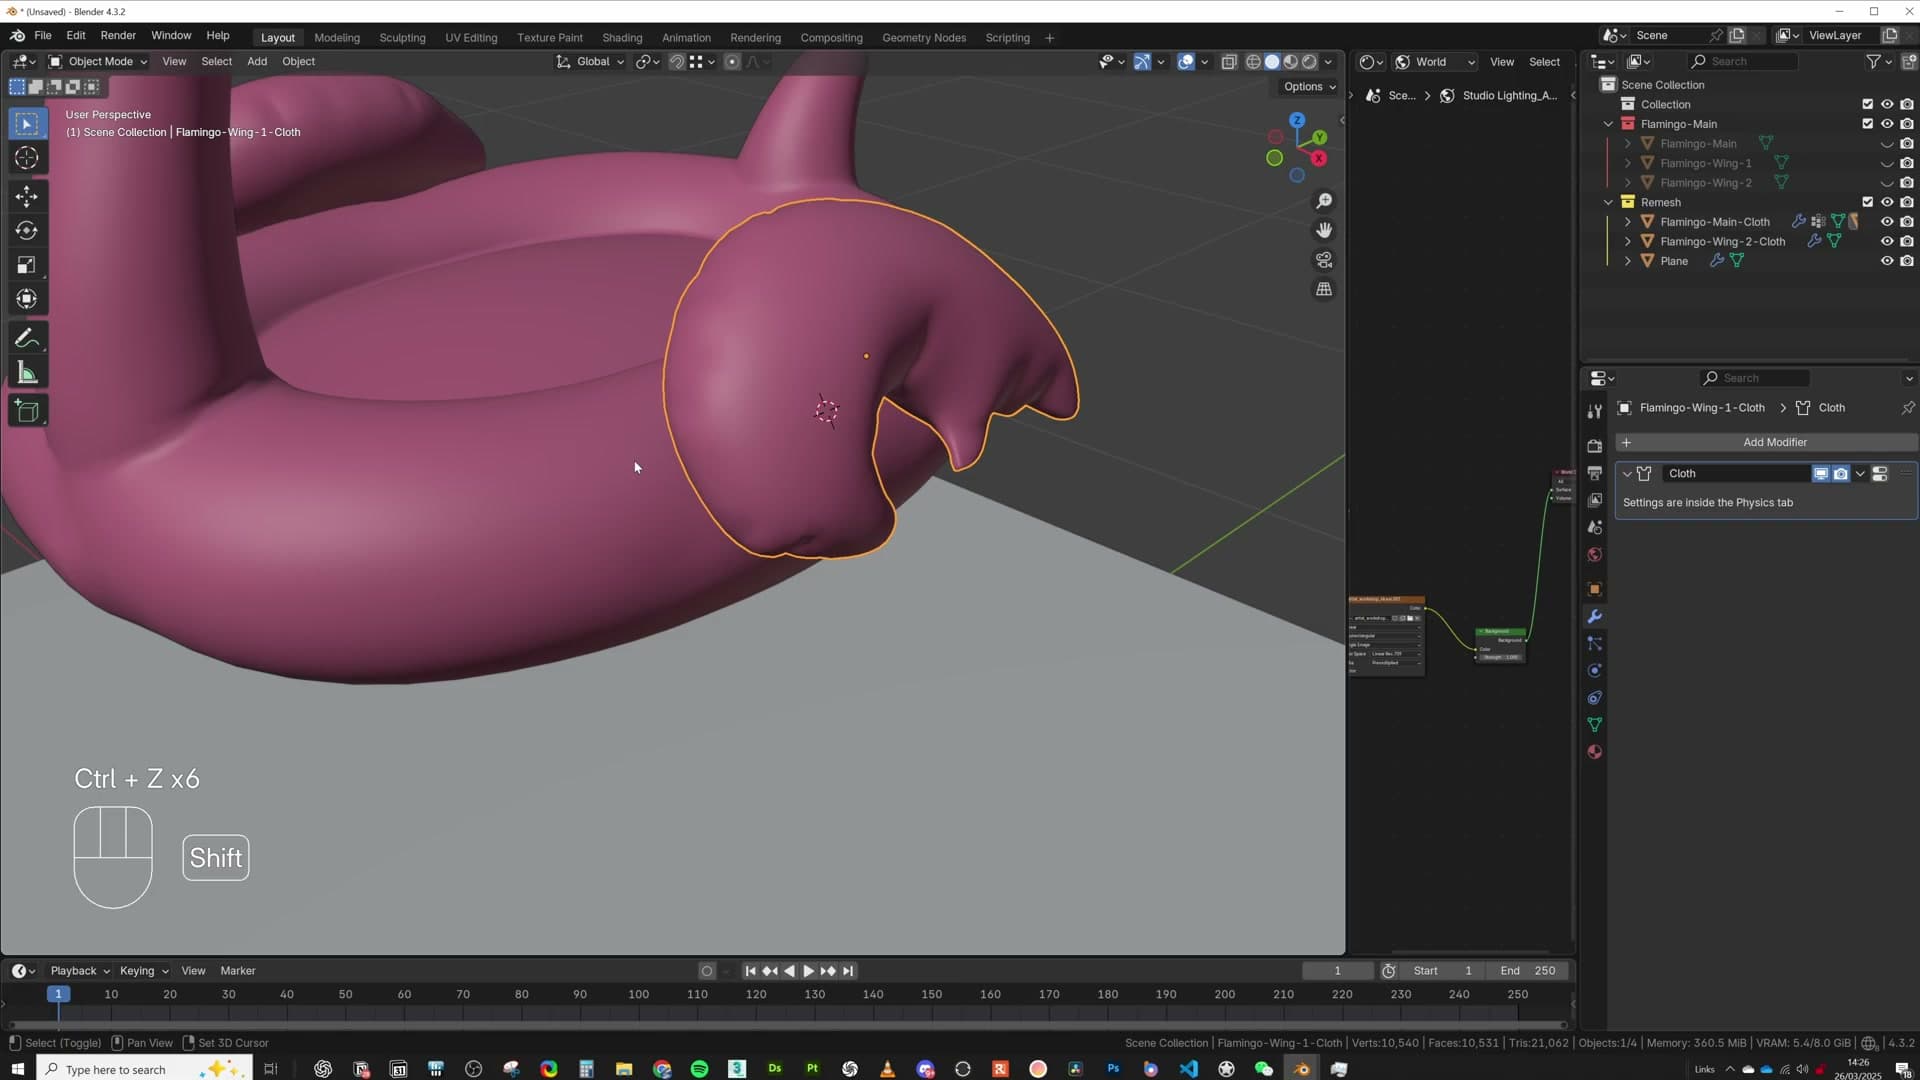
Vertex parenting looks like a smarter alternative. Shift-click the body, drop into edit mode, select three vertices on the surface, and press Ctrl+P. Normally this pins a child to a moving piece of geometry. But press play and the wing still passes through the body, because the wing object is itself a cloth sim. Its own origin also doesn't budge during the solve. Two stationary origins parented to each other can't help each other move.
Triangulating an Empty against the body surface
The fix is to slip an Empty between the two simulations. An Empty is a regular object, so its position and rotation can be driven by a vertex parent on the body cloth, and the wing can then hook itself onto the Empty.
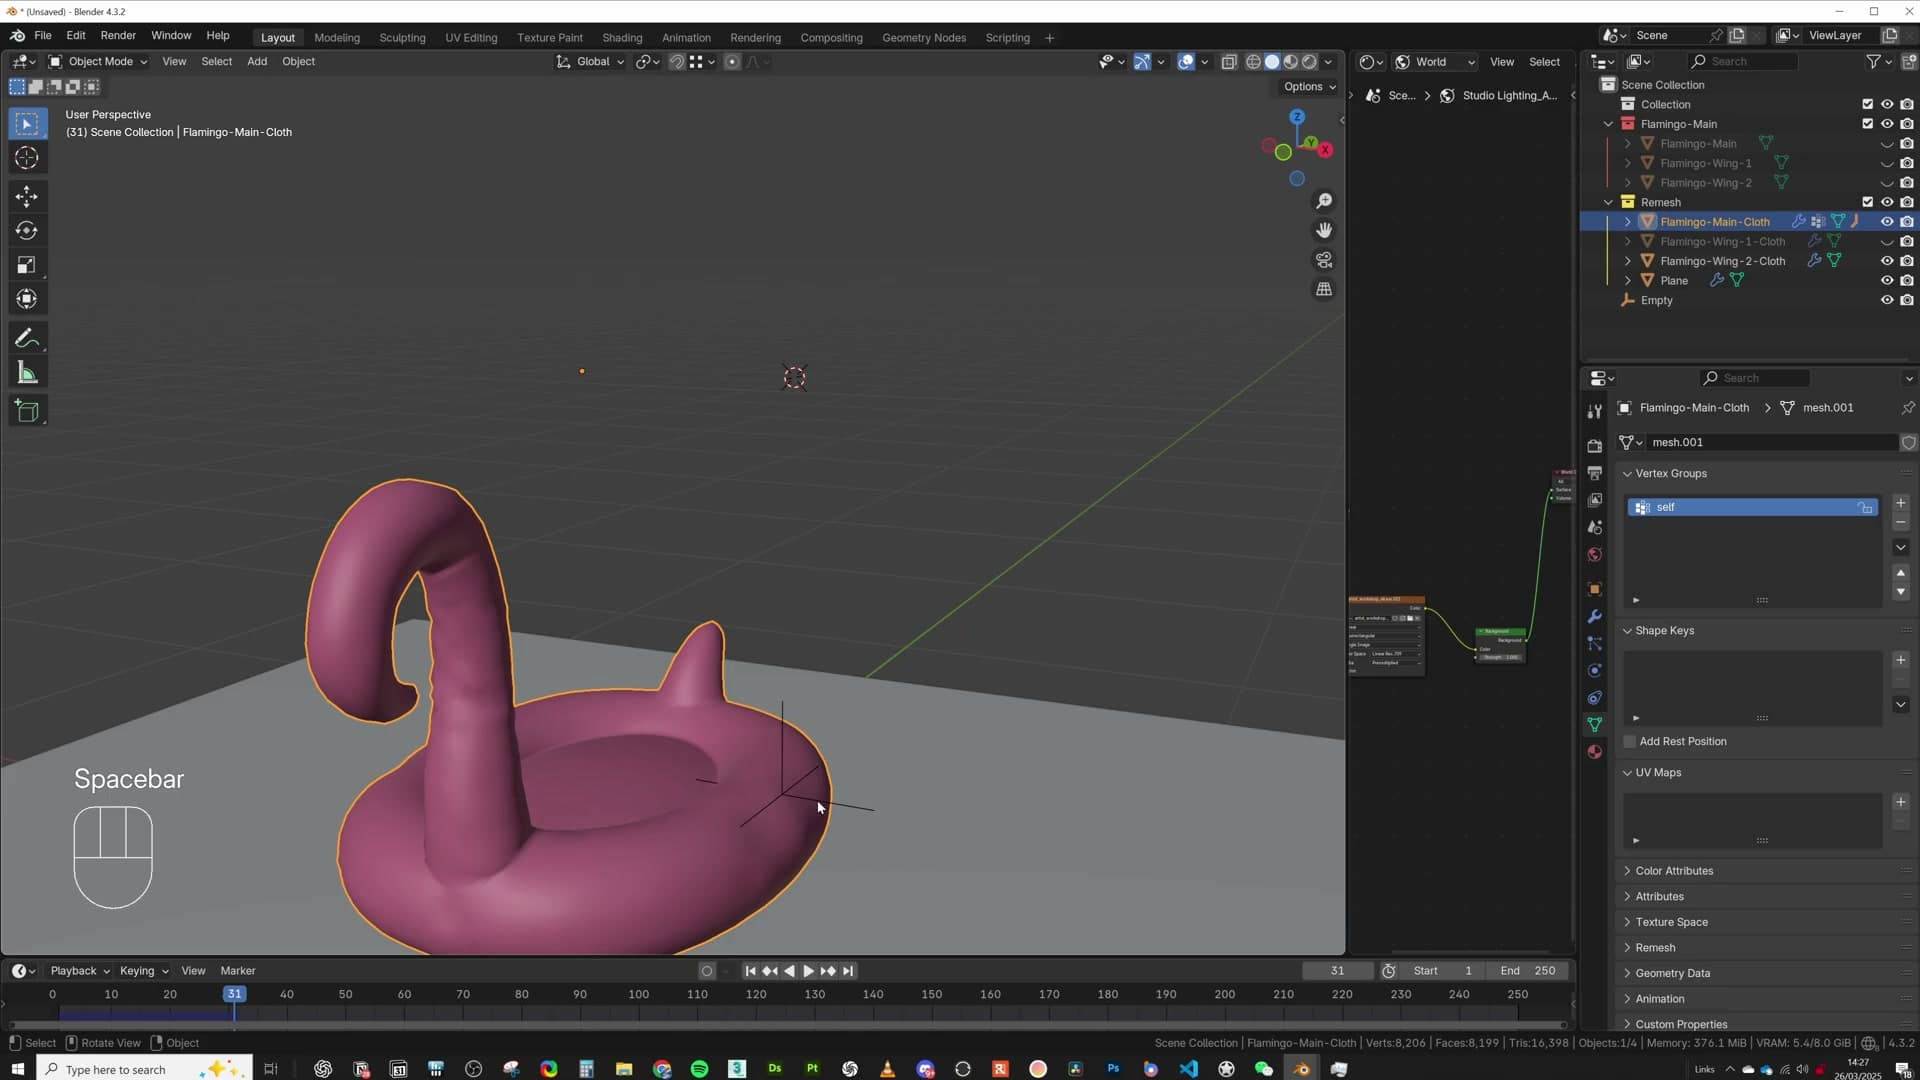
Press Shift+A and add an Empty roughly where the wing meets the body. Shrink it down so it doesn't dominate the viewport. Click the body, hold Shift and click the Empty so the Empty is the active object, then drop the body into edit mode. Select three vertices around the contact patch and press Ctrl+P to vertex-parent the Empty to those vertices.
Press play and the Empty now rides the body cloth, even tumbling with the face it's anchored to. Rename it hook1. Hide the first wing and repeat the whole sequence for the second wing-to-body contact patch, naming that Empty hook2. You now have two Empties tracking the body surface, ready to drag the wings along with them.
Hook modifier and the hook vertex group on the wing
Bring the cloth wings back into view, click the first one, switch to front view, and drop into edit mode. Press Alt+H to unhide anything that was tucked away.
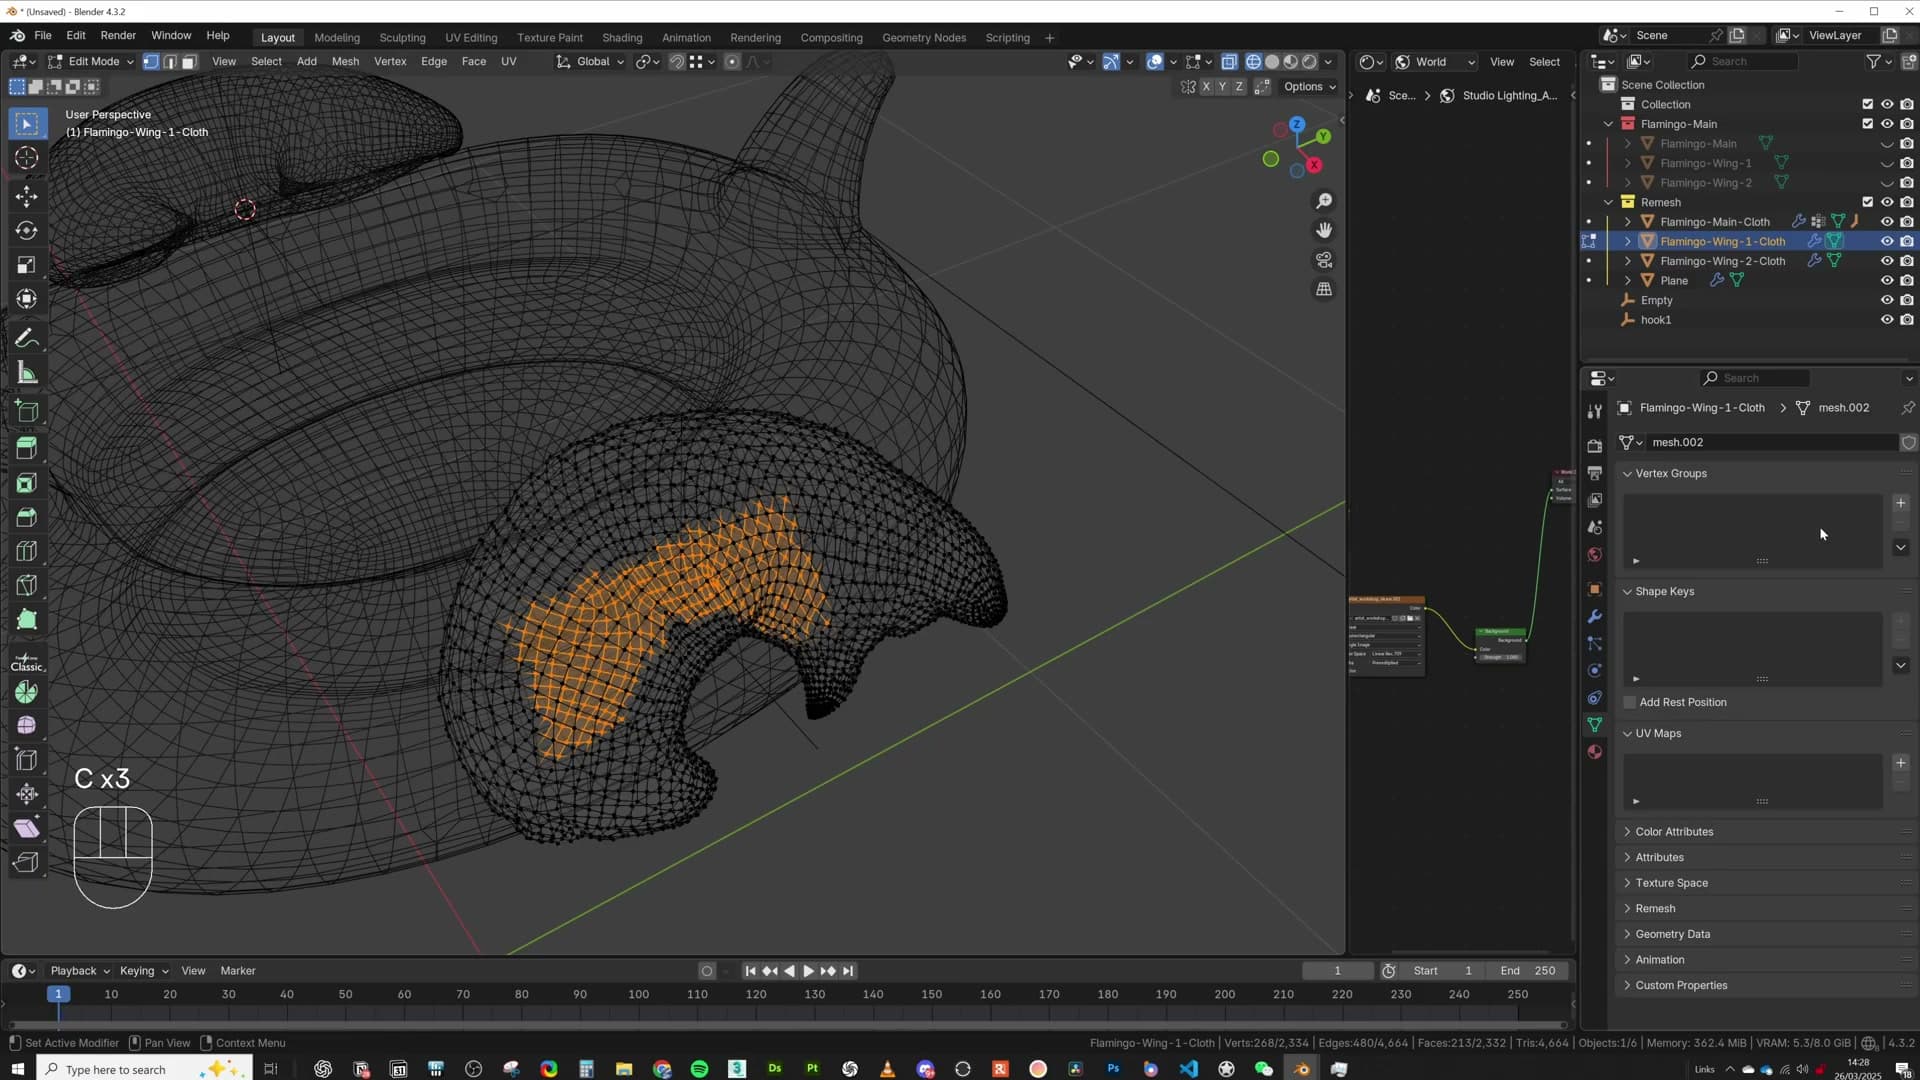
The Hook modifier needs a vertex group covering only the strip of the wing that contacts the body. The rest must stay free to simulate. Press C for circle select and paint across the wing to grab everything, then hold Shift and paint over the regions that aren't touching the body to deselect them. It doesn't need to be surgical; rough boundaries are fine.
In the Object Data Properties, add a new vertex group, rename it hook1, and click Assign. Repeat on the second wing with a group called hook2.
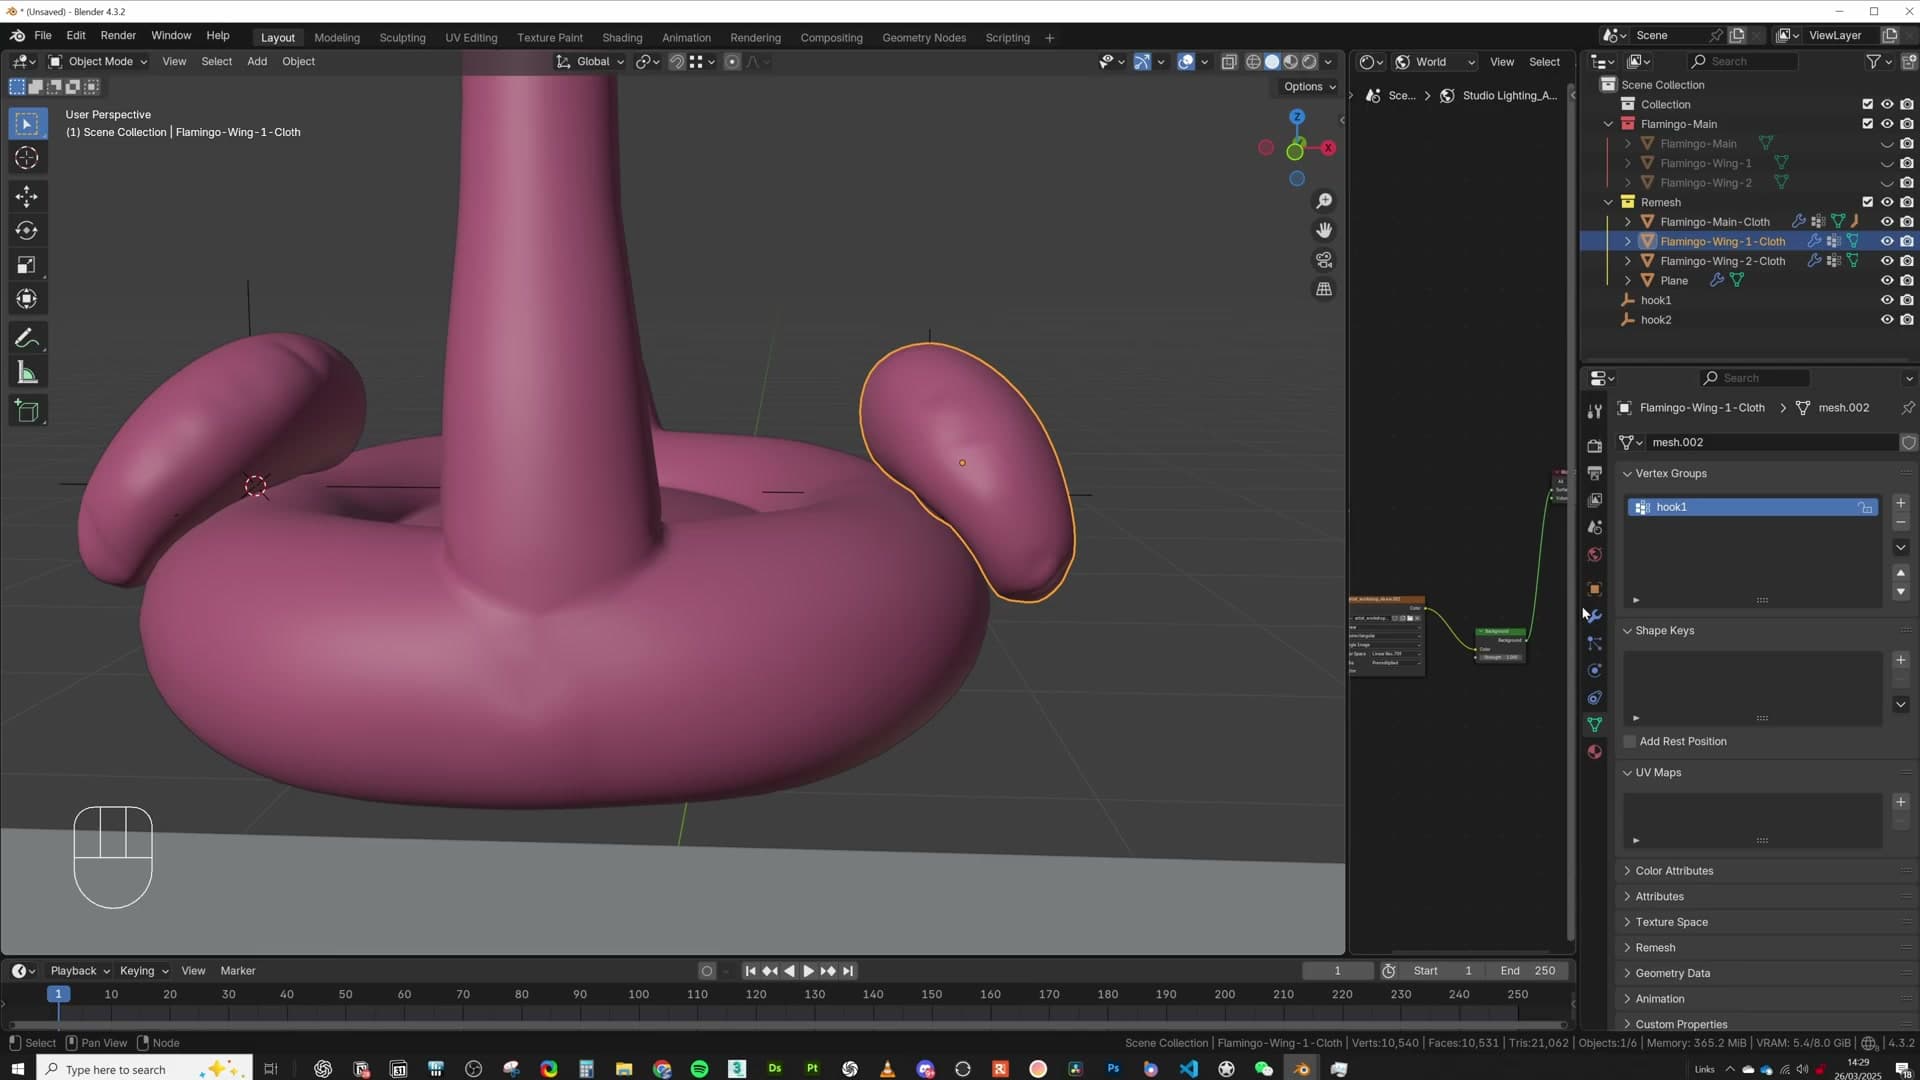
With the first wing still selected, open the Modifiers tab and add a Hook modifier. Set Object to the hook1 Empty and Vertex Group to the hook1 group. Press play. The wing is finally tracking the body, but it still drifts through itself a little. One more setting locks it in.
Pinning the hook group in cloth shape settings
Open the Physics tab on the wing and scroll down to the Shape section. Set Pin Group to hook1. Pinning tells the cloth solver that those vertices won't move under cloth forces. The rest of the mesh simulates around them.
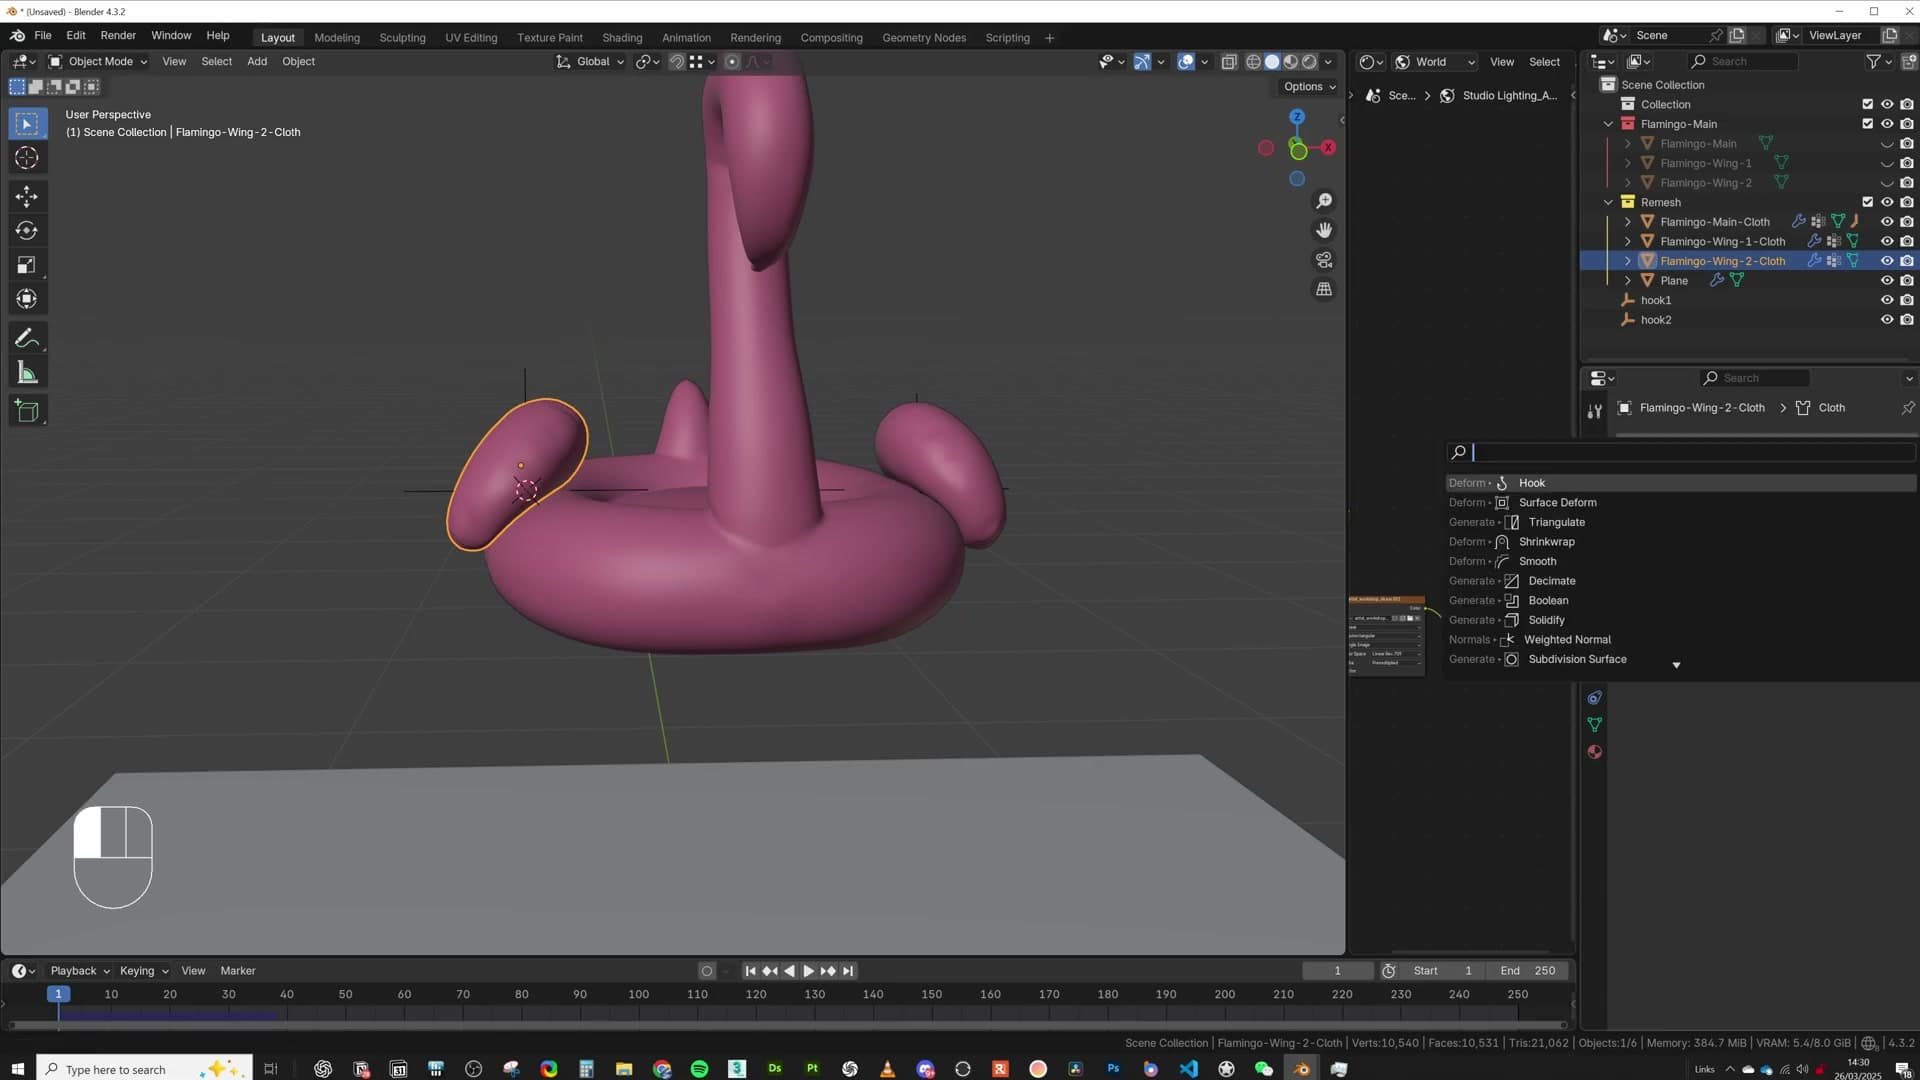
The trick is the combination. You've simultaneously told Blender, via the Hook modifier, to move that same vertex group to follow the Empty. So the pinned vertices ride the body cloth while the unpinned remainder of the wing flaps freely. Press play and the first wing is now attached to the body surface, deforming naturally as it goes.
Repeat on the second wing. Add a Hook modifier and move it to the top of the modifier stack. Set its Object and Vertex Group to hook2, then open the Physics tab and set Pin Group to hook2 under Shape. Press play and both wings now interact with the body cleanly through the whole simulation.
Drive the high-poly with Surface Deform
Add a Surface Deform modifier on each high-poly piece, bind it to its low-poly cloth twin, and resolve concave polygon errors by cleaning floating edges. Optionally stack a subdivision modifier on the cloth for smoother results.
Binding the high-poly main body to the cloth proxy
With the secondary pieces parented and the low-poly proxy solving cleanly, the last job is to tell Blender that the high-poly flamingo should follow the low-poly version frame-for-frame. The Surface Deform modifier does exactly that. It samples the surface of a target mesh at bind time, then deforms whatever you put it on to match.
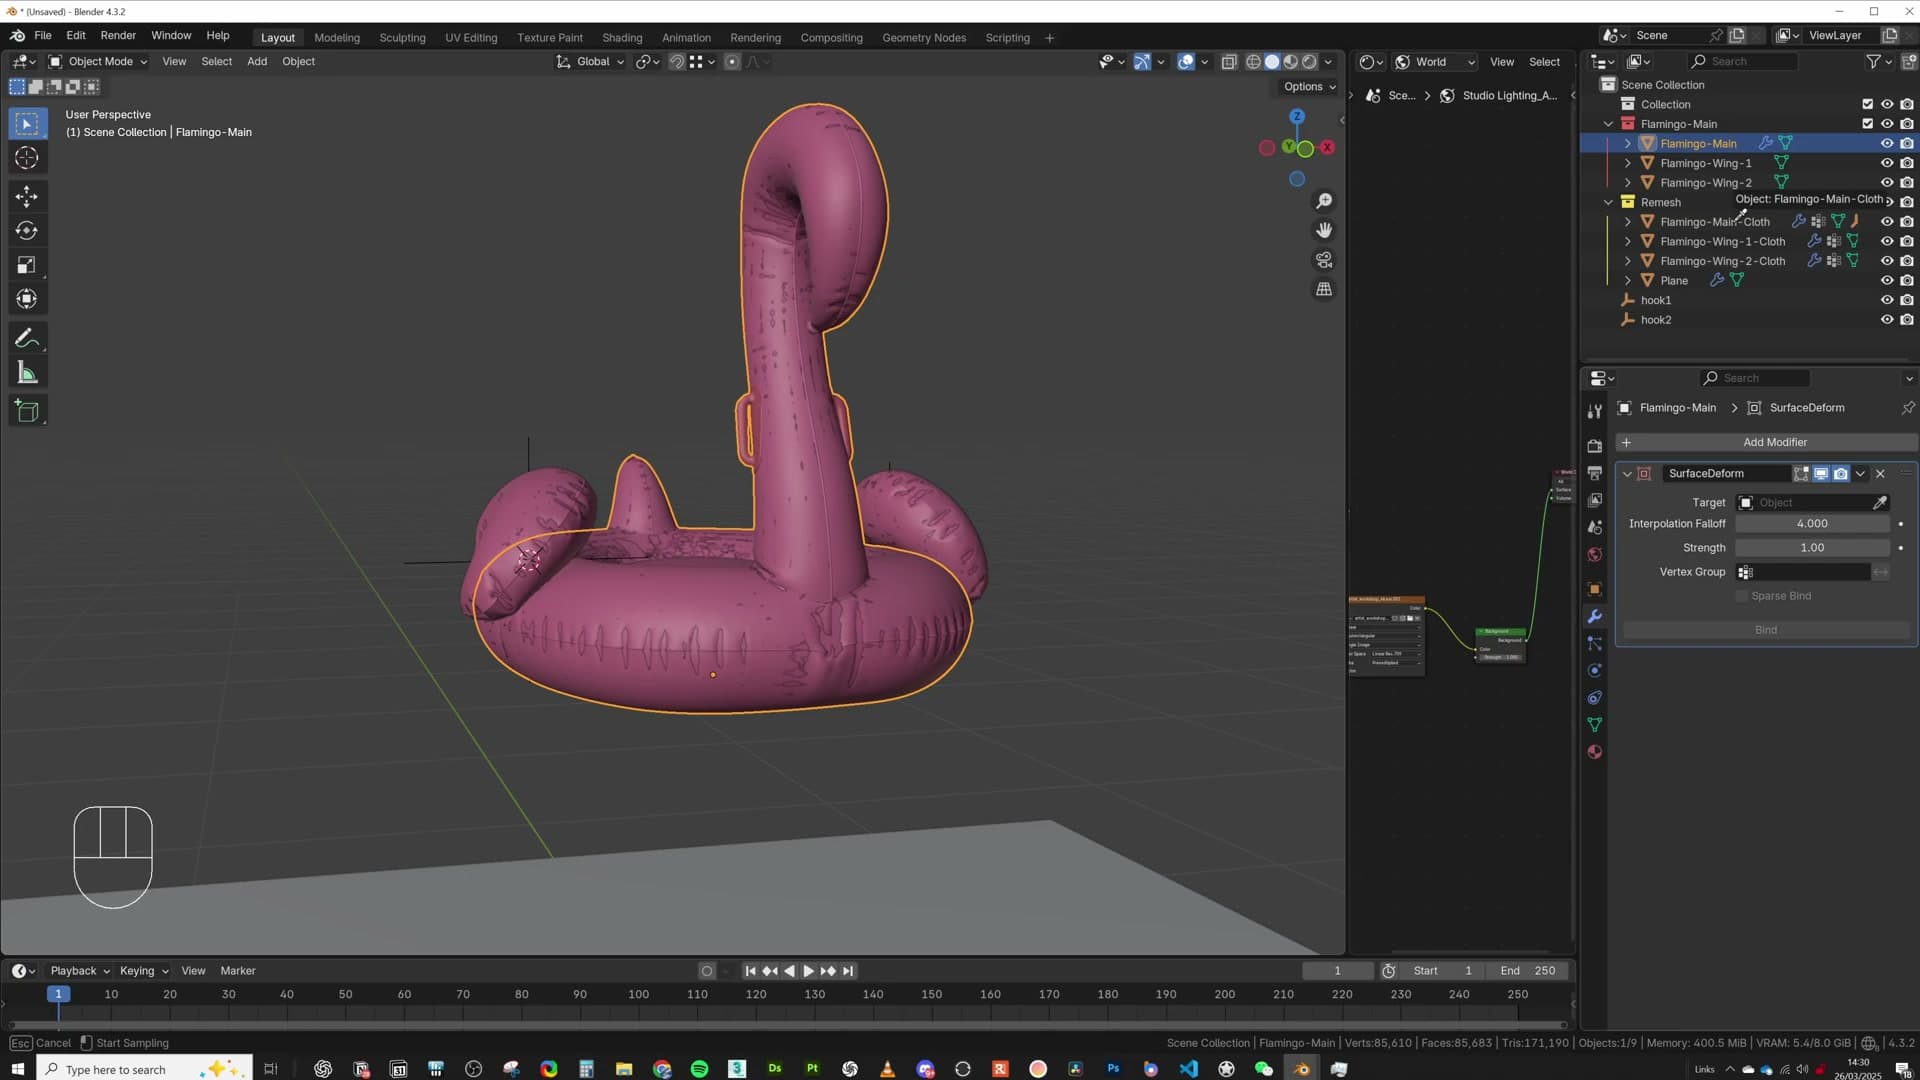
Unhide the high-poly objects so you can work with them again. Select the high-poly main body, go to the modifiers tab, and add a Surface Deform modifier. In the modifier's target slot, pick flamingo_main_cloth (the low-poly cloth proxy you've been simulating against), and then click Bind.
Once bound, the high-poly main body is locked to the proxy. Anywhere the cloth solve pushes the proxy, the detailed mesh follows.
Binding the wings and handling concave polygons
Repeat the same binding workflow on each wing. Select the high-poly wing, add a Surface Deform modifier, set the target to the matching low-poly wing cloth (wing1_cloth for the first, wing2_cloth for the second), and click Bind on each one.
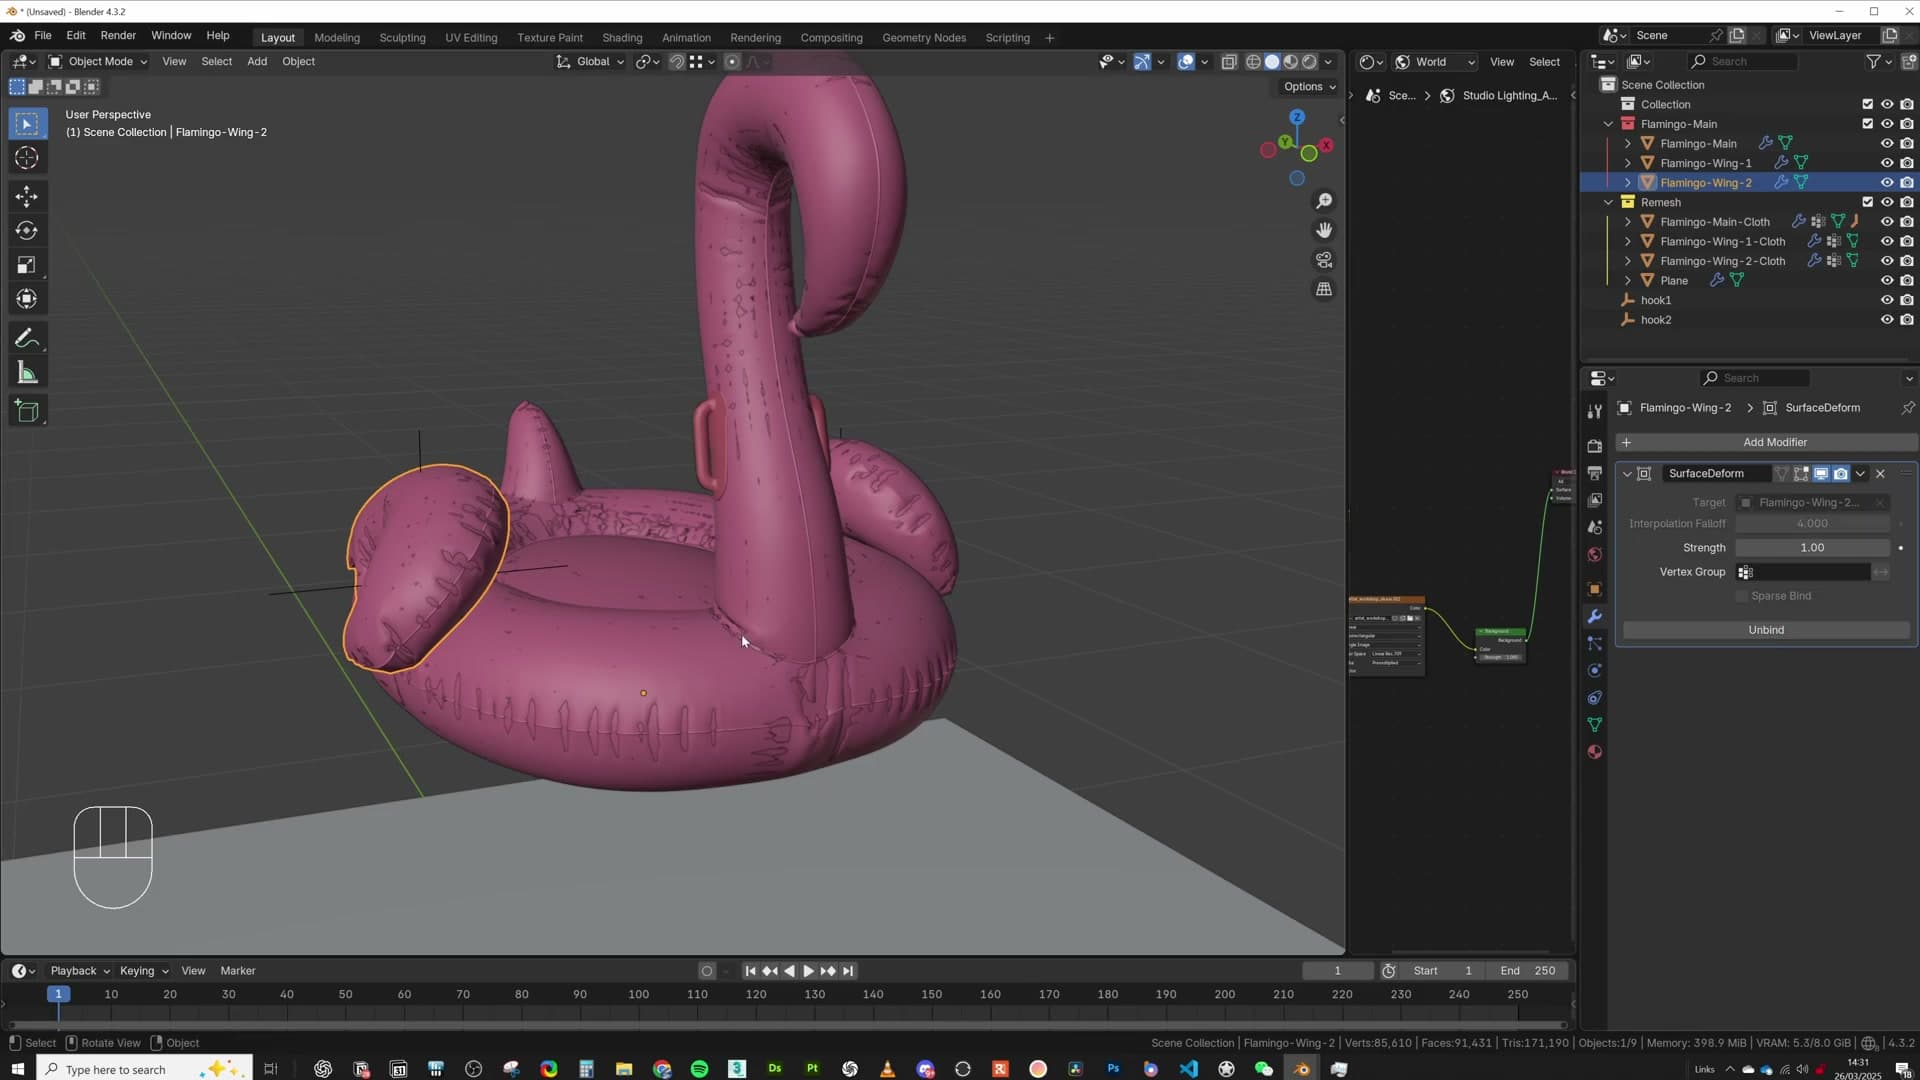
Sometimes Bind throws a concave polygon error instead of completing. A concave polygon is one that's not cleanly convex. In practice this usually shows up where there's a floating edge inside a face, or a vertex that breaks an n-gon into a non-convex shape. Blender can't unambiguously project onto that surface, so the bind refuses.
The cleanest fix is to tidy up the offending face on the proxy: connect the floating vertices into a proper edge so the surrounding face becomes a clean, convex polygon, then try Bind again.
On this flamingo, both wings happened to bind without complaint on the first attempt. The concave-polygon scenario is common enough that it's worth knowing the cause before you hit it on your own asset.
Playing back the bound simulation and adding smoothing
Hide the low-poly proxy and scrub the timeline. The detailed flamingo now rides the cloth solve exactly as the proxy did. Every squash on impact, every wobble on the surface, transferred straight onto the hero mesh.
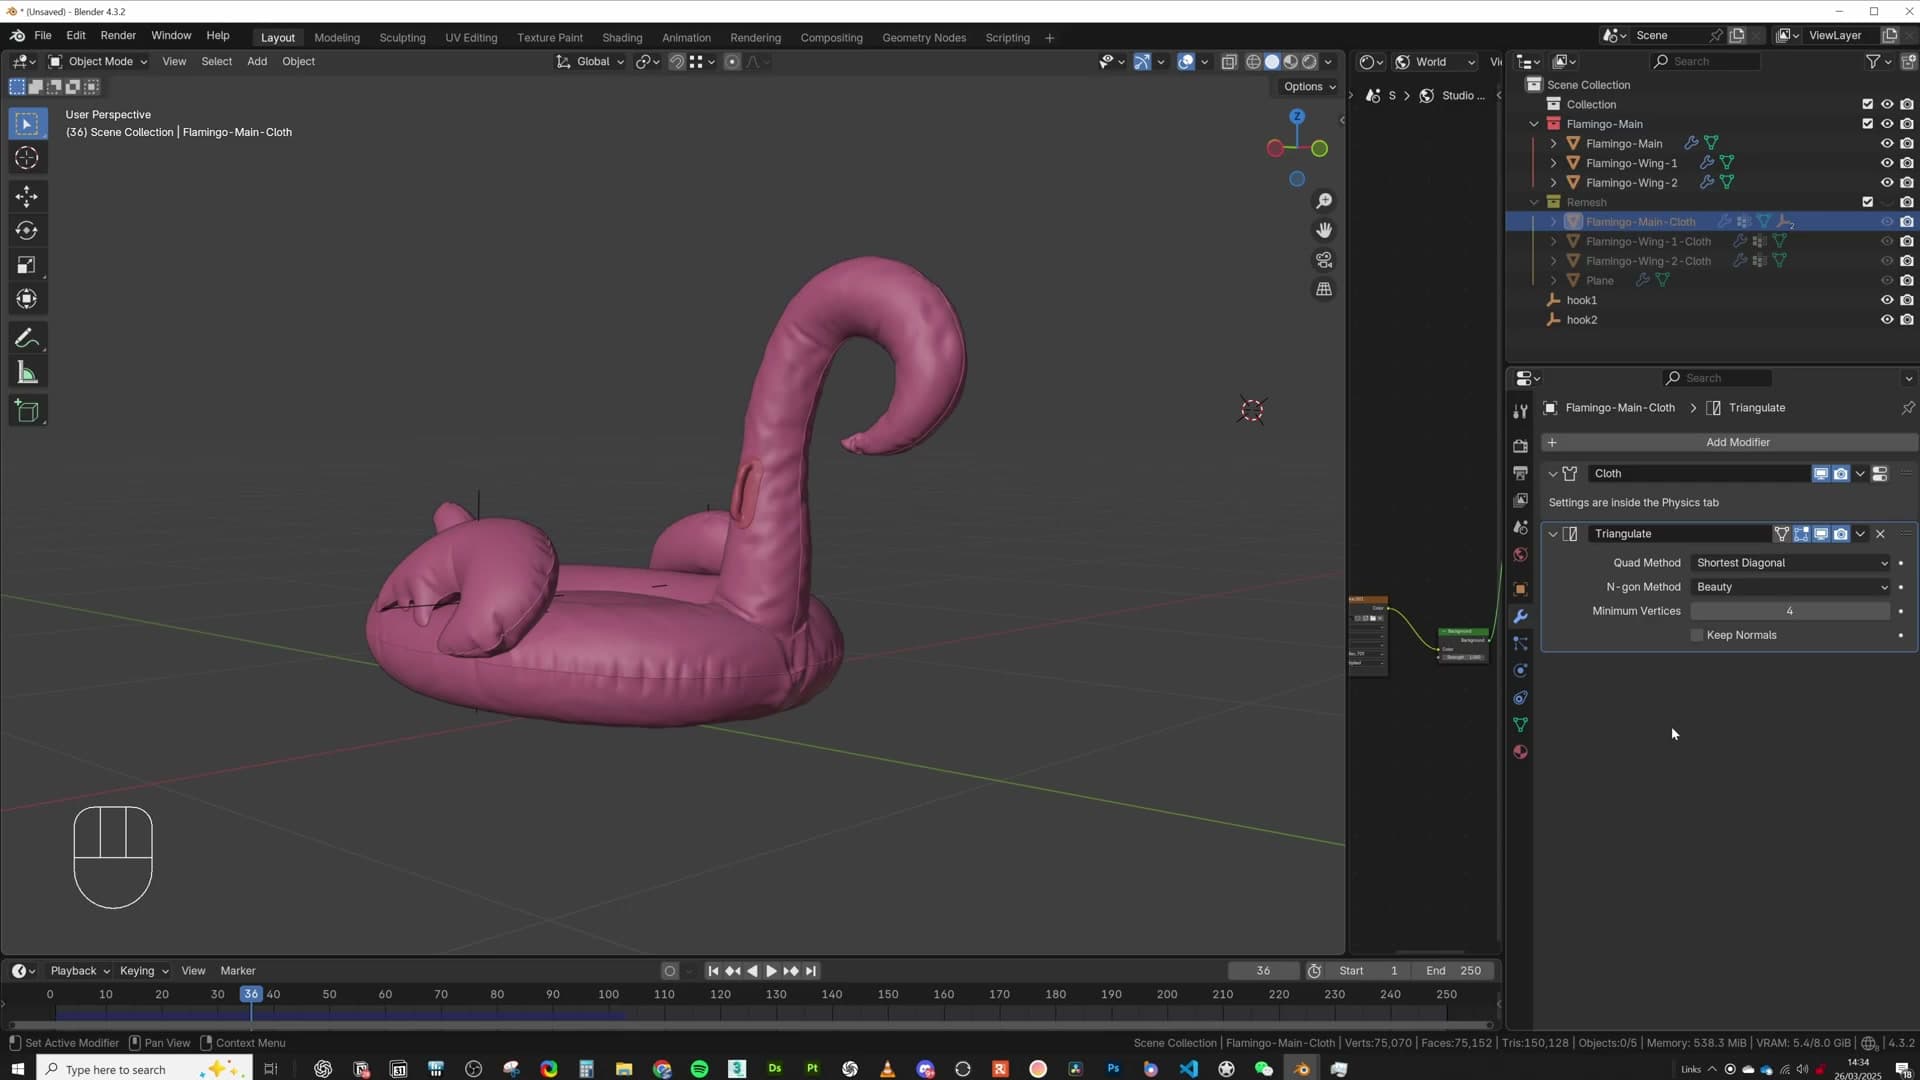
If the result looks too coarse, or you can still read the low-poly silhouette through the bound high-poly, you have two options. Either go back and rerun Quad Remesher on the proxy with a higher target polygon count, or stack a Subdivision Surface modifier at the bottom of the cloth object's modifier stack. The subdivision route smooths the edges of the proxy after it solves, which carries through to the Surface Deform result. It's slower to compute, but it cleans up faceting without re-binding anything.
Water ripples with Dynamic Paint
Add a Dynamic Paint Brush to the flamingo, a subdivided plane below it as a Canvas, set surface type to Waves, and let Blender stamp ripples wherever the float intersects the surface.
Setting up the brush and canvas
With the cloth simulation behaving, the last piece is the water surface. The ripples in the original render are pure Dynamic Paint: no fluid sim, no manual keyframes. Select the flamingo, open the Modifiers tab and add a Dynamic Paint modifier.
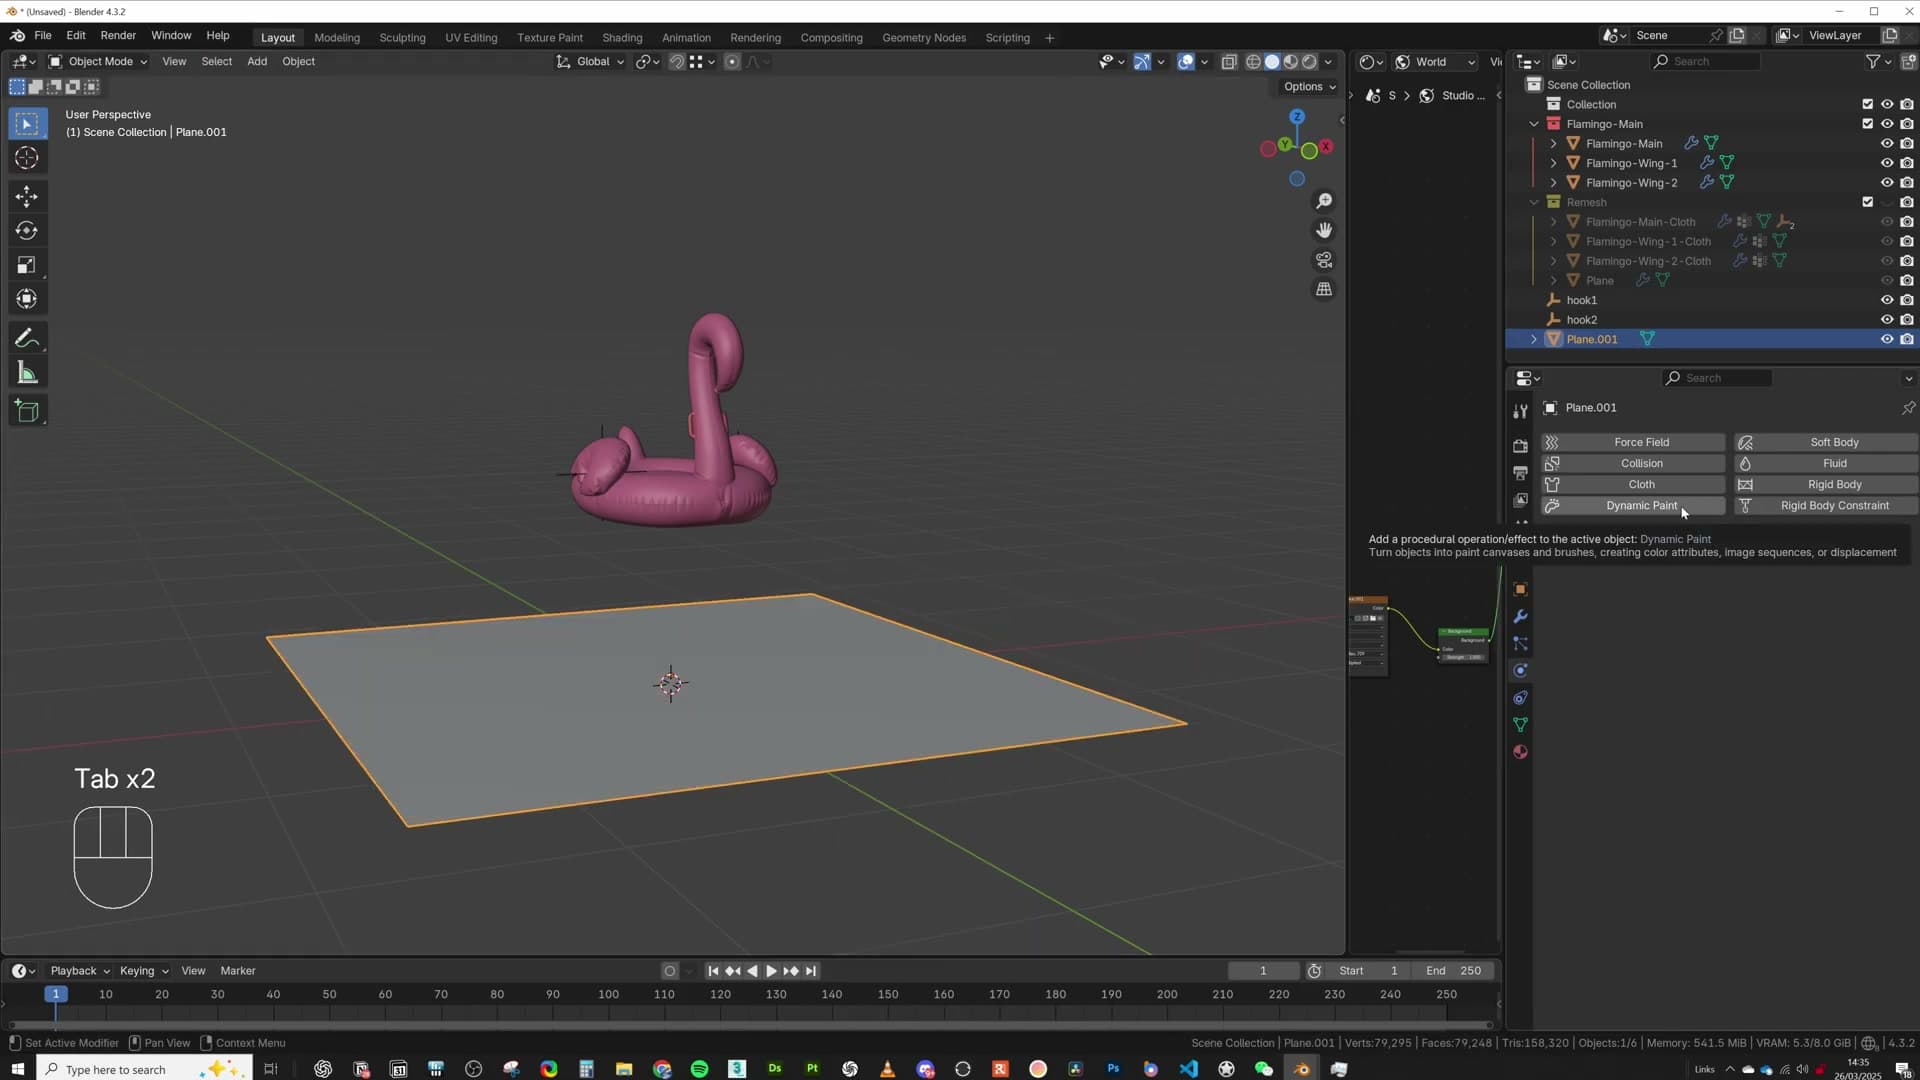
Inside the Dynamic Paint settings, switch the type to Brush and click Add Brush. The float is now the object that paints onto the water whenever it touches it.
Press Shift+C to recentre the cursor, add a plane, and subdivide it several times so it has enough geometry to deform smoothly. Give the plane its own Dynamic Paint modifier, but this time set the type to Canvas, click Add Canvas, and change the Surface Type from Paint to Waves.
Playing back the wave ripples
Press play. Blender starts solving, and ripples radiate out from wherever the flamingo touches the canvas. Dynamic Paint reads the intersection between the brush mesh and the canvas mesh and stamps wave displacement onto the canvas automatically.
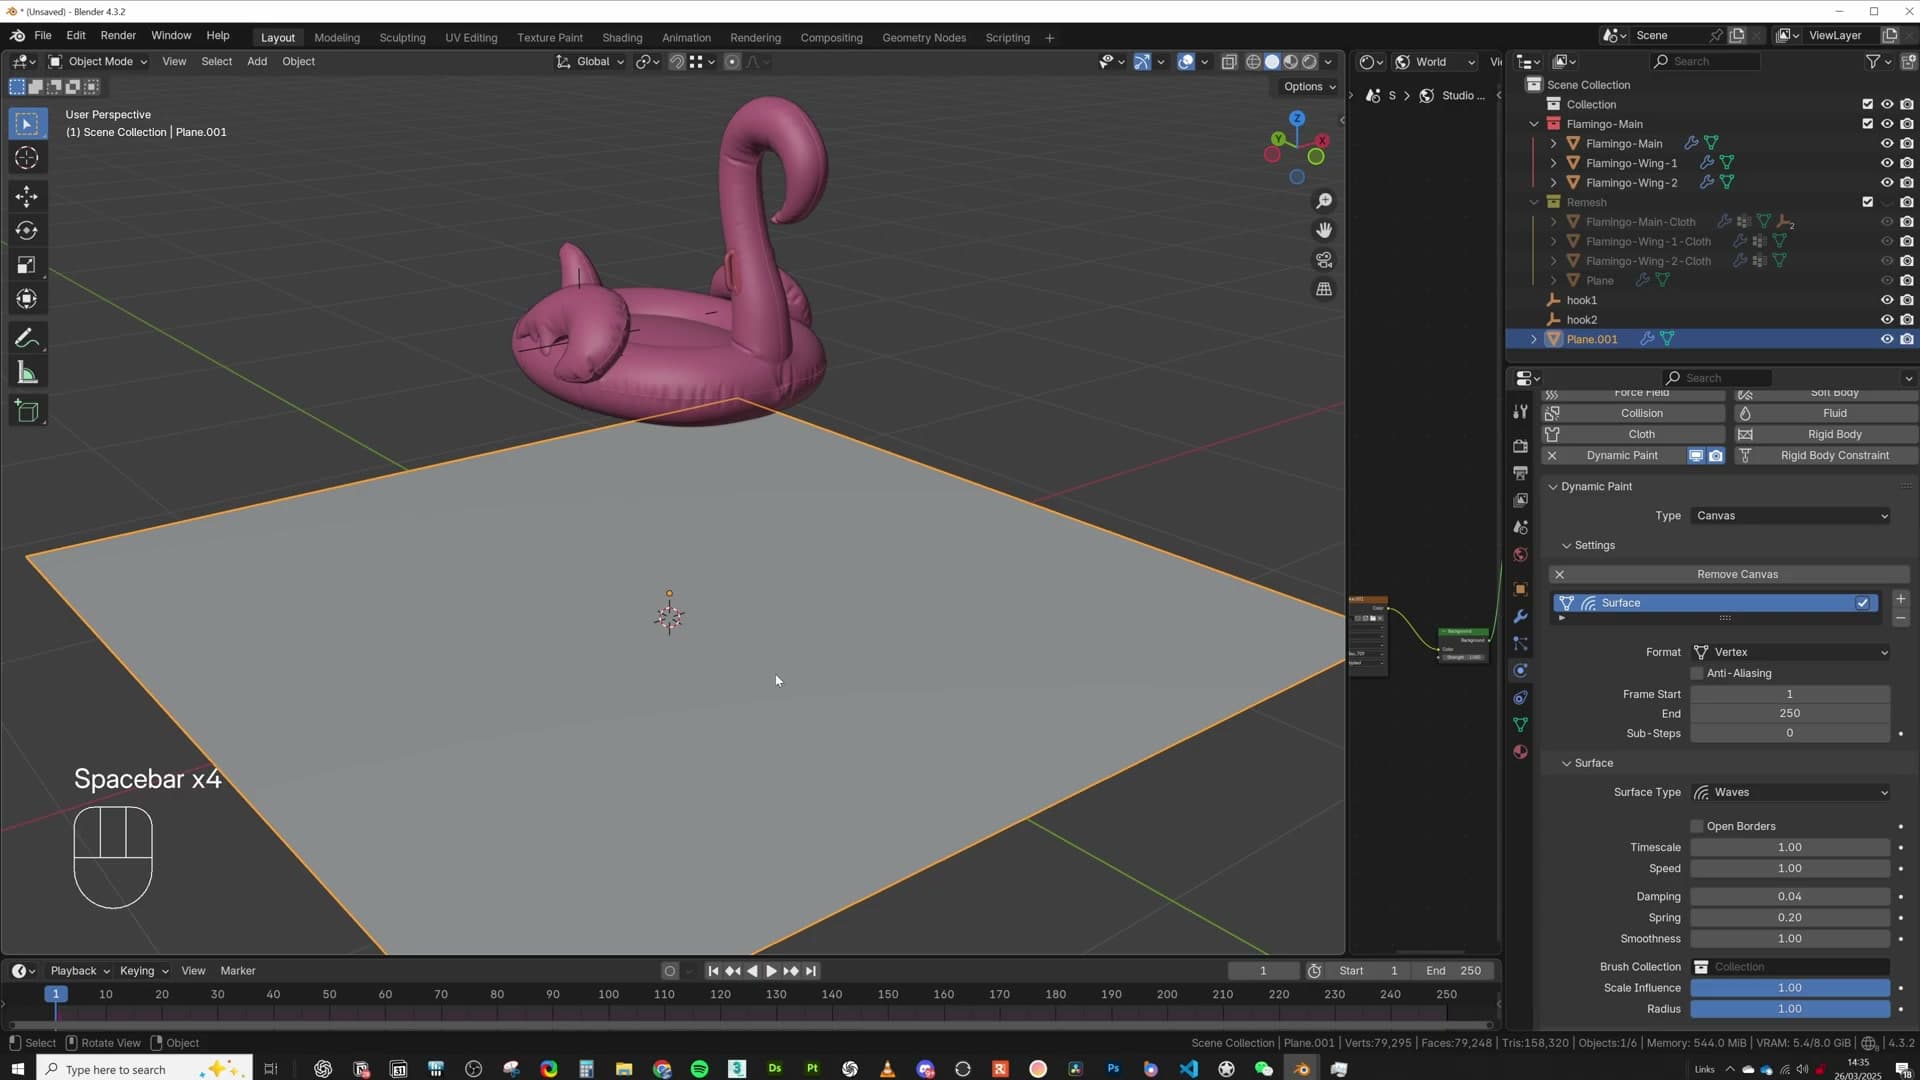
If the float is sitting above the plane and nothing is happening, drag the plane up a little so it actually intersects the body of the float, then play again. With Shade Smooth on the plane, the waves read as a soft water surface rather than the faceted subdivision lines underneath.
That is the entire interaction. No fluid solver, no baking, no keyframing. The float moves, and the water reacts.
Procedural wave displacement material
Layer a noise-driven displacement material on the water plane, switch displacement mode to Displacement Only, then animate the 4D noise W coordinate for continuous wave motion that combines with the Dynamic Paint ripples.
Noise texture into displacement
With the Dynamic Paint canvas doing the splash-driven ripples, you can now layer a procedural wave pattern on the same plane so the water still has motion when nothing is touching it. Open the Shading workspace on the water plane and add a Noise Texture node and a Displacement node. Wire the noise Fac output into the Displacement node's Height input, then run the Displacement node's output into the Displacement socket on the Material Output.
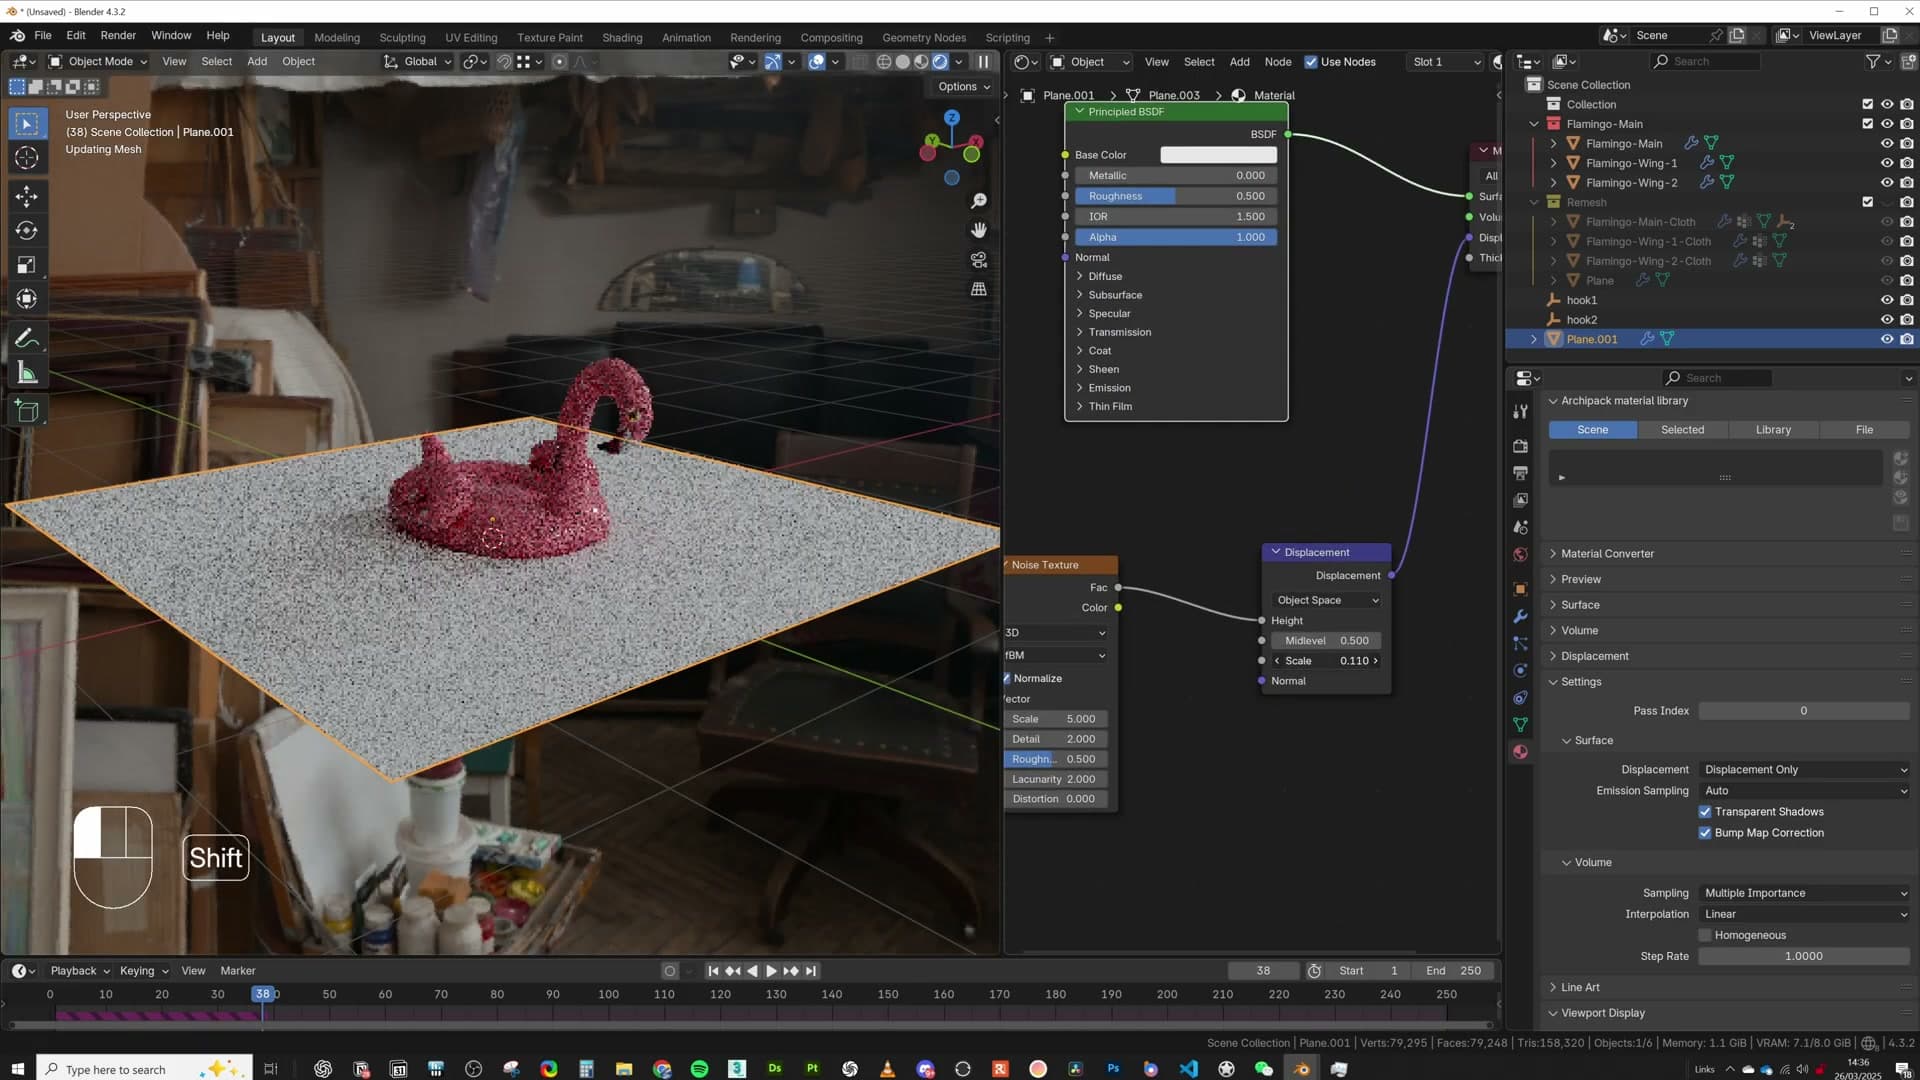
By default Blender treats that connection as bump shading only. The surface looks displaced but the geometry never actually moves. Go to the material Settings panel, find the Surface > Displacement dropdown, and switch it from Bump Only to Displacement Only. The subdivided canvas from the previous module is what gives the solver enough vertices to push around.
Flip the viewport to rendered preview. The first result will be extreme: huge spiked waves all over the plane. Dial back the Displacement node's Scale until the surface settles into something that reads as gentle water rather than a stormy sea.
Animating waves with the 4D noise W coordinate
A static noise pattern gives you texture, but not movement. To animate the waves, change the Noise Texture's Dimensions dropdown from 3D to 4D. This exposes a fourth input, W, which behaves like a seed for the noise field.
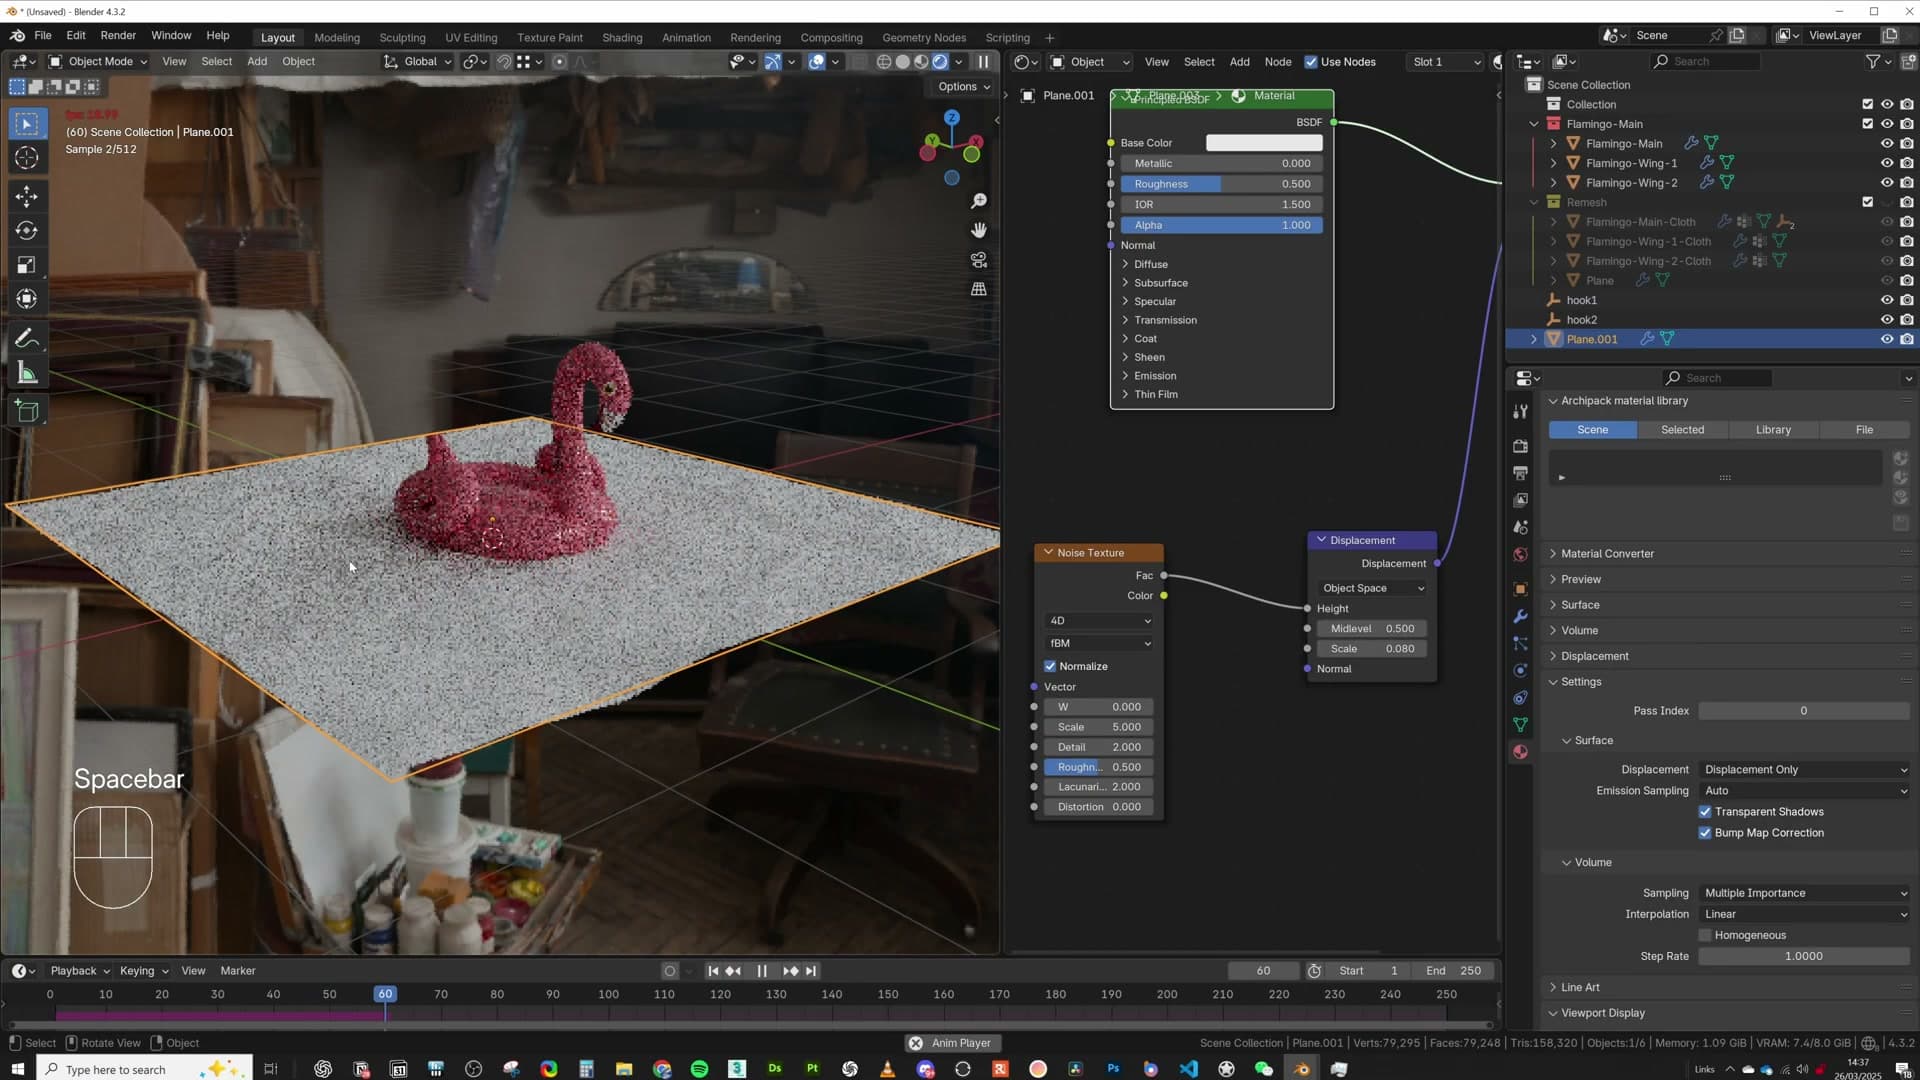
As you scrub the W value, the noise pattern shifts through a new slice of the field, and the displaced surface looks like waves rolling across the water. Animating W across the timeline gives you continuous wave motion without ever having to keyframe geometry.
Because the procedural displacement and the Dynamic Paint waves are both modifying the same canvas, they layer on top of each other. The ambient noise gives the water a constant gentle motion, while the brush-driven ripples still kick in wherever the flamingo touches down. If the combined effect is too aggressive, bring the displacement scale down a touch so the splash interaction still reads clearly.
That's the overview of how the fabric simulation and the water surface were put together for the original animation.
Tools and credits
Everything mentioned in this tutorial, with links.
- Blender is the renderer this entire build runs in.
- iMeshh is a studio platform (project management, client review, asset library, invoicing). The asset library used in this tutorial is included with every iMeshh Pro plan.
- Poly Haven provides free CC0 textures and HDRIs.
Pillar guide: Animation hub