Why model the chesterfield instead of simulating it
This is where I introduce the buttoned-upholstery technique borrowed from 3ds Max workflows and make the case for hand-modelling square sofas over Marvelous Designer. Part 1 covers the main cushion section; later parts cover the frame, legs and loose cushions.
Modelling vs Marvelous Designer for square sofas
Welcome to this iMeshh tutorial on building a chesterfield-style sofa from scratch in Blender. The buttoned-upholstery approach you'll use here is borrowed from a workflow that shows up regularly in 3ds Max scenes but isn't as widely shared in the Blender community. It's a technique I hadn't reached for personally until the project that triggered this video.
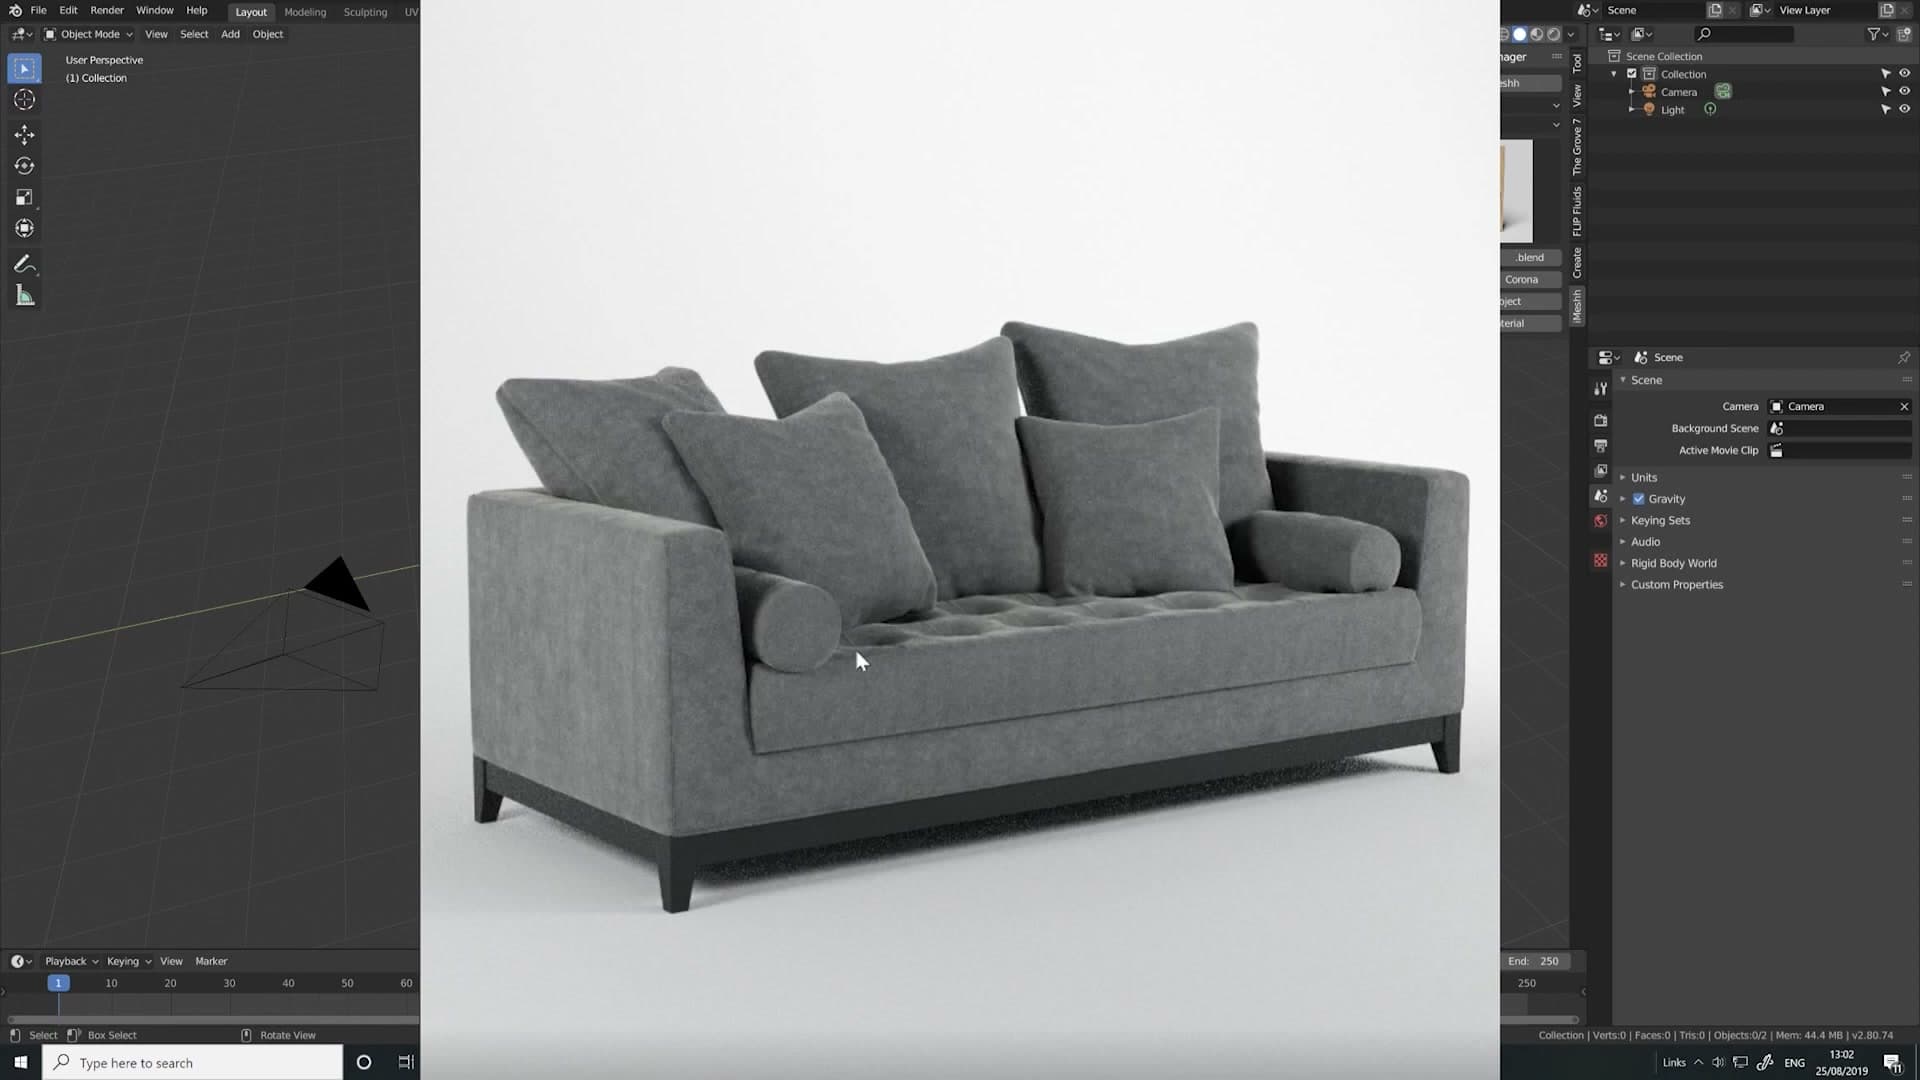
Up to this point, my go-to tool for soft furnishings had been Marvelous Designer. It's a very capable piece of software, and for cushions that genuinely drape and bunch it still earns its place. Square, boxy sofas are a different problem: they're tight, blocky and structured, and a cloth simulation tends to fight against that.
Hand-modelling boxy sofas gives you cleaner topology and better-looking results than letting a sim resolve the shape for you. That's the case this tutorial makes, and it's the workflow you'll follow for the rest of the series.
Scope of Part 1: the main buttoned cushion
The full sofa is split across a few parts. Part 1 (this video) covers the main cushion section: the buttoned, tufted slab that defines the look of a chesterfield. Later parts will tackle the sofa frame, the legs, and finally the loose seat cushions.
Inside Part 1 you'll block out the cushion, build the bumps that come from buttoned upholstery, and set the geometry up so the creases (covered in the next section) sit naturally between each button.
Block out the sofa shape from a cube
Start with a single cube scaled to roughly 2.33 × 1 × 0.5 m, then carve the hollow seat well using a couple of loop cuts, face deletes and a Bridge Edge Loops to form the recess that the cushion will live inside.
Add a cube and set sofa dimensions
Clear out the default scene contents and add a fresh cube. This single primitive becomes the block-out for the entire sofa.
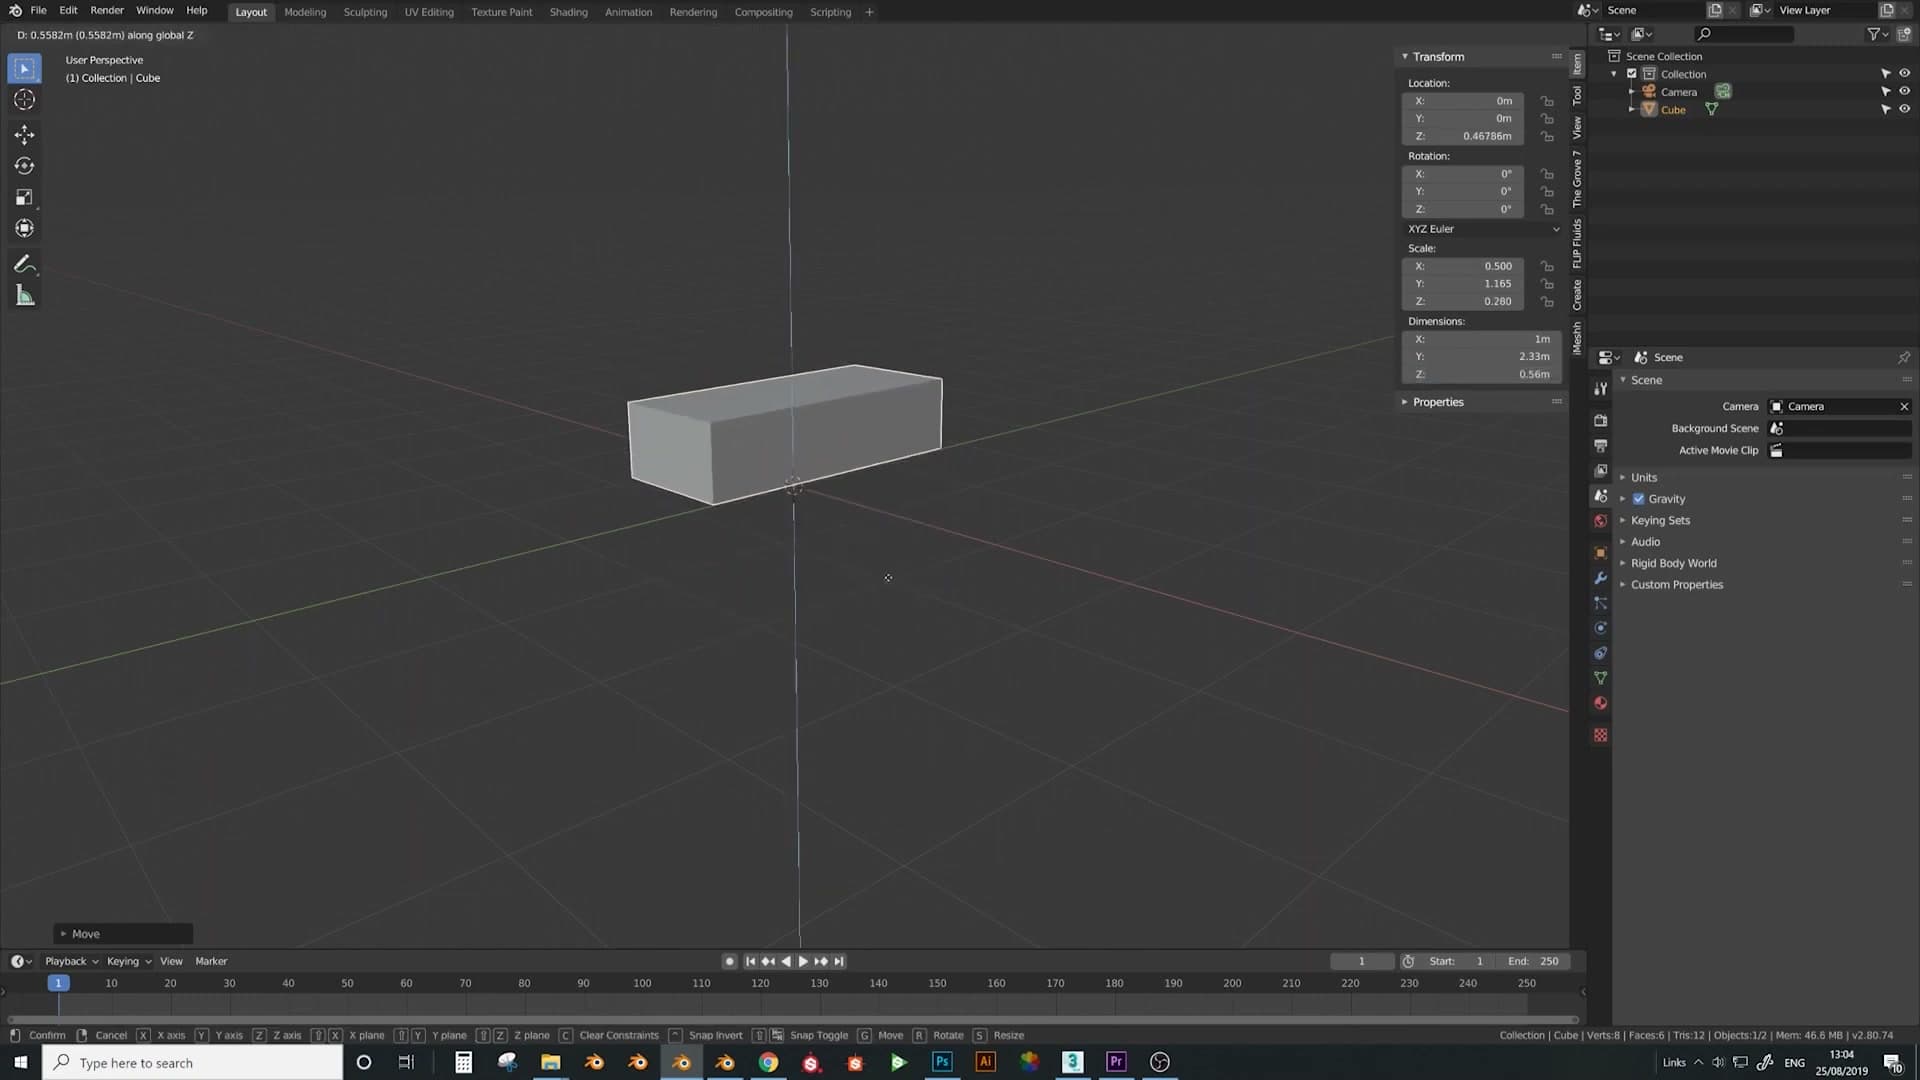
Open the N-panel and set the cube's Dimensions to roughly 2.33 m long, 1 m deep, and 0.56 m tall. Working in real-world scale from the start keeps the buttons at a believable size when you start tiling them across the cushion later on.
Lift the cube clear of the origin with G then Z so it sits flat on the floor plane. That's the outer volume of the sofa locked in.
Loop cuts, face deletes and Bridge Edge Loops
Drop into edit mode with Tab, hit Ctrl+R across the long axis of the block, and scroll the middle-mouse wheel to drop in two loop cuts. These will mark out the inside walls of the seat well.
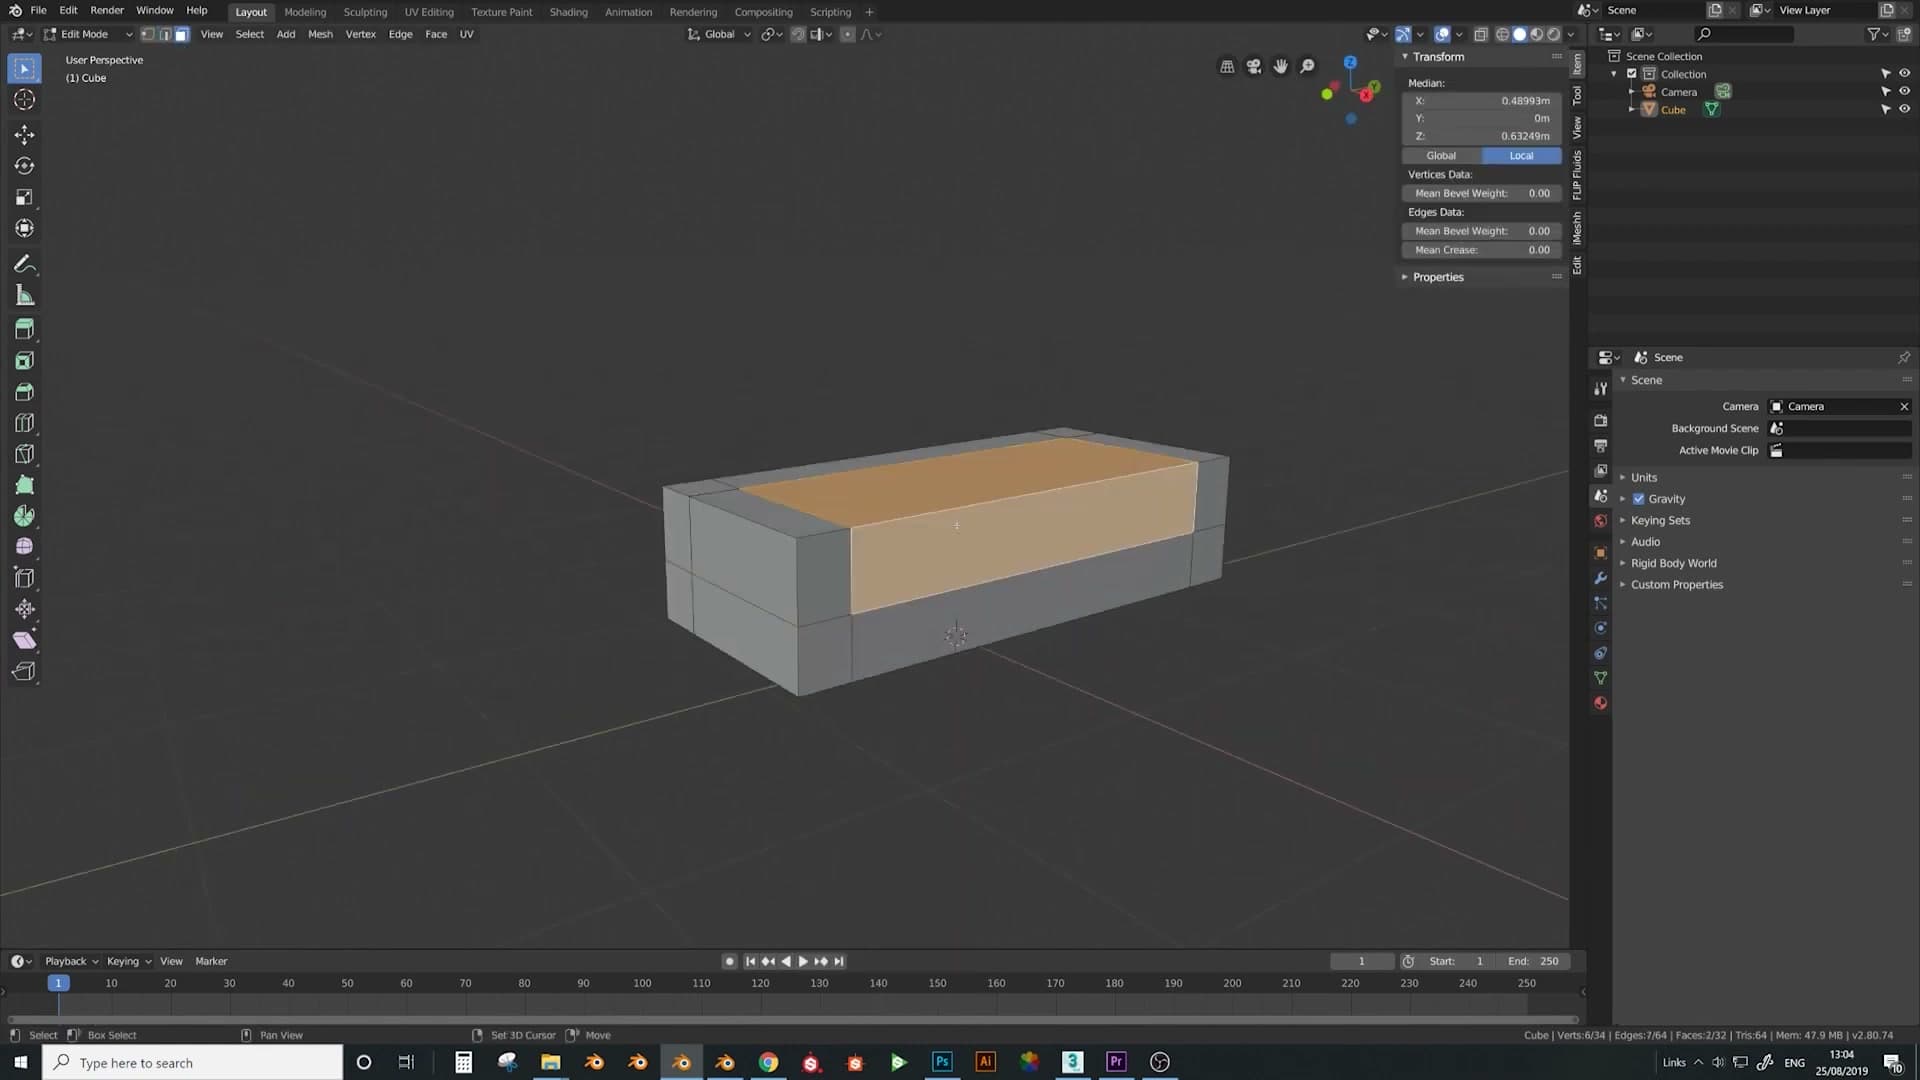
Squeeze the new loops inward with S then Y so they sit close to where the cushion edge will end up. If the spacing doesn't feel right, slip in another loop cut now. It is far easier to fix the topology before you start removing faces from it.
Switch to face select, pick the two top faces between your loops, and delete them with X → Faces. That opens the seat well from above.
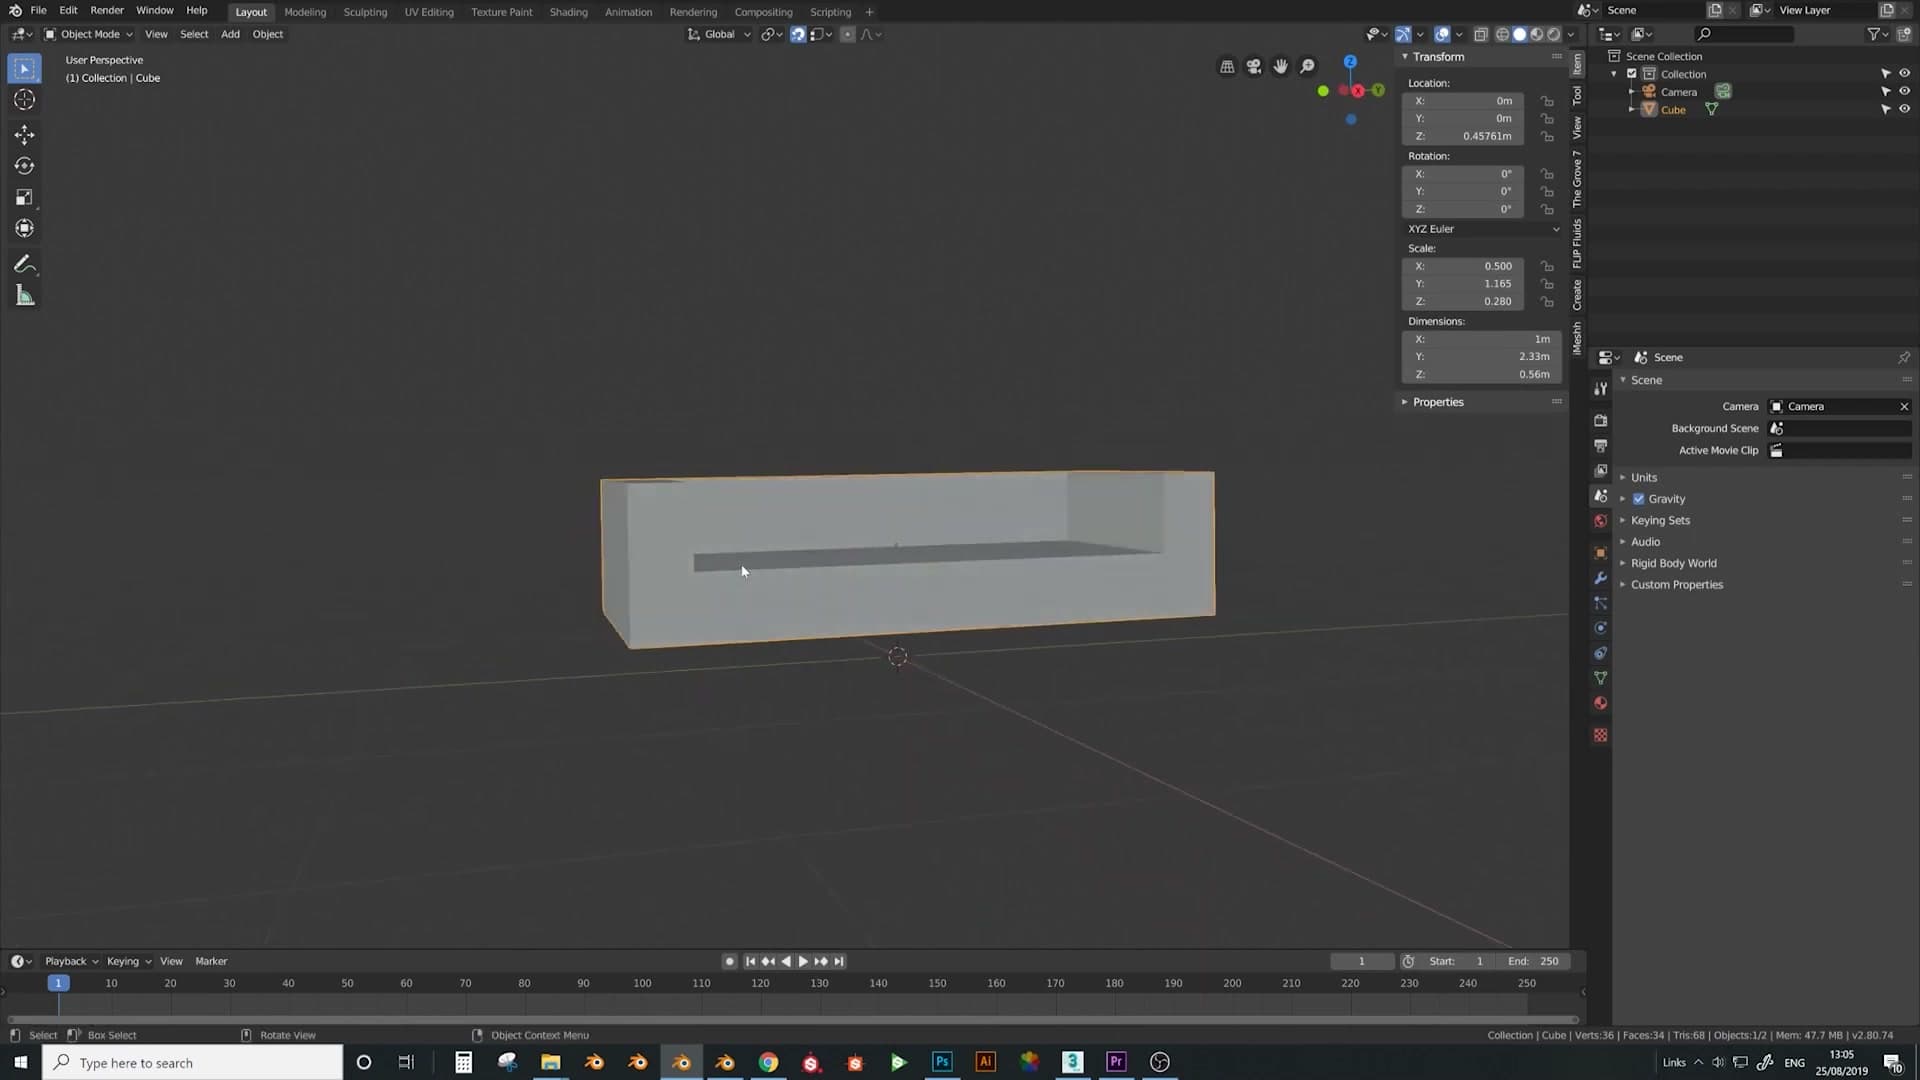
Now drop the floor of the well in. Use Shift+Tab to flick into vertex mode, click the inside edge along the bottom of the opening, then extrude it across with E then X, snapping it to the matching edge on the far side. Select the open boundary faces left at either end of the recess, hit Space and search for Bridge Edge Loops to stitch the gap closed.
You should now have a hollow recess sitting inside the block: the space the buttoned cushion will live in.
Build a single button-tufted cell
Add a plane, inset it, and carve the geometry that will become one repeatable button on the cushion. Proportional editing creates a gentle arch on the lower edge, a Mirror with clipping locks the centreline, and Loop Tools' Circle delivers a clean buttonhole.
Plane, inset and loop cuts for the cell
With the cushion well dug out, switch to a fresh start for the buttoned panel itself. Add a plane (Shift+A → Mesh → Plane) and scale it down. The exact dimensions don't matter at this stage because you'll calibrate against the sofa block once a single cell is finished. Tab into edit mode.
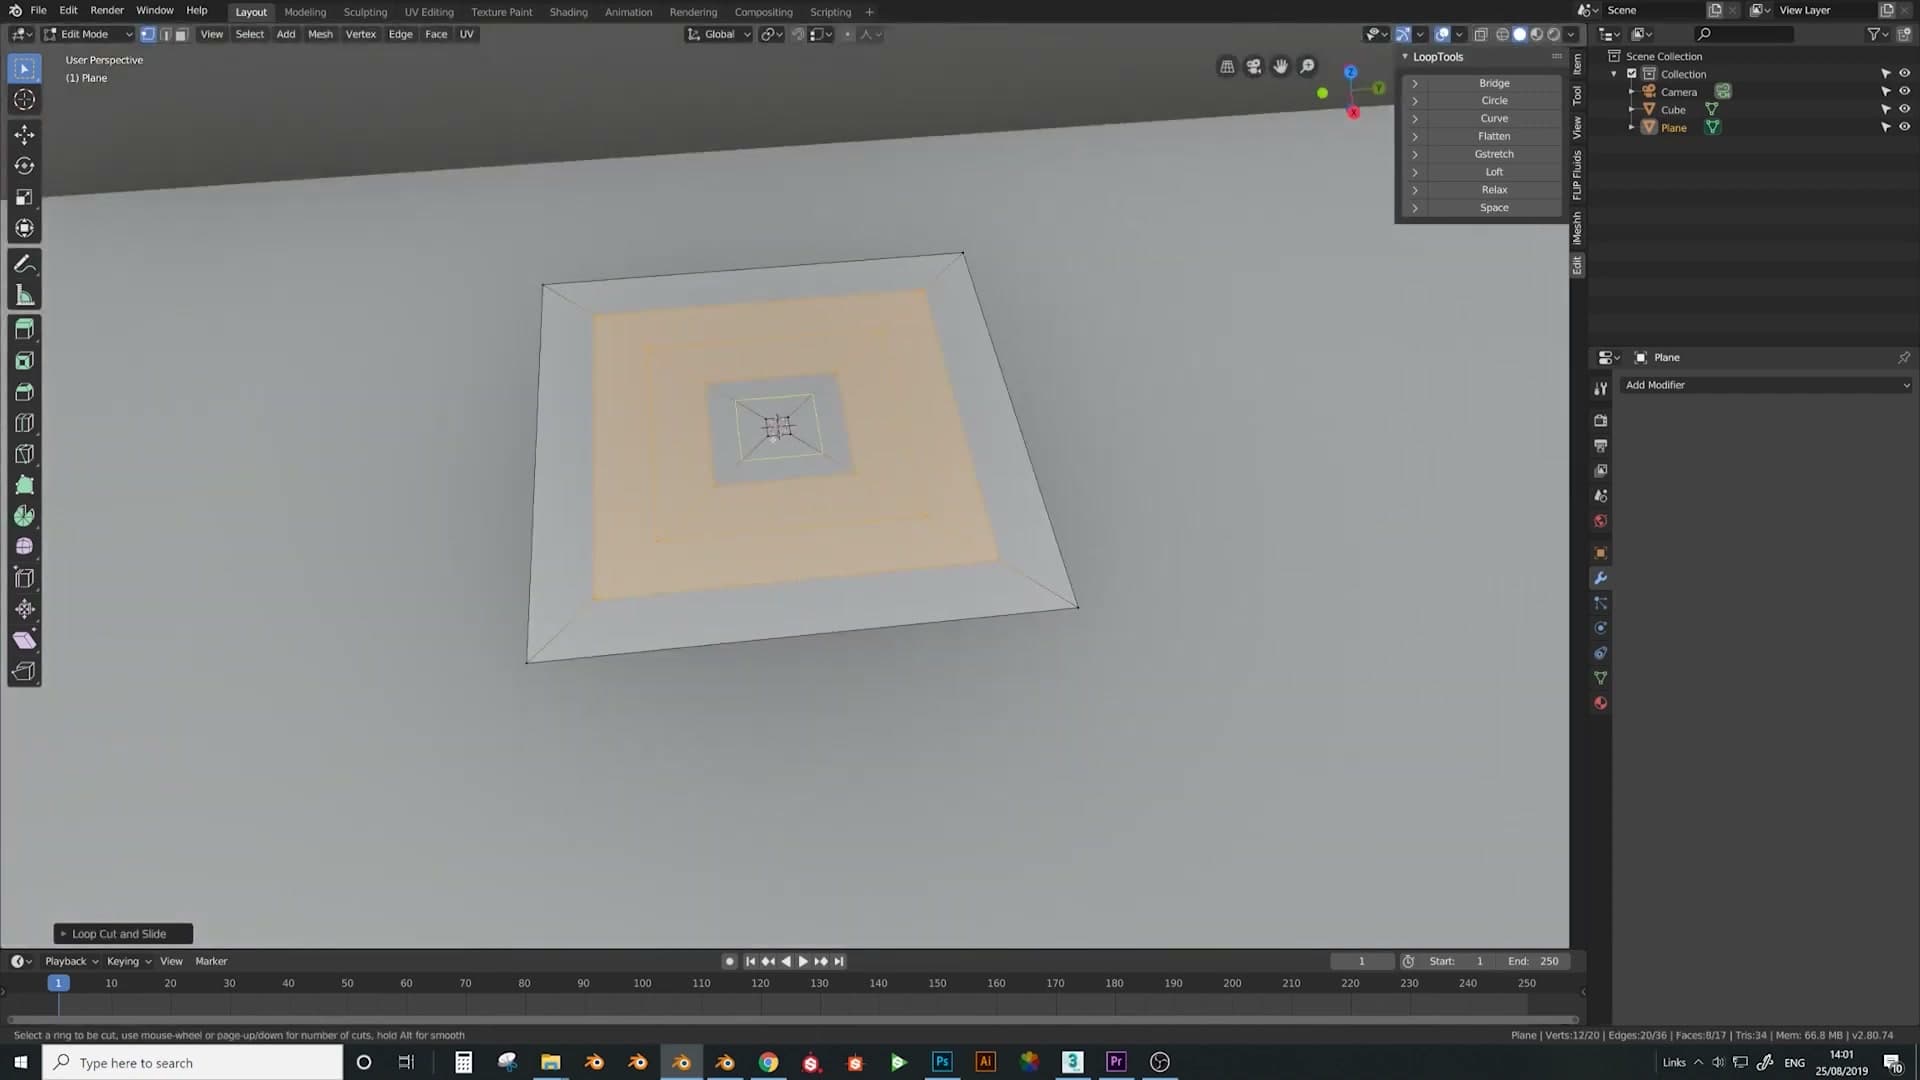
Press I to inset the face. Treat this inset as the visible quilted panel: the outer rim will become the stitched seam that frames each button, while the inner face becomes the soft cushion field where the button itself indents.
Press Ctrl+R and use the middle-mouse wheel to drop loop cuts running across the inset. I place a couple of horizontal loops through the centre: enough divisions to give the proportional-editing pull in the next step somewhere to bend without distorting the outer rim.
Arch the lower edge with proportional editing
Switch to front view (Numpad 1) so you can sculpt the silhouette cleanly. Select the lower edge of the cell. This is the edge that will droop down to mimic how fabric is pulled tight beneath each button.
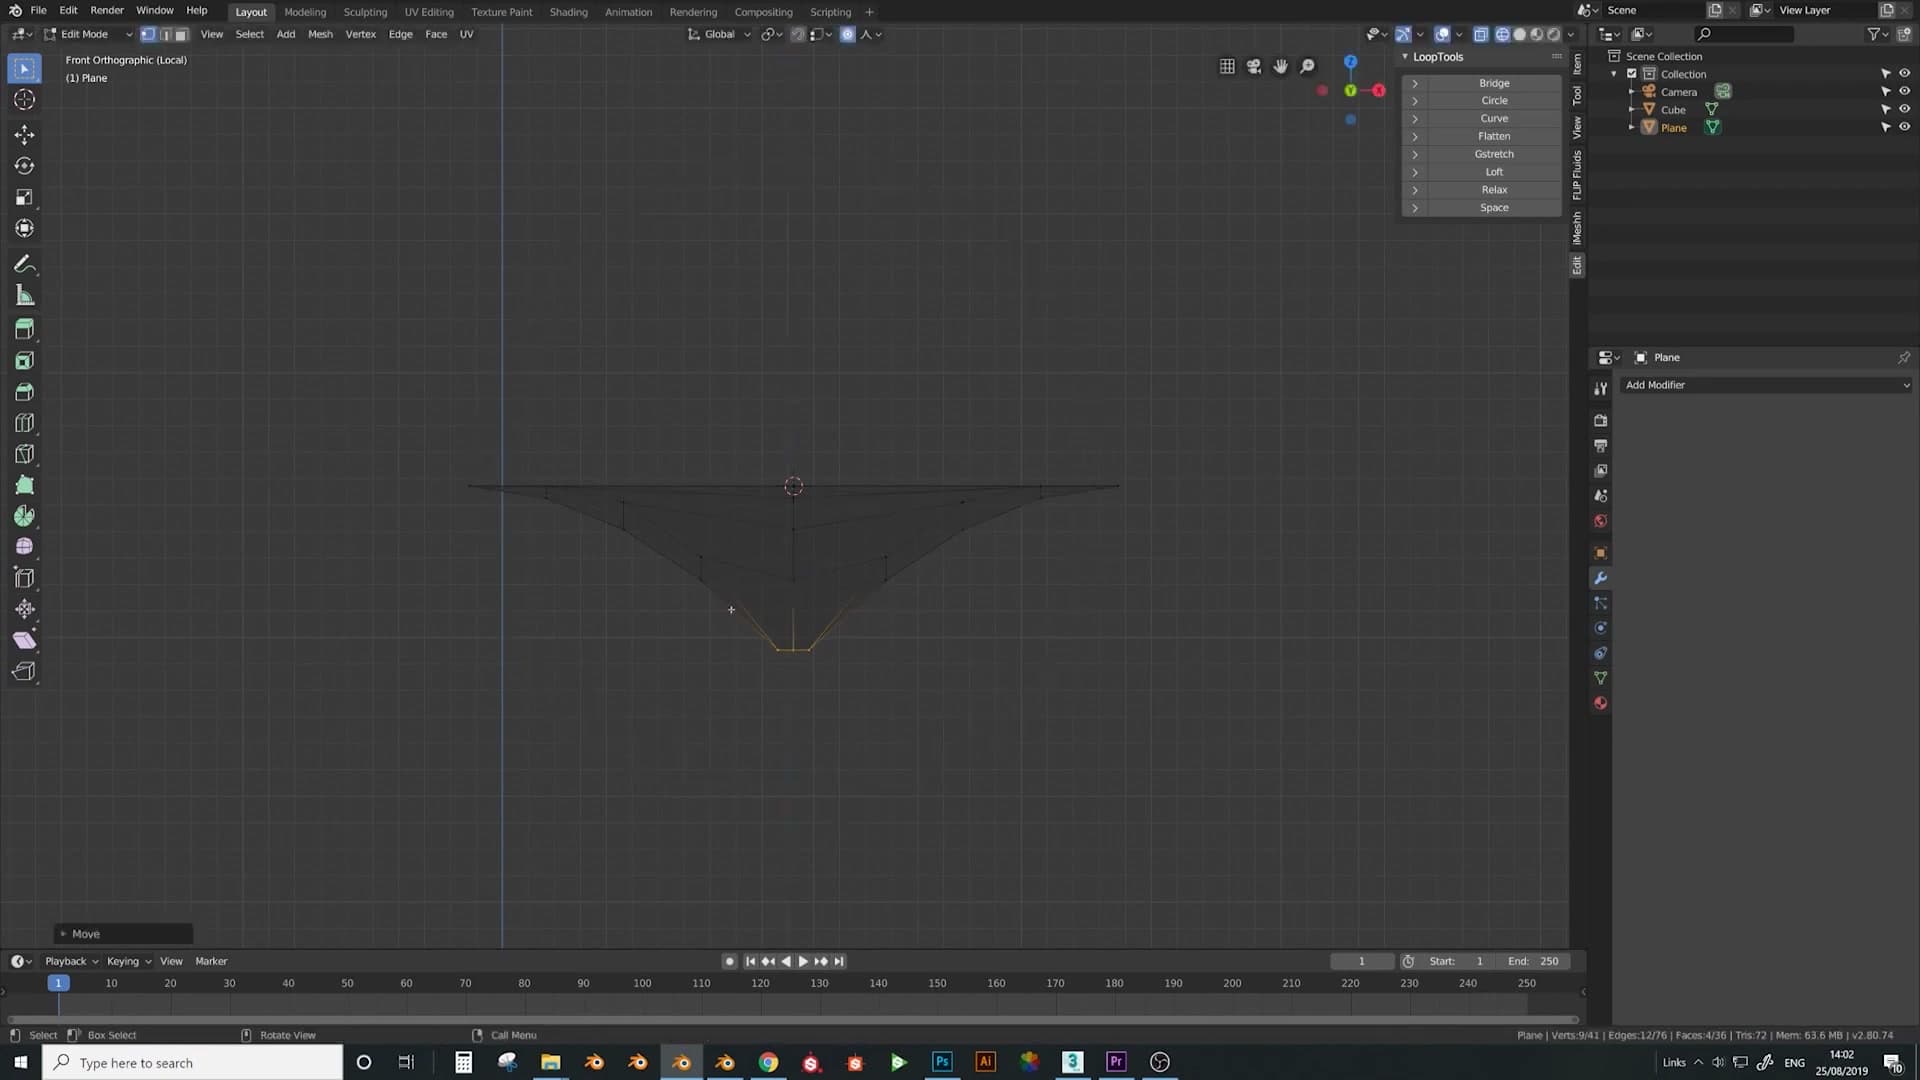
Enable proportional editing with O and change the falloff to Sharp from the proportional-editing dropdown in the header. The Sharp curve drops off quickly, giving the cushion a tight pull close to the grabbed edge rather than a broad, soft dome that would deform the whole cell.
Press G then Z and drag the edge downward to form a gentle archway along the bottom of the cell. Scroll the middle mouse wheel mid-grab to dial the proportional radius. Wider reaches further up the cell; narrower keeps the deformation hugged to the bottom. You want a soft inverted arc, not a deep valley.
Delete half and mirror with clipping
Back in front view, deselect everything and box-select one half of the cell. I take the left side. Delete those vertices. You'll rebuild the missing half with a modifier so the two sides stay perfectly symmetrical no matter how you tweak the remaining geometry.
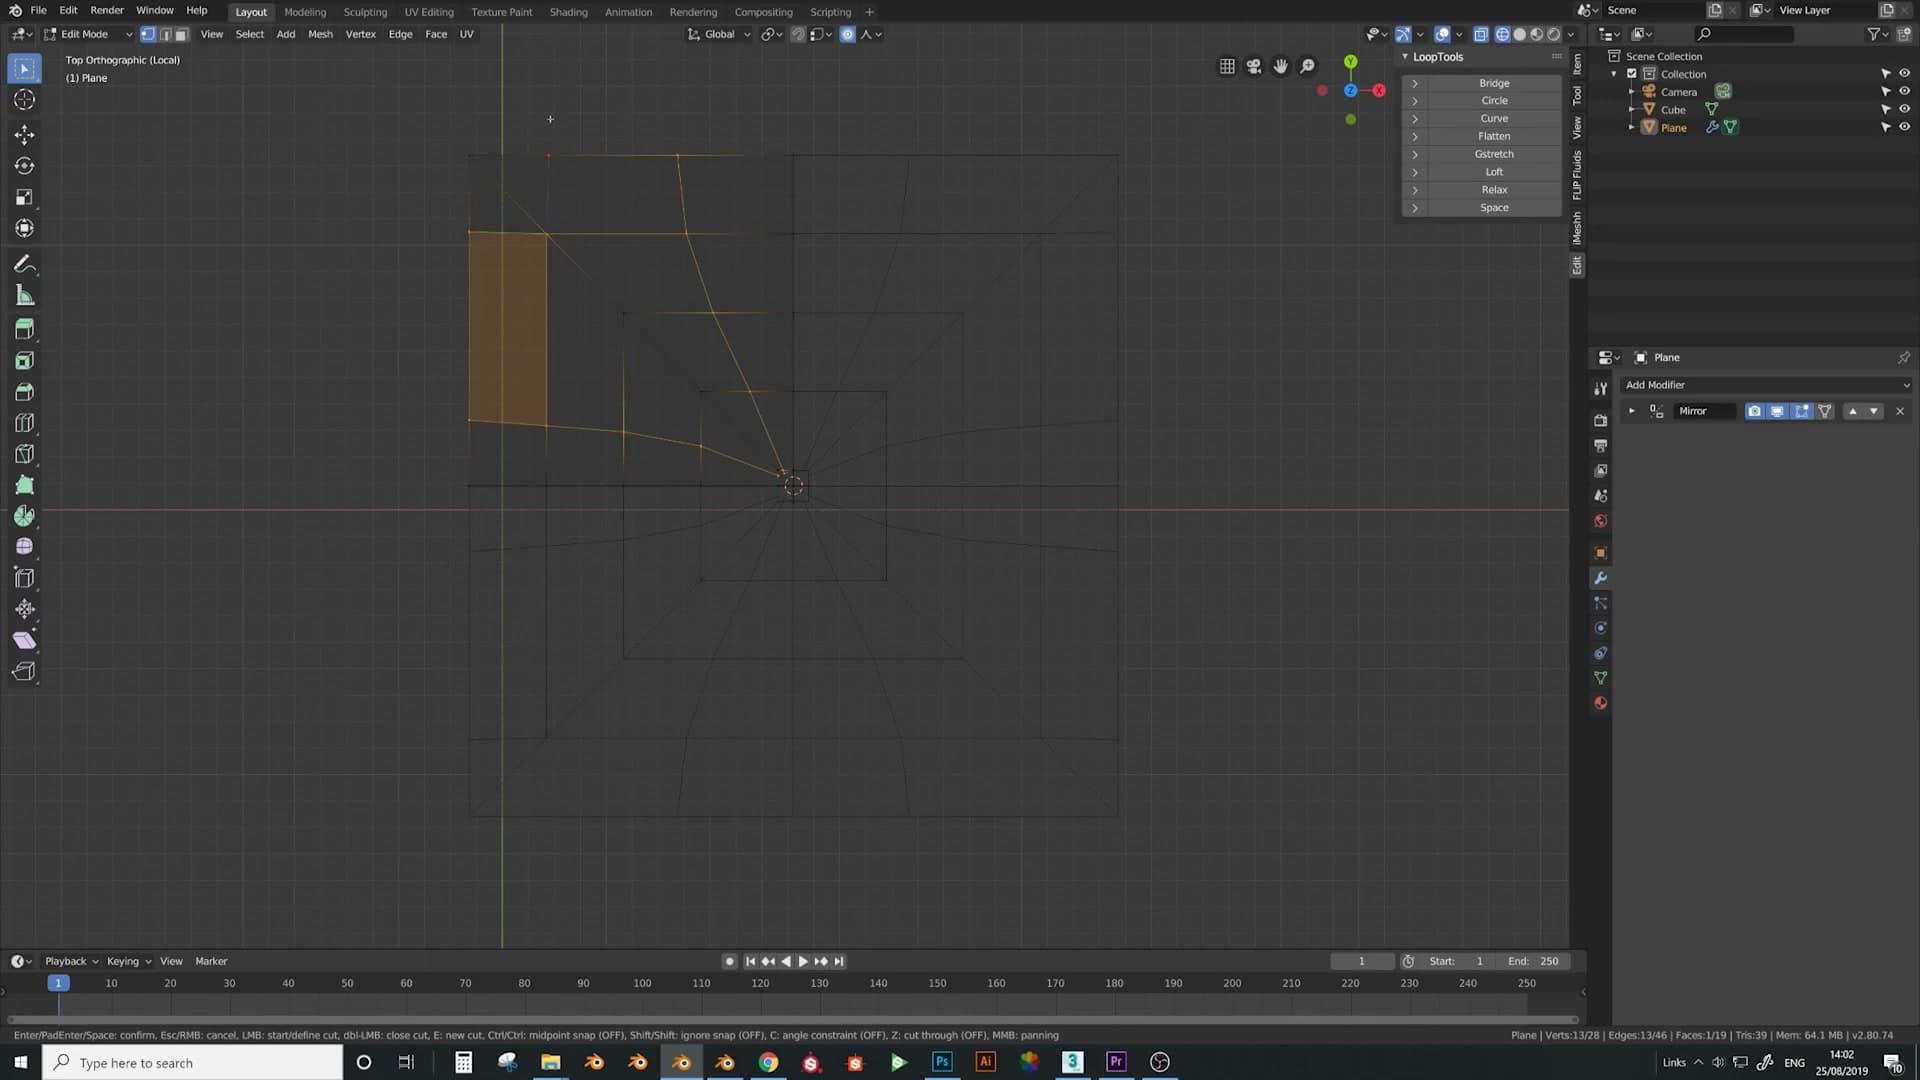
Add a Mirror modifier to the object. Tick Clipping so vertices that touch the mirror plane stay welded to the centreline and don't drift across to create a seam down the middle of the cell.
With the mirror in place you can continue editing one half and watch the other half update live. This symmetry is the foundation for the buttonhole work coming next. Symmetrical knife cuts will produce a perfectly centred indent once you tidy the topology.
Knife cuts and Loop Tools Circle for the buttonhole
Press K to fire the Knife tool and lay in the cuts that will frame the button. I slice a couple of short edges around where the buttonhole will sit, then clean up by dissolving any stray edges and filling open faces with F so the topology around the centre stays quad-friendly.
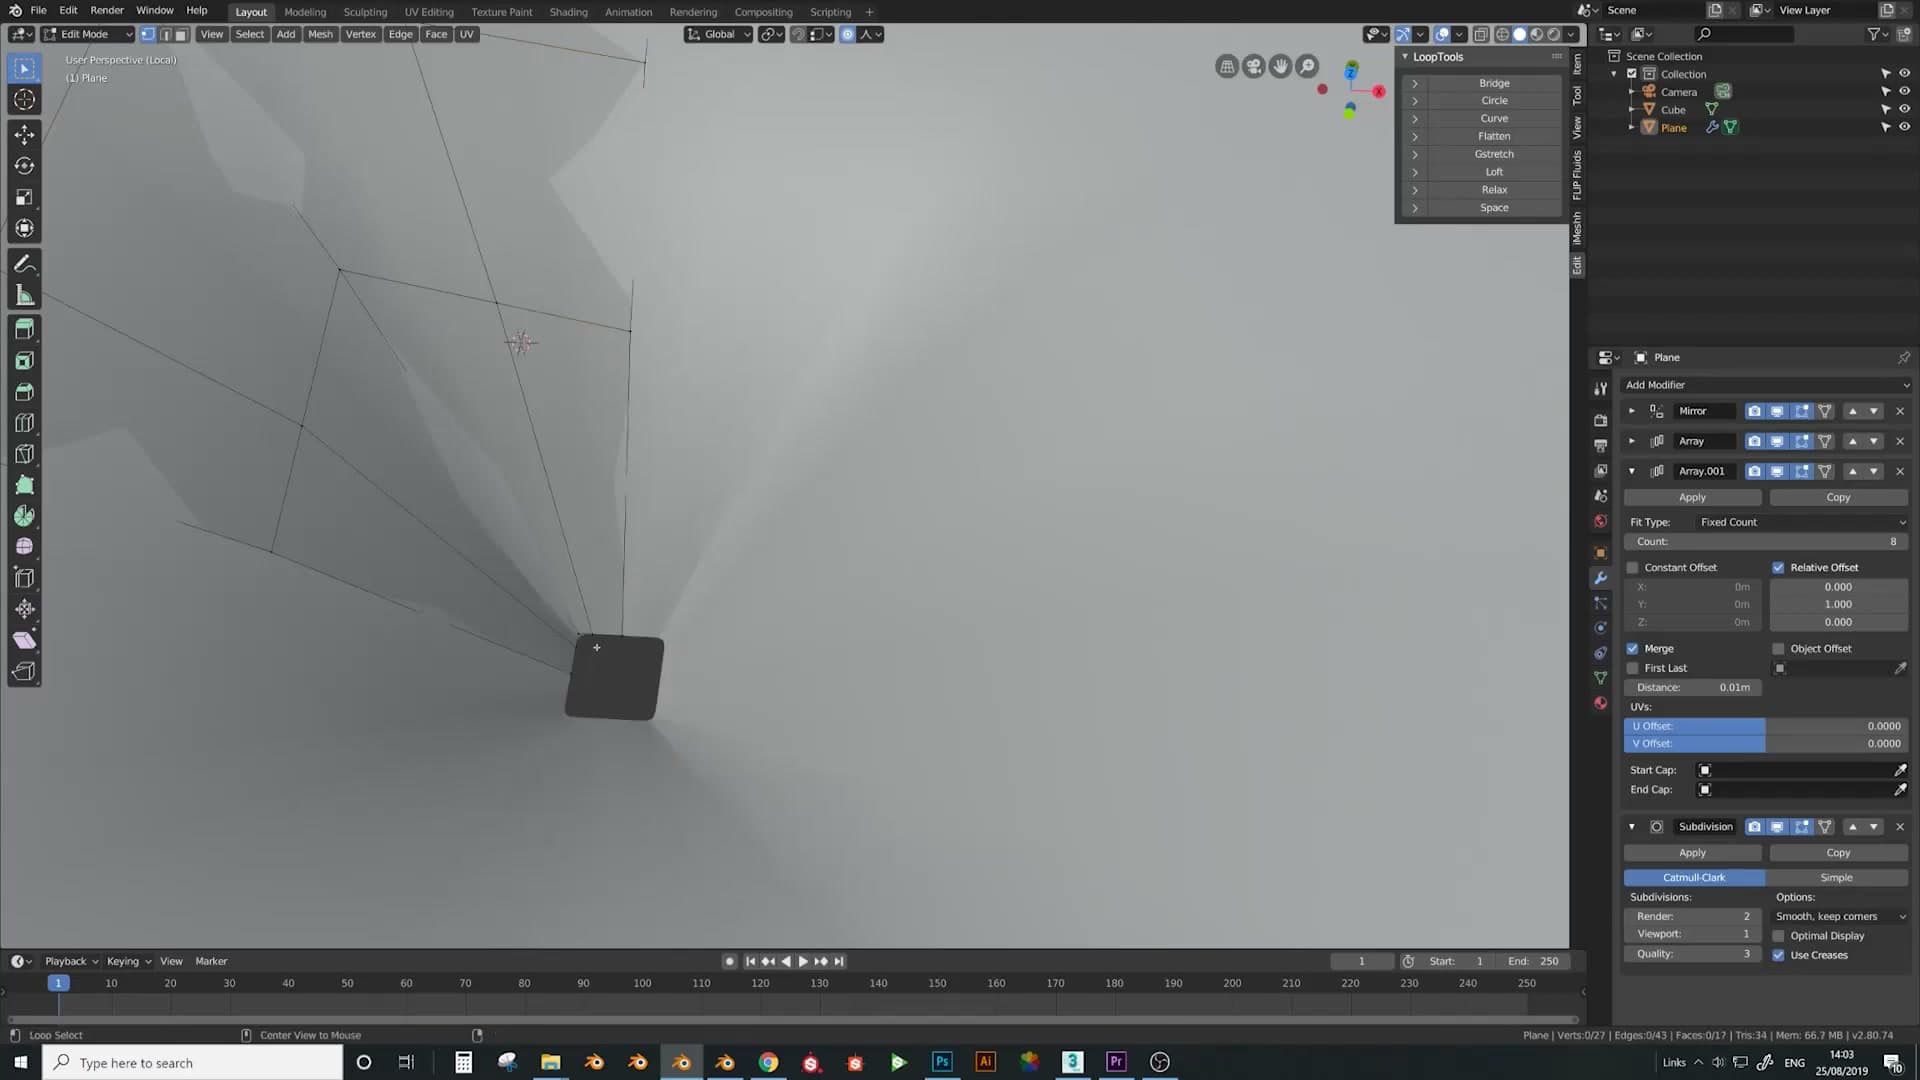
To preview how a single cell will look once tiled, stack an Array modifier with Merge enabled (so duplicated edge vertices don't double up at the seams) and a Subdivision Surface on top. Even at this rough stage the soft, pillowy silhouette of a buttoned cushion should be readable, which makes the next step easier to judge.
Drop back into edit mode and click the centre vertex where your knife cuts converge. Press X → Vertices to delete it, opening a small ring of edges at the heart of the cell. That opening is what becomes the button indent.
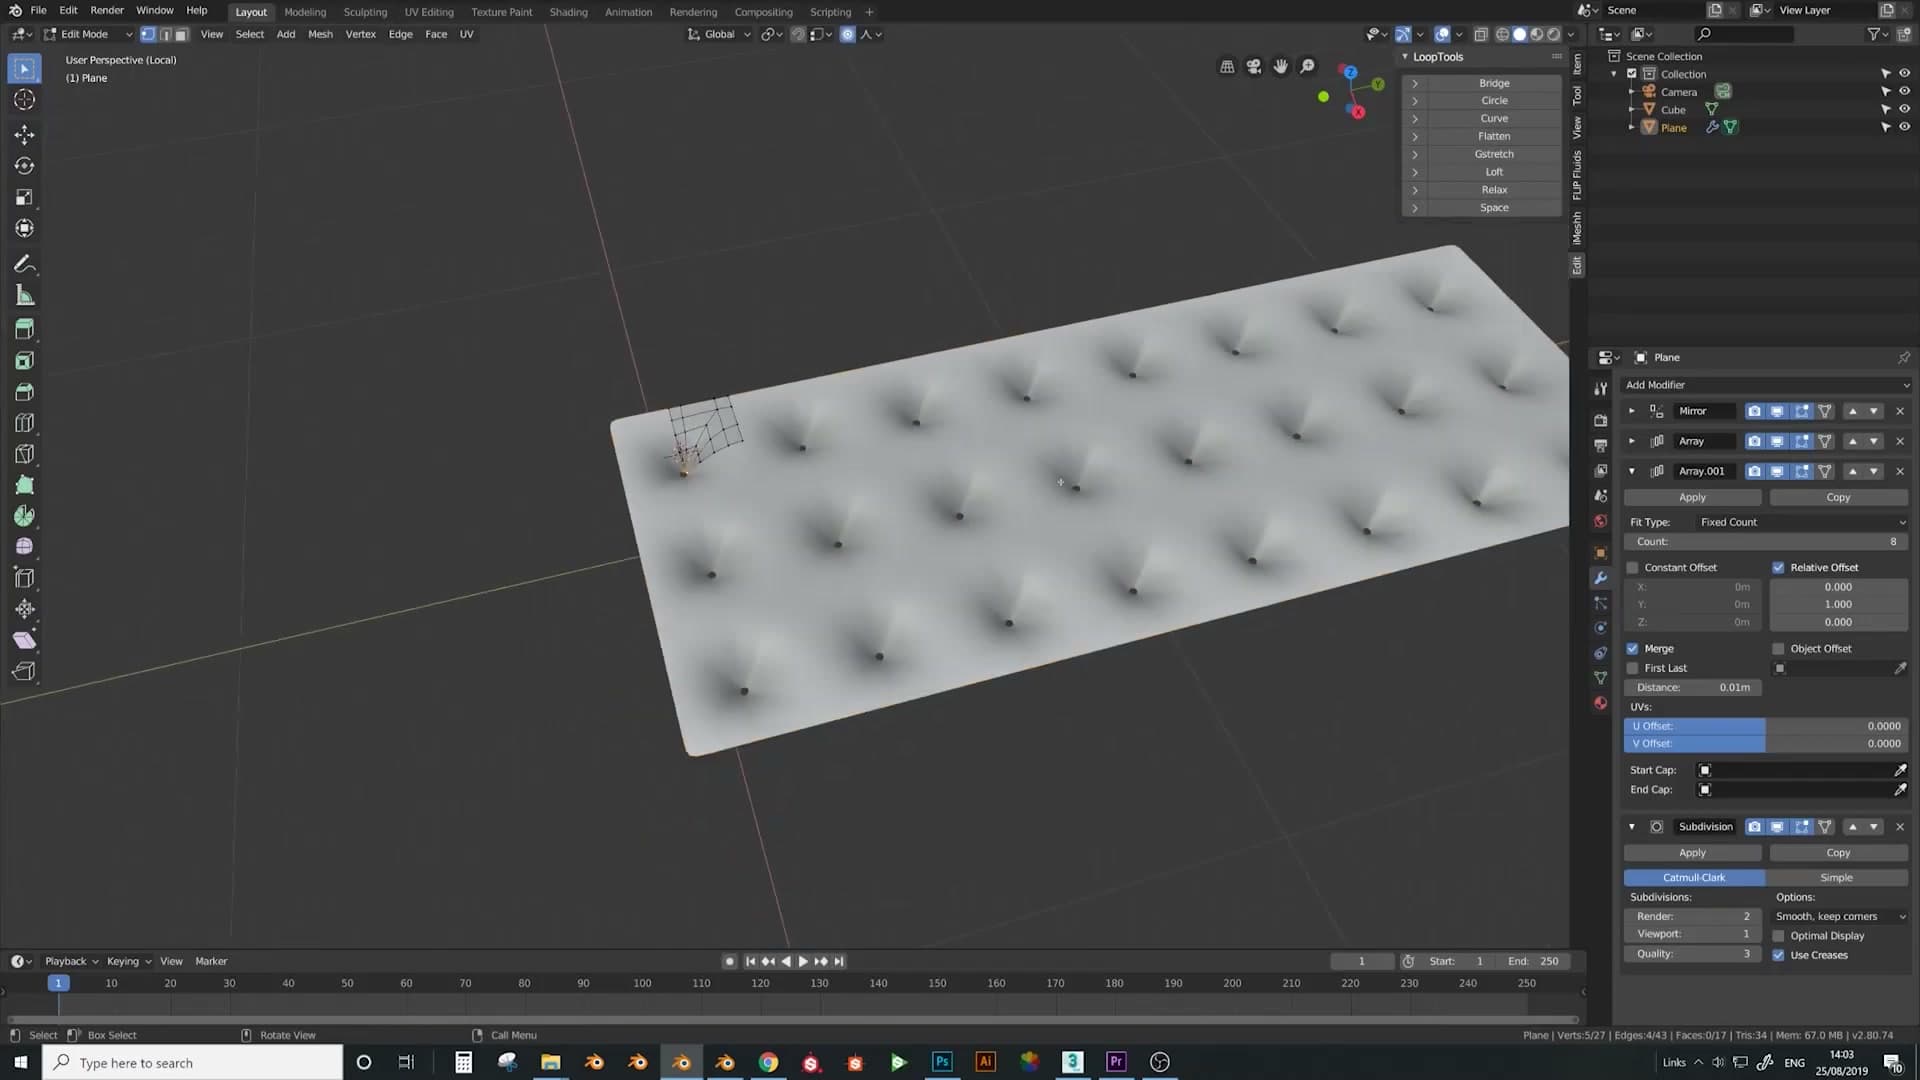
Open Edit → Preferences → Add-ons and make sure LoopTools is enabled. With the open ring of edges still selected, run LoopTools → Circle. The loop snaps to a perfect circle in a single click, giving you an evenly spaced, geometrically clean indent that will read as the button impression once the subdivision surface pulls it inward.
Inflate the button into a 3D cushion
Extrude the buttonhole edge inward and downward to dish the button, then add a Subdivision Surface to see the cushion swell. Splitting the upper ridge from the lower section with V sets up the next step for adding a fold seam.
Extrude the button dip and shape the bulge
Before pushing the button into a cushion, collapse the helper geometry so you are working on a single cell. Apply the Mirror and every Array, then box-select the duplicated halves and delete the vertices until only one mirrored piece of the buttonhole remains. That single cell carries the entire shape you are about to detail.
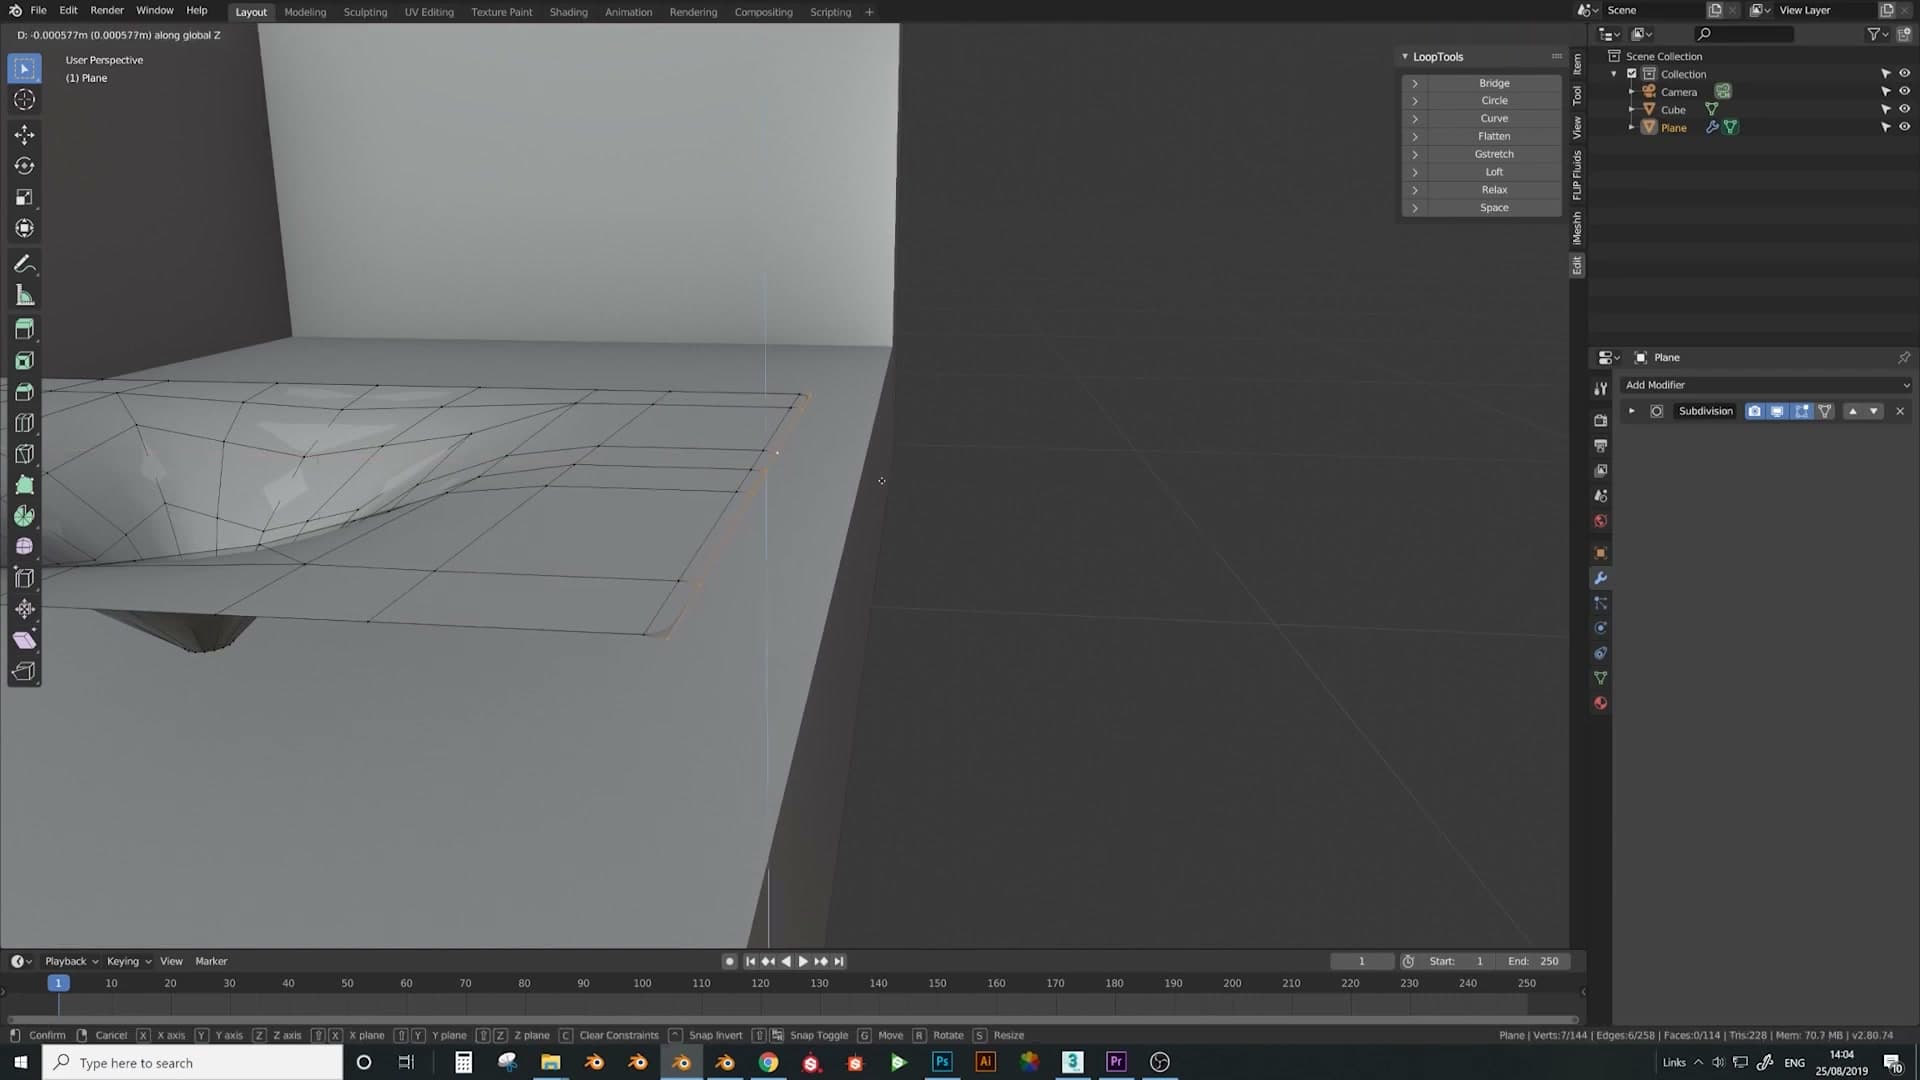
Select the round edge loop around the buttonhole and start extruding inward. Press E then X to step the loop in towards the centre, then E + X again for another small step. Each extrusion gives you a new ring of geometry that you can shove around to dish the button.
Now switch off proportional editing so the moves stay local to the selection. Use G + Z and E + Z to pull the inner loop downward into the cell, then keep alternating E + X and G + Z until the dip drops far enough to read as a pinched buttonhole rather than a flat hole.
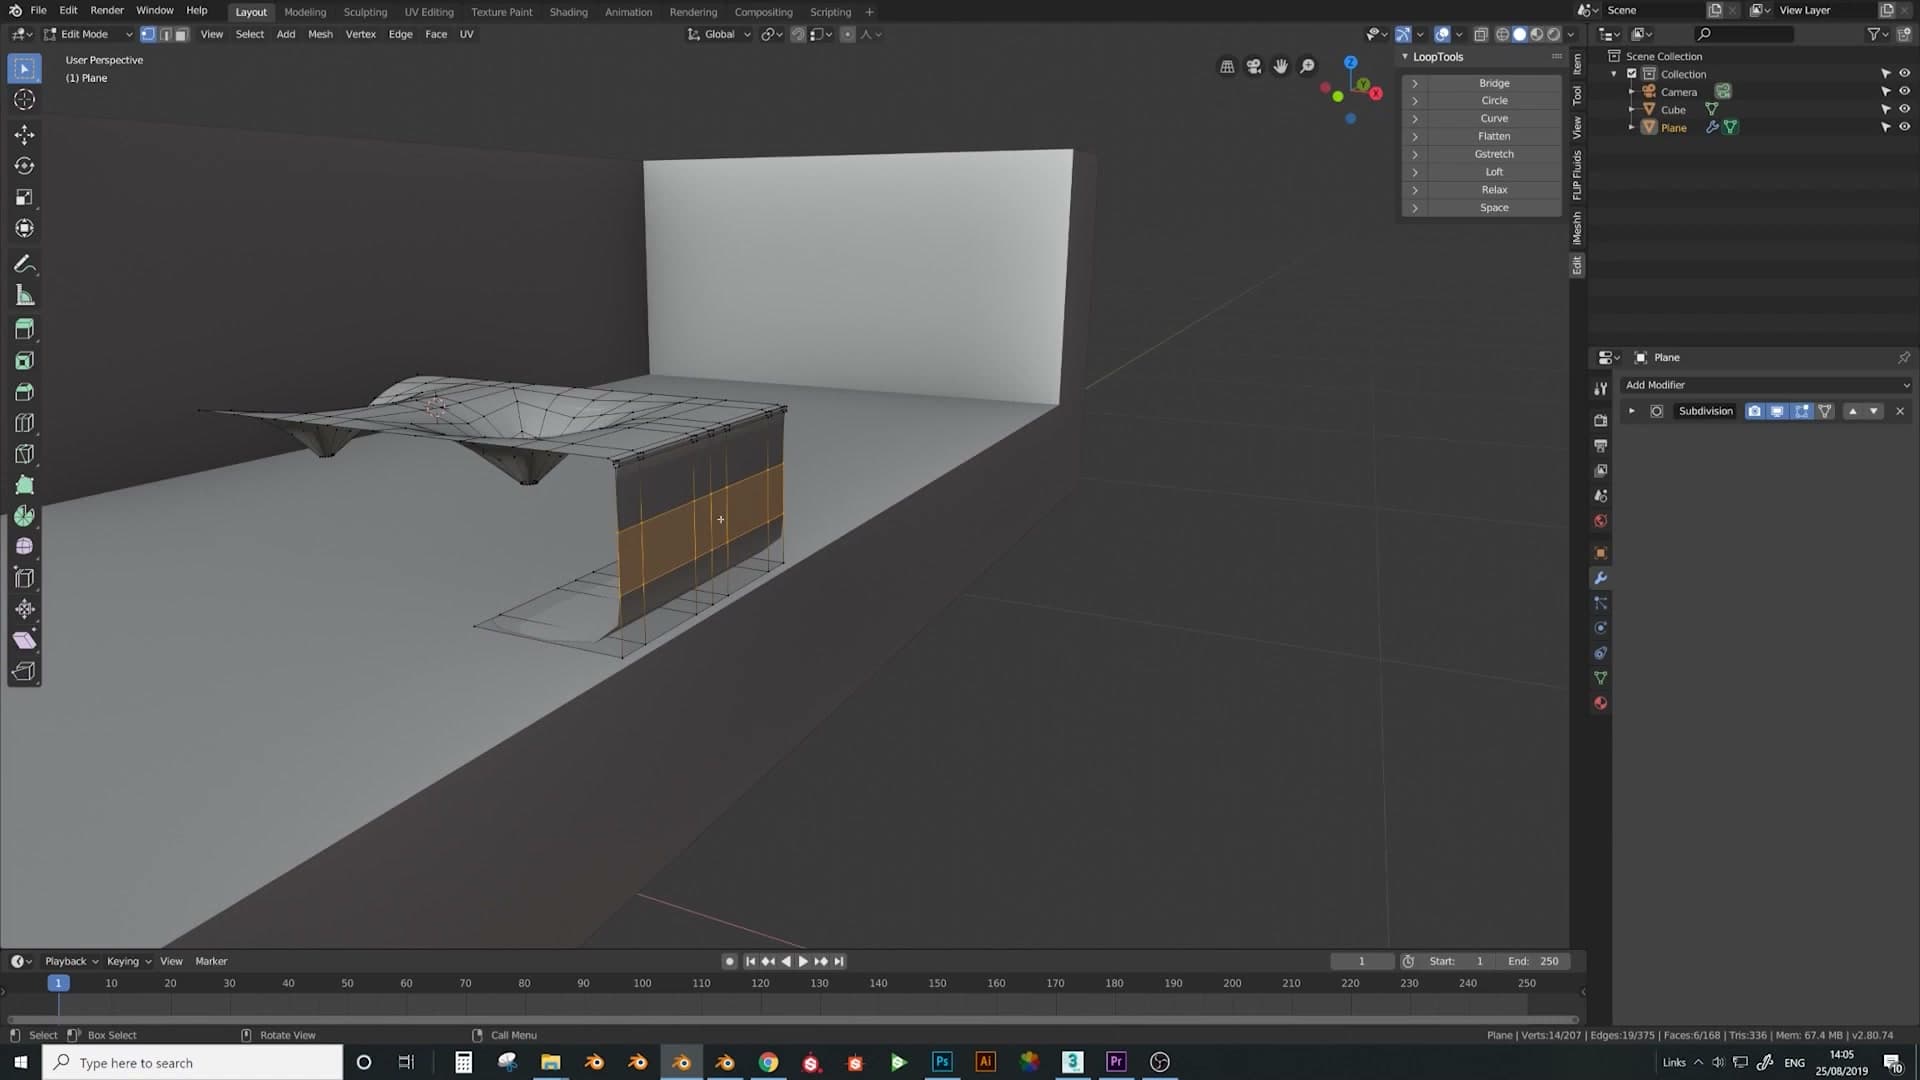
With the indent in place, add a couple of fresh edge loops across the cushion and tug them outward with G + X to scale the puff. The extra loops give the soft surface around the button somewhere to swell into instead of collapsing flat against the buttonhole.
Leave the Subdivision Surface enabled in the viewport while you work. As soon as the modifier is active the angular cage softens into a rounded, tufted button. That is the cell you are going to tile across the whole sofa later.
Split the seam ridge from the cushion with V
The next steps treat the upper ridge of the cell and the lower cushion area differently, so they need to behave as independent strips of geometry rather than one continuous mesh. Splitting them now means future loop cuts and bevels will only travel as far as you intend.
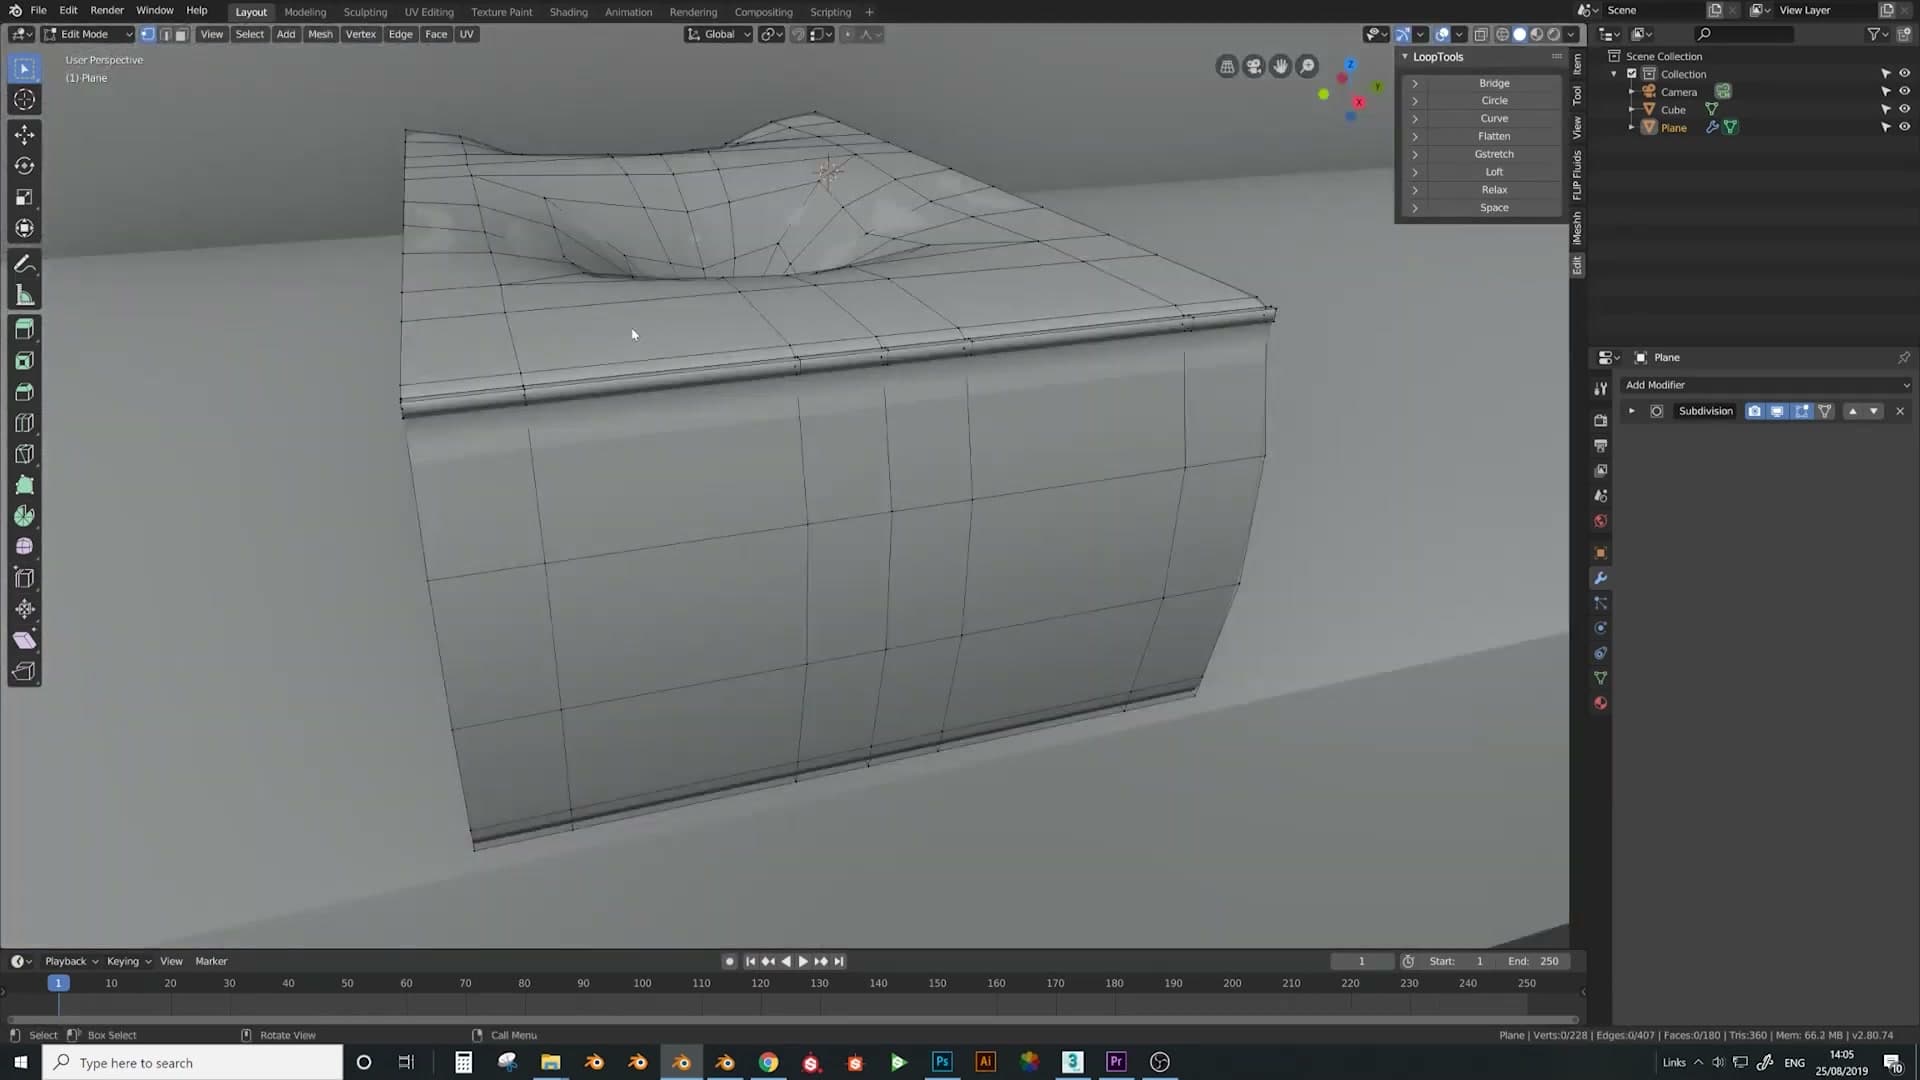
Select the edge that divides the ridge from the cushion and press V to rip the vertices apart along that line. The two halves are now disconnected in edit mode, even though they still sit in the same object. A quick Ctrl+R across either piece confirms it: the loop cut runs through one section without carrying over into the other.
Add the fold and crease between buttons
A Ctrl+B bevel on the ridge creates the raised seam between adjacent buttons. Push and pull the new edges to suggest fabric being tucked behind the next button, then smooth the join so there is no visible gap.
Bevel the ridge into a fold
The ridge running along the top of the cushion between two buttons needs to read as a raised seam where the fabric pinches. Hover that edge loop and press Ctrl+B to bevel it, then scroll the middle mouse wheel once so the bevel resolves with a single loop running through its centre. You should end up with three parallel edges where there was one. Click to confirm the bevel.
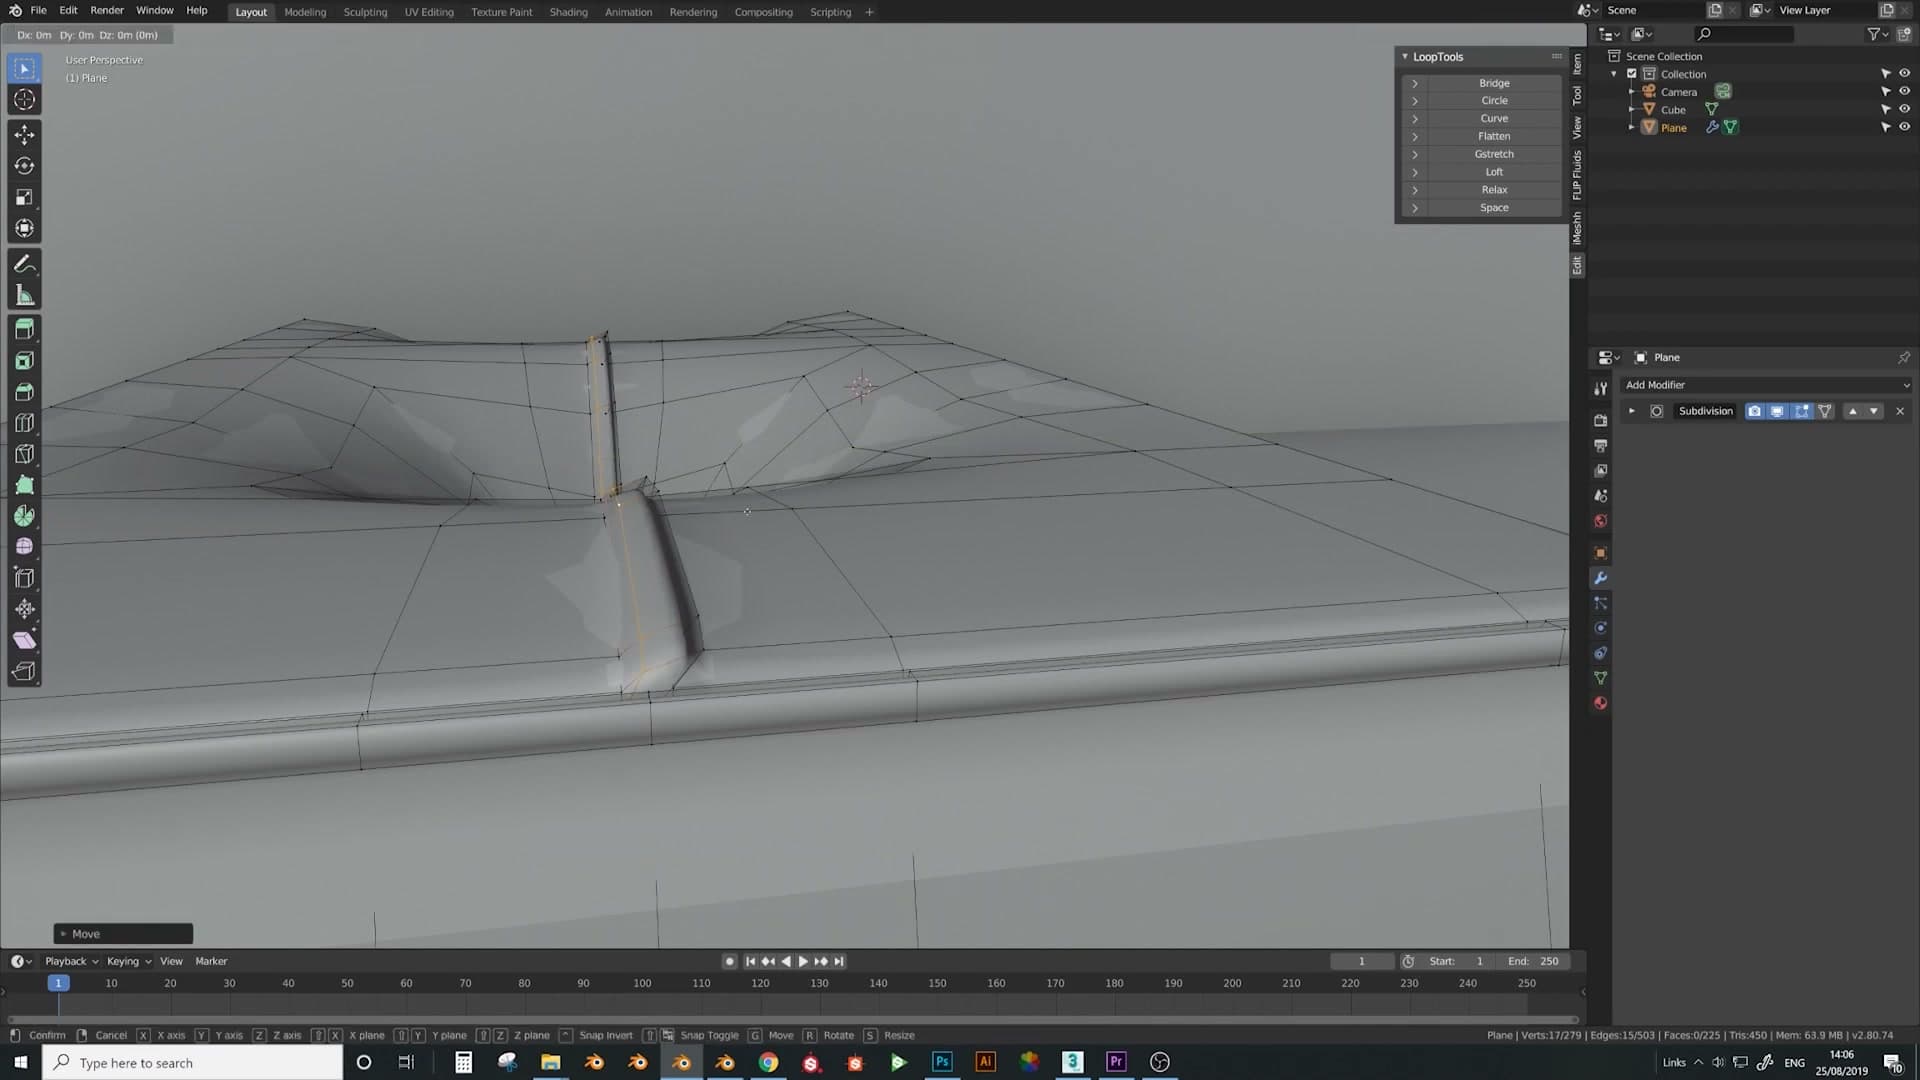
With the bevel laid down, the seam is in place but still flat. Deselect, then grab one of the outer bevel edges and drag it across the cushion to start shaping a fold. G followed by Y constrains the move along the cushion's length, which keeps the fold tidy. Pull the matching edge on the opposite side in the same direction so the seam now reads as fabric being pinched together rather than a flat strip of geometry.
Refine the crease so the fold tucks in cleanly
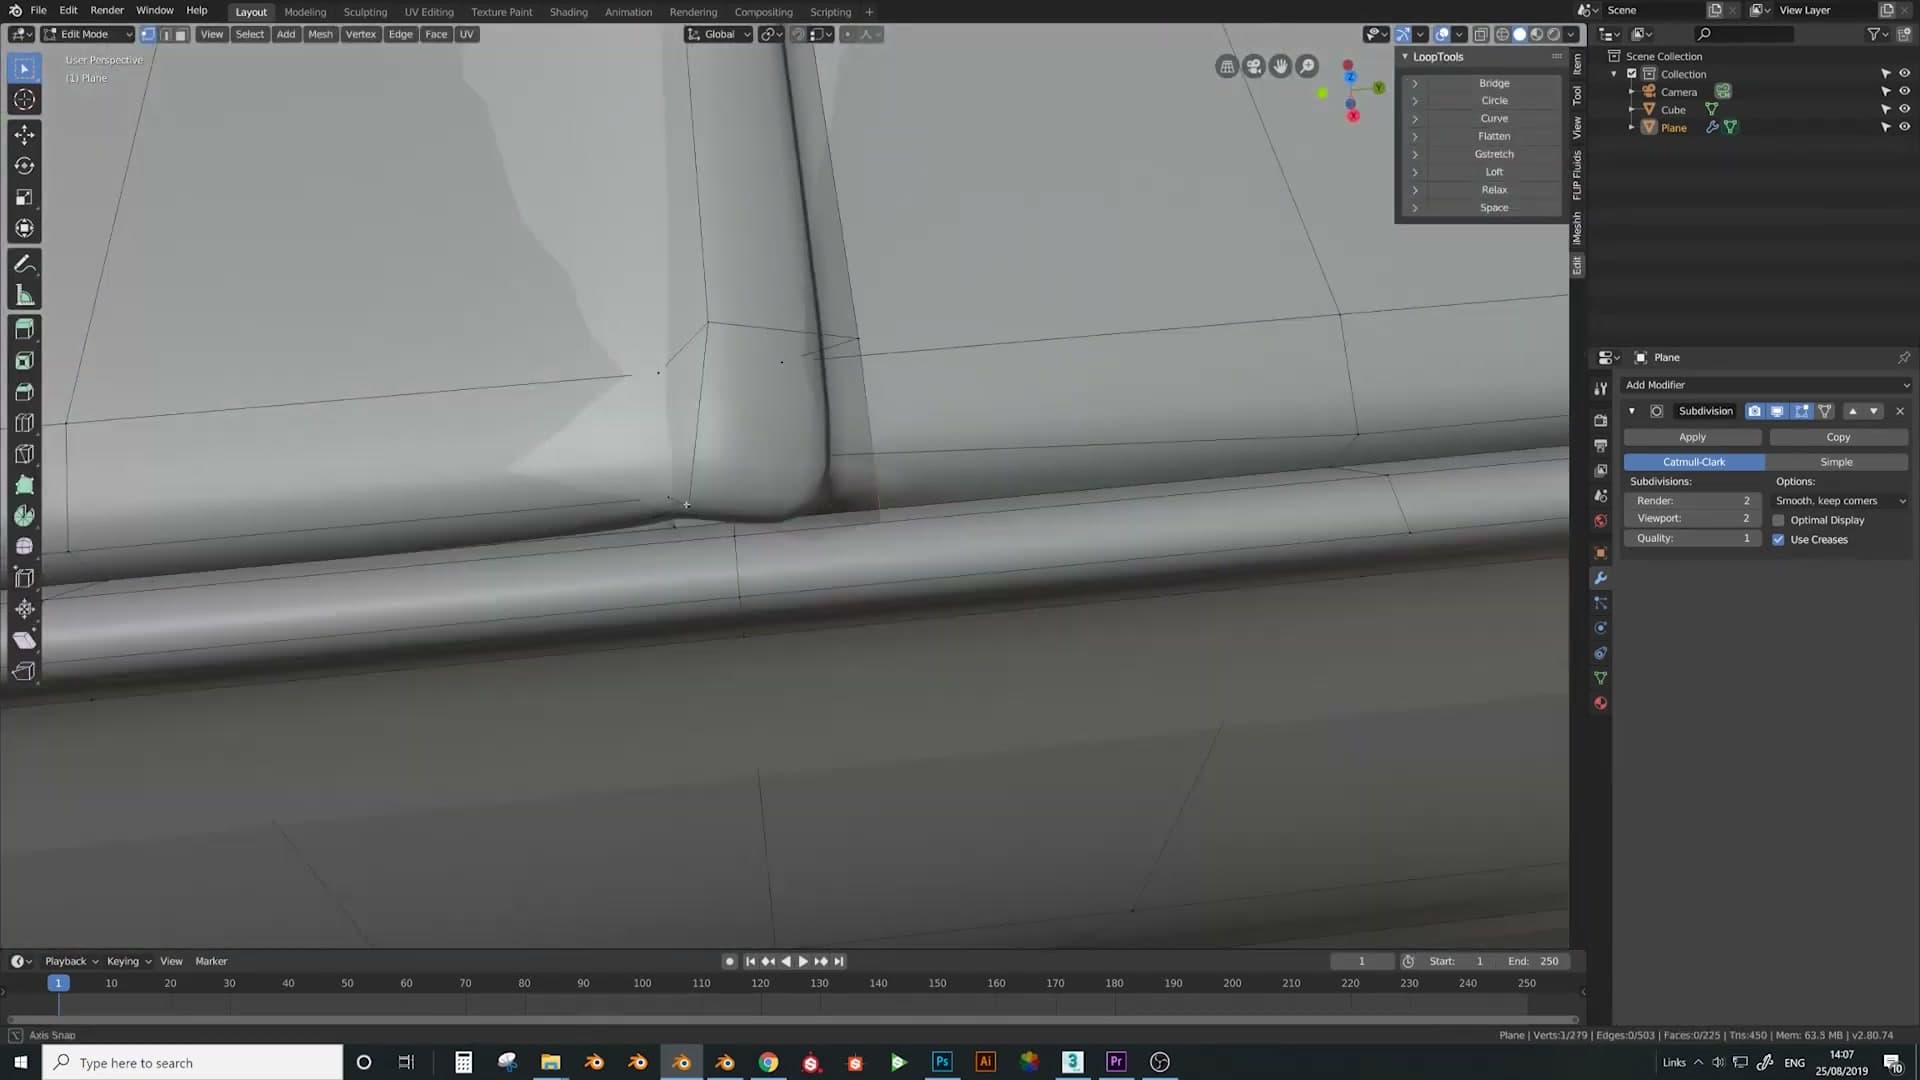
With the seam beveled, the next step is shaping the crease itself. Grab the two new central edges and nudge them down a fraction with G. That small drop gives the fabric somewhere to fold into and instantly turns the seam from a ridge into a crease. Tidy any surrounding edges that look loose by pulling them in slightly so the geometry around the fold stays clean.
Now tune the fold's direction. Push the outer side of the seam outward a touch and pull the inner side inward so the crease reads as fabric being tucked behind the next button rather than sitting on top of it. The offsets are small. A millimetre or two is usually enough to sell the effect, and overdoing it flattens the illusion.
Finally, check the gap where the seam meets the next button. If you can see daylight between the two pieces of fabric, slide the seam edge across until the join closes. The fold should disappear behind the button rather than terminate beside it with a visible seam underneath.
Tile the cushion grid with arrays and mirrors
Two Array modifiers (three deep, eight across, both set to Merge) replicate the single cell across the whole seat. Applying the array, snapping the cursor to the centre edge and using Origin to 3D Cursor lets a fresh Mirror modifier reflect the grid perfectly down the sofa's centreline.
Array along X and Y with Merge
With one button cell finished, the cushion grid is just that cell repeated. Add an Array modifier and set the count so the row runs three deep across the short axis of the cushion, then add a second Array and set its count to eight along the long axis. Tick Merge on both so the duplicated edges weld together rather than stacking as separate vertices. Without Merge you would get a faint seam down every join.
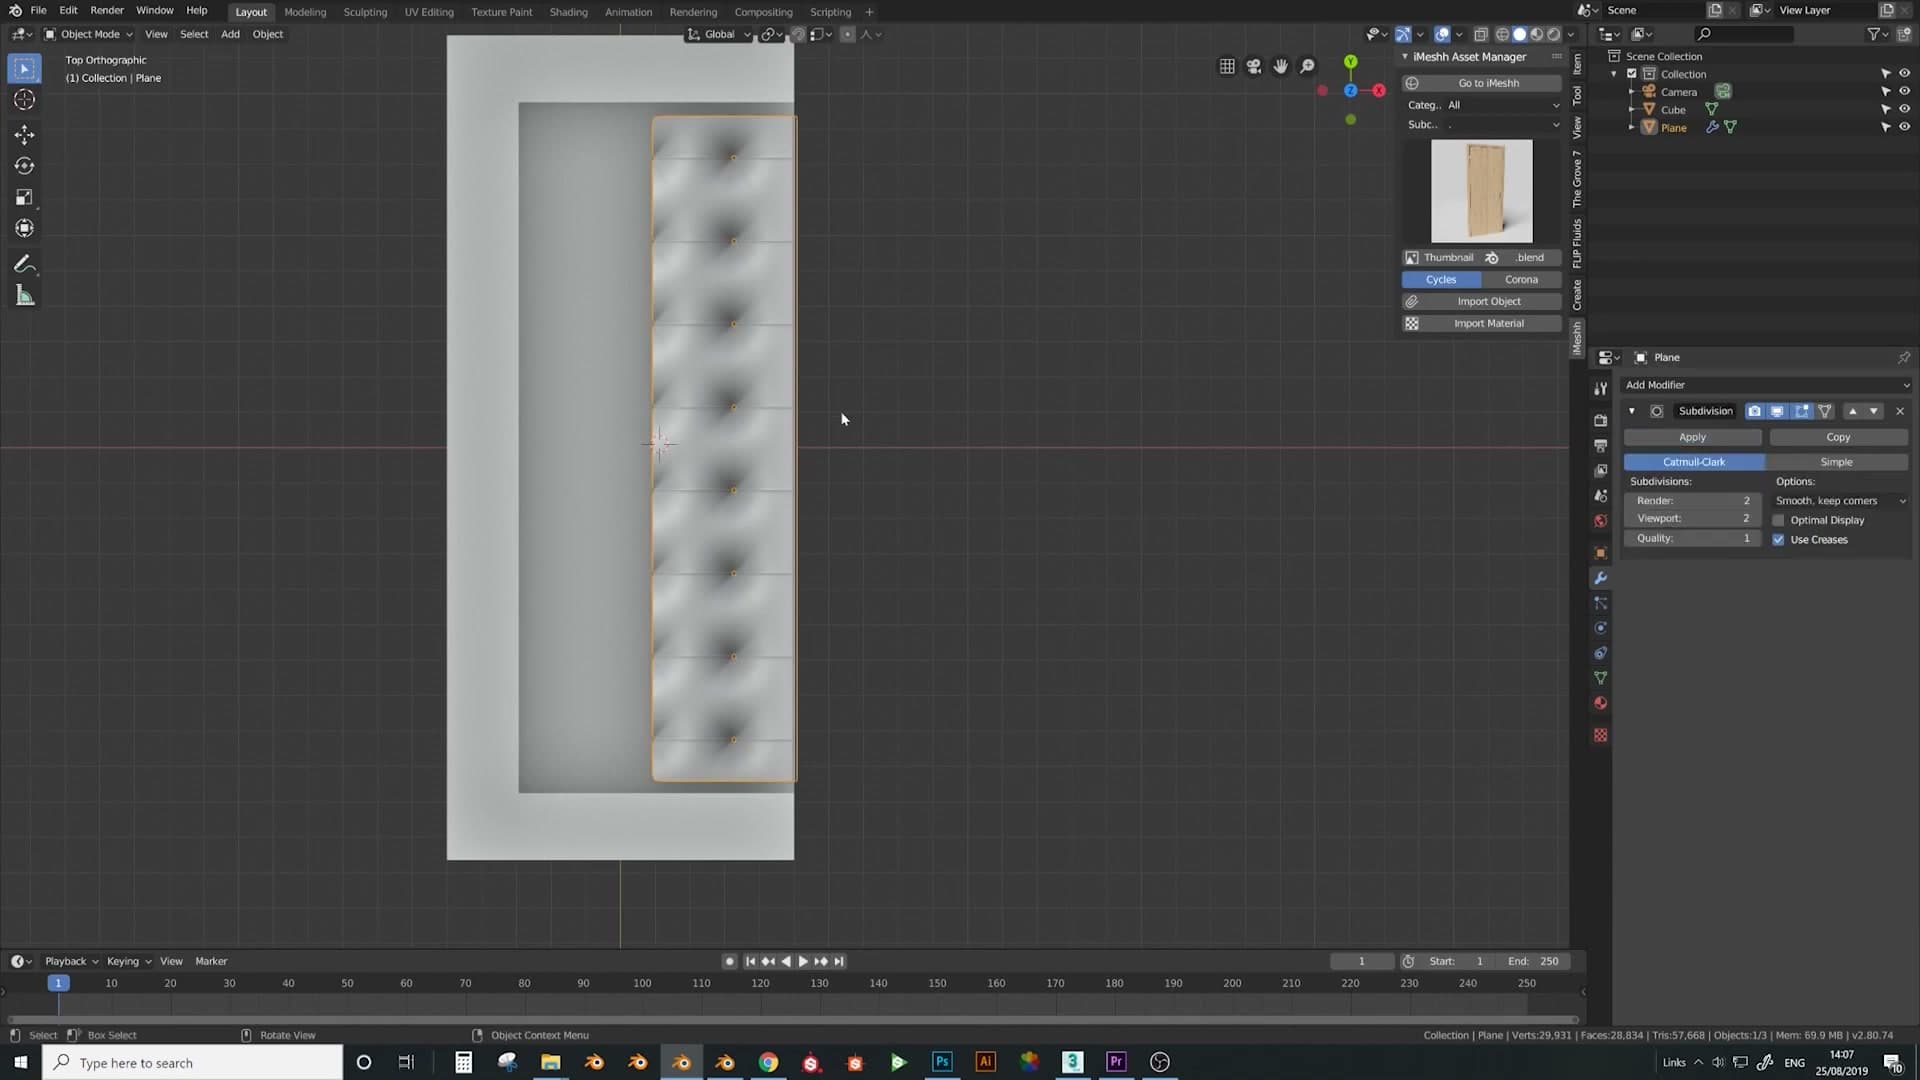
Order matters here. Both Array modifiers need to sit above the Subdivision Surface in the modifier stack, otherwise Subsurf smooths a single cell and the array then copies the already-smoothed result, which doubles up control loops and softens the buttons.
Nudge the offset on each Array until the cells butt up cleanly against one another. The shared edges should overlap by exactly the merge distance so the whole grid reads as one continuous piece of upholstery rather than a tiled wallpaper.
Set origin to 3D Cursor and mirror the grid
The arrays cover one half of the seat. To reflect the grid across the sofa's centreline you need a Mirror modifier, but a fresh mirror will pivot around the object origin, which is still sitting wherever the original cell started. The fix is to move the origin to the centre edge first.
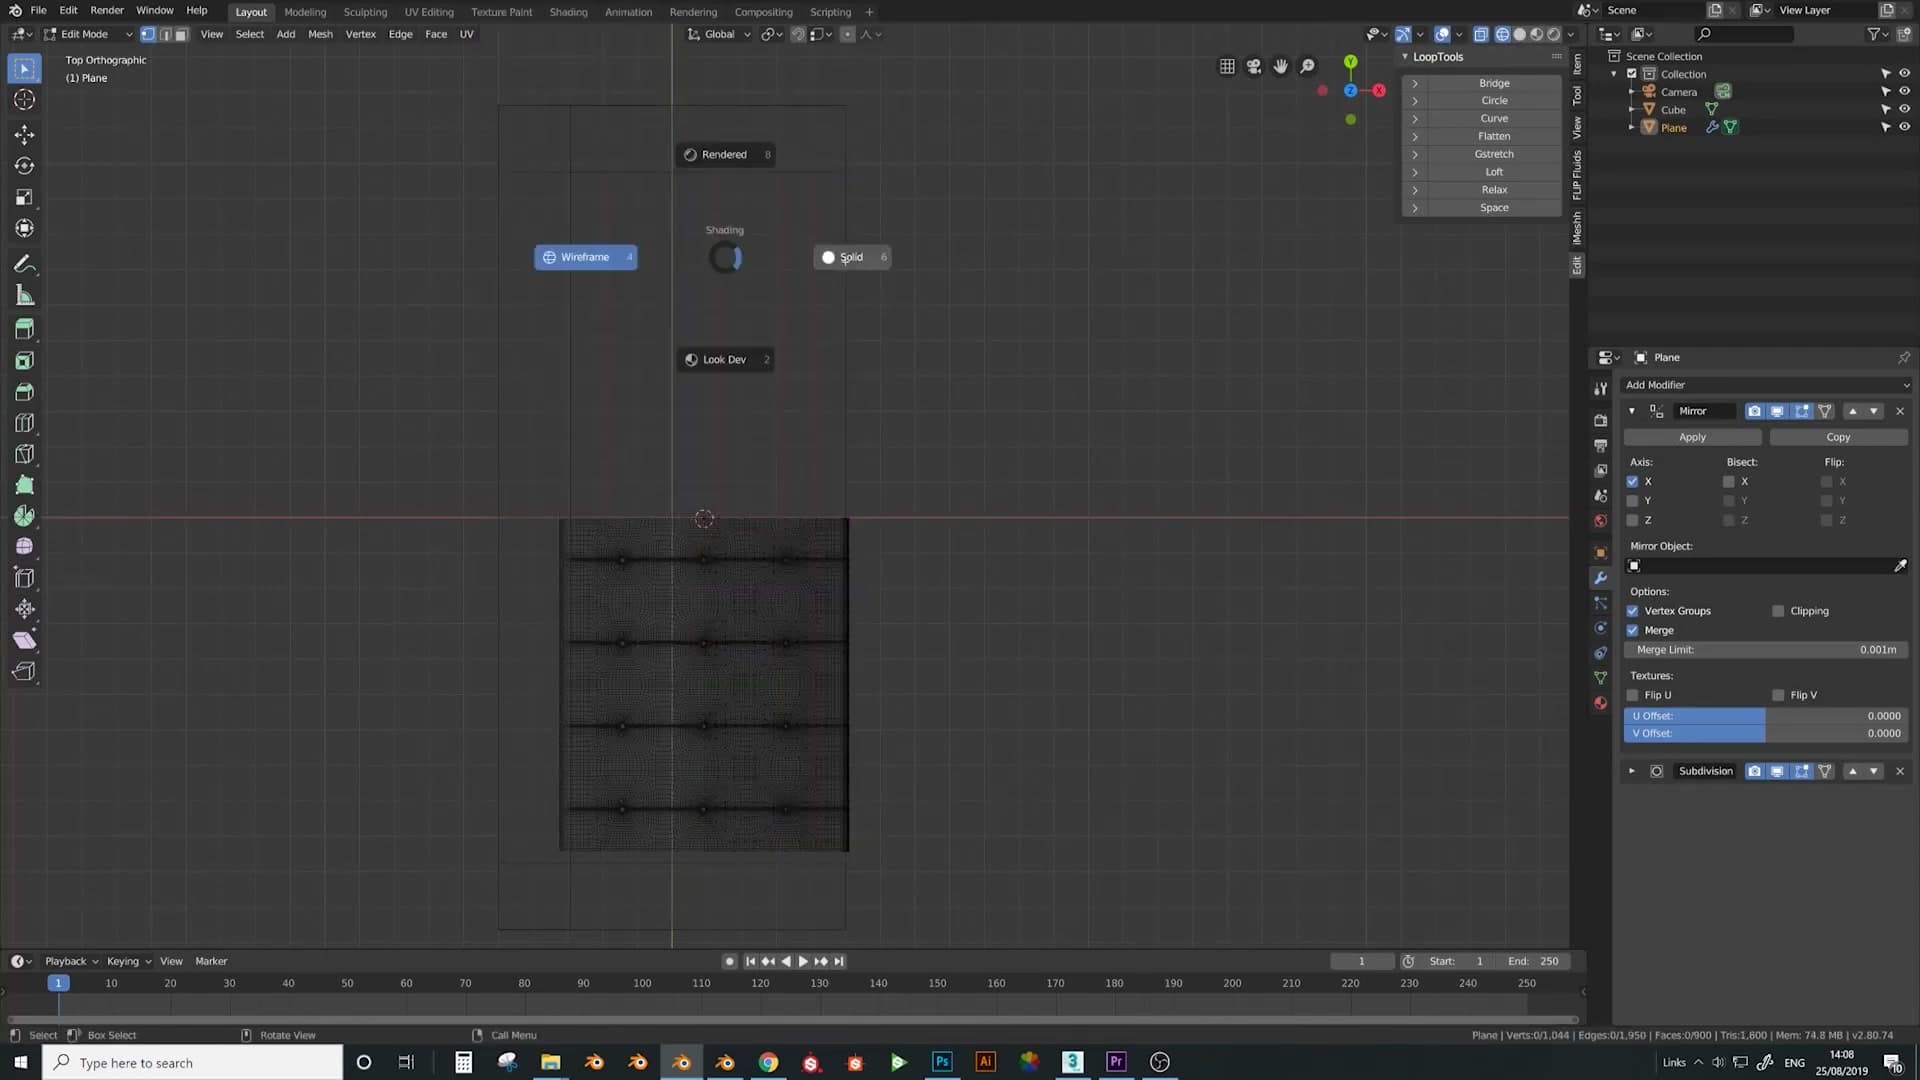
Apply the Array modifier so the geometry is real, then drop into Edit Mode and select the edge that sits on the centreline of the seat. Press Shift+S and choose Cursor to Selected. The 3D cursor snaps to that edge. Back in Object Mode, head to Object → Set Origin → Origin to 3D Cursor and the origin jumps to match.
Now add a Mirror modifier and drag it above the Subdivision Surface in the stack. With the origin sitting on the centre edge, the mirror reflects the eight-by-three grid perfectly down the middle, giving you a full cushion top with every button still identical to the original cell.
What's left are the corners: the strip of upholstery that wraps around the front and side of the seat well. The mirror is doing the heavy lifting; the next step is to add geometry along those exposed edges so the cushion has a proper border rather than ending in mid-air.
Wrap the corner with Shear
Rather than modelling the corner band by hand, extrude an edge along Y, then run Shear and scale 1 on the X axis to rotate the strip 90 degrees. Repeat extrudes match the segment count of the front cushion, and Bridge Edge Loops closes the corner cleanly.
Extrude along Y and Shear to zero
With the cushion array finished, the sofa still has an open corner where the seat meets the arm. Modelling that wrap-around strip vertex by vertex is tedious. A much cleaner approach is to extrude a single edge and rotate it into position with Shear.
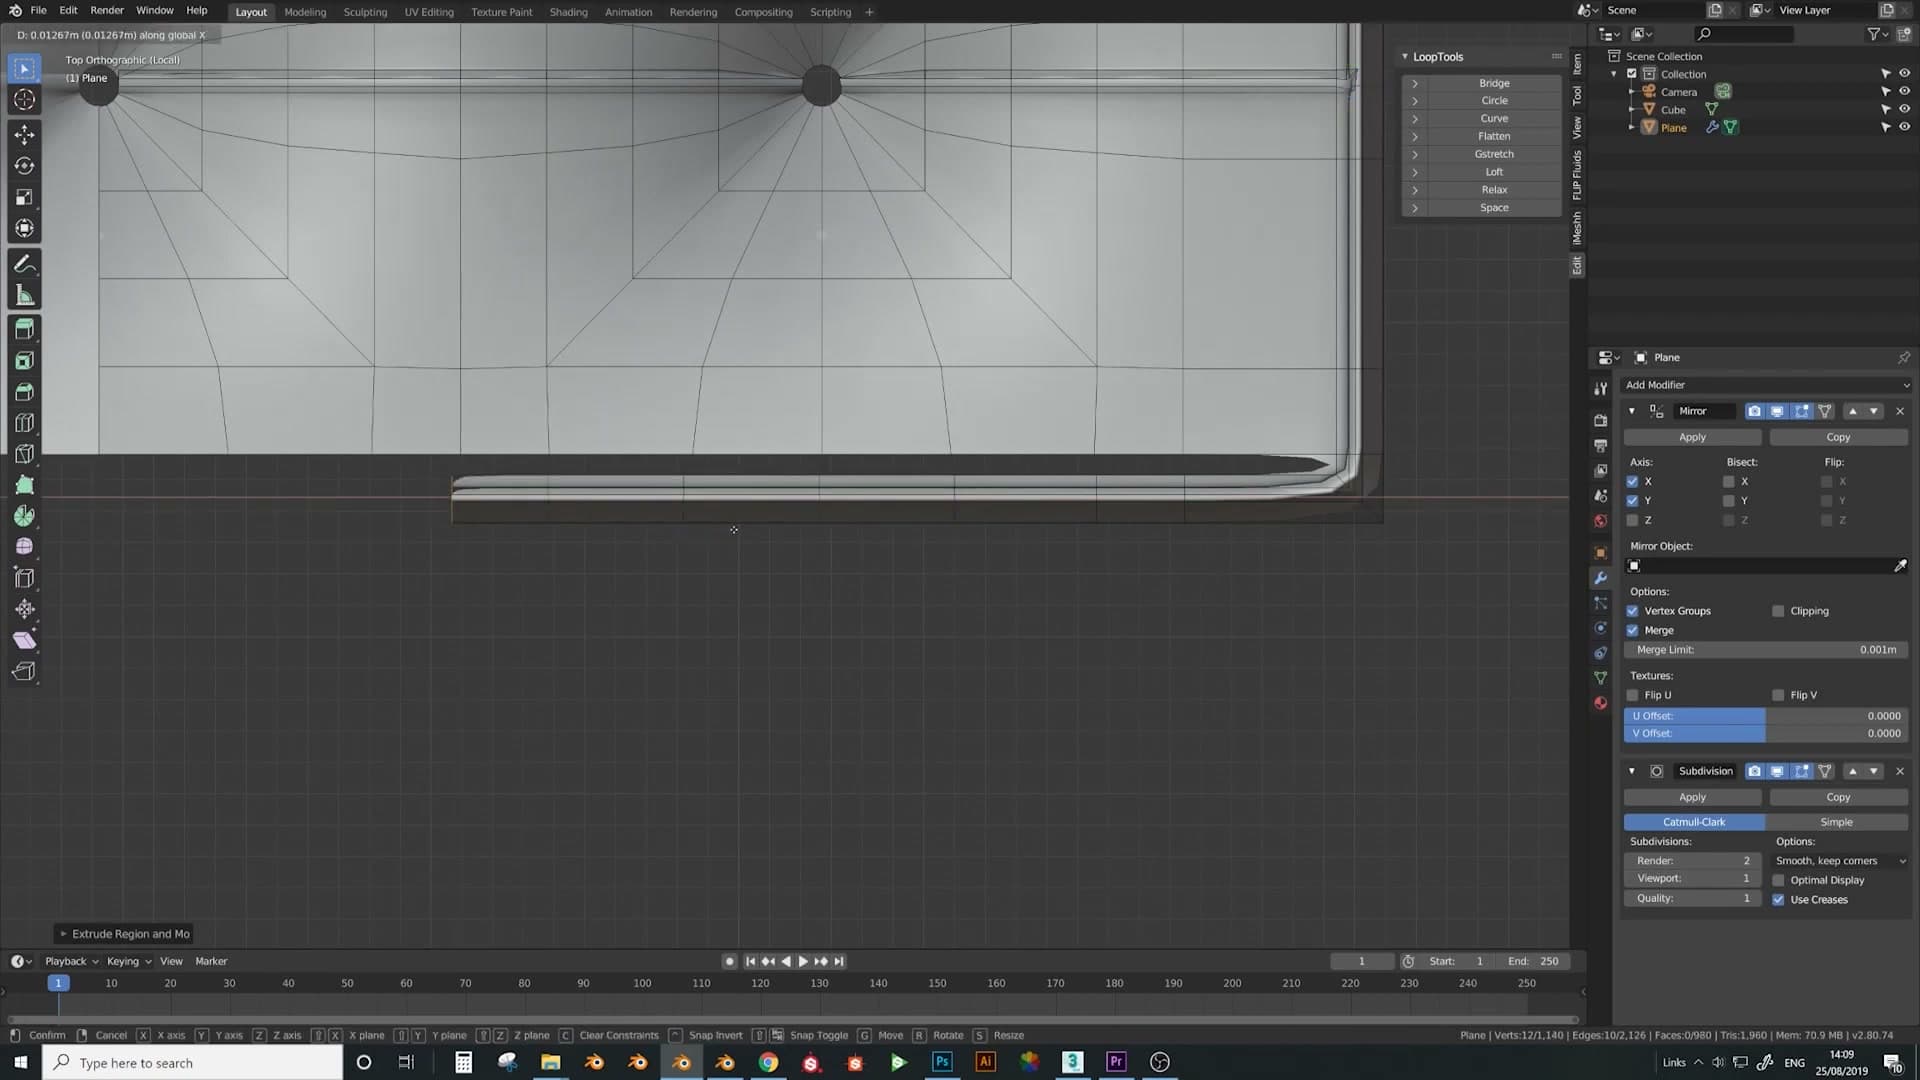
Select the corner edge at the end of the cushion grid, then extrude it along the Y axis with E, Y. With the new edge still selected, press Space and search for shear. Constrain the operator to X and type 1 for the factor. The strip swings 90° around the corner so it now points perpendicular to the front of the sofa.
Repeat extrudes and Bridge Edge Loops to close the corner
Now walk that corner strip across the side of the sofa with repeat extrudes. Press E, X to extrude the edge along the corner, then keep firing the repeat-last-action shortcut until you have the same number of edge loops as the front cushion has down its side. Matching the segment count is what makes the bridging step produce clean quads instead of triangulated mess.
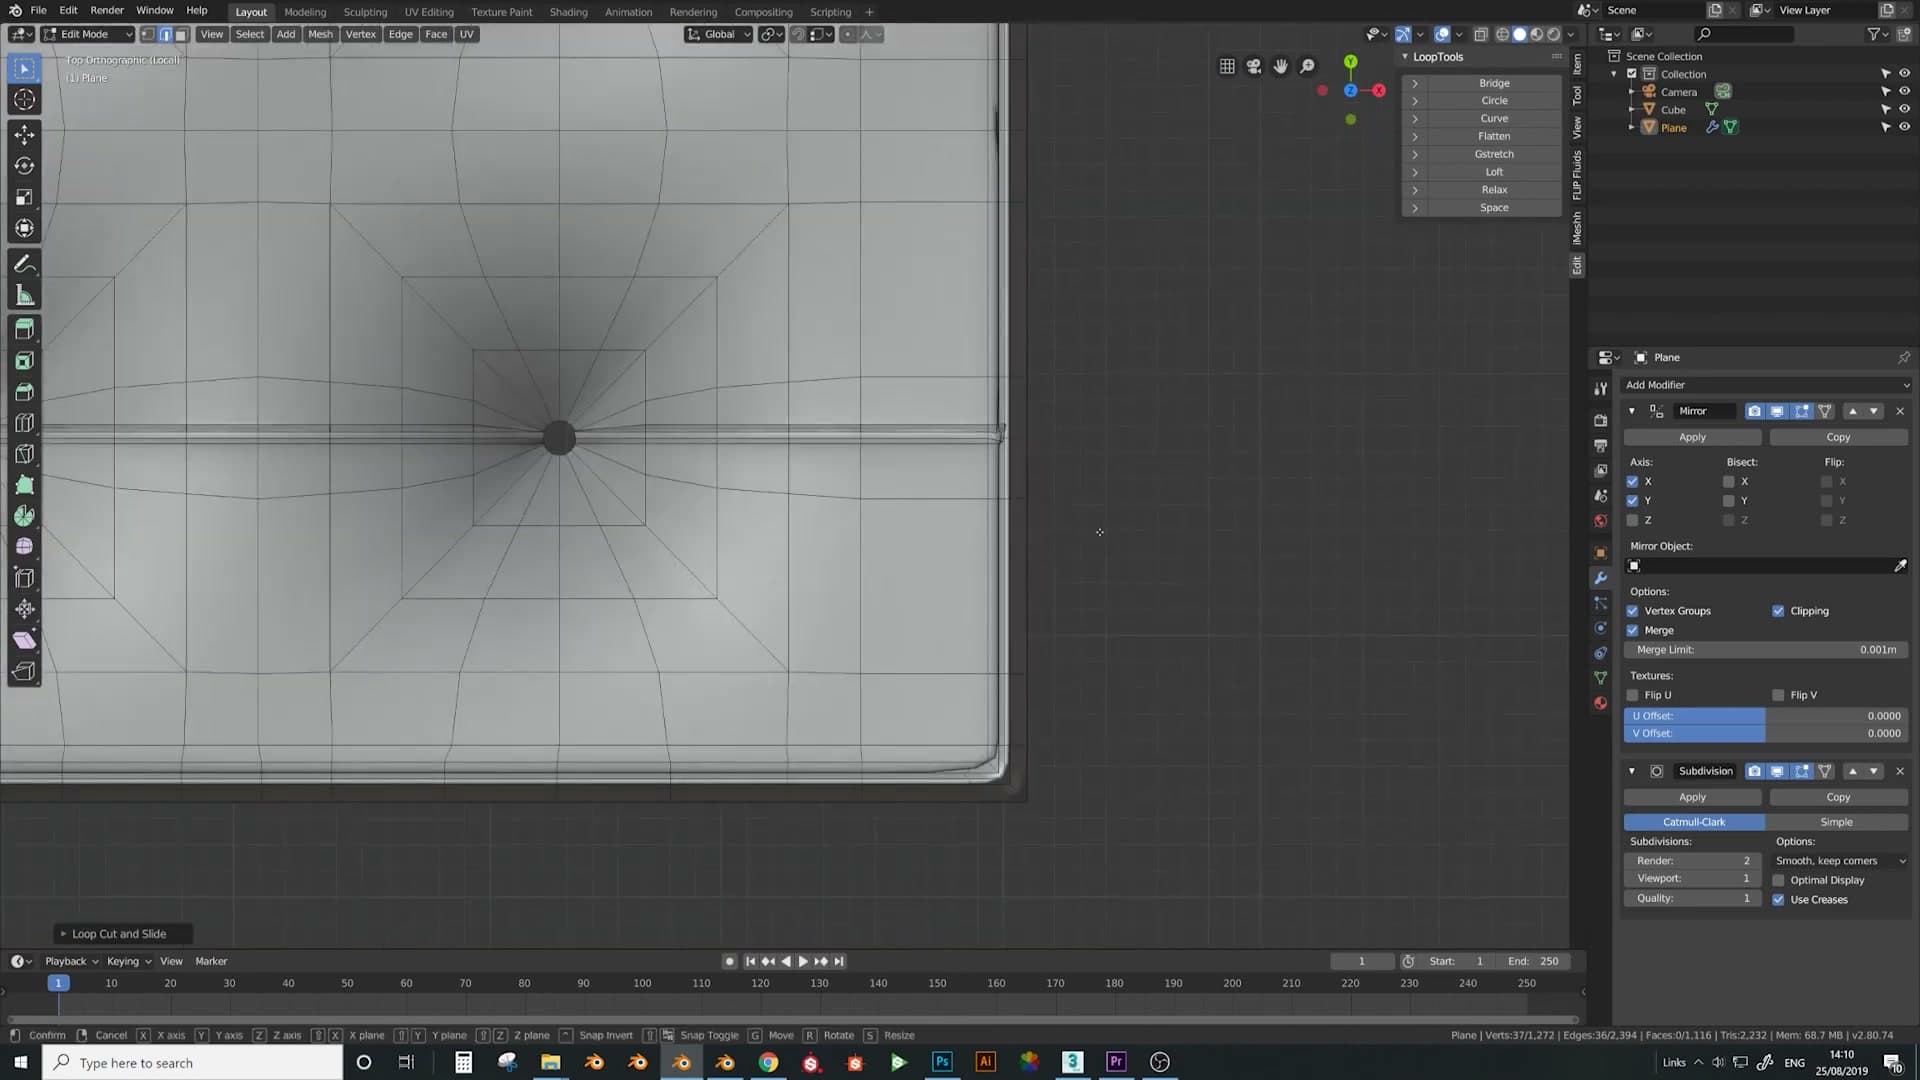
Keep Clipping ticked on the Mirror modifier while you work. When you press G to slide the final edge inward to meet the mirror plane, it will stop dead at the centreline rather than overshooting through its own reflection.
With the strip in place you have two open loops (the new corner band and the side of the cushion grid) that need joining. Alt+click one loop to grab it, then Shift+Alt+click the other to add it to the selection (deselecting any stray edges as you go). Press Space, type bridge and run Bridge Edge Loops. Blender fills the gap with a tidy band of quads. If the segment counts didn't quite line up first time, add a loop cut or two to balance them and run Bridge Edge Loops again on the remaining open edges.
For a little extra realism, drop a piped seam into the corner join. Select the bridged loop, scale it slightly on X and again on Y to pinch the geometry inwards, then press Ctrl+B for a quick bevel to round the lip.
Add a seam line, thicken and clean up
Drop in a quick beveled seam along the corner band, pull the cushion up to give it more body, and run Merge by Distance to remove the overlapping verts that show up after applying mirrors and arrays.
Bevel a seam line along the corner band
With the bevel running across the front of the cushion, the corner band needs the same seam line so the upholstery reads as one continuous run. The new edge from the bevel doesn't quite line up with the existing geometry at the join.
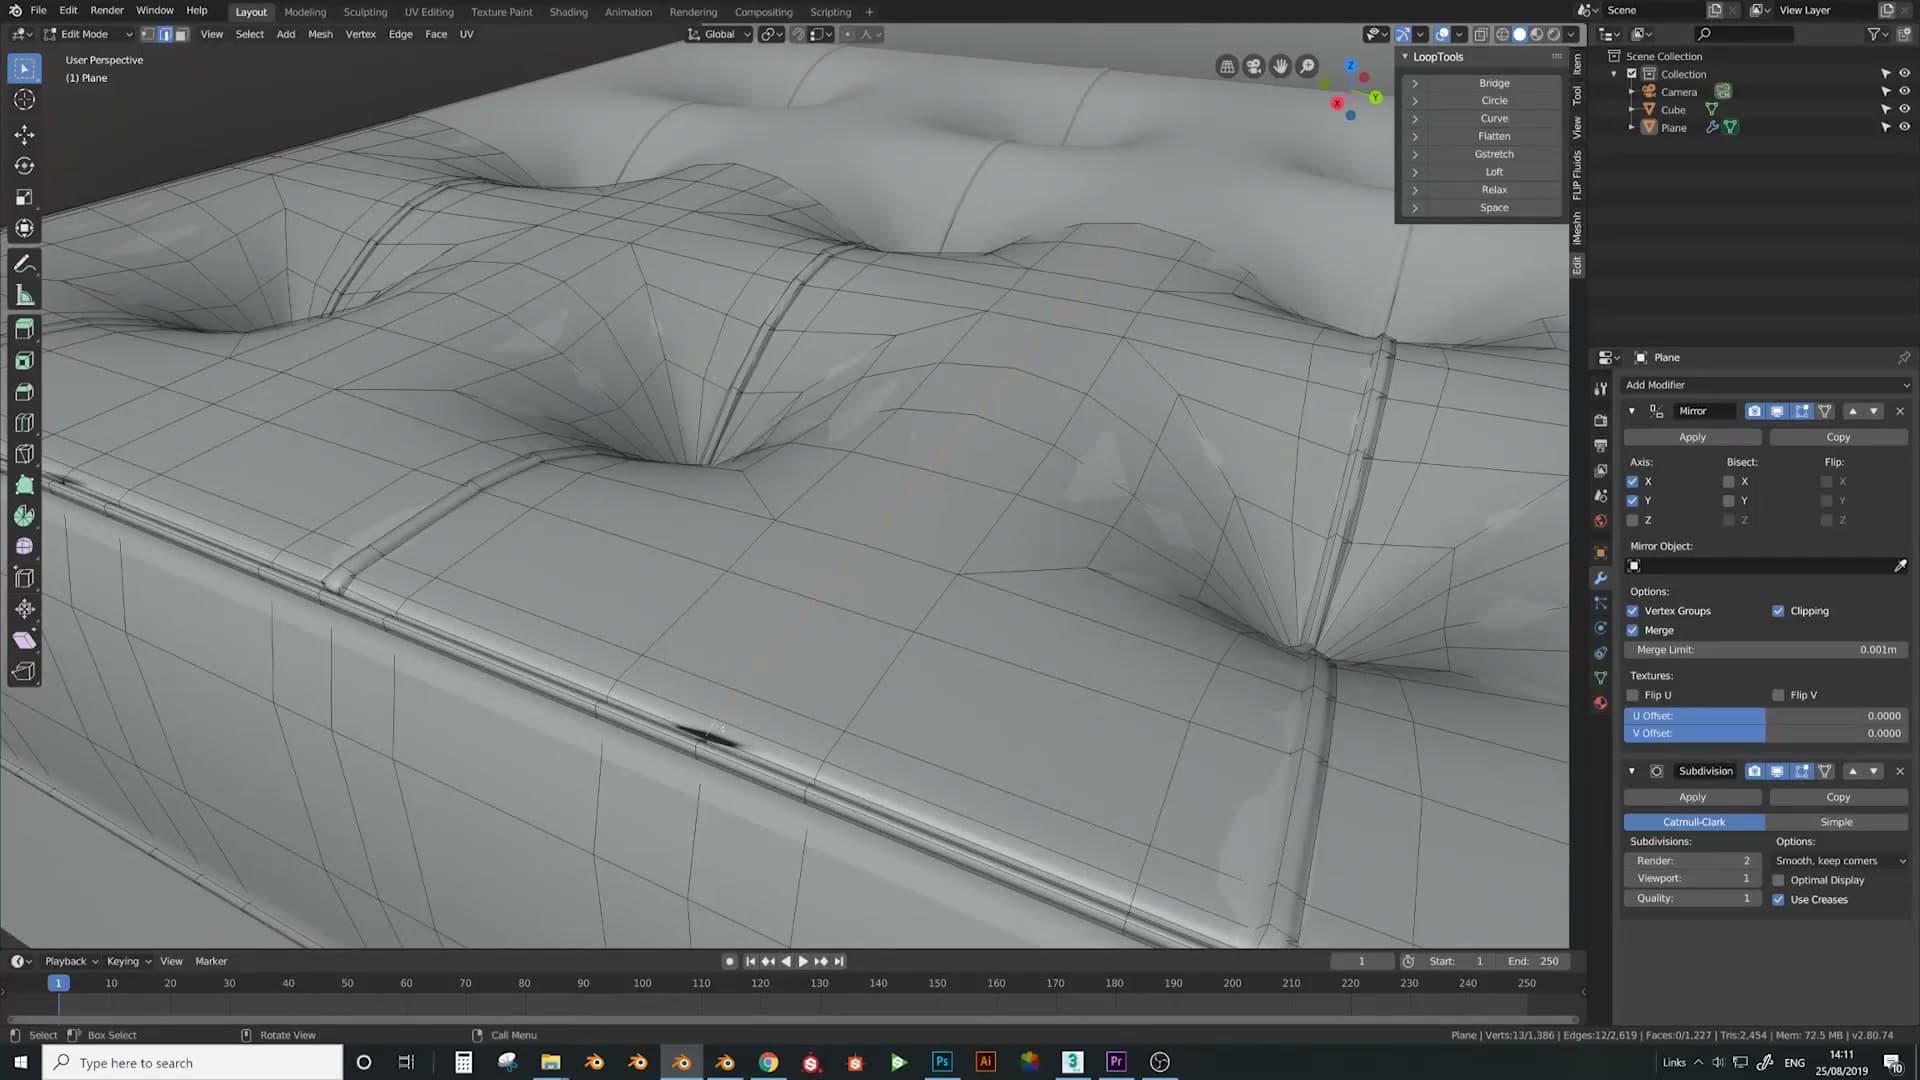
Press Ctrl+R and drop in a single loop cut at the join. Once it's placed, the two edges meet cleanly and the bevelled seam wraps from the front face around onto the corner band as one continuous line.
Thicken the cushion and merge overlapping verts
Time to give the cushion some body. Switch to vertex select, grab the top run of verts along the cushion and pull them straight up to make the shape fuller and thicker. Do the same on the matching row so both sides plump up evenly.
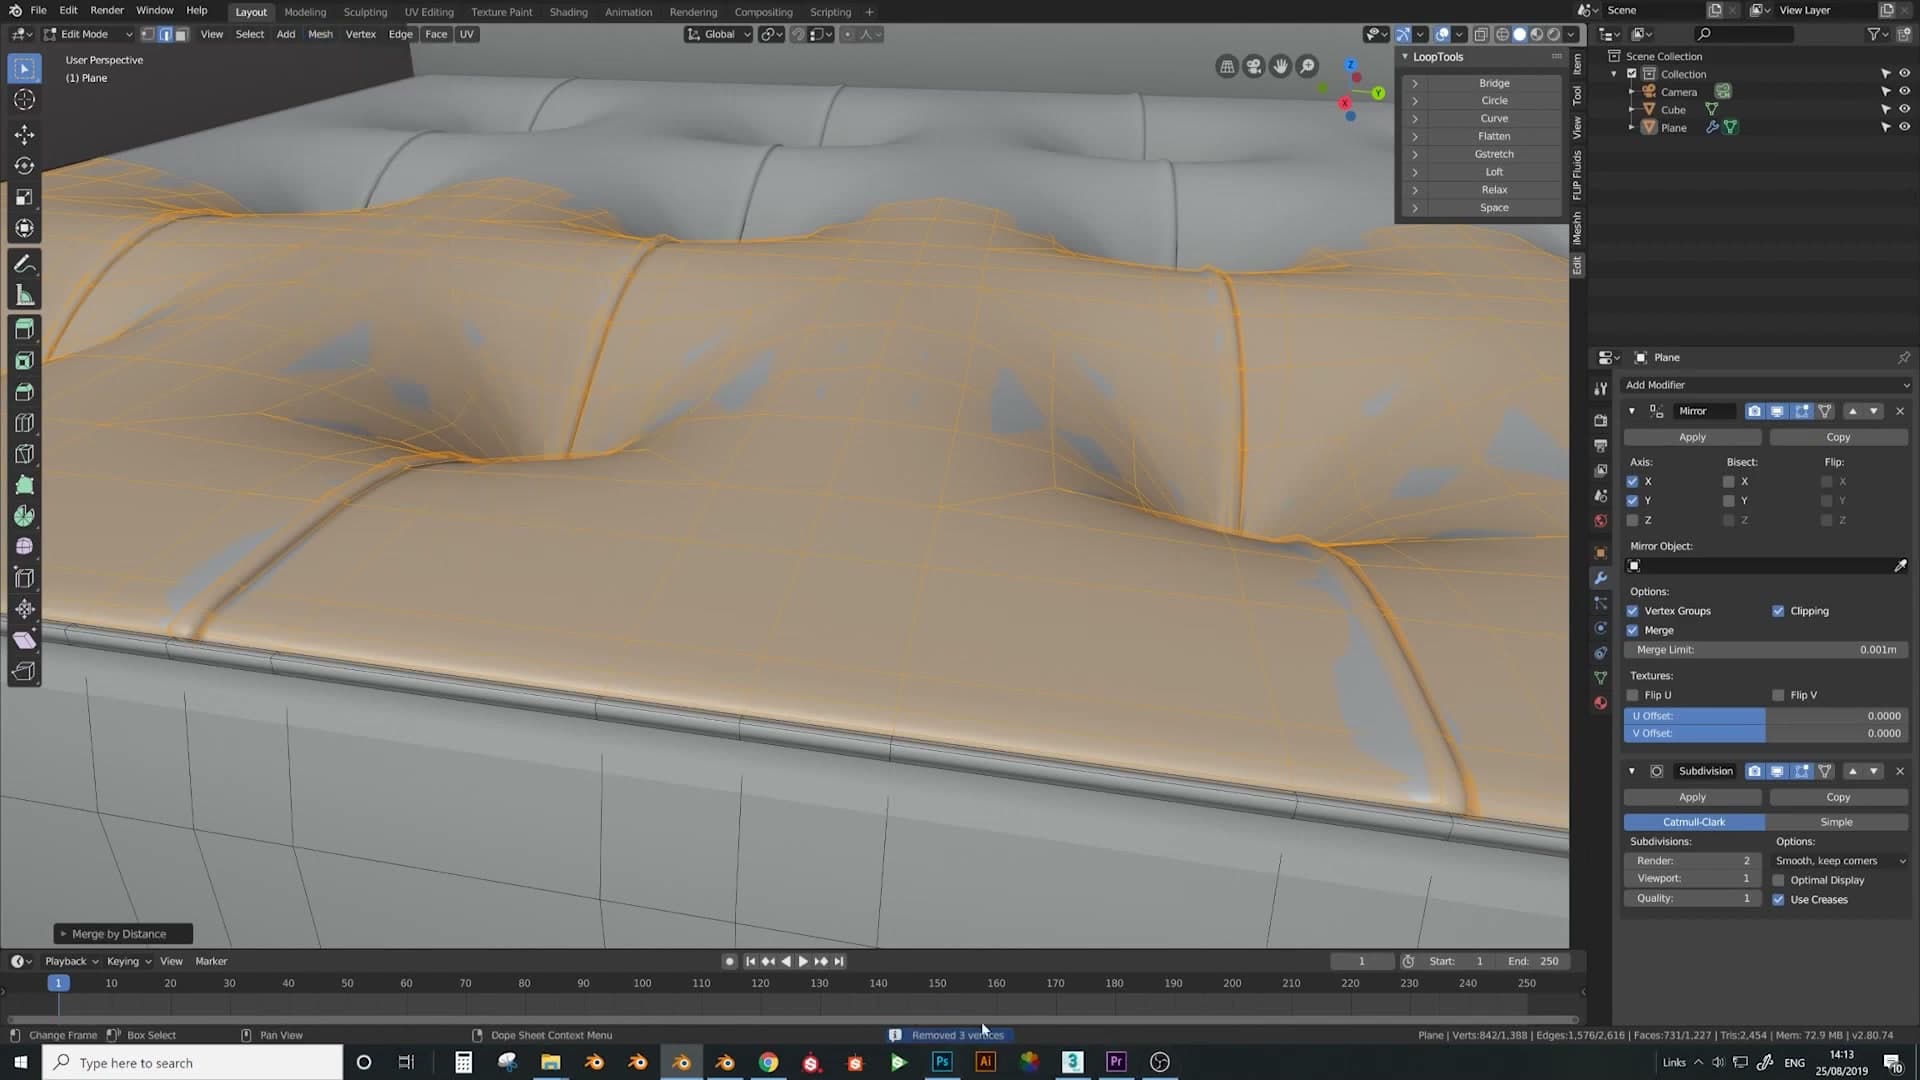
Drag the back edge of the cushion up to the top of the sofa body as well, so the cushion fills the well it sits inside rather than floating below the rim.
Once everything's been pushed around, you may spot a visual glitch where the mirror and array joins meet. That's usually overlapping vertices sitting on top of each other. Press Space and start typing Remove Doubles. In Blender 2.8 that operator has been renamed: it now lives under Mesh → Clean Up → Merge by Distance. Run it and you should see something like three vertices removed. Repeat on the matching strip on the opposite side just in case the same overlap is hiding there too.
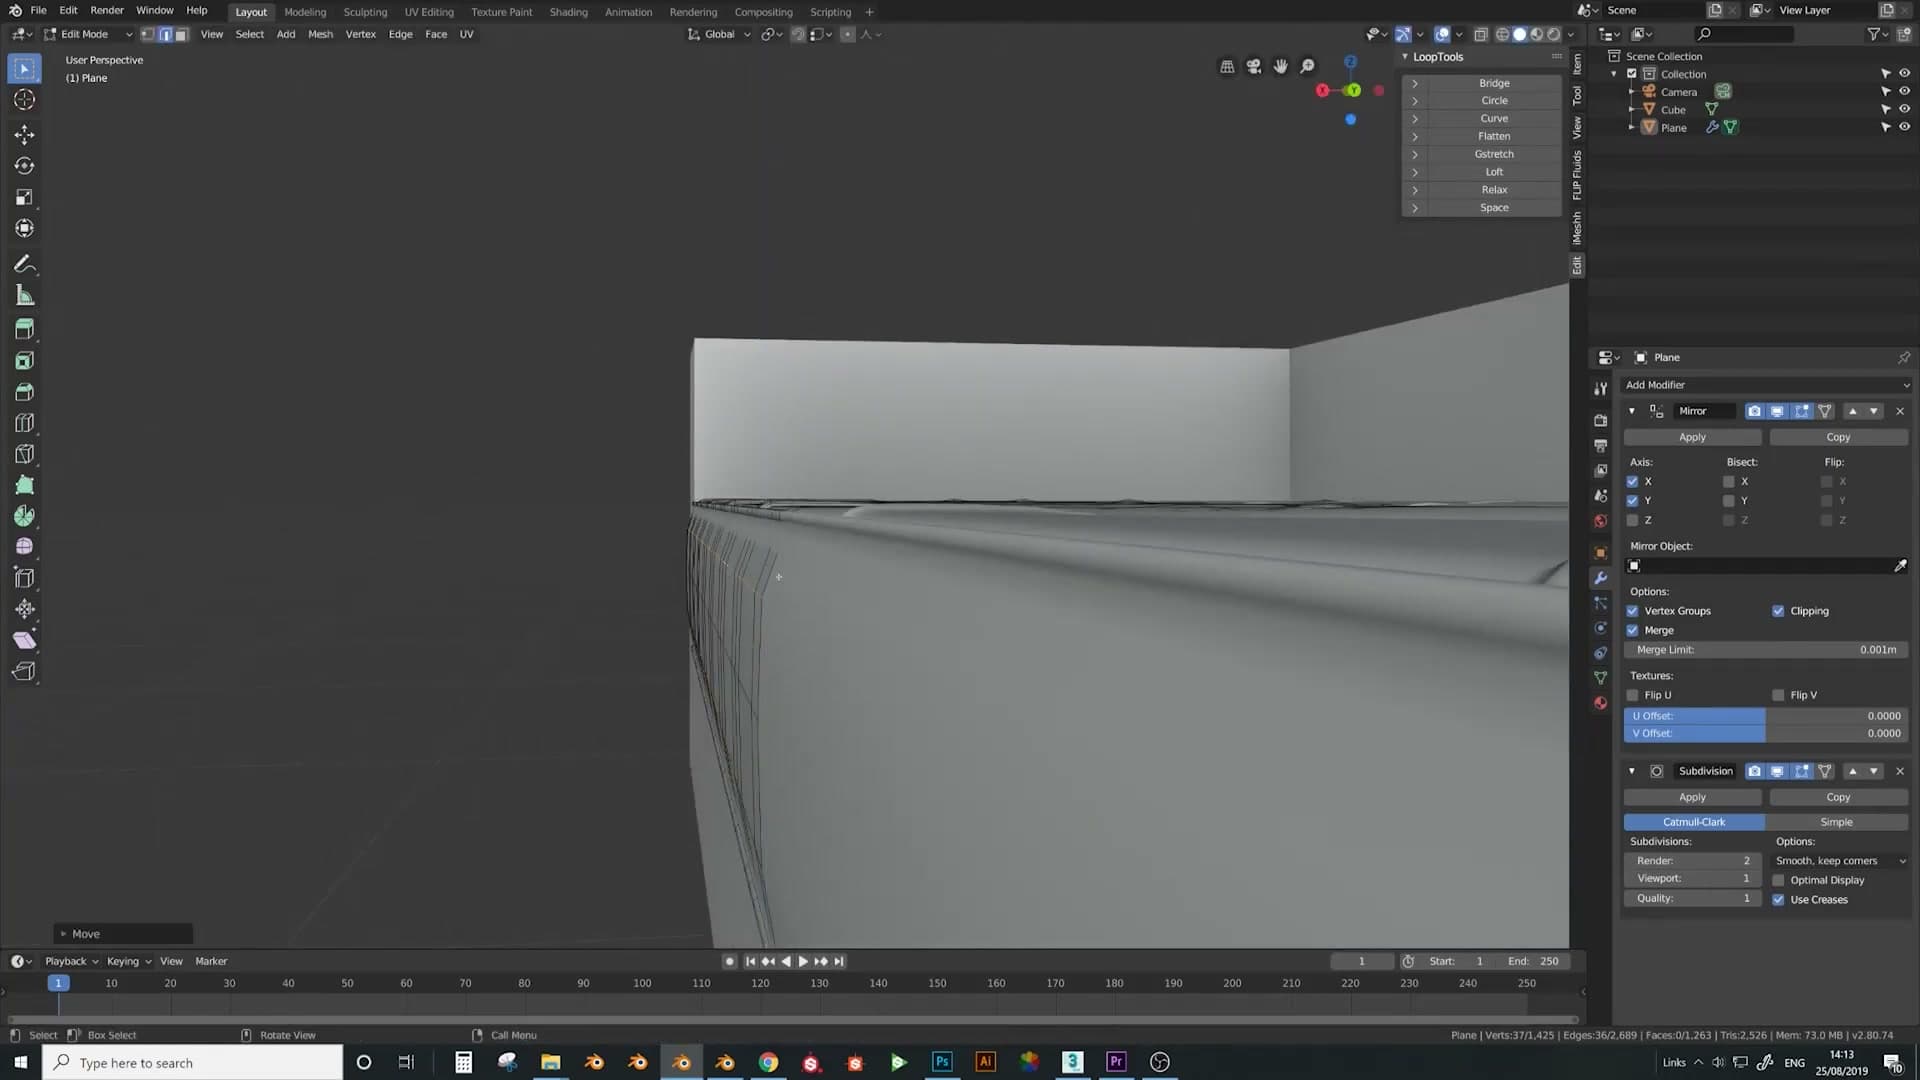
To soften the silhouette further, add an extra edge loop along the cushion and press Alt+S to run Shrink/Fatten. That pushes the loop in or out along the face normals, which is what you want for fabric padding rather than a flat scale. Scale individual cells to taste until the cushion looks nice and cosy.
UV unwrap and apply an iMeshh fabric material
Mark a seam down the back edge so the unwrap doesn't tear at the corner, then run U → Unwrap → Conformal for a soft, fabric-friendly layout. Apply a default fabric material from the iMeshh Asset Manager and drop in an HDRI to see the chesterfield in rendered viewport.
Mark a seam and unwrap with Conformal
With the sofa selected, split the workspace so you can see the UV Editor alongside the 3D view. Drop into Edit Mode, select everything with A, then press U and choose Unwrap.
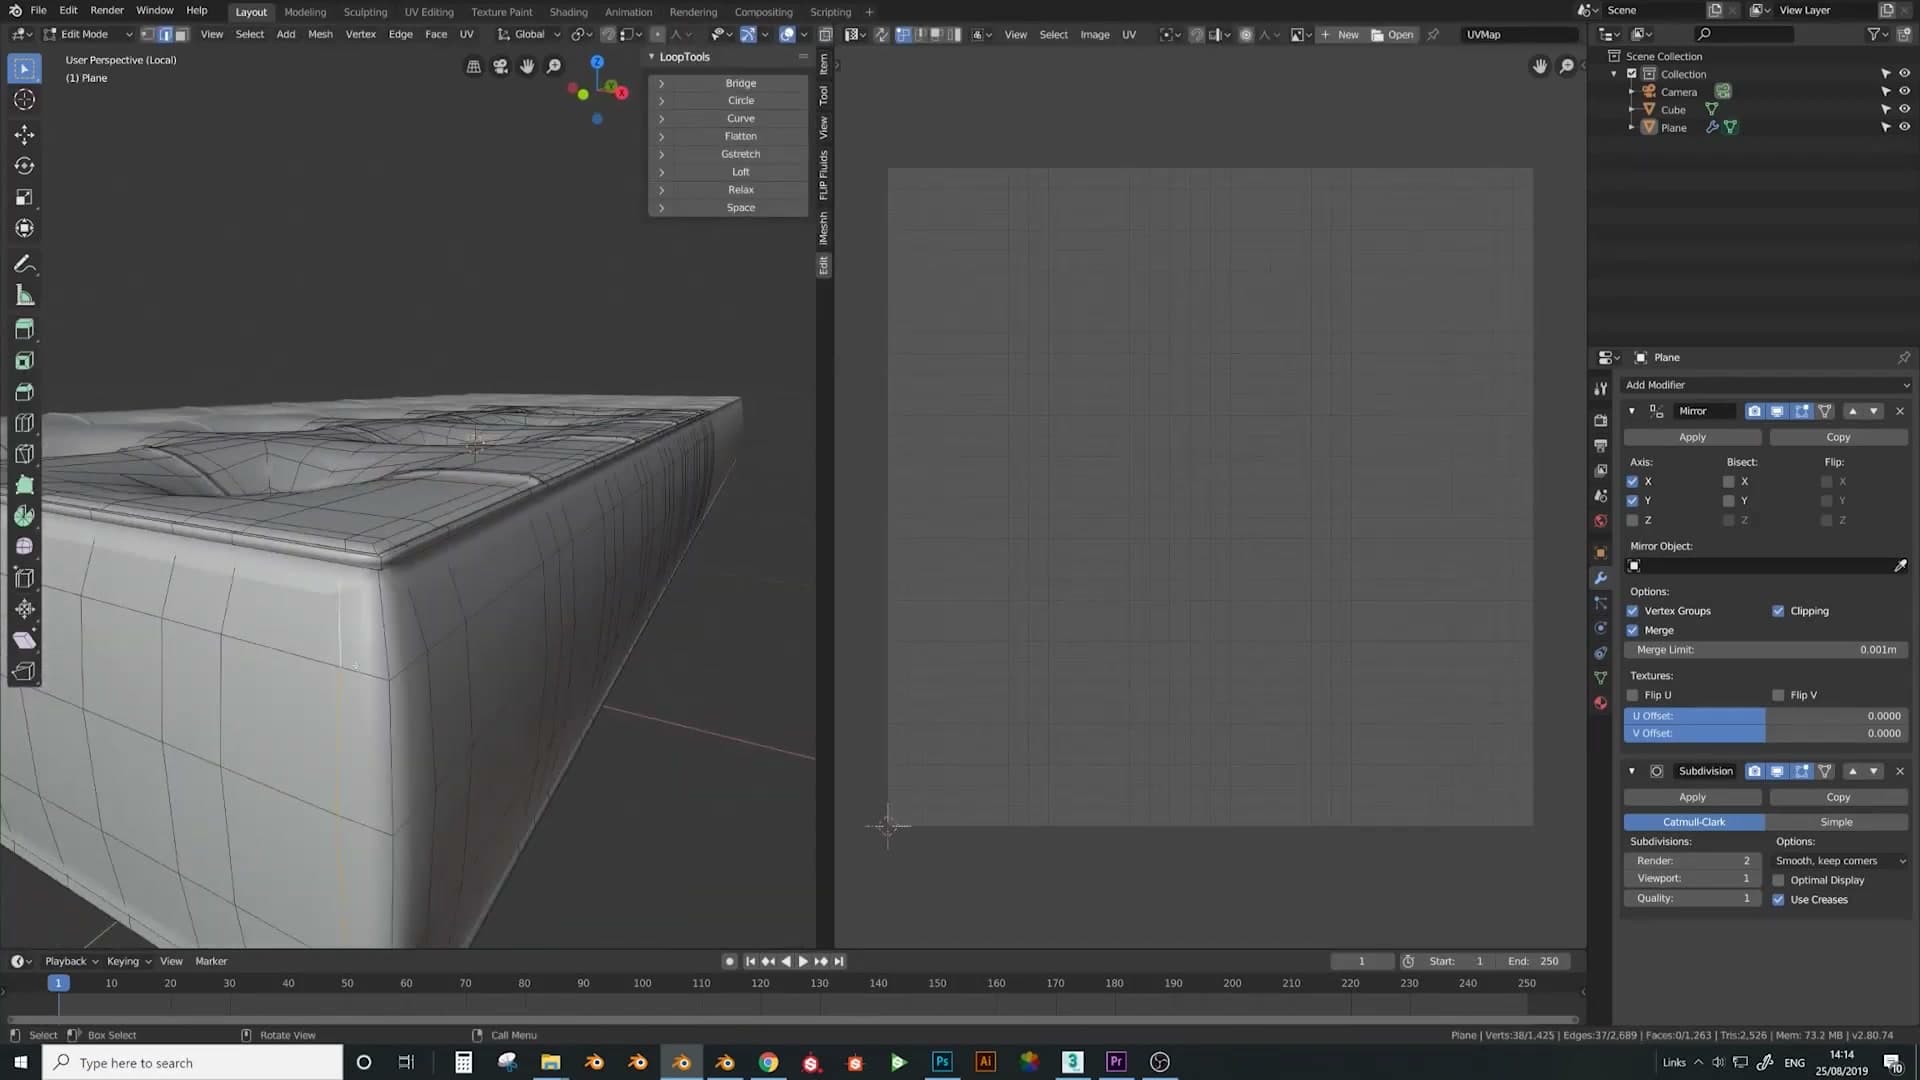
In the operator panel at the bottom-left of the viewport, switch the Method from the default Angle Based to Conformal. Conformal gives a softer result that suits fabric better than the harder, more angular default. It's the right pick when the texture has to flow across the curved buttoned cells rather than sit on flat panels.
Out of the box the unwrap pinches awkwardly where the cushion face meets the wraparound strip, so give it somewhere to split. Stay in Edit Mode, select the back edge that runs along that join, and use Ctrl+E → Mark Seam. Hover over the connected geometry, press Ctrl+L to select everything linked through that seam, then press U → Unwrap with Conformal still set. The seam opens the layout cleanly so the fabric tiles consistently across every button.
Apply a fabric from the iMeshh Asset Manager
Open the iMeshh Asset Manager (there is a link to it from the iMeshh homepage). The add-on ships with a bundle of ready-made materials, so the block-out doesn't need a shader built from scratch before you can see how the chesterfield will read.
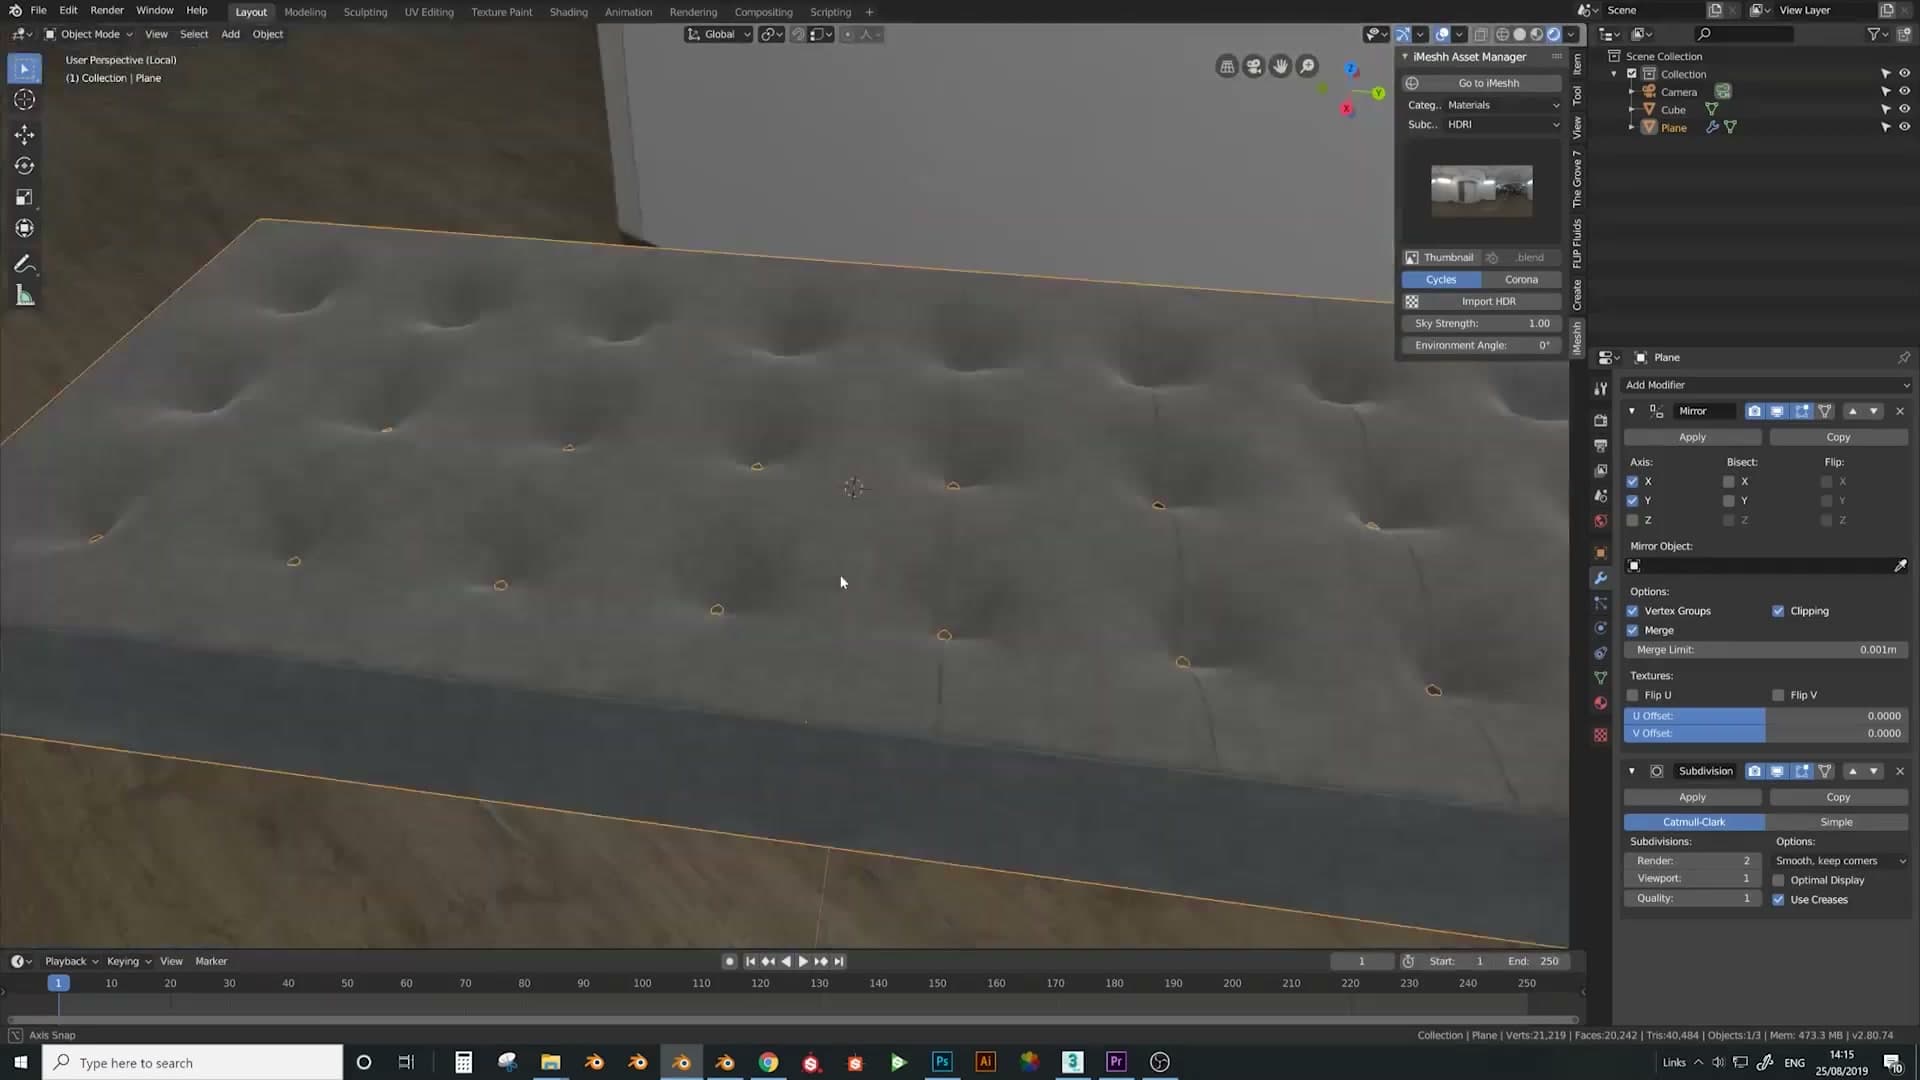
Inside the Asset Manager, go to Materials → Default Material Library. I pick a fabric, then with the sofa selected in the viewport, click Import Material. One click and the material is on the object.
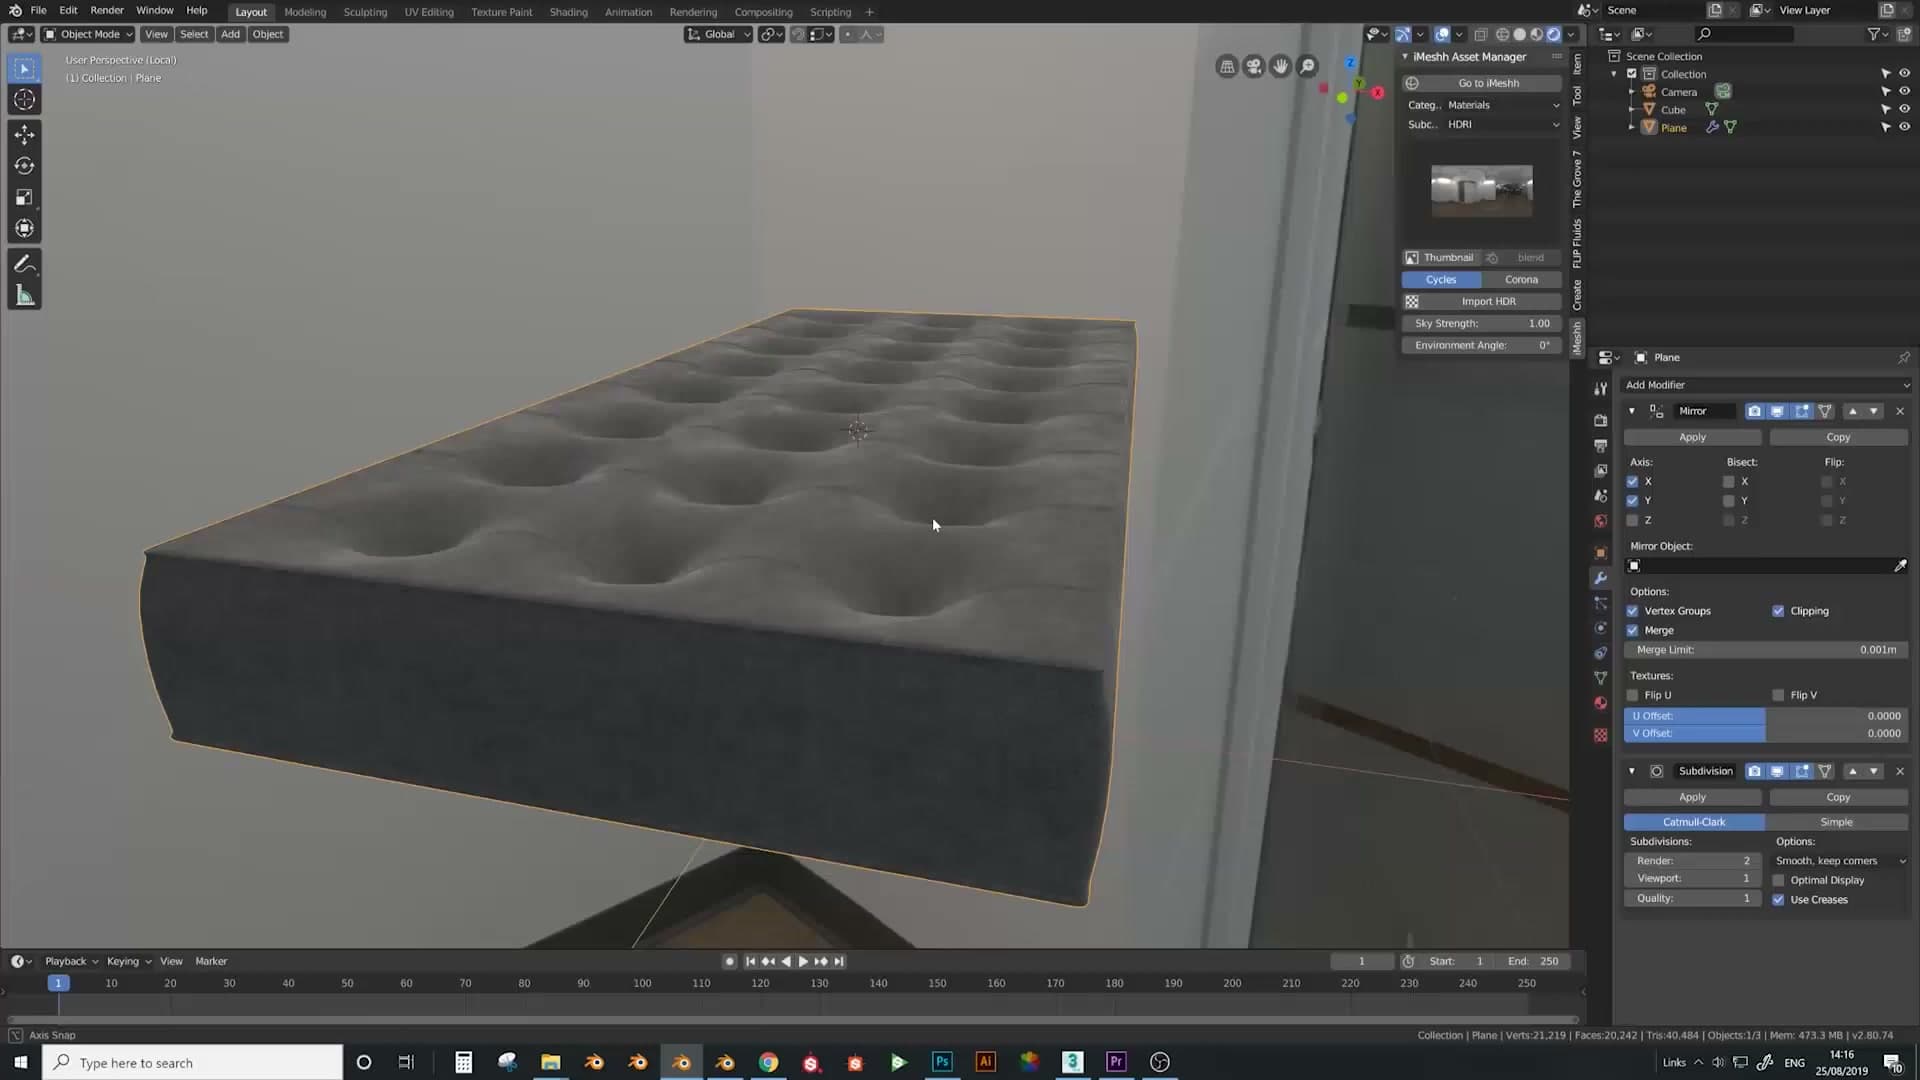
Switch the viewport shading to Rendered. With nothing lighting the scene the sofa stays dark, so drop in an HDRI so the environment lights it. The buttoned upholstery now reads as fabric. The tiled cells, the rounded buttonholes and the bevelled seams all sit where they should. That's the block-out and material pass done; the next step is to add the creases and folds that sell the tufted look as something a real upholsterer has stitched.
Tools and credits
Everything mentioned in this tutorial, with links.
- Blender: the renderer this entire build runs in.
- iMeshh: studio platform (project management, client review, asset library, invoicing). The asset library used in this tutorial is included with every iMeshh Pro plan.
- Poly Haven: free CC0 textures and HDRIs.
Pillar guide: Modelling hub