Why lighting comes before materials
Materials can't be evaluated honestly against a black viewport, so the workflow is to block in world lighting first, then dial in shaders against that exposure. This part covers the World tab, opening the Shader Editor in World mode, and how the background colour controls scene illumination before any HDRI is loaded.
Opening the World shader in the Shader Editor
Before you touch any materials, you need light in the scene. Materials read incorrectly against a black viewport. You cannot judge a colour or a roughness value if there is nothing illuminating the surface. The honest workflow is to block in the world lighting first, get the exposure roughly where you want it, and only then start dialling in shaders.
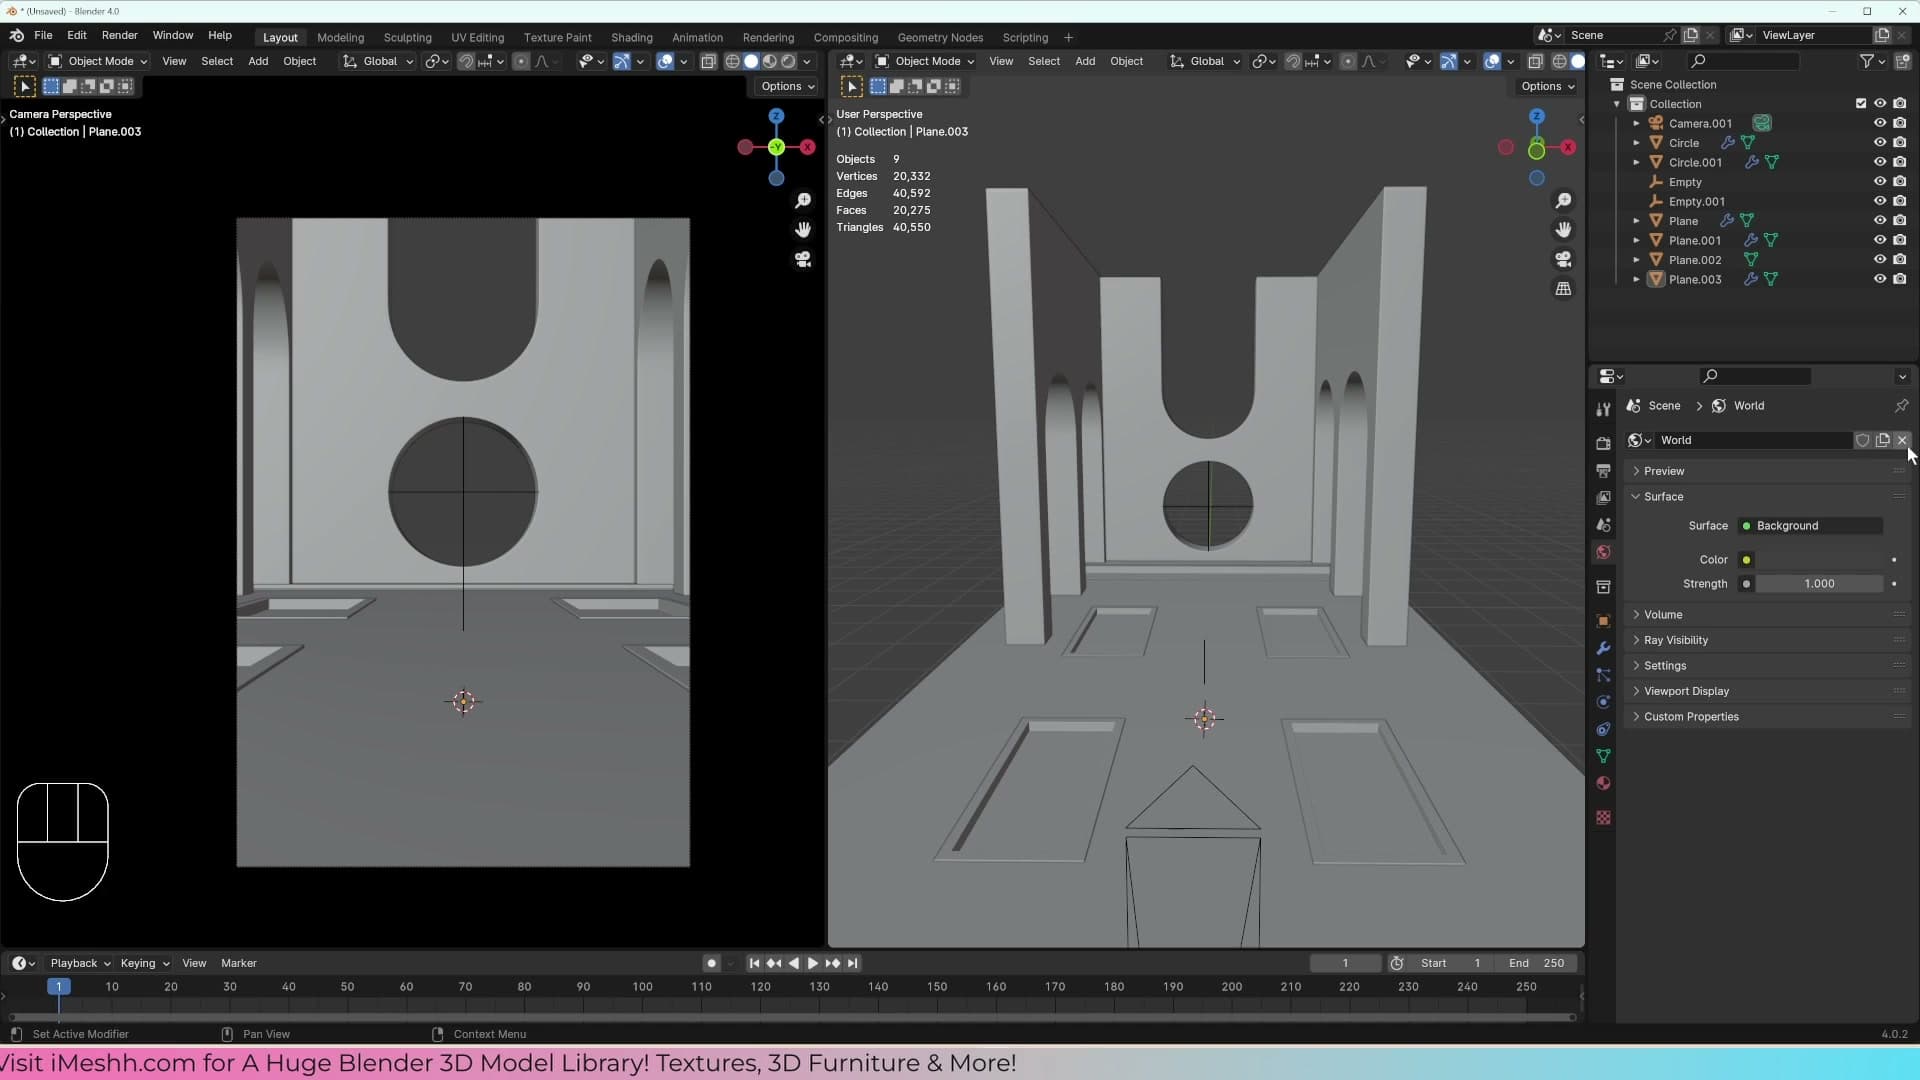
Open the World Properties tab in the Properties panel. If the scene already has a world assigned you will see the default Background node and a flat grey colour. If the slot is empty, click New to add one and give yourself something to edit.
The Properties panel works for quick changes, but the Shader Editor is the cleaner place to actually build world lighting. Open a Shader Editor and switch its mode from Object to World using the dropdown at the top of the editor. You should now see the same two nodes (Background feeding into World Output) laid out as a node graph instead of a stacked panel.
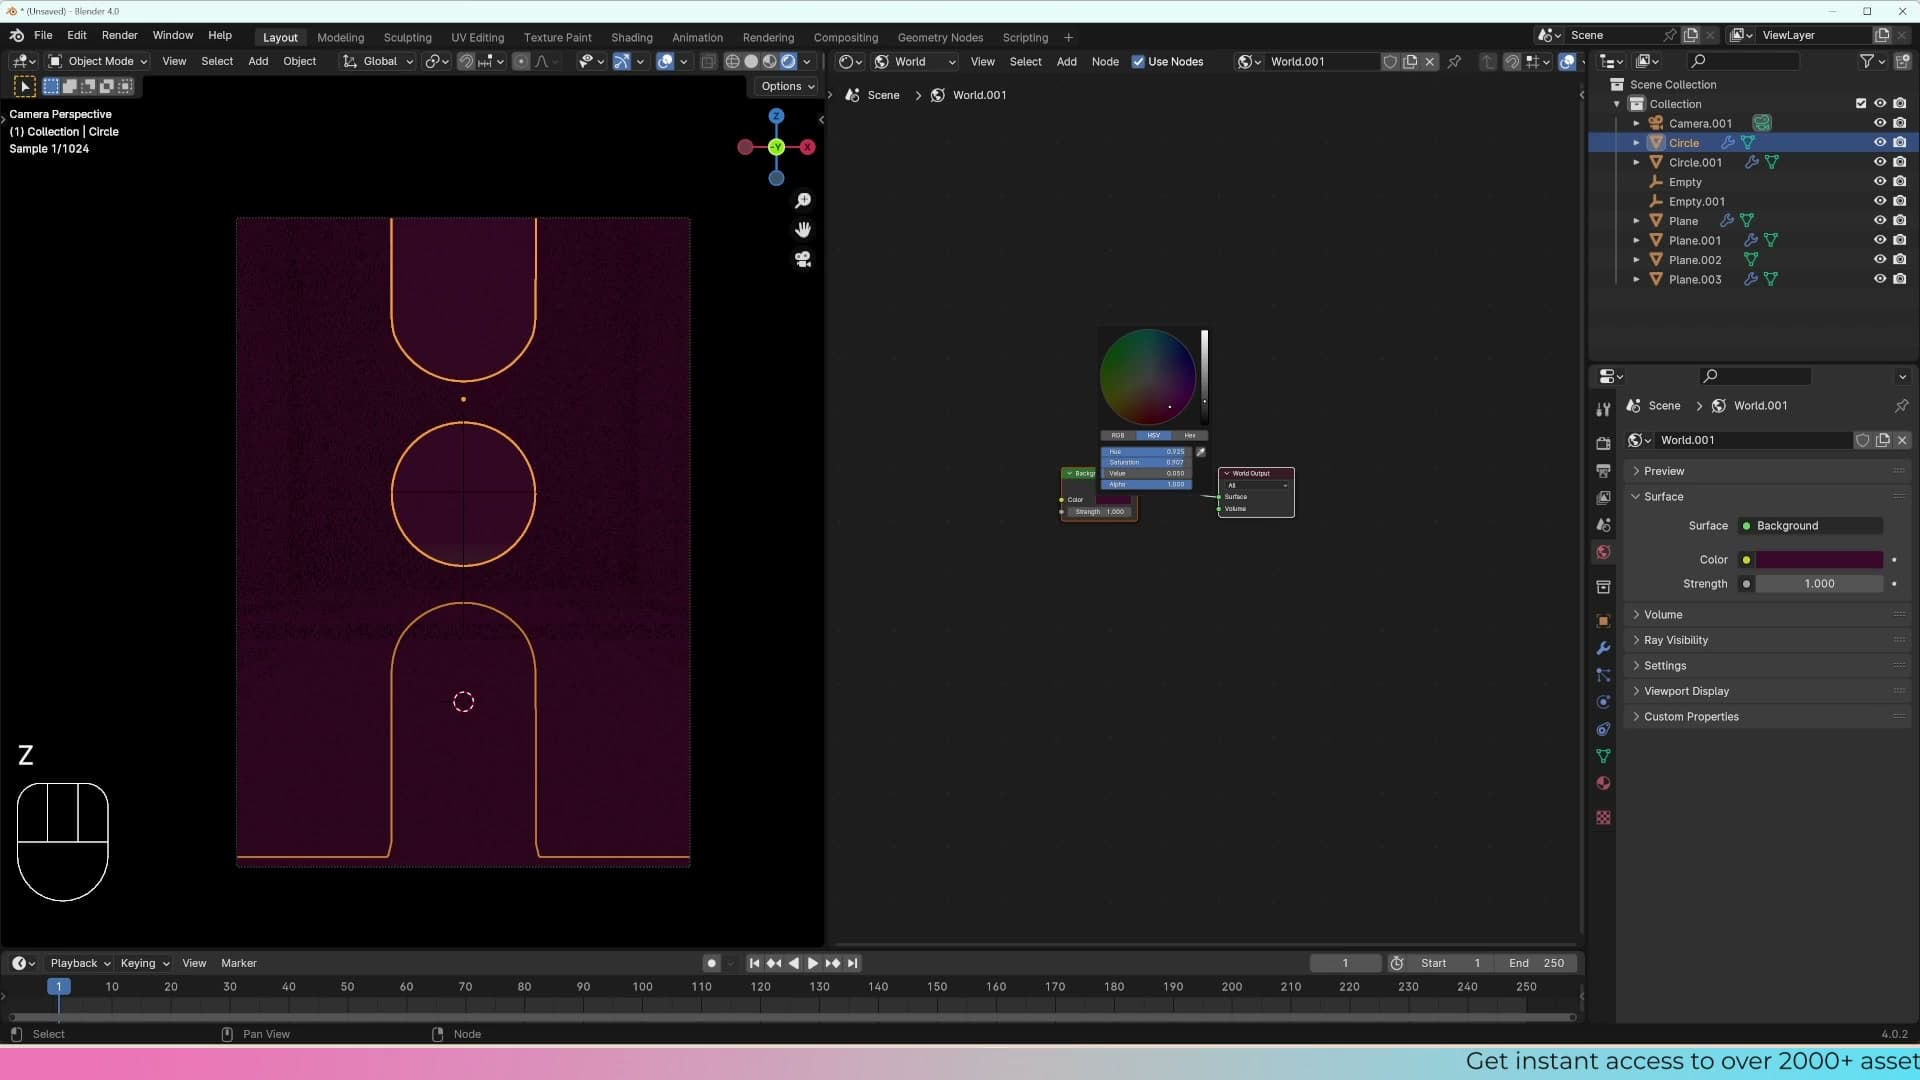
With the viewport set to Rendered preview, the Color socket on the Background node controls the entire scene's ambient illumination. You can drag it to pink, to blue, or push the Strength higher to brighten everything. Handy as a sanity check that the world is actually lit, but a flat colour is not what you want for a believable render. The next step is to replace that flat colour with a proper HDRI.
HDRI lighting: why .hdr and .exr beat JPEG
An HDRI carries the wide dynamic range Cycles needs to drive real lighting. A JPEG bakes brightness into the pixels and can't illuminate a scene. This module covers what makes an HDRI different, loading one via the Environment Texture node, and the immediate visual difference once it's plugged into the Background.
What an HDRI actually stores
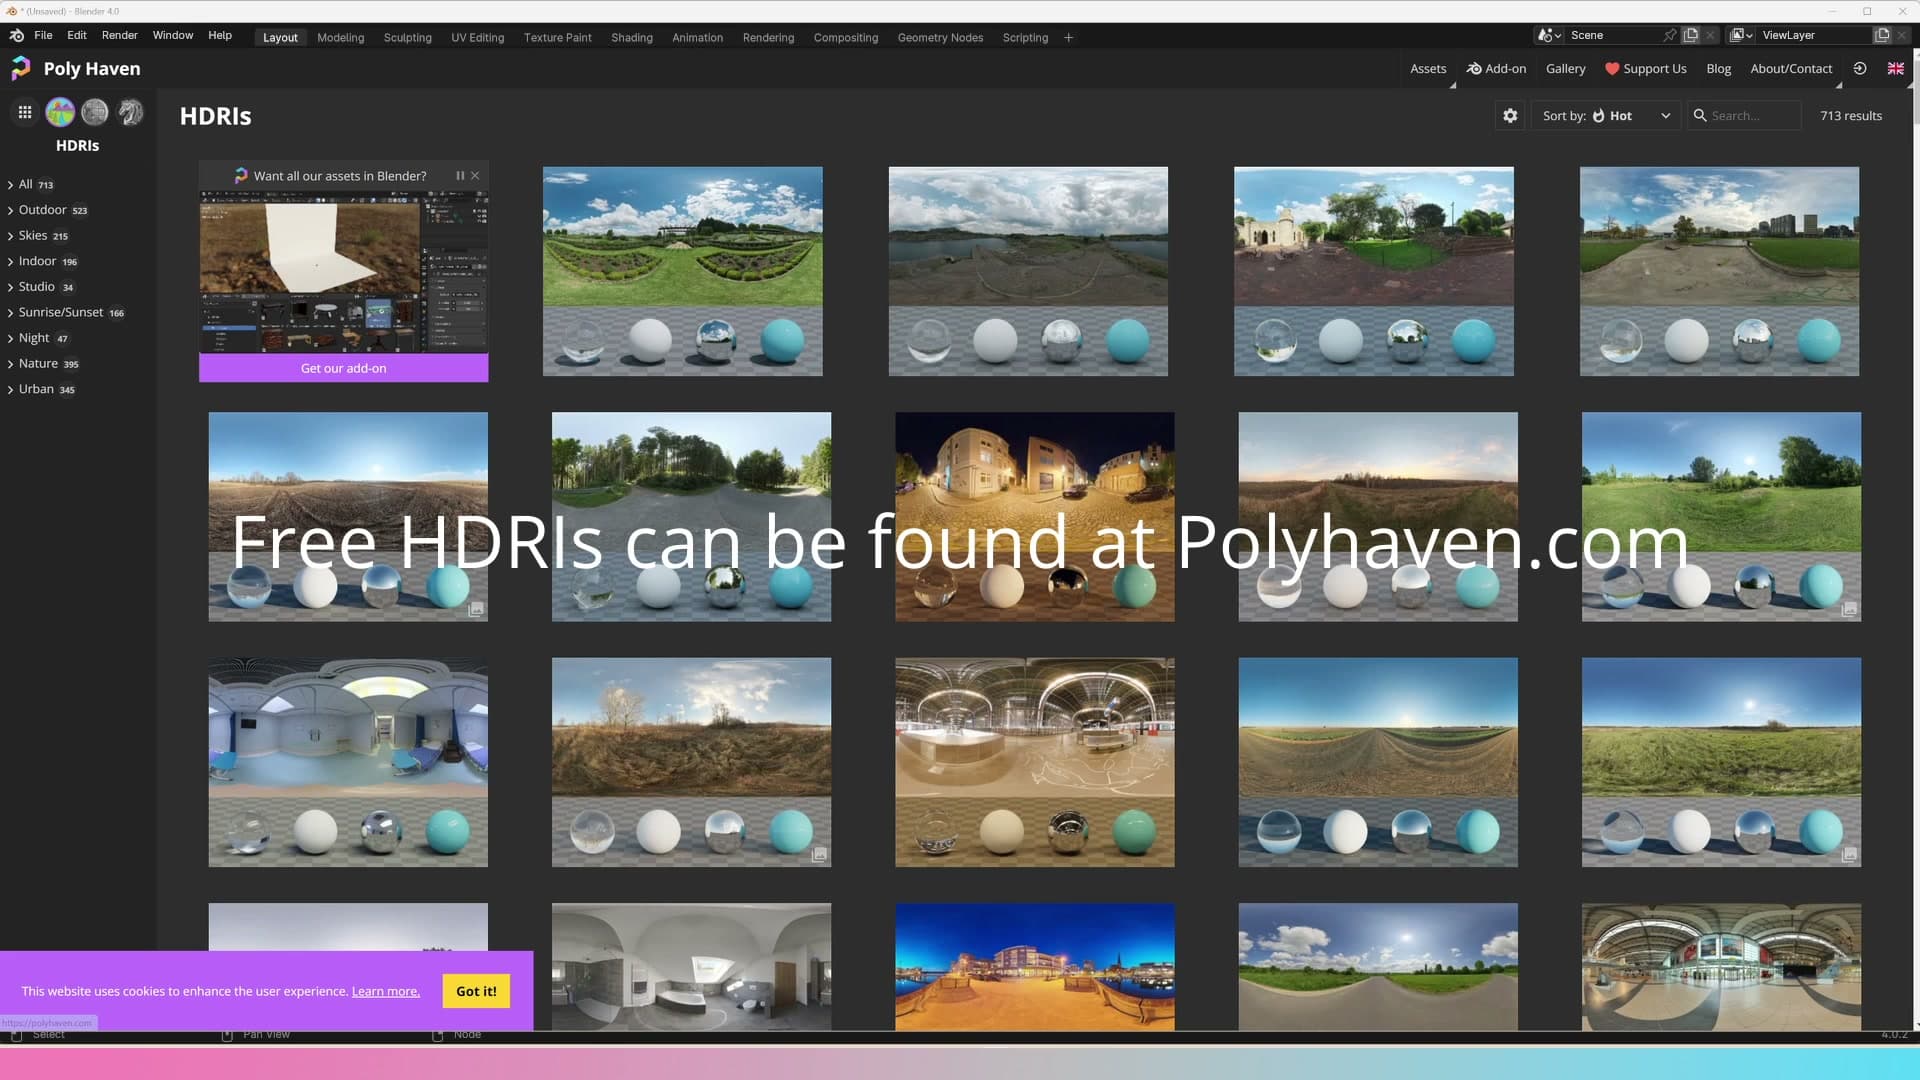
A flat world colour gives you something to look at, but it isn't really lighting the scene. Most of the time you'll reach for either a HDRI or Blender's procedural Sky Texture instead. Both feed genuine light data into the Background shader rather than a single uniform value, and the difference is dramatic the moment you switch render preview on.
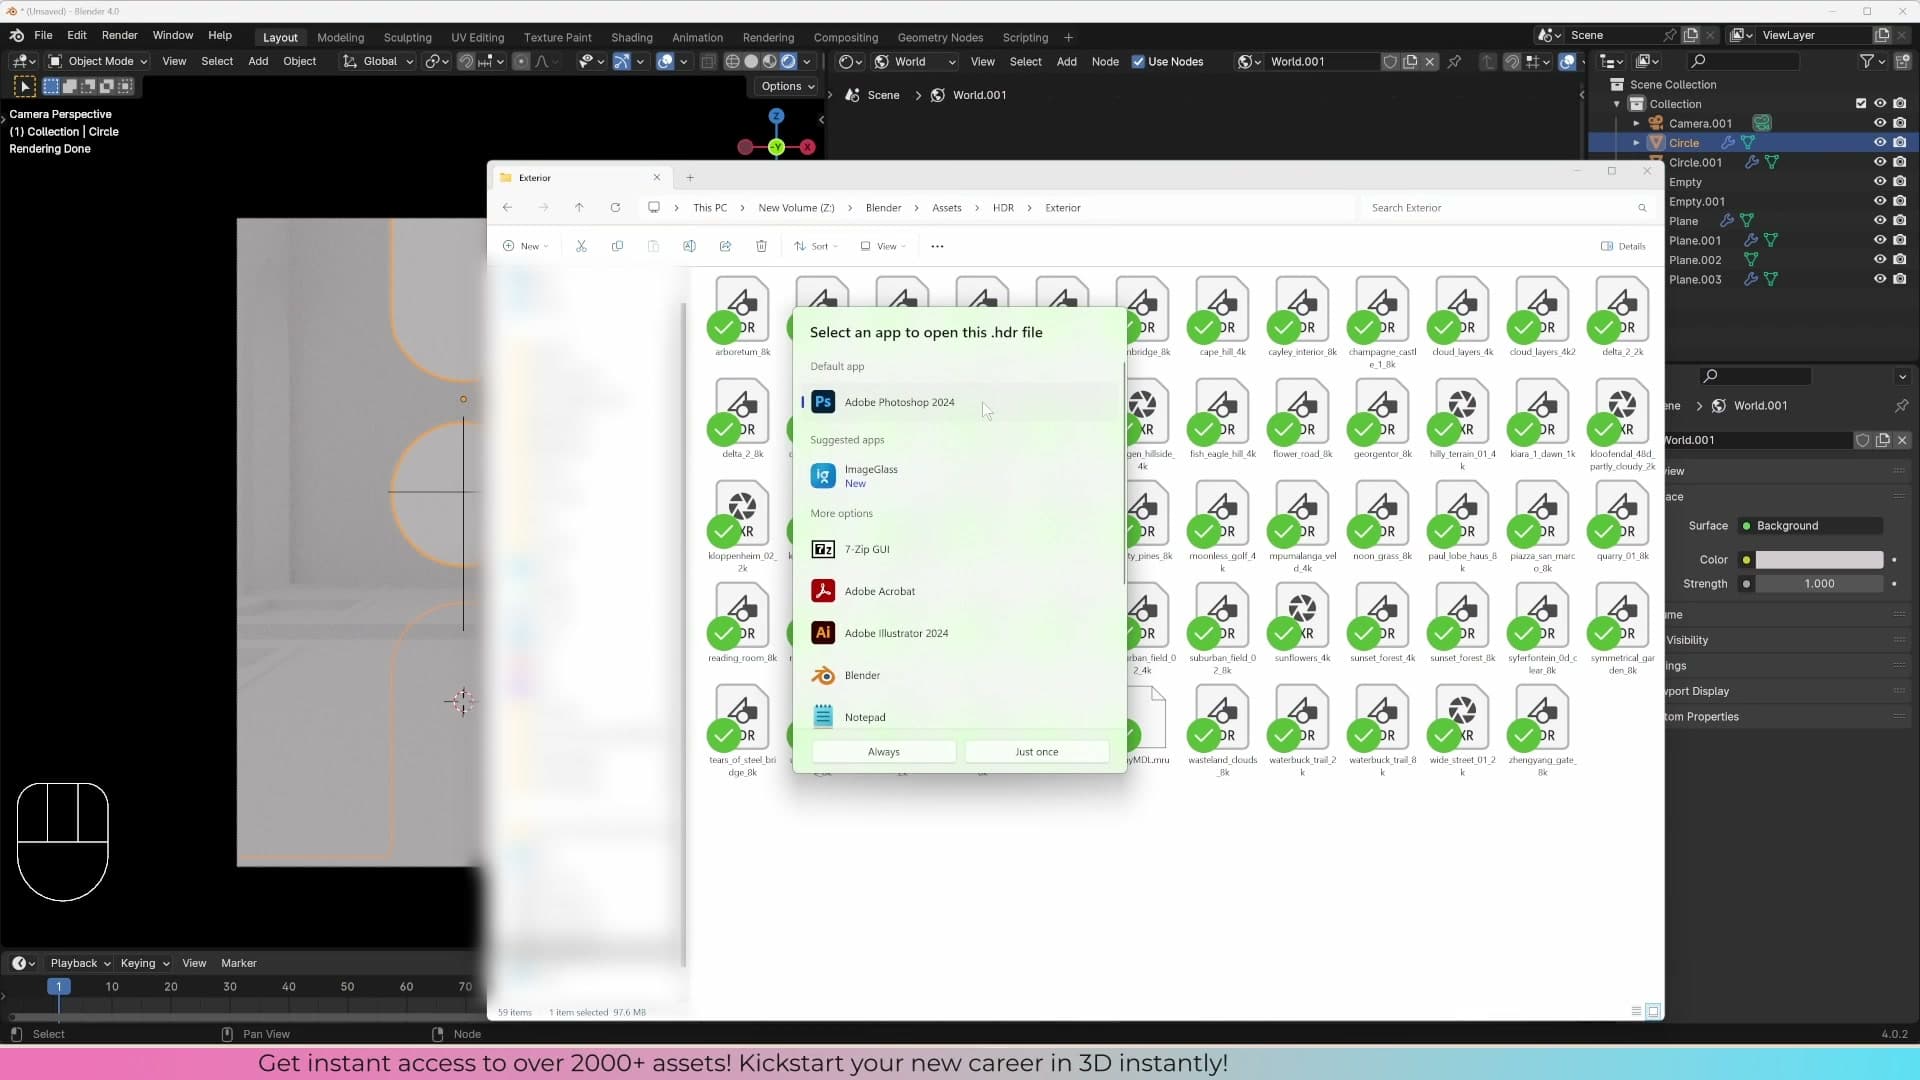
Open a HDRI preview for the first time and the image can look slightly broken. The sun is a featureless white blob, and bright sky areas look blown out next to perfectly normal-looking ground. That isn't a fault in the file. It's the opposite. A HDRI is a 360-degree panorama that stores far more brightness range than your monitor can display, so the screen clips the brightest parts down to white while the underlying file keeps the real values intact.
These images come as .hdr or .exr files, and they carry the wide dynamic range Cycles needs. The sun value inside the image is genuinely enormous, the deep shadow value is genuinely tiny, and Blender reads those numbers directly to use as a real light source for your scene.
A JPEG sky won't do the same job. JPEG bakes the final on-screen look into each pixel, so the bright sun and the dark shadows all get squashed into a narrow display range. The light information has been thrown away by the time the file is written, which is why dropping a JPEG into the Background shader produces a flat, unlit result. The file simply doesn't contain anything for Cycles to use as light.
Wiring an Environment Texture into the Background
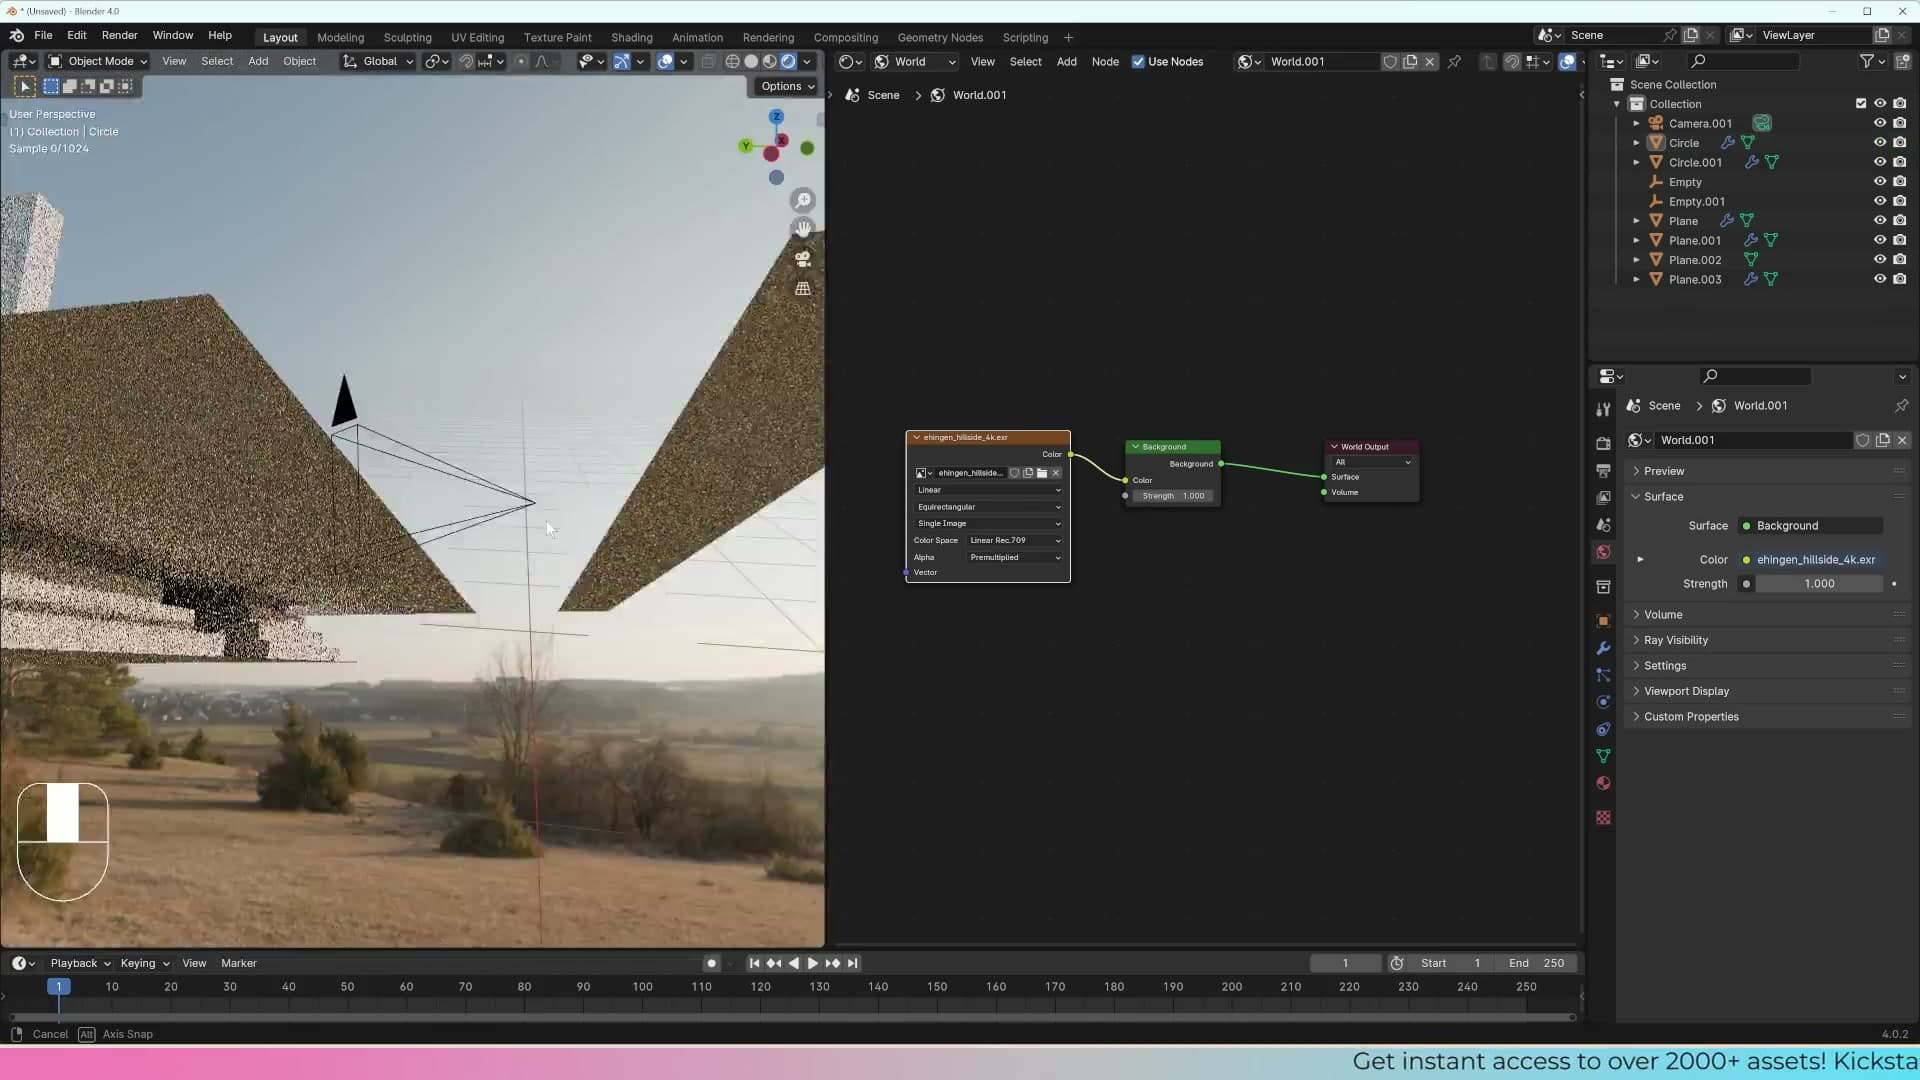
With the World data block open in the Shader Editor, press Shift+A and search for "environment texture." Add the node, click Open, and pick an HDRI file from disk. Blender will load it ready to use.
Drag a connection from the Environment Texture's colour output into the Background node's Color input. The viewport updates immediately. The world goes from a flat field of grey to something that reads as a real environment, and any reflective surfaces in your scene start picking up the sky behind them. That single connection is the entire HDRI lighting setup at its most basic; everything else in this guide is refinement on top of it.
Rotating an HDRI with Texture Coordinate and Mapping nodes
Out of the box an HDRI faces a fixed direction. The Texture Coordinate → Mapping → Environment Texture chain is the standard rig for spinning the sun on the Z axis without moving the horizon. This module walks through wiring those three nodes and adjusting strength to demonstrate how HDR values still resolve at low intensity.
Adding the Mapping and Texture Coordinate nodes
Straight out of the file browser an HDRI lands in a fixed orientation. The sun will be wherever the photographer happened to be facing when they shot the panorama. To spin it around your scene you need two more nodes sitting in front of the Environment Texture.
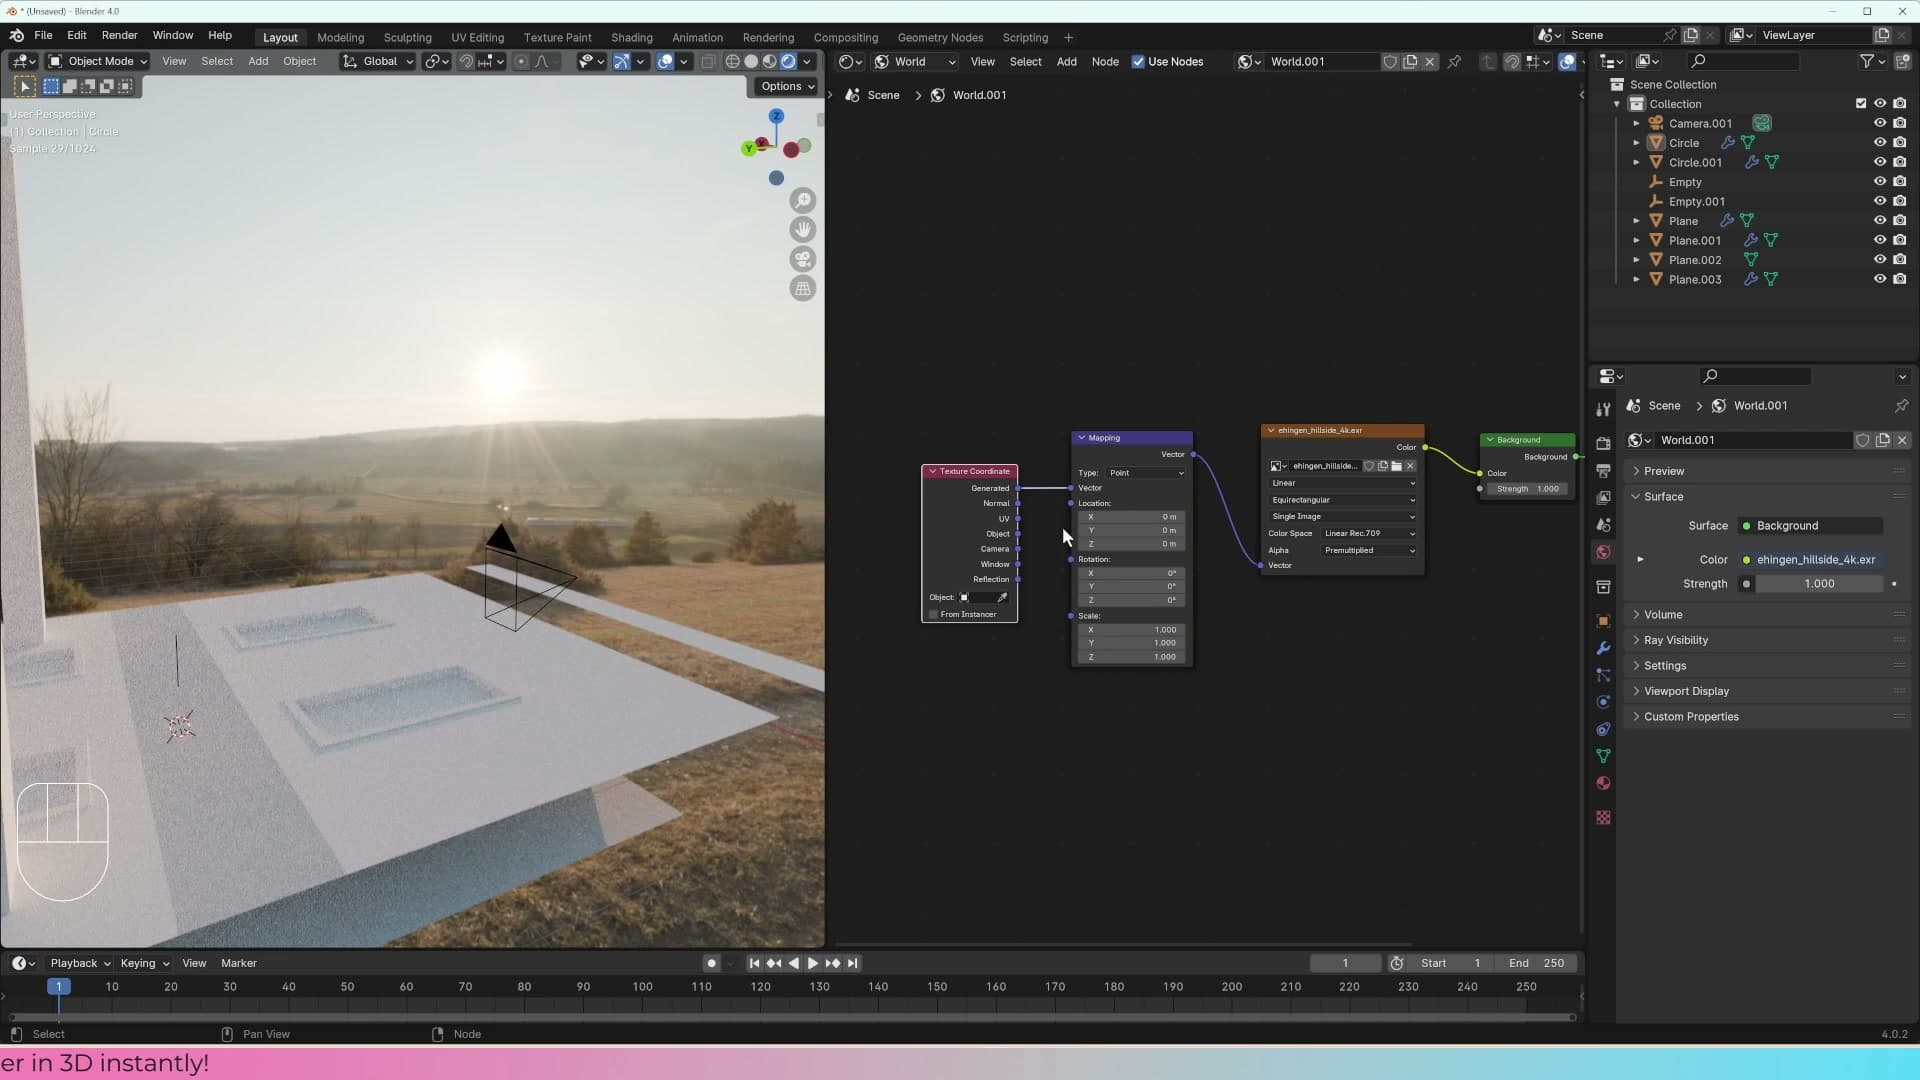
In the Shader Editor press Shift+A, search for Mapping, and drop the node in between the Environment Texture and the Background shader. As soon as you plug it in the HDRI will appear to vanish. That's expected. The Mapping node is asking for a coordinate space to work against, and it doesn't have one yet.
Press Shift+A again, search for Texture Coordinate, and add that to the left of the Mapping node. Plug the Generated output into the Mapping node's Vector input and the HDRI snaps back into view. Texture Coordinate is essentially telling Blender that the world has a generated coordinate space the texture can sit on top of, and Mapping is the dial that lets you rotate, scale or shift it around inside that space.
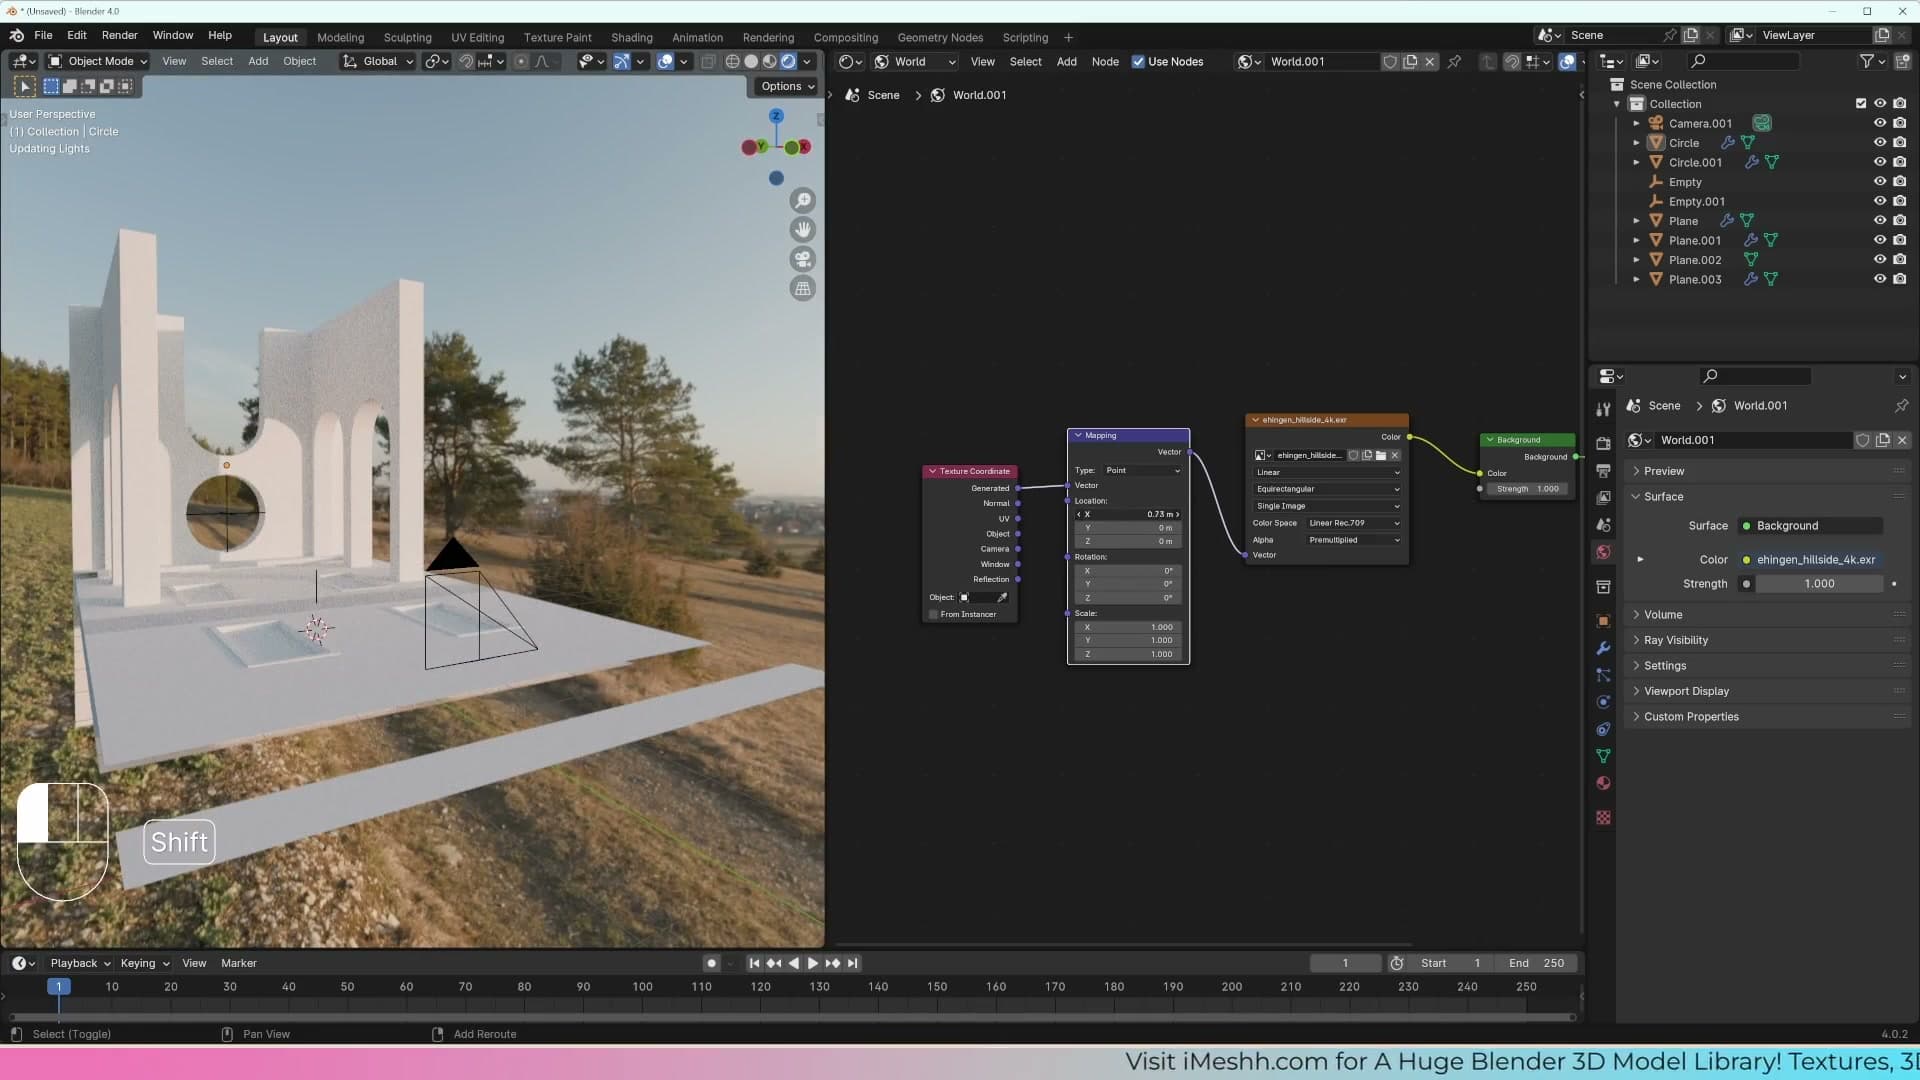
Texture Coordinate → Mapping → Environment Texture is a chain you'll wire up again and again, so it's worth committing to muscle memory now.
Z-axis rotation and HDRI strength behaviour
The Mapping node exposes Location, Rotation and Scale on three axes, but for a 360° HDRI you almost always only want the Z rotation. Rotating on X or Y tips the horizon over and the result gets confusing fast. The ground ends up on the ceiling. Z keeps the horizon flat and spins the sun around the scene, which is the move you actually want.
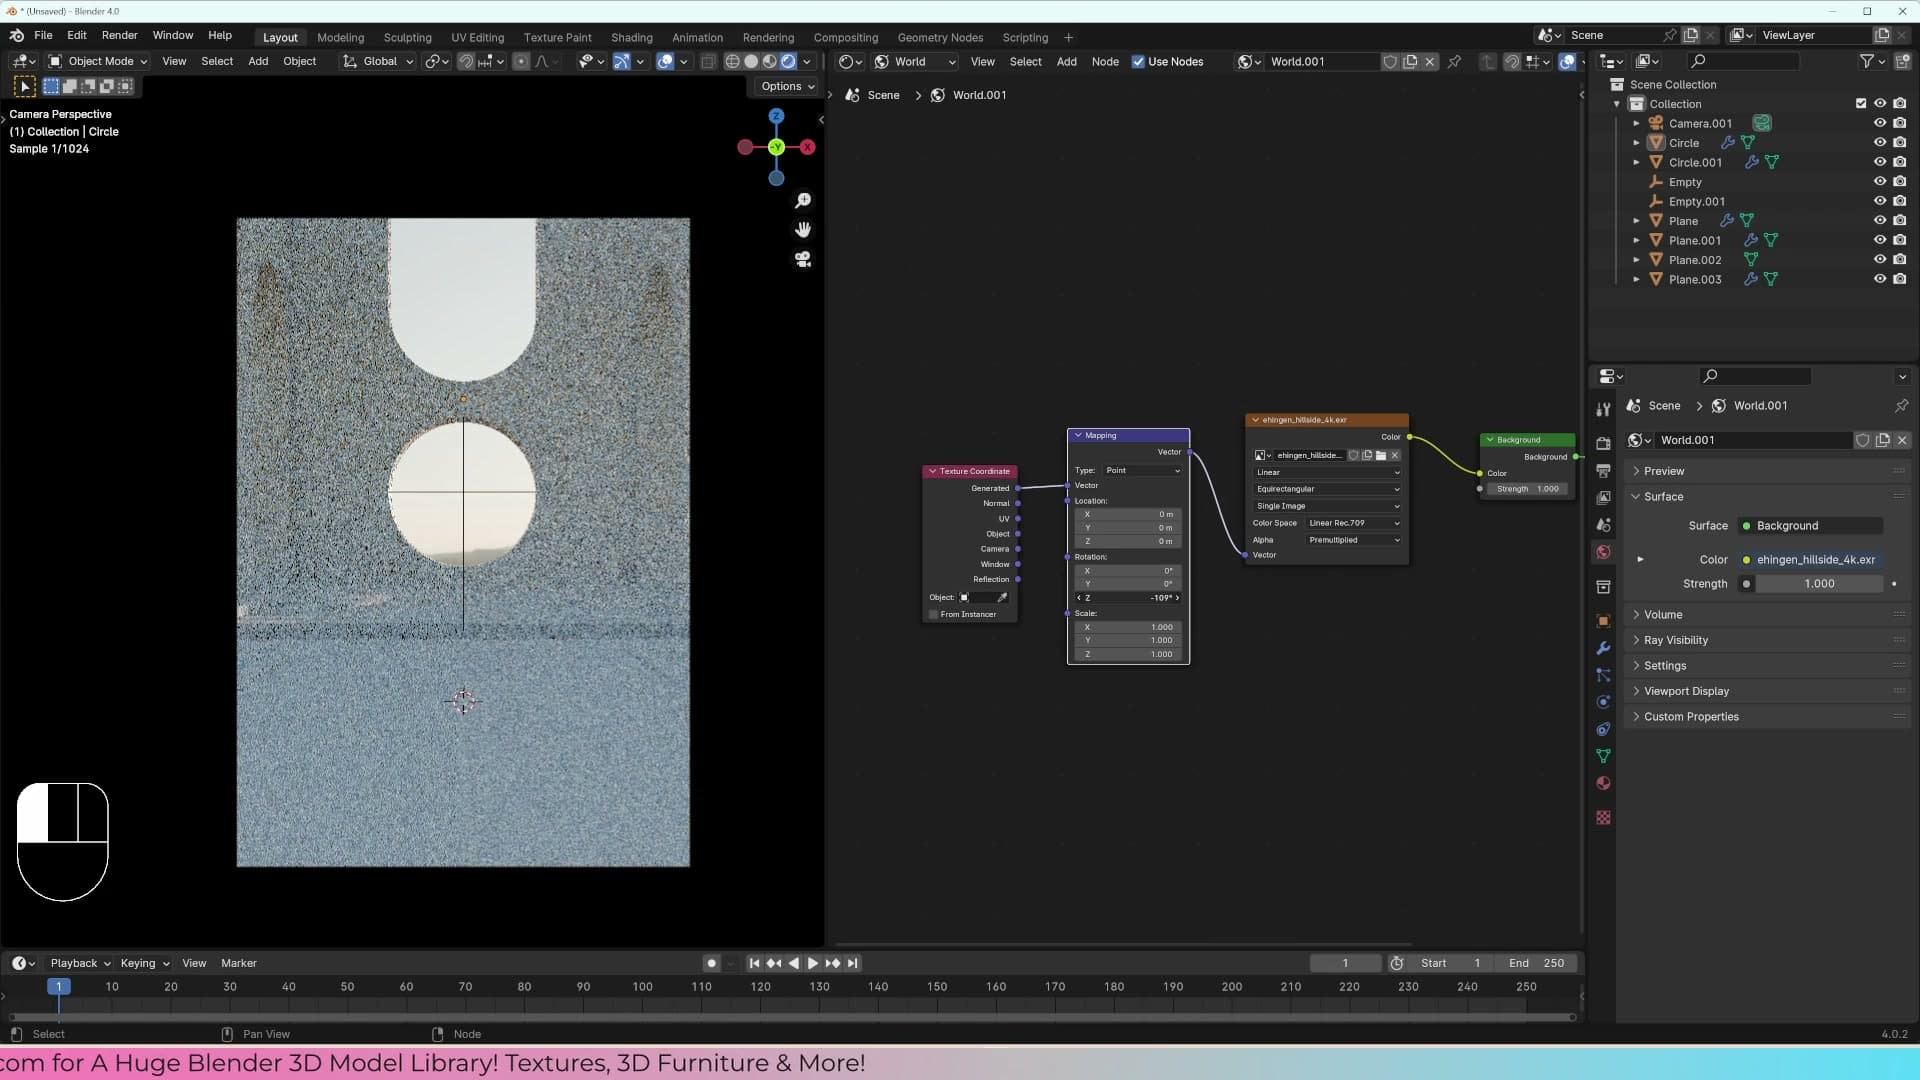
Click into the Mapping node's Z rotation field and dial in a value until the sun is hitting your scene from the direction you want. There's no correct number here. Rotate it to taste based on where you'd like the key light to fall.
Once the sun is in a good spot, it's worth proving to yourself that the HDRI is actually carrying real light data. Drop the Background strength down very slightly and watch what happens: the edges of the scene fall into near-darkness, almost as if it's become nighttime, but the sun stays clearly visible. Blender is reading the incredibly bright values around the sun disc and the incredibly dark values in the shaded areas and handling them separately. A JPEG sky could never do this, because a JPEG has no information above pure white to begin with.
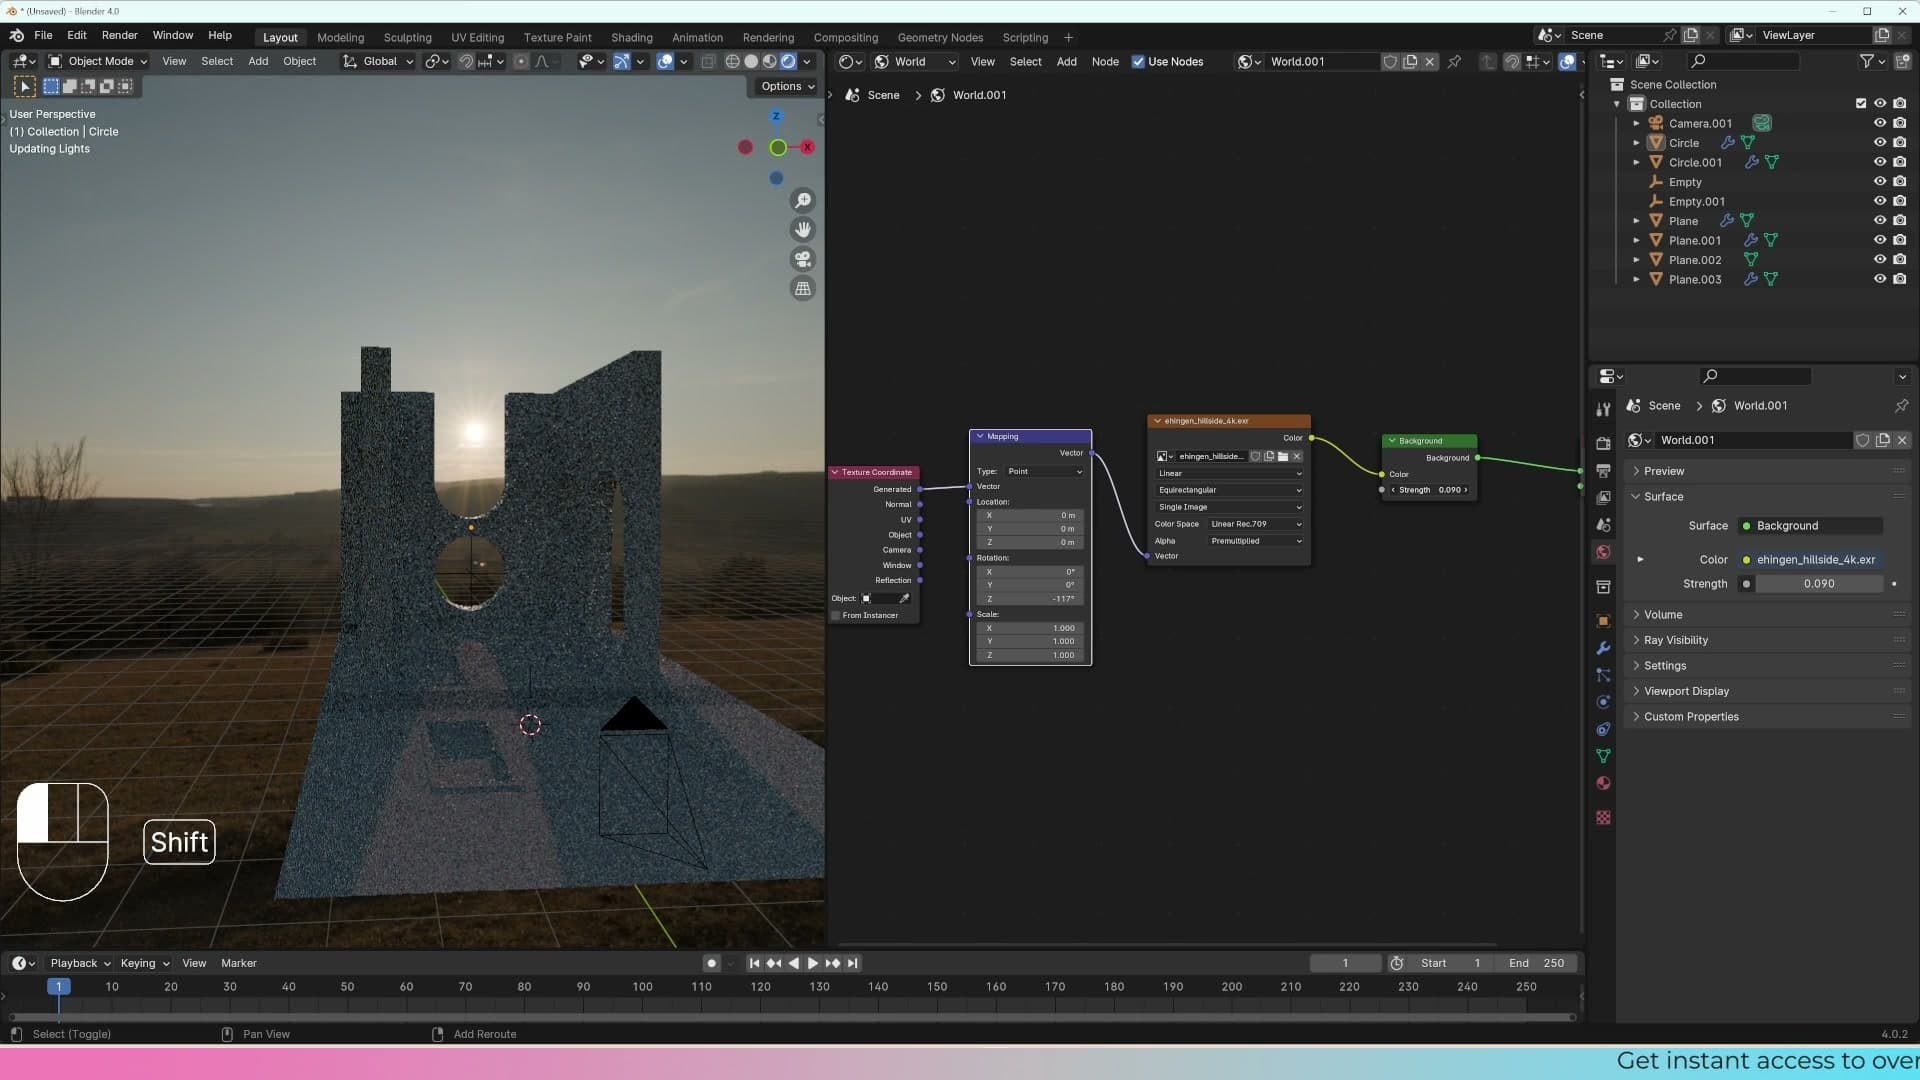
Bring the strength back up to 1.0 once you've seen the effect. You're not trying to dim the scene, you're just confirming the HDR range is intact.
Blender's Sky Texture as an artistic alternative
When an HDRI doesn't give the sun position you want, Blender's procedural Sky Texture is more flexible: sun size, elevation, rotation and altitude are all dialable. This module sets up a Sky Texture with my preferred values and shows how elevation drives the sunset-to-midday range.
Adding and previewing the Sky Texture node
Once the HDRI sun sits where it shouldn't, you have a choice: accept the angle, or switch to a procedural sky you can actually dial. Rotating the Mapping node lifts the sun, but it also tilts the horizon, and the result quickly looks wrong. Blender's Sky Texture sidesteps the problem. It's a procedural sun-and-sky model with separate controls for sun size, elevation, rotation and altitude, so you can move the sun without dragging the horizon with it. HDRIs still cover roughly nine out of ten archviz scenes, but when you need a specific time of day this is the better tool.
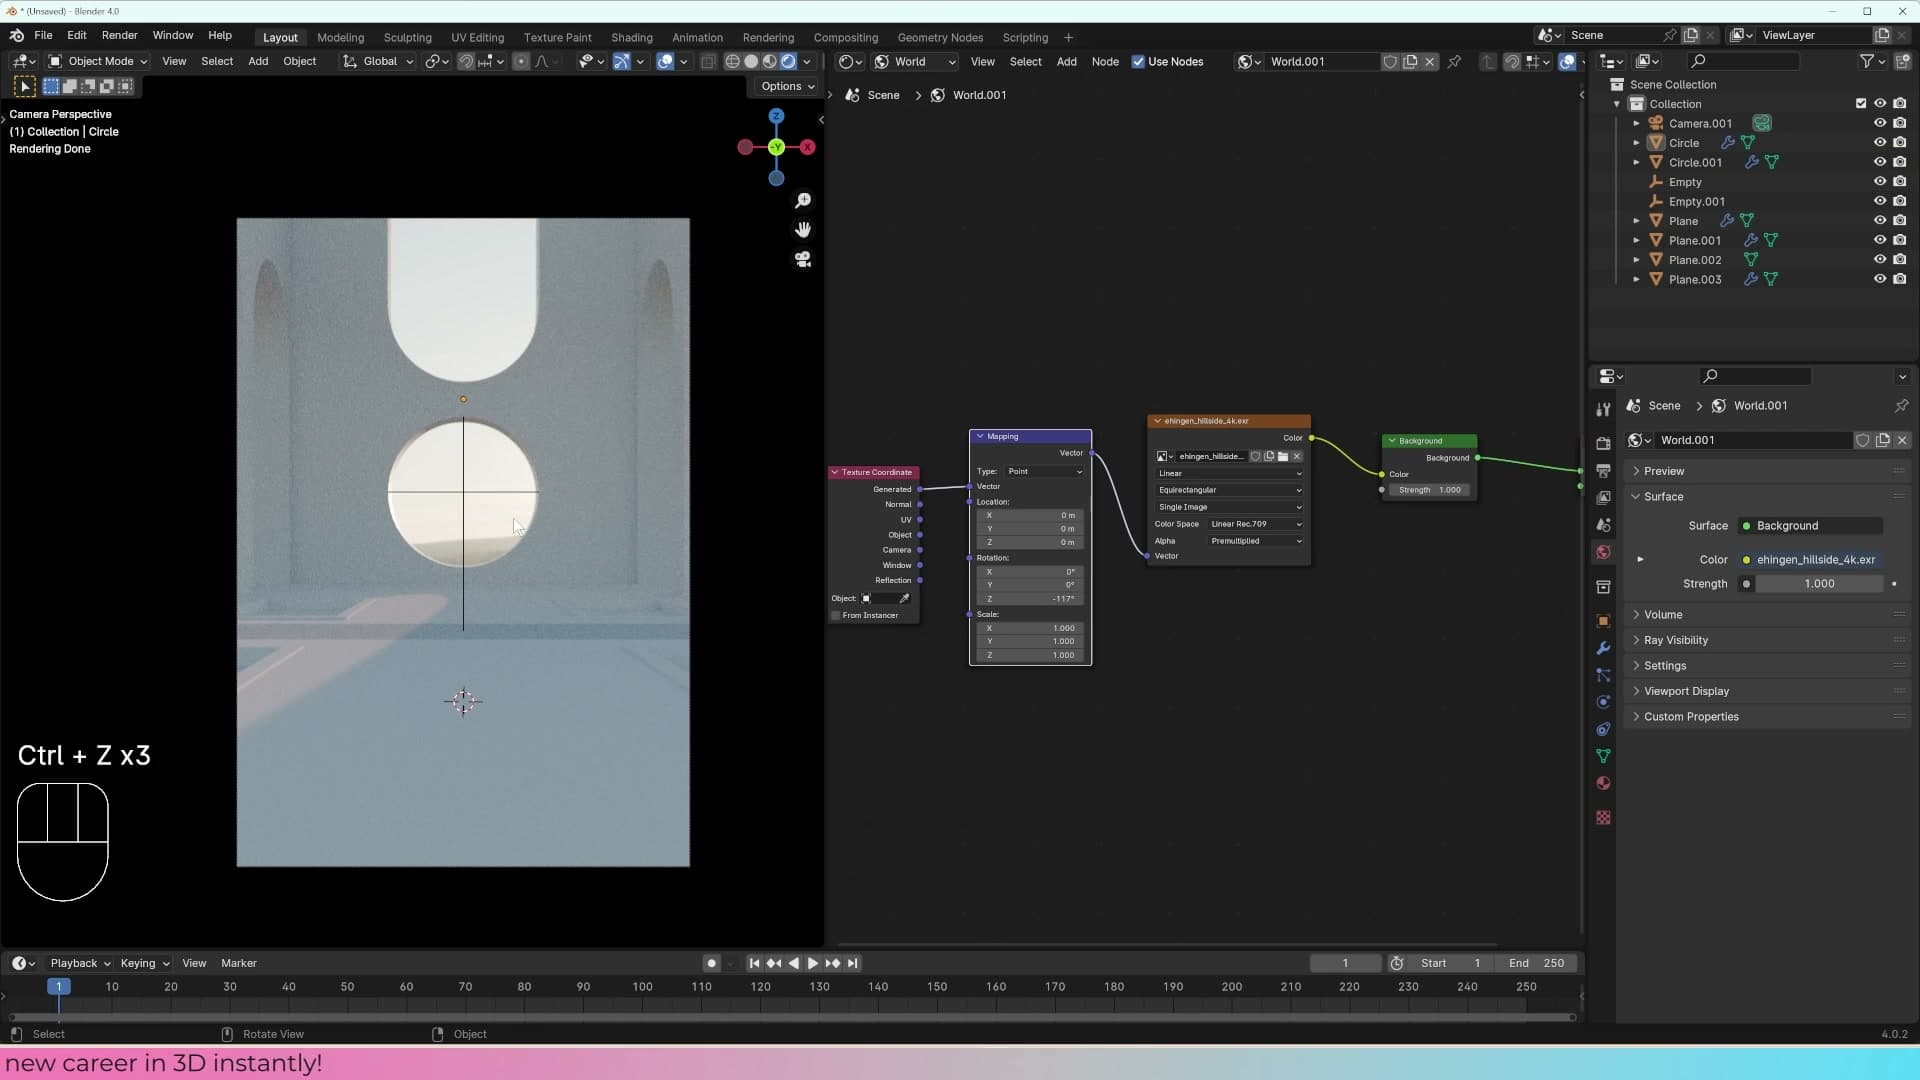
In the Shader Editor, with the World still active, press Shift+A, go to Texture and choose Sky Texture. Plug its Color output into the Background node's Color socket in place of the Environment Texture you wired up earlier.
This is Blender's physically based sun-and-sky model. There's a research paper behind the maths, and the upshot is that the parameters behave like real-world quantities rather than arbitrary sliders. Drop the Background Strength to 0.1 first, otherwise the sun disk blows out the viewport and you can't tell where it actually sits.
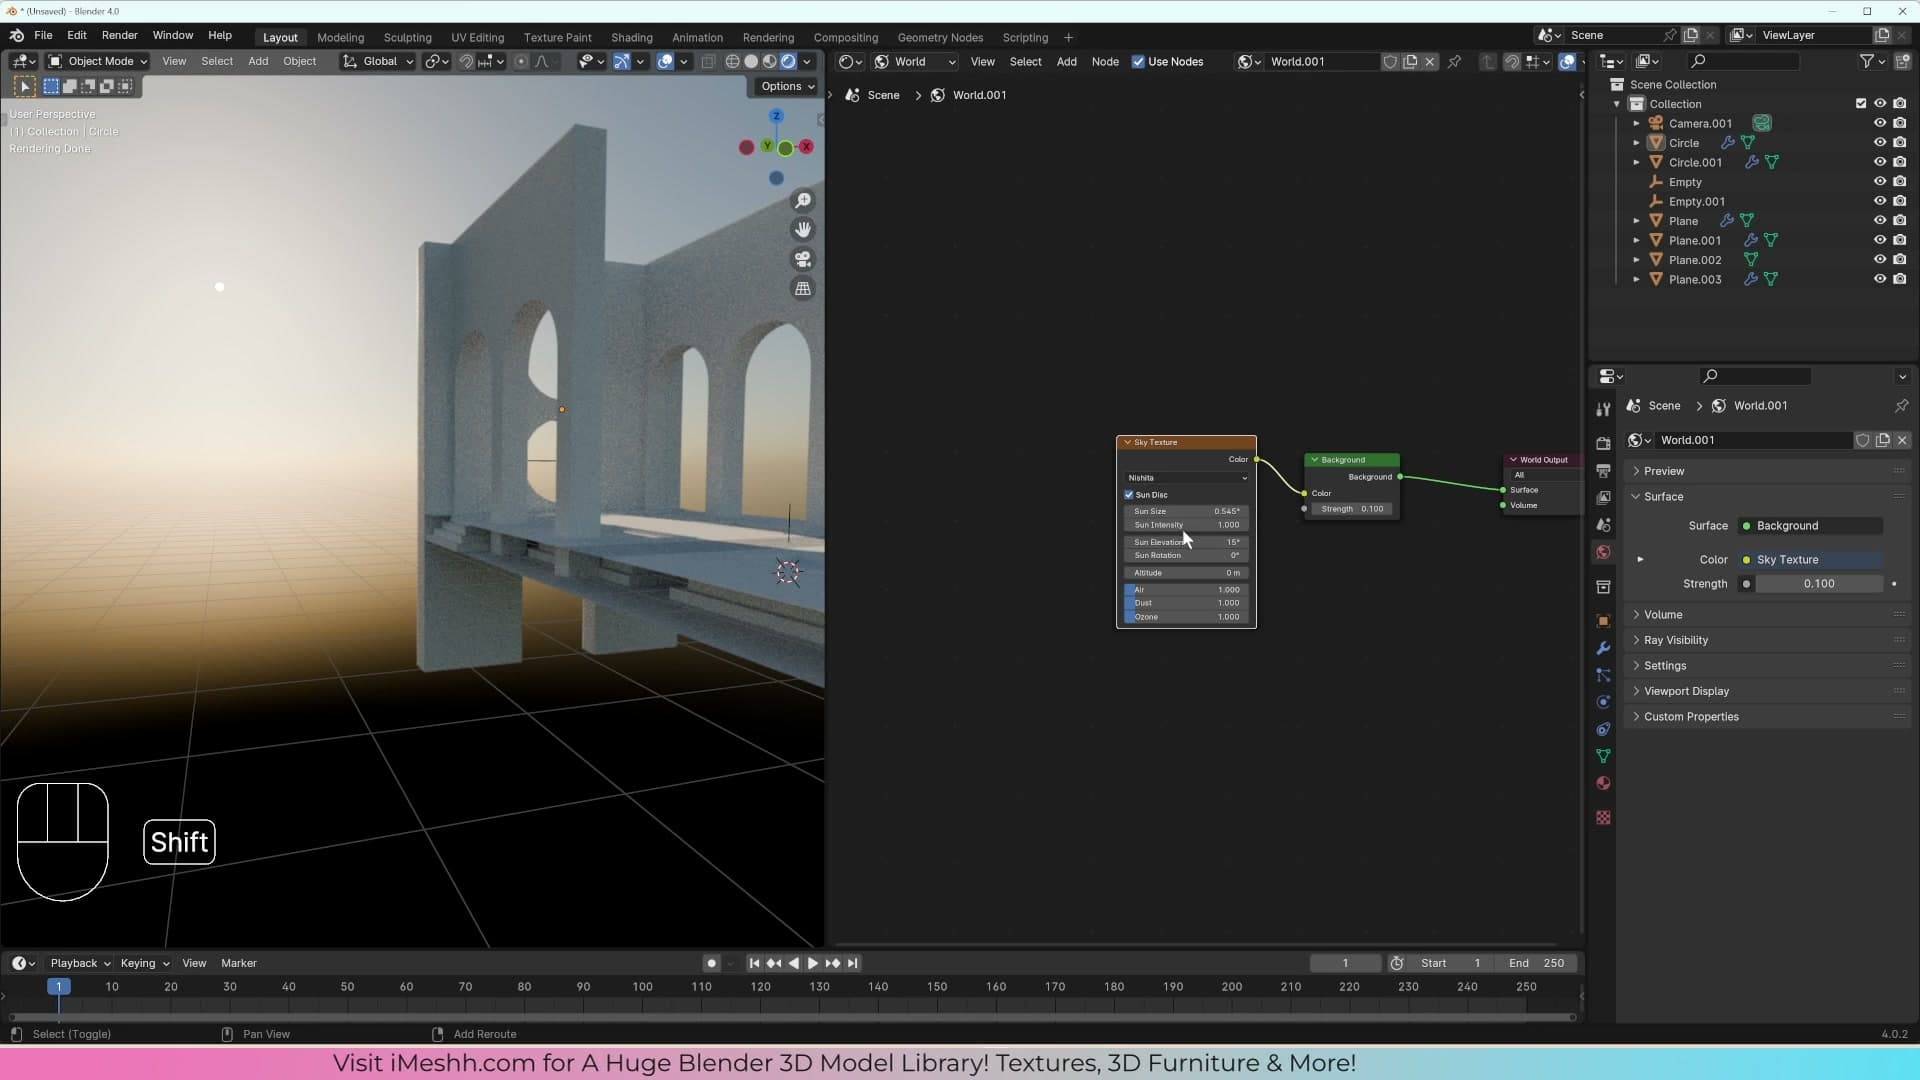
With the strength tamed you can start dragging Sun Elevation. Pull it down towards the horizon and the light gets progressively redder and more raking, sliding all the way into a hard sunset; push it back up towards 90° and you arrive at a flat overhead midday. That single slider covers the entire arc most archviz lighting needs.
Tuning sun size, elevation and altitude
From there it's a matter of dialling in values that suit the shot. For this scene, set Sun Size to 0.5 and Sun Intensity to 0.4, then push Sun Elevation up to 31°. That's high enough to lift the sun out of pure sunset territory but still low enough to throw long, directional shadows through the openings in the wall.
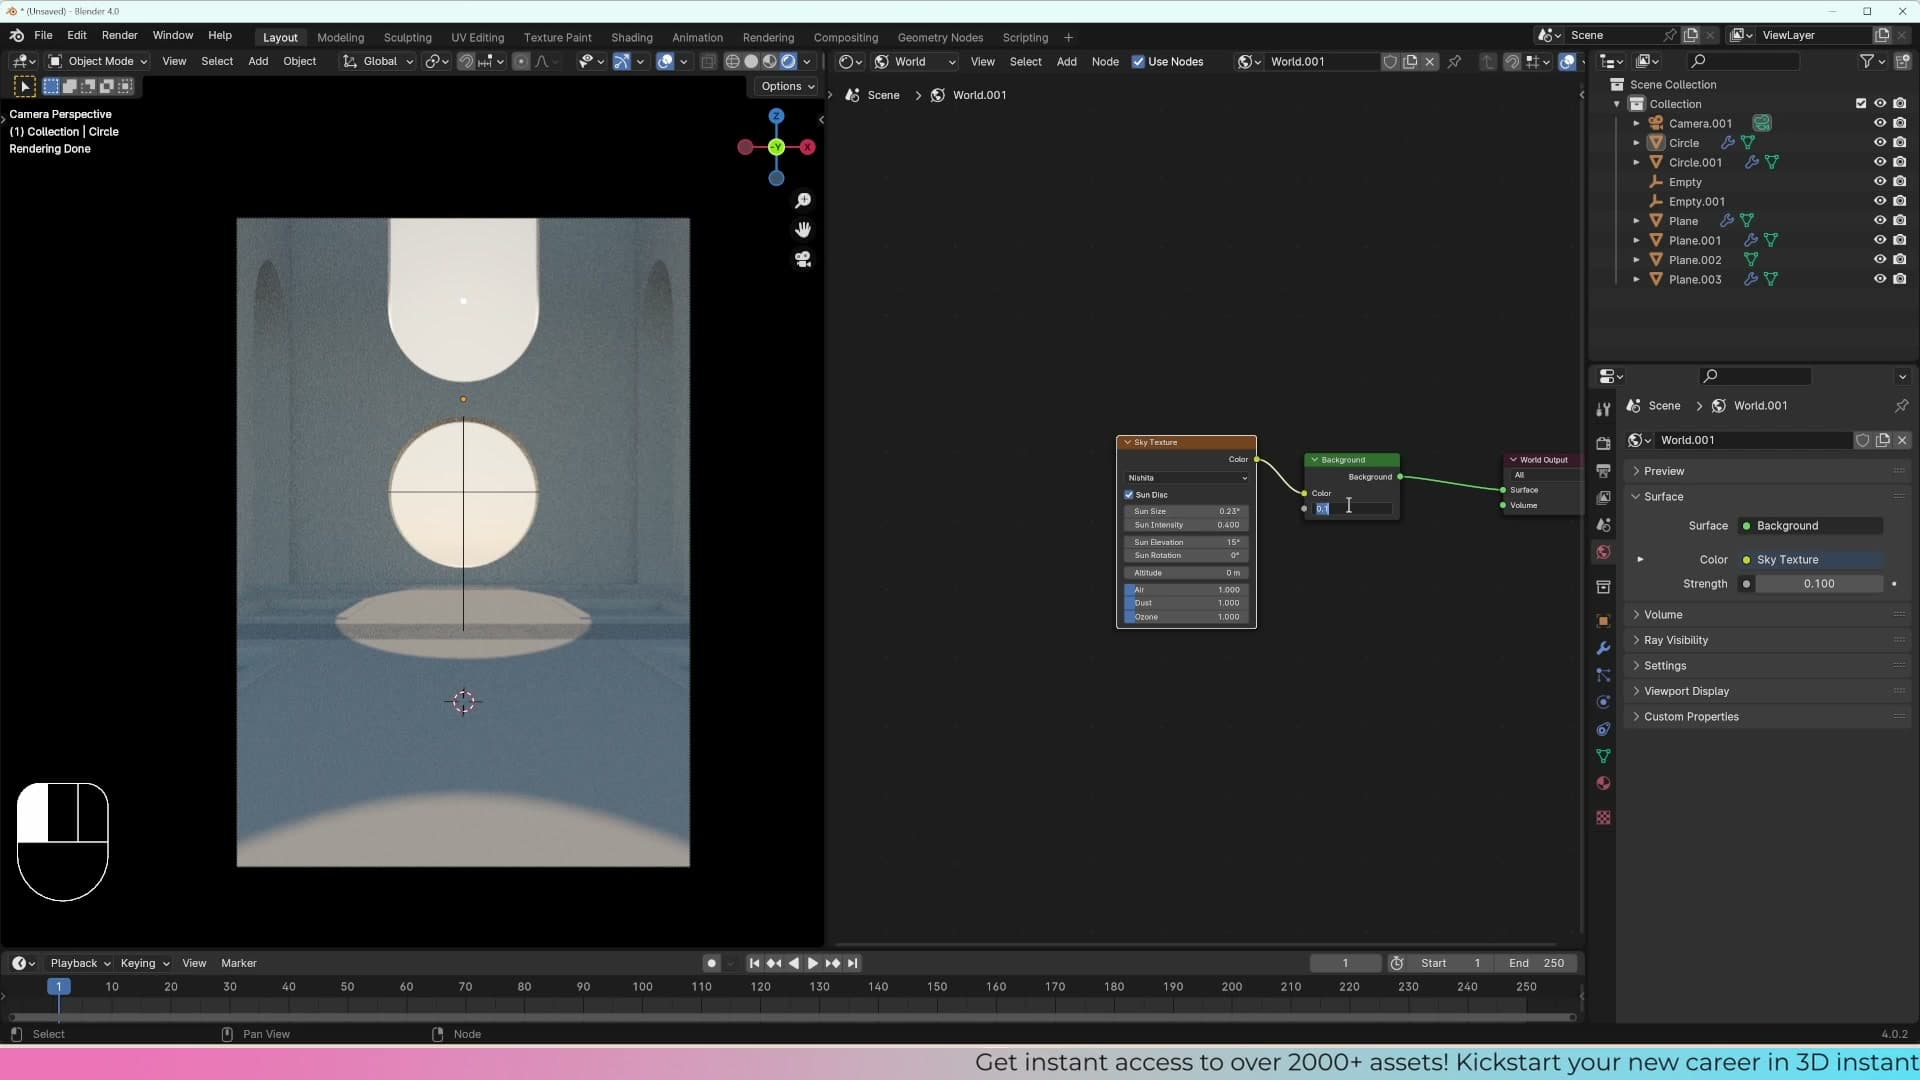
Sun Rotation is best judged by eye rather than typed in. Spin it until the sunlight enters the scene from the angle you want, watching how the highlights and shadows land on the geometry. It's fine to revisit this later if a particular beat in the scene needs more (or less) light striking a specific surface.
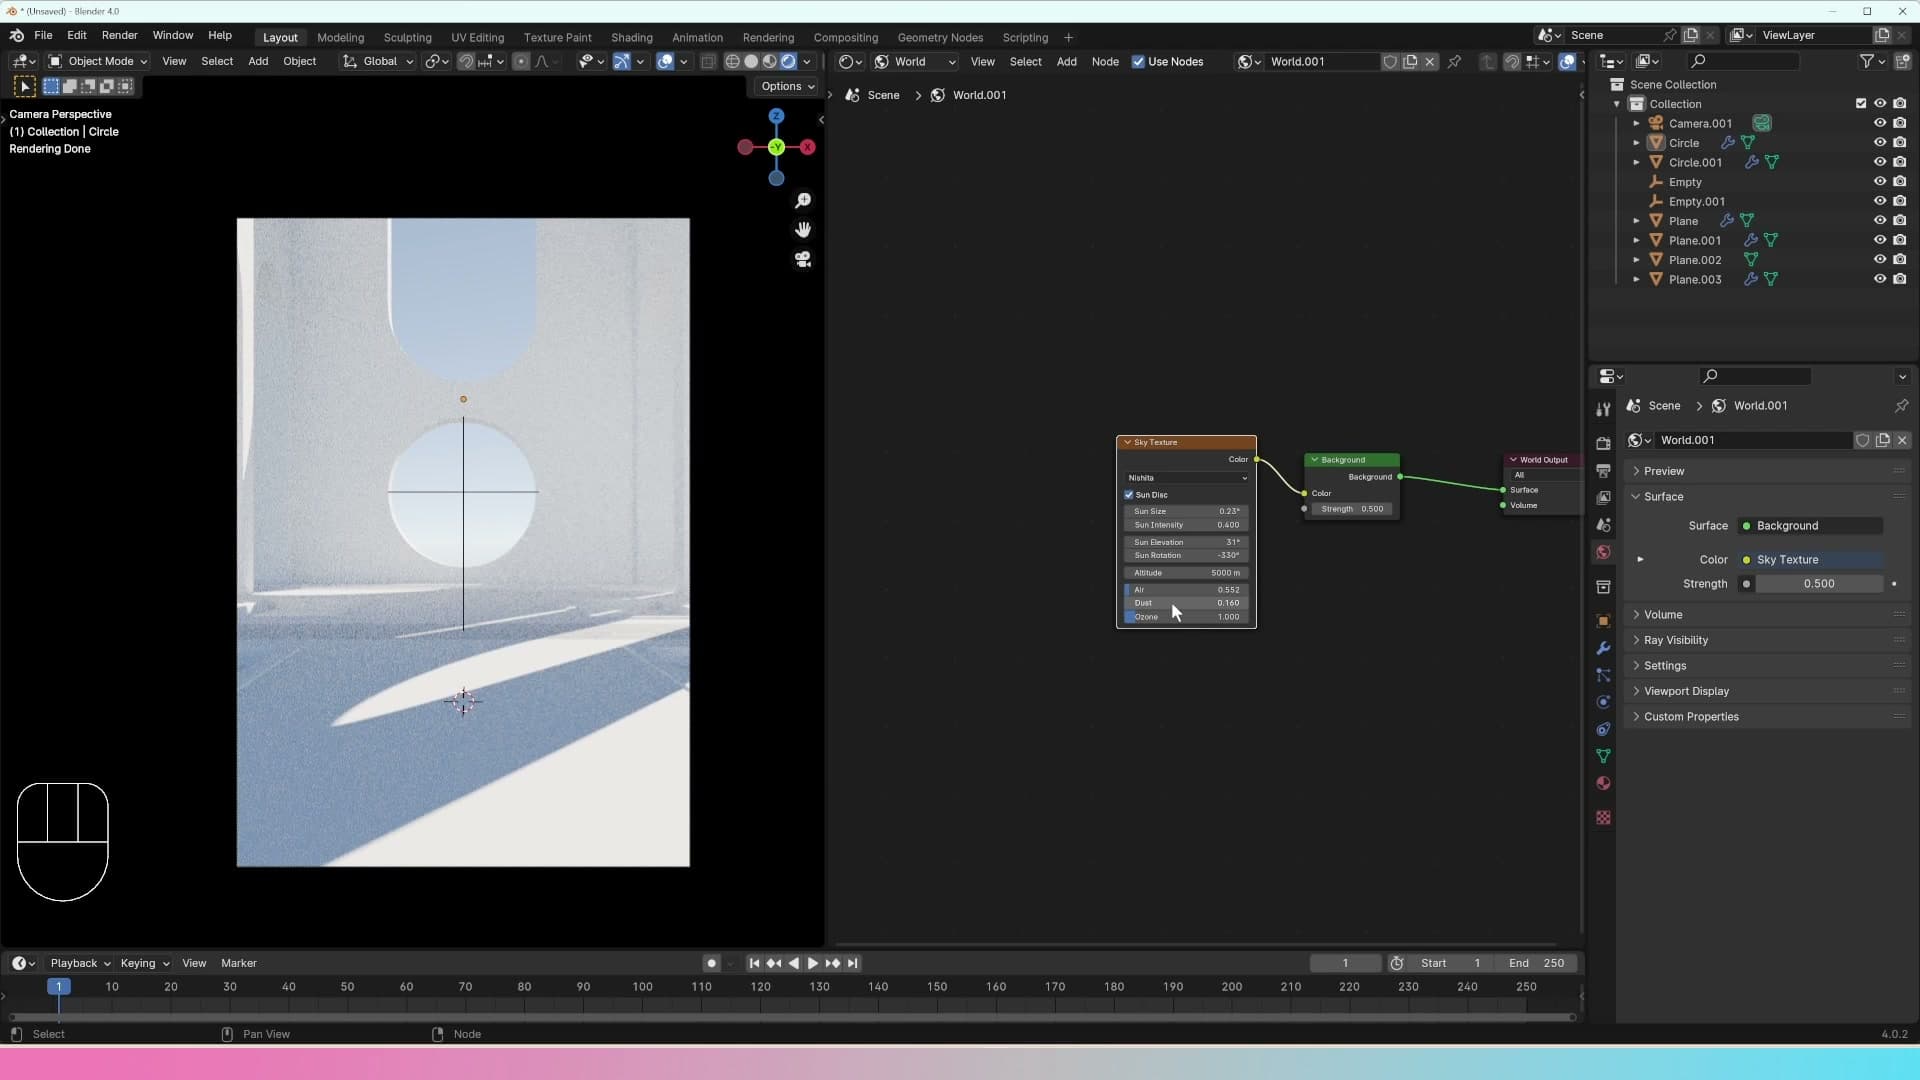
Finally, drop in an Altitude of 5000. The field is in metres, so you're telling the model the camera is sitting five kilometres up, which thins the atmosphere slightly and nudges how the sky colour and sun warmth read together. The goal here is the look, not a literal weather simulation.
Cycles render setup: GPU, samples and noise threshold
Switching the render engine to Cycles GPU and tuning the noise threshold gives you a predictable quality dial: 0.01 pushes Cycles to stop only when the image is 1% from noise-free. This module also covers picking a max sample cap that suits the GPU and why power-of-two values pair better with the denoiser.
Switching to Cycles and GPU Compute
Once the world is doing its job, the viewport will still look noisy. That is Cycles starting to sample the scene. To get a clean render rather than the Eevee approximation, head to the Render Properties tab and set Render Engine to Cycles.
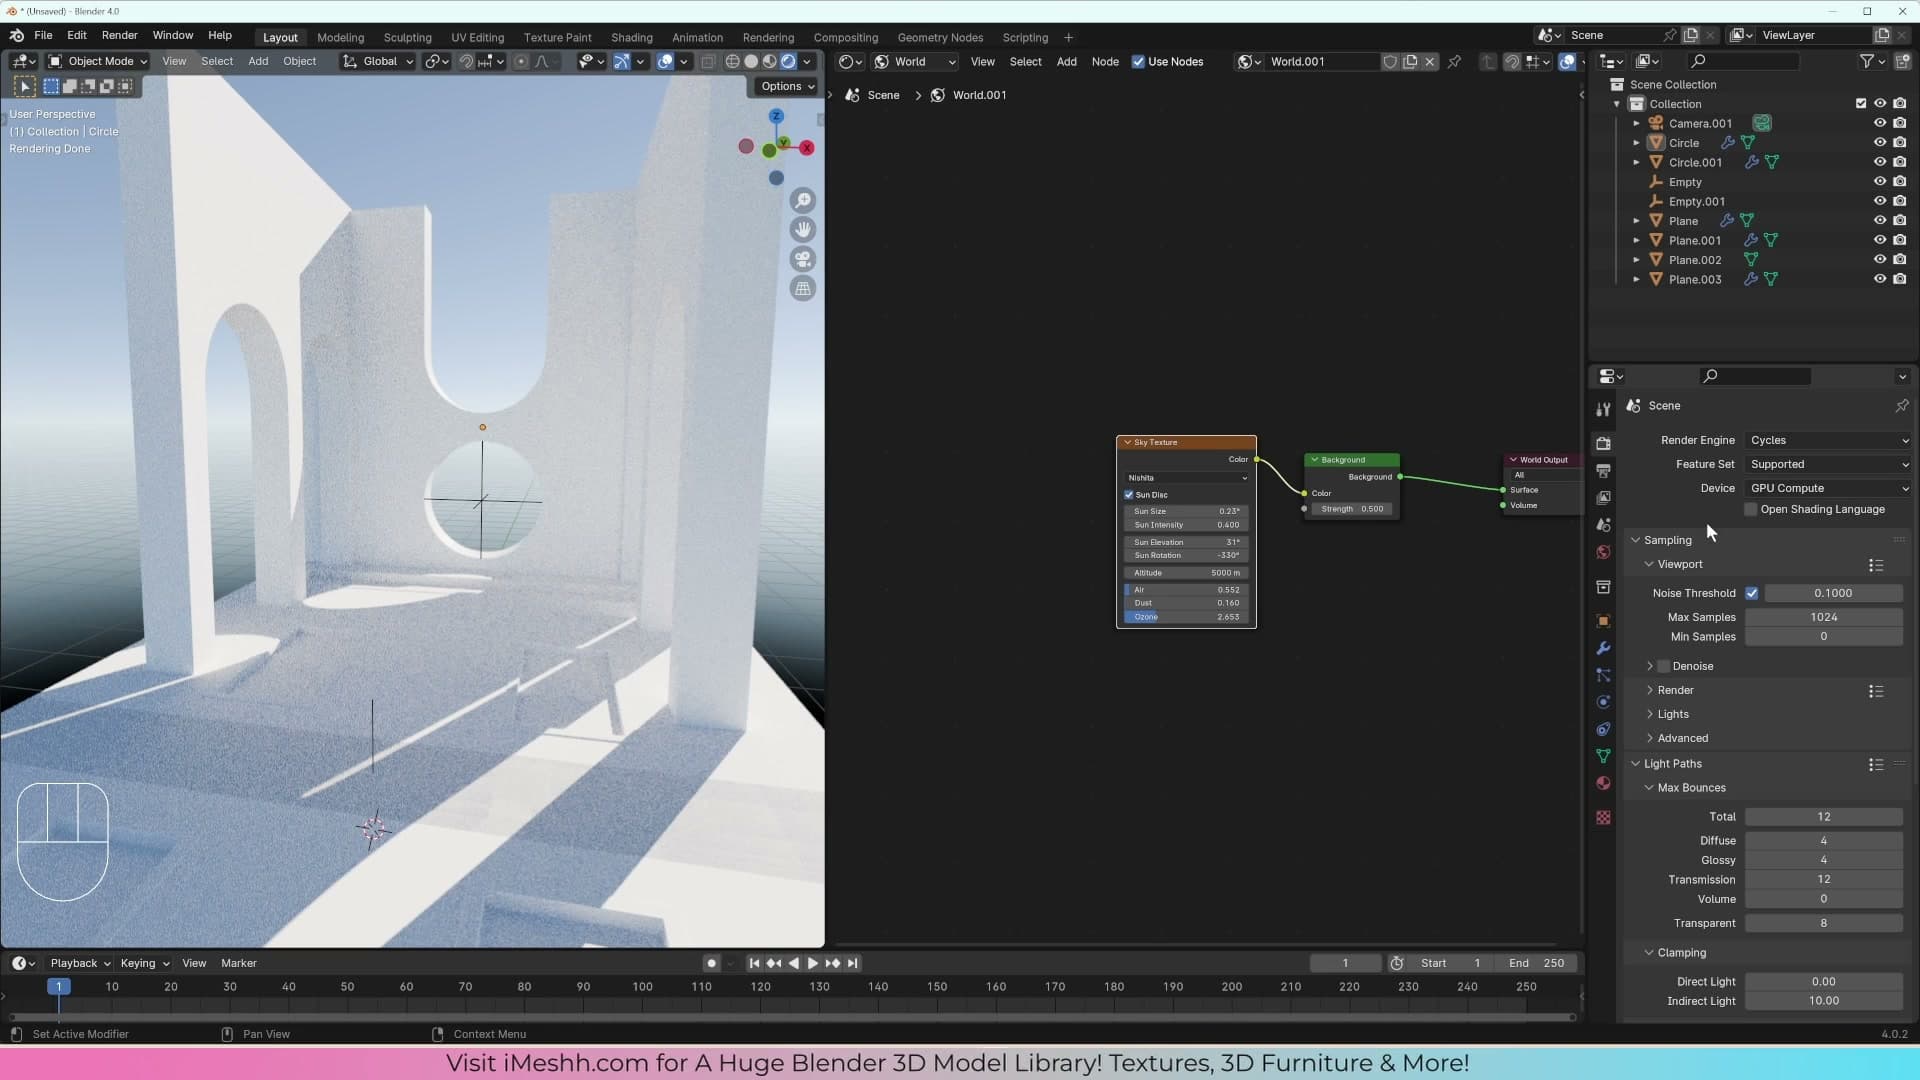
Underneath, change Device from CPU to GPU Compute. Your graphics card will handle sampling far faster than the CPU, which makes the noise threshold and sample tuning in the next step feel responsive rather than glacial.
Noise threshold and max samples
Cycles decides when to stop sampling using two values working together: the Noise Threshold and the Max Samples cap. The threshold tells Cycles how close to noise-free the image needs to be before it can call it done; the cap stops it from rendering forever if it never quite gets there.
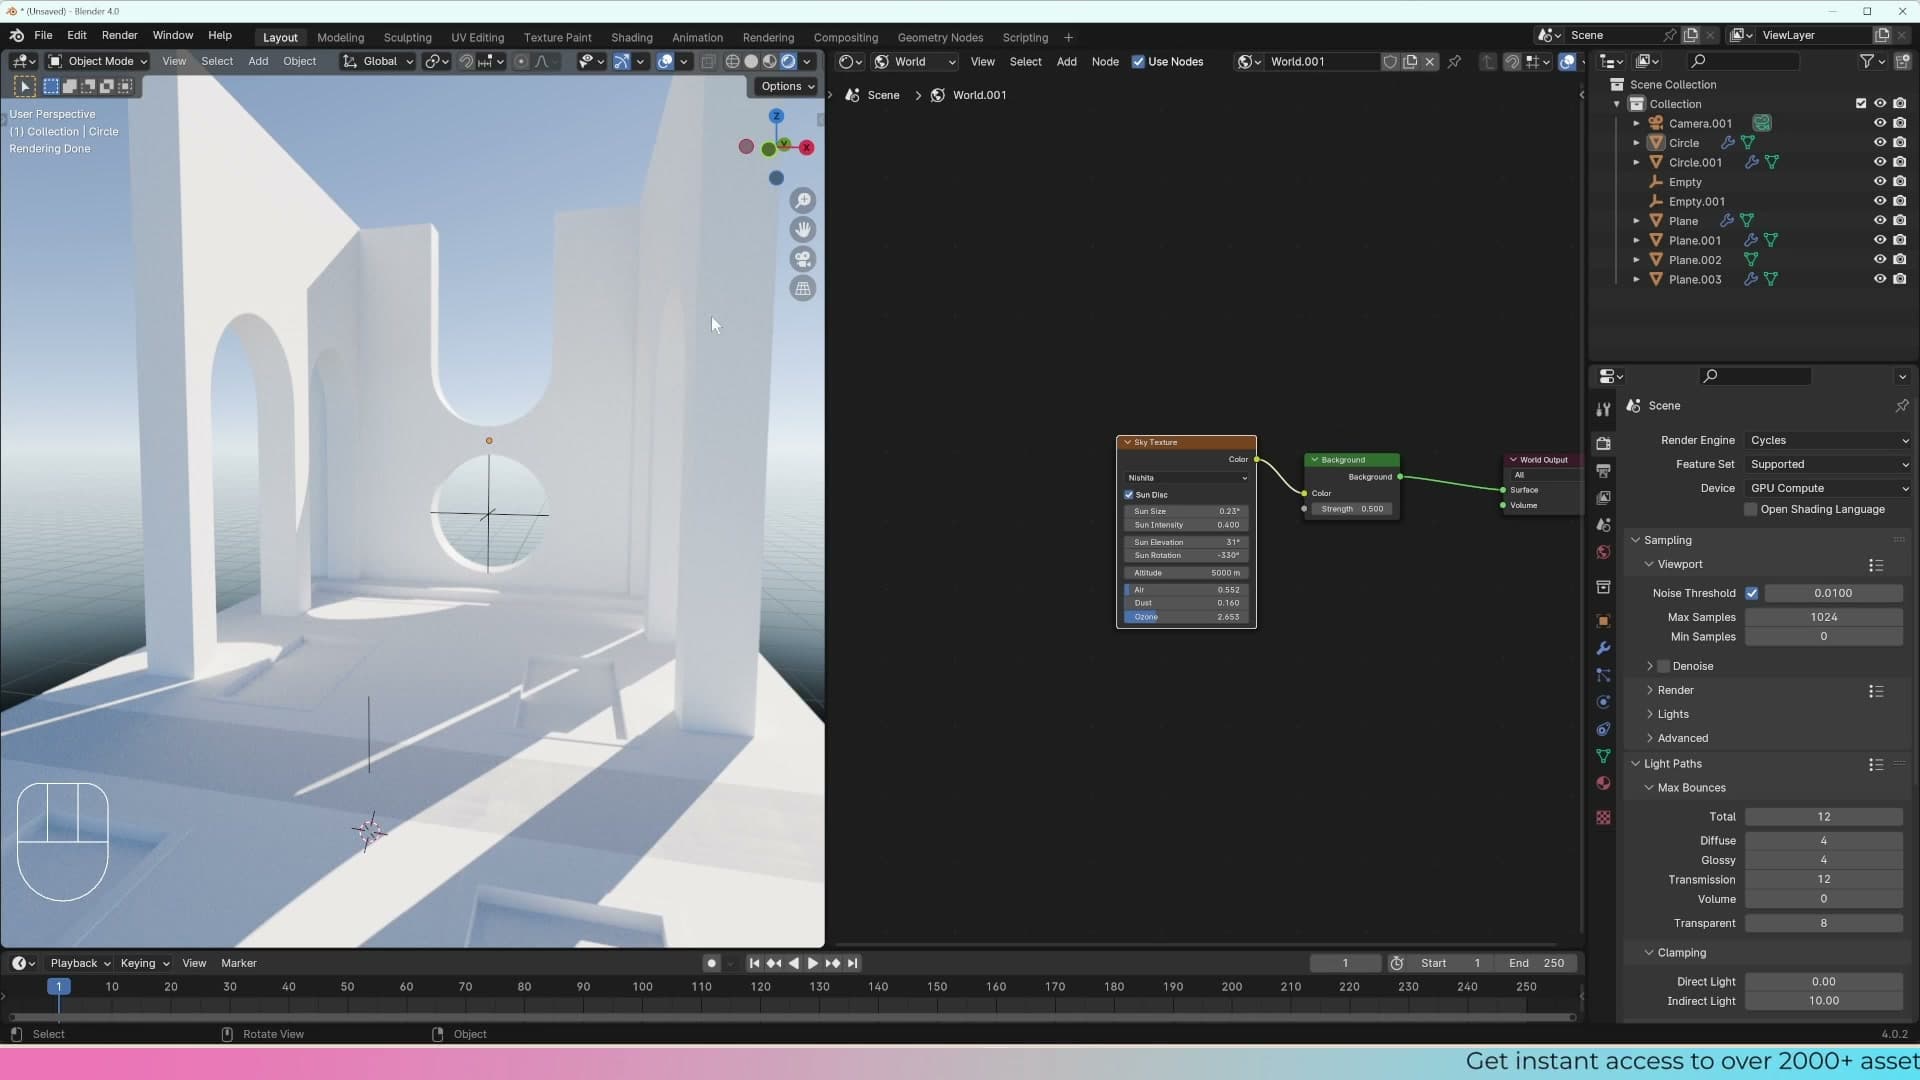
Open the Sampling > Render section. The default noise threshold is around 0.1, which leaves the image visibly grainy. Cycles is stopping when it is only 10% of the way to clean. Drop this to 0.01 so it keeps sampling until the image is 1% from noise-free. You will see the sample counter rise and rise as it chases that target, and the result is dramatically cleaner.
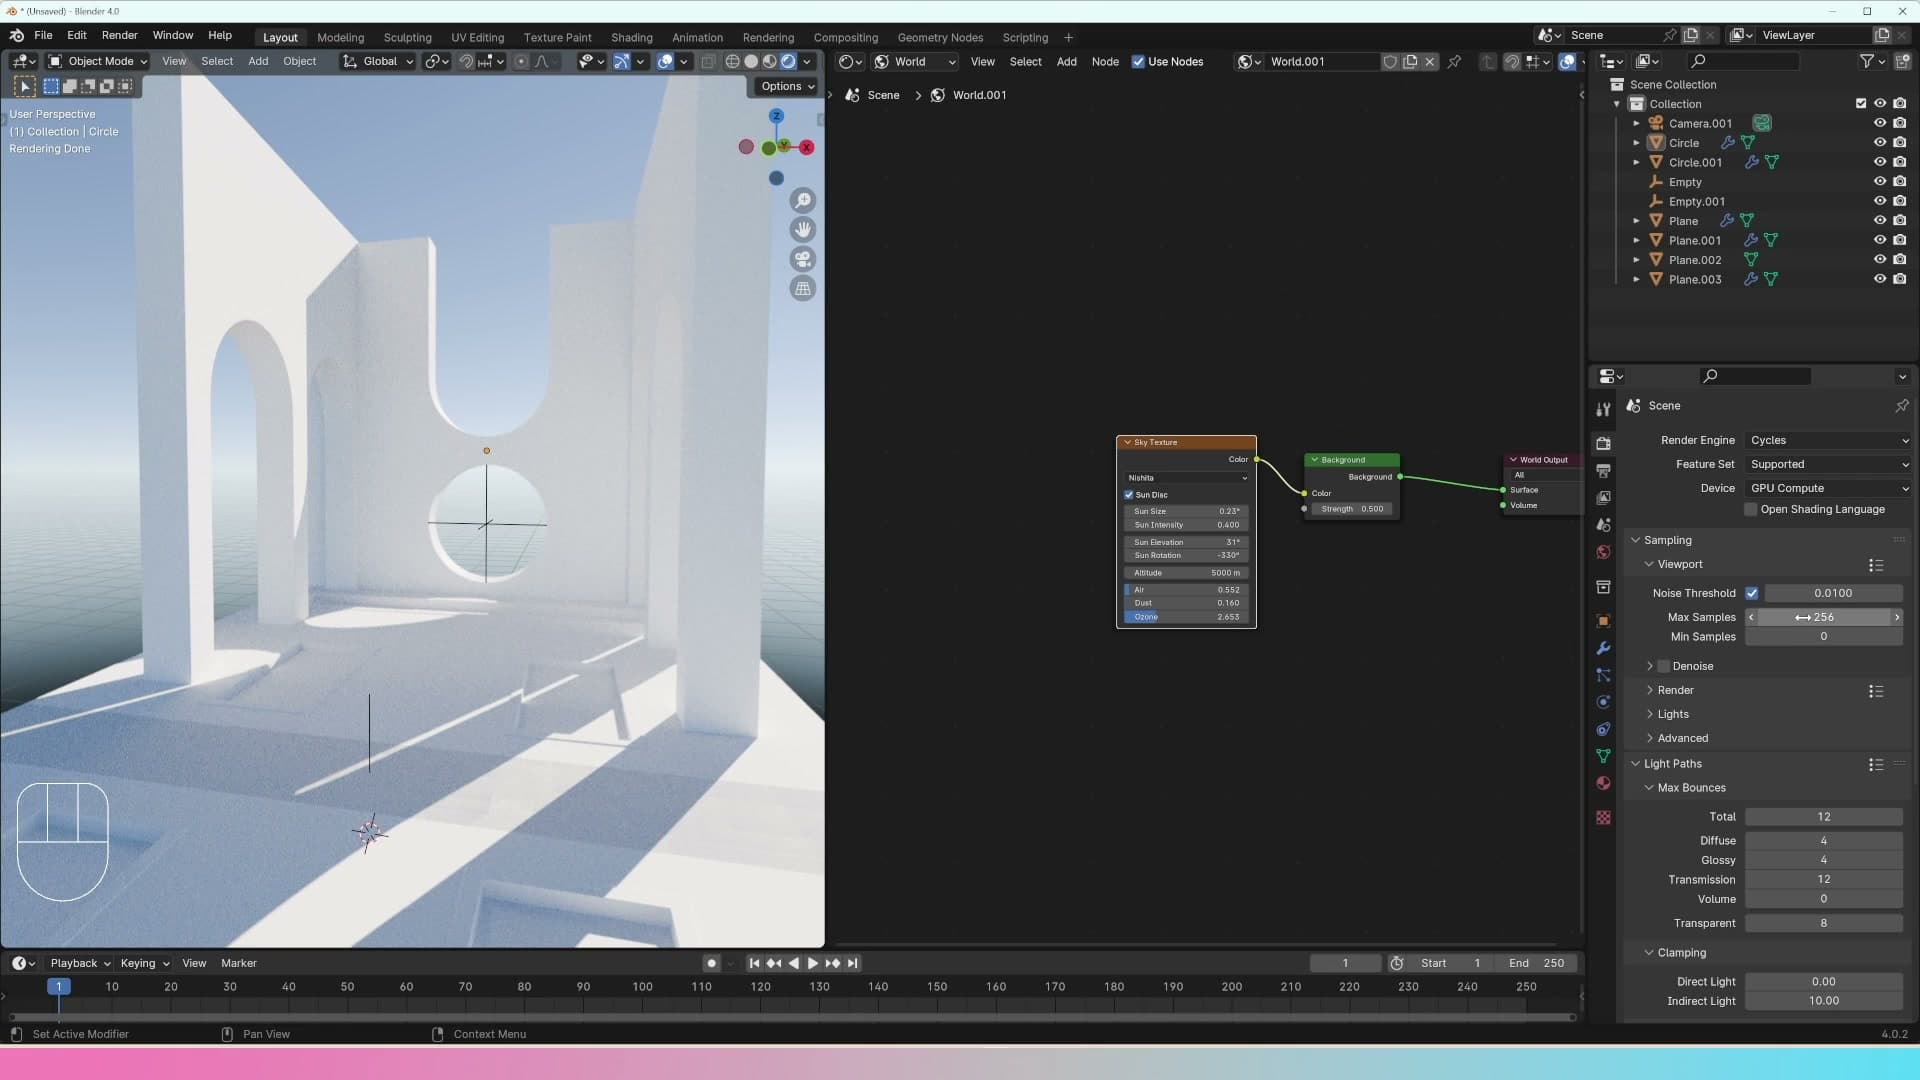
Underneath, set Max Samples to 1024. That is your ceiling: if the noise threshold has not been hit by 1024 samples, Cycles stops anyway. Square values like 1024, 256 or 128 pair better with the denoiser than arbitrary numbers, so stick to powers of two when you change it.
Adding and configuring the denoiser
Enabling Cycles' viewport and render denoiser cleans up residual noise quickly, but the start-sample setting matters: letting Cycles climb to ~150 samples before denoising avoids slowdowns during interactive work. This module compares OptiX and OpenImageDenoise and explains when each pays off.
Enabling denoise and setting a start sample
With samples climbing, you'll still see grain across the image. The denoiser cleans that up almost instantly, but enabling it has a cost: on slower machines, Cycles feels sluggish while the denoiser runs against every sample step. The fix is to delay when denoising kicks in.
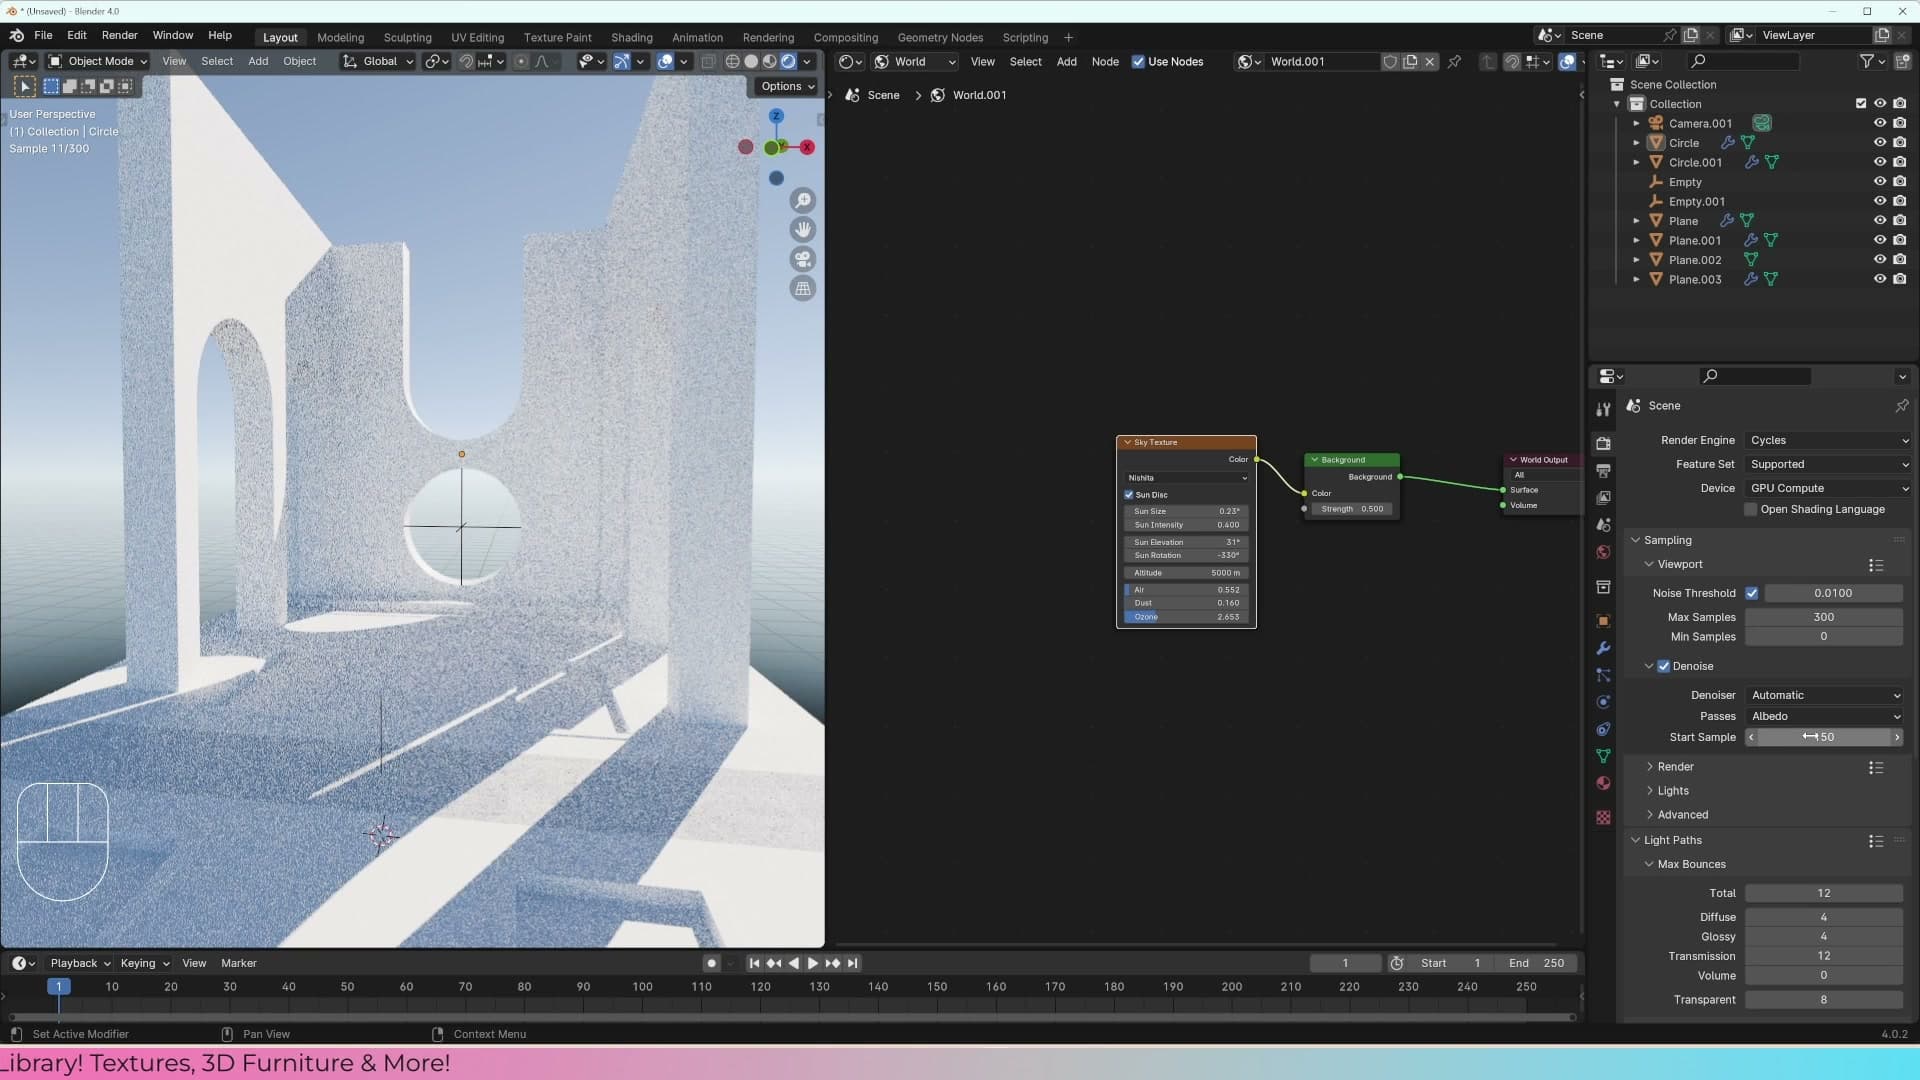
Tick Denoise in the Render Properties, then set Start Sample to 150. Cycles now climbs to 150 real samples before the denoiser engages, so the noisy early passes don't drag your interactive work, and the moment you hit 150 the image snaps clean.
OptiX vs OpenImageDenoise
Cycles ships with two denoisers and the choice is a straight speed-versus-accuracy trade. OptiX is the fast option. It runs on the GPU and produces good results almost instantly, but it's less accurate than the alternative. OpenImageDenoise (OIDN) is more accurate, especially when you enable the Albedo and Normal passes and set the prefilter to Accurate, but it's noticeably slower to compute each pass.
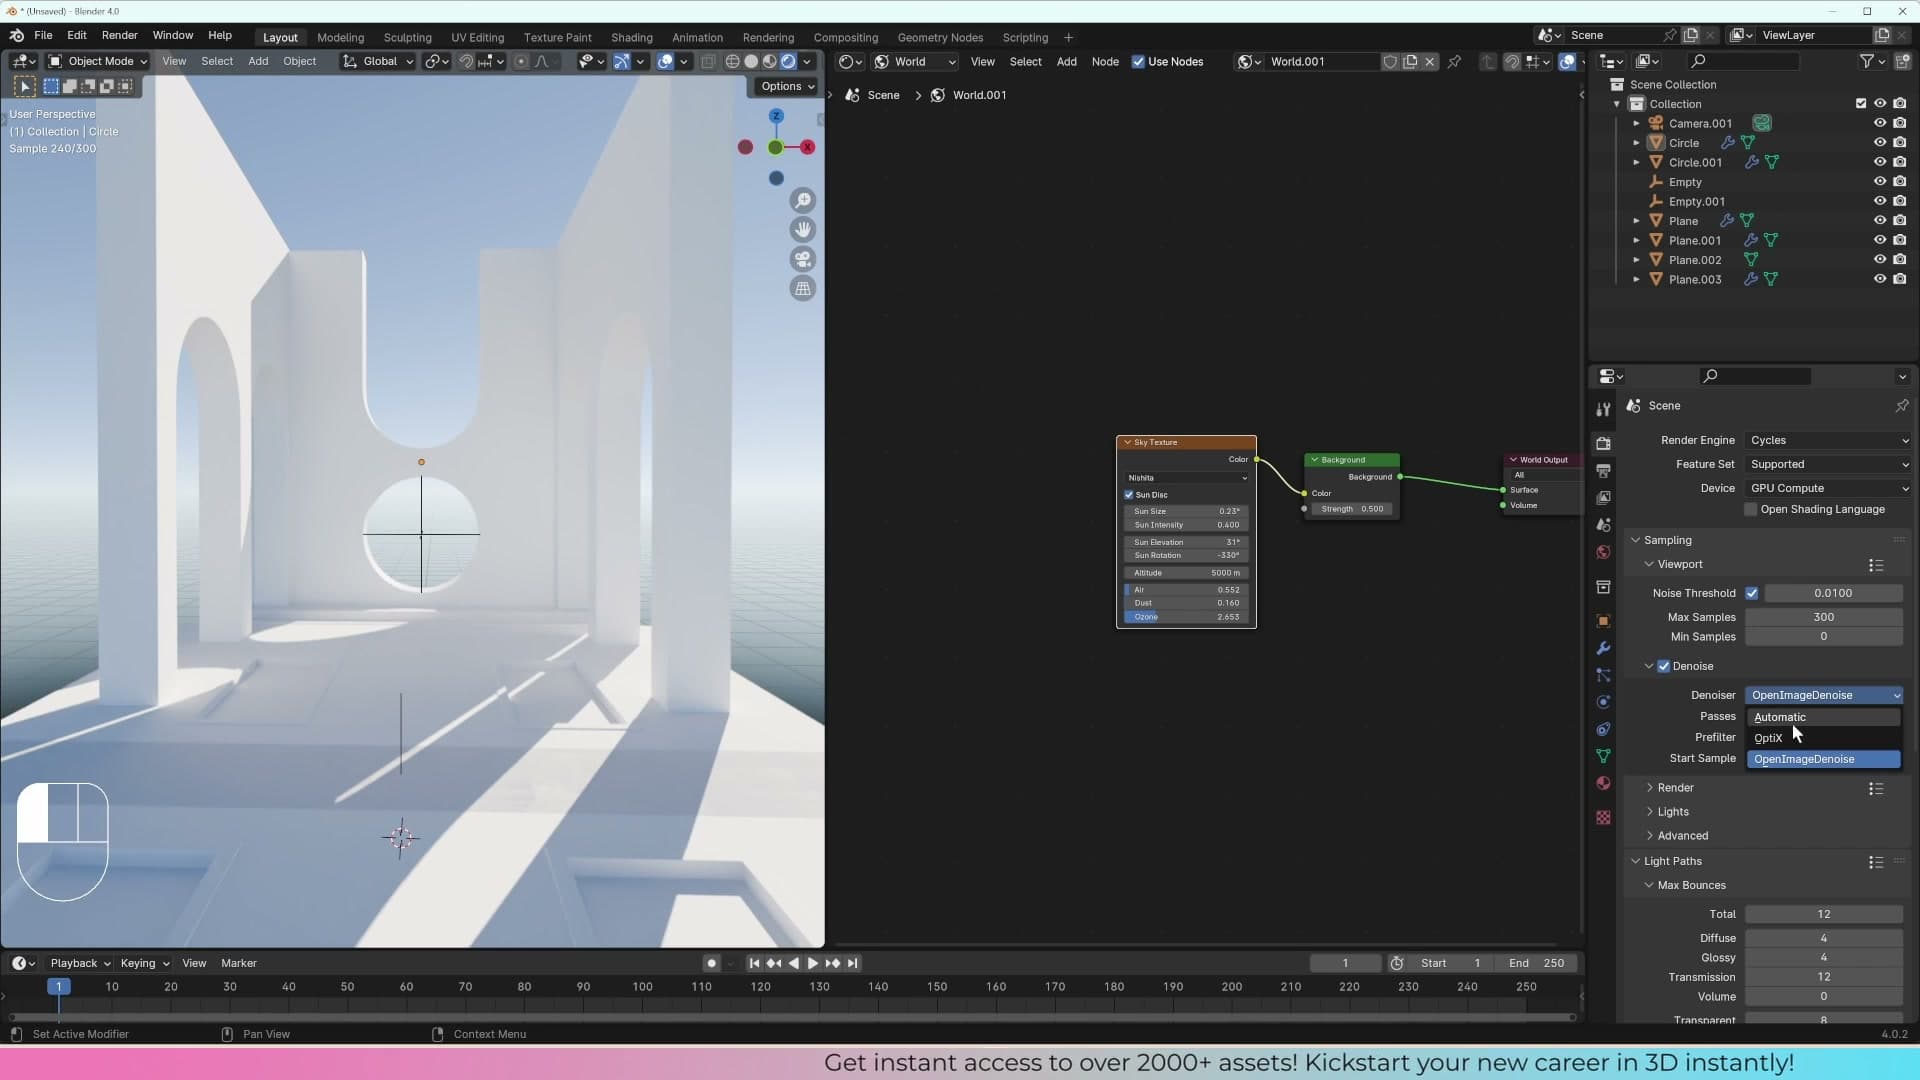
In practice, OIDN with Albedo, Normal and Accurate slowed this scene down enough to be uncomfortable for interactive viewport work, so I stick with OptiX. It still produces a clean result. Drop into camera view and zoom into any corner of the image and the surfaces come through smooth and grain-free.
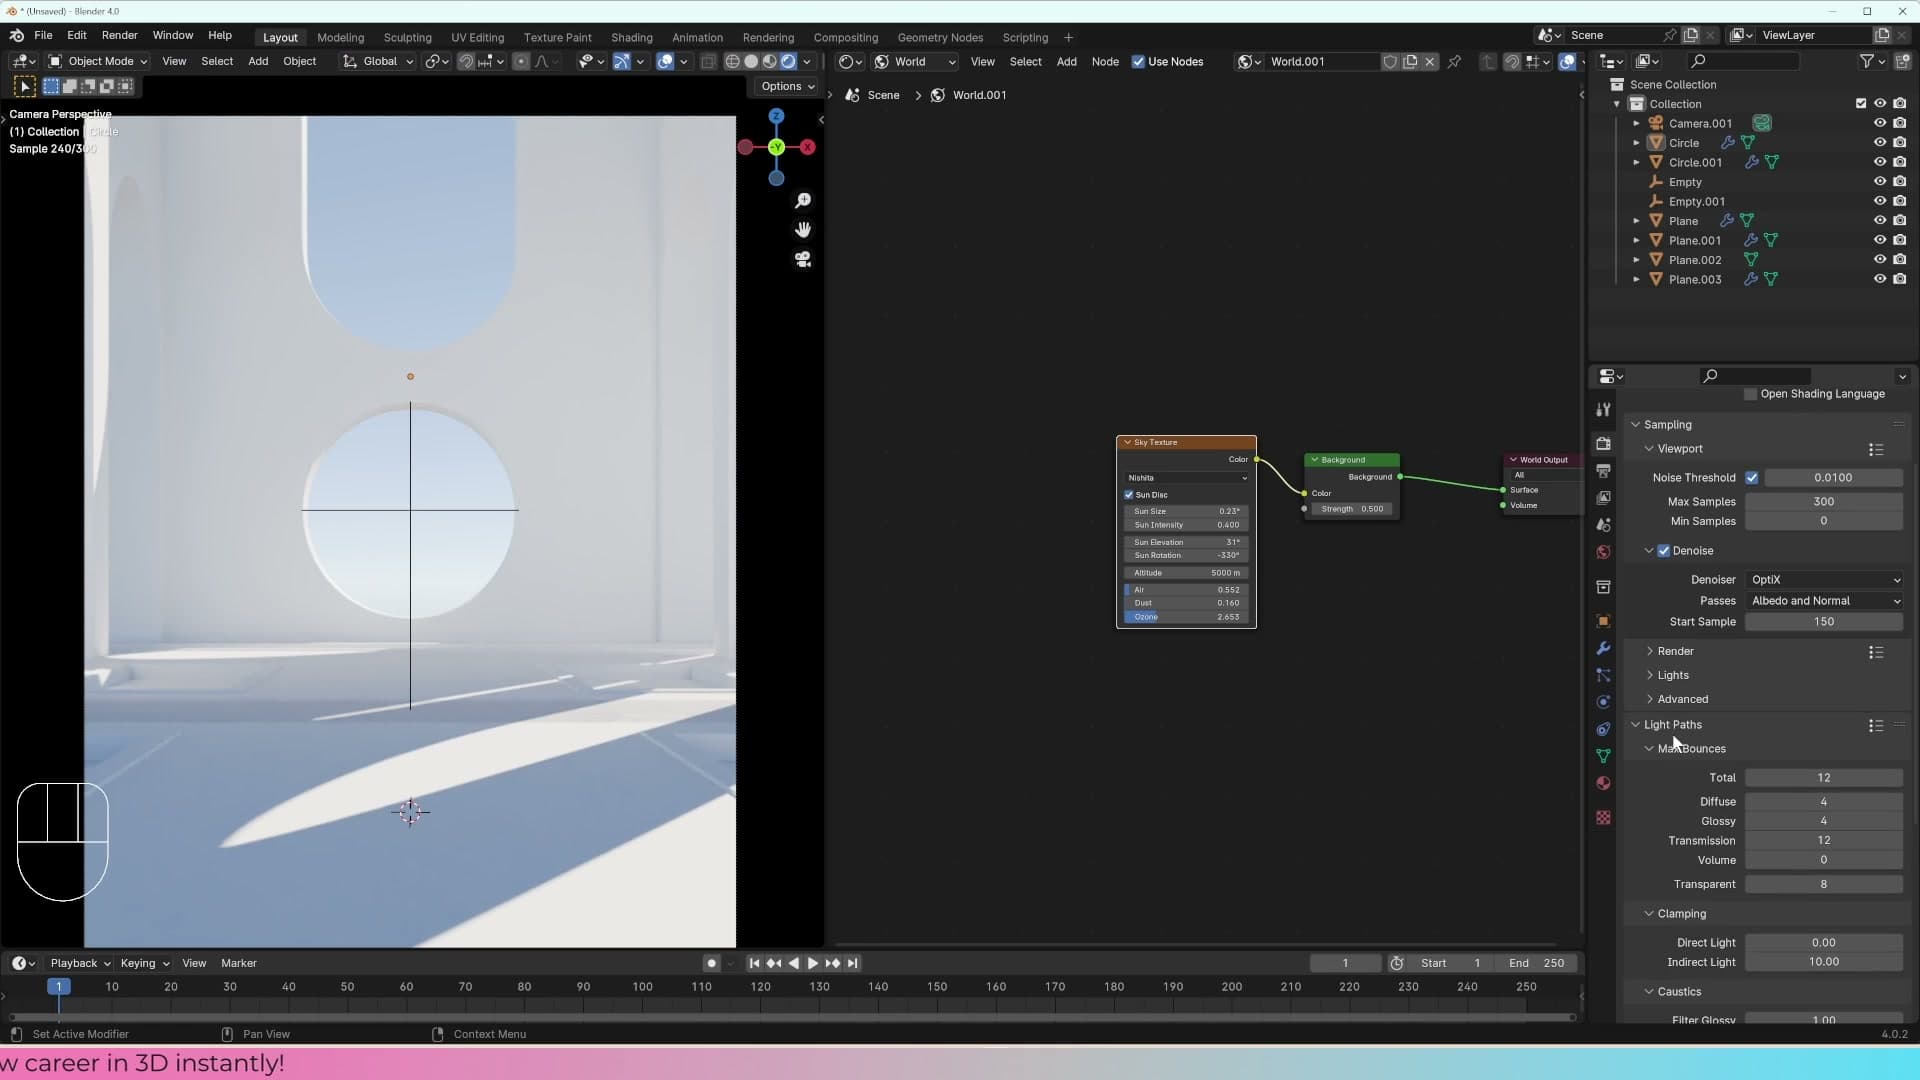
Treat OptiX as the default for setup and lookdev, and reach for OpenImageDenoise when you need the extra fidelity for a final still. It's worth the wait anywhere the image has fine detail or subtle gradients that OptiX tends to smear.
Light paths and clamping for realistic highlights
Raising light path bounces gives more accurate indirect lighting at a small render-time cost, and disabling clamping lets very bright highlights stay bright the way they would in real life. This module covers my archviz defaults: 32 bounces across the board and clamping turned off.
Setting all light path bounces to 32
Scroll down to the Light Paths panel in the Render Properties. This is where you tell Cycles how many times a ray of light is allowed to bounce around the scene before it gives up. More bounces means more accurate indirect lighting, especially in interiors and anywhere light has to reflect off several surfaces to reach the camera.
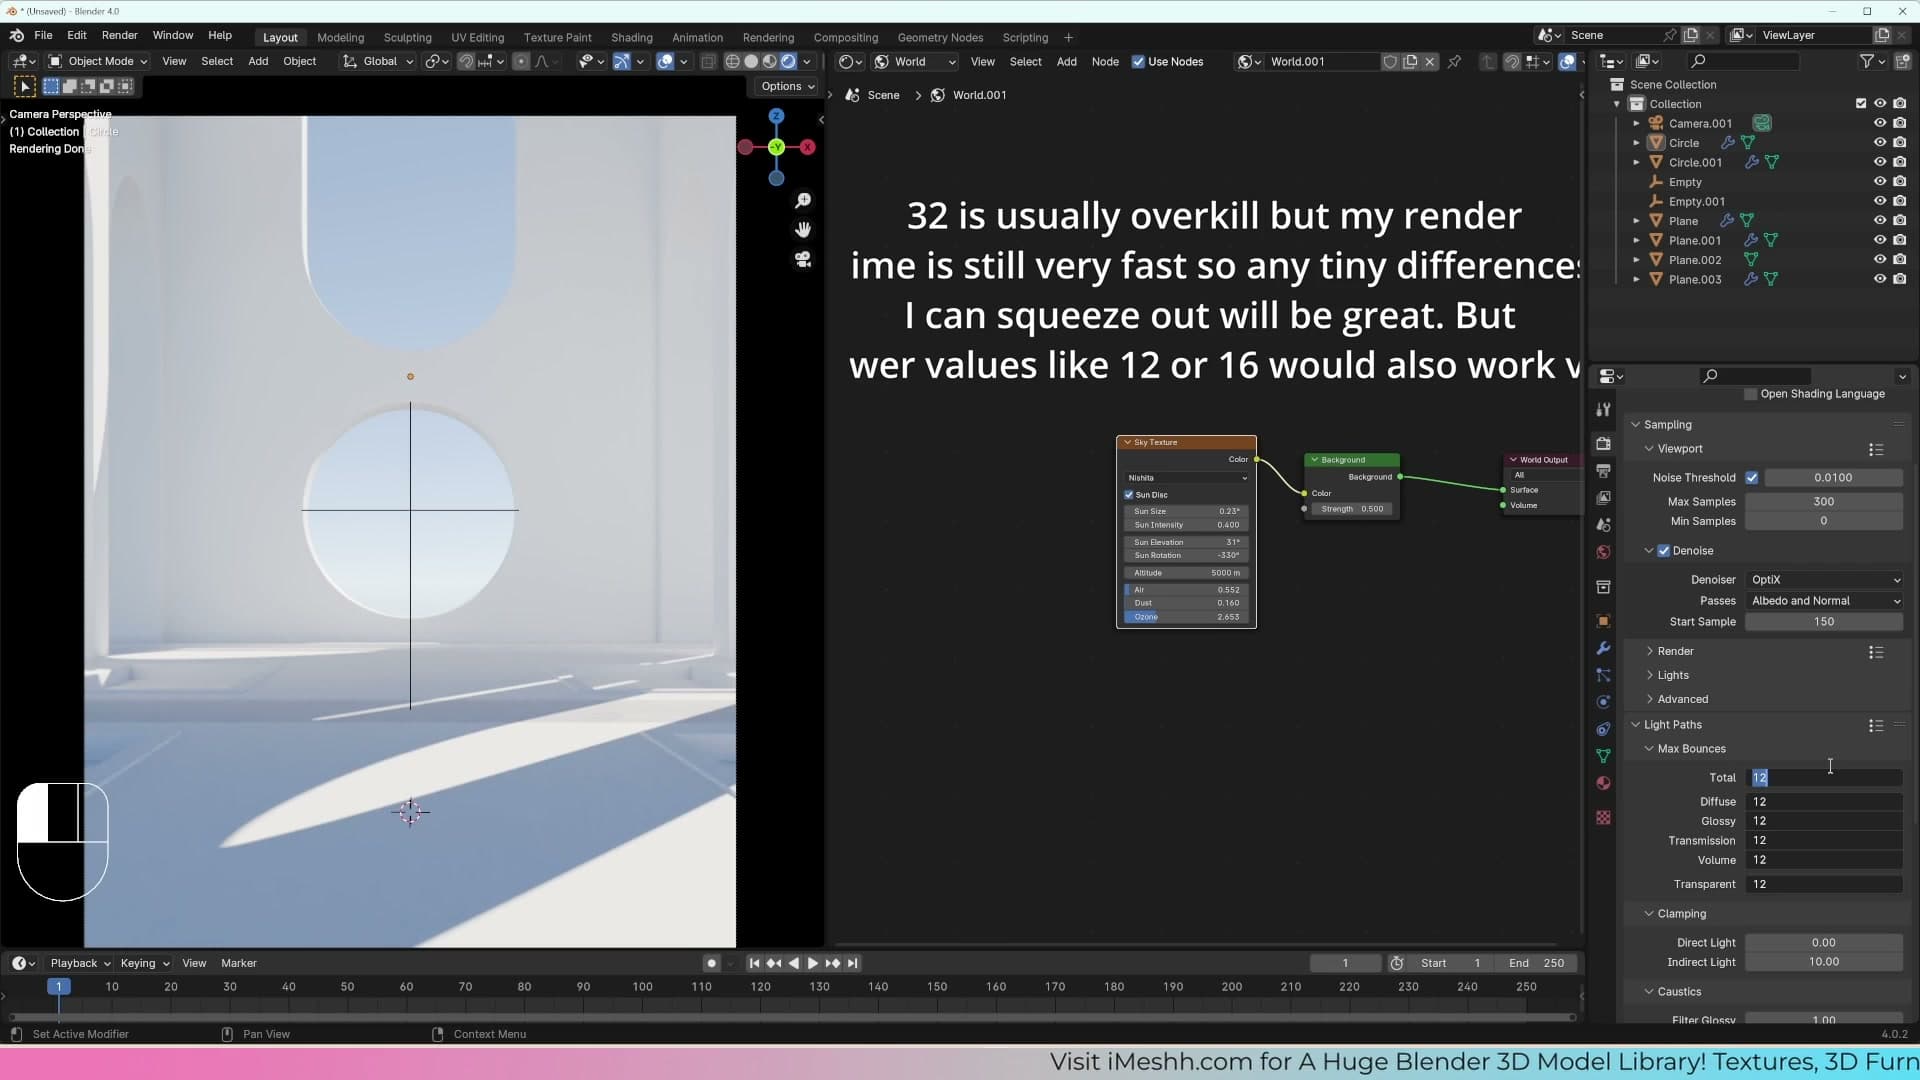
Click into the Max Bounces section and select all of the bounce fields. Rather than dragging each slider individually, you can click and drag across them, or select them all and type a single value to apply it to every field at once. Type 32 and confirm. Every bounce type now allows up to 32 light interactions.
The visible difference between the default values and 32 bounces is not enormous, and 32 is not strictly necessary for every project. My reasoning is simply that archviz clients expect as much detail as possible, and 32 across the board has become a comfortable, slightly over-engineered default that guarantees indirect lighting is never the bottleneck.
Turning clamping off for realistic bright values
Just below Max Bounces is the Clamping section. Clamping puts a ceiling on how bright any single sample is allowed to be. If a ray hits something that produces a very, very high value, clamping squashes that value down to the cap instead of letting it through.
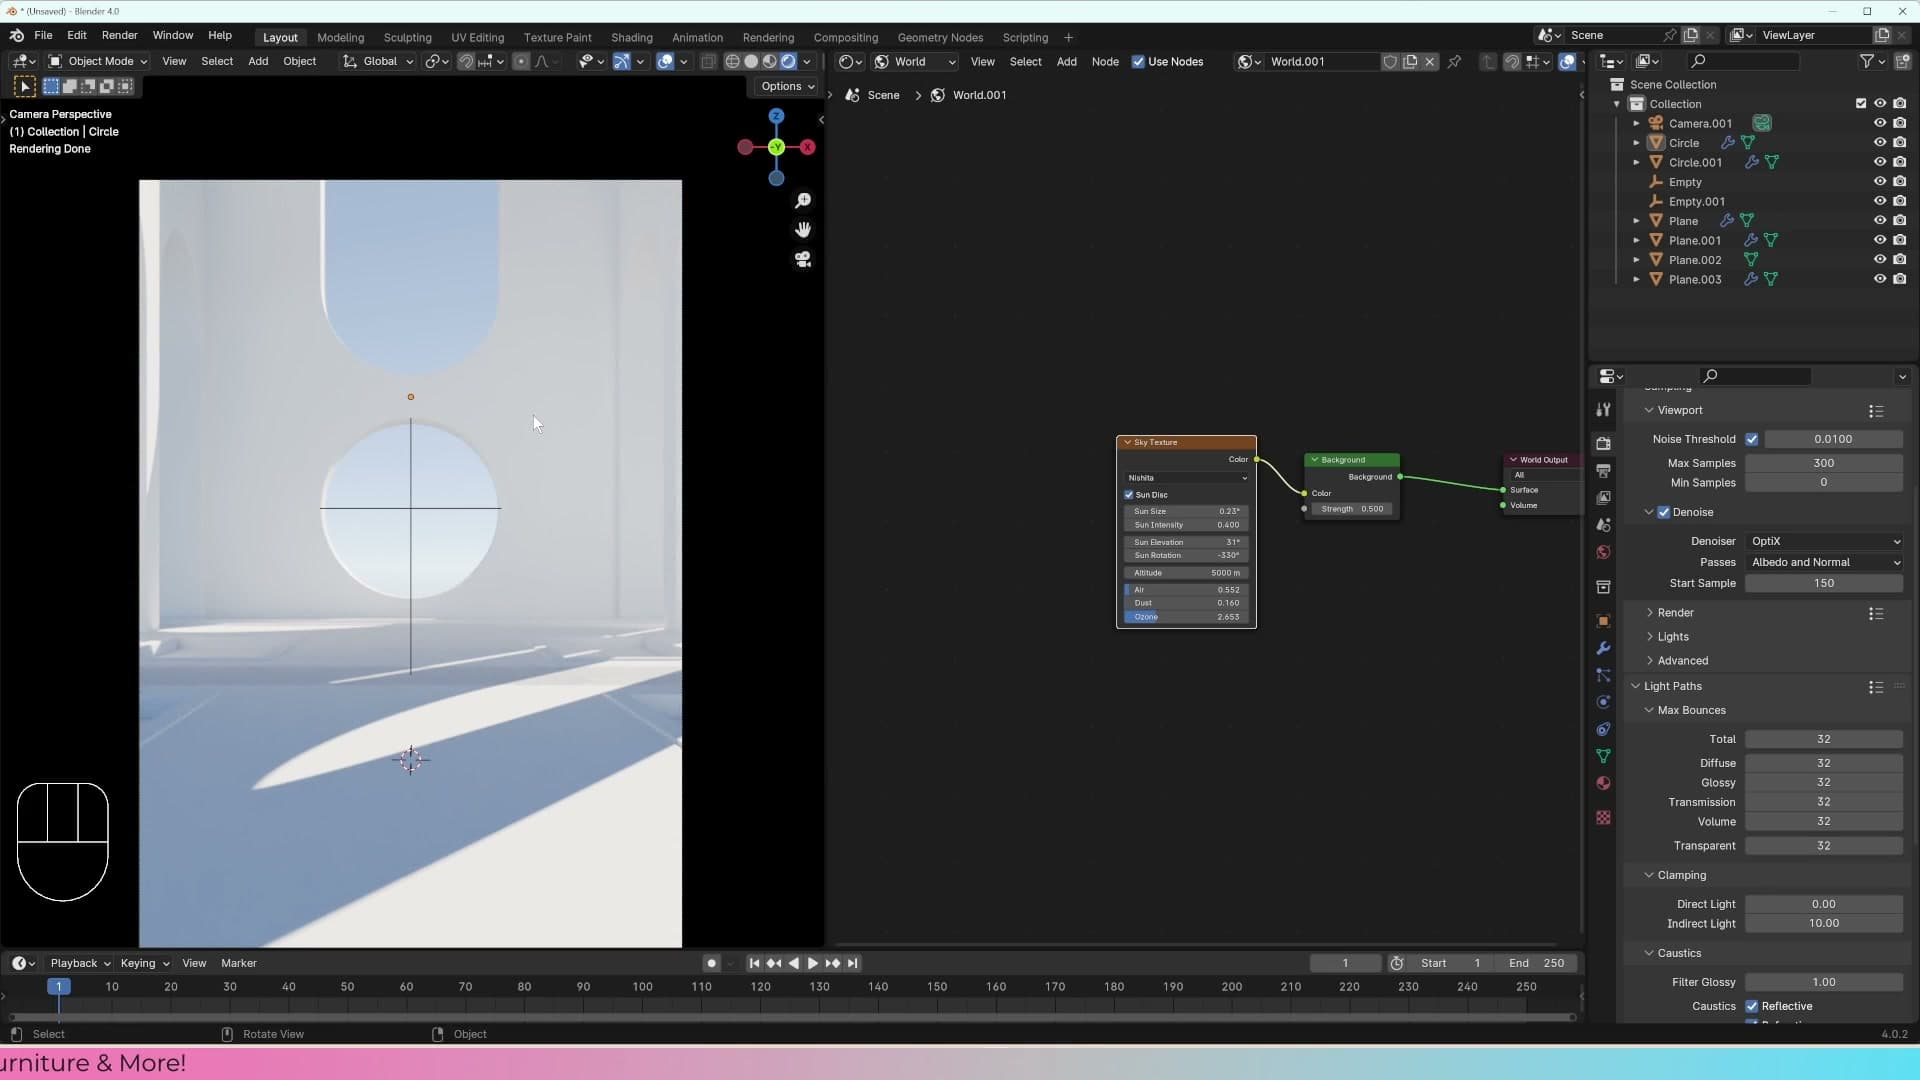
For a realistic archviz render, that behaviour is the wrong call. In real life, very bright things are very bright: the sun glinting off chrome, a hot specular highlight on glass, a lamp filament caught in reflection. Squashing those values flattens the image and removes the natural punch of high dynamic range lighting. Turn clamping off so Cycles records the full brightness of every sample.
There is a trade-off. Disabling clamping can introduce fireflies: bright sparkly pixels caused by rare, extremely high-value samples that the denoiser then struggles to clean up. If your scene happens to be full of those sparkly artefacts, clamping is the dial you reach for to tame them. For most clean archviz scenes, including this one, leaving clamping off is the right default.
AGX colour management with High Contrast
Blender 4.0 ships AGX as the modern alternative to Filmic. It handles bright HDRI and sun values without the washed-out highlight rolloff. This closing module switches Colour Management to AGX with the High Contrast look, locking in the look the rest of the course will build materials against.
Setting View Transform to AGX, Look to High Contrast
In the Render Properties panel, scroll down to the Color Management section. Set View Transform to AgX, then change Look to High Contrast. Blender 4.0 ships with AgX as the default view transform, but it's worth setting it explicitly so the file looks identical for anyone opening it on an older Blender version where Filmic is still the default.
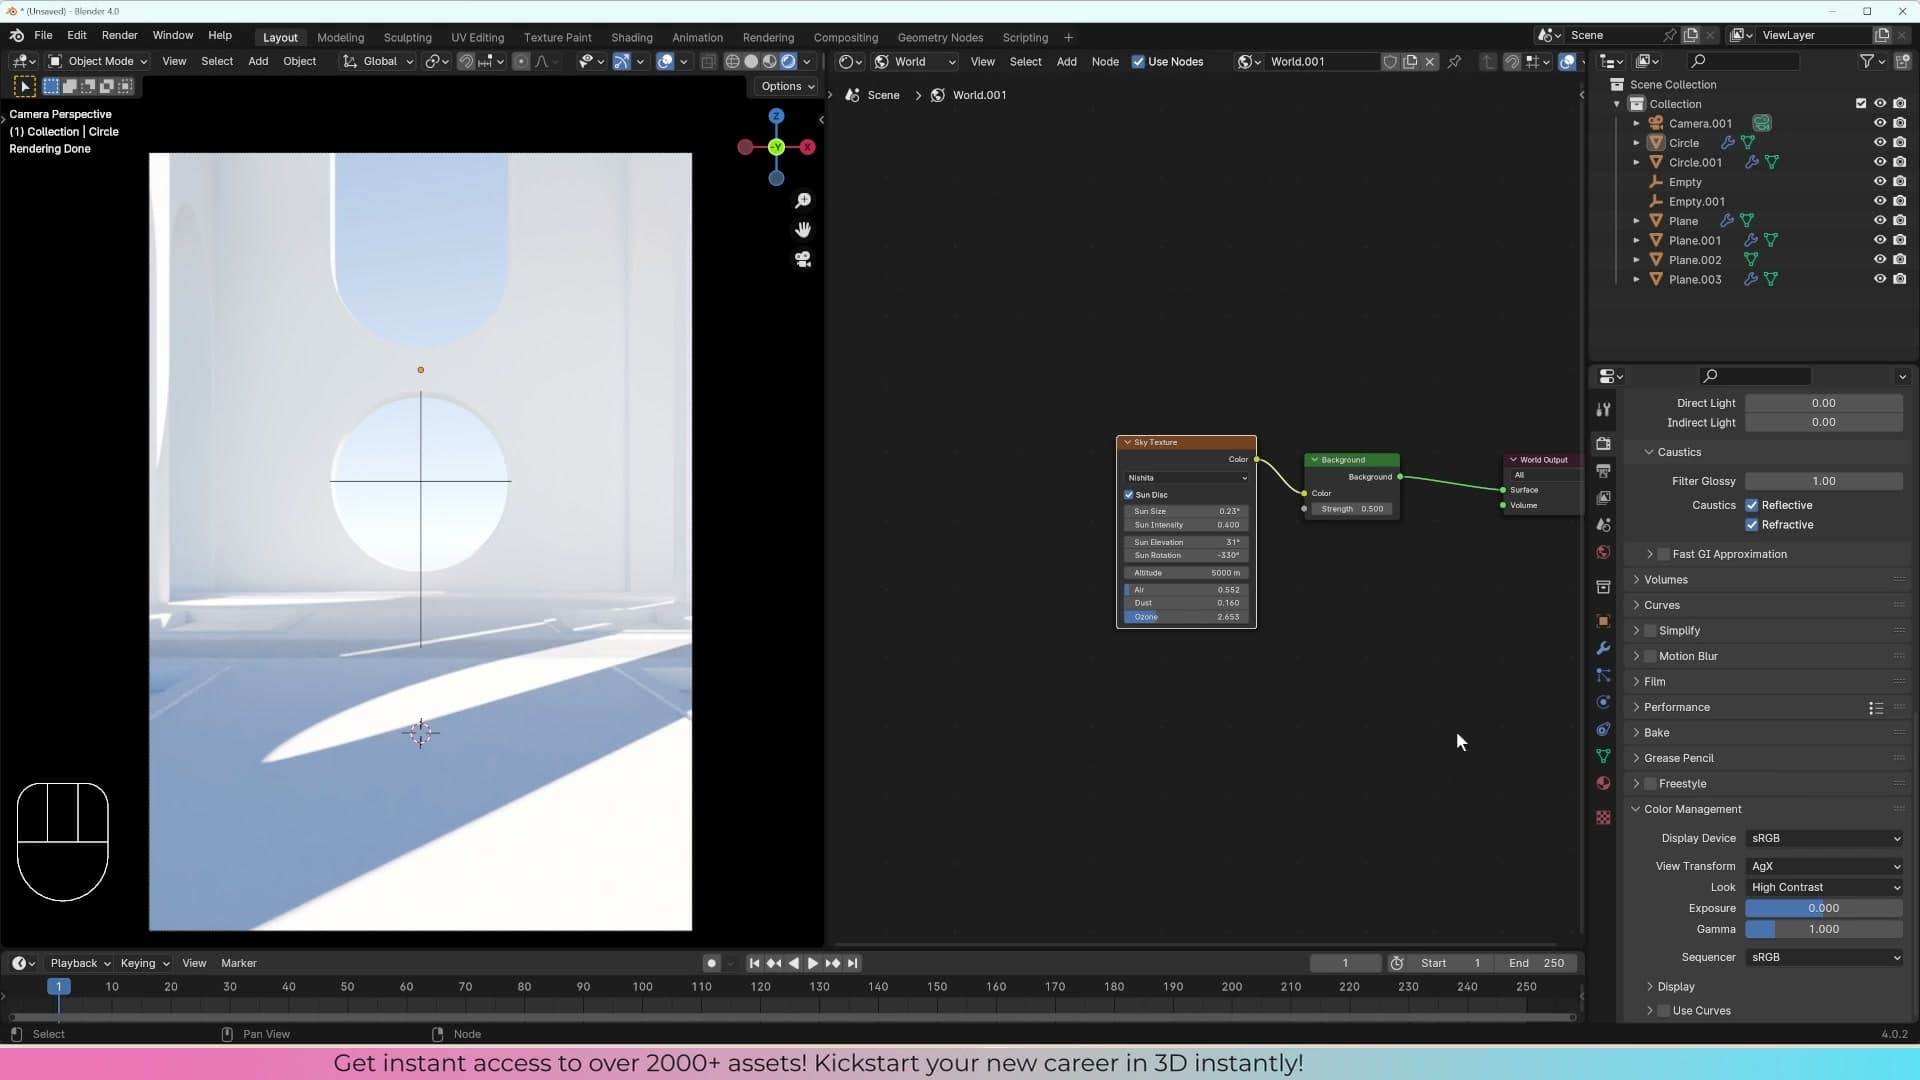
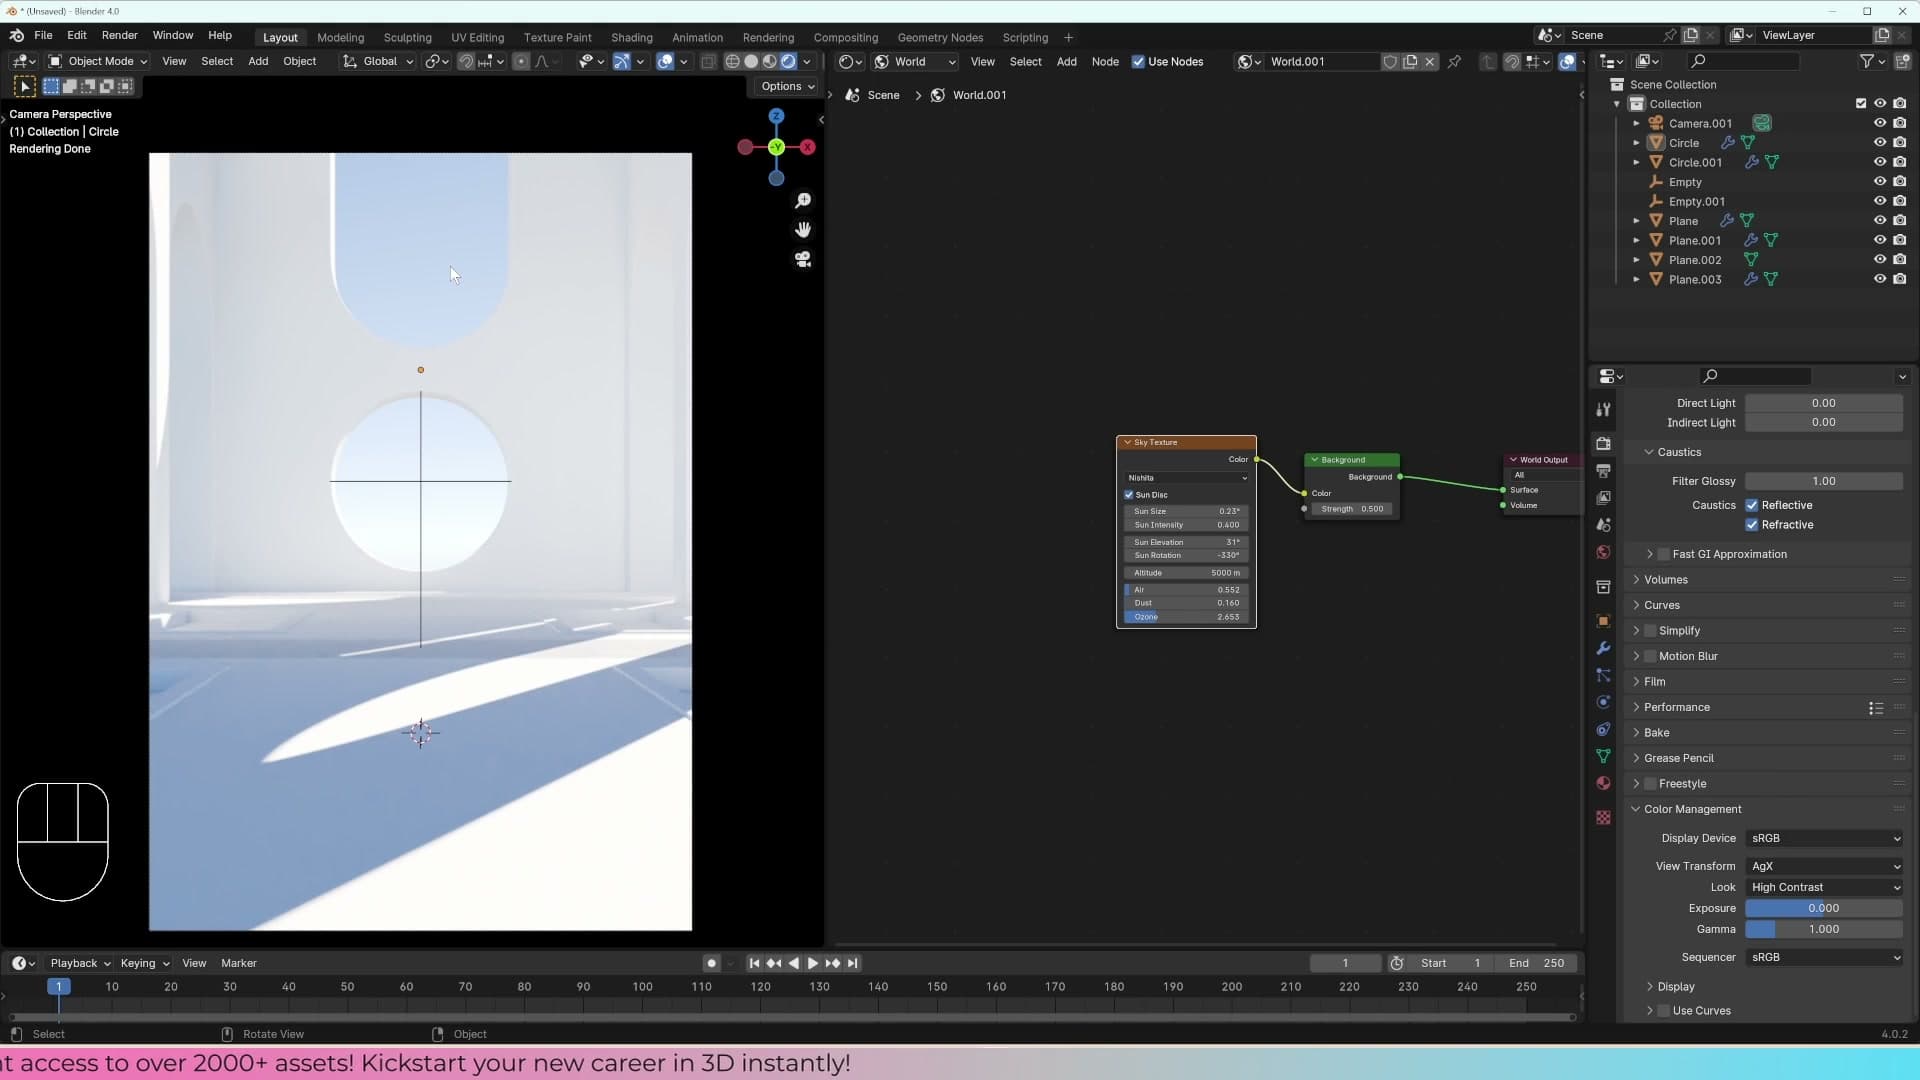
That's the look the rest of the course will build materials against. With the HDRI lighting the scene, the OptiX denoiser cleaning up samples, and AgX handling the bright highlights, you've got an honest exposure to read colour and roughness decisions against. Time to start working on some materials.
Tools and credits
Everything mentioned in this tutorial, with links.
- Blender is the renderer this entire build runs in.
- iMeshh is the studio platform covering project management, client review, asset library and invoicing. The asset library used in this tutorial is included with every iMeshh Pro plan.
- Poly Haven provides free CC0 textures and HDRIs.
Pillar guide: Beginner Course hub