What's new in E-Cycles 2.93's denoiser
Why the updated Open Image Denoise build matters: client-usable previews from 8 samples in roughly 30 seconds, even with maxed-out 64 light path bounces and High Quality mode on.
The eight-sample, 30-second test render
E-Cycles 2.93 ships with a refreshed denoiser (what I'd describe as a newer build of Open Image Denoise), and the headline claim is that you can drop the sample count to 8 and still walk away with a render you'd happily send to a client.
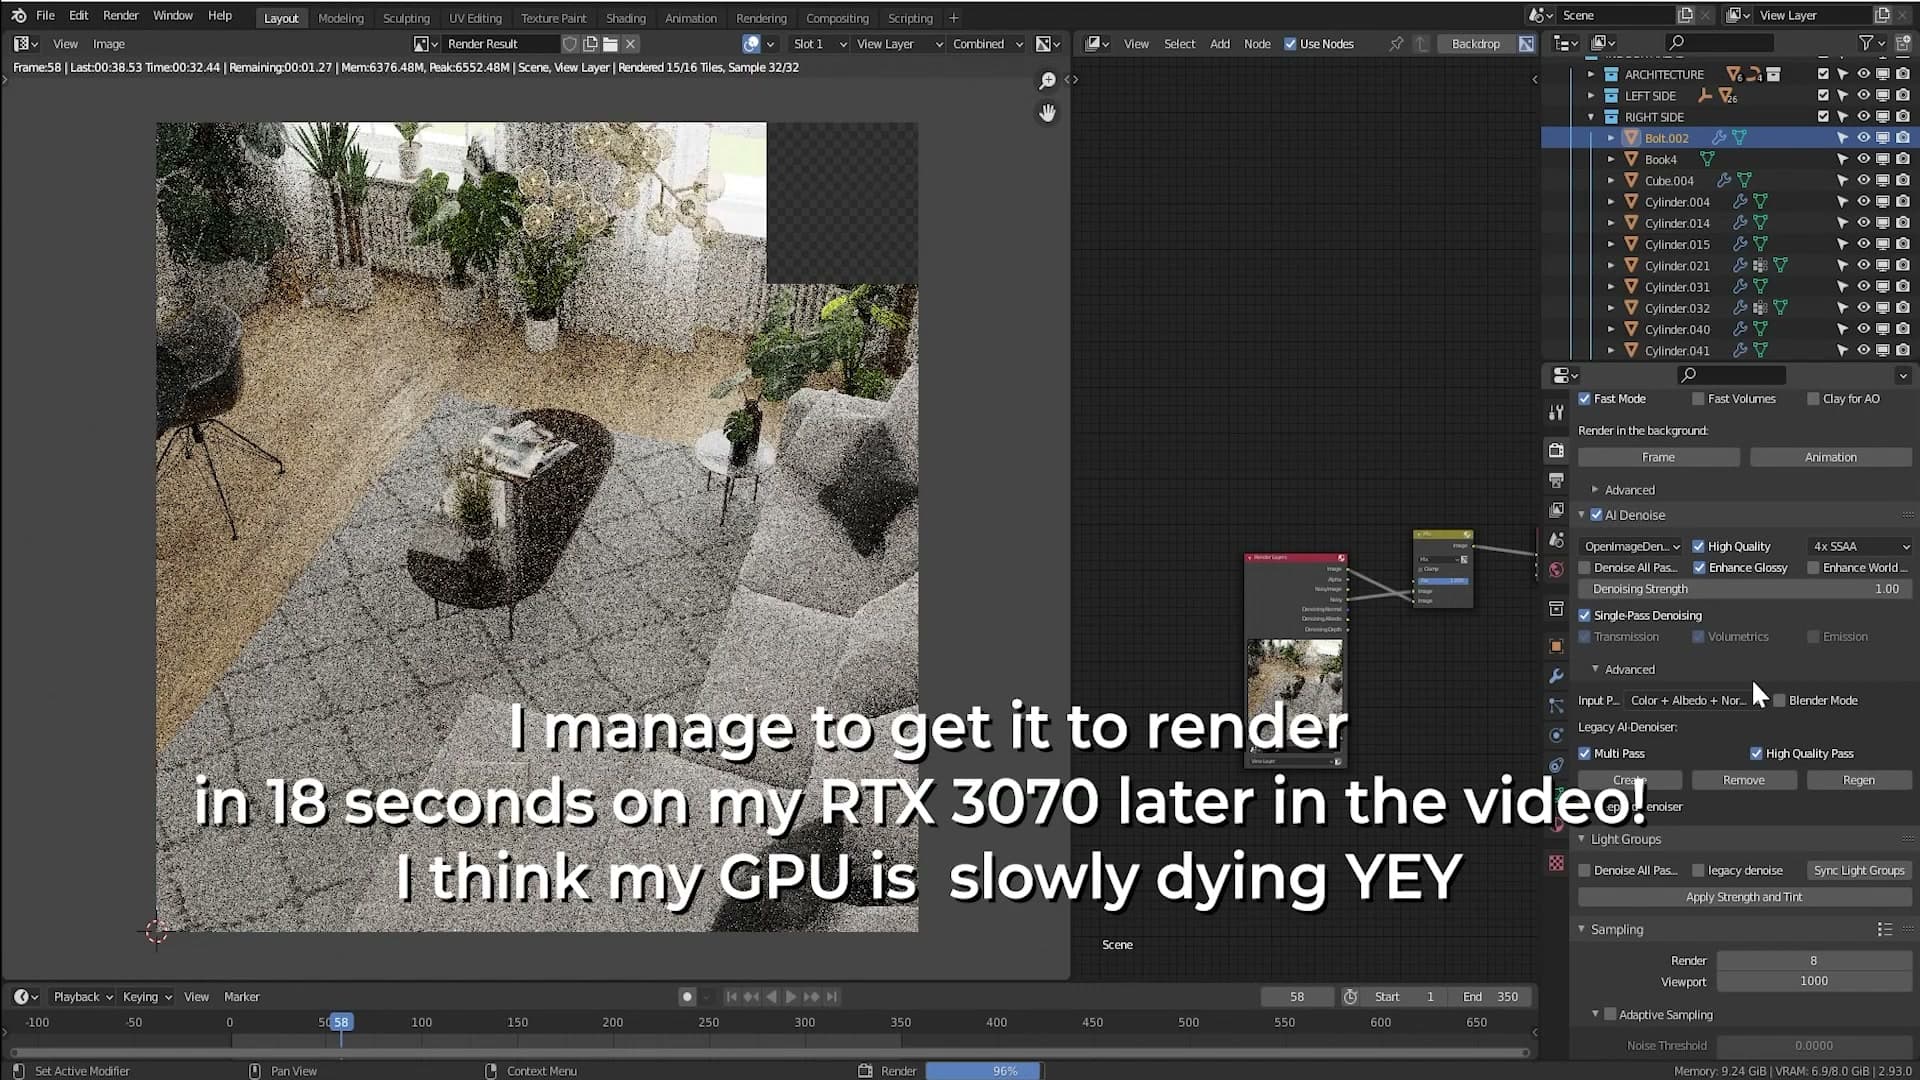
On the test machine, that 8-sample frame finished in roughly 30 to 40 seconds: about 33 seconds of actual sampling plus a short denoise pass on top. On a faster card like an RTX 3080 or 3090, I'd expect the same shot to land in closer to 10 to 15 seconds.
This is not a stripped-back preview preset. The test runs with High Quality mode enabled and 64 light path bounces. That's what I'd call the max settings you'd ever need. The time savings are coming from the denoiser itself, not from cutting corners on light transport.
Enabling AI Denoise and the auto-generated node group
The setup is almost embarrassingly quick. In the render properties, click AI Denoise and E-Cycles drops a small node group into the compositor automatically. No manual wiring required.
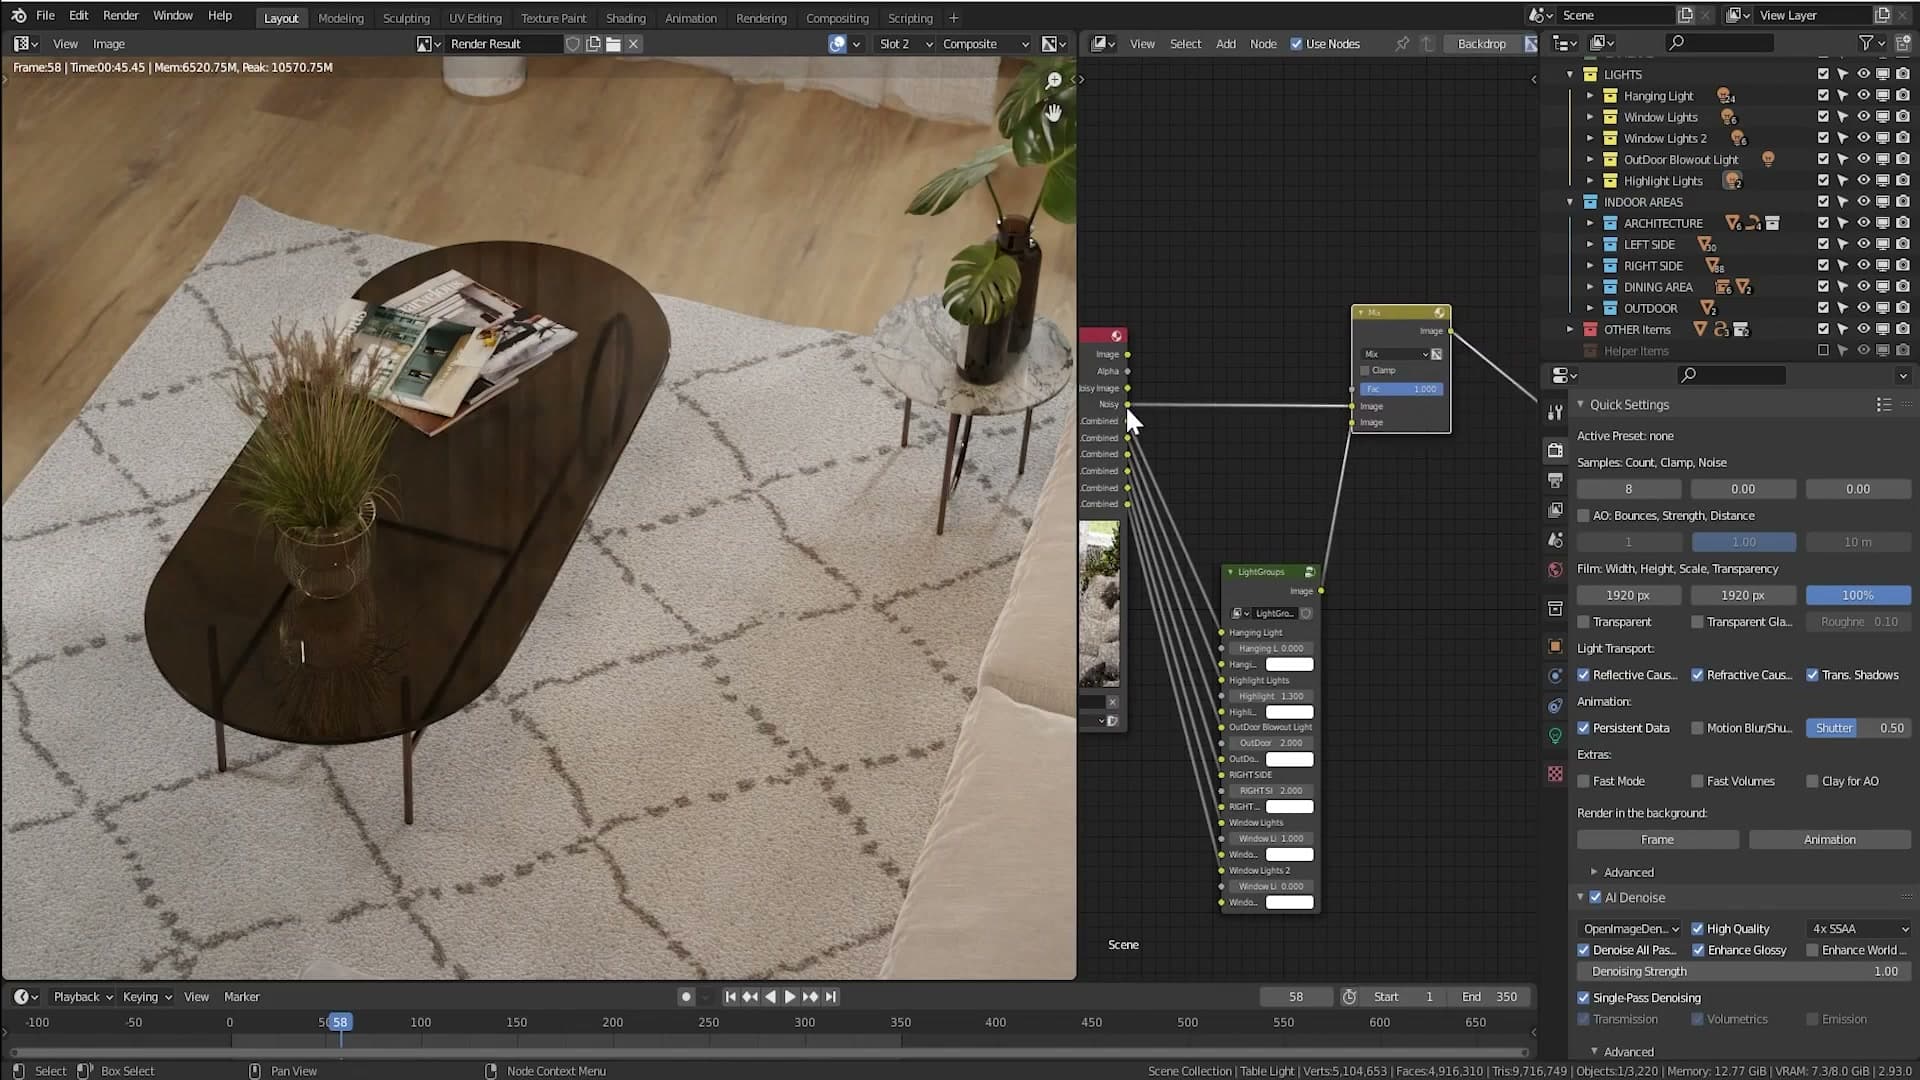
That auto-generated group exposes a new Noisy input that pipes the raw render into the denoiser before mixing it back into the final output. If you've ever assembled a compositor-based denoise rig by hand, the topology will look familiar; the one click just spares you the boilerplate.
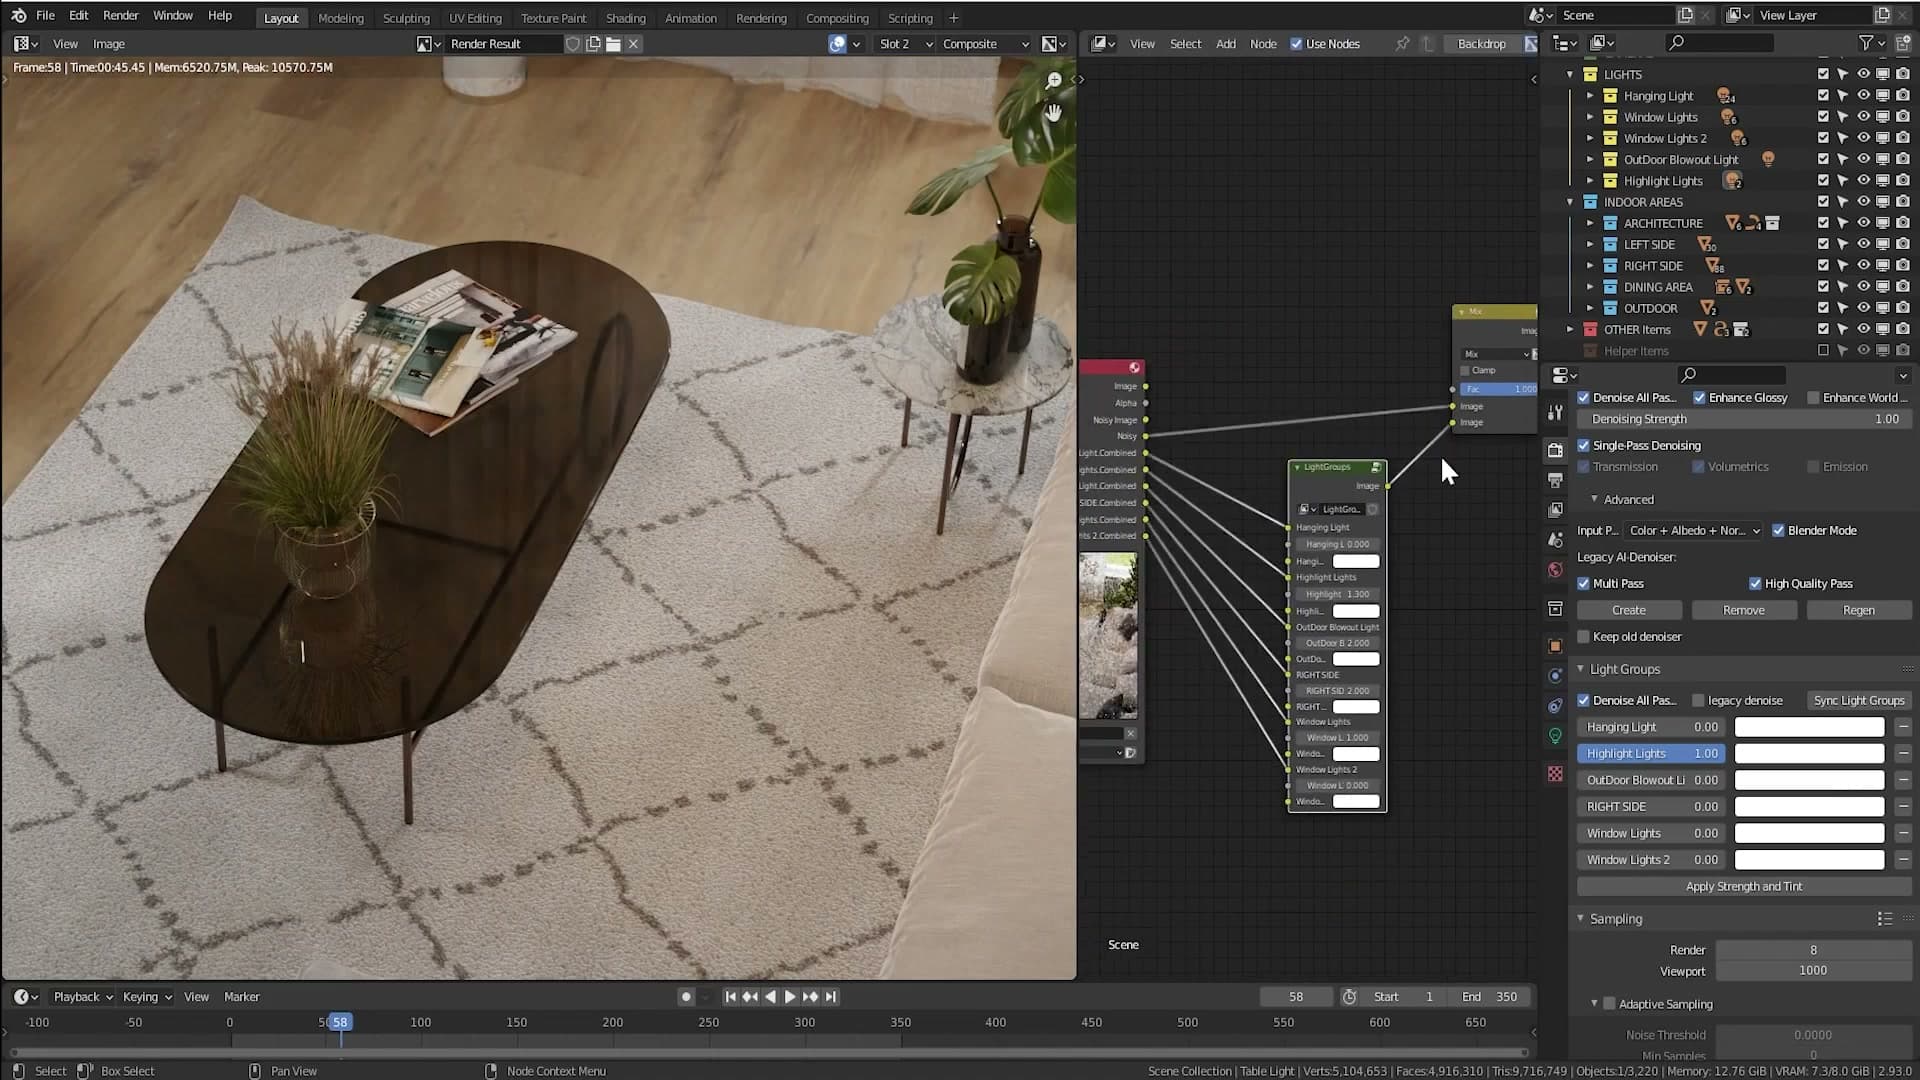
The second click sits over in the Light Groups panel: hit Sync Light Groups and E-Cycles spawns a second node group alongside the first, then mixes the two together. This is the wiring that makes the relight-in-real-time workflow possible later in the post. Anything you adjust in the light groups pass lands on top of the denoised image.
Side-by-side: stock Cycles vs E-Cycles denoiser
A Photoshop A/B between Blender 2.93's standard denoiser and the new E-Cycles pass on the same scene, identical settings, only the denoiser swapped.
Methodology: same scene, same samples, only the denoiser changes
Before getting into the new settings, it is worth seeing what the updated denoiser actually buys you. The test is deliberately blunt: the same scene opened twice, once in stock Blender 2.93 and once in E-Cycles 2.93, with every render setting matched between the two files.
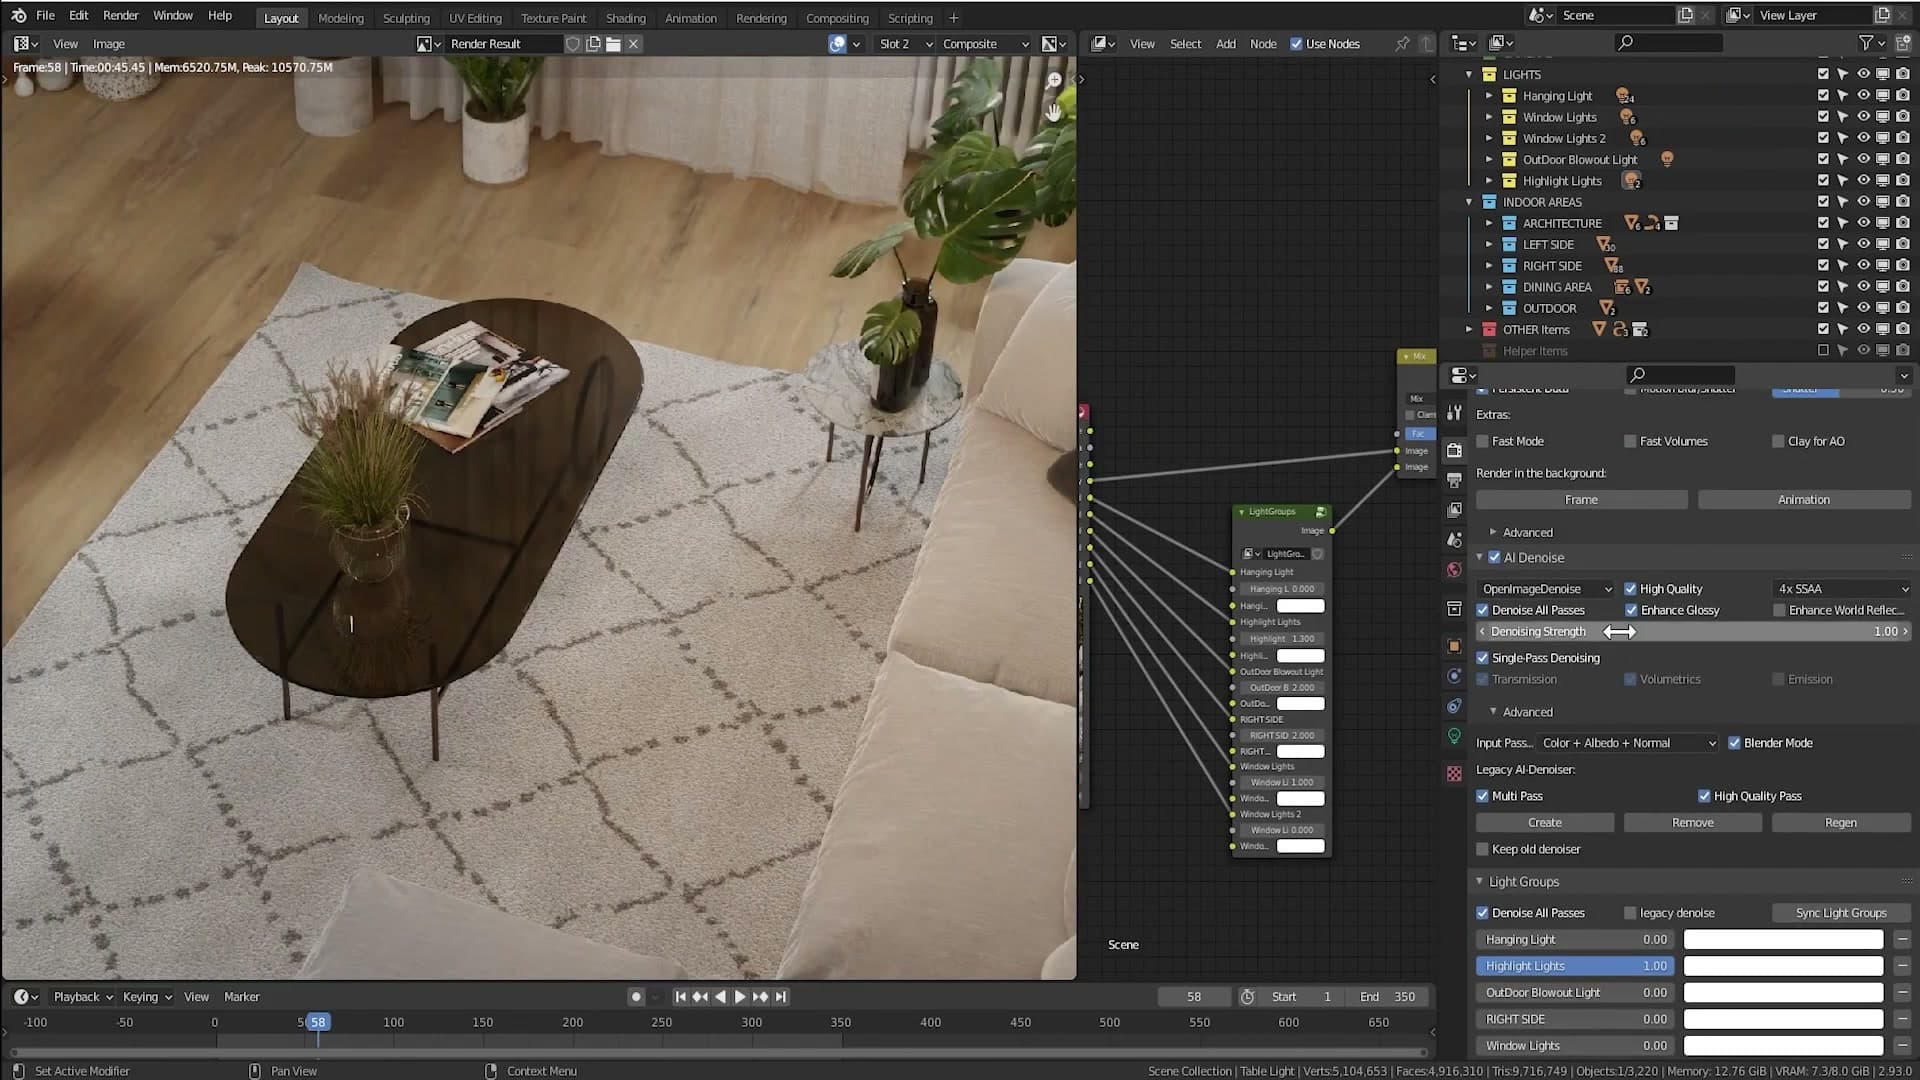
Open both projects, hit render, and change nothing other than the denoiser itself. Same sample count, same light path bounces, same resolution, same camera. The only variable is whether the final pixels go through Blender's stock denoising pass or through E-Cycles' new AI Denoise.
That is the entire methodology. Whatever differences show up in the next two comparisons are coming purely from the denoiser, not from a different sample budget or a quietly tweaked light setup.
Fabric weave and curtain detail preservation
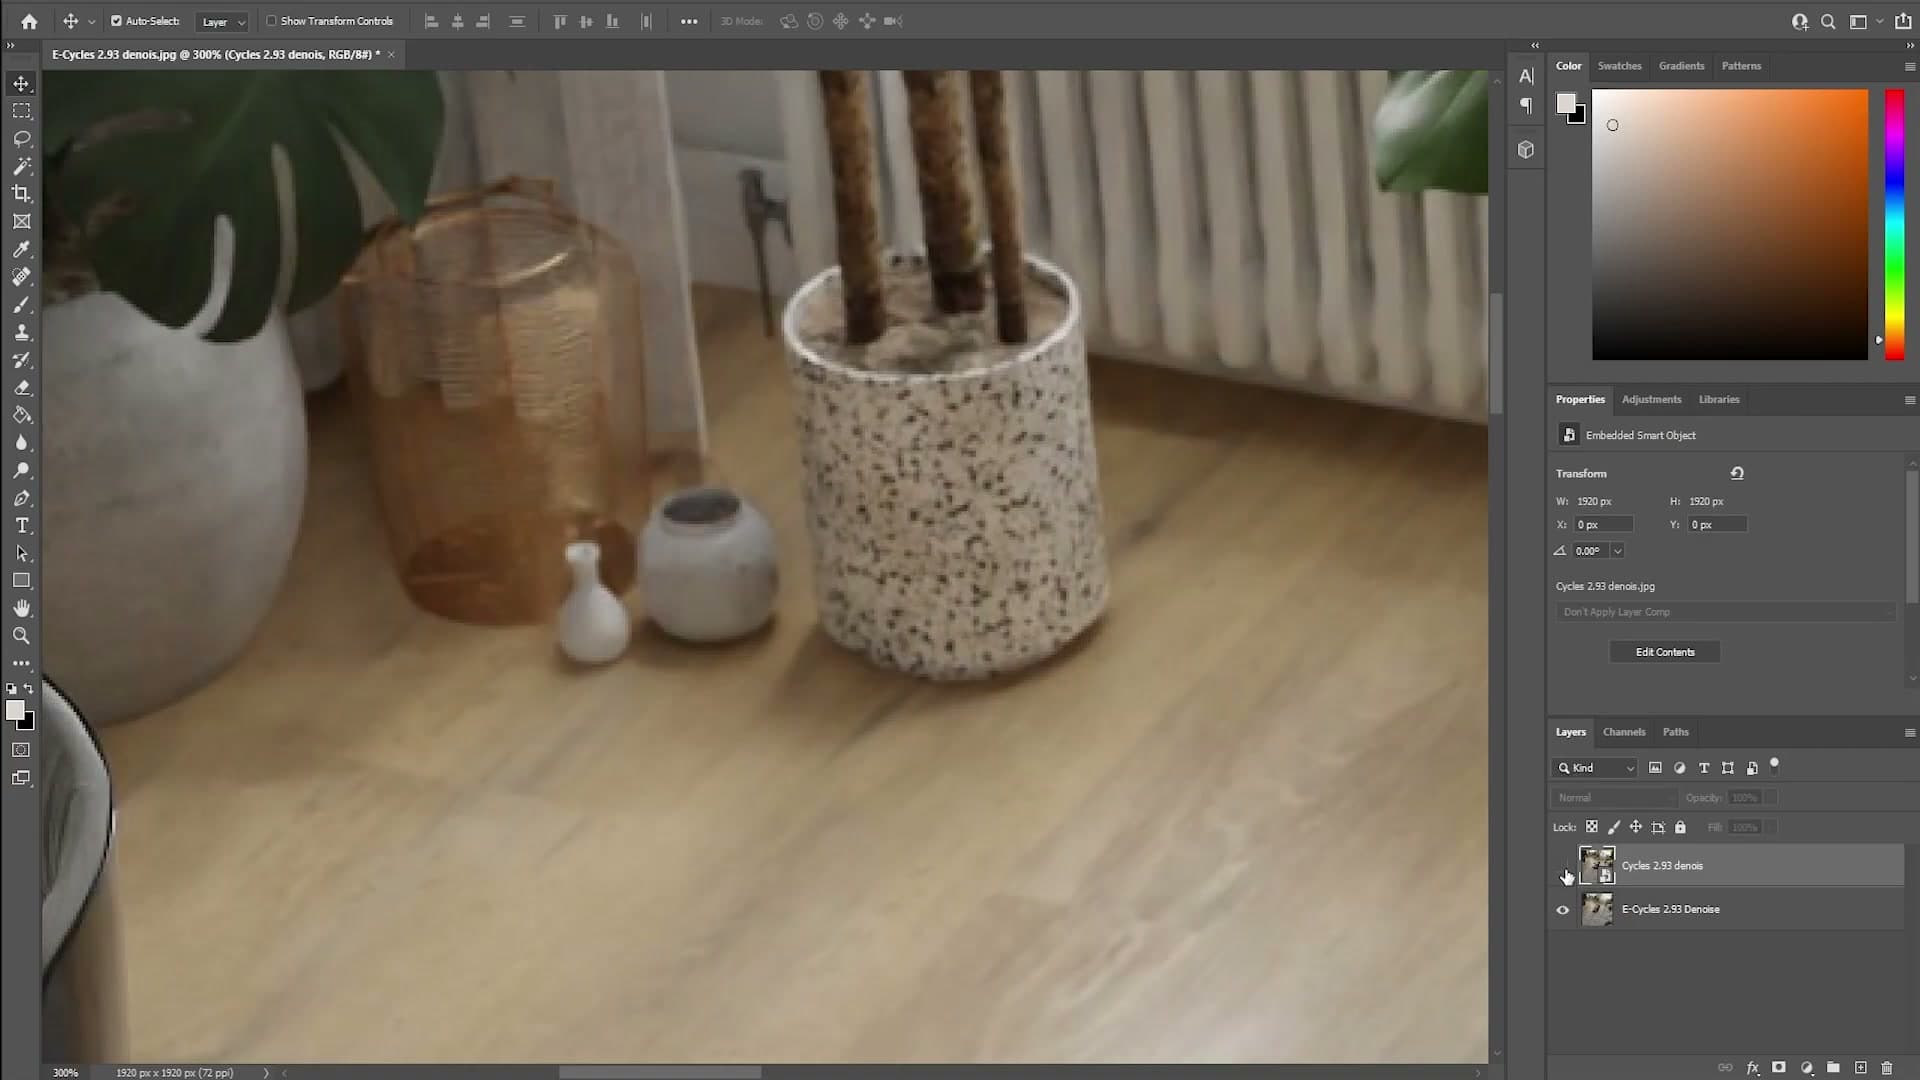
The stock Cycles 2.93 render is not bad on first glance. The lighting reads, the composition holds up, and at thumbnail size most clients would accept it. Look closer, though, and detail starts going missing: the curtain loses its texture, and other fabric in the shot blurs out in the same way.
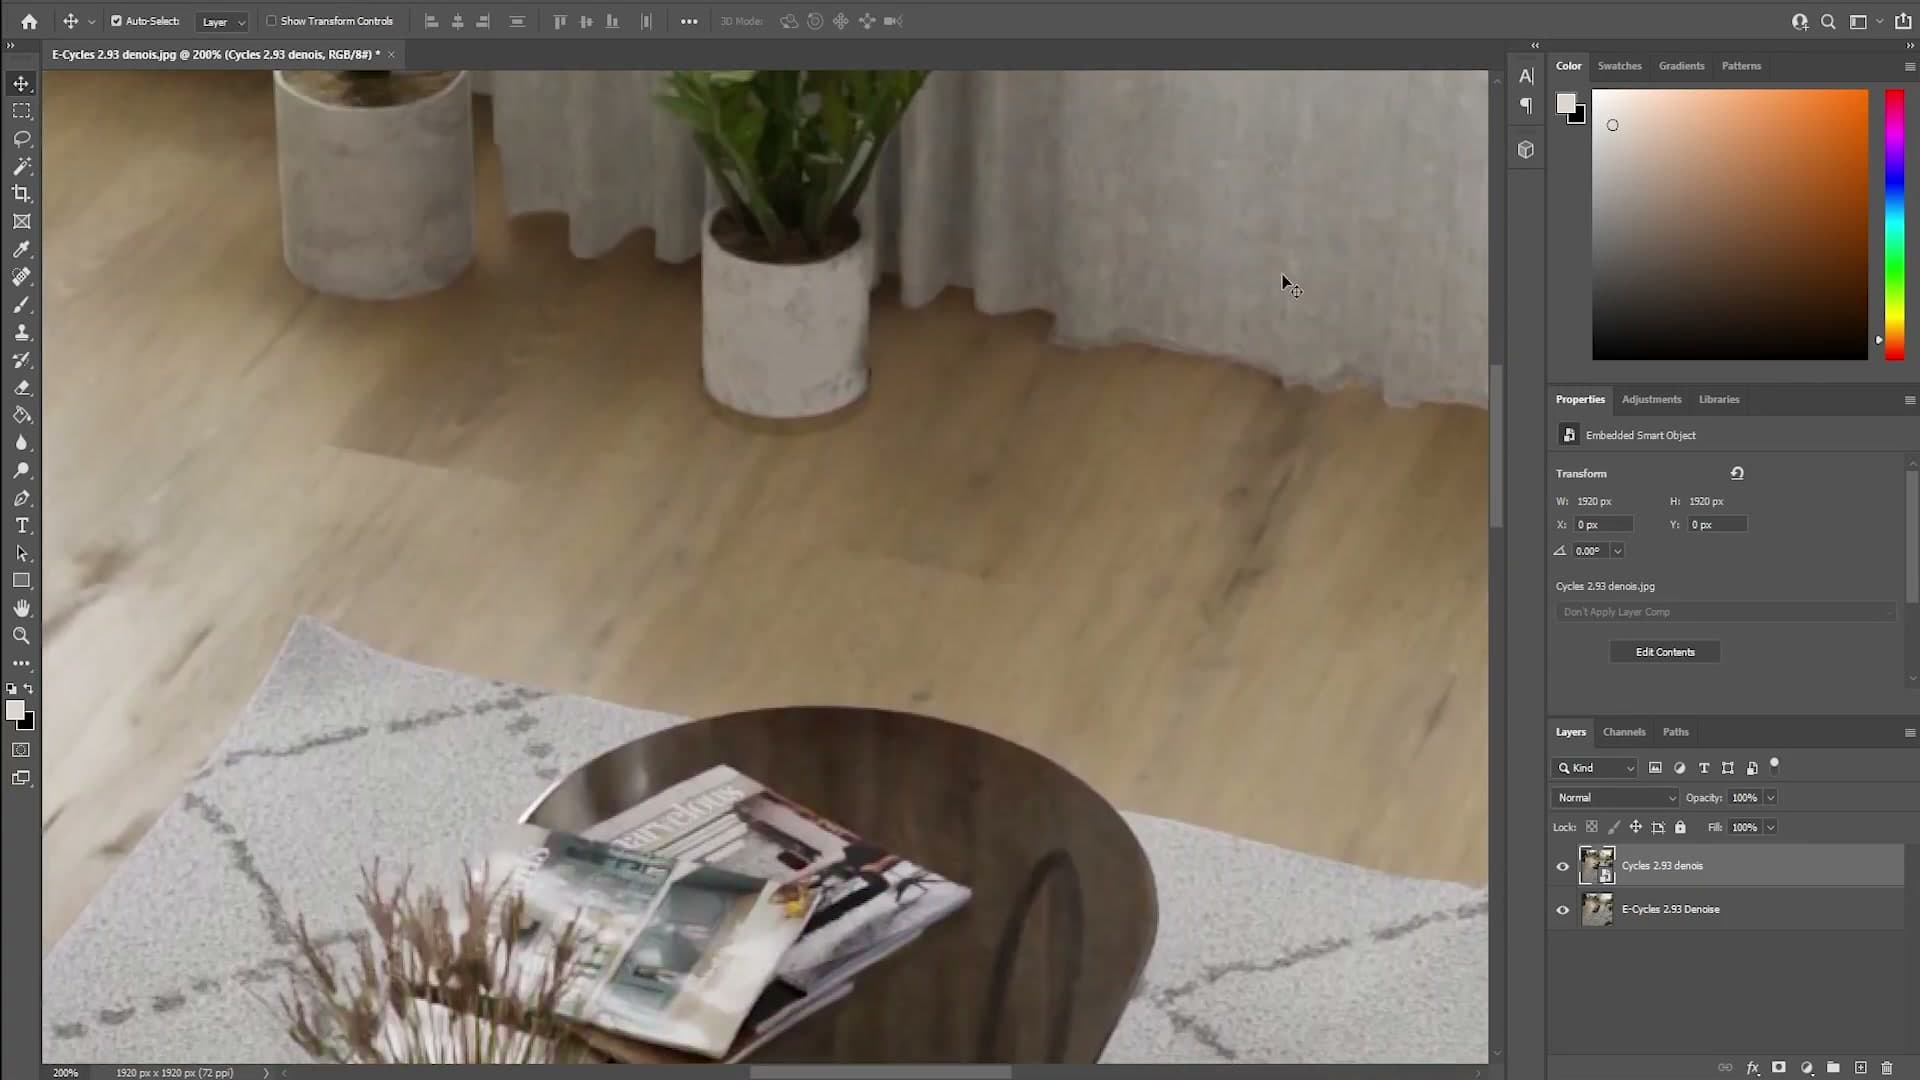
Swap to the E-Cycles denoiser on the identical render and the picture changes. You can pick out the weave running through the upholstery fabric, the kind of fibrous detail that normally only survives at much higher sample counts. The stock pass takes that same data and mushes it together into something flatter and softer.
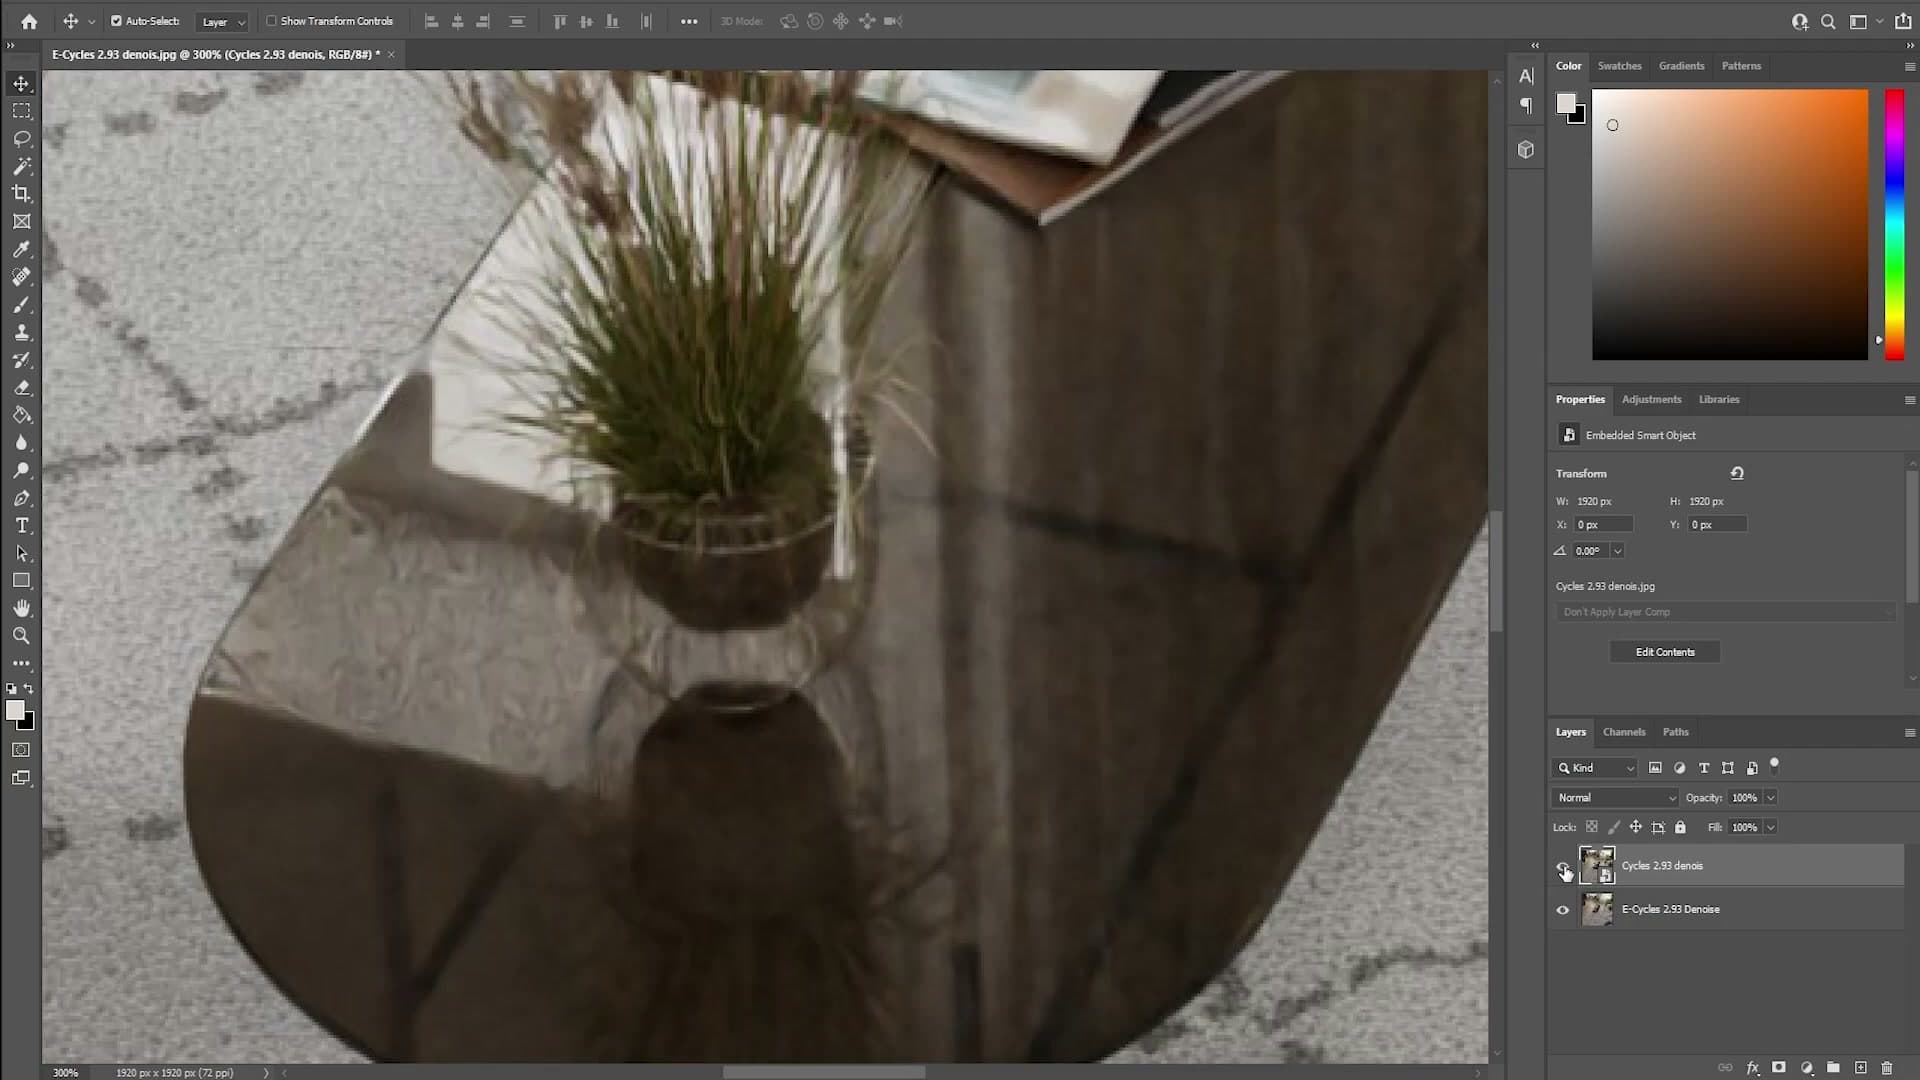
It is the difference between a render that looks denoised and one that looks resolved. Both are clean: neither has visible fireflies or grain. But only one of them keeps the material reading correctly.
Where the denoisers really diverge: thin lines and wires
The clearest tell in the whole comparison is the thin linework in the scene. On the stock Cycles version those lines effectively vanish. The denoiser has no idea what is meant to be there and smears them into the surrounding pixels.
On the E-Cycles version the same detail comes back. You can see the wires curving through the shot clearly enough that the surface almost reads as glass, which is roughly the opposite of the soft mush the stock pass produces from the identical render data.
This is the kind of thing that decides whether a render is client-ready or whether it needs another pass at higher samples. If the denoiser keeps fine geometry intact, you can stop fighting noise and start trusting the 8-sample preview.
Light Groups: relight a finished render in real time
Sync Light Groups from existing light collections, enable the Light Groups render pass, and adjust individual lamp intensity on the rendered image without re-rendering.
Syncing light groups from your light collections
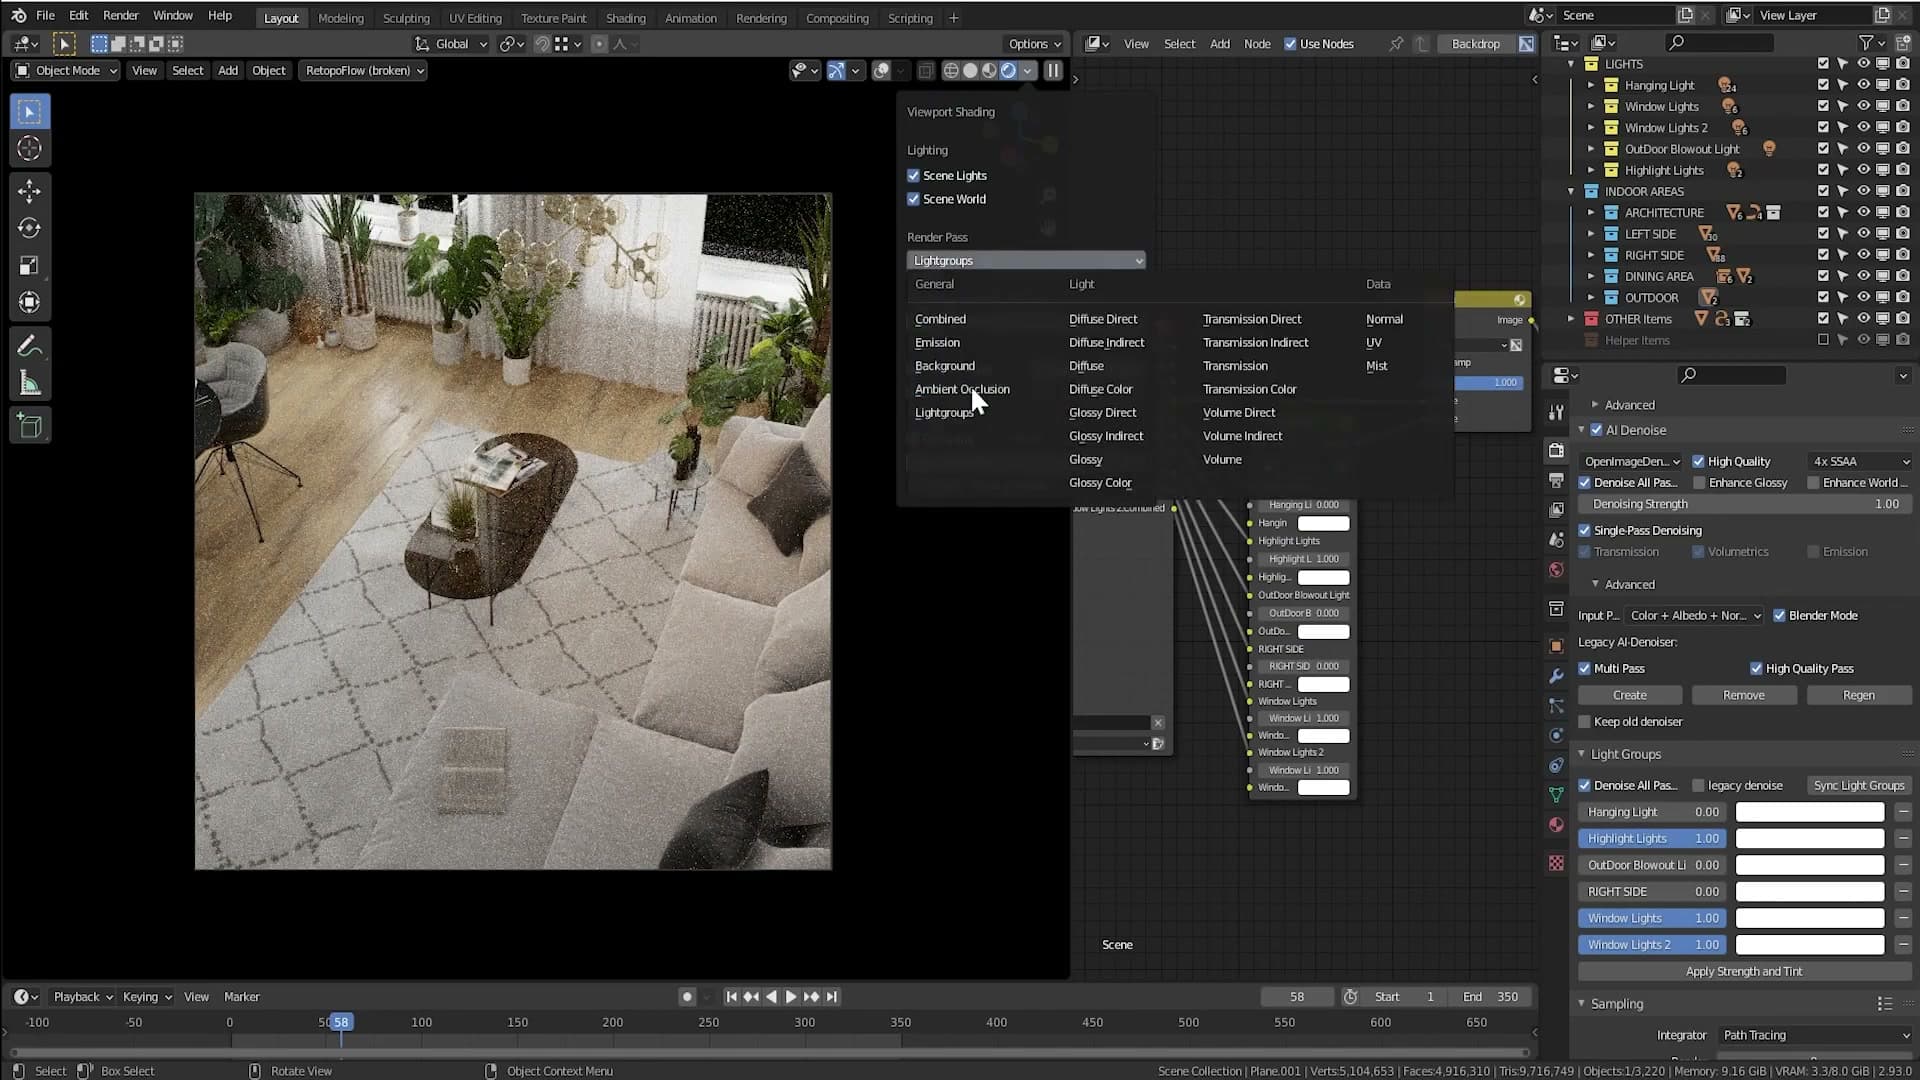
Light Groups are the second headline feature of E-Cycles 2.93, and the setup is just as hands-off as the denoiser. Open the E-Cycles panel and click Light Groups. E-Cycles scans the light collections you already have in the outliner and builds the matching compositor node group for you: one input per collection, no manual wiring.
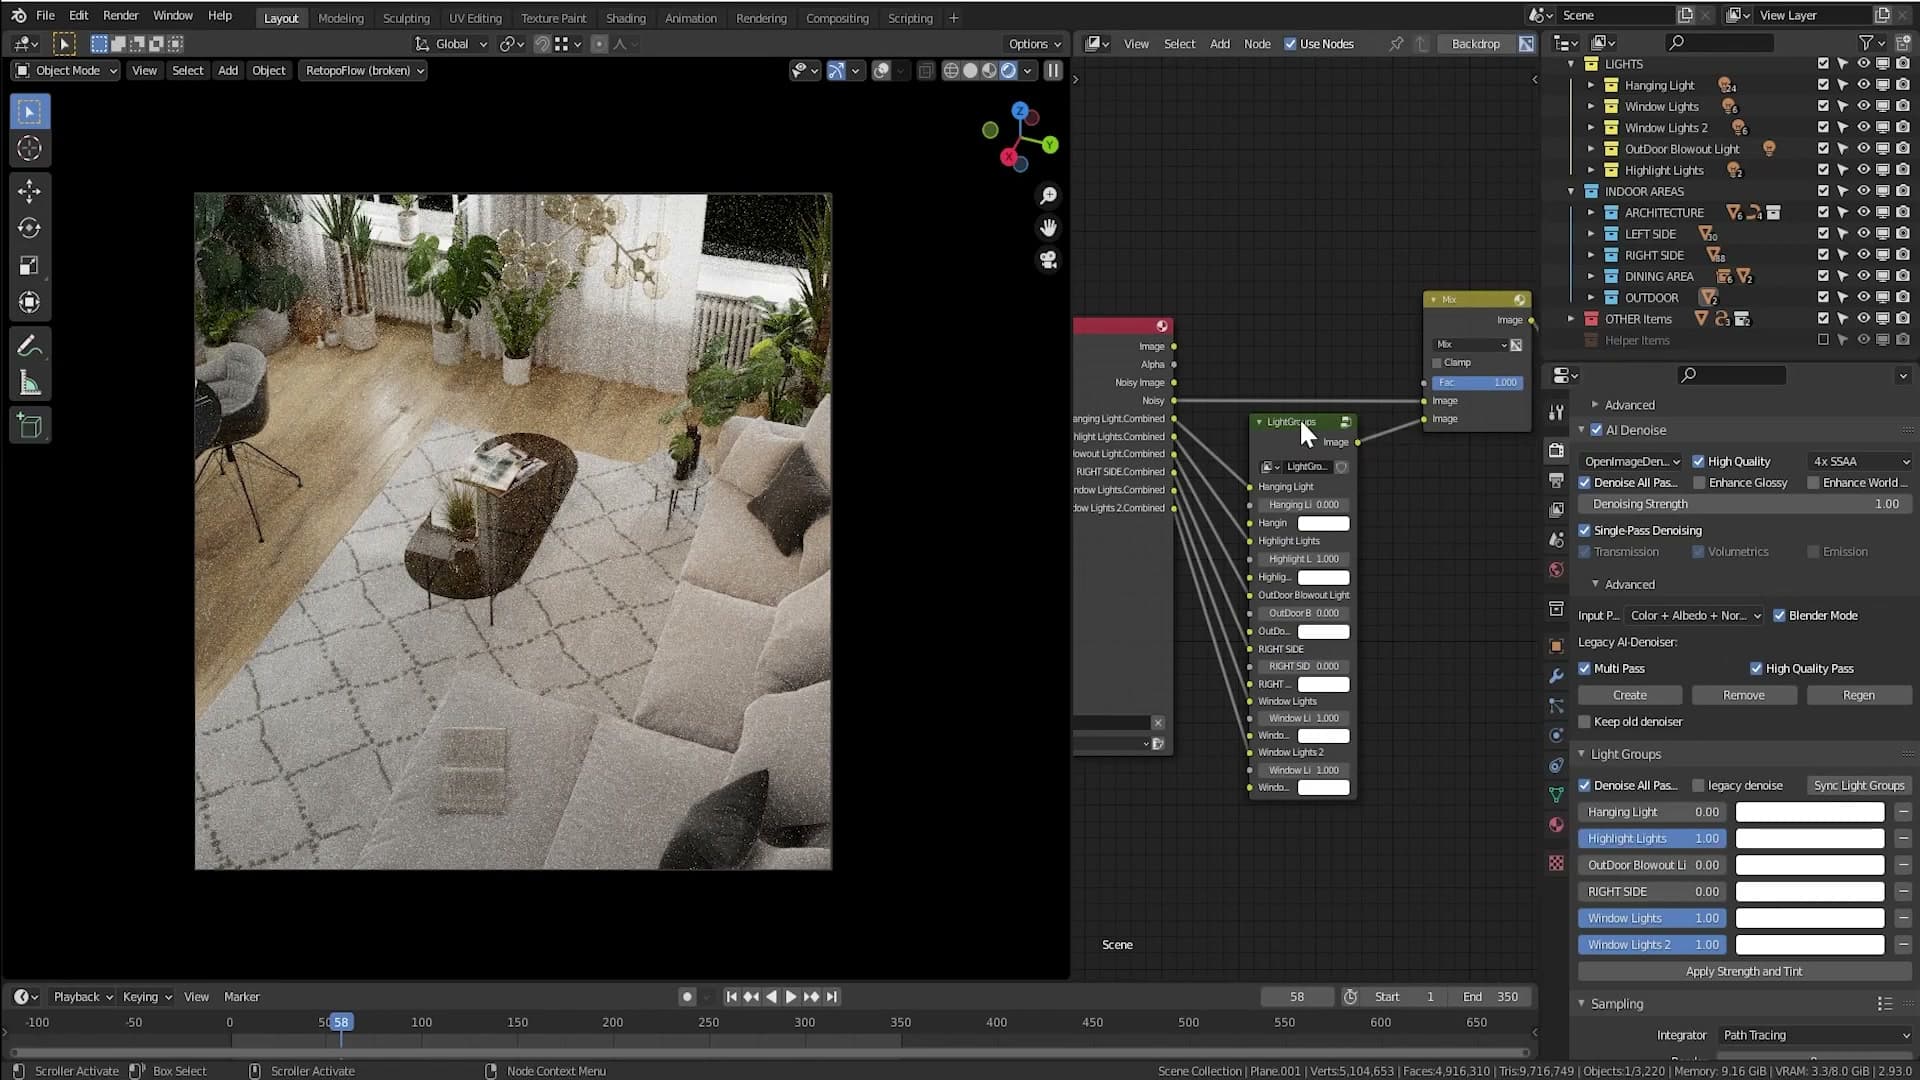
Once the group exists, head to the render passes and enable Light Groups there as well. That exposes each lamp (or each collection of lamps) as its own pass, which is what lets you push individual lights up and down on the finished image without touching the 3D scene.
Tweaking individual lamps on the finished render
With the passes enabled, you can change the render while it is rendering, a workflow that has lived in Corona and V-Ray for years and has finally landed in Blender. You can dial every individual lamp's contribution up or down and watch the result update on the rendered image in real time.
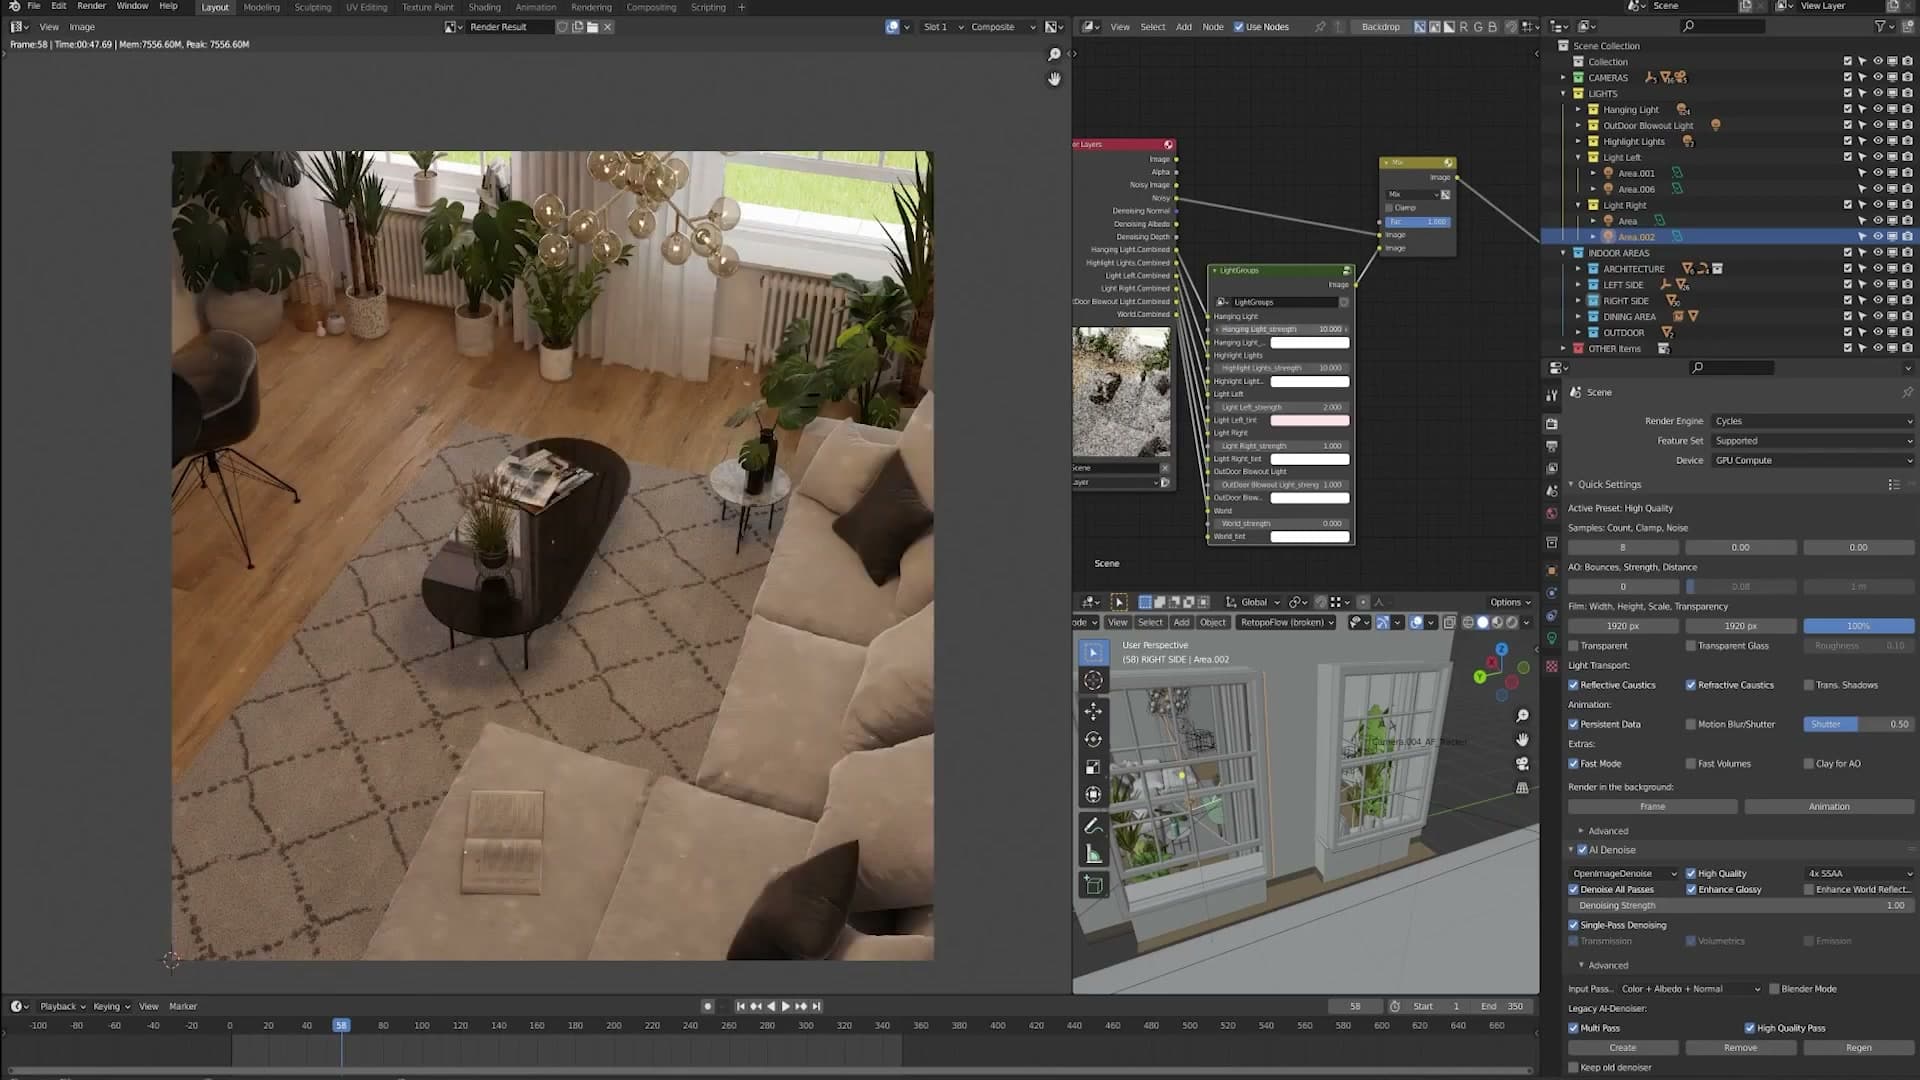
Because the denoiser is now so fast, the practical workflow flips around. Instead of fighting noise in the viewport, render the image at full size (it will likely come in under a minute) and then do your lighting adjustments on the finished frame. The compositor mix nodes that Light Groups created each map to one lamp; slide one up to brighten its contribution, slide another down when it is reading too hot. In the demo scene that means lifting the table lamp, then easing the side light back because it was overpowering the rest of the room.
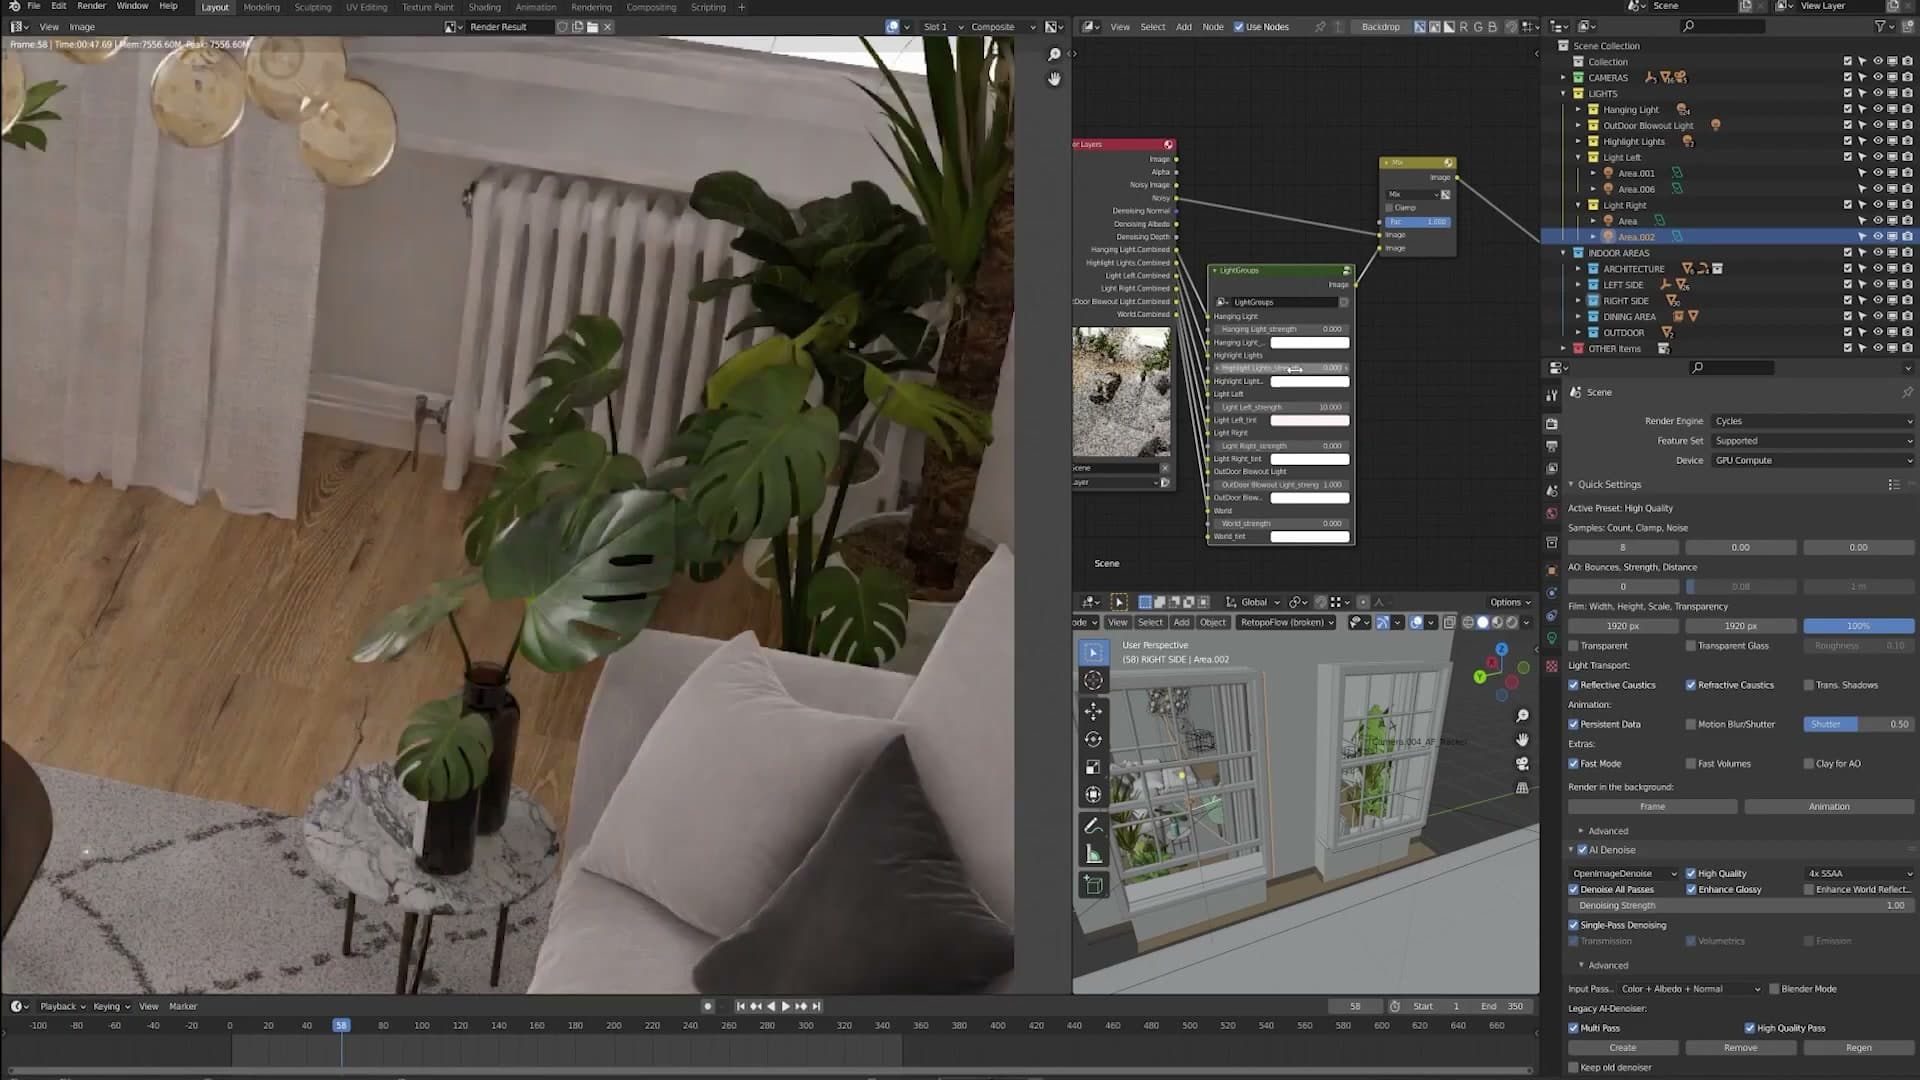
The real payoff is being able to zoom into the result. Because you are working on a full final render rather than a viewport sample, you can scrub in close on fine detail (like light passing through a leaf) without the viewport resetting its samples and starting from scratch. Render once at full quality, then relight by eye on the finished image.
Denoiser settings explained: High Quality, SSAA, Enhanced Glossy
What each toggle in the AI Denoise panel actually does to the final image, with slot-by-slot comparisons of High Quality on/off and SSAA at 4x vs 1x.
Enhance World Reflections: only when an HDRI shows in glossy
This part of the walkthrough was recorded a day after the timing demo, so the scene loaded with slightly different settings. Treat the slot-by-slot comparisons as the lesson, not the absolute render time. Slot 1 holds my preferred starting point: 4x SSAA, High Quality on, and Enhance Glossy on.
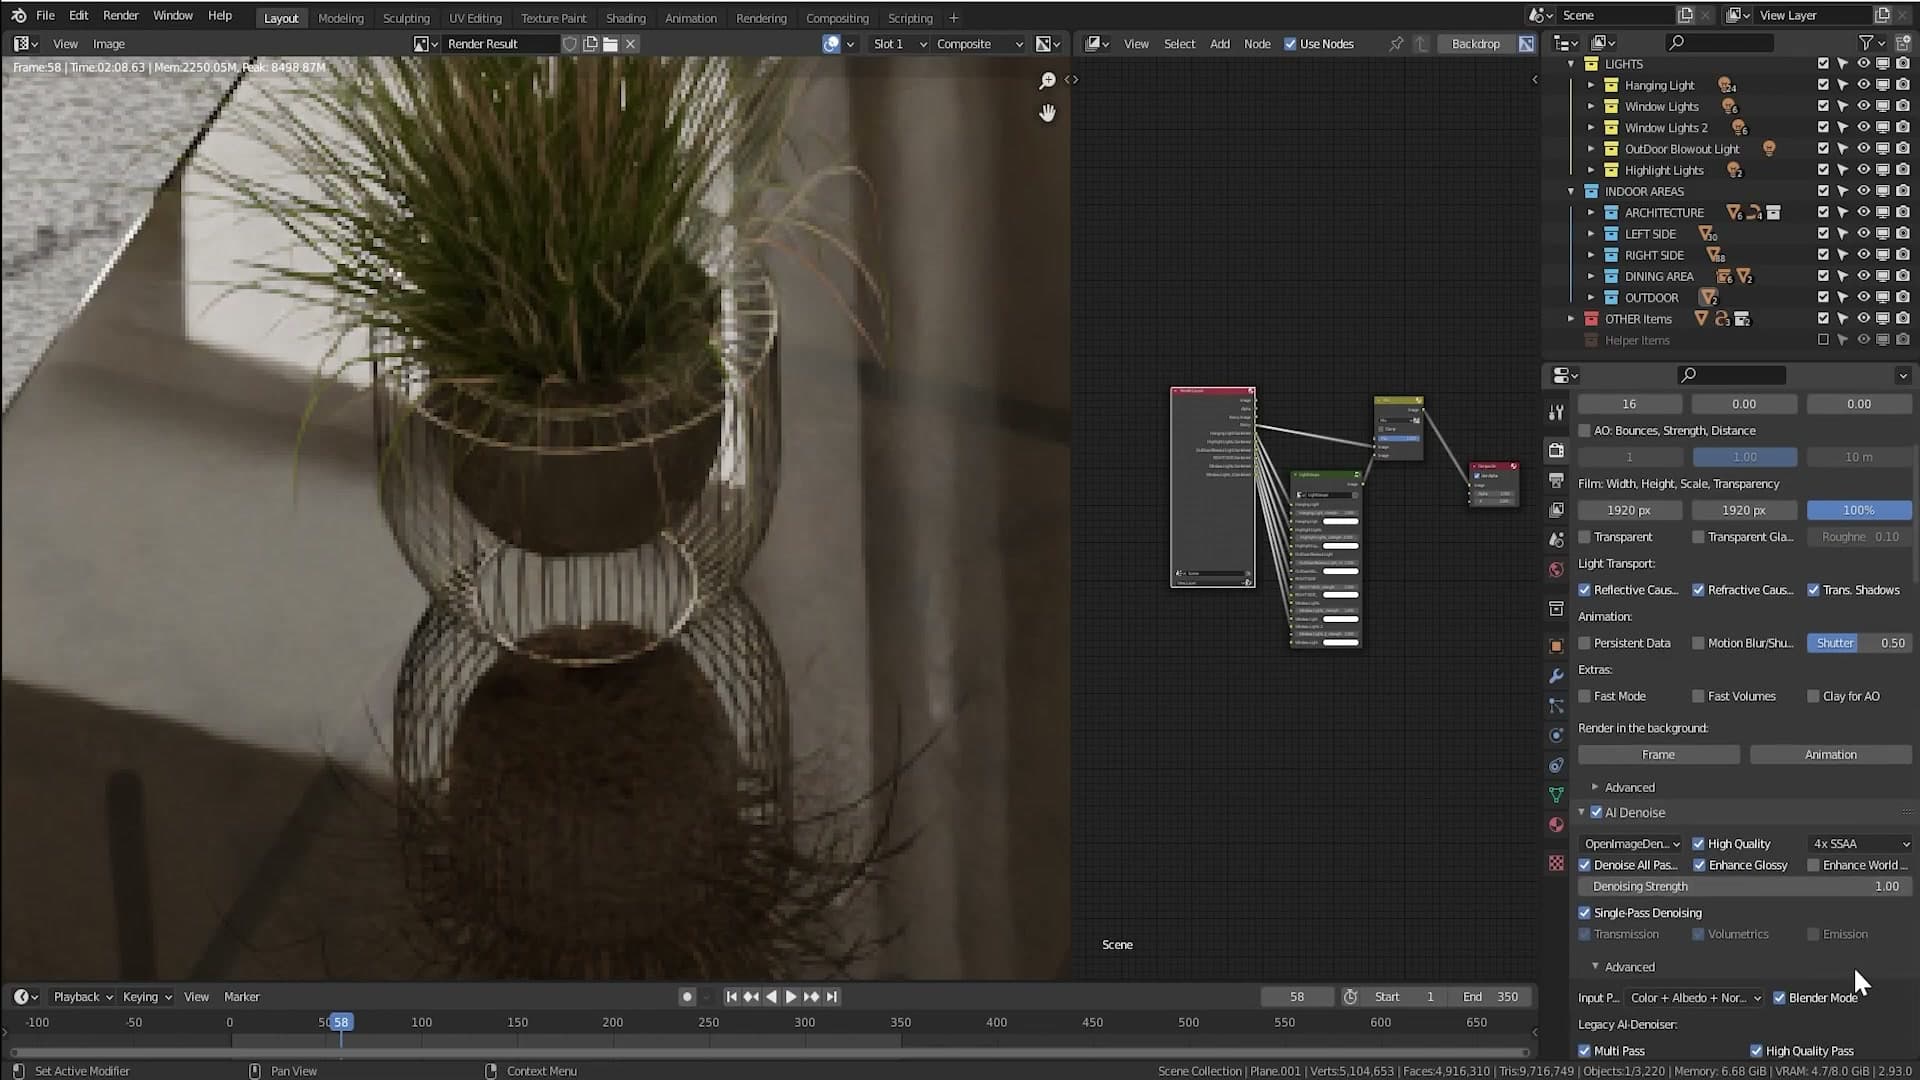
Enhance World Reflections is the one toggle in this panel that depends on the scene rather than being a sensible default. Turn it on when your HDRI or environment actually shows up in the reflection of glossy surfaces: that is the case it is designed for. In this scene the backplate behind the window is a flat white card, so the world contributes nothing visible to the reflections and the toggle is left off.
High Quality on vs off: the pre-filter pass that sharpens fibres
Flip across to slot 2 to see the same render with High Quality turned off. At a glance the overall image looks nearly identical, but zoom into the grass and other fibrous detail and the gap becomes obvious. Slot 1 keeps individual blades crisp; slot 2 smears them together into a softer wash.
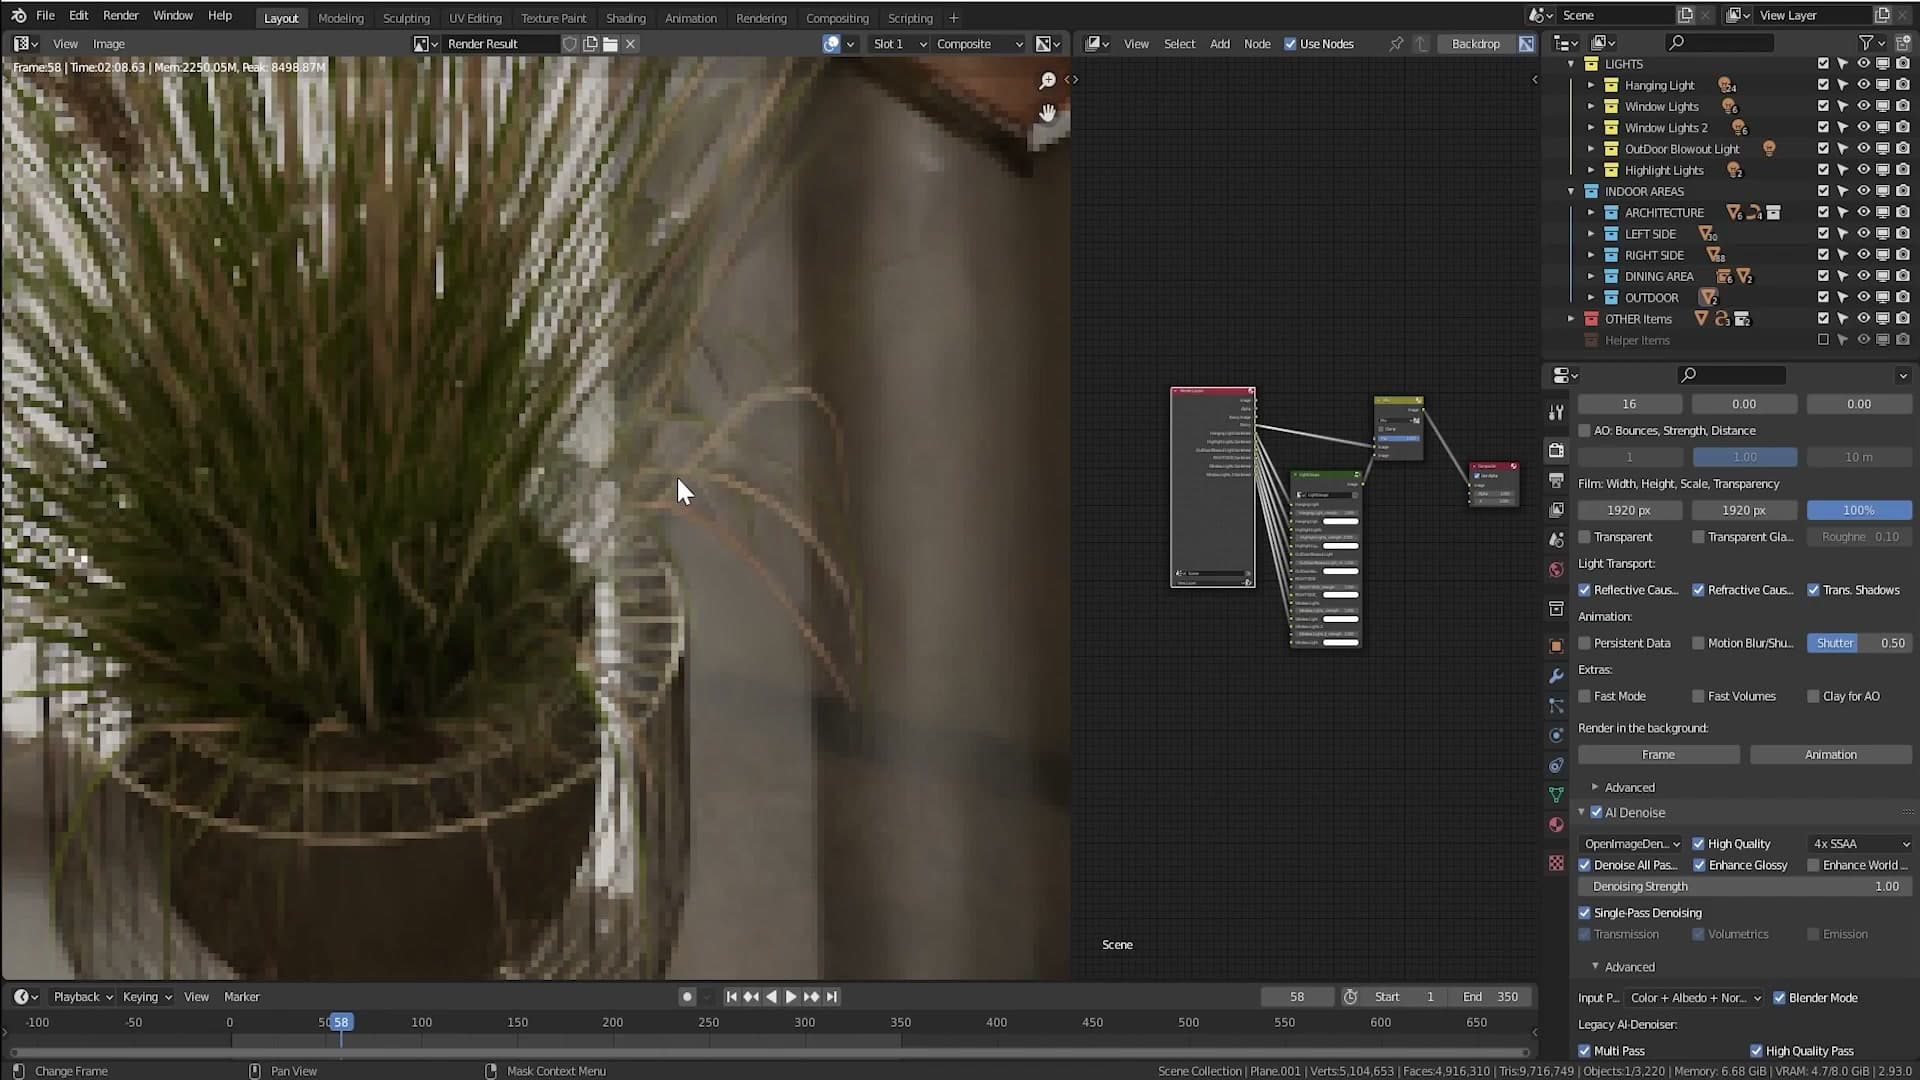
What High Quality actually does is run a pre-filtering pass before the denoise. That extra pass gives the denoiser more information to work with on fine, repeated detail, which is why anything thin or fibrous (grass, fabric weave, hair, cables) comes out noticeably sharper with it on.
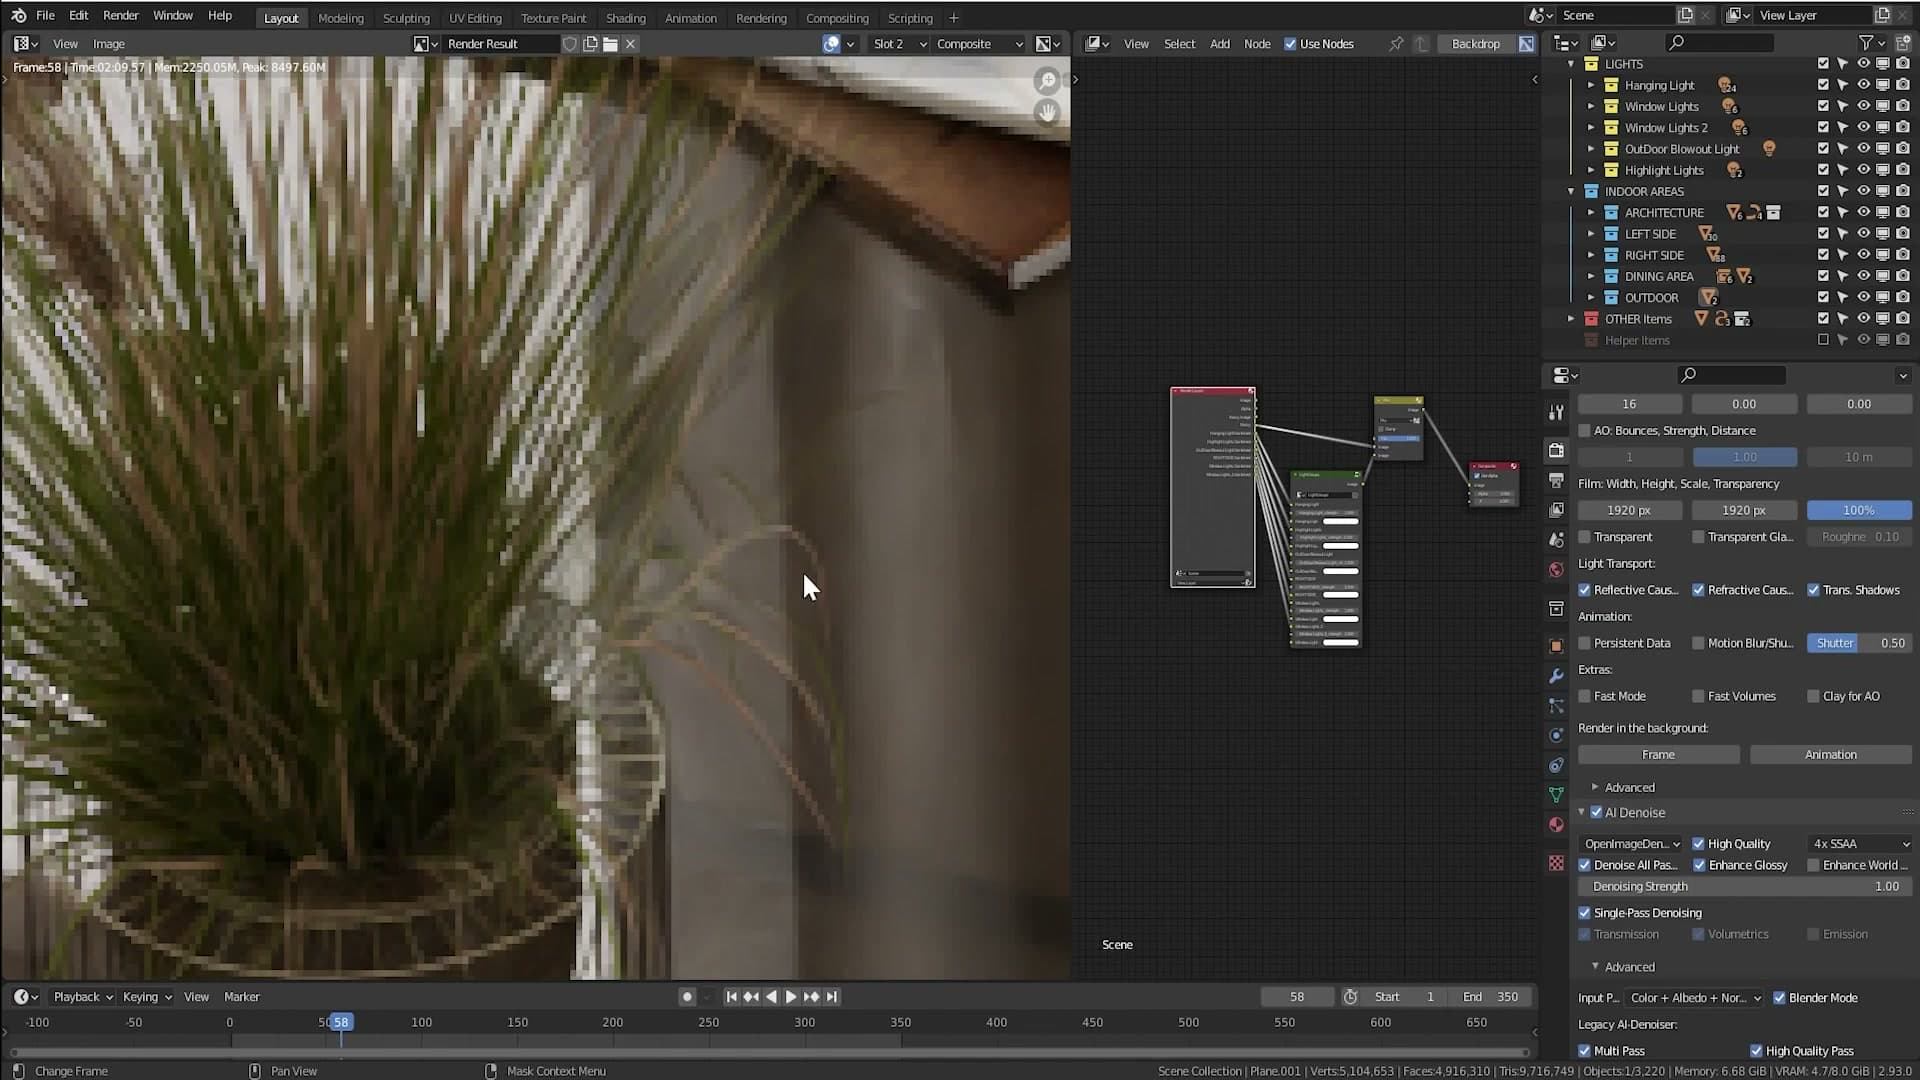
SSAA 4x vs 1x: the biggest single quality lever
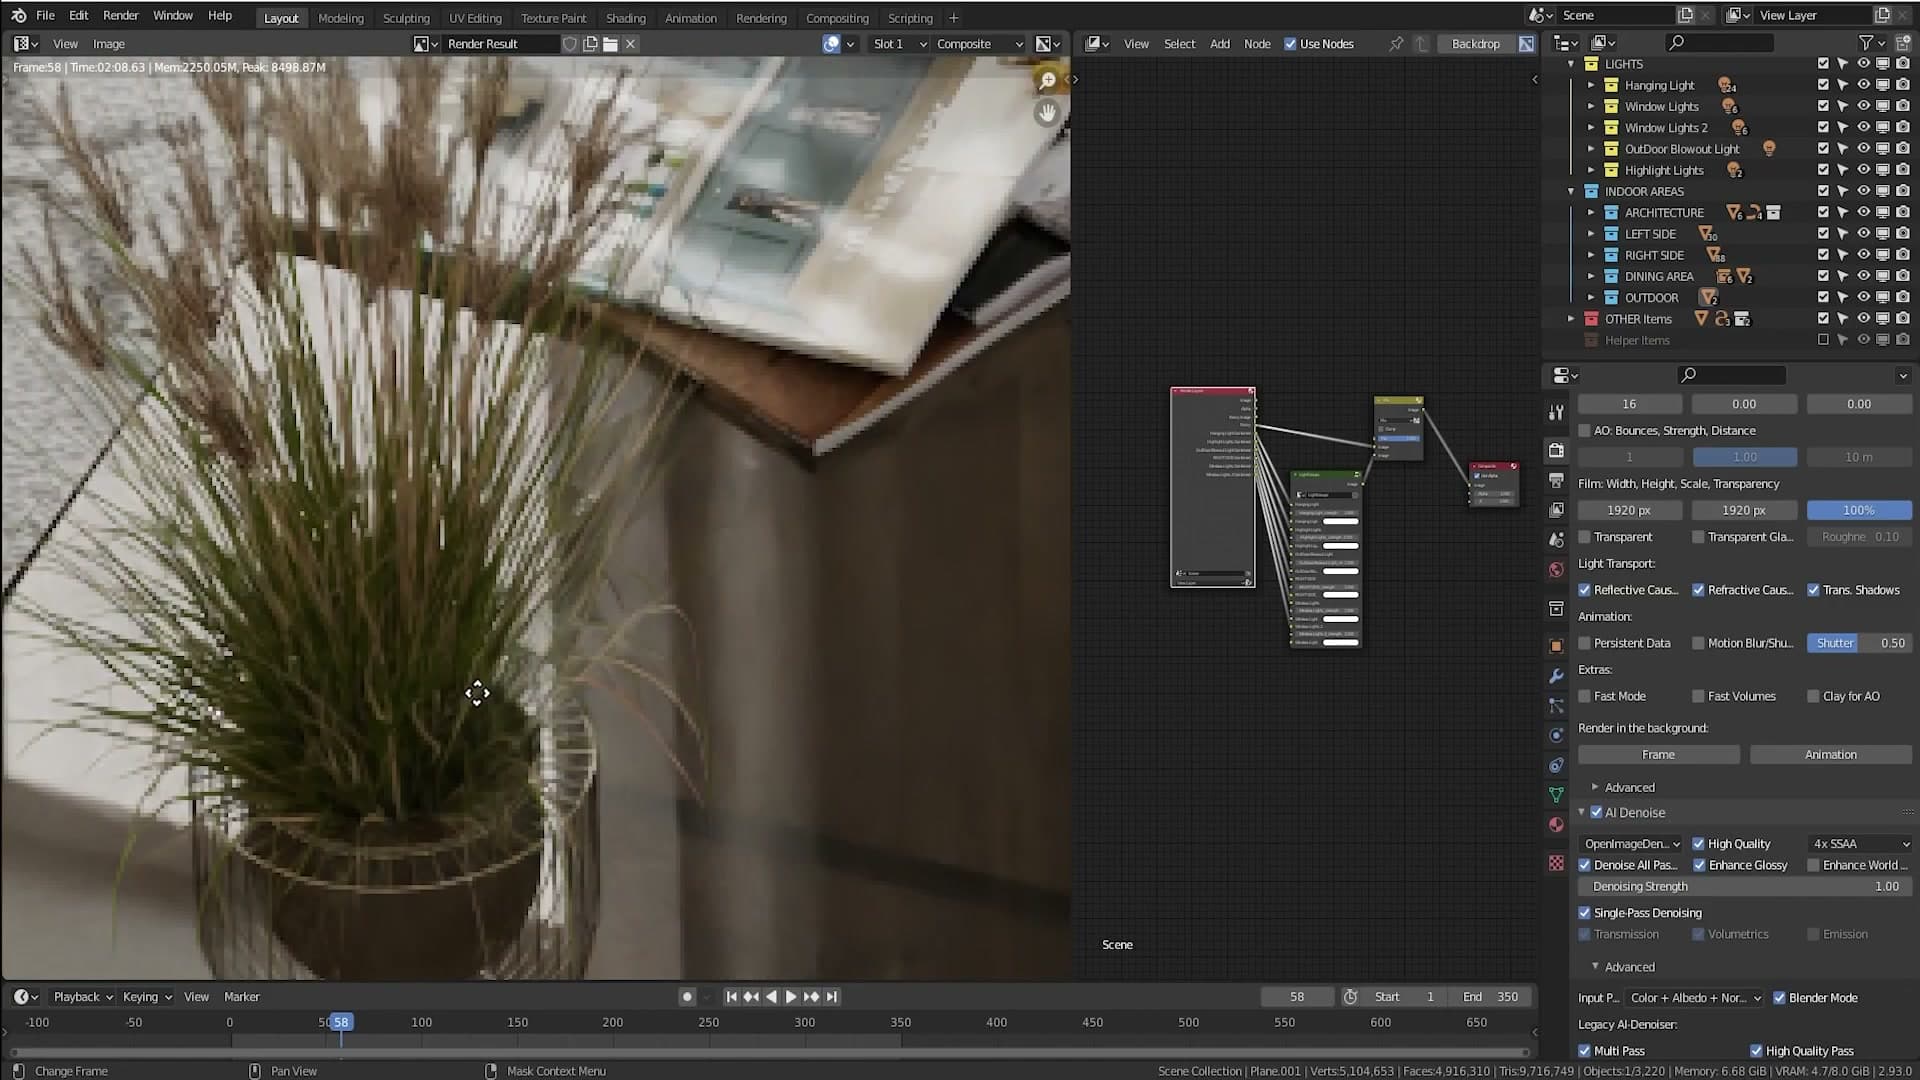
SSAA is the single biggest quality lever in the denoiser panel. Slot 1 is rendered at 4x, slot 3 drops the same scene to 1x, and the gap between the two is dramatic. It is far more noticeable than the High Quality toggle.
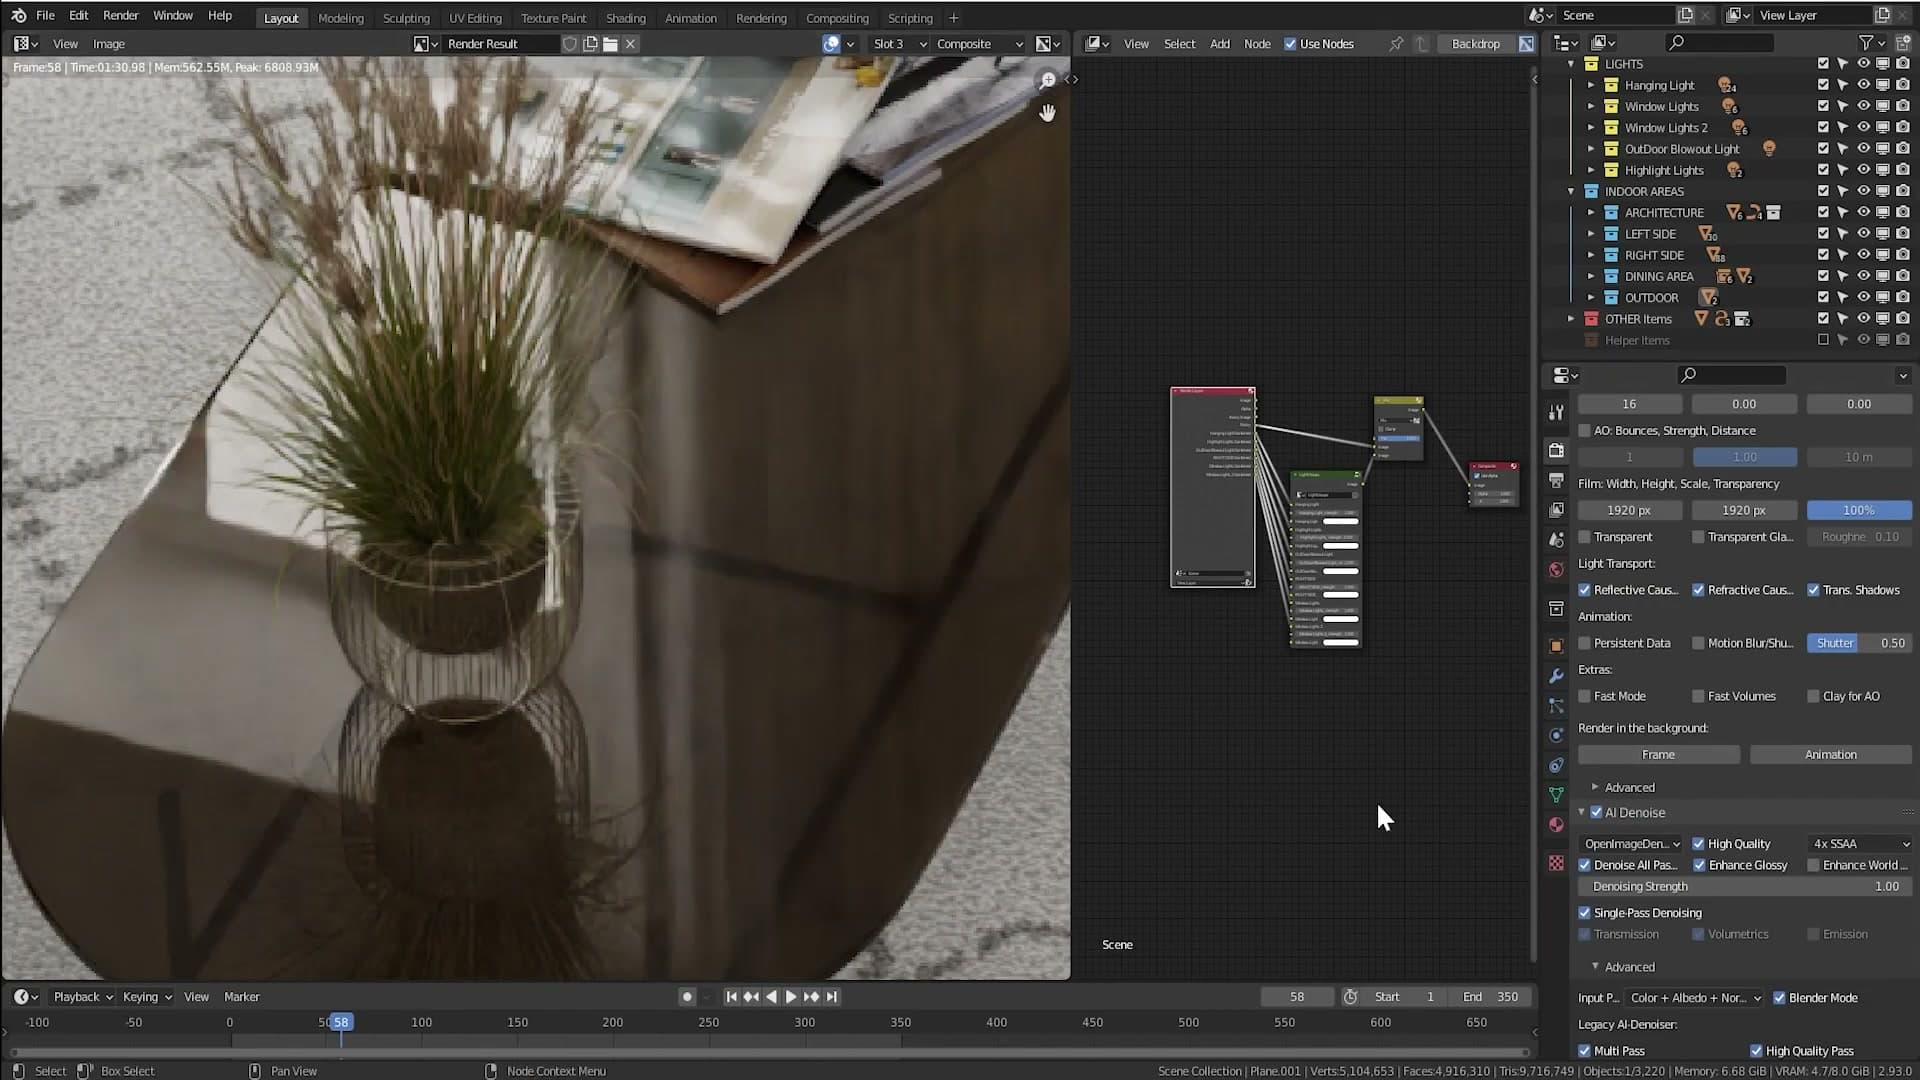
At 1x, fine detail collapses. The woven fabric on the curtain and cushions flattens into a blurry mess, and the grass loses any sense of individual blades. Everything fibrous turns into a soft wash.
At 4x, that same fabric reads as actual woven thread and the grass keeps its texture. The rule is simple: use 4x whenever the hardware can handle it. Dropping to 1x may speed things up, but it undoes most of the quality the denoiser is there to deliver.
Enhance Glossy is the final toggle in this row, but this particular scene does not have a glossy material that shows it off. I flag that in the video and cut away to a separate E-Cycles scene to demonstrate it properly. For an architectural interior like this one, treat it the same way as High Quality: leave it on with the other defaults.
GPU render speeds and the full-render-then-tweak workflow
An 18.8-second full render on a 3070, then live light group adjustments and even per-lamp colour changes pushed back to the scene afterwards.
18.8 seconds for a full render on a (failing) 3070
A quick word on the hardware first. The 3090 in this machine died a while back, and the 3070 that replaced it is showing the same warning signs. Render times jump around inconsistently, and it is not an E-Cycles or Cycles problem specifically; it happens any time the GPU is pushed. Take the figures here as a slightly pessimistic baseline rather than a like-for-like benchmark.
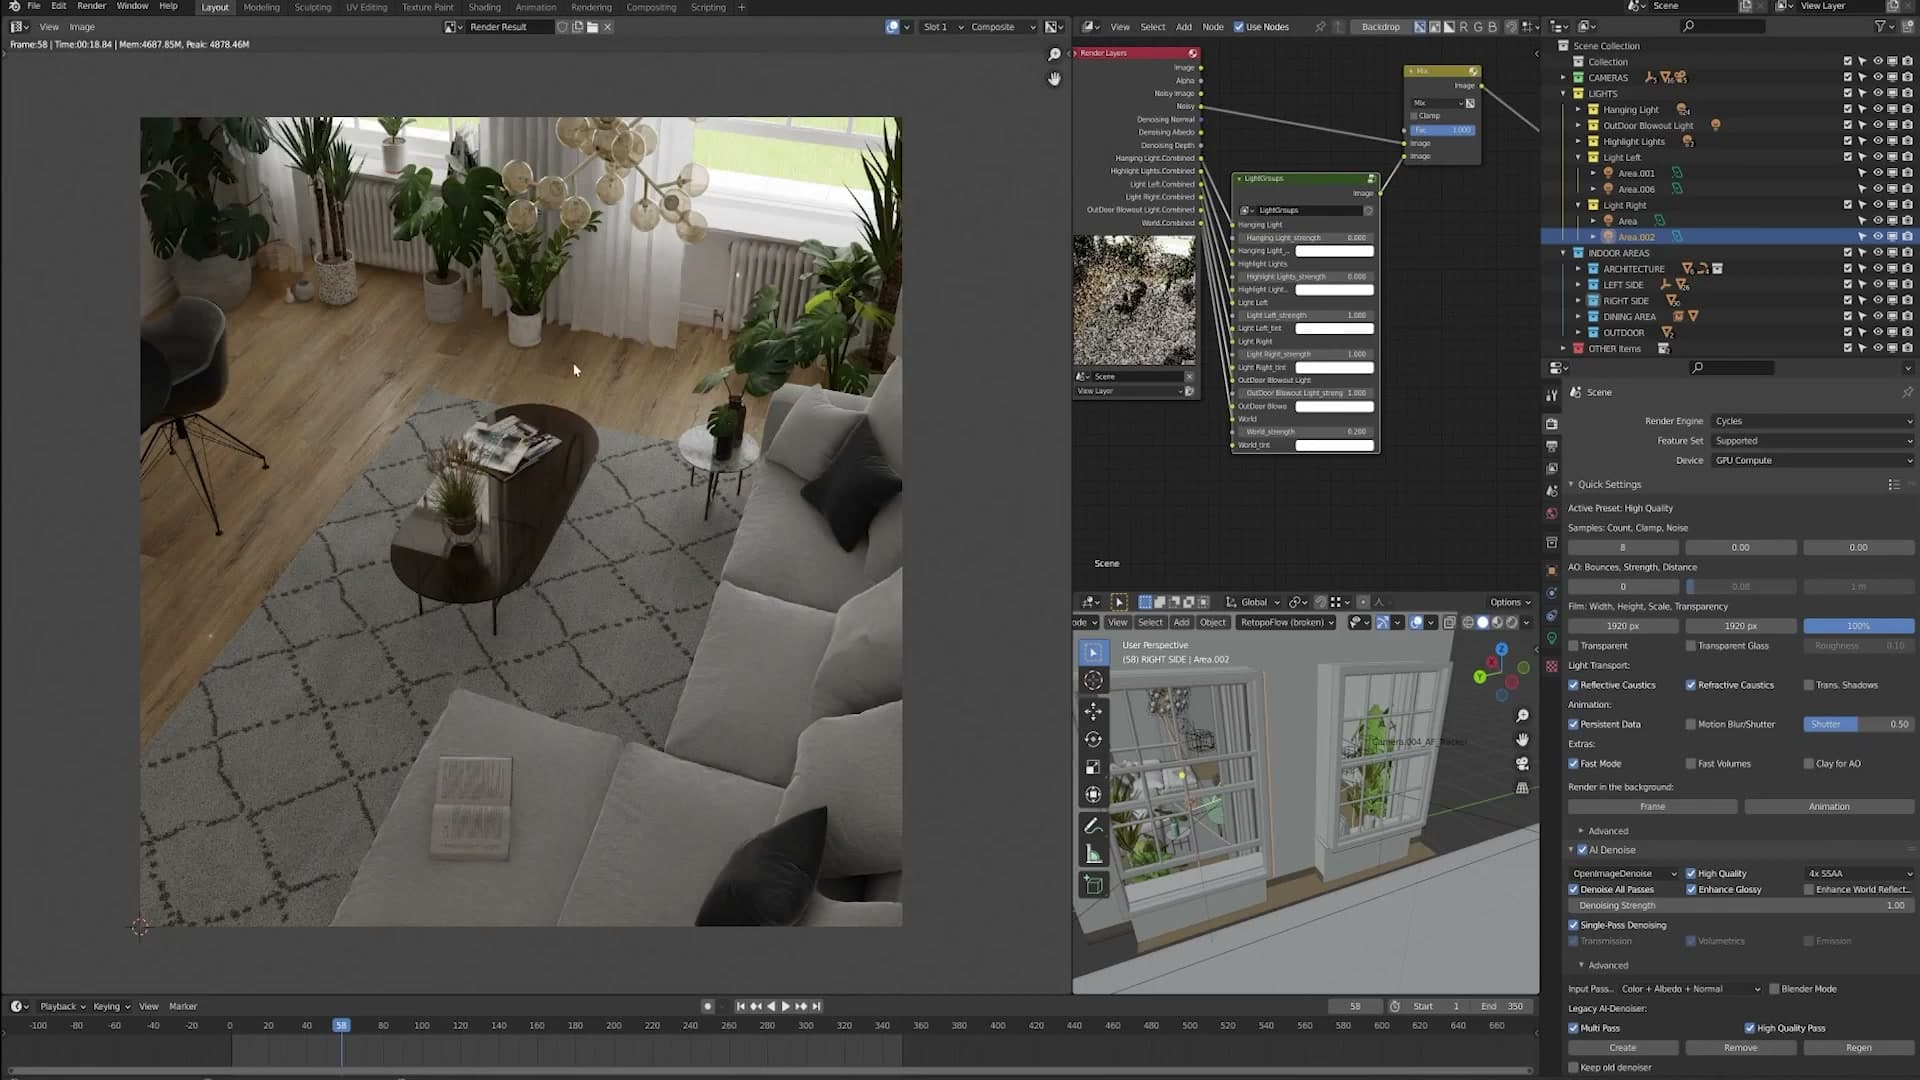
Even on that struggling card, this scene finishes a full-size render in 18.8 seconds. A reliable GPU running flat-out should comfortably beat that, so treat the number as a floor rather than a ceiling.
The bigger point is that 18 seconds for a finished frame changes how you work. Instead of fighting noise in the viewport and guessing how the final will resolve, you render the whole thing and tweak from there.
Recolouring individual lights on the rendered image
With the full render sitting in the image editor, you can still drop into the light paths and adjust every setting that the Light Groups node exposes. Brightness per group is the obvious one, but the colour swatches are the surprise. You can recolour individual lamps on the finished image and watch the scene re-light in real time.
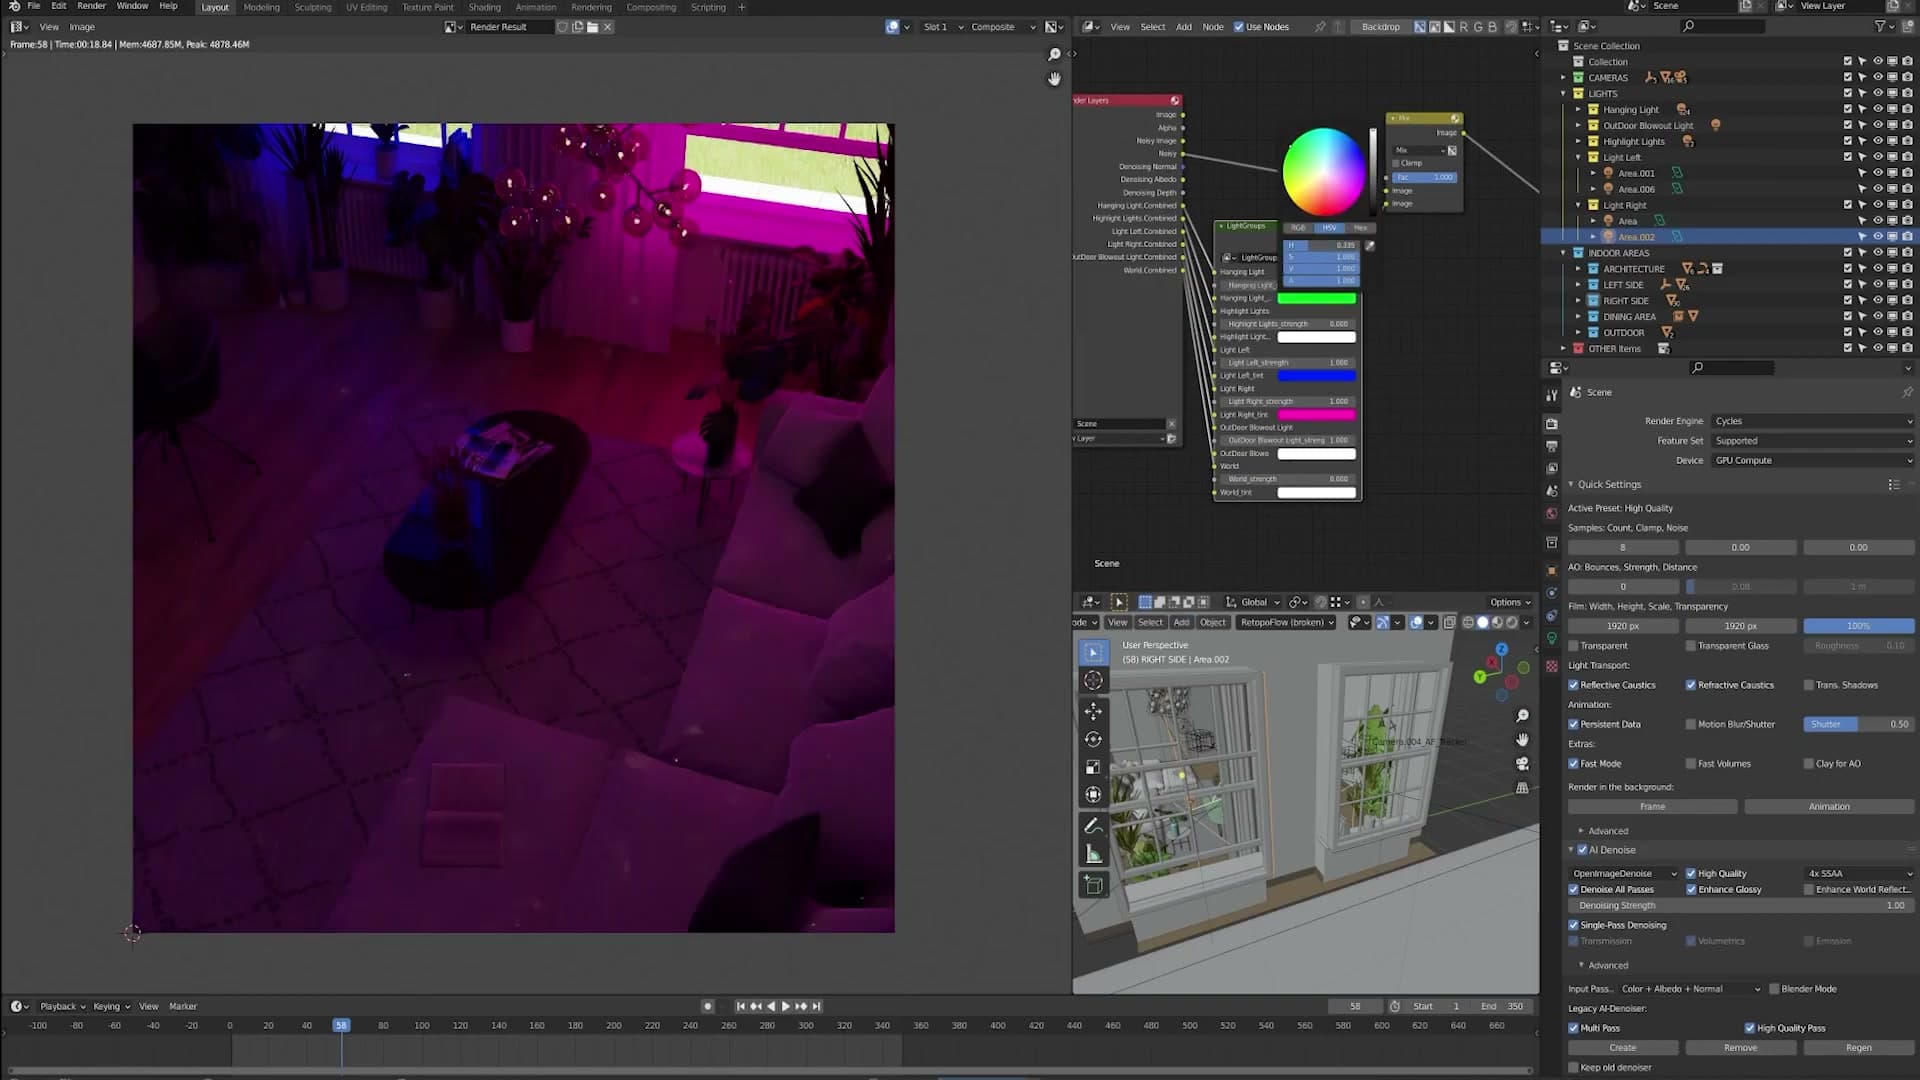
It's a useful sanity check as much as a stylistic tool. Push a lamp warm, push it cool, see what the room looks like under each, all without re-rendering.
When you've landed on a look you like, push the adjustments back to the scene so the lamps in Blender match what you tuned on the rendered image. That way the next render starts from your tweaked values rather than the originals.
This is the workflow the whole denoiser update makes possible: render in full, zoom in, retune lights and colours on the finished frame, then commit the changes. For most scenes it's faster than iterating in a noisy viewport.
Portal Creator: one right-click instead of the area-light dance
The old workflow of grabbing the window edge, adding an area light, sizing it, orienting it, then ticking Portal, replaced by a single right-click menu item.
The old way: edge-snap an area light and tick Portal manually
If you've been rendering interiors in Blender, portal lights at every window are almost certainly part of your standard setup. They're one of the cheapest ways to cut the noise that fires through an opening. The setup, though, has always been a faff.
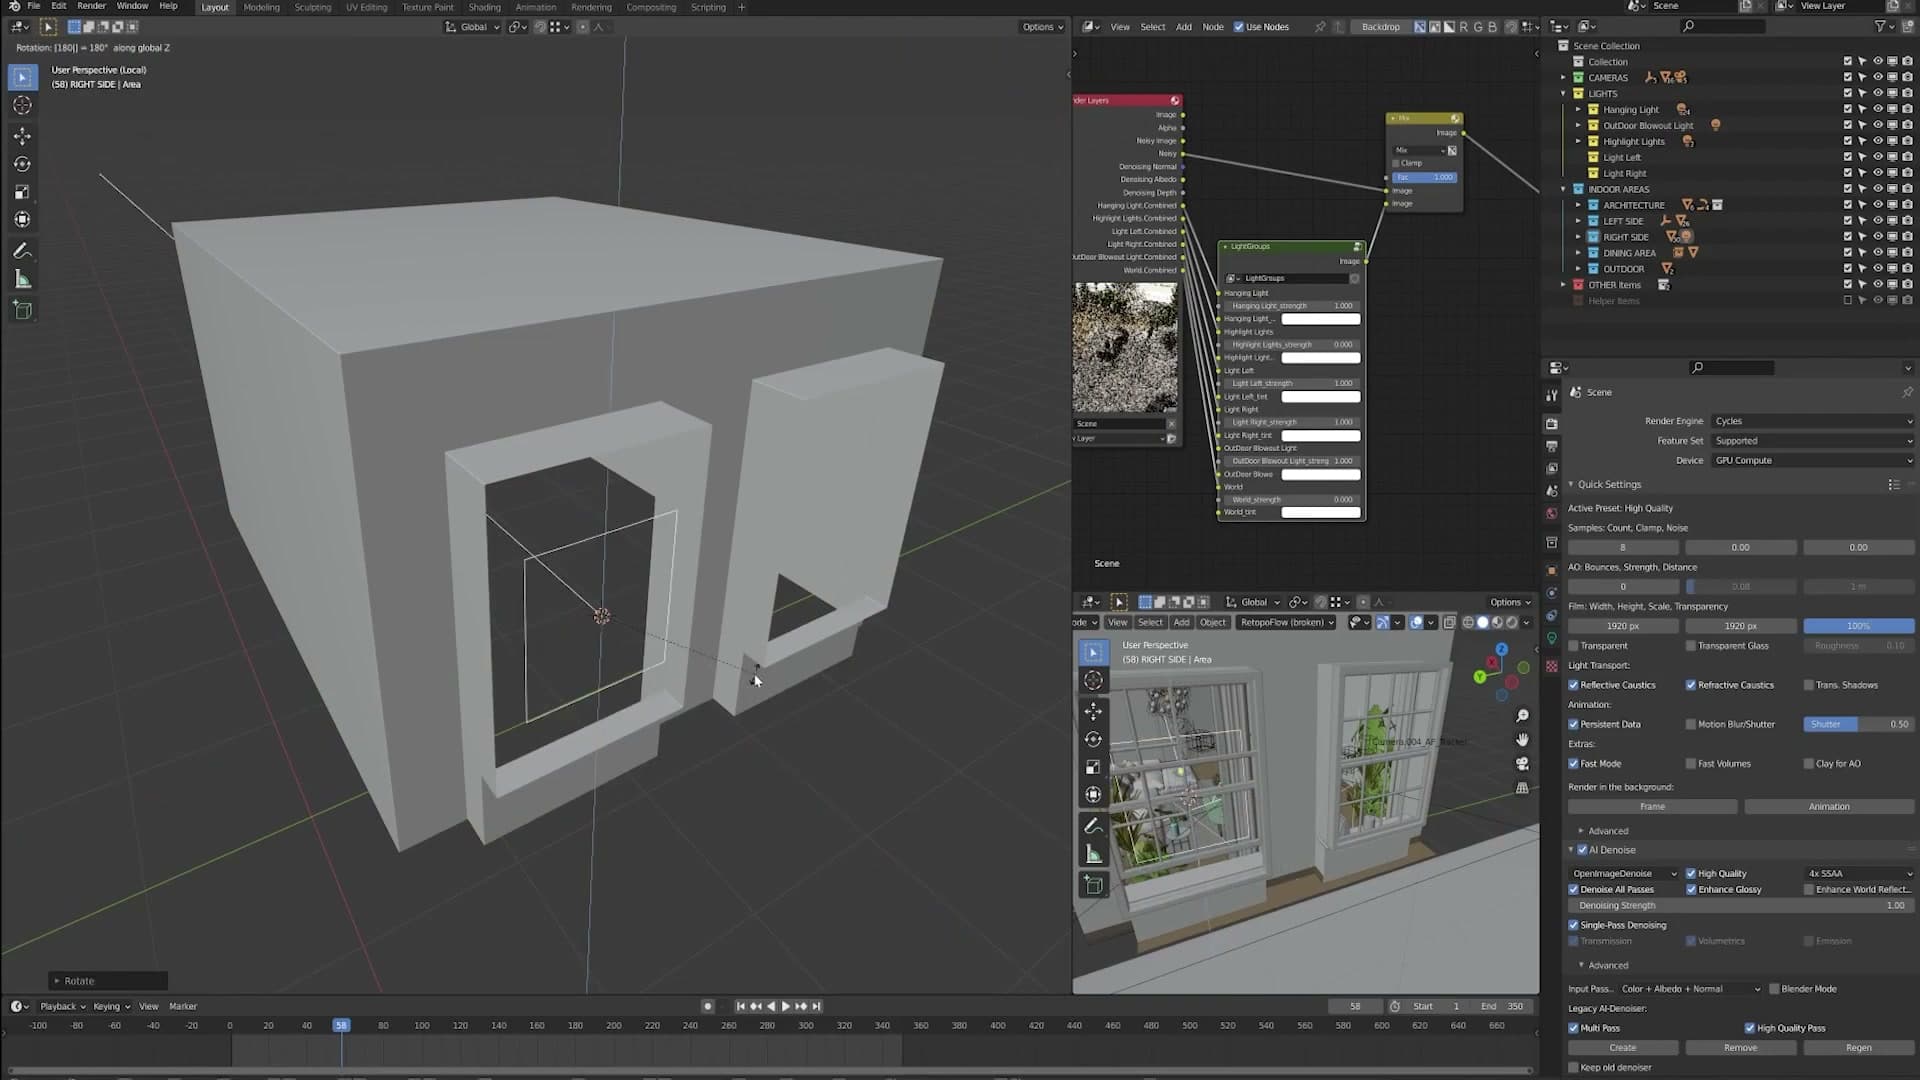
Done by hand, the sequence is: grab the window edge as a reference, add an area light, scale it to match the opening edge-for-edge, rotate it so the emissive side faces outward, then jump over to the light data panel and tick Portal. Five steps per window, repeated for every opening in the scene.
The Portal Creator right-click shortcut
E-Cycles 2.93 collapses that whole sequence into a single context-menu click. Select the window face, right-click in the viewport, scroll to the bottom of the menu, and pick Portal Creator. E-Cycles drops a perfectly-sized area light over the face, oriented to match the geometry. No manual scaling, no manual rotation, no hunting through the light data panel for the Portal checkbox.
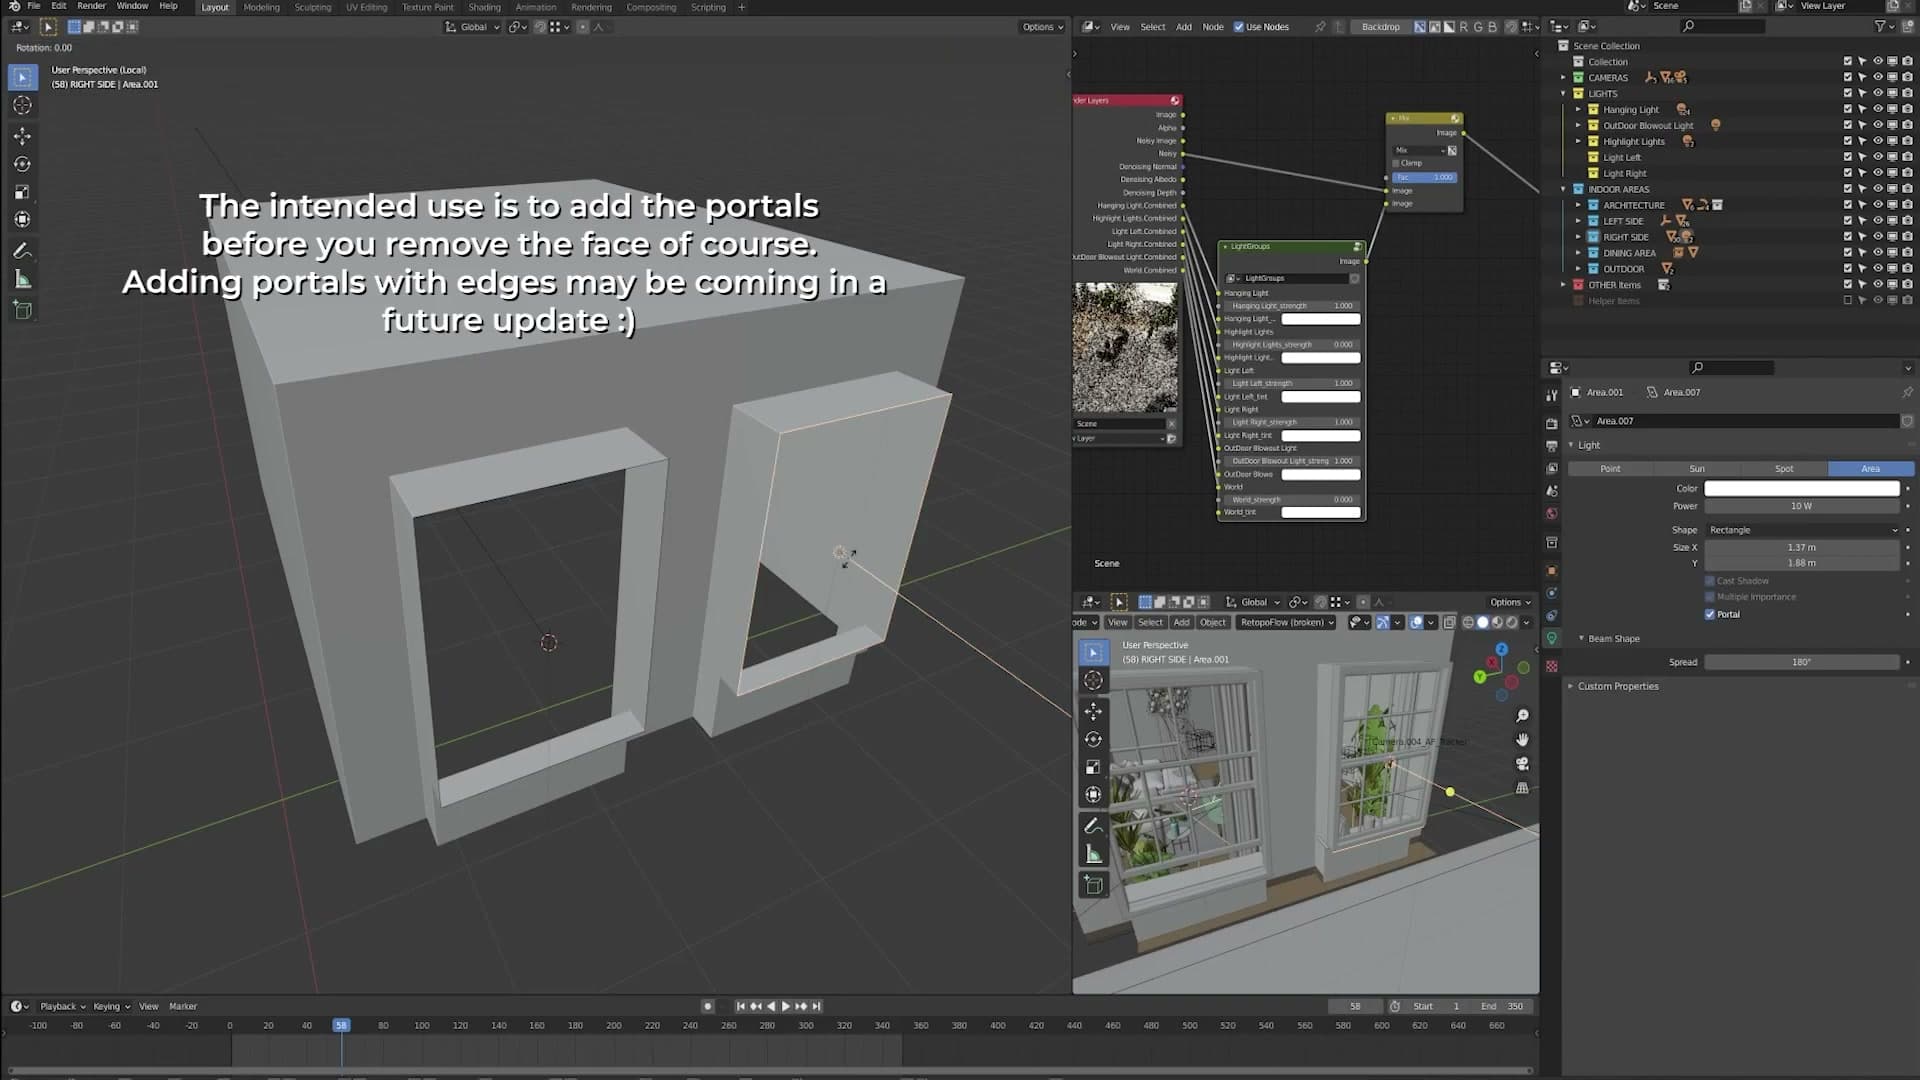
If the face normal happened to point the wrong way when you ran the tool, the portal will land back-to-front. Flip the normal and the portal flips with it. That's the entire fix.
Work through the rest of the openings the same way: click a face, right-click, Portal Creator. With each portal landing in one action rather than five, there's no longer any reason to skip them on smaller windows just to save time.
In other renderers (V-Ray and Corona being the obvious ones) portals are largely a non-issue, because those engines handle the equivalent automatically. Blender still benefits from explicit portals, but with the Portal Creator the setup cost is no longer painful enough to put you off using them.
Wrap-up: client-ready drafts at 8-16 samples
Why E-Cycles 2.93 changes the draft-render economics. At 8-16 samples a client preview can look so clean they may mistake it for the final image.
Closing thoughts and where to ask follow-up questions
That's the headline take-away from this walkthrough: with the new E-Cycles 2.93 denoiser, you can realistically produce client-ready renders from just 8 to 16 samples. Even when you only intended to send a quick draft, there's a fair chance the client will mistake it for the final image. It's a strange new problem to have, and a very welcome one.
If anything in this video needs more depth, drop a question in the YouTube comments and I'll try to respond. Otherwise, that's the tour. The denoiser update is genuinely impressive, and it's worth opening one of your existing scenes to feel the difference for yourself.
Tools and credits
Everything mentioned in this tutorial, with links.
- Blender (the renderer this entire build runs in).
- iMeshh (studio platform: project management, client review, asset library, invoicing). The asset library used in this tutorial is included with every iMeshh Pro plan.
- Poly Haven (free CC0 textures and HDRIs).
Pillar guide: Rendering Post hub