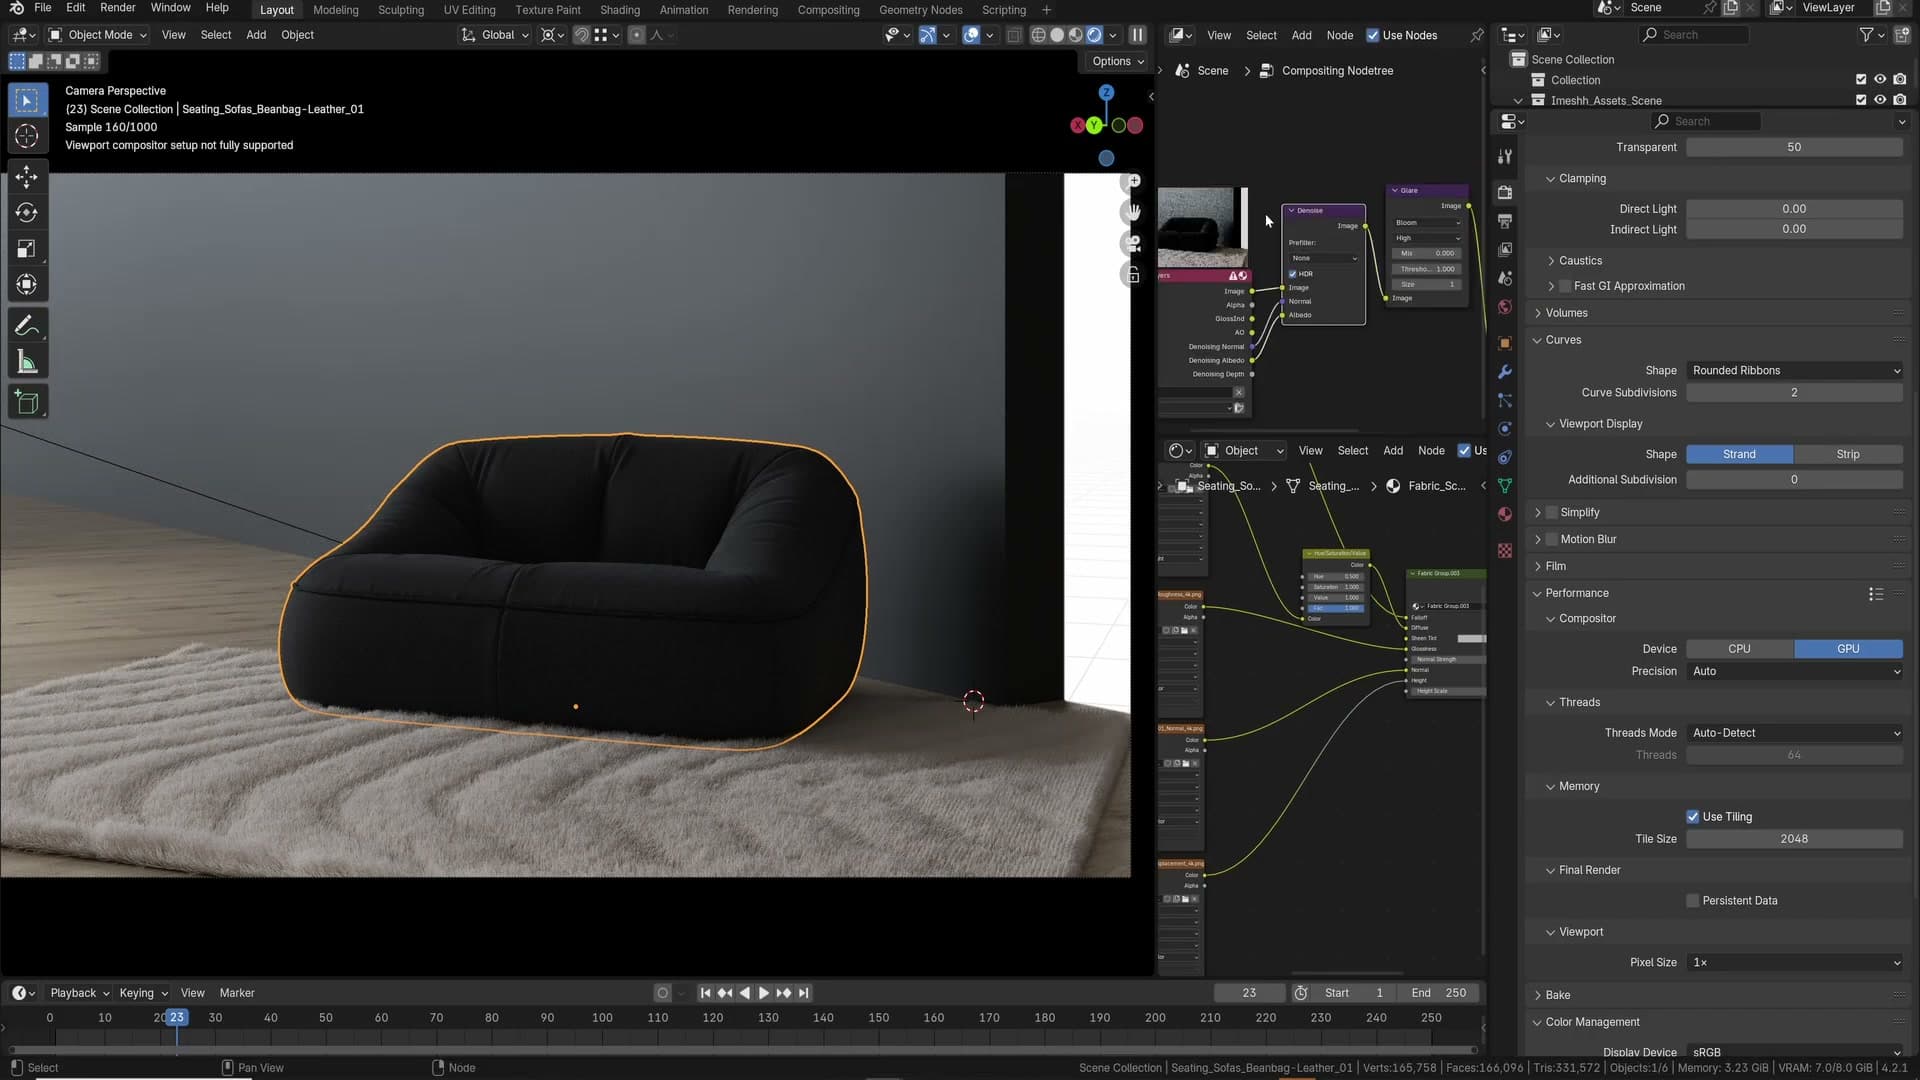
Eevee Next: near-Cycles realism at nine seconds a frame
The new Eevee Next replaces the janky legacy Eevee with a much more physically grounded real-time renderer. Despite a 53-second render time stamp in the viewport, animation frames actually render in around nine seconds each. That is fast enough to make Eevee a serious option for archviz animations.
Why Eevee Next changes the maths for animation
If you spent any time wrestling with the old Eevee, you already know the drill: hit and miss results, materials that read fine in the viewport and then fall apart in the final render, lighting that needed nursing every time you moved a camera. Eevee Next changes the maths. The rewrite pulls the real-time engine far closer to Cycles in terms of believability, and for the first time it's a serious contender for finished archviz work rather than a previs-only tool.
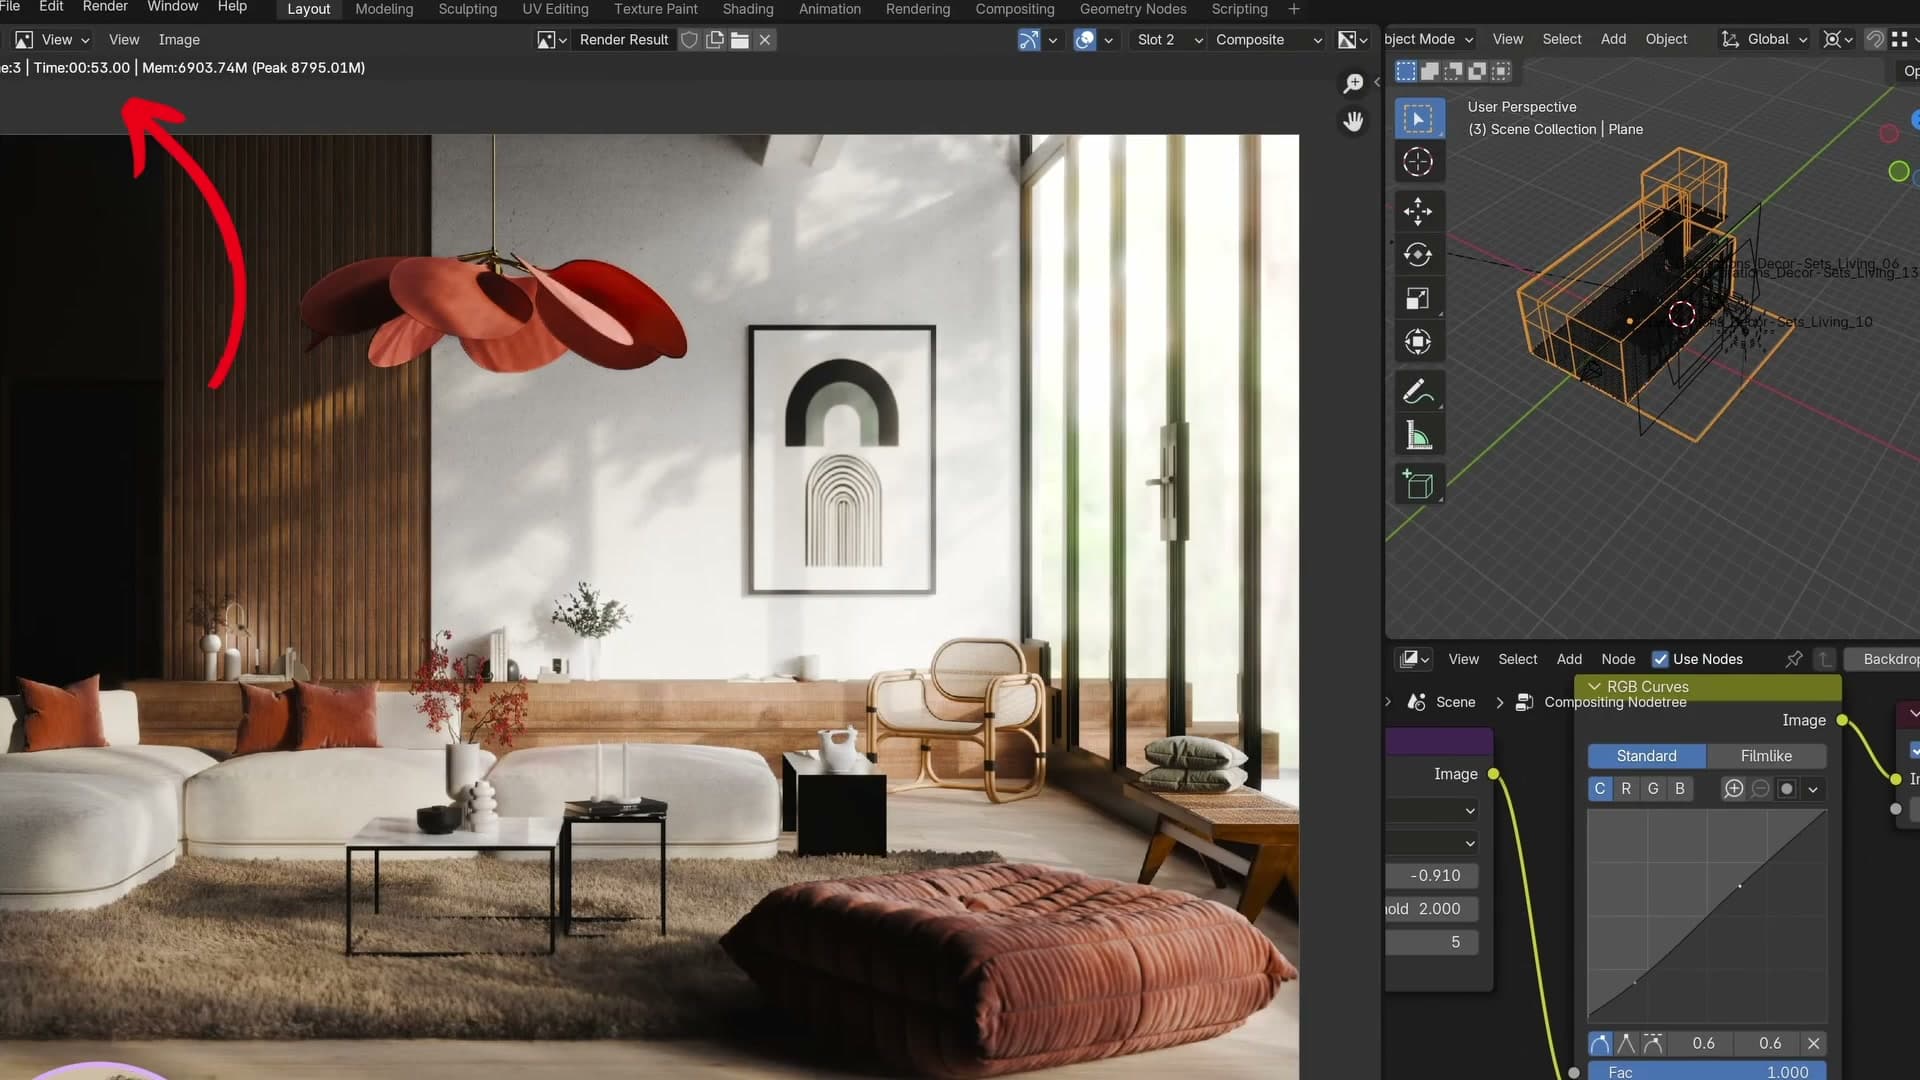
The render time stamp in the viewport can be a little misleading. In this scene the top corner reads 53 seconds, which sounds slow for a real-time engine, but that figure isn't what you actually pay per frame once an animation kicks off. When Blender starts churning through frames, each one lands in around nine seconds. That is a wildly different number, and one that quietly puts Eevee Next in the same conversation as fast Cycles setups for long sequences.
Nine seconds a frame at this level of detail is the headline. A 250-frame walk-through that would have taken hours in Cycles drops to under forty minutes, with surface response and lighting that you can actually ship. If you haven't given Eevee Next a proper run since the rewrite, this is the feature in 4.x that most deserves a fresh look.
Cycles Denoise node: set Prefilter to None to keep detail
By default the Cycles Denoise node uses the Accurate prefilter, which is aggressive enough to wipe out fine wrinkles, paint texture, and line work. Switching the prefilter to None keeps far more of that micro-detail intact. A quiet win for tile, fabric, and painted surfaces.
Comparing Accurate vs None on fine surface detail
This tip arrived courtesy of a community member on Discord, and it's the kind of setting most people never think to question. The Cycles Denoise node's Prefilter dropdown ships set to Accurate, and the natural assumption is that anything labelled that way must be the right answer. It often isn't.
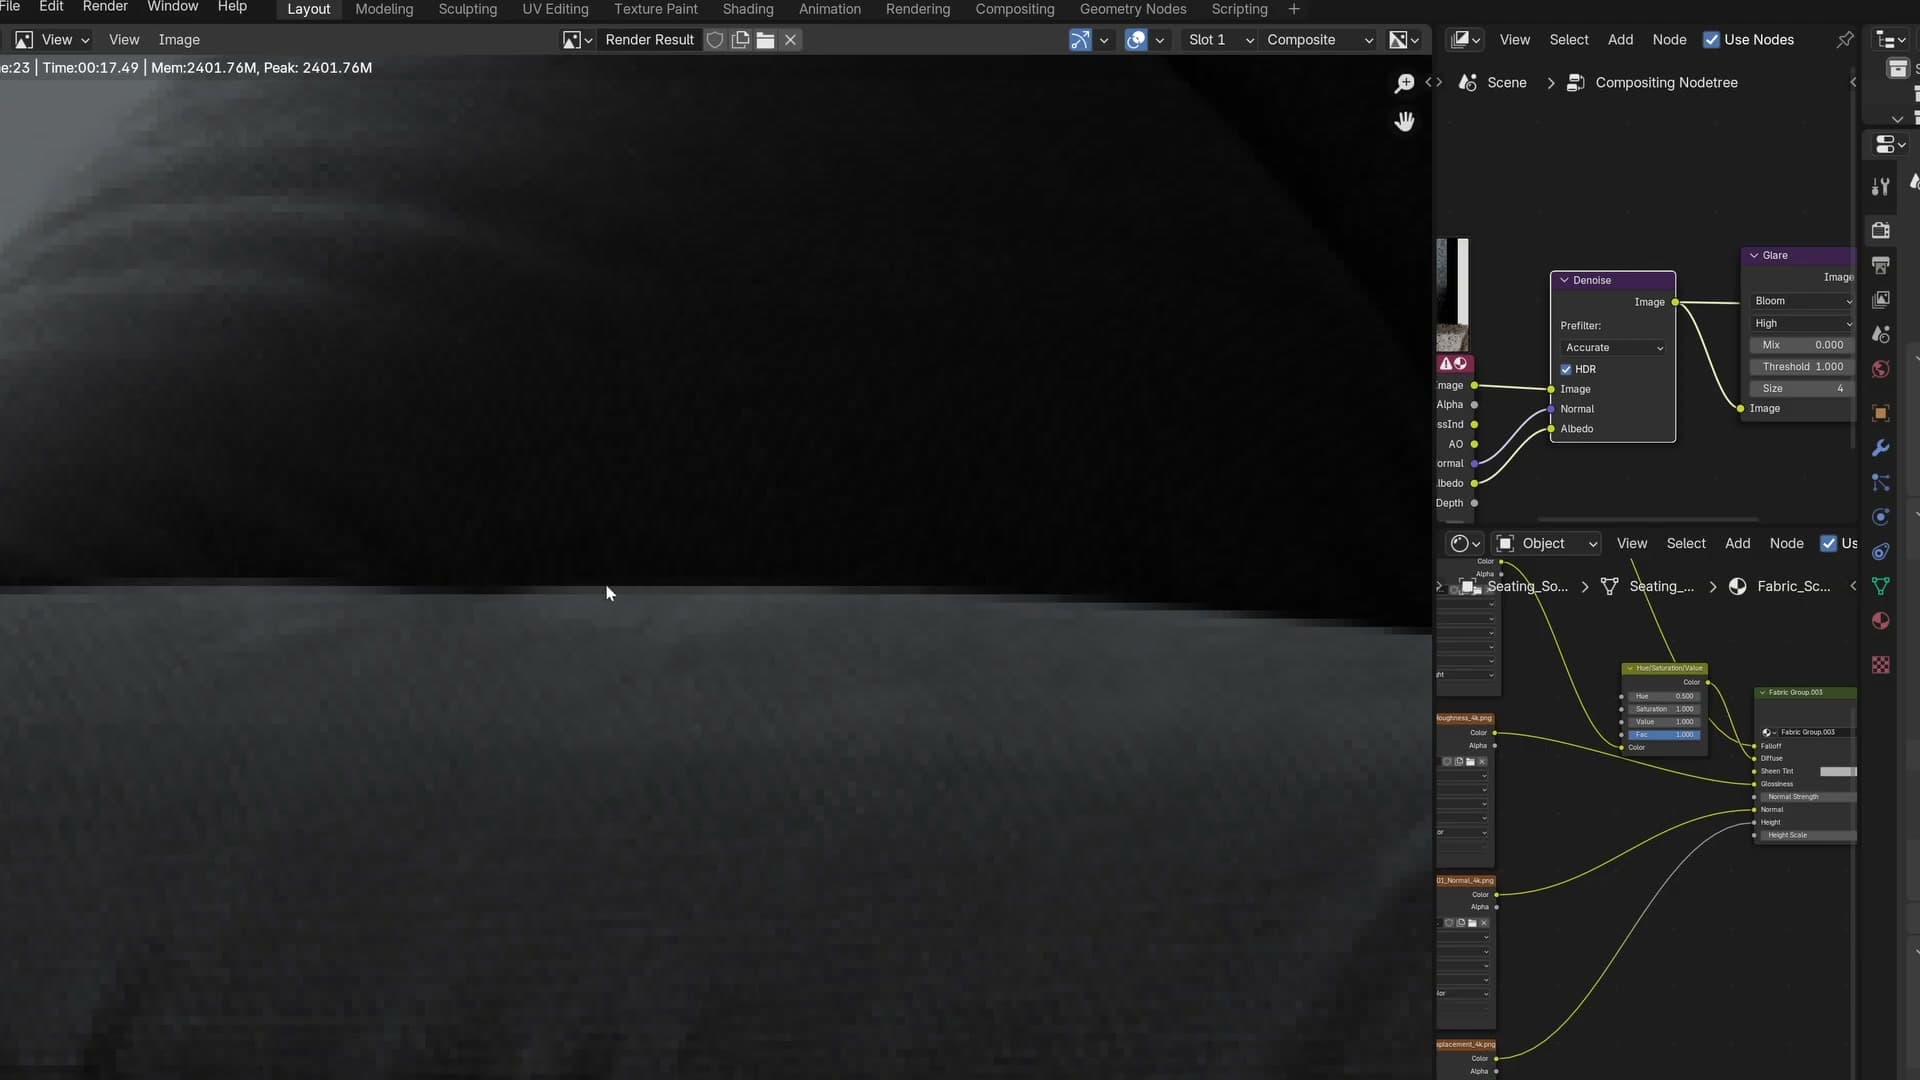
The trouble is that the Accurate prefilter works hard. On any denoiser, working hard means smoothing aggressively, and on images with lots of small surface detail that aggression starts to chew through the things you wanted to keep. The bigger the image and the finer the texture, the more obvious the loss becomes.
Look closely at a wrinkled surface or a painted wall denoised on Accurate and you can see lines getting crunched away. Fine wrinkle creases lose their definition, the subtle paint texture on a back wall flattens out, and line work that read crisply before the compositor pass starts to dissolve. YouTube compression makes the comparison harder to spot on screen, but on your own renders at full resolution the difference is obvious.

Switch the dropdown to None and the detail comes back. The denoiser is still doing its job on the noisy bits. What changes is that it stops eating into the micro-detail. Wrinkle lines reappear, paint texture survives, and the small intentional marks across surfaces stay intentional. It's a quiet change with an outsized effect, particularly on the large painted walls, tiled floors, and fabric drapes that fill the background of architectural scenes. These are the areas you've already given a lower sample budget, and where denoising losses bite hardest.
Real-time GPU Compositor in the viewport
Setting the compositor to GPU and enabling the Compositor toggle in the viewport lets you stack glare, curves, and most colour nodes live, with no re-render. A few heavier nodes (notably blur) still stall the viewport. Press M to mute those while you're scrubbing.
Switch the compositor to GPU and turn on viewport compositing
Open Render Properties → Performance → Compositor and switch the Device to GPU. With that flipped over, the compositor stops being a final-render-only step and can run live inside the 3D viewport.
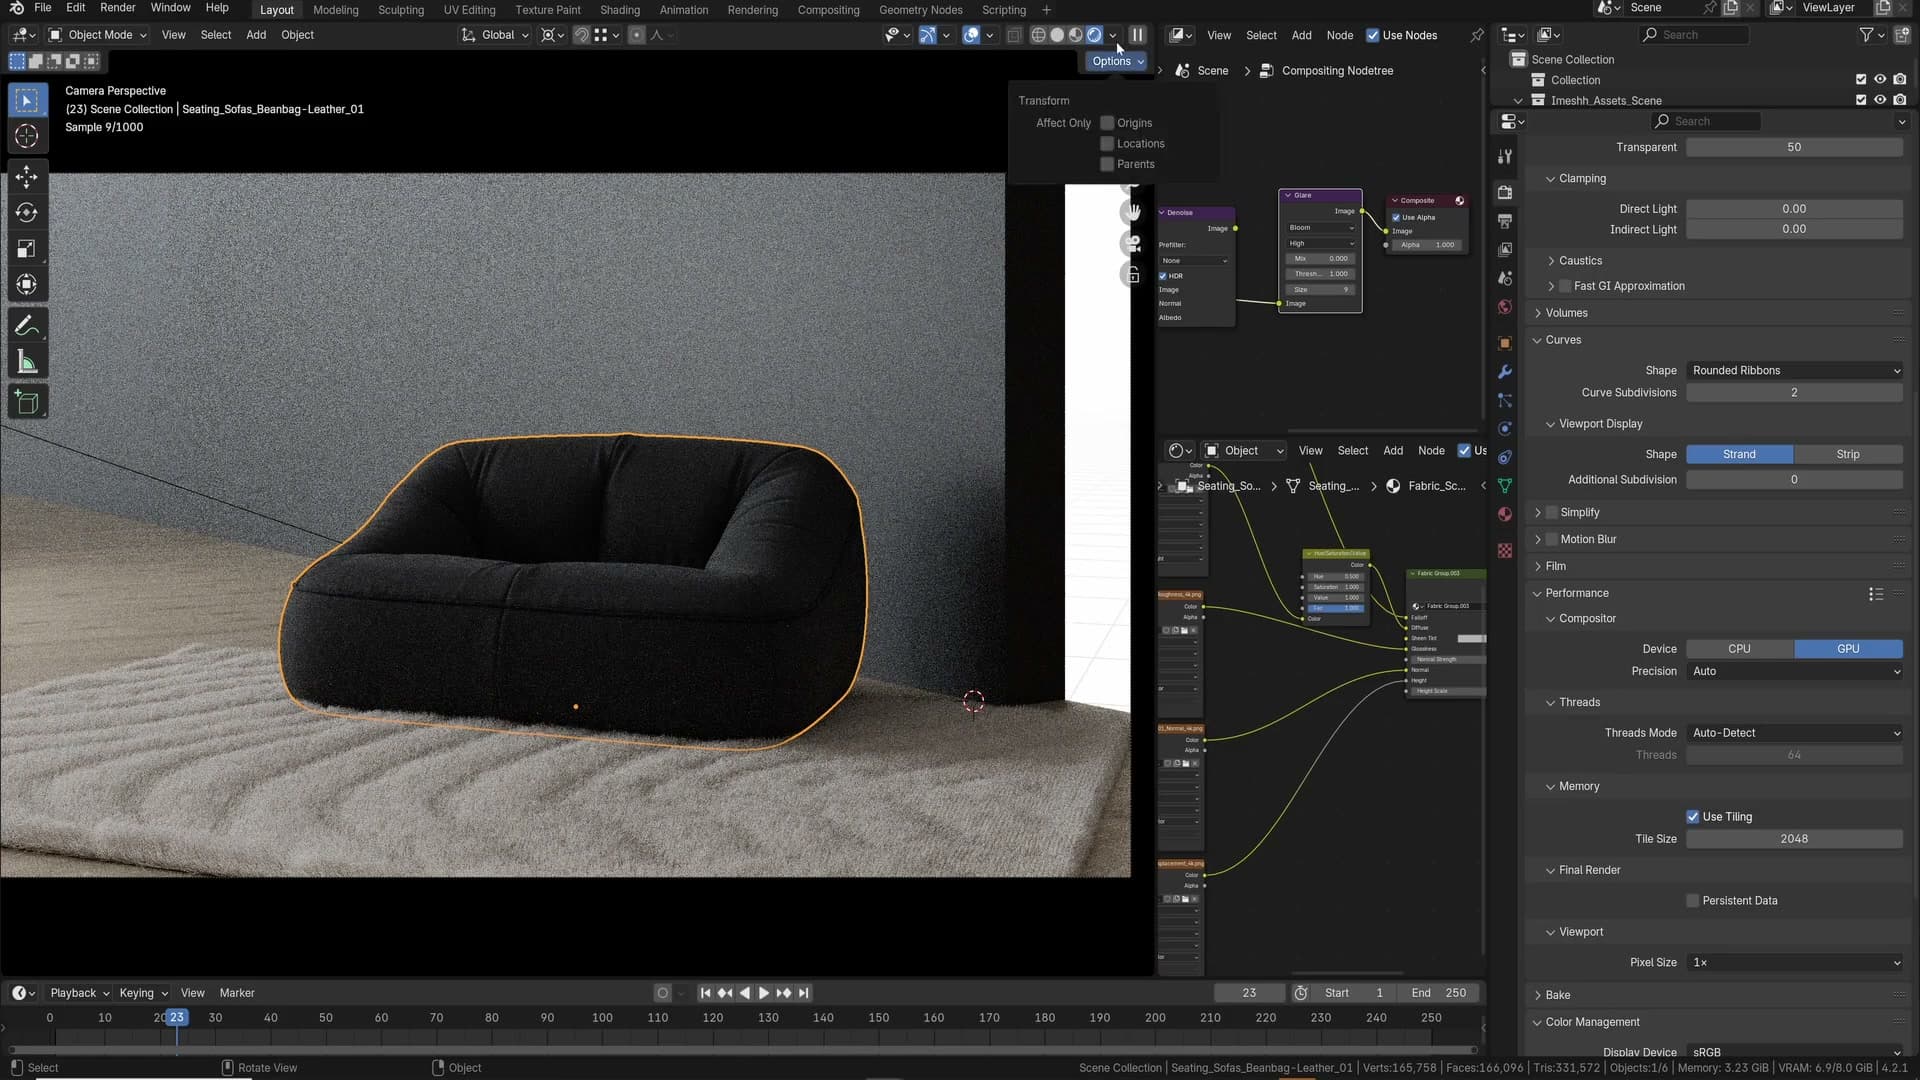
To actually see it working, click the compositor toggle at the top of the viewport and set it to Camera or Always. Drop a Glare node into your compositor tree, wire it between Render Layers and Composite, and the bloom appears in the viewport instantly. No F12, no waiting for a re-render.
Stack curves live and mute heavy nodes with M
Colour grading works the same way. Add an RGB Curves node into the live chain and shape the curve. The grade updates in the viewport as you drag the handles. If you remember how painfully slow the compositor used to be for this kind of preview, the recent rewrite is a genuine leap; most colour and tone nodes are now effectively real-time.
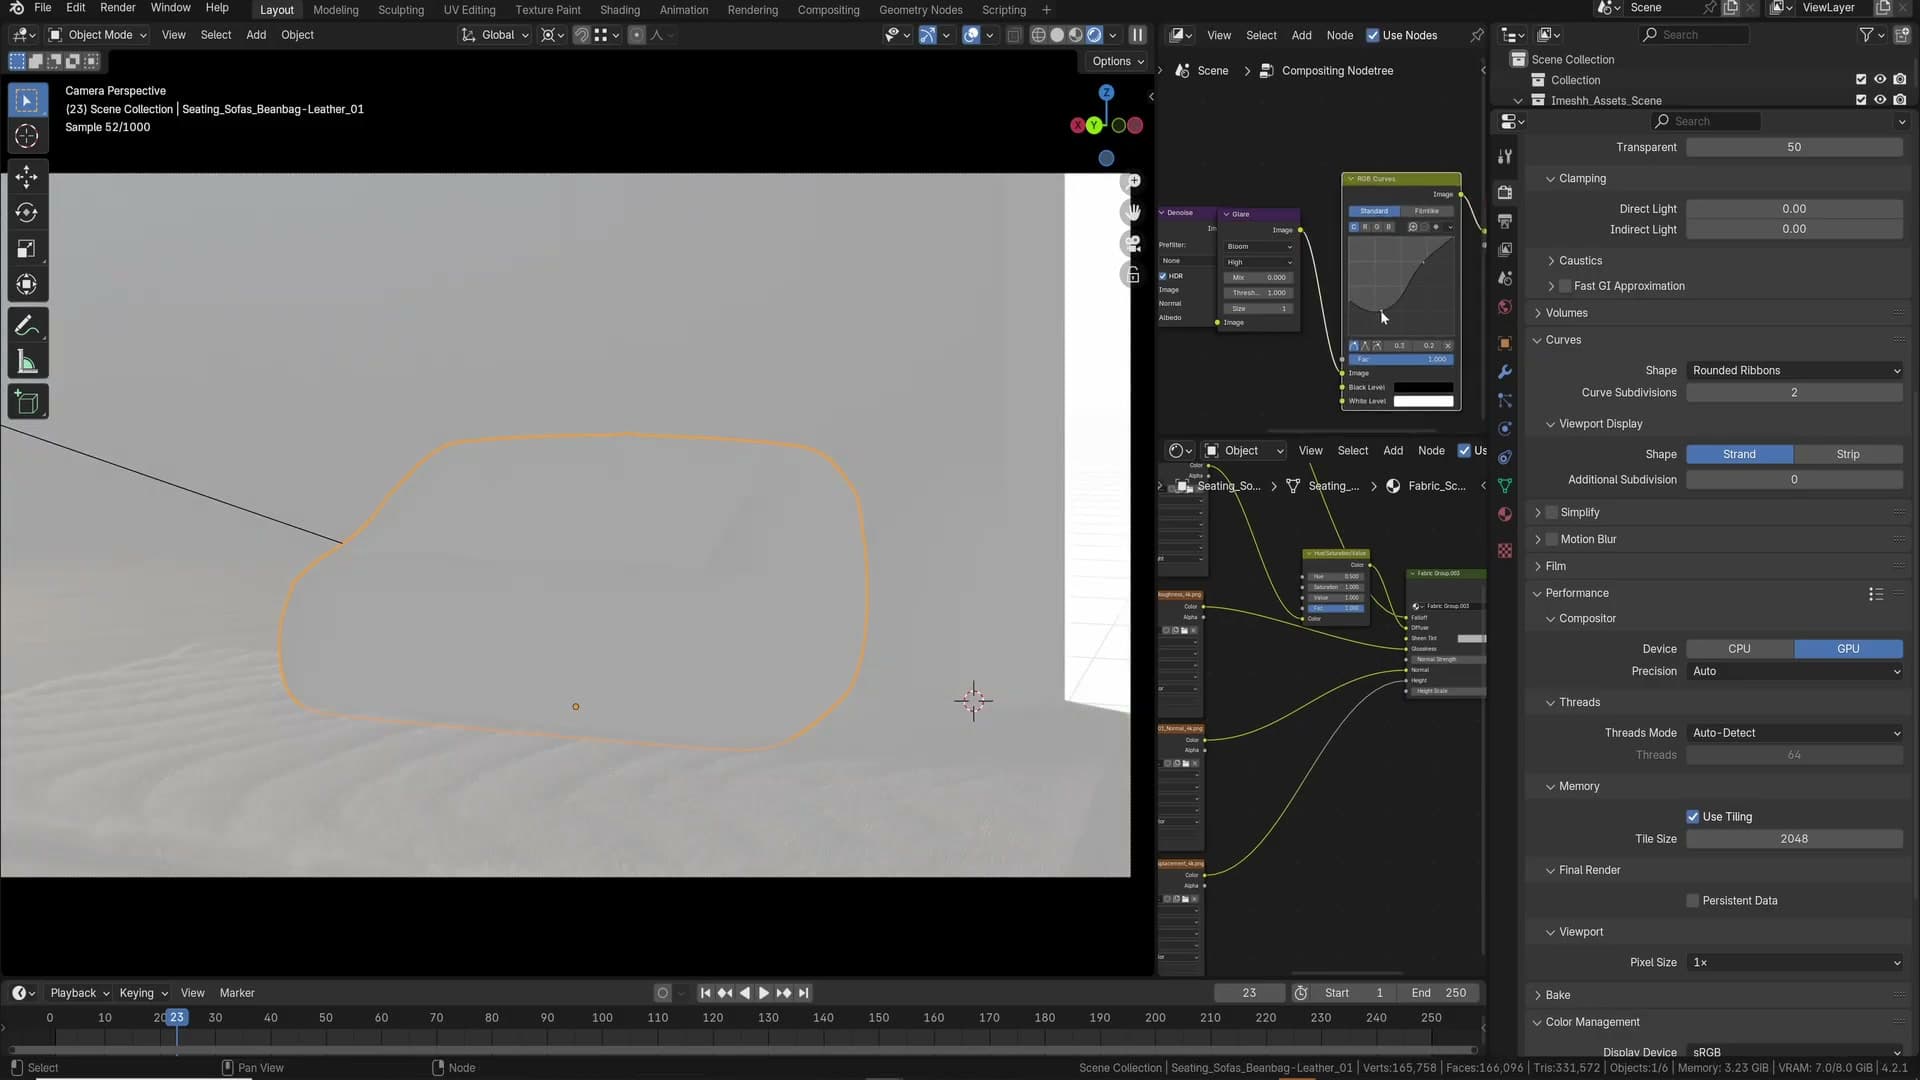
Not every node has been ported to the fast path yet. Plug one of the heavier nodes in and the viewport starts to crawl. Rather than disconnecting it, leave it wired up and press M to mute it while you're working. Blender skips the muted node in the live preview but still uses it when you hit render on the final frame.
Drag-and-drop file imports for FBX, OBJ and more
Blender now accepts dragged files straight onto the window. FBX, OBJ, and the other supported formats trigger their importer automatically. It saves the constant trip through File → Import and the mental check of which format you're actually dealing with.
Drop an FBX or OBJ straight onto the viewport
This is the quality-of-life addition that quietly disappears into your workflow once you've used it a few times. Grab an FBX, OBJ, or any other supported format from Explorer or Finder and drop it straight onto the Blender window. The matching importer fires automatically and the file lands in your scene.
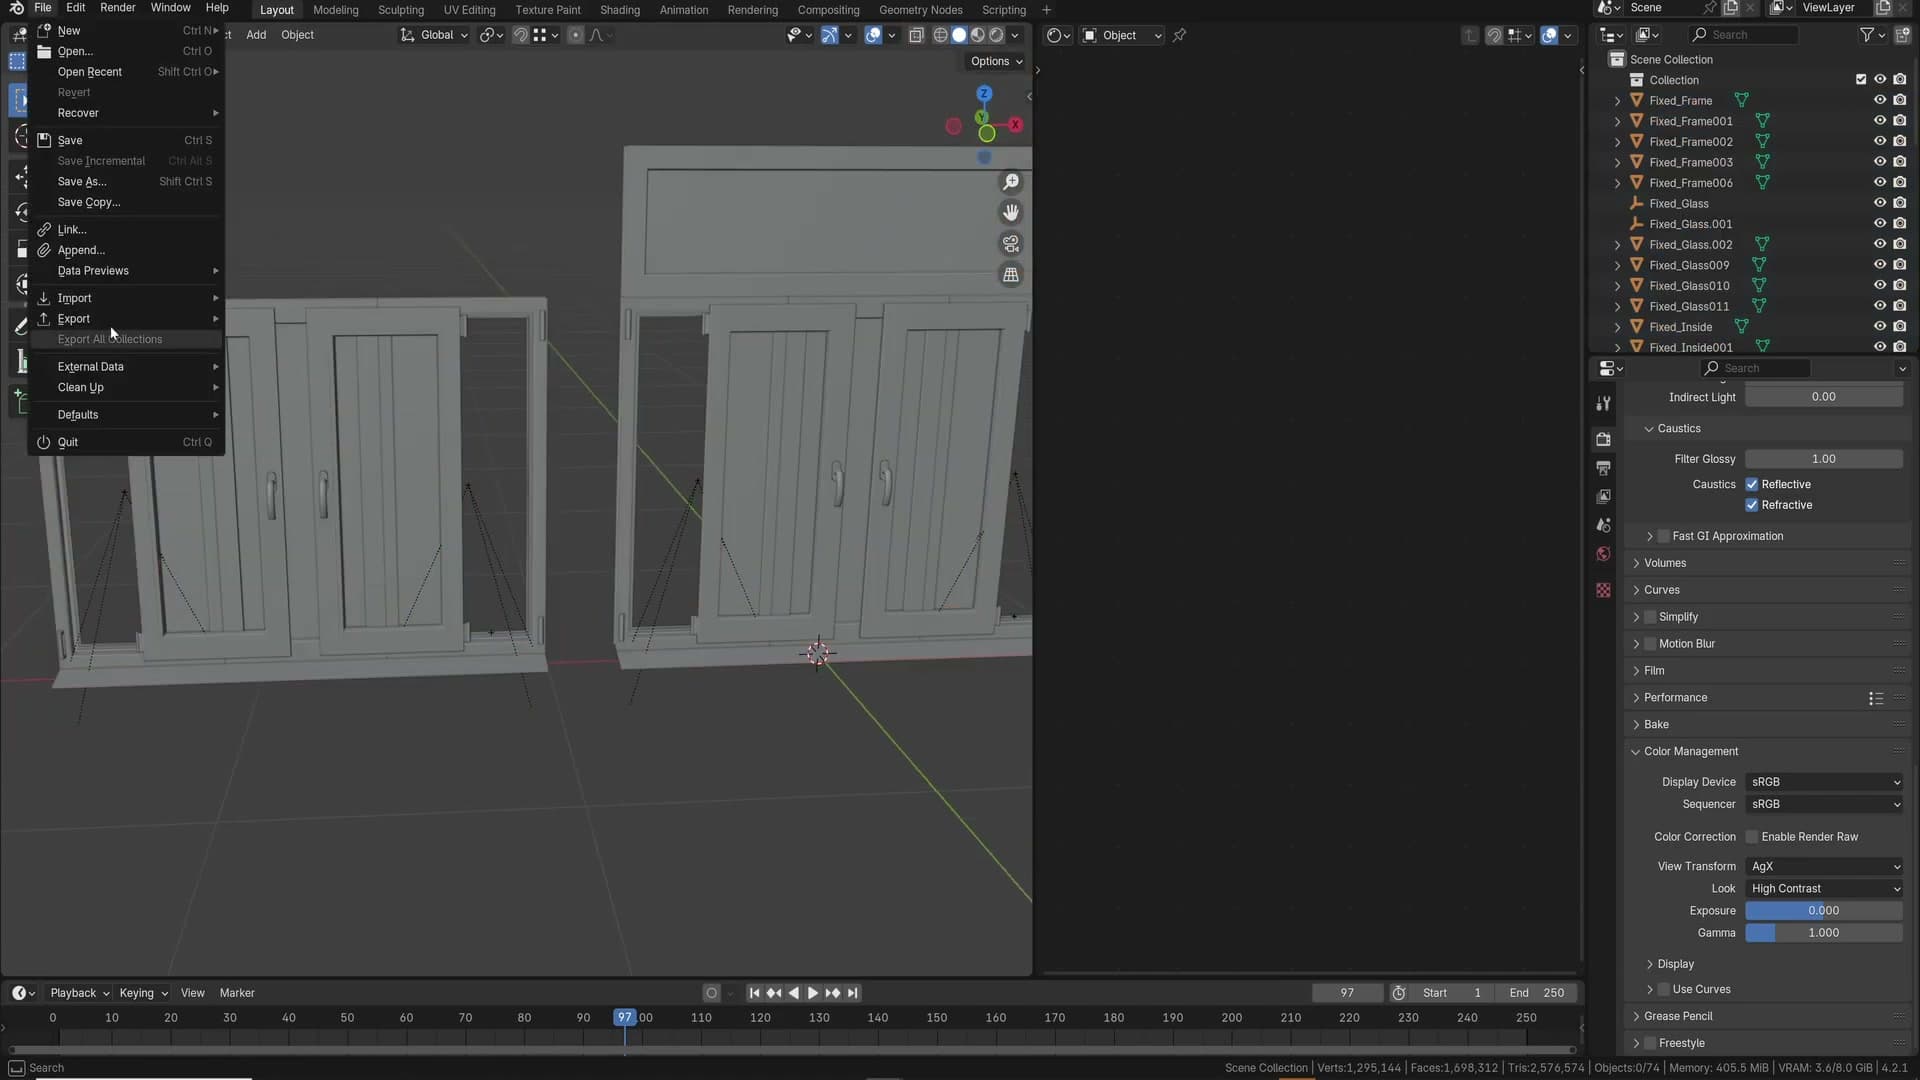
It replaces the small but constant ritual of opening File → Import, pausing to remember which exporter the file came out of, then hunting for the right entry in the submenu. Drag, drop, done.
It sounds trivial written down, but if you bring external geometry into Blender regularly (client deliveries, marketplace downloads, kit-bashed parts) the saved seconds add up across a day.
Geometry Nodes: the most powerful system you're probably ignoring
Not a new feature, but easy to skip. Geometry Nodes get updates every release and now cover an enormous range of procedural work. The community at iMeshh consistently shy away from them because they look intimidating. Learning even the basics pays back enormously in workflow speed.
Why every pro should learn at least the basics
Geometry Nodes isn't a new feature, but it earns a dedicated reminder because every Blender release ships brand-new nodes and the system keeps expanding in scope. At this point it's one of the most powerful tools in Blender. If you can picture a procedural setup, you can almost certainly build it inside the graph.
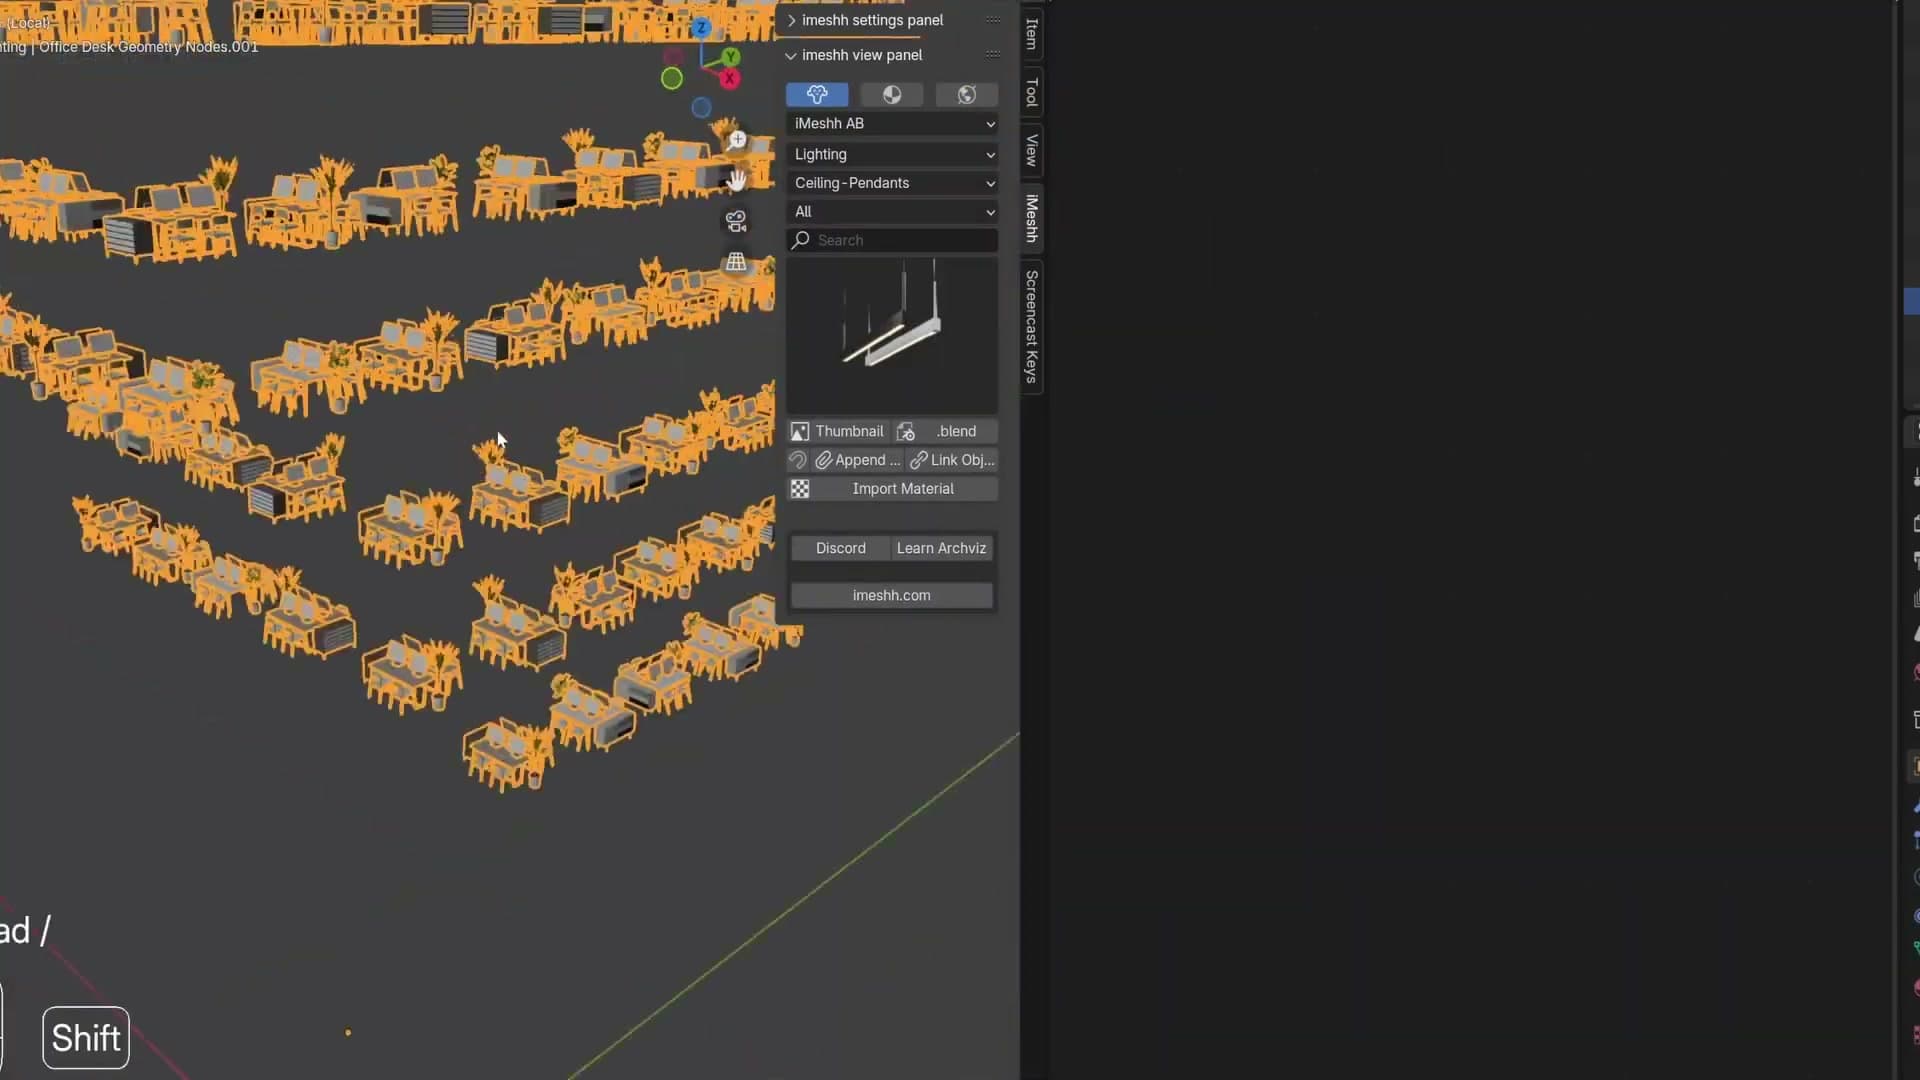
The reason it's on this list is behavioural rather than technical. Talking to subscribers in the iMeshh Discord, the same pattern keeps surfacing. People open the editor, see the graph, decide it looks scary, and back out. It is genuinely intimidating at first glance. That isn't a reason to skip it.
Push past the first wall and learn the basics. The more you use it, the more use cases you start spotting, and the quicker your day-to-day workflow becomes. A handful of nodes is enough to start paying the investment back. You don't need to master the entire system before it becomes useful.
Filter Glossy: the hidden setting that controls caustics
Filter Glossy defaults to 1, which heavily blurs caustics. The highlight a ring or kitchen handle should cast on the surface behind it is essentially erased. Lowering it brings caustics back. The catch is firefly noise, which Indirect Clamping can tame at the cost of some realism.
Drop Filter Glossy to reveal caustics
Filter Glossy isn't a new feature, but it lives deep enough in the render settings that most people never touch it. Most people don't realise what the default is doing. It's quietly switched on in every Cycles render you've ever made, and it has a real cost.
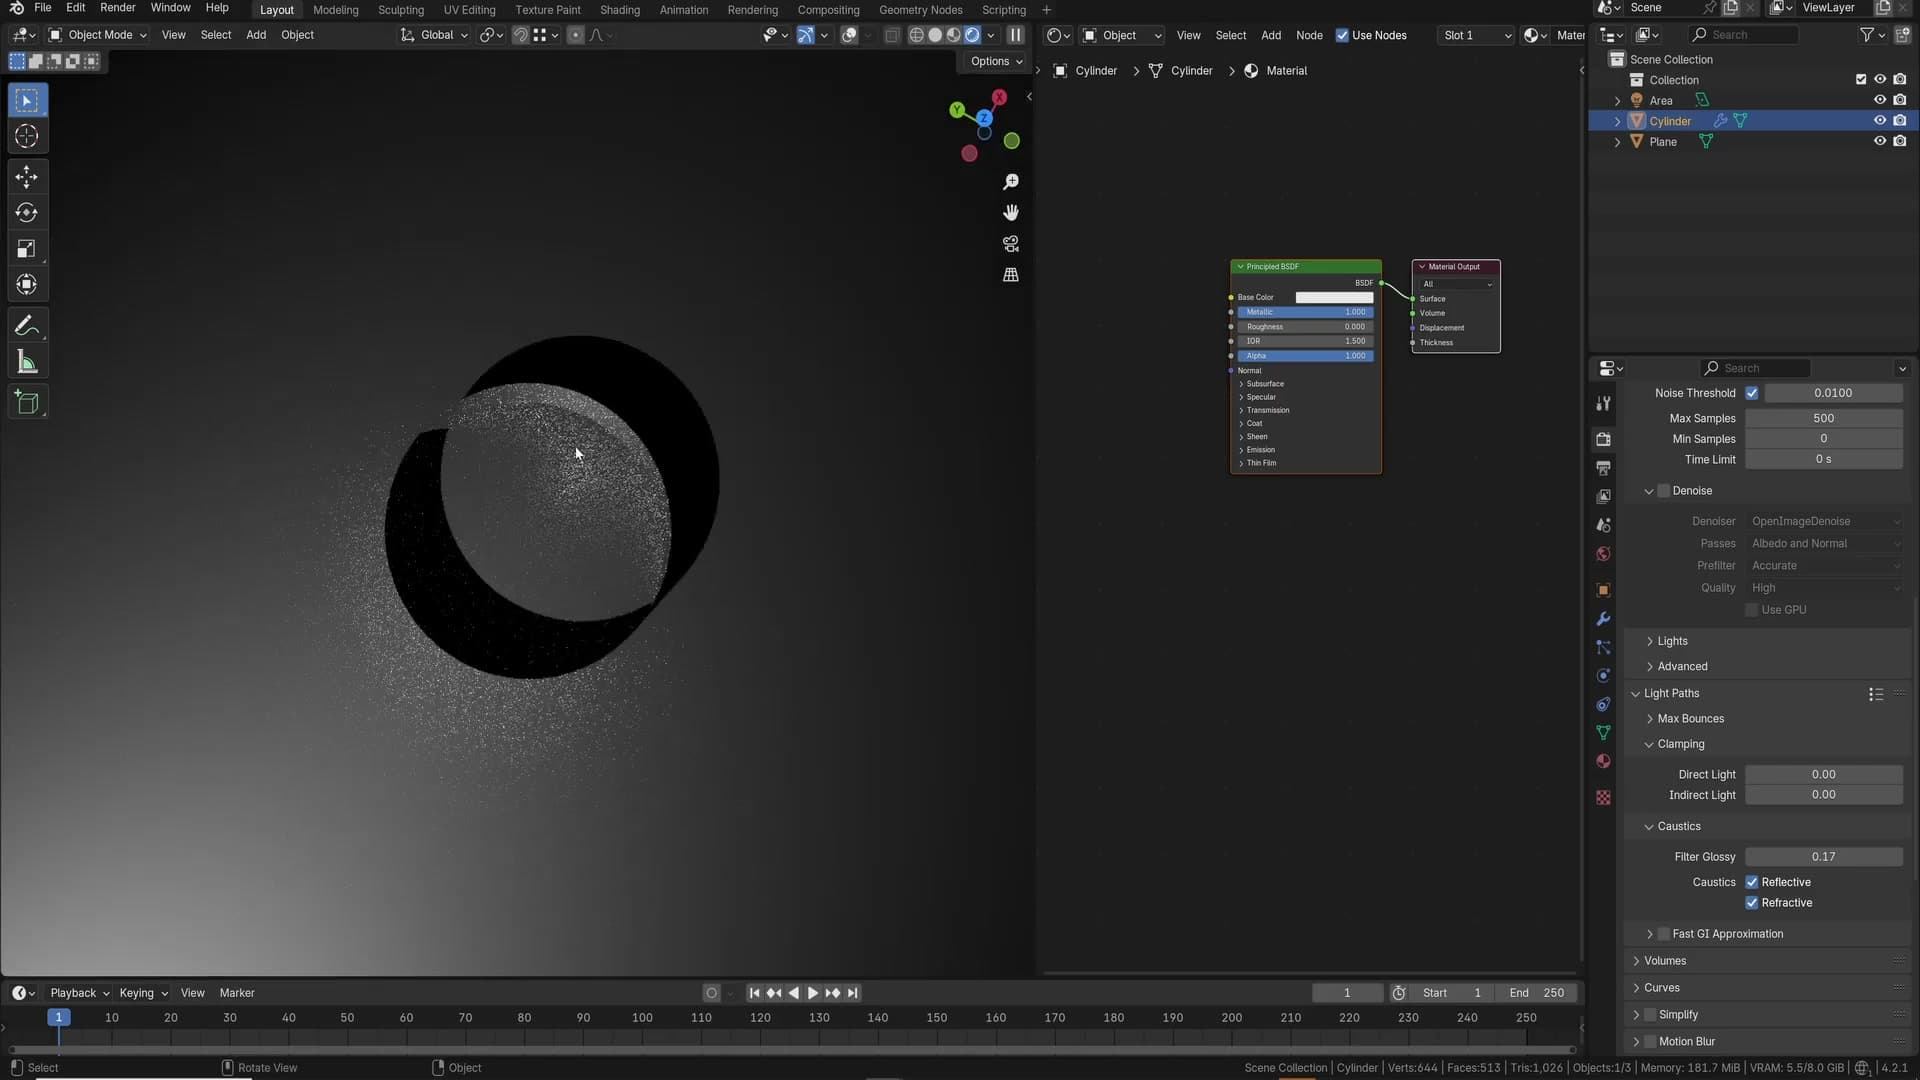
At default settings, look at the surface behind any reflective object in your scene and you'll often spot what looks like a soft, vague highlight. That isn't shading or a glow. It's a caustic being cast into the scene by the metal. Filter Glossy has blurred it so heavily that none of the underlying detail comes through. You're left with a wash where there should be a pattern of light.
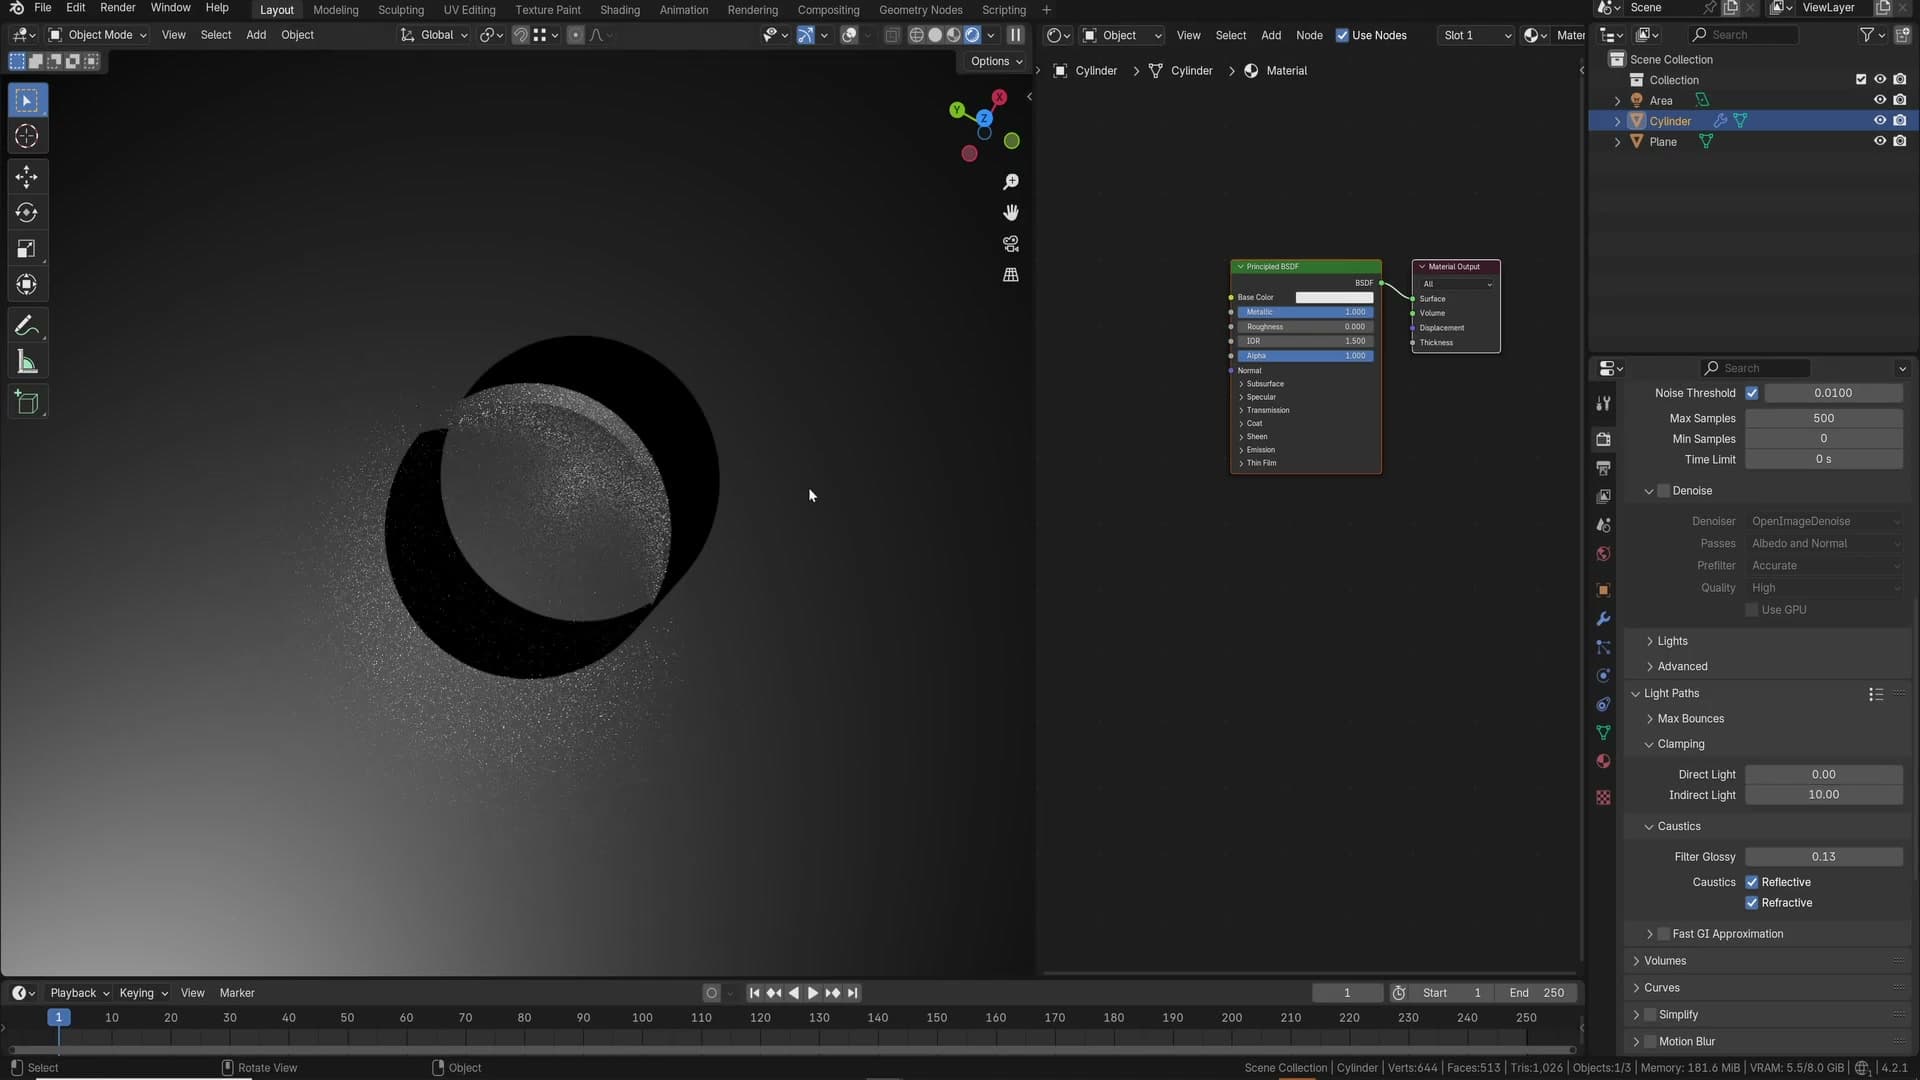
Drop Filter Glossy below its default and the caustic detail returns. The ring in this scene suddenly throws crisp light shapes onto the surface around it. That light was always being calculated, but was being smudged out before it could reach the final image. Without this adjustment, the caustics from rings, metalwork, and glass are completely erased from the render.
Indirect Clamping: the trade against fireflies
Filter Glossy is set to 1 by default for a reason: fireflies. As you lower the value, more caustic detail comes back, but with it come those bright stray pixels scattering across the scene where tight specular paths have caught the sampler off guard. The setting is essentially trading detail for noise control.
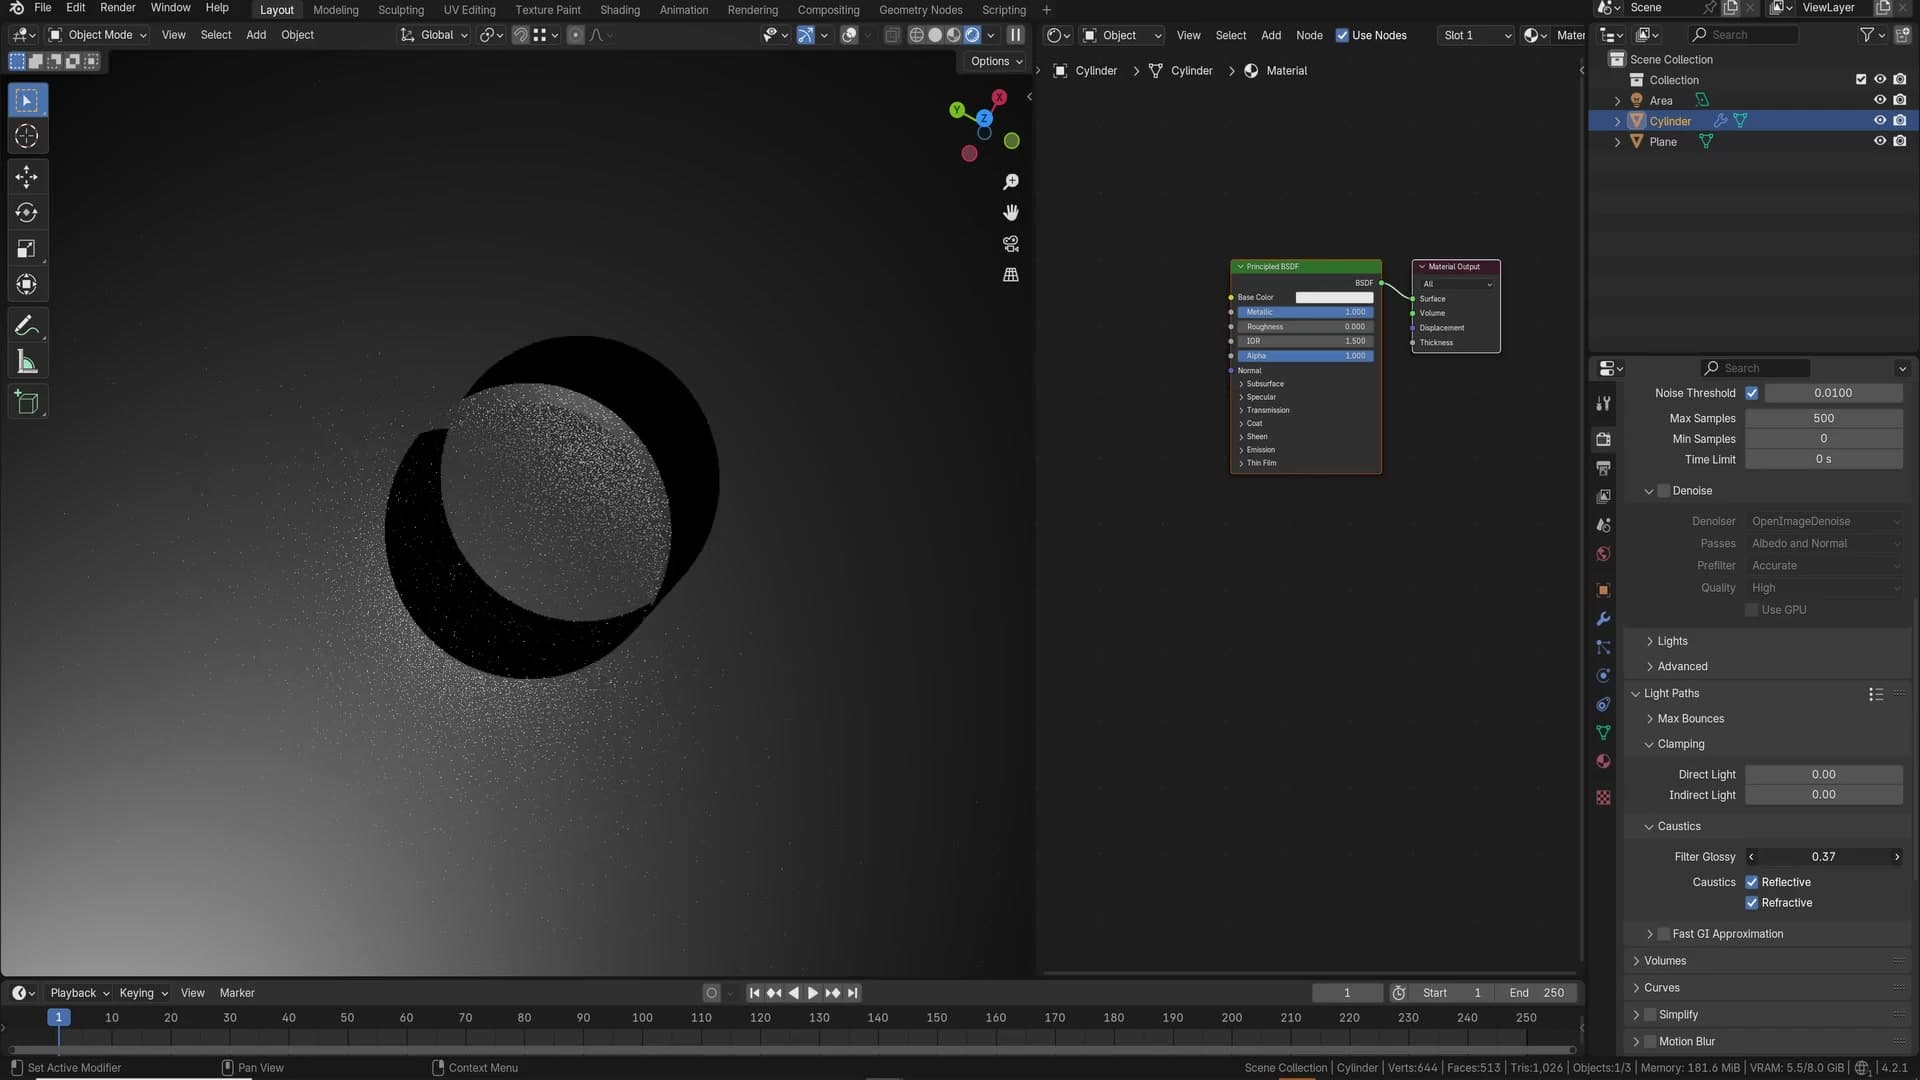
If you want to keep the recovered detail and suppress the fireflies at the same time, you can raise Indirect Clamping. A value like 10 is a reasonable starting point. Personally I don't like clamping, because pulling down the brightest indirect bounces is the same thing that gives metal and glass their punch, and clamping costs you a measurable amount of realism. It's worth knowing the lever is there, though, particularly for animations where a single firefly frame would jump out.
Where this matters most is in product and interior work. Think of a kitchen with metal handles, or a glass sitting on a worktop. Both would naturally throw caustics onto the surface behind them. With Filter Glossy at the default value, Blender silently blurs all of that away, and the render loses a subtle layer of realism that the eye picks up even when the viewer can't articulate why. Lower the value, accept a few fireflies (or clamp them), and those secondary highlights come back.
In the final demonstration I dial Filter Glossy down with Indirect Clamping switched off, and the caustics appear cleanly next to the metal without fireflies. A small, hidden setting that can quietly lift the realism of an otherwise finished render.
Viewport Pixel Size: stop your preview renders looking blurred
Under Render → Performance → Viewport, Pixel Size defaults to Automatic, which routinely upscales pixels and leaves viewport renders looking soft. Set it to 1 for client-ready preview screenshots, or push it to 4 when you're stress-testing lighting setups.
Set Pixel Size to 1 for full-detail previews
This one isn't a new feature, but it's a setting most people leave alone, and it's the reason your viewport renders look softer than they should. If you've ever fired off a quick preview render, glanced at the result and thought the detail looked a touch mushy, the culprit is almost always Pixel Size.

Open Render Properties → Performance → Viewport and look at the Pixel Size dropdown. By default it sits on Automatic, which routinely upscales the pixels and softens fine detail in the viewport render. Drop it to 1 and Blender stops resizing pixels altogether. Every bit of detail you've sampled actually makes it onto the screen.
The trade-off is render time: at pixel size 1 the viewport takes longer to resolve. But the workflow it opens up is worth it. If you're mid-scene, you fire off a quick viewport render, the framing looks perfect for a client, you can just screenshot it and send. The detail is already there. No need to kick off a full F12 render just to share a preview.
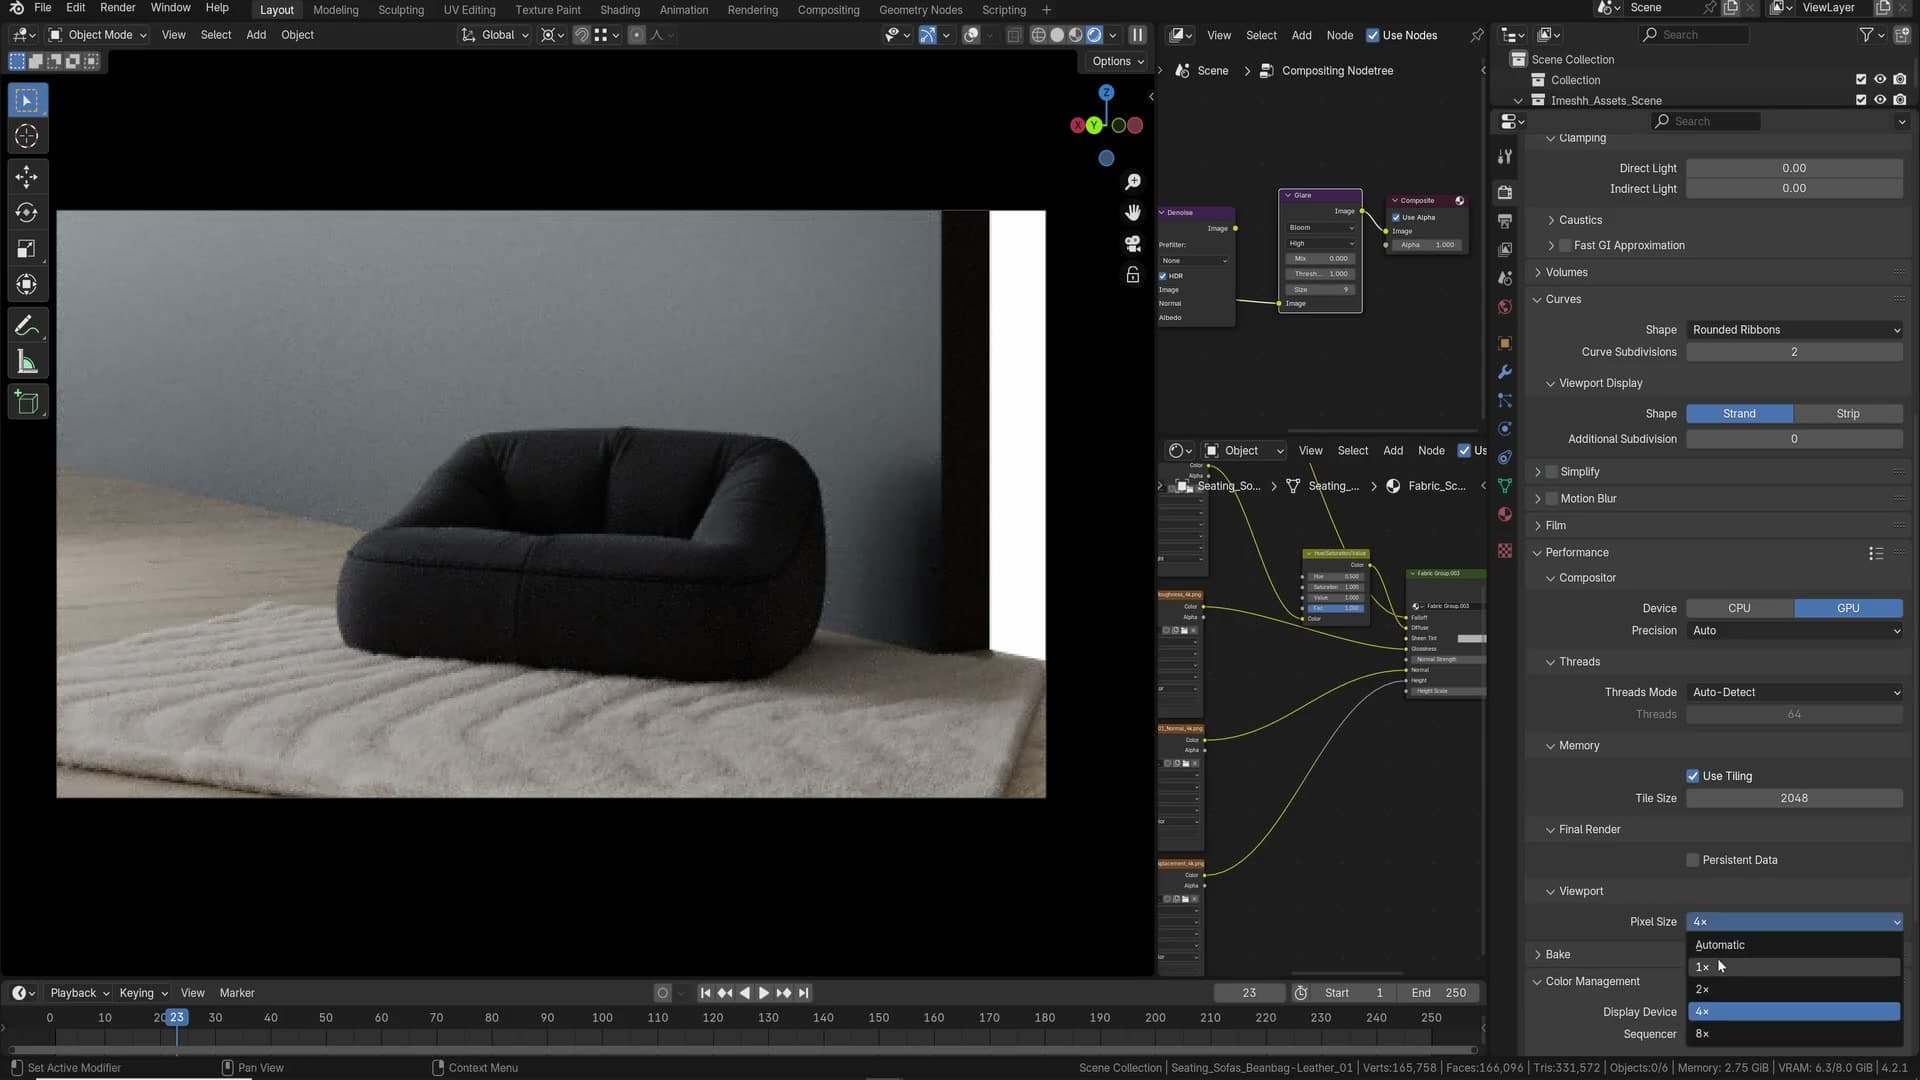
The dial swings the other way too. Push Pixel Size up to 4 and the viewport render comes back almost instantly, just much blurrier. It's effectively the same image you'd get by zooming out, except you still see the whole frame. Ideal when you want to audition a handful of lighting setups in quick succession without waiting around between each one.
GPU viewport denoising with Open Image Denoise
Open Image Denoise now runs on the GPU and is fast enough to denoise the viewport in real time. Start sample, Albedo, Normal, and Prefilter are all configurable. Set it up once and you get near-instant clean feedback on every change.
Enable Open Image Denoise on GPU for instant feedback
Open Image Denoise has been the go-to denoiser in Blender for years, but it always ran on the CPU. In recent versions it runs on the GPU, and the difference is dramatic. It's fast enough that you can leave it on in the viewport and watch your render denoise itself in real time. Pan, zoom, drag a slider, and a clean preview comes back almost instantly.
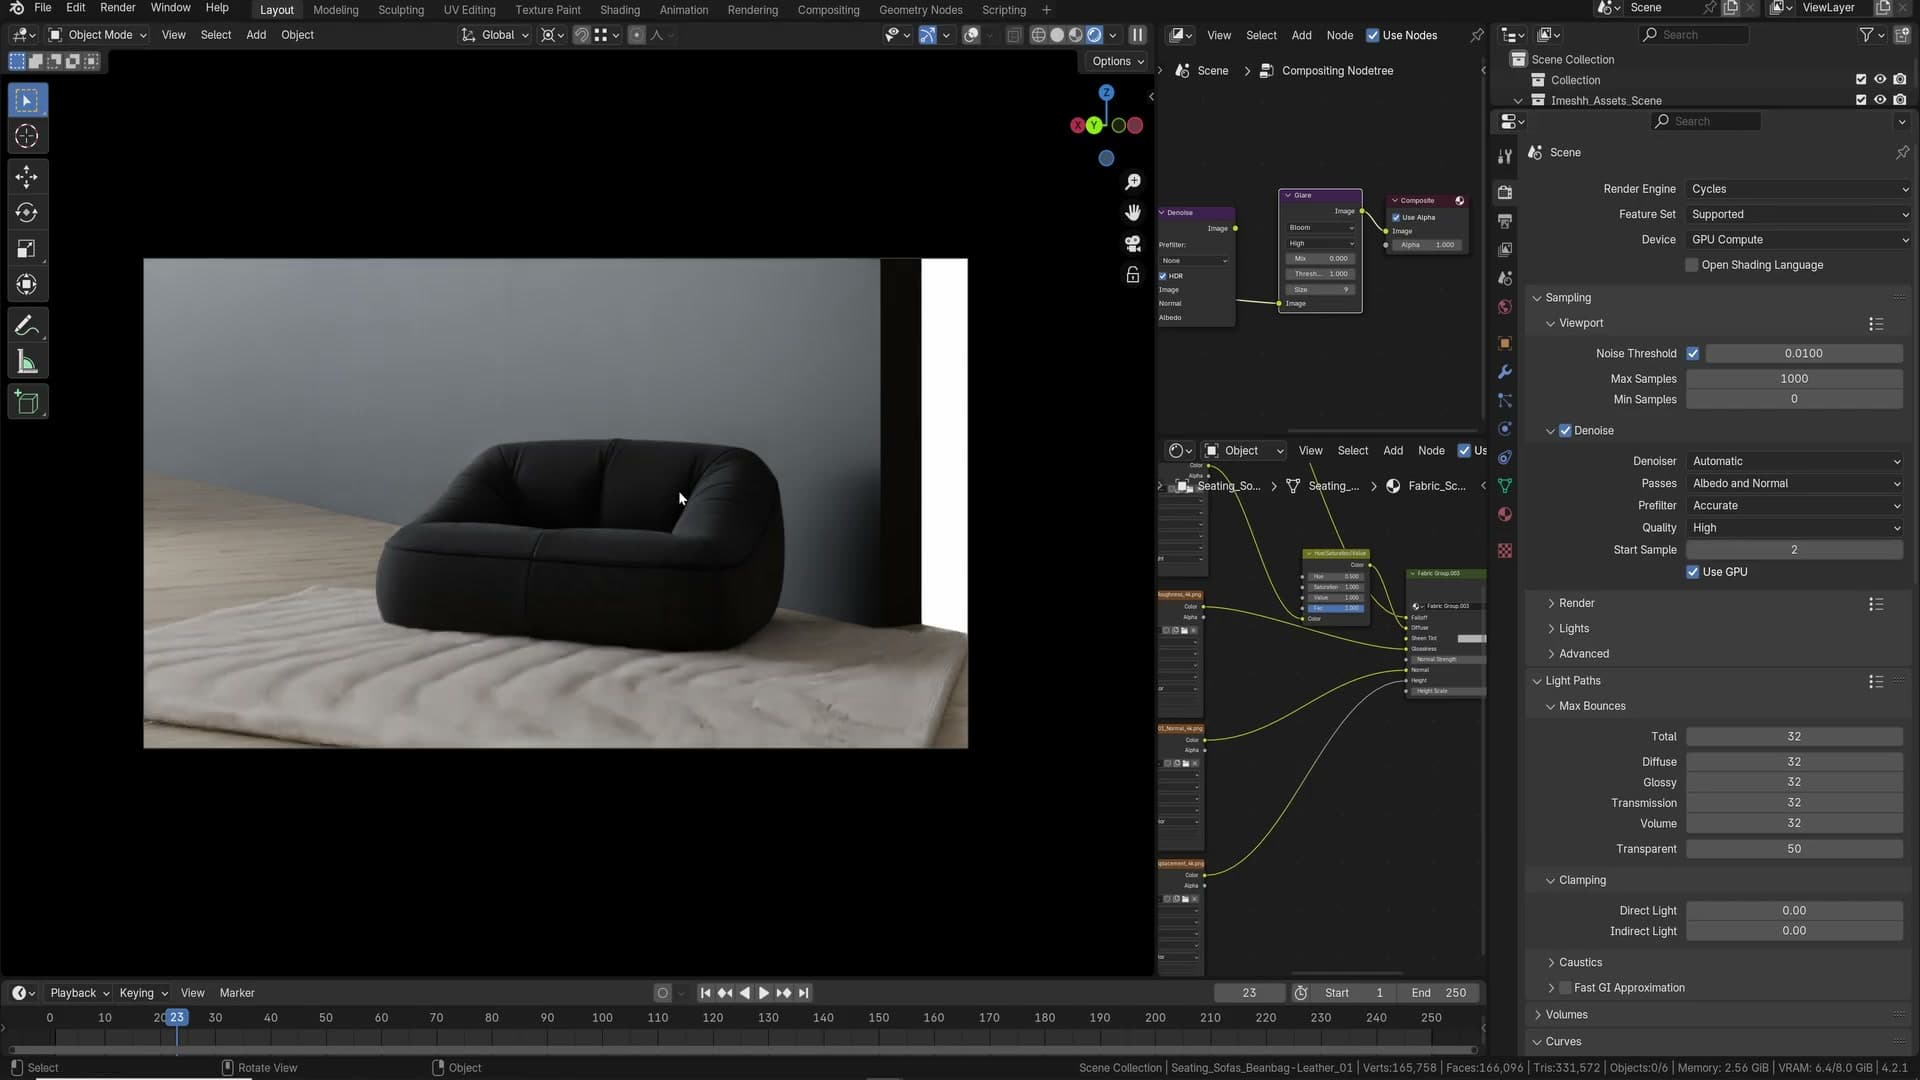
Set the viewport denoiser to GPU in the sampling settings (Automatic does the same thing if your card supports OIDN on GPU), and the familiar controls from the final-render denoiser carry across. Switching the passes to Albedo and Normal gives the denoiser extra information about edges and surface orientation. The same None / Accurate trade-off from Module 2 applies here: None preserves fine detail, Accurate smooths more aggressively.
Start Sample controls how soon the denoiser kicks in. Leave it low and you get a clean image from the very first sample. Nudge it up to a higher number (2, for example) if you'd rather see a couple of raw samples before the denoiser steps in. Either way, the feedback loop tightens to the point that dialling in lighting, materials, and camera framing becomes a genuinely interactive exercise rather than a wait-and-see one.
Tools and credits
Everything mentioned in this tutorial, with links.
- Blender (the renderer this entire build runs in).
- iMeshh: studio platform (project management, client review, asset library, invoicing). The asset library used in this tutorial is included with every iMeshh Pro plan.
- Poly Haven (free CC0 textures and HDRIs).
Pillar guide: Tips Tricks hub