The animation that started it all
How an Instagram render of the iMeshh fruit pack prompted a still-life animation and why this breakdown finally exists as a video.
The Instagram render that sparked the project
A scroll through Instagram turned out to be the trigger for this whole video. I spotted a render someone else had made using iMeshh's fruit pack and felt the artist had pulled more out of the assets than our own promotional shots ever had. That single post was enough to send me back into the files to look at the fruit properly.
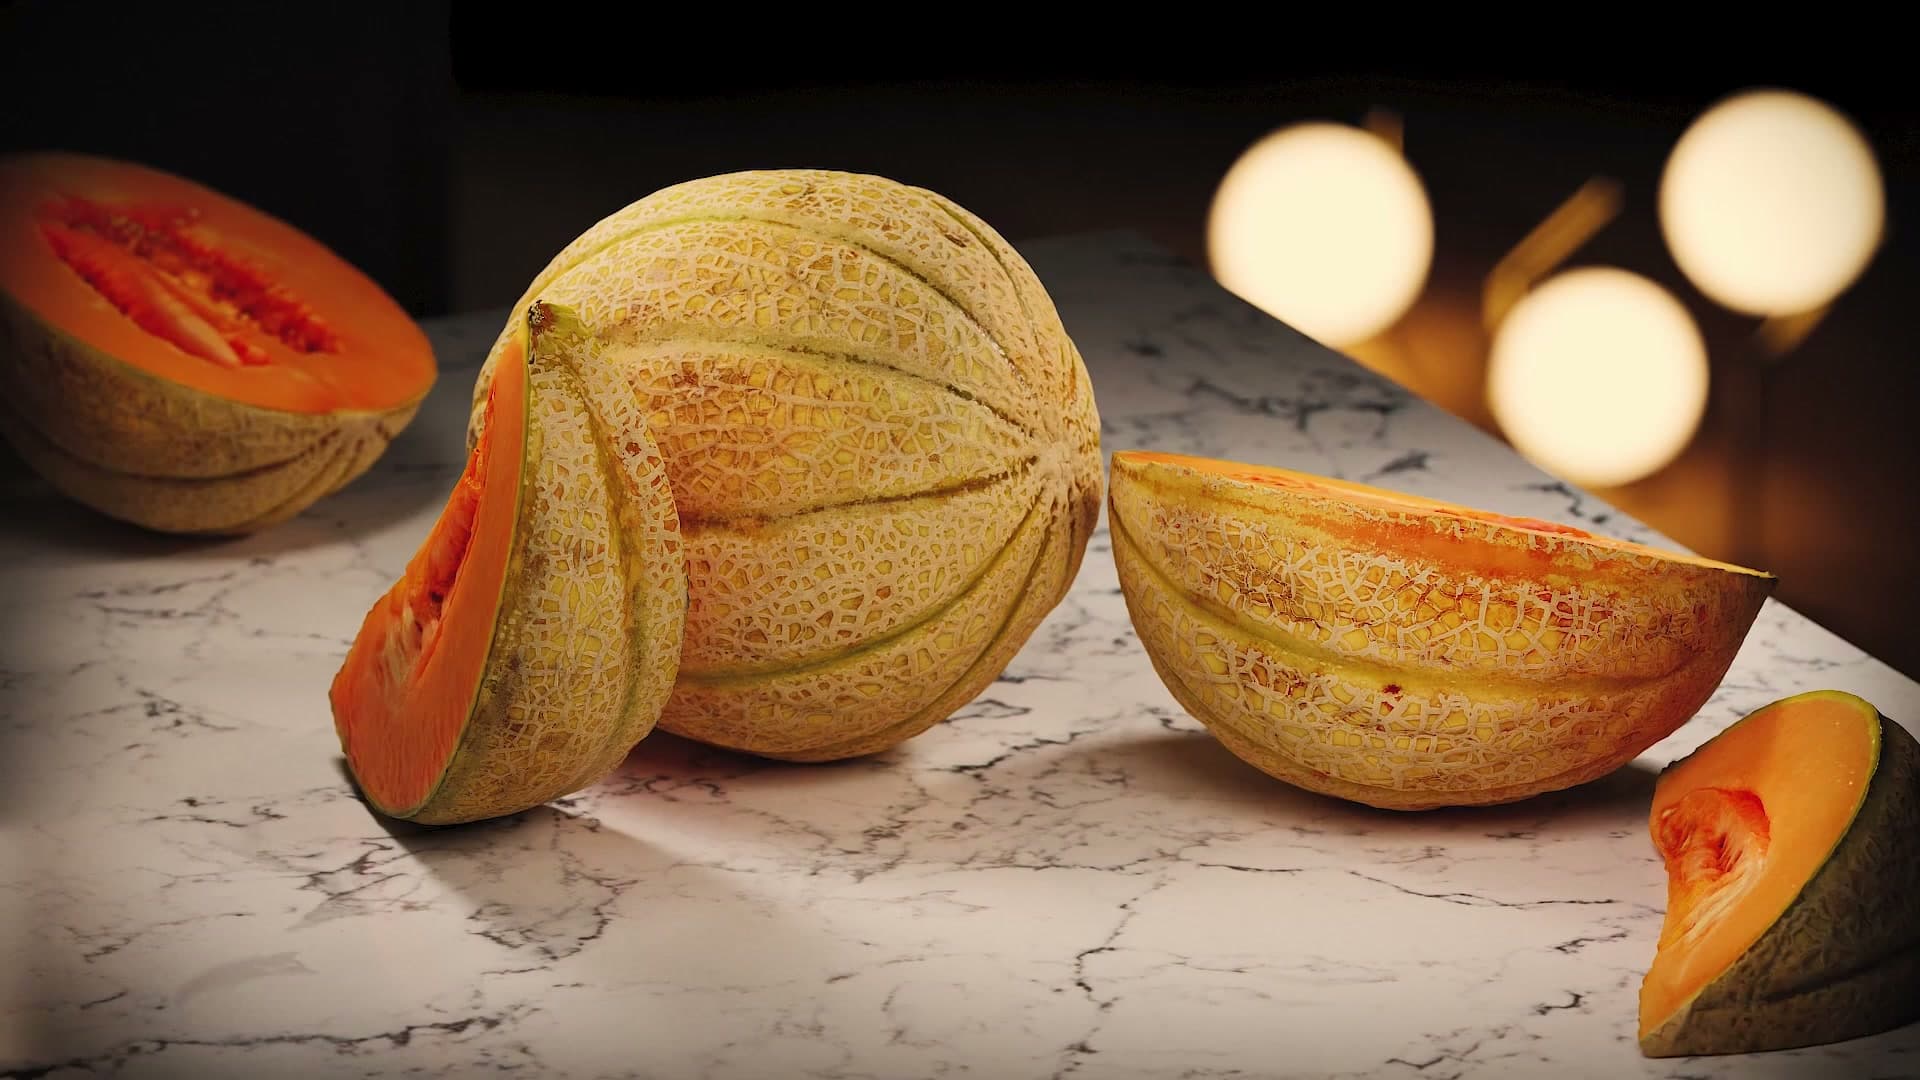
Digging around in older projects reminded me of an animation I'd put together with those same fruit assets some time before: a still-life piece with fruit tumbling and bouncing through a kitchen scene. A handful of viewers had asked for a breakdown of it at the time, but a proper walk-through had never made it onto the channel.
There is a written version of the breakdown over at Blender Nation, put together when the animation first went out. Reopening the project files this time surfaced a few details that didn't make it into the article, which is why this video exists rather than just a pointer back to the post.
Render tricks, physics sims and lighting: what's coming
The breakdown that follows covers three broad areas: a couple of render-time tricks that kept the frame count manageable, the physics and soft-body simulations behind the falling and bouncing fruit, and the lighting setups used across the different shots.
It's worth following along even if you've already read the Blender Nation write-up. Going back into the files turned up a few things that weren't covered there the first time round.
The background is fake: rendering scenes onto emissive planes
The signature trick of the project: pre-rendering out-of-focus kitchen geometry once and pasting it onto an emission-shaded plane so the foreground sim renders fast.
One Blender file per shot for sanity
Every shot in the project lives in its own .blend file. You could keep all of them inside a single file as separate scenes, but I tried that on paper and decided I preferred one file per shot. At least the file browser stays tidy, even if the contents of each file are a mess.
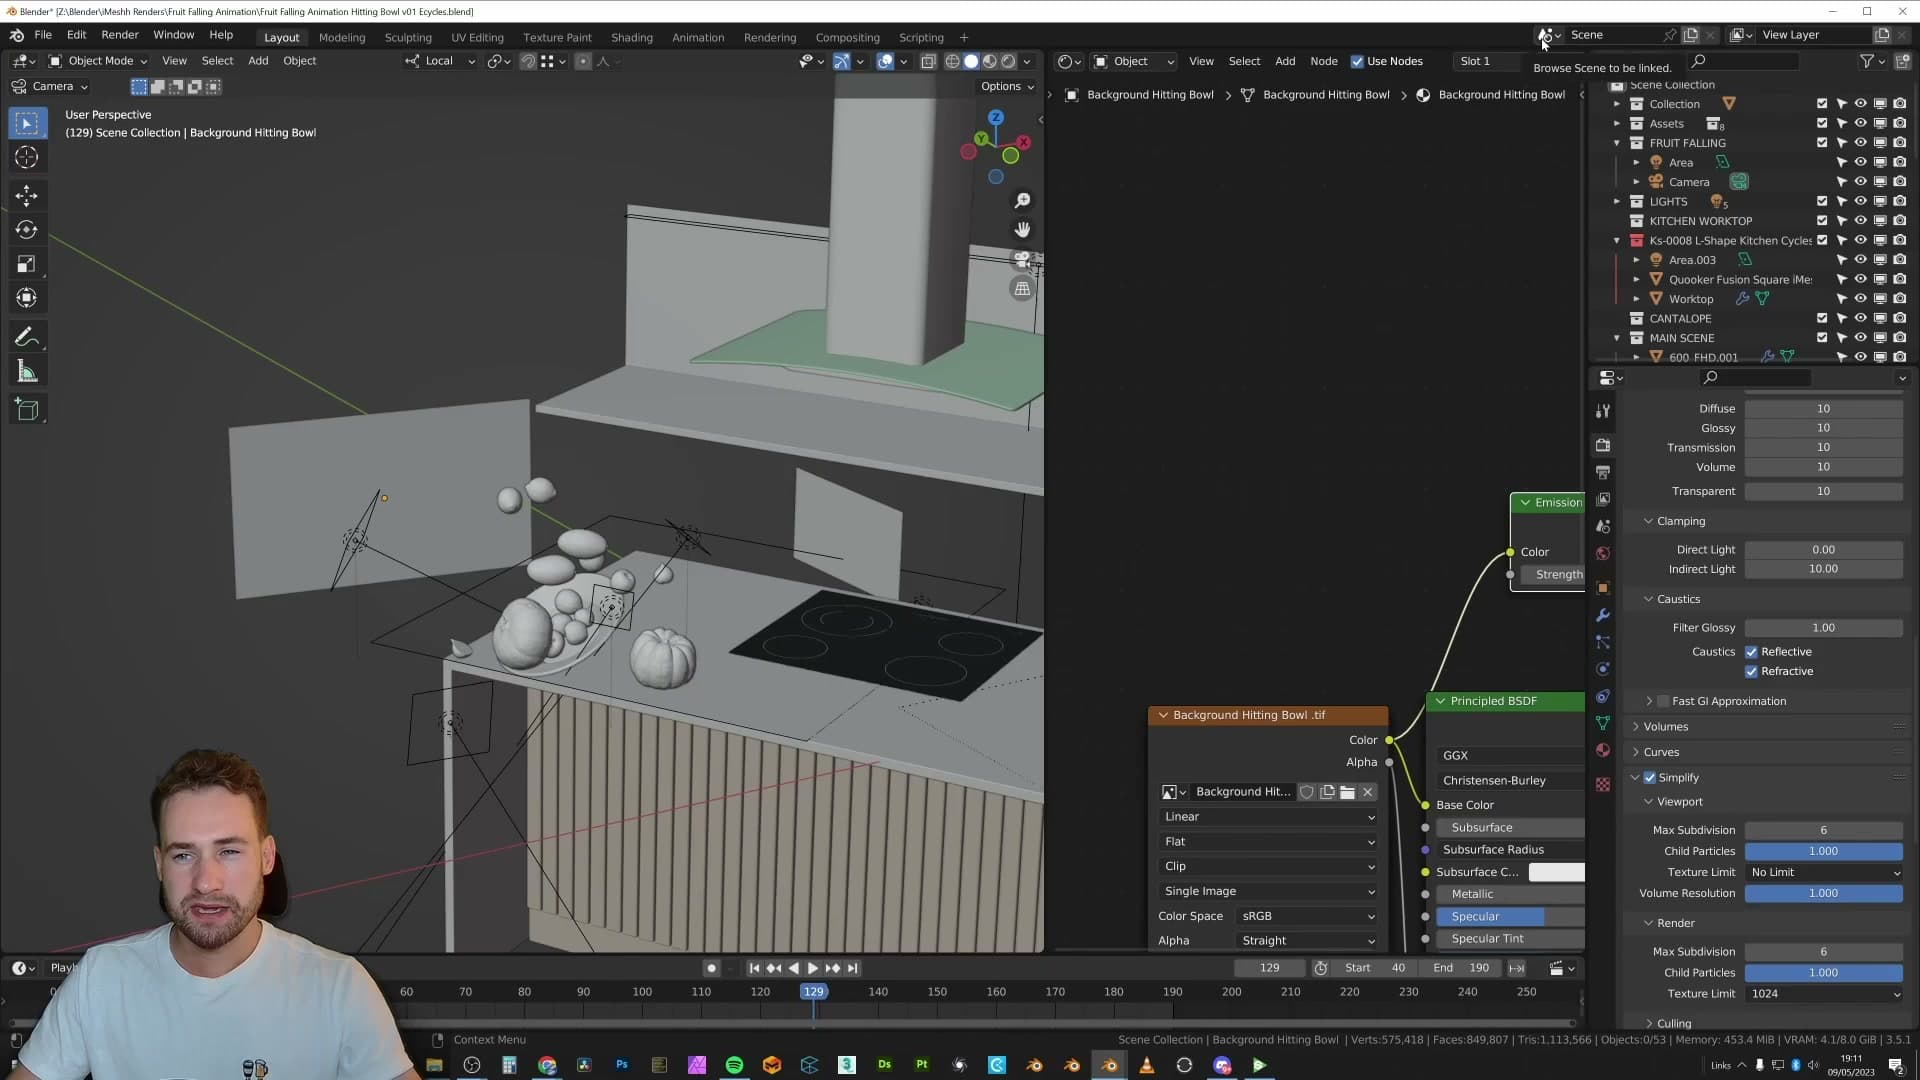
Be warned: inside each file, organisation goes out the window. I didn't expect anyone to be poking around, so collections, naming and outliner hygiene were never a priority. The split-by-file convention is the only piece of structure you can rely on.
Why the ovens behind the camera are killing render time
Most of the shots in this project share a single optimisation trick: there's a flat plane sitting in the background that's actually a piece of the kitchen pre-rendered to an image. In the lemons-on-the-counter shot, the camera is pointing one way at the fruit, and directly behind it is an oven cabinet (glass doors, complex shading, the works).
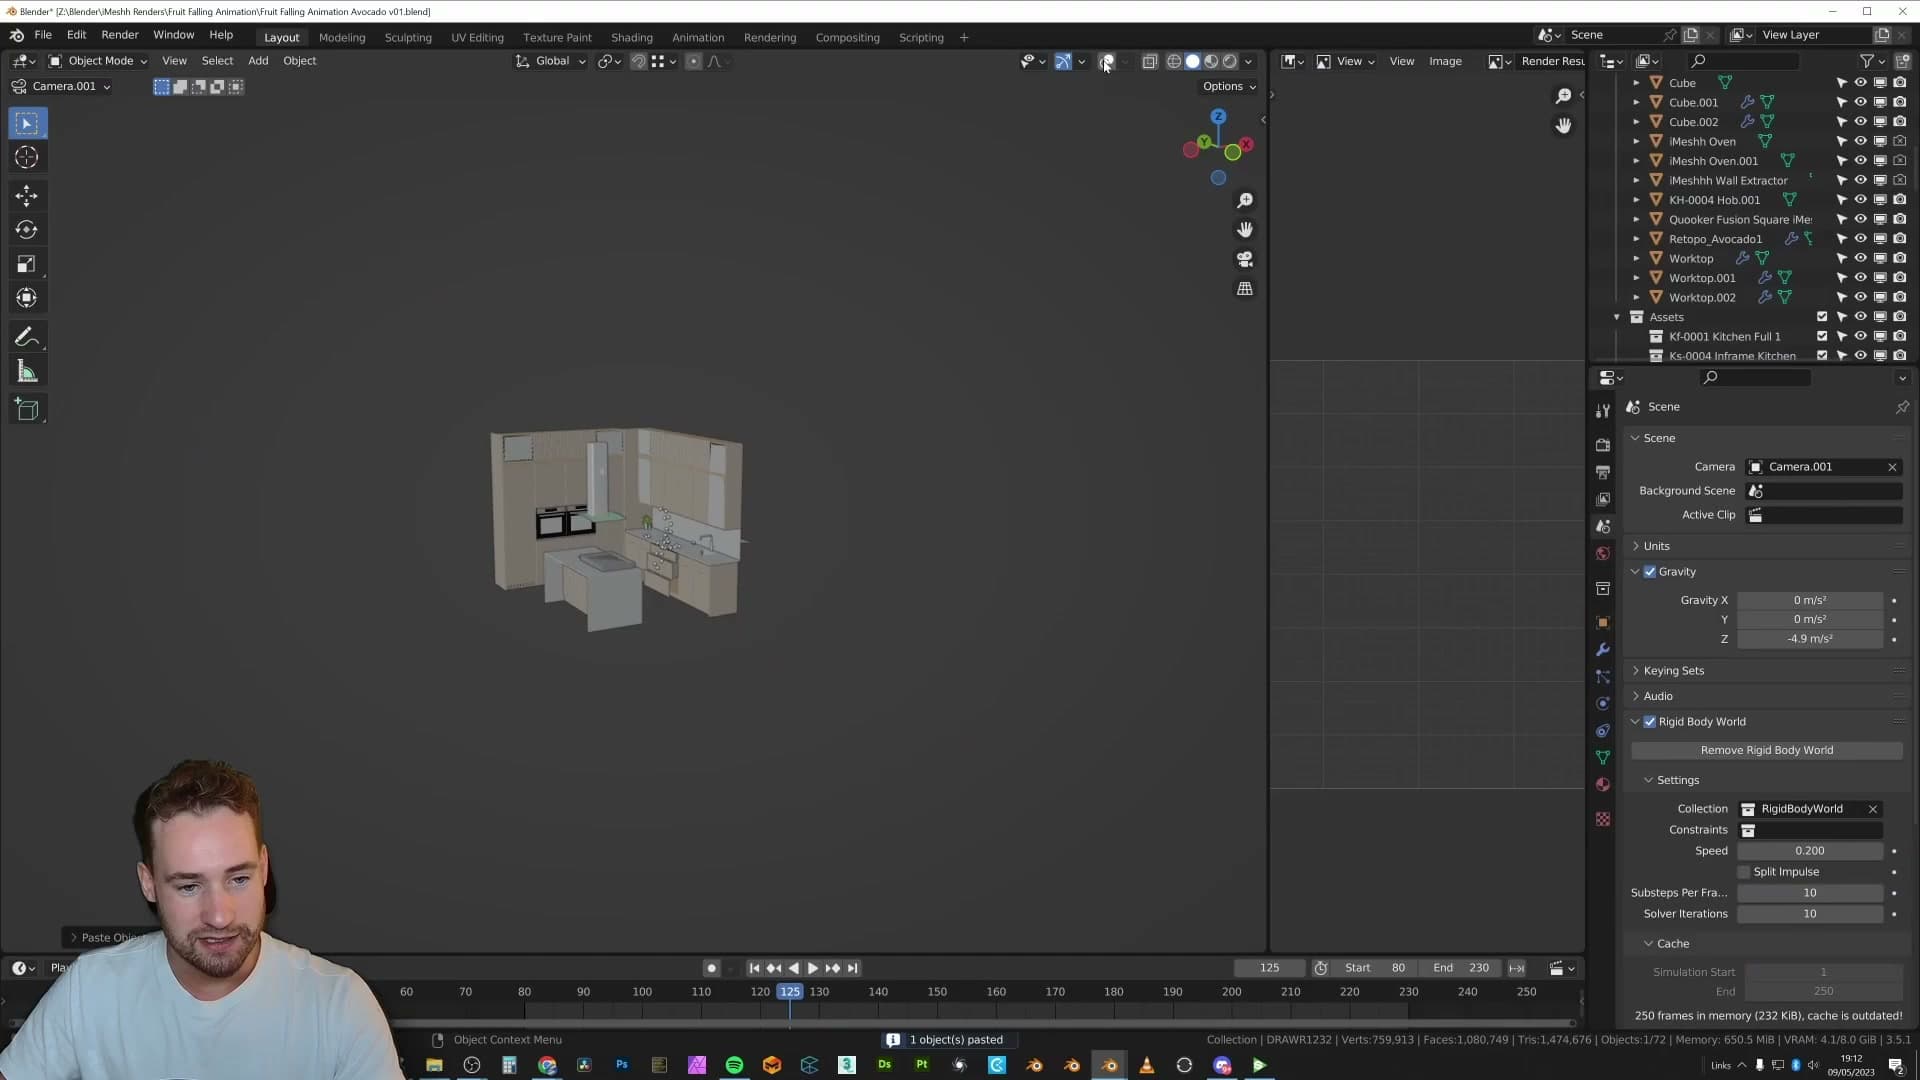
If you leave that cabinet in the scene, Cycles has to evaluate every reflective surface, every refractive panel and every shader bounce on it for every frame of the animation. None of that matters visually, because depth of field smears the whole thing into a soft blur. But the render engine doesn't know that. It does the full calculation anyway.
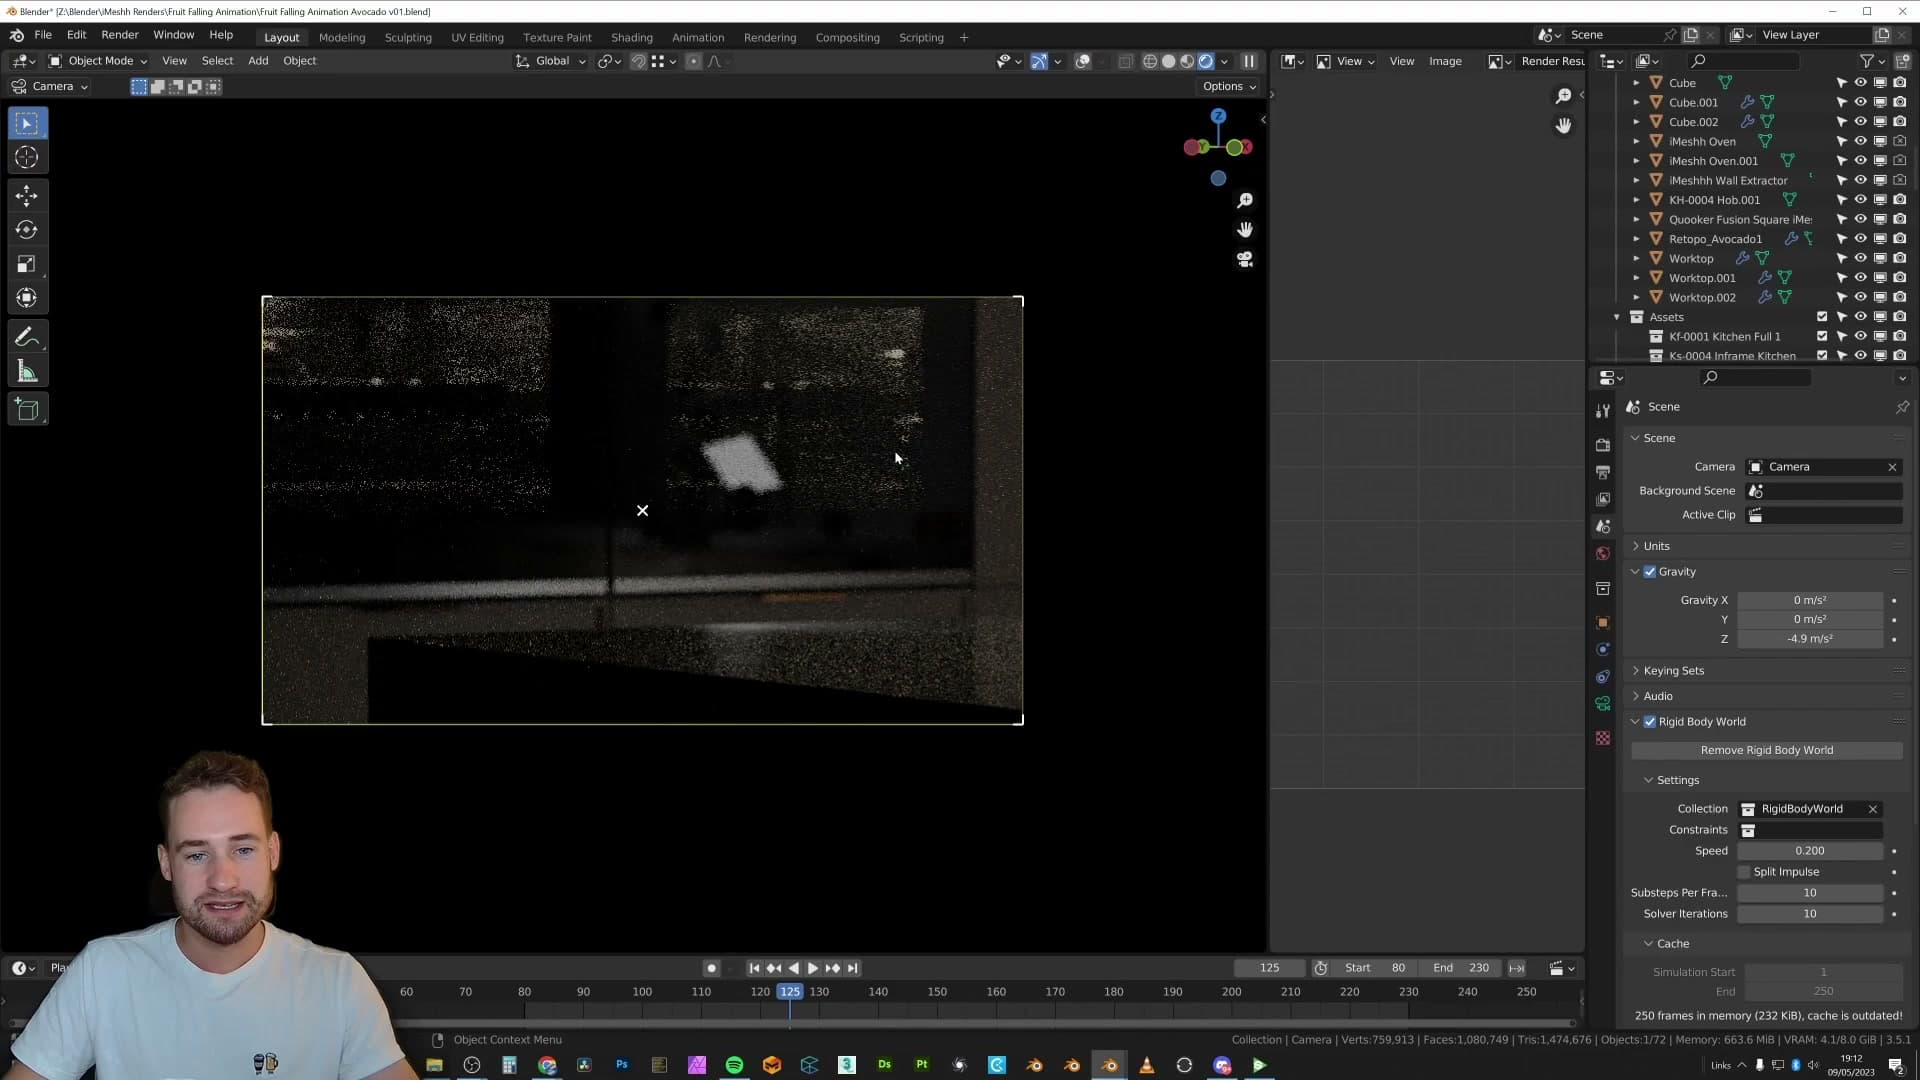
Render a preview and you can see the problem plainly: the glass and oven detail behind the lemons is so out of focus there's no actual information to preserve. Paying full render cost for that, frame after frame, is wasted compute.
Baking the kitchen to an emission-shaded plane
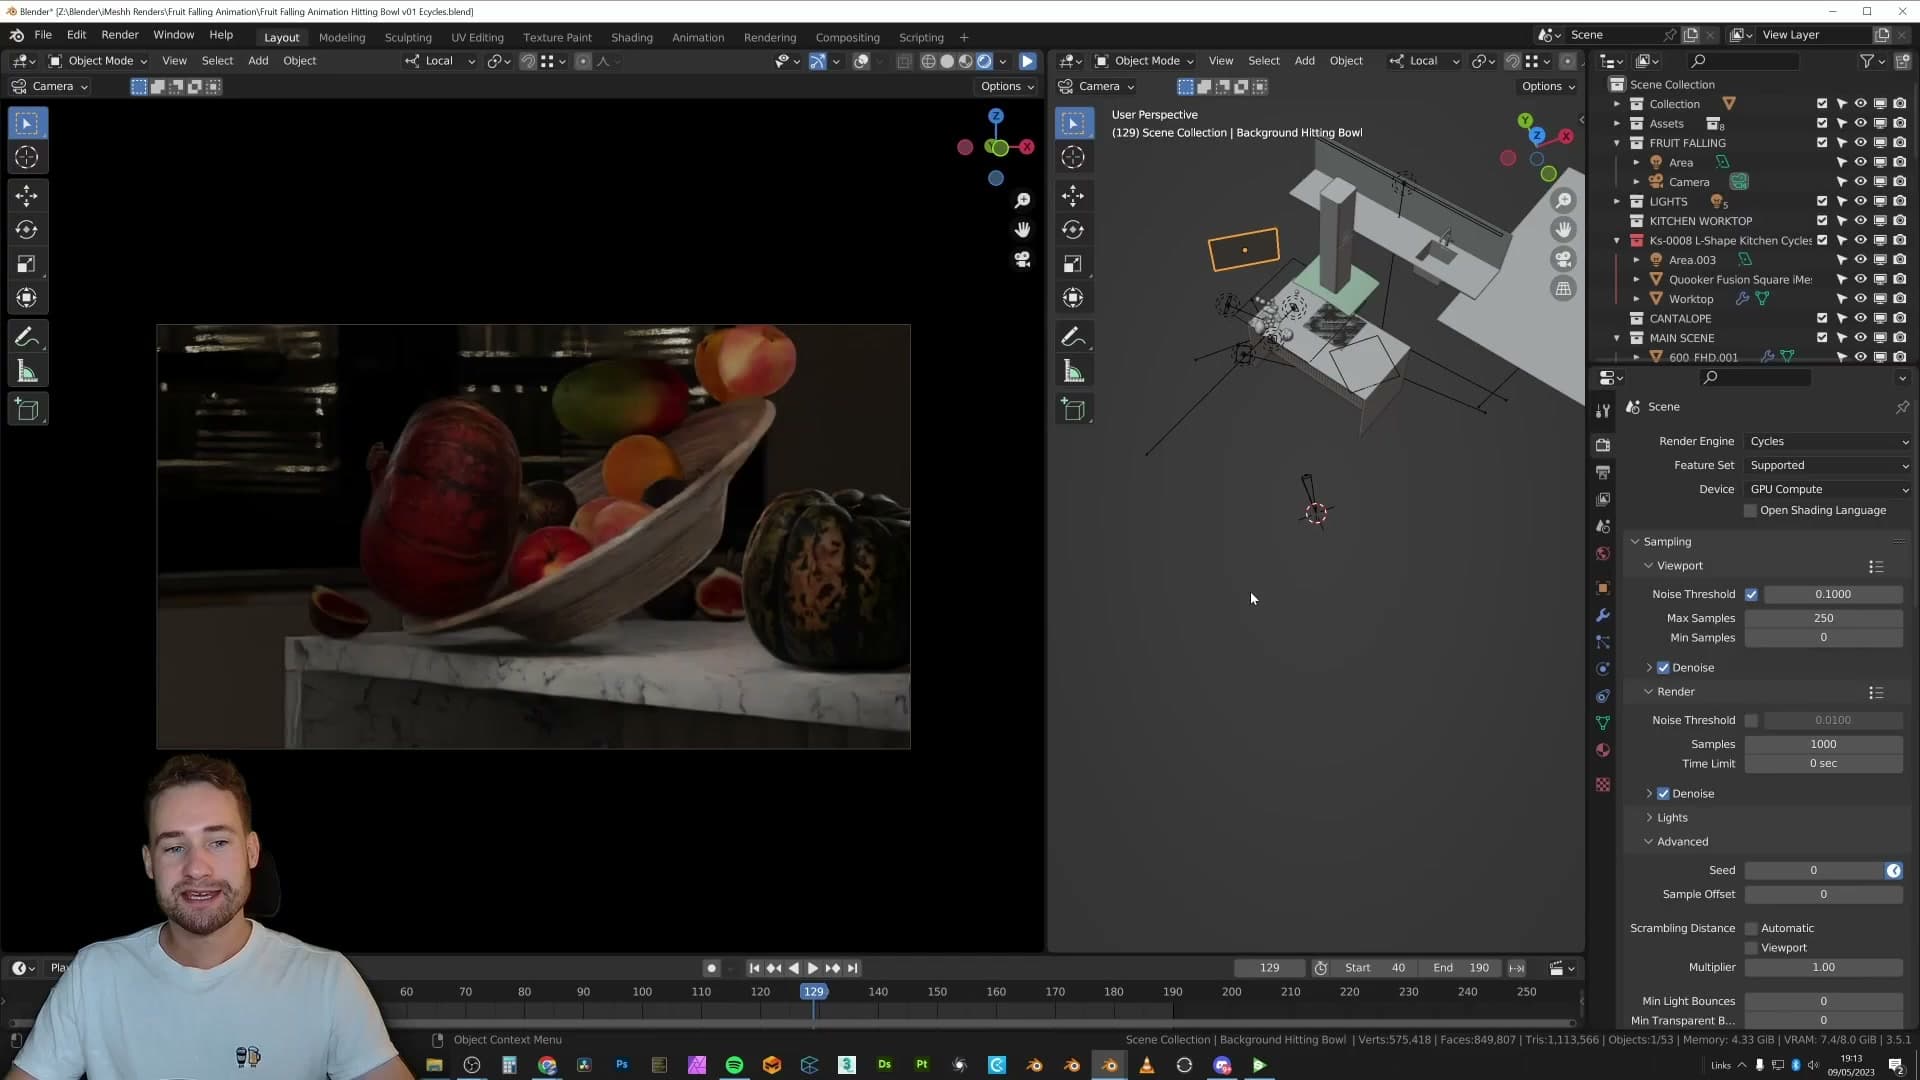
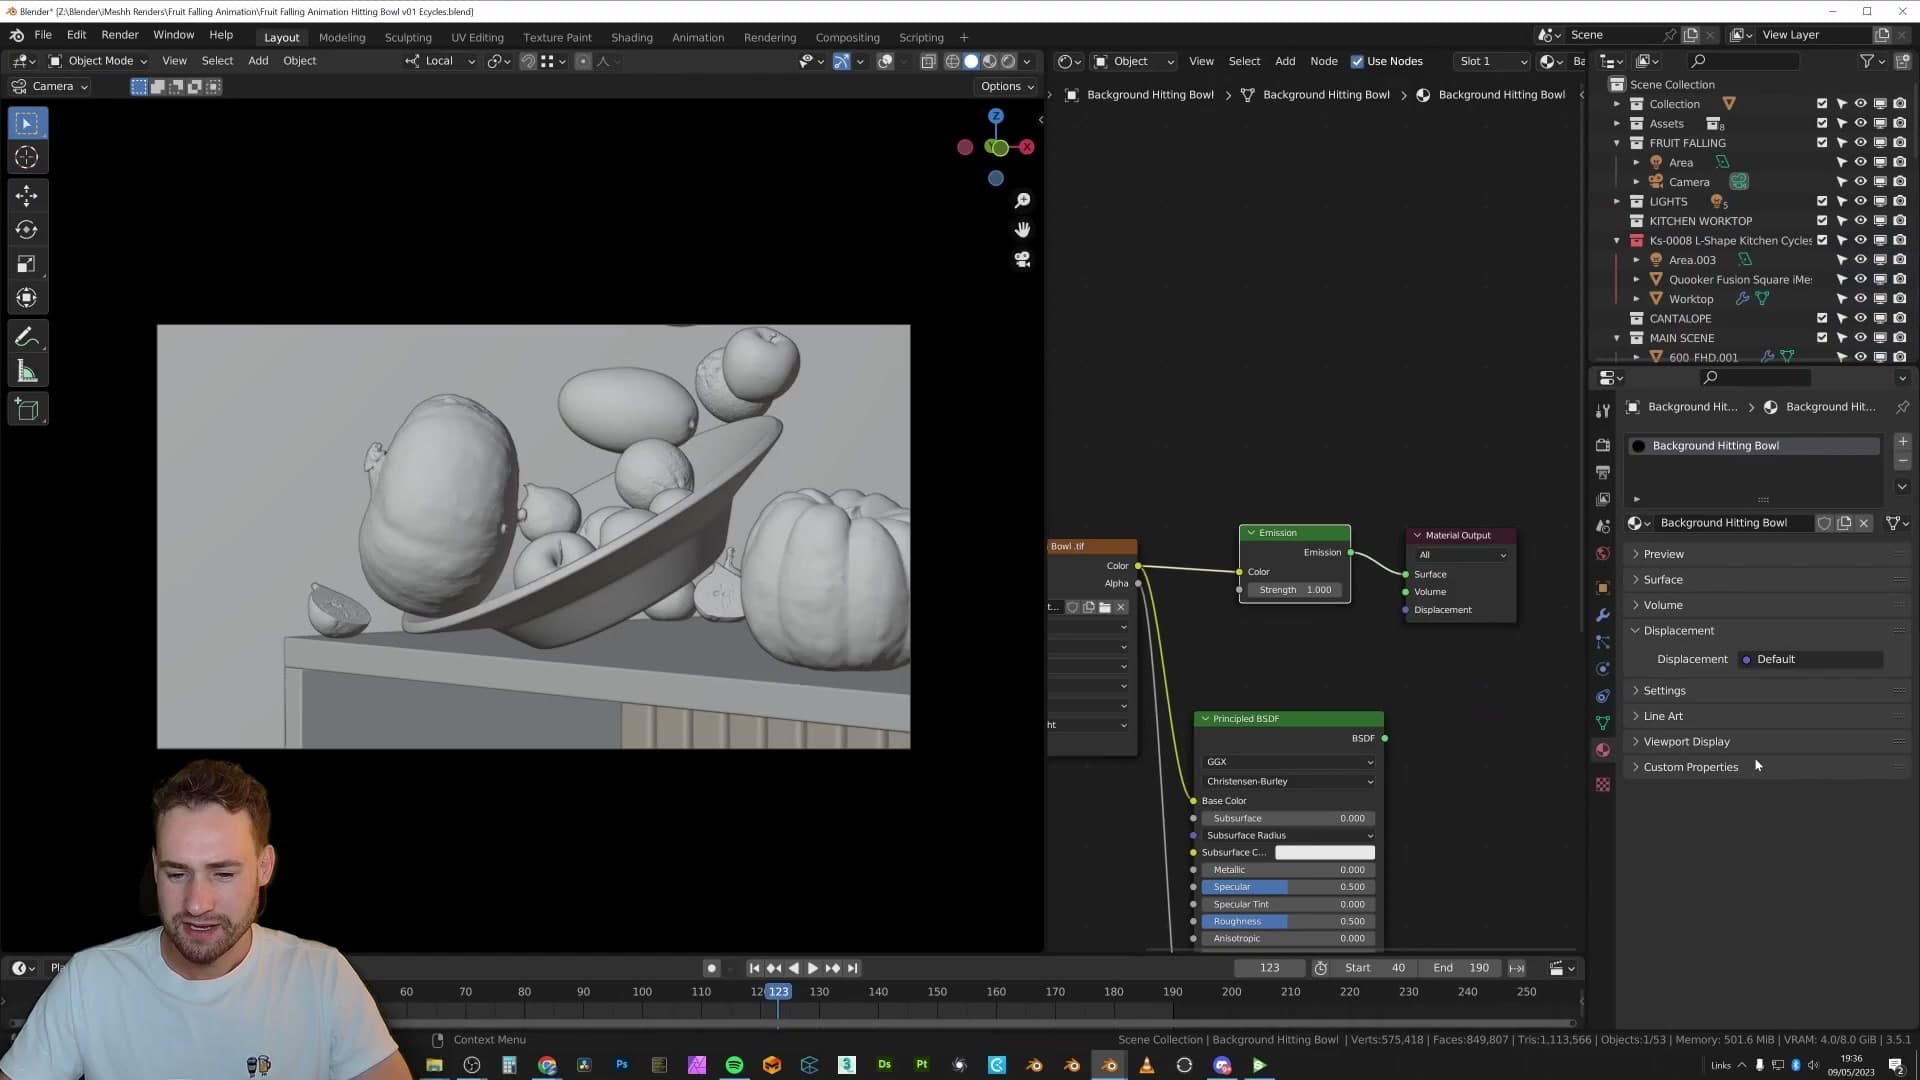
The fix is to render that cabinet section once, as a still, and then drop the resulting image onto a flat plane positioned where the cabinet used to sit. From the hero camera's point of view it reads as the real thing. The soft blur of depth of field hides any clue that you're looking at a flat card rather than full geometry.
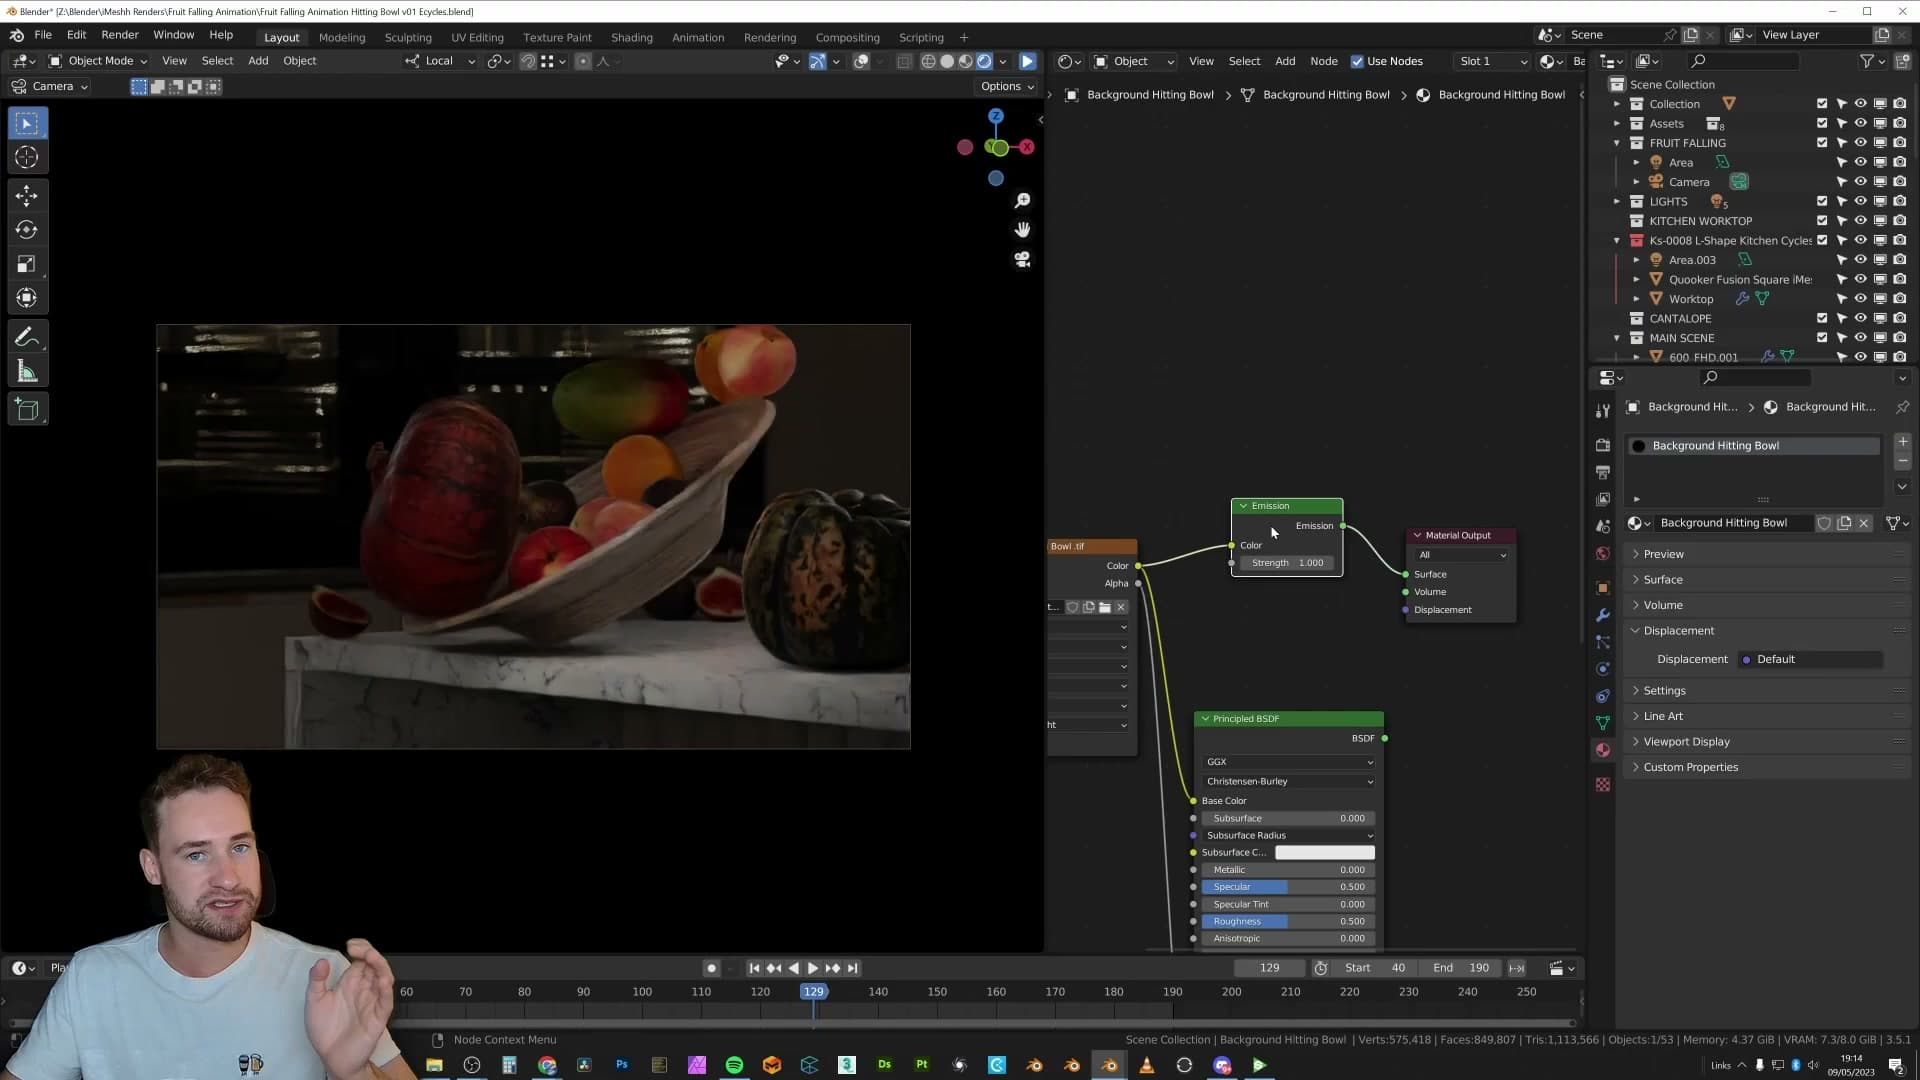
Open the shader editor on that plane and the material is a single node: an Emission shader feeding straight into Material Output. Because the plane emits its image directly with no light interaction, Cycles barely has to think about it. I reckon it resolves in roughly one sample.
Multiply that across 190 animation frames and the saving is enormous. The foreground sim still costs whatever it costs, but the background (the heaviest part of the original scene) becomes effectively free.
Fairy lights shot and the double-defocus mistake to avoid
The same trick reappears on the shot with the warm fairy-light glow in the background. That isn't a real light fixture in the scene. It's the iMeshh fairy lights bed asset, rendered once and pasted onto a plane standing behind the hero fruit.
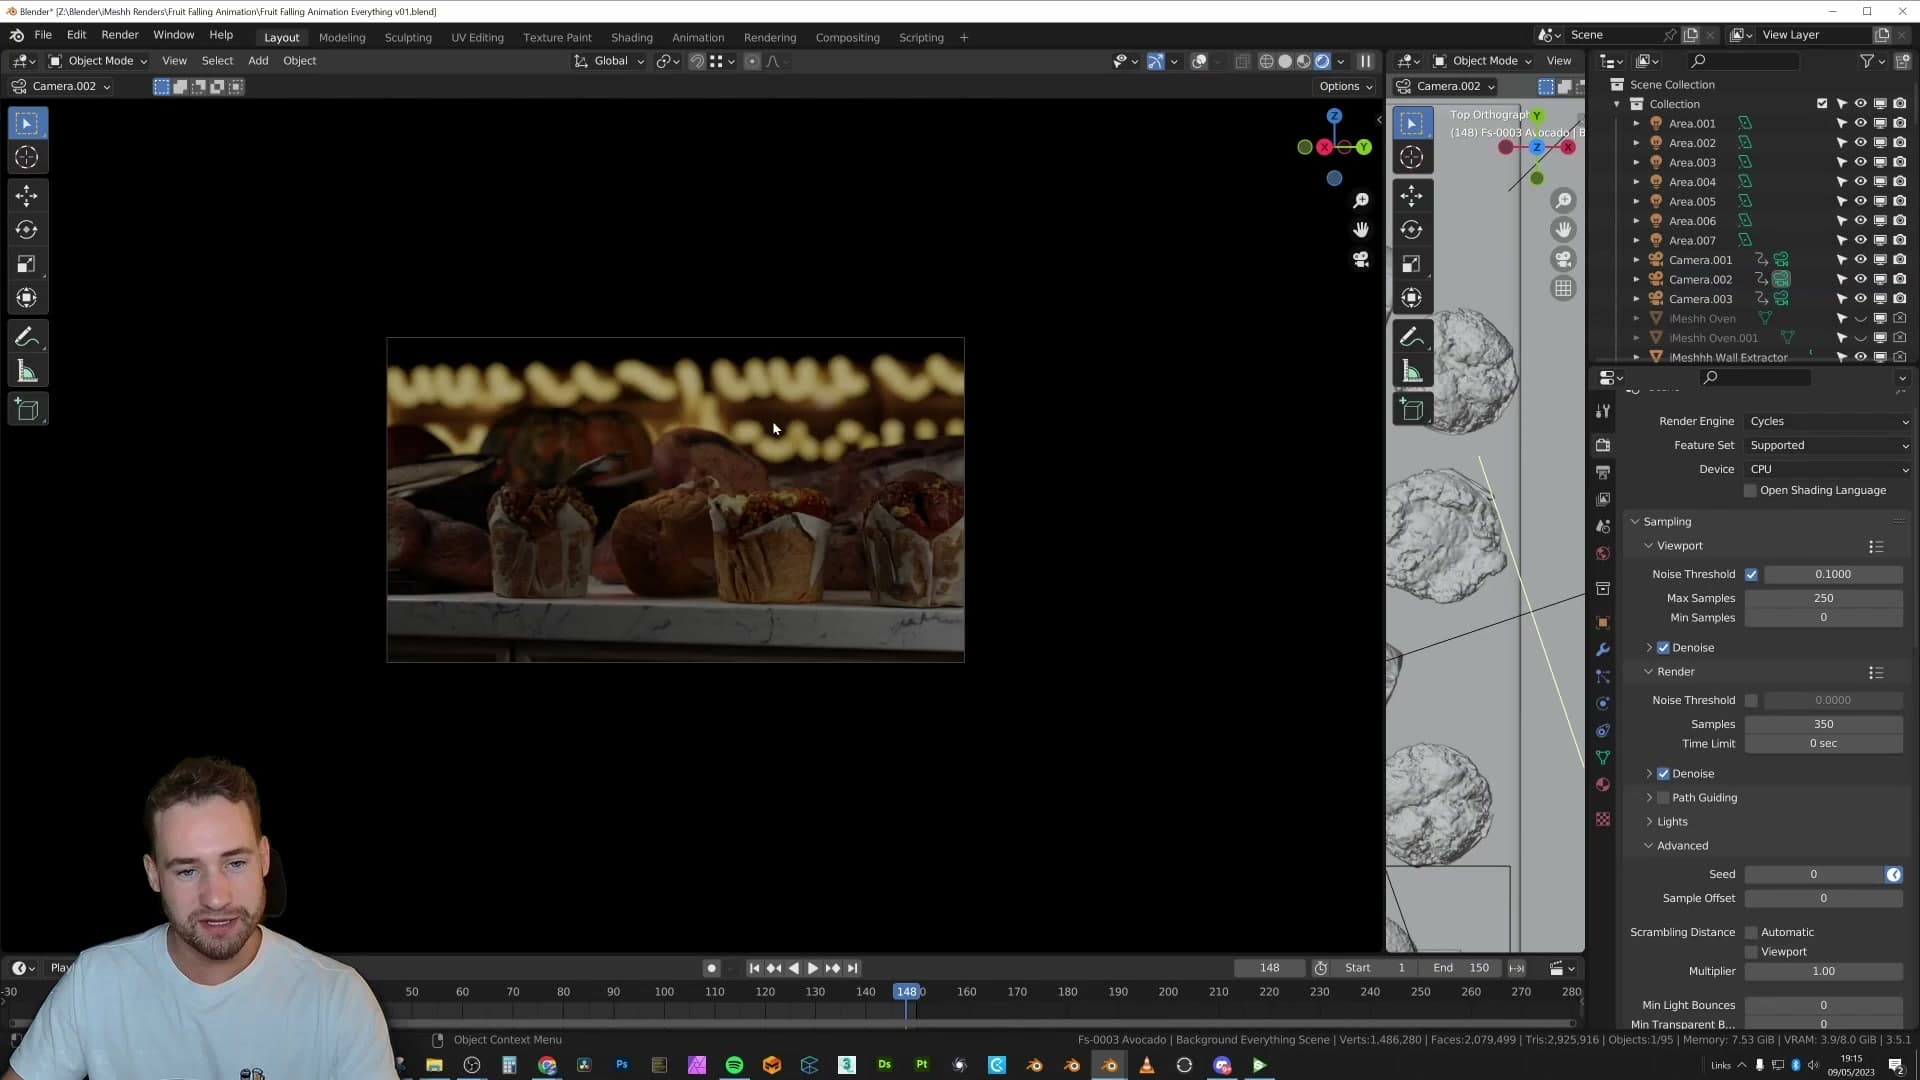
There's a mistake worth flagging here, though. I rendered that background plane already out of focus. The hero camera then applies its own depth of field on top, so the plane gets blurred a second time. The net effect is that the bokeh reads as if the fairy lights were almost twice as far away as they actually are. Not the intention.
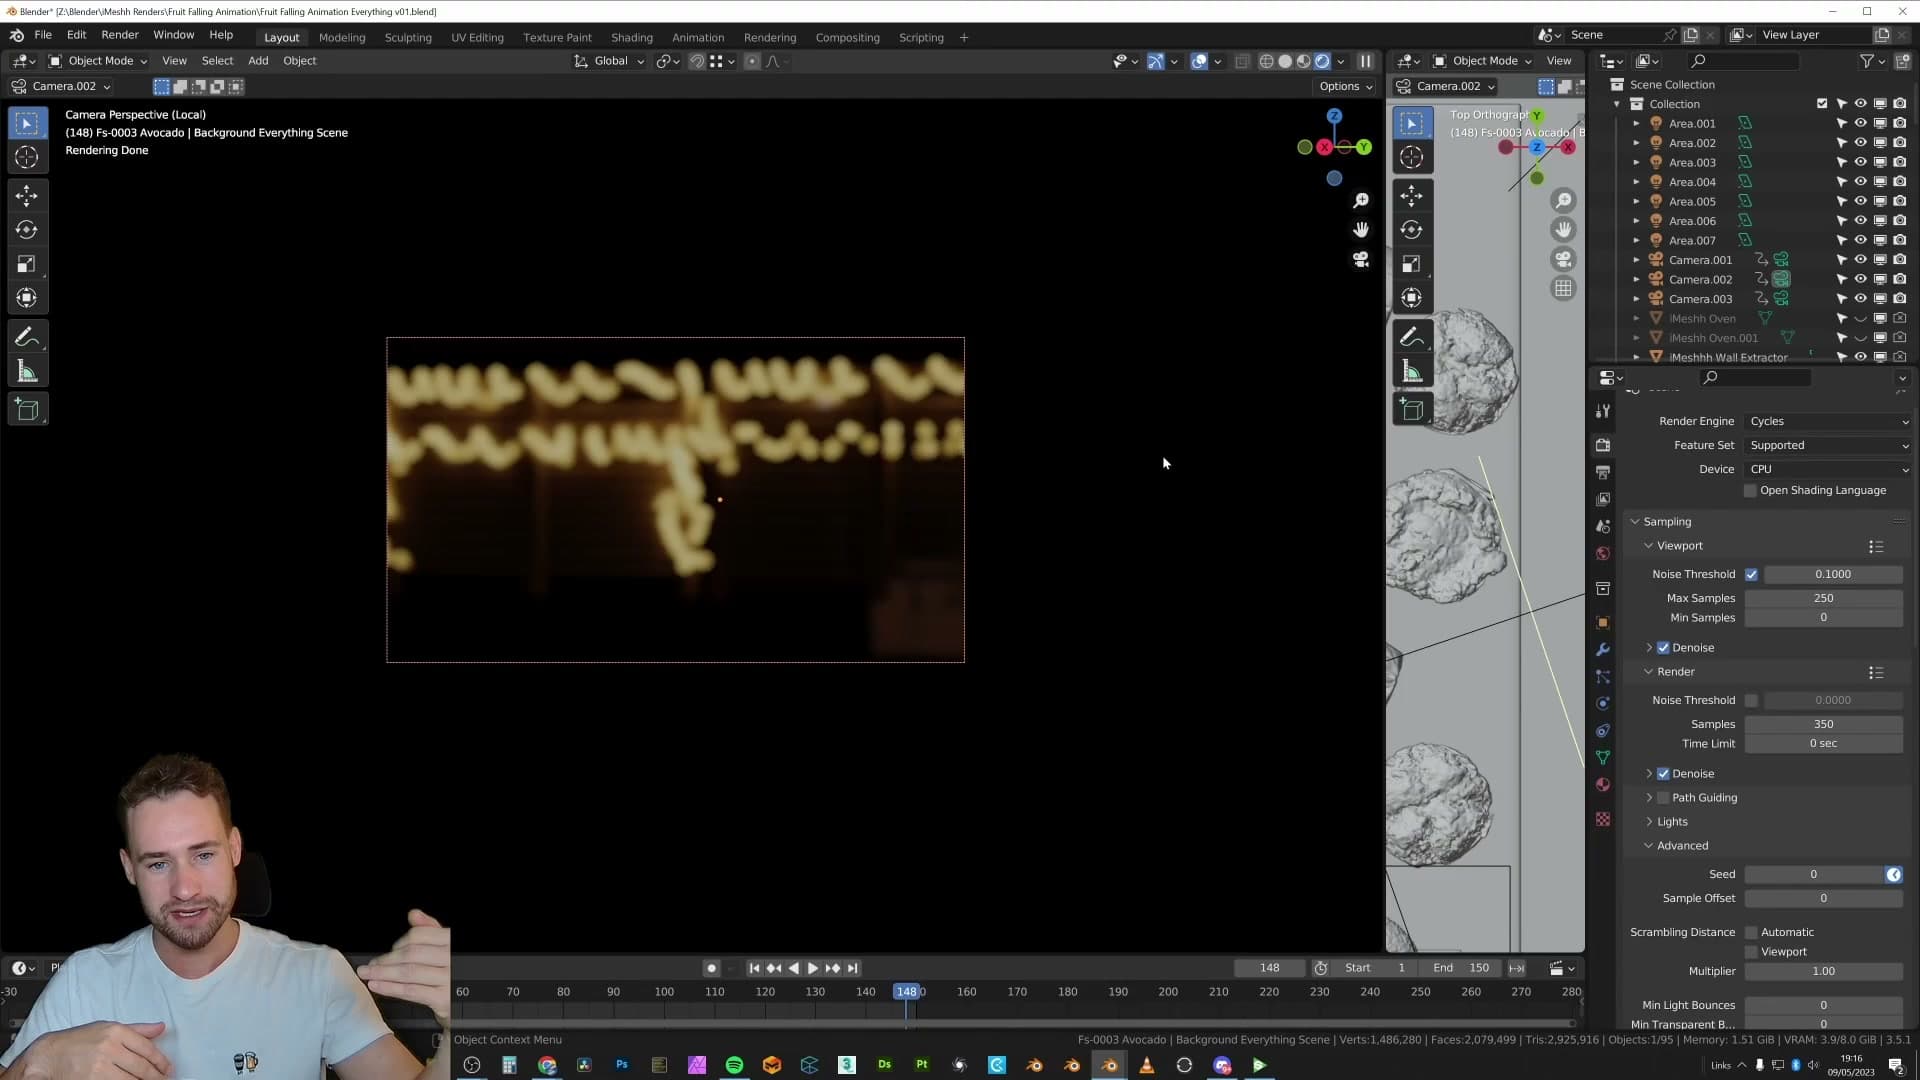
The right approach is to render the background plane completely in focus, then let the hero camera's depth of field do all the blurring naturally in the final frame. One source of blur is honest; two stacked on top of each other gives you a softer, more distant look than you asked for.
When faking the background is more work than just rendering it
Not every shot got the plane treatment. A few were borderline candidates, but framing the bake, rendering the still and positioning the plane back in 3D ended up being more fiddly than just letting Cycles chew through the real background. For those, I left the geometry as-is and rendered normally. The trick is powerful, but it isn't free. Pick your battles.
A simple three-point lighting rig (no HDRI)
Why a couple of fill lights, a key light and the odd rim light beat a full HDRI for this style of close-up product animation.
Three-point lighting with no HDRI
Every shot in this animation uses the same lighting philosophy: no HDRI, just a small handful of placed lights aimed at the hero fruit. For tight, product-style close-ups that's often the better call. An HDRI lights the entire scene uniformly, whereas a few well-positioned area lights give you direct control over where the highlights land and how soft the falloff reads on a glossy lemon skin.
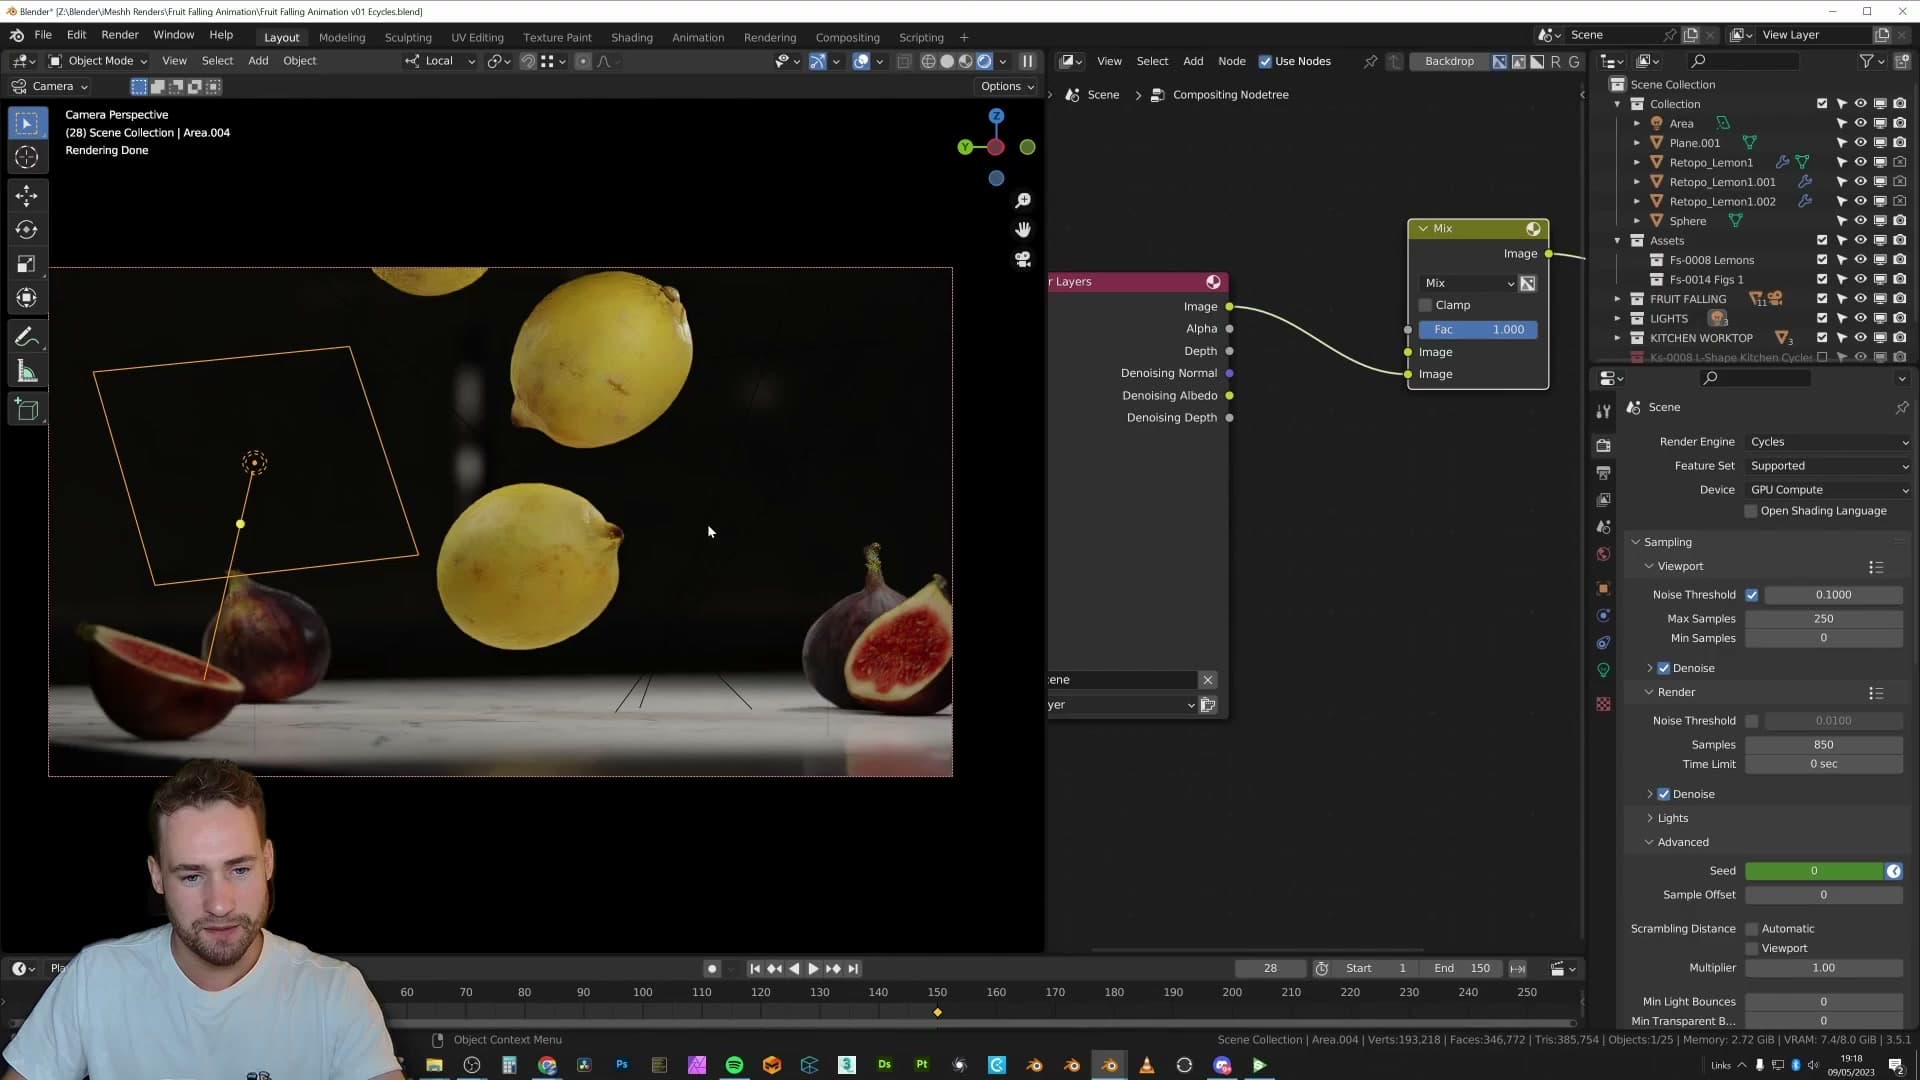
The rig itself is roughly three-point in spirit rather than a textbook key-fill-rim setup. You have a couple of fill lights doing the broad work, a couple of more focused lights acting as the key, and then the odd extra highlight tucked in on the side when a particular angle needs a bit more punch on an edge or a specular kick. Nothing exotic. The strength of the look comes from where the lights sit and how big they are, not from any single clever trick.
It's worth being honest about one other ingredient: good source geometry and shaders carry a lot of the weight here. The lighting is deliberately simple because the fruit assets already look convincing on their own, so the lights only need to flatter what's there rather than rescue it.
Falling lemons: soft body with a low-poly to high-poly proxy
The most efficient way to soft-body a 50,000-face fruit: remesh to a low-poly proxy, simulate that, then drive the hero mesh with Surface Deform.
The 50,000-face fruit that's too heavy to simulate
The lemons that bounce on the surface in the slow-motion section are doing real soft body simulation. But the hero lemon is roughly 50,000 faces. Every bump, dimple and pore is modelled, which is exactly what you want for a close-up render and exactly what you don't want anywhere near a physics solver.
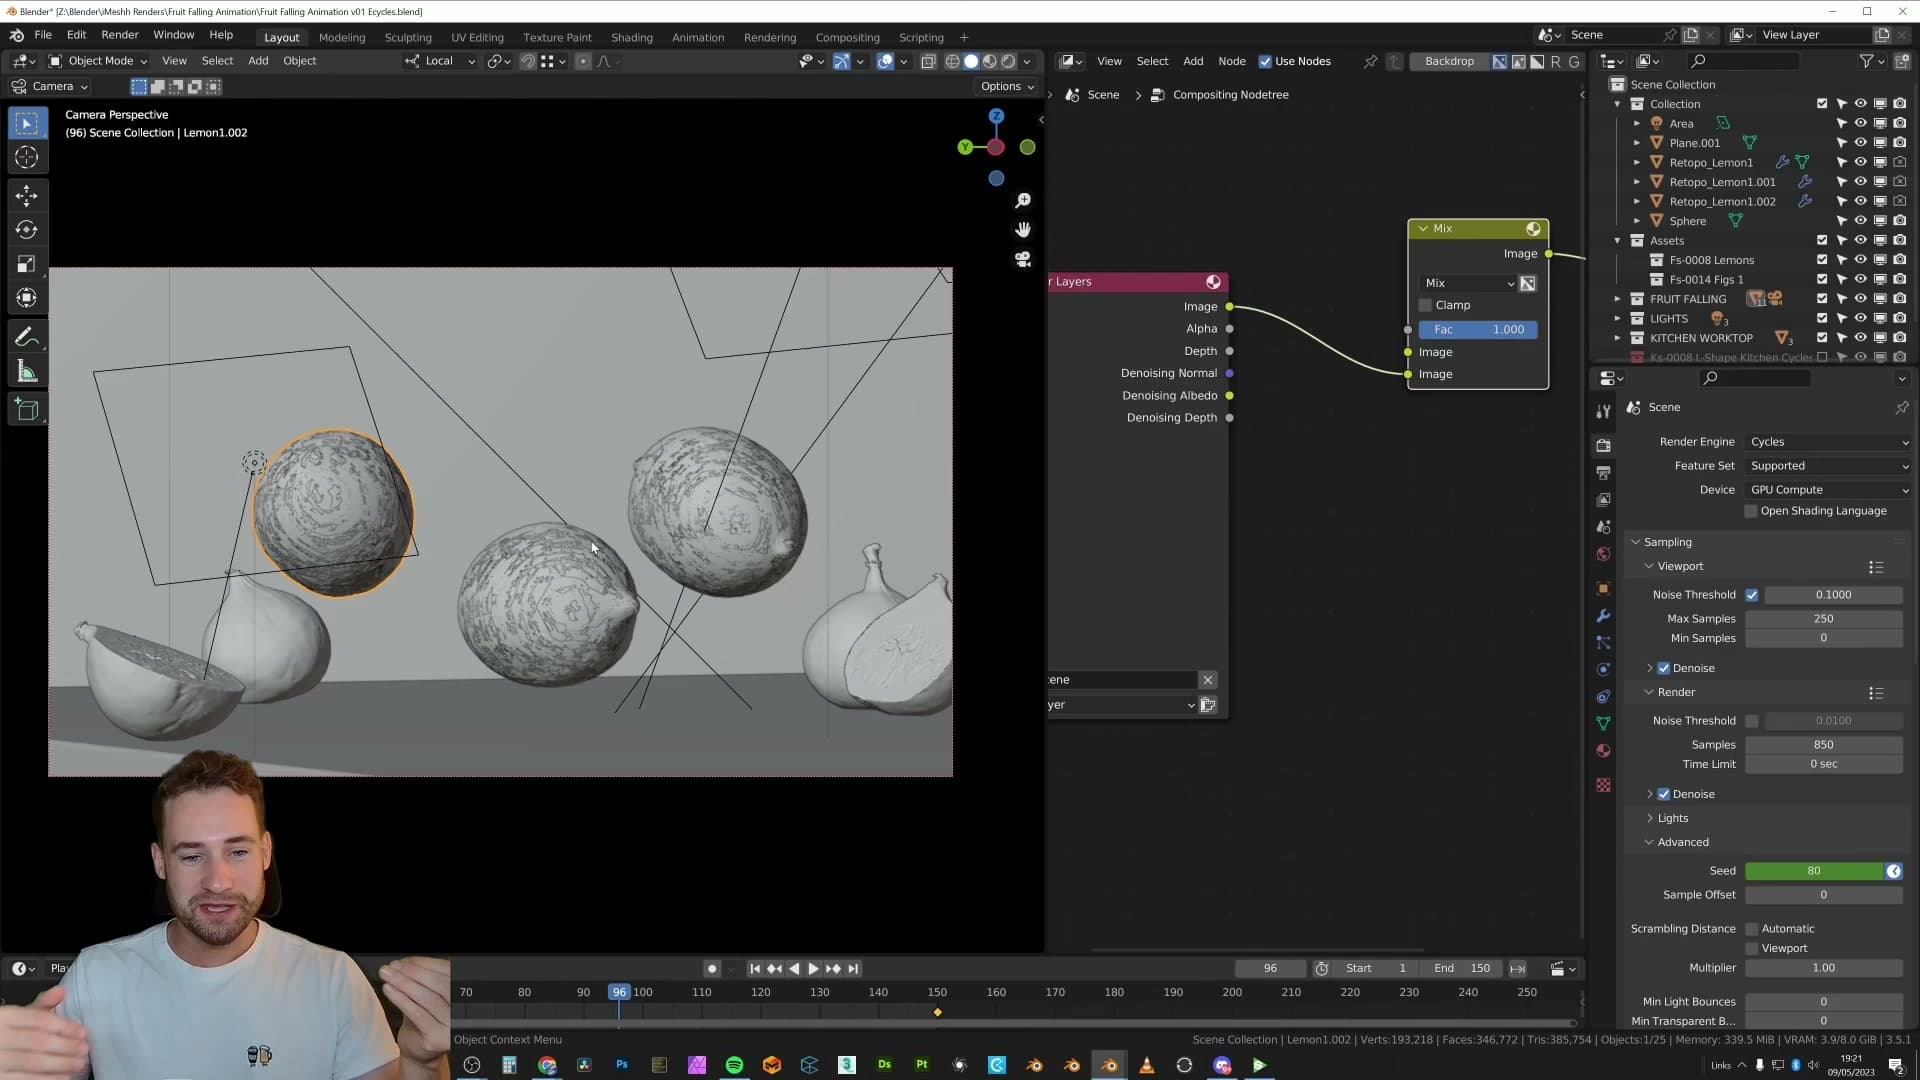
Throw that mesh straight at Blender's soft body system and feedback slows to a crawl. You scrub one frame and wait. Tweak a stiffness value, wait again. Over a 190-frame shot that loop is unworkable, and you'll never converge on settings you like.
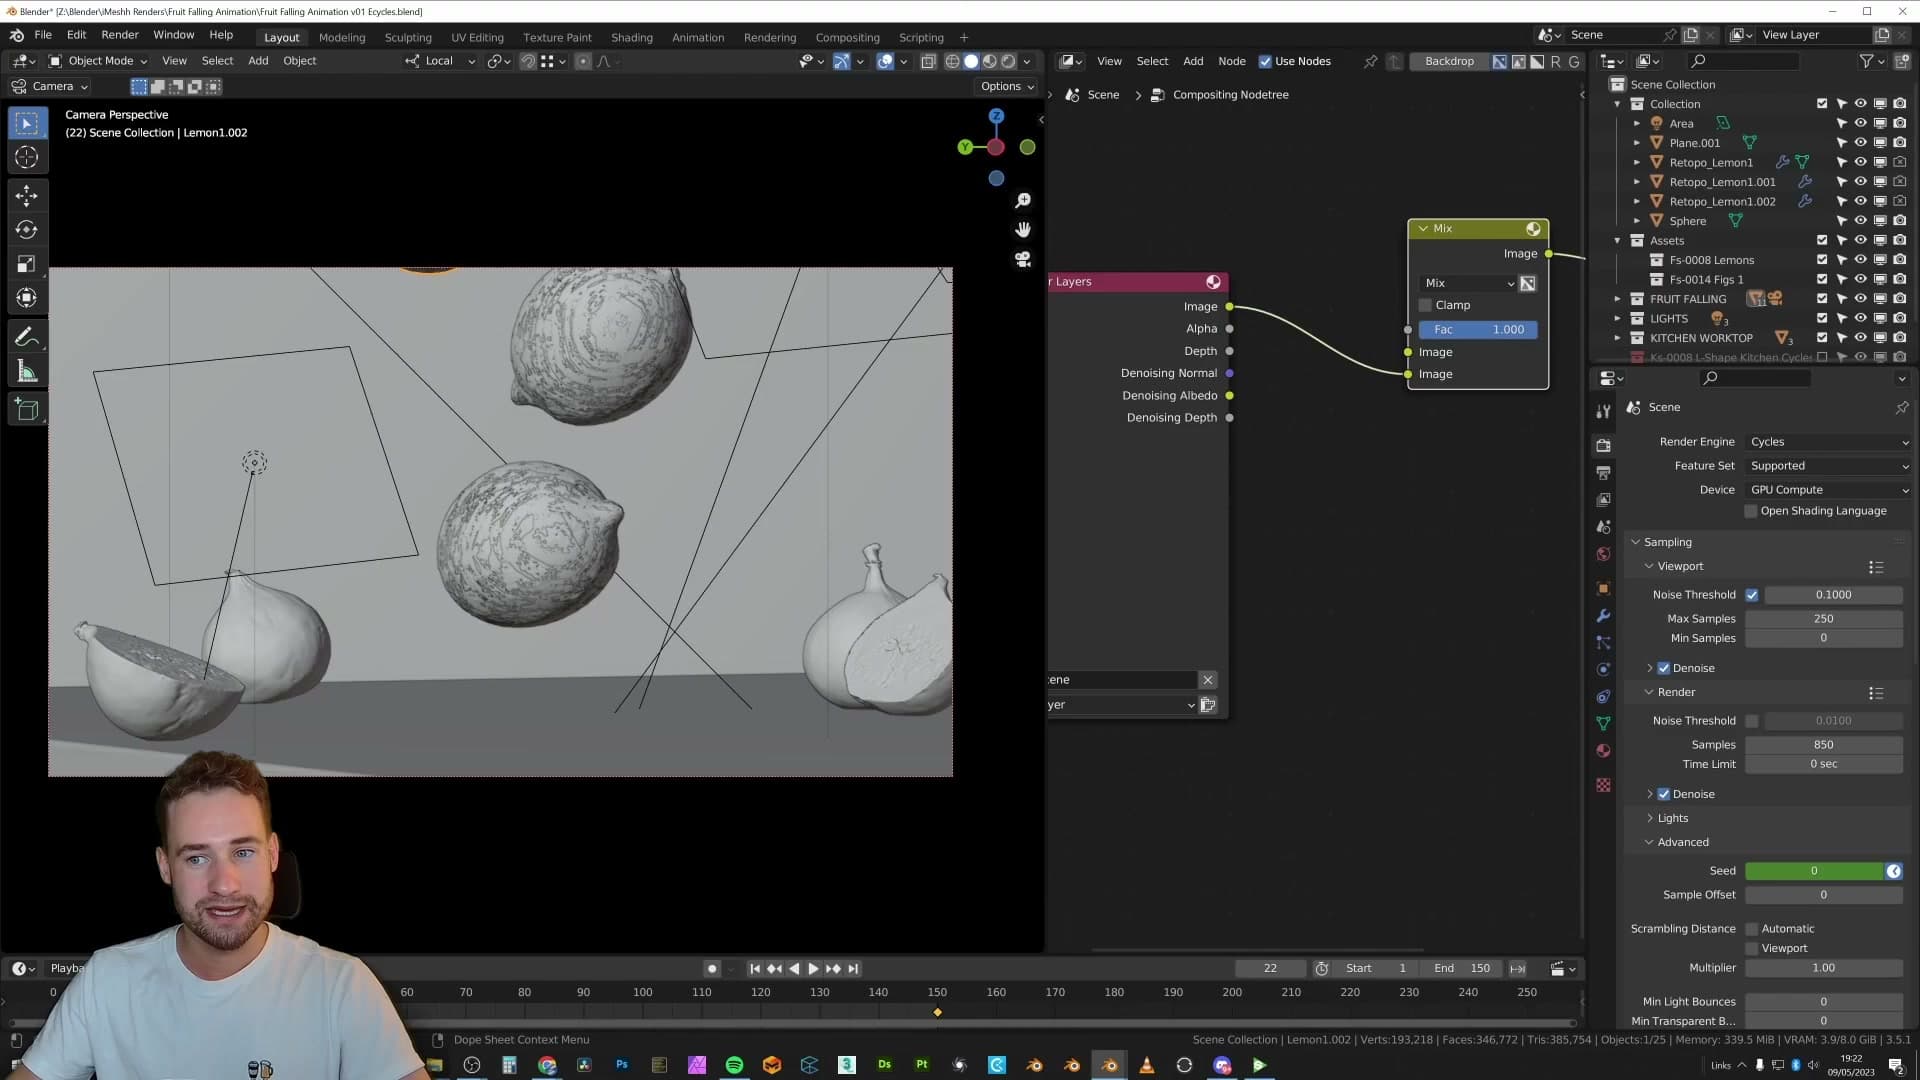
The fix is a proxy. You simulate a stripped-down version of the fruit and tie the hero mesh to it after the fact. Looking back, I wish I'd dialled the softness up further. The lemons read a touch firm in the final shot. But the high-low workflow itself is the bit worth copying.
Quad Remesher down to about 350 faces
I remesh with the Quad Remesher add-on. It's a paid tool rather than a built-in Blender option, but I recommend it specifically for jobs like this where you want clean quad topology in a single click instead of fighting with Decimate.
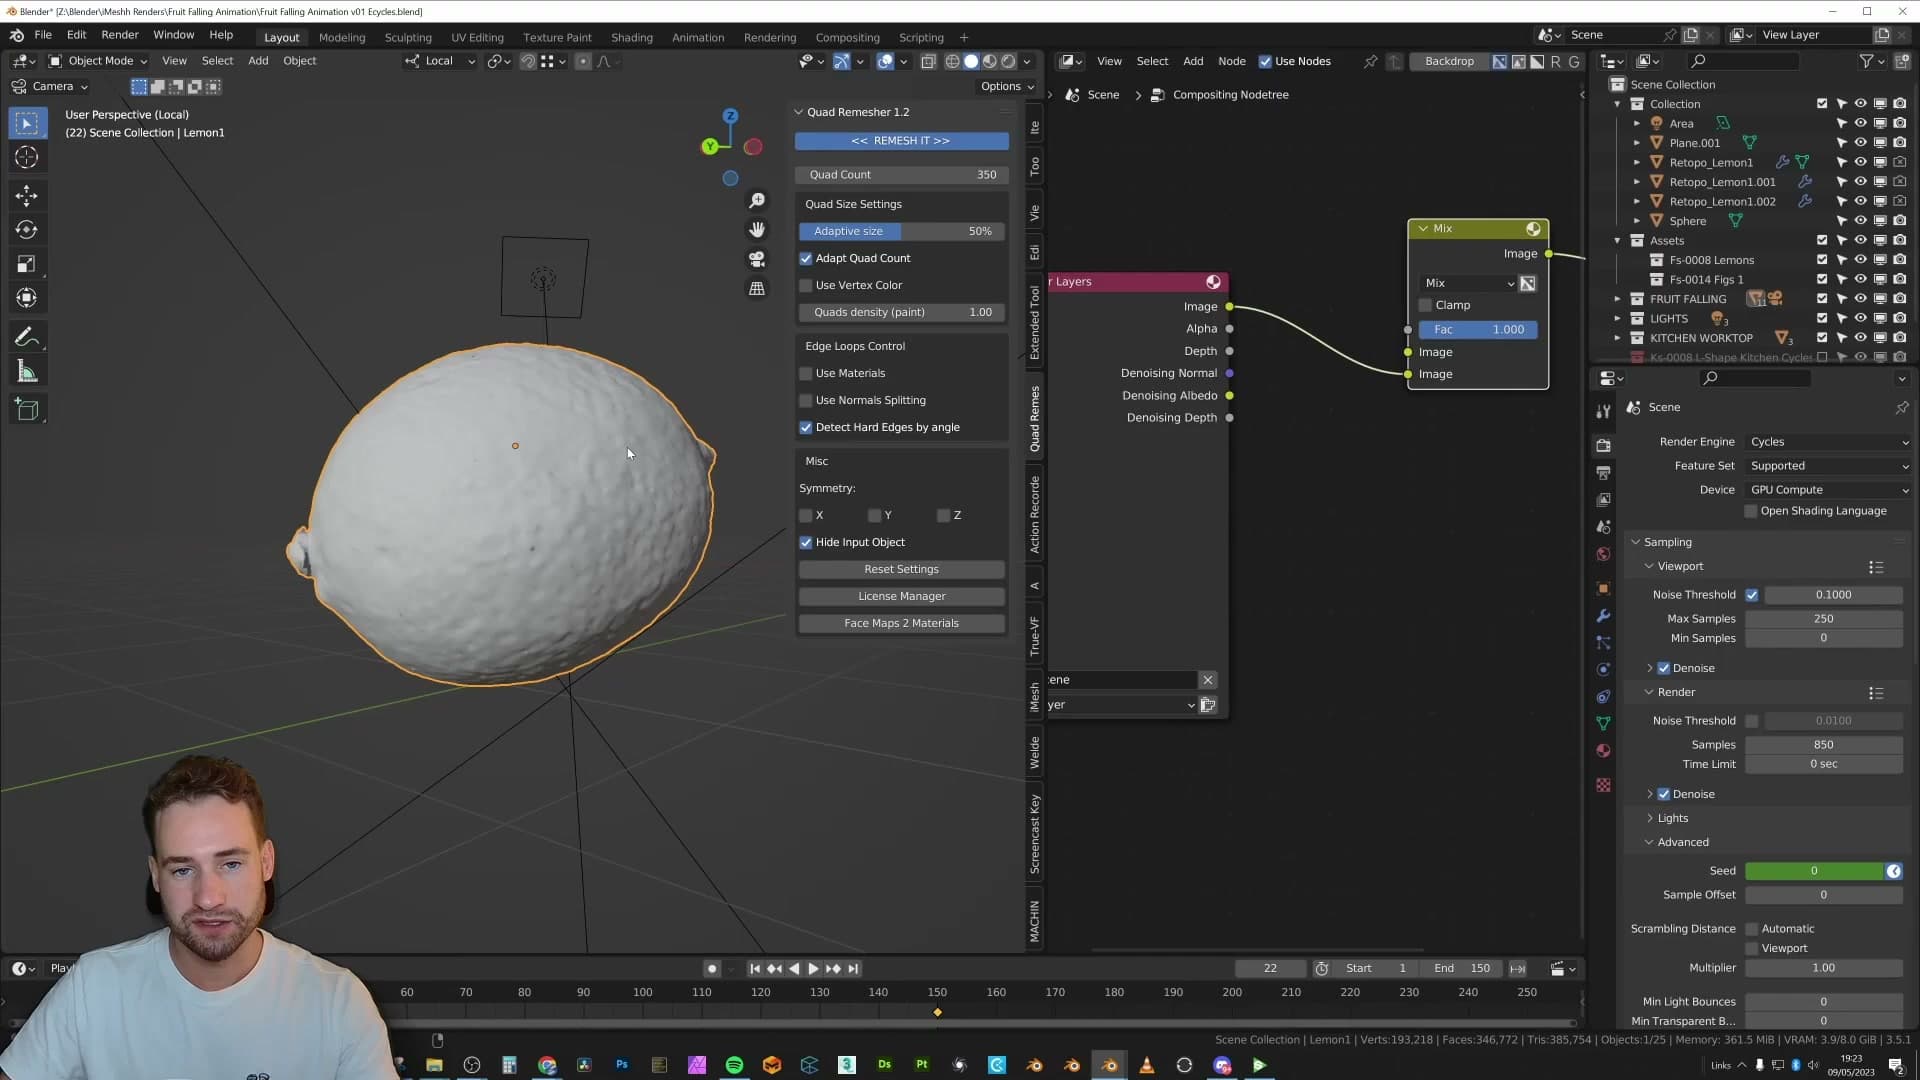
The workflow is short. Select the hero lemon, open Quad Remesher, set the target to about 350 faces, then run the remesh. The add-on does its best to hit that target with even quad flow.
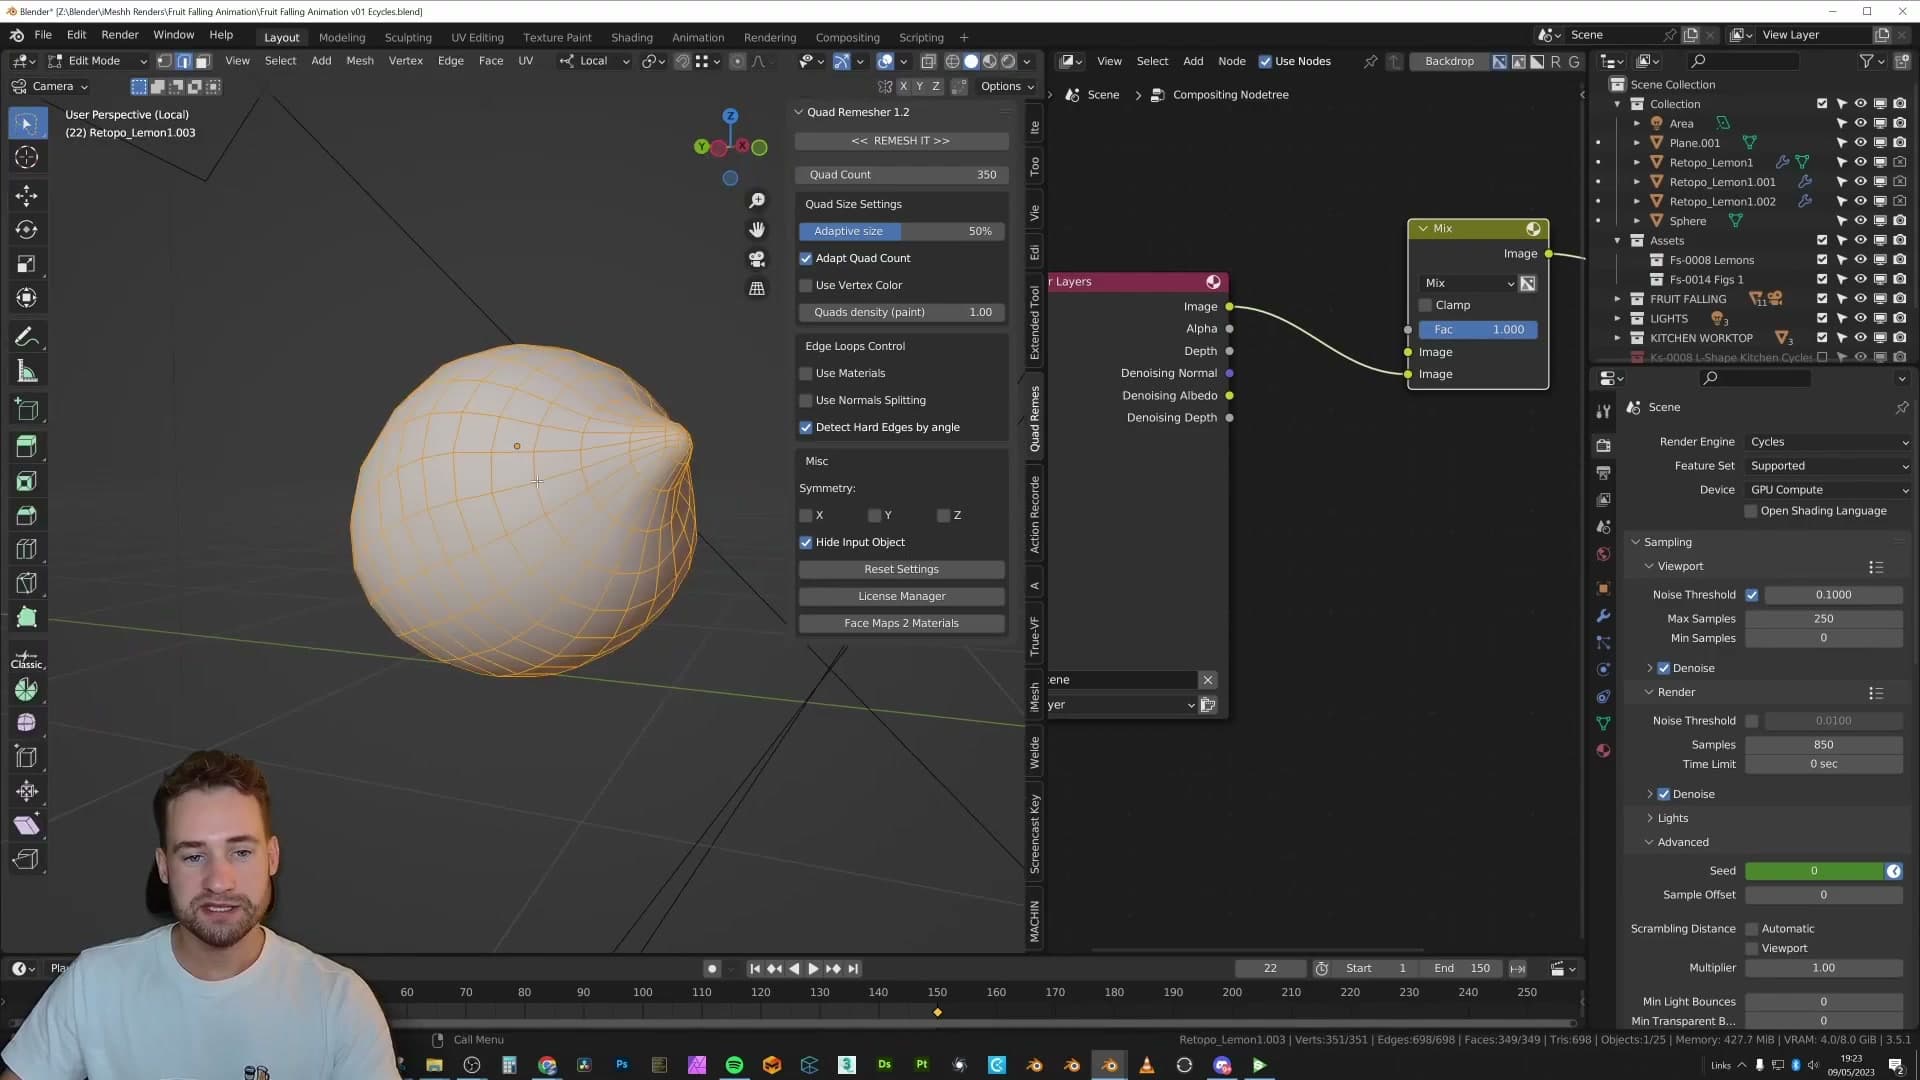
What comes back is a recognisably lemon-shaped low-poly proxy. It's no use for rendering (up close it would read as faceted), but it is exactly what a soft body solver wants: a small number of well-distributed quads that describe how the volume bends and bounces.
Soft body settings on the low-poly lemons
Each of the remeshed lemons gets two pieces of physics: Collision so the lemons interact with the table and with each other, and Soft Body so they squash on impact instead of behaving like billiard balls.
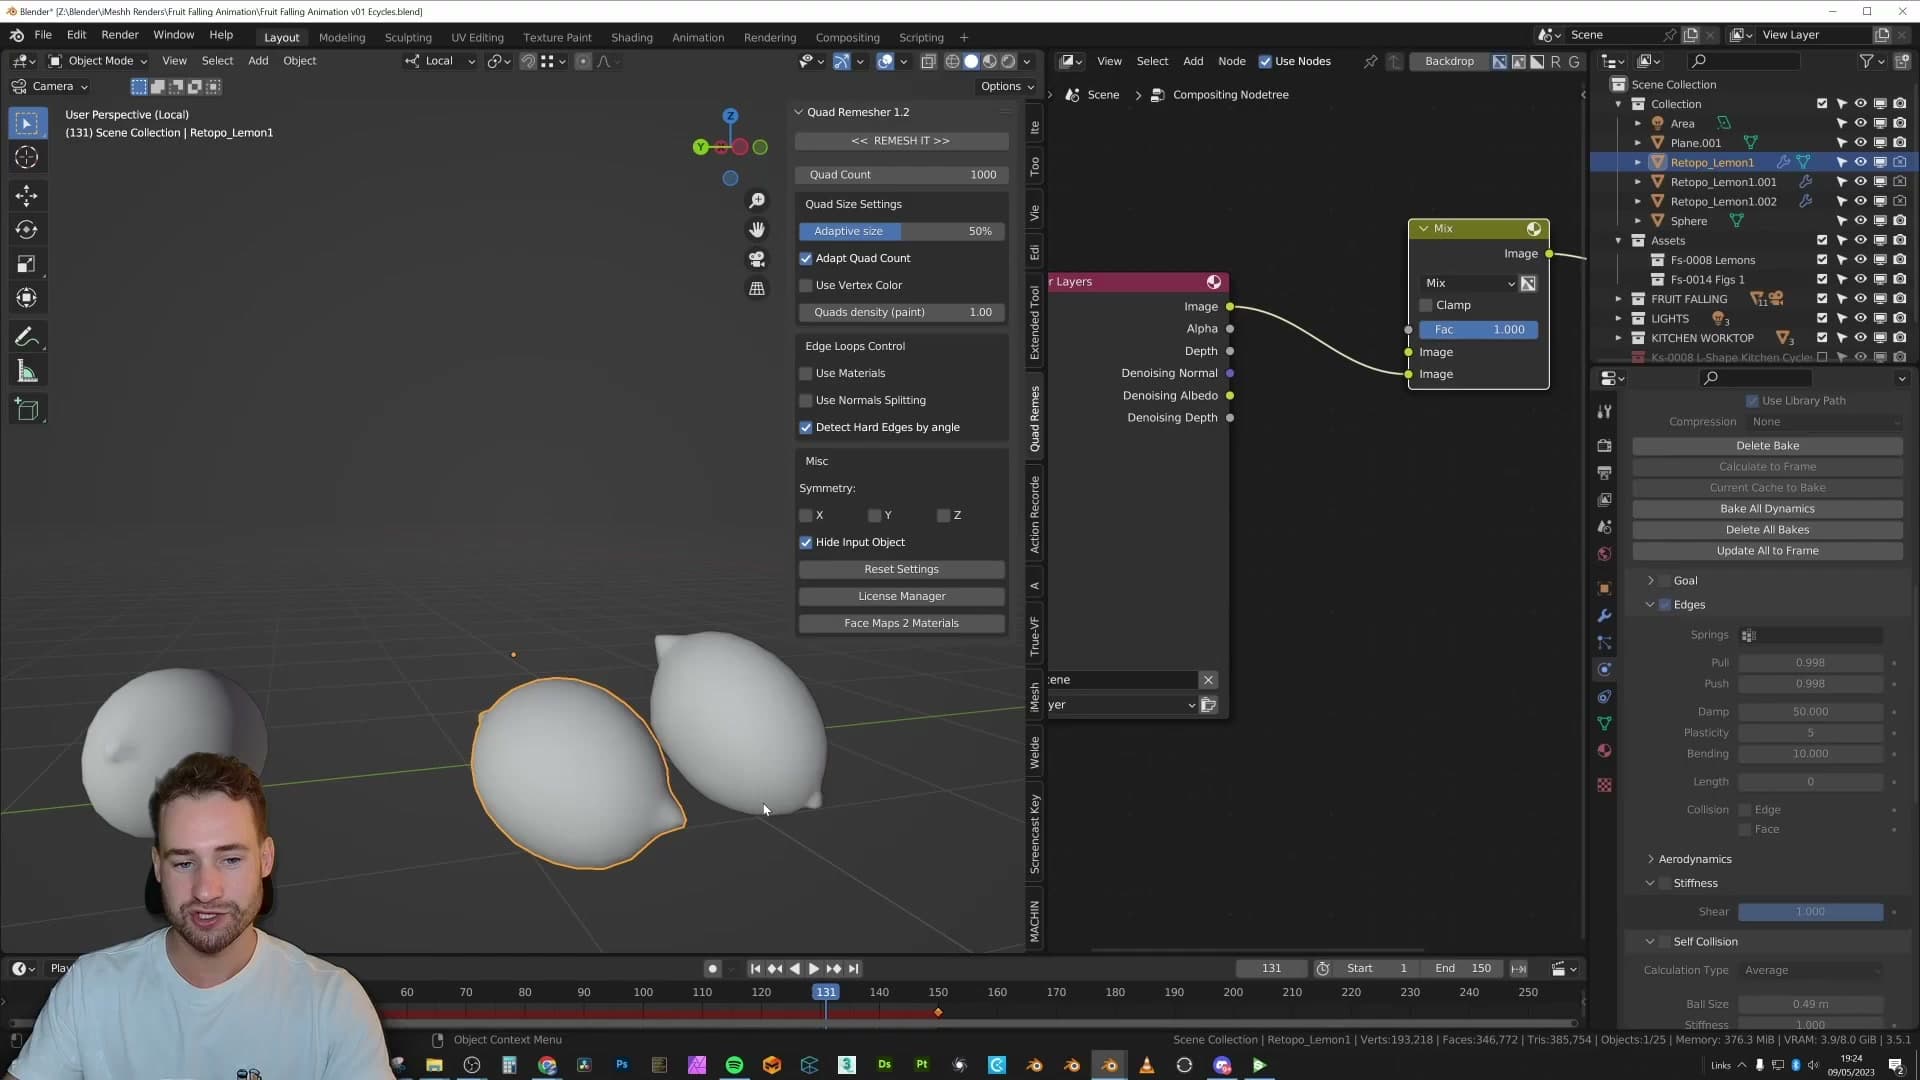
I deliberately don't walk through the soft body sliders. The panel is on screen and the values are visible if you want to copy them, but there's one caveat that matters more than any individual setting.
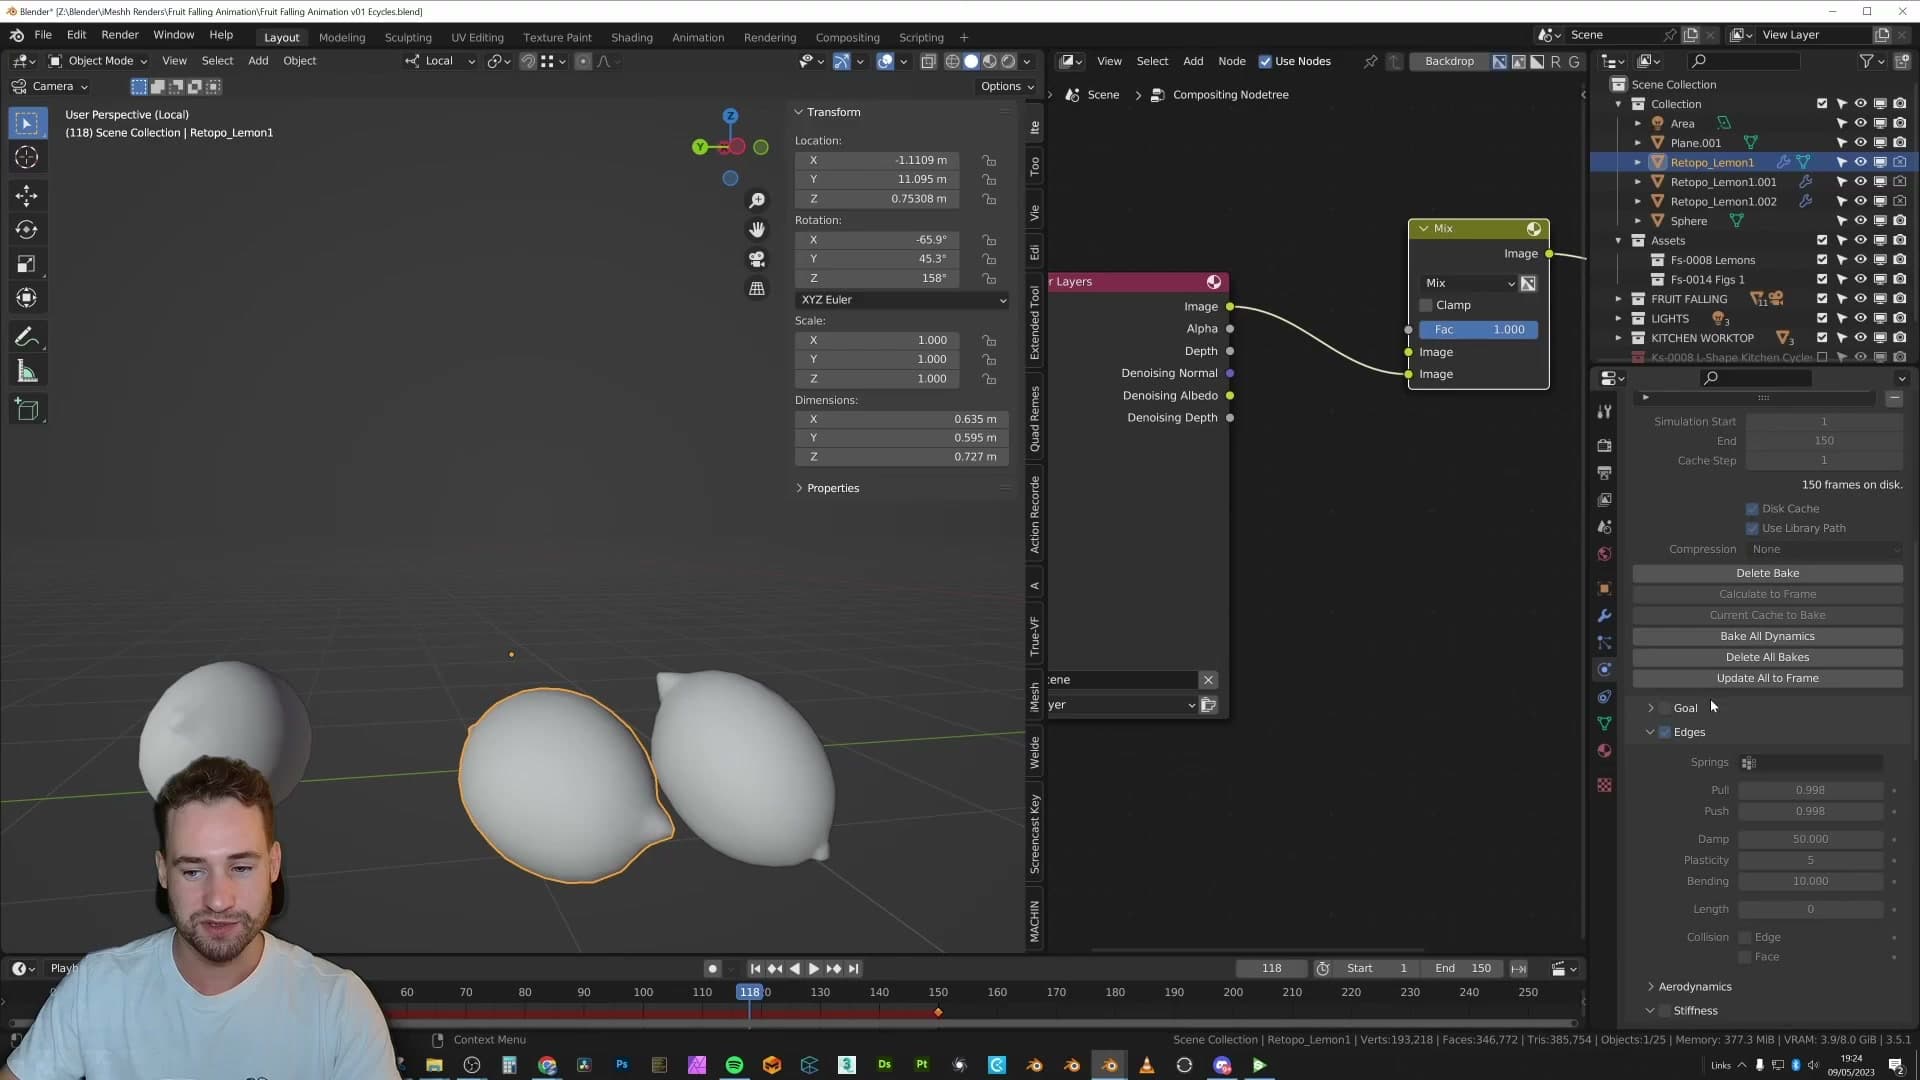
With the panel set and the bake running, the low-poly lemons deform just enough to read as fruit rather than rubber. Crucially, the feedback loop is fast. You can scrub, tweak and re-bake without grinding the viewport to a halt, which is the whole point of simulating the proxy instead of the hero mesh.
Driving the hero mesh with Surface Deform
With the low-poly simulation behaving the way you want, you can tie the hero mesh back in. The connector is the Surface Deform modifier.
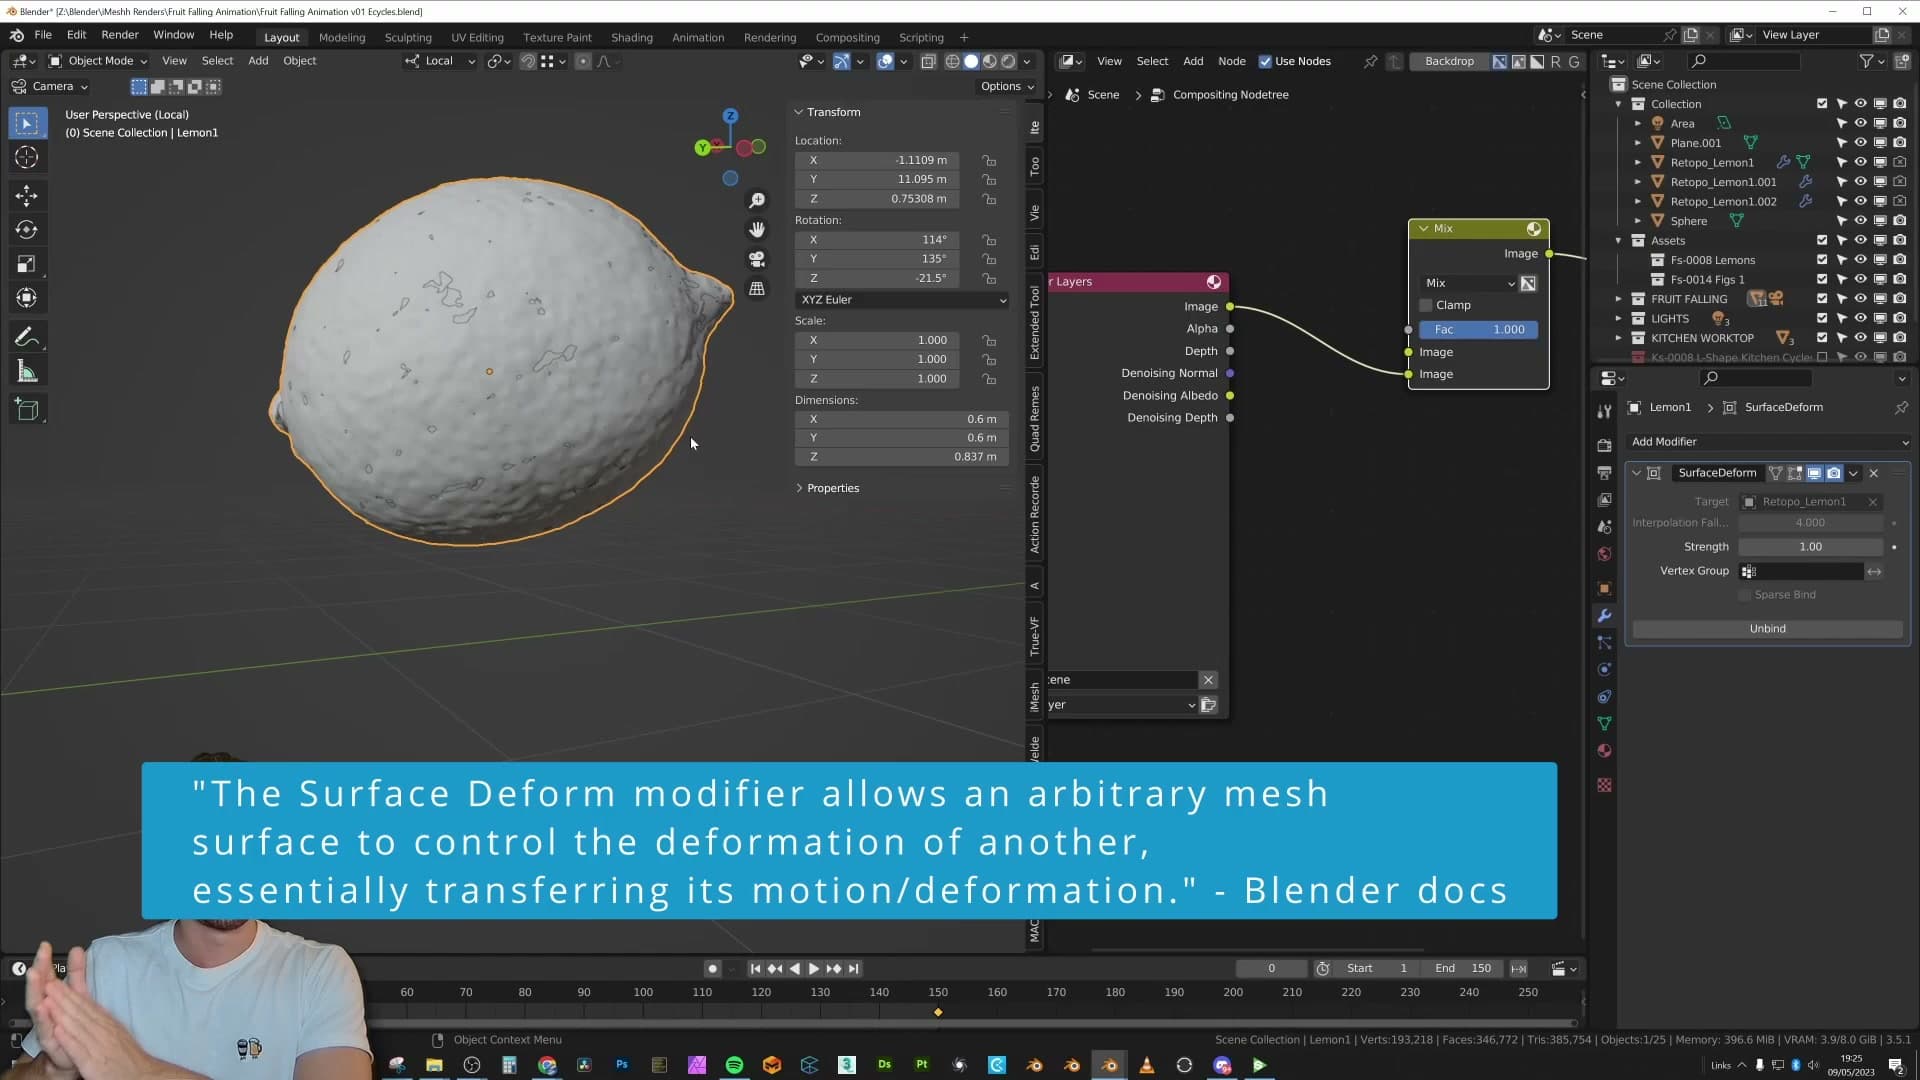
Select the high-poly hero lemon and add a Surface Deform modifier. Set the target to the matching low-poly proxy, scrub back to the first frame of the simulation, then click Bind. From that point on, the modifier locks the hero mesh to the surface of the proxy.
Every wobble and squash on the 350-face proxy is now mirrored on the 50,000-face hero. The solver never touches the heavy geometry, but in the rendered frame the fruit you modelled is, to the camera, the fruit you simulated.
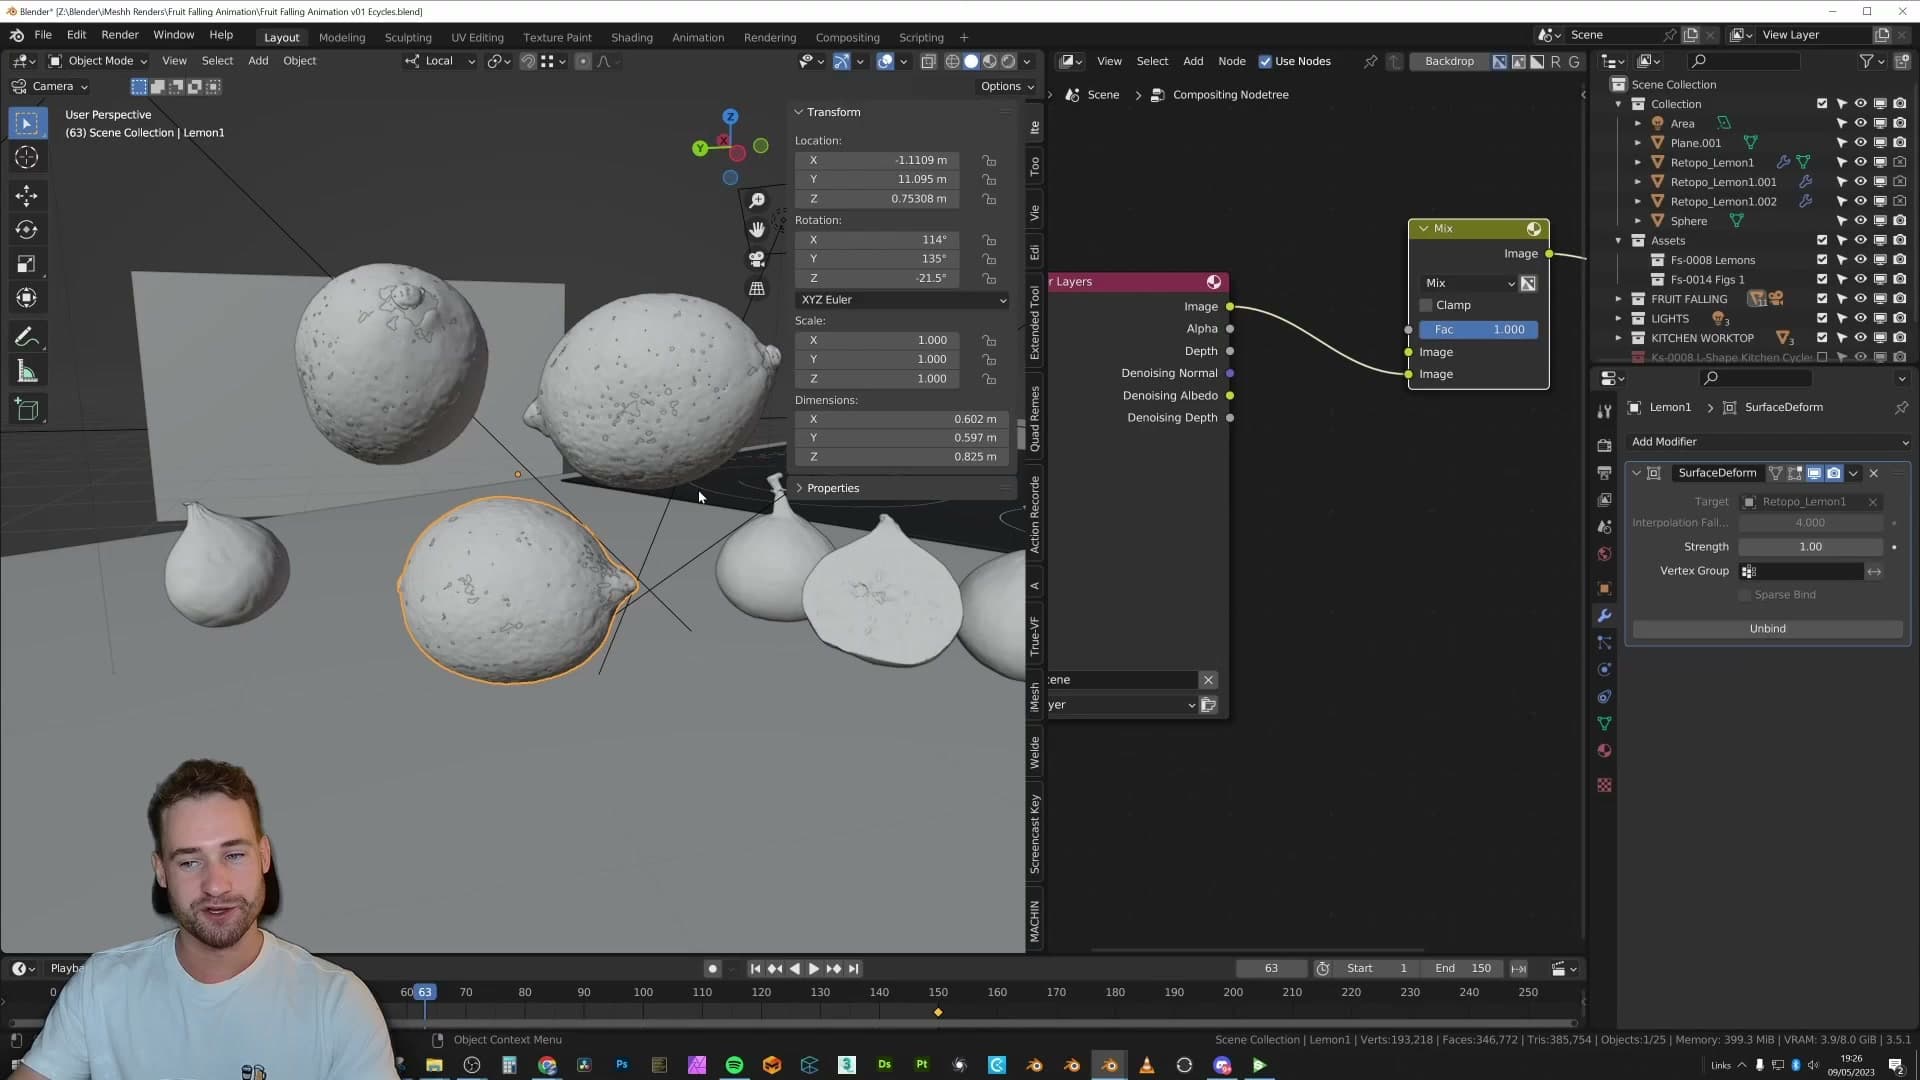
I'd push the softness further if I were doing the shot again. But the high-low proxy technique itself is what I was pleased with, and it generalises well beyond fruit. Anything you'd want to soft body but is too dense to simulate directly (cushions, bread, soft-edge product hero shots) is a candidate for the same trick.
Avocados into the drawer: rigid body and collision shapes
Convex Hull for the fruit, Mesh for the drawer. Why mixing collision shape types is the trick for clean cupboard interactions.
Convex Hull for fruit, Mesh for the drawer handles
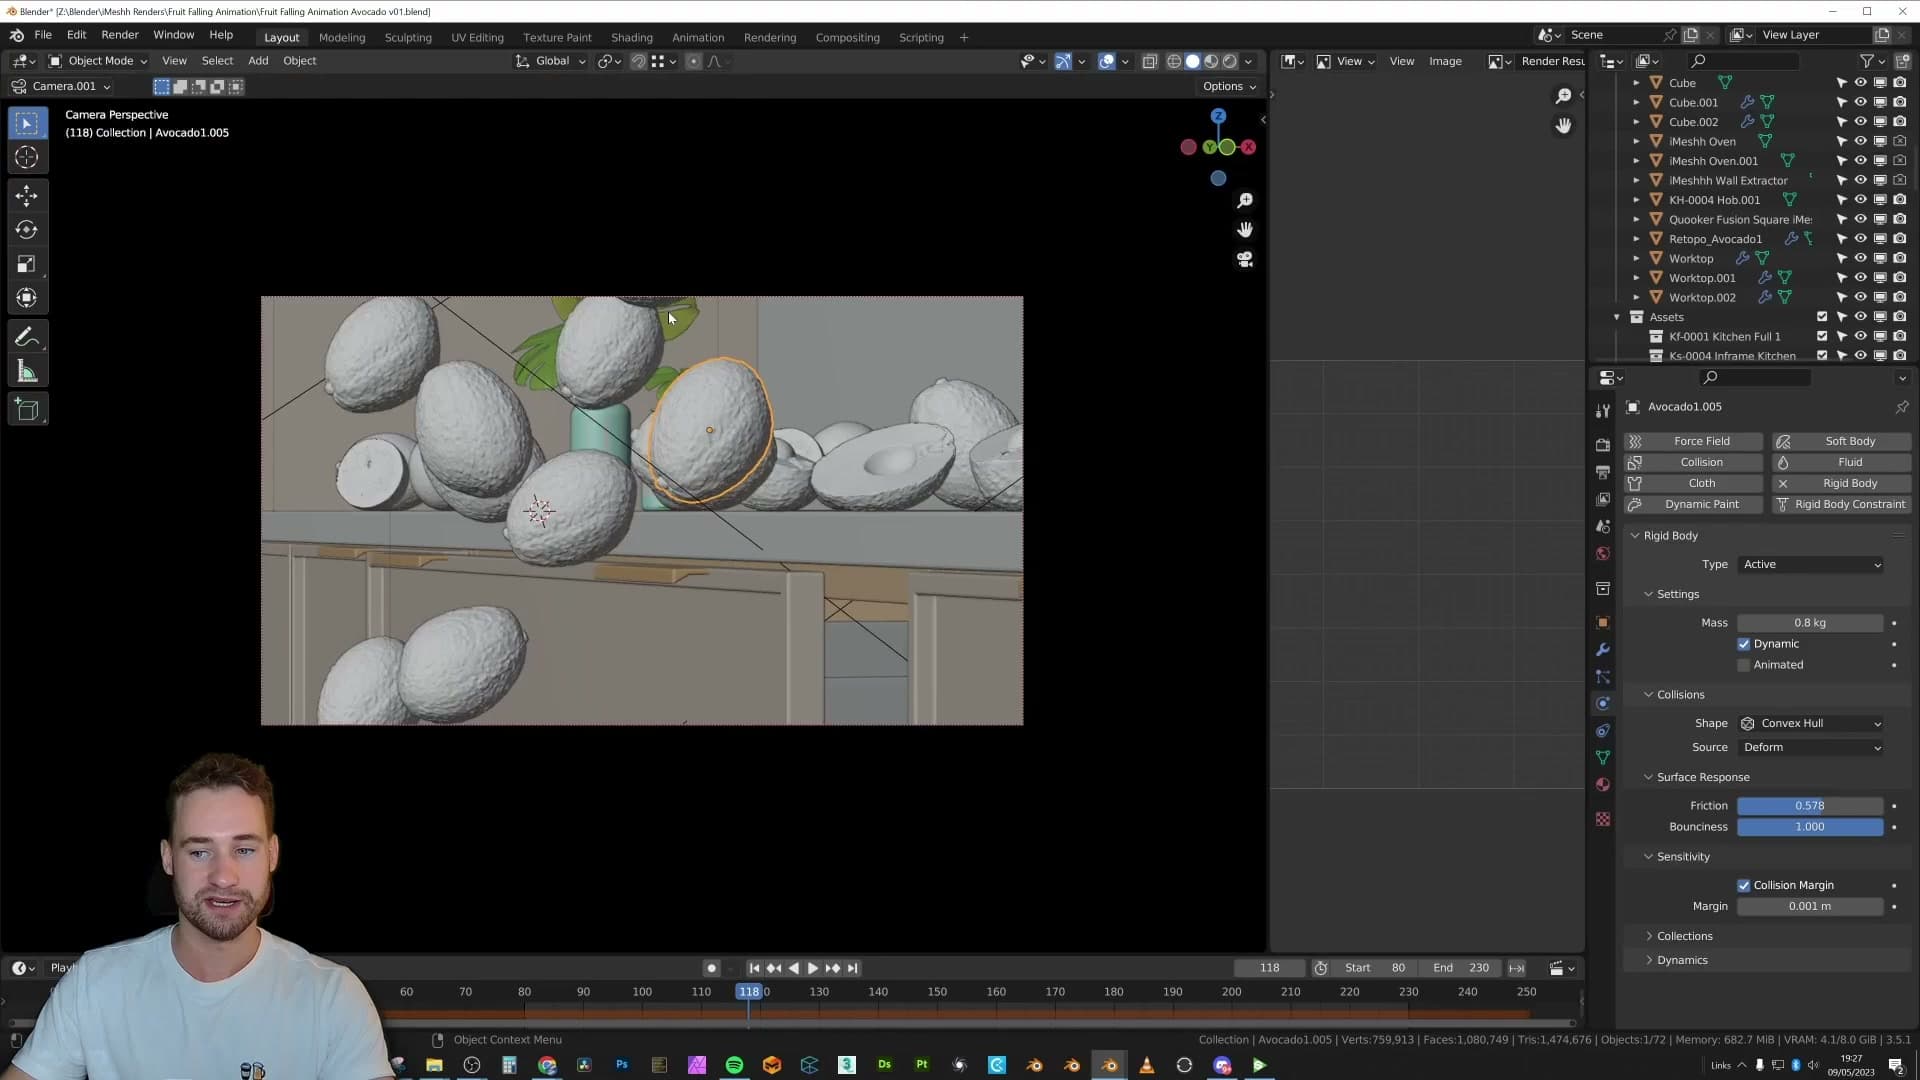
Both the avocados and the drawer use rigid body, but with very different collision shapes, and that mix is the trick. The avocados are active rigid bodies on Convex Hull collision. In hindsight, soft body would have sold the squash on impact better. The fruit reads as a touch too solid when it hits the drawer sides. But the falling motion itself works, and Convex Hull is fast enough that the sim bakes quickly.
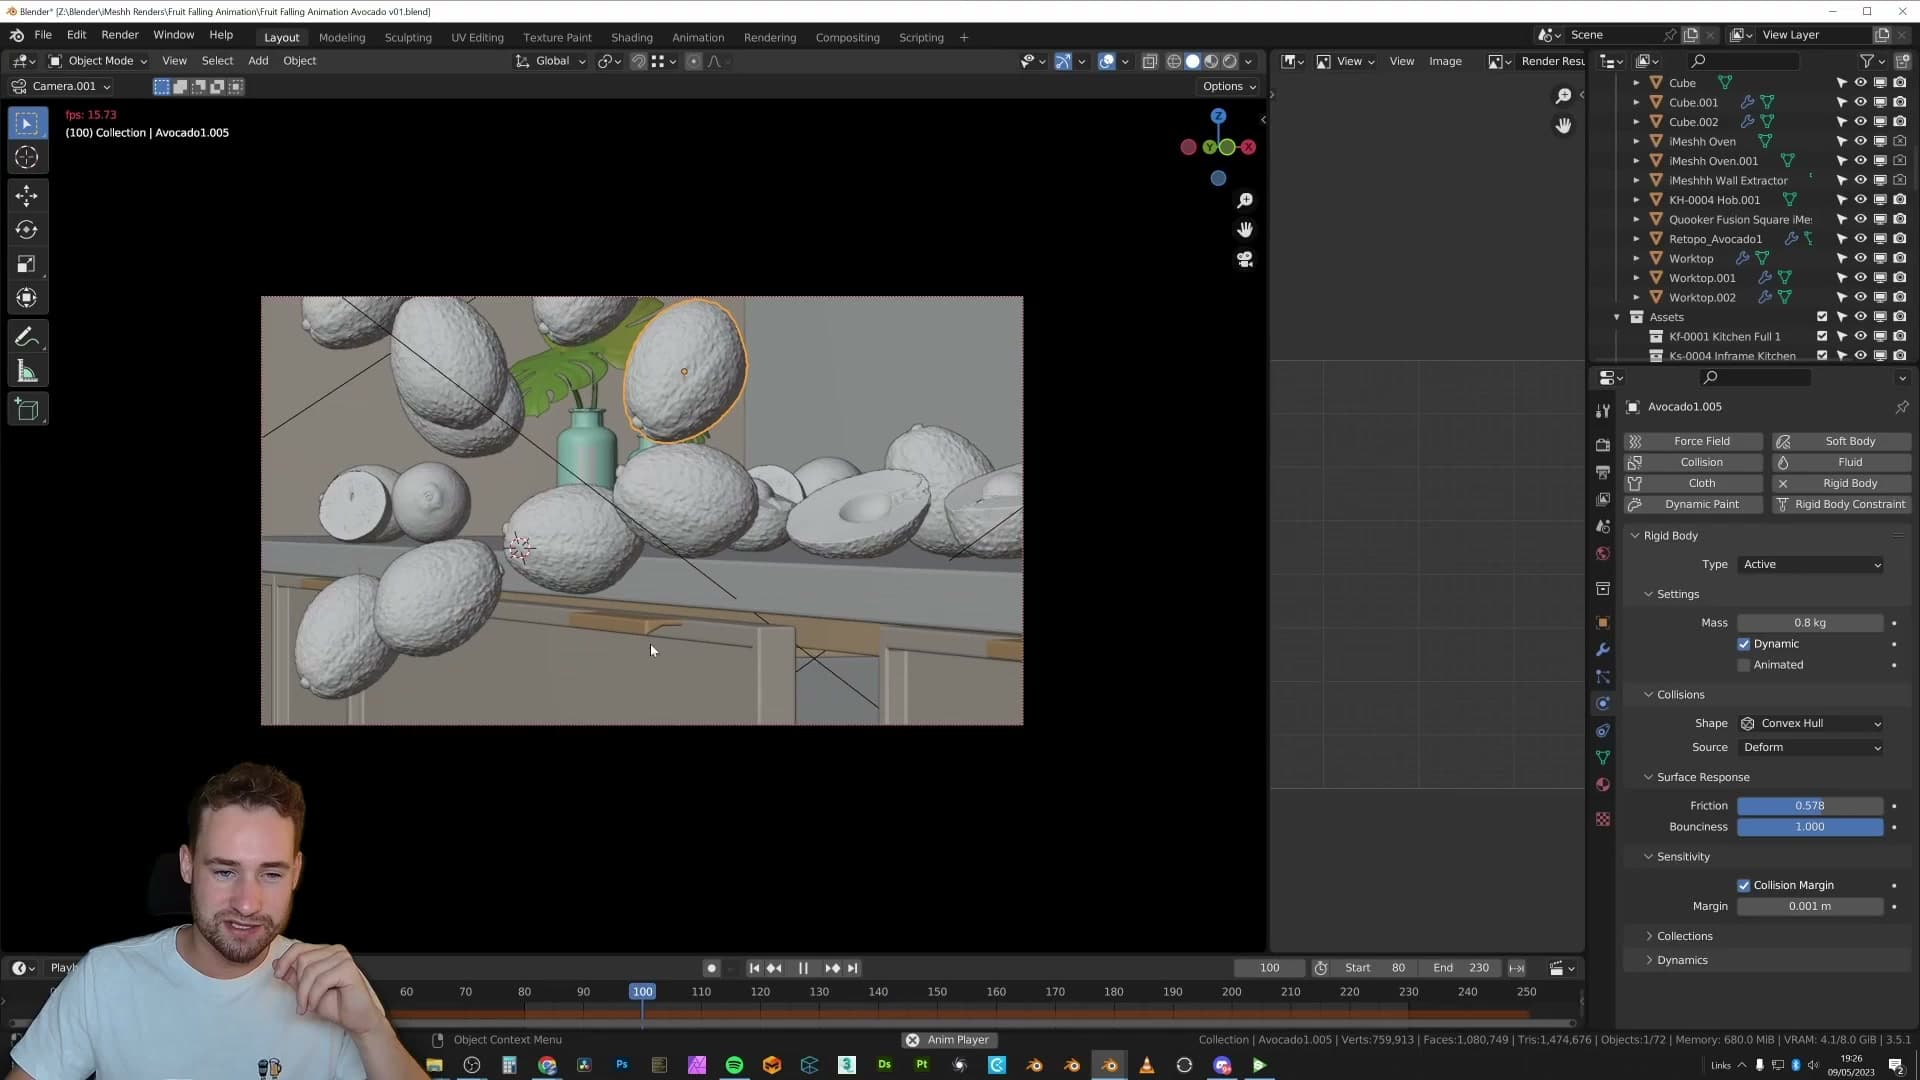
The drawer is a passive rigid body so the fruit can land on it without it moving. The important detail is its collision shape: Mesh, not Convex Hull. Convex Hull would have wrapped a single envelope across the front of the drawer face, smoothing over the recesses where the handles sit and treating the whole face as one continuous plane. Fruit landing near a handle would bounce off an invisible surface that isn't actually there. Mesh respects the real geometry, so the gaps around the handles behave the way the eye expects.
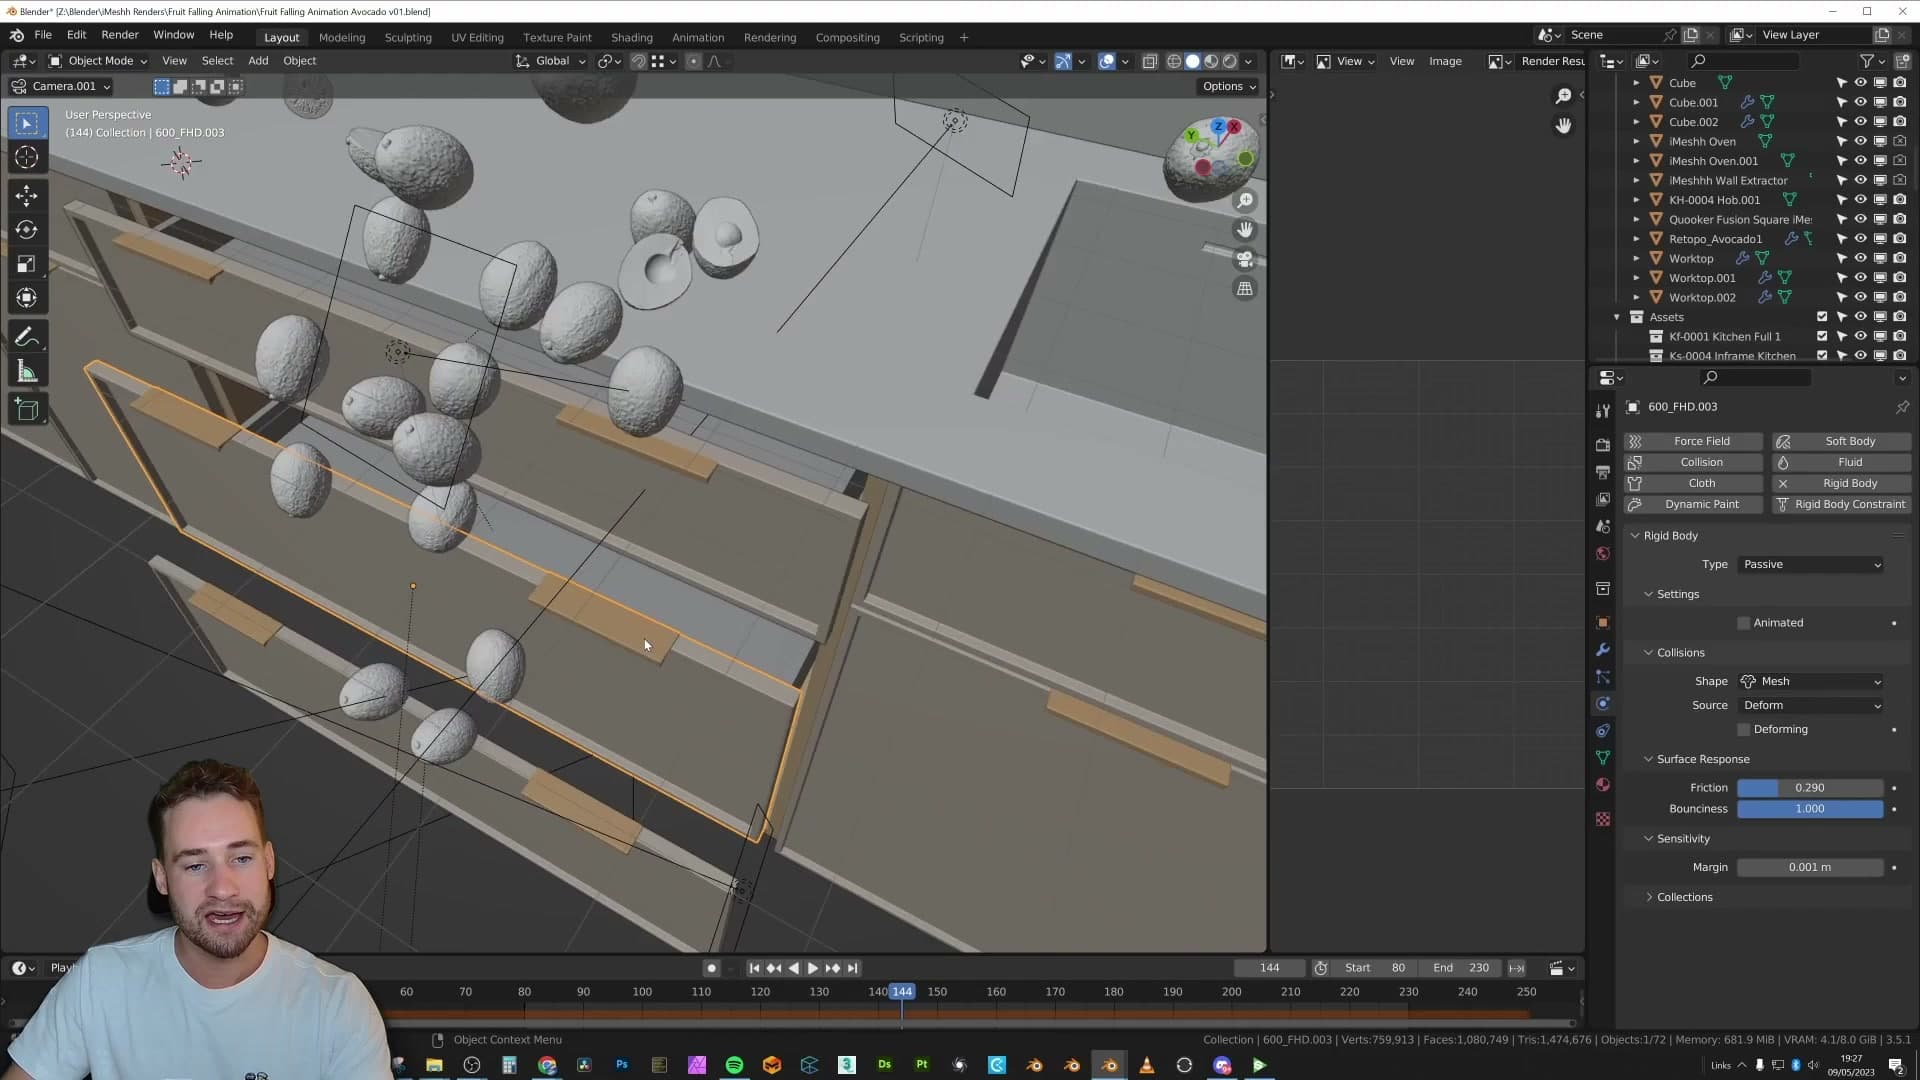
With only the drawer on Mesh collision and everything else on Convex Hull, the simulation still ran quickly. From there it was almost embarrassingly simple: place the fruit up at the top of the frame, let the solver run, bake, and record the shot.
Flying oranges: low gravity and a hidden push cube
How to make rigid bodies look like they're being shoved out of a cupboard rather than dropping passively: cheat gravity and add a hidden pusher.
Cranking gravity down so fruit flies, not falls
The cupboard reveal needs the oranges to fly outward, not tumble out. If you leave gravity at its real-world value, every rigid body in the shot picks up a visible downward arc the moment it clears the door. A piece of fruit that drops more than it shoots reads as something falling, not something being shoved out.
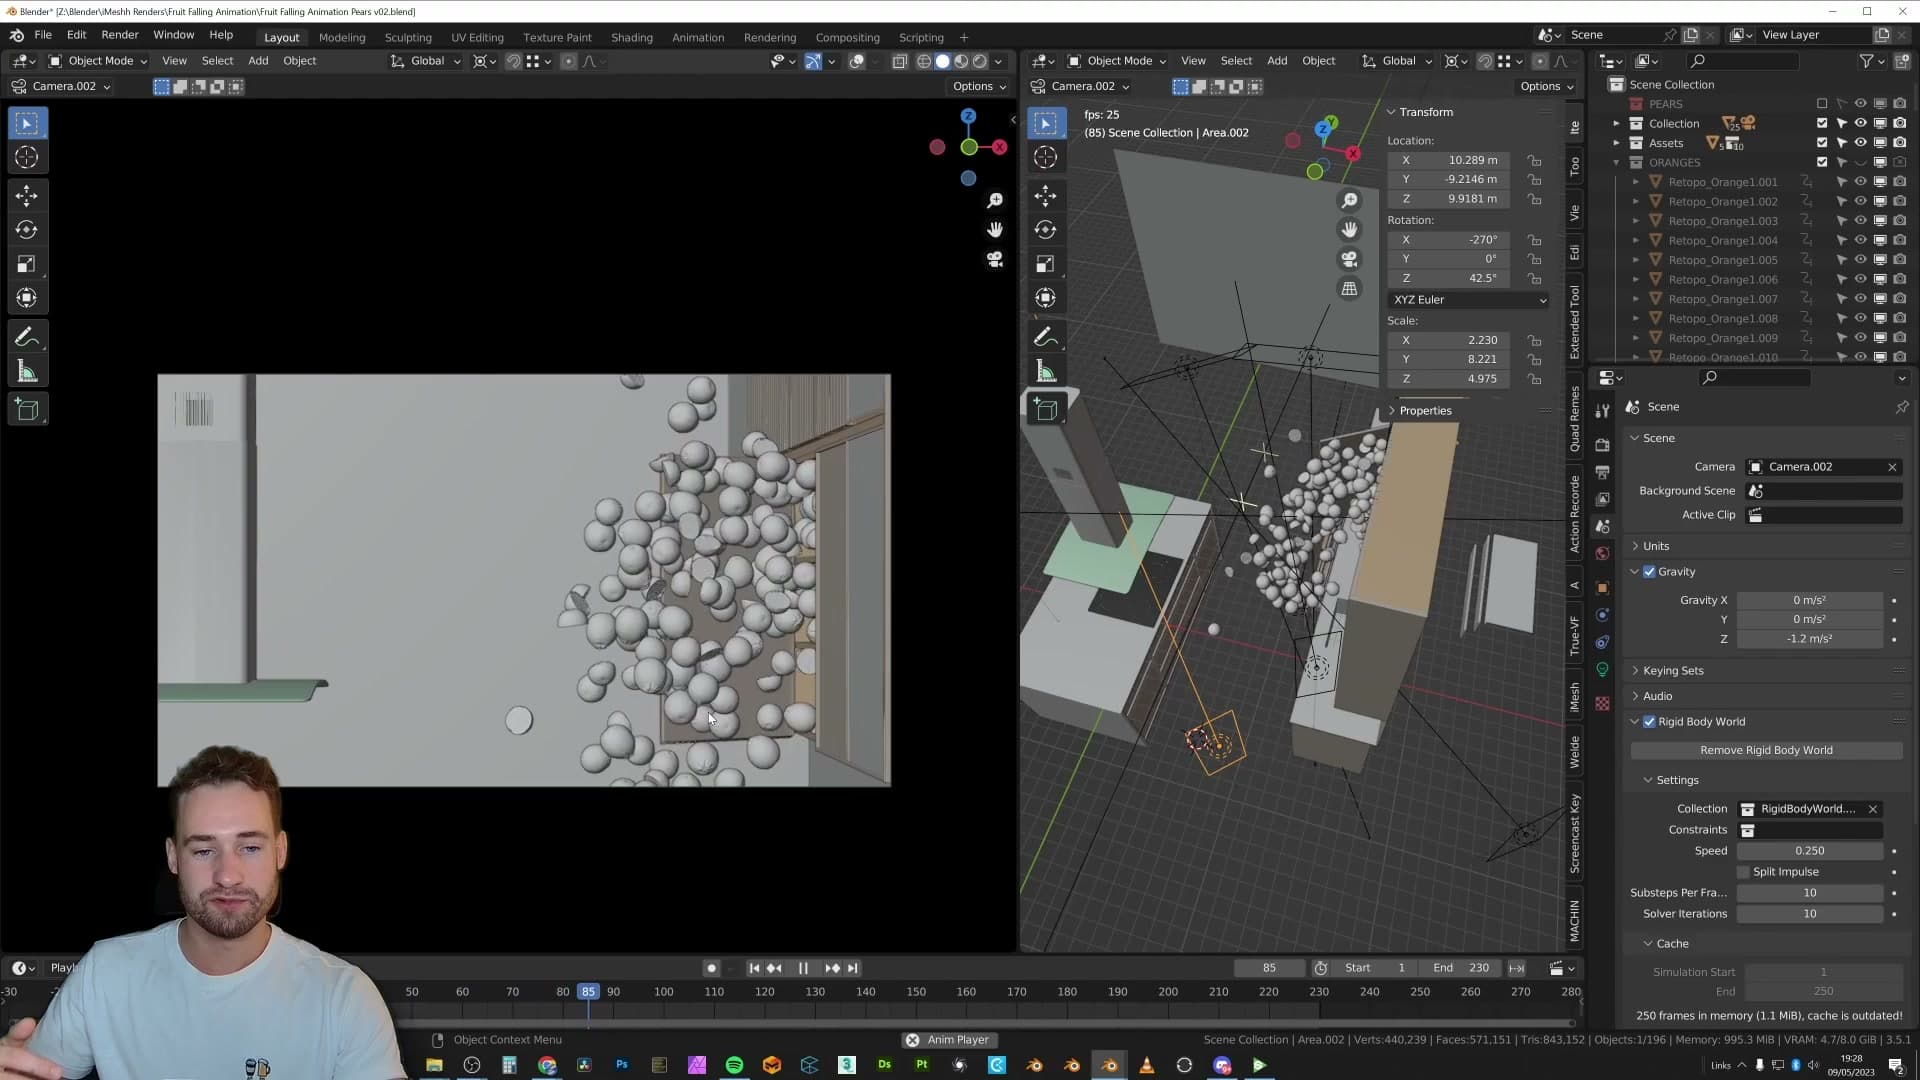
The fix is to crank the scene gravity down to a very low value. With gravity barely pulling on them, the oranges keep most of the horizontal motion they were given by the push and travel outward in something close to a straight line.
They still settle eventually (gravity isn't zero, just heavily damped), but across the short window the camera is on them, the motion reads as a burst rather than a fall.
Parenting (not Surface Deform) for rigid round fruit
Like the lemons earlier in the breakdown, the oranges were retopologised to a low-poly version for the simulation. The high-poly hero meshes are far too heavy to feed straight into the rigid body solver. Every extra face is more collision maths per frame.
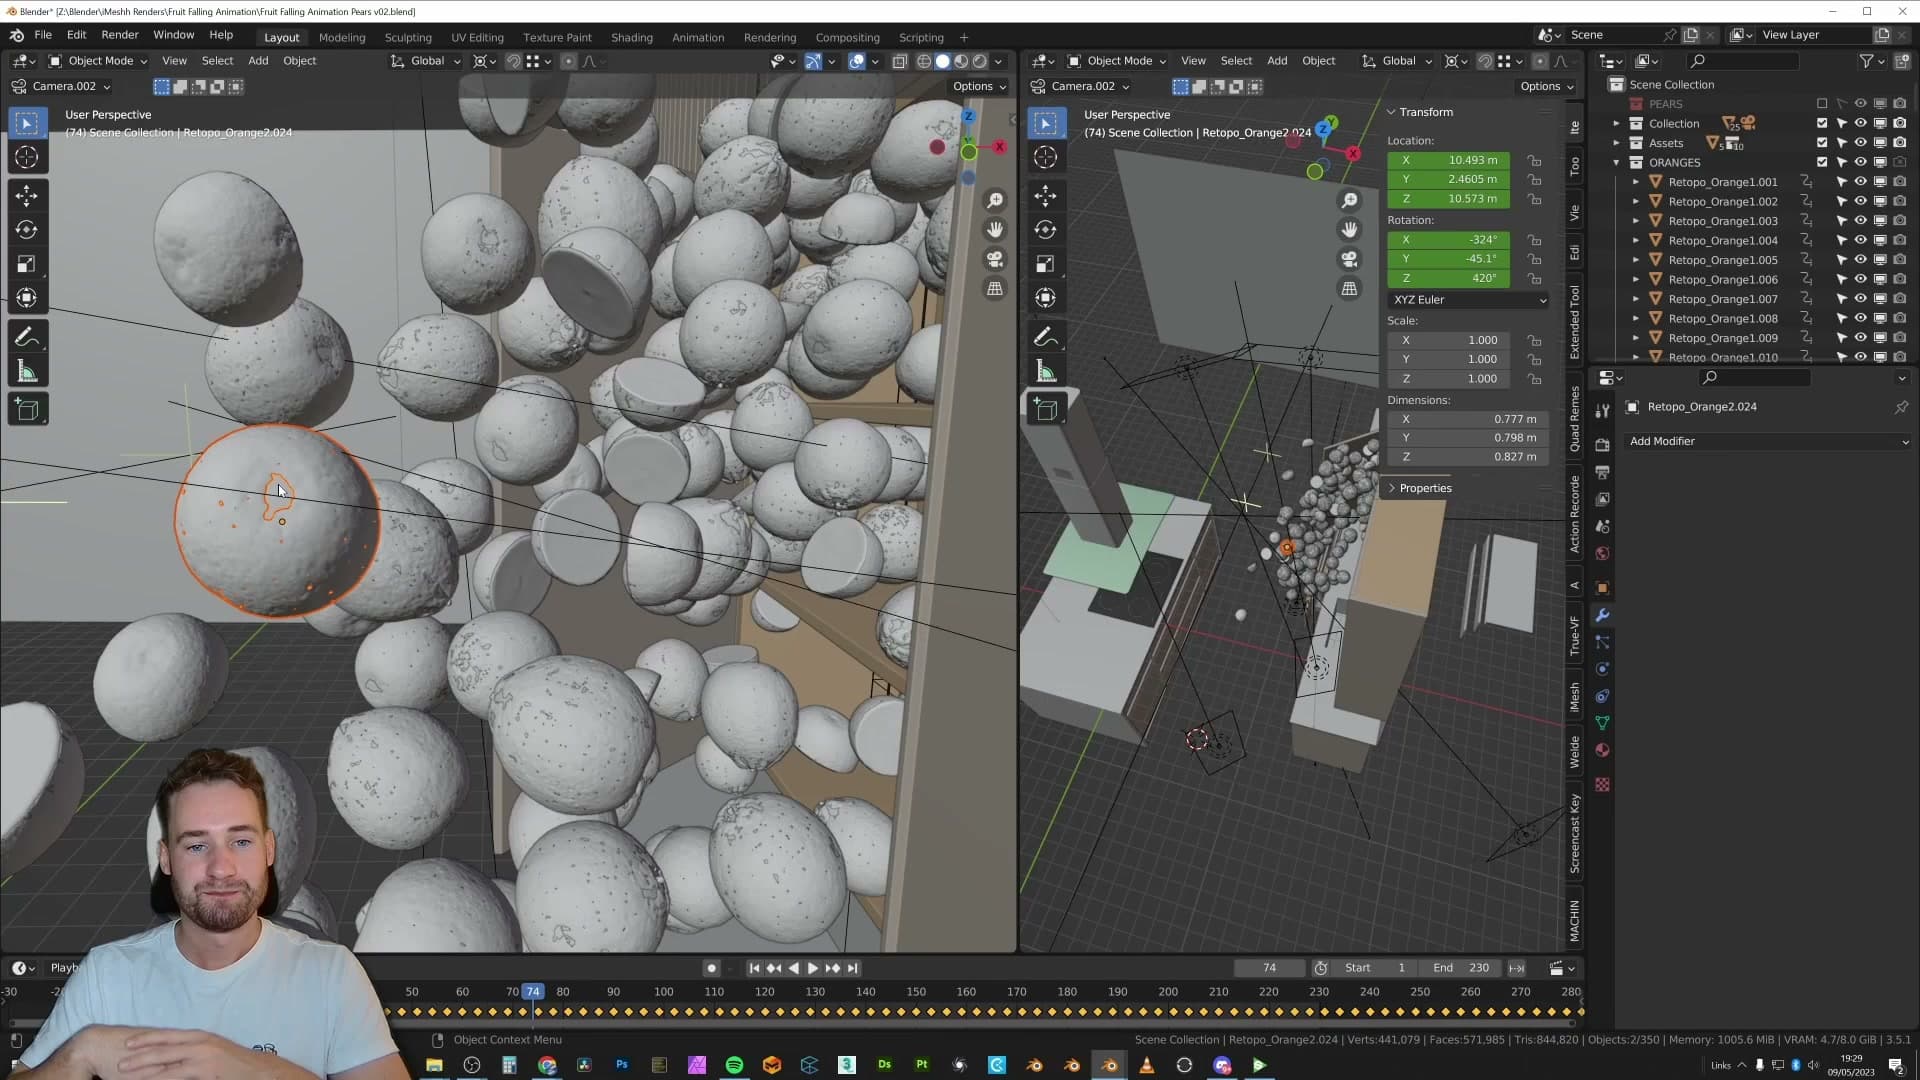
Where the workflow differs from the soft body lemons is in how the high-poly geometry is attached to the low-poly proxy. Lemons need a Surface Deform modifier because they actually squash and bend. Oranges don't. They're round, rigid, and never change shape across the shot. There's no deformation to drive, so a Surface Deform binding would be pointless overhead.
Instead, each high-poly orange is simply parented to its low-poly proxy. The two meshes already occupy the same space, so when the proxy gets thrown around by the solver, the hero mesh follows it transform-for-transform. It's faster to set up and faster to evaluate every frame.
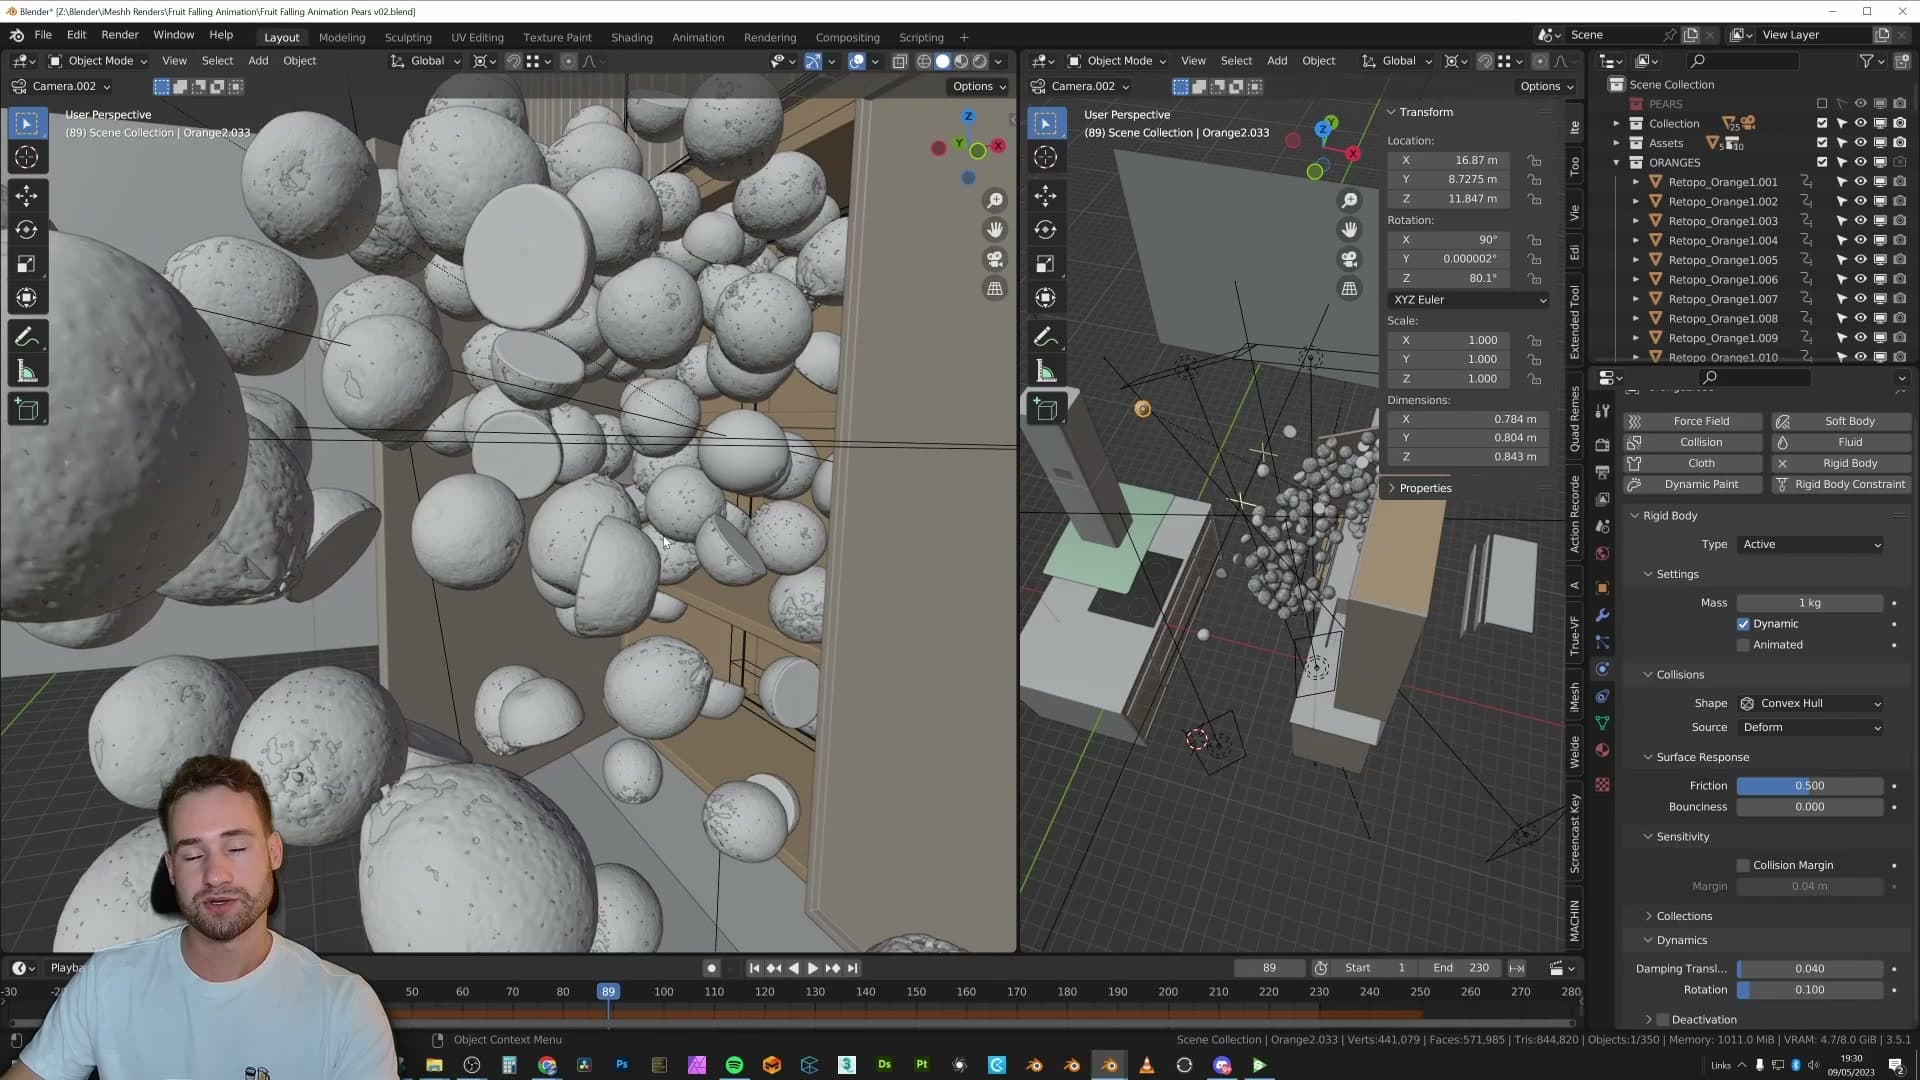
On the low-poly proxies, set the rigid body collision shape to Sphere. Spheres are the cheapest shape the solver can work with. Collision tests against a sphere are effectively a distance check, so they evaluate far faster than Convex Hull or Mesh. Round fruit is the textbook case for it.
Apply scale and fix the origin, or nothing works
Two unrelated setup issues will quietly break a rigid body sim, and both bit this scene before it started working. They're worth checking before you ever press play.
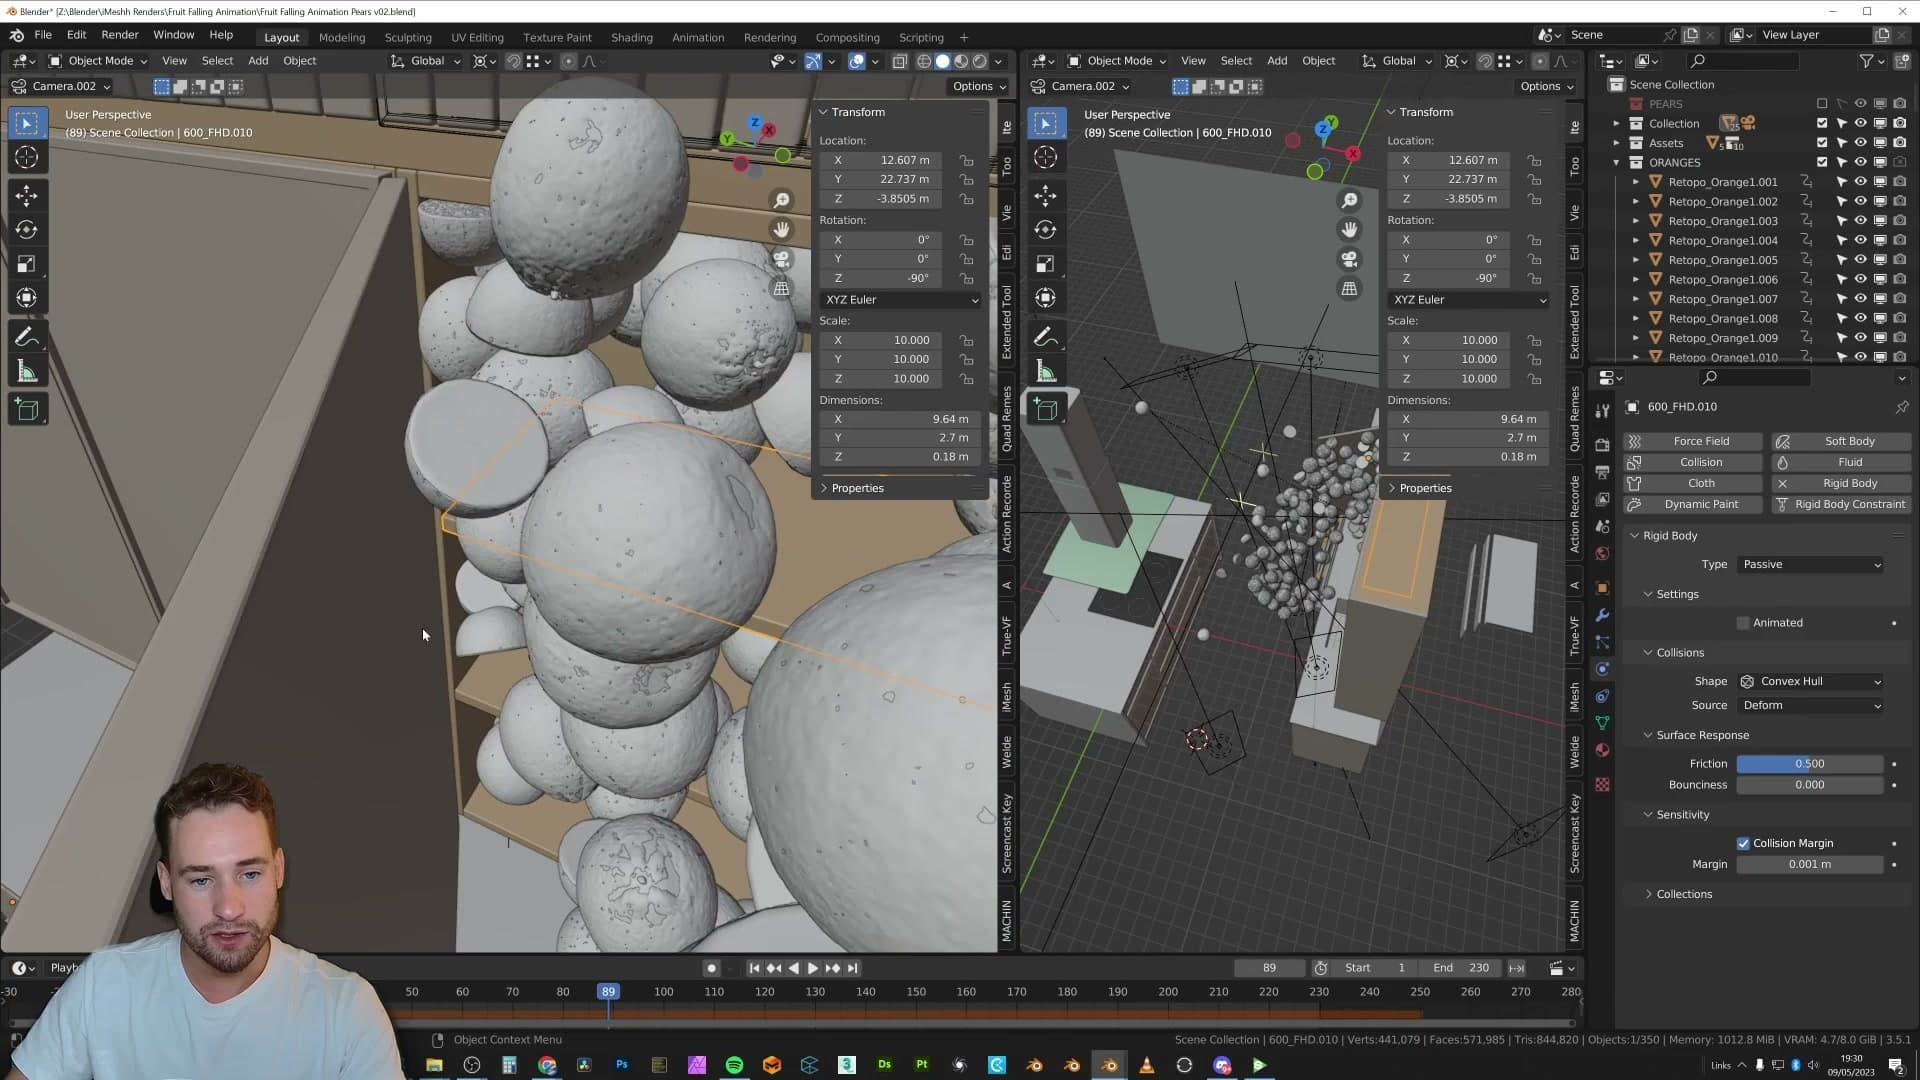
The first is unapplied scale. If the X, Y or Z scale values in the N-panel aren't 1.0, the solver is working from a transform that doesn't match what your mesh looks like, and the resulting motion goes wild. Select every simulated object and run Object > Apply > All Transforms (or just Scale if rotation matters) before adding the rigid body.
The second is the origin point. If the origin is sitting outside the geometry, or anywhere other than the centre of the object, the rigid body will appear to rotate around empty space rather than around itself. The fix is to set the origin to the centre of the mesh (Object > Set Origin > Origin to Geometry works for symmetrical shapes like fruit).
Neither of these throws an error. The sim just behaves strangely and you waste a long time wondering why. Check both first.
The hidden push cube that forces fruit against the door
The cupboard itself isn't doing anything fancy. The shelves and the inside surfaces are all set to rigid body passive with Convex Hull collision. They only need to act as a very basic shell for the fruit to bounce off, and Convex Hull is more than accurate enough for that.
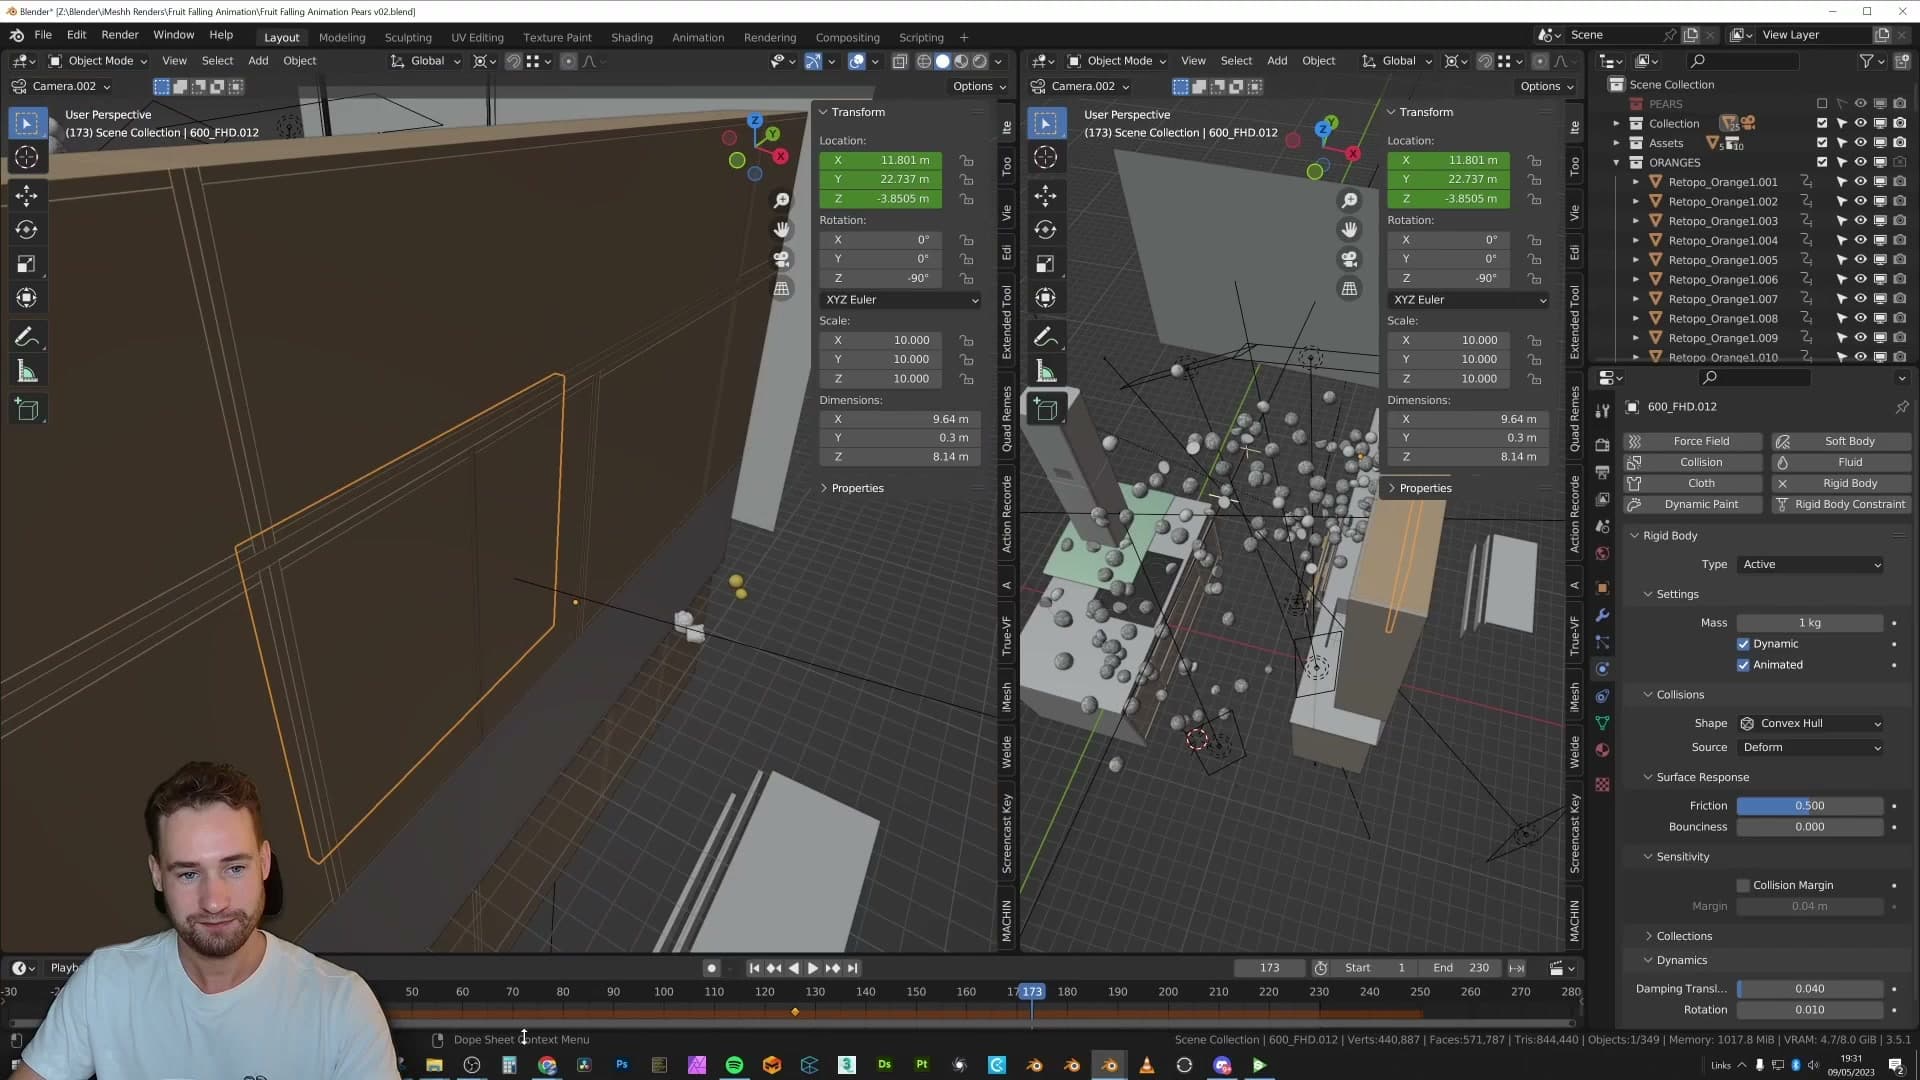
The oranges aren't dropped into the cupboard live. The shot is built in two stages. First, the fruit is simulated sitting on the shelves and that result is applied. When the camera arrives, the oranges are already at rest in believable positions. That baked rest pose is the starting point for the next sim.
The trick that makes the reveal work is a hidden push cube tucked at the back of the cupboard. The cube is animated to slide forwards, and as it moves it forces every orange ahead of it. Because the door is still closed at this point and the shelves are passive walls, the fruit has nowhere to go. It's crammed up against the inside of the door under pressure from the cube behind it.
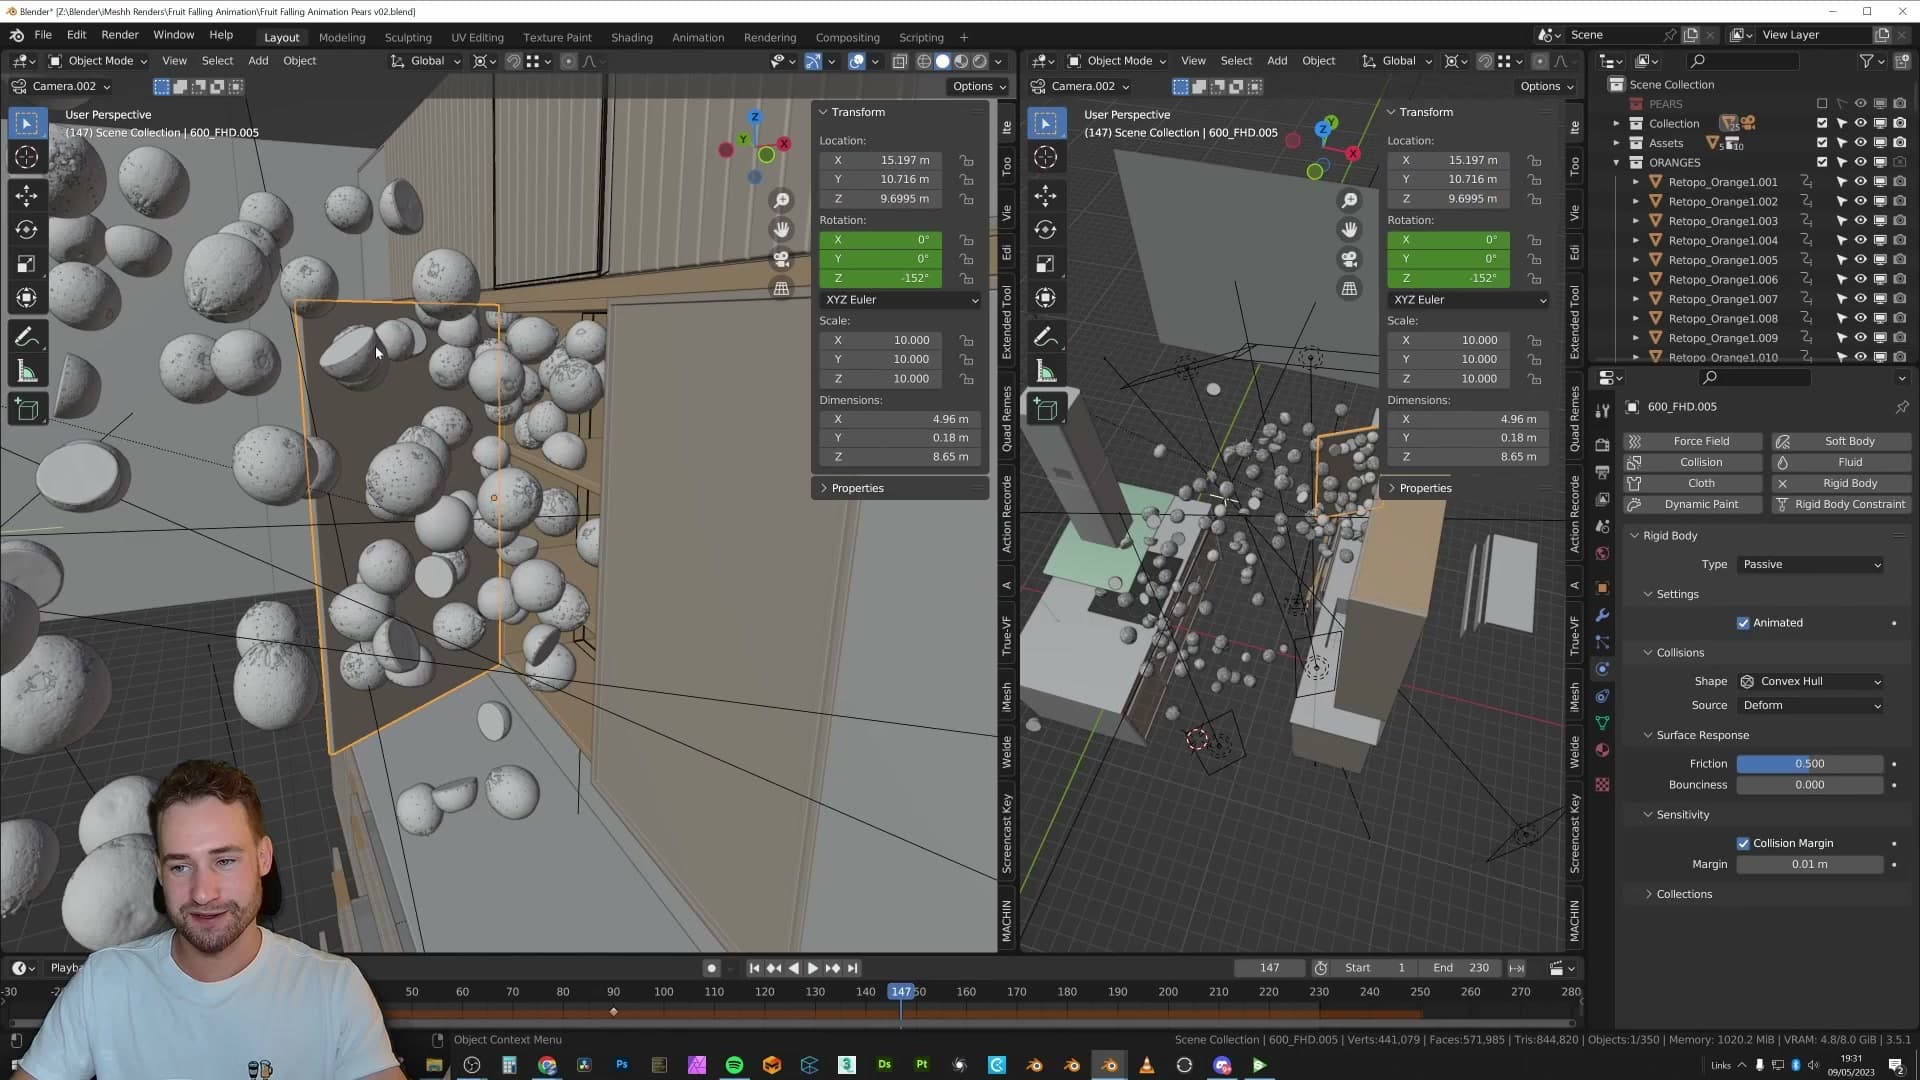
Then the door opens. Everything that was being squeezed against it releases at once, and combined with the low-gravity setup from earlier, the oranges launch outward instead of falling. That's the whole illusion: compression behind a door, low gravity, and a moment of release.
Beyond those two cheats, nothing in the setup is exotic. Every cupboard surface is a passive rigid body, each orange is an active rigid body, and the solver does the rest.
Cantaloupes: the simplest shot in the project
Sometimes you don't need tricks. Convex Hull, a passive plane, press play.
Just gravity, a plane and four lights
The cantaloupe shot is my favourite in the whole project, and ironically it's also the one that needed the least intervention. Everything else in the breakdown so far has involved a workaround: soft body proxies, hidden pusher cubes, low gravity tricks. But here, the simulation just behaved. Set the fruit where you want it, hit play, walk away.
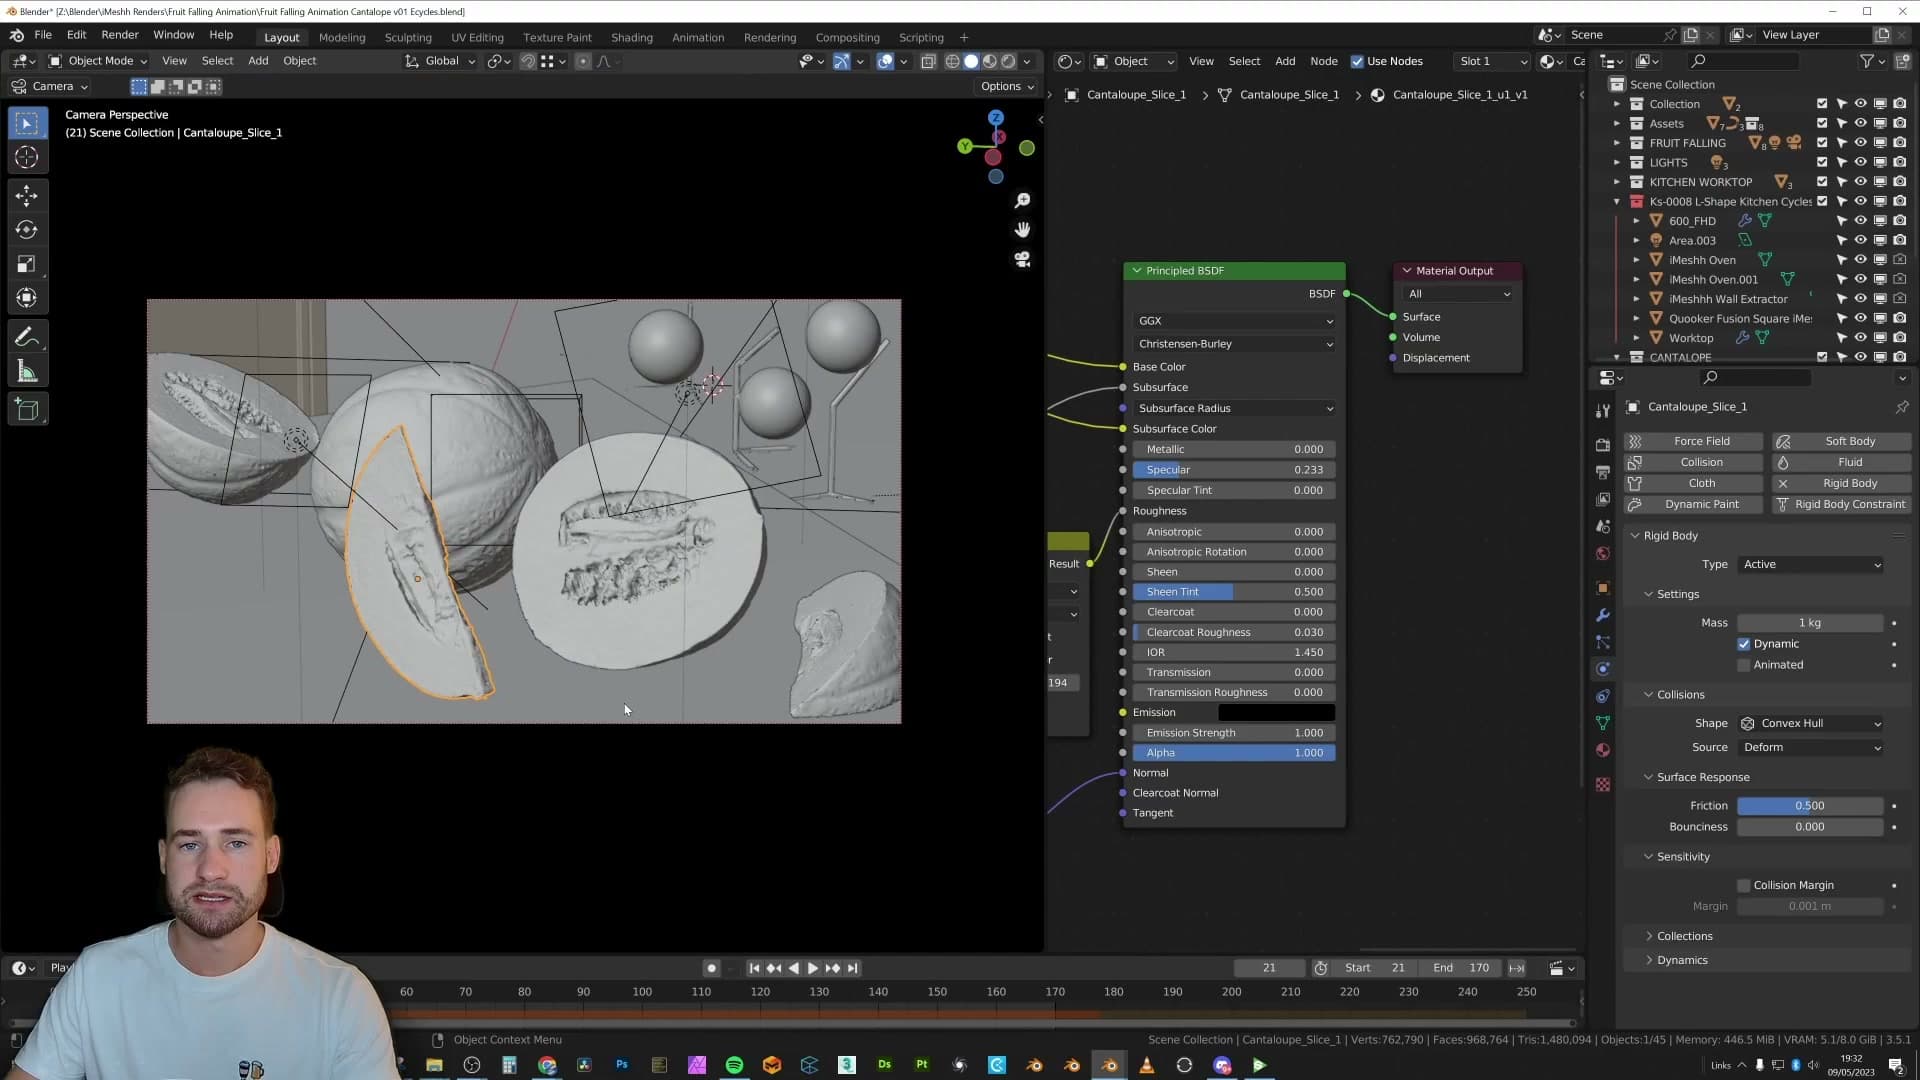
The setup is genuinely three steps. Position each cantaloupe in the air roughly where you want it to start. Add a rigid body to each one with the collision shape set to Convex Hull (round, chunky fruit suits convex hull perfectly, so there's no reason to pay the cost of mesh collision). Then drop a plane underneath them and set it to Passive so it acts as the floor.
Press play. You'll see a small initial drop as the fruit settles onto the plane, and then they roll and nudge into their final resting positions. That's the entire simulation.
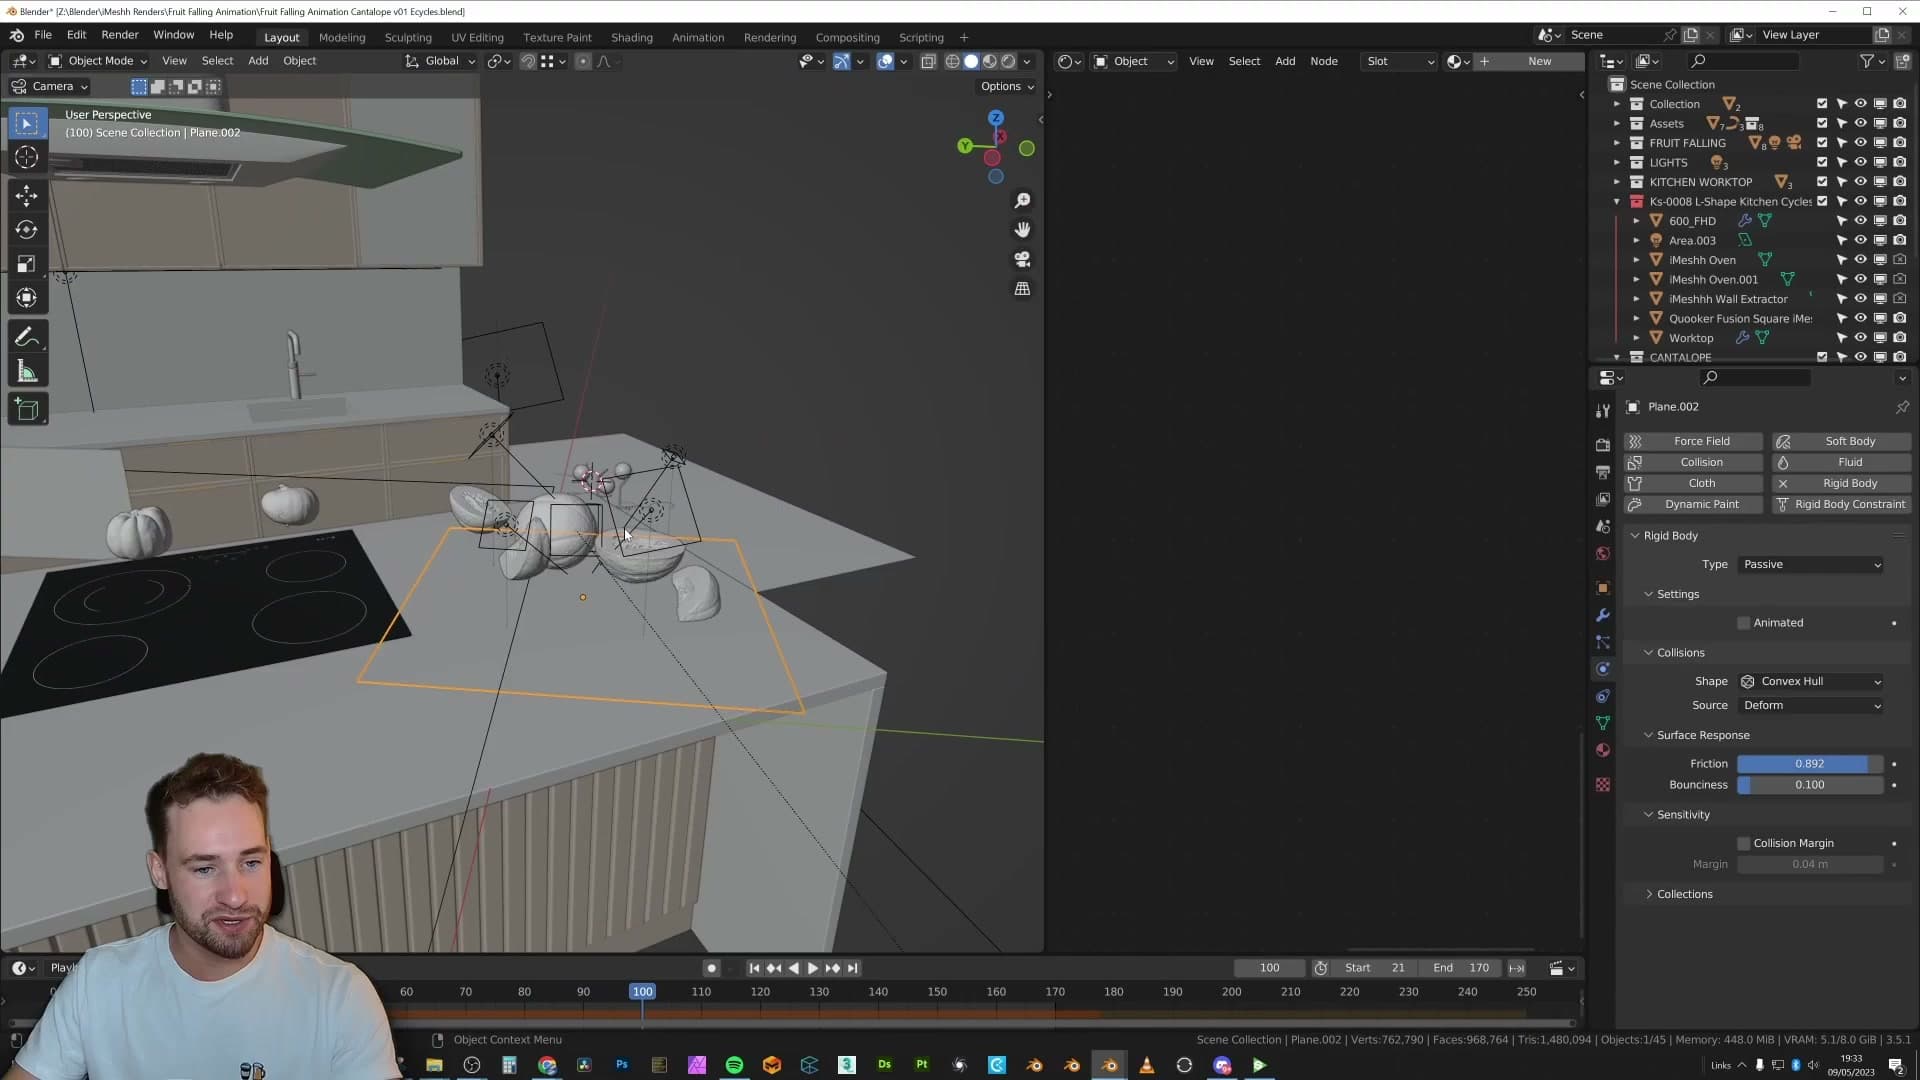
Lighting is just as restrained. Four lights are aimed directly at the cantaloupes to pick out the netted skin and give the fruit some shape, and a handful of extra lights in the background add some decorative interest behind the hero subjects. Nothing exotic, just enough to flatter the surfaces.
Falling bread: move the camera, not the bread
Why animating a single camera move plus per-object rotations beats hand-keyframing every loaf's translation.
Building a soft-box rig around the hero bread
The final shot, the falling bread, looks visually wild the first time you open the scene. There's light coming in from what feels like every direction at once, which would normally be a recipe for flat, contradictory shadows.
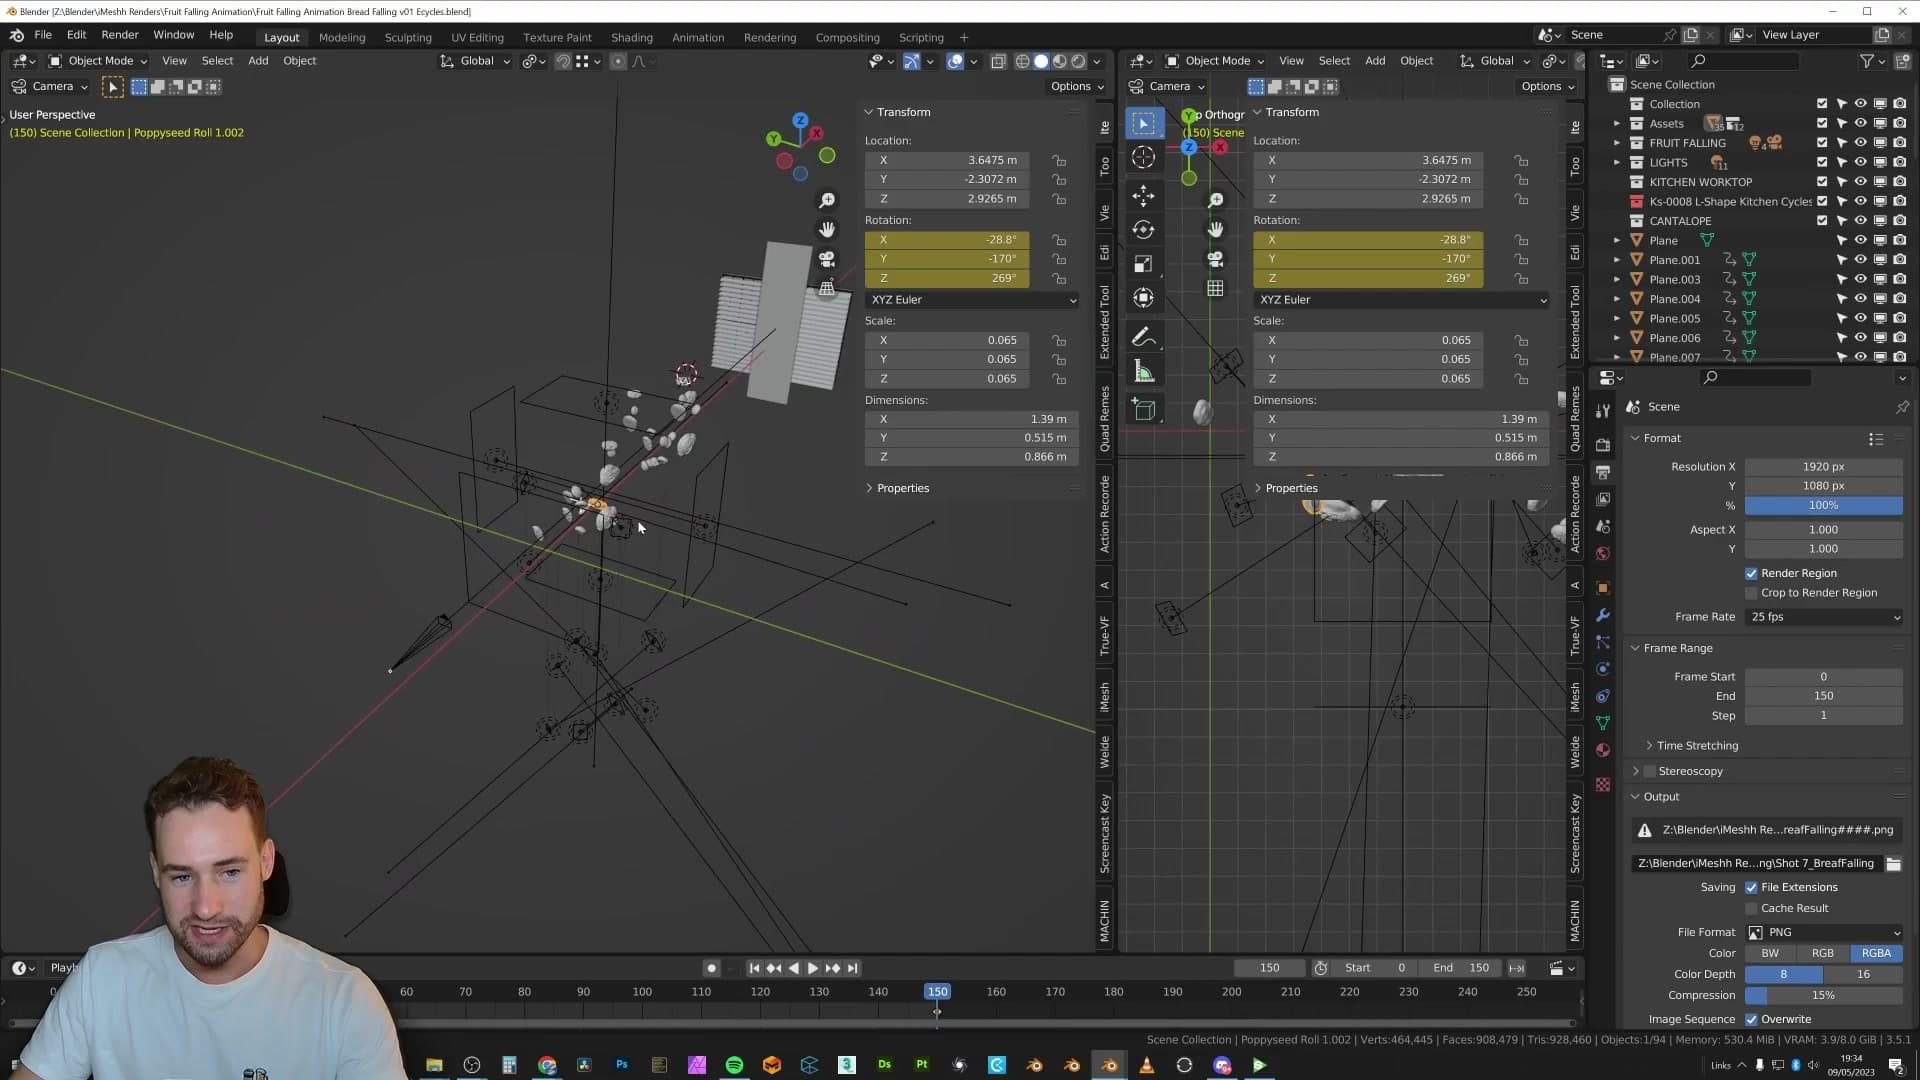
Most of that clutter is leftover. Some of those lamps were tests from earlier lighting passes that got nudged out of frame rather than deleted, so they still sit in the outliner without actually contributing to the render.
The lighting that actually matters is a soft-box rig built directly around the hero bread. Area lights wrapped above and around the loaves give the crust the soft, wraparound illumination you'd expect from a product still. Once you ignore the disused test lights, what's left is essentially a tabletop soft-box pointed at the subject.
Camera move plus per-object rotation keyframes
The falling-bread effect is a trick. The loaves aren't actually translating downward. The camera is moving past them, and your brain reads that parallax as objects dropping past the lens. Even watching the final render, the illusion holds: it reads as falling bread, but it's the camera doing the work.
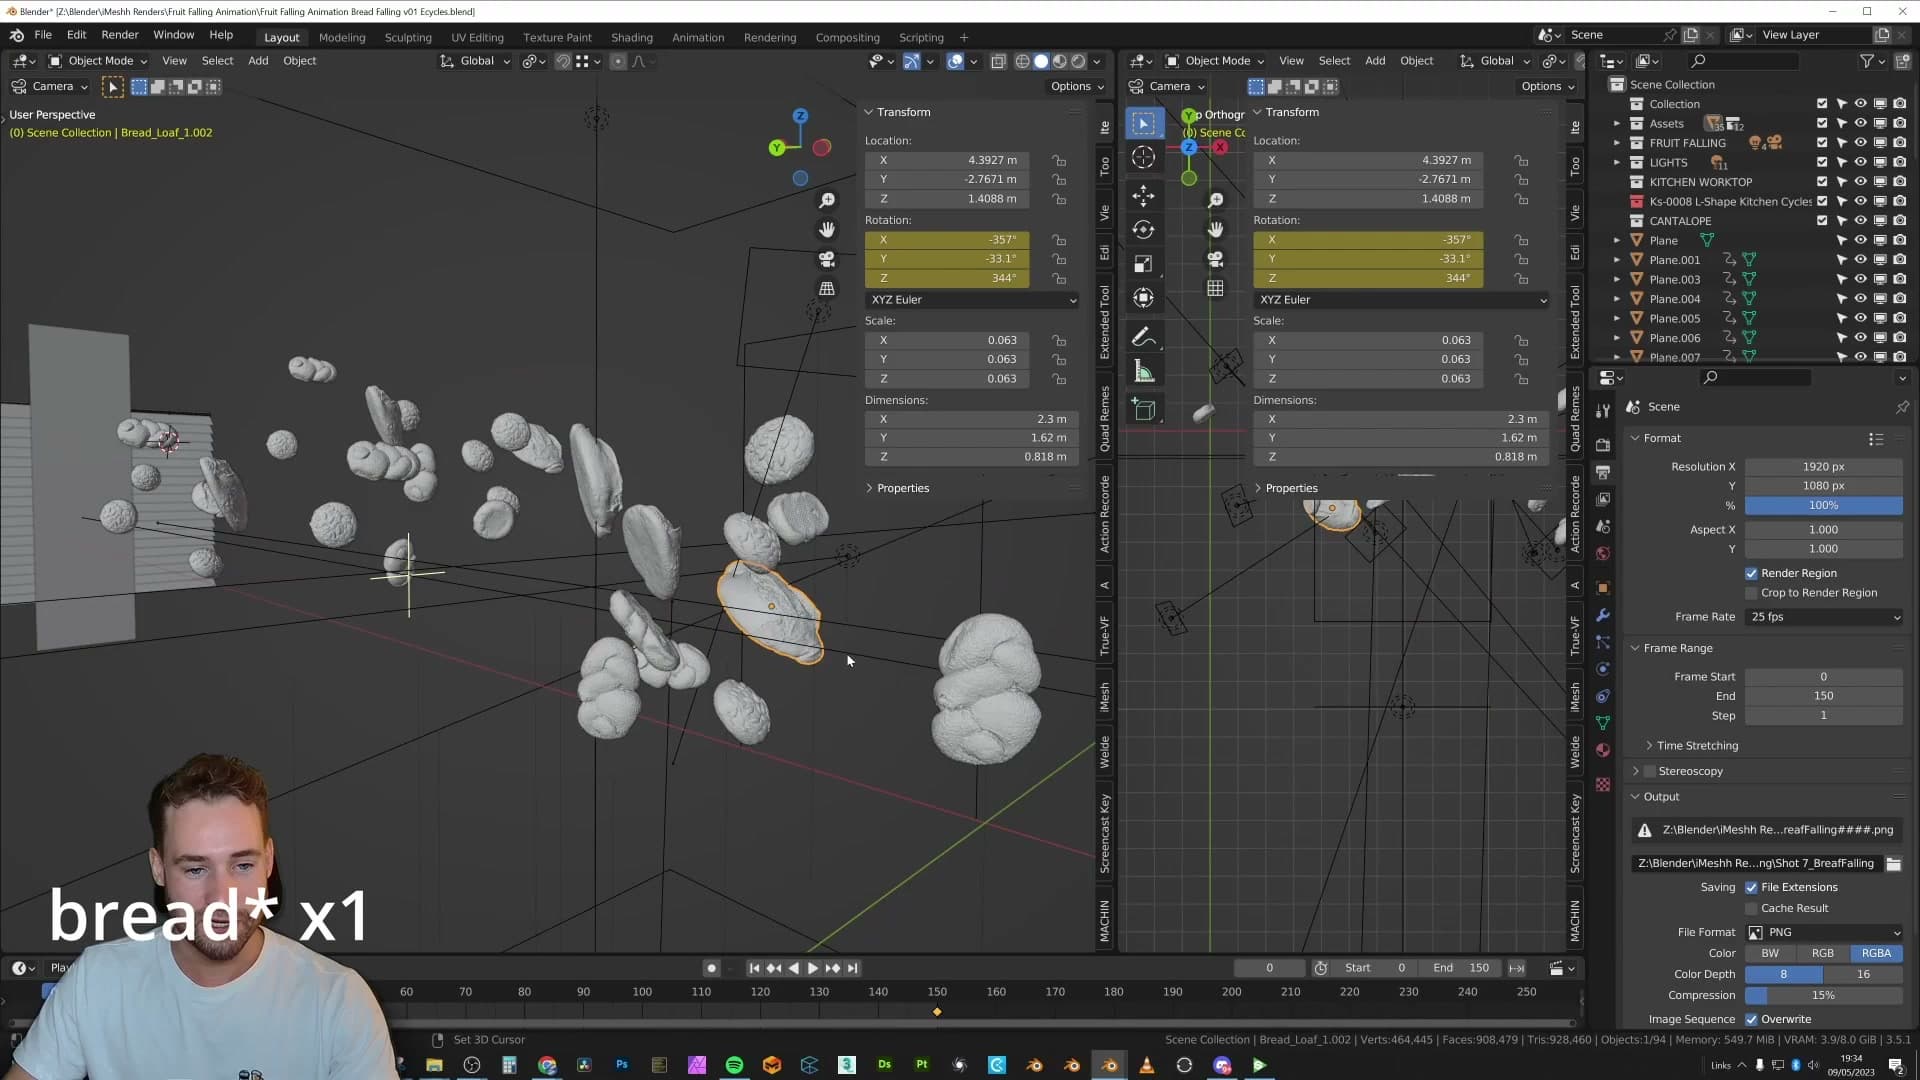
Hand-keying every loaf with both a translation and a rotation curve would have been hours of finicky animation. Moving the camera once and letting it sell the fall reduces the per-object animation to a single channel (rotation), which is far easier to art-direct.
For each falling object, pick a starting rotation, press I to insert a rotation keyframe, jump to the end frame, rotate the object to where you want it to land, and press I again. Two keyframes per loaf, one camera move, and the whole shot is done.
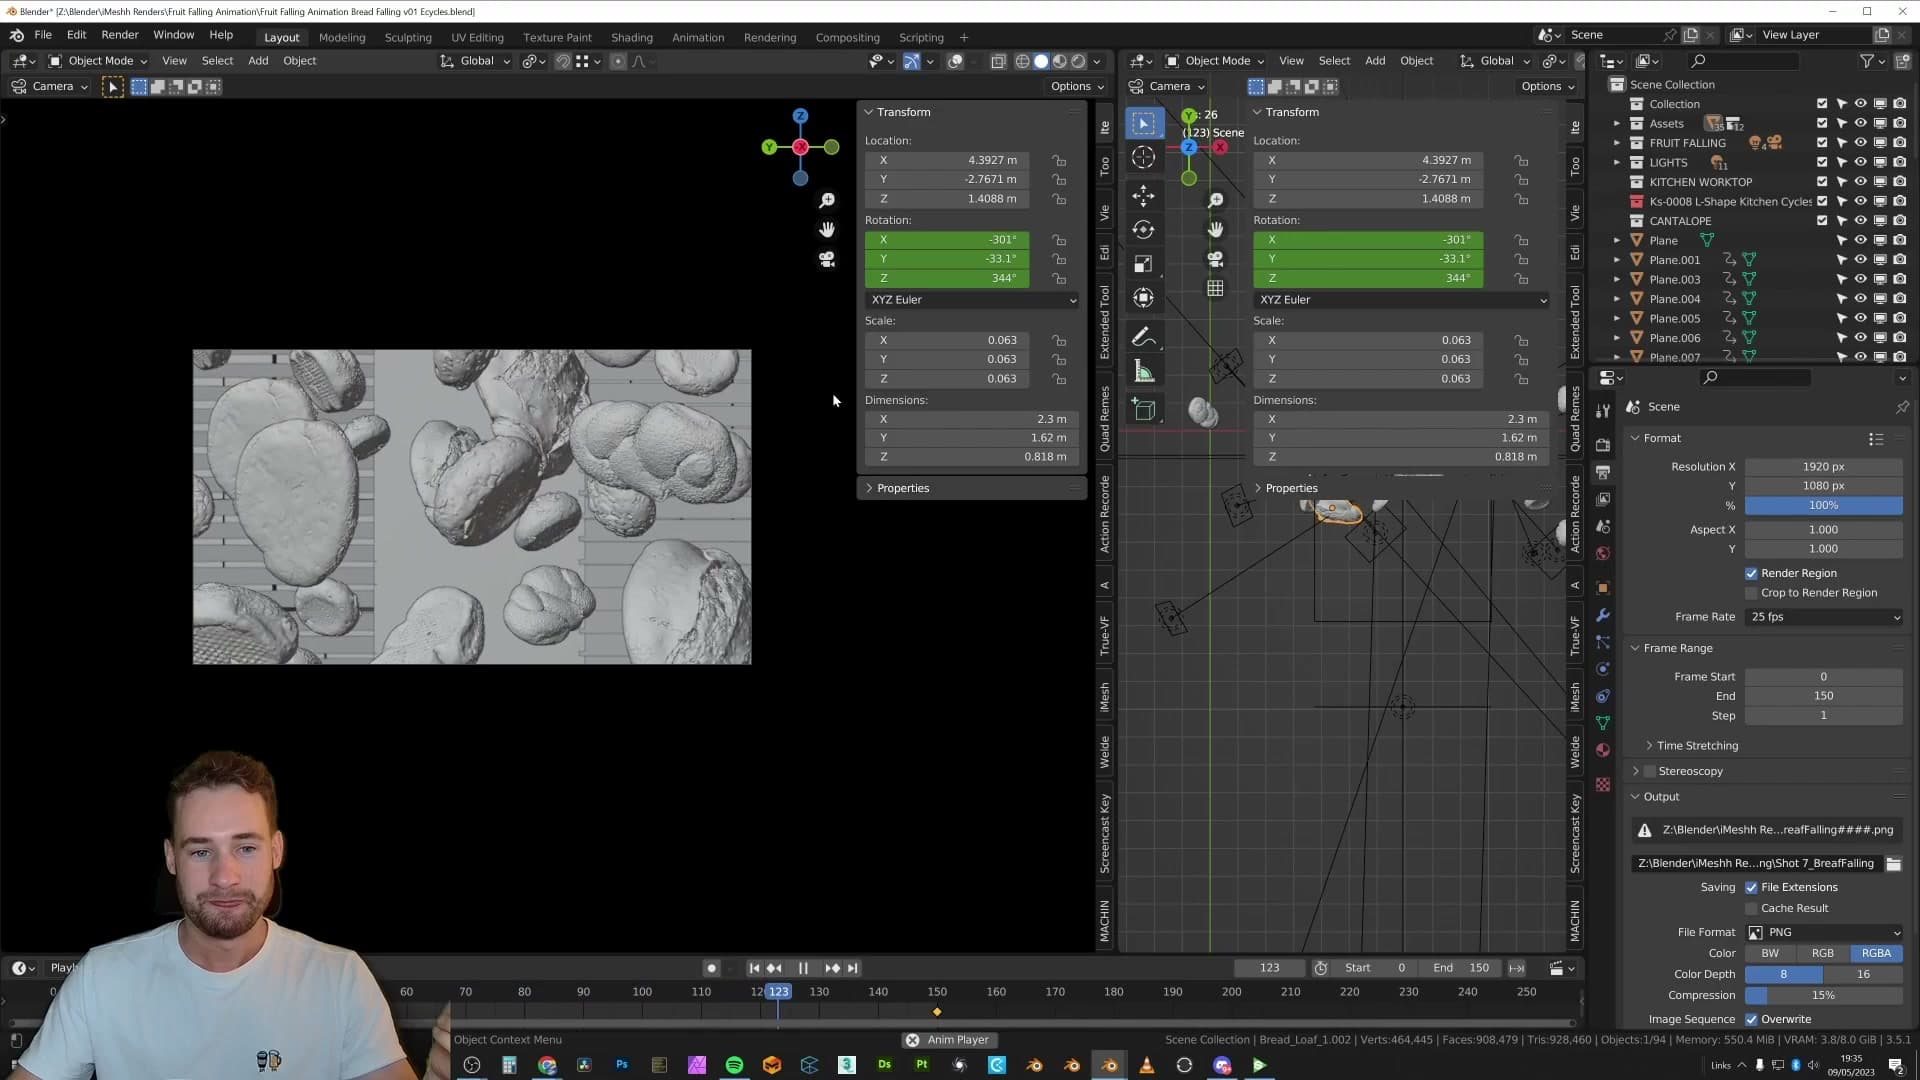
The reason this is so much faster is focus: you only have to think about how each object spins, not where it travels. The camera takes care of the travel for everything at once.
Render settings and the animated seed
Sample counts, the deprecated denoising tick-box vs the Compositor denoise node, and why every animation needs an animated seed.
Samples, denoise node and Animated Seed
Open the Render Properties for any of these shots and you will see the old denoising tick-box still enabled in the Sampling panel. That is how Andrew set this scene up at the time, but it is not how he would do it today. In all of his more recent videos he recommends leaving that checkbox off and adding a Denoise node in the Compositor afterwards instead. That gives you more control over strength and prefilter, and you can mix it with passes. The only reason this animation still uses the tick-box is that it is an older render.
Sample counts are not consistent across the shots. This one is set to 850, which Andrew picked while hunting for the sweet spot between image quality and render time. If a particular shot was rendering too slowly he would simply crank the samples down a little until the per-frame time felt sensible. Across 190 frames a small saving per frame adds up quickly. There is no magic number; tune it per scene against your own hardware.
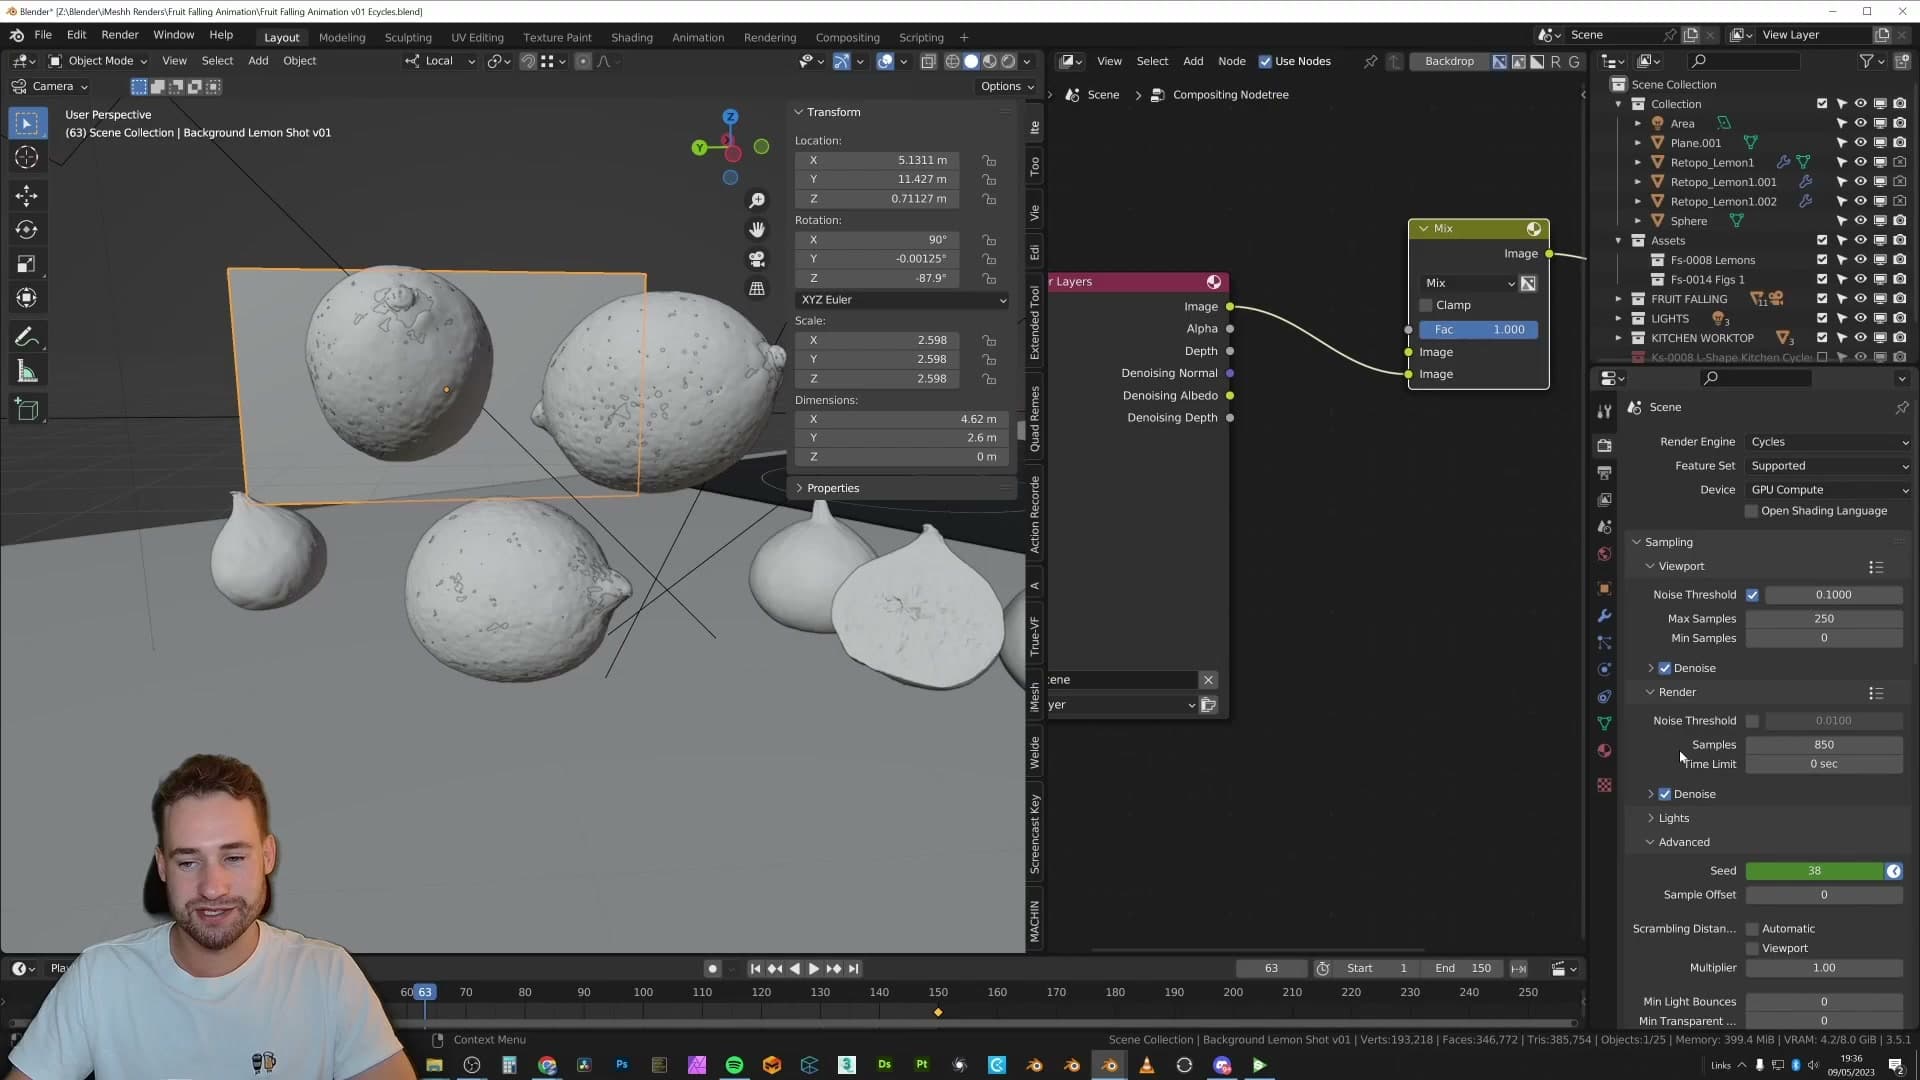
Every shot in this animation also has Animated Seed enabled in the Sampling panel. This is non-negotiable for animation work. Without it Cycles uses the same noise pattern on every frame, and any fireflies or sampling artefacts sit in exactly the same pixels for the entire clip, which the eye locks onto immediately. With Animated Seed on, the noise reshuffles each frame and reads as natural film grain instead of a stuck pattern.
Wrap-up: where to grab the fruit
Closing thoughts, the still-life-meets-archviz vibe, and where to download the free and paid versions of the iMeshh fruit.
Closing thoughts and free vs paid fruit
That wraps up the breakdown. The shot sits somewhere between archviz and still life. There's a kitchen in there, but the fruit is really the subject, and that mix is what made it one of Andrew's favourite pieces to put together. If you'd like to see more in this vein, that's worth knowing for what comes next on the channel.
If you want to recreate something like this yourself, the fruit used in the animation is available on iMeshh. A handful of pieces are free to download, and the full set (with more variations and more models) sits behind the paid library. Either way, you can grab the same assets used here rather than starting from scratch.
If there's a specific part of the build you'd like a deeper dive on (the soft body lemon rig, the cupboard-explosion setup, the falling-bread camera move) leave a comment on the video and it can be covered in more detail in a follow-up.
Tools and credits
Everything mentioned in this tutorial, with links.
- Blender (the renderer this entire build runs in).
- iMeshh (studio platform: project management, client review, asset library, invoicing). The asset library used in this tutorial is included with every iMeshh Pro plan.
- Poly Haven (free CC0 textures and HDRIs).
Pillar guide: Camera Composition hub