What's new in iMeshh Asset Manager 1.2
Tour the redesigned manager, the access-for-£17 pricing, and the new per-asset update flow that's especially load-bearing for geometry node systems.
The new asset manager at a glance
While putting the thumbnail together for the previous YouTube video, the new iMeshh Asset Manager genuinely stopped me in my tracks. That's why this walkthrough exists: to flag what's changed since the last release. If you missed the previous build, the short version is that this is a new add-on rather than a face-lift of the old one, and the workflow around it has shifted alongside it.
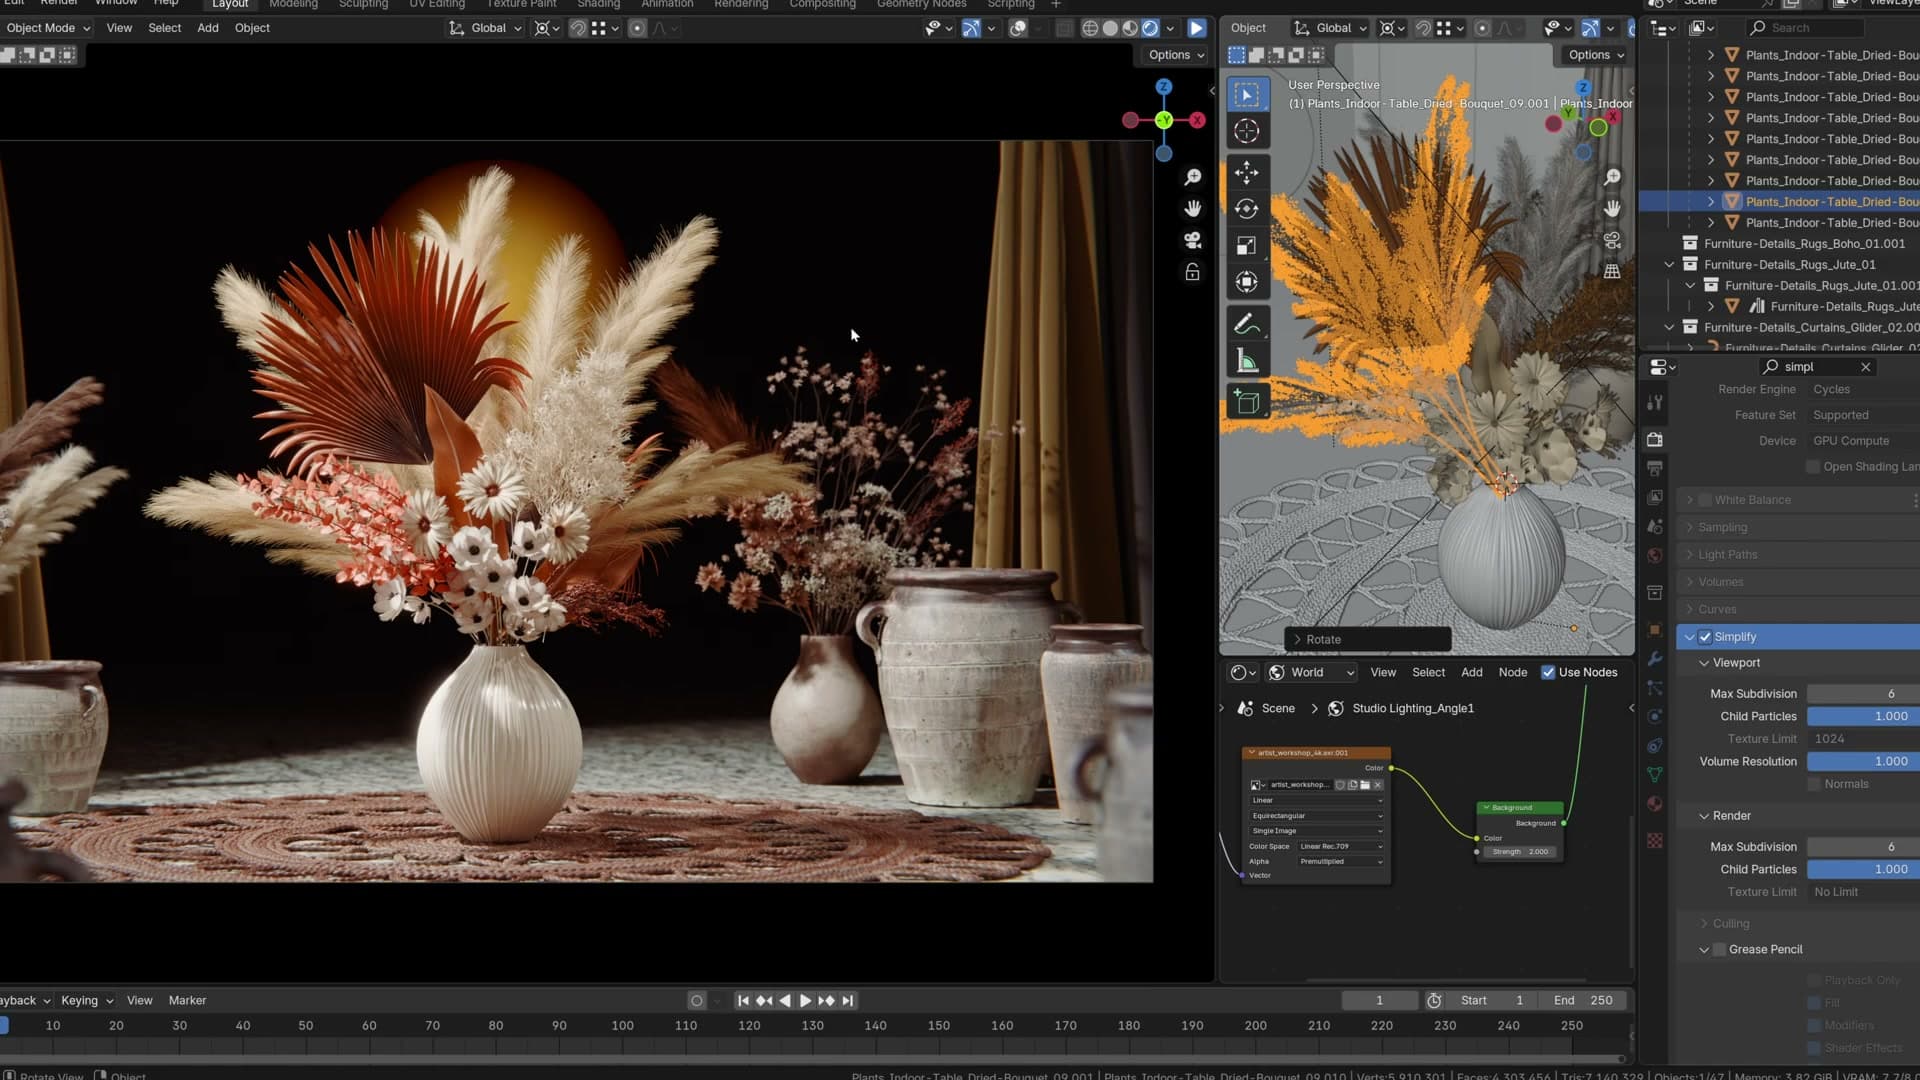
The library now sits behind a single subscription rather than a stack of per-product purchases, and the add-on itself docks inside Blender as a tabbed panel: models, materials, geometry nodes, effects and HDRIs, all reachable from one place. The rest of this post tours the changes that matter most for an archviz workflow.
Per-asset update notifications and one-click re-downloads
The most immediately visible change is per-asset update notifications. When iMeshh pushes a new version of an asset to the website, the tile for that asset in your local panel flags an update icon, but only if you've already downloaded it. Untouched assets stay quiet, so the panel doesn't fill up with prompts for things you've never used.
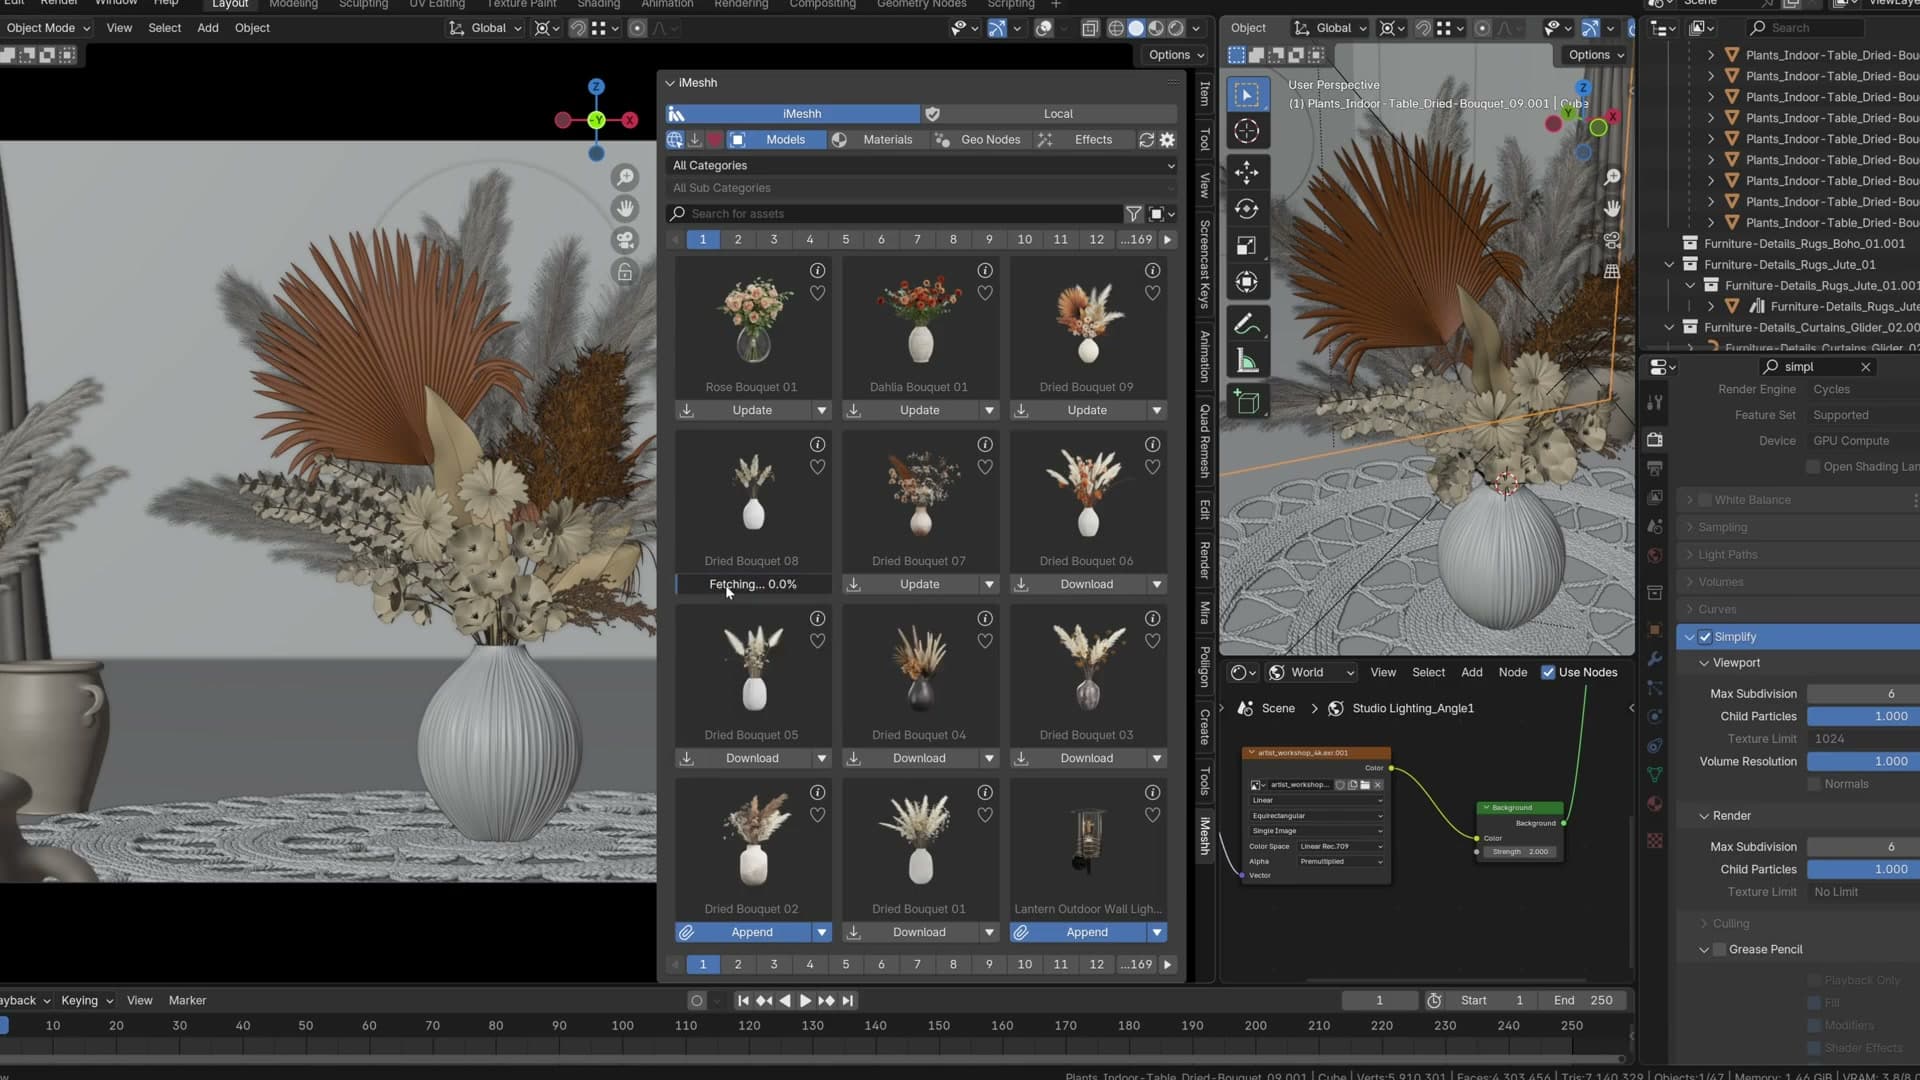
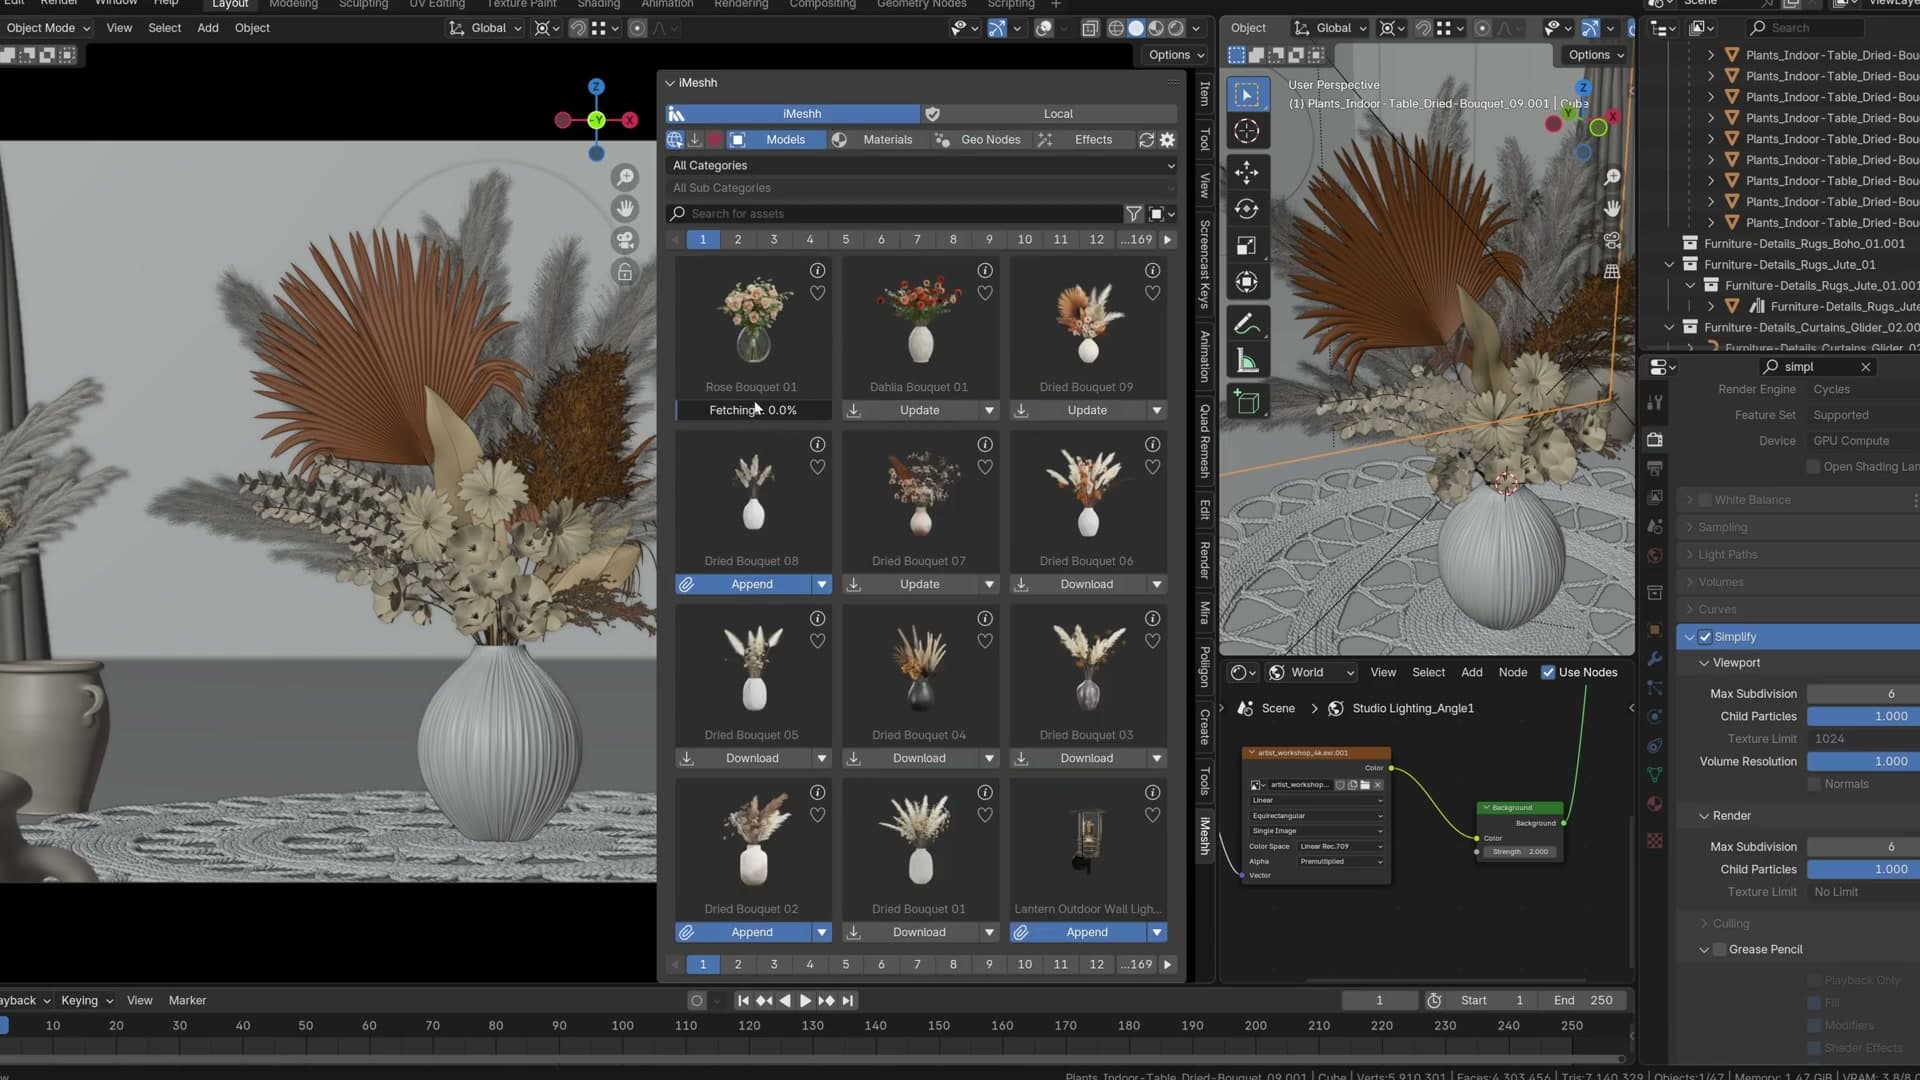
Click the icon and the new version pulls down in place. Once the download finishes, the existing local folder is replaced with the updated copy. No manual cleanup, no parallel folders with version suffixes, no chasing the website to see what's moved.
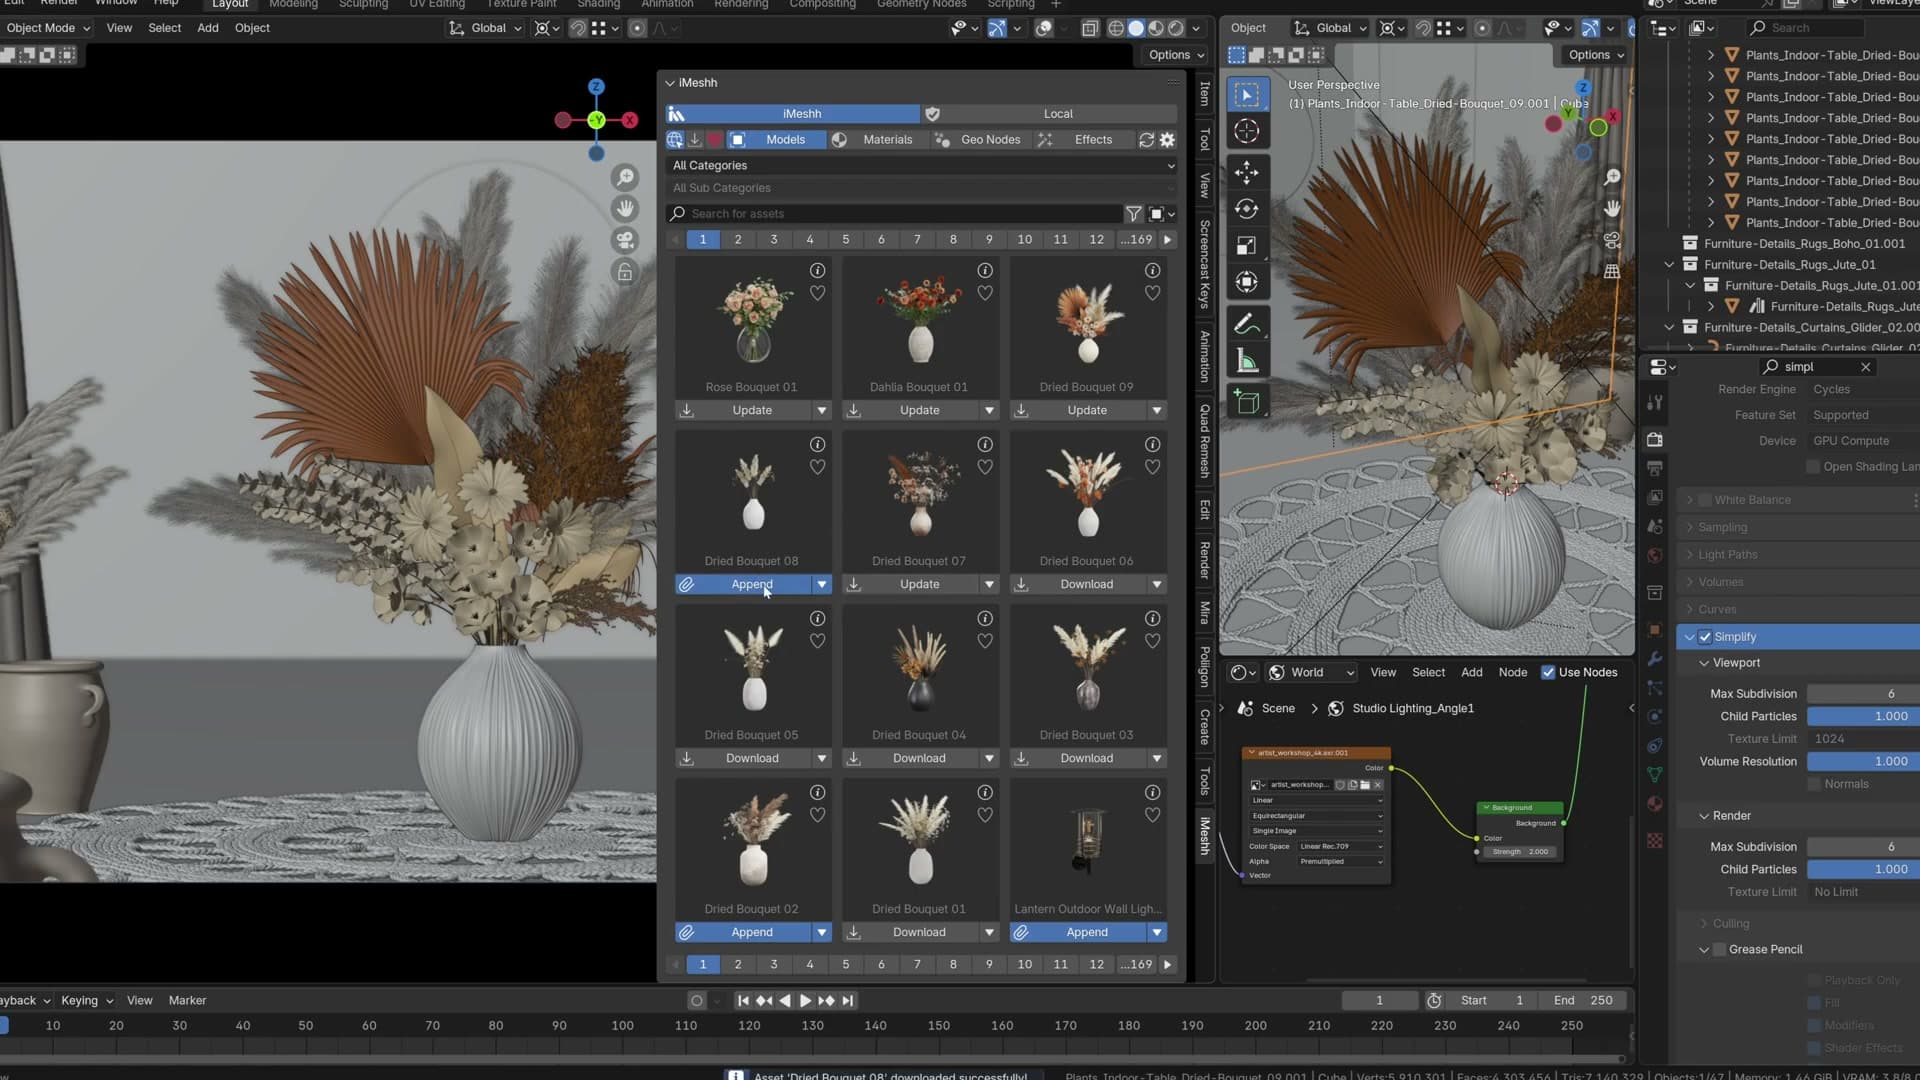
This matters more than it looks at first glance. Geometry node systems behave like small computer programs. They have lots of moving parts, and hotfixes get pushed fairly regularly as edge cases turn up. Without a built-in update channel, every fix would mean re-downloading the asset from the website by hand and swapping the folder over yourself.
Adding your own asset libraries
The manager isn't locked to iMeshh subscribers. Point it at any folder on disk and the directory tree becomes your category tree.
Why the manager opened up to non-subscribers
The manager used to be a subscriber-only tool, but that put a hard wall between the add-on and anyone who simply wanted somewhere sensible to keep their own assets. The team decided that wall was the wrong call, so the local-library feature has been merged in for everyone.
My view is that an asset manager like this is too useful to lock behind a paywall when the underlying job (pointing Blender at a folder of .blend files and getting them into a scene) is something every archviz artist needs. If you don't subscribe to iMeshh, you can still install the add-on and use it as a manager for your own library.
Folder structure becomes the category structure
Once the add-on is installed, you can point it at any folder on disk and it will treat that folder's sub-directories as your category structure. There's no manifest to write, no per-file tagging step. Whatever hierarchy you've already built on your hard drive is the hierarchy the manager exposes inside Blender.
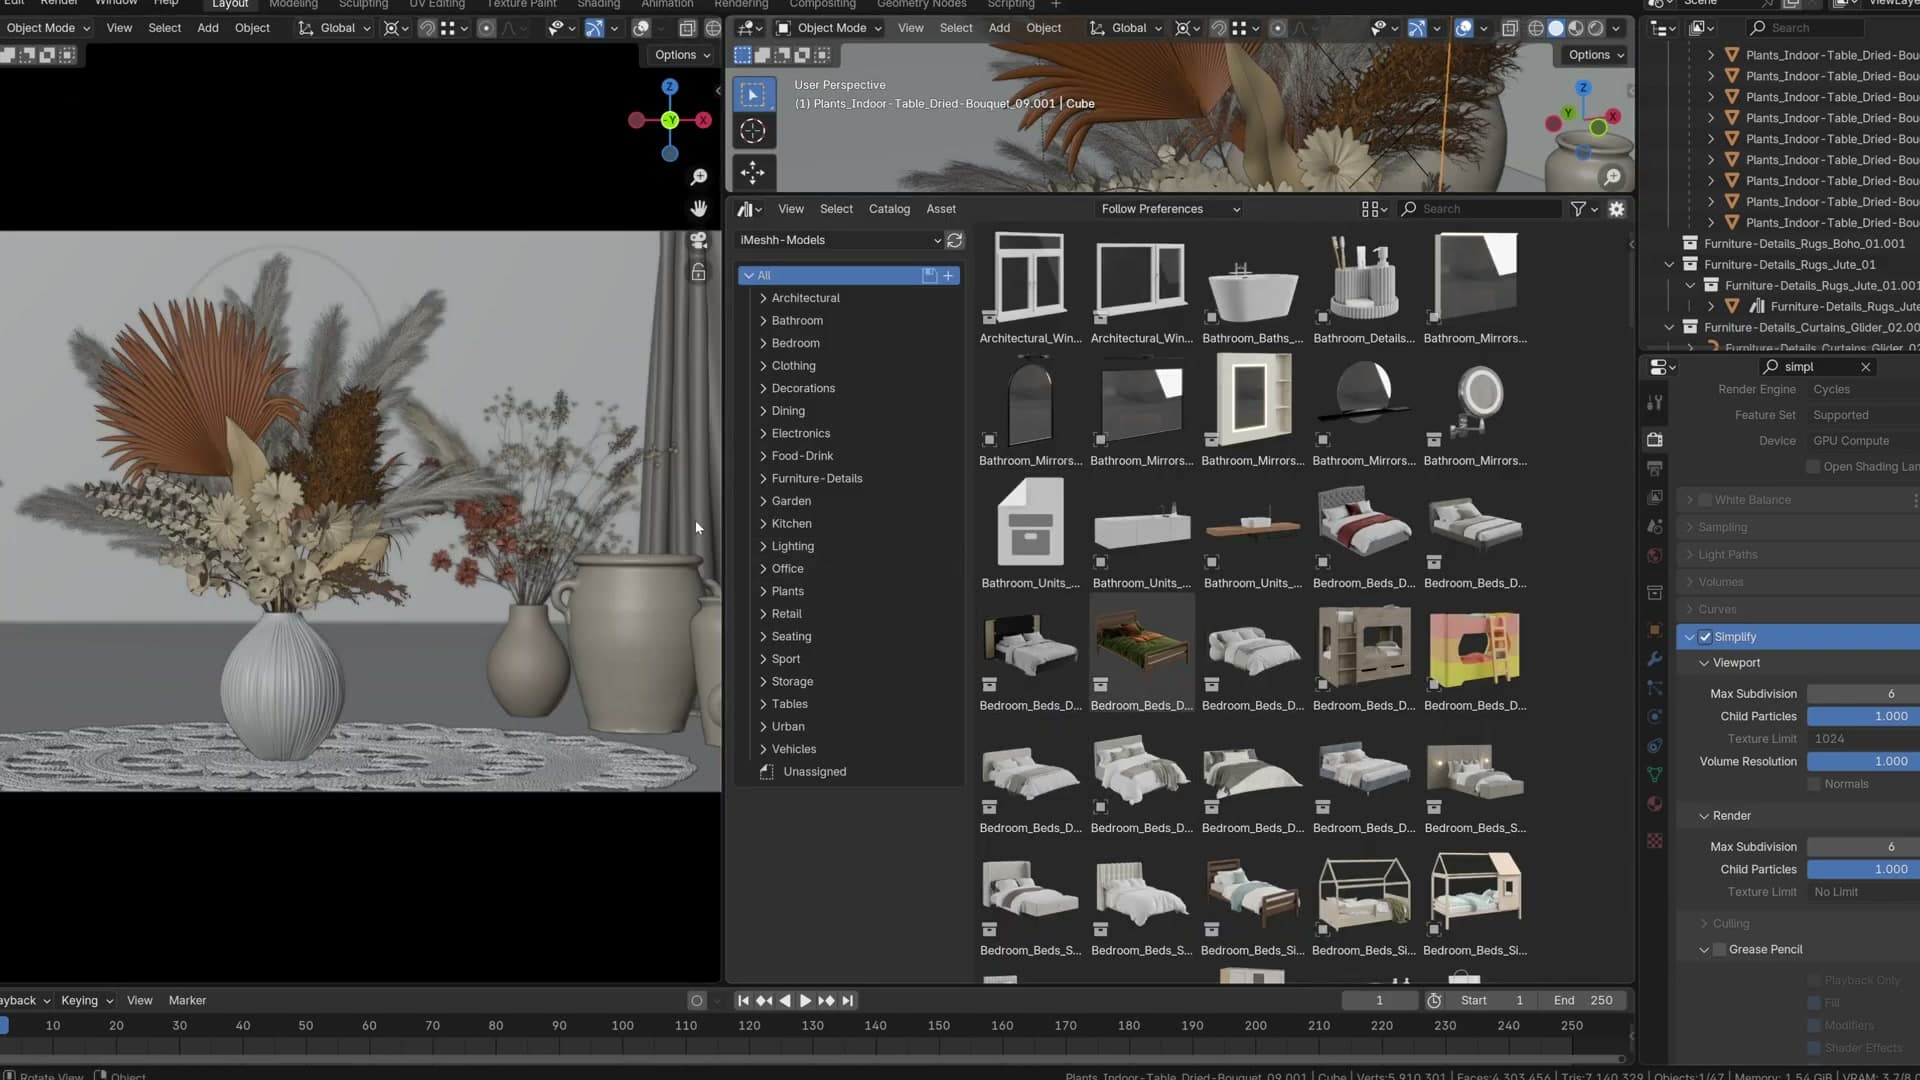
The obvious question is: why not just use Blender's built-in Asset Browser? My answer is that the Asset Browser is powerful but painful for the way archviz artists actually work. A huge part of the job is pulling assets in from other sources. Time is money, and somebody else has usually already modelled the thing you need.
By the time you've been working for a while, you have thousands of items downloaded and categorised in folders. To make any of those usable in Blender's Asset Browser, you have to open every single .blend, mark the object as an asset, drop it into the right category, and save. For every file. The local-library tab in the iMeshh manager skips that entire step: the folder tree you've already curated is the library.
Why folder-based beats Blender's Asset Browser for archviz
When you've already organised thousands of downloaded assets, you don't want to re-categorise them inside Blender. Here's where the built-in Asset Browser fights you and how iMeshh's manager sidesteps it.
The 'categorise twice' problem with the Asset Browser
If you've ever downloaded a third-party asset library, you've already done the organising work. The folders are named, the categories are sensible, every file sits where you can find it. That's the only way to actually locate anything once a library reaches a few thousand items. Asking you to re-categorise the whole lot a second time, inside Blender, is asking you to do the same job twice.
That's the core friction with the built-in Asset Browser when your library lives on disk. Marking files as assets and tagging them is a second pass over a collection that was already curated. The iMeshh manager sidesteps the problem entirely by mirroring whatever folder structure you point it at: the directories you've already built become the tabs and sub-categories inside the panel, with no extra step to perform.
Appending multi-object collections in one click
Most assets in an archviz library aren't single objects. A decoration set is exactly that: a set, packaged in one .blend because the pieces belong together on a shelf or a table. When you bring that file in, you want every item inside it to land in your scene, ready to place, with nothing extra that you don't need.
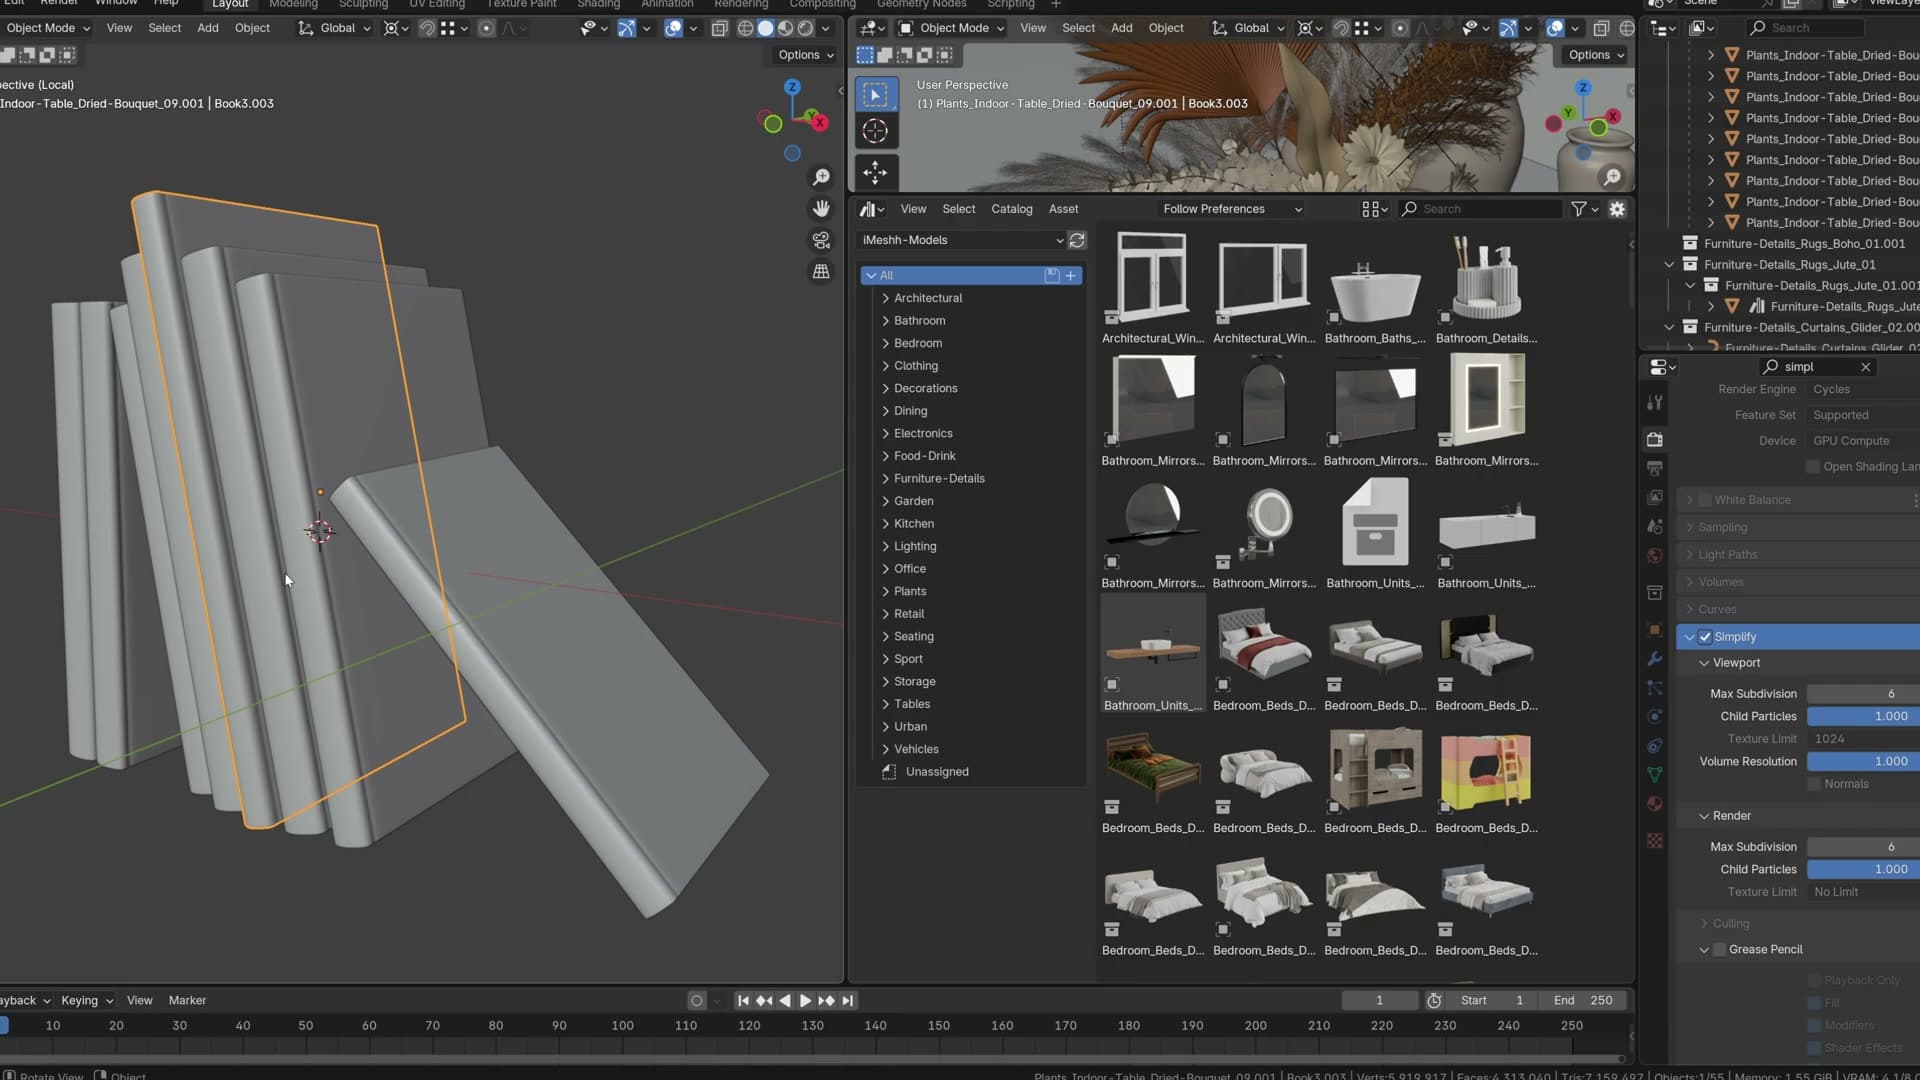
The iMeshh manager handles this with a single click. Hit append and the contents of the .blend drop straight into the viewport: every object, every part of the set, exactly as it was packaged. There's no unpacking pass and no separate UI to navigate. That's how it should work. Assets aren't shipped with extra clutter, so importing them shouldn't add any either.
The built-in Asset Browser route to the same result is more involved. You'd first need to mark the collection as an asset in the source file, drop it into the scene (where it arrives as a single instance with an empty at its root), then run Make Instances Real with Keep Hierarchy enabled in the operator panel to unpack it back into editable objects. The empty has to be deleted on the way out. It's reachable, but it's three or four extra clicks that the folder-driven manager skips entirely.
Parented assets, Mark As Asset and the bone-constraint workaround
Parenting compounds the problem. If the objects in your set are parented to a single root rather than grouped in a collection, marking the root as an asset only marks the root. Drag it into the scene from the Asset Browser and the children stay behind. For sets built around a central hero object with smaller items attached to it, that's a meaningful gap.
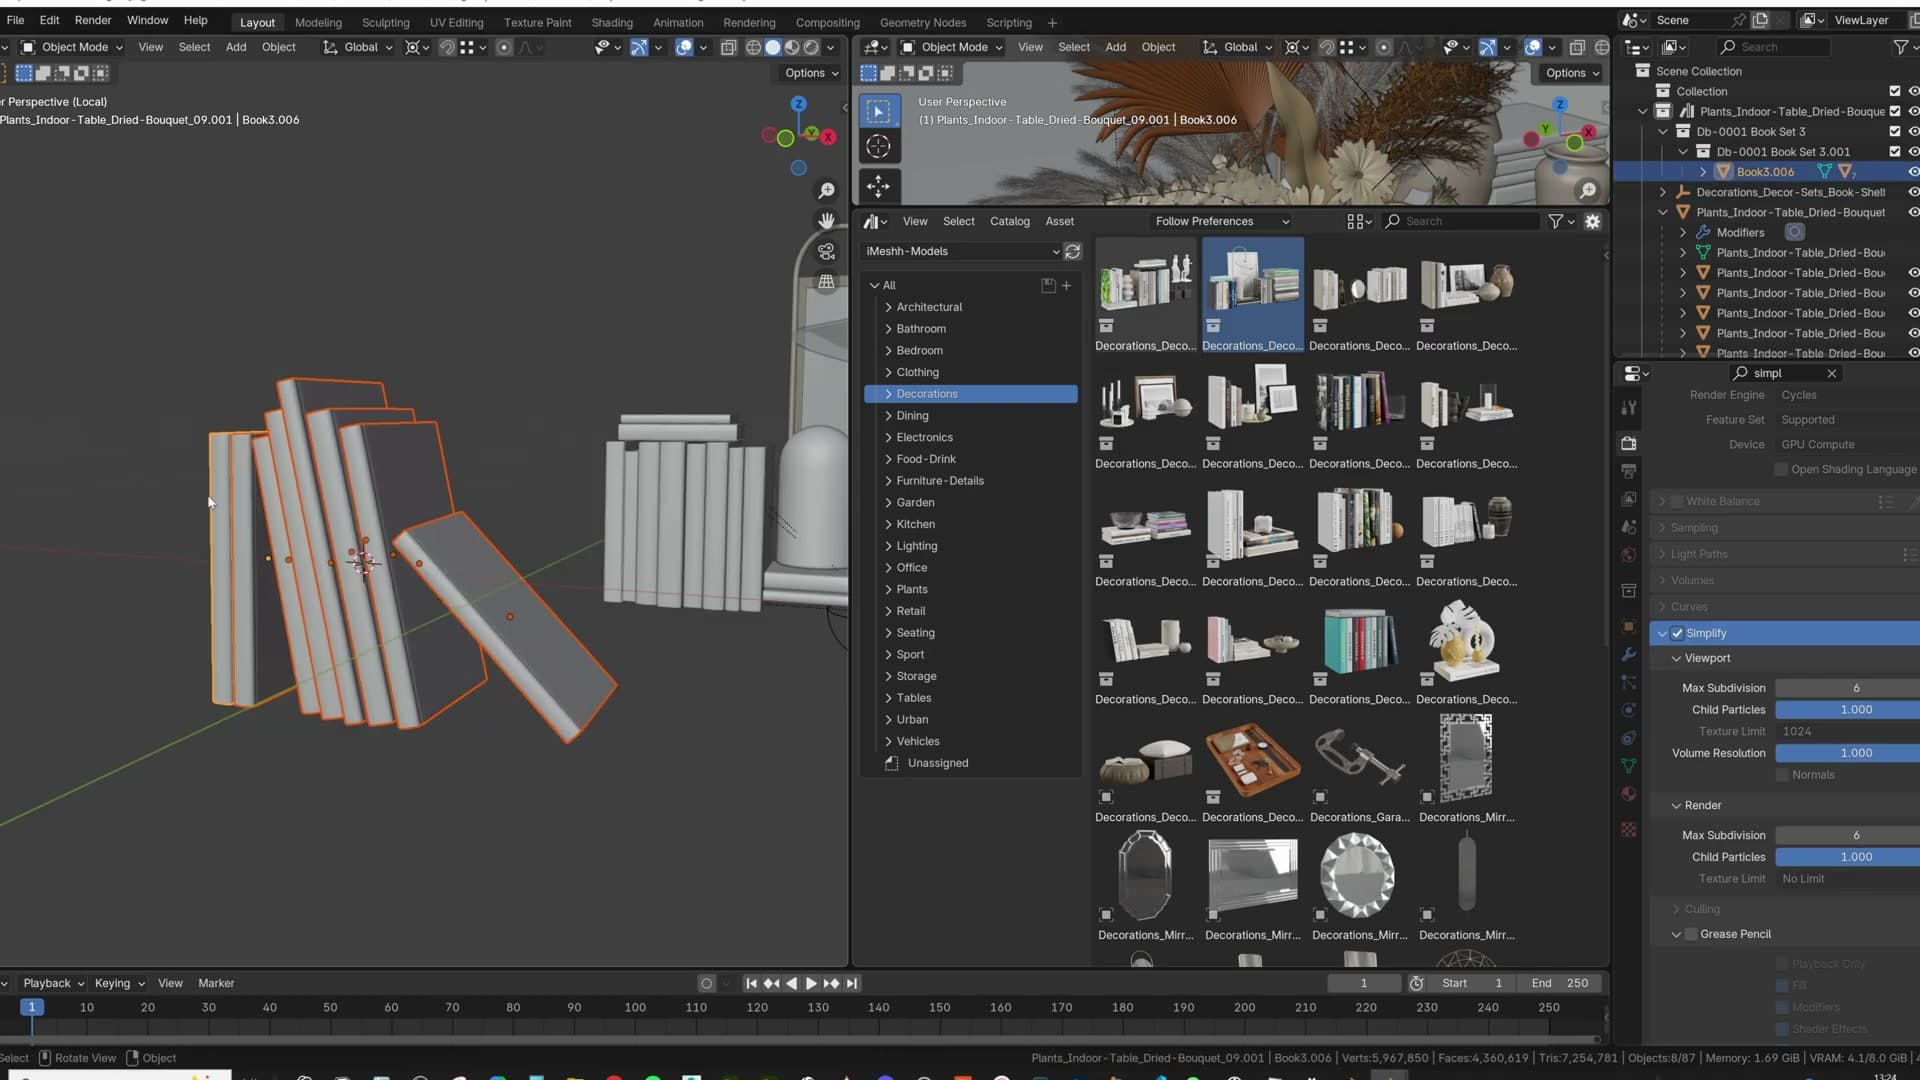
There is a community workaround. You can add a constraint that convinces Blender to treat the parented children as though they were bones, at which point marking the parent as an asset does pull the entire hierarchy into the scene with it. I mention this in passing but couldn't recall the specific constraint by name, and suspected there may also be an add-on that automates the step, though nothing specific came to mind.
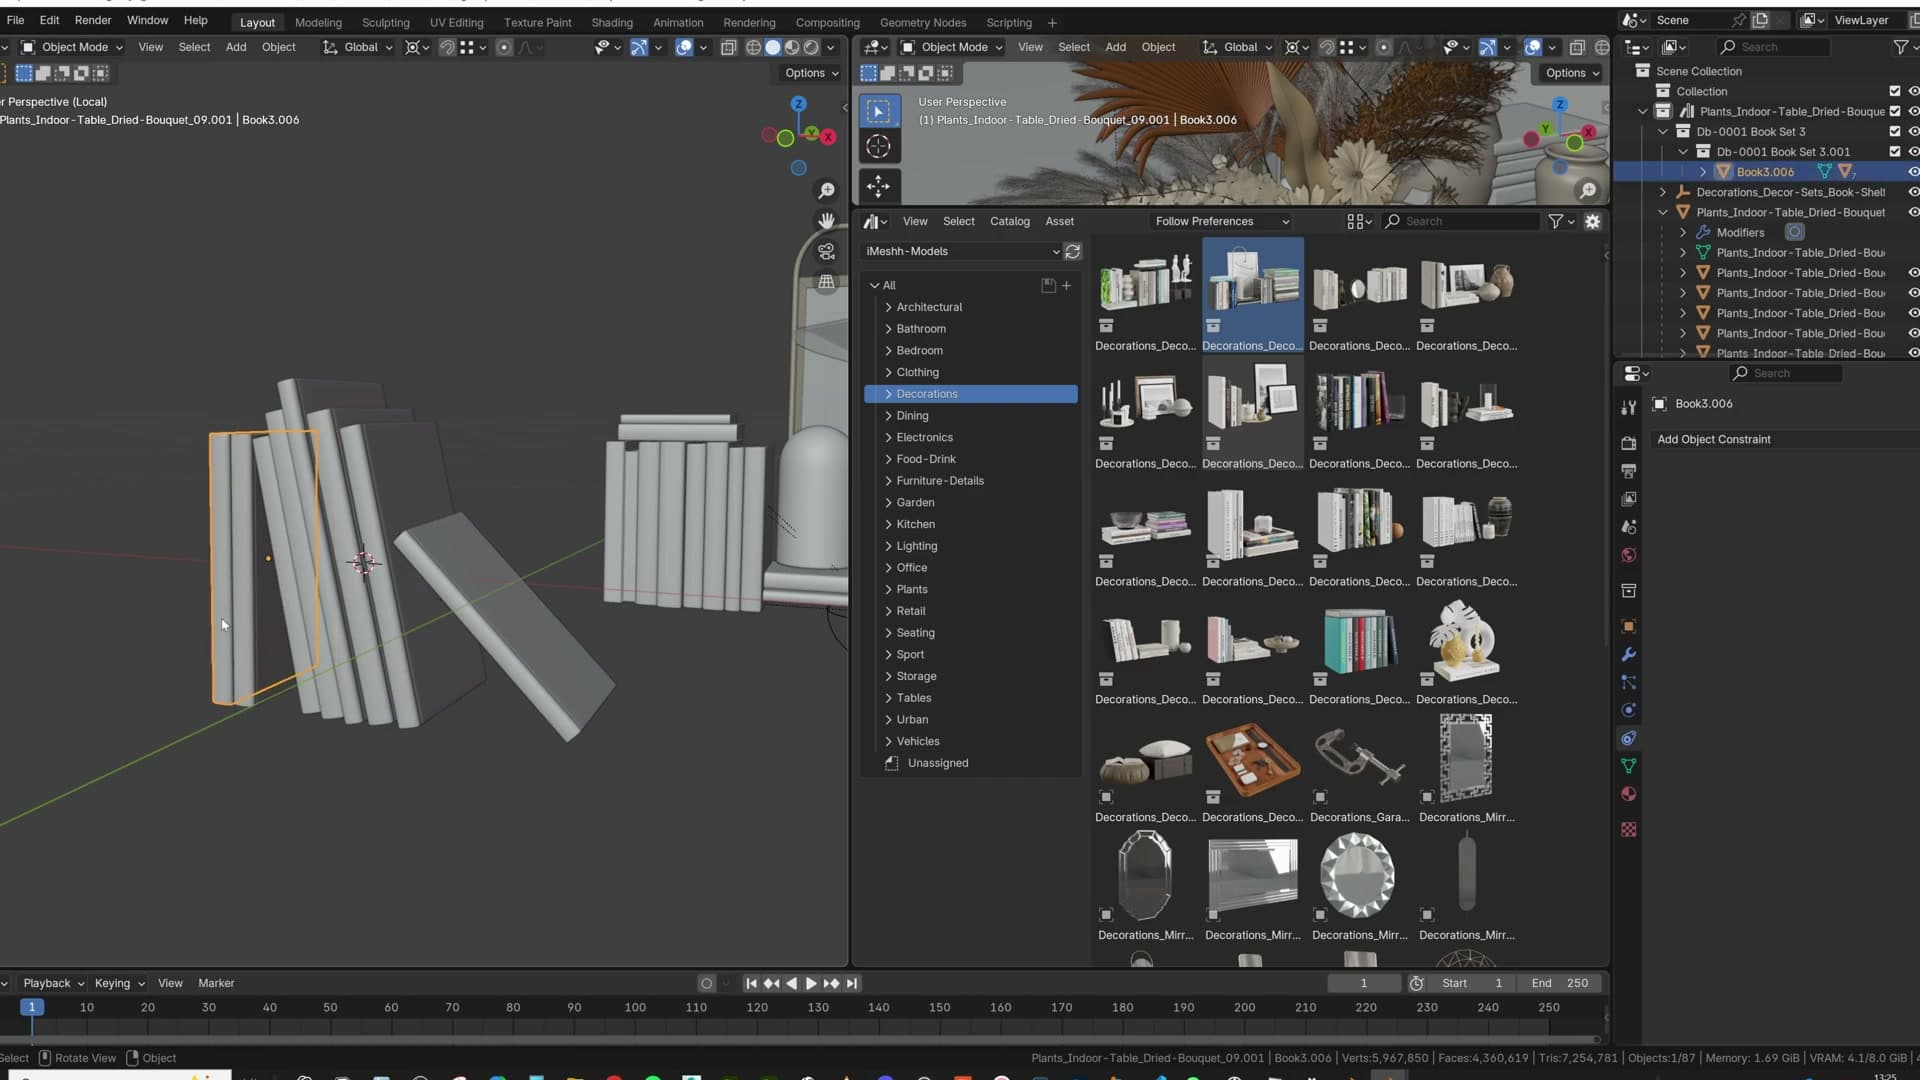
None of this is fatal. The Asset Browser is a capable piece of software, and Blender's developers keep improving it. But for a library you've already organised on disk, these are exactly the limitations that pushed us to build the manager the way we did: skip the marking, skip the constraint trick, skip the Make Instances Real dance. The folder is the library, and append is the action.
Materials and HDRI tools
How materials, HDRIs and the bundled HDRI utility panel work, including independent strength sliders, background replacement and ground projection.
Applying materials from the Materials tab
Append brings an entire .blend into your scene with a single click. Every object inside that file lands together, with its hierarchy intact. A useful default for multi-object decoration sets that would otherwise need unpacking after import.
Materials and HDRIs live in their own tabs alongside Models in the same panel. Pick a material and it's applied; pick an HDRI and the world is built out for you. You aren't marking individual datablocks or thinking about file paths. The folder structure you already organised is the category structure.
If you've merged your workflow into Blender's native Asset Browser, that's still a perfectly good route. The folder-driven manager is aimed at the traditionalist who has the library on disk and just wants those folders to be the tabs.
Independent sky, diffuse and reflection strength
Once an HDRI is loaded, the manager wires up the world and exposes an HDRI Tools panel for it. Selecting the HDRI in that panel reveals a row of independent strength sliders rather than a single multiplier.
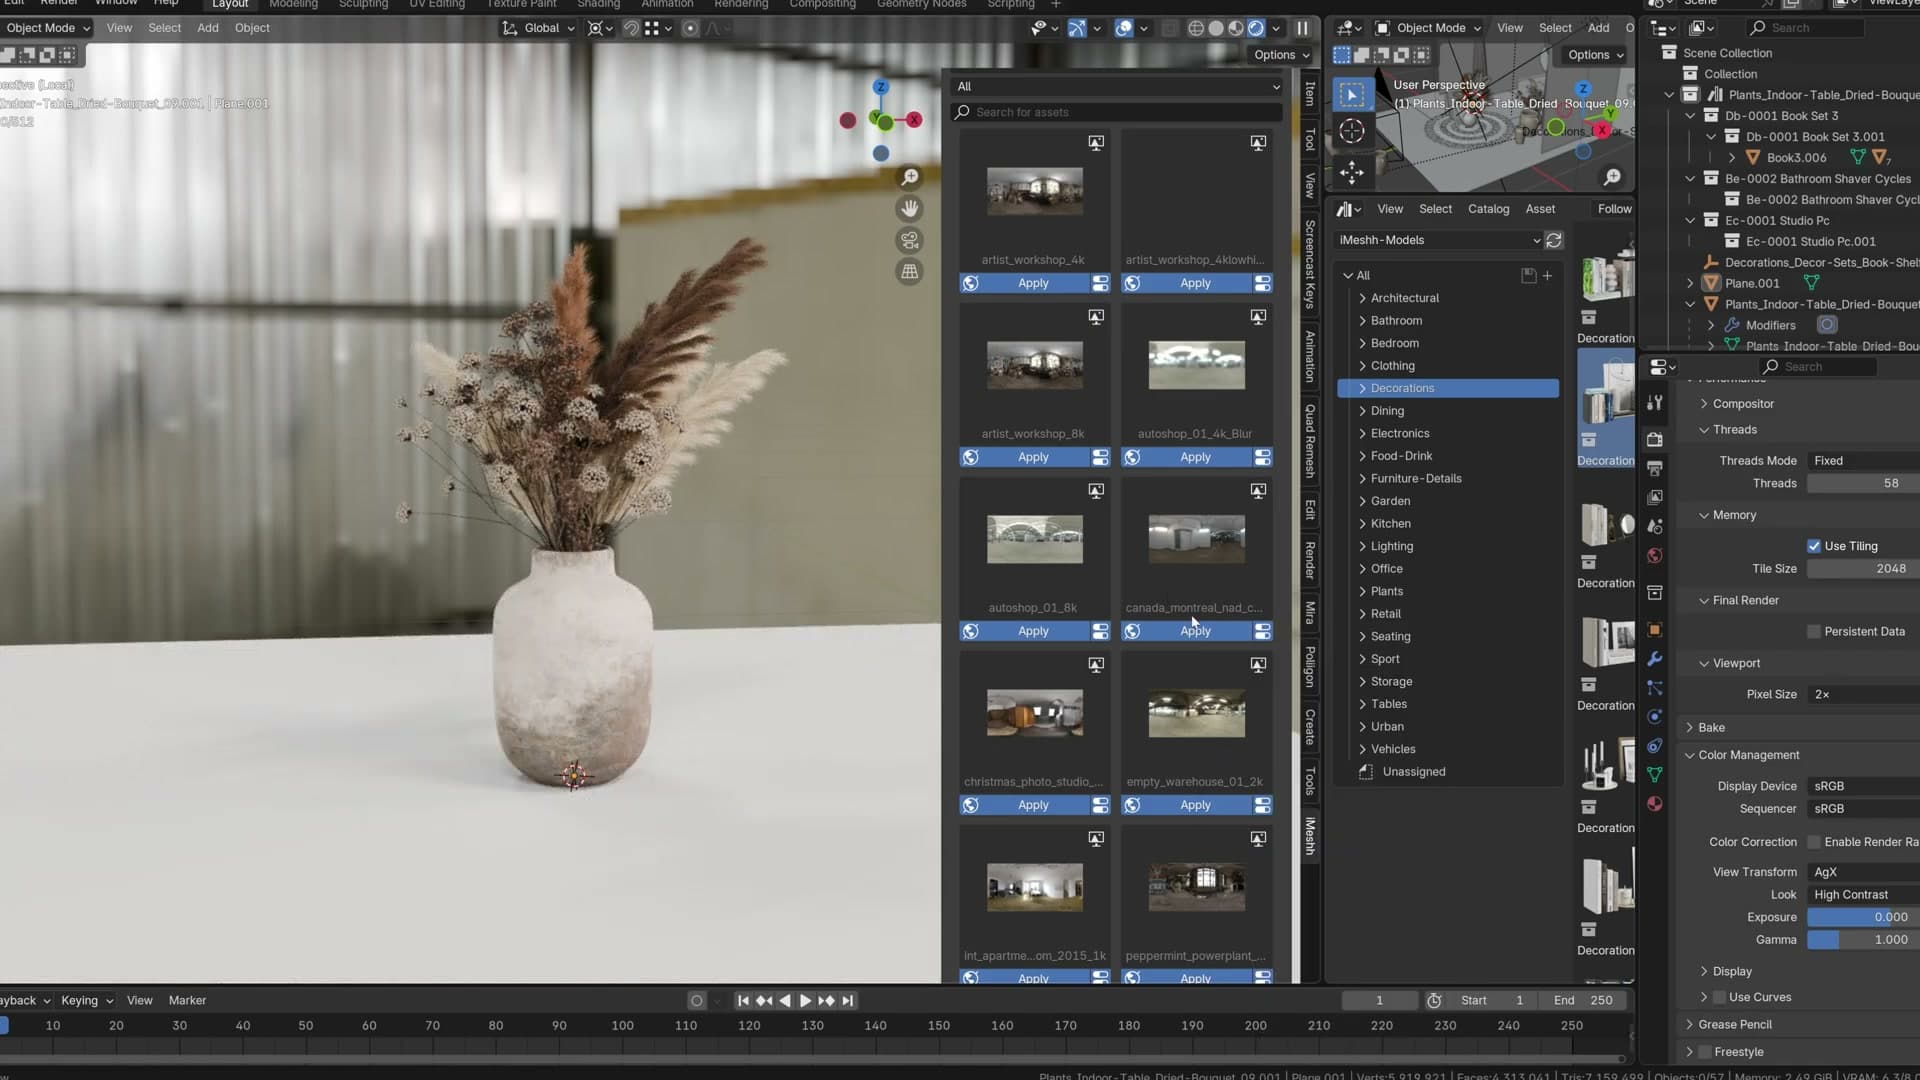
Three are split out: sky strength, diffuse strength and reflection strength. Each one drives a different aspect of the world's contribution, so you can push one without dragging the others with it.
That separation matters in archviz. If you want the HDRI to read more obviously through a window without flooding the room, you can lift the sky on its own. If the bounced light from the dome is overcooking the interior, you can pull the diffuse down without losing the punch in the reflections.
Replacing the visible background without losing the lighting
Background Replace is my favourite control in the HDRI Tools panel. It swaps out the visible sky behind the camera for whatever image you point it at while the original HDRI carries on driving the lighting.
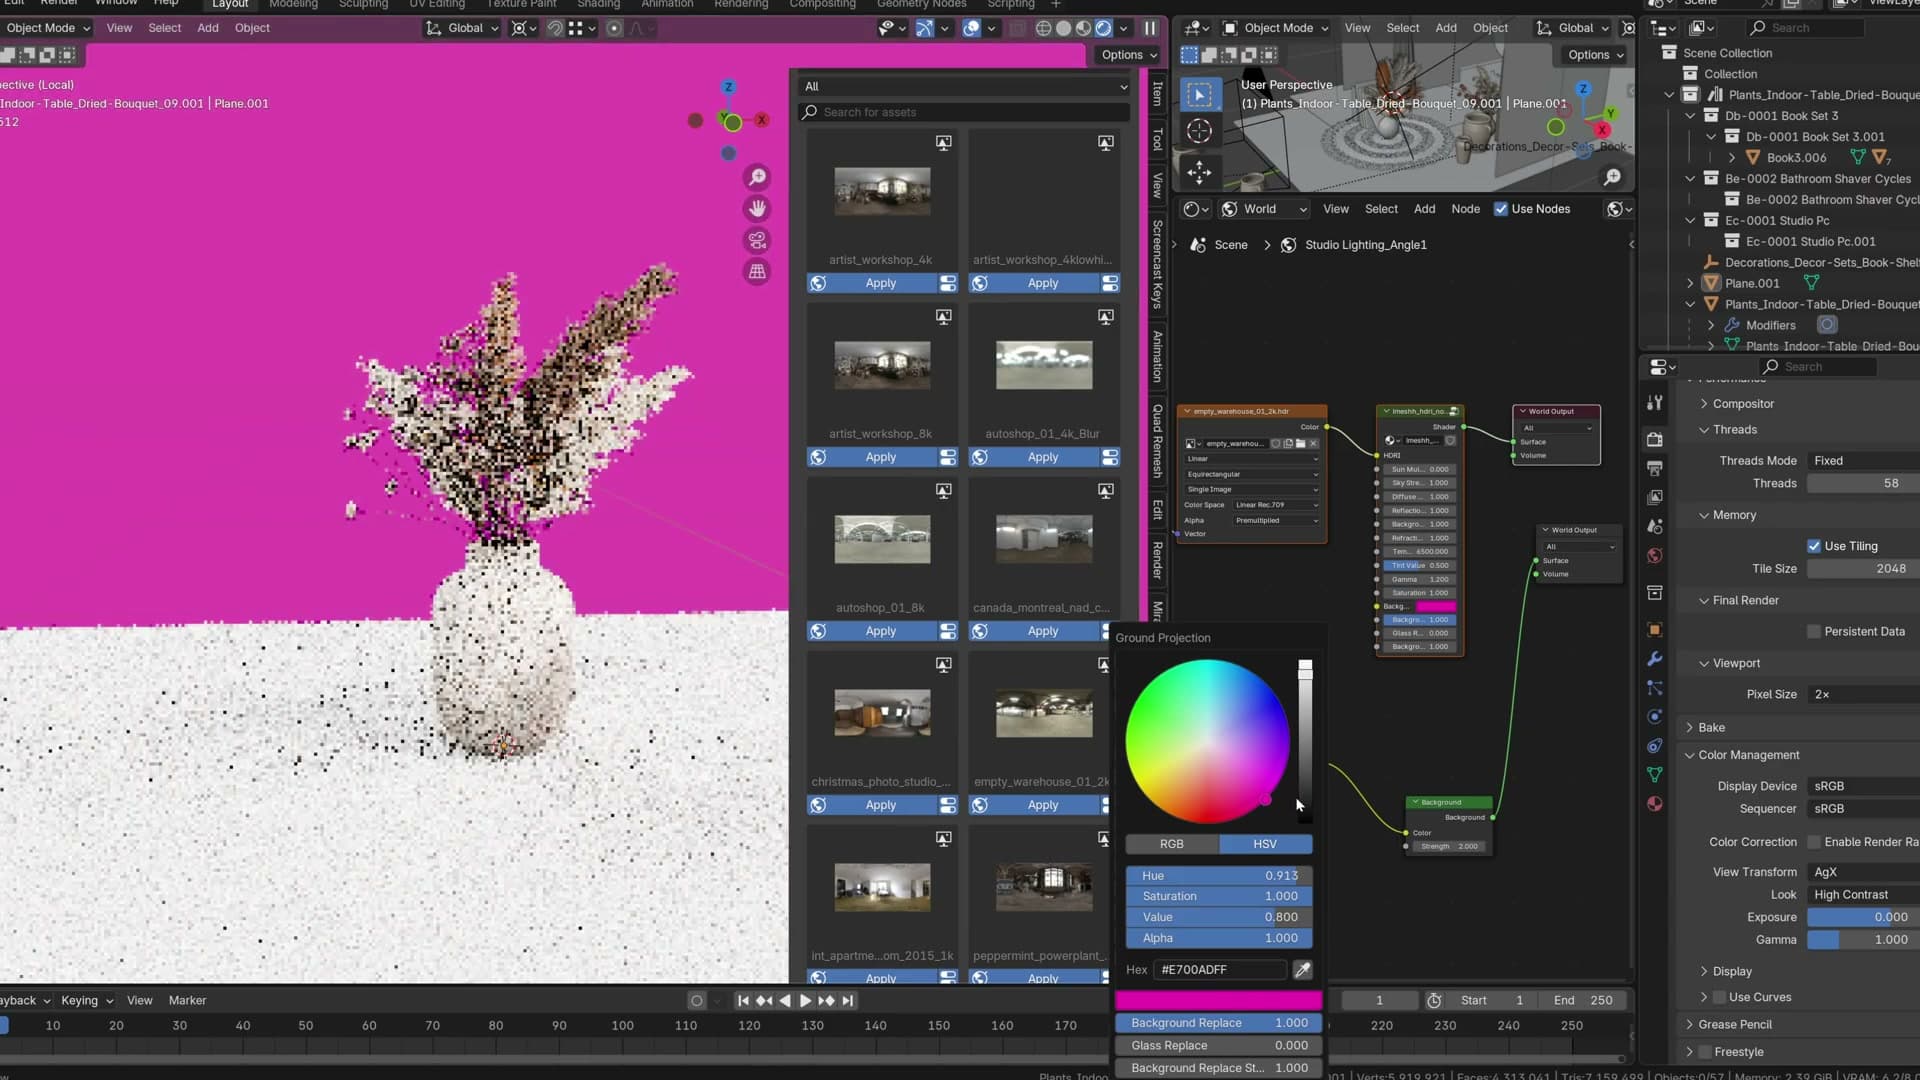
The slot accepts your own textures, so a photographed back plate or a painted sky can sit behind the scene without you having to rebuild the world graph or duplicate the lighting setup.
Ground projection with a shadow-catcher plane
Ground projection turns the HDRI dome into a flat floor under your scene. The setup is two steps: drop a plane where the ground should sit and mark it as a shadow catcher, then enable the ground-projection toggle in the HDRI Tools panel.
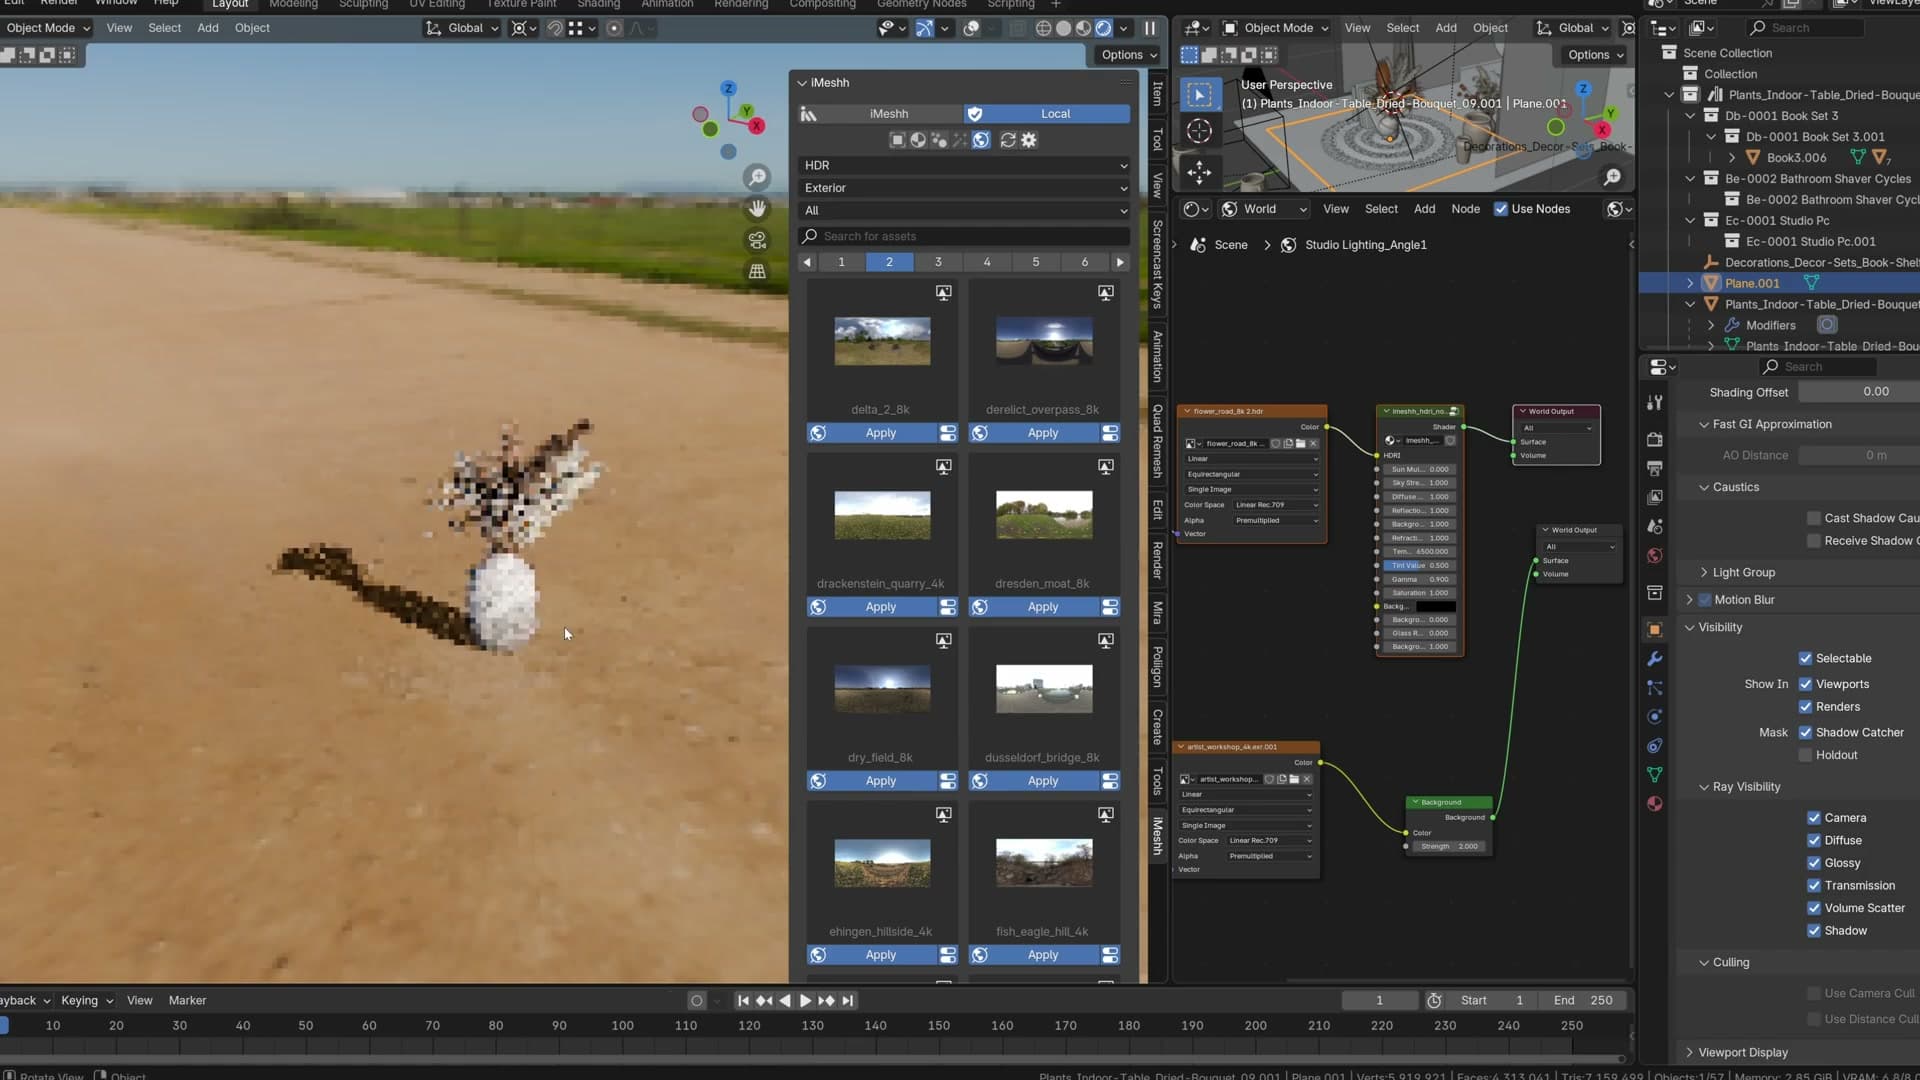
With both in place, the HDRI behaves as if its lower hemisphere has been flattened against the plane. Objects placed on top read as if they're sitting on the photographed environment rather than floating in a sphere, which is the effect that makes outdoor product or vehicle shots feel grounded.
It isn't a universal fix. The illusion holds best in outdoor scenes where the surrounding geometry in the HDRI is far enough away to hide the projection edges; in tighter setups the seams give the trick away.
Setting up asset paths and types
Adding folders in Edit Preferences and tagging each one as Model, Material, Geonodes, Effects or HDRI so the manager knows how to import on click.
Adding paths in Edit Preferences (v1.2.0)
To set this up, open Edit > Preferences in Blender and search for iMeshh in the Add-ons list. Expand the add-on (version 1.2.0 at the time of recording) and switch to the Paths section. This panel is where the manager picks up the folders it scans for assets.
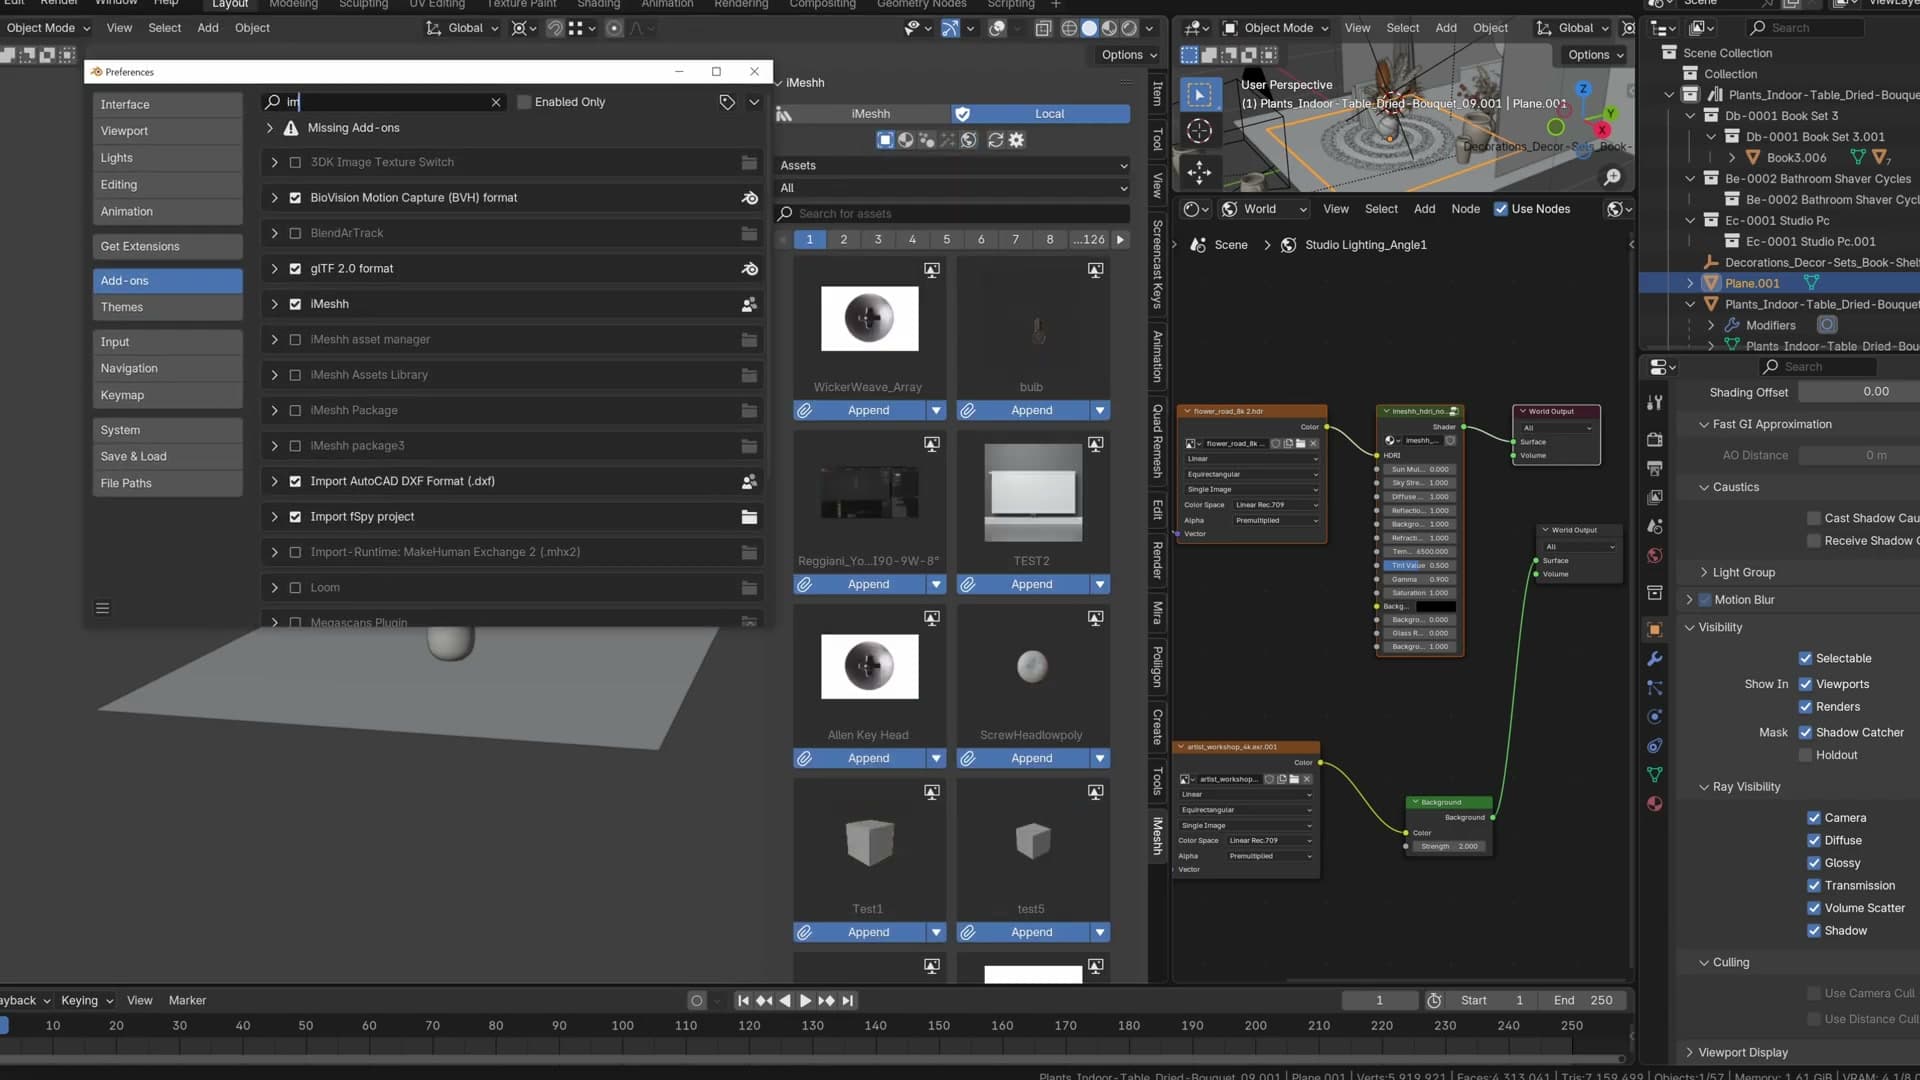
Click the path-picker button to add a new entry, then choose a directory that already holds your organised assets. You can add as many paths as you like and remove existing entries from the same panel, so there's nothing stopping you from pointing the manager at every separate library you keep on disk.
Tagging each path as Model, Material, Geonodes, Effects or HDRI
Each path needs a type. The dropdown beside the directory chooser offers five options: Model, Material, Geonodes, Effects or HDRI. The setting tells the manager what to do when you click an asset in the N-panel.
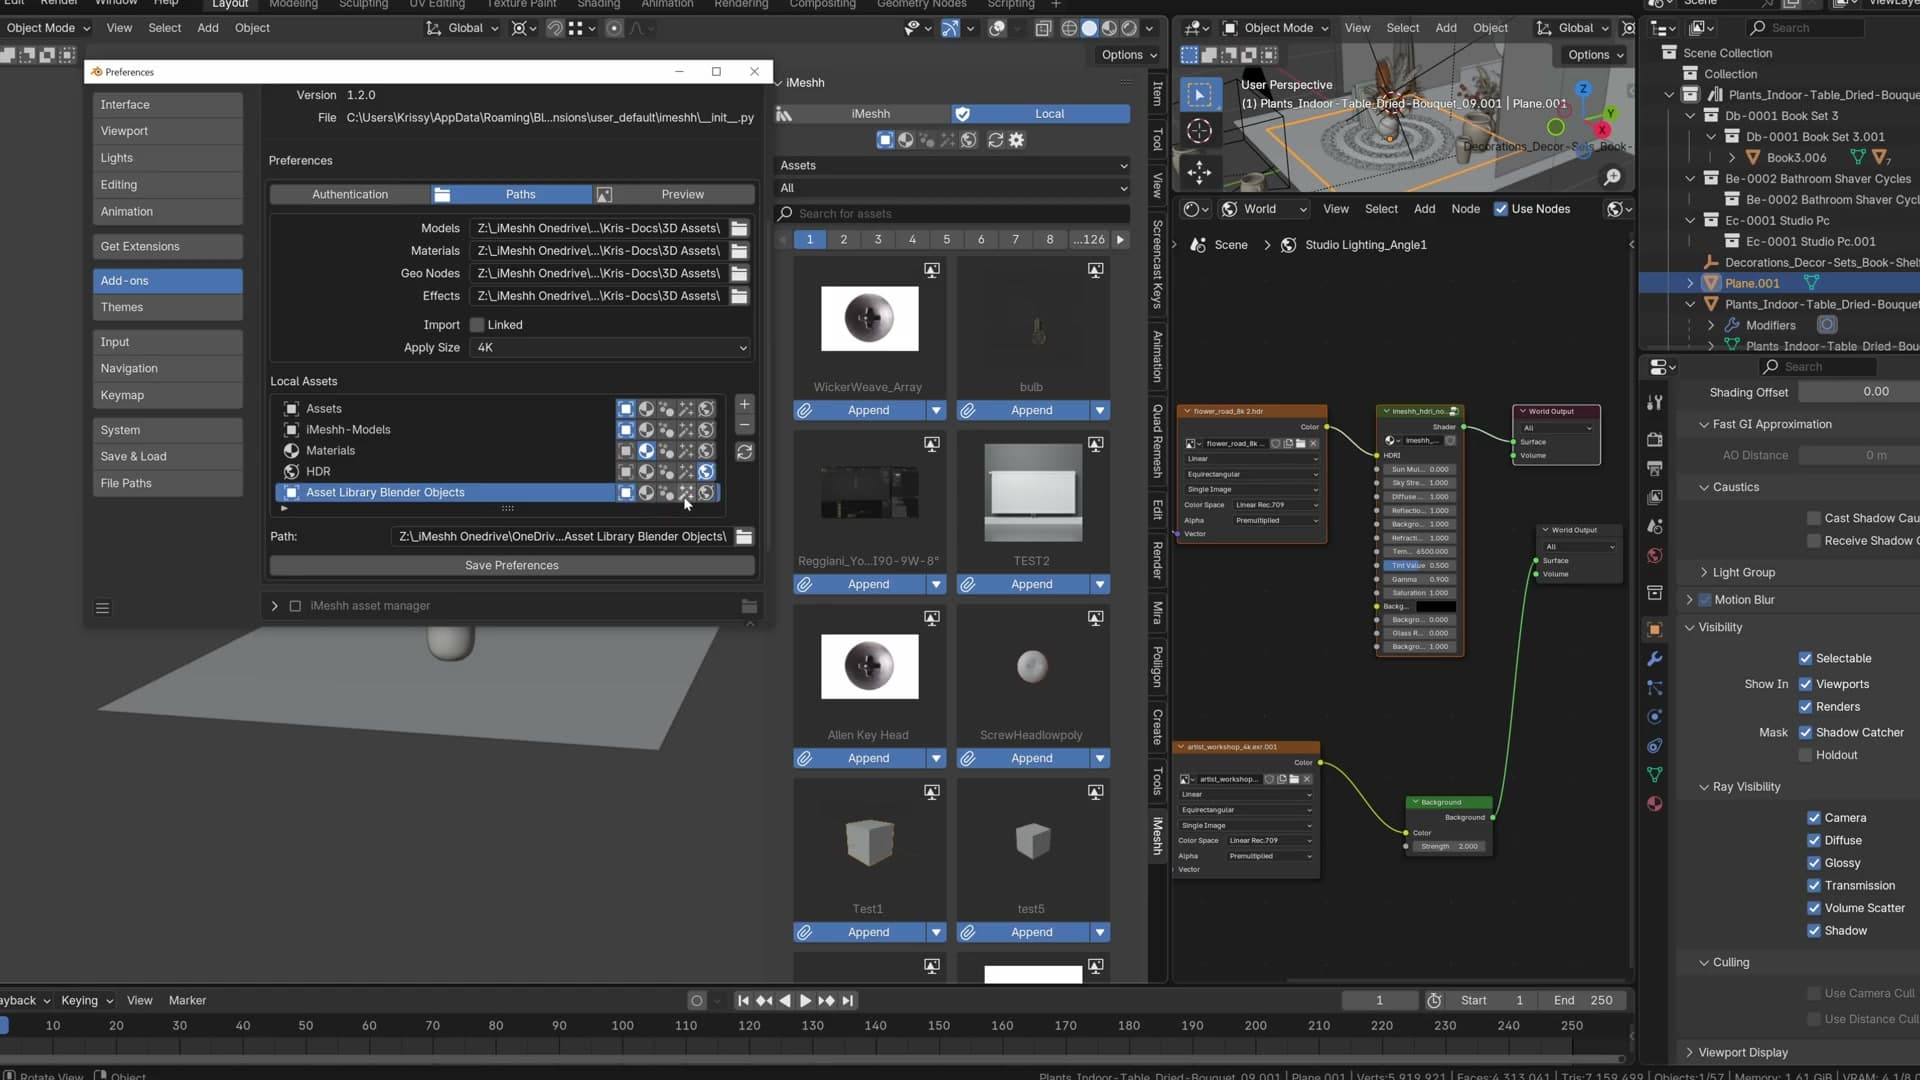
Models, geonodes and effects all behave the same way under the hood: clicking an asset appends the object into the scene. Materials are different; clicking one applies the selected material to whatever object you currently have selected. HDRIs are different again, loading the chosen image into the world.
Because the three object-style types are functionally identical, you don't strictly need three separate paths for them. I keep them split in the main iMeshh library because a lot of users already organise their downloads into distinct model, geonode and effects folders, so matching that split inside the manager keeps the tabs tidy.
The type you assign a path to is the tab the assets show up under. Tag a folder as Material and its .blends turn into click-to-apply materials in the Materials tab; tag the same folder as Model and the contents are appended into the scene as objects instead.
Thumbnail and folder layout rules
The whole indexing rule is one line: a .blend and an image with the same filename, sitting next to each other. Hit Refresh and you're done.
Pairing .blend files with same-name thumbnail images
The whole indexing rule is one line: put a .blend and an image with the exact same filename next to each other in any folder, and the manager treats them as one asset. No manifest, no metadata file, no Mark As Asset step. Just two files sharing a name, side by side.
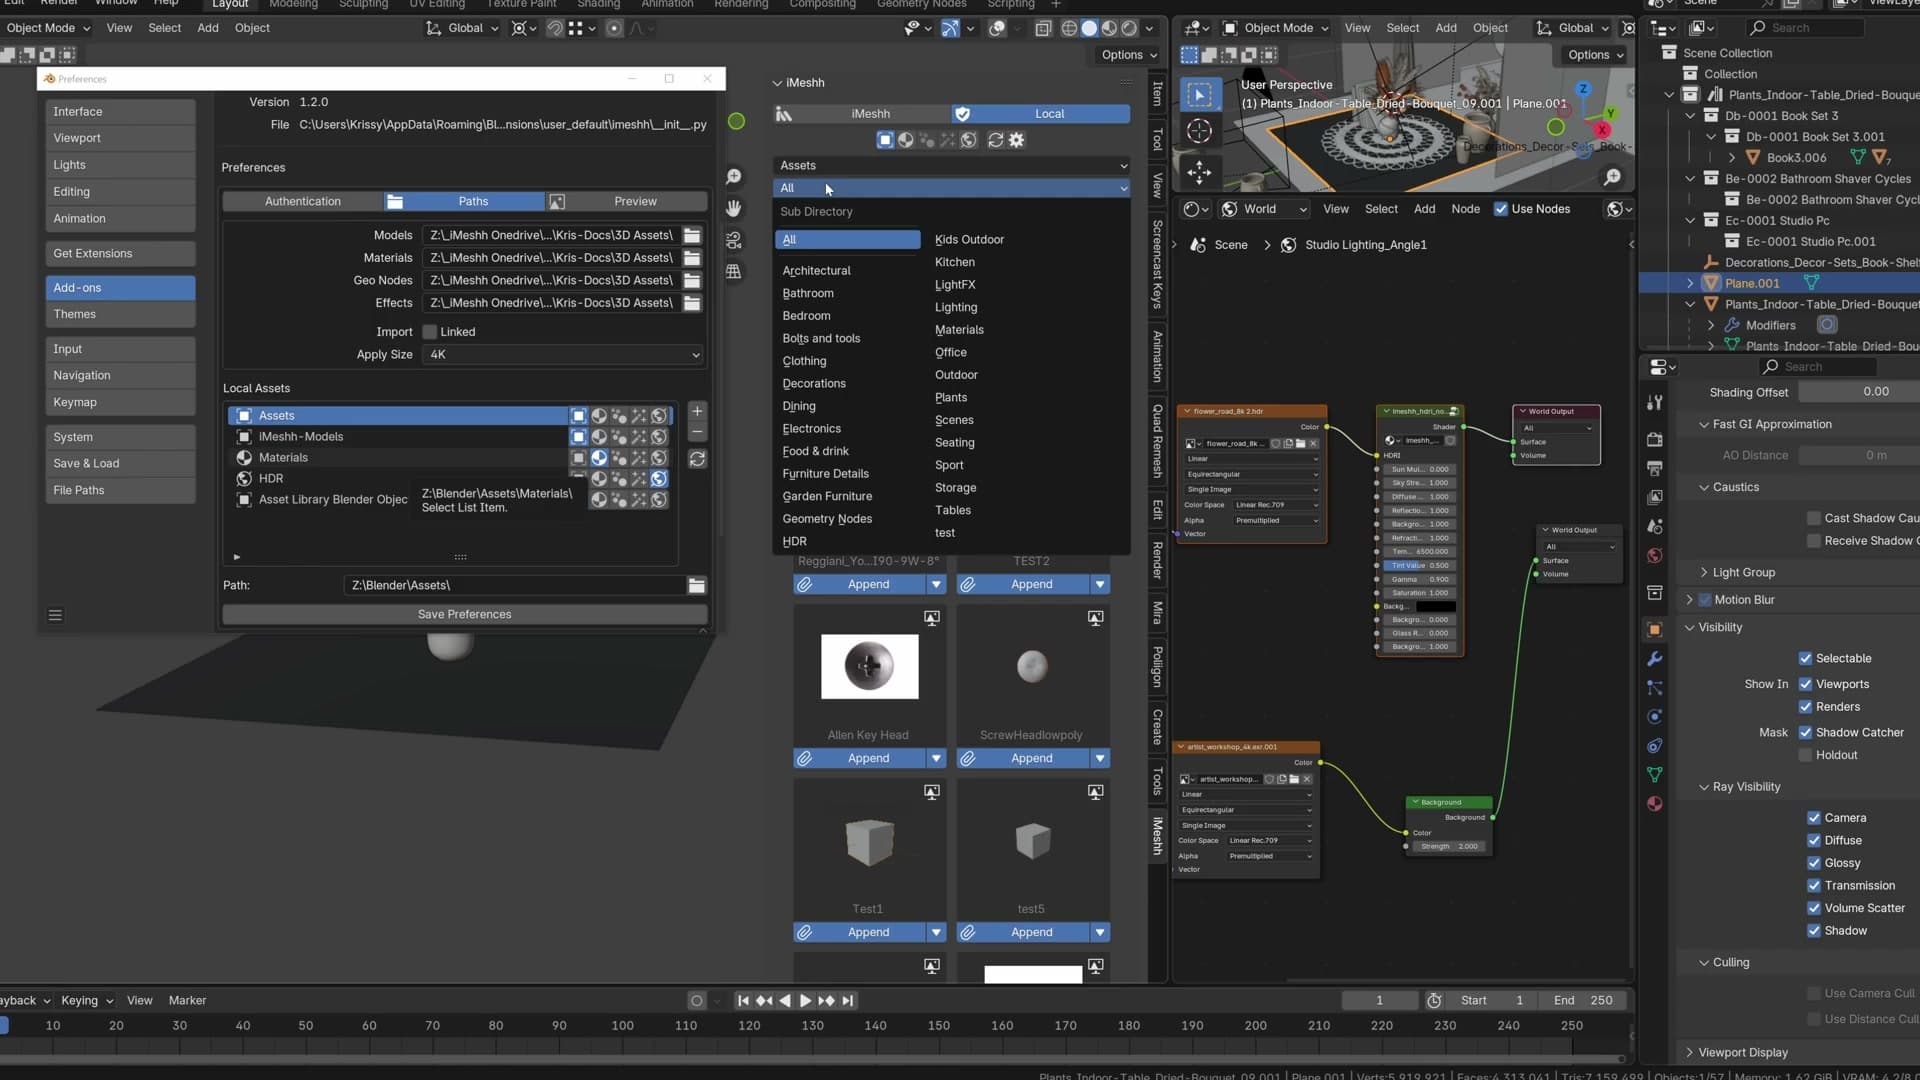
Browse into something like assets/architectural/ceiling fans and you can see the pattern in action: each ceiling fan in the panel corresponds to a .blend plus its matching image sitting in the same directory. The folder you put them in becomes the category, and the filename pair becomes the entry.
You also don't need a separate sub-folder for every single asset. A flat folder containing ten .blend/image pairs reads exactly the same as ten nested folders. The manager keys off the filename match, not the directory depth. Organise however suits the way you already think about your library.
Refreshing the library and keeping texture paths intact
When you drop a new pair into a watched folder, hit the Refresh button in the asset manager and the new entry appears immediately. No Blender restart needed. You can prove it to yourself by copying an existing .blend and its thumbnail, pasting the duplicates into the same folder, clicking Refresh, and watching a second tile pop in next to the original.
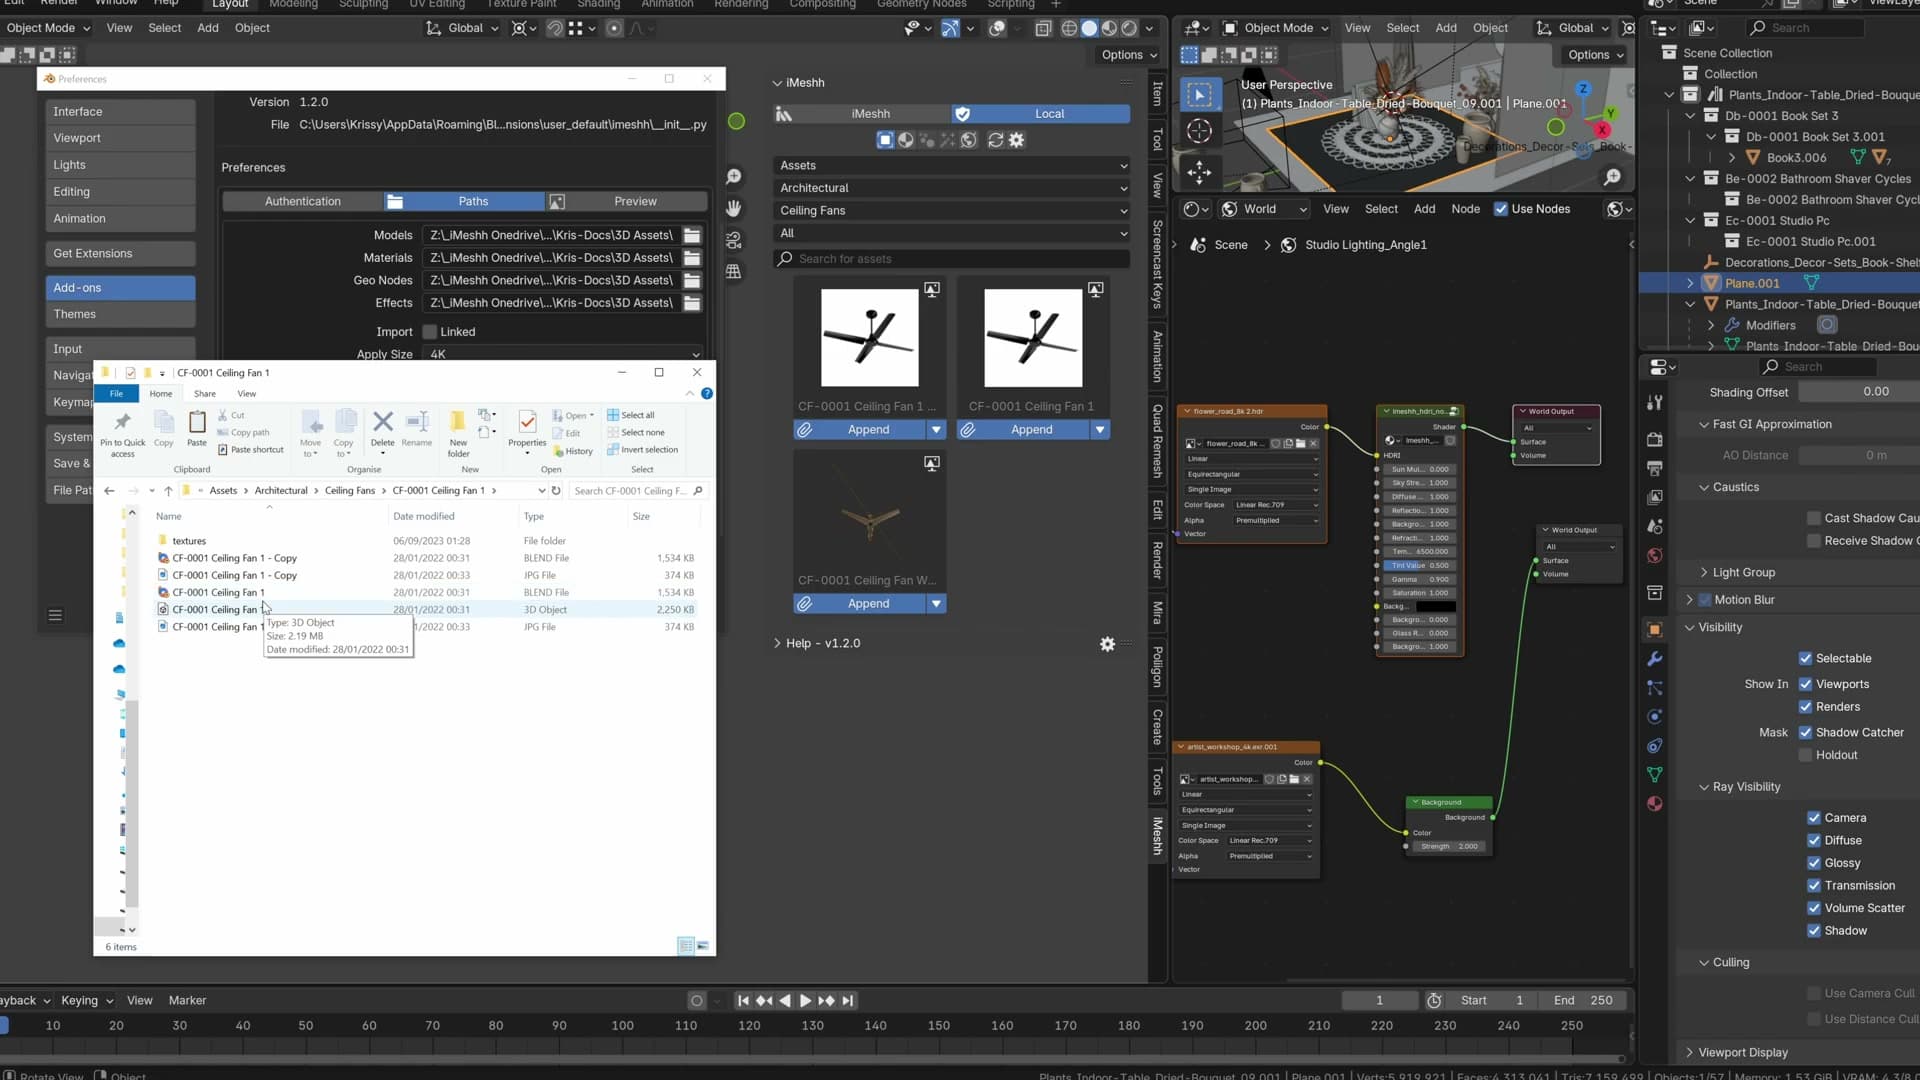
The only thing the manager doesn't handle for you is texture linkage. The .blend itself needs to know where its textures live (either packed into the file or pointed at a stable relative path) so that when you append the asset into a new scene, the maps come with it. Get that right inside the source file once, and from then on the workflow is just append, place, and render.
Tools and credits
Everything mentioned in this tutorial, with links.
- Blender the renderer this entire build runs in.
- iMeshh studio platform (project management, client review, asset library, invoicing). The asset library used in this tutorial is included with every iMeshh Pro plan.
- Poly Haven free CC0 textures and HDRIs.
Pillar guide: Imeshh Tools hub