Why this tutorial exists and what the roof generator does
iMeshh released a complex procedural roof generator and 10 preset glass materials. This post answers the most common question from new users: where do you even start once it's appended?
What's in the roof generator release
iMeshh has just released what's arguably the most complex roof generator built for Blender, and the team spent many months on it. I got so deep into the technical details on launch that I forgot to cover the most basic question: where do you actually start once it's appended? The inbox filled with that exact question from new users.

This post is the missing onboarding pass. You'll append the generator, bind it to a custom roof, clean the geometry Blender needs to shade tiles correctly, then customise tiles and build your own metal panel profiles until the roof is render-ready.
The headline of the release itself is 30 new procedural roof generators: variations across tiled pitches, metal panels, and the awkward geometry combinations that make archviz roofs slow to model by hand.
Glass preset materials and the new iMeshh pricing
The same drop also ships 10 preset glass materials. They're built on top of a node group designed to handle the trickier glass cases, so you can append the closest preset (a frosted glossy, a matte frosted, whatever fits) rather than rebuilding the shader from scratch on every project.
My reasoning was simple: glass is the material I was forever recreating. Even with experience, getting a believable frosted glass to behave properly takes time, and that time adds up across a year of projects. Wrapping ten variations as ready-to-append presets means you spend that effort once and reuse the result everywhere.
Add 30 standalone asset releases from the same month, and the practical upshot is that most of what you'll reach for in a typical archviz scene now ships ready to drop in. That sets up the rest of this walkthrough, starting with appending the generator itself.
Appending the generator and binding it to your own roof shape
Two ways to attach the generator to your building geometry. Ctrl+J is the right choice rather than Copy Modifiers, because it preserves the attribute list you'll need later.
Appending the tile roof from the iMeshh Asset Manager
Open the iMeshh Asset Manager and switch to the tab where the roof generators live. For this walkthrough, start with a tiles variation rather than a metal one. The tiled generator is the easiest to read while you're learning how the system wants to be driven.
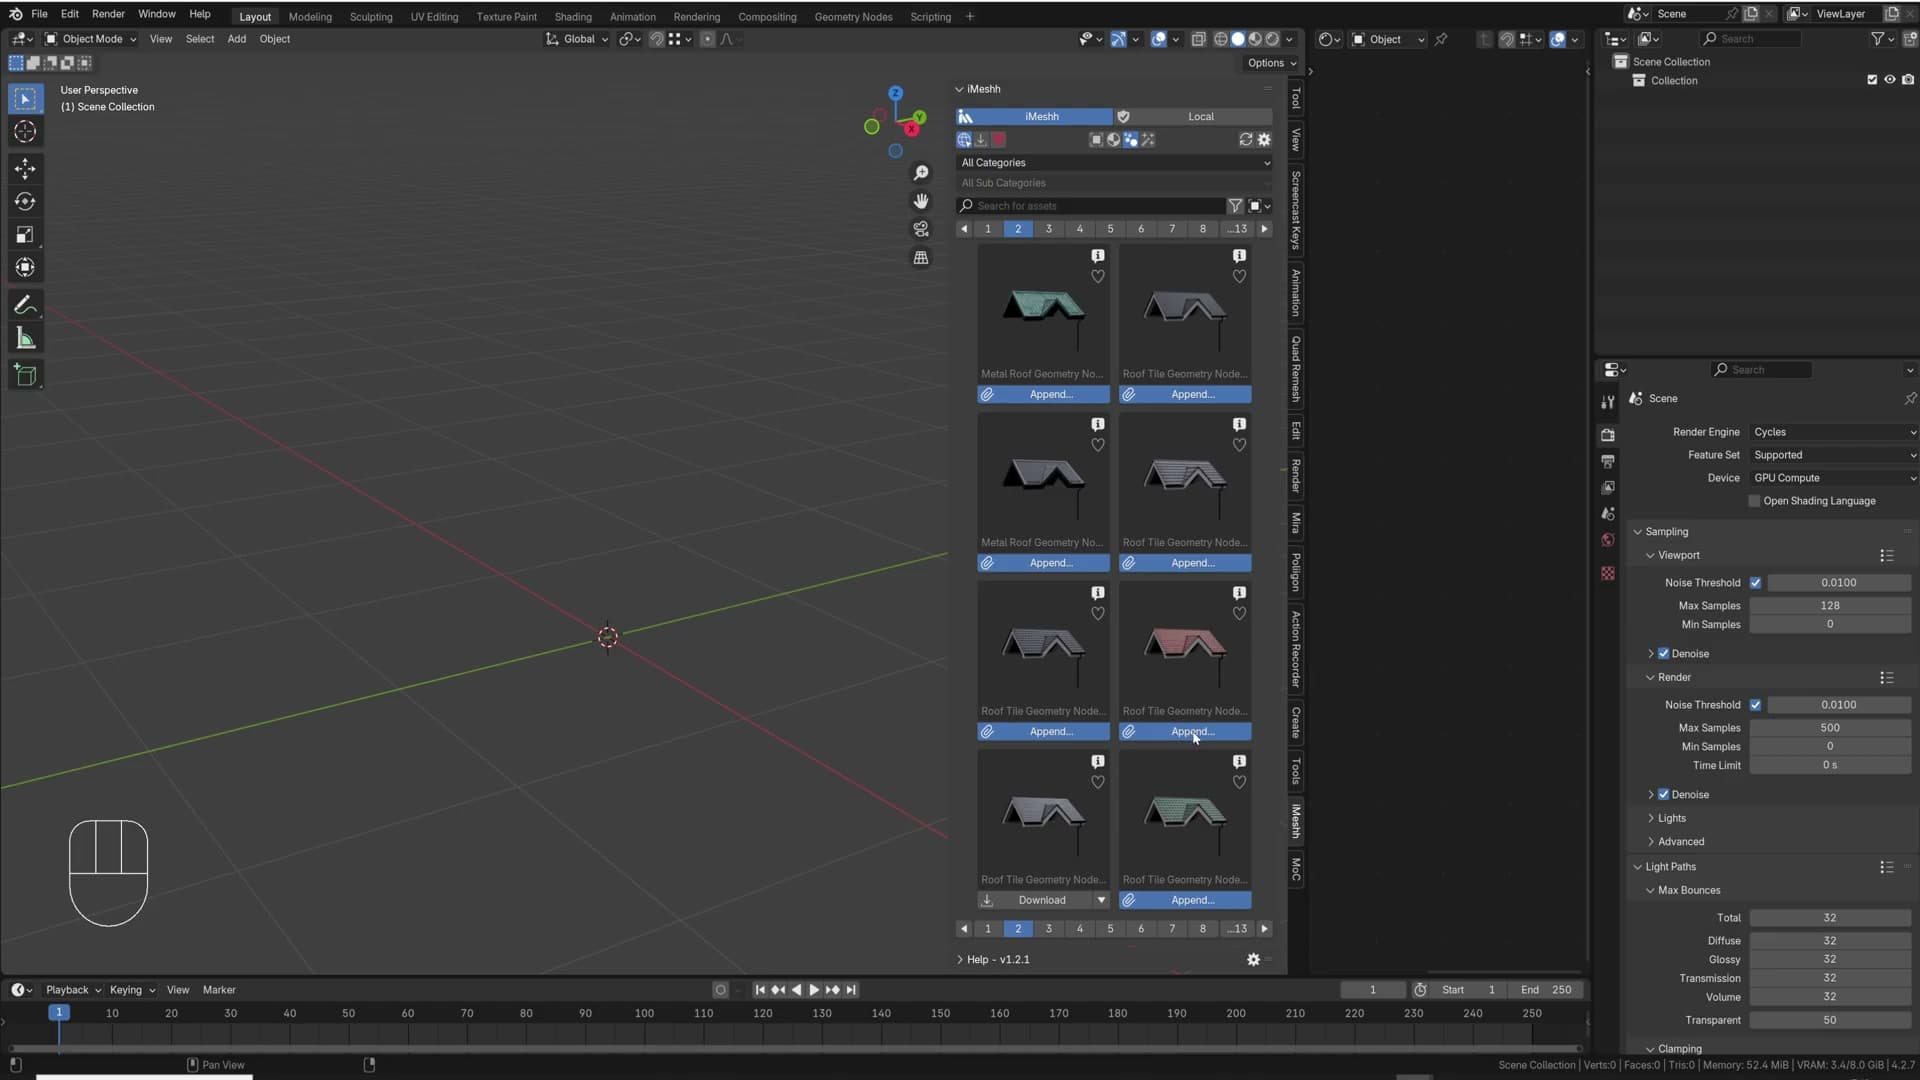
Click Append on the variation you like and the generator drops into your scene as a stand-in roof shape. It arrives with its own geometry already attached, which is what trips most people up next.
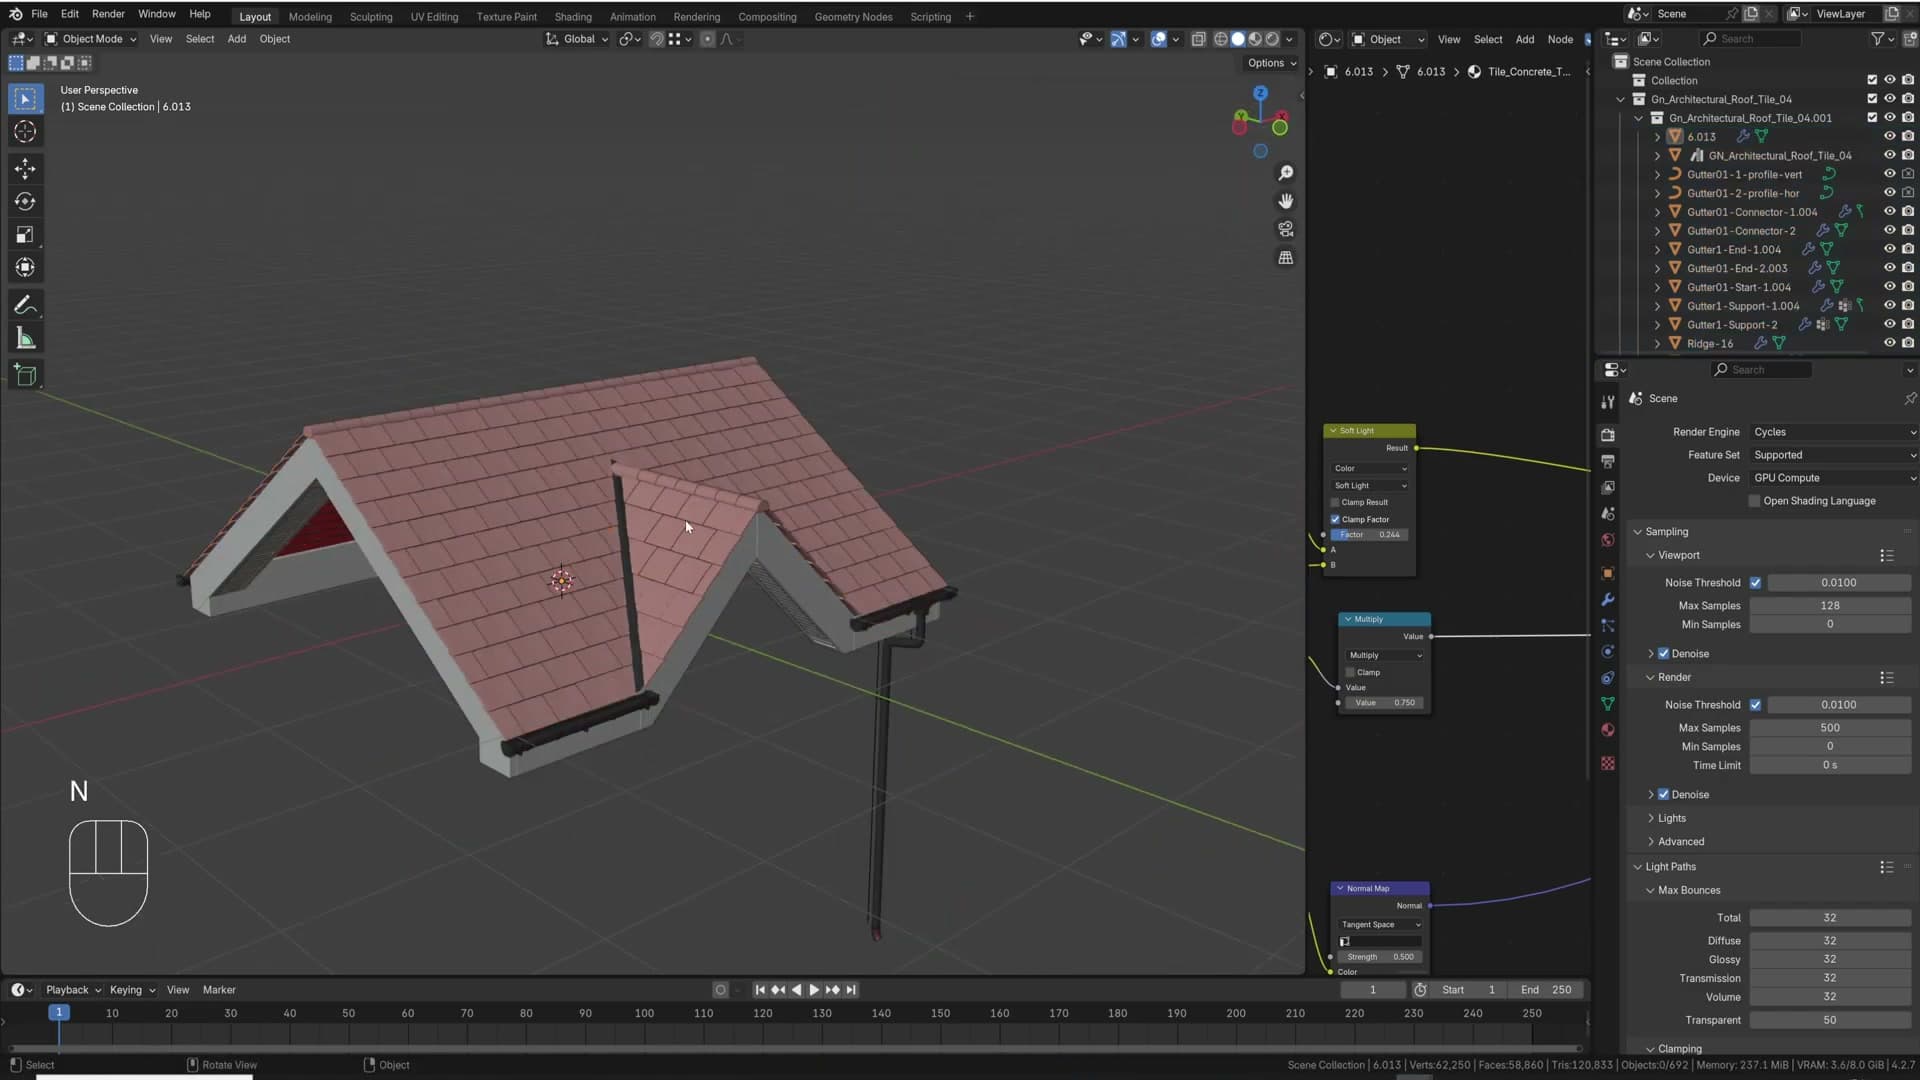
Modelling a quick test roof to bind the generator to
From here the obvious instinct is to jump into edit mode on the appended geometry and try to push the verts around until it matches your building. Don't. The generator's stand-in shape is almost never going to match your roof, and trying to remodel it from the inside out is a fight you won't win.
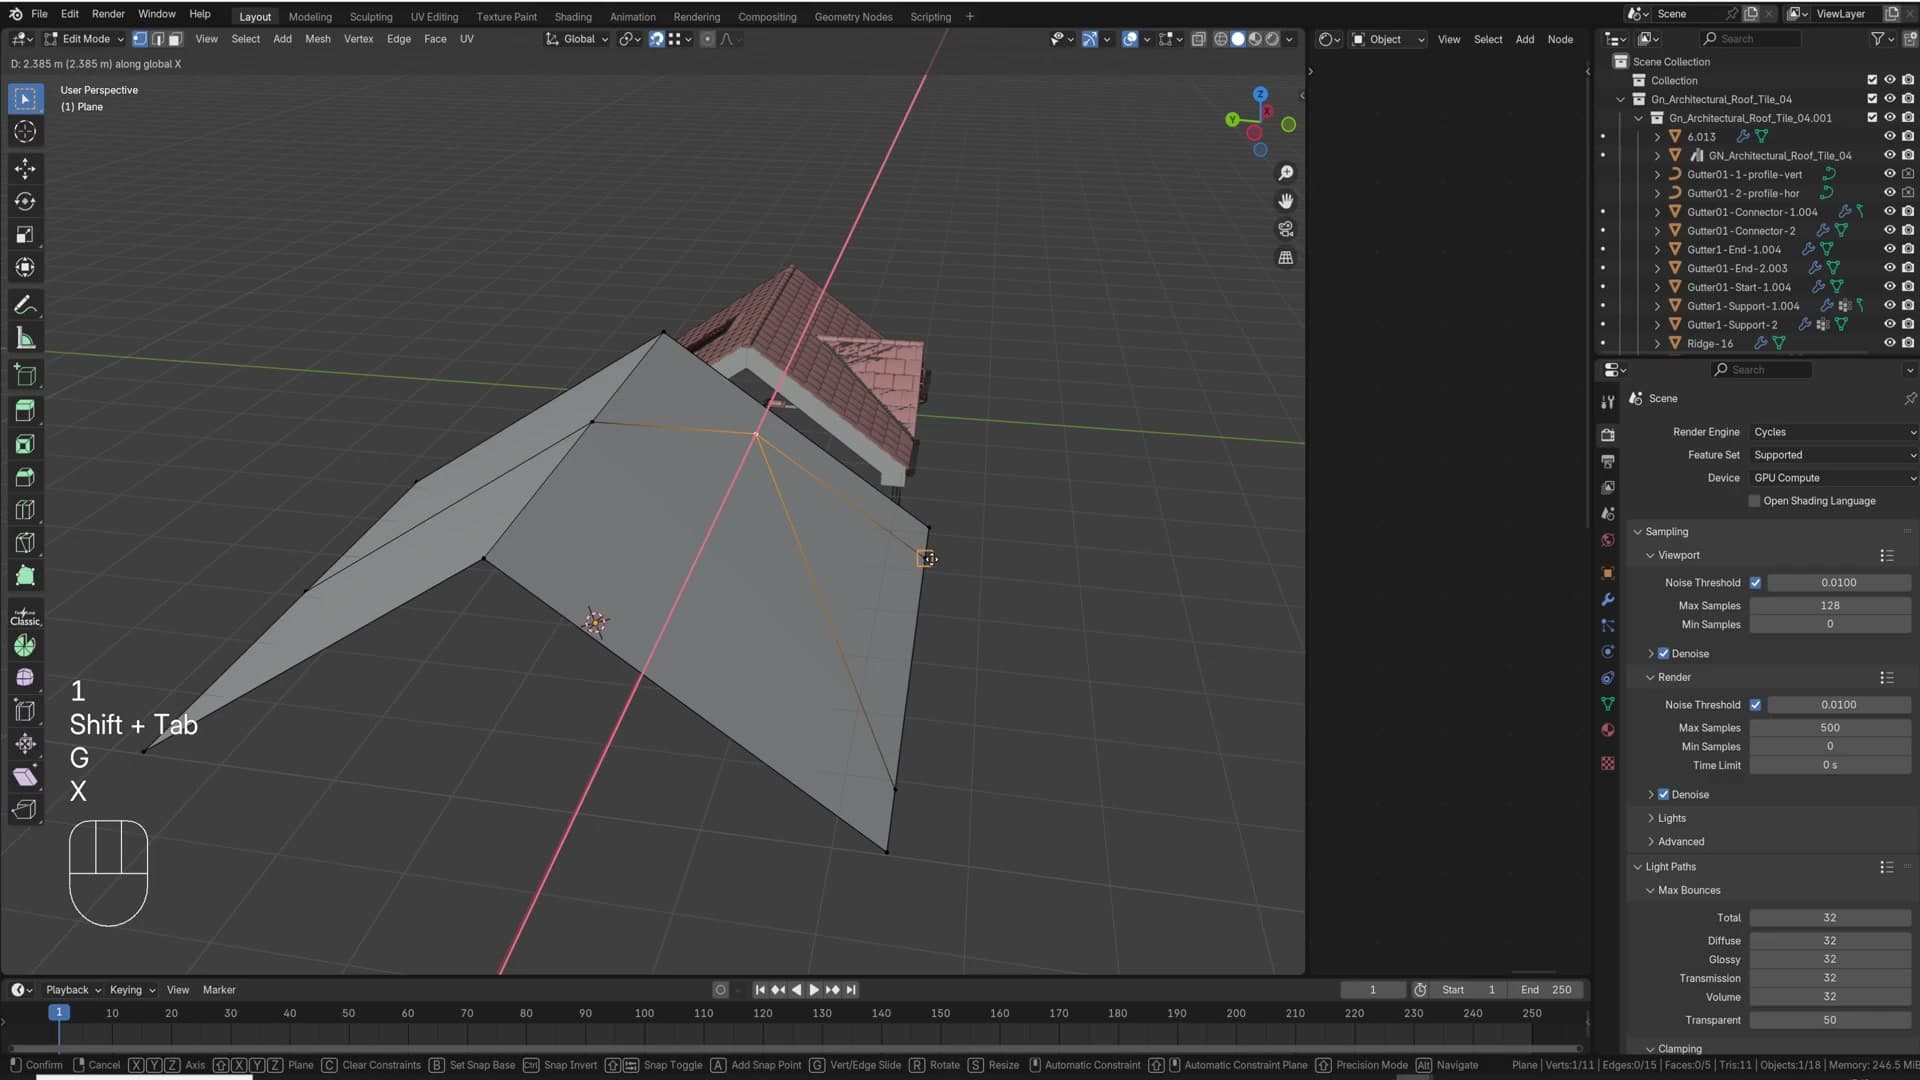
Instead, model your own roof shape on top of your building and bind the generator to that. For testing, throw together any rough roof form (even a quick random shape will do) so you can see how the generator reacts to your geometry before committing to a final roof.
Delete the top face once you've blocked the shape in. You'll end up with something that broadly resembles a roof, and as you'll see in the next module it'll have at least one geometry problem baked in. That's deliberate: it gives us something concrete to fix.
Why Ctrl+J beats Copy Modifiers for attribute access
There are two ways to push the generator onto your custom roof. The first is to select your roof, shift-select the appended generator, then press Ctrl+L and choose Copy Modifiers. In this particular setup it won't behave correctly out of the gate, but more importantly it's the wrong tool for the job regardless.
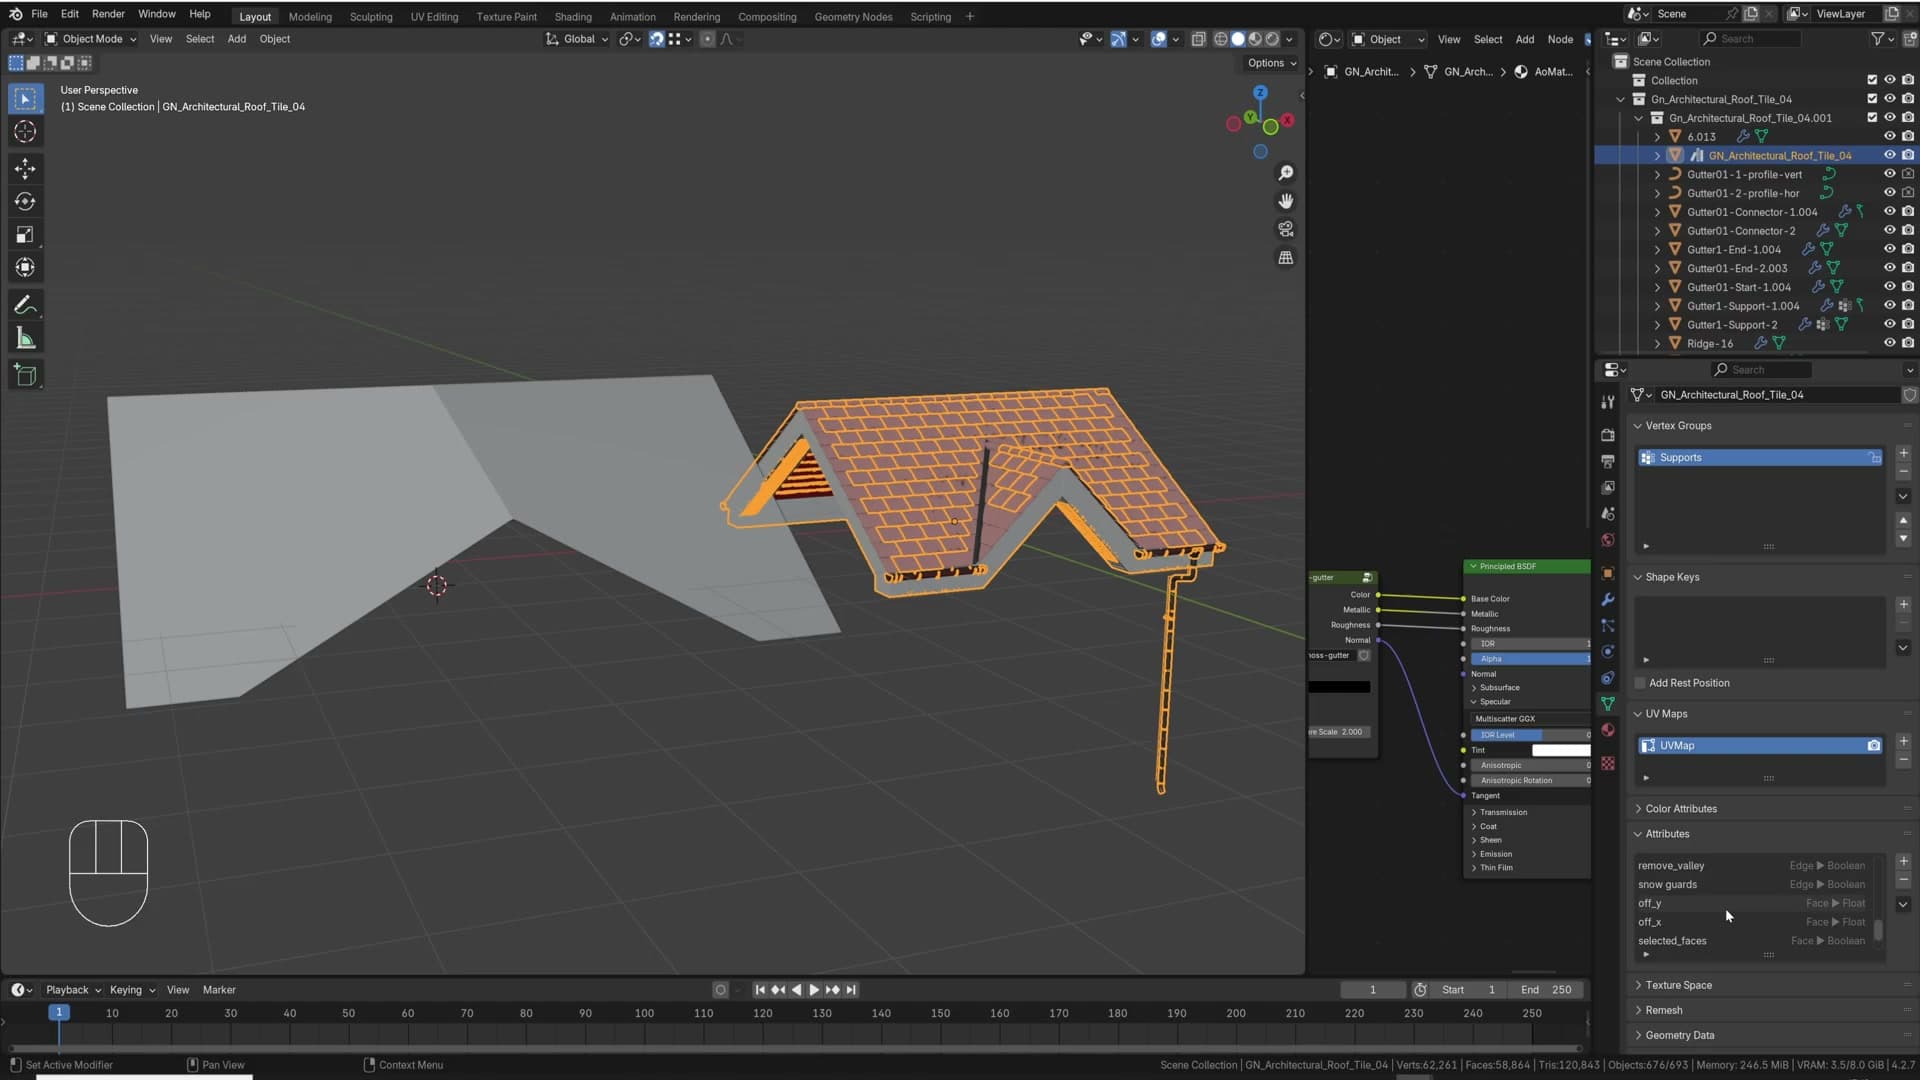
The reason is attributes. When you append the generator you don't just get a modifier stack. You also get a long list of attributes on the object that you'll lean on later when you want to fine-tune how the roof behaves. Copy Modifiers leaves those attributes behind on the original object, so you lose the control surface you actually need.
Join is the right move. Click on your custom roof first, shift-click the appended generator, then press Ctrl+J to join them. The attribute list comes along with the modifiers, and the generator now treats your geometry as the driver. Drop into edit mode and select the imported stand-in mesh that came in with the generator so you can delete it in the next step, leaving only your roof shape behind.
Cleaning your roof geometry: flat faces and merged vertices
The two non-negotiables for a working roof: every face must be perfectly flat, and there must be no overlapping vertices. Both cause visible bugs that are easy to misread as 'the generator is broken'.
Why every roof face must be perfectly flat
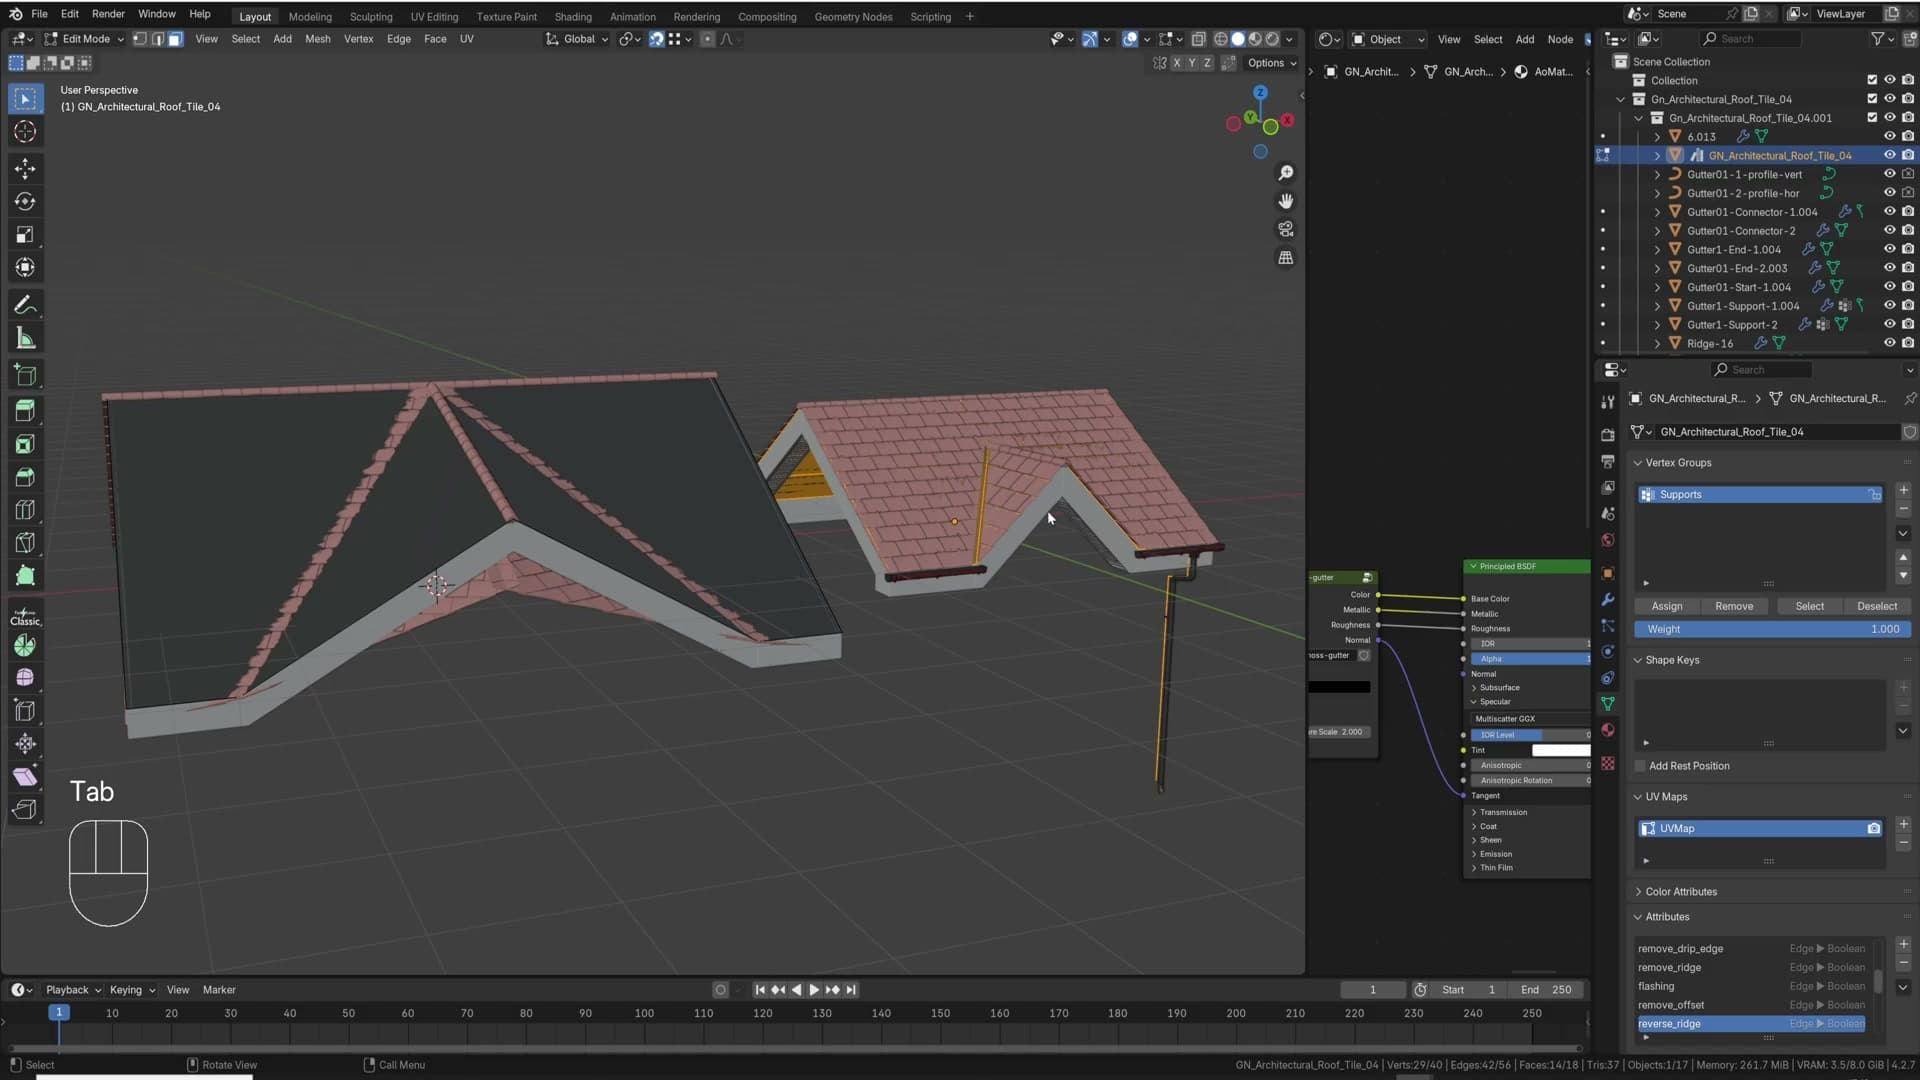
Once you've joined the appended generator onto your roof and deleted the imported mesh in edit mode, resist the urge to start tweaking attributes. The first thing to do is look at your geometry, because most of what looks like a broken generator is actually a broken roof. The single biggest rule: every roof face has to be perfectly flat. If even one vertex sits slightly off the plane of its face, Blender doesn't know how to shade the ngon, and the tile generator can't lay tiles across it predictably.
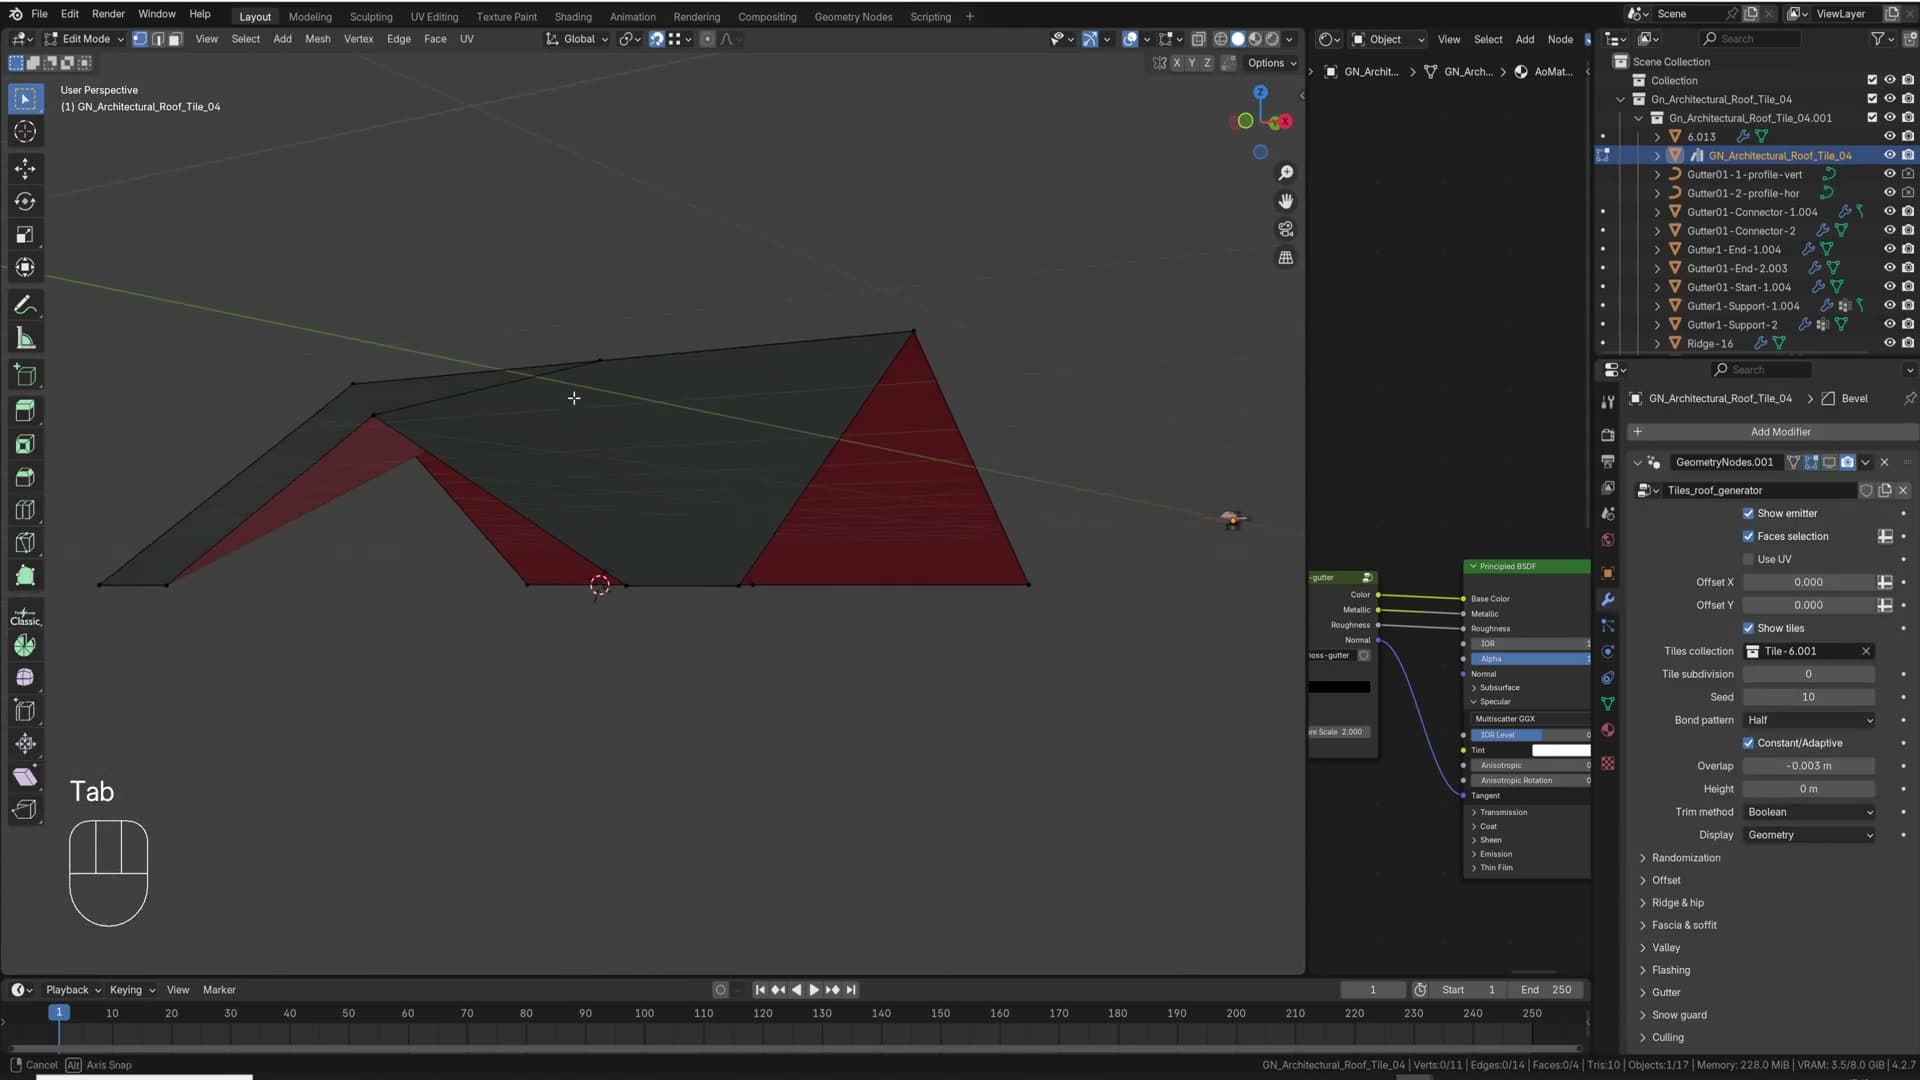
You'll usually spot the problem visually before you go hunting for it. A face that should read as a single clean slope ends up with strange shading bleeding into the next face. The ngon's normals are fighting themselves, and the boundary between two adjacent faces dissolves into a smear.
The fix is to join the stray vertices back into the topology so each face becomes a clean planar polygon. Hover over the offending vertex and press J to join it along the existing edges. Work your way around the roof, joining anything that's confusing the shading, until every face reads as a single flat plane with predictable highlights.
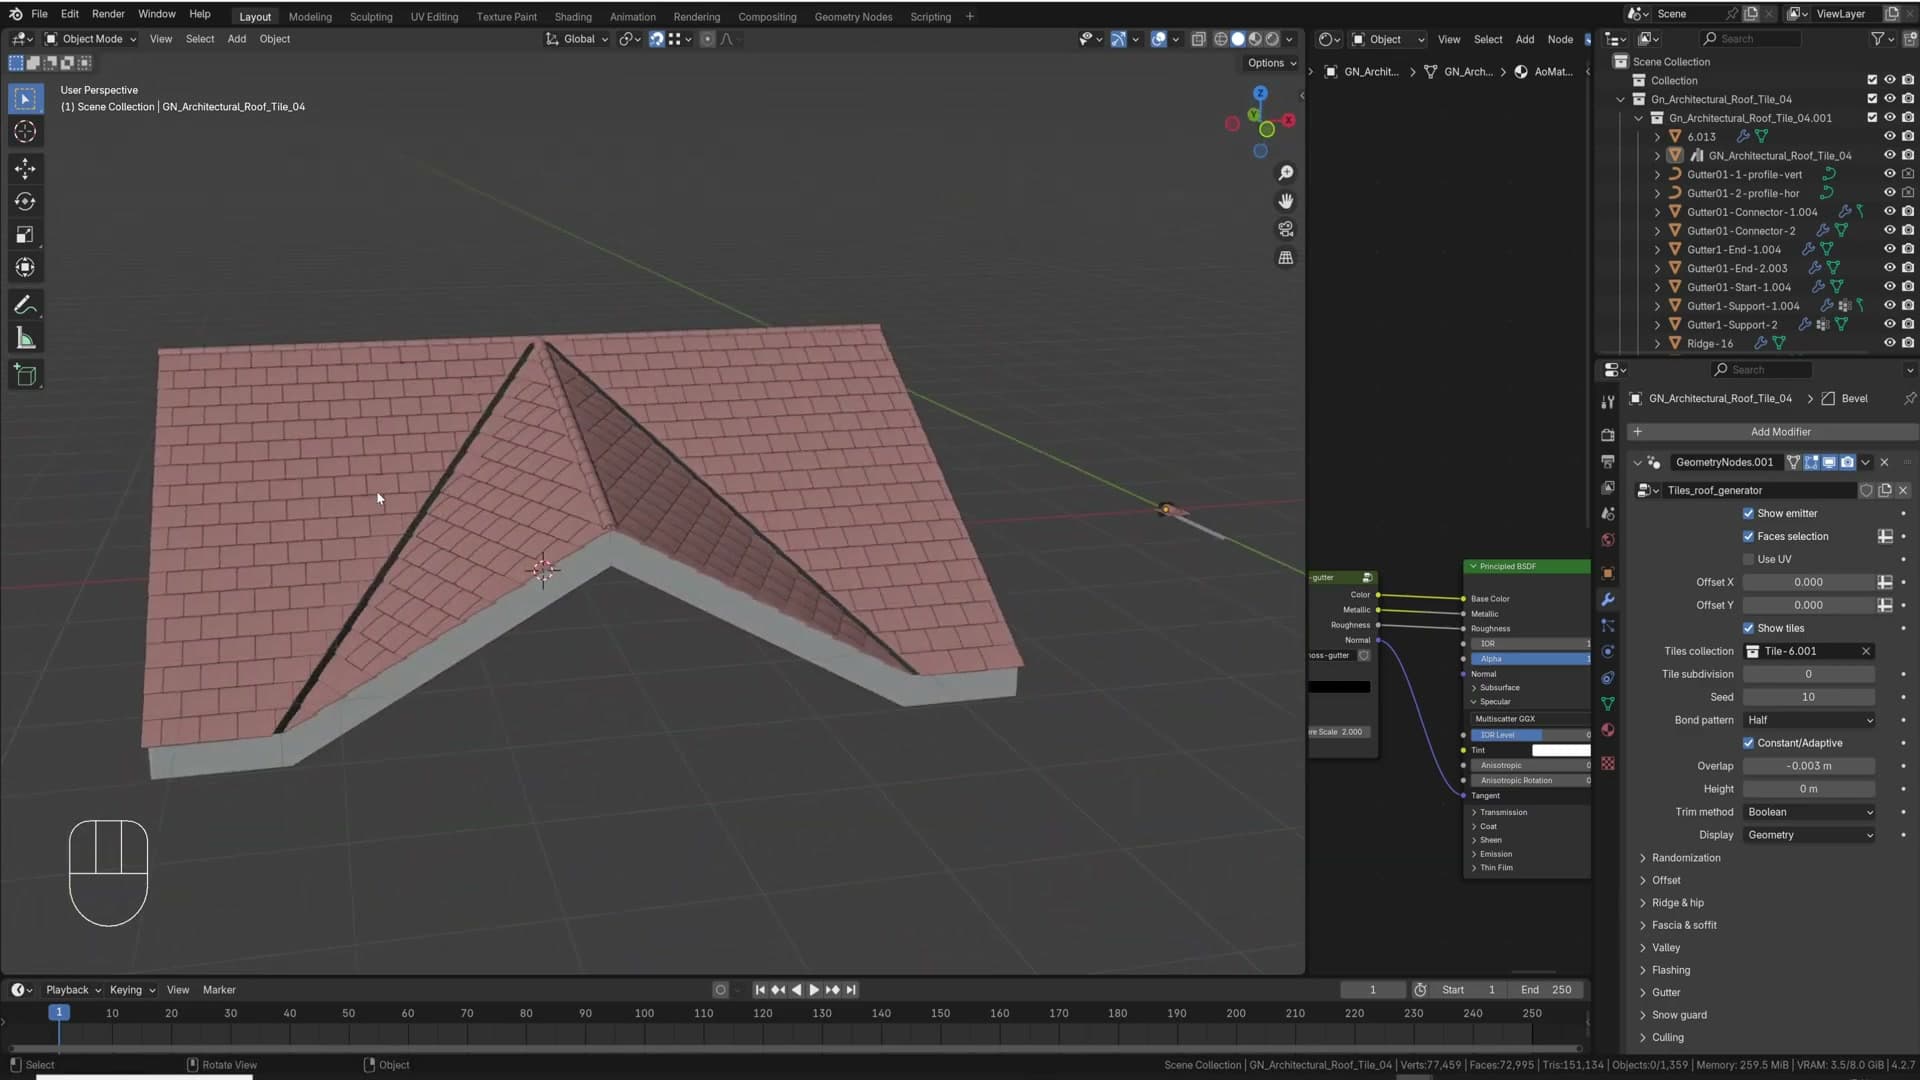
My takeaway is blunt: faces must be completely flat, full stop. Real-world roofs almost always are, and the generator is built on that assumption. Clean geometry up front saves you from chasing phantom bugs later.
Spotting non-flat faces by deliberately breaking one
The easiest way to internalise the flat-face rule is to deliberately break a clean roof and watch what happens. Once your geometry looks good, grab a single vertex from one of the flat faces and nudge it off-plane. Even a tiny shift on the Z axis is enough.
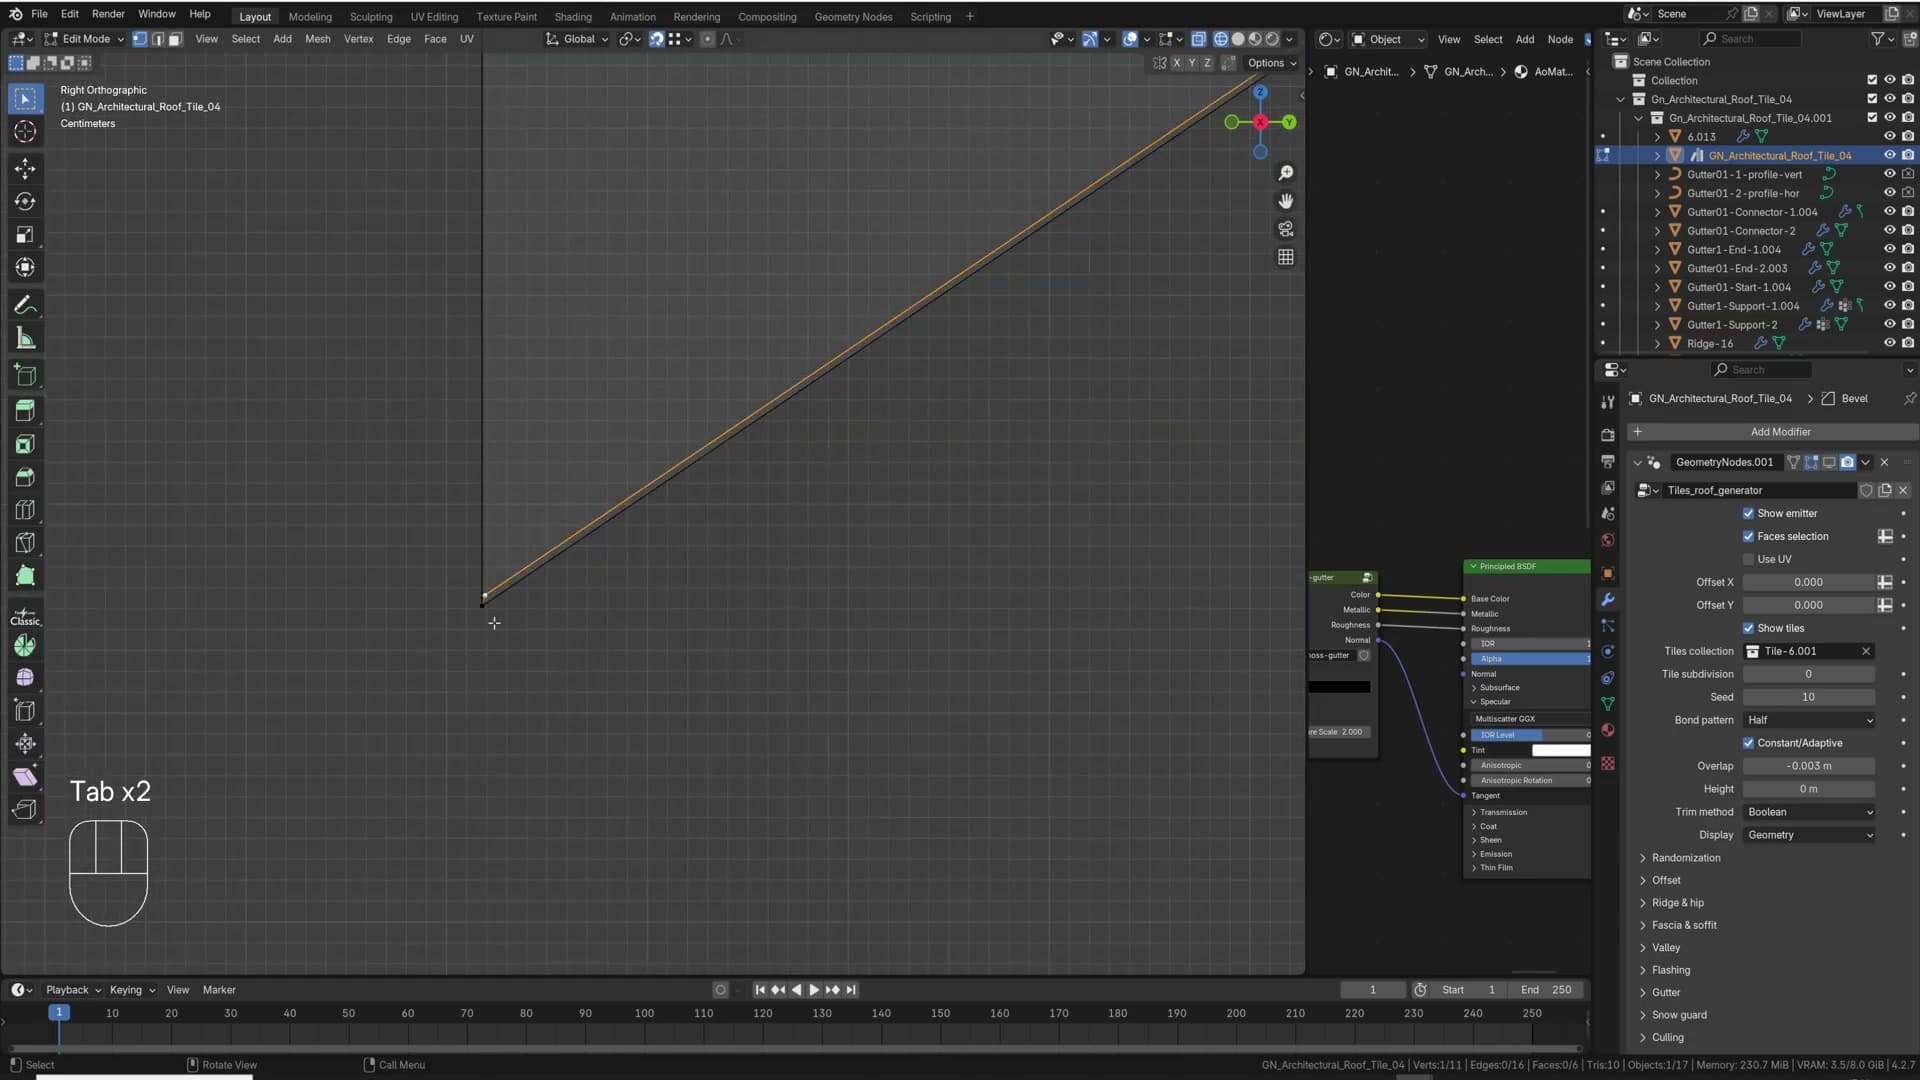
Switch back to object mode and the entire face that vertex belongs to falls apart. The tile pattern stretches, rows misalign, and Blender's shading goes haywire across what was, a moment ago, a perfectly working surface. One vertex is all it takes.
This is the diagnostic move when someone hands you a roof and the generator is producing odd results. Walk around every face, verify each one is planar, and clean up anything off-plane before you start blaming the modifier. Undo your test nudge before moving on. You've made your point.
Removing overlapping vertices with Merge by Distance
The second common cause of broken roof output is overlapping vertices: two vertices sitting on top of each other, usually left behind by extrudes, subdivides, or sloppy snapping. The roof looks fine in the viewport, but the generator quietly chokes on the duplicates.
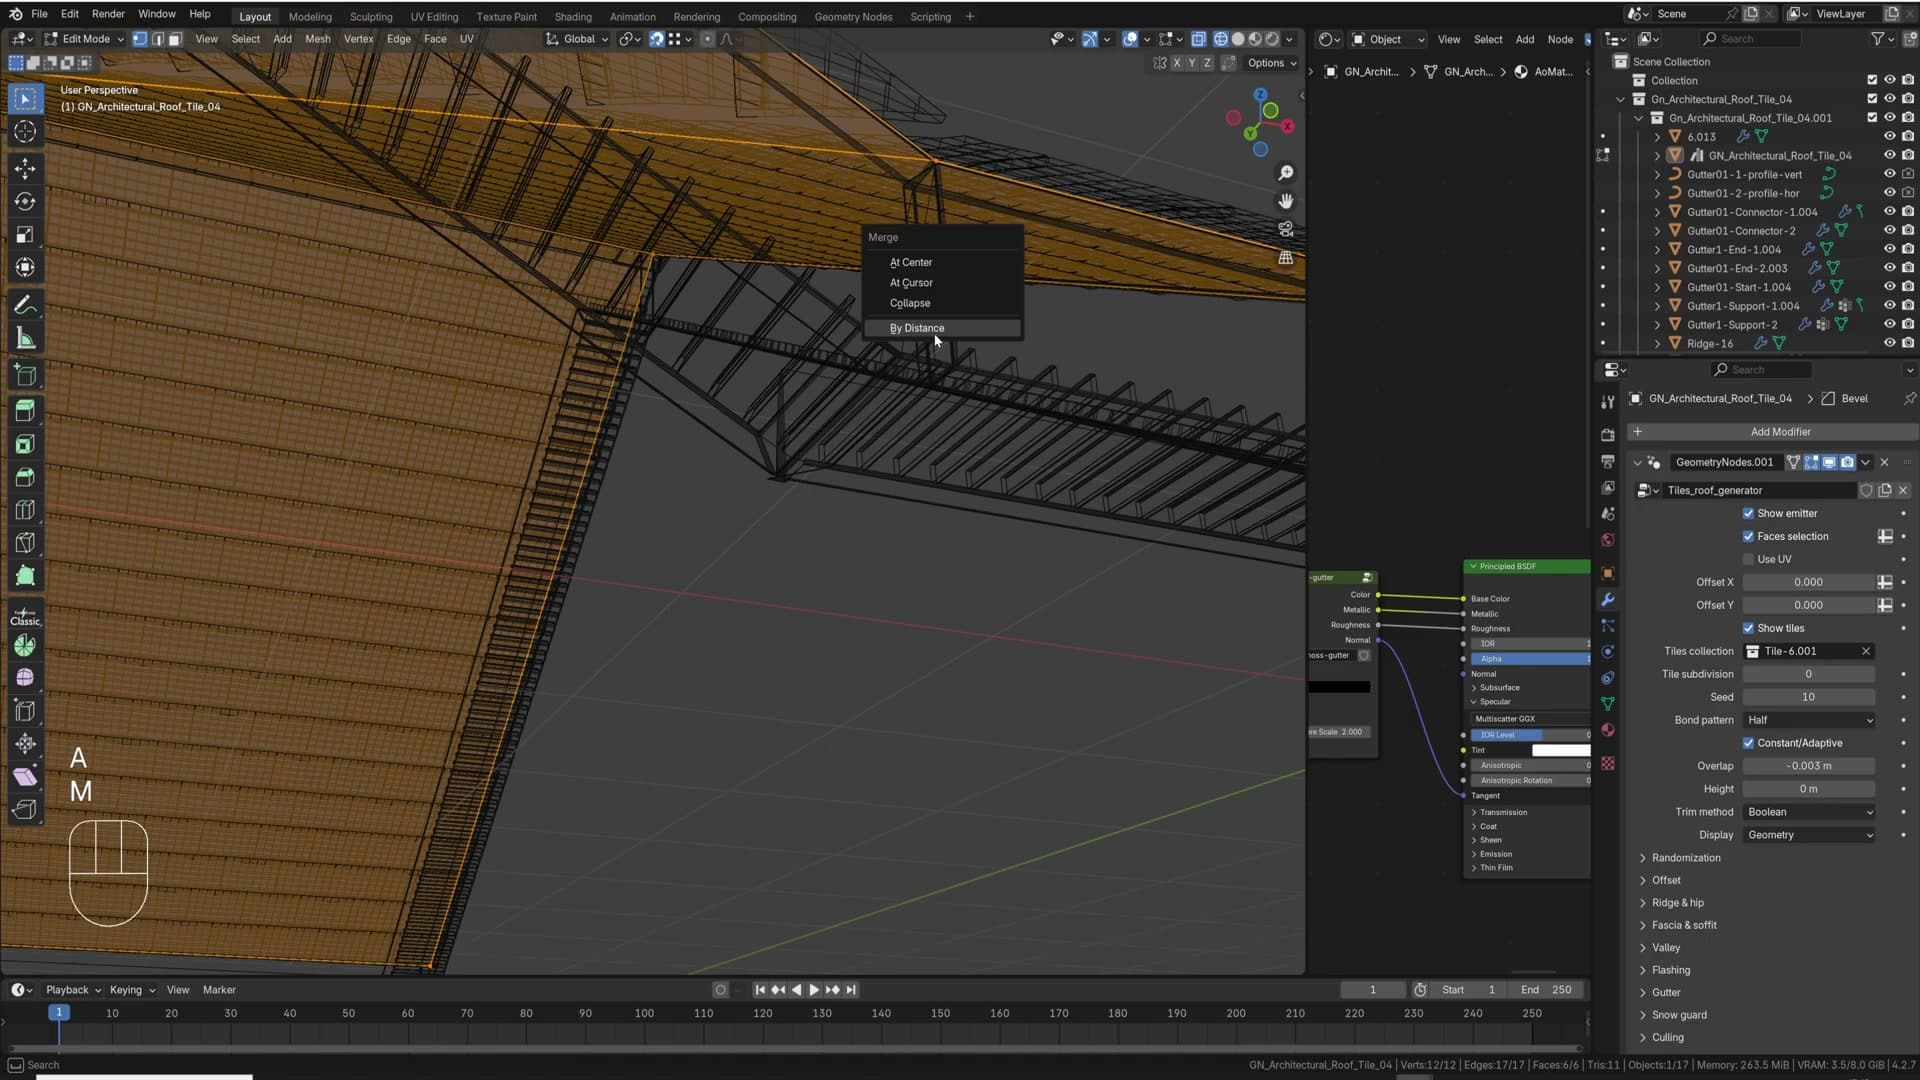
To see what this looks like, subdivide one of your roof edges in edit mode and drag the new vertex back onto an existing one so they stack. Drop back into object mode and the corner where the duplicates sit starts showing visible bugs in the tile layout (broken rows, misplaced tiles), while the other corners stay perfectly clean.
The fix is one keystroke. Select your whole mesh, press M, and choose Merge by Distance. Blender collapses any vertices within the merge threshold into one, and the corner bug disappears.
Worth running this prophylactically on any roof before you spend time troubleshooting attributes. Even a vertex that isn't visibly overlapping, just slightly off, can be close enough to confuse the generator and produce what looks like a modifier bug.
Controlling tile direction with Smart UV Unwrap
When the default tile orientation goes flat or sideways on a face, switch the generator to UV mode and rotate individual face islands to take full control of tile direction.
Switching the generator from auto to UV-driven tile direction
By default the generator organises tiles based on how it thinks they should sit in the real world. That works for the bulk of cases, but there's a toggle on the modifier that switches the behaviour. Instead of guessing, the generator follows the object's UV map. It's the lever you reach for when the automatic result is laying tiles flat or sideways on a face and you want them flowing a particular direction.
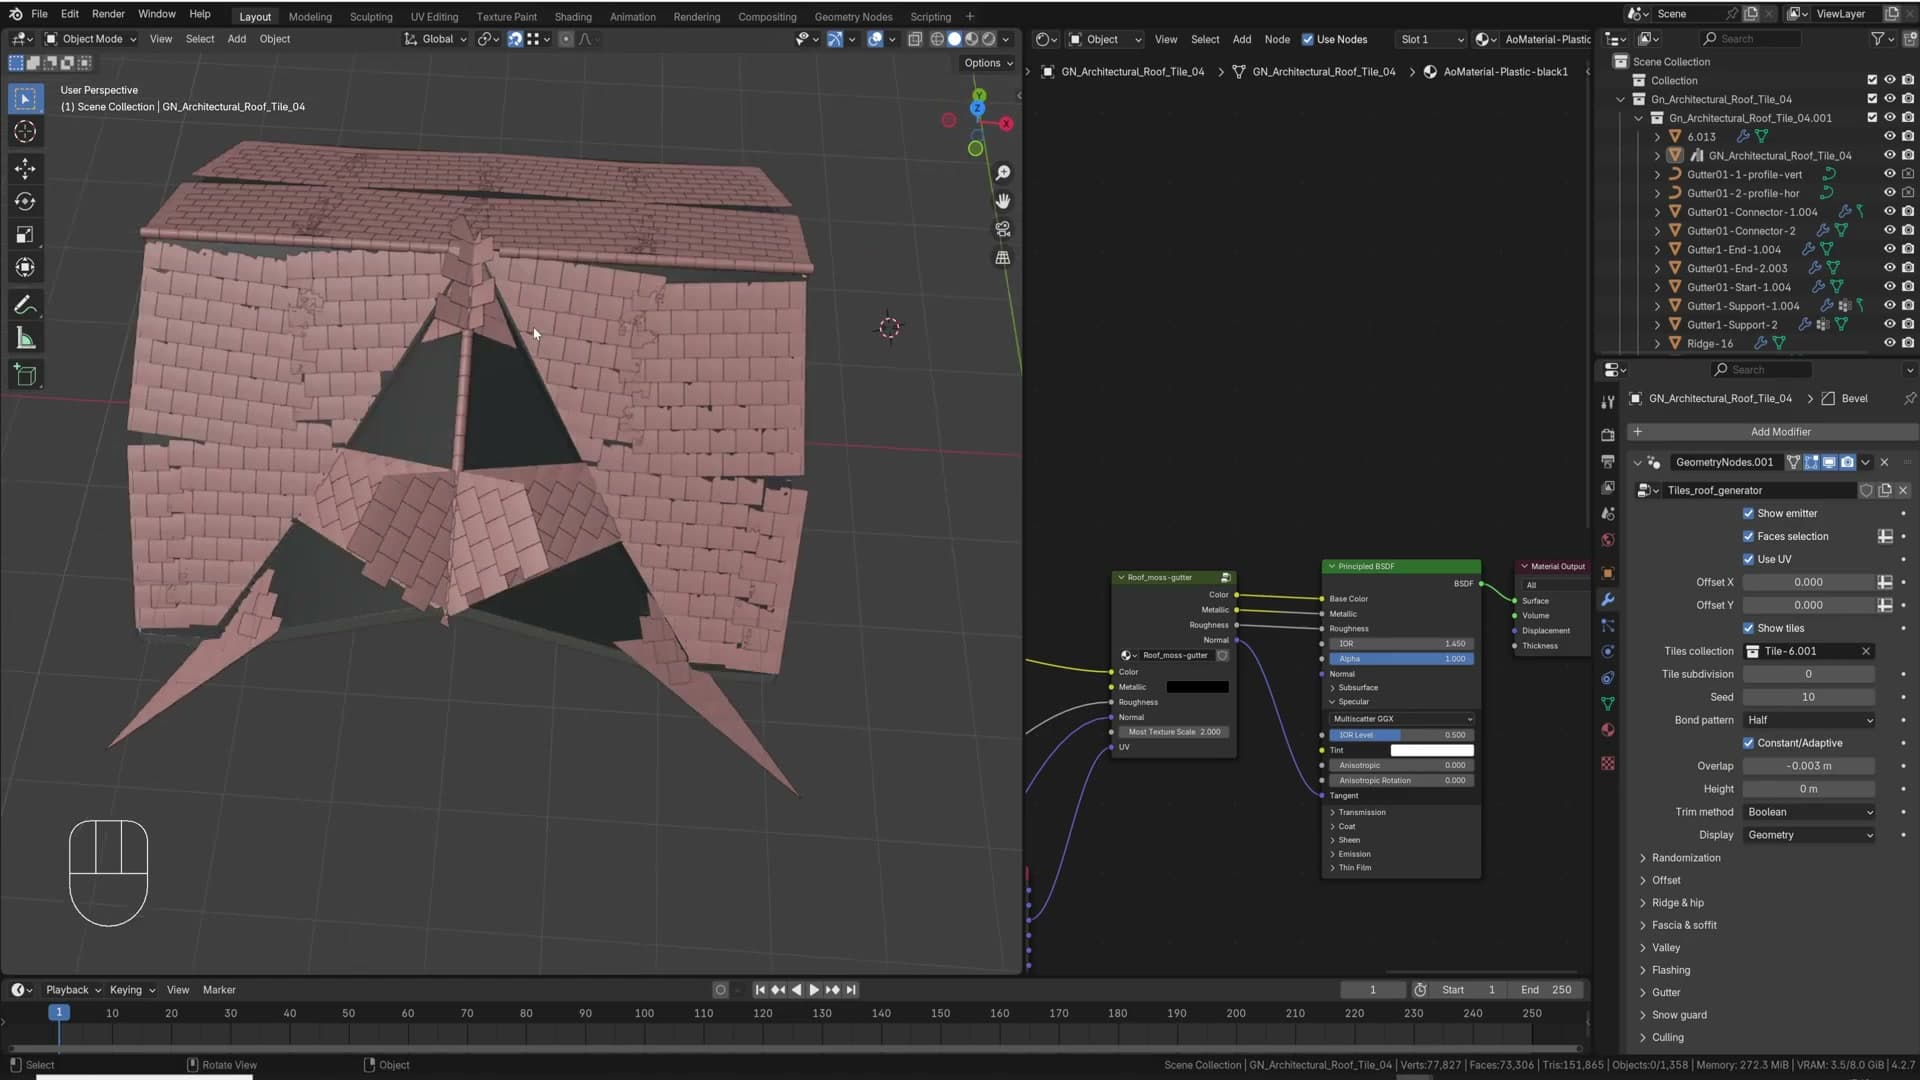
The catch is that the output is only as good as the UVs underneath it. Flip the toggle on before unwrapping the mesh and the tiles fly off in every direction. Completely wild. That's expected: the generator simply has no clean map to align to yet.
So the workflow has two stages. Turn the UV toggle on first to see what the generator is currently doing with the existing UVs, then move on to giving Blender a proper unwrap so the tiles have somewhere sensible to land.
Running Smart UV Unwrap on the full roof
With the UV toggle on and tiles scrambled, the next step is to give the generator something clean to follow. Press Tab to drop into edit mode, then A to select every face. Press U to open the unwrap menu, choose Smart UV Unwrap, and click Unwrap in the dialog that appears.
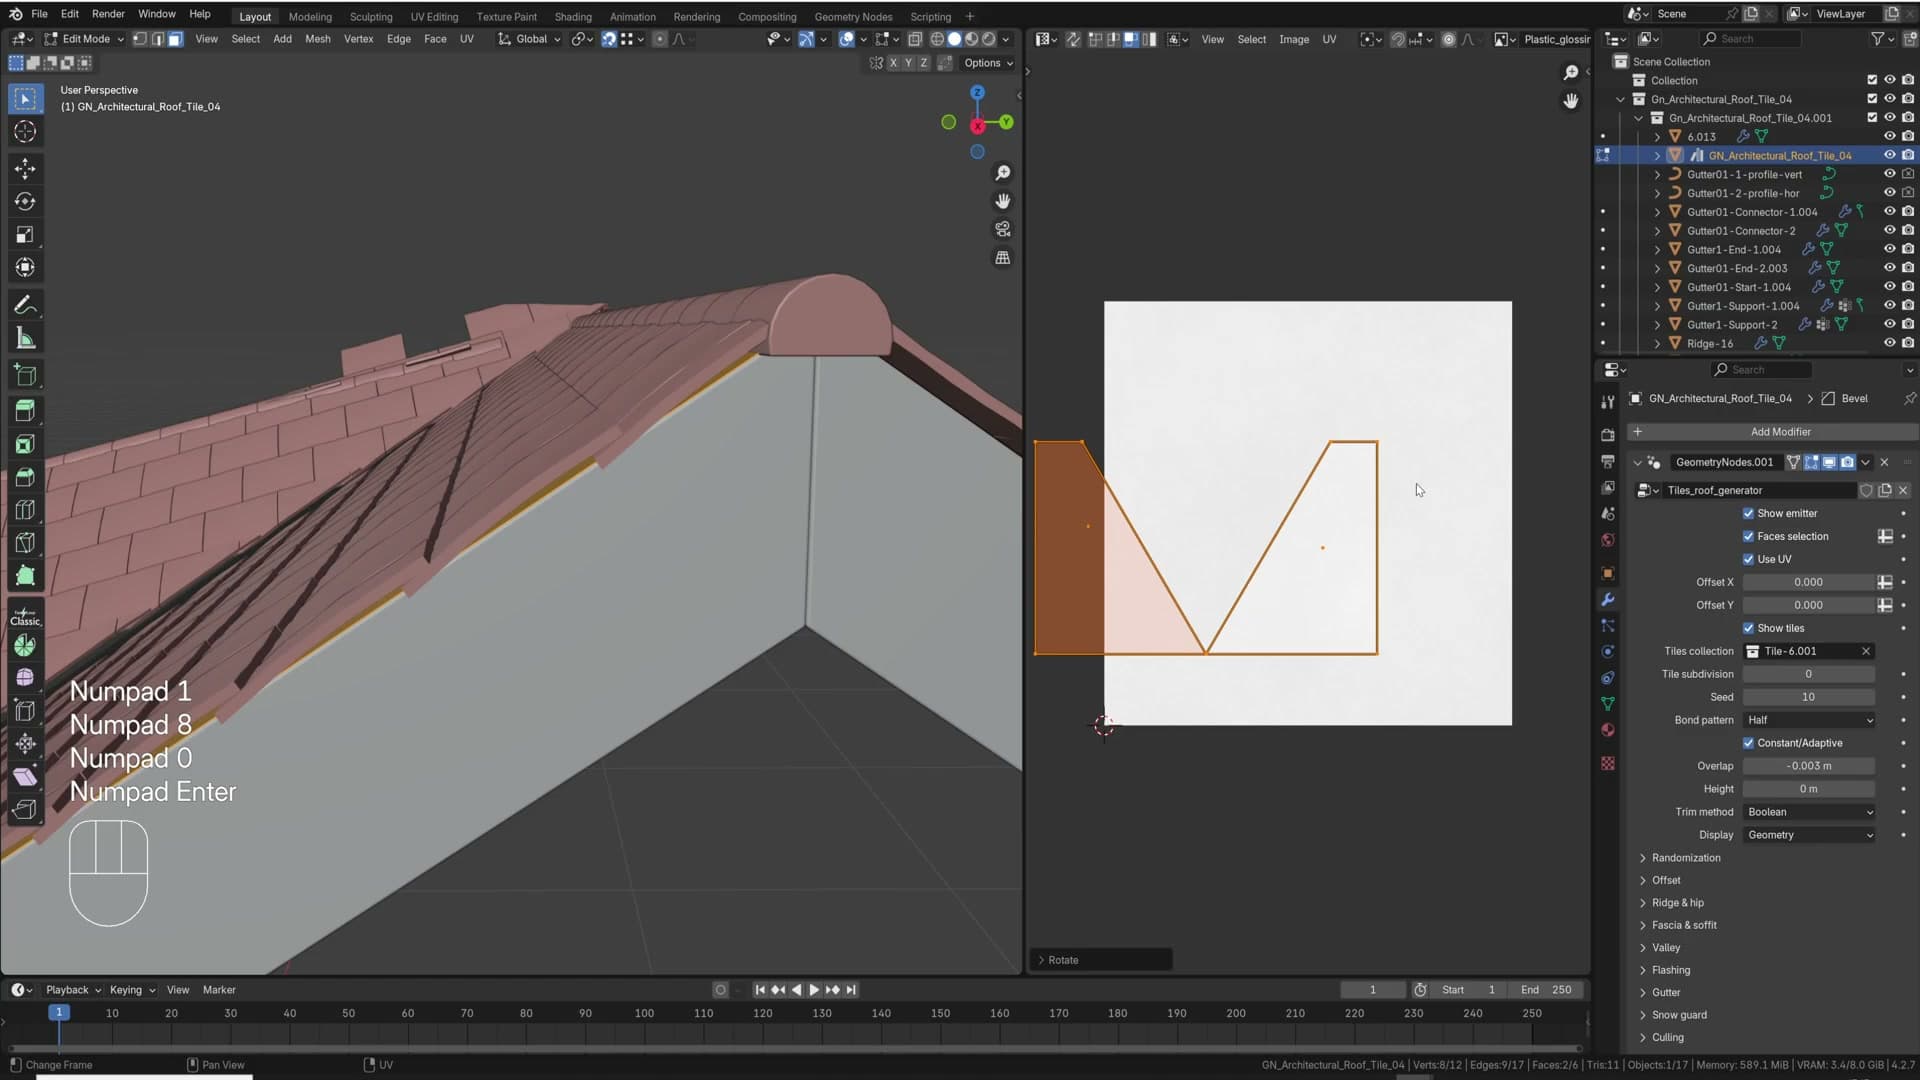
Drop back into object mode and the tiles will now snap to the freshly generated UV islands instead of flying around at random. It's a big improvement on the unwrap-less state. But you'll almost certainly see faces where rows of tiles are still flowing the wrong way. That's the cue to move on to rotating individual islands by hand.
Rotating individual UV islands to flip tile direction
To flip a problem face, click it in the 3D viewport so its island lights up in the UV editor, then press A to select that island and R to rotate. Type 90 for a quarter turn or 180 to flip the tiles back the other way. Expect to do both: rotate 90, check what the tiles are doing, then rotate another 180 if the direction came out reversed.
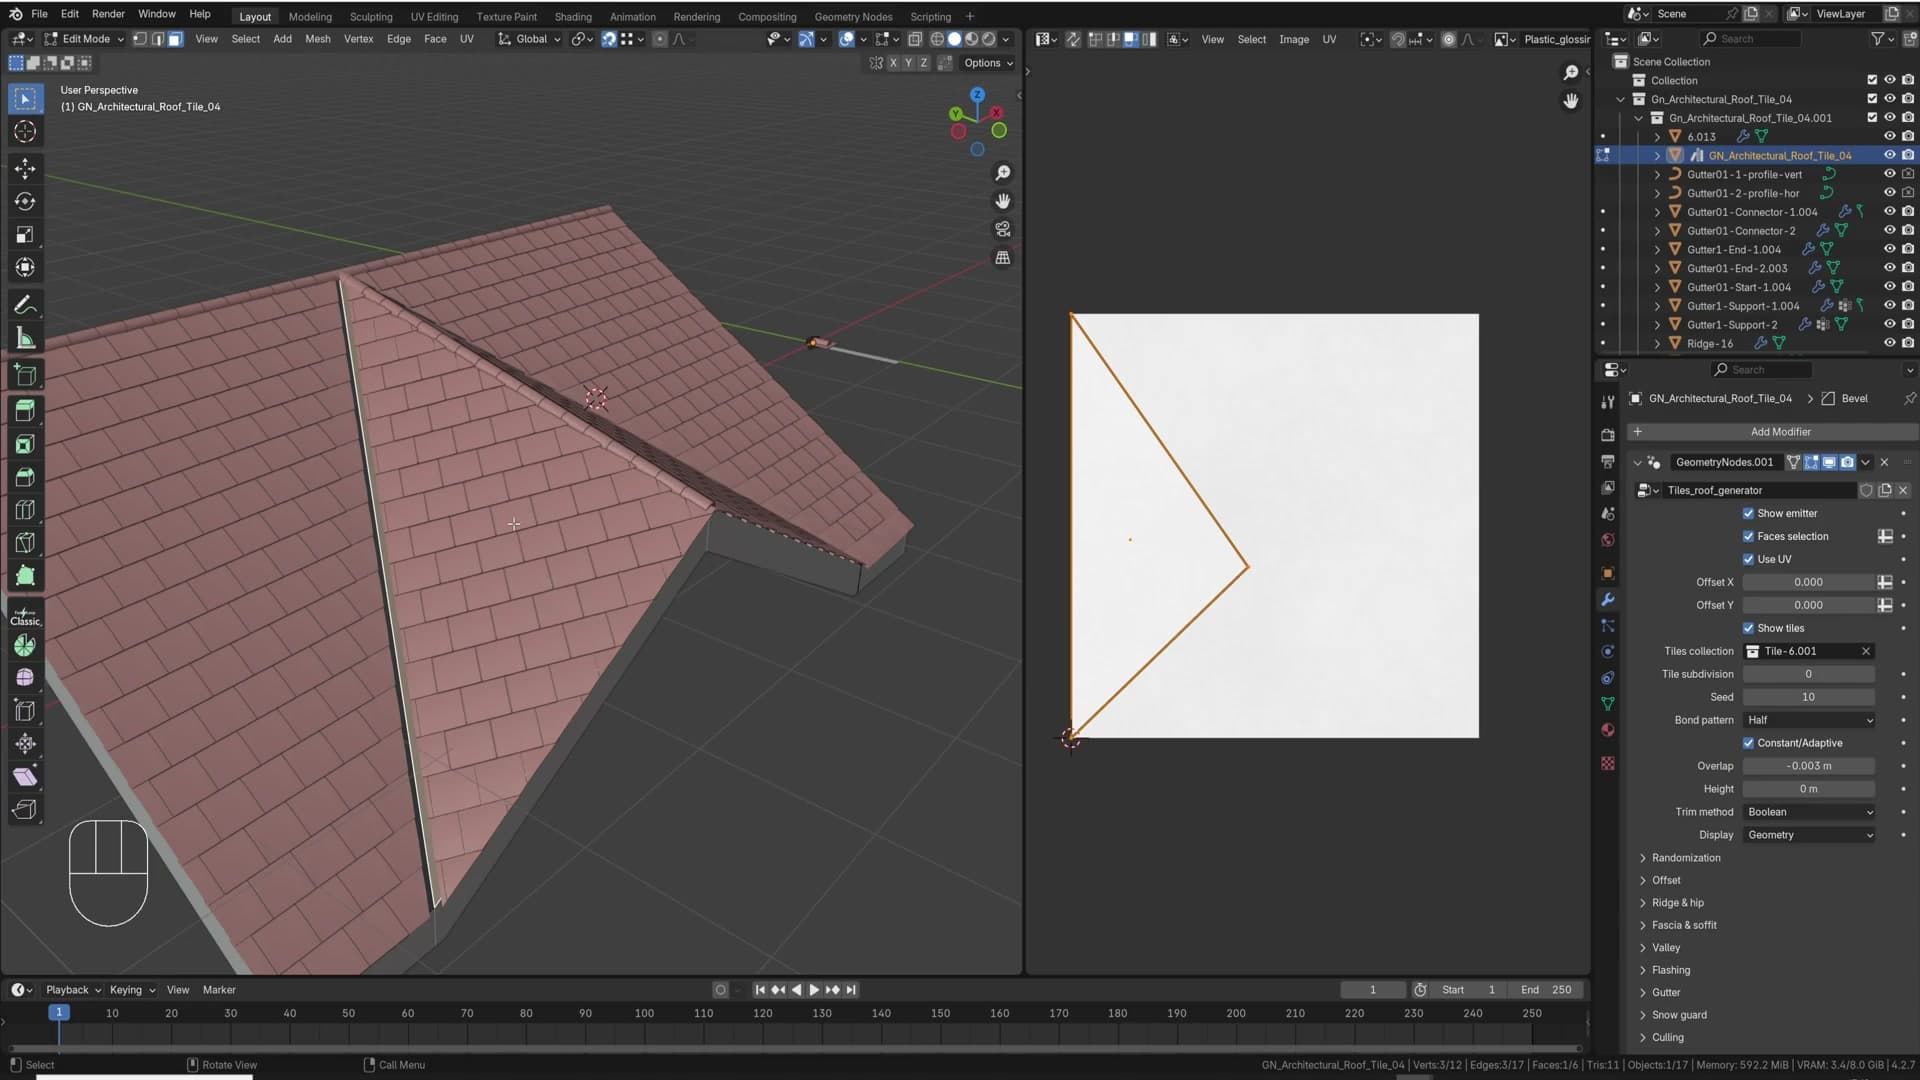
Some faces refuse to behave no matter how you rotate them. When that happens, select just the troublesome face on its own, run Smart UV Unwrap again on that single face, and rotate the new island into position. Unwrapping a face in isolation usually produces a cleaner island than the one it got as part of the whole-roof pass.
This whole approach takes a bit of cleanup. I'll be honest: leave UV-driven mode off in most cases. Reach for it only when a specific slope absolutely needs tiles flowing in a direction the automatic algorithm won't give you, and accept that you'll be face-by-face for a few minutes to get there.
Fixing boolean failures and shifting tile offsets
Blender's boolean isn't 100% reliable. When tiles don't cut cleanly, nudge the offset, add a tile subdivision, or toggle adaptive spacing to give the solver more room.
Nudging the offset to fix failed booleans
Once the unwrap is sorted, you'll occasionally hit a different problem: a tile or two that simply refuses to cut cleanly at a roof edge. Blender's boolean isn't 100% reliable, and the generator leans on it heavily. Every tile that meets a sloped edge is being trimmed by a boolean cut behind the scenes.
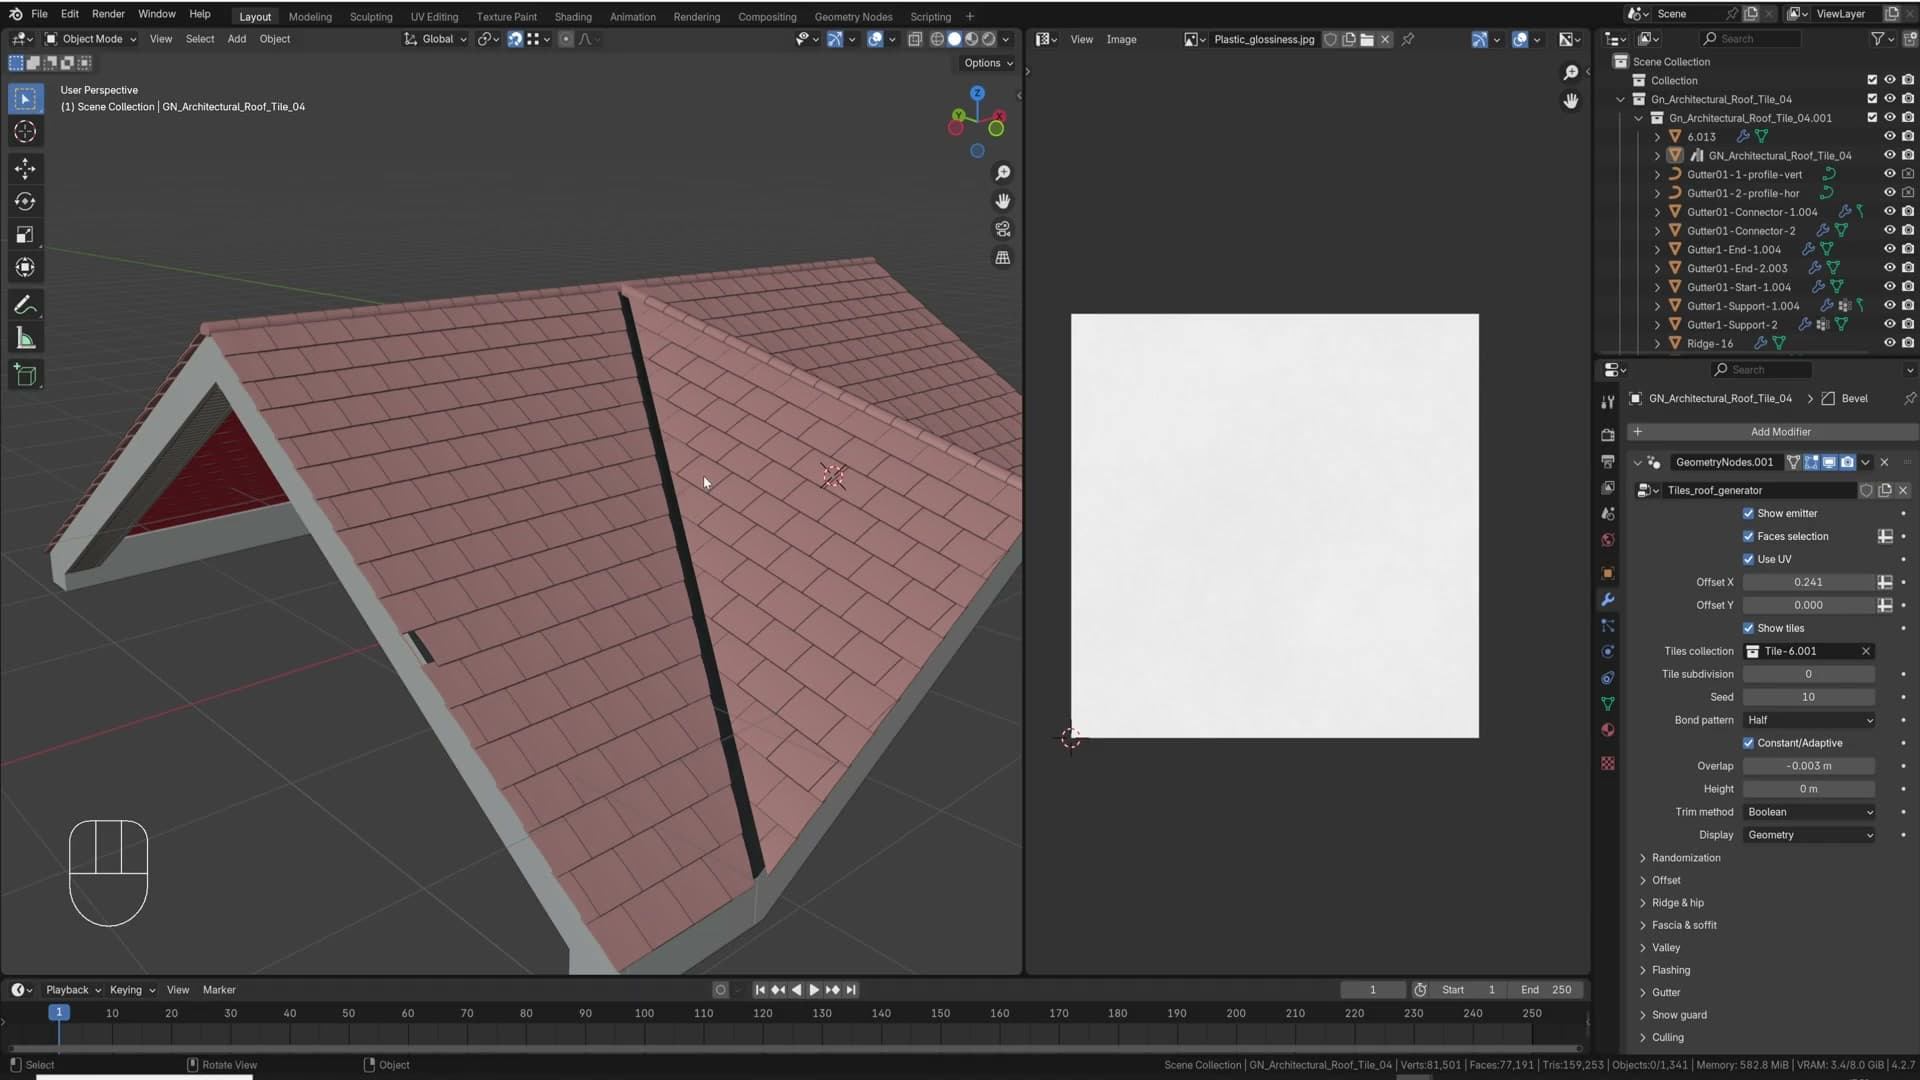
The simplest fix is to nudge the tiles. Shift the row offset ever so slightly in any direction and most failed cuts will resolve on their own. The solver just needs a tiny shift to settle on a clean intersection, and that's usually all it takes.
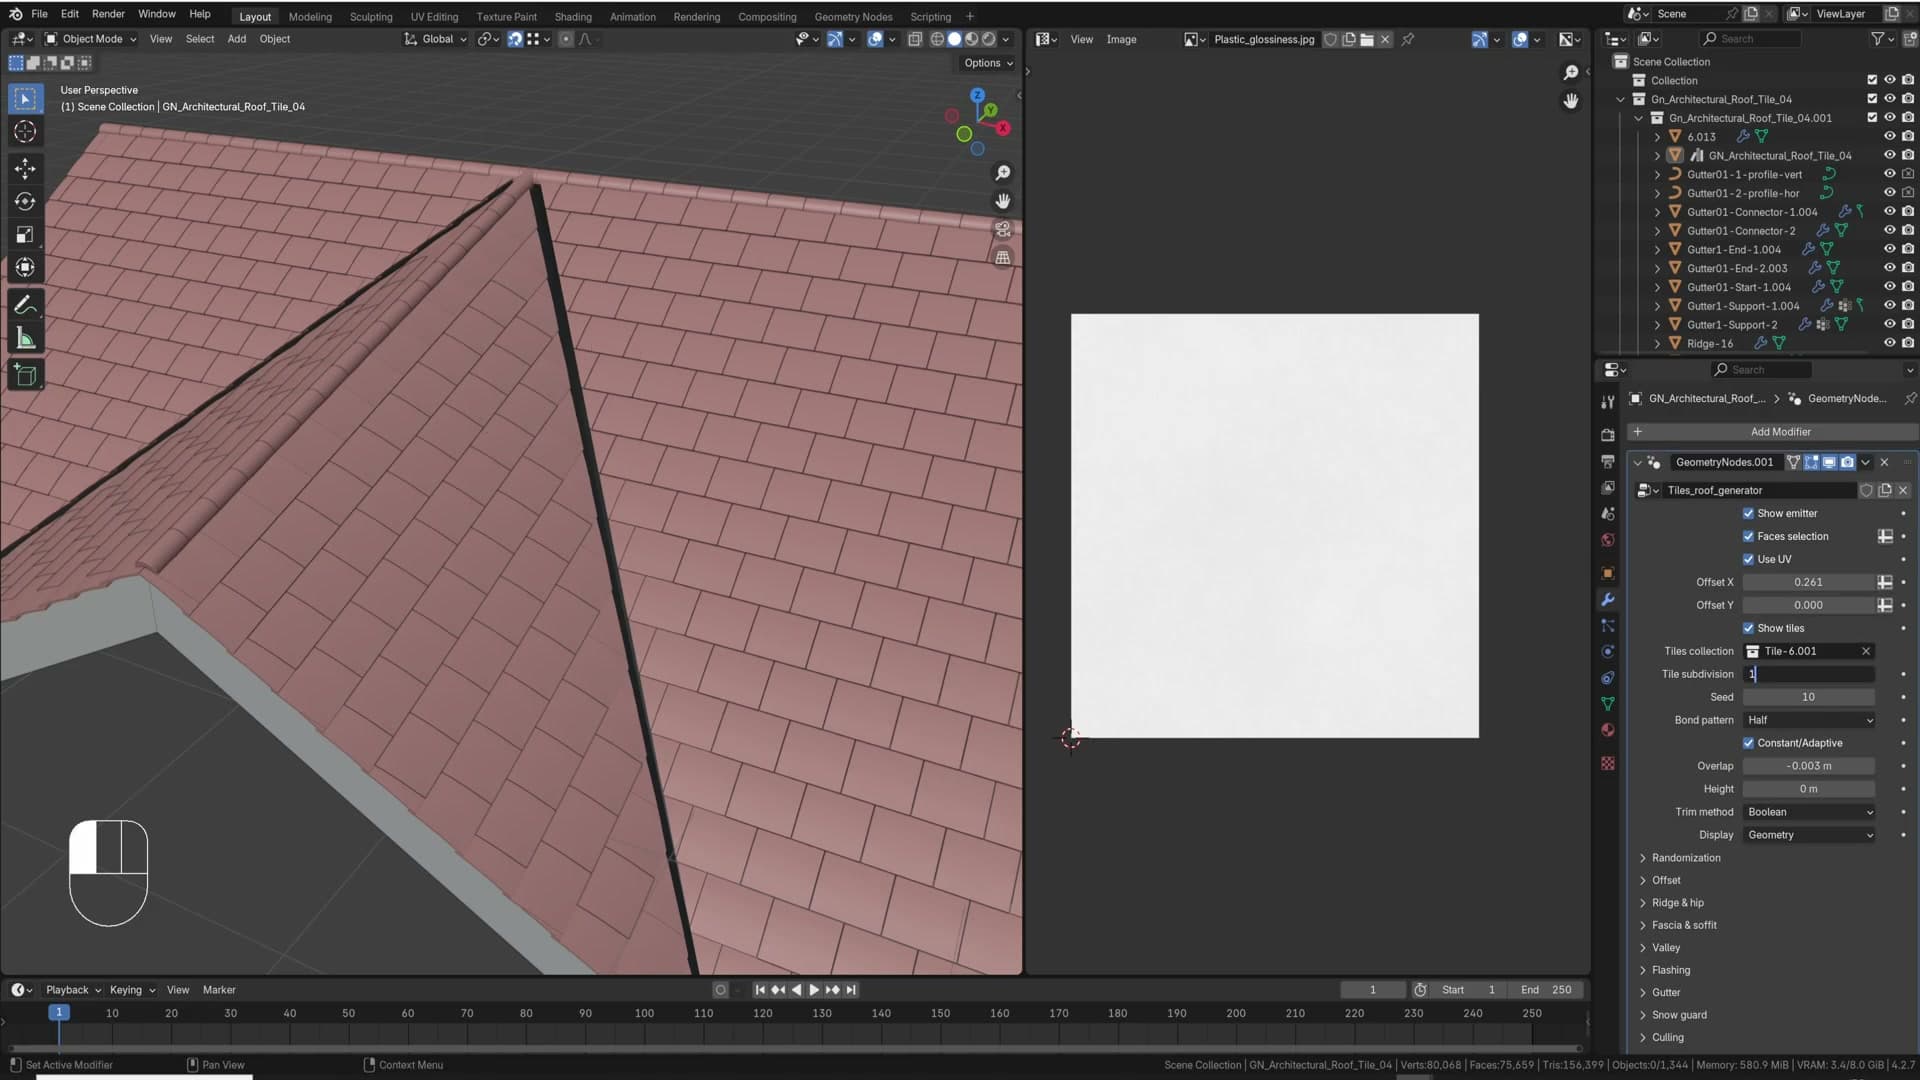
Adding tile subdivisions for complex tile geometry
When a tile refuses to cut no matter how much you shift it, the cause is usually more complicated tile geometry overwhelming the boolean. Custom or highly detailed tiles produce more polygons at the cut line, and the solver runs out of room to decide where the cut should fall.
The fix is in the modifier's tile subdivision setting. Bump it up by one or two. The extra subdivisions give the boolean more room to calculate where the cut should land, and that clears up most stubborn failures.
Adaptive and constant tile spacing on top and bottom edges
With the boolean behaving, you can shift tiles freely along the X axis. Try the same on Y, though, and nothing happens. The row positions stay locked. That's down to a setting near the bottom of the modifier that's always trying to maintain a full tile length along the top and bottom edges of each roof face.
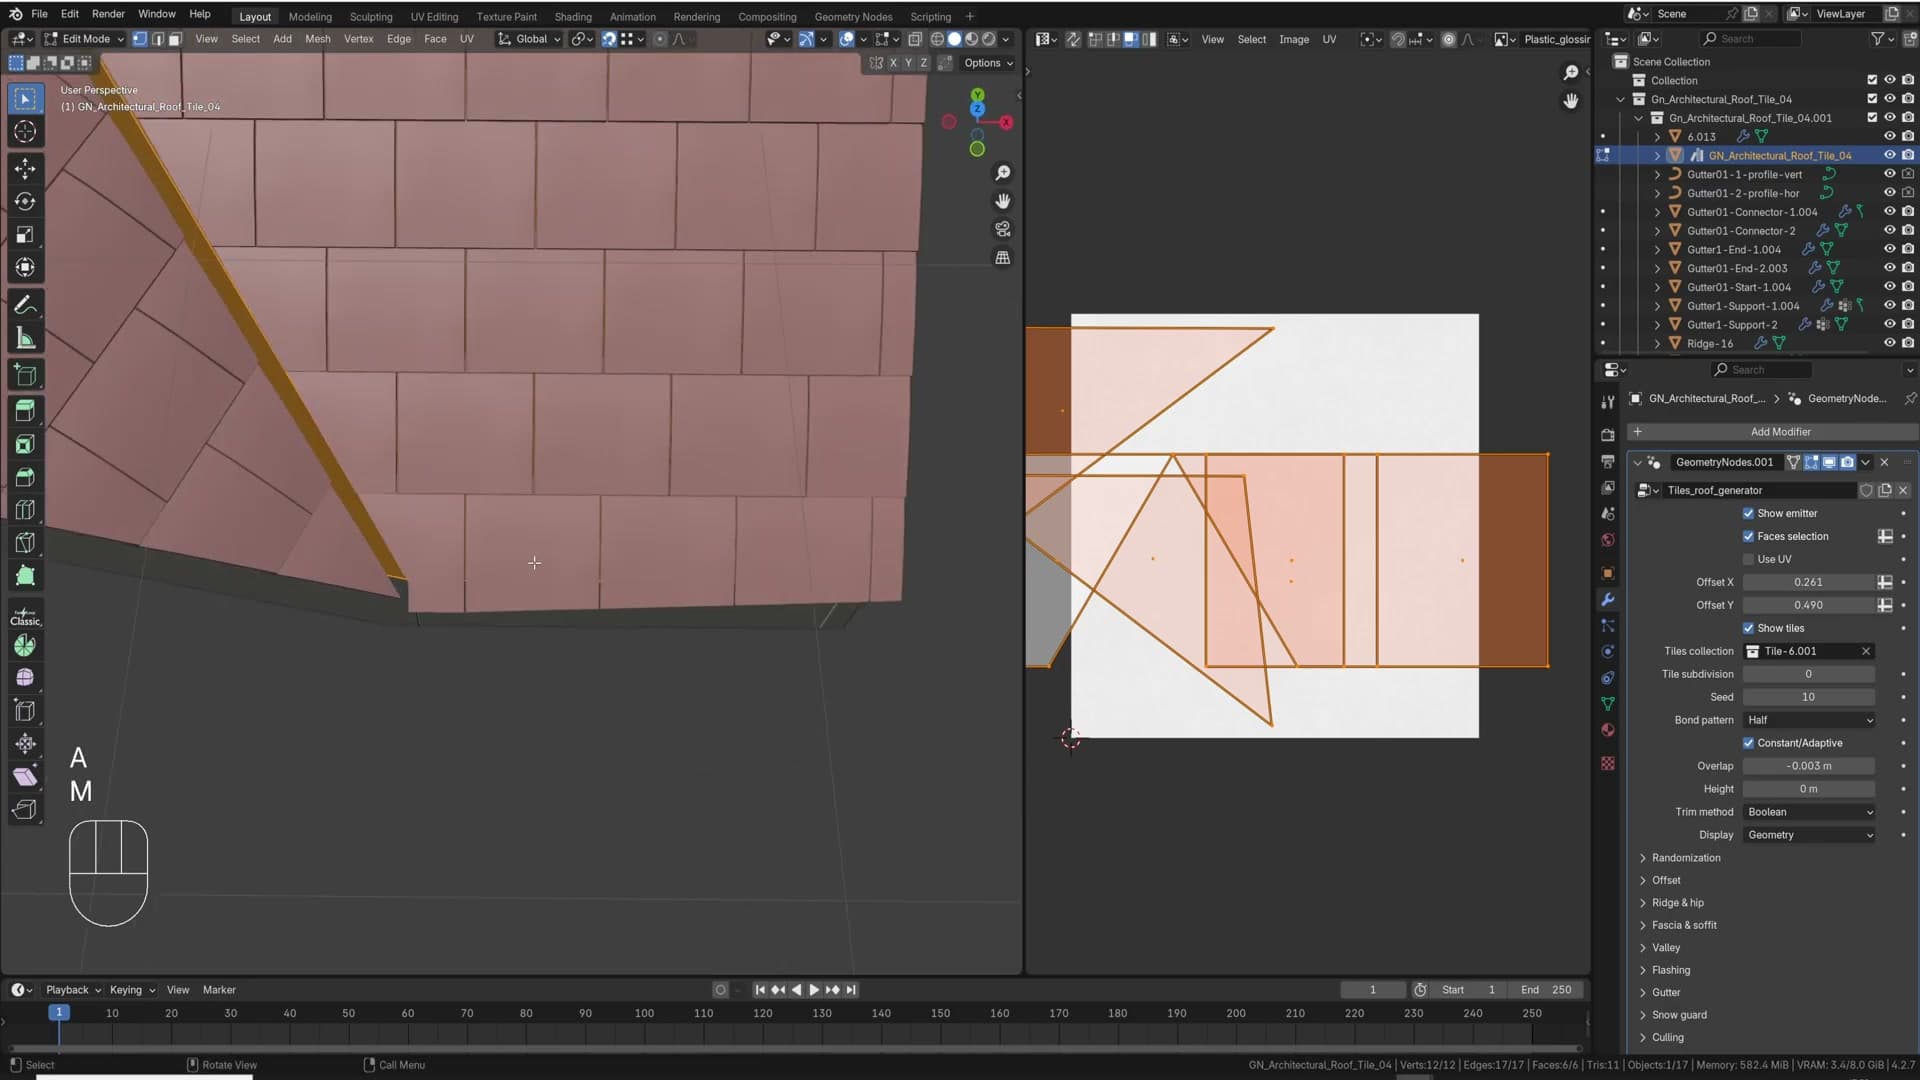
Turn it off and the Y offset becomes editable. The bottom edge will now allow partial tiles, which gives you full control over exactly where the lowest row of tiles sits relative to the gutter line.
In most cases, leaving the toggle on is the right call. The top and bottom edges normally want a full tile anyway, and letting the generator handle that automatically saves a lot of fiddling. Only disable it when you need a specific vertical offset that the full-tile constraint is getting in the way of.
Adding gutters along roof edges
Gutters work two ways: tag specific edges of the roof mesh with the Add Gutters attribute, or extrude a standalone vertical edge that the generator automatically treats as a downpipe.
Selecting edges and applying the Add Gutters attribute
Drop into edit mode on the joined roof, switch to edge select with 2, and select the bottom edges where you want gutters to run.
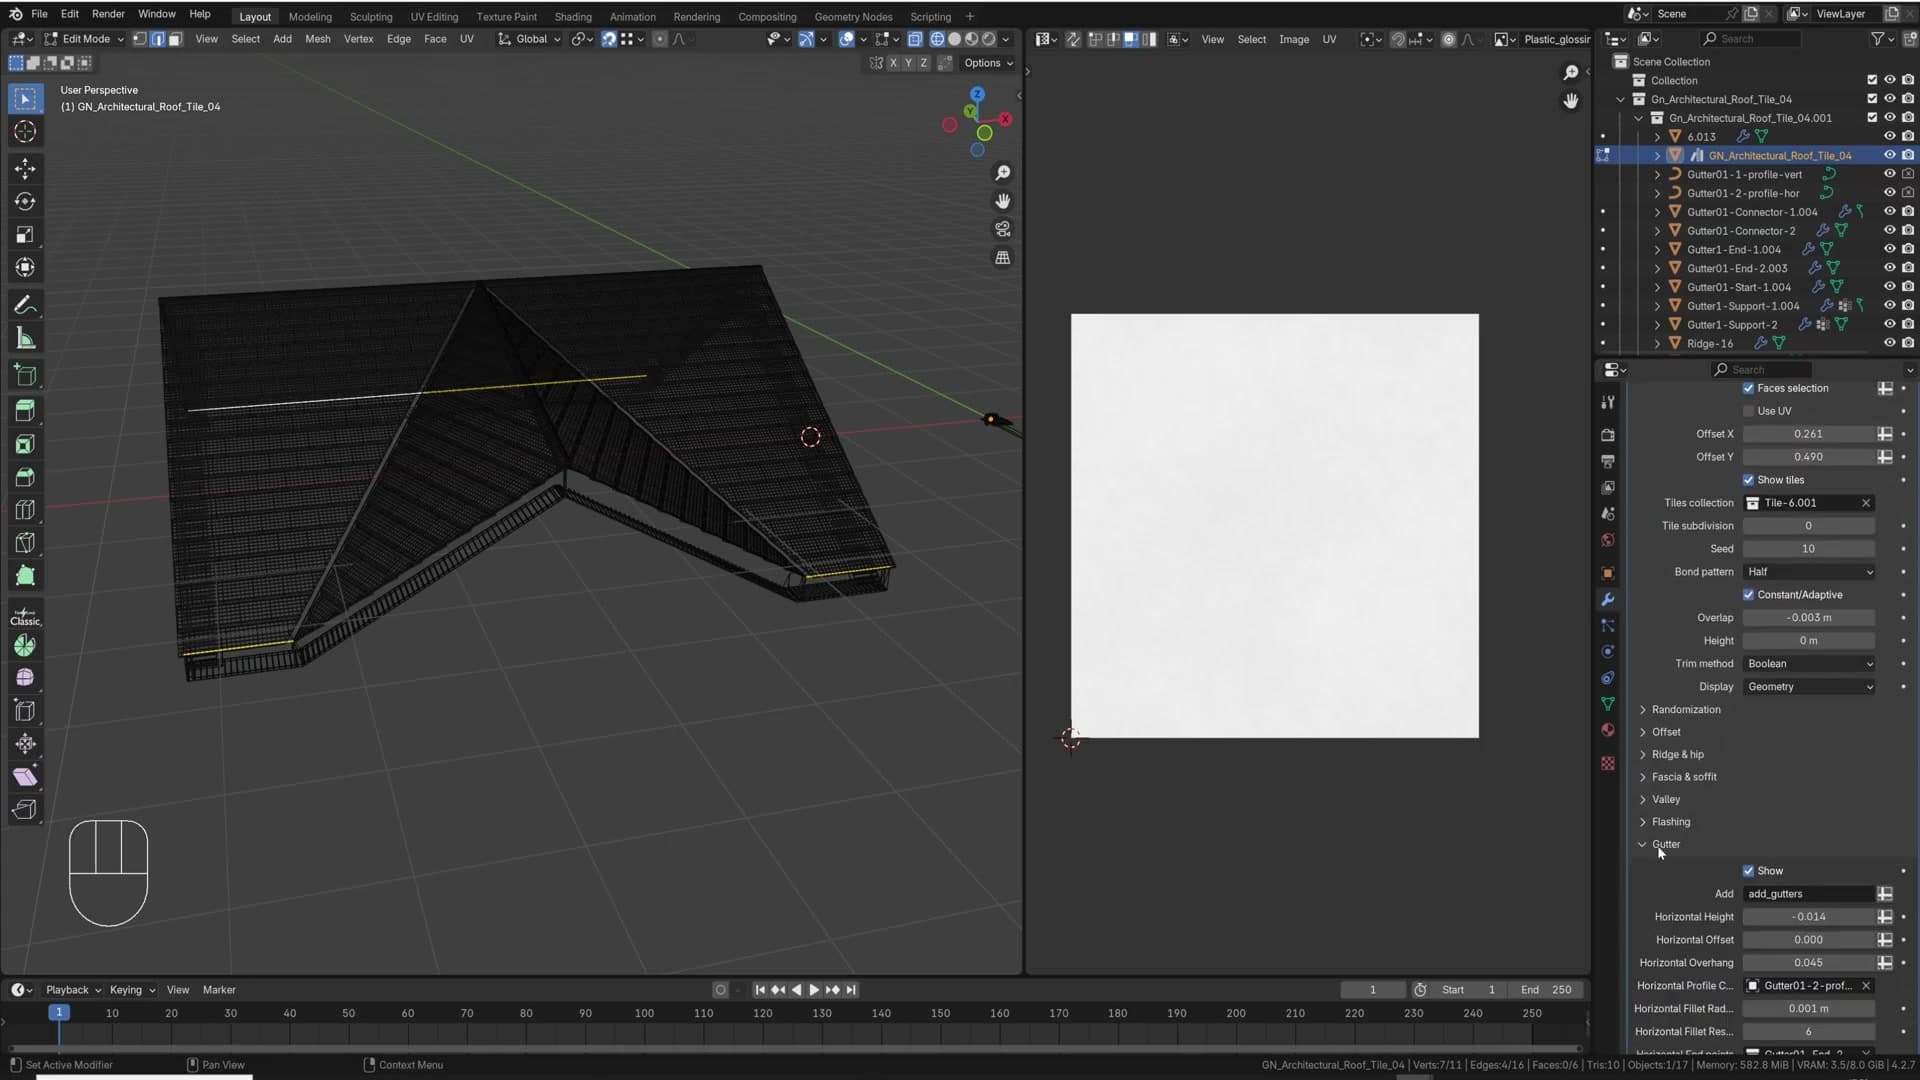
Scroll down to the Gutters section of the generator and open the attribute list. Because you joined the original roof to the imported generator with Ctrl+J earlier, the full list of attributes came with it, including one called add_gutters.
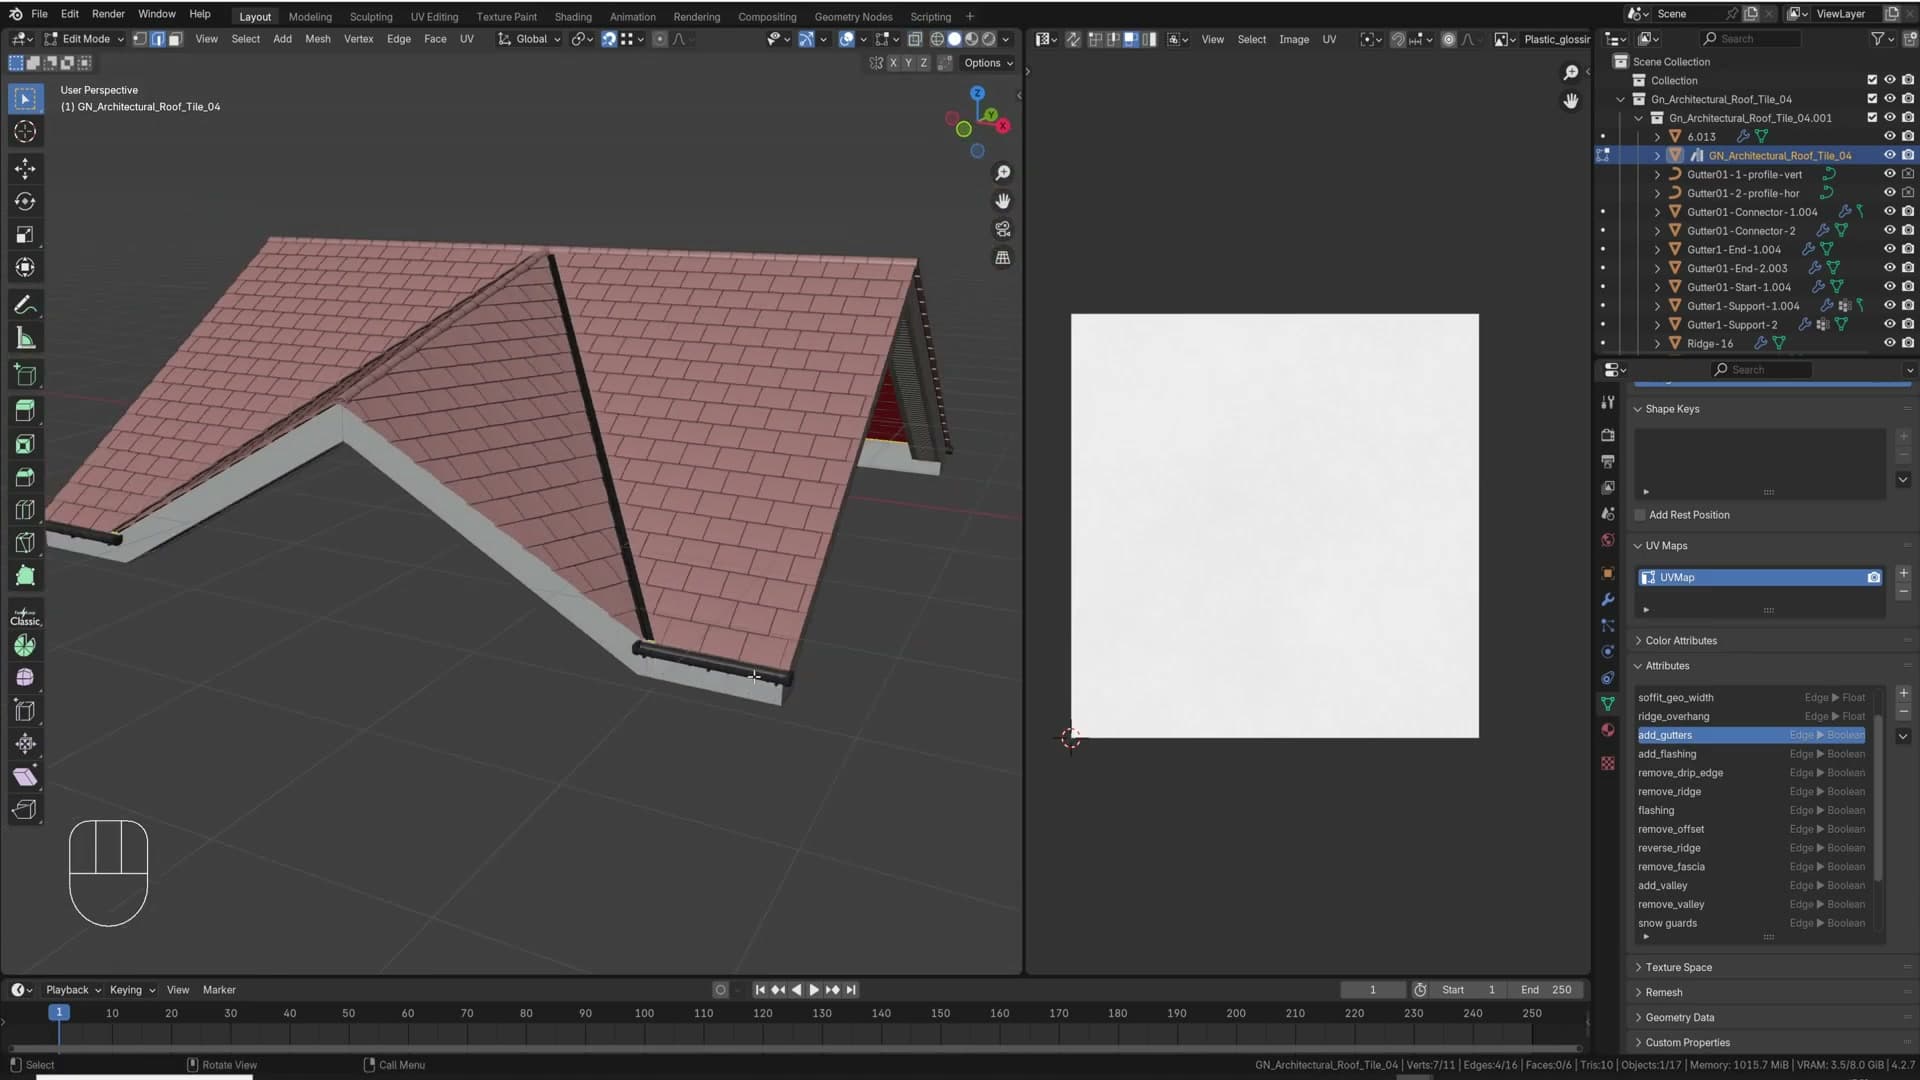
With the edges still selected, click add_gutters, press F3, search for Set Attribute, and turn it on. Gutters now follow every edge you tagged.
Extruding a standalone vert into a vertical downpipe
Vertical downpipes work in a different way, and they need almost no setup. Right-click anywhere in the viewport to place the 3D cursor, then press Shift+A and choose Add Single Vert.
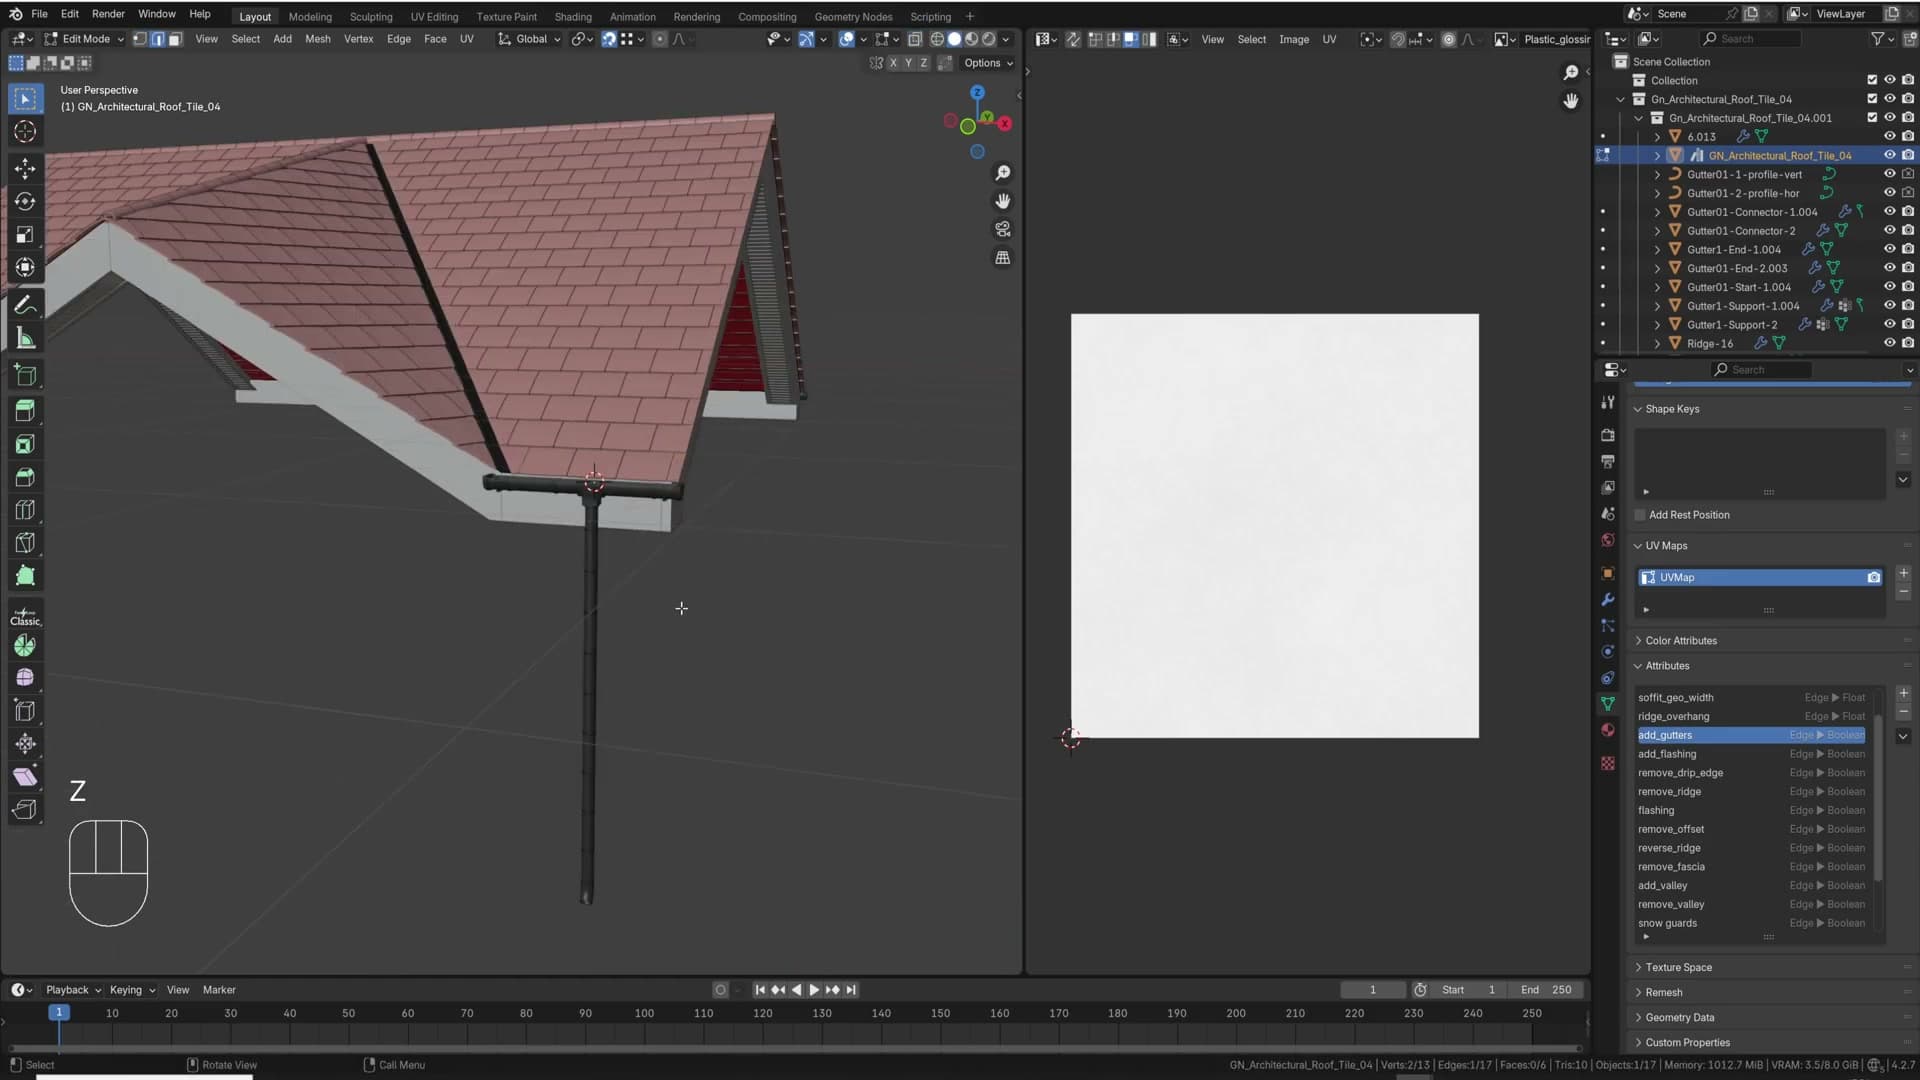
If Add Single Vert isn't in the Add menu, open Edit → Preferences → Add-ons (or Extensions on Blender 4.2 and later), find Add Mesh: Extra Objects, and enable it. The Single Vert option will appear under Shift+A from then on.
Drop into edit mode on that single vertex and extrude it straight down to roughly the height you want the downpipe to reach.
For this kind of geometry you don't even need to tag the edge with add_gutters. Because the new edge is a standalone piece (disconnected from any roof face) the generator assumes it can't be roof geometry and treats it as a gutter run automatically. The top of the edge snaps to the lower edge of the roof, so you can duplicate the downpipe around the building and every copy lines up to the roof line the same way.
Importing your own tiles and randomizing variations
Drop any mesh into a named collection, point Tile Collection at it, and the generator instantly uses your geometry. Origin position controls overlap; multiple meshes in one collection randomize automatically.
How the generator references tile collections
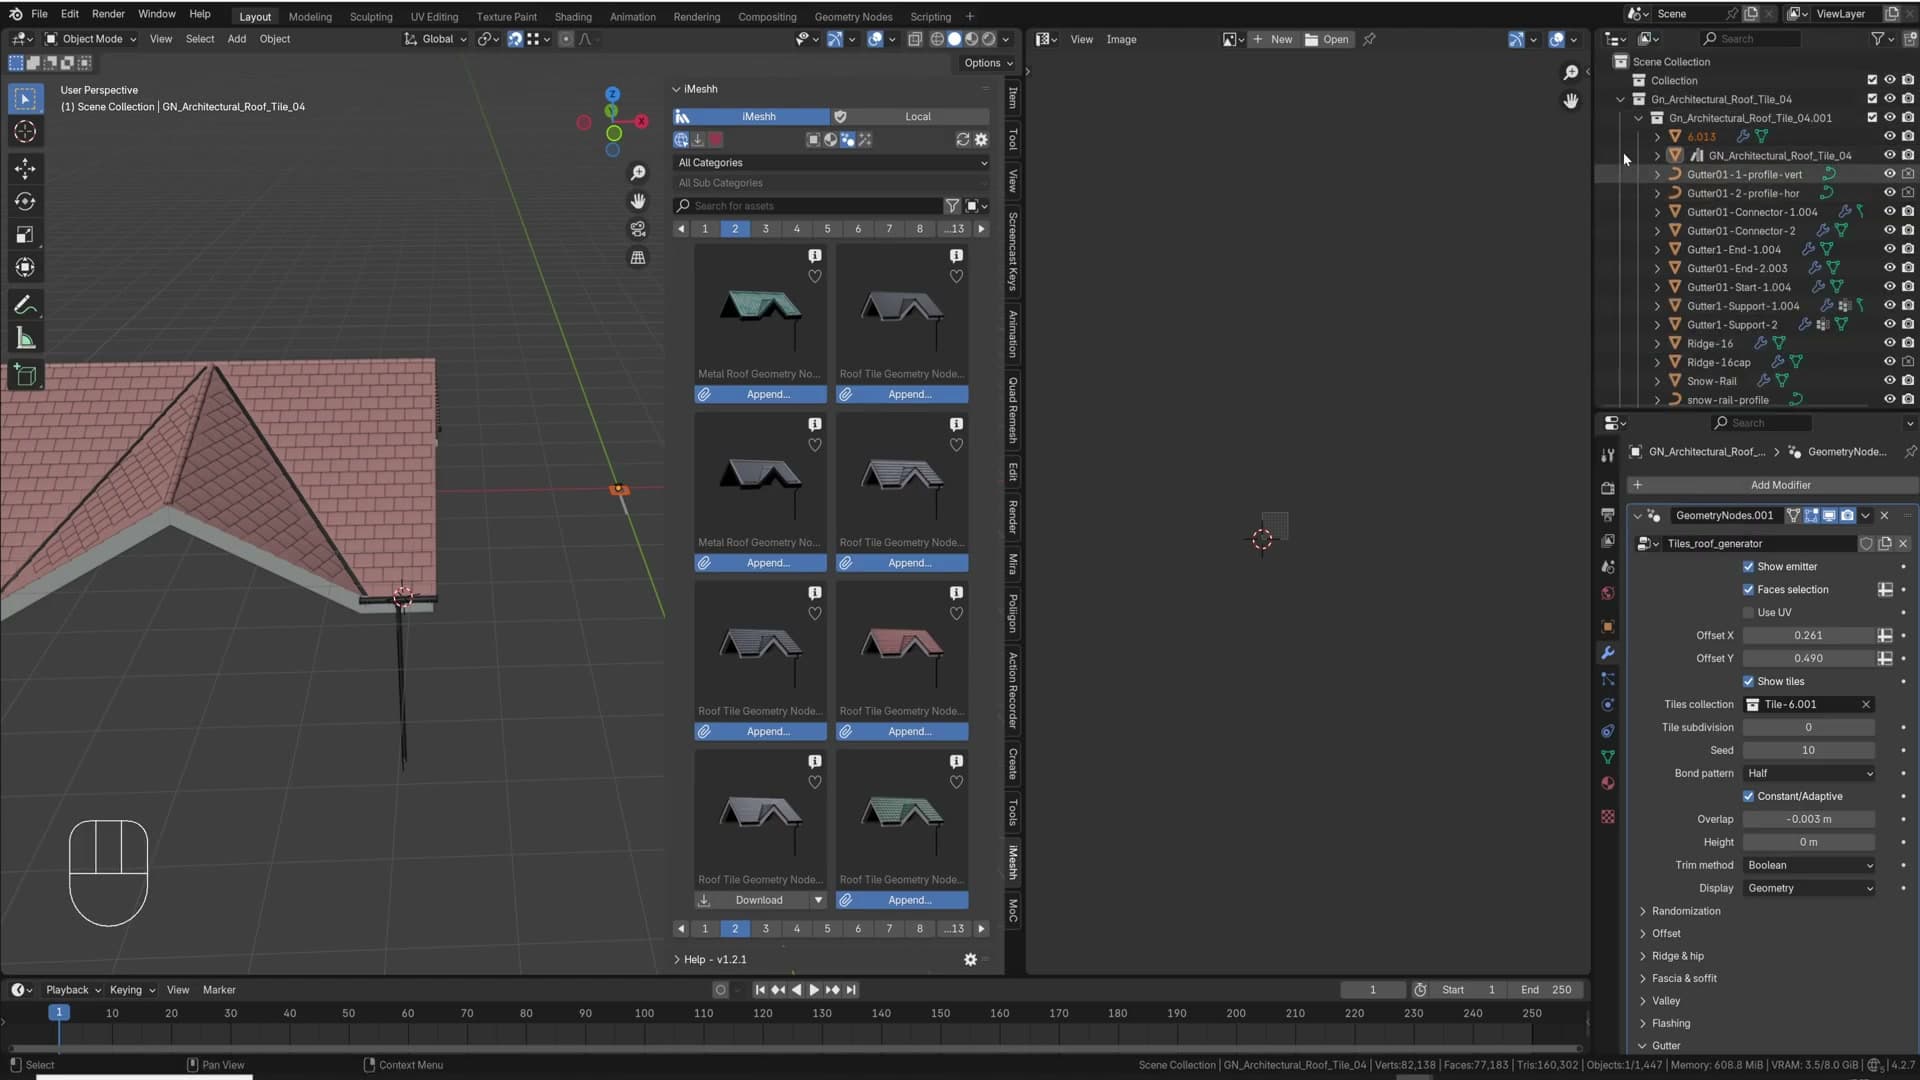
The roof generator decides which geometry to lay down based on whatever you put in its Tile Collection field. Out of the box that field points at a collection the appended asset ships with (in this walkthrough it references one called tile_6.001), and swapping it for any other collection in the scene instantly changes the tile mesh the generator uses.
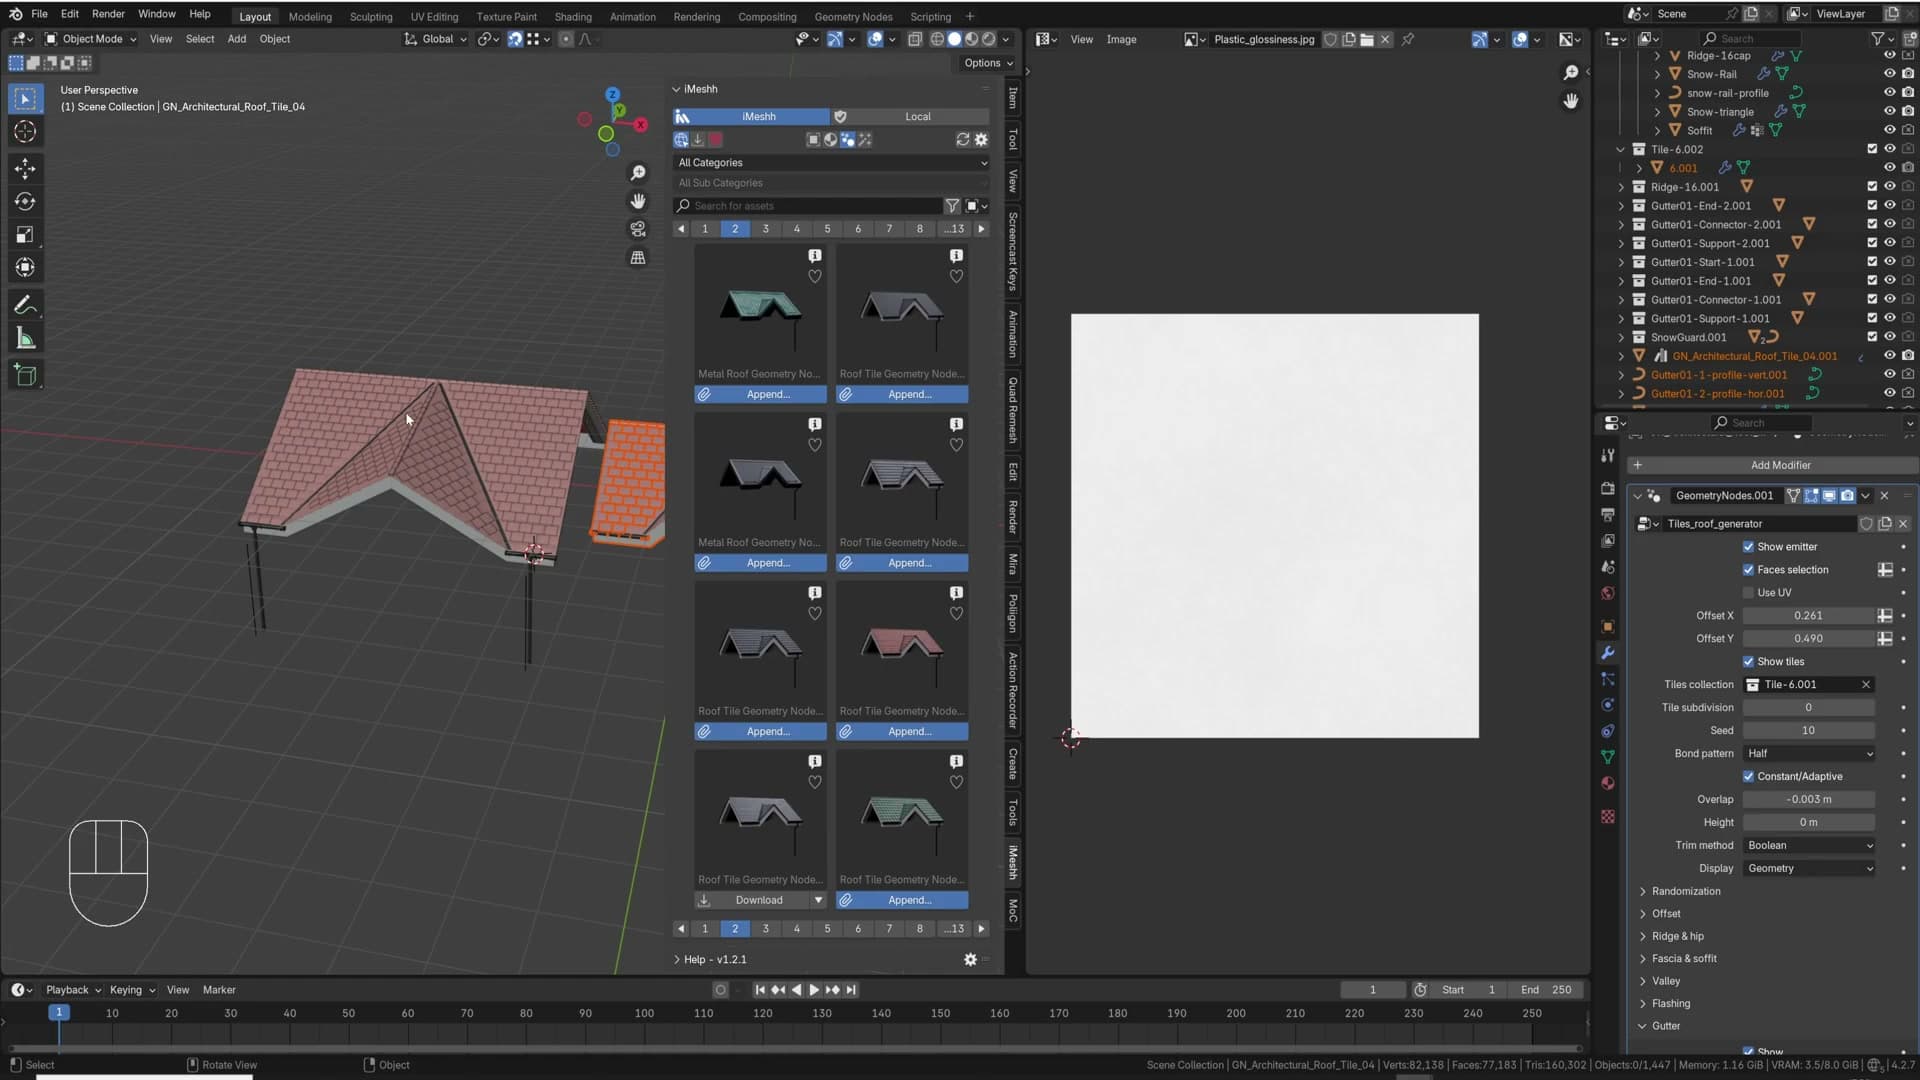
There is a caveat worth knowing about the append step itself. At the moment, appending the generator through the iMeshh Asset Manager does not pull the referenced tile collections into your scene's view layer alongside the object. If you instead go File → Append and navigate to Object, all the collections come across as expected, which is the behaviour iMeshh is working to restore in the add-on.
Building a custom tile from a scaled cube
Pretend a client has sent you a tile profile they want used on the roof. You can build the simplest possible version of that custom tile from a single cube and have the generator pick it up immediately.
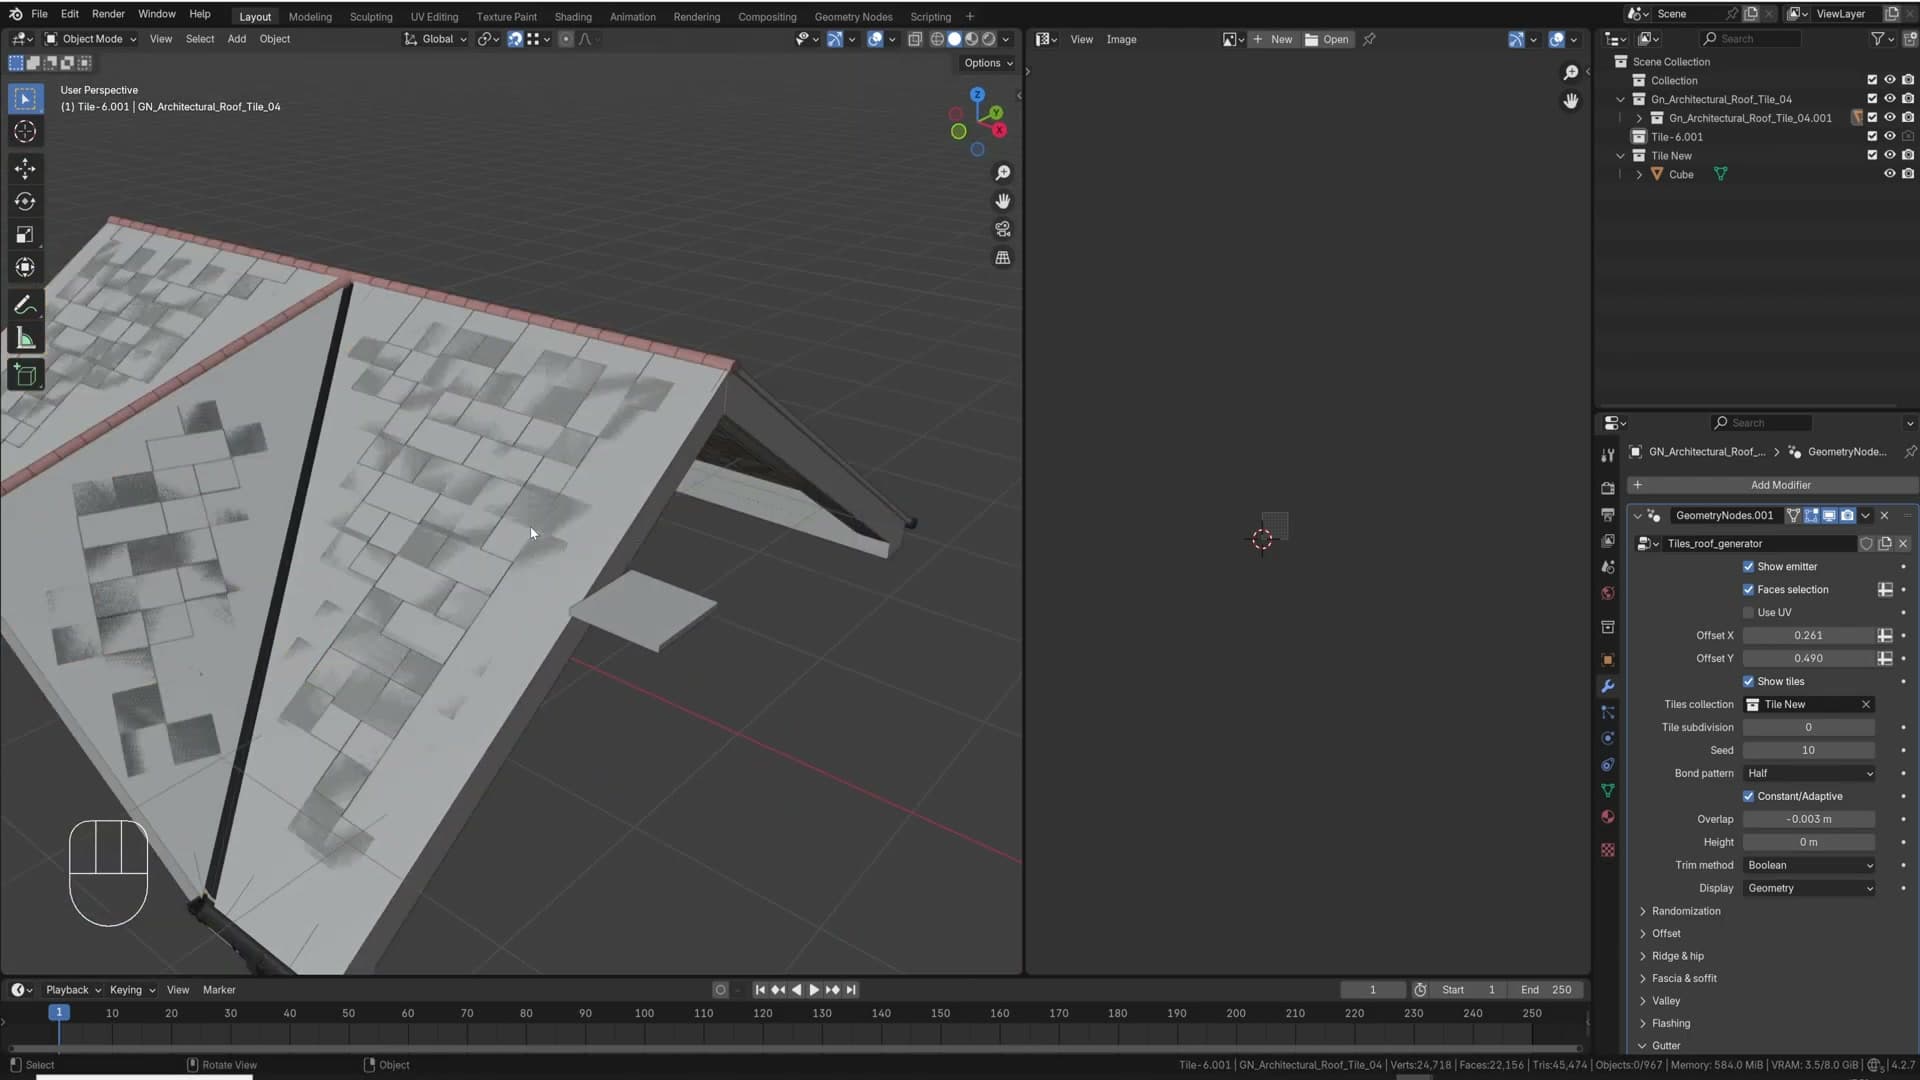
Start by adding a mesh cube to the scene and moving it into a brand new collection called tile_new. Drop into front view, then scale the cube down on the Z axis to flatten it into something tile-shaped. Leave it as it is for now. You can refine the silhouette later.
Back on the roof, open the generator's Tile Collection field and type in tile_new. The generator instantly replaces its tiles with your flattened cube. The result will look wrong at first (every tile overlaps the next) because real roof tiles are usually angled, not laid perfectly flat.
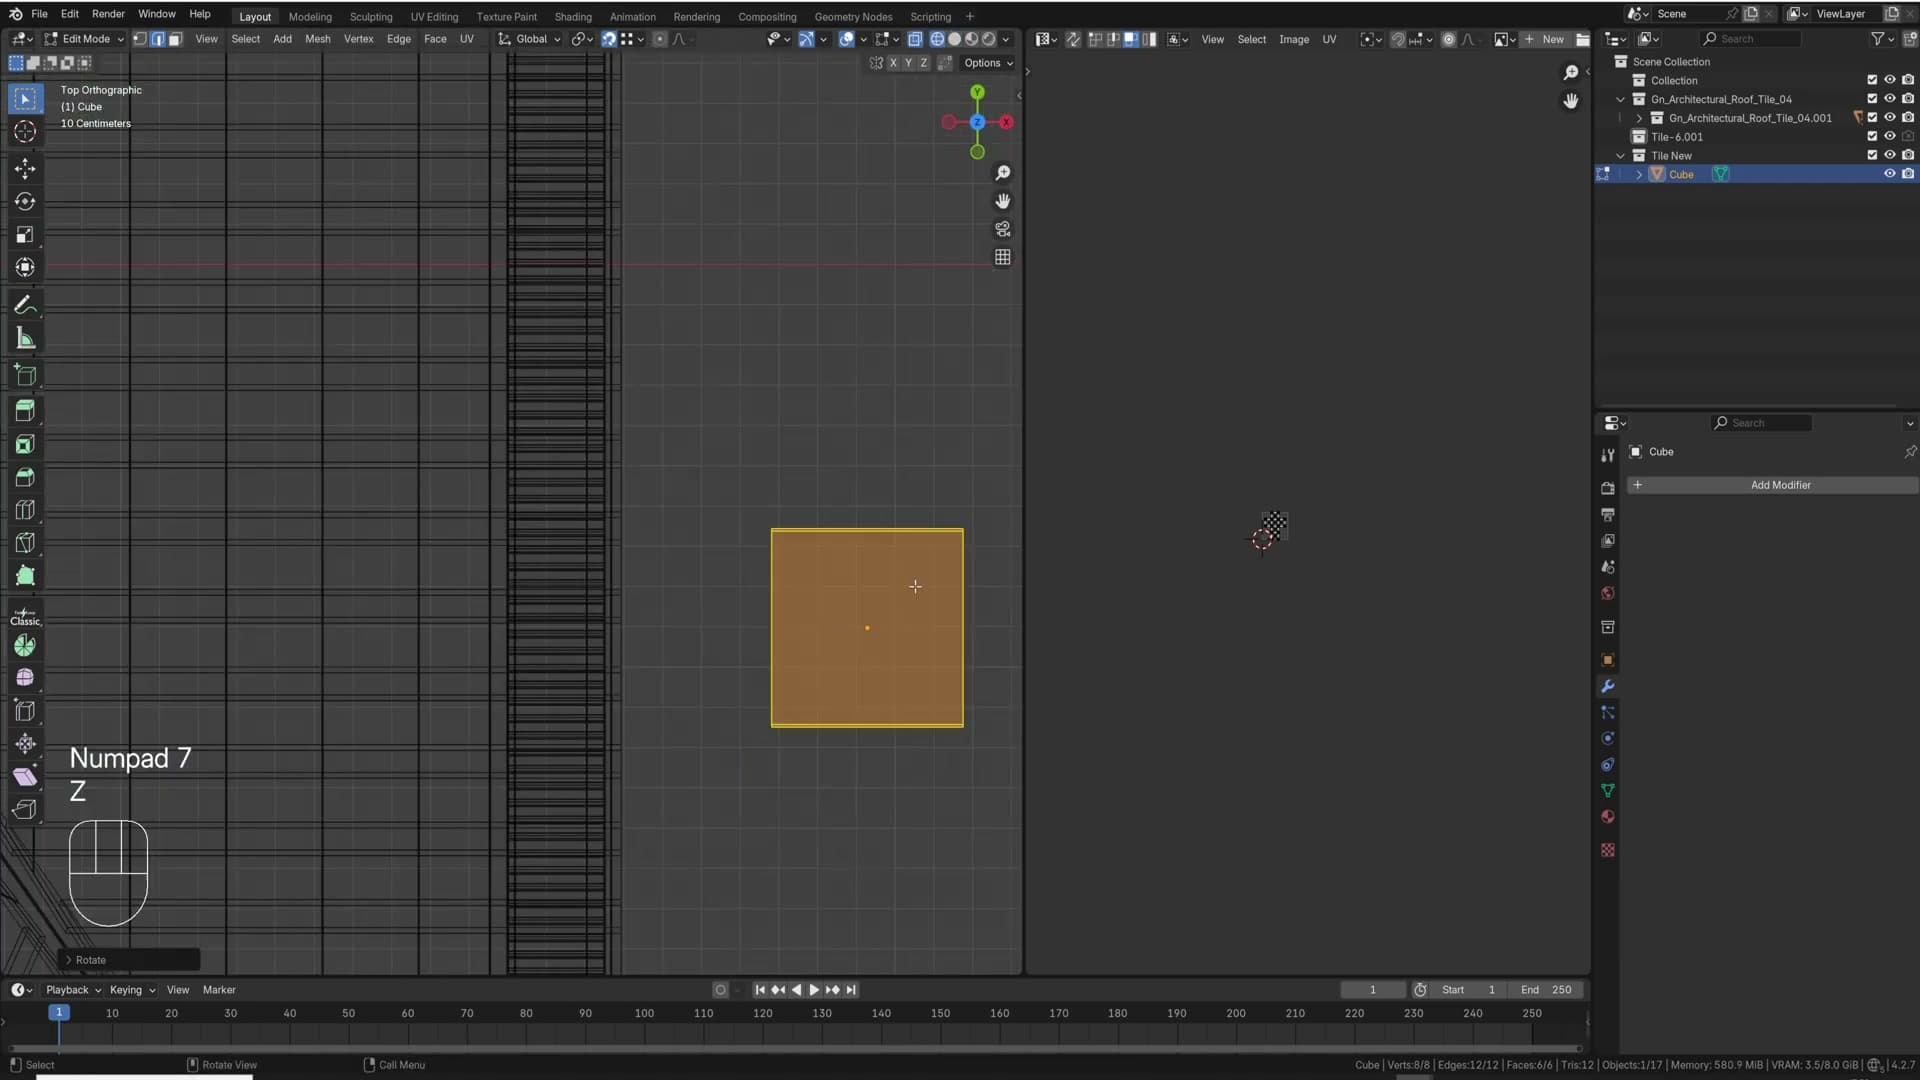
To fix that, select your tile, drop into edit mode, and press R followed by X to rotate the geometry around the X axis. As the tile tips up, the rows on the roof start to separate and you can see the shape of an actual tiled surface emerging.
Using the origin point to control tile overlap
Scaling your custom tile changes its size on the roof exactly as you would expect, but you will notice the overlap between rows stays anchored to the same point, usually halfway down the tile. That anchor is the tile's origin point, and shifting it is how you control where one row sits in relation to the next.
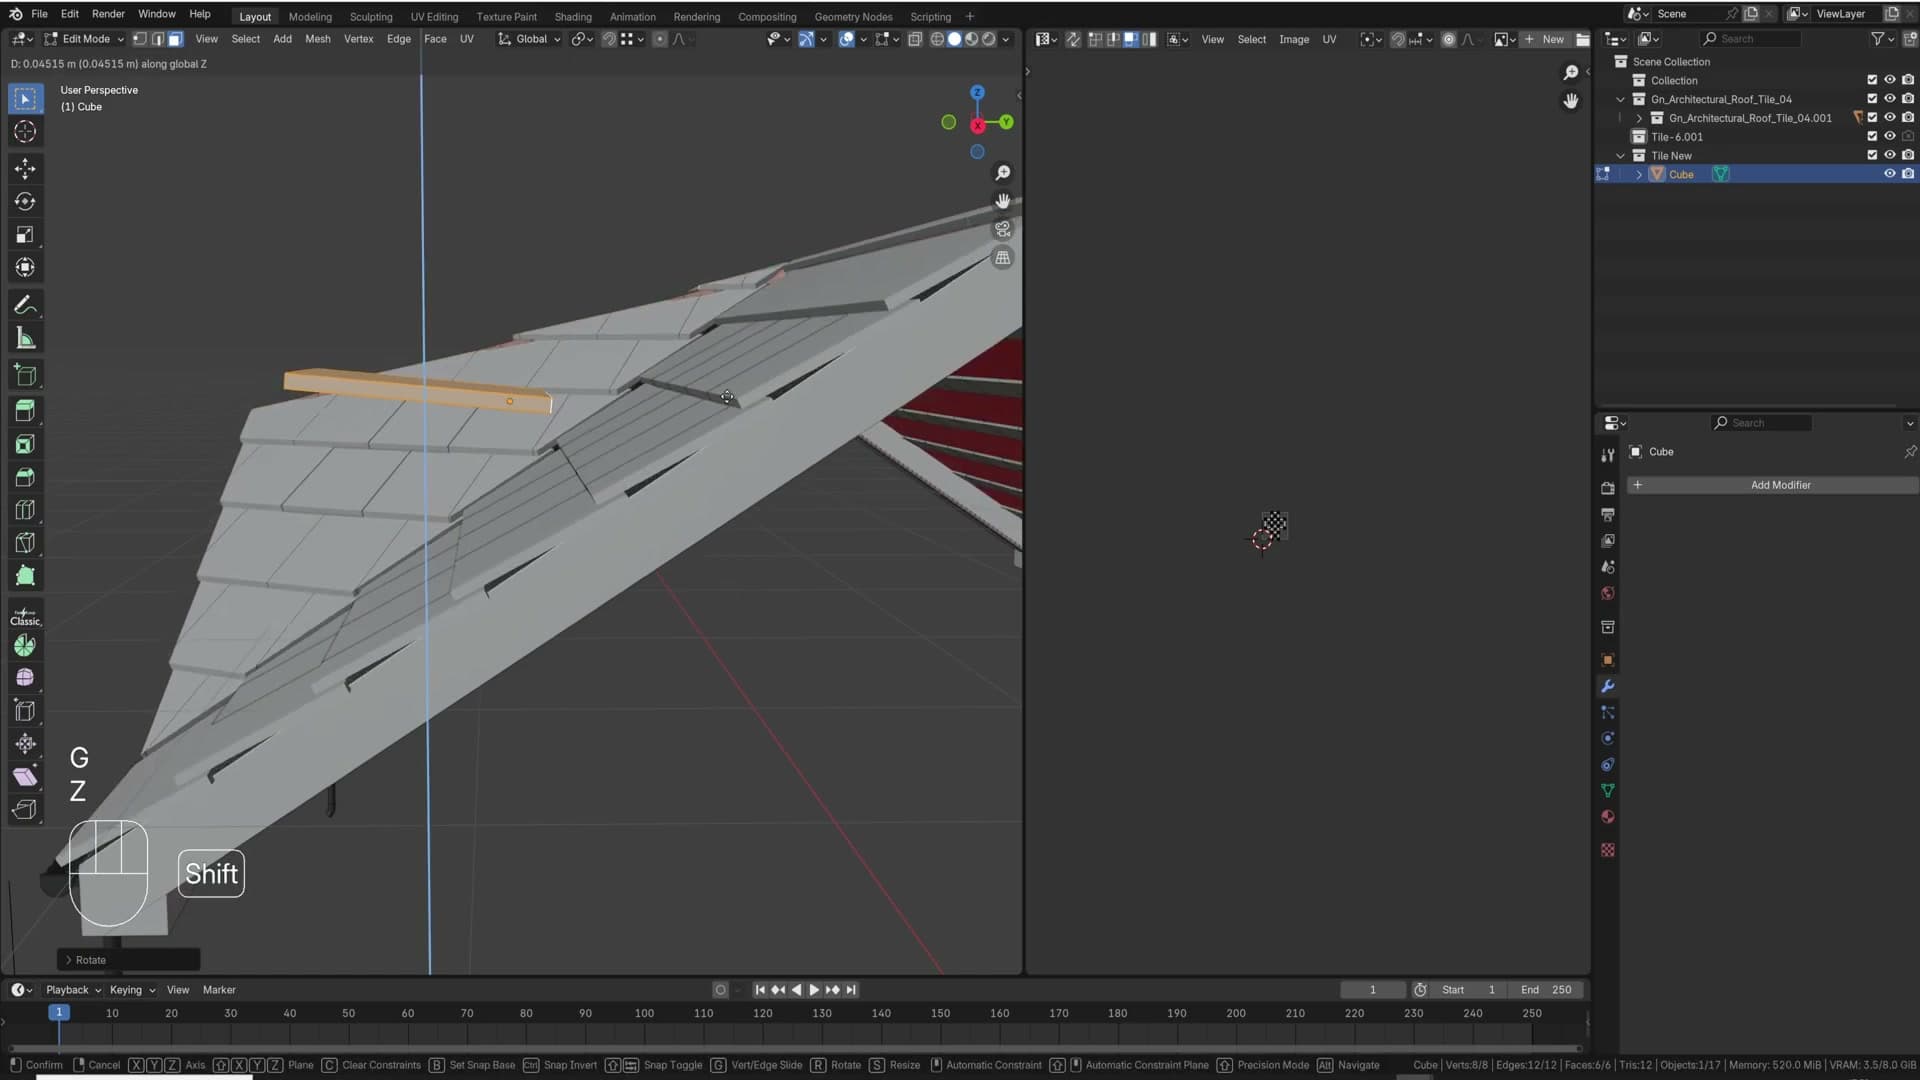
Move the origin along the Y axis and the overlap shifts with it: drag it one way and the tiles space themselves further apart until gaps appear; drag it the other way and they nest tighter together. If your tiles look like they are snapping to fixed positions while you do this, turn off Adaptive in the generator settings so the changes read more clearly.
If the tiles end up sinking into the roof after rotation, you have two options. Either go back into edit mode and lift the geometry on the Z axis, or use the generator's Additional Height attribute to push every tile up by a uniform amount without touching the source mesh.
Once the tile is the right size and shape, press Ctrl+A and apply the scale so the generator has clean transform values to work with. Keep the origin sitting on or just inside the geometry. If it drifts off the mesh, you will see large gaps open up between rows.
With a sensible origin and applied scale, the roof renders as a properly tiled surface built entirely from a cube you scaled and rotated.
Randomizing tile variations within one collection
A single tile collection is not limited to a single mesh. Duplicate your custom tile, tweak the duplicate into a slightly different variation, and leave both meshes inside the same tile_new collection. The generator will randomly cycle through every mesh it finds in the collection as it lays the roof, breaking up the repetition you get from one source tile.
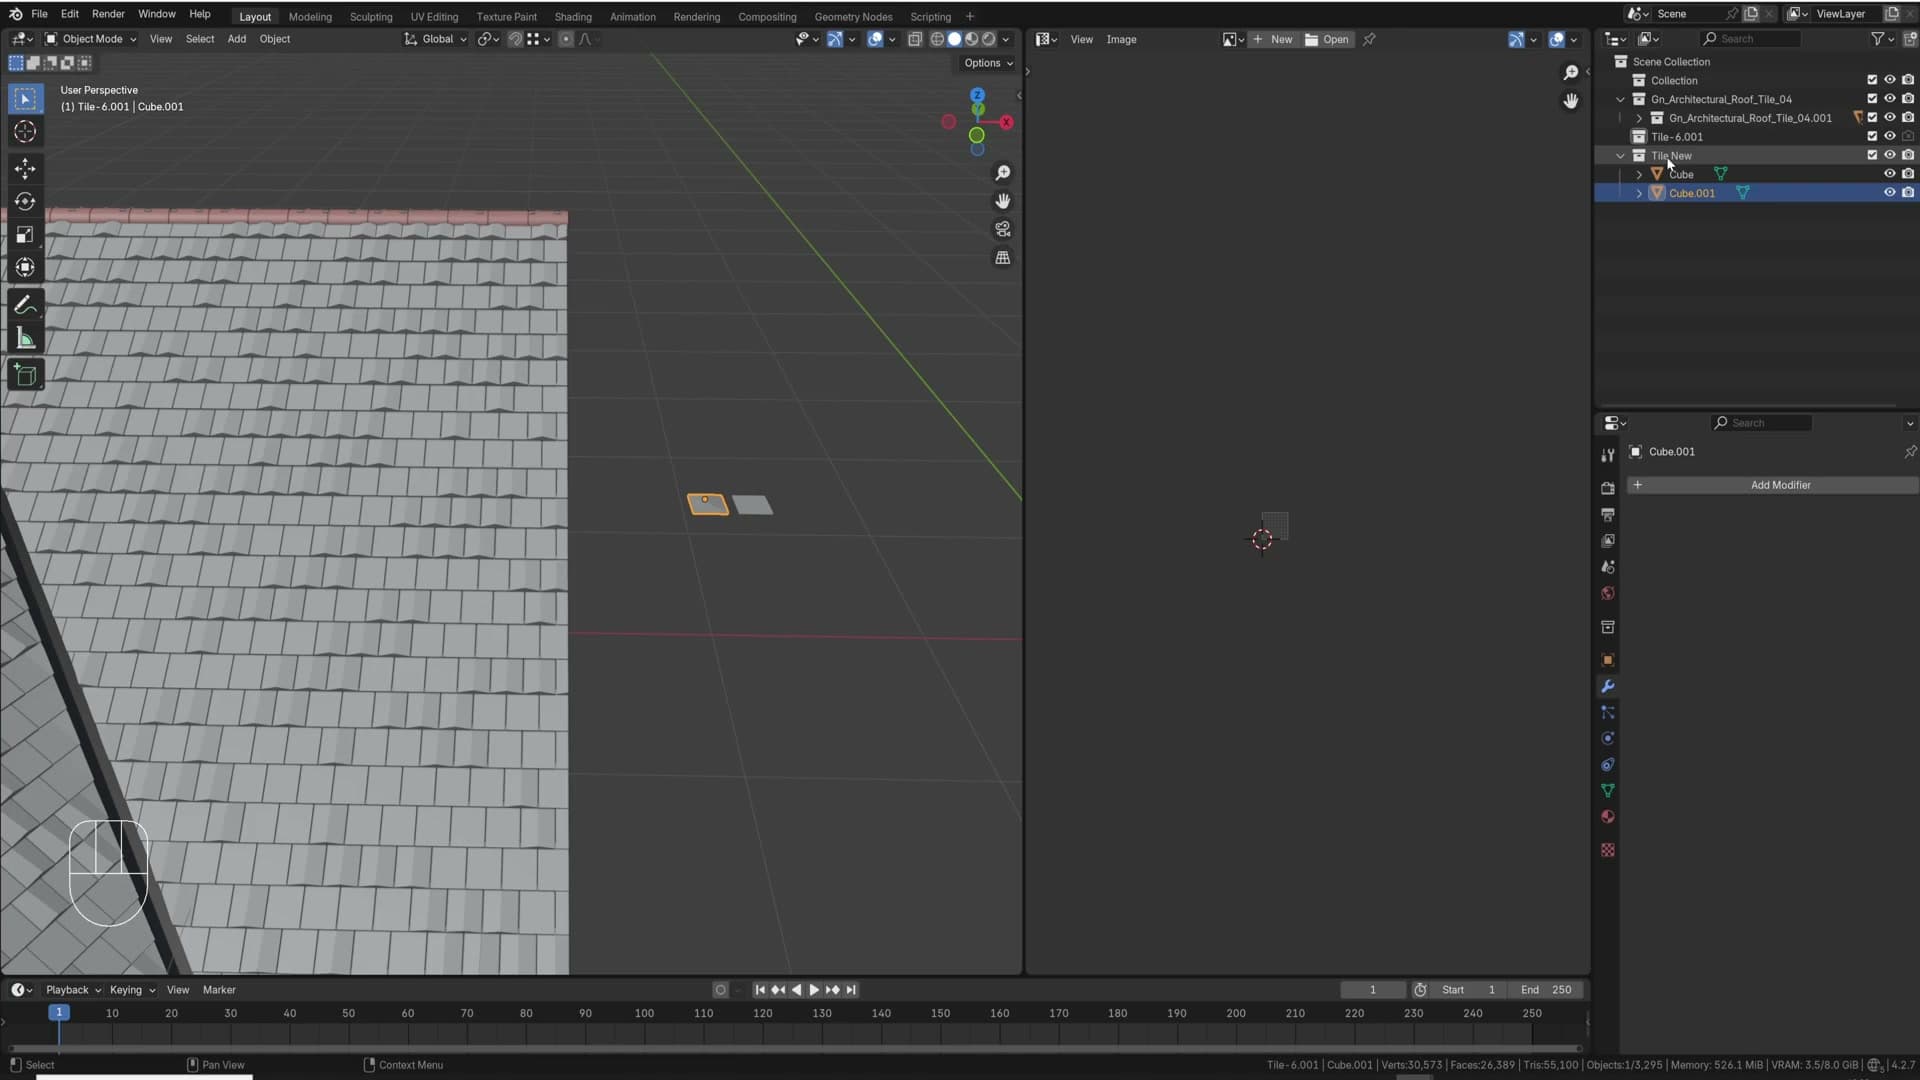
There is no fixed cap on how many variations you can stack. Add as many subtly different tiles as you like and the generator will keep randomising between them across the surface.
Custom metal panel profiles with curves
Metal panel roofs use a different mechanism: build any 2D profile, convert it to a curve, drop it into a Profile Collection, and the generator extrudes it along every slope.
Appending the metal panel roof onto the same geometry
The metal panel generator works on exactly the same principle as the tile version. You swap one for the other on the same underlying roof shape. To do that, delete the current roof generator modifier off your custom geometry, head back to the iMeshh asset browser tab and append the metal panel roof.
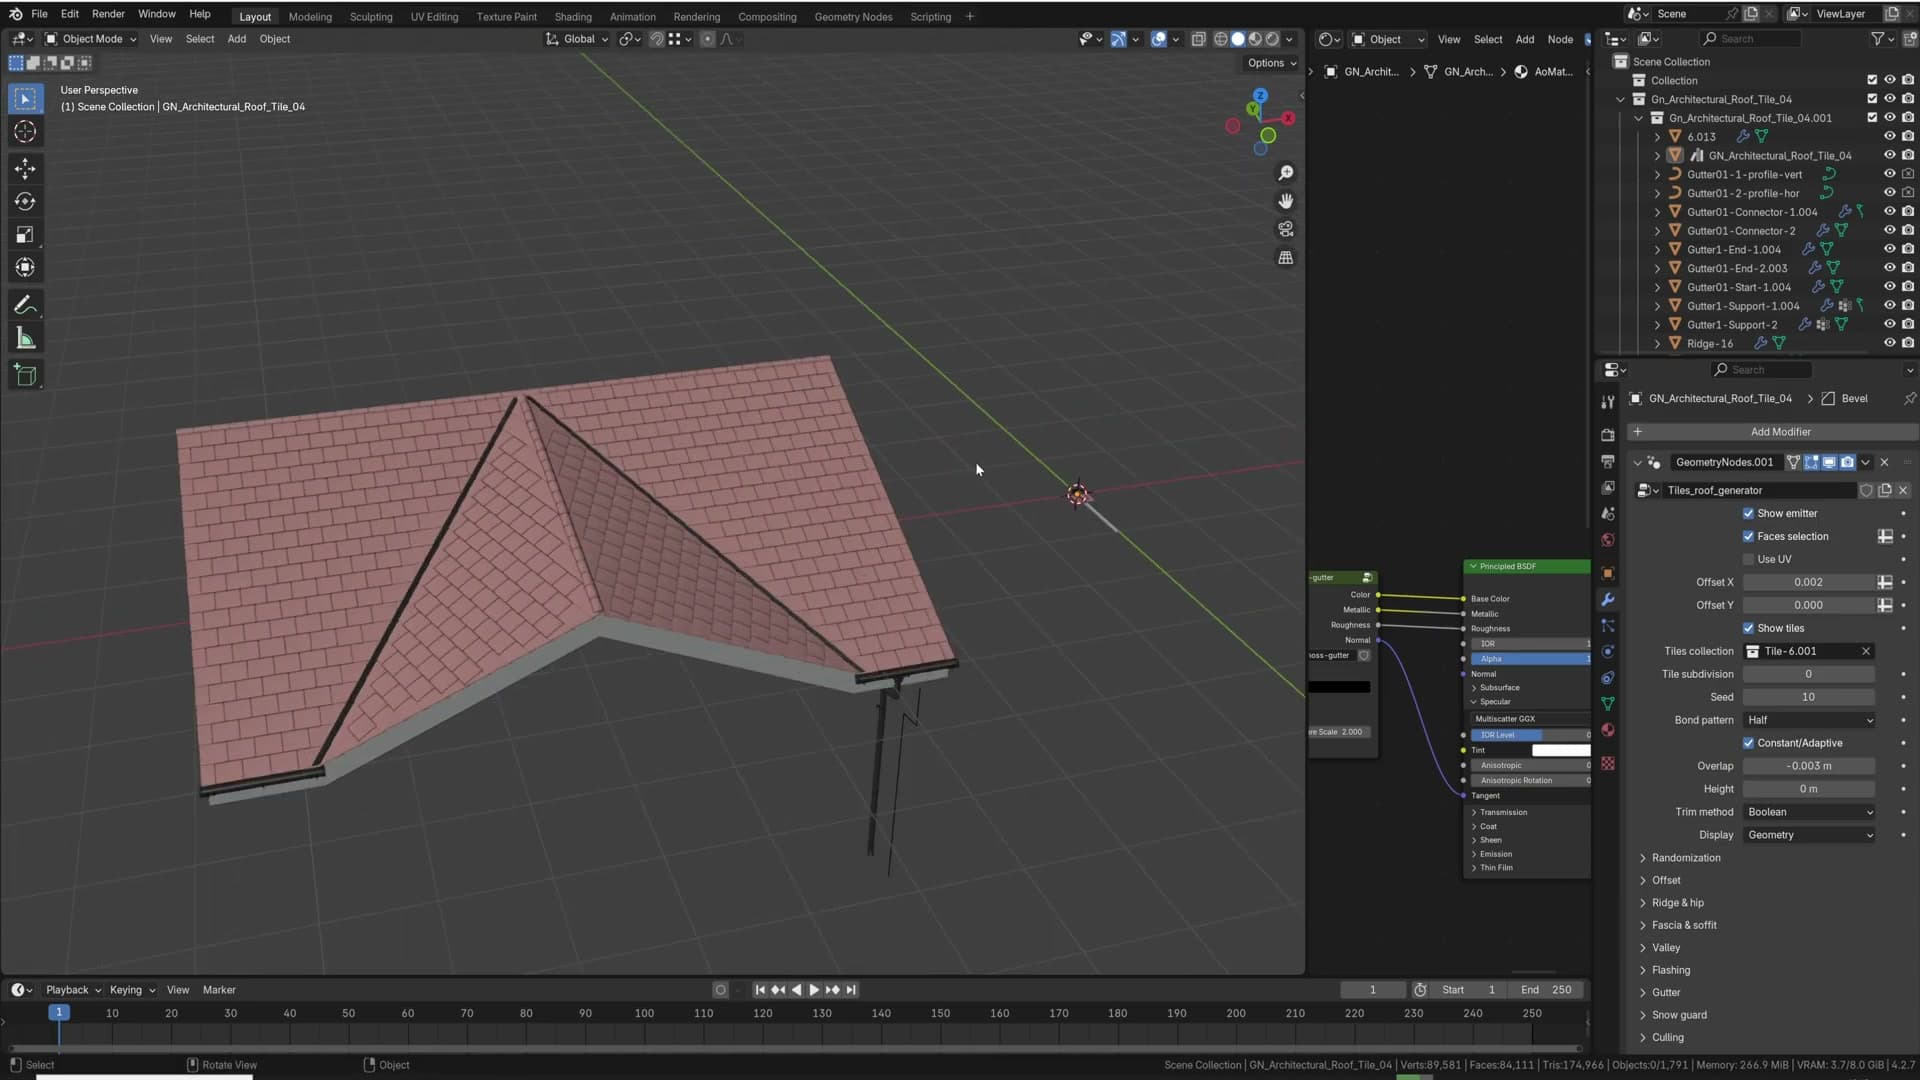
Once it lands in the scene, select your original roof geometry first, then shift-select the appended generator. Press Ctrl+J to join them, the same workflow used for the tile version. Joining (rather than Ctrl+L copying modifiers) is the better method because it carries the full attributes list across so you can keep tweaking every setting.
Drop into edit mode, select the imported mesh that came in with the generator, and delete those vertices. What's left is your bespoke roof shape now driven by the metal panel generator instead of tiles.
Drawing a custom panel profile with Add Single Vert
The metal panel generator extrudes a 2D profile shape along every slope of your roof. The default ships with a handful of profiles, but you can draw your own from scratch.
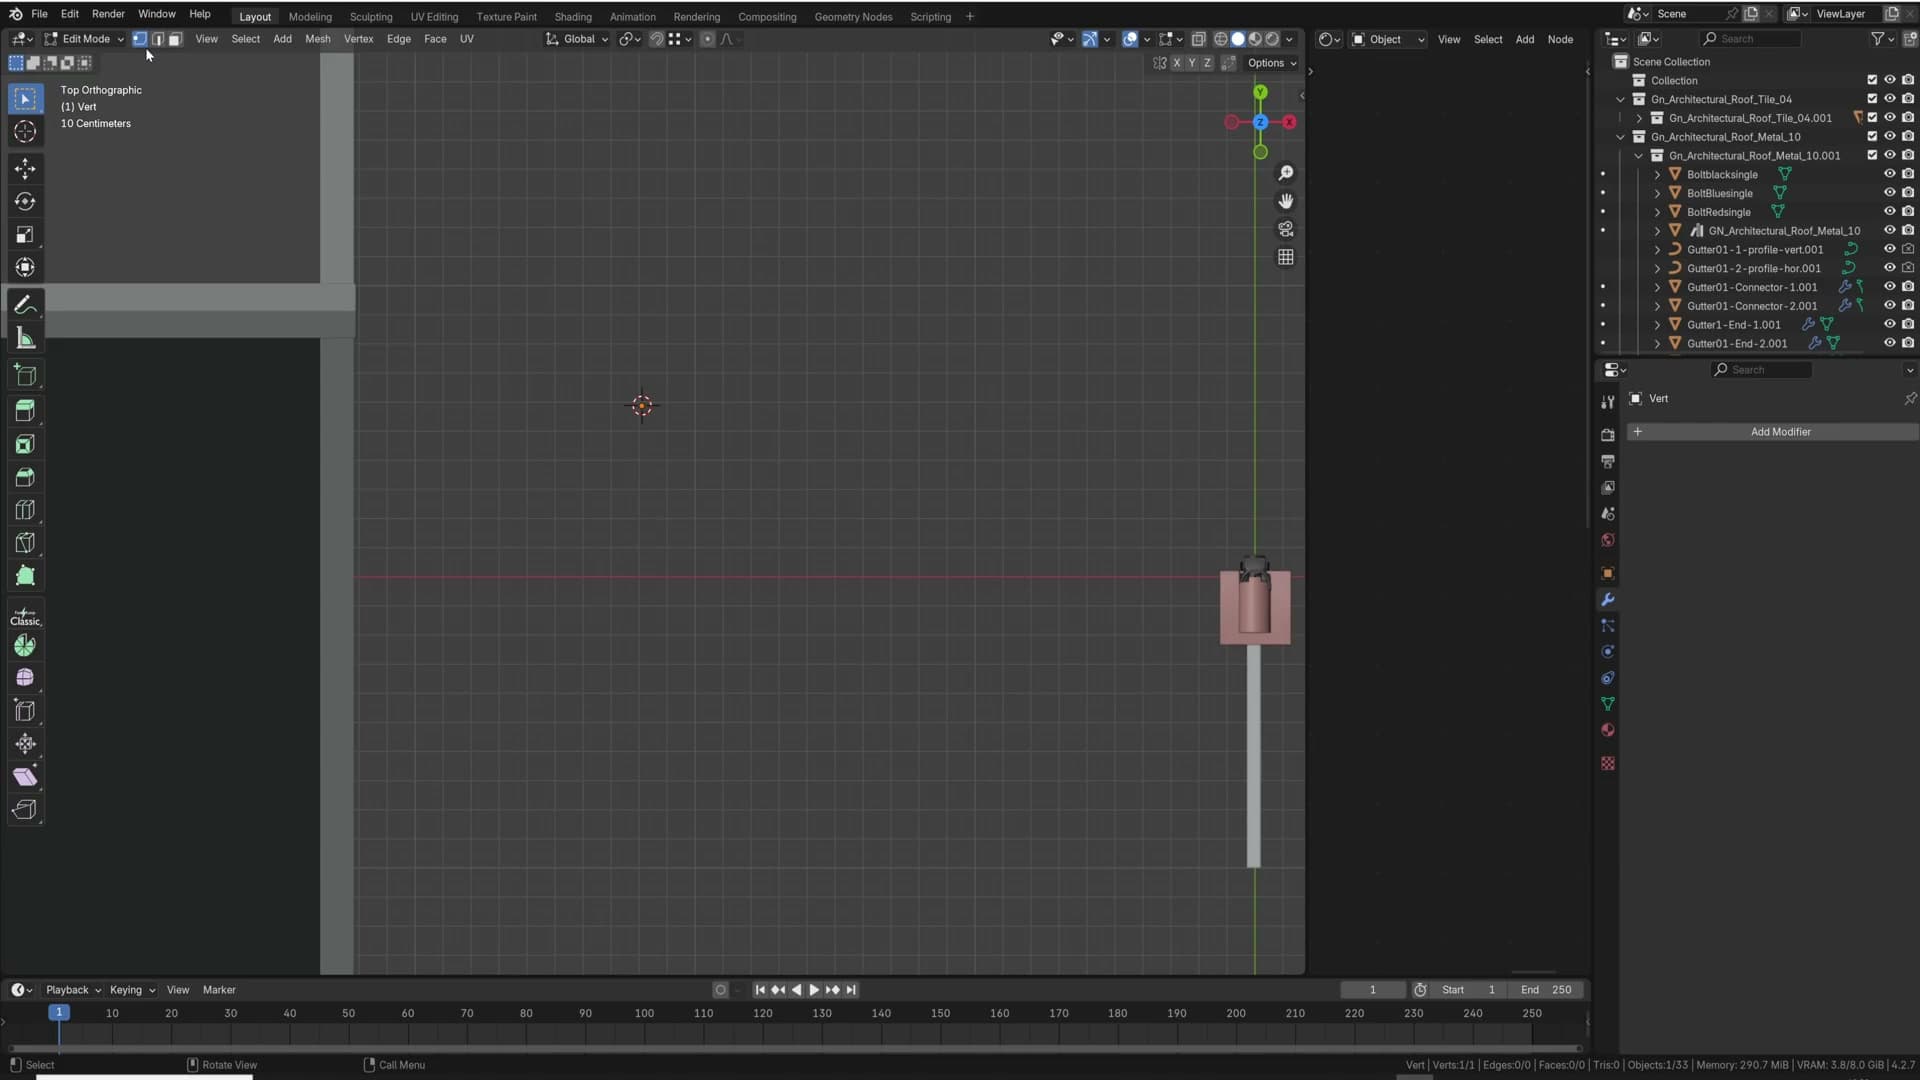
Switch to top view so you're drawing flat on the XY plane. Press Shift+A and add a mesh, specifically Add Single Vert. This operator comes from a stock Blender add-on. If it isn't in your Add menu, enable it from Preferences first.
Press 1 to make sure you're in vertex select mode, then build your profile vertex by vertex. Extrude with E to lay down each new point and shape whatever cross-section you want the panel to follow.
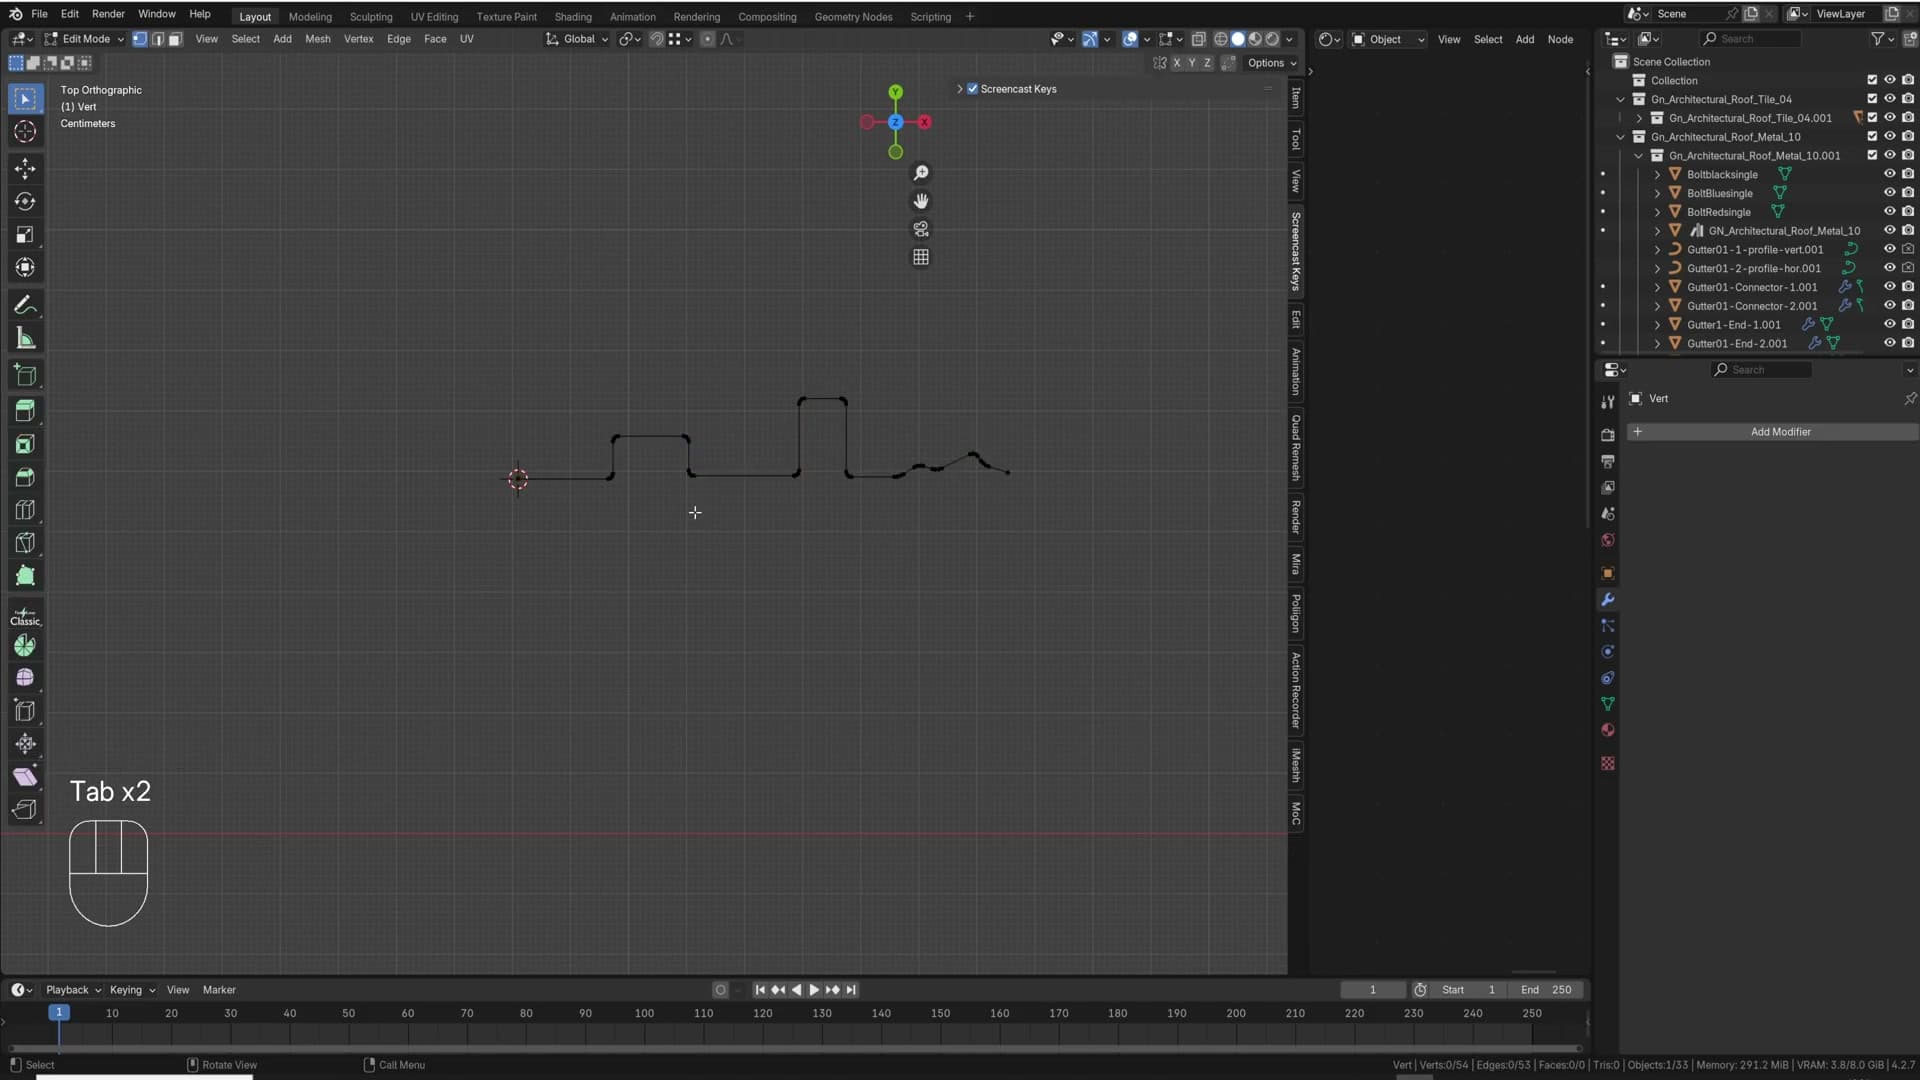
Once the profile is roughed out, soften the corners with a vertex bevel: select the verts you want to round and press Ctrl+Shift+B, then drag to set the bevel radius.
Finally, move the finished profile into its own new collection. I named mine strange profile. Give yours whatever name you'll recognise later, because you'll be pointing the generator at this collection in the next step.
Converting the mesh profile to a curve
Back on your roof, find the Profile Collection field on the metal panel generator and choose the new collection you just created. The roof will shift upwards as it acknowledges the new profile, but nothing visible appears along the slopes yet.
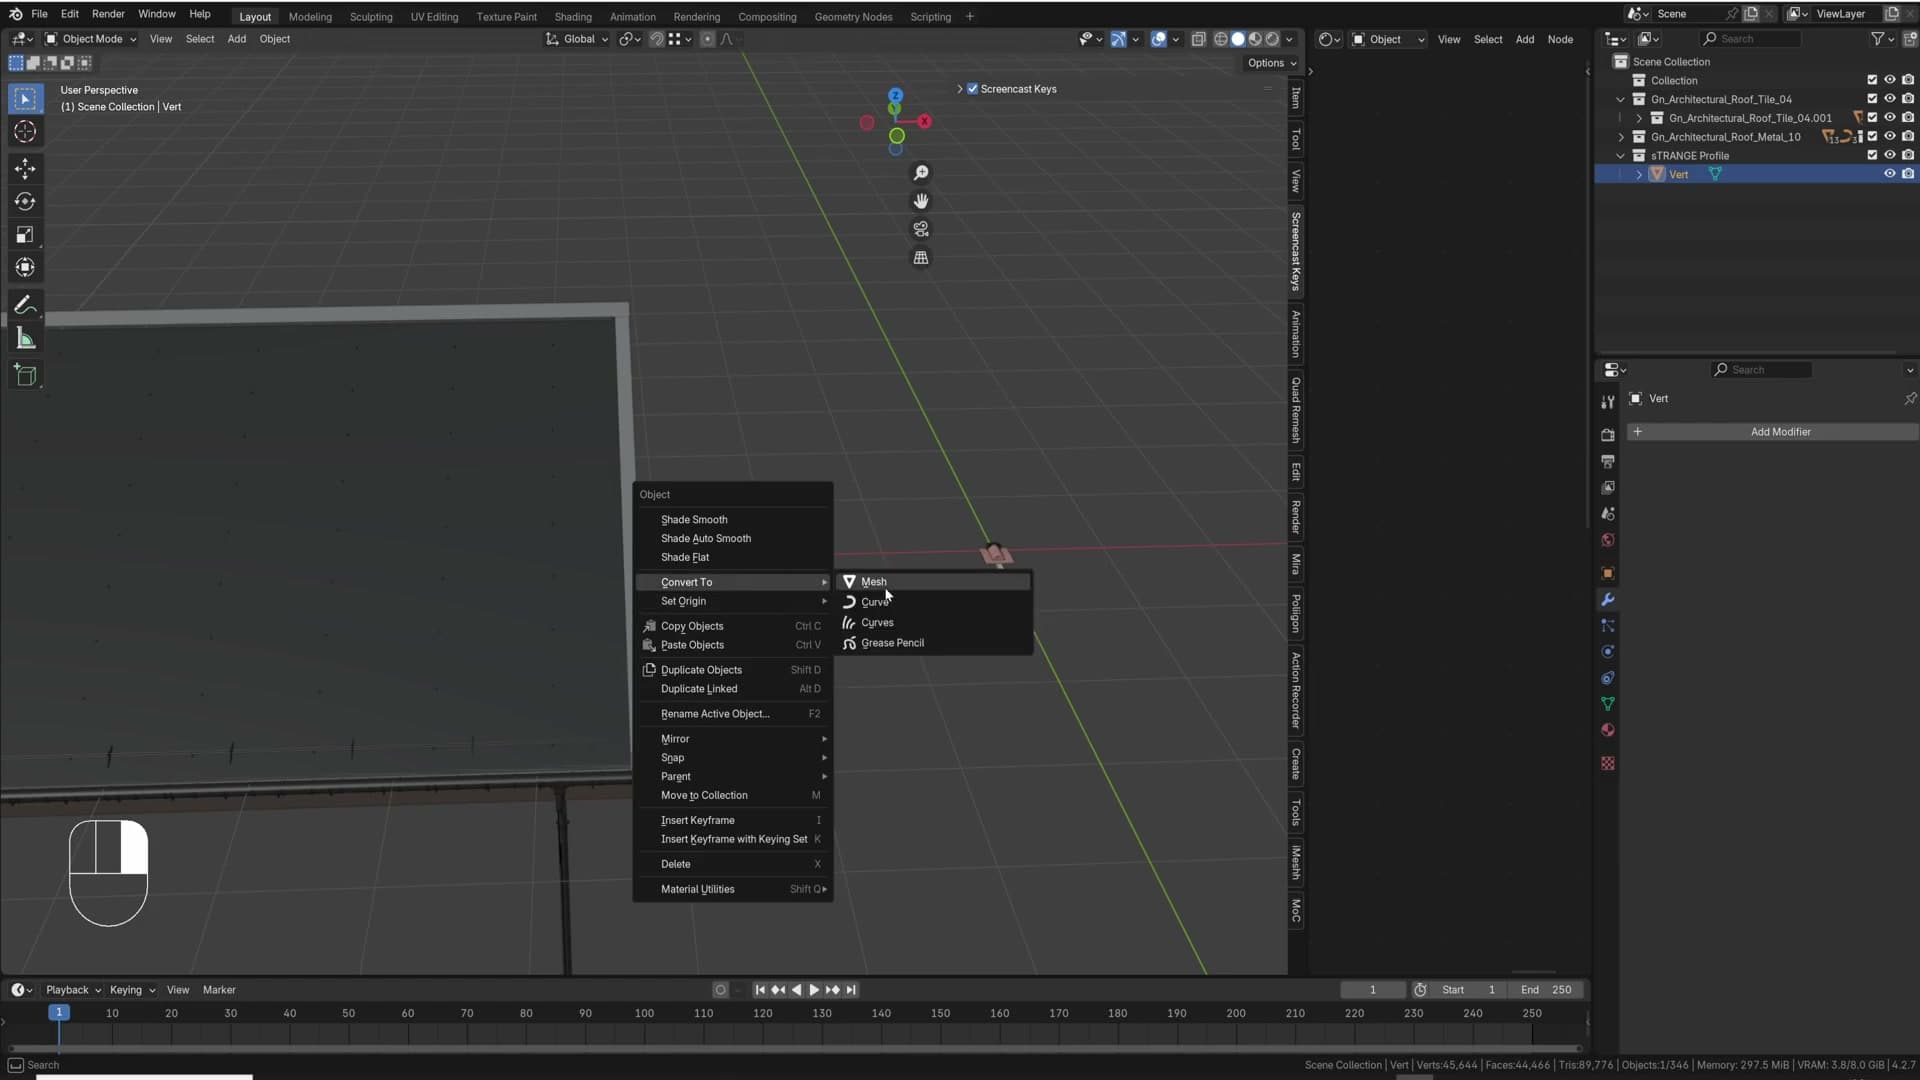
That's because the profile is still a mesh object. The generator only renders profiles that are curves. Select your profile, right-click and pick Convert to Curve. As soon as the conversion completes, the profile extrudes along every roof face and you get the full panel geometry.
Cycling through multiple panel profiles automatically
You're not limited to one profile per roof. Duplicate your curve, drop into edit mode on the copy, and reshape it (delete vertices, add new ones, or just flatten the bump out) so each variant looks distinct.
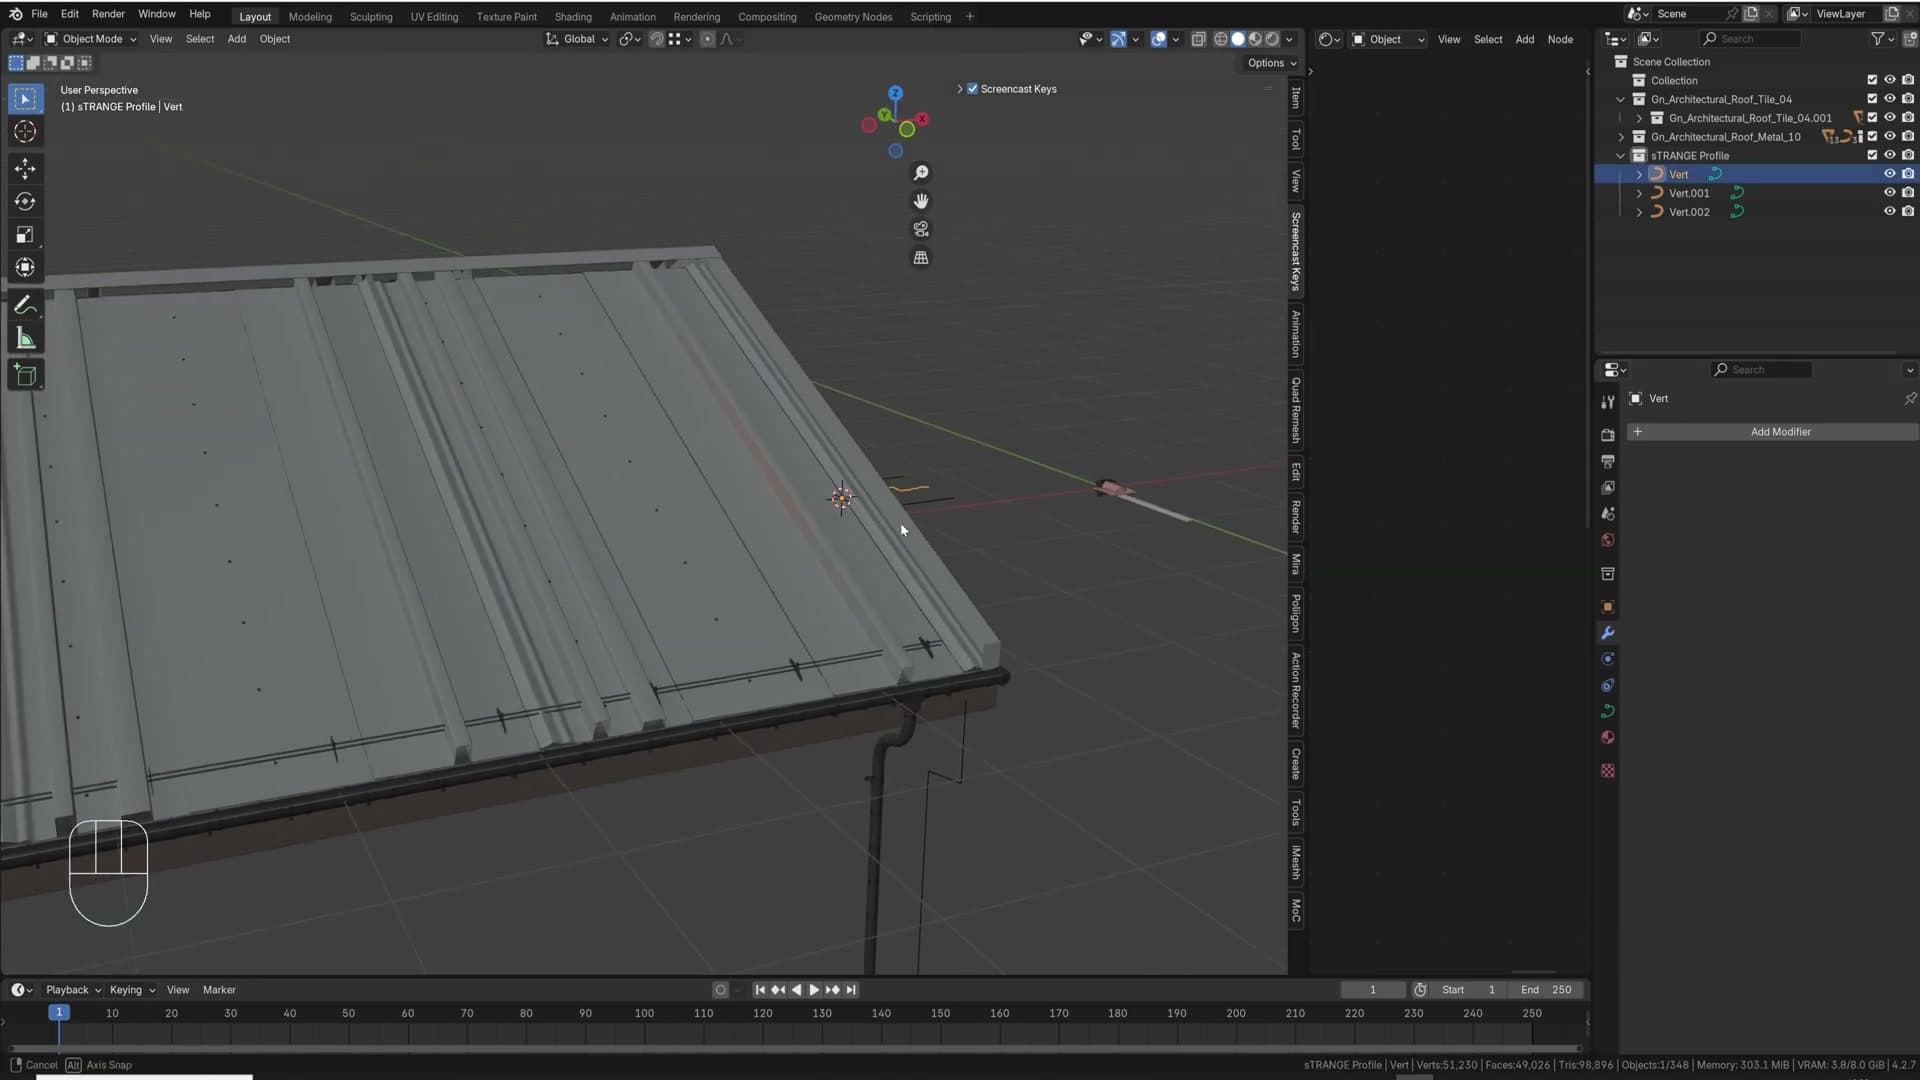
As long as every profile lives inside the same collection that the Profile Collection field points to, the generator will cycle through them automatically across the roof panels. With three curves in one collection (the bumped one, a flat one and the strange one) the generator alternates bump, flat, strange, bump, flat, strange along the slopes.
There's a final touch worth knowing about. On the side edges of the roof where the panels terminate, select the edge faces and press F. The generator will fill that opening with panels running down the side, closing off the edge cleanly. It happens automatically once the face is there, and in some cases it's exactly the detail the roof needs.
Wrap-up: curve resolution, shading and the Discord community
Closing notes on what curve resolution actually does (shading, not booleans), the recap checklist for clean roofs, and where to ask follow-up questions.
Curve resolution helps shading, not booleans
A small correction from the previous video. The curve resolution setting on the generator isn't there to help booleans calculate cleanly. It's a shading control. If you see strange shading artefacts on a particular slope, push the resolution up to add more detail along the curve and the shading will tidy up.
Beyond that, the workflow is genuinely this simple. Grab the tool, drop it onto any roof you like, and as long as every face is perfectly flat and there are no overlapping vertices, it should just work.
The final checklist for any roof you generate
If your tiles are running the wrong way across a face, the fix is a Smart UV Unwrap. Tab into edit mode, press A to select everything, then U and choose Smart UV Unwrap. The tiles will reorient to follow the new UVs.
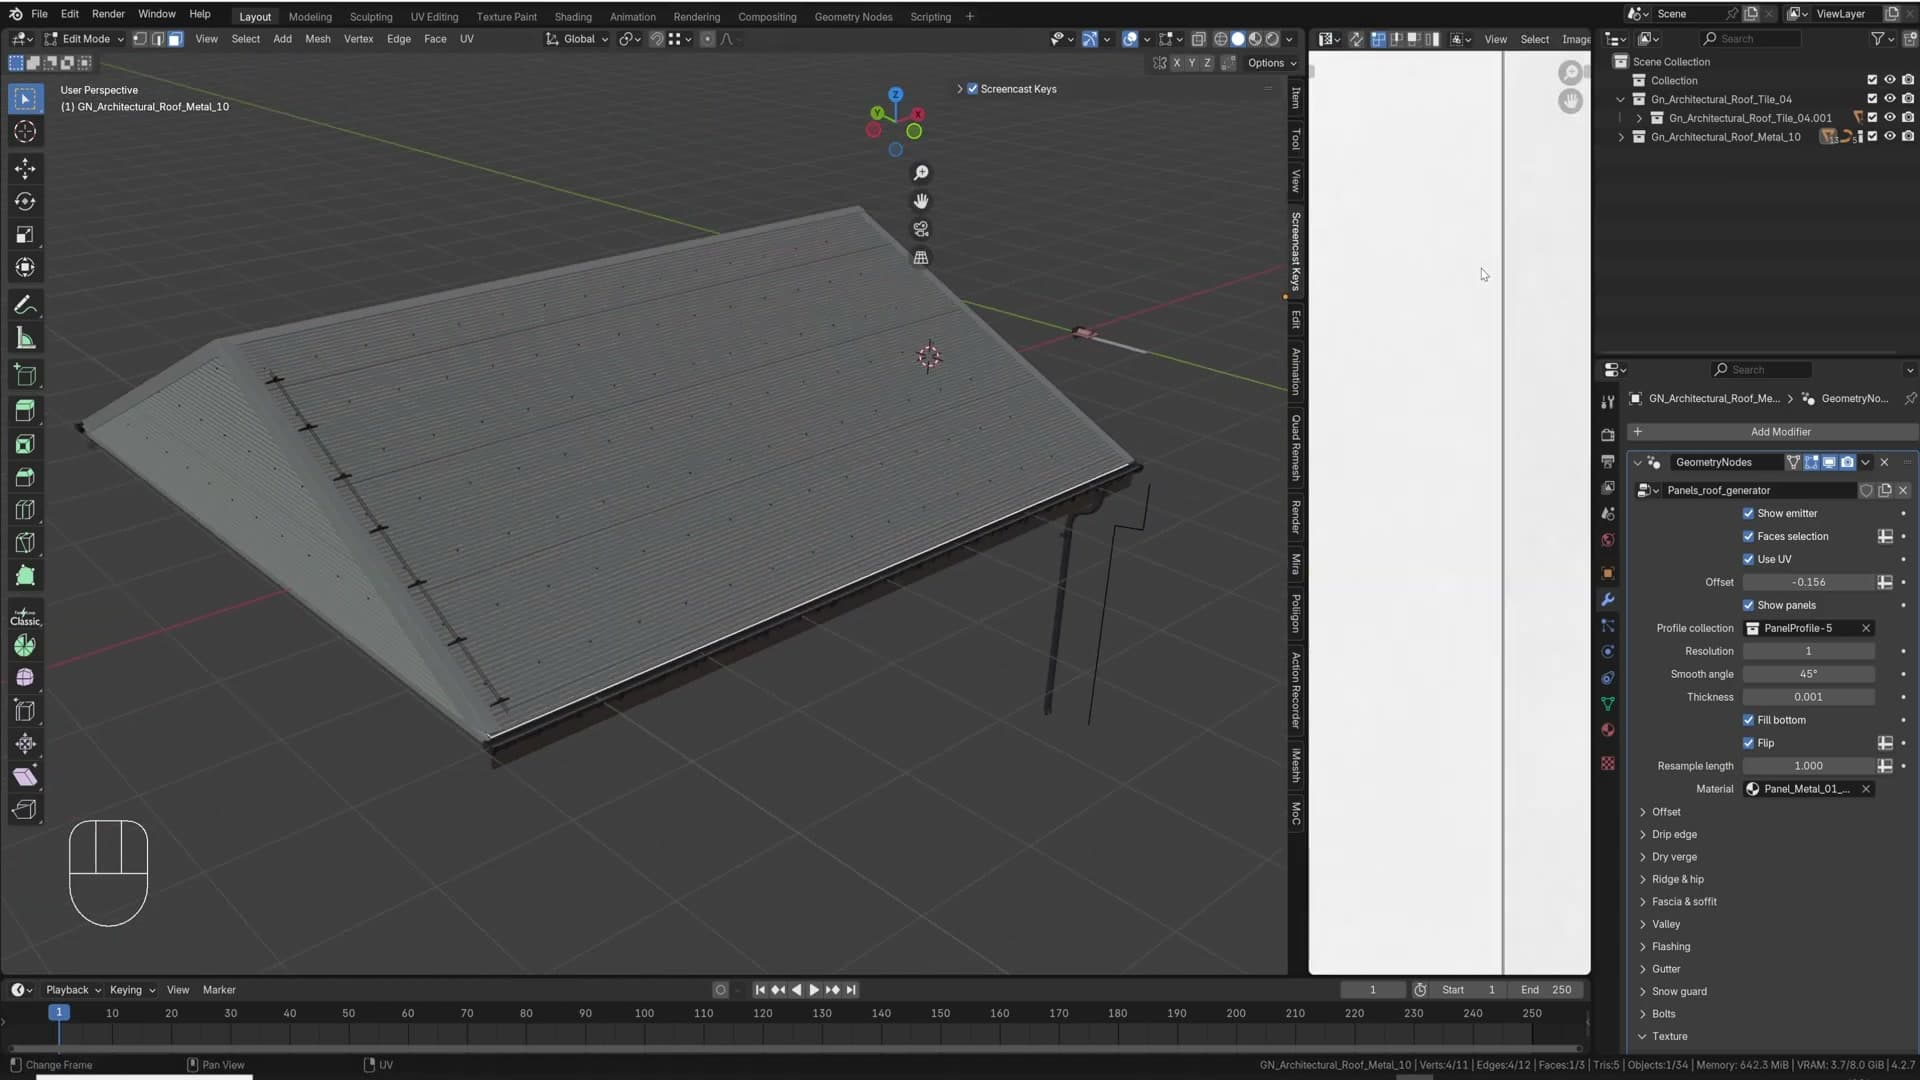
Smart UV Unwrap reads the angle of each face, so it doesn't always pick the direction you'd predict. If one slope is still wrong after the global unwrap, select just that face and unwrap it on its own, or nudge the island in the UV editor until the tiles line up.
That gives you a final three-point checklist for any roof you generate: every face perfectly flat, no overlapping vertices (merge by distance handles those), and UV direction sorted per slope. The 45-degree pyramid roof shown here isn't a shape you see every day, but the generator handles it without complaint once those boxes are ticked.
Where to ask questions and how updates ship
Questions about the generator are best raised in the iMeshh Discord. Post in the help channel with the roof generator tag so anyone running into the same problem later can find your thread and the solution alongside it. Suggestions for the tool go in the same place. They get read, and they shape what ships next.
The generator is updated constantly, so if you're subscribed to iMeshh you'll always pull the latest version as features and fixes land. People are already using it on real renders and the level of detail it adds to a project is impressive.
Drop into the Discord with renders, questions, or just to see what other people are building. The community is welcoming, archviz is for everyone, and the people in there are remarkably willing to help. Thanks for watching.
Tools and credits
Everything mentioned in this tutorial, with links.
- Blender the renderer this entire build runs in.
- iMeshh studio platform (project management, client review, asset library, invoicing). The asset library used in this tutorial is included with every iMeshh Pro plan.
- Poly Haven free CC0 textures and HDRIs.
Pillar guide: Modelling hub · Get the Roof Generator