What's in the iMeshh wood floor system
An overview of the 30-plank geometry nodes setup, the manufacturer-supplied textures behind it, and how 4K/2K/1K resolution options keep VRAM usage low despite the variety.
Thirty plank geometry node setups, one floor system
The iMeshh wood floor system bundles thirty separate plank geometry node setups, one per wood type. Each setup is its own asset, so you can swap floor species without rebuilding the pattern, the wear layer or any of the supporting nodes.
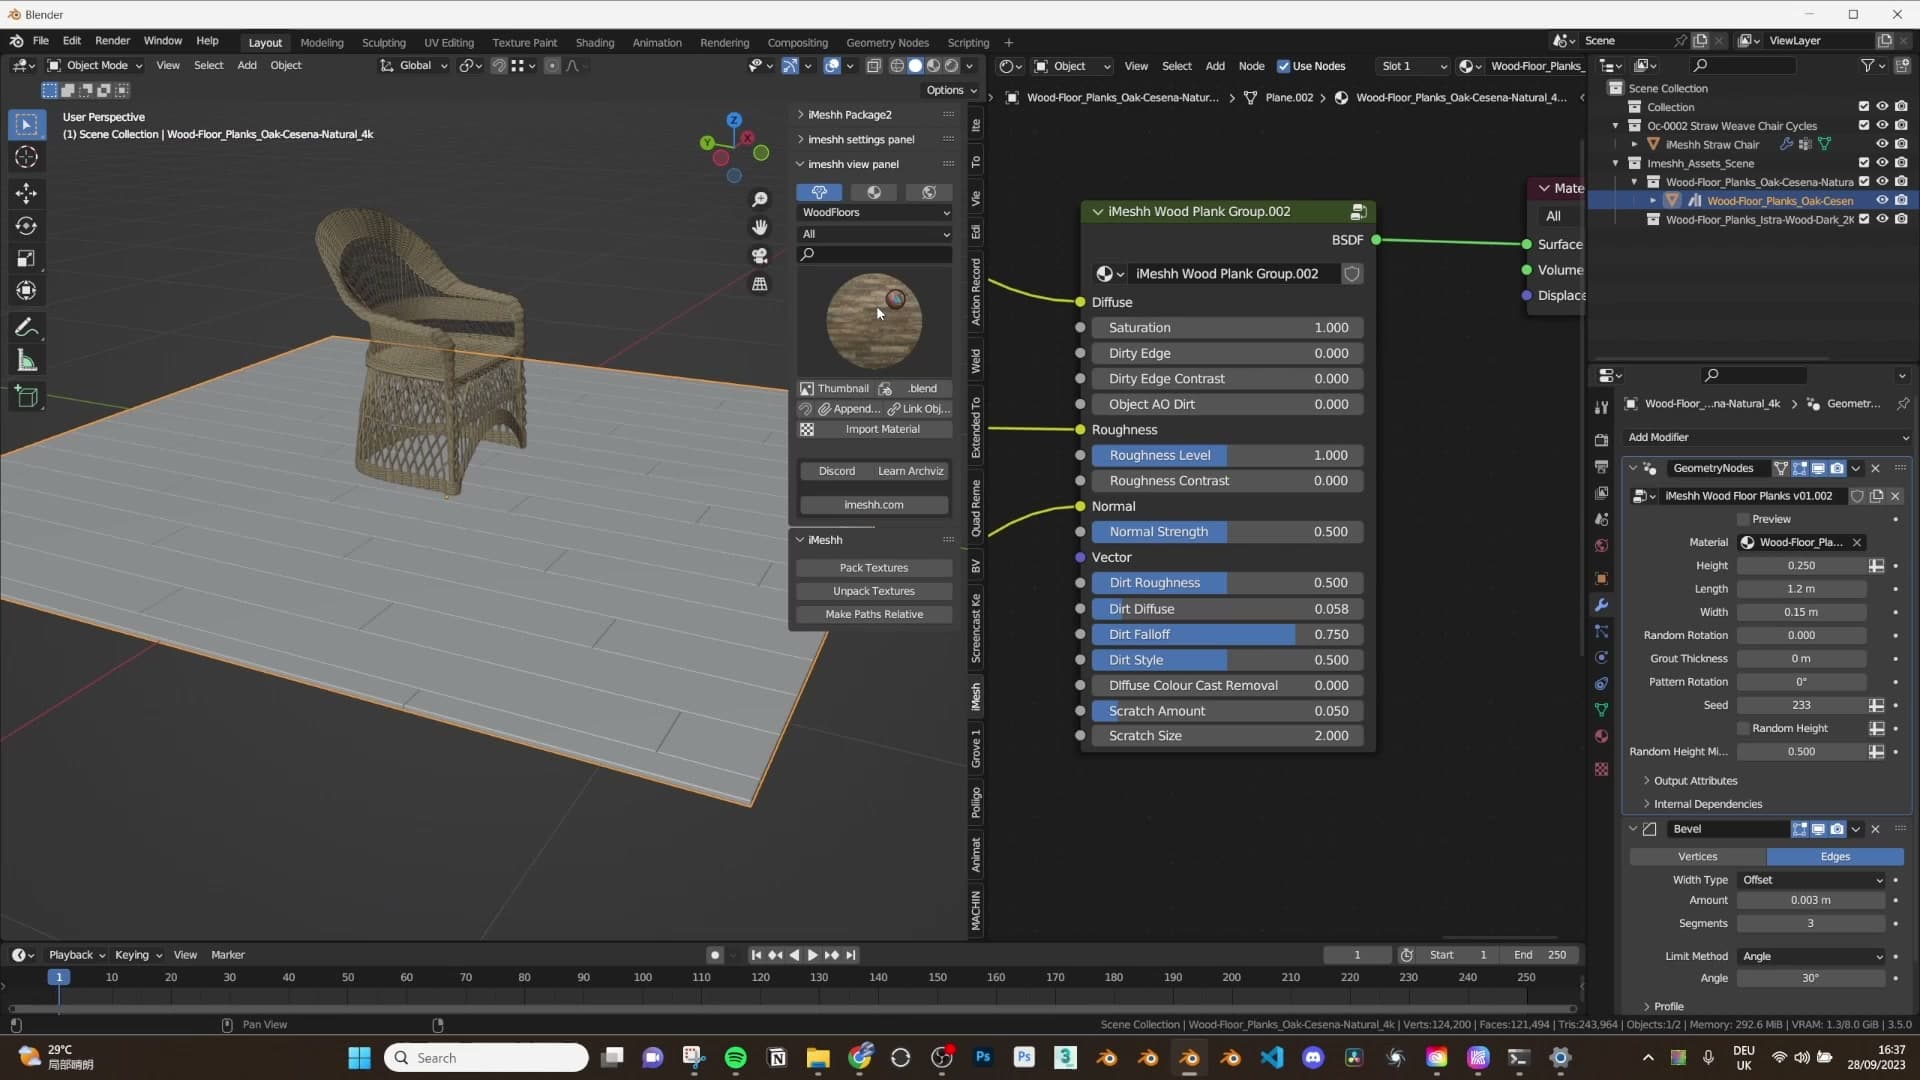
The textures behind those planks aren't stock PBR scans. They're supplied by a high-quality wood floor manufacturer. That source matters for archviz close-ups, where manufacturer-grade plank scans tend to hold up under direct light far better than the tiled photographs you find in most generic libraries.
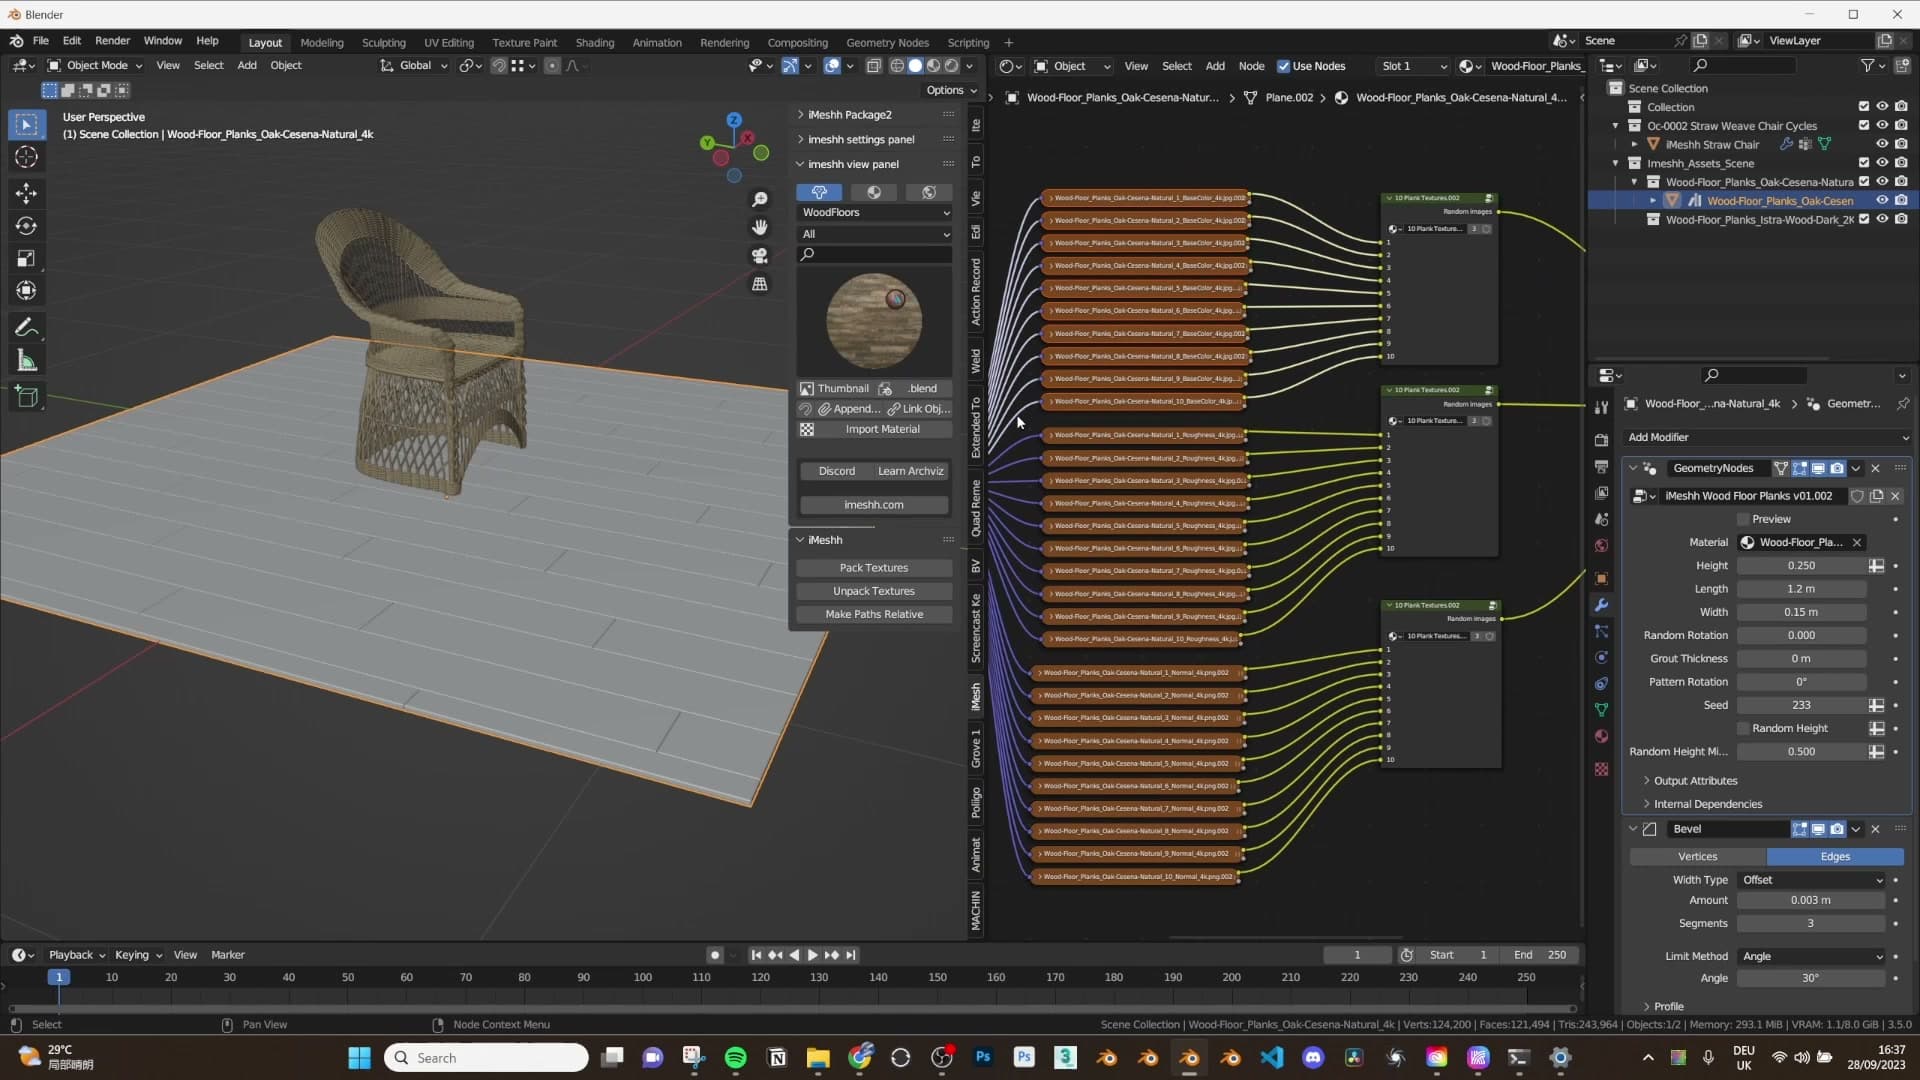
Inside each material you get around ten unique planks, and the iMeshh team has generated matching roughness and normal maps for every one. Once those ten variants are scattered across the geometry nodes pattern and repeated across a full floor, the surface stops showing recognisable repeats long before the eye starts hunting for them.
4K, 2K and 1K options without the VRAM hit
Every plank ships at three resolutions: 4K, 2K and 1K. In practice 2K and 1K look fine for most scenes, because with ten planks scattered and tiled across an entire floor, individual texture detail rarely sits close enough to the camera to give itself away.
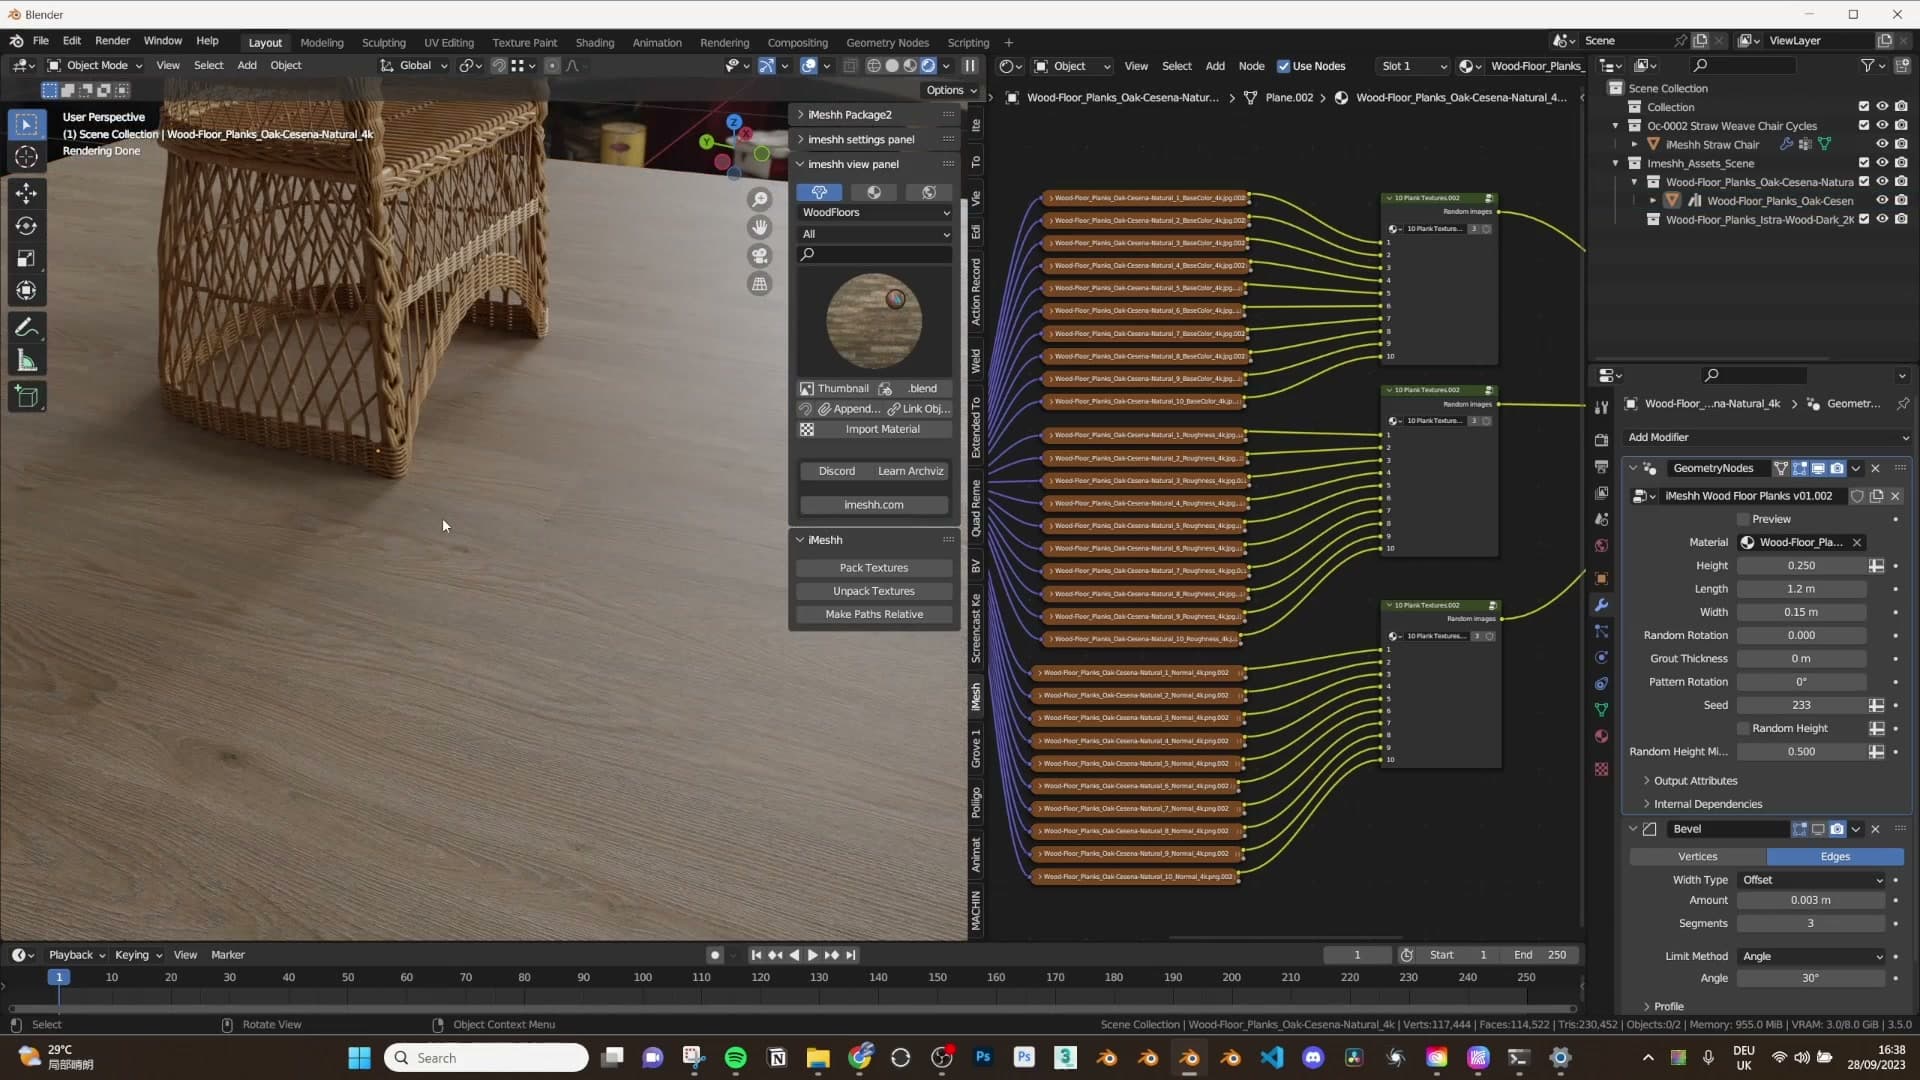
Save the 4K set for hero shots where the camera is right down on the floorboards: close-up product renders, low-angle furniture stills, anything where a single plank fills a meaningful chunk of frame. That's where the manufacturer-scan quality earns its keep.
Toggling the bevel modifier off gives you a clean, modern laminate look with crisp edges between planks. Switch it back on for the more traditional engineered finish with a soft chamfer along each seam.
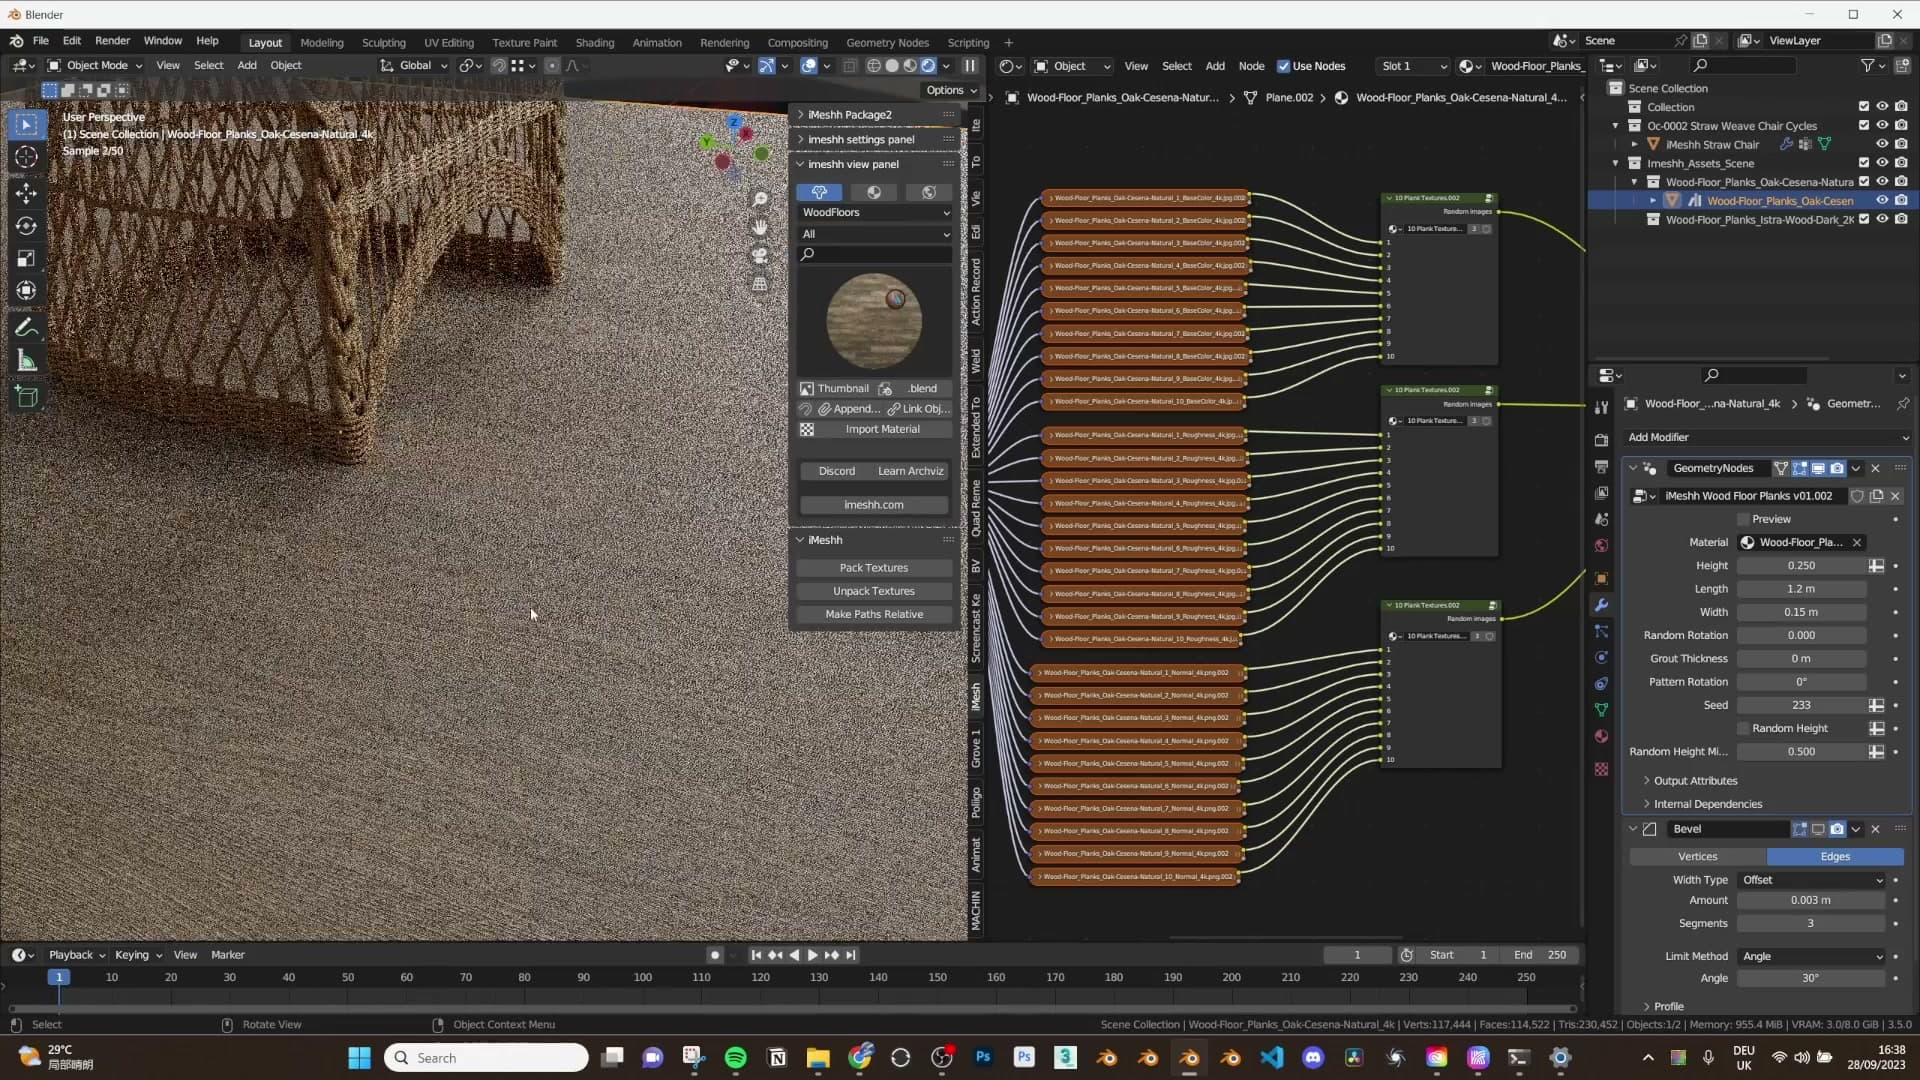
Thirty textures per material sounds like a VRAM disaster, but it isn't. Each plank texture is 4K tall but only 512px wide, so it takes roughly eight of them to cover the same area as one square 4K map. Stack all thirty together and you end up with a footprint of about four 4K textures, the same as a perfectly ordinary PBR material with diffuse, roughness and normal maps plus a couple of masks.
The payoff is high-quality close-ups with no visible tiling and barely any extra VRAM cost over a single-plank floor.
Fitting the floor to your room
How to resize the underlying mesh in edit mode, drop your existing room floor into the Boolean to conform the planks, and toggle preview mode to bypass Blender's slow Boolean while iterating.
Editing the floor shape directly in edit mode
With the bevel toggled back on so you can see the actual plank shape, you can drop straight into edit mode and edit the floor's underlying mesh. Grab an edge, drag it across, and the geometry nodes setup populates the new area with planks on the fly. No need to re-trigger anything.
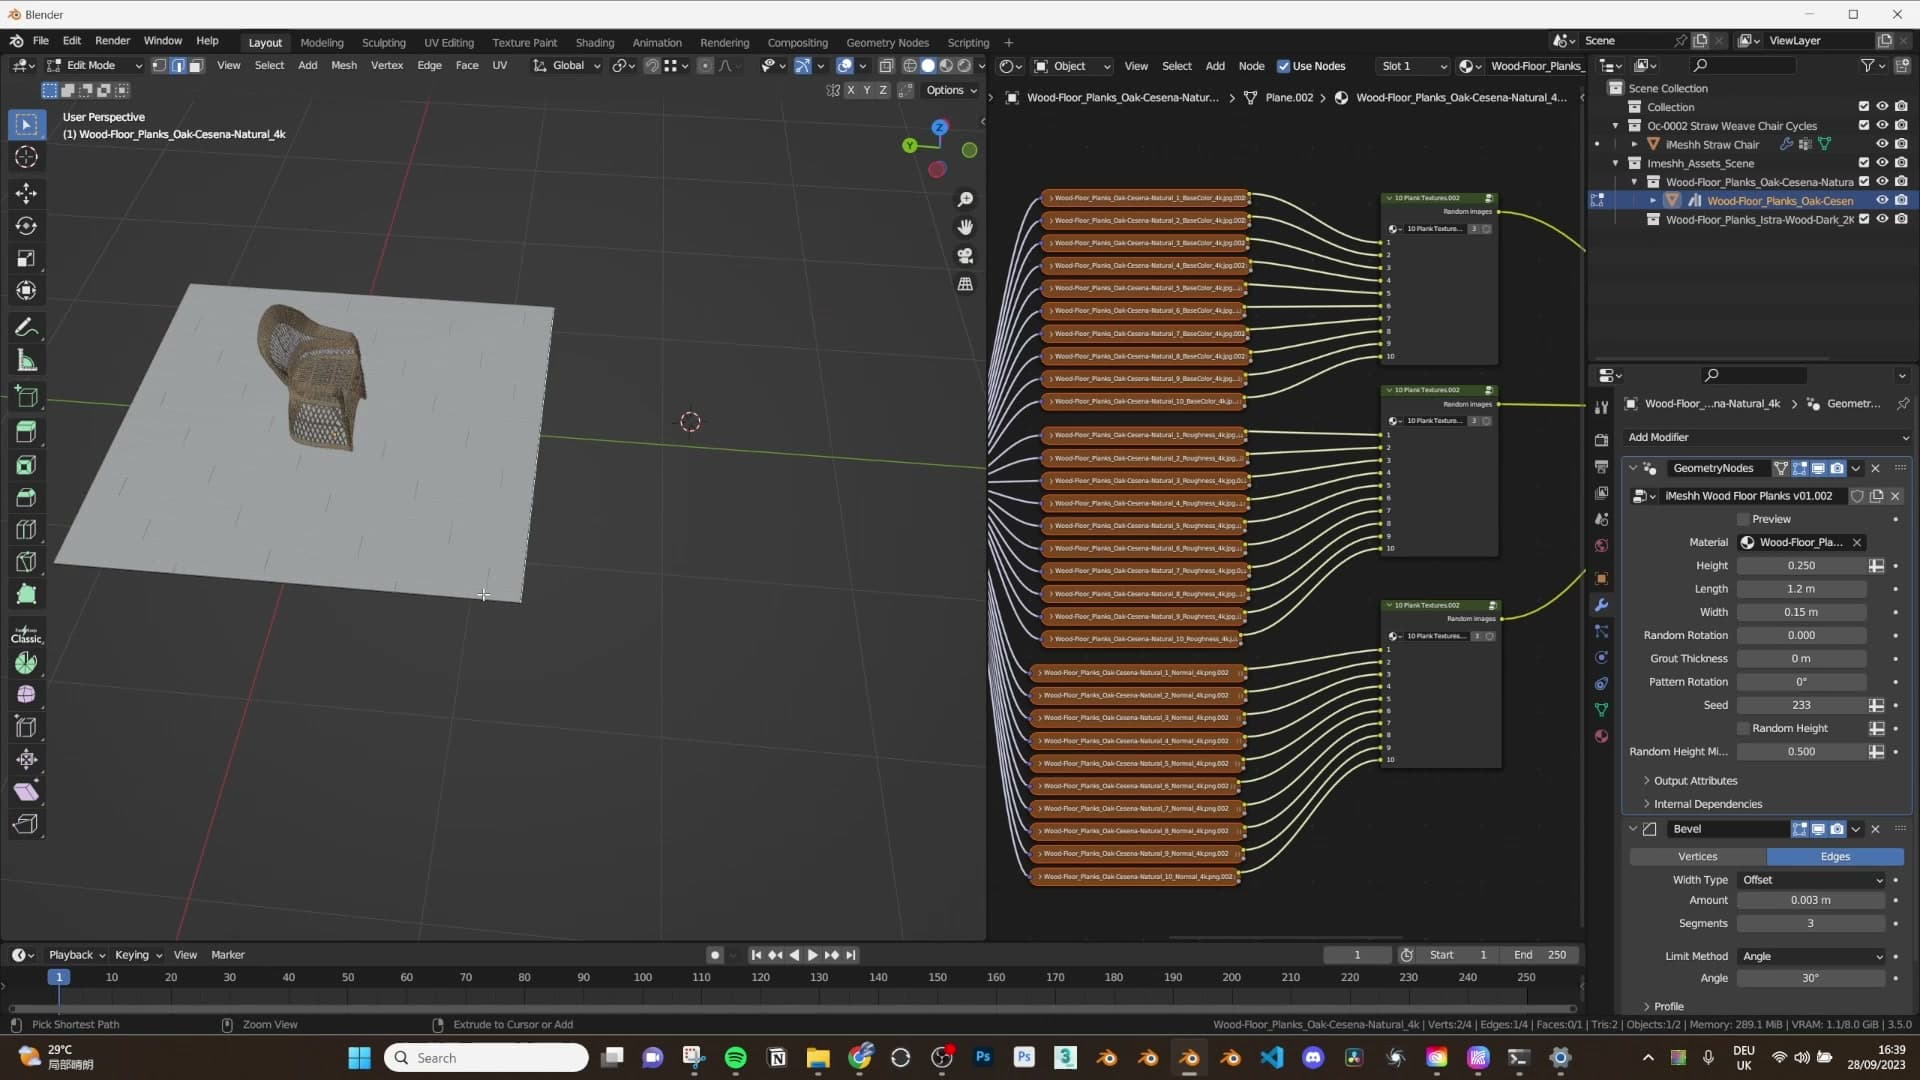
For a quick free-floating floor that isn't constrained to a specific room outline, that's all there is to it: stretch the base mesh to roughly the size you need and the planks follow.
Using your existing room floor as the Boolean
Most of the time you'll already have a room floor in your scene that you want clad in wood, and the system is built for exactly that. Select your existing floor object and add it to the wood floor geometry nodes object as the Boolean target.
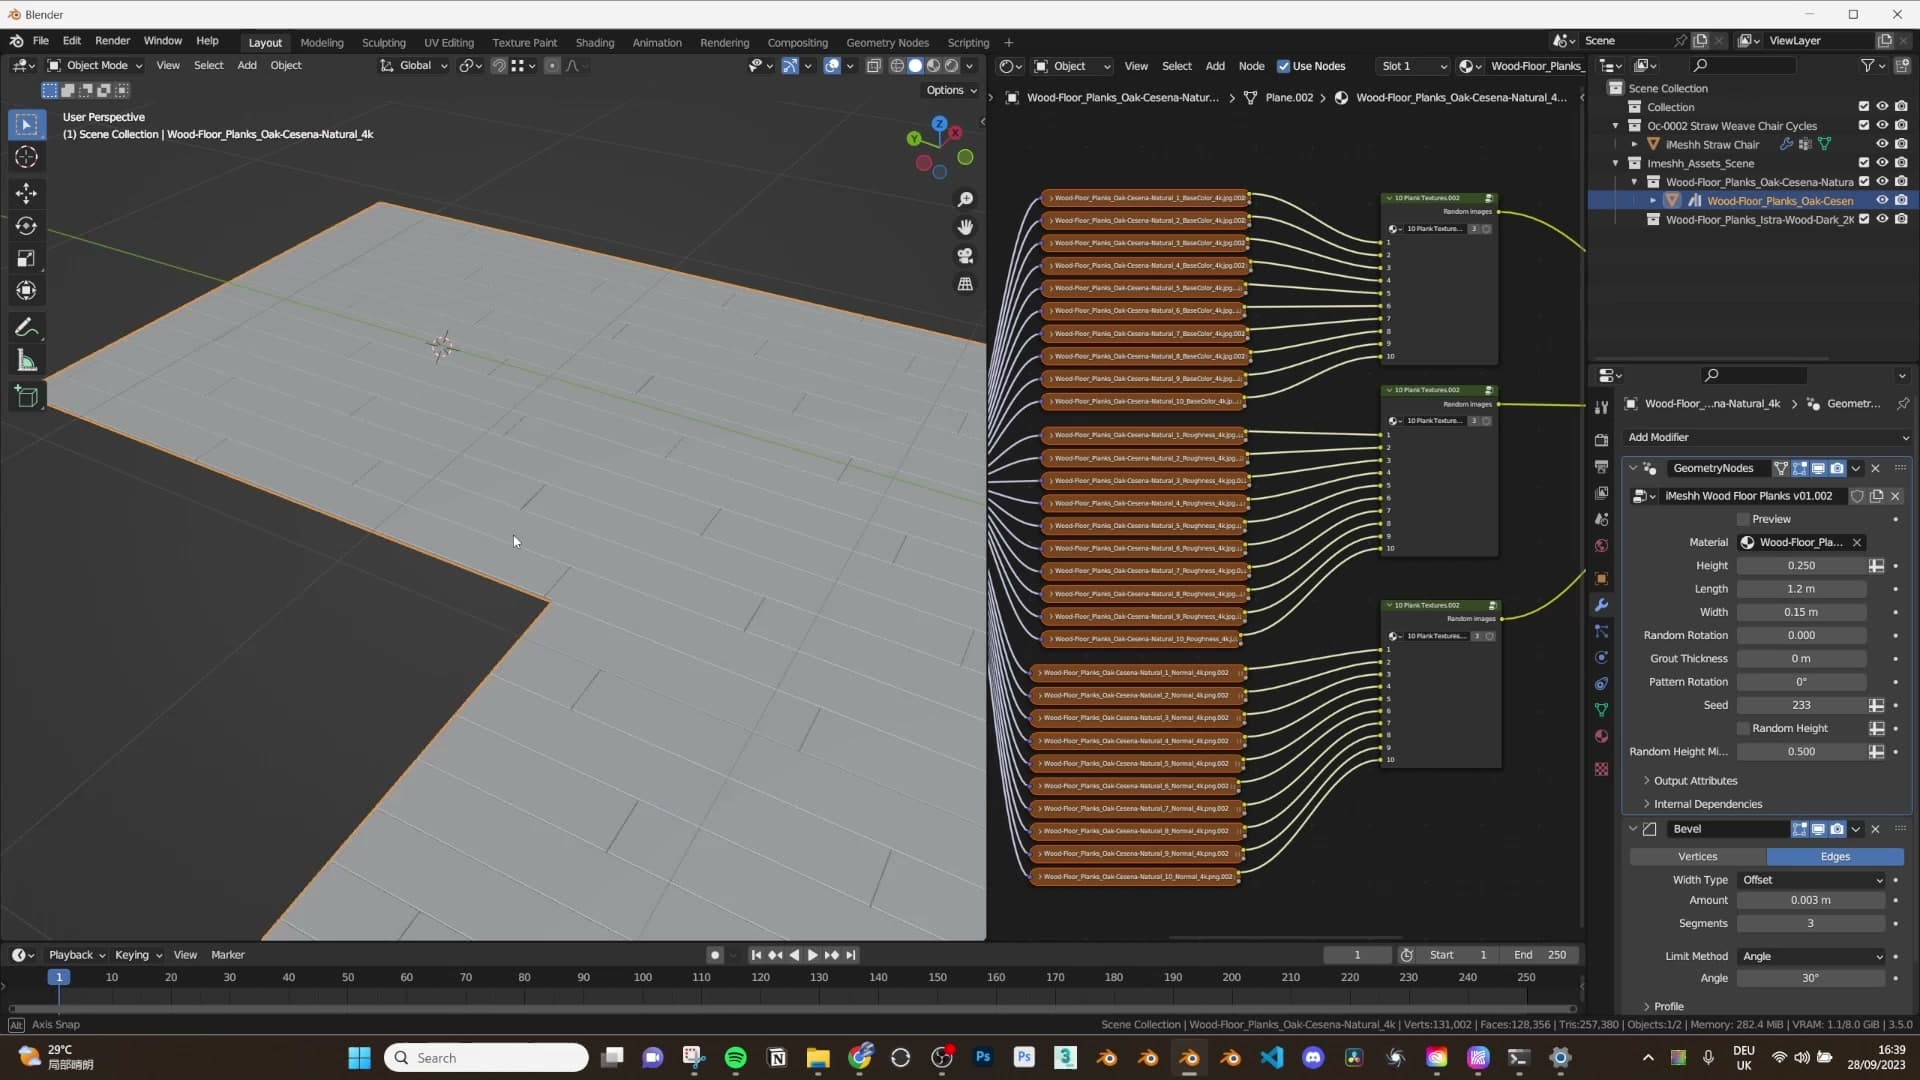
Make sure both planes sit on the same vertical level. If the room floor is offset above or below the geometry nodes mesh, the result won't line up. Once they're aligned, you don't need the original geometry nodes plane any more, so delete that mesh out.
The planks now conform to your room outline and you have a finished, Boolean-driven wood floor ready to keep tweaking.
Preview mode for fast iteration
Blender's Boolean modifier is notoriously slow, so the system ships with a preview setting that bypasses the full Boolean evaluation while you iterate. For a single isolated room without any connecting spaces, you can leave this enabled while dialling in plank size, rotation, grout and the rest. The viewport stays responsive and adjustments feel near-instant.
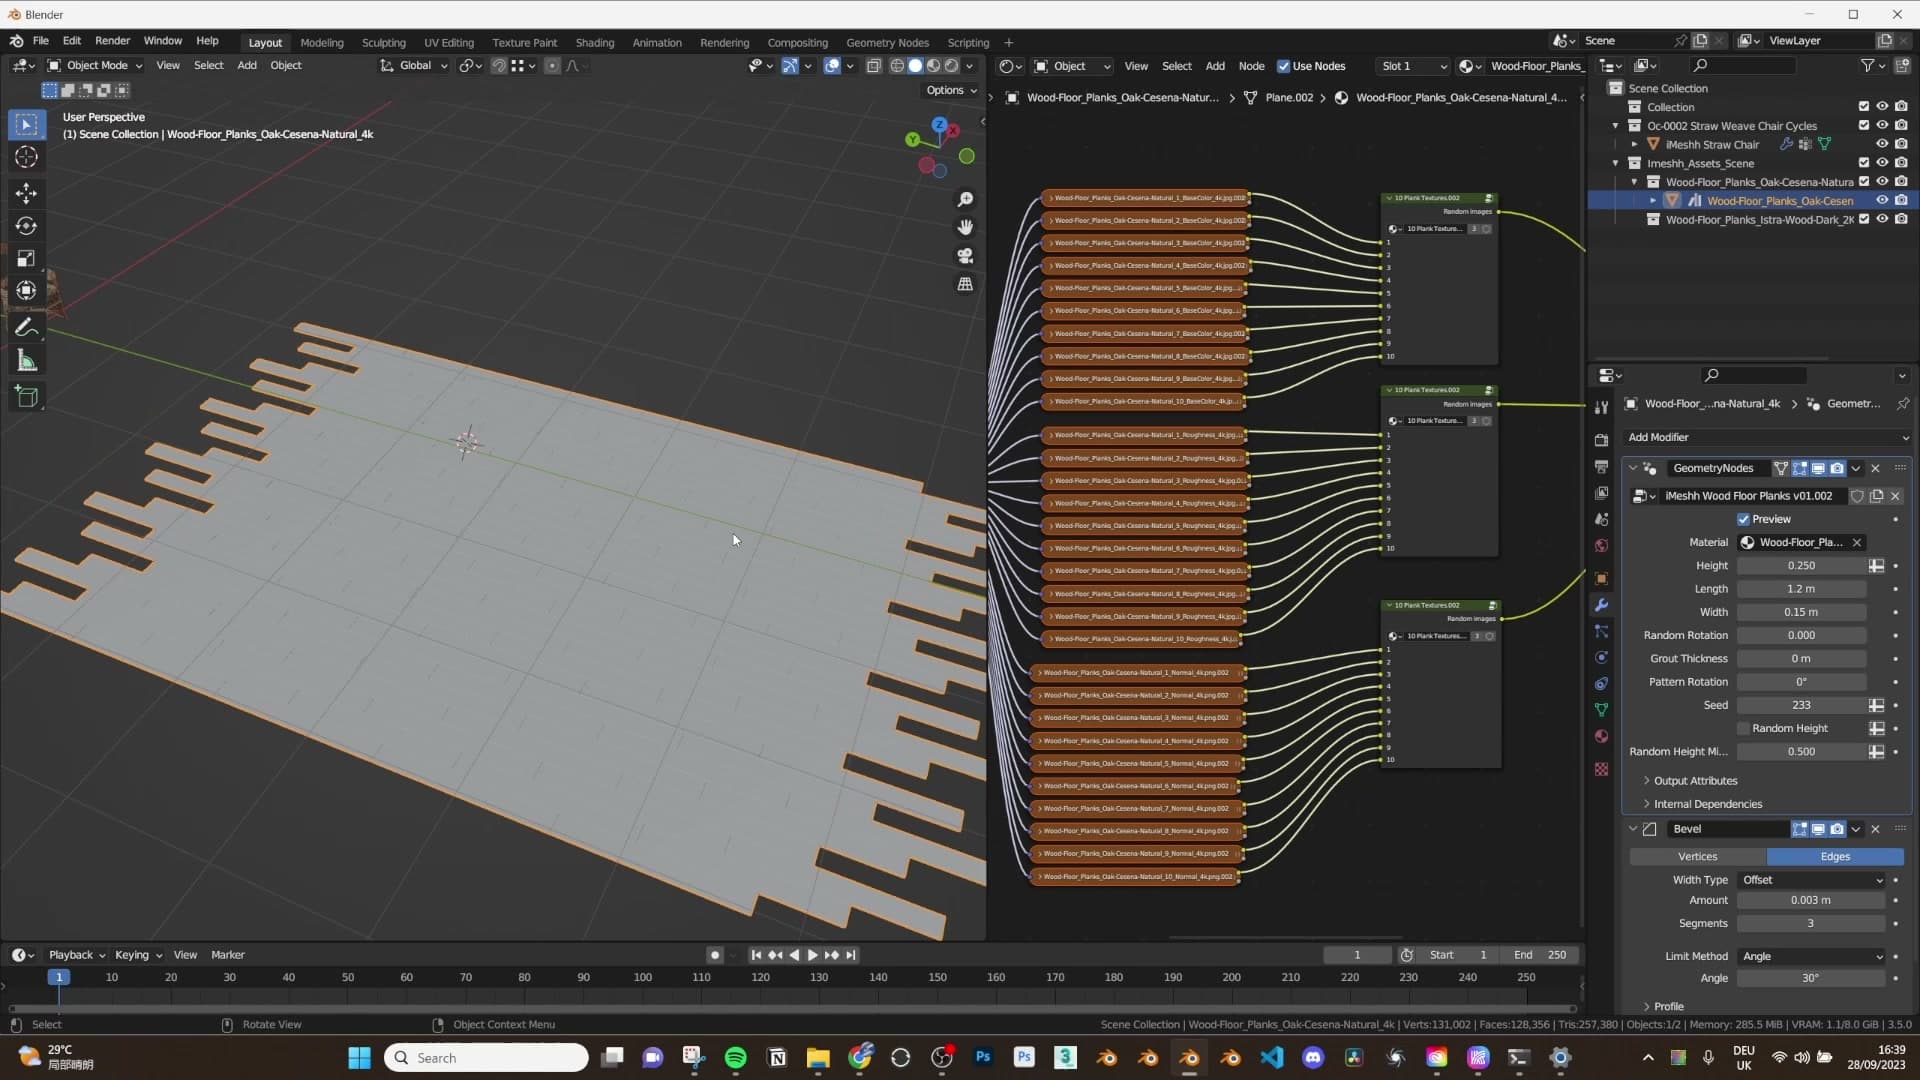
When the scene is simple, as it is here, the preview mode is the easiest way to keep edits fast without fighting the modifier on every change.
Standard, herringbone and chevron
Three pattern types share the same input panel. Swap by re-plugging the geometry node socket, then resize the planks because the herringbone and chevron defaults are intentionally large.
Swapping pattern types with a single socket plug
With the boolean preview behaving, step over to the geometry nodes side of the asset to see what the system actually exposes. Three pattern variants ship inside every wood floor object: standard planks, herringbone and chevron.
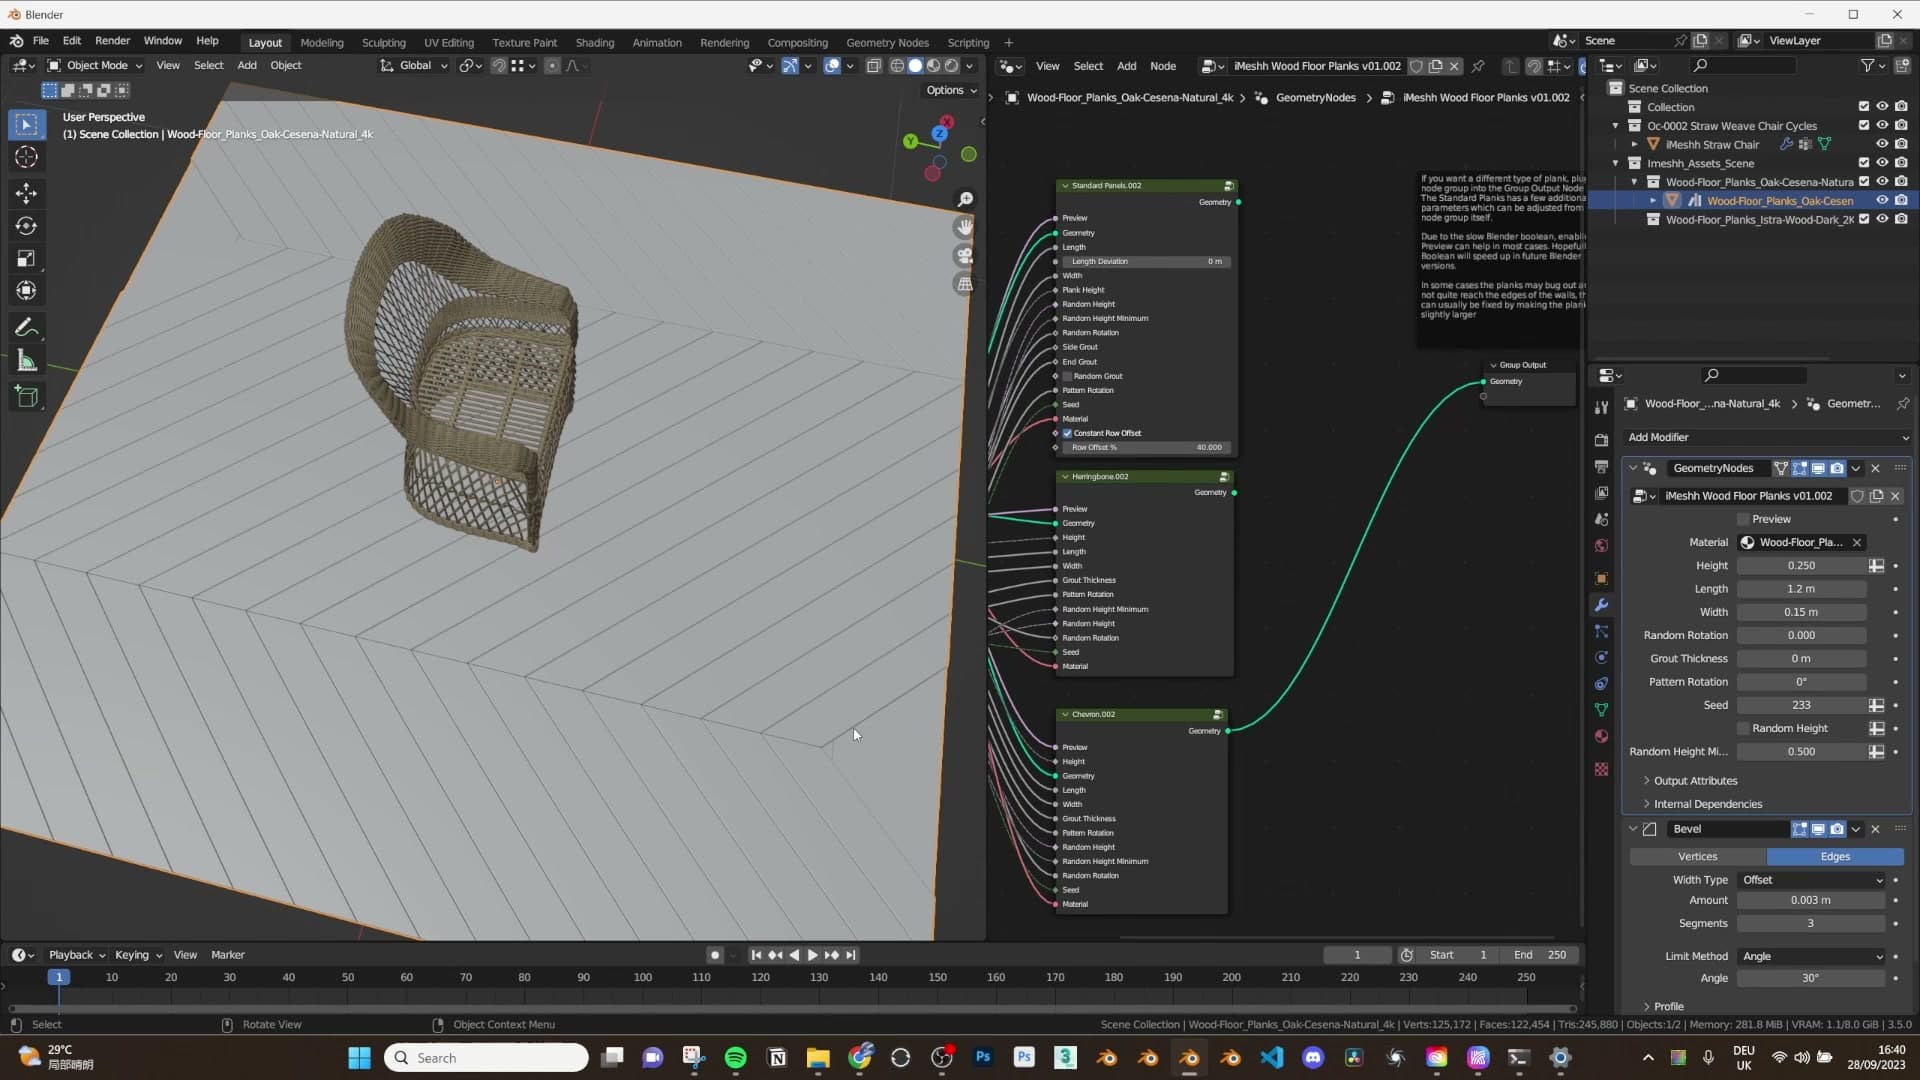
Switching between them is a single action. Plug the pattern you want into the geometry nodes output socket and the floor rebuilds instantly. The input panel does not change between patterns, so any settings you have already tuned carry over from one variant to the next without re-entering values.
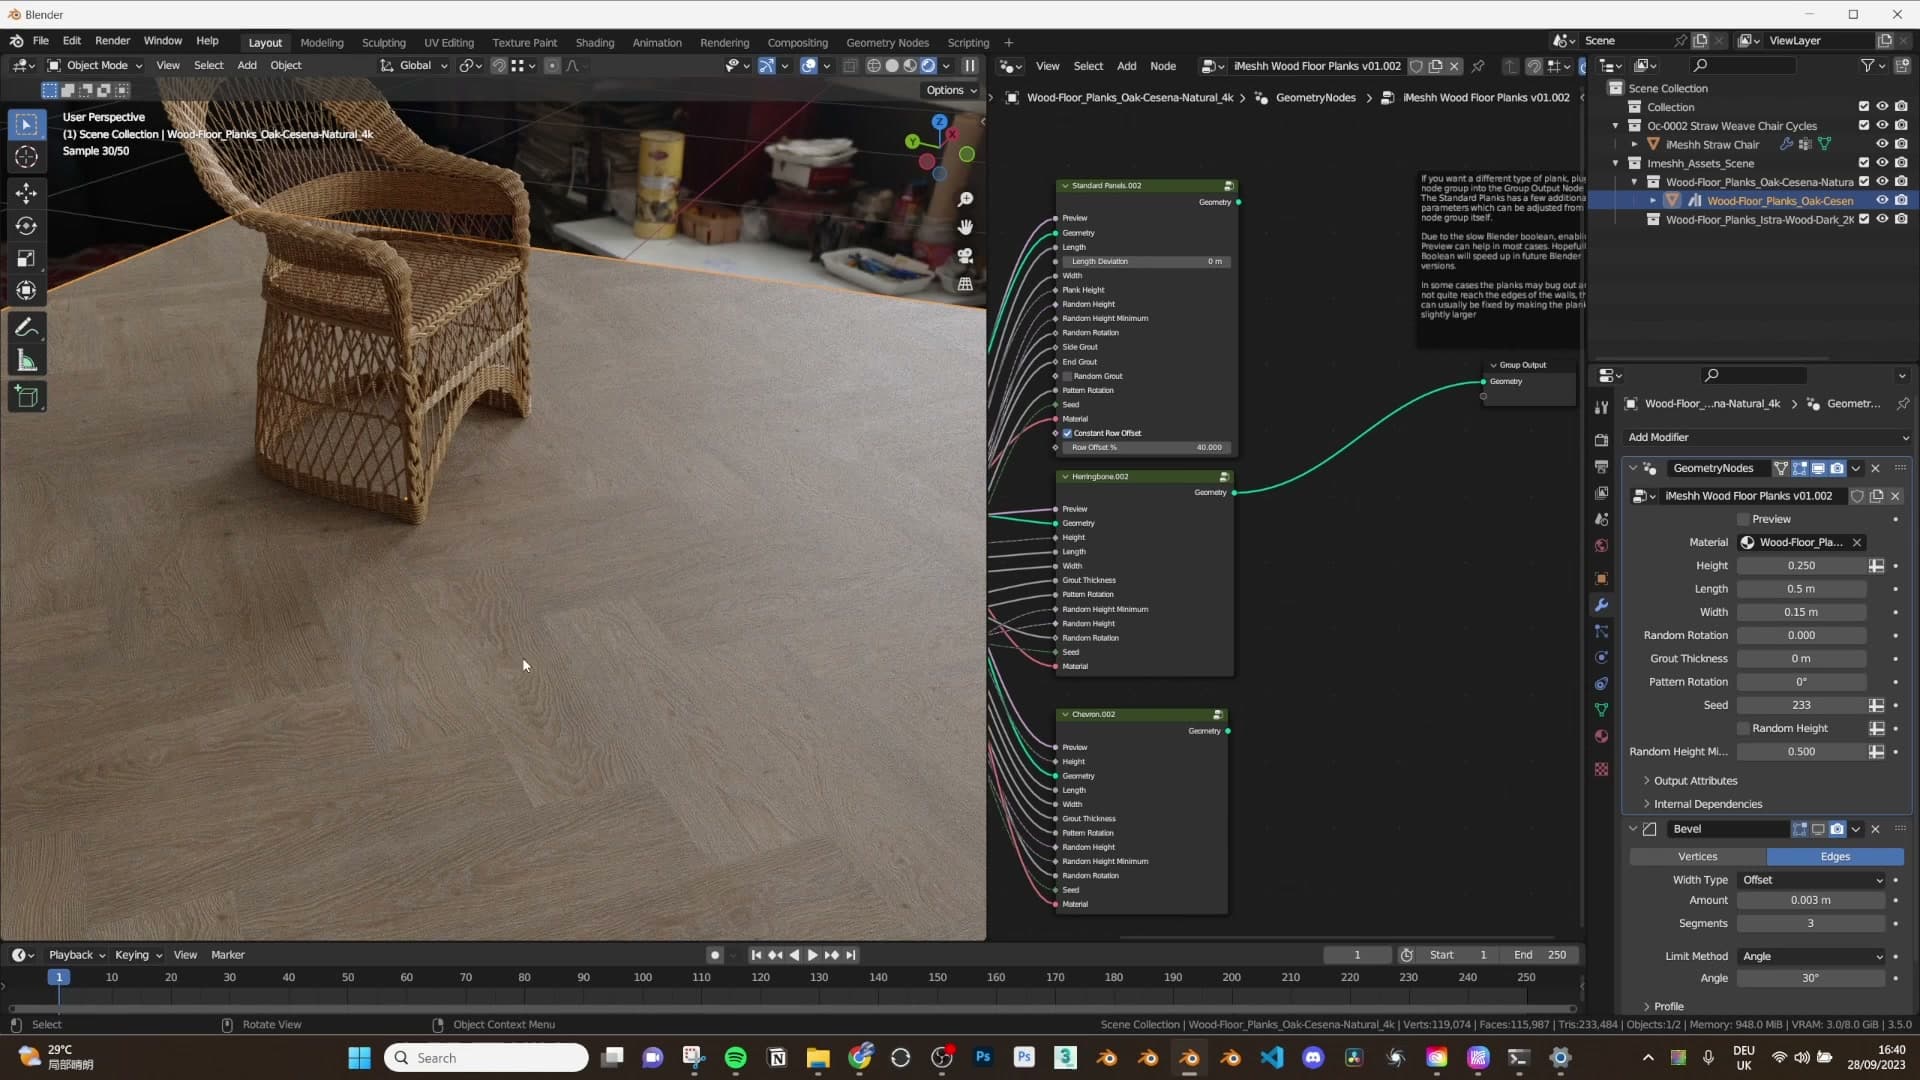
Chevron occasionally clashes with the boolean at default scale, but that is a sizing issue rather than a node problem. The fix lives in the next sub-lesson.
Scaling planks down for herringbone and chevron
Both herringbone and chevron ship with deliberately oversized planks so the pattern reads clearly the moment you preview the asset. For a realistic interior you will want to drop the dimensions before rendering.
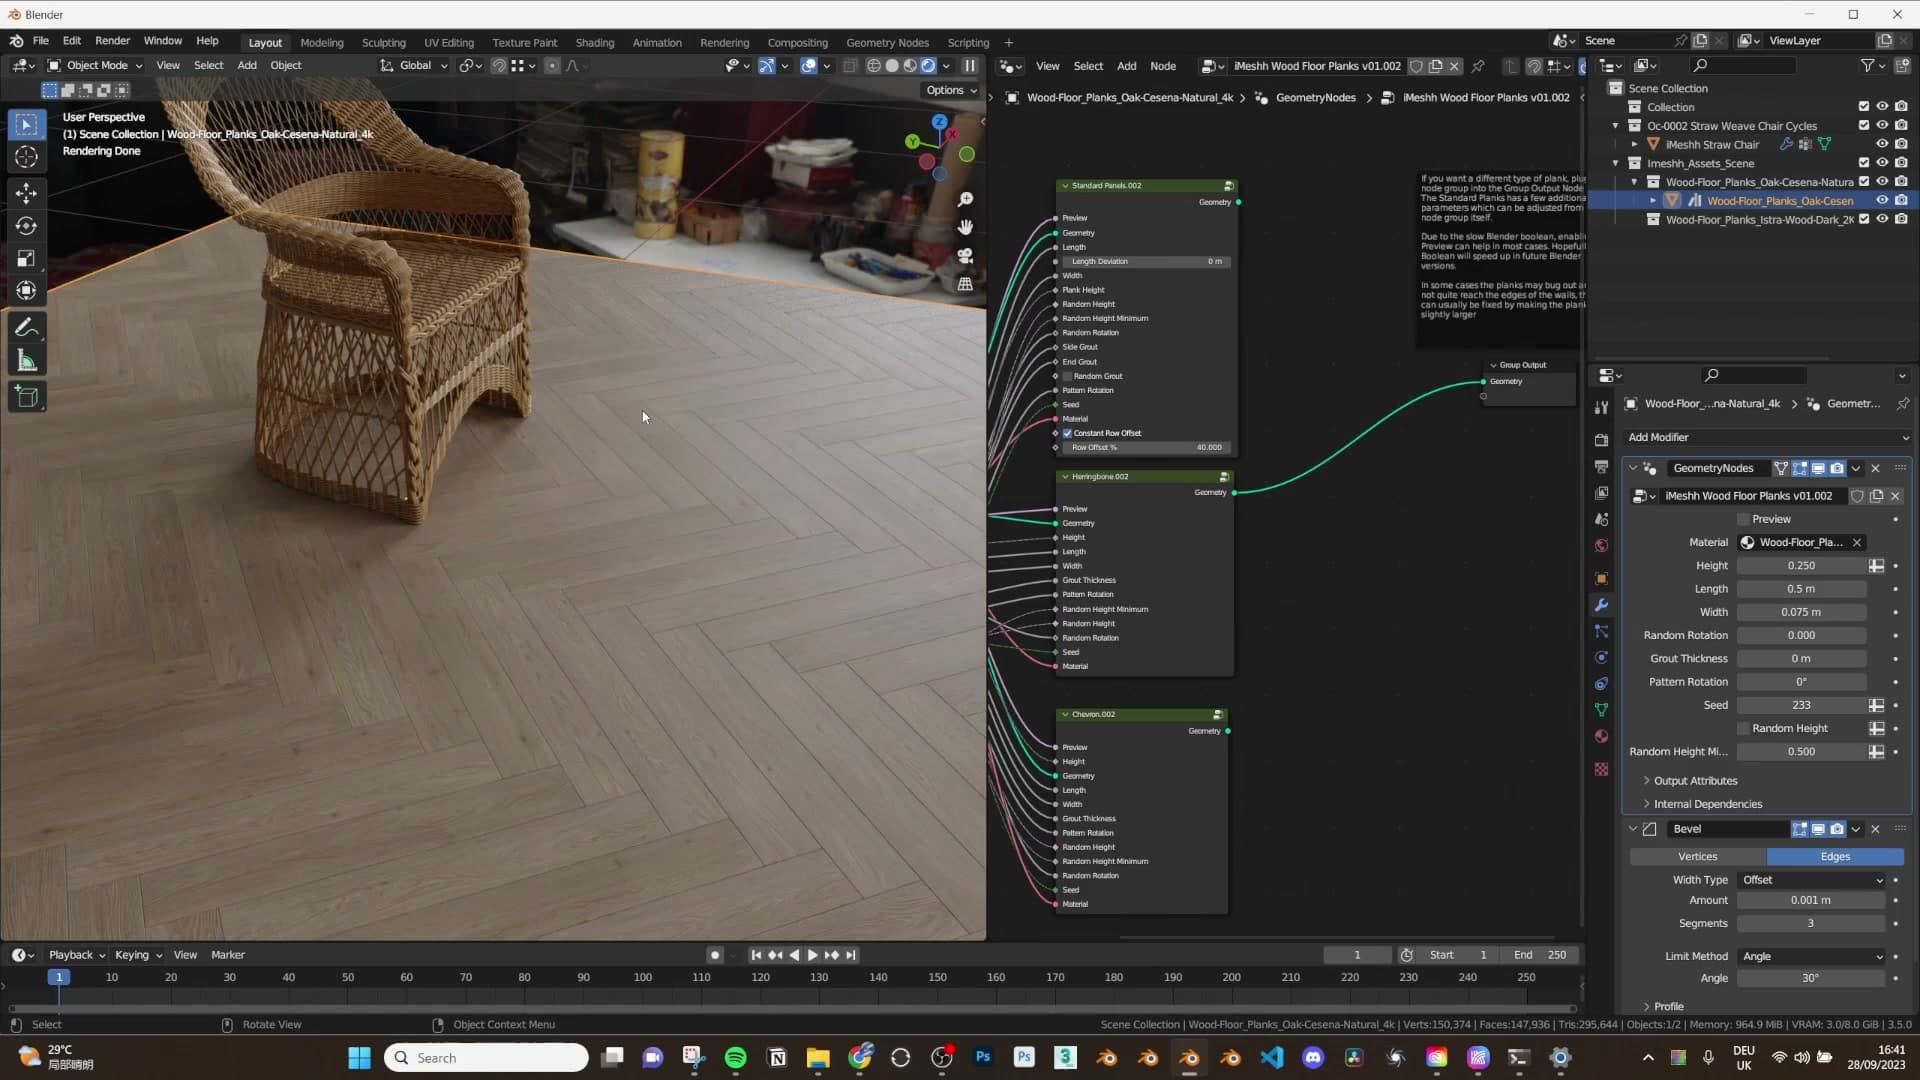
Chevron is the most sensitive of the three patterns. If the boolean misbehaves at default scale, simply scale the pattern down. A smaller chevron resolves the glitch and gives a more believable floor in one move.
Herringbone behaves the same way. The default planks read more like a gallery floor than a living room, so set the plank width to 0.075 in the input panel and the proportions settle into a natural domestic scale.
From there a light bevel finishes the planks off nicely if you want softer edges, and because the textures are 4K you can push the camera right in without the surface breaking down.
Plank shape and layout controls
Set the thickness, grout distance and footprint of each plank, then introduce length deviation and row offset for a staggered, lived-in look that doesn't break the Boolean.
Height, grout distance, width and length
The first cluster of inputs controls the physical footprint of each plank. Height sets the thickness, specifically how far the plank stands proud of the floor plane. With the bevel temporarily disabled, you can read the thickness more honestly while you dial it in.
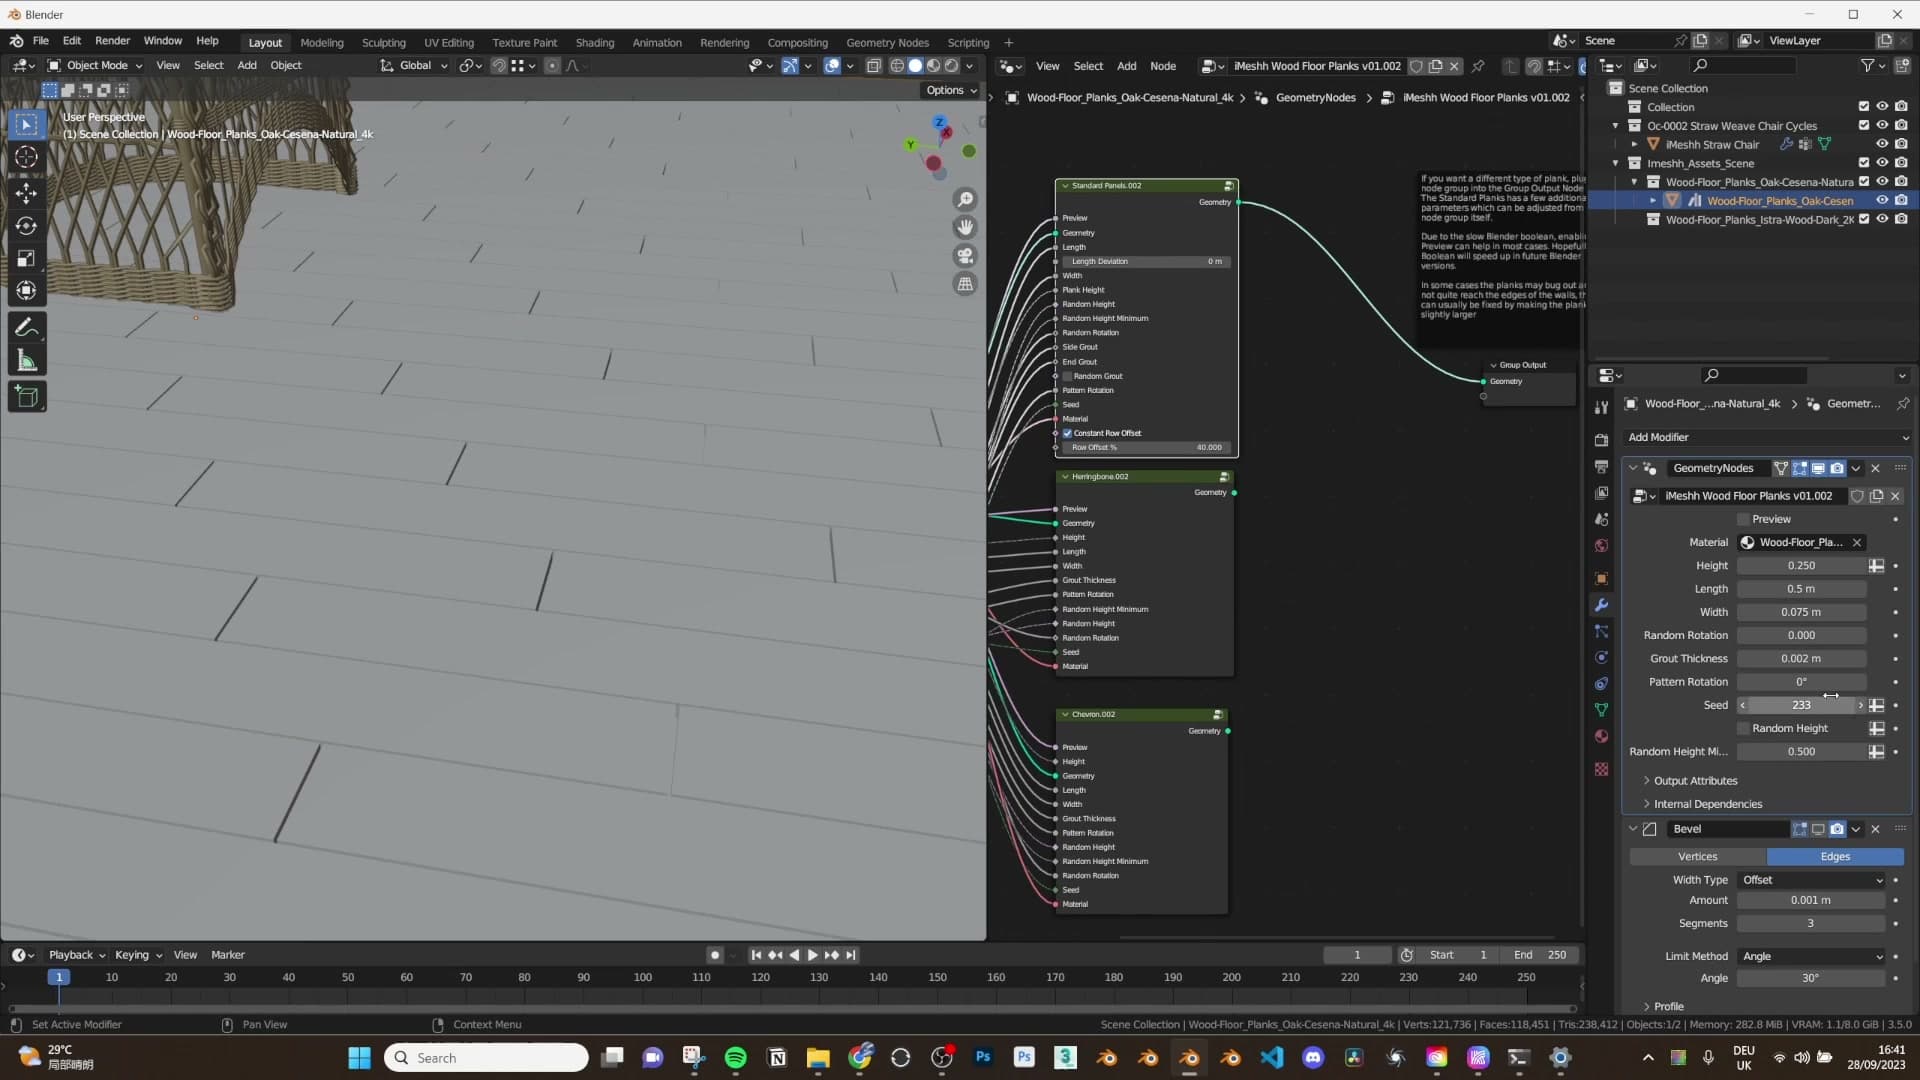
Grout distance is the gap between neighbouring planks. Push it up and the individual planks separate visually instead of reading as one continuous surface, which is useful when you want the floor to look like discrete boards rather than a sheet. Width and length then size each plank to taste.
These four inputs are the baseline shape controls and they behave the same way regardless of which pattern you have plugged in, so you can lock the plank dimensions in early and not revisit them when you swap between patterns later.
Length deviation and random row offset
The standard plank pattern exposes a couple of extra controls that the herringbone and chevron variants don't need. The first is length deviation. Turn it up and individual planks start varying in length slightly, which immediately breaks the cloned, every-board-identical look.
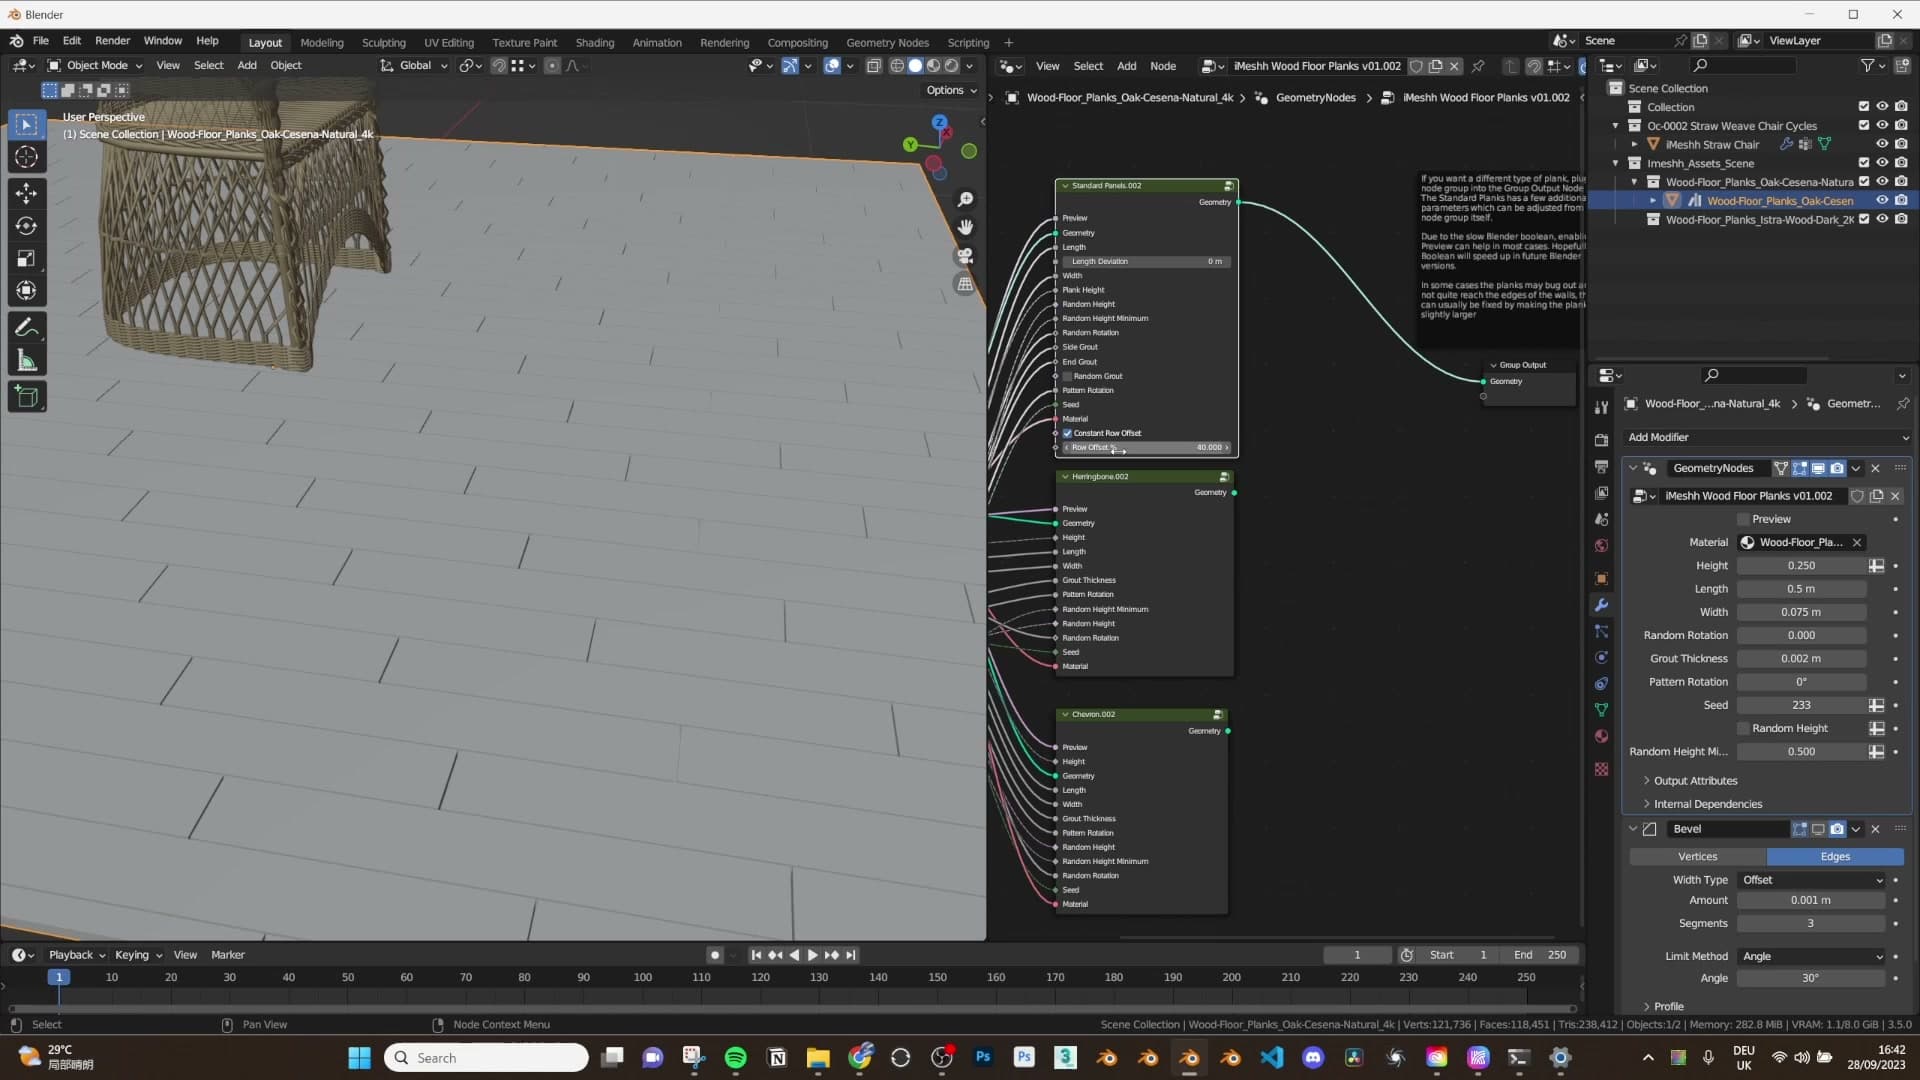
You can push deviation fairly hard before it stops reading as natural, but there's a ceiling: take it too far and it will actually break the Boolean. Keep it within a sensible range and it stays well-behaved.
The second is the random row offset. At 50% each row sits exactly half a plank off the one above it, giving the classic running-bond look. At 25% the offset is smaller and the floor starts to read as staggered rather than perfectly aligned. Drop to 5% and it's barely offset at all.
A range of 30 to 40% tends to land closest to a real-world floor, so that's a good starting point when you want the layout to feel natural rather than mechanically uniform.
Constant row offset on or off
Sitting alongside the row offset value is a toggle for constant row offset. With it on, every row steps by the same amount, which is how the overwhelming majority of real floor panels are actually laid.
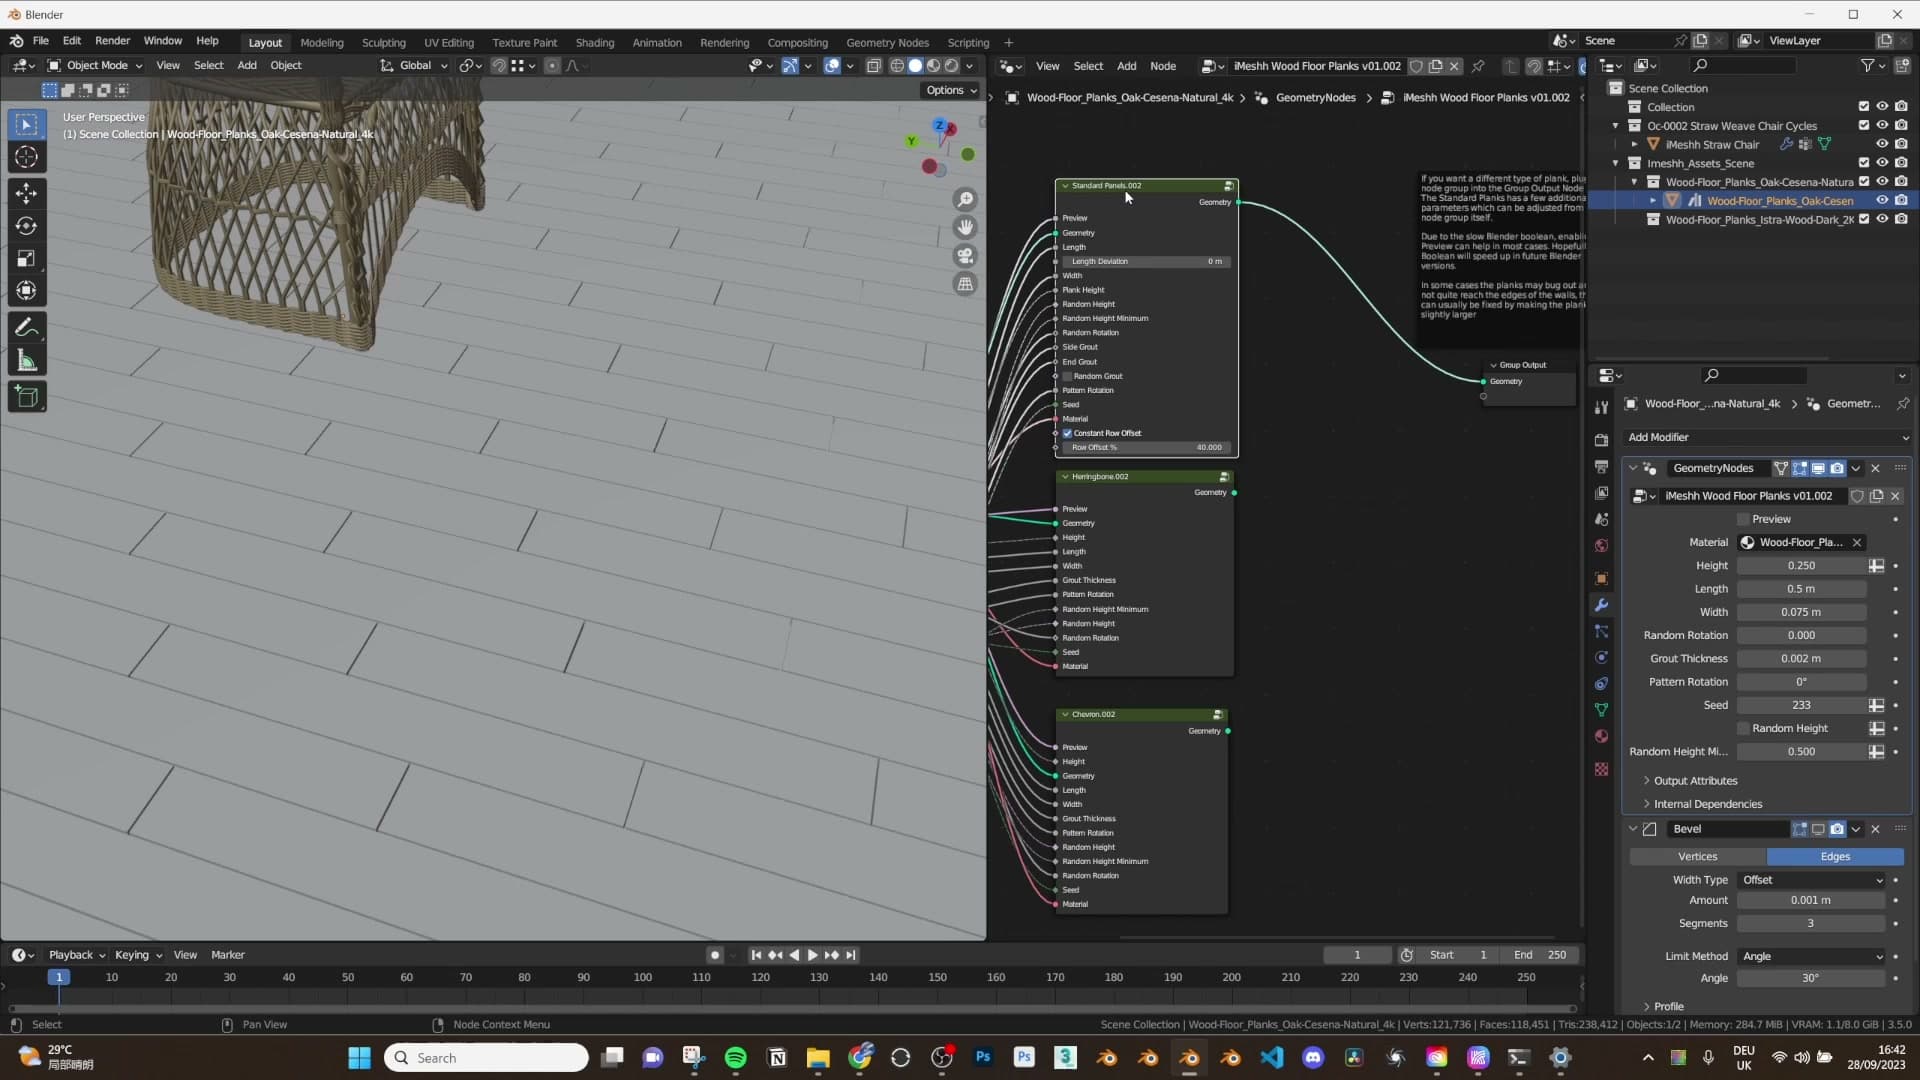
You can disable it if you want a less regular cadence between rows, but most of the time you'll want to leave it enabled. It matches how standard plank floors are installed in practice.
Randomization controls for natural floors
Per-plank rotation breaks up flat layouts, pattern rotation orients the whole floor at any angle, the seed reshuffles the texture allocation, and random height adds subtle plank-to-plank thickness variation.
Random rotation for an old, bowed floor look
The next slider is random rotation, which tilts each plank by a tiny amount relative to its neighbours so the layout stops looking laser-flat. Crank it up and the variation becomes obvious. Every board takes a slightly different angle and the floor reads as deliberately broken.
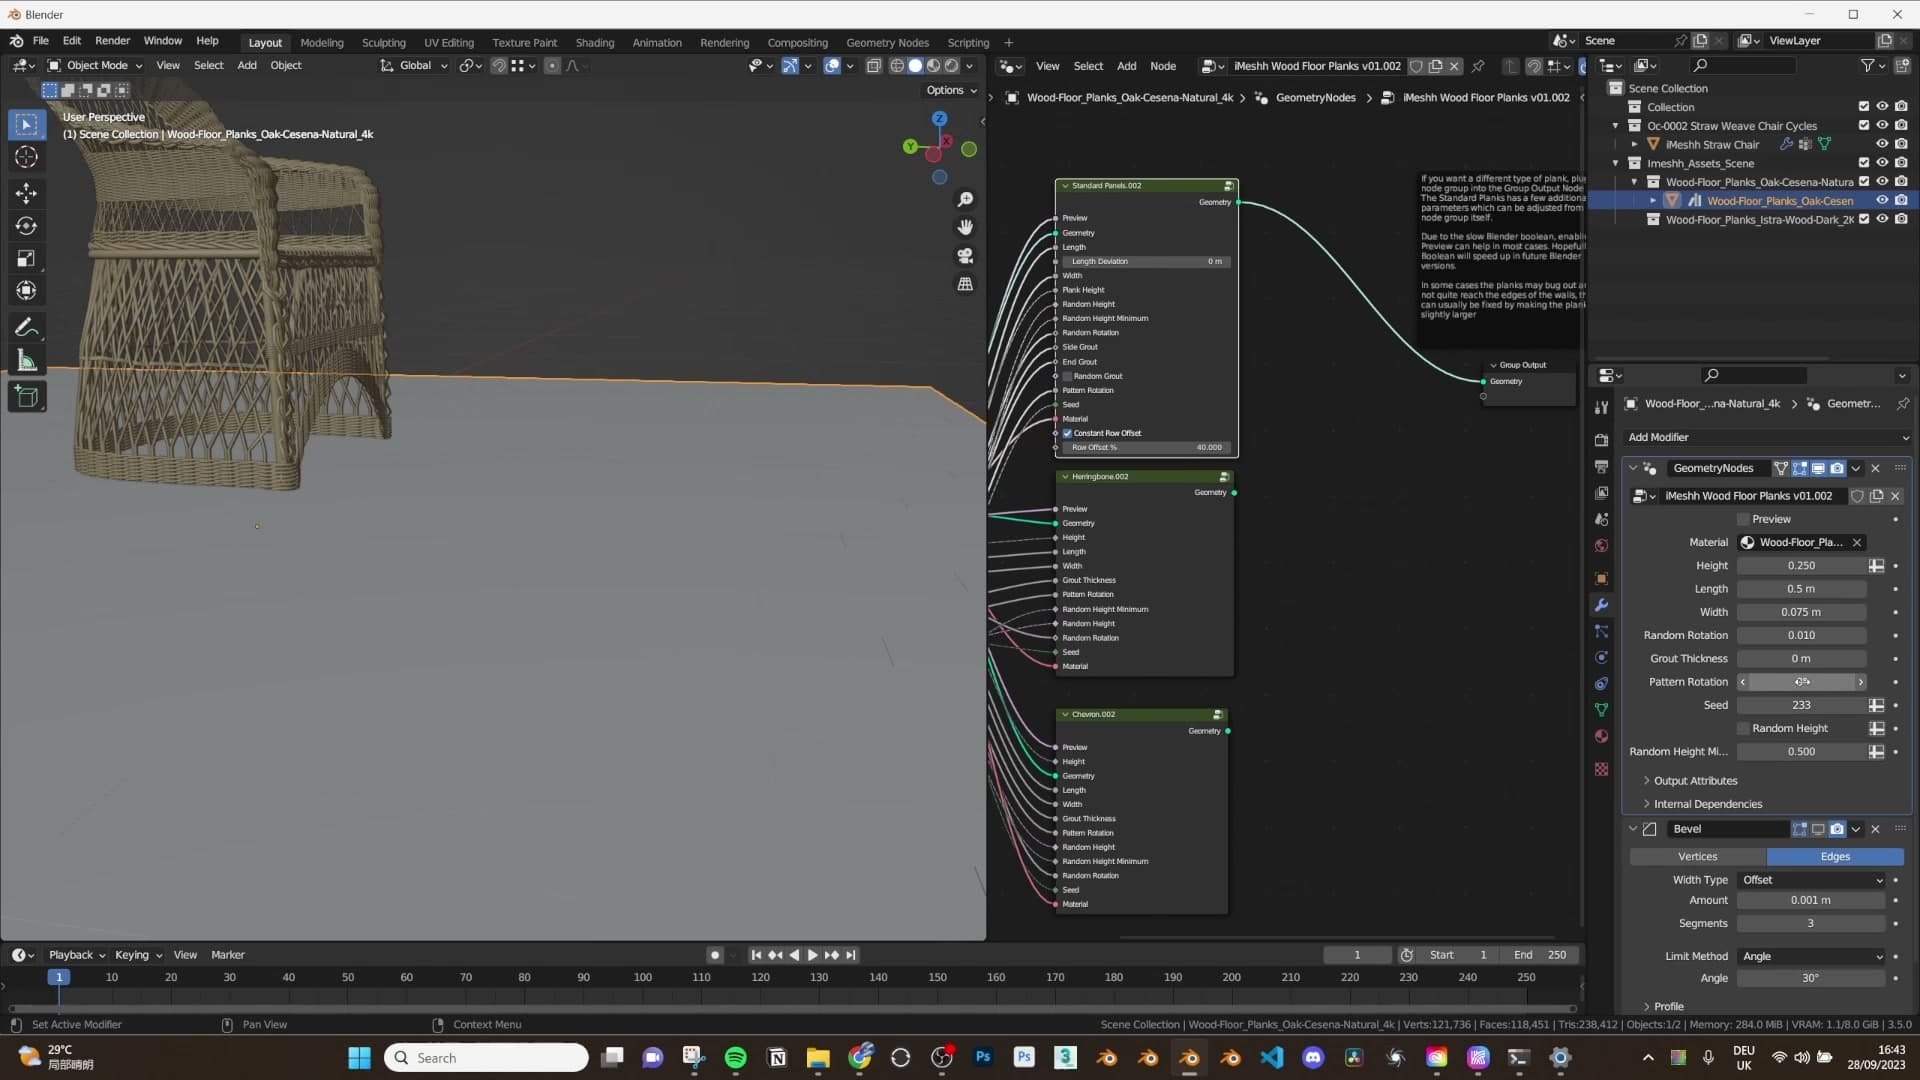
0.1 is already too aggressive for most rooms. Push it that far and the effect becomes cartoonish. 0.05 is the sweet spot: barely perceptible per plank, but across the whole floor it suggests an older floor where individual boards have started to bow and settle over time.
Pattern rotation and the seed control
Below random rotation sits pattern rotation, which turns the entire floor layout rather than individual planks. Drop a wood floor into your scene and find the boards running across the room when you wanted them running down it. Set pattern rotation to 90 degrees and the whole pattern flips perpendicular without re-fitting anything.
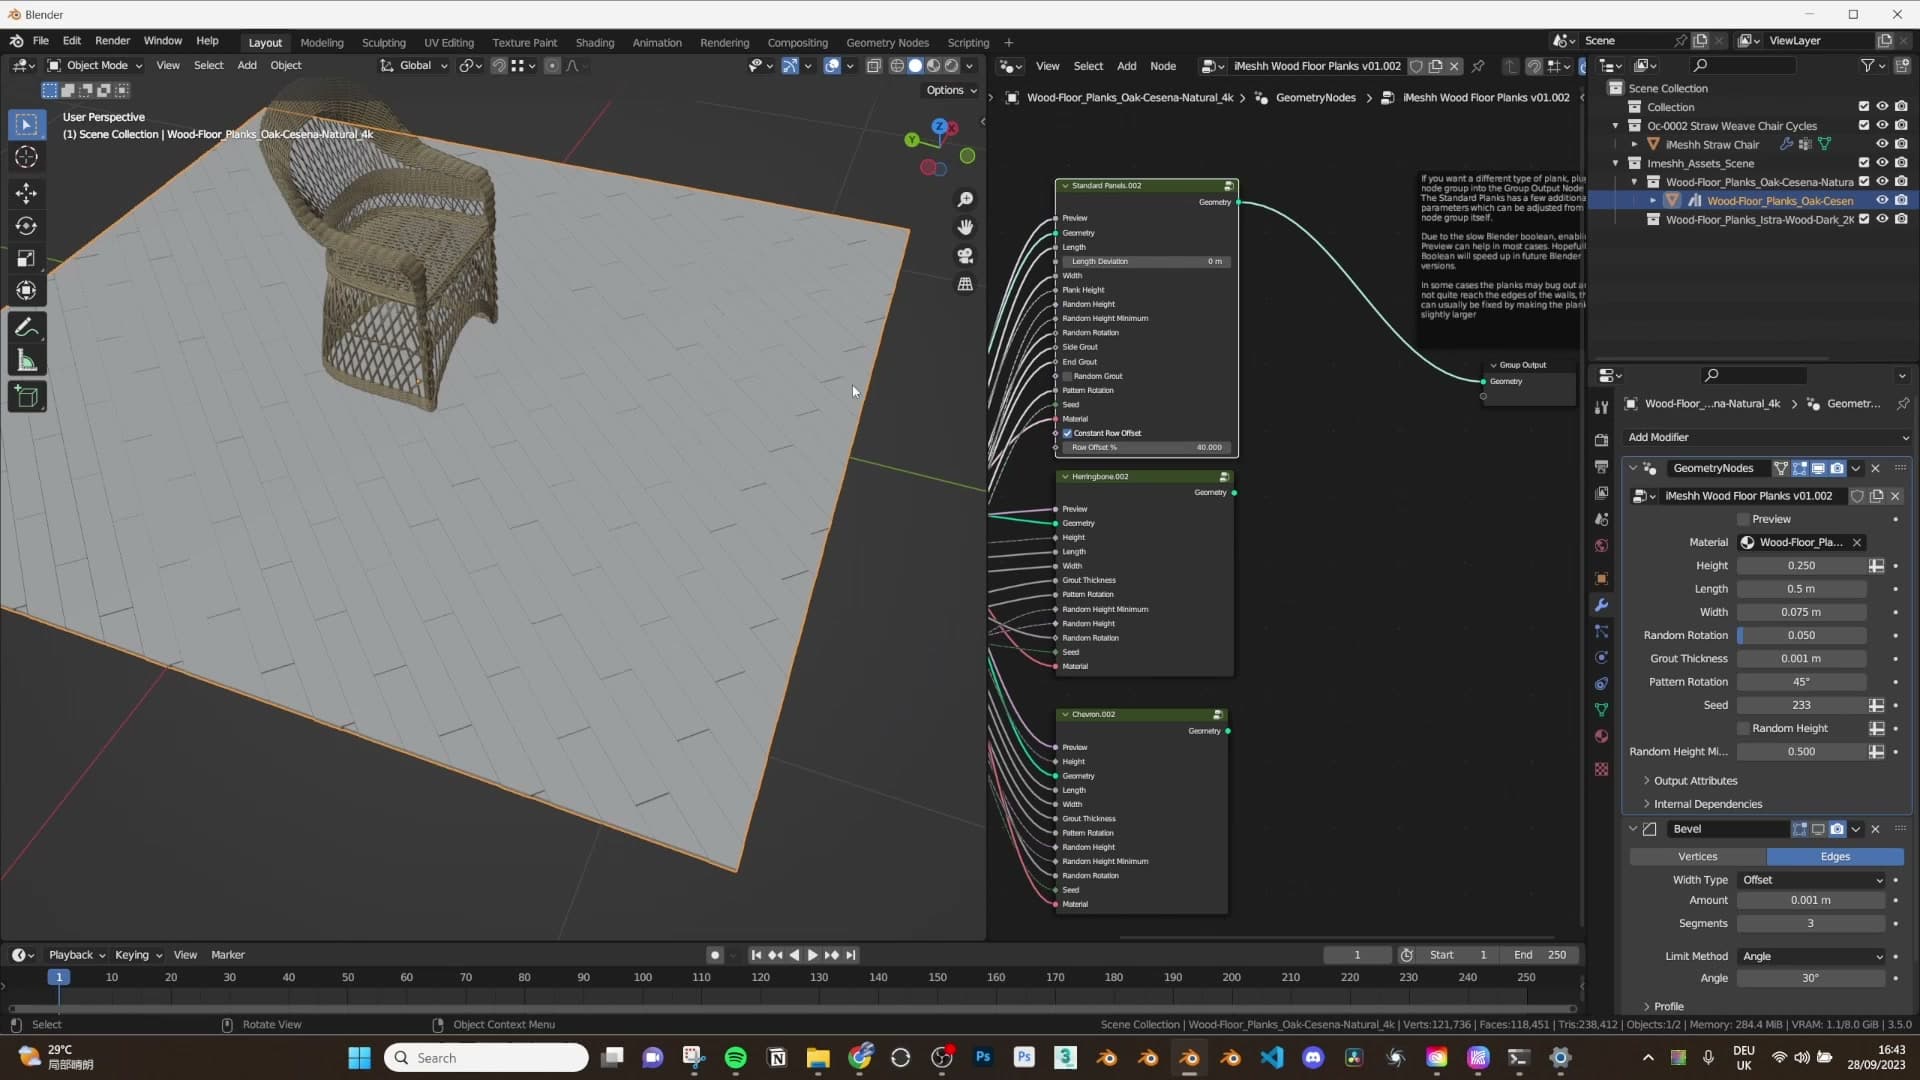
45 degrees gives a diagonal layout, and the Boolean keeps working the whole way through. The floor re-clips to your room outline as you rotate. In practice most jobs stay between 0 and 90 degrees, since anything beyond that just mirrors a layout you can already get inside that range.
If you find that a particular plank texture keeps surfacing in an obvious spot (say a heavily-grained board landing right in front of the camera), change the seed. It reshuffles which texture goes where without touching any of the other settings, so you keep your rotation, grout and offset values intact and just spin the lottery for a fresh arrangement.
Random height multiplier
The last randomisation control is random height, which varies plank thickness from one board to the next. It treats your base height value as the maximum and the slider itself as a multiplier. So 1.0 means every plank stays at full height, and dropping the slider pulls some of them down toward a minimum.
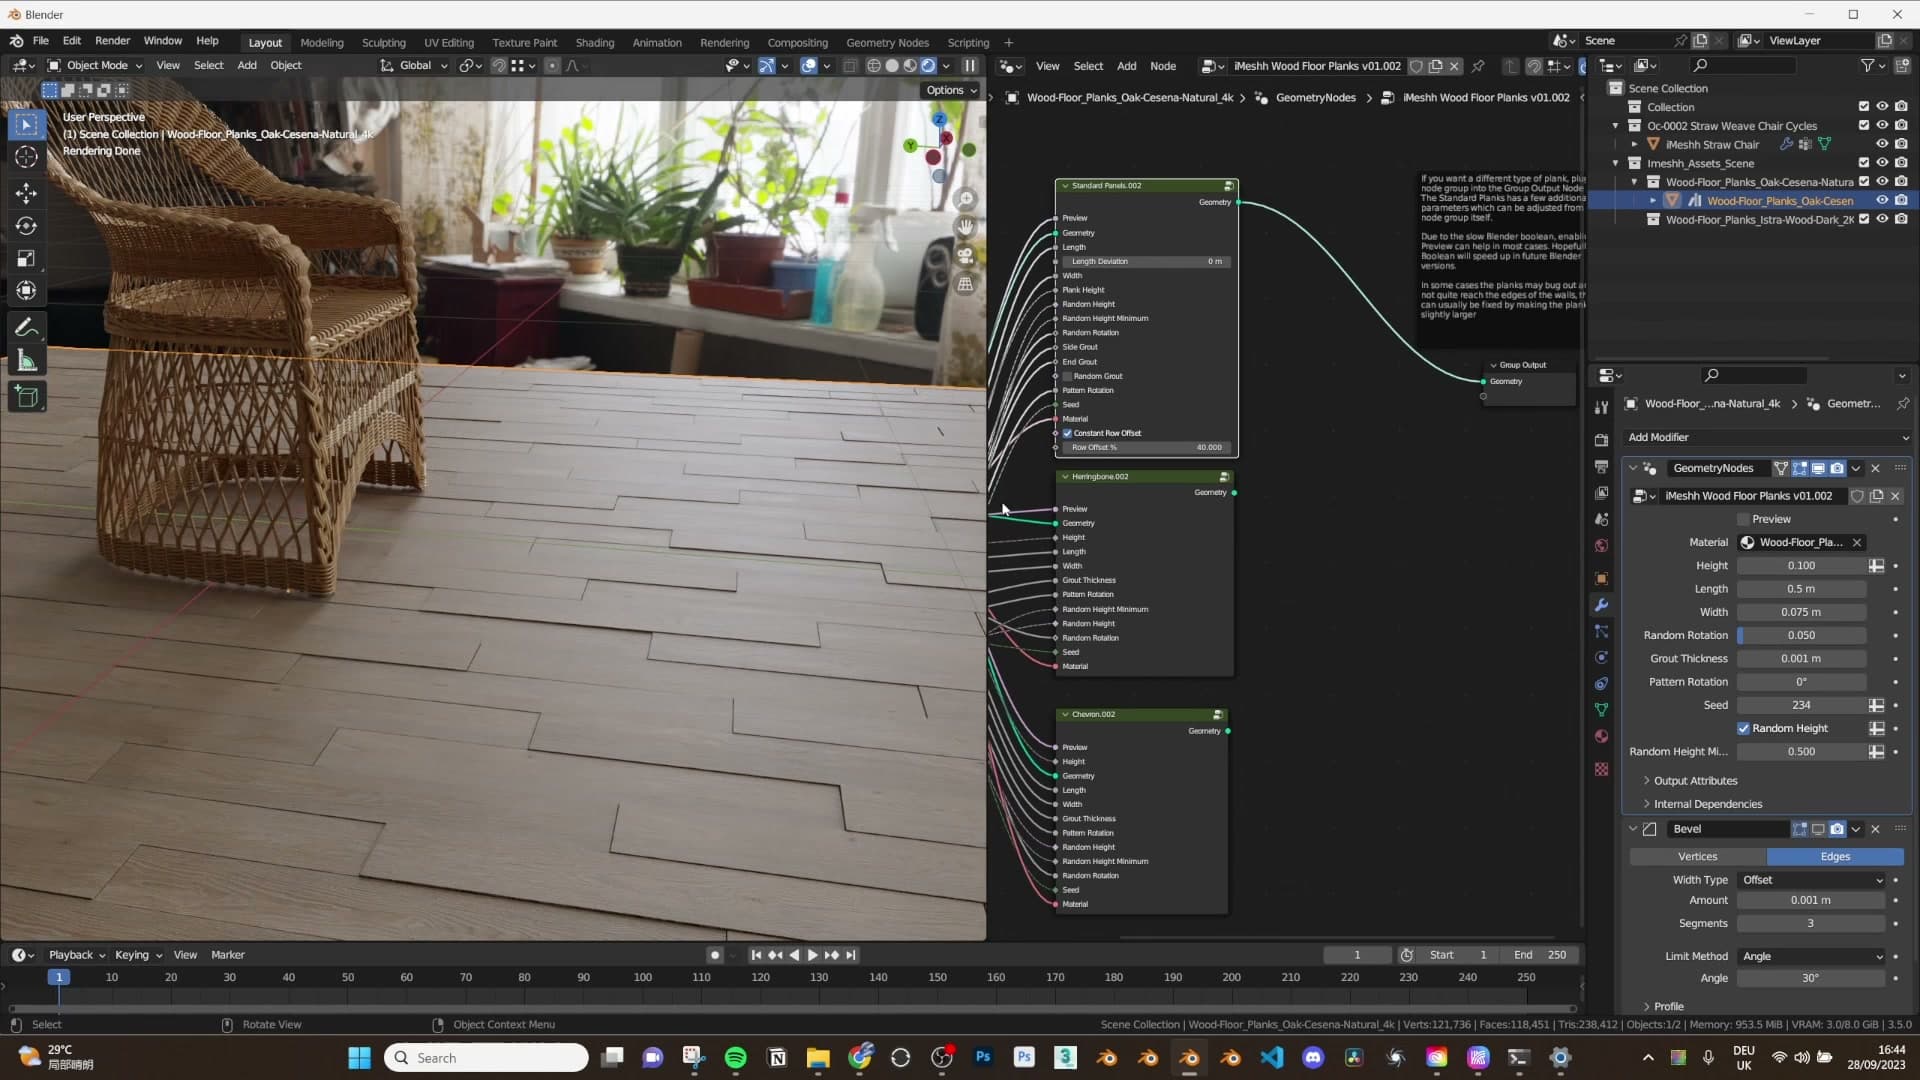
Take it too far and the floor looks like broken slats. With a base height of 0.1, setting random height to 0.01 is far too wild; 0.5 is a more usable starting point. Planks now vary between 50% and 100% of your base thickness, enough to catch a sliver of shadow between boards without making the floor look damaged.
All of these randomisation settings (rotation, seed, height) copy across to the other pattern types. Dial them in on standard, switch to herringbone or chevron, and your values carry through. To finish the module, switch back to herringbone, turn random height off, and re-enable bevel so the plank edges read cleanly again.
Inside the smart wood material node
A custom shader node group exposes saturation, edge dirt, object ambient occlusion grime, and a roughness contrast slider. These are the foundations of the floor's wear system before the more advanced dirt sliders kick in.
Saturation and dirty edges
Before touching the material controls, I strip the floor back to its plainest state: random rotation off, bevel off, grout thickness pulled to zero. That way the shader changes are easy to read in isolation.
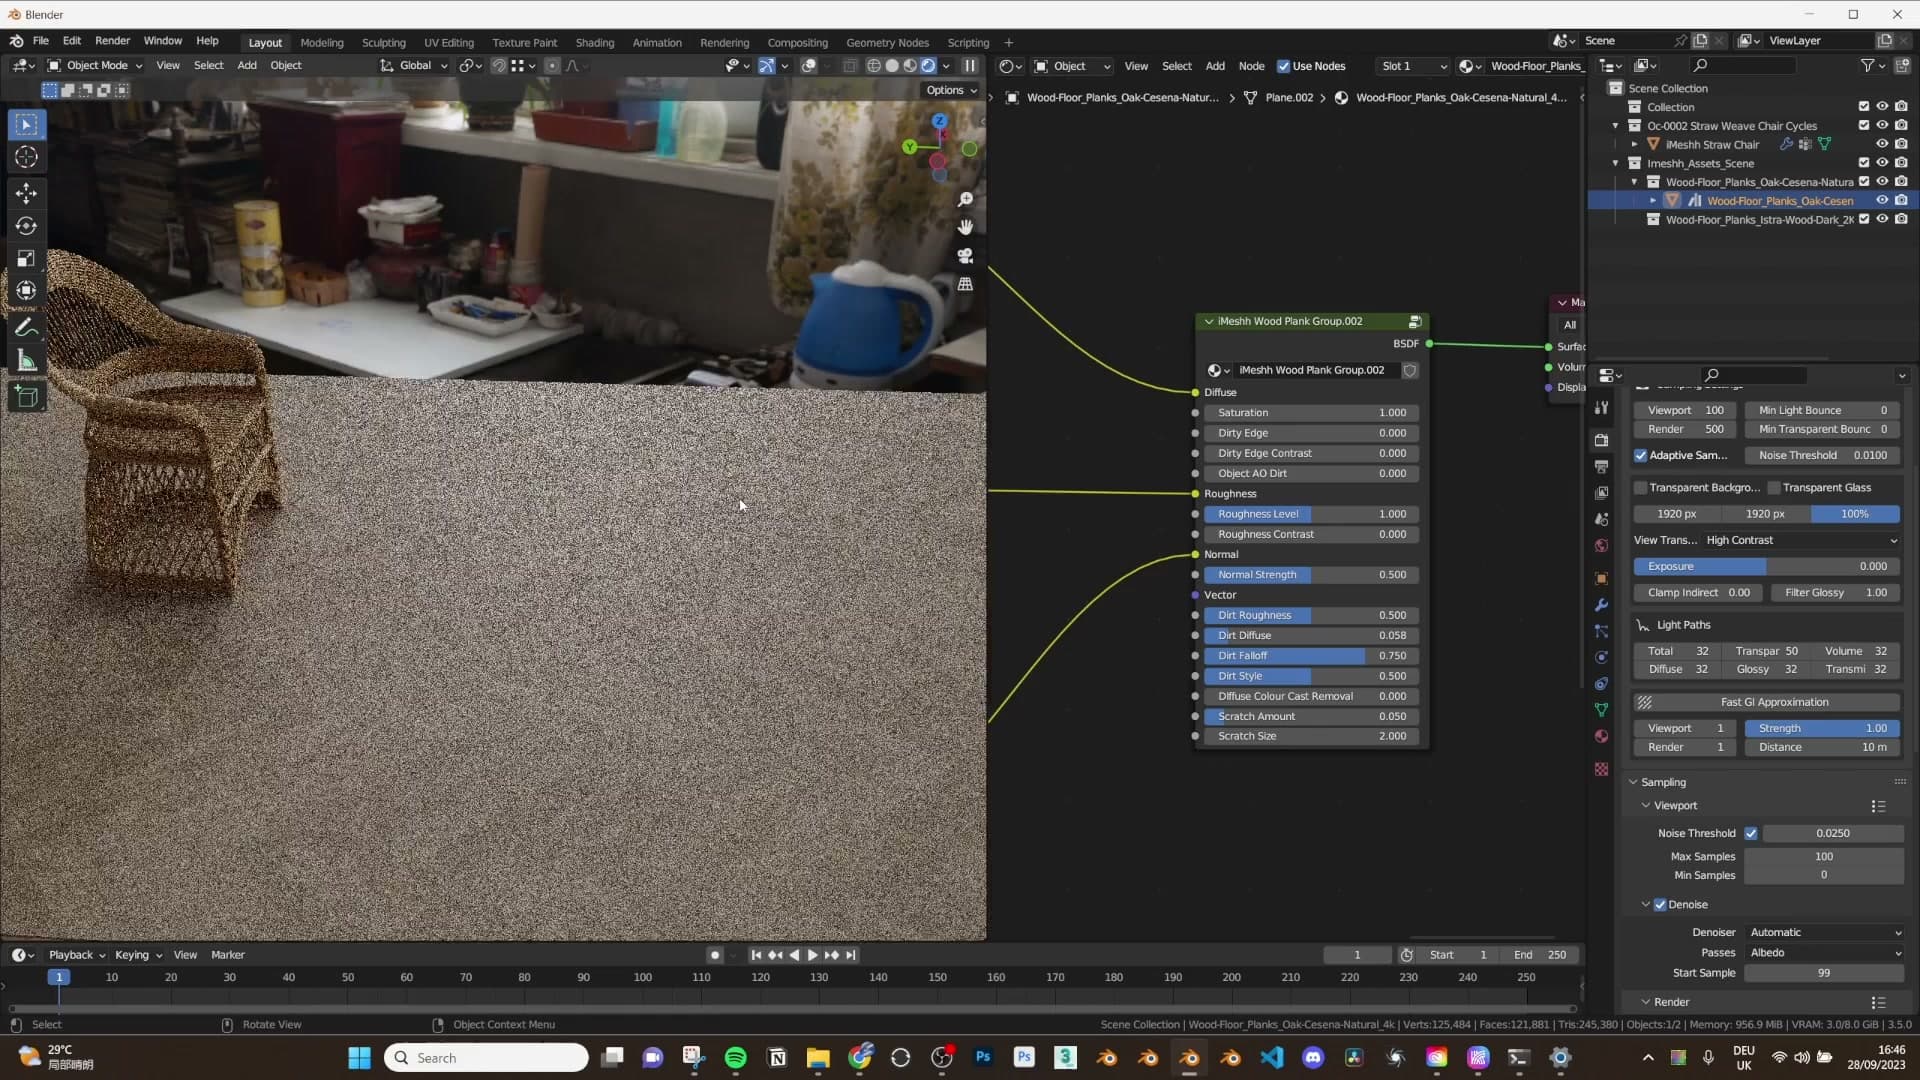
The smart wood material node exposes a small panel of inputs at the top of the material. The first is Saturation: drop it and the entire floor desaturates to grey. It's a useful sanity check that the inputs are wired up to the right shader, and a quick way to confirm a wood type before committing to it.
The dirty edges input is where the wear system starts to earn its keep. Because the planks are built with geometry nodes, the shader knows exactly where one plank meets another, and the dirty edges control concentrates grime along those seams. Switch it on for an older room and the joins between planks fill with the kind of dirt that works its way in over years of use.
Next to it is a contrast slider that pushes the dirty-edge effect further. Crank it up and the result is, honestly, absolutely wild. Useful when you specifically need a neglected or heavily worn floor, and easy to dial back when you don't.
Object ambient occlusion dirt
The next input adds an ambient-occlusion-driven dirt pass that reacts to any object sitting on the floor. Turn it on and grime appears around the chair legs where they meet the planks. That's exactly the kind of build-up that collects at contact points in a real room.
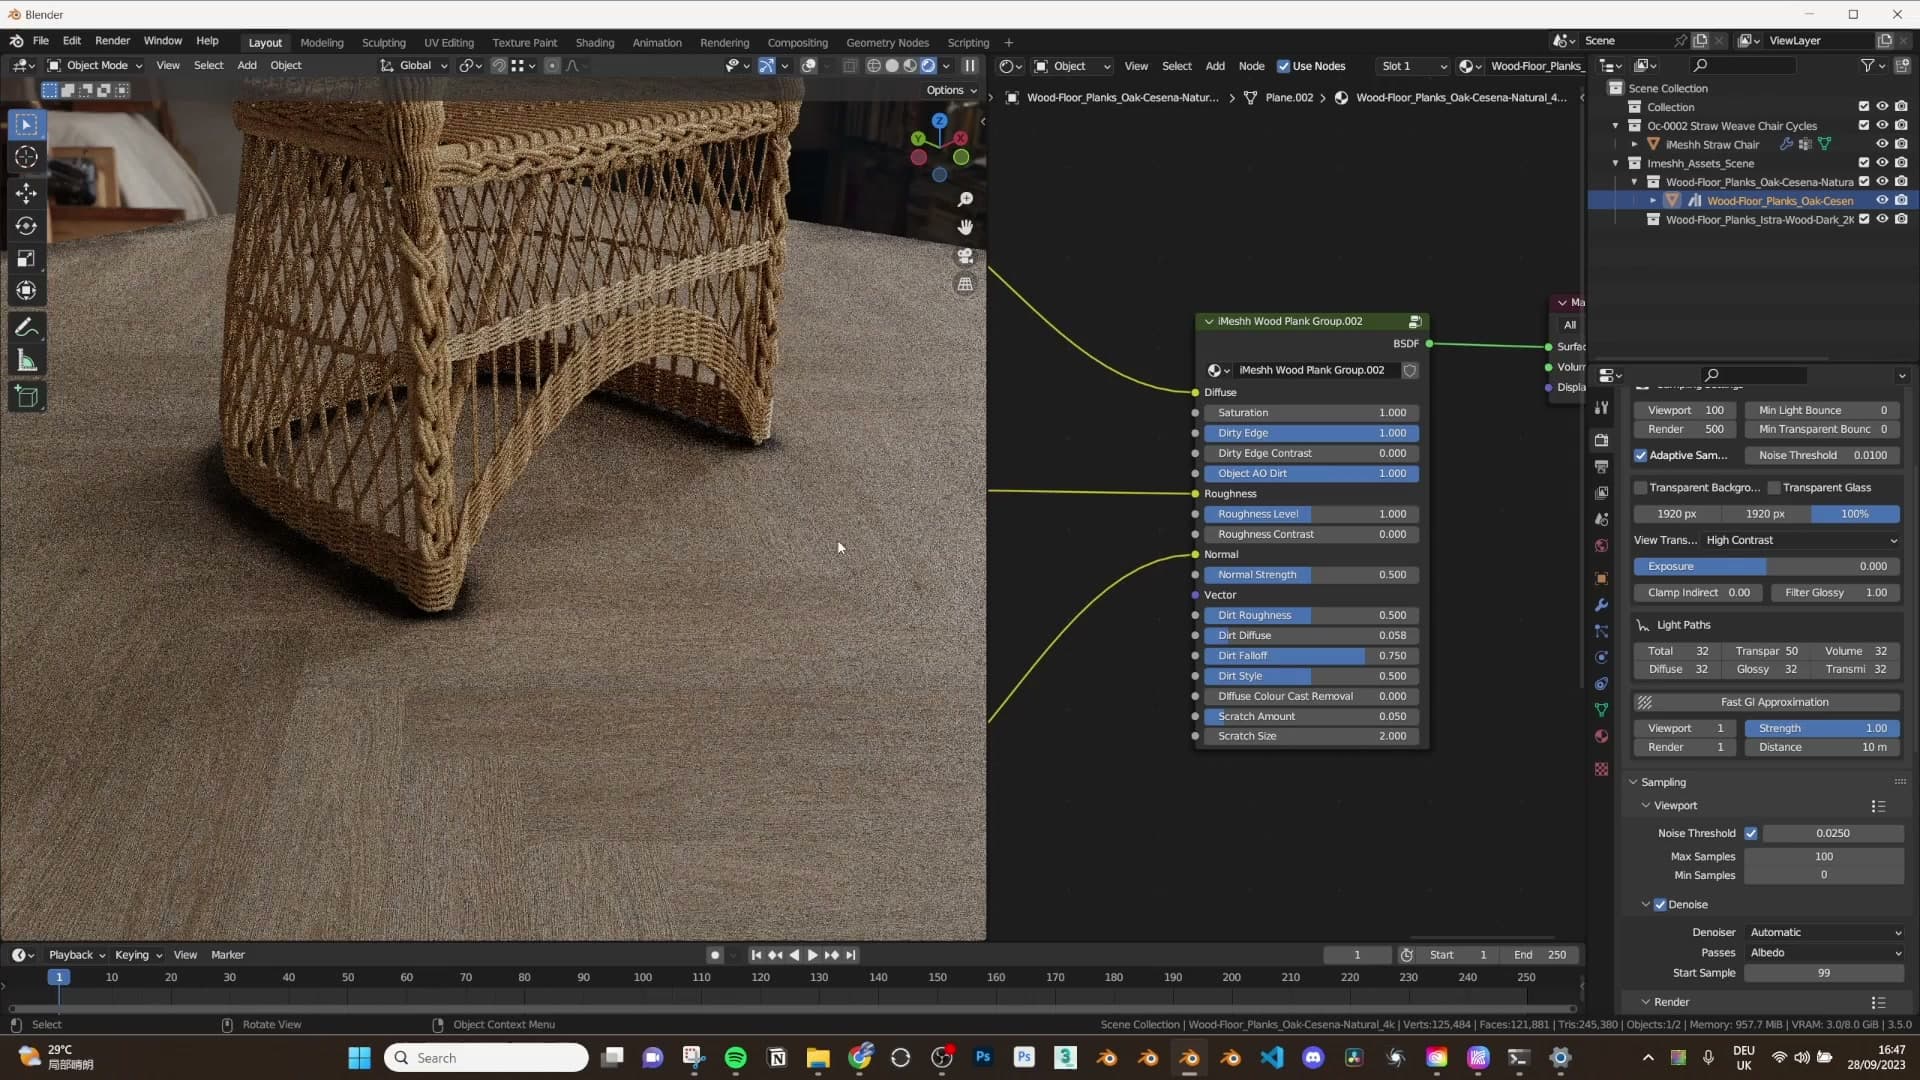
It's the easiest control in the panel to overdo. At full strength it reads as too much. A small amount around objects usually sells the floor better than a heavy pass does.
Roughness level and roughness contrast
Two roughness controls sit side by side. The first, the roughness level, scales the overall roughness of the floor. Pull it down and the planks turn into a glossy laminate finish that picks up every bit of normal-map detail across the surface. Useful for modern interiors or any scene where you want the floor to catch reflections.
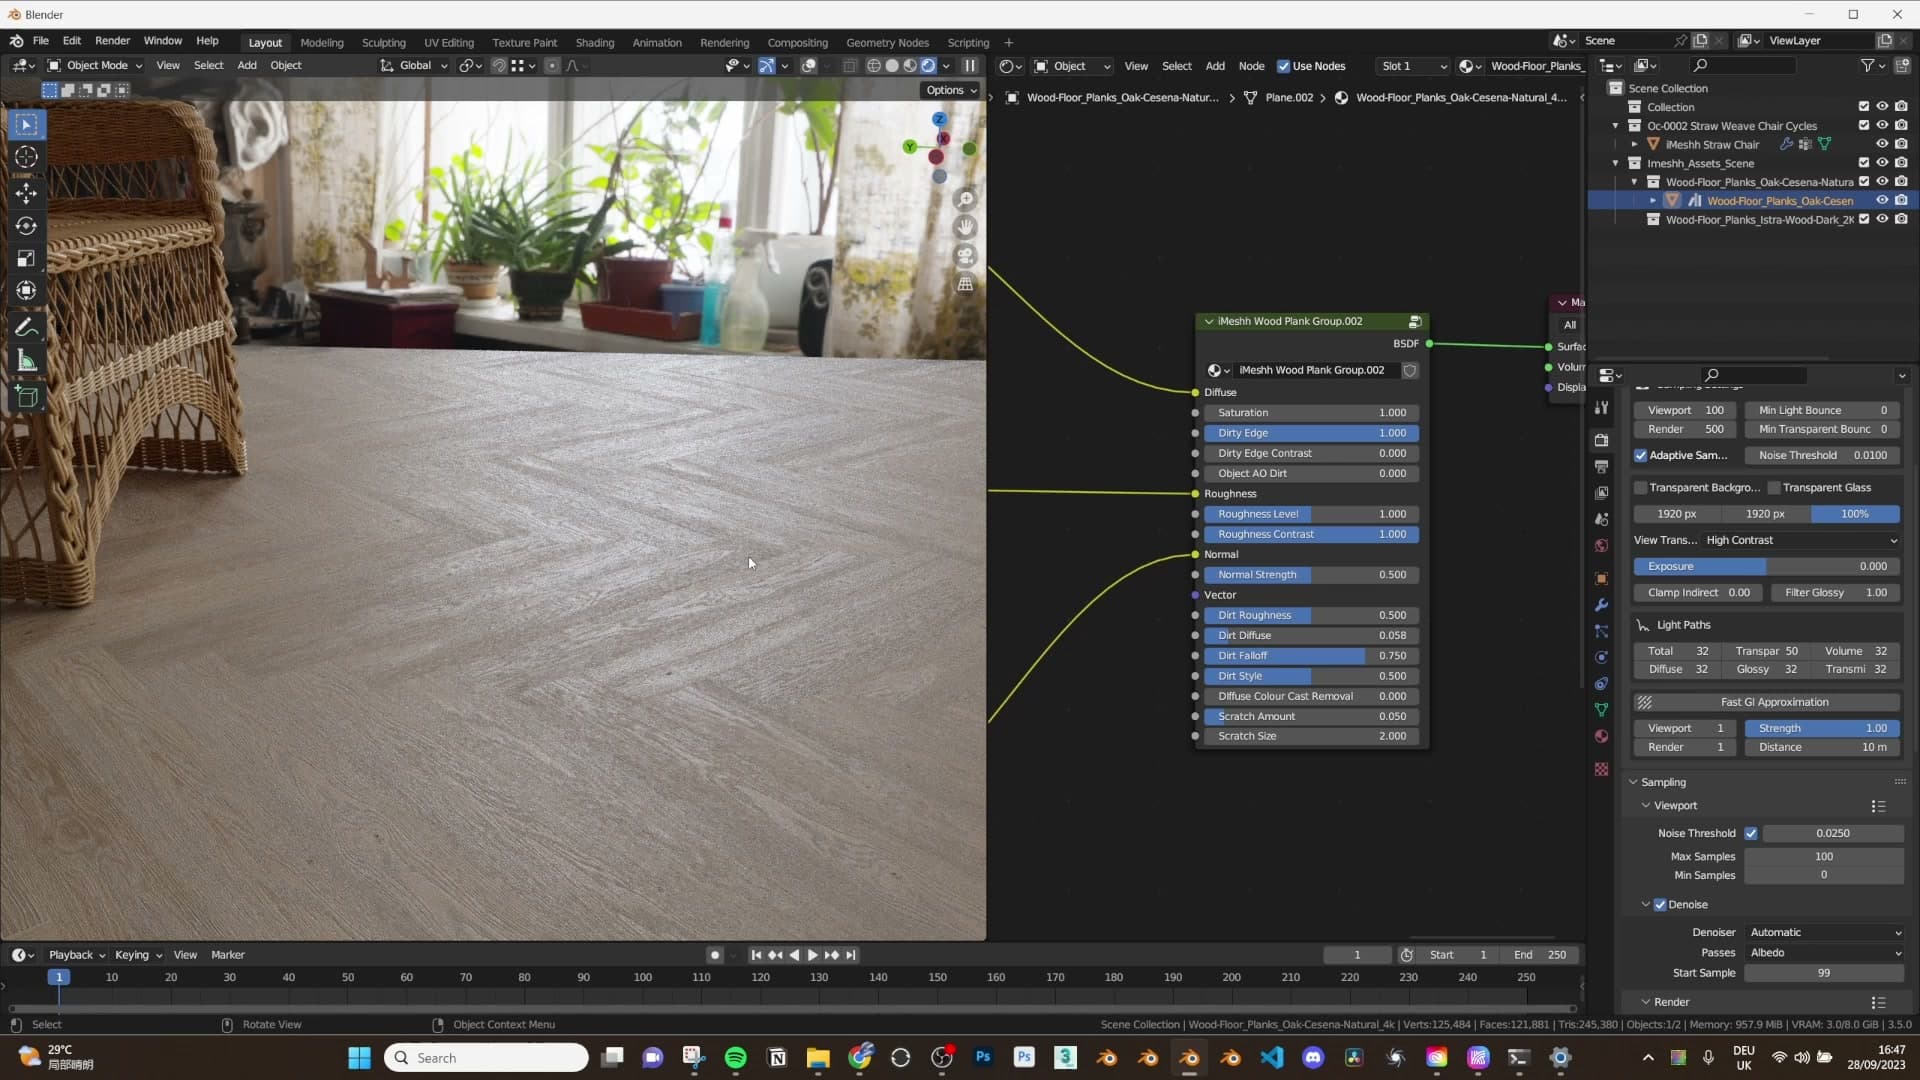
The second is the contrast of the roughness map itself. Pushing it up exaggerates the difference between the rougher and smoother patches baked into the texture, which sometimes brings out a lot of nice grain detail and sometimes tips into looking too exaggerated. Worth testing per floor rather than leaving it on by default.
For the rest of the walkthrough I reset the roughness level back to 1 and the contrast back to 0, returning the floor to its default matt finish before moving on to the dirt fall-off controls.
Advanced dirt, dust and scratches
The view-angle fall-off slider mimics how real-world dirt is more visible at grazing angles, while the diffuse dust splodges and surface scratches add the close-up wear that sells archviz shots.
Dirt fall-off based on viewing angle
The next group of inputs (dirt roughness, dirt diffuse and a handful of related settings) are all driven by a single dirt fall-off control. The idea comes straight from observing real wood floors: dirt and grime are far more obvious at grazing angles than they are when you look straight down. Stand at the far end of a room and the floor near your feet looks clean while the boards in the distance read as dusty and worn.
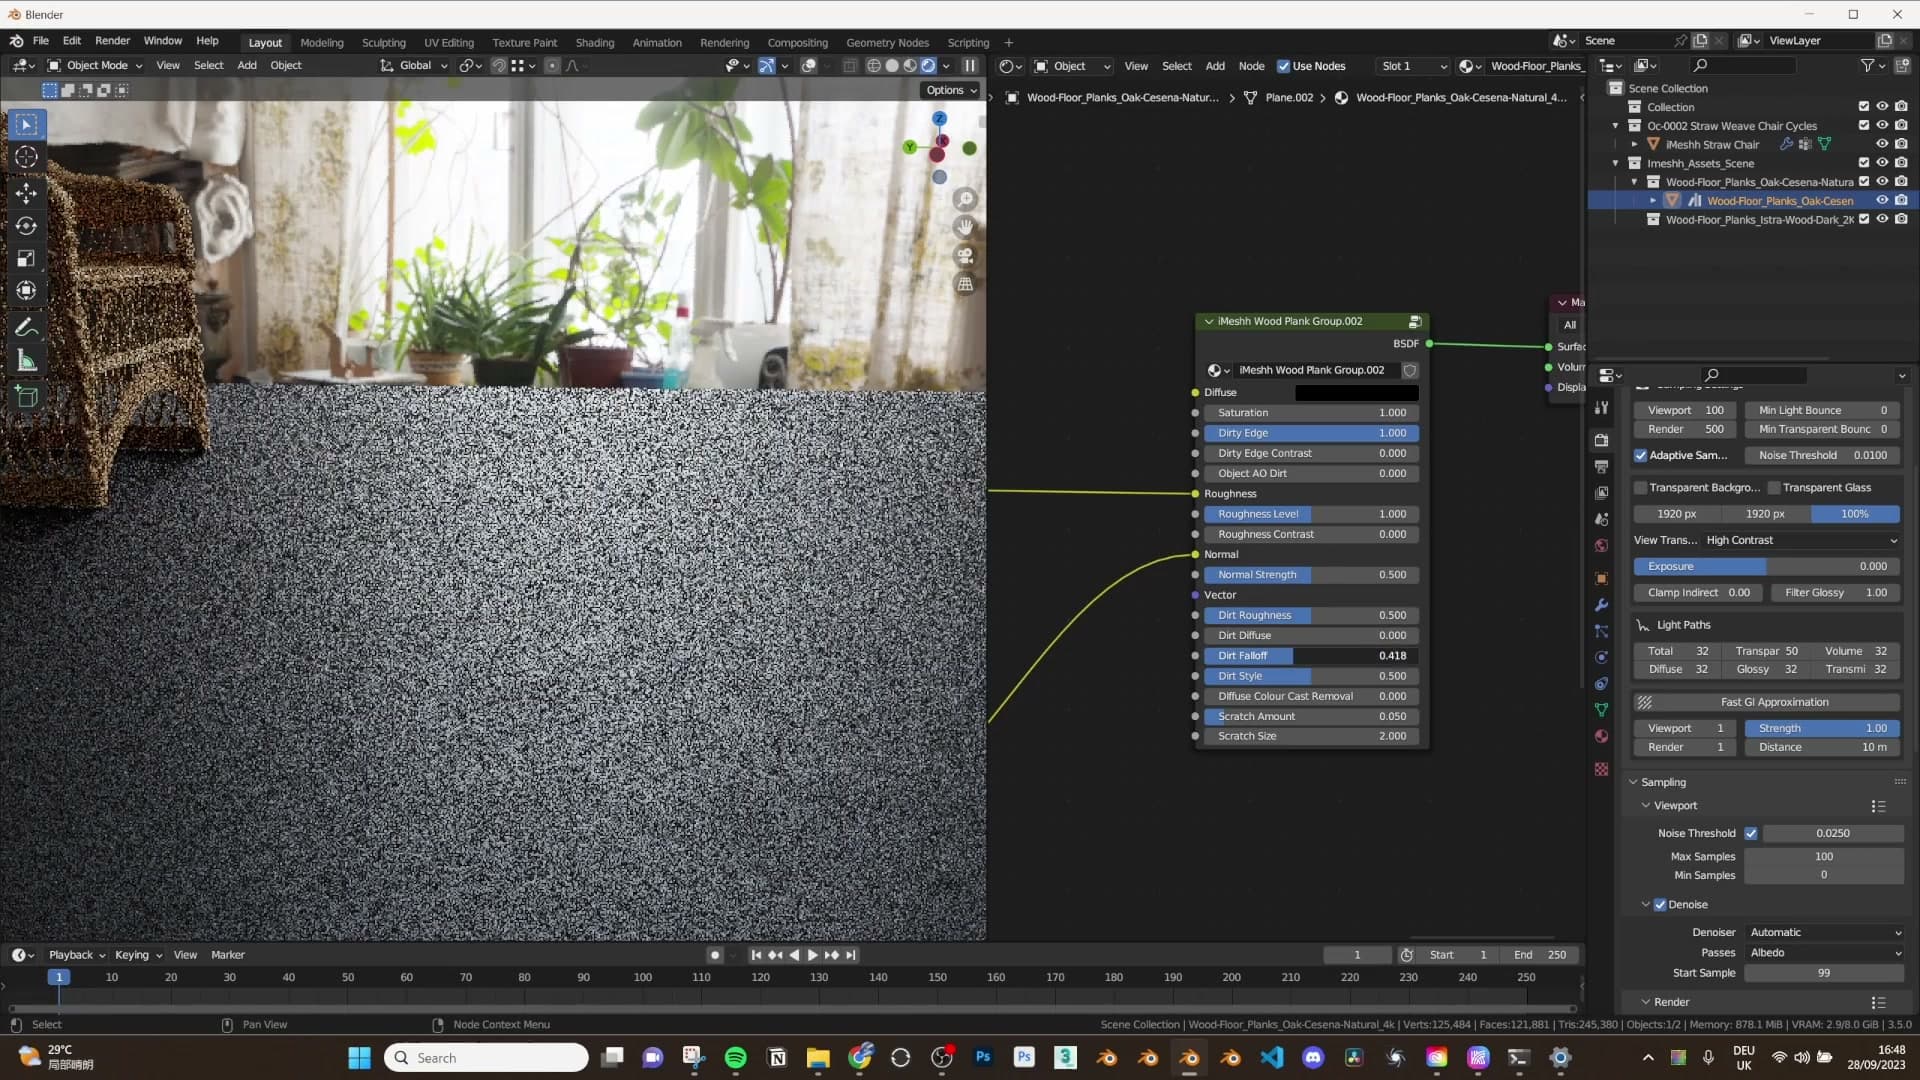
With the fall-off set to its maximum, the shader uses the full effect and you might barely see any grime at all from a typical camera angle. As you turn the value down, dirt becomes progressively more visible closer to the camera. Pull it too low and only one corner of the floor reads as dirty; find a middle ground and you get dirty patches showing up everywhere without the effect feeling artificial.
A moderate fall-off setting is usually the sweet spot. It gives you that natural variation across the floor, clean where the eye expects clean and dirtier where the light grazes the surface. That's what makes the wear feel like it belongs to the room rather than being painted on uniformly.
Diffuse dust splodges and dirt style
On top of the fall-off-driven grime, the node also exposes a diffuse dust layer. Think of this one as actual dust sitting on the surface of the floor. A little goes a long way. Pushing it up adds visible dirt out at the furthest edges of the room; you can tune it alongside the dirt roughness input until the balance feels right for the shot.
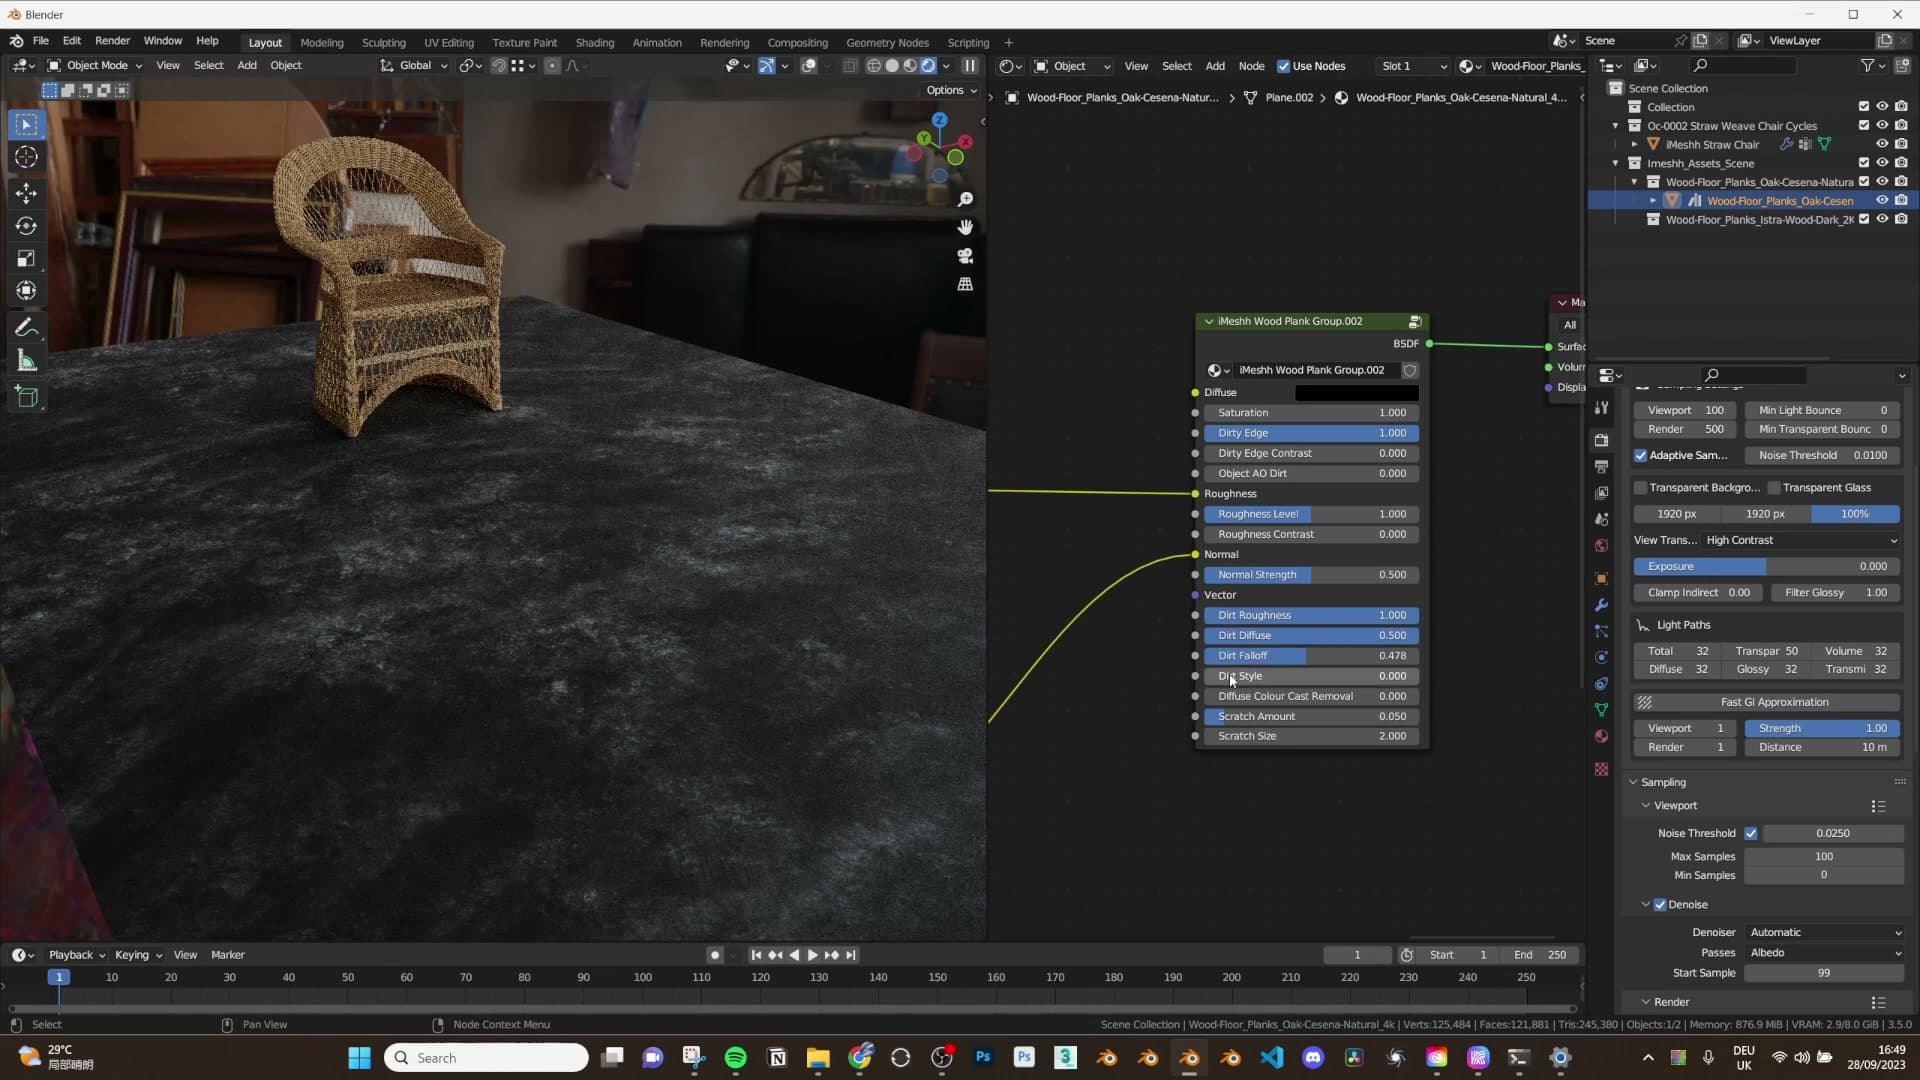
The dirt style slider then lets you choose what kind of dirt you are layering on. At one end the look is entirely dusty and hazy; at the other it shifts to discrete splodgy patches. Halfway between the two gives you a pleasant mix of both characters, which tends to be the most useful setting for a generic interior.
Plug the diffuse layer back in once you have the style dialled, and the floor immediately looks more interesting than the clean version. The defaults push the wear hard for demonstration purposes, so for a paying client render you will almost certainly want to back the dirt off rather than send them a floor that looks like it has not been swept in a year.
Surface scratches for close-up shots
The final wear layer is a scratches input that runs across the whole floor surface. Turn it on and you will start to see thin scratch marks appearing across the boards, often catching just enough light to read as a fine pattern of micro-wear.
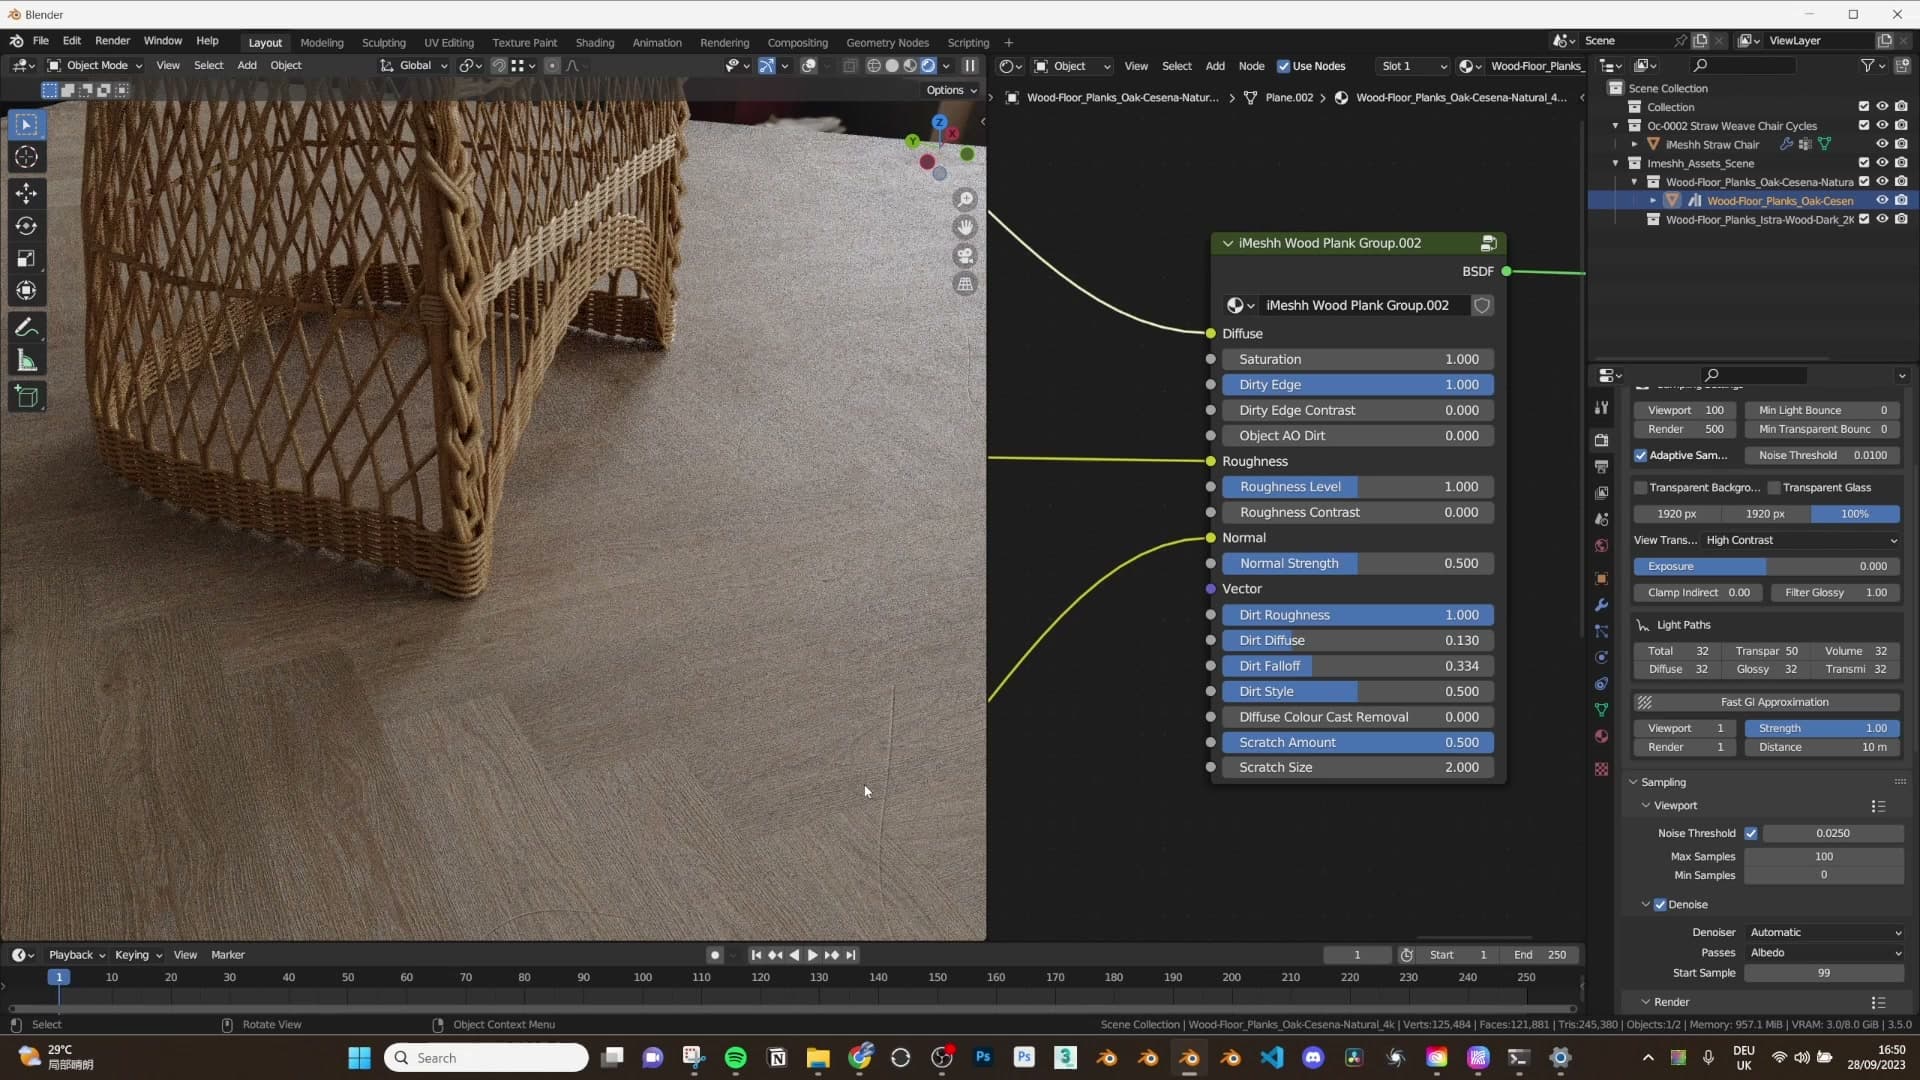
From a typical archviz camera angle the scratches are deliberately subtle, easy to miss when you are looking at the whole room from above. Their real job is to hold up under close-ups. Drop the camera in tight on a chair leg or a prop sitting on the floor and the scratches start to do their work, giving the surface around those objects a believable hint of life.
There is also a scale control built in: pushing the value up shrinks the scratches down to a tighter pattern, which often reads better at close range than the larger default marks. Tune it for the shot you are framing rather than treating it as a global setting.
Workflow recap and what's coming next
The whole system collapses to one settings panel and one geometry node socket. iMeshh plans to add more wood types and pattern variations (cross patterns and additional species) depending on how this release lands.
Workflow recap and roadmap for more patterns
The system looks busier than it actually is. In practice the whole workflow collapses to two touch-points: the input panel where you dial in plank dimensions, grout, randomisation and wear, and the geometry node socket at the top where you pick which wood floor you want to use. Plug a different floor into that socket and every setting you've already tuned carries straight across. You don't redo the work for each species.
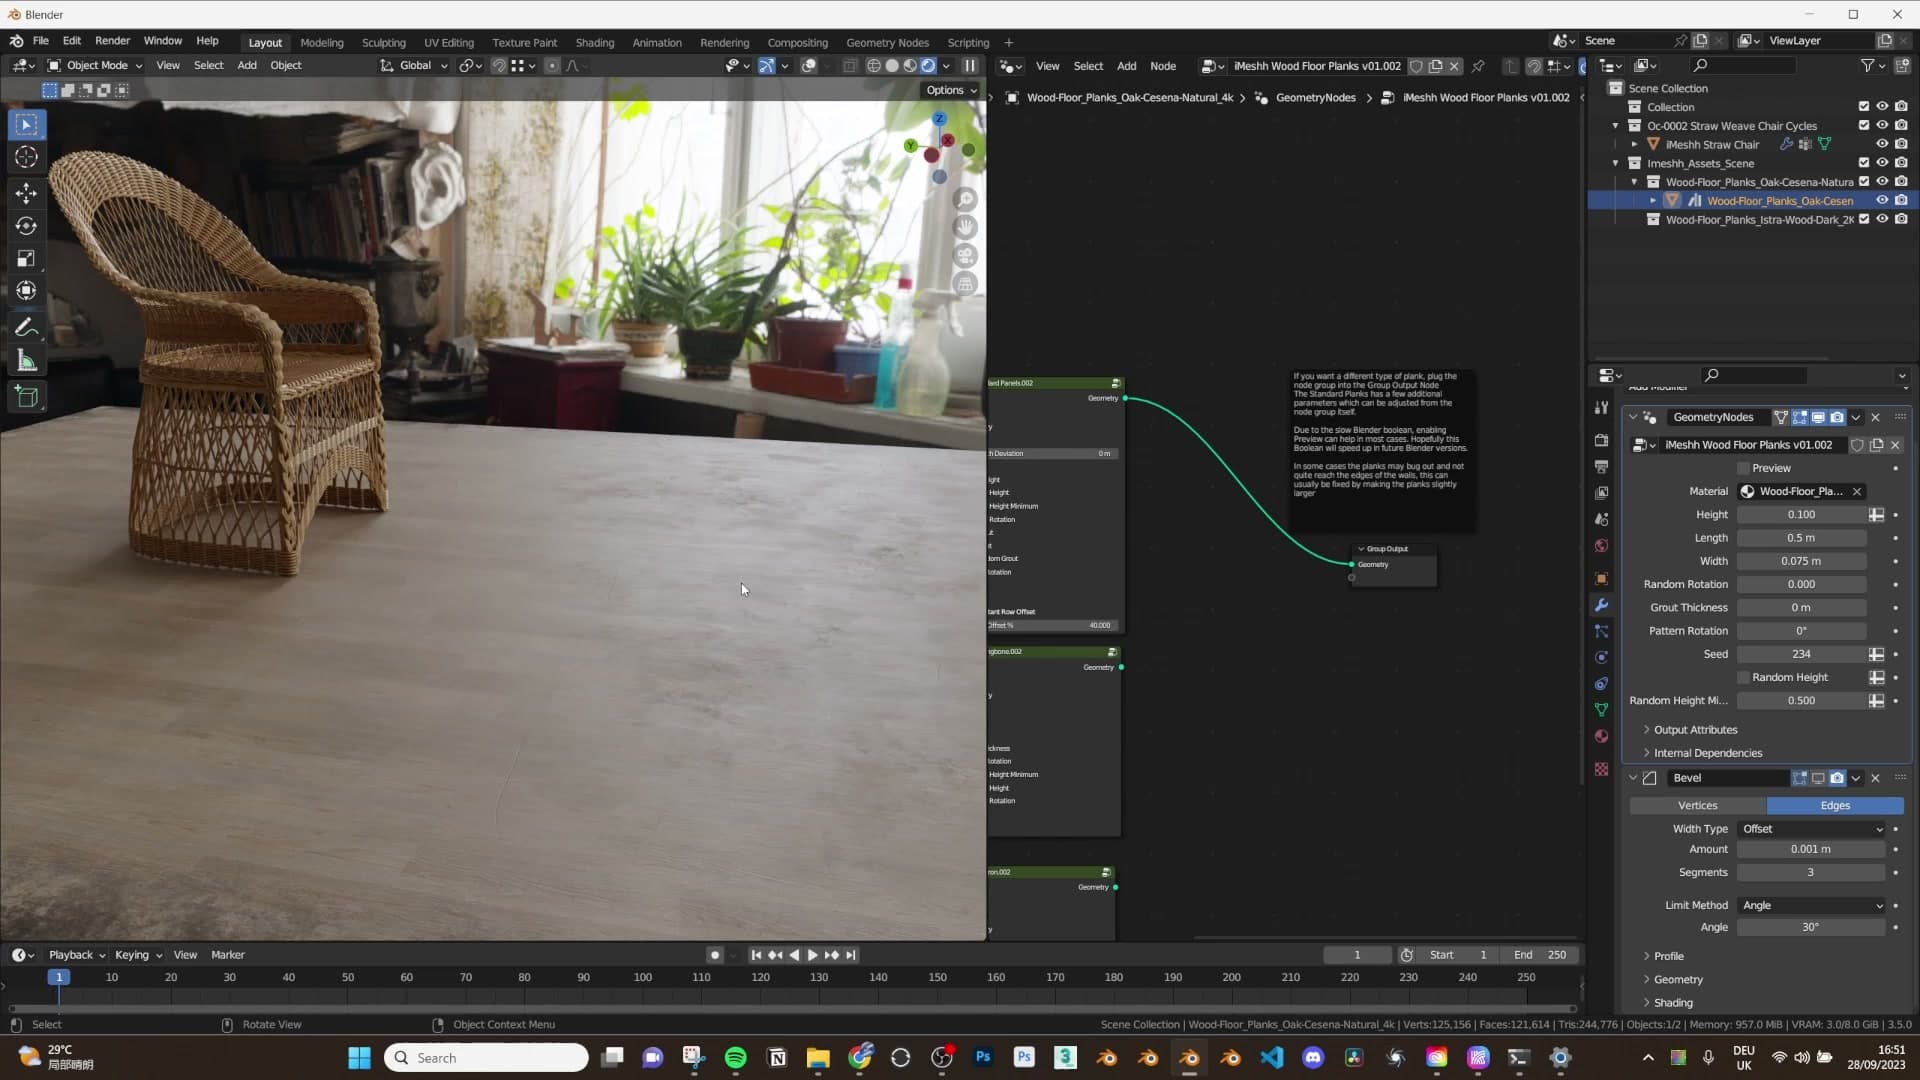
Treat the demo defaults as exactly that: defaults built to show off the dirt, fall-off and scratch features in a single shot. For a paying client renting a new apartment render, pull the grime back. Keep the dust subtle, the scratches restrained, and let the wood do the work. The wear features are there when you want them, not a look you have to live with.
The roadmap is open-ended and tied to how this release lands. If the current set proves popular, iMeshh plans to add more wood species and more pattern variations on top of the standard, herringbone and chevron already shipping. A cross pattern is specifically called out, and there are plenty of other floor layouts worth covering. Nothing further is promised, but the system is built to extend, so future drops should slot into the same panel you've just learned.
Tools and credits
Everything mentioned in this tutorial, with links.
- Blender: the renderer this entire build runs in.
- iMeshh: studio platform (project management, client review, asset library, invoicing). The asset library used in this tutorial is included with every iMeshh Pro plan.
- Poly Haven: free CC0 textures and HDRIs.
Pillar guide: Materials Shaders hub · Get the Floor Generator