The problem: noisy emission planes inside glass
Set the scene for the tip. When you build a realistic light fixture in Blender (an emission plane sitting behind frosted or clear glass), Cycles fires through the glass and treats the emitter as an indirect light source, dumping noise everywhere. Light linking would fix this in one click but isn't in Blender yet, so this video walks through the node workaround.
Why emission planes inside glass create noise
This started as a side problem, not a planned video. While building a small set of spot lights for an upcoming iMeshh release, I ran into a noise issue that was severe enough to derail an unrelated tutorial. It was stubborn enough that the eventual fix felt worth sharing as its own quick tip.
The clean solution would be light linking: the ability to include or exclude specific lights from specific objects on a per-object basis. With light linking, you would simply tell the noisy emission plane not to influence the surrounding scene, and the problem would disappear in a single click. At the time of recording, that feature was not available in Blender, so the workaround has to live inside the shader nodes instead.
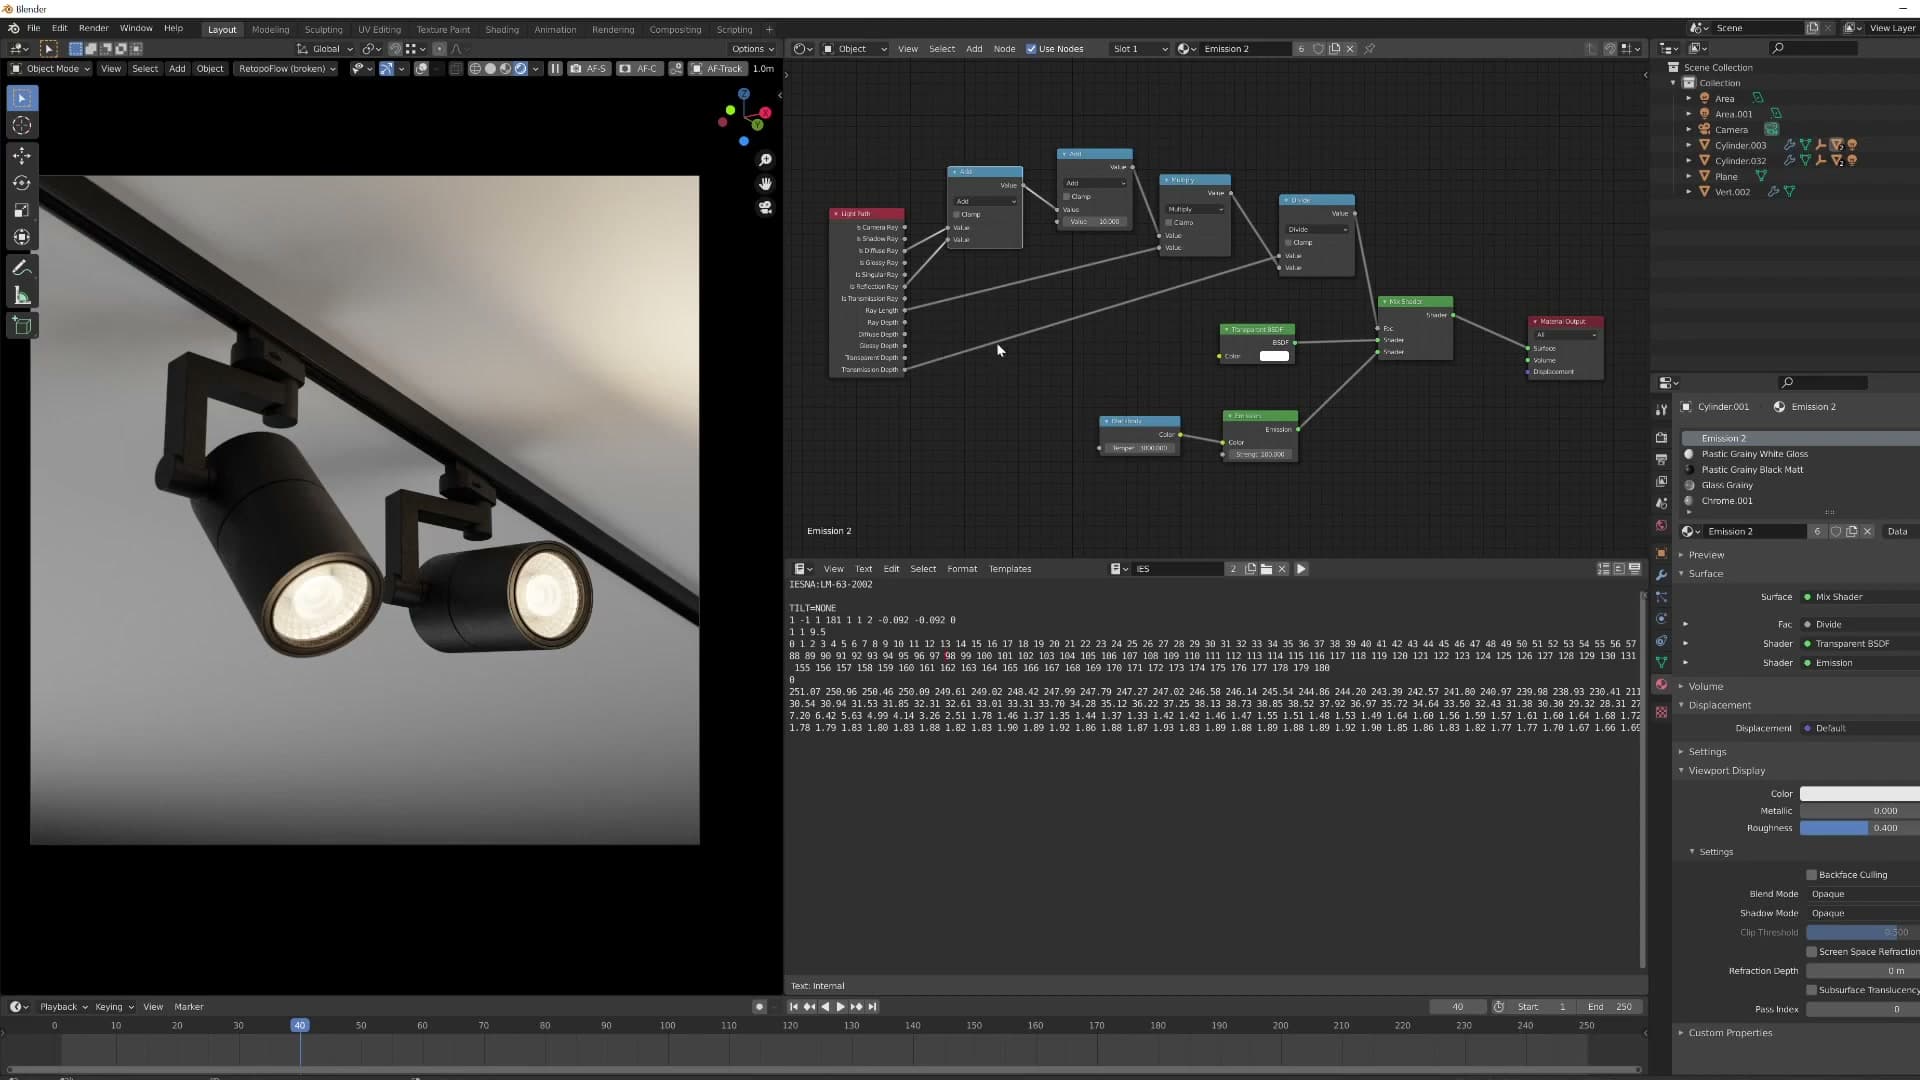
Fair warning: the node setup that follows came from trial and error rather than from a clean theoretical model. I plugged sockets in, divided things, added things, and kept iterating until the noise dropped out. The video walks through the working result, not a polished derivation of why every connection does what it does, because the practical answer is what matters once you hit this problem on your own scene.
The test fixture: emission disc, frosted glass and an IES point light
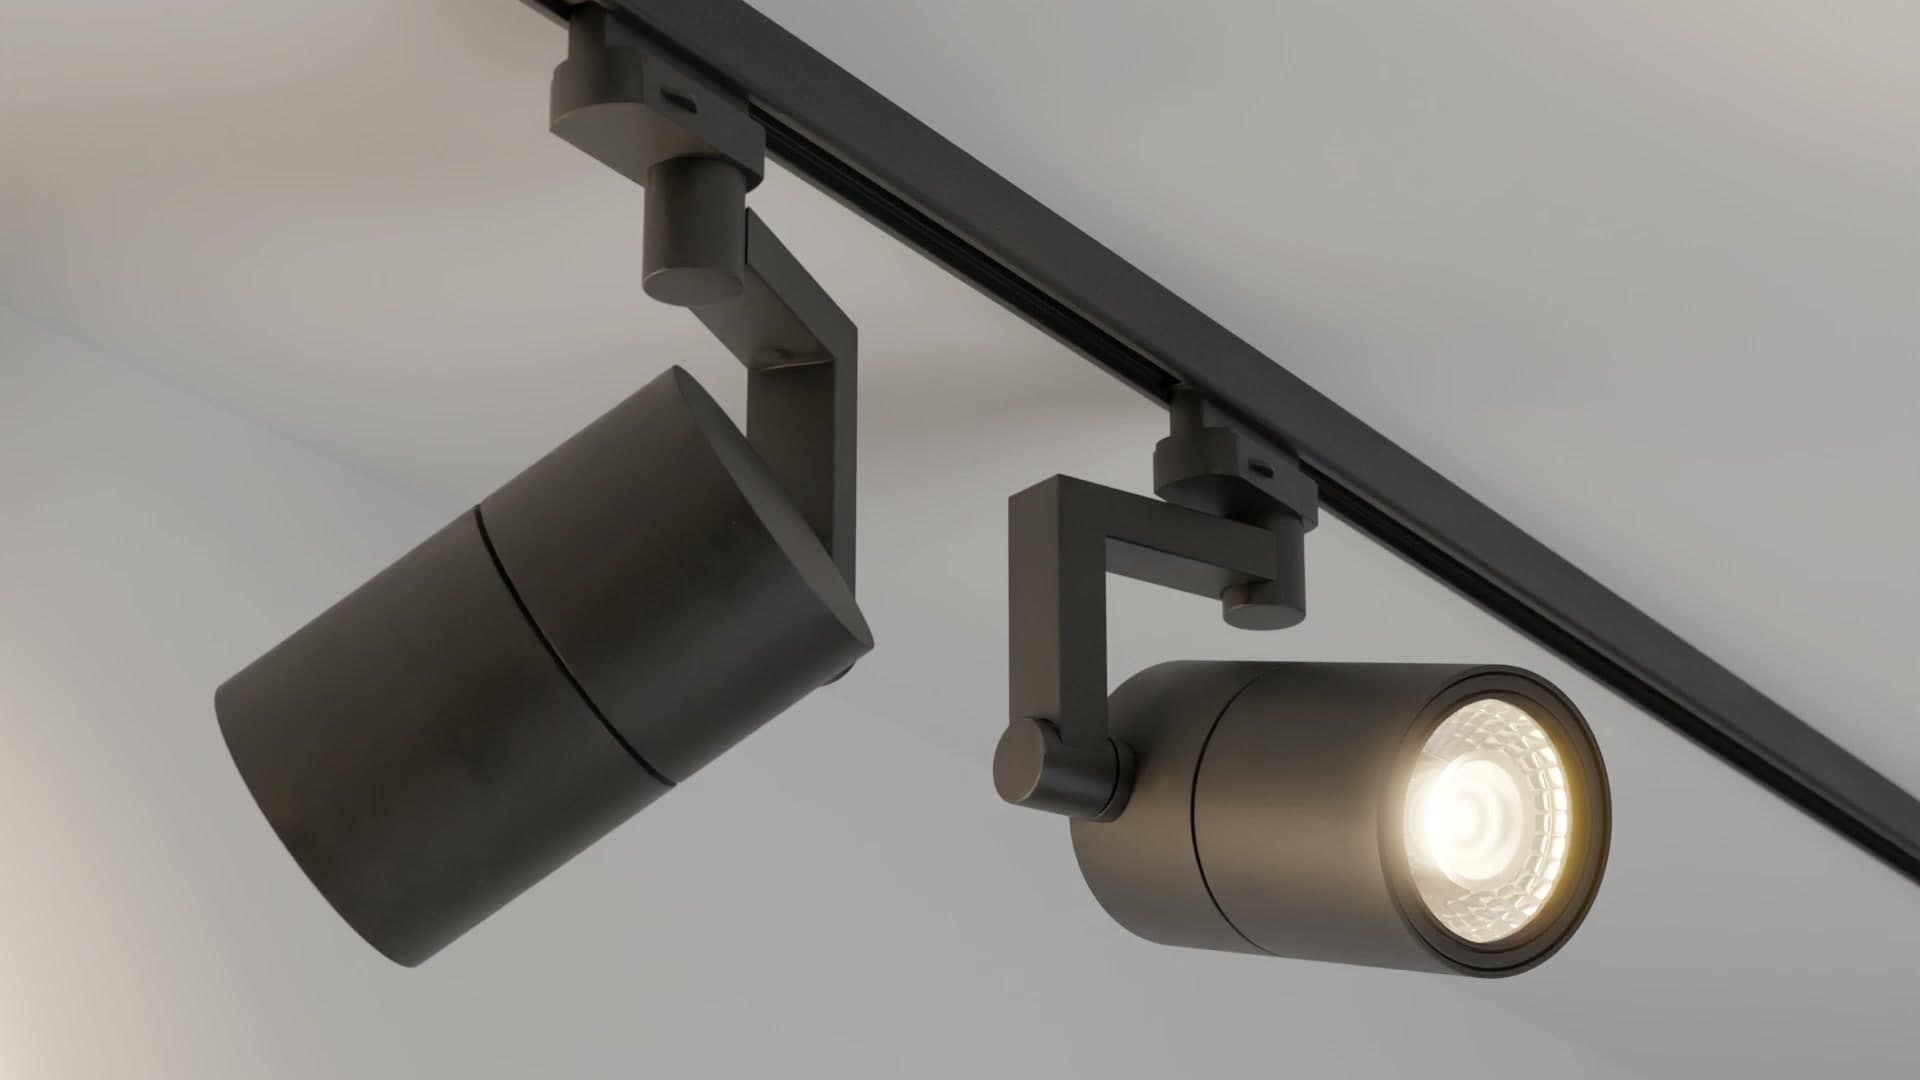
The test fixture is a small spotlight: an emission plane sits inside a housing, with a sheet of glass mounted on the front. In iMeshh's case the front panel is frosted, but the same problem appears with any clear glass enclosure where an emission shader is trapped behind it. Cycles fires through the glass, treats the emission plane as an indirect light source, and dumps grain across every surface it can see.
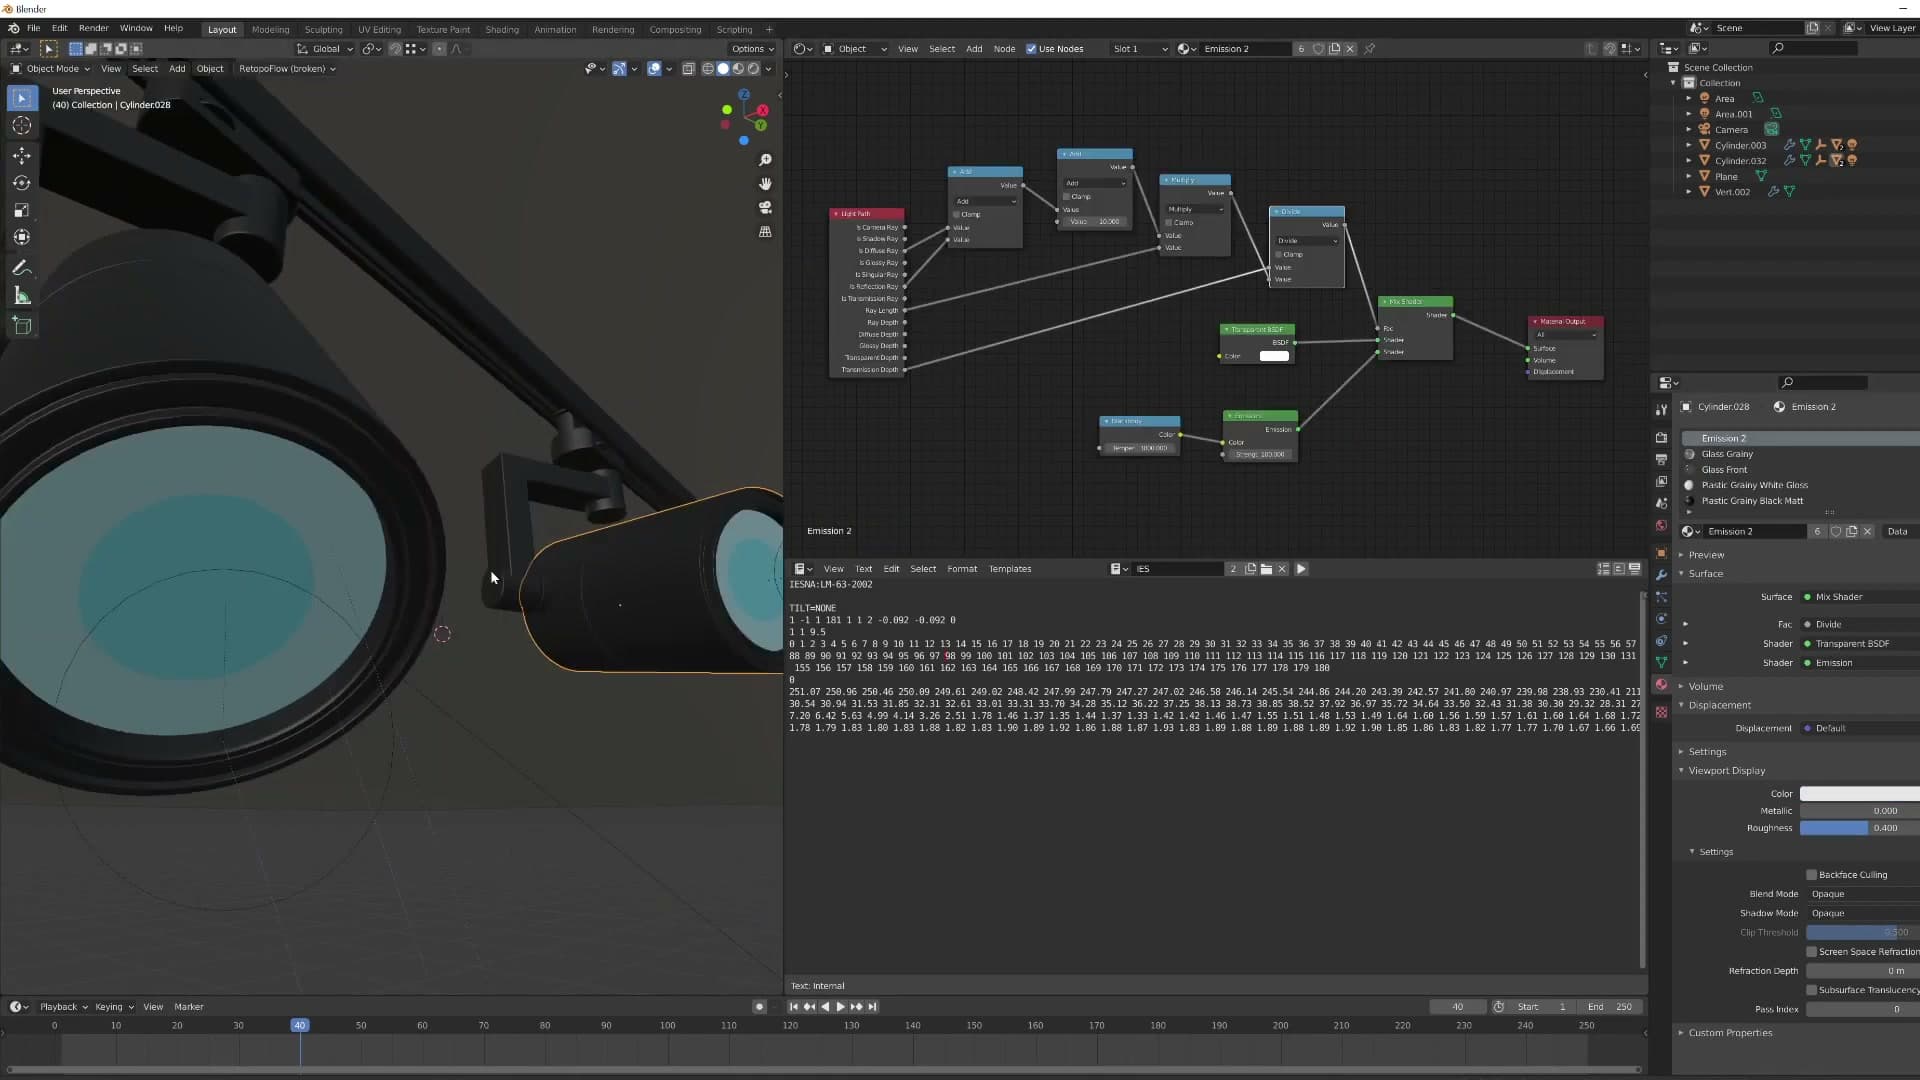
Render the fixture with nothing but the emission shader behind frosted glass and the result looks pretty disgusting: a noisy, blotchy spill that no amount of samples cleans up quickly. The emitter is doing exactly what it's told. The issue is that Cycles can't sample it efficiently through the rough refractive surface in front of it.
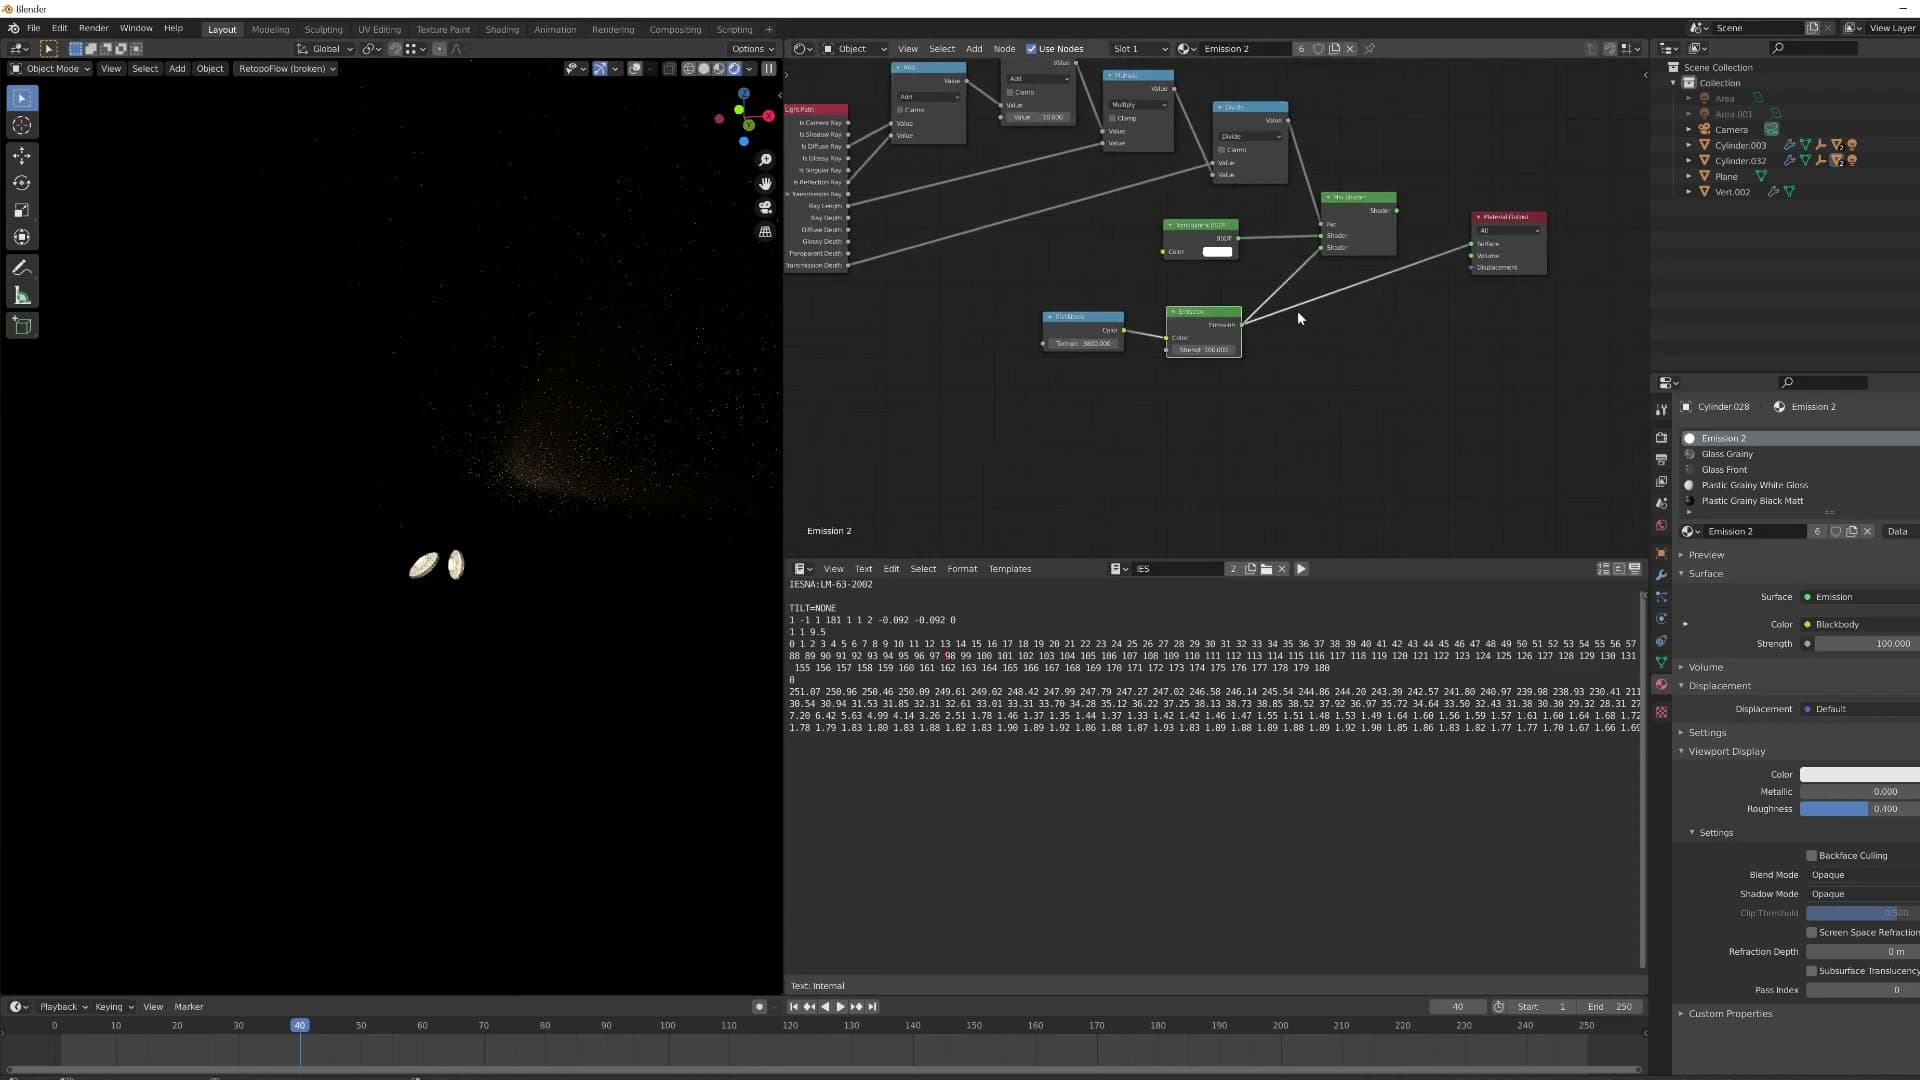
The look you actually want is split across two jobs. The emission plane handles the appearance of an illuminated lamp, a glowing disc visible behind the frosted lens. A separate point light, loaded with an IES profile, handles the actual lighting of the room. The point light samples cleanly because Cycles knows how to importance-sample it directly, and the IES profile gives you the shaped cone you'd expect from a real fitting.
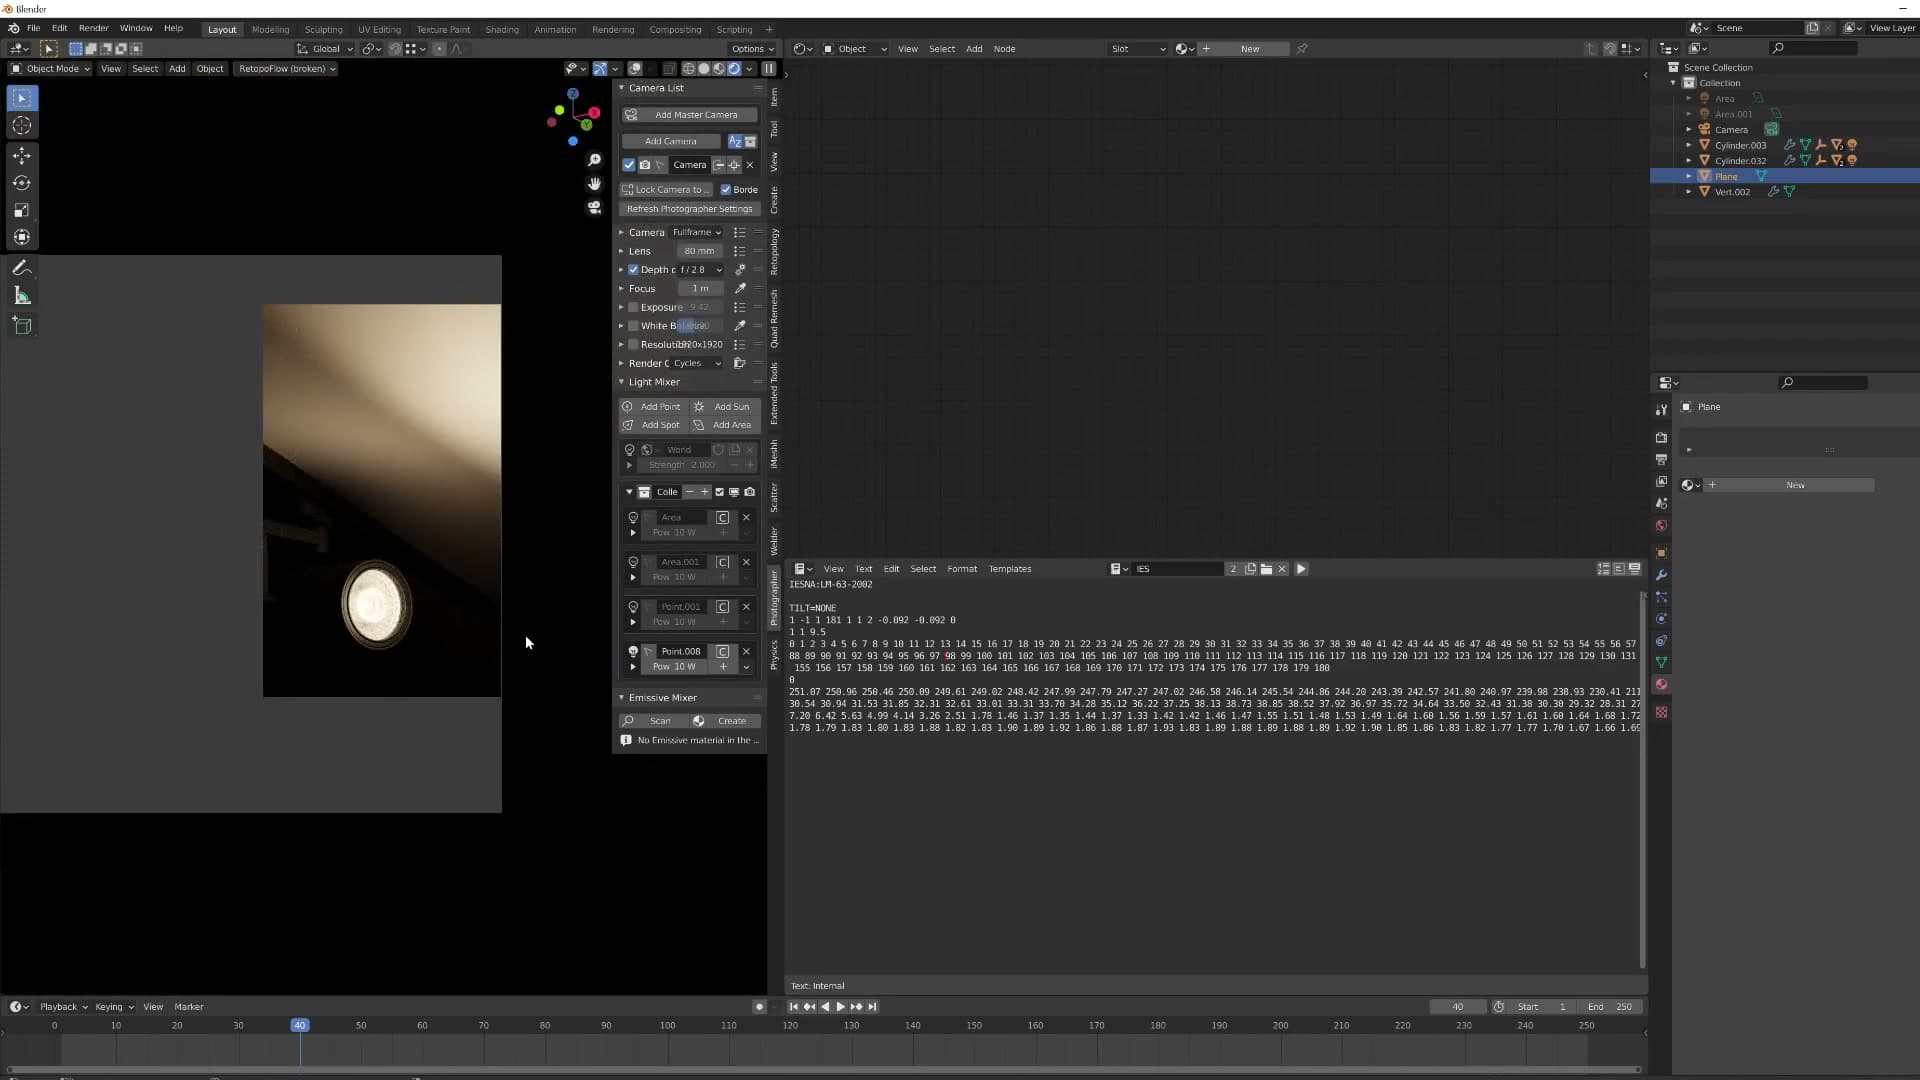
From here the fix has two parts: the emission disc on the inside of the housing, and the glass that the light is travelling through. Each one needs its own node trick before the render comes out clean.
Clear glass node setup: Is Shadow Ray plus Is Diffuse Ray
First, fix the glass. For a normal clear glass window or housing pane, mix a transparent shader into the glass using the Light Path node. Feed Is Shadow Ray and Is Diffuse Ray into an Add node, then into the mix factor. This makes the glass invisible to the rays that produce the most noise, while keeping the surface visible to the camera.
Shadow and diffuse rays into an Add node
Start with the outer glass: the window, the housing pane, whatever pane of clear glass the room is looking through. You want light to come through it cleanly, but a default Glass BSDF leaves shadow and diffuse bounces speckling the result. The fix is a small Mix Shader setup driven by a Light Path node.
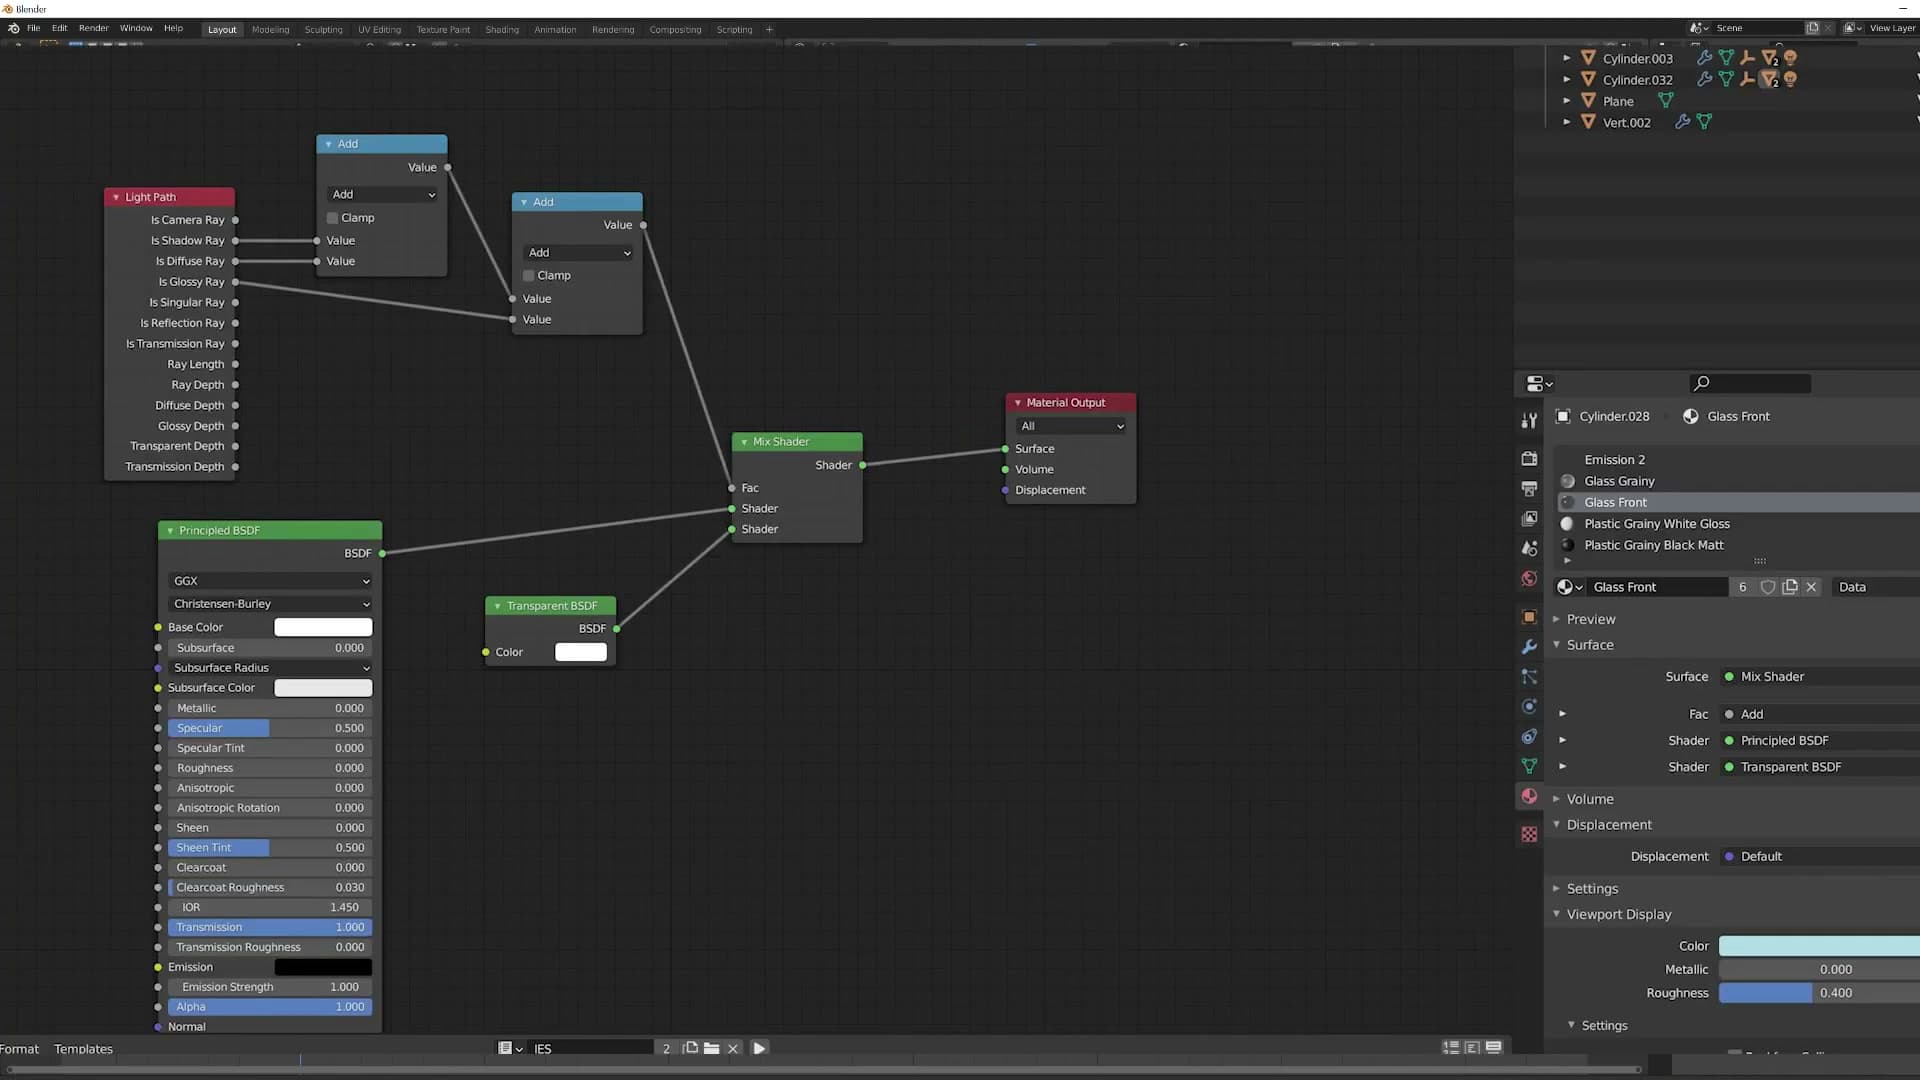
Drop a Light Path node into the material. Take the Is Shadow Ray output and the Is Diffuse Ray output, and feed both into an Add node. Wire the Add's result into the Fac socket of a Mix Shader. Plug your Glass BSDF into the first shader slot and a Transparent BSDF into the second. That is the whole setup.
The logic is straightforward. When a camera ray hits the glass, both Light Path outputs sit at zero, the mix stays fully on the Glass BSDF, and the surface reads as glass. When a shadow ray or a diffuse ray hits the glass, the corresponding output flips to one, the Add result is one, and the mix swings entirely to the Transparent BSDF. Those rays pass straight through as if the glass were not there. They are the rays that produce the most noise, so the noise goes with them.
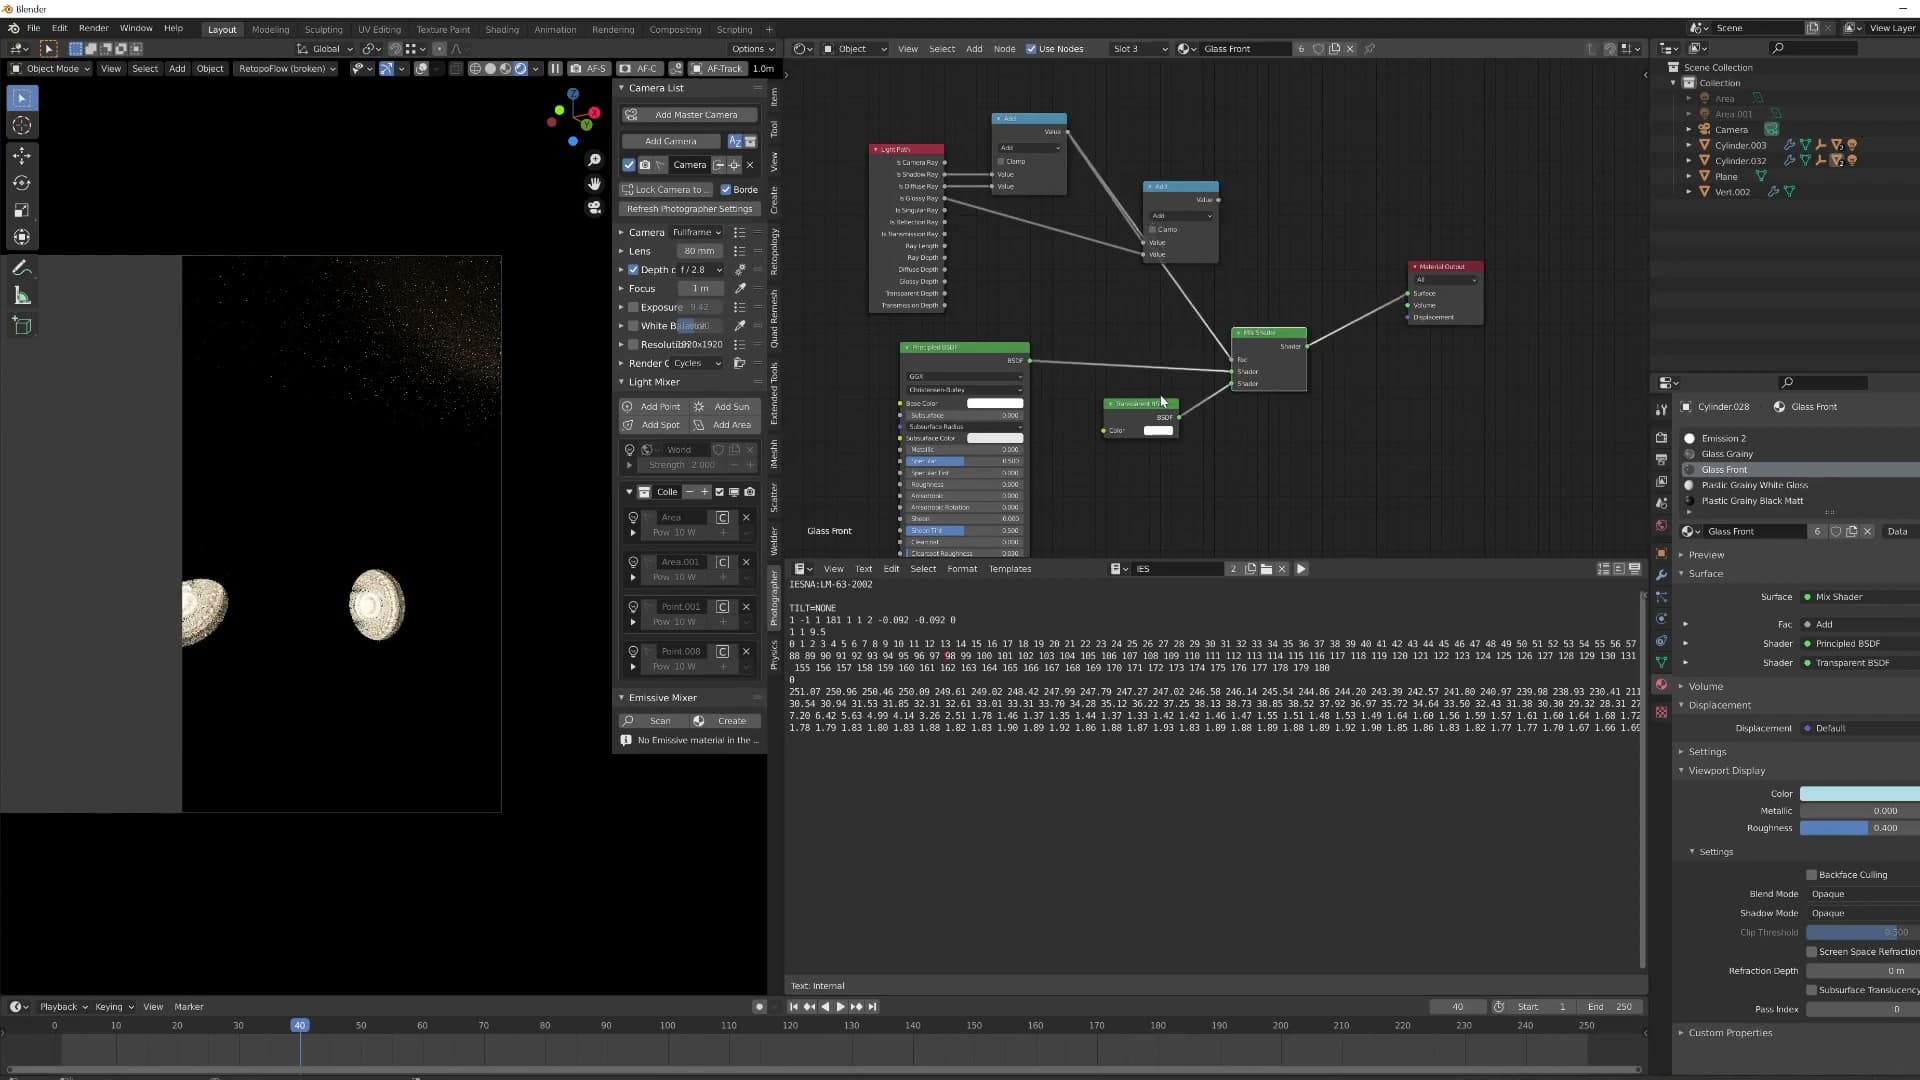
This is the setup to reach for whenever you have a normal room with a clear window, or any other pane that is genuinely meant to let light through. The camera still sees the glass; the renderer's noisiest bounces just do not.
Cutting glossy ray noise with Is Glossy Ray
Shadow and diffuse rays handled, a touch of grain can still come from glossy bounces, light skidding off the inside or outside of the pane. The fix is to bring Is Glossy Ray into the same Add node, alongside Is Shadow Ray and Is Diffuse Ray. Glossy bounces are then treated the same way: pass straight through as transparent.
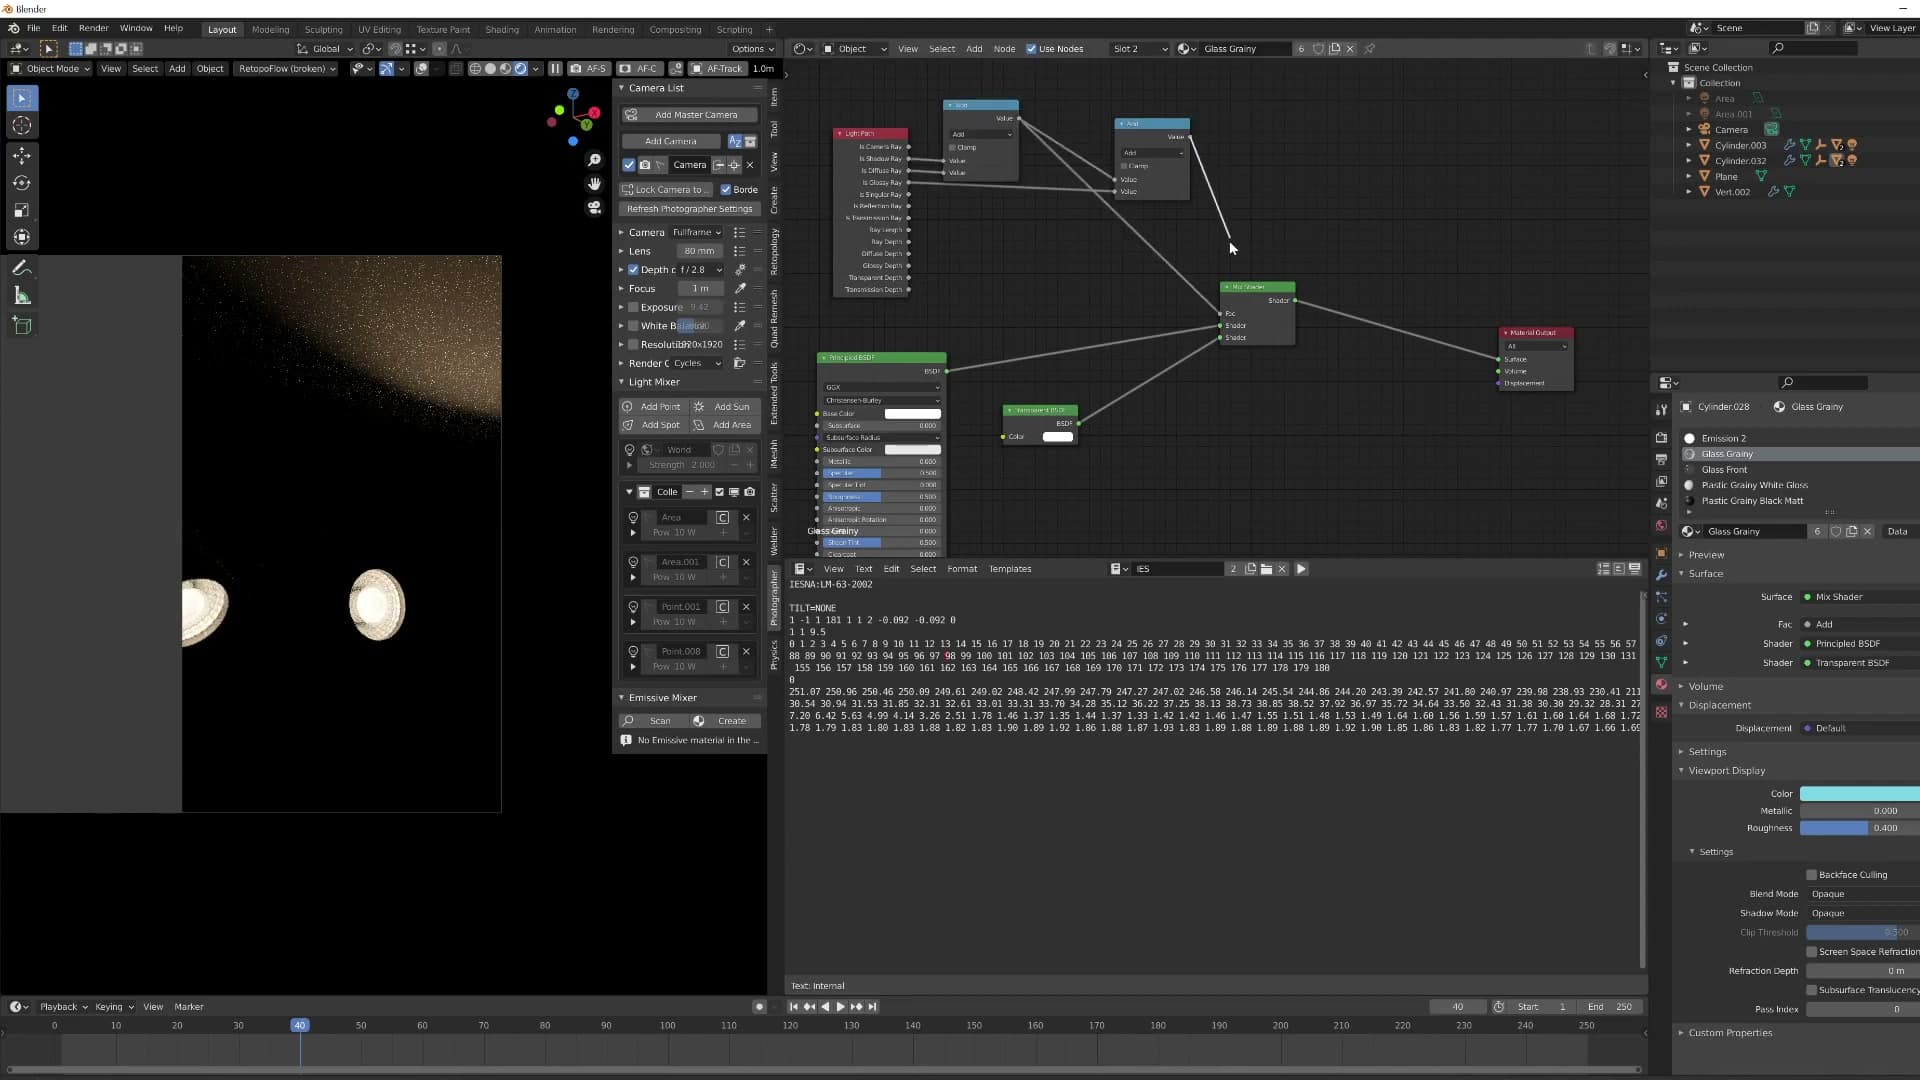
With all three Light Path outputs feeding the mix, the only rays that see the glass as glass are the ones coming from the camera. Every other ray treats it as empty space, which clears the last of the speckle.
Frosted glass: Glossy Depth for the translucent lens look
Frosted glass is trickier. Plugging Is Glossy Ray into the same setup as clear glass kills the noise but also flattens the soft translucent glow that frosted glass should have. Swap in Glossy Depth instead. It preserves the lens-like translucency through the panel while still cancelling the noise.
Why Is Glossy Ray flattens the translucency
Frosted glass looks like it should slot straight into the clear-glass recipe with one extra wire. The shadow-ray plus diffuse-ray mix already cancels most of the noise-producing bounces; adding Is Glossy Ray on top feels like the obvious next step, because the roughness on the frosted surface is exactly what generates the worst of the grain.
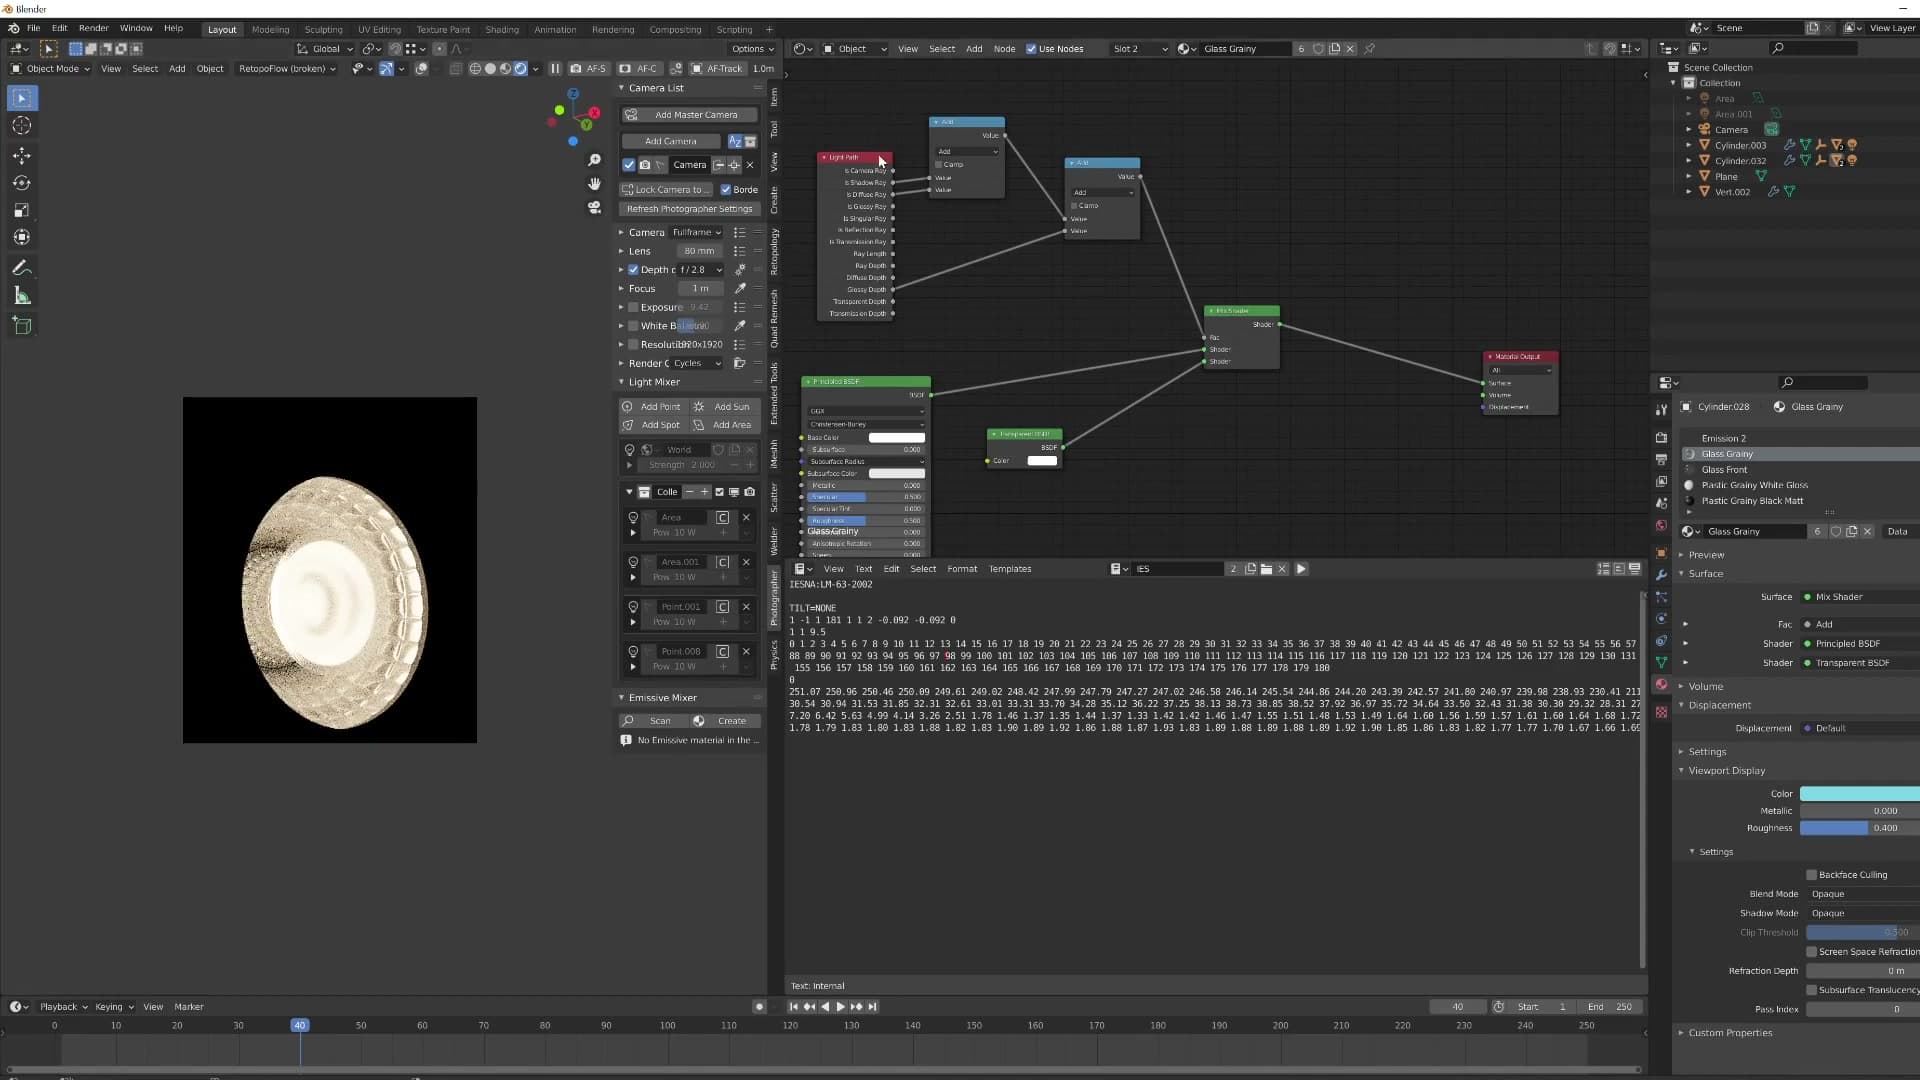
The problem is that those glossy bounces are also what give frosted glass its soft, translucent character. Mask them out completely and the panel goes flat. The diffused lens look that sells the fixture as frosted disappears, and you are left with a clean but lifeless sheet.
So the brief shifts: you need a way to bring that translucent effect back without dragging the noise back in with it. I worked through the relevant Light Path outputs one by one looking for an output that holds the lens-like glow but does not act as a full noise valve.
Glossy Depth preserves the translucent lens effect
Glossy Depth is the output that solves it. Route the Light Path node's Glossy Depth socket into the mix factor in place of Is Glossy Ray, leaving the rest of the clear-glass setup intact, and the frosted panel keeps its diffused-translucent character while the grain from the emission plane behind it drops to effectively zero.
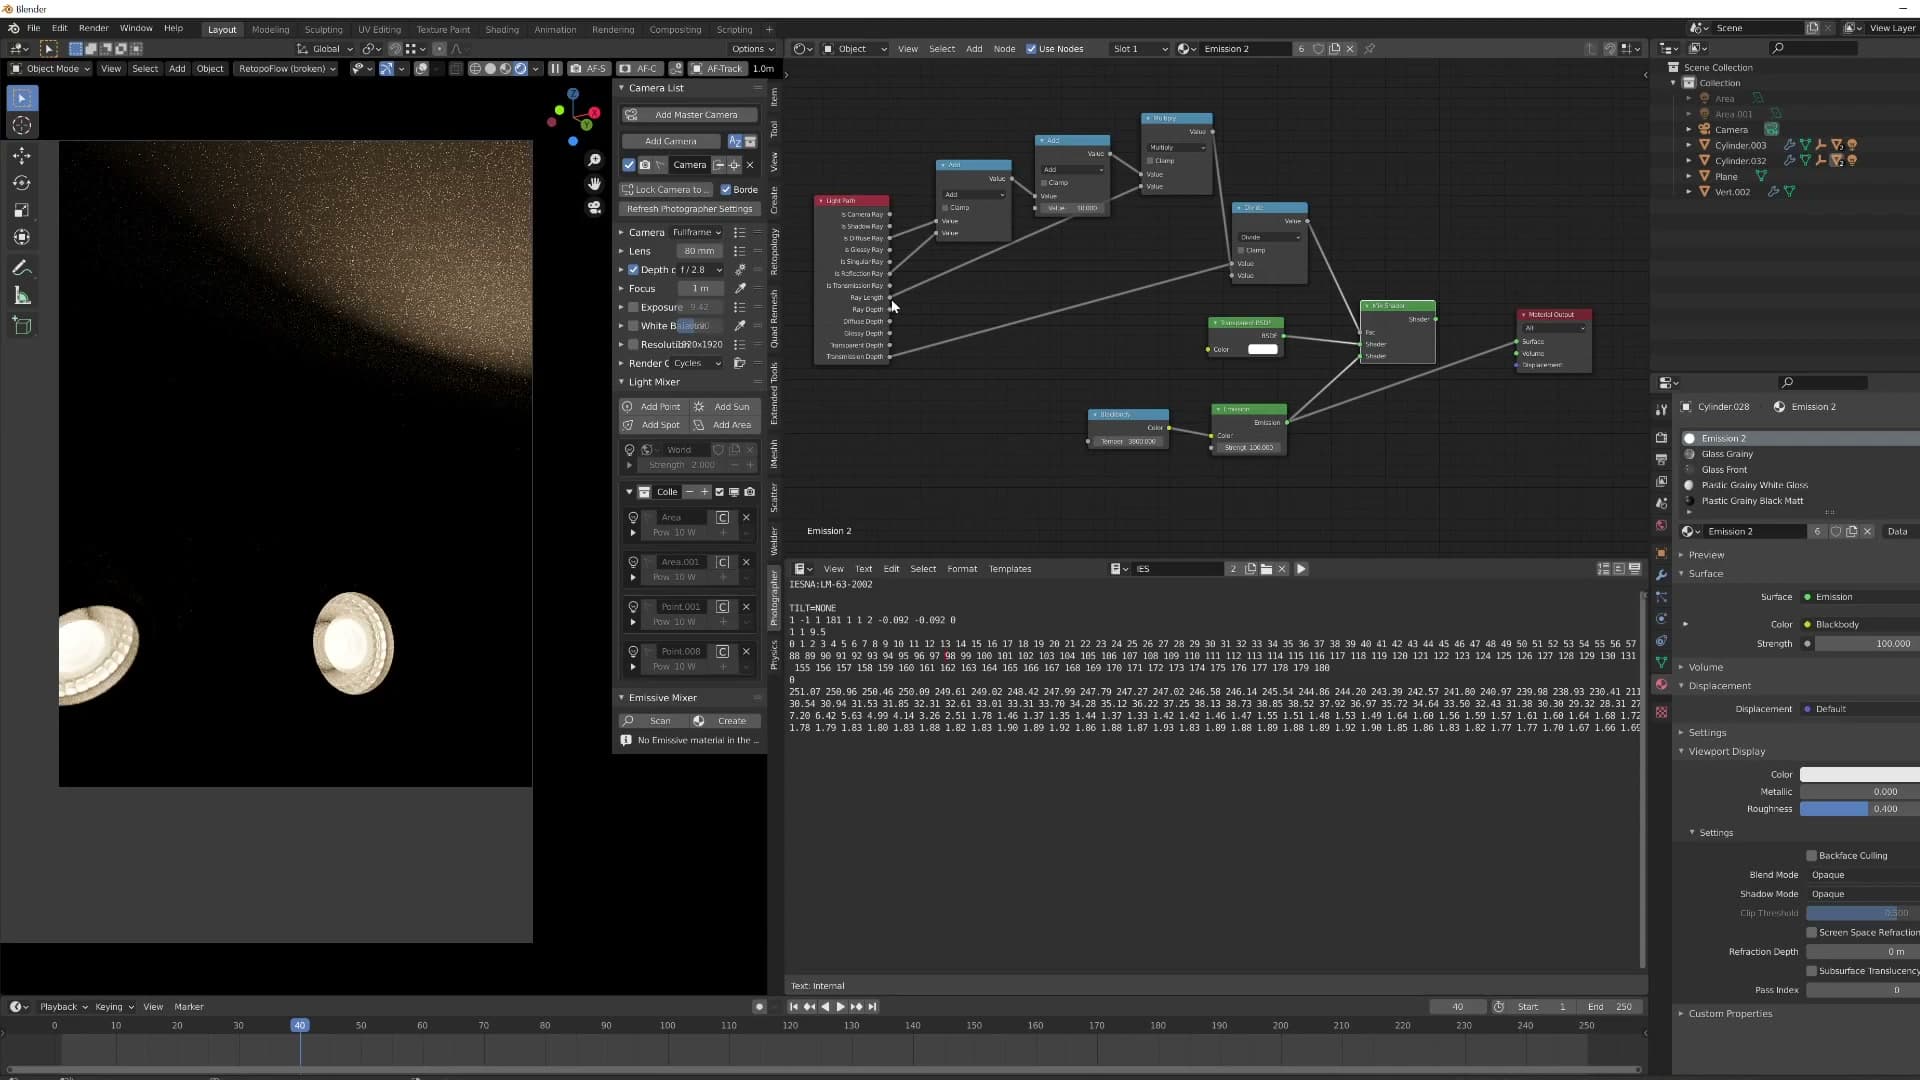
There is a touch of fine detail missing compared with the noisy original, a fair price for what you gain. In return you get a clean translucent lens effect through the glass with no visible noise, the same look frosted glass should have in any archviz shot.
Emission shader node setup: muting the light contribution
With the glass sorted, the emission plane itself still throws noise. The fix is to multiply the emission down for the ray types that are causing the noise. Ray Length helps, boosting the visible strength to around 10 makes the disc read brighter for compositing glare, and Transmission Depth is the magic ingredient that finally cancels the emission's contribution while keeping it visible to the camera.
Ray length to dampen noise from the emitter
With the glass itself now invisible to most noise-producing bounces, the next source of grain is the emission plane sitting behind it. The hunch is the same as before: diffuse rays and other secondary bounces are hitting the emitter and scattering noise back into the scene, so the fix should look similar to the glass setup.
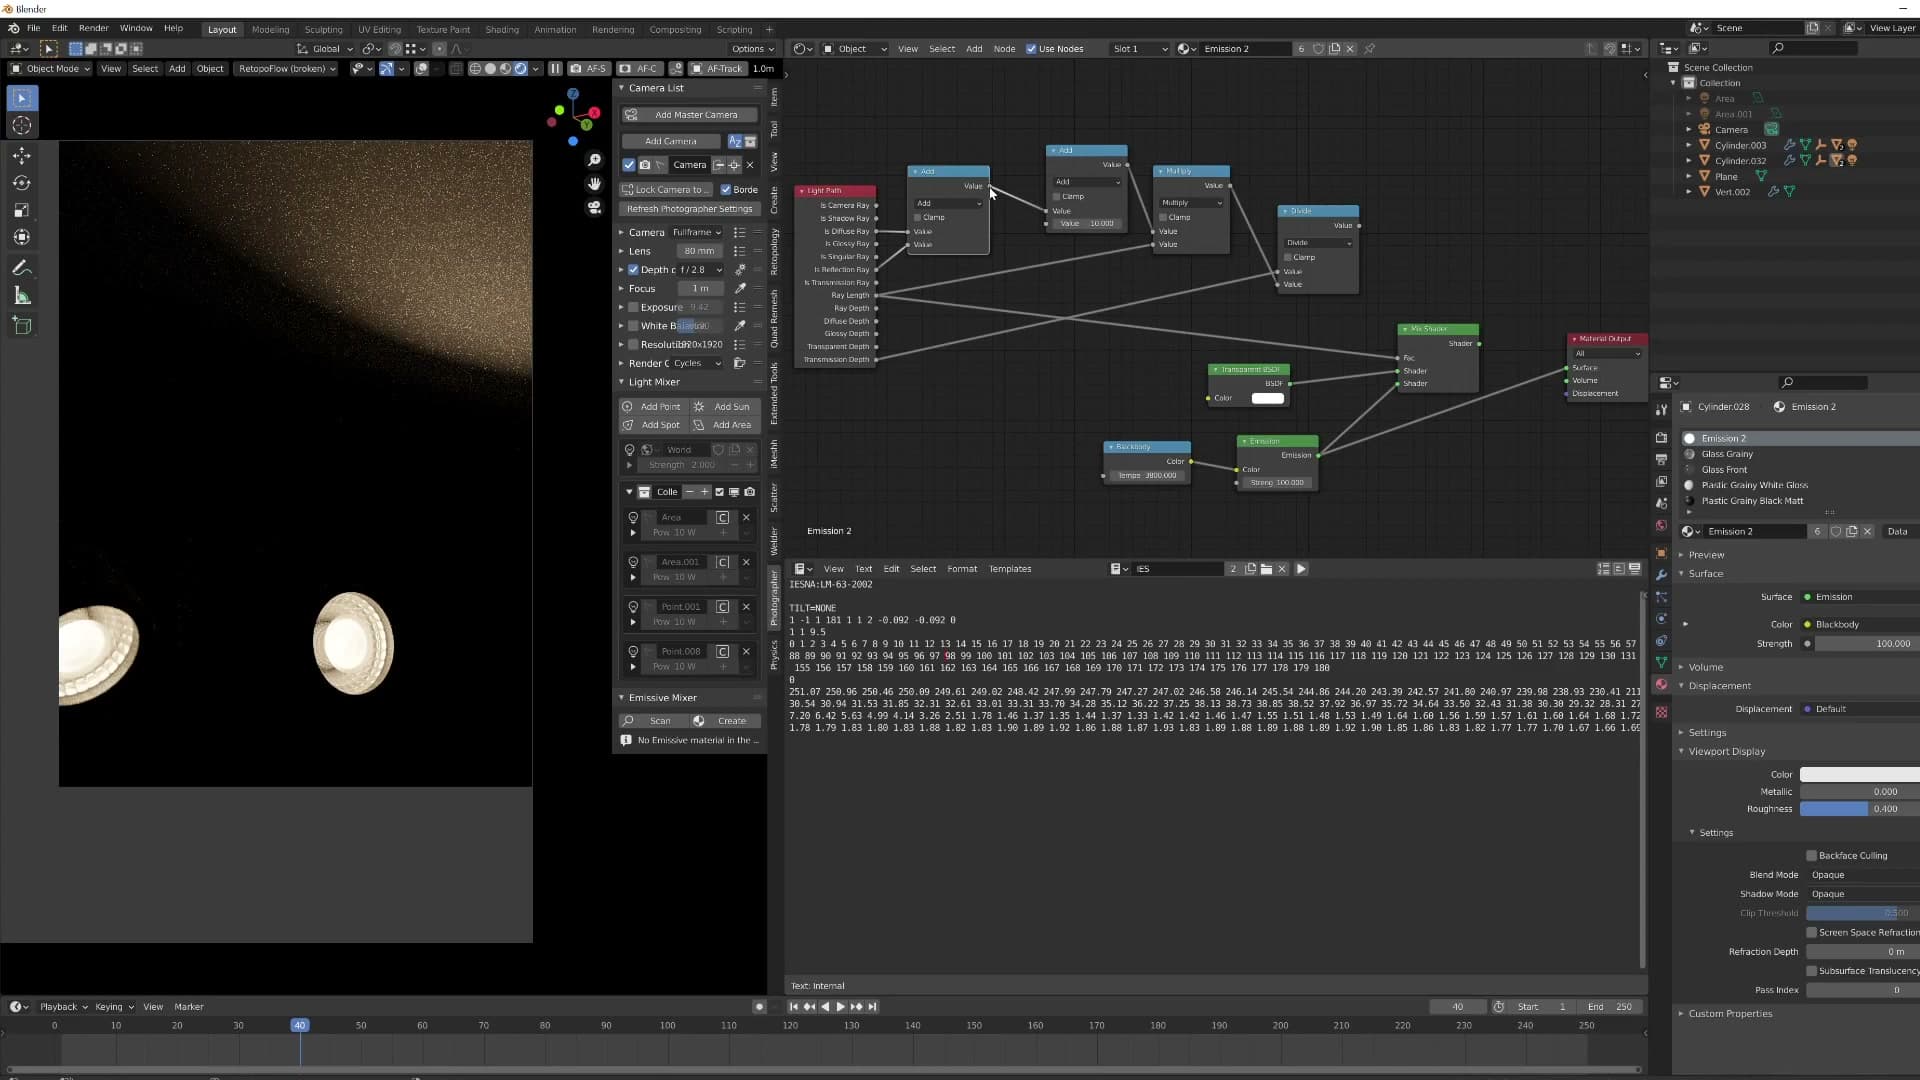
Start by feeding the Light Path node's Ray Length output into the emission shader's strength, multiplying the contribution down by distance. Wire it in the same way you handled Is Shadow Ray and Is Diffuse Ray on the glass side.
The render does get noticeably cleaner, but the trade-off shows up immediately. The disc inside the fixture goes dark. It still emits a small amount, but it no longer reads as an illuminated lamp, which defeats the whole point of putting a visible emitter inside the casing.
Boosting emission strength for compositing glare
The next experiment is to add a second Add Shader into the emission branch and route the dampened signal through it. That attempt doesn't land cleanly either, and the moment you unplug the extra node the scene jumps back up in brightness, and actually looks closer to what you want.
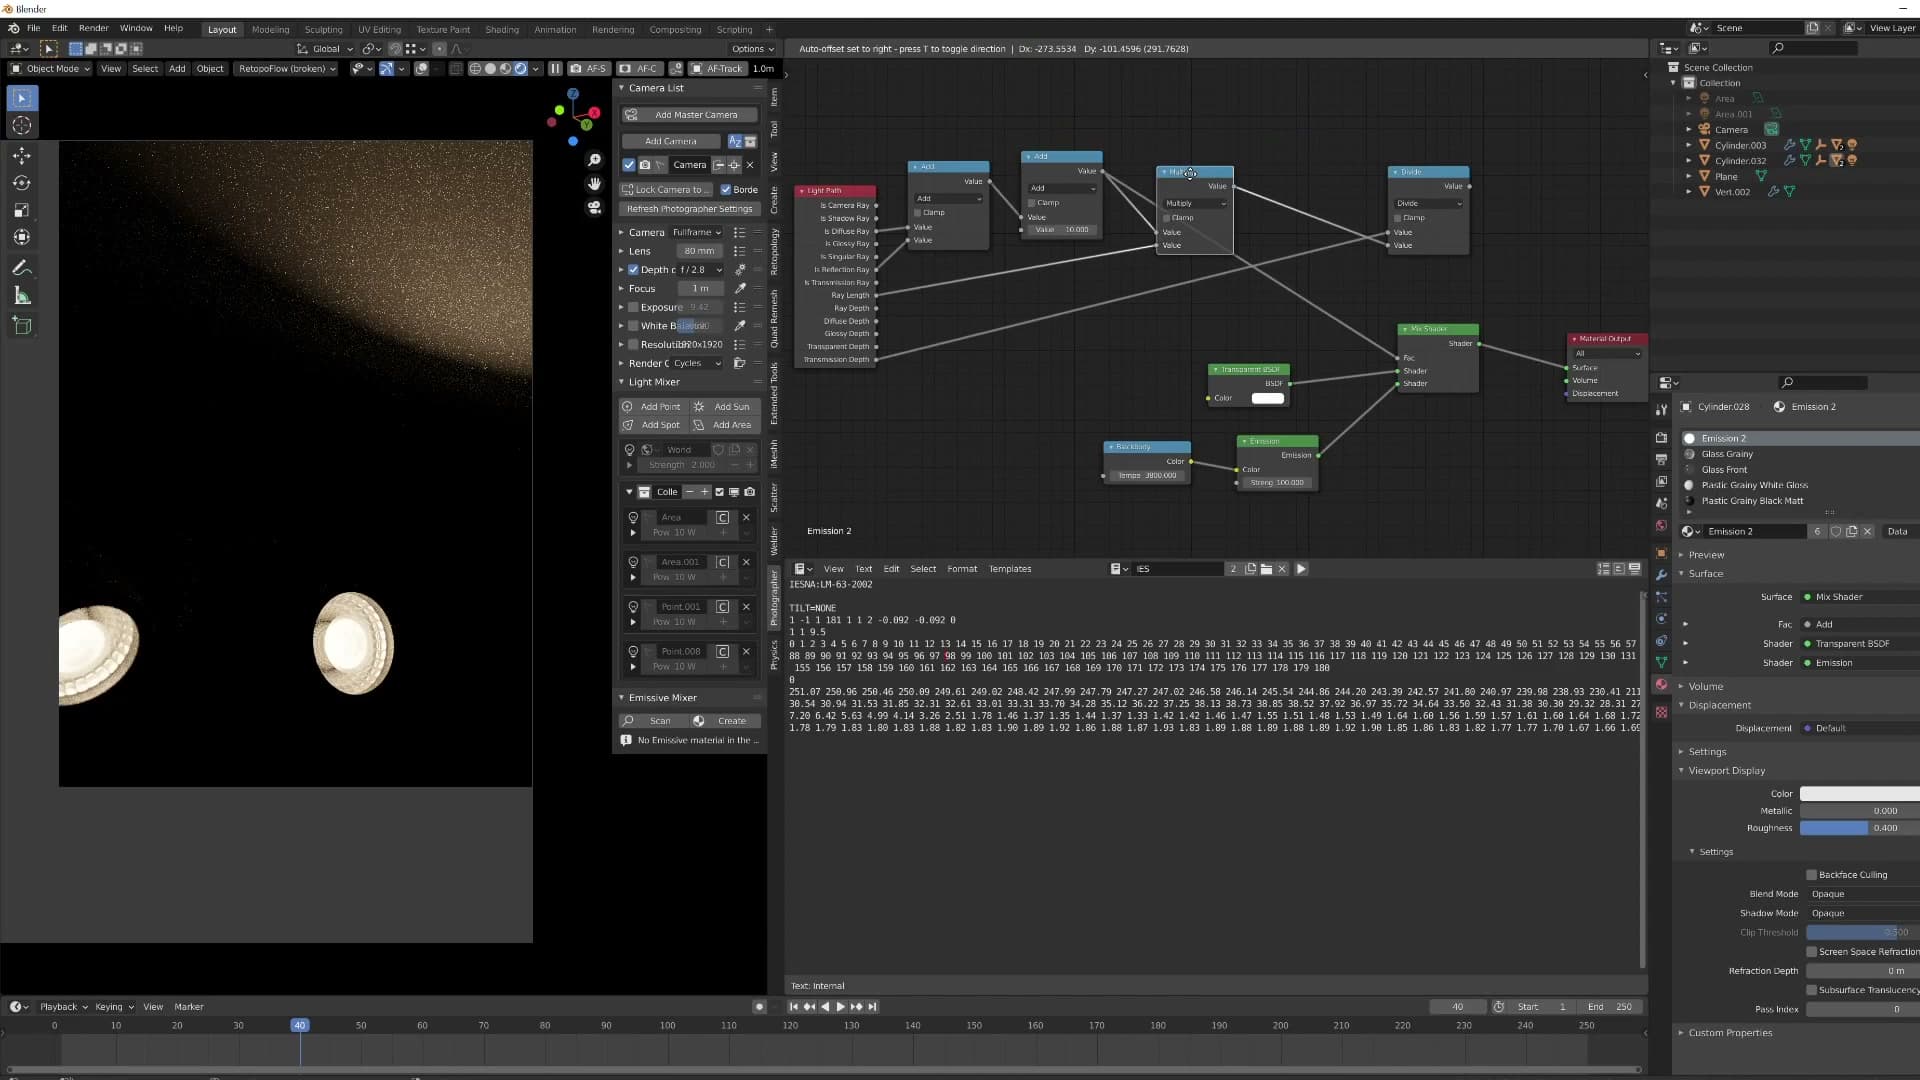
Push the emission's Strength from 1 up to around 10. The disc now reads punchy in-camera, and once you take the render into the compositor it has enough headroom to drive a convincing glare effect on top. The exact number is scene-dependent. Ten is what suited this fixture, but the principle is to overdrive the visible emitter so the post-processing has something to grab onto.
Transmission Depth cancels the noisy light contribution
Boosting the strength gives the disc its presence back, but it also hands the noise problem straight back. The brighter the emitter, the worse the grain bleeding off it. The trick that finally works is to wire the Light Path node's Transmission Depth output into the emission strength chain alongside Ray Length.
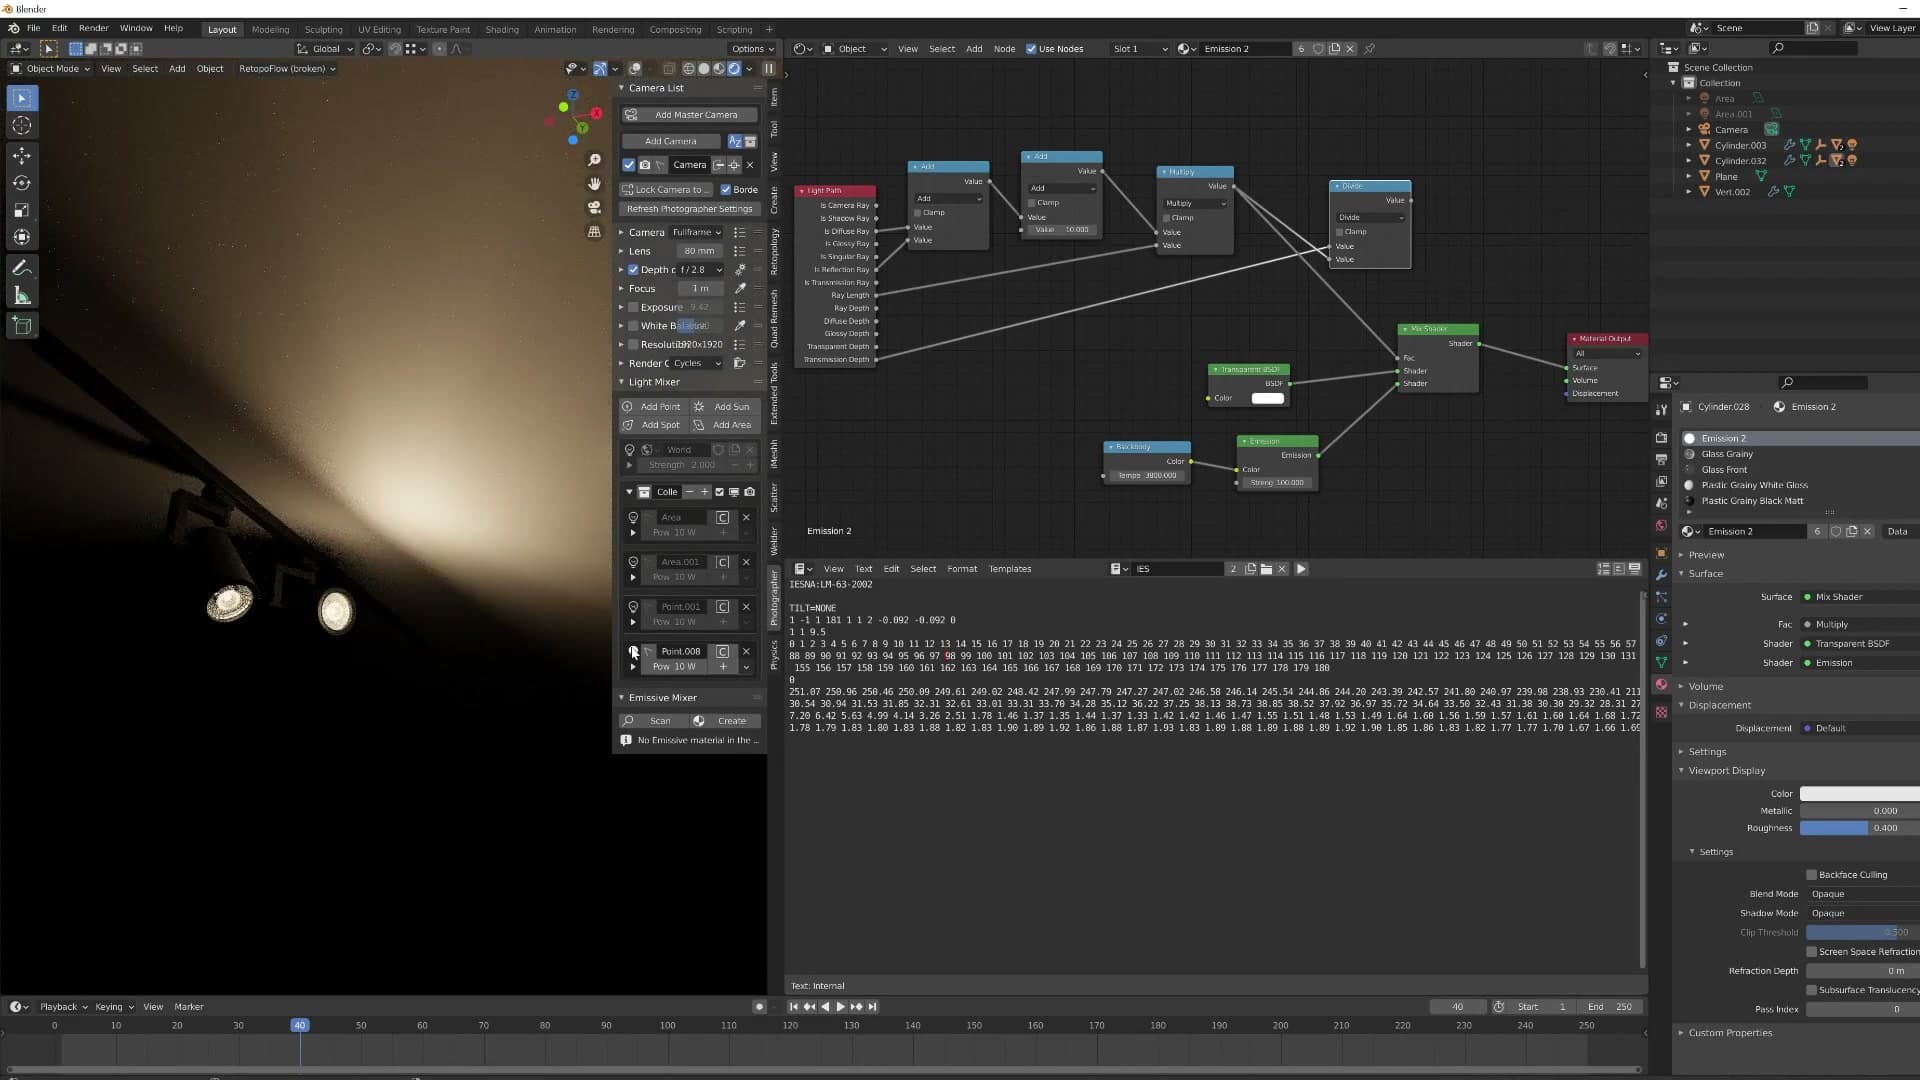
The reasoning is loose but it tracks: Cycles sees the emission plane through the surrounding glass as a transmission bounce, so an output that responds to transmission depth gives you a handle on that specific contribution. Plug it in, and the noise from the emitter drops away almost completely while the disc itself stays visible to camera.
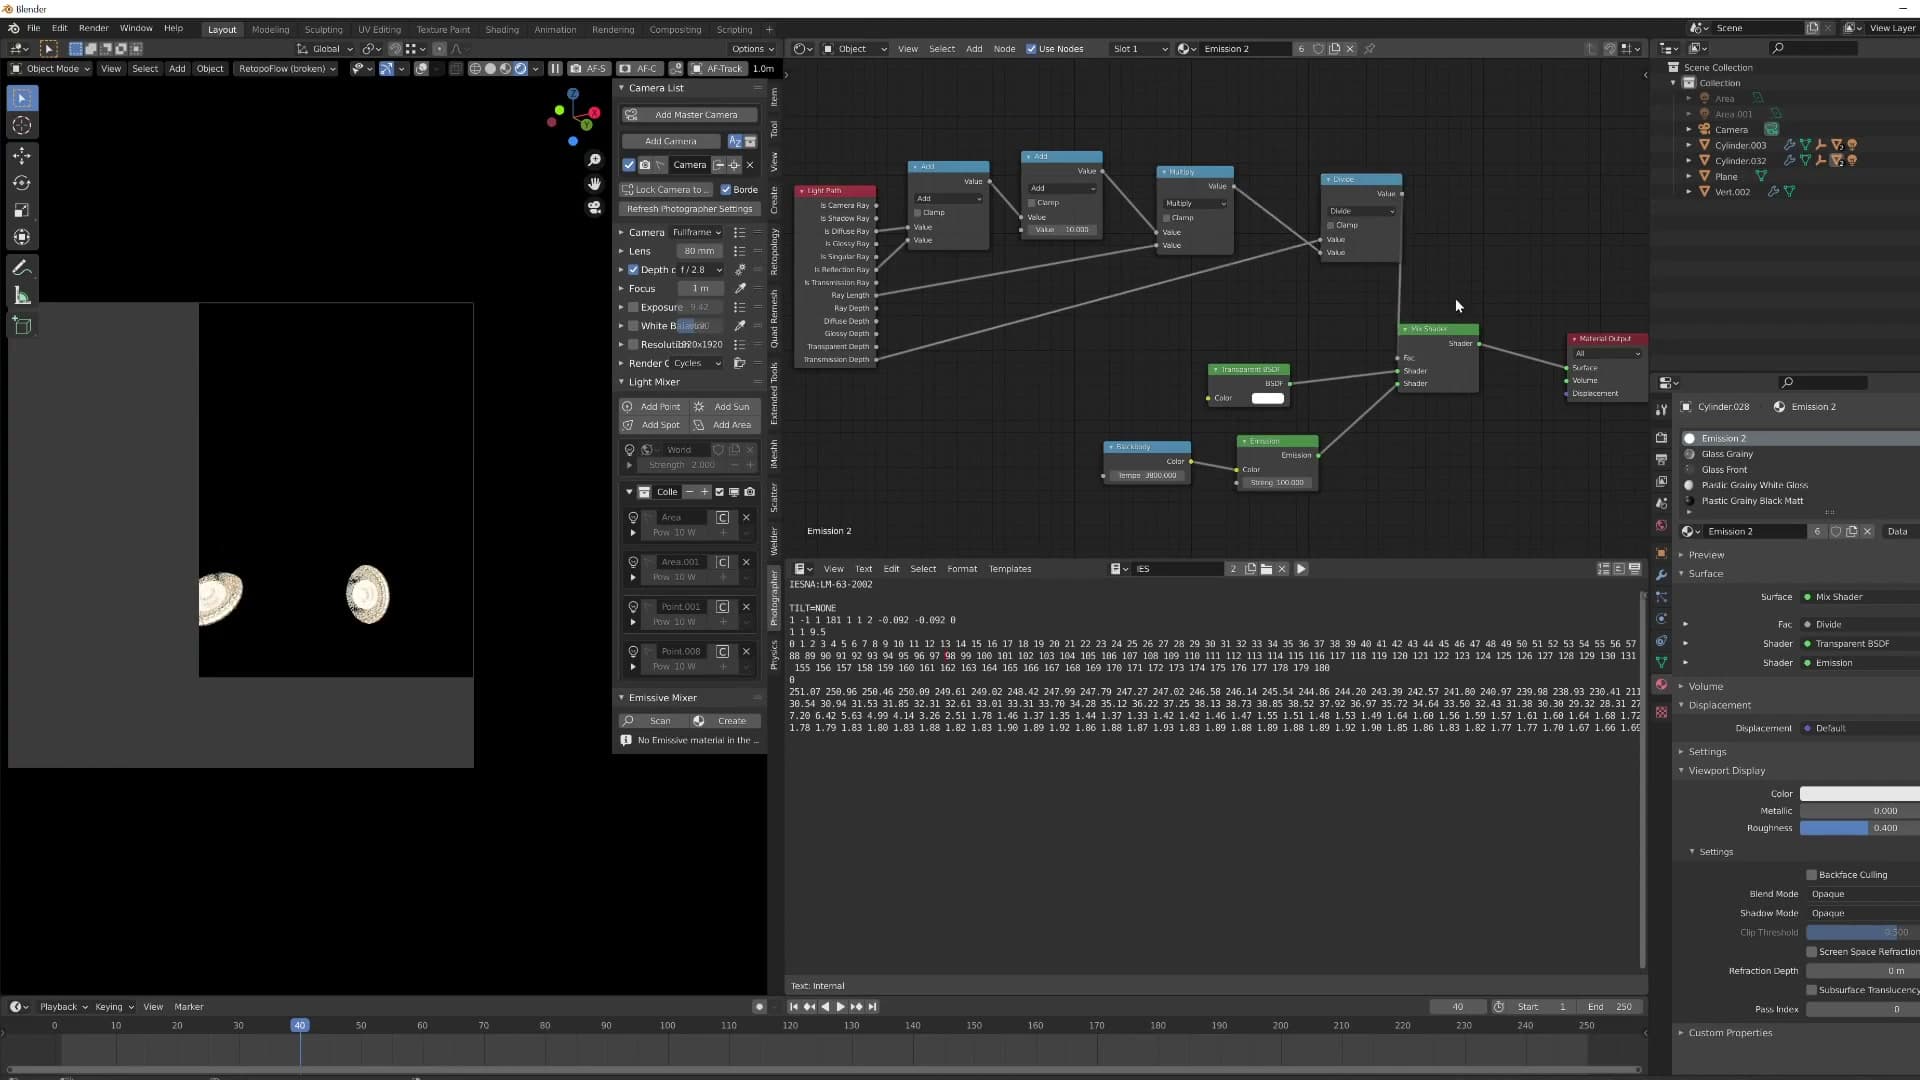
That's the entire setup. The IES point light does all the real lighting work: shaping the soft pool on the floor and lifting the surrounding surfaces. The emission plane only exists so the bulb reads as lit on screen. With Ray Length and Transmission Depth both feeding into its strength, it stops contributing any meaningful light to the rest of the scene, which is exactly the behaviour you want from a decorative emitter trapped inside a glass casing.
Result, use cases and further reading
What you end up with is a reusable archviz light fixture: a visible emitter inside glass, an IES point light for the actual cast, and no noise penalty. Point it at a wall in any scene and it just works. The video closes with a pointer to Creative Shrimp's deeper Light Path node breakdown if you want to understand why this all works.
Clean, reusable archviz point lights
What you are left with at this point is a small family of point lights that you can drop into any scene, aim at a wall, and rely on. They contribute real, useful illumination, the visible emission disc inside the glass reads correctly in camera, and the noise penalty that originally pushed you down this rabbit hole has gone. For archviz work, that combination (directional fall-off, IES character, no fireflies) is what makes these fixtures worth keeping around.
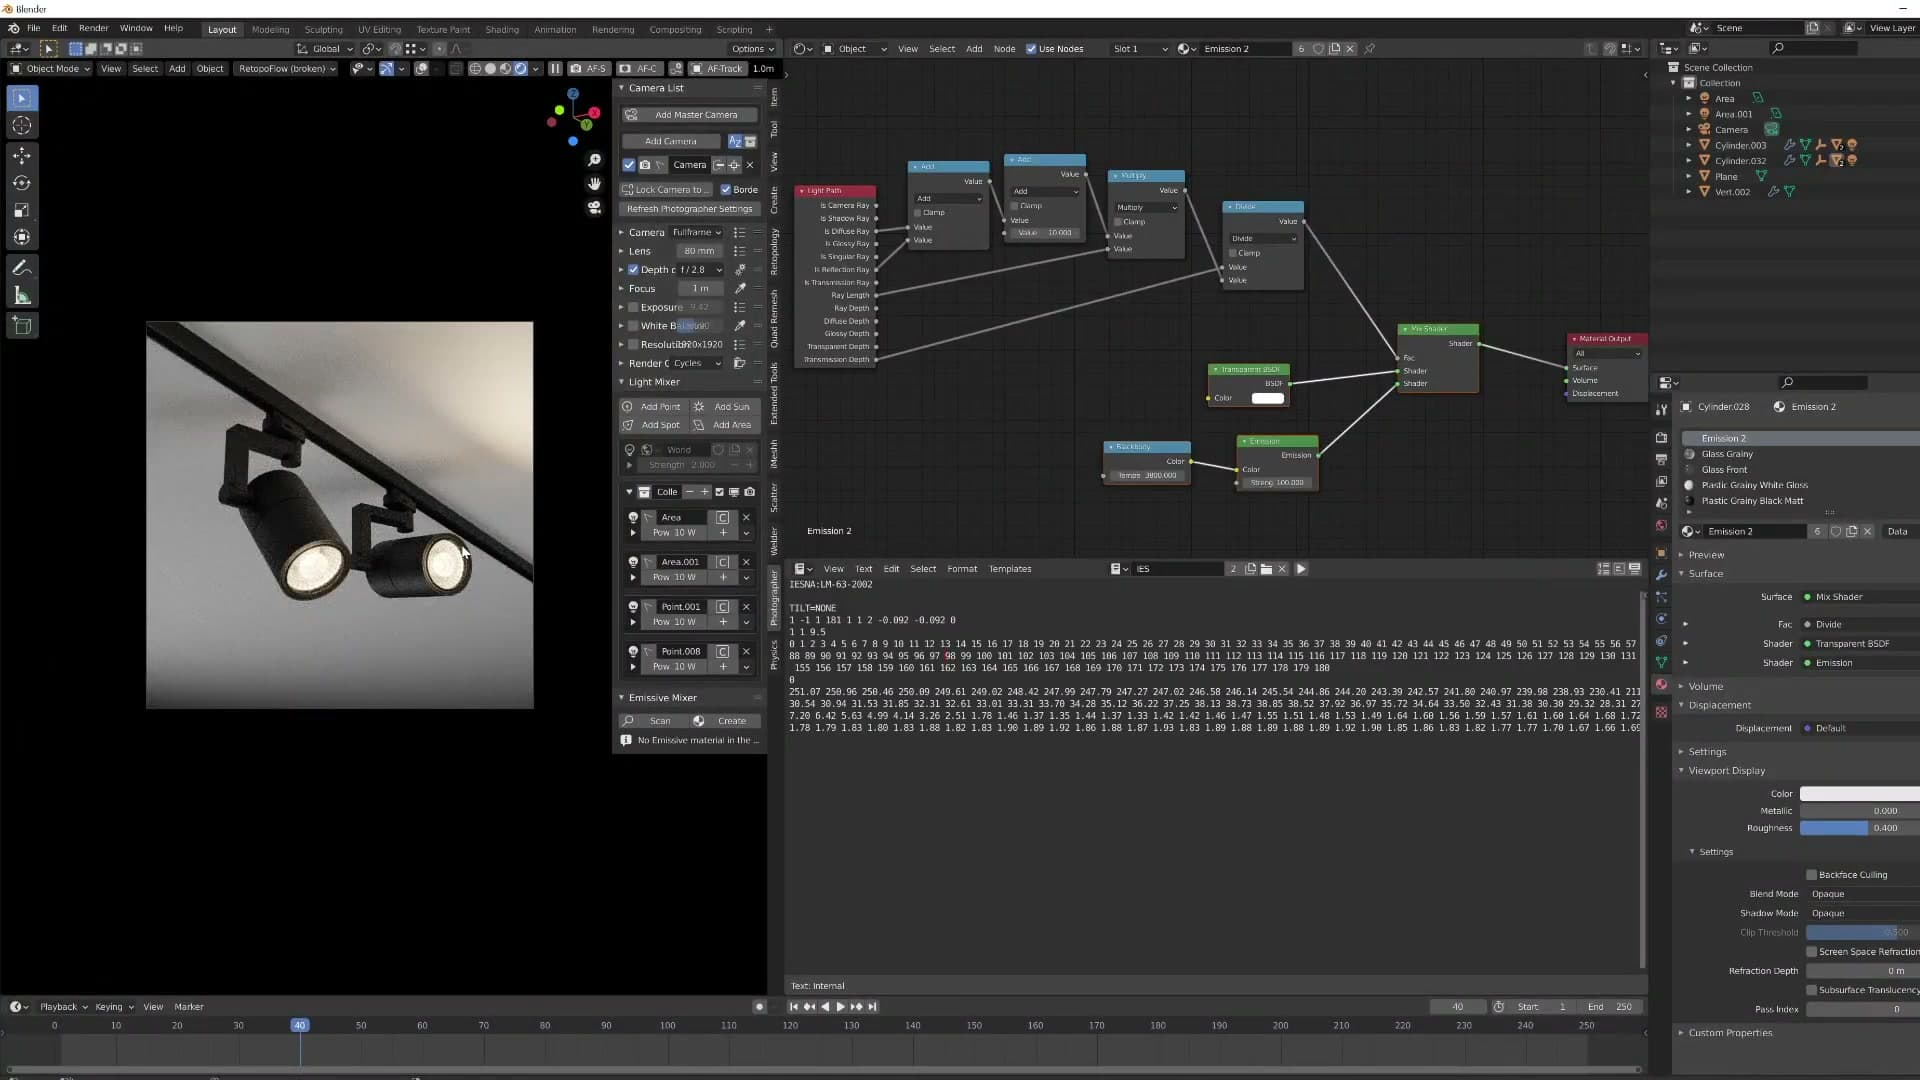
The bigger reason the setup matters is reusability. A common frustration with lights pulled off other sites is that they arrive completely static: locked to a particular position, baked into a particular scene, fiddly to move without the whole look breaking down. The setup described in this post does the opposite. Once the node graph is wired up inside the fixture, you can point the lamp at any surface in any scene and it just works.
These specific fixtures are also being released through iMeshh as ready-made assets, so if you do not fancy rebuilding the node graph yourself you can grab them straight from the library and drop them in.
Further reading: Creative Shrimp's Light Path node breakdown
If you want to understand why this works rather than just copy the recipe, Creative Shrimp has a deeper video on the Light Path node covering the more advanced uses of those ray-type and depth outputs. It is the natural next step if the shadow-ray / diffuse-ray / transmission-depth logic from earlier in this post left you curious about what else those sockets can do.
That is the whole setup. A pair of clean, efficient archviz point lights that behave themselves inside frosted glass. If you want to push the Light Path node further, Creative Shrimp's video is the place to start. Thanks for reading.
Tools and credits
Everything mentioned in this tutorial, with links.
- Blender is the renderer this entire build runs in.
- iMeshh is the studio platform (project management, client review, asset library, invoicing). The asset library used in this tutorial is included with every iMeshh Pro plan.
- Poly Haven provides free CC0 textures and HDRIs.
Pillar guide: Rendering Post hub