What E-Cycles 2021 is and why archviz artists are watching it
E-Cycles is a paid, optimised fork of Cycles aimed squarely at archviz and animation work. iMeshh got early access to the 2021 release and built a heavy test scene (hundreds of trees, dense grass, dozens of lights, an interior with reflective glass) to push every new feature to its limit.
The benchmark scene built to break things
E-Cycles 2021 is a paid, optimised fork of Cycles, and through a collaboration with the developer iMeshh got early access to the new release. Rather than reviewing it on a clean cube, the goal was to find out what happens when you throw a real archviz workload at it.
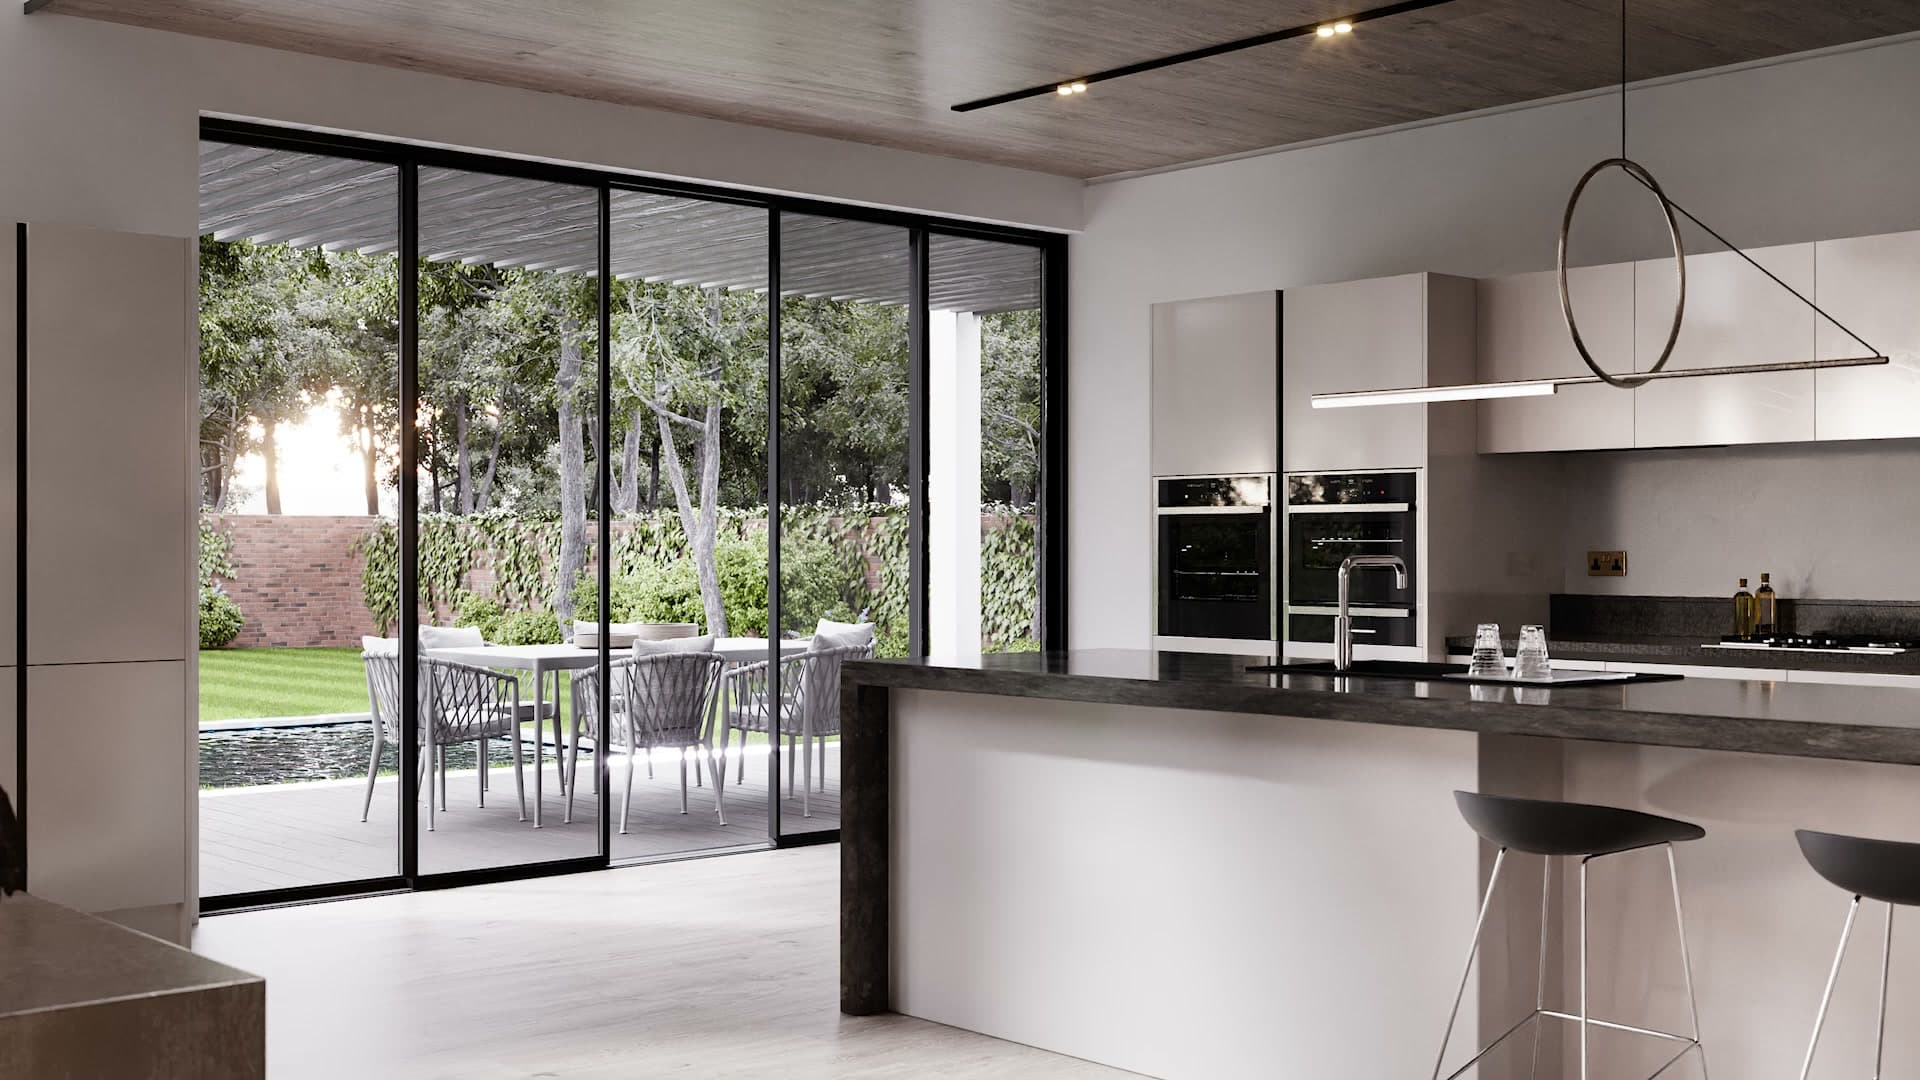
The benchmark scene was built deliberately heavy. It packs in a huge number of trees, layers of grass and dozens of lights. That is the kind of geometry and lighting load that grinds standard Cycles to a crawl. The brief was simple: push every part of E-Cycles to the limit and see what holds up, including the headline feature that everyone has been talking about, the incredibly fast viewport.
If you are already weighing up whether E-Cycles is worth the money, or you have seen the name floating around and are not quite sure what it actually is, the rest of this walkthrough is for you. Each new feature is tested against this same scene so the comparisons stay honest.
Render time: 4m 05s vs 9m 06s on the same scene
The headline number first: rendering the same scene with the same samples produced near-identical output in less than half the time. Over a long animation that gap turns into days of compute. That is the bit that pays for the licence.
Same scene, same samples, half the time
The headline test is a straight A/B: render the same archviz scene twice, same camera, same samples, same lighting setup, swap only the engine. E-Cycles finished the frame in 4 minutes 5 seconds. Standard Cycles, opening the exact same file, took 9 minutes 6 seconds.
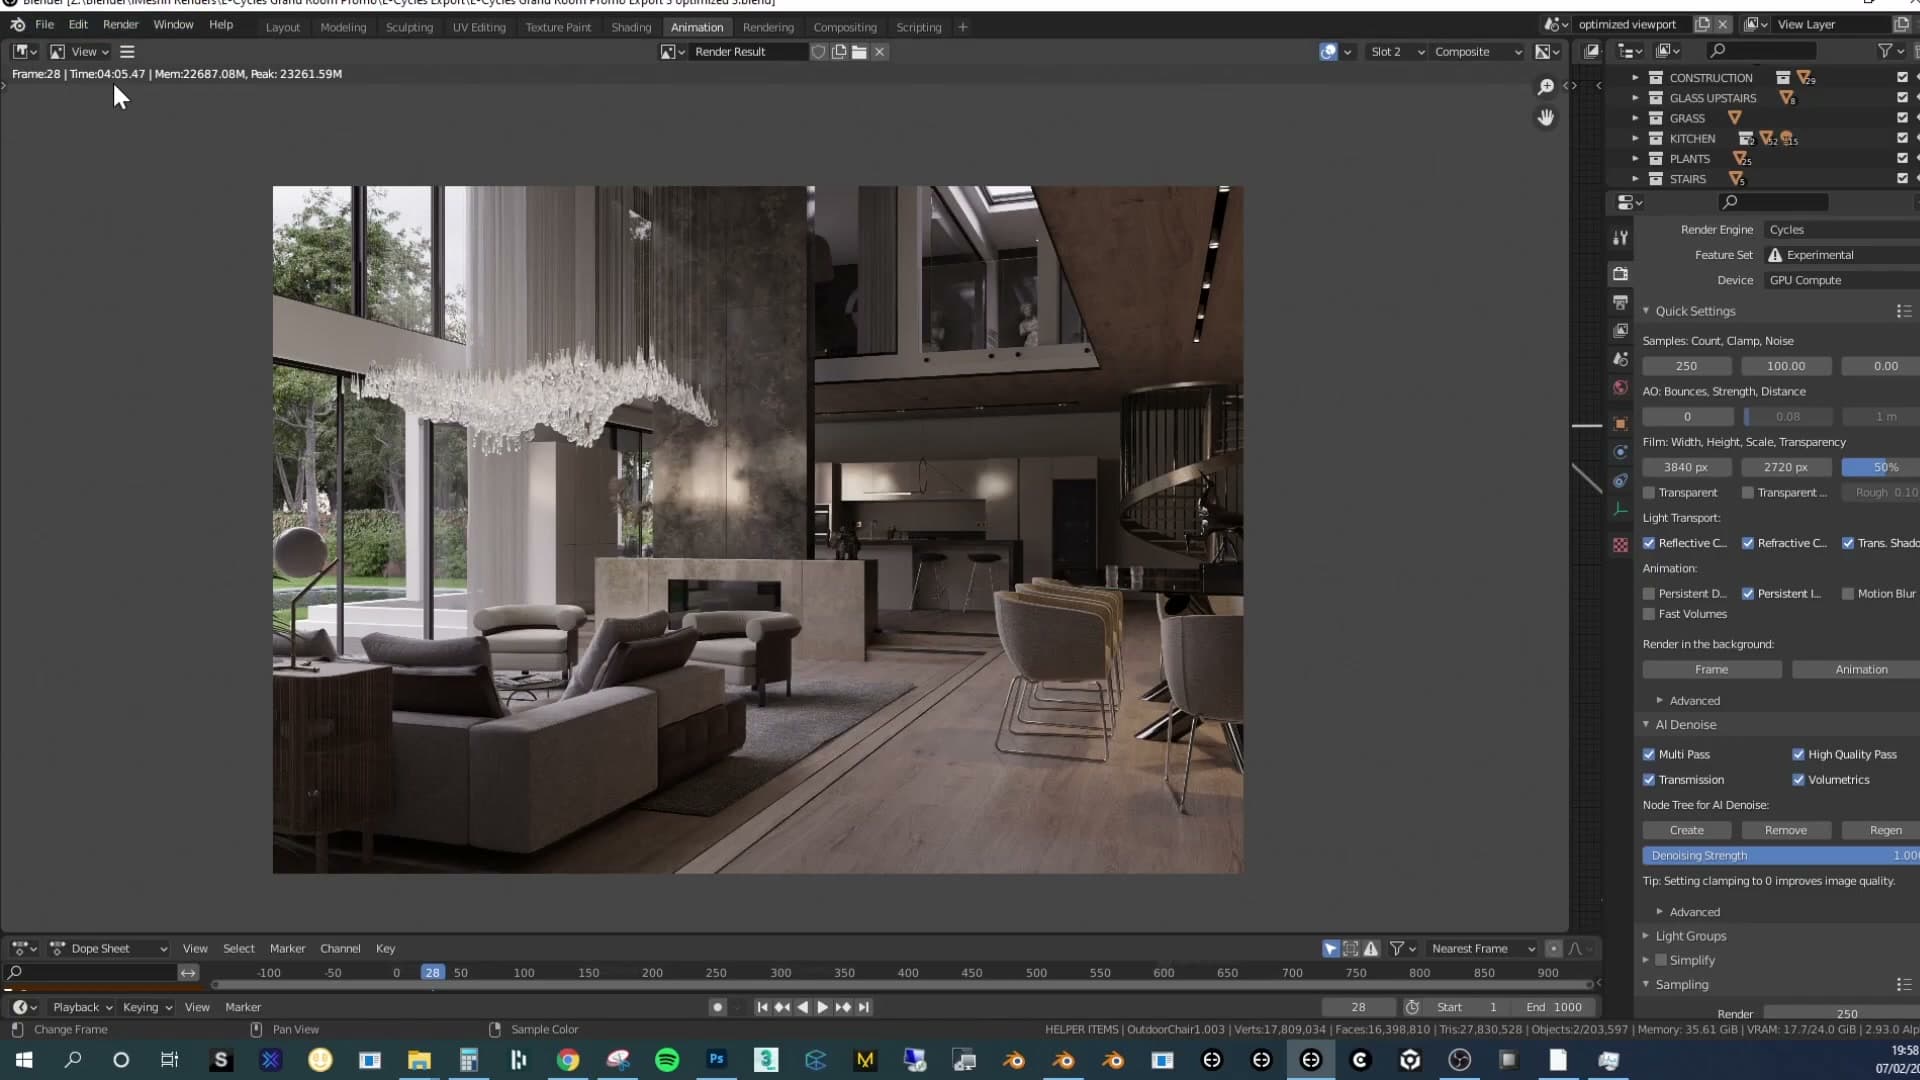
Side by side, the two outputs are effectively identical. There is a faint tonal shift between them, but that is the denoiser behaving slightly differently on each engine rather than any change in the lighting solve. Geometry, materials and shadow falloff all line up.
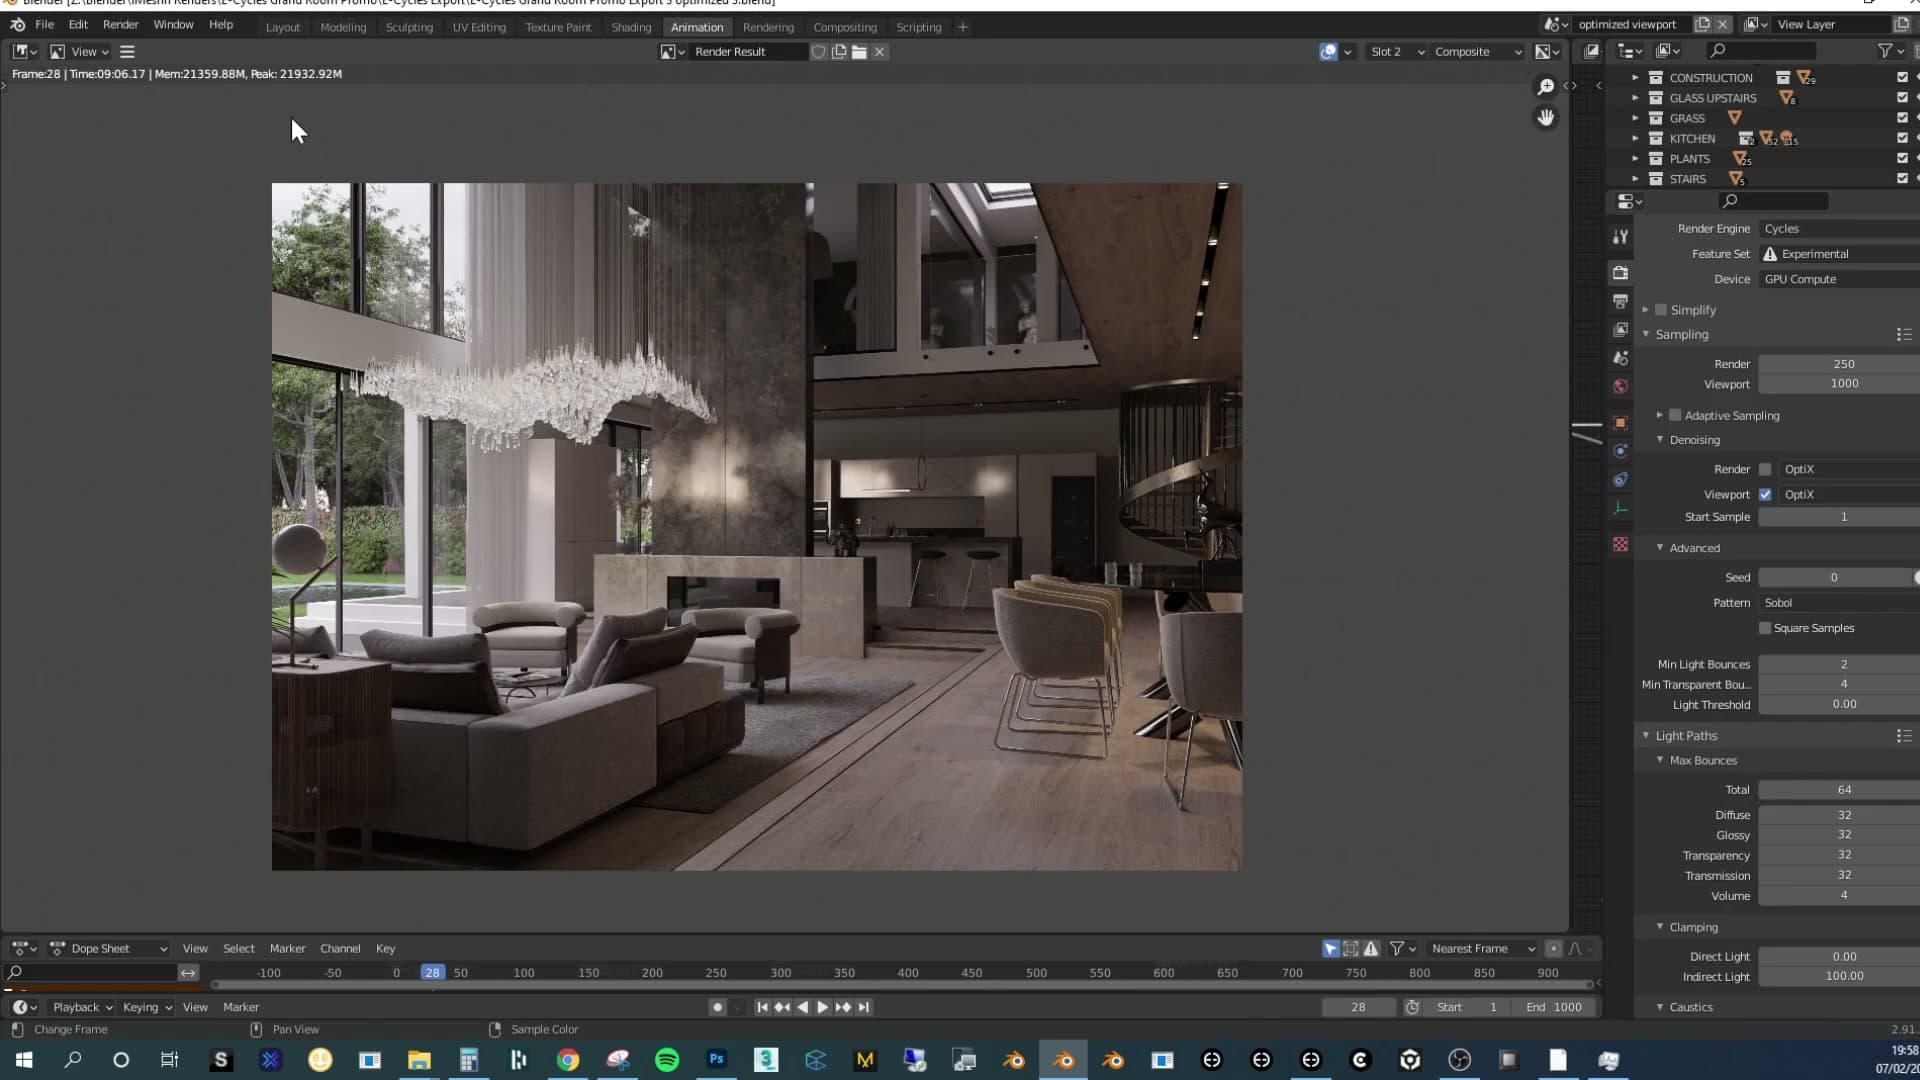
That means the saving is genuinely free: less than half the render time for an image you cannot meaningfully tell apart from vanilla Cycles. On a single still, it just feels like a nice bonus. The real impact only shows up once you scale it across a job.
What that saves on a 1,000-frame animation
Run the numbers across an animation and the gap becomes the whole story. A 1,000-frame sequence at 9 minutes per frame is 9,000 minutes, which is 150 hours of render time. The same 1,000 frames at 4 minutes per frame is 4,000 minutes, or roughly 66 hours. That is days of render farm time given back on a single job.
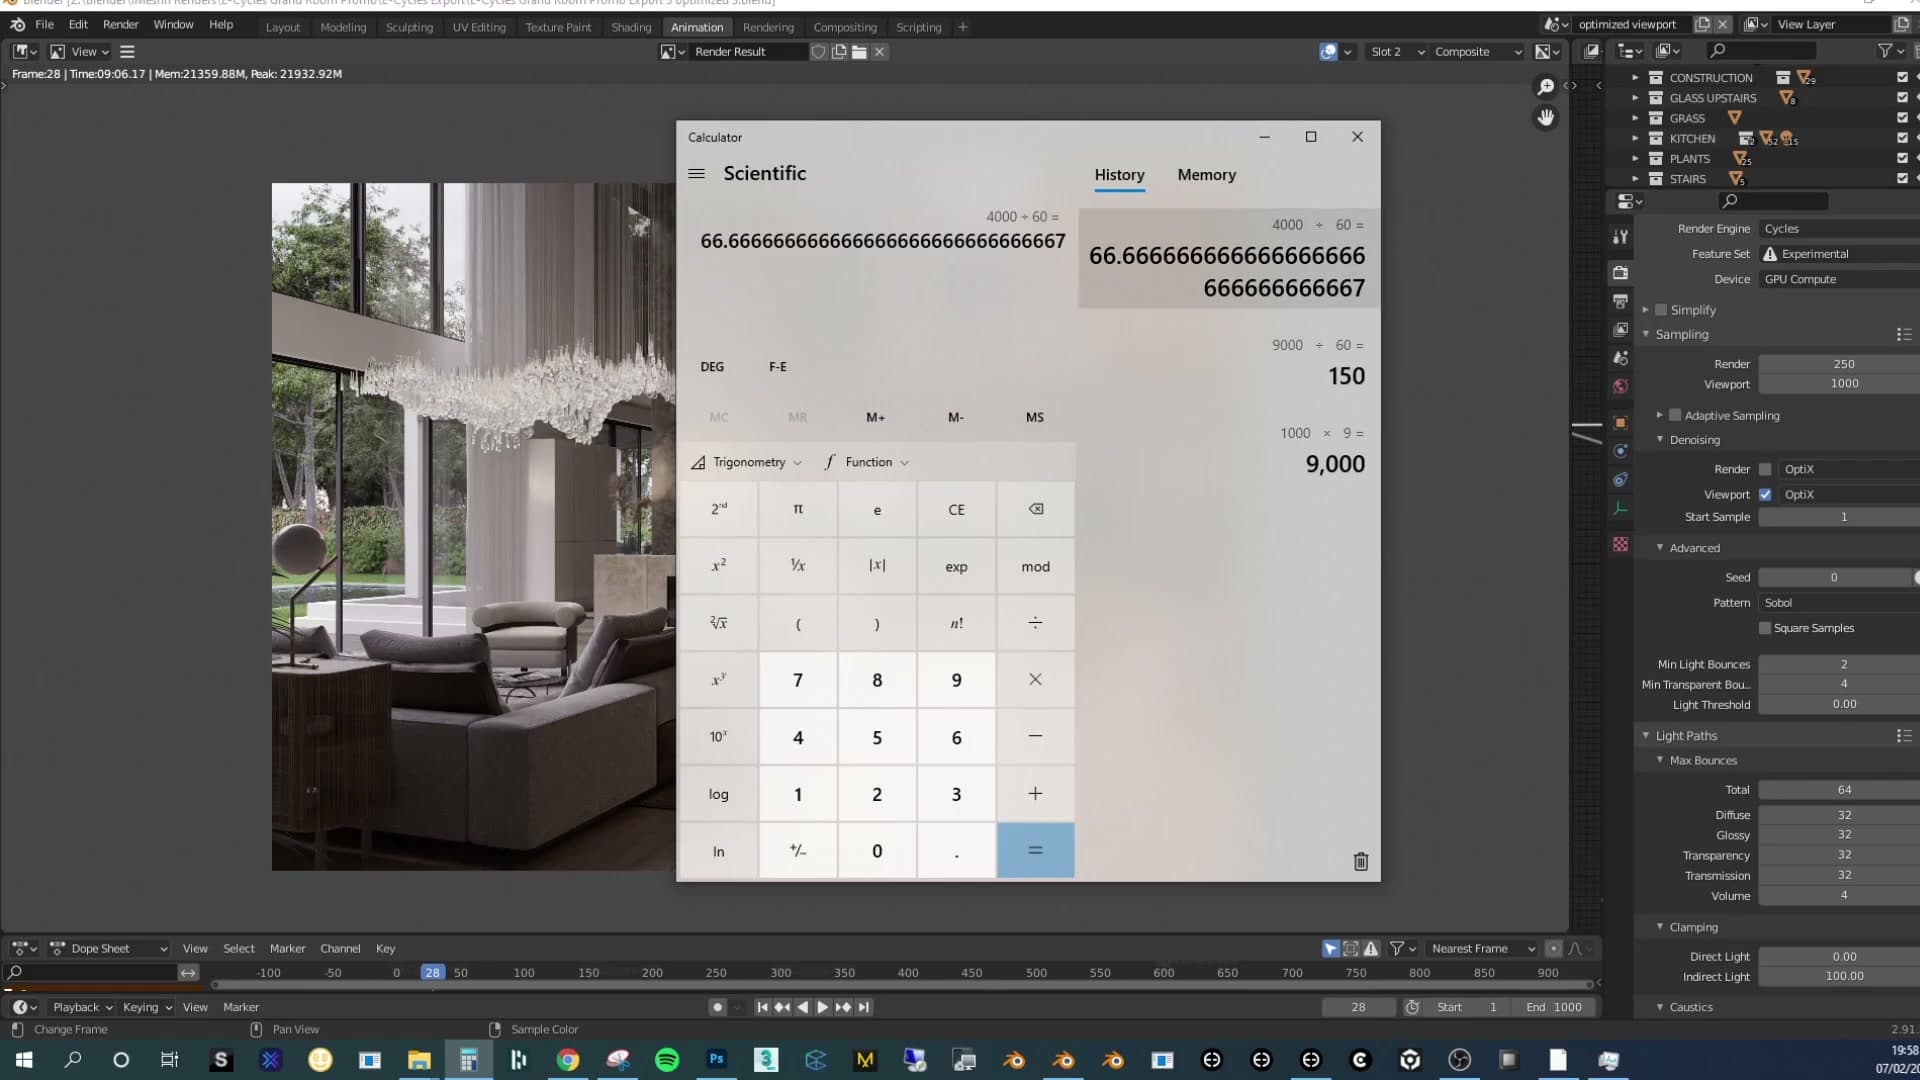
If you are working with clients who expect regular animated walkthroughs, that delta pays for the licence very quickly. E-Cycles is paid software, around €300 at the time of this review, with the iMeshh partnership unlocking 20% off the 2021 pre-order (dropping to 10% later). Interior archviz scenes were always my biggest sore point; full-resolution interiors in standard Cycles often pushed render times past the point of being manageable when there were lots of frames to deliver.
The other thing the saving buys you is headroom. Once you are rendering in half the time, you can spend some of that budget back on quality: push the resolution higher, add samples, or crank the bounce count. I typically take light bounces all the way up to 128 for final frames, on the basis that there is now time in the budget to chase the cleaner image rather than settle for the faster one.
Instant viewport response and Super Sampling Anti-Aliasing
The render speed-up gets the marketing, but the viewport rework is what changes the day-to-day. Combined with the new SSAA setting, you can frame shots and produce client-ready previews without the usual Cycles wait.
Side-by-side viewport responsiveness test
Before any render numbers come into play, the most immediate change in E-Cycles is how the viewport behaves while you're working. With default Blender on the left and E-Cycles on the right, the difference is obvious the moment you start dragging the view: the left side feels sluggish and jolty, lagging behind every input, while the right side refreshes the instant the mouse moves.
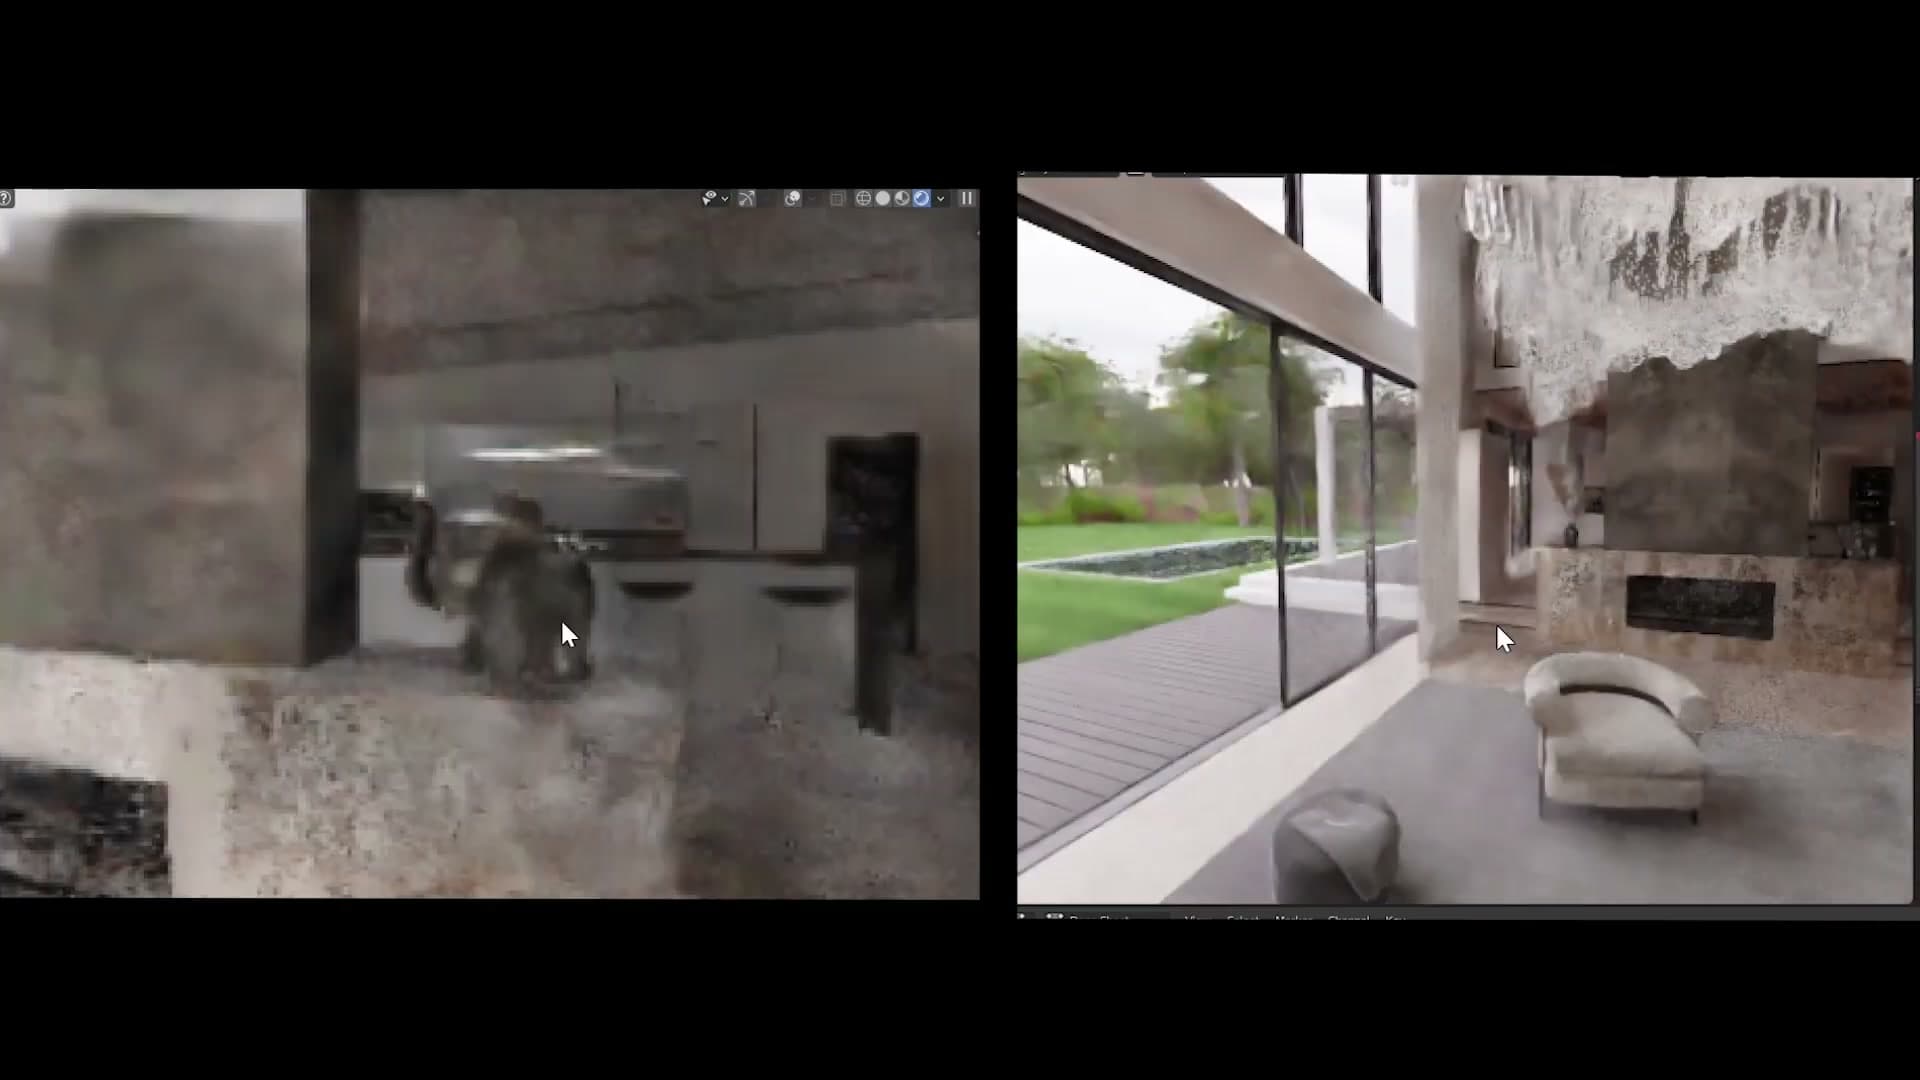
Try to frame up on the elephant statue in the centre of the scene. On the left you have to nudge the view, wait, nudge again, and slowly creep towards the composition you want. On the right you can move freely and the viewport reacts straight away. There's no delay between moving the scene around and landing on the shot you're after.
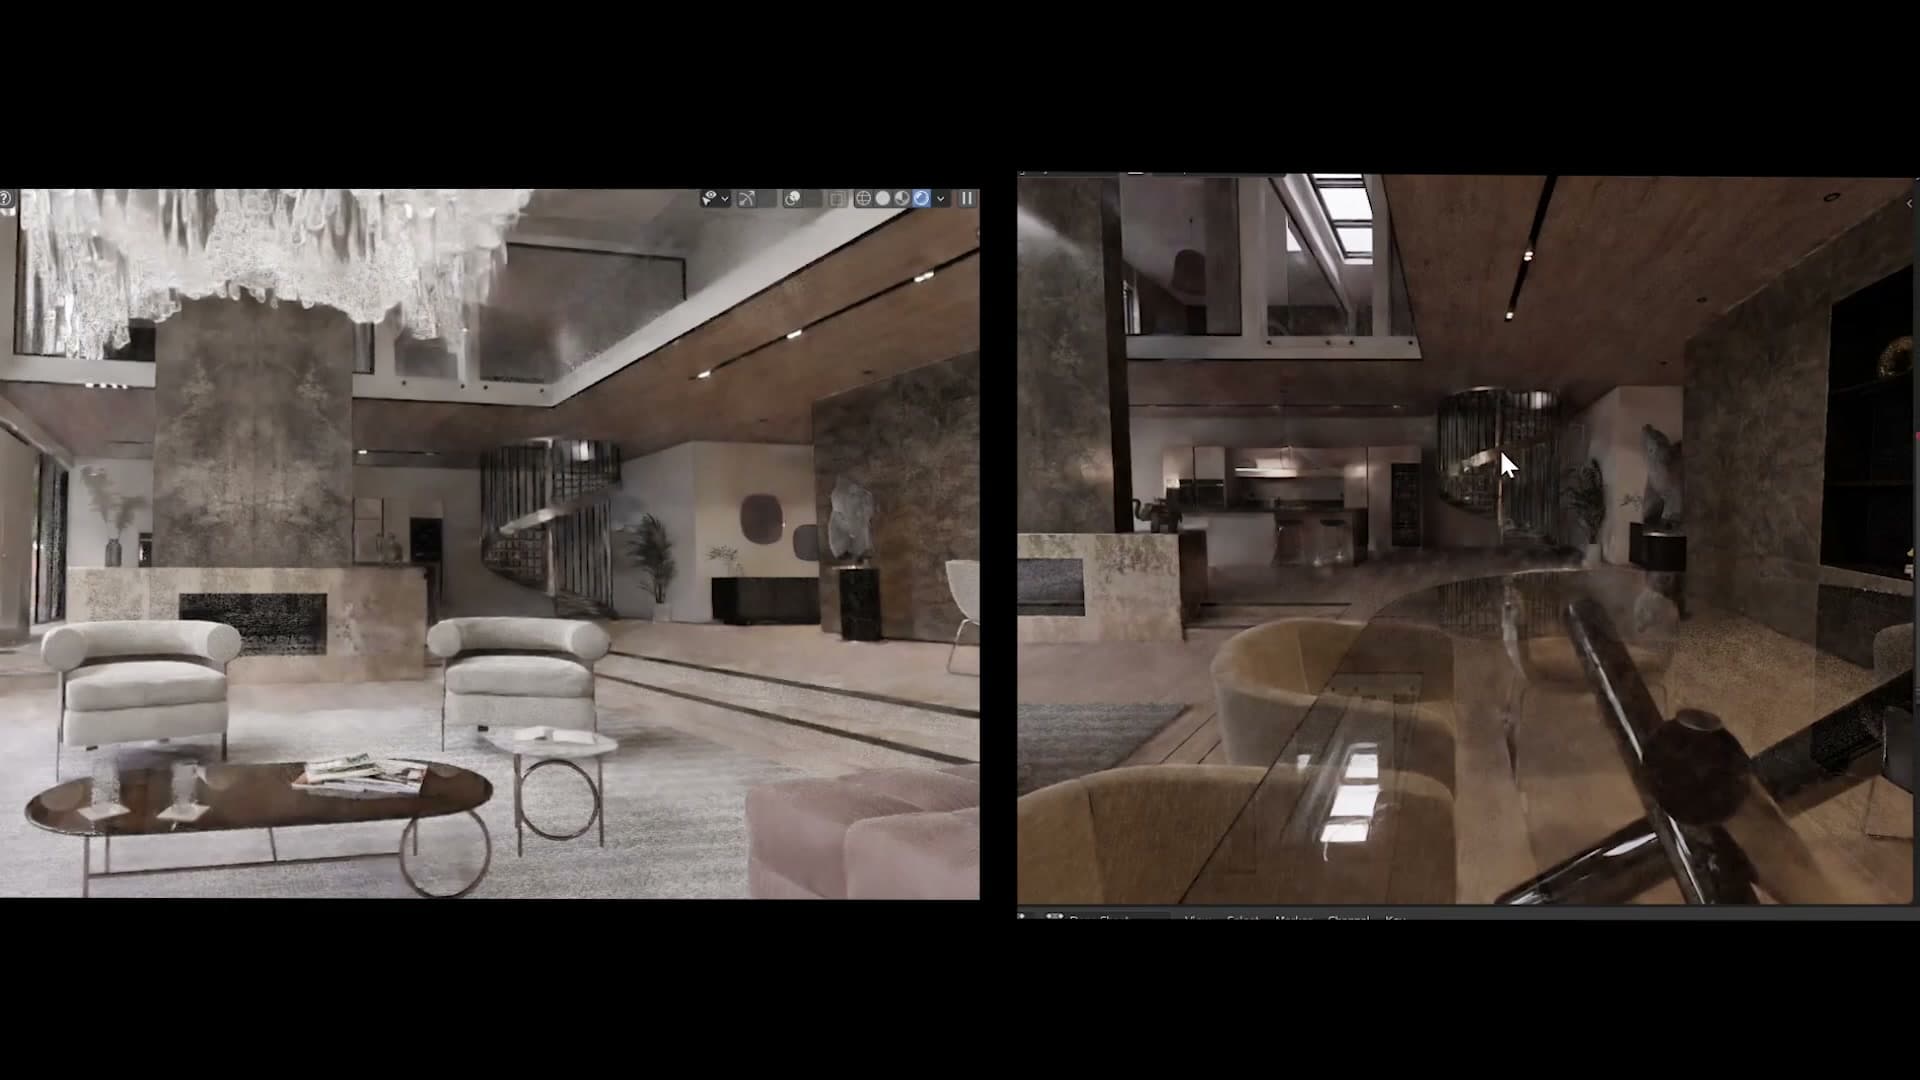
For day-to-day archviz work, this matters more than it sounds. Lining up cameras, checking framing, or adjusting an object's placement against the camera view are all things you do constantly, and every one of those becomes easier when the viewport keeps up with you. Once you've worked in both, there's no going back.
Super Sampling Anti-Aliasing for sharper previews
The other viewport-side win is a new setting called Super Sampling Anti-Aliasing (SSAA). By default it's set to 1, but bumping it to something like 4 produces a noticeably sharper image and gives the denoiser much more pixel data to work with, so the denoised result holds onto fine detail instead of smearing it.
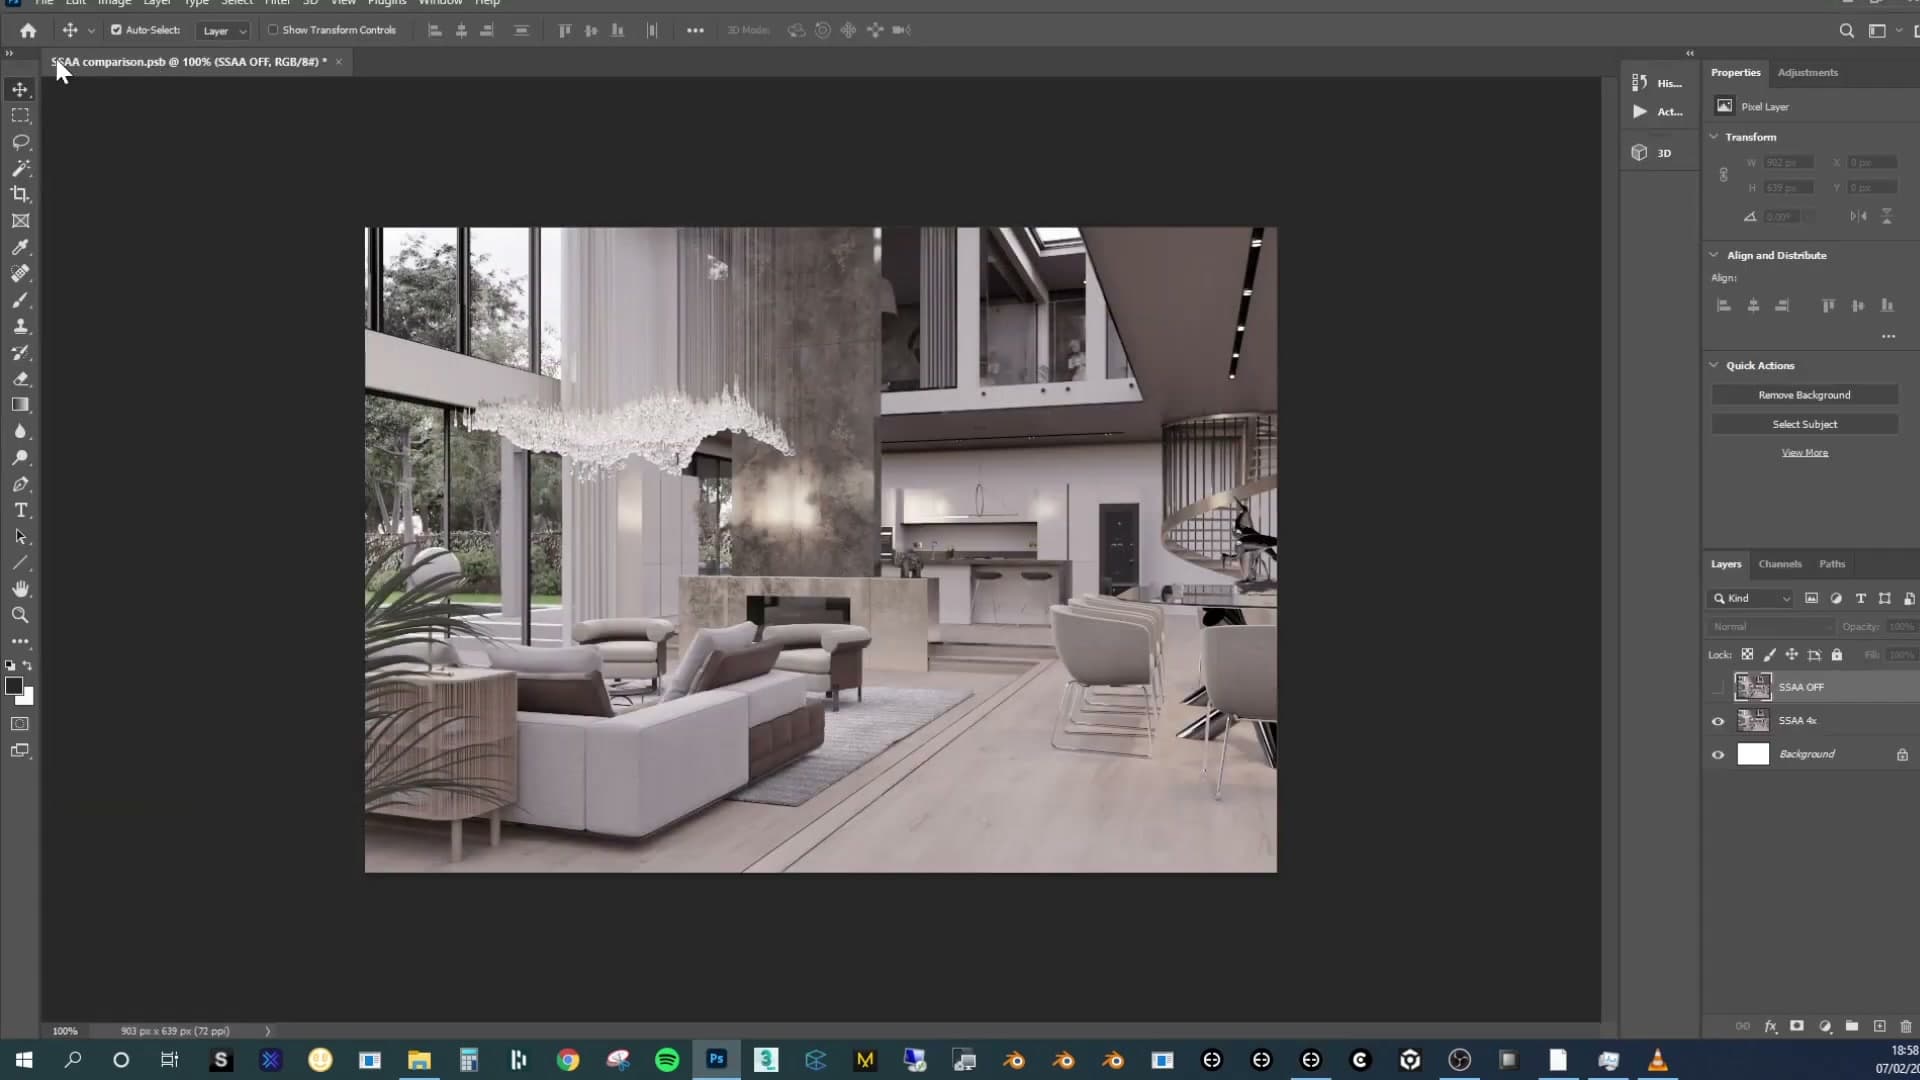
The clearest example is the pampas grass in the test scene. With SSAA off, the individual strands collapse into a soft, indistinct mass and you can't really tell what you're looking at. With SSAA on, the same area resolves into defined hair-like strands; you can actually read the shape of the plant.
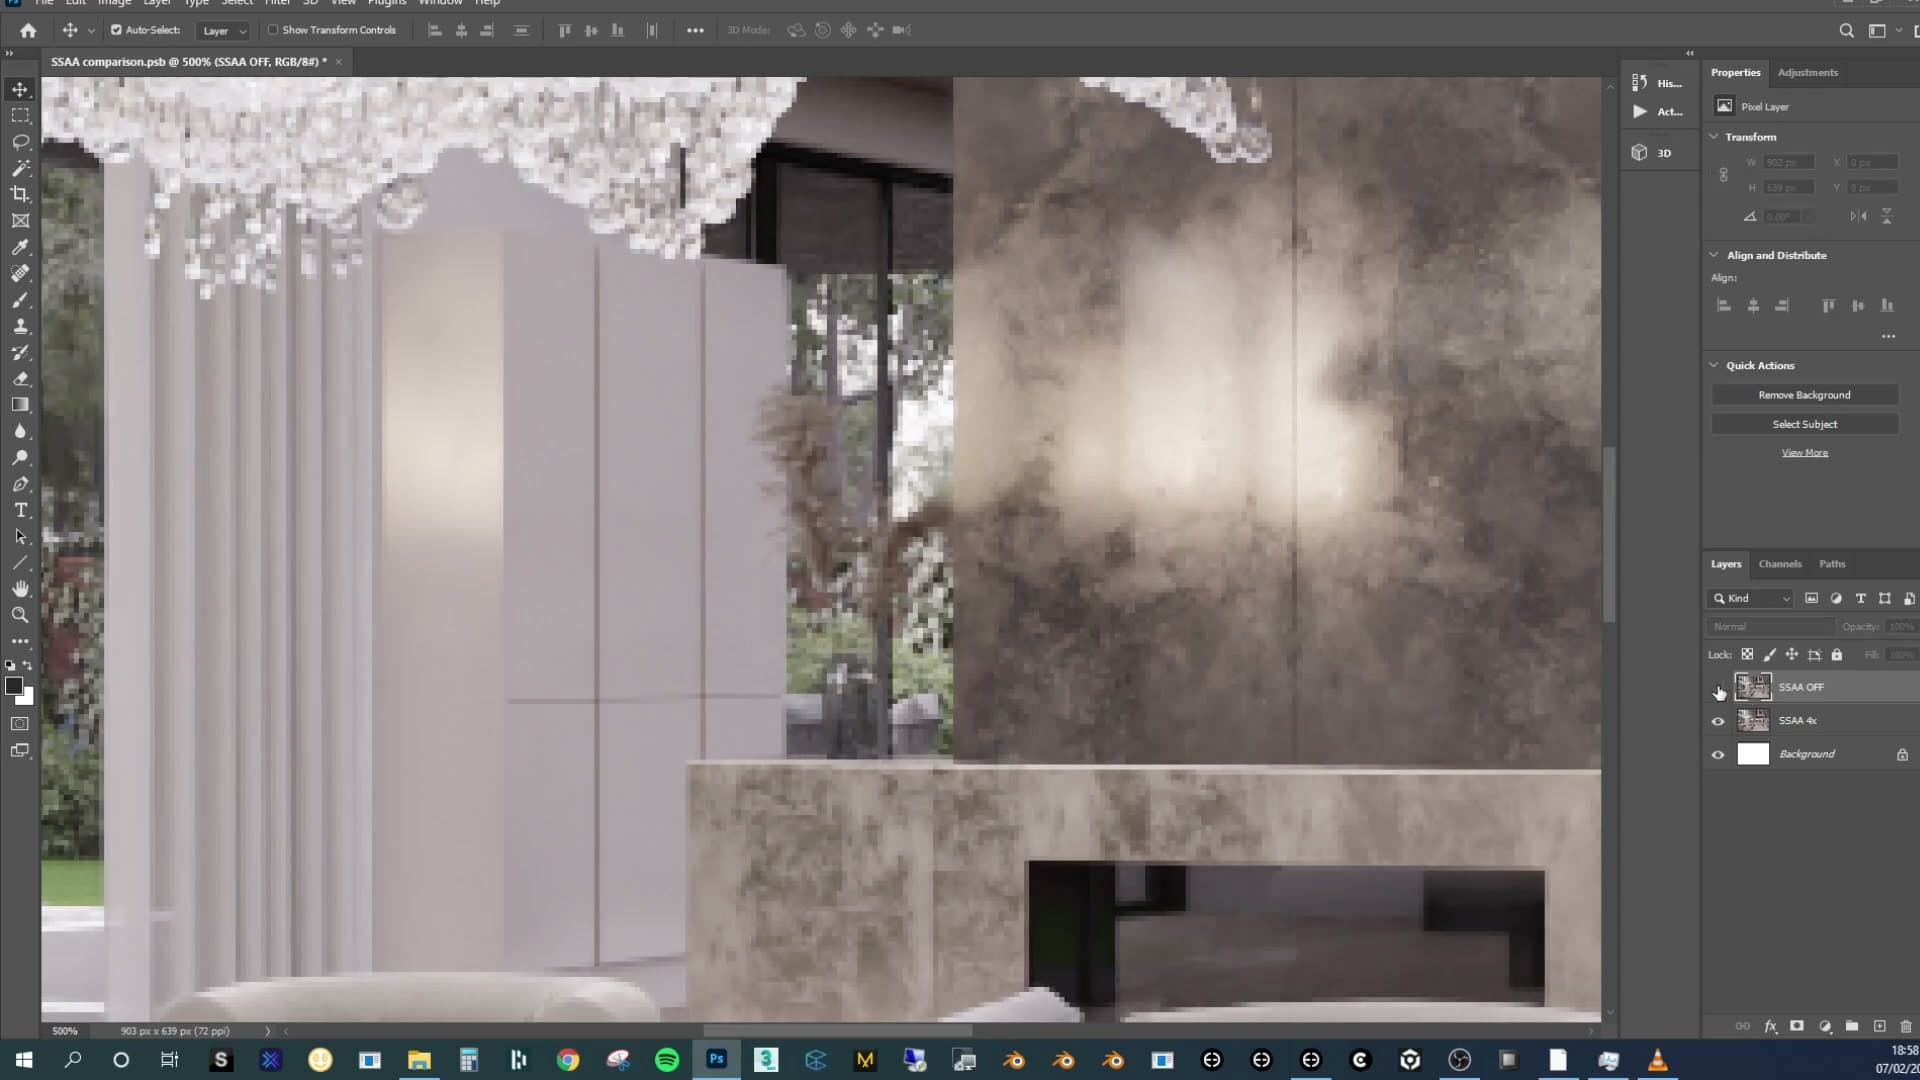
The practical use is client previews. If you need to whack out a quick high-resolution preview to send over for sign-off, switch SSAA on, render, and you'll get a much more presentable image without having to push the sample count up. The viewport itself is also heavily optimised on top of this, so flying through the scene at higher quality stays responsive.
Light Groups: a non-destructive light mixer for Cycles
The feature that genuinely changes how you light an archviz scene. Drop lamps into outliner collections, hit the auto button, and every collection becomes a slider you can adjust after the render: colour, intensity, mood. This is the reason a lot of archviz artists moved to Corona Render. Now it's inside Blender.
Auto-detecting groups from outliner collections
Light Groups piggy-back on something most archviz artists already do: organise lamps into outliner collections. In the test scene I have a collection called Suns, another called lights, and a handful of other collections that each contain their own lamps. There's no special tagging or naming convention required, just the normal outliner structure.
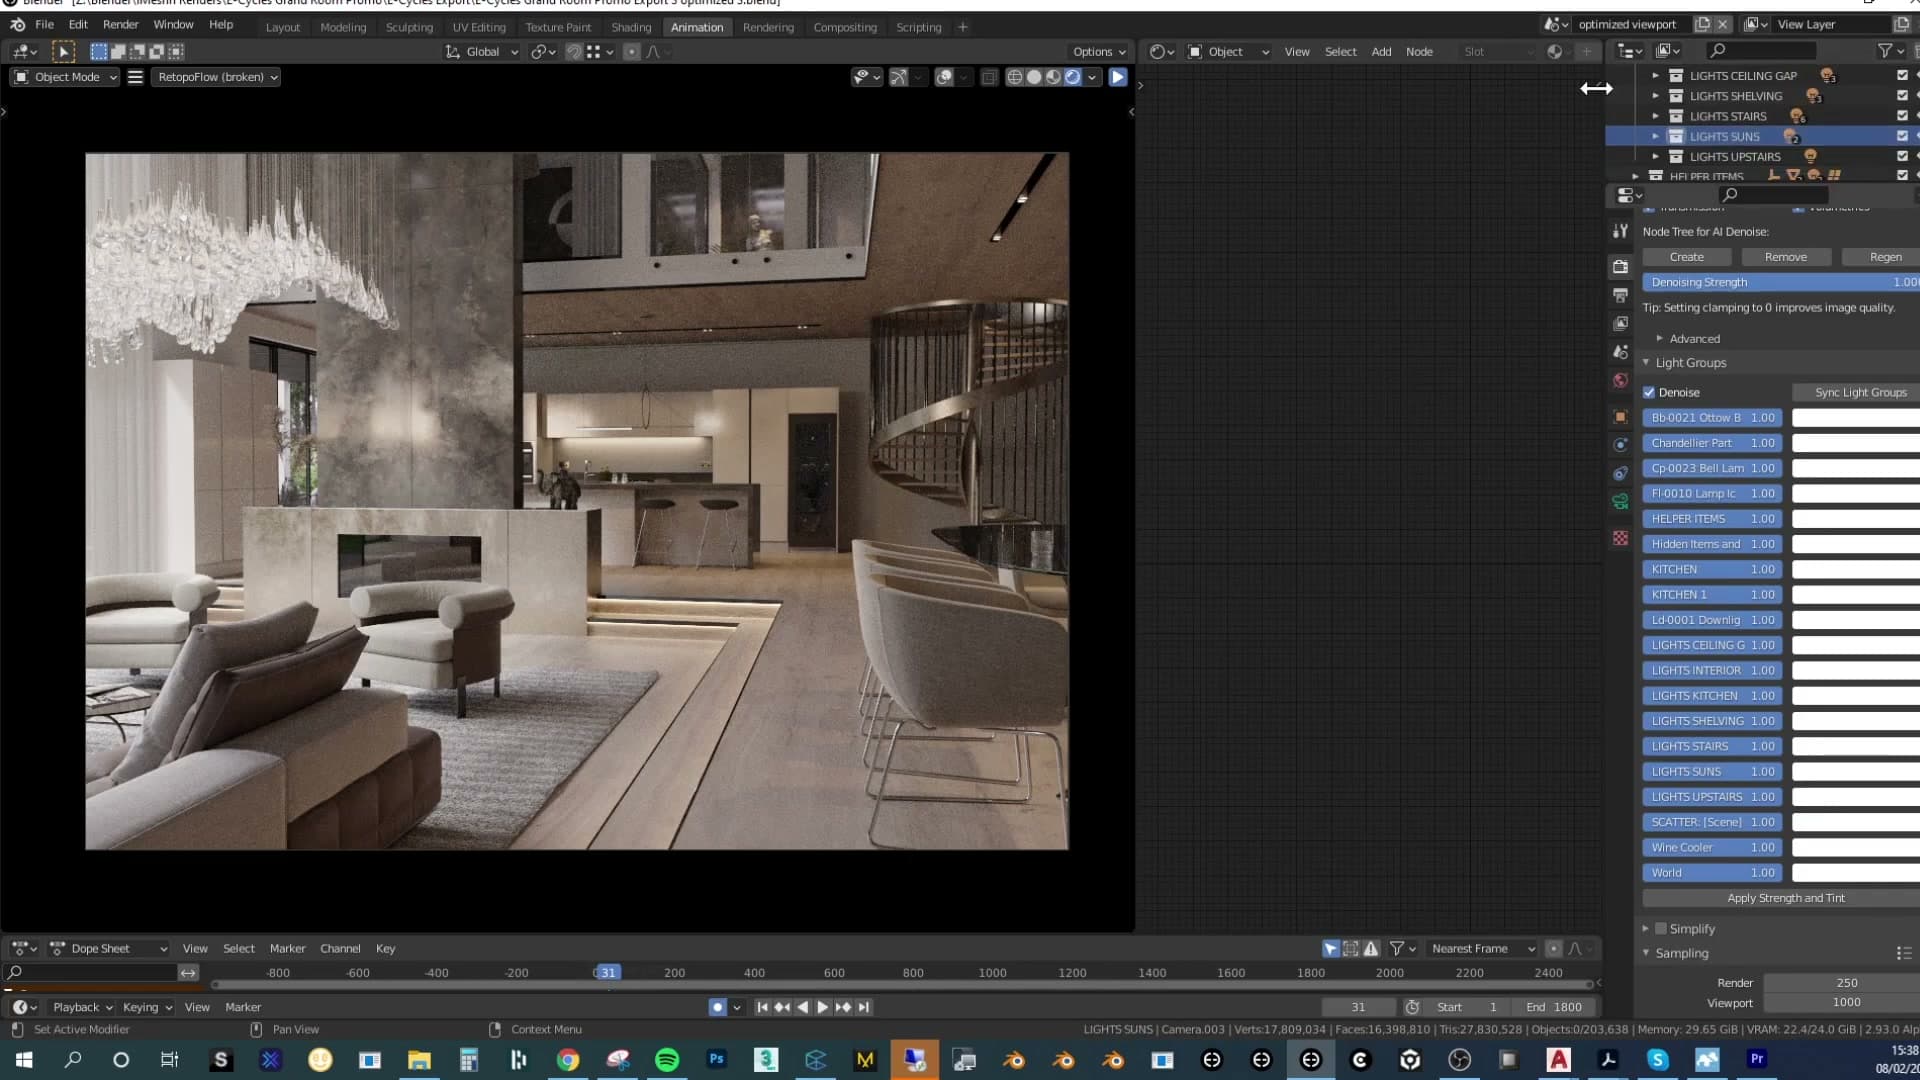
From there it's a single click. The automatic button walks the outliner, picks up every lamp inside a collection, and turns each collection into its own light group. Whatever structure you already have becomes the mixer you'll use after the render. The time you spend tidying the outliner pays itself back later.
Enabling the Light Groups render pass
With the groups created, jump into a rendered viewport and set the render pass to Light Groups. The viewport switches into the light-mix view and the Light Groups panel appears alongside it.
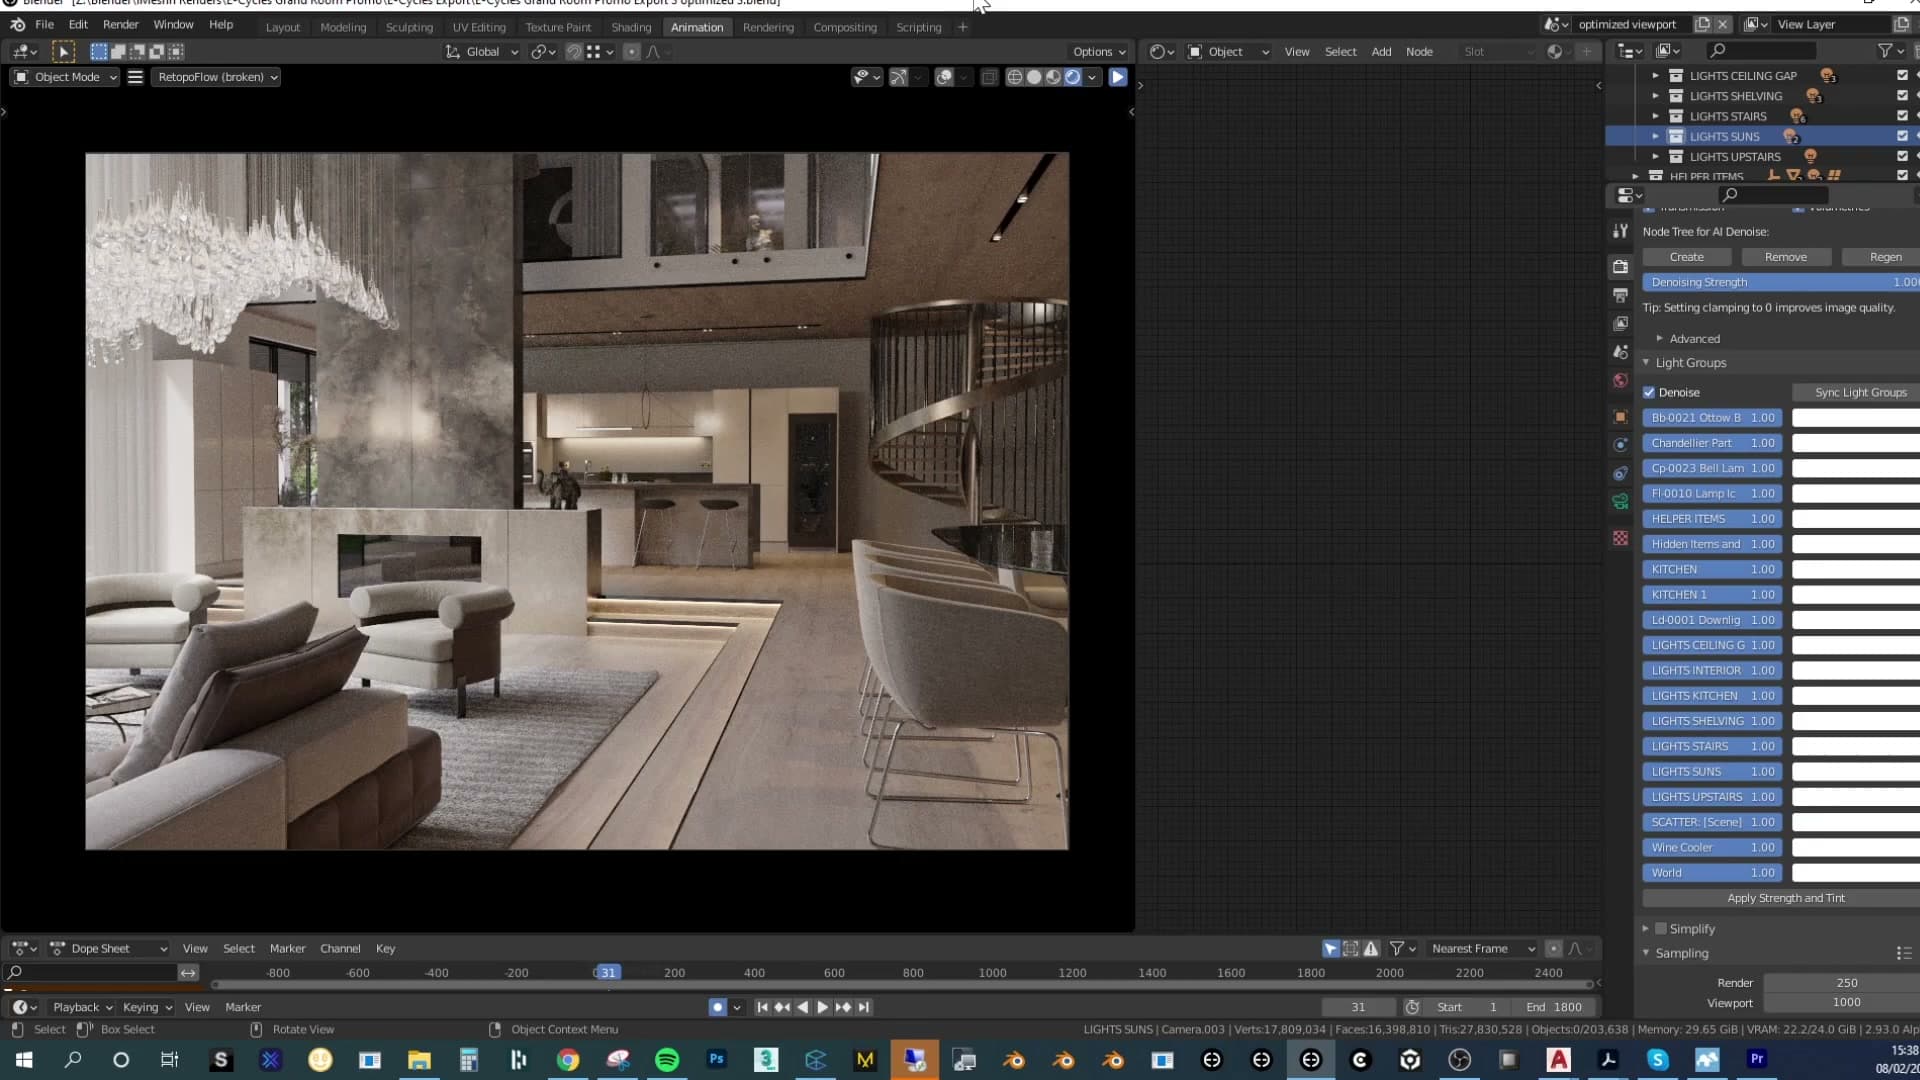
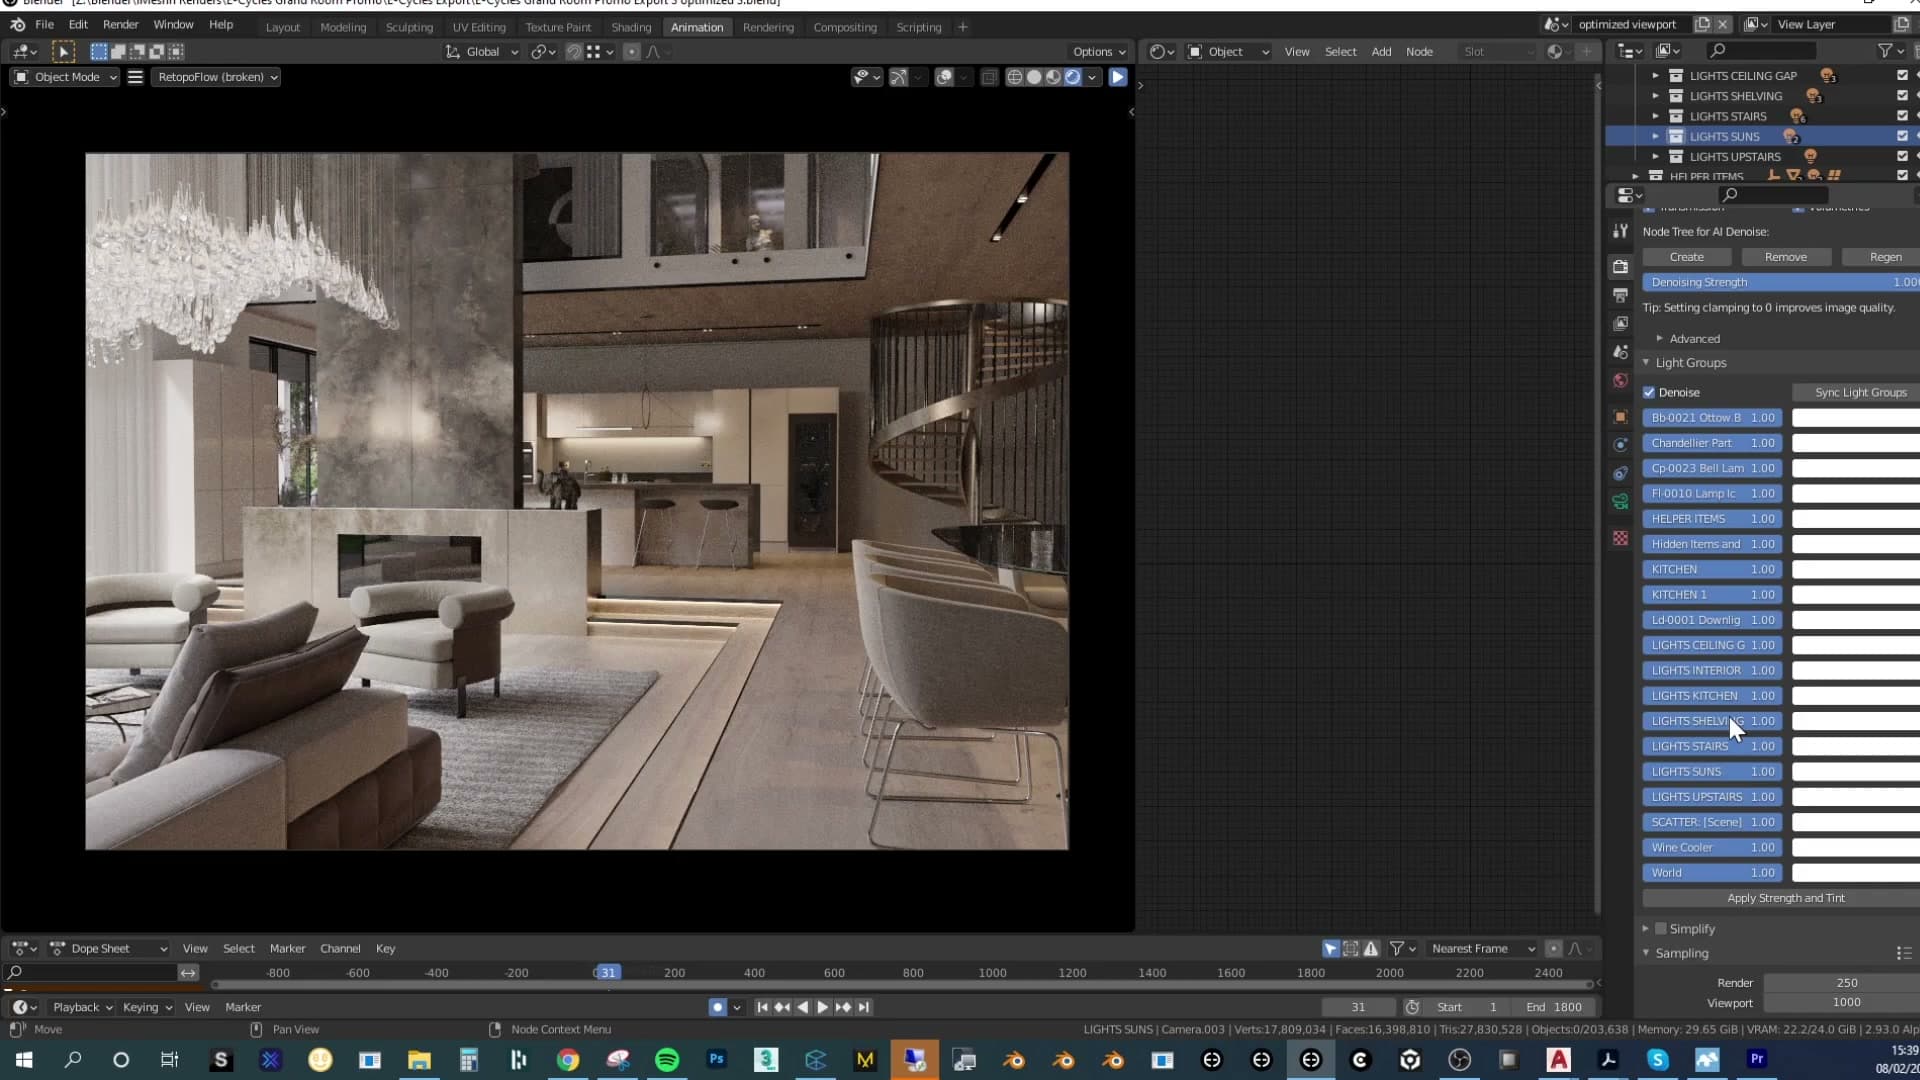
Each collection gets its own row in that panel: an intensity slider and a colour swatch. I'd describe this directly as the Corona Render light-mix workflow brought inside Blender. Everything happens in Blender's viewport: no exporting to a standalone application, no separate window, no waiting on a second renderer to catch up.
Mixing moods without re-rendering
Here's where the feature earns its place. Every group is a slider you can move after the render. Drop one to zero and that collection's contribution vanishes from the image; nudge another's colour swatch and the whole interior shifts towards that tint, all without re-rendering a single sample.
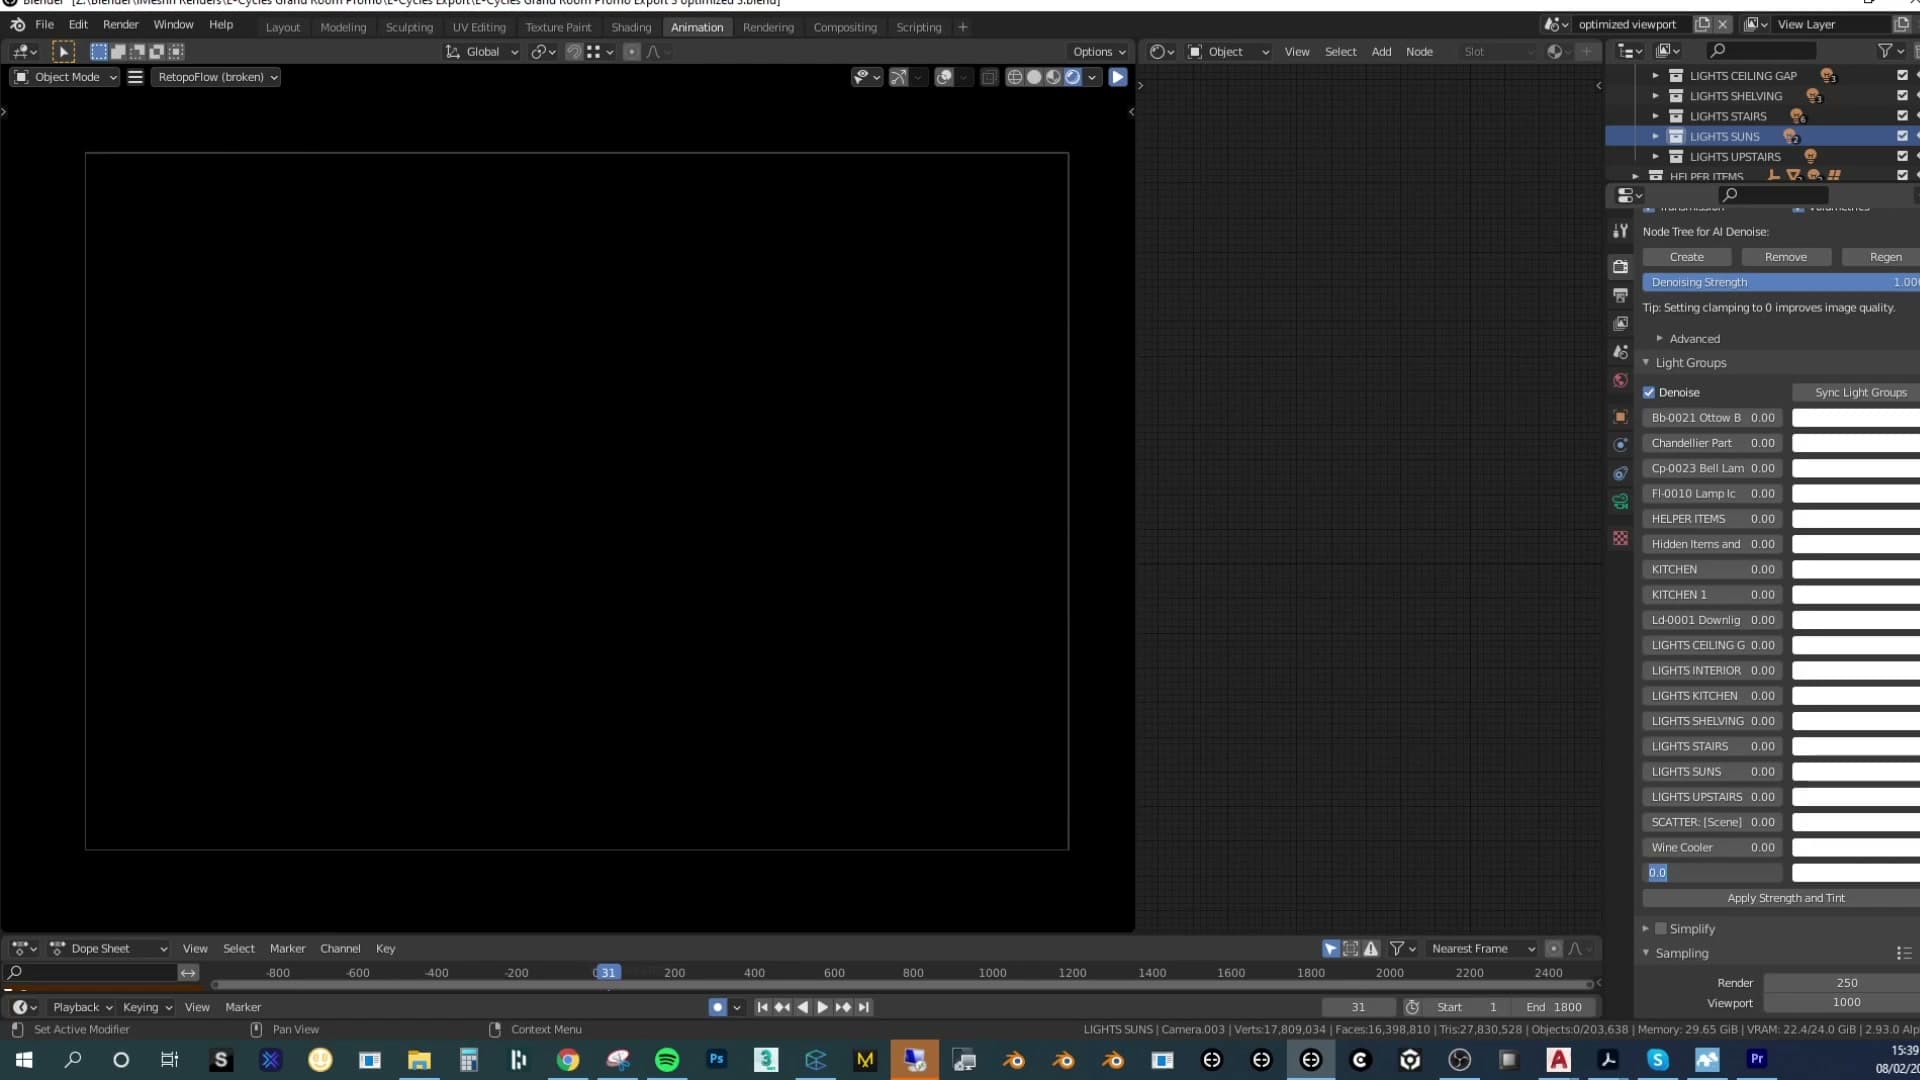
I start by pulling every group's intensity down to zero, so only the world contribution is left in the image. That's a useful baseline: you're now looking at the scene lit by the HDRI alone, which makes it obvious how much each artificial light is actually doing once you bring the groups back in.
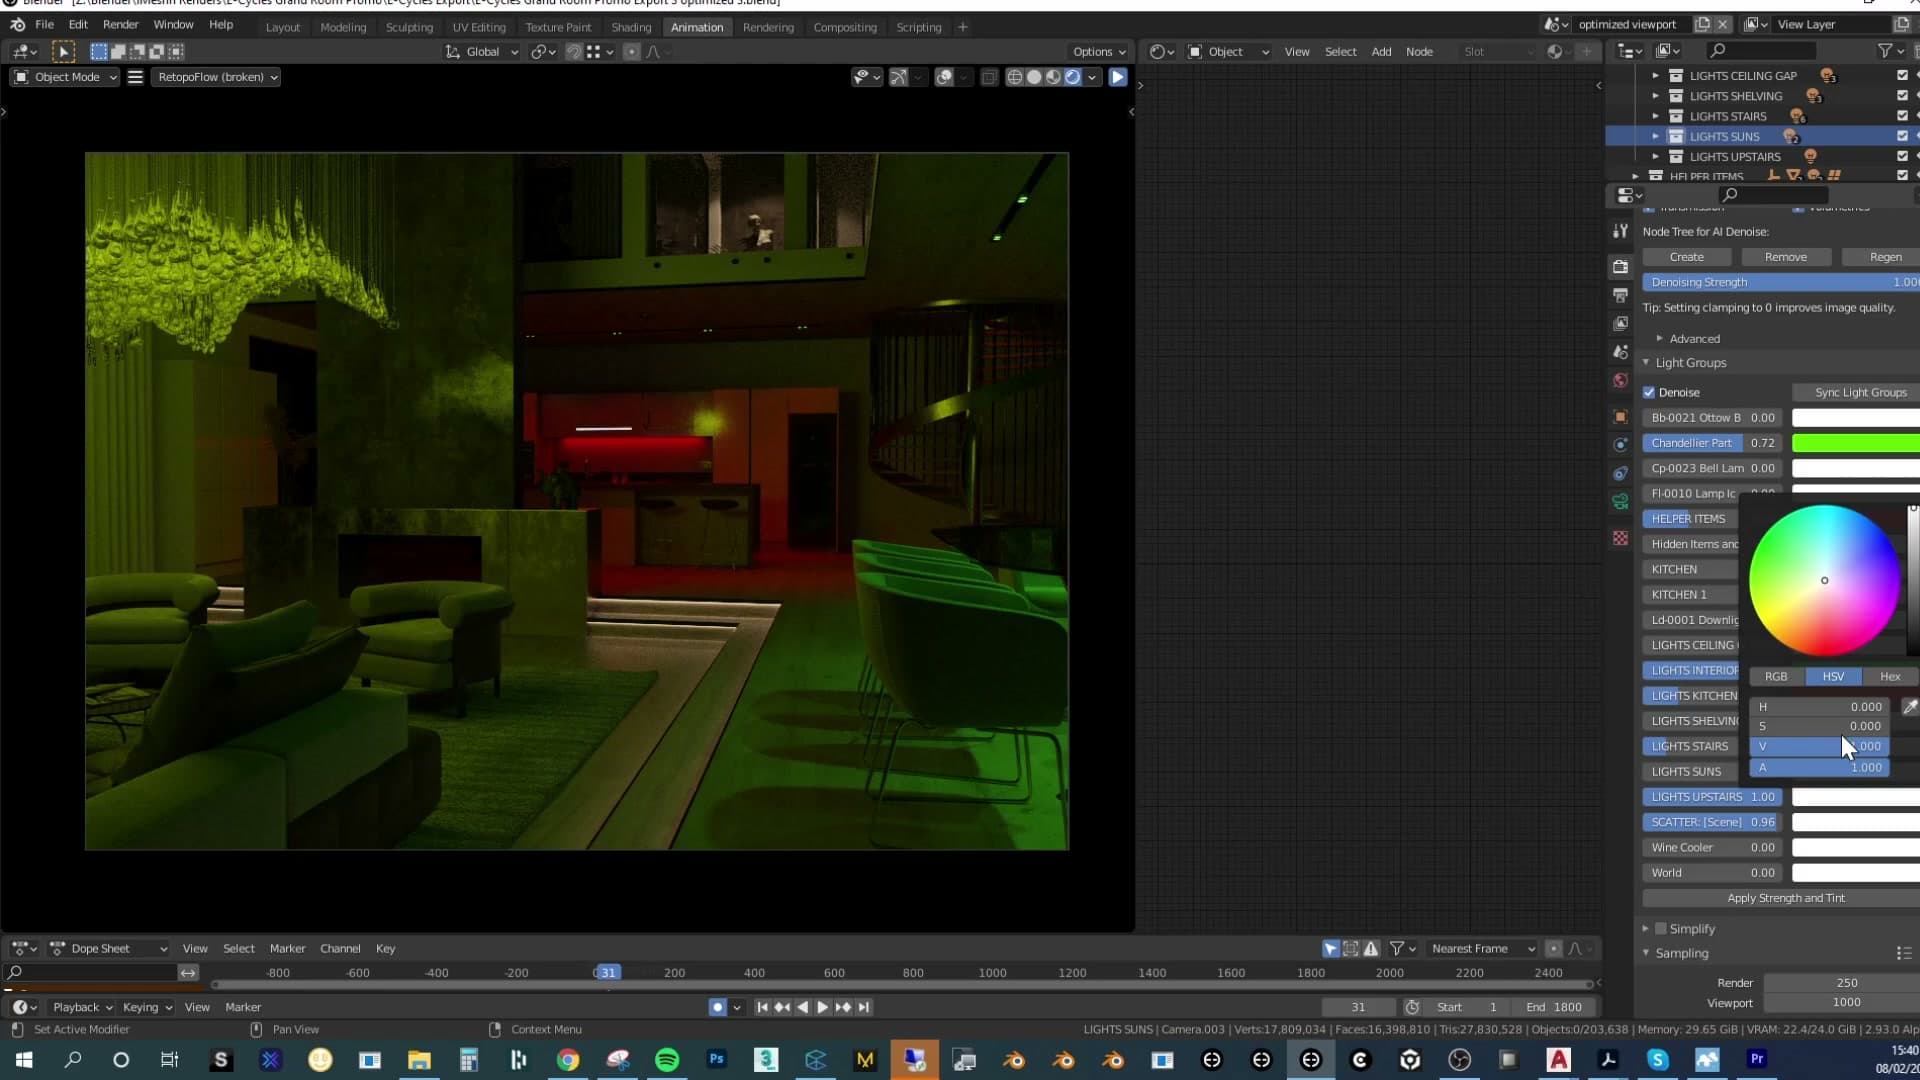
From there it's a mixing job. Push one group's colour towards a warmer tone, pull another back, lift a third and the mood of the whole image changes in seconds. Compare that with the old loop: render at intensity 1, decide it's wrong, re-render at intensity 2, decide it's still wrong, re-render at intensity 3, and so on. With Light Groups you skip the loop entirely and just dial the result in.
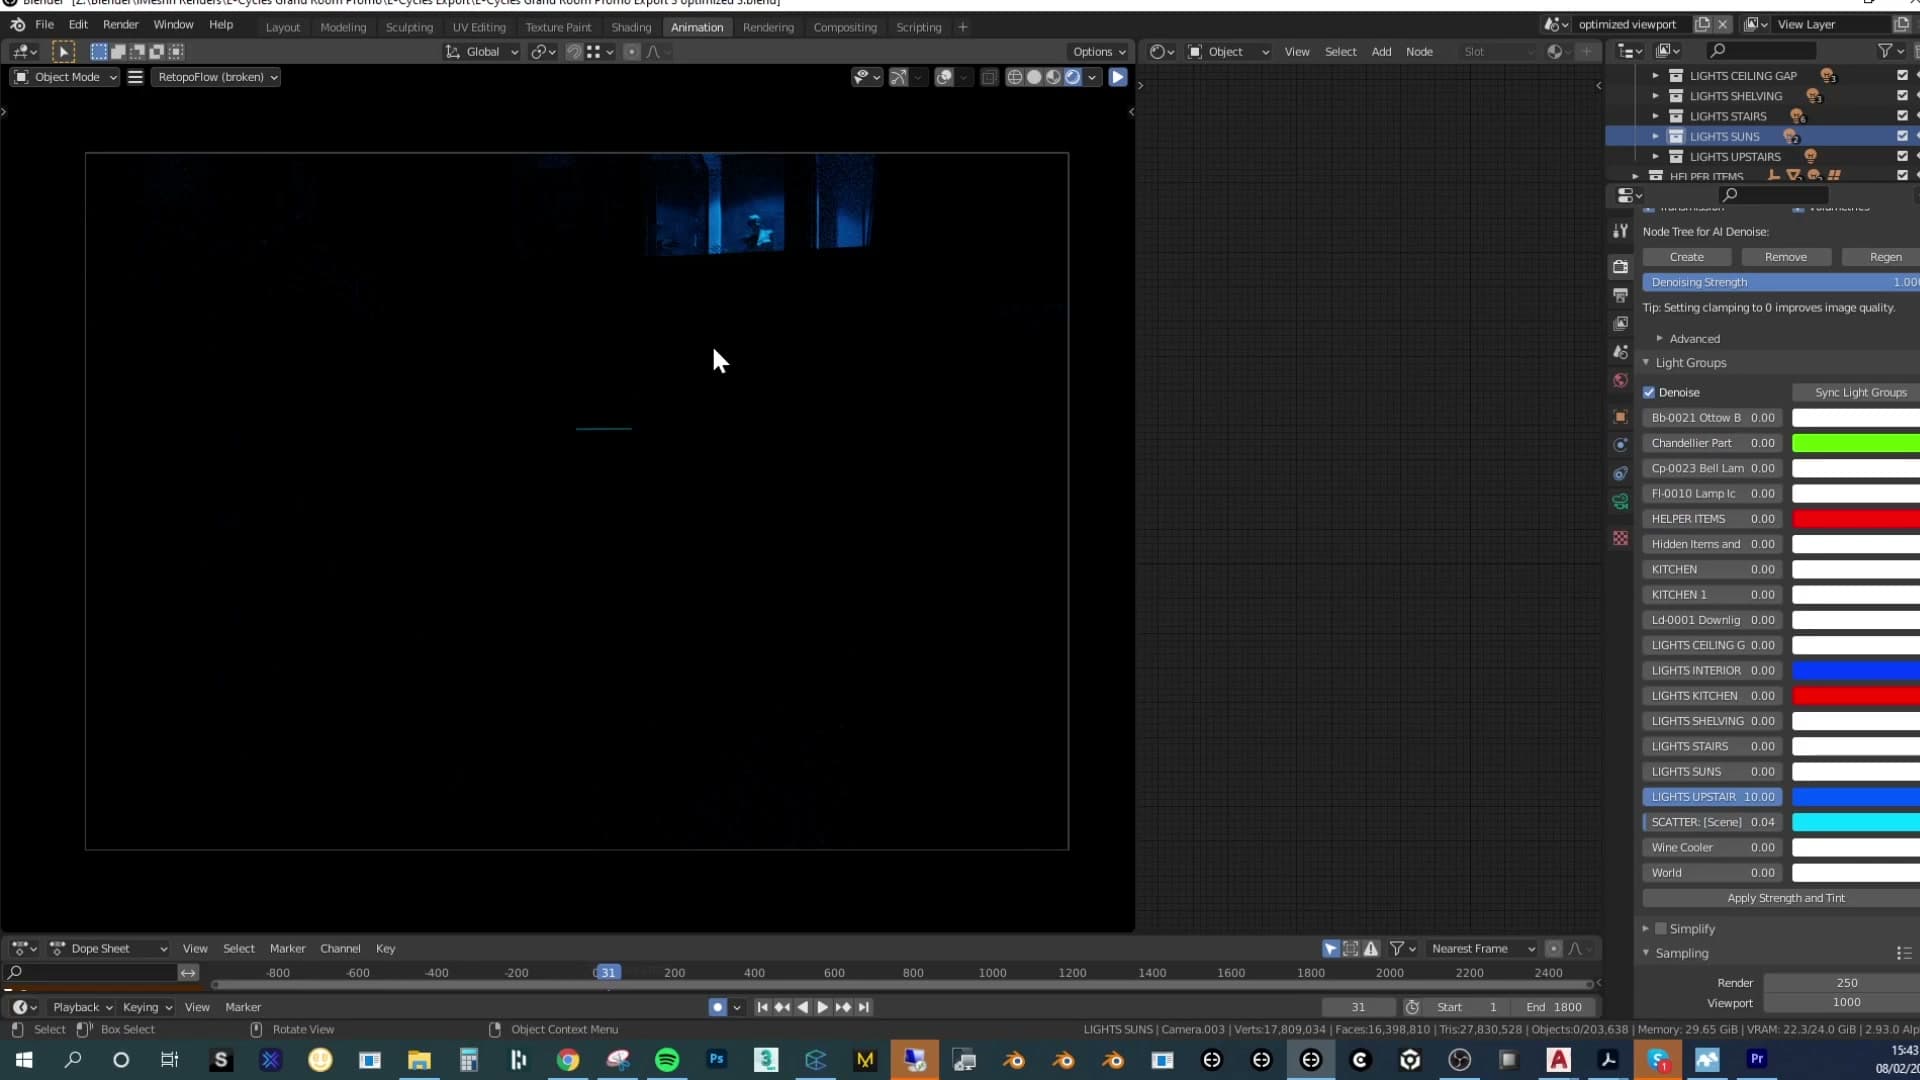
It's also a useful diagnostic. By soloing a single group you can see exactly which surfaces a given light is hitting, and whether it's behaving the way you expected when you placed it. Lights that are doing nothing become obvious; lights that are doing too much become equally obvious. Setting E-Cycles' speed gains aside entirely, I'd say this feature alone is one of the best things released for Cycles in ages.
Render-quality presets and EV-like viewport flying
Cycles has always had too many knobs. E-Cycles bundles them into named presets (Very Fast for navigation, Physically Correct for finals) so you can debug a scene without learning every clamp setting first.
Very Fast vs Physically Correct
One panel quickly becomes the most-used part of the E-Cycles interface: a render-quality dropdown that swaps every relevant Cycles setting in a single click. The working pattern is simple: leave it on Very Fast while you're building the scene, then flip to Physically Correct (or High Quality) when you're ready for the final render.
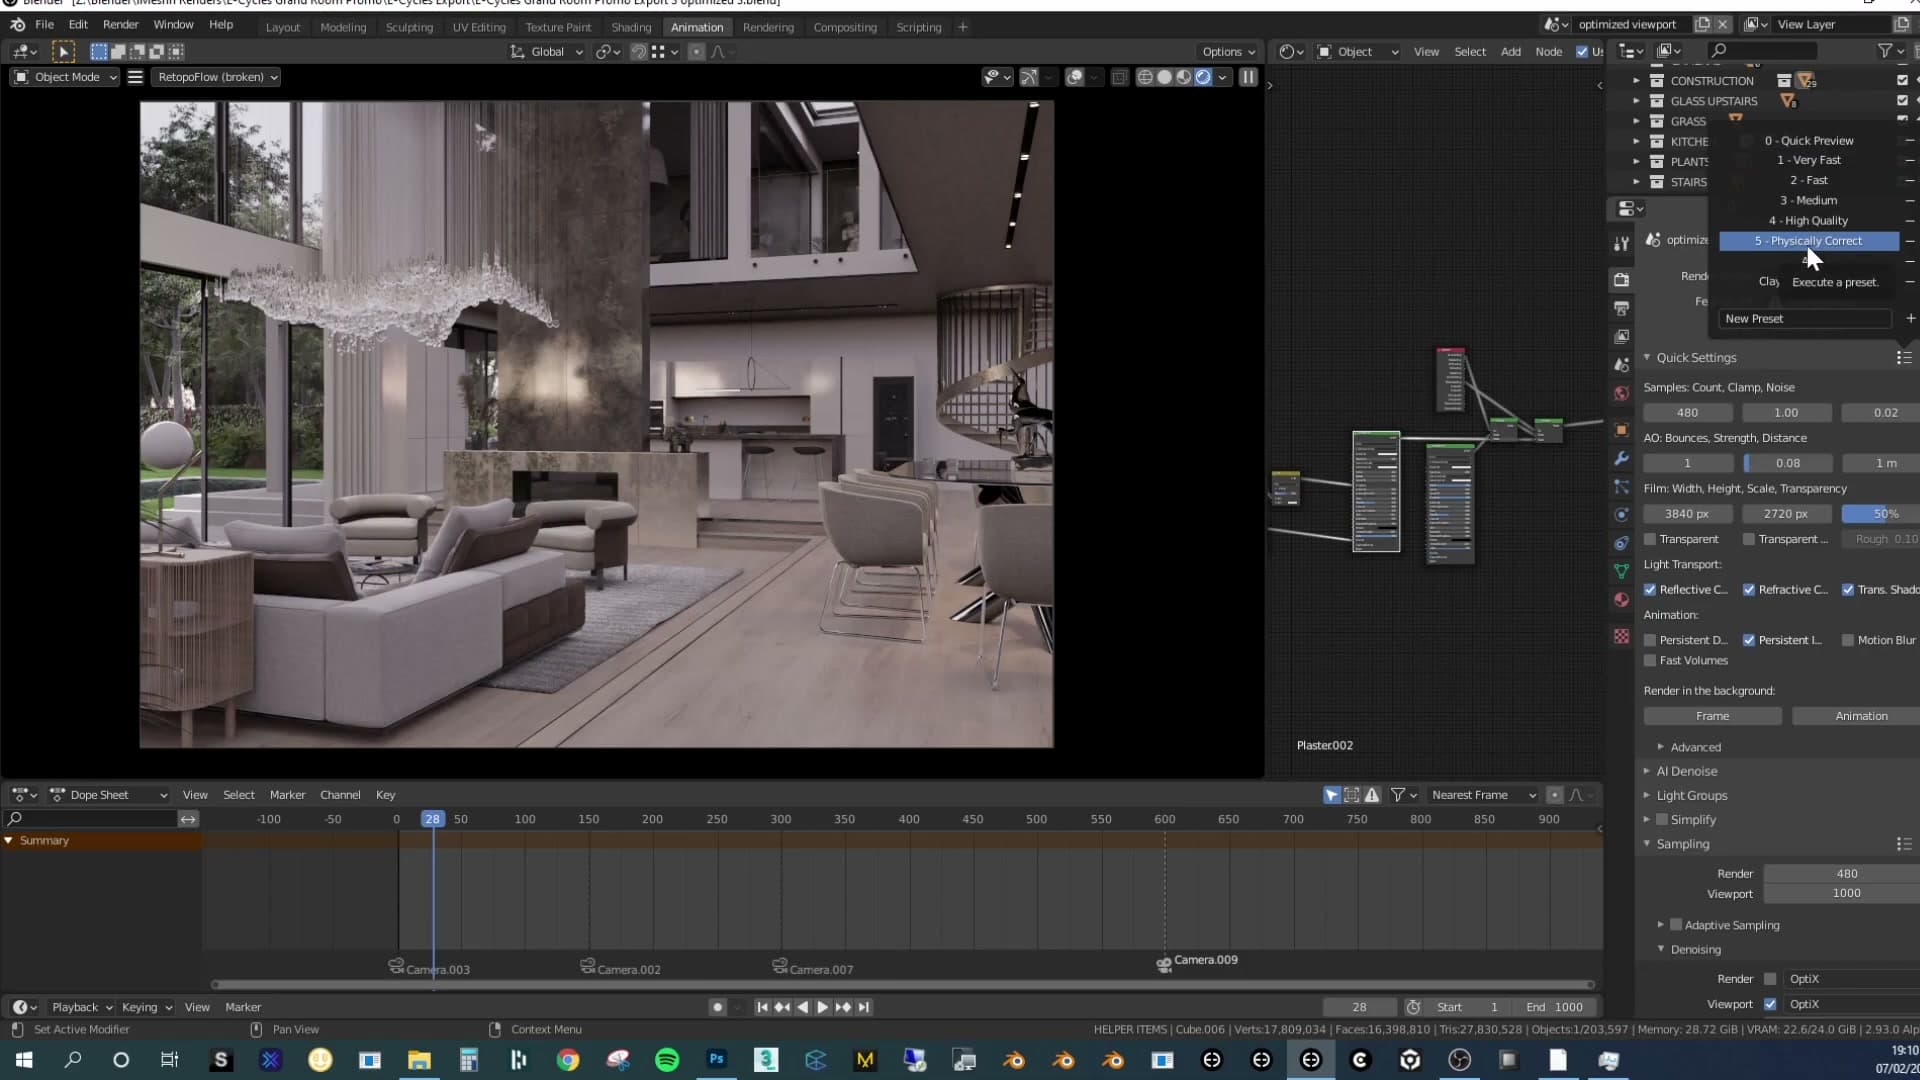
This is the answer to a chronic Cycles problem. There are so many sampling, bounce and clamping knobs in vanilla Cycles that working out which one is actually slowing the render down, or which one to push when quality matters more than speed, can be a job in itself. The preset takes that decision out of your hands and bundles a sensible default behind each name.
Switching to Physically Correct sets light bounces to 128, raises the minimum-bounce floor, and clears clamping out entirely. The viewport preview, meanwhile, stays on the Very Fast profile with SSAA enabled, so navigation remains responsive even while the final-render numbers are fully dialled in.
Setting up camera angles like Eevee
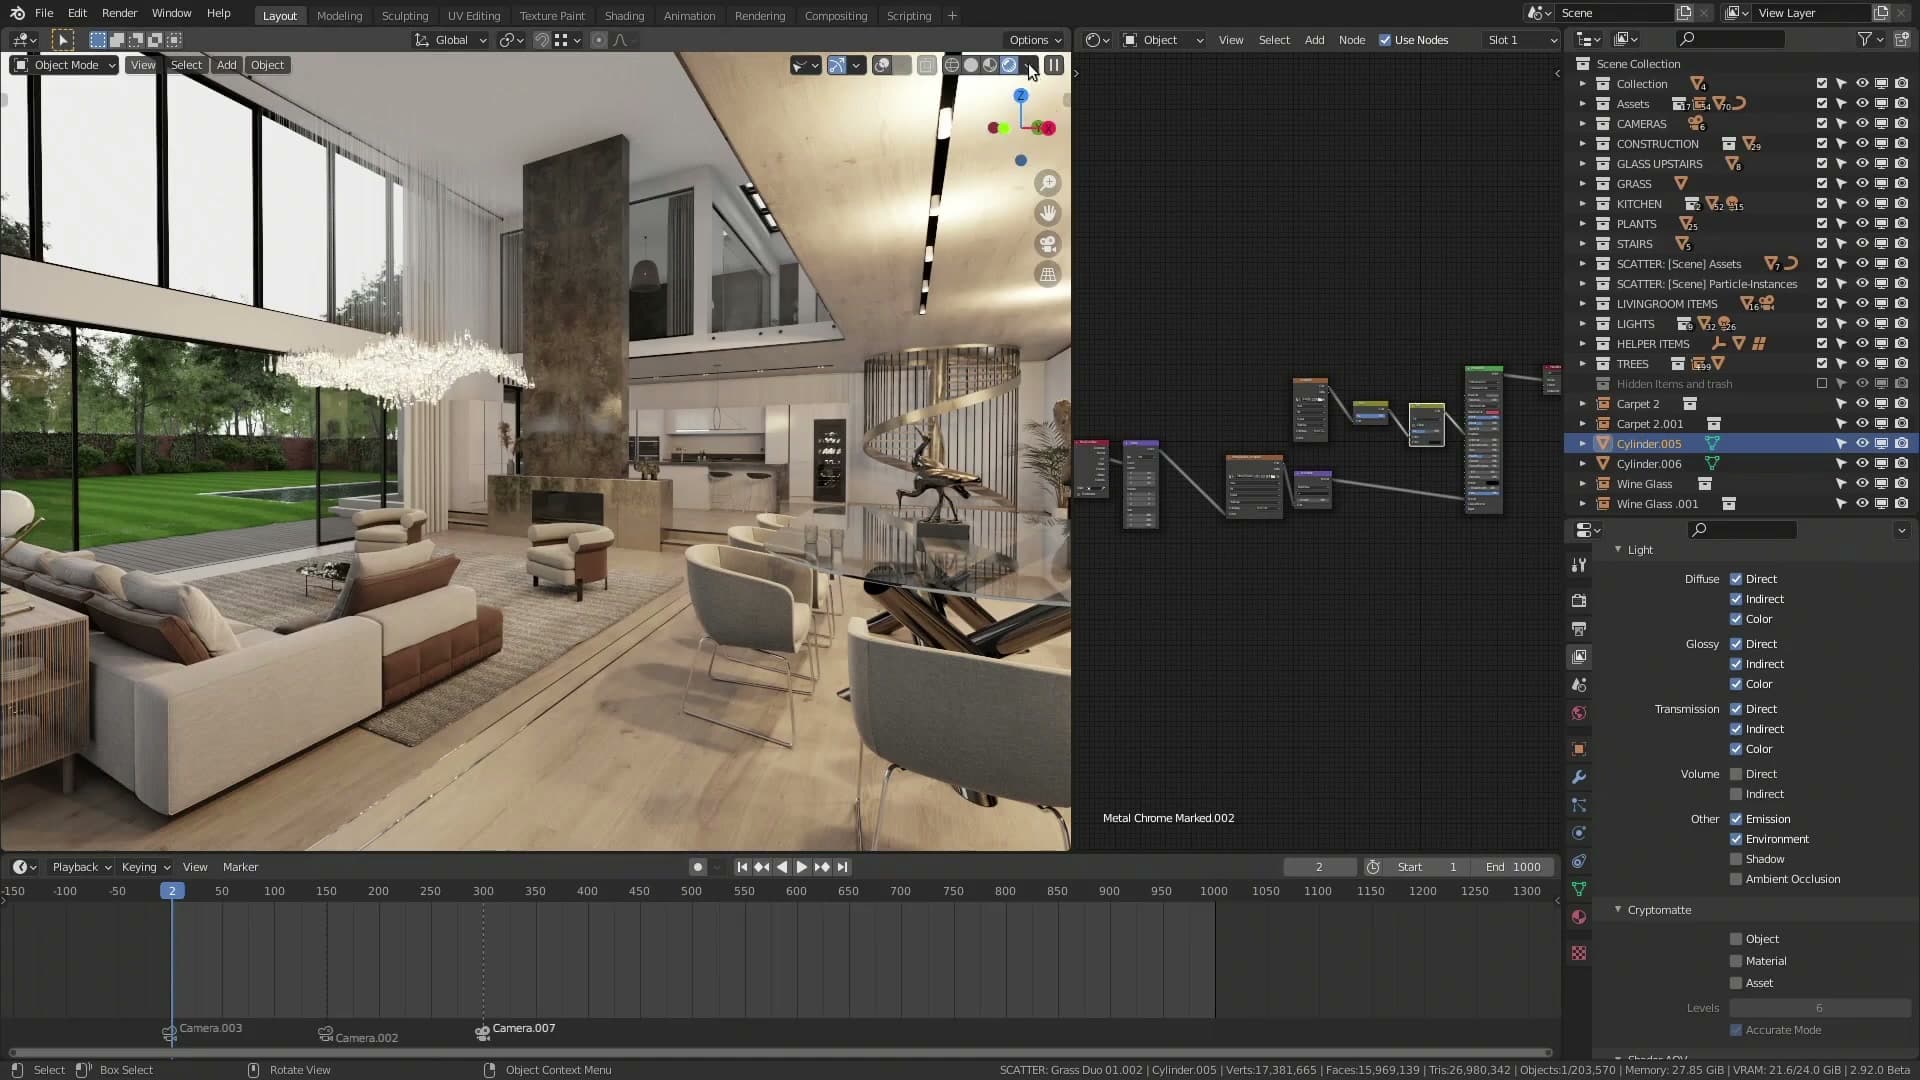
Combine the Very Fast preset with the new SSAA and the rebuilt E-Cycles 2021 viewport and Cycles starts behaving like a real-time engine. You can fly through an interior, line up a camera, step outside, and frame another without waiting on samples between each move.
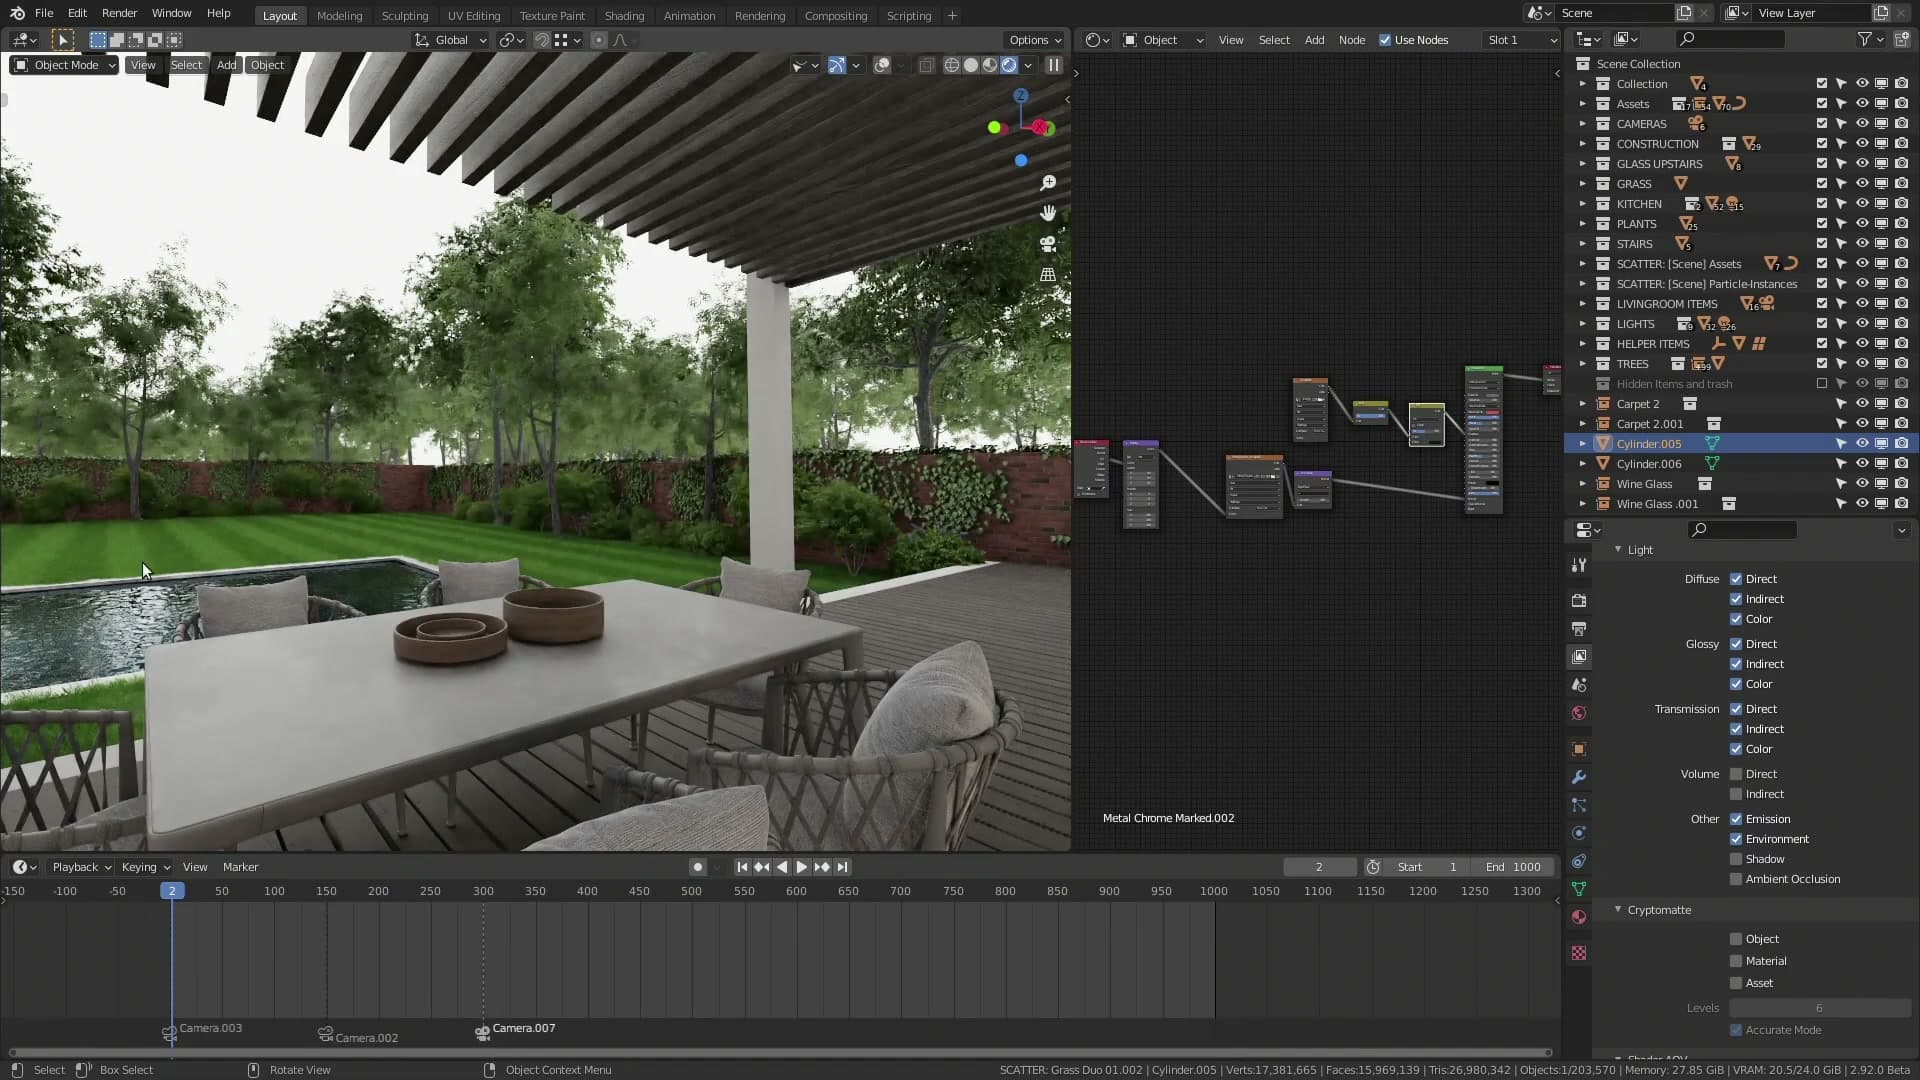
In this scene, that means pushing into the room to compose against a cabinet, then dropping outside to look back at the building and swinging past the surrounding planting to check how the exterior reads. Every viewpoint is fully shaded with proper Cycles lighting, and the navigation feel is closer to Eevee than anything vanilla Cycles has offered before.
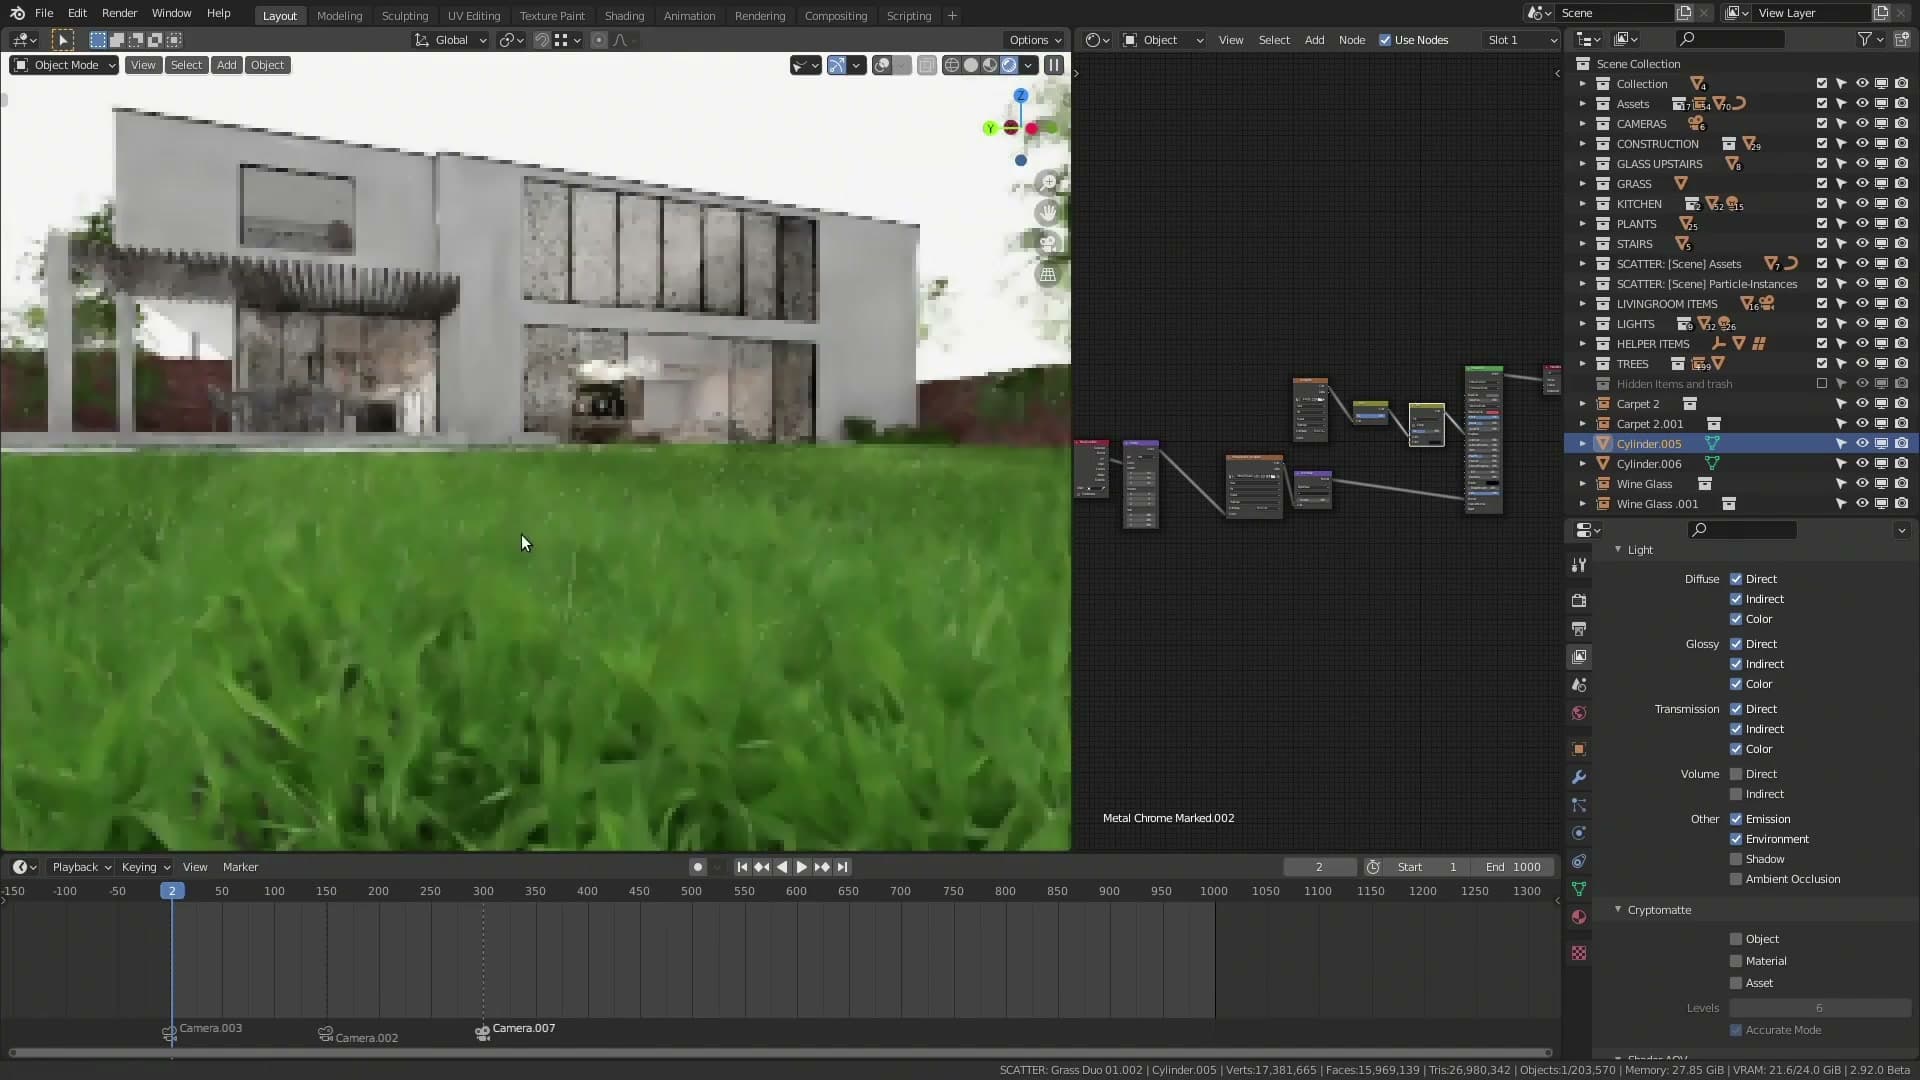
That speed change also shifts a habit a lot of archviz artists have built up over the years: avoiding the viewport denoiser because it washed the image out into a painterly look. With the new preset doing the heavy lifting, the viewport runs fast enough to preview cameras at near-final quality without falling back on a softer denoiser just to keep things moving.
The new optimised window glass shader
Cycles' classic window-glass setup was a mix-shader hack to force light through the geometry. E-Cycles 2021 replaces it with a single Glass BSDF plus an object-level Ray Visibility flag. Simpler, faster, and noticeably cleaner in the render.
Old mix-shader hack vs new single-BSDF method
The legacy way of doing window glass in Cycles is essentially a workaround. You wire up a mix-shader chain that forces light through the geometry while keeping the reflection in the pane. It works, but it is a hack rather than a faithful description of how glass actually behaves.
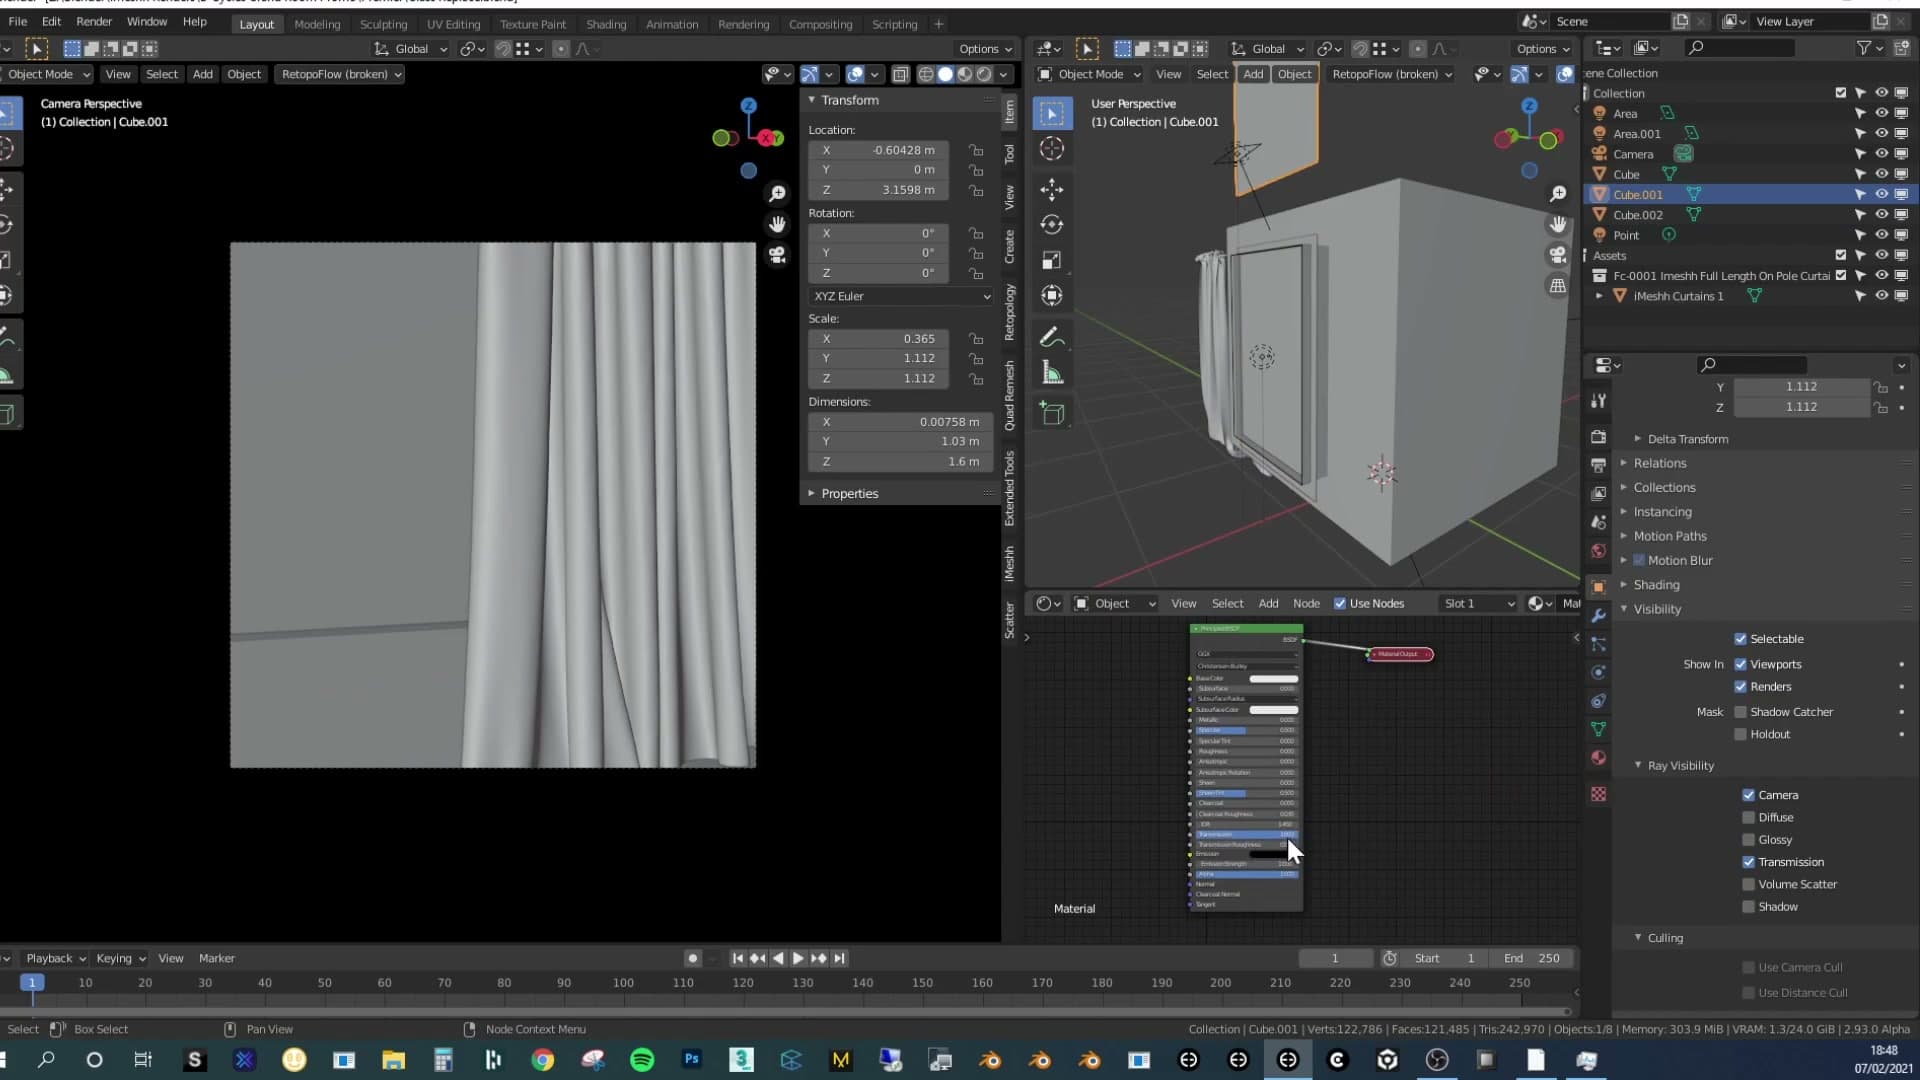
The new approach drops the hack entirely. Add a single Glass BSDF, push Transmission all the way up, and set Roughness to 0. That is the whole shader.
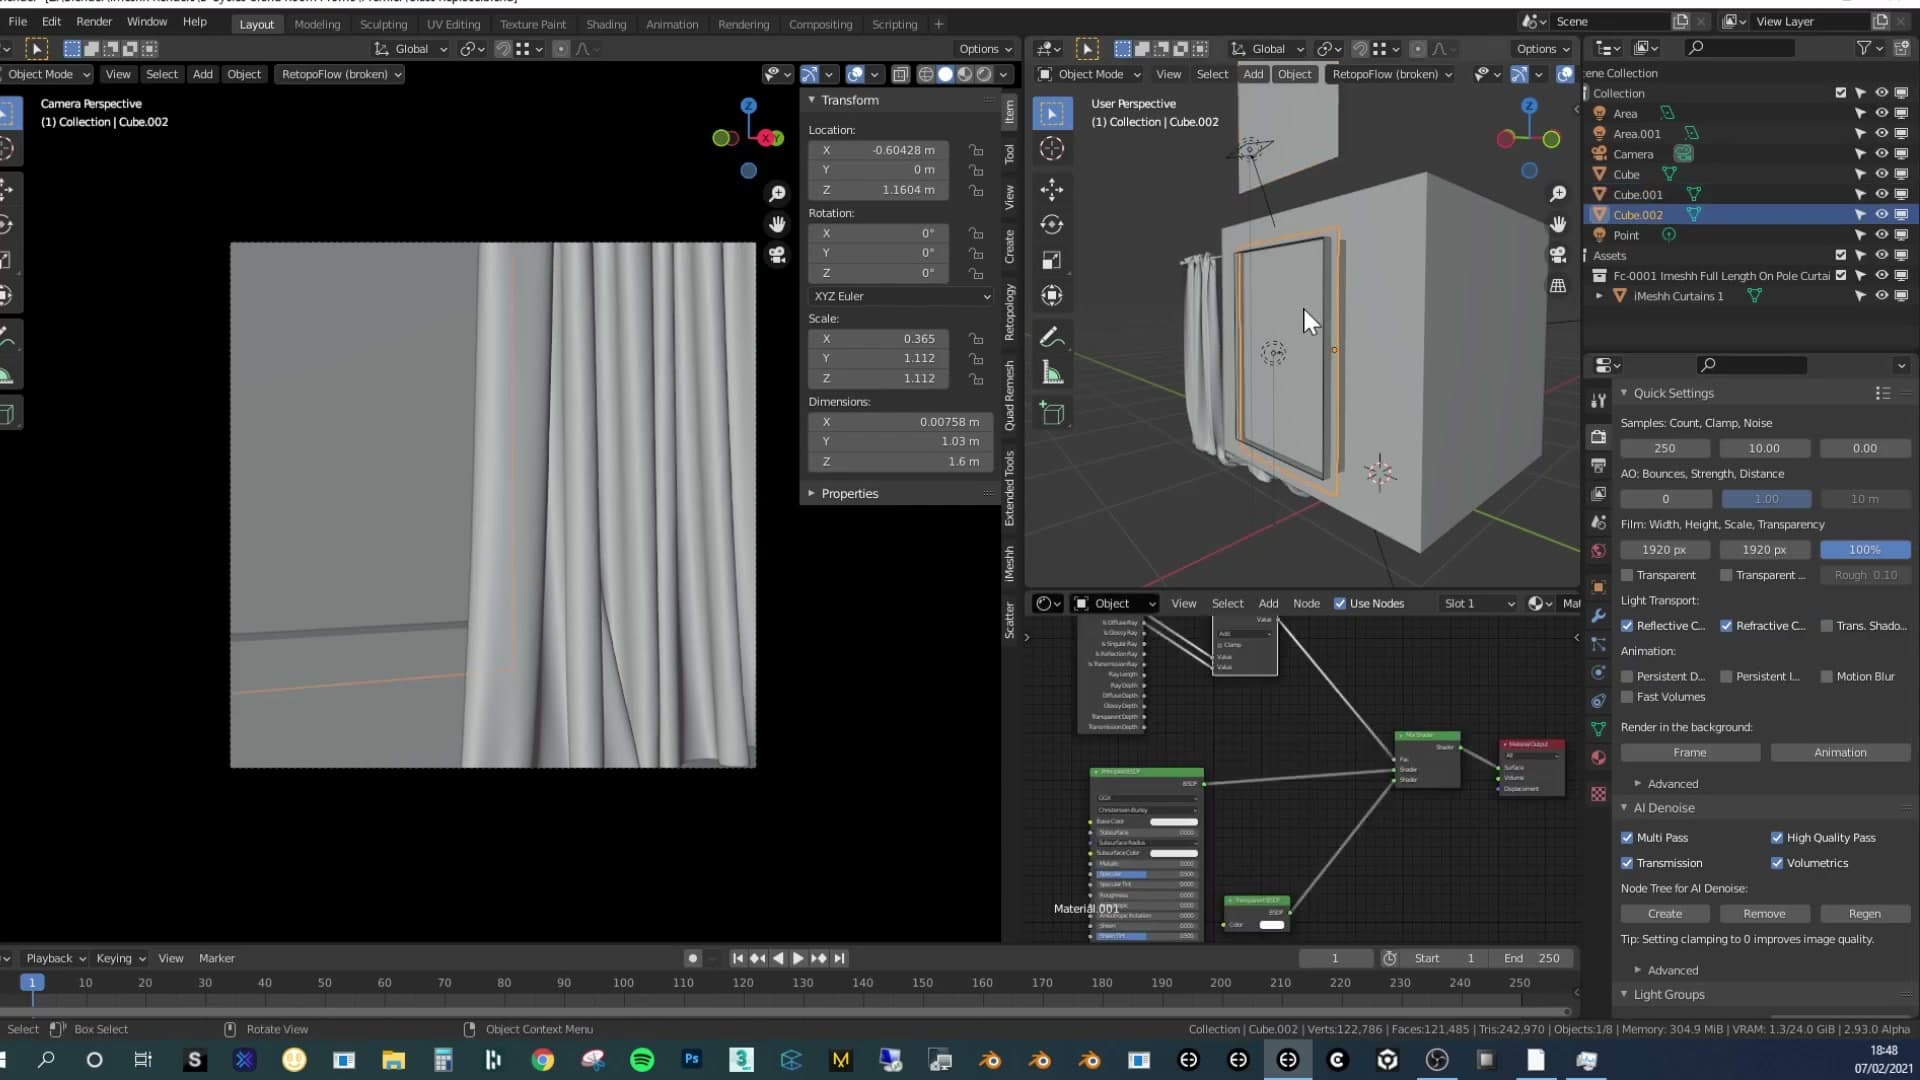
The trick that makes it work sits one level up, on the object itself. Open the Object Properties and find the Ray Visibility section. Leave Camera and Transmission ticked, and untick everything else. Light then passes through the pane cleanly without any mix-shader gymnastics.
About 30% faster, more detail kept
To make the difference concrete, render the same view twice: once with the old mix-shader in slot one, and once with the new Glass BSDF in slot two. Then compare them side by side.
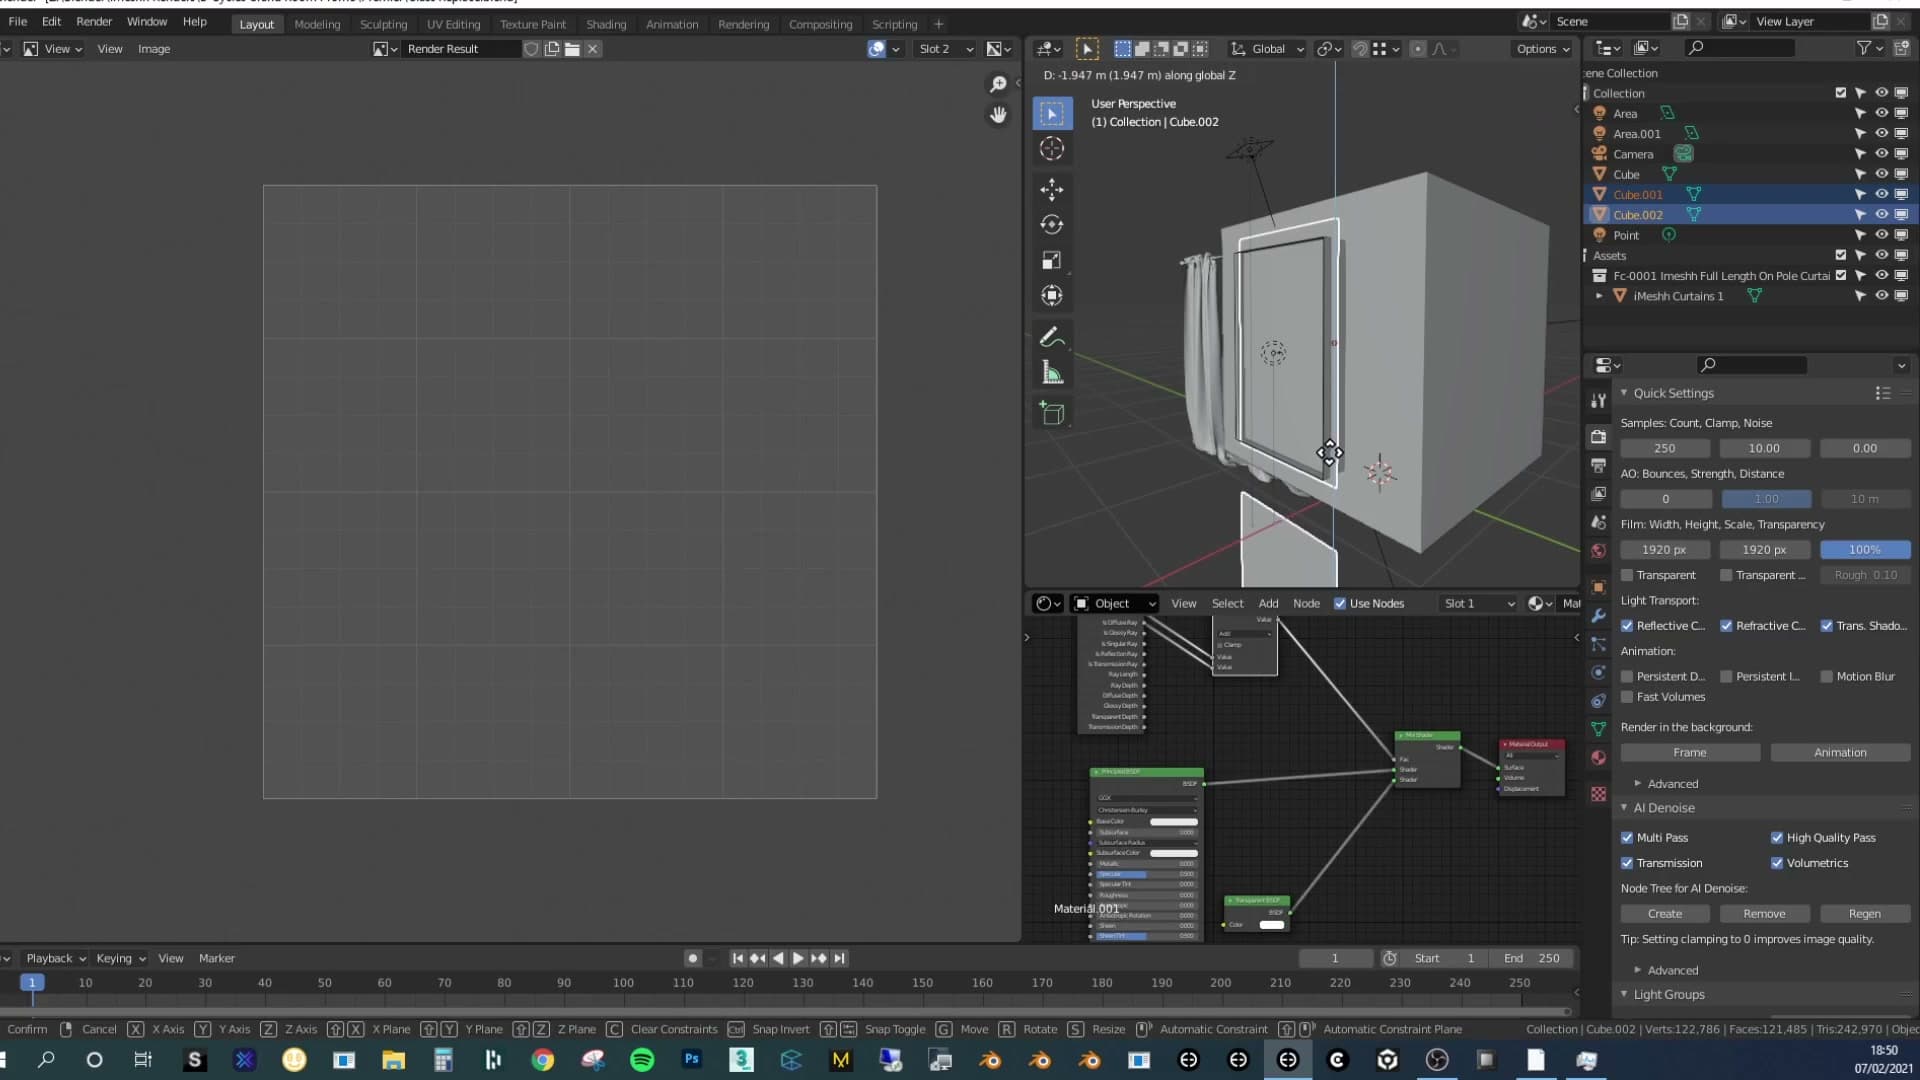
The old shader finishes in roughly 1 minute 30 seconds. The reflection of the curtain reads correctly in the window pane, which was always the whole point of the legacy hack.
Switch to slot two and rebuild with the new shader. Make sure transparent shadows are turned off, double-check that Ray Visibility on the object is restricted to Camera and Transmission, and press F12. The same view finishes in 1 minute flat, about 30% faster on this scene.
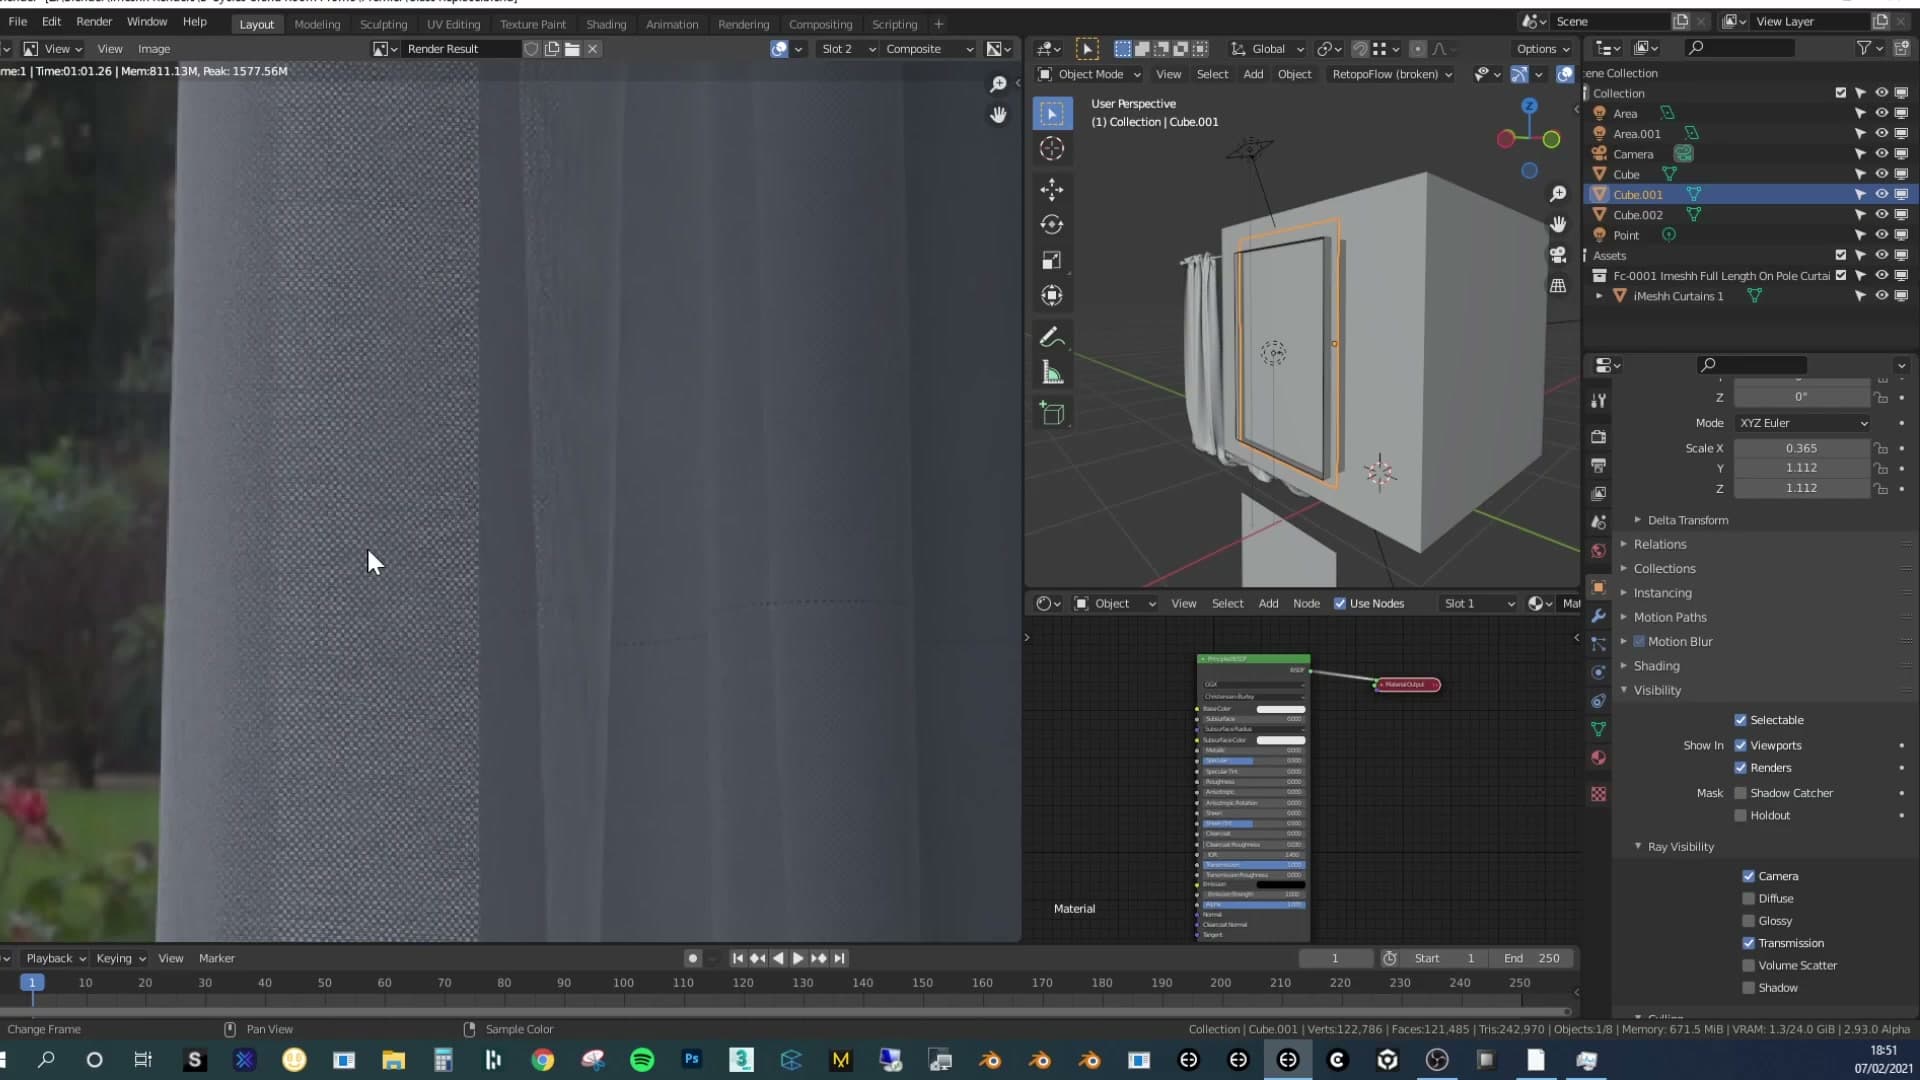
That speed-up is not fixed. Heavier scenes typically see somewhere near 30%, lighter scenes closer to 10%, depending on how much the glass was costing in the first place.
Quality holds up as well. Noise drops, the denoiser has cleaner data to work with, and the curtain reflection is still present in the window. The new render comes out a touch darker than the old one, but that is a one-click fix: nudge the light intensity or adjust the exposure. The new method is also closer to how glass behaves physically, so for any window glass from here on this is the setup to use.
The E-Cycles AI denoiser node
E-Cycles ships its own AI denoising compositor node that preserves fine surface detail (wood grain, fabric weave, leaf edges) that the standard denoiser tends to smooth into noise. Drop-in replacement; render at fewer samples for the same perceived quality.
Wiring the AI denoiser into the compositor
E-Cycles ships its own AI denoising compositor node, and wiring it in is a one-click job. Trigger the create action and the required nodes drop straight into your compositor tree. You can leave them where they land or, as in this scene, bundle them into a node group to keep the rest of the comp tidy.
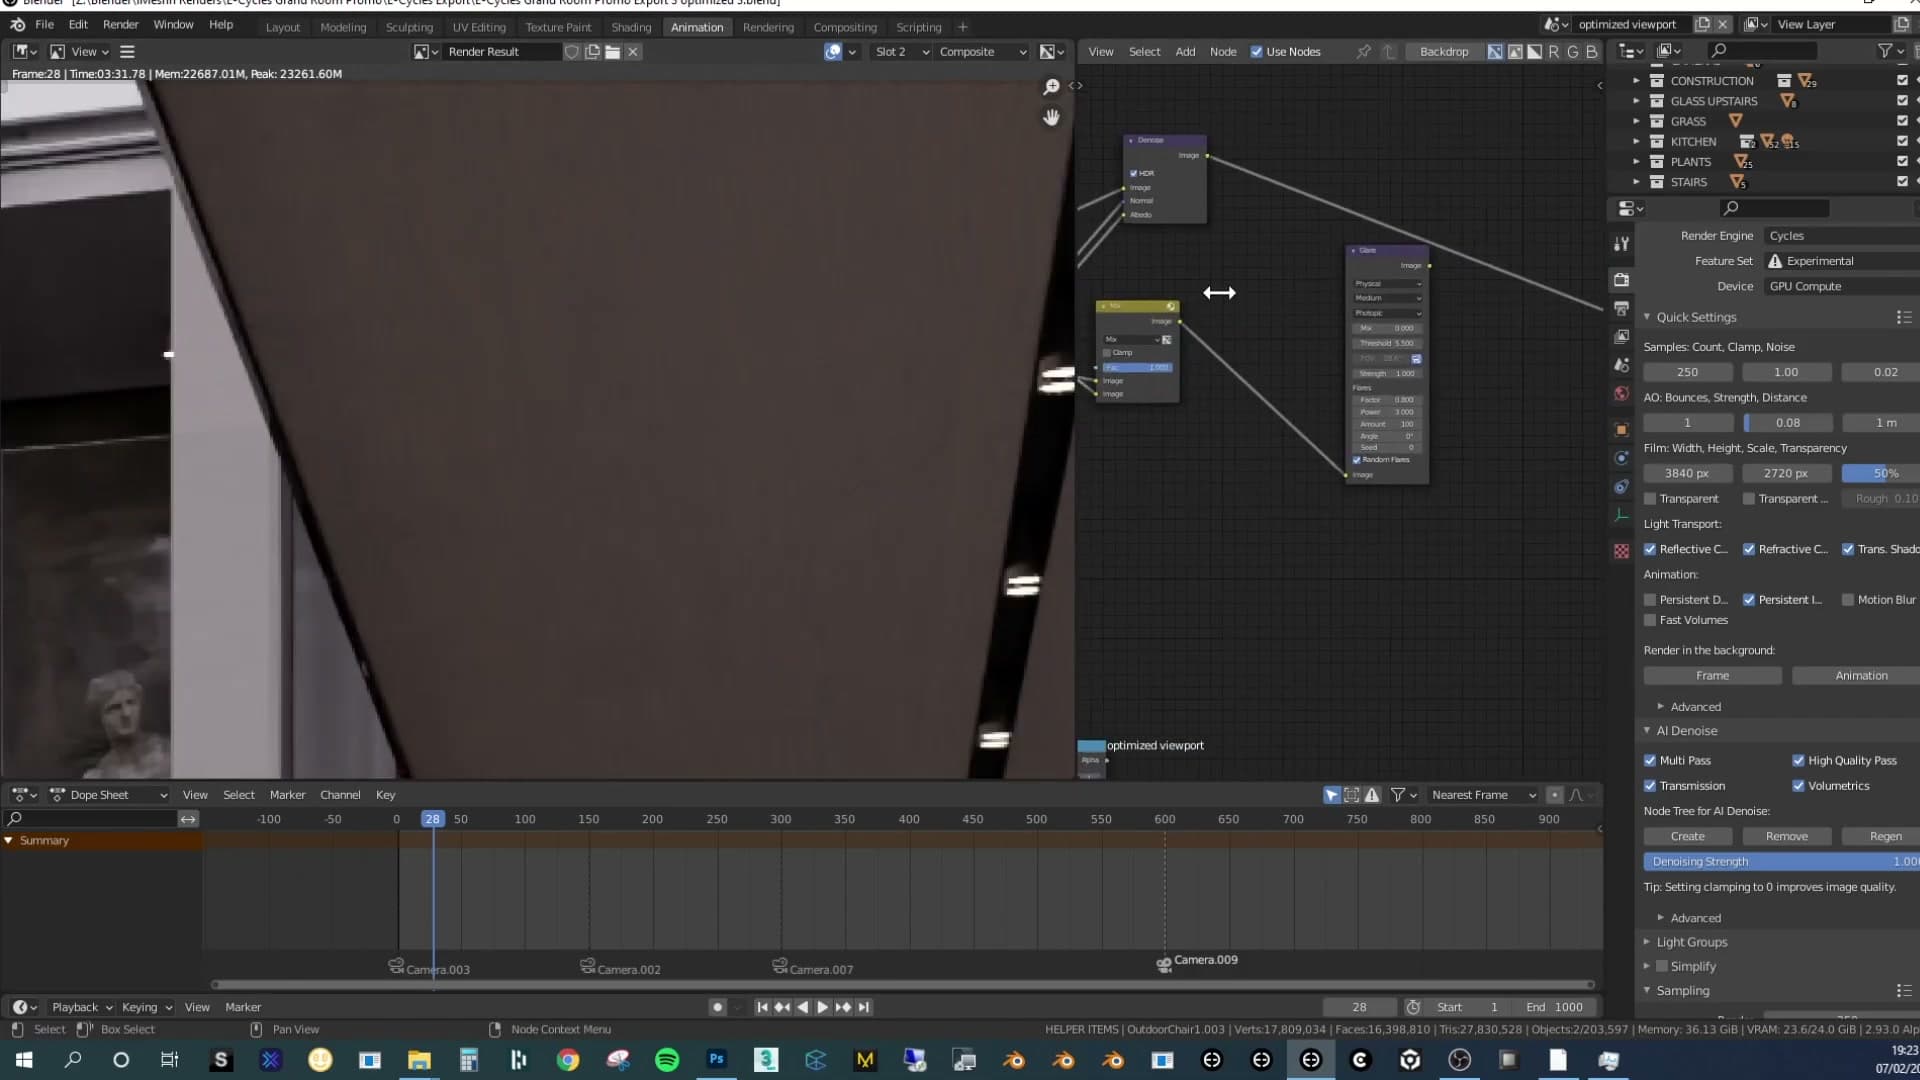
The difference is easiest to read on a wood surface. With the default denoising node in the chain, the grain is technically still present but reads as a soft, muddy blur; you have to look hard to spot it. Swap that node for the E-Cycles AI denoiser and the wood pattern snaps back into focus, holding onto the fine surface detail that the standard denoiser was averaging away into noise.
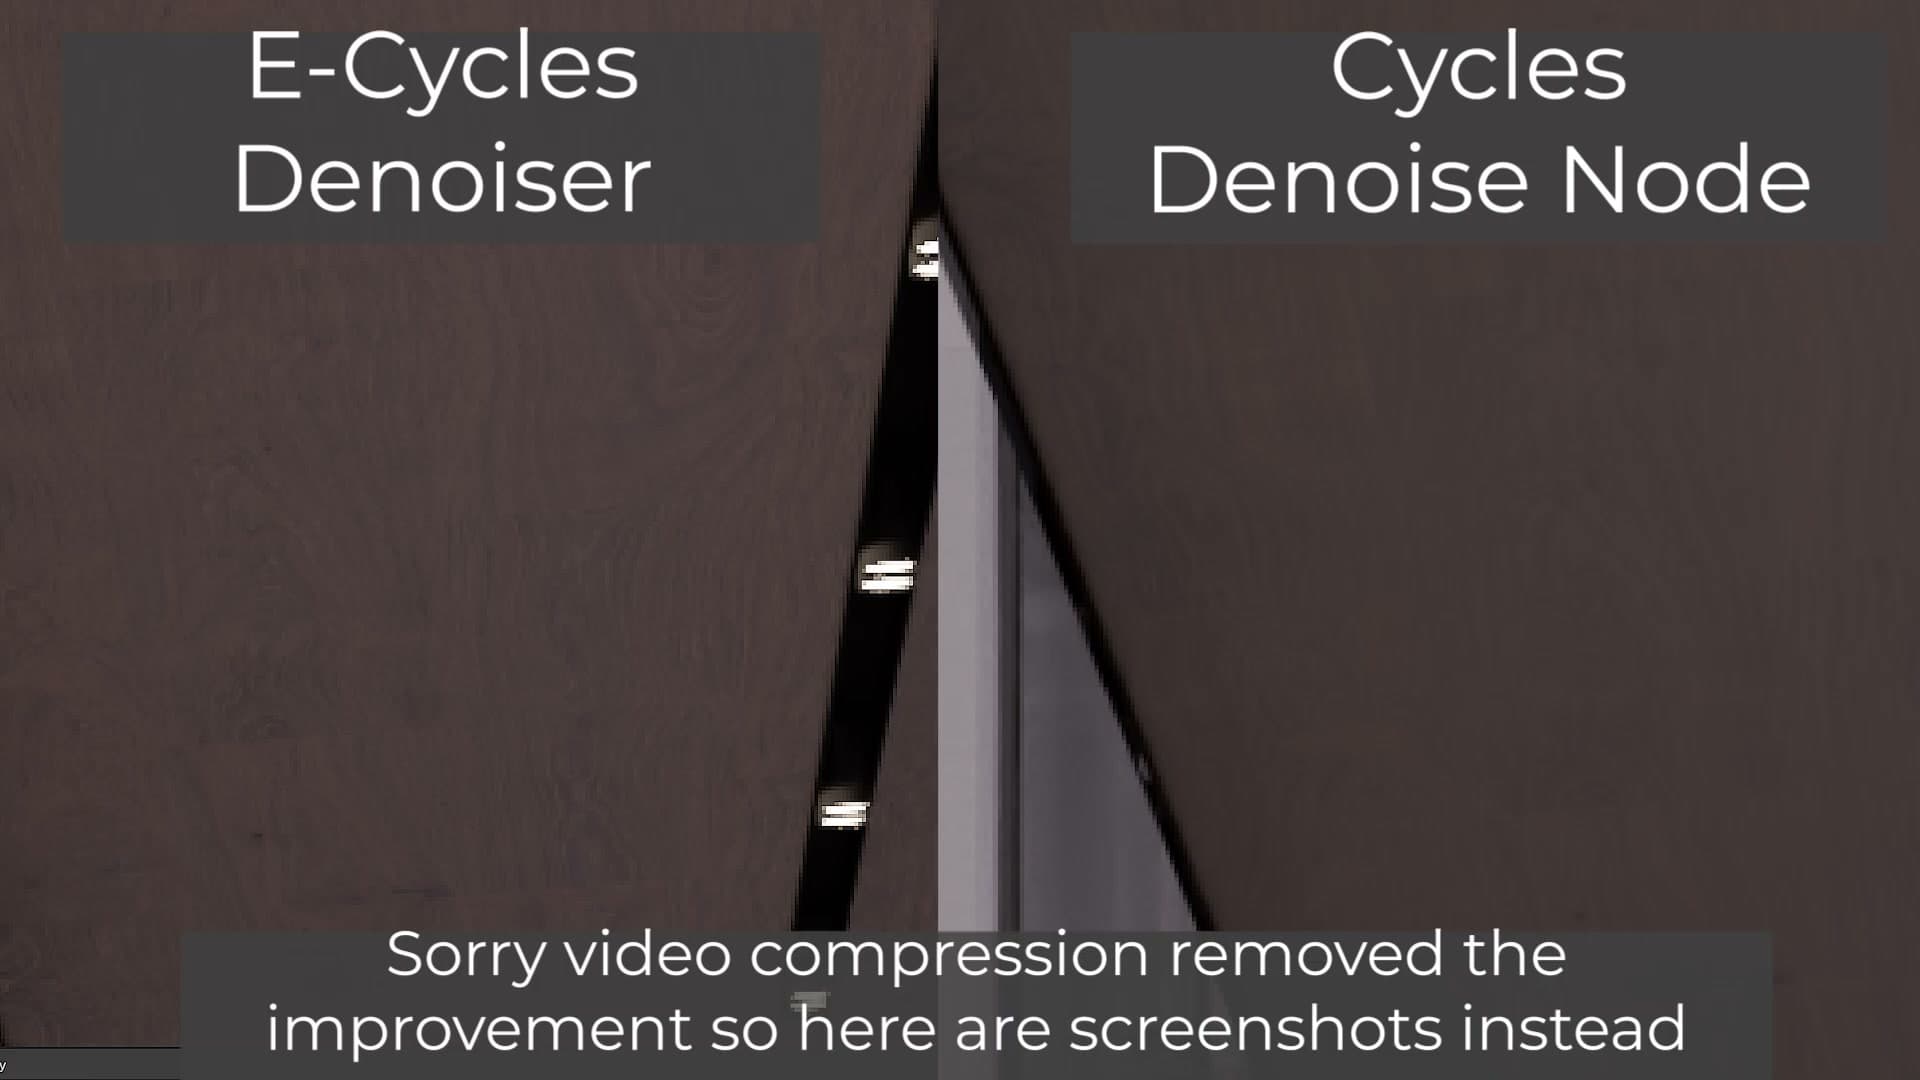
The practical pay-off is that you can render at fewer samples and still finish with a more accurate-looking image than a higher-sample pass run through the old denoiser. For archviz work where wood grain, fabric weave and foliage edges carry the realism, that's a meaningful win for almost no extra setup.
RAM and viewport optimisations for heavy archviz scenes
Not E-Cycles-specific, but learnt the hard way while building this scene. Three changes took the file from a sluggish 22-GB monster to something that loads, renders and animates: collection instances over Alt+D, bounding-box display on vegetation, and aggressively simpler glass shaders for animation work.
Collection Instance vs Alt+D for duplicates
What follows isn't E-Cycles-specific, but it came out of building this exact scene and would have saved real time if I'd known it from the start. Throughout the project, duplicate objects (trees, chairs, the wicker baskets) were placed with Alt+D, which creates a linked-data instance. That usually works fine: the underlying object data is shared, so it only needs to be calculated once.
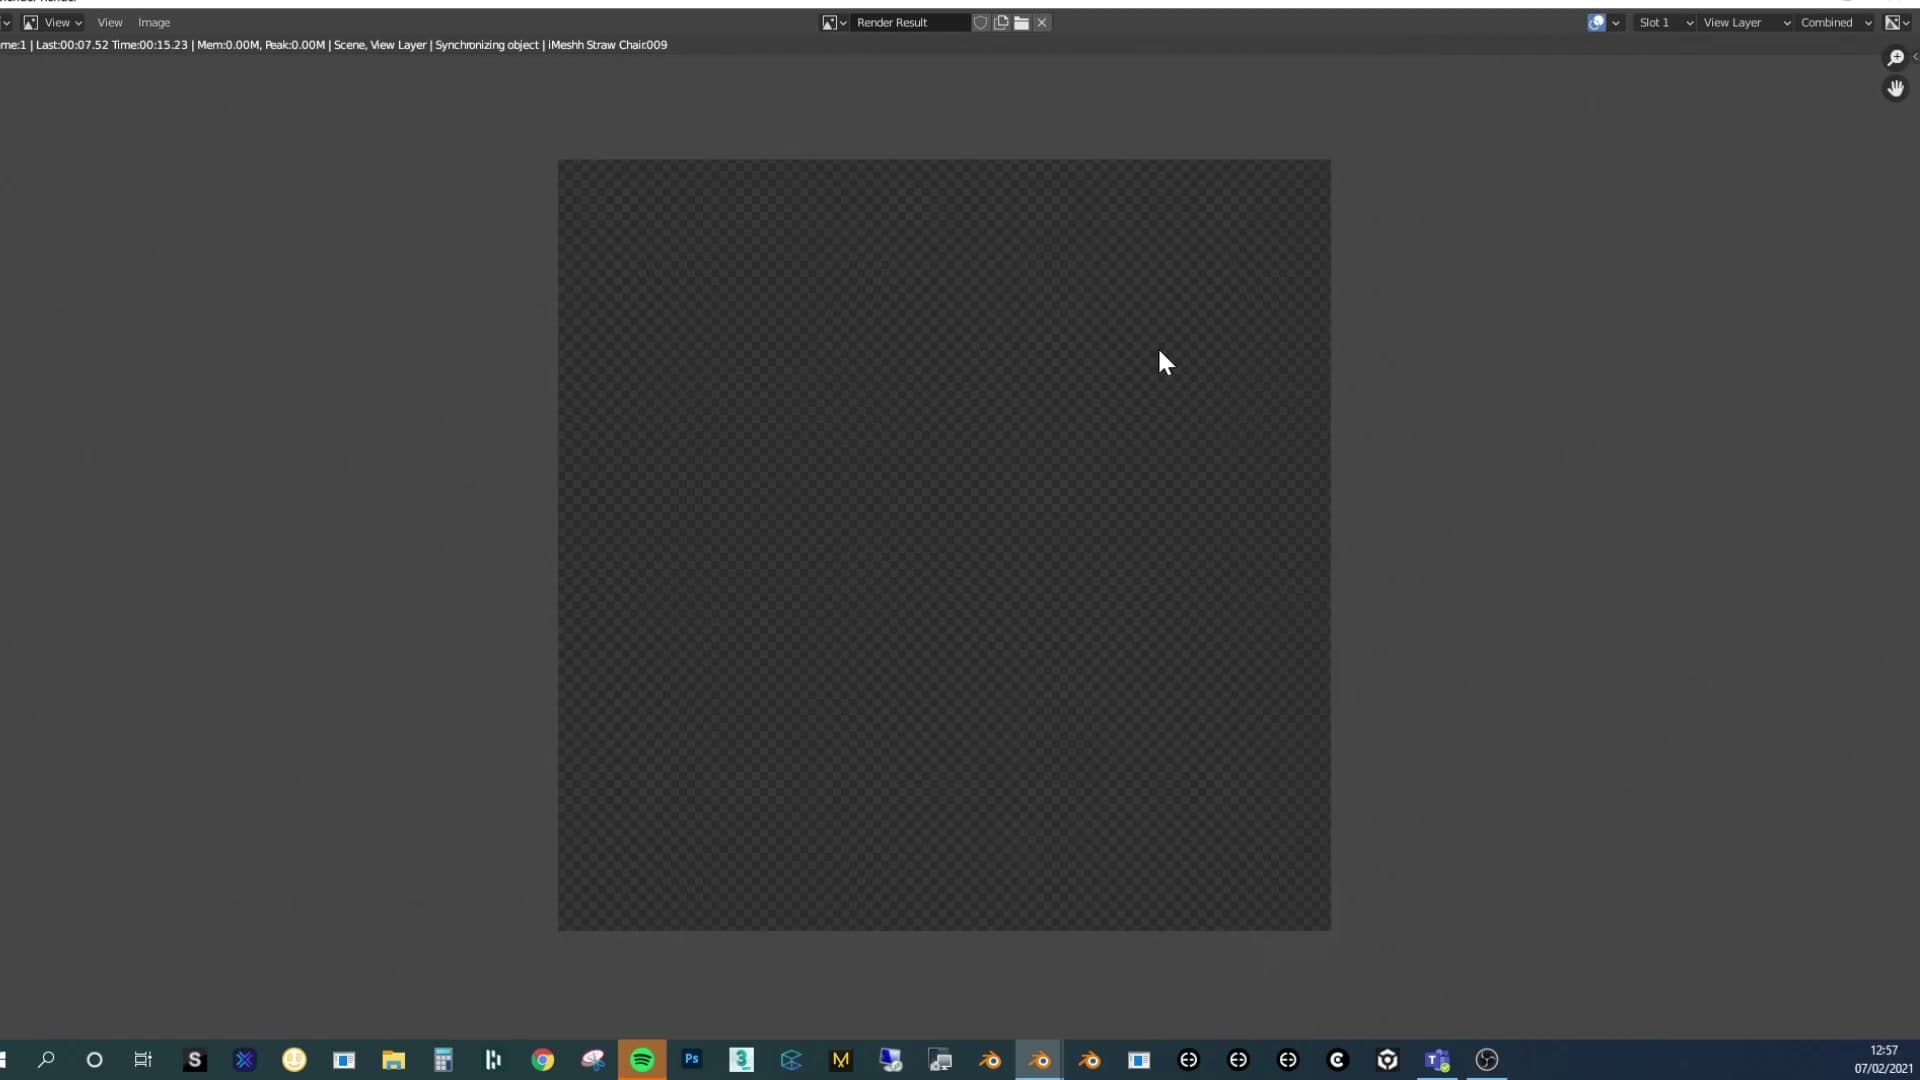
The catch is modifiers. If a modifier is applied to the source object, every Alt+D copy evaluates that modifier independently. On this scene that pushed RAM usage up to roughly 2 GB, a lot of memory burnt on recalculating the same modifier hundreds of times.
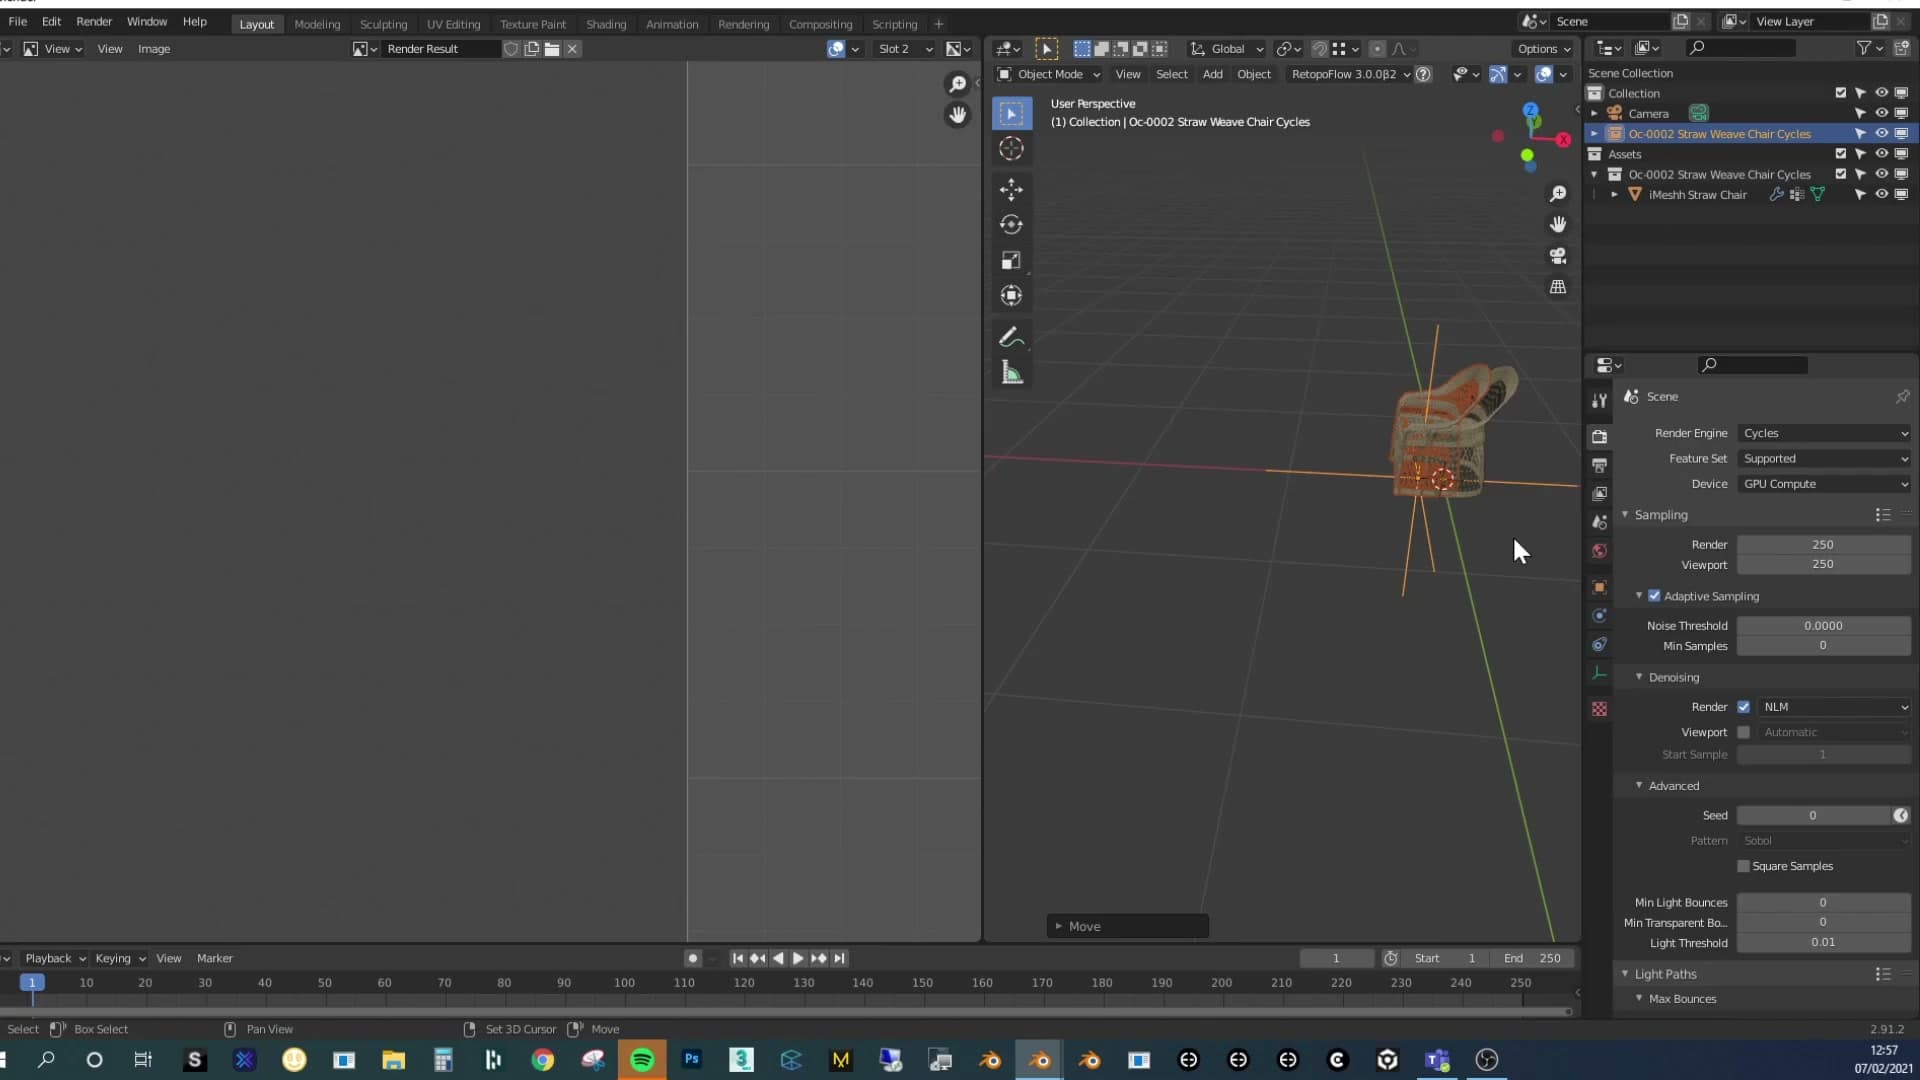
The fix is to use a Collection Instance instead. When you append an iMeshh asset, it usually comes in inside its own collection (the wicker basket arrives as OC002 Straw Weave, for example). Rather than Alt+D-ing copies of the basket object, press Shift+A and choose Collection Instance. Each placement is now an instance of the whole collection, and the modifier inside that collection is only evaluated once.
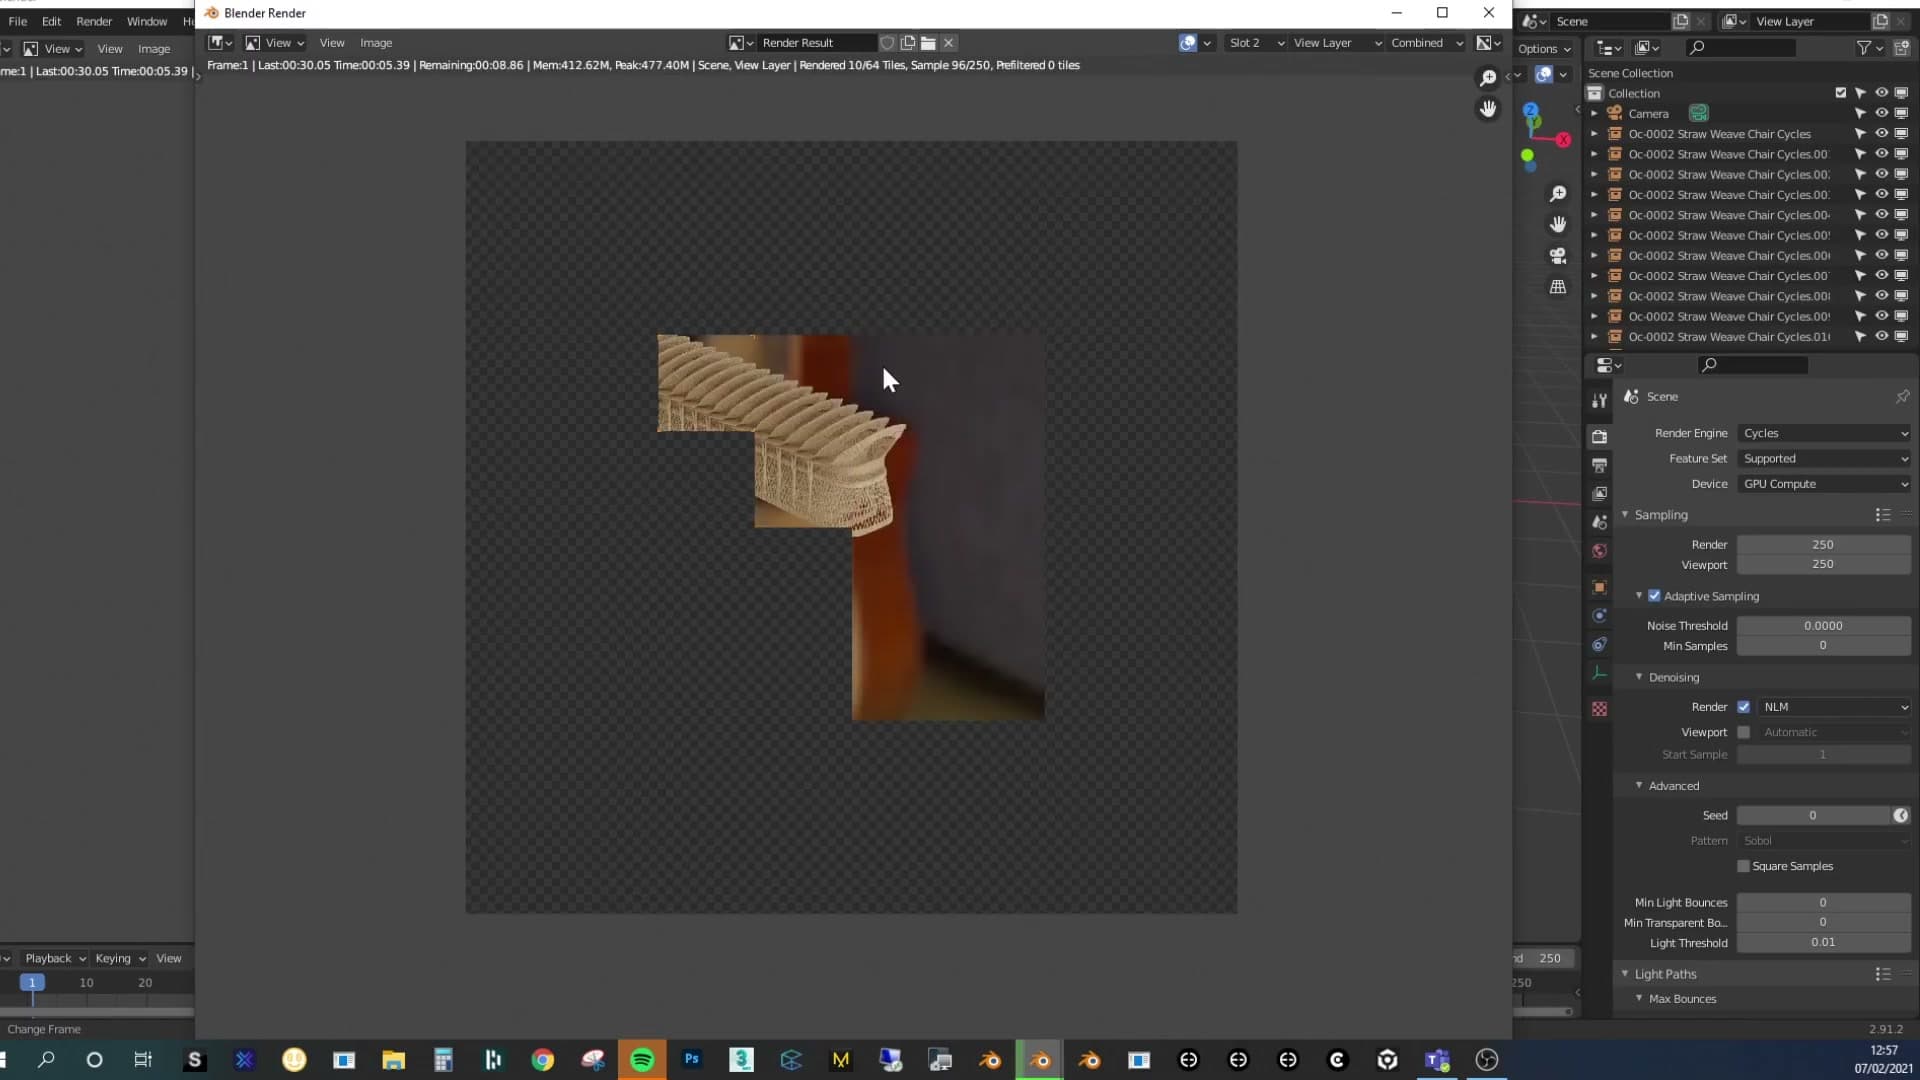
Same scene, same number of placements, RAM dropped to around 400 MB. That approach was then applied to every duplicated object in the file (trees, chairs, anything that appeared more than once) and the savings compound across the whole project.
Honest admission: this behaviour was a surprise to me. I assumed Alt+D instances and Collection Instances behaved the same way. They don't, and once you know that, Collection Instance becomes the sensible default for any repeated asset.
Bounding-box display on dense vegetation
Trees and grass in this scene are all set to bounding-box display. The dense vegetation that would otherwise drag the viewport down is collapsed into simple boxes you can drag around without Blender choking on every redraw.
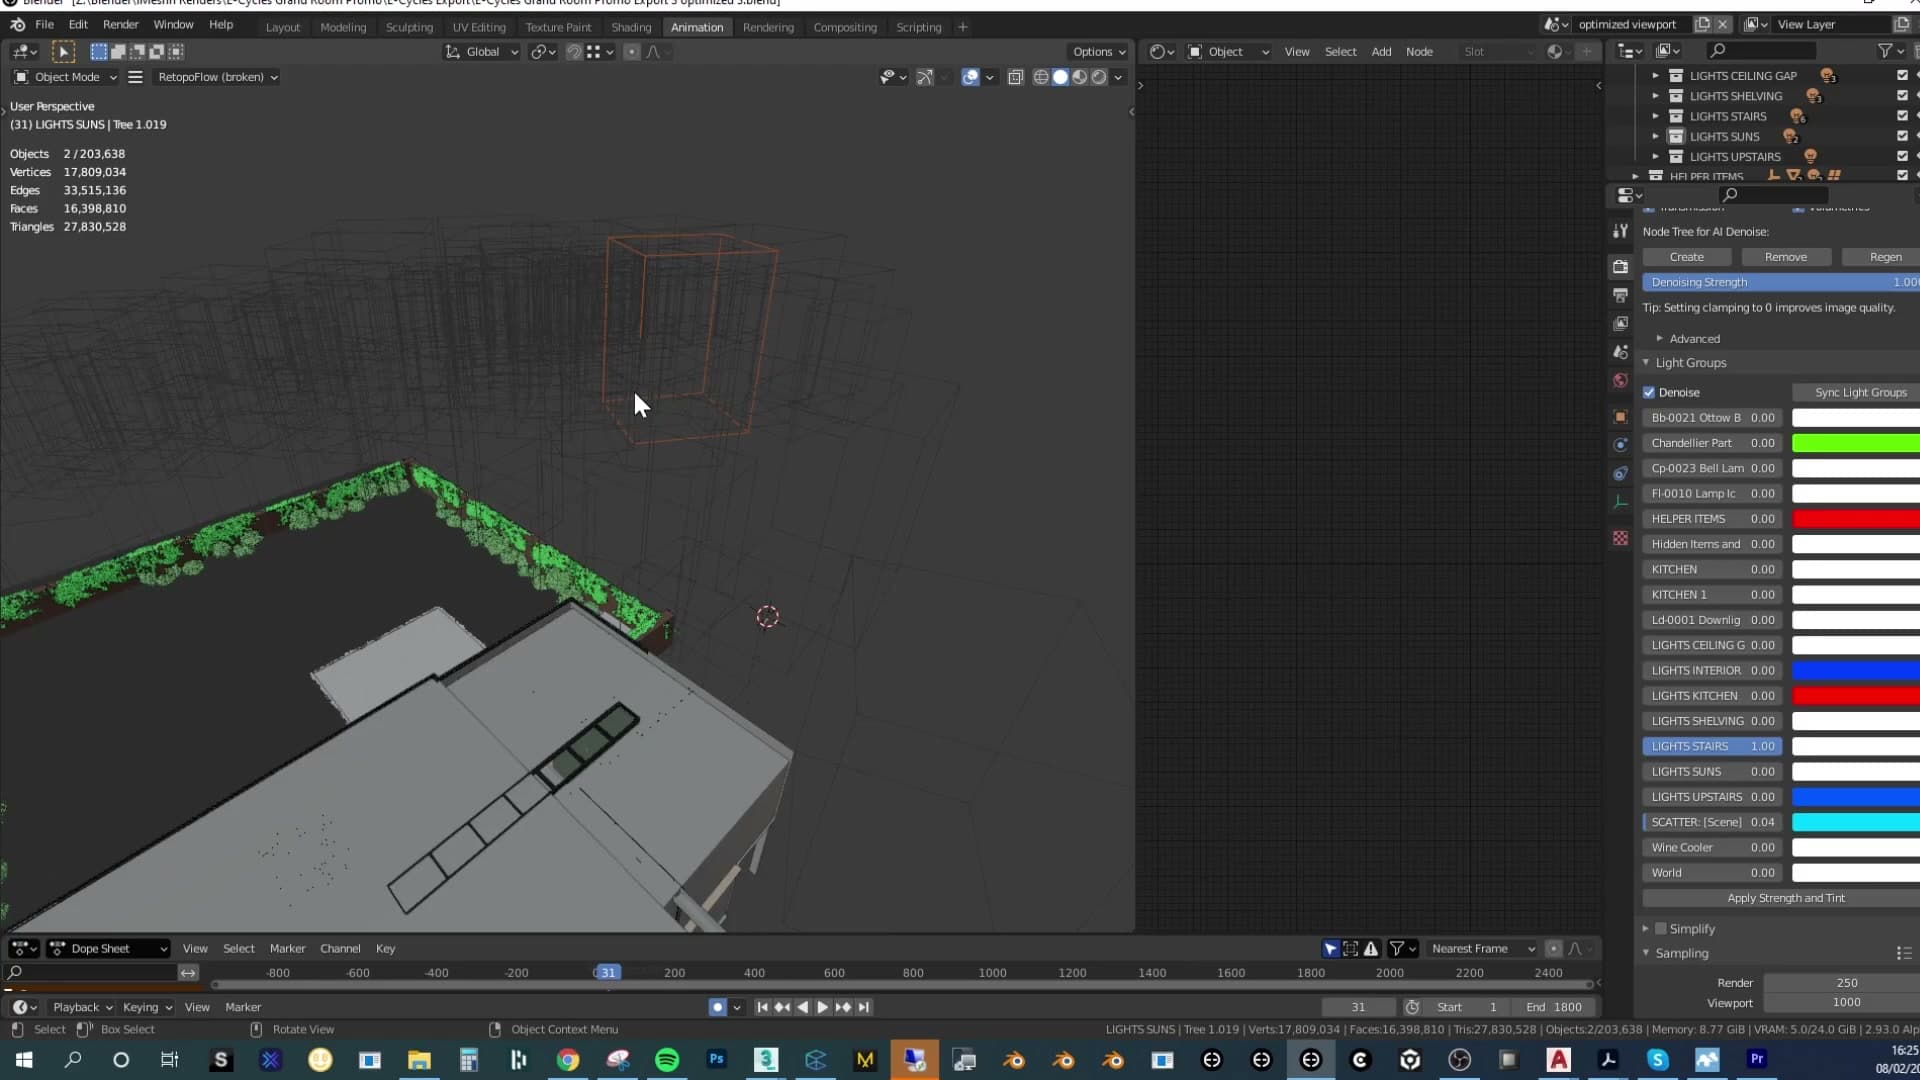
The reason this came up was render time. The earlier workflow used an LOD-swap add-on to switch low-poly proxies for high-poly meshes at render time, but the swap itself was taking too long. A low-poly preview wasn't actually useful for this scene either, since the trees only needed to read as full coverage in the wide shot.
Switching to bounding boxes solved both problems at once. The viewport stayed fluid even as more trees were duplicated in, and the wide-shot composition could be judged from box silhouettes alone.
Simplifying glass shaders for animation
The third optimisation was specific to the animation workflow. Some of the window glass in the scene had volumes plugged in, and in places more elaborate shader networks layered on top. Fine for a single still, expensive across a thousand frames.
For an animation, every per-frame cost multiplies, so the glass was stripped right back to plain transmission shaders with nothing else attached, kept as simple as possible on purpose. The render time per frame came down noticeably as a result.
Verdict, support, and scene availability
E-Cycles 2021 pays for itself the moment you start charging clients for animation frames. Beyond the speed it ships with active developer support, and iMeshh subscribers get a discount on the pre-order. The test scene may be released as an iMeshh exclusive once it has been pared down enough for normal hardware.
Where to get E-Cycles and the iMeshh discount
Stepping back from the technical breakdowns, the overall verdict on E-Cycles is unambiguous. After putting it through real production work, this is an incredible piece of software and what you get for the money is genuinely worth the value. The pre-order pricing and the iMeshh subscriber discount were covered earlier in the post; the outbound link to E-Cycles itself sits in the Tools, assets and credits section at the bottom of this page.
Just as important as the raw render-time savings is the support behind the project. If you're new to E-Cycles, or you hit something that looks broken, you can reach out to the developer directly. He's a very knowledgeable person and there's a good chance you'll learn something in the process rather than just getting a one-line fix back. Treat the support channel as a learning resource, not only a bug tracker.
On the question viewers have been asking most: will the test scene be released as an iMeshh exclusive? The tentative answer is yes. A few of the textures come from outside iMeshh and need to be replaced with iMeshh originals or CC0 alternatives before it can ship. The scene is also extremely heavy. RAM usage during the test renders was sitting at roughly 22 GB, which is more than most viewers will realistically have free. Expect a lighter, further-optimised version of the file so it's actually renderable on average hardware.
A handful of the models inside the scene haven't been uploaded to the iMeshh library yet either, so those will most likely land first and the full scene afterwards. That's the wrap on E-Cycles 2021. If breakdowns like this one are useful, subscribing to the iMeshh YouTube channel genuinely helps these videos reach more archviz artists.
Tools and credits
Everything mentioned in this tutorial, with links.
- Blender (the renderer this entire build runs in)
- iMeshh: studio platform (project management, client review, asset library, invoicing). The asset library used in this tutorial is included with every iMeshh Pro plan.
- Poly Haven (free CC0 textures and HDRIs)
Pillar guide: Rendering Post hub