What we're building
Overview of the spiral-weave wicker basket and why this technique scales to any weave-pattern object: chairs, lampshades, planters.
The spiral weave goal and prior chair tutorial
This tutorial walks you through modelling a wicker basket with a spiral weave wrapping its tapered cylindrical form. It's the same weave pattern that appeared on a wicker-style chair covered previously on the iMeshh channel. That earlier video was a quick walkthrough, and a lot of viewers asked for a more detailed breakdown of how the weave was actually built.
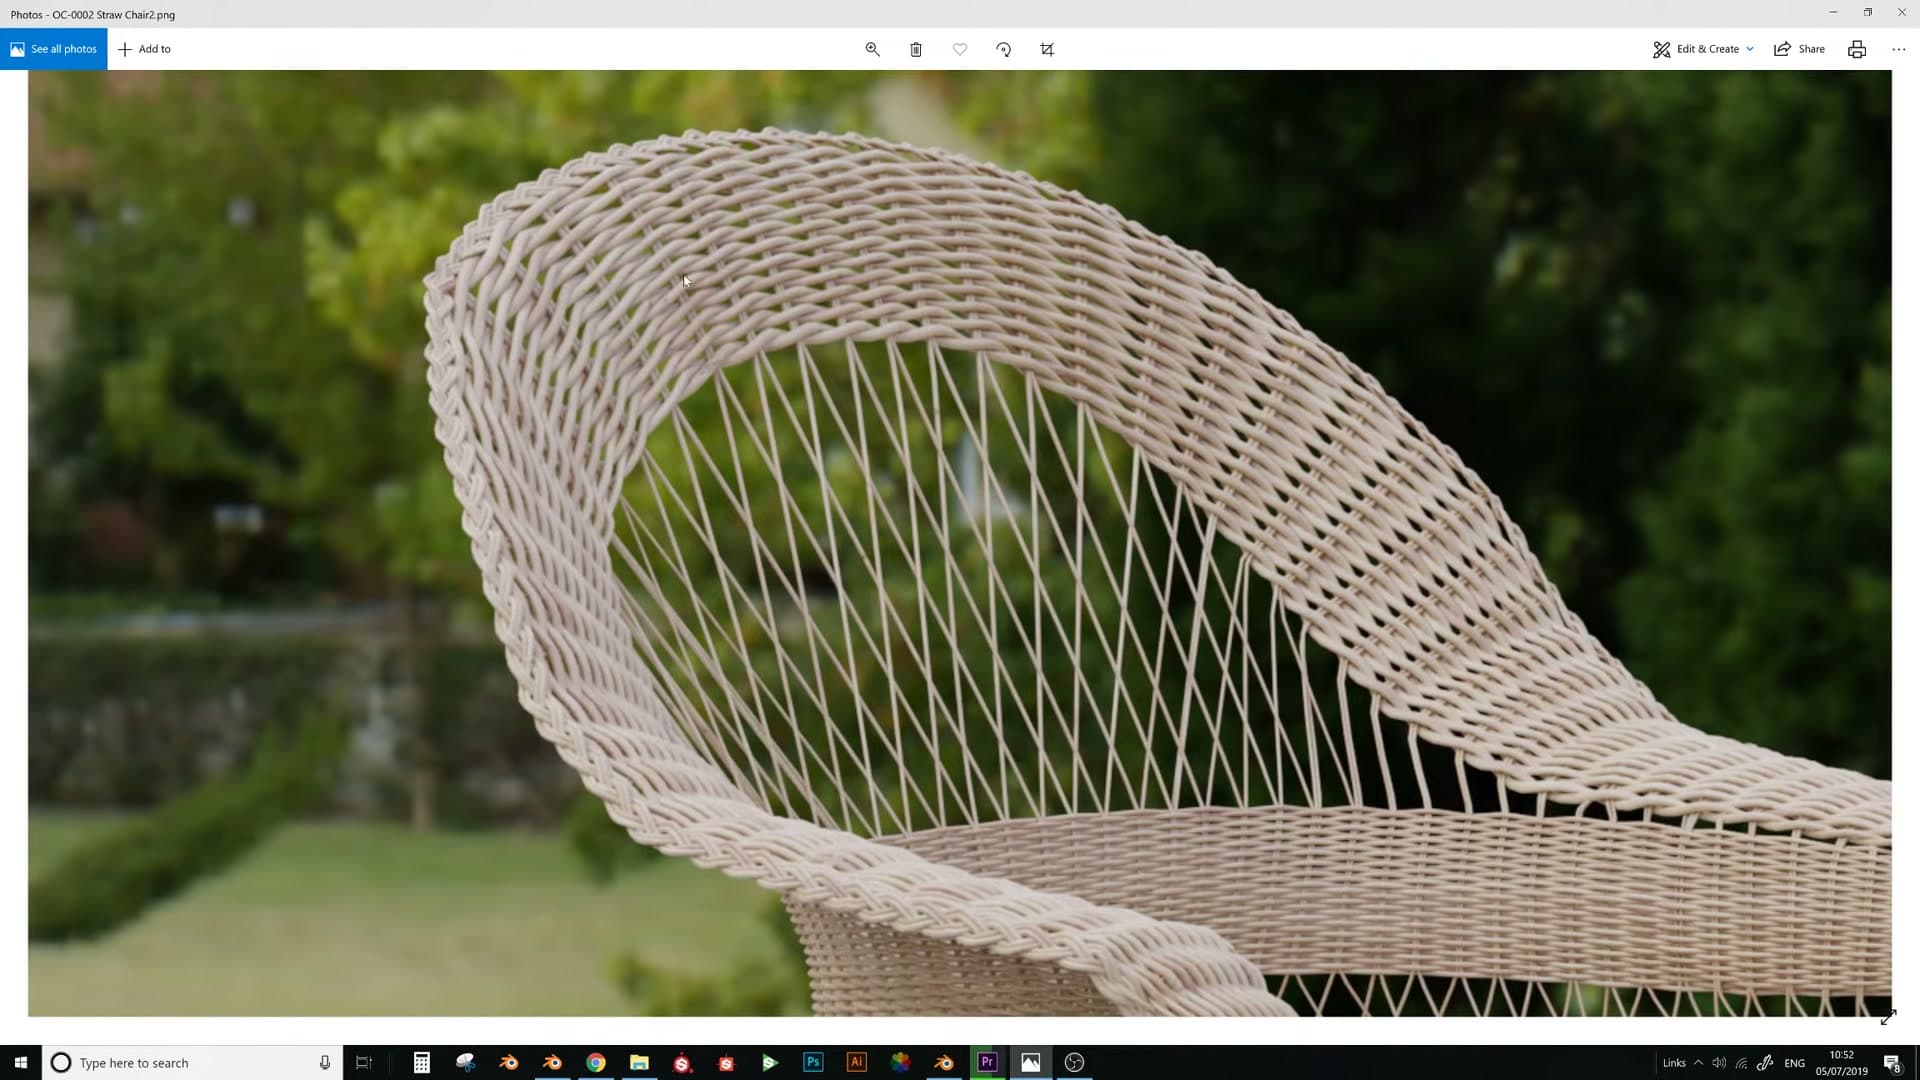
The reference chair had the spiral weave running along its vertical supports, and turning that technique into a proper step-by-step felt like a worthwhile challenge. The basket here is arguably a bit more complex than the chair piece, but the underlying process is very similar. Once you've followed it through on this object, the same approach carries across to chairs, lampshades, planters, and anything else with a weave wrapped around a curved surface.
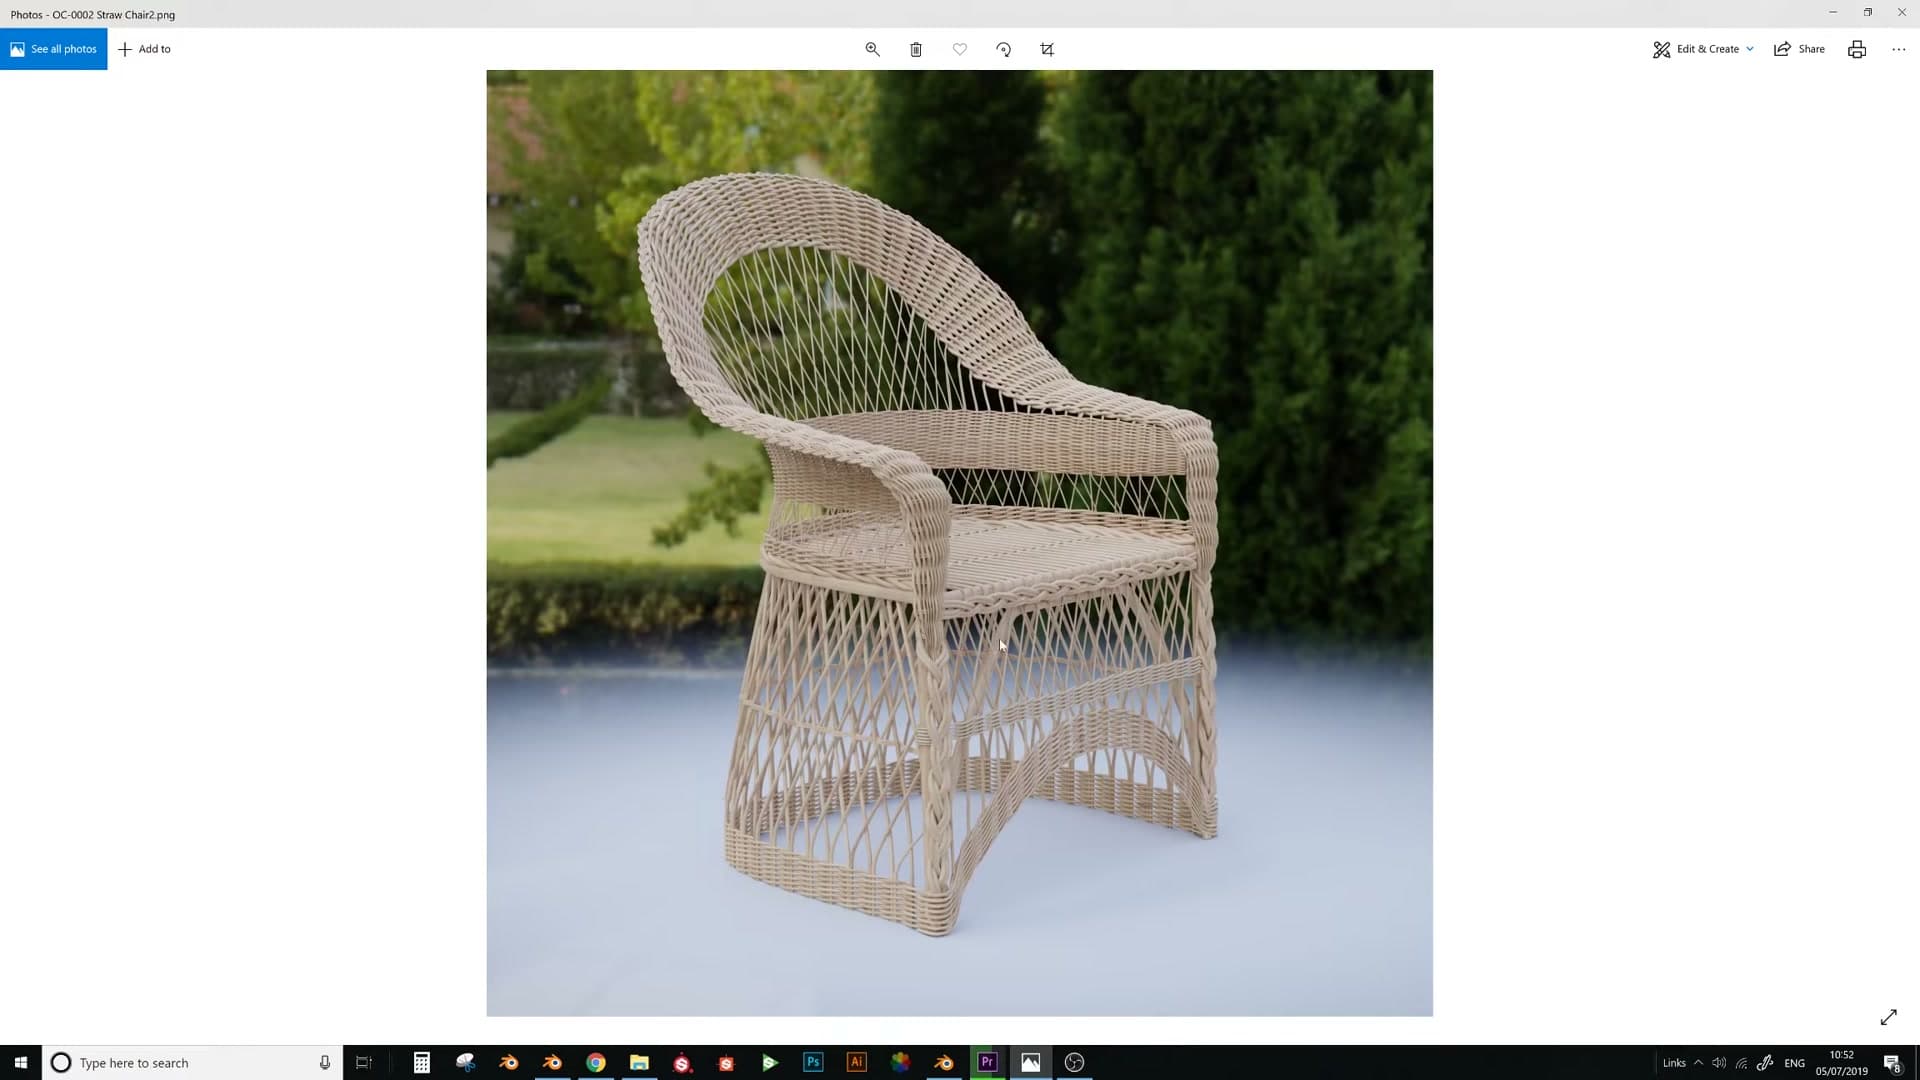
A much longer five-hour version of the full unedited build is being uploaded separately to Twitch, and possibly YouTube, if you want to sit through every decision in real time. The tutorial you're reading here is the condensed walkthrough: base cylinder to finished render in roughly twenty minutes.
Setting up the base shape in Blender 2.79
Install the Surface Follow and Quad Unwrap add-ons, model the basket cylinder with proportional editing, and create a perfectly flat rectangular UV island that the weave will eventually wrap.
Installing Surface Follow and Quad Unwrap
Most of the build happens in Blender 2.8, but the two add-ons that flatten the basket's UV haven't been ported across yet, so the first few steps need to happen in 2.79. Once the base shape and the flat UV island exist, you'll save the file and reopen it in 2.8 for the rest of the work.
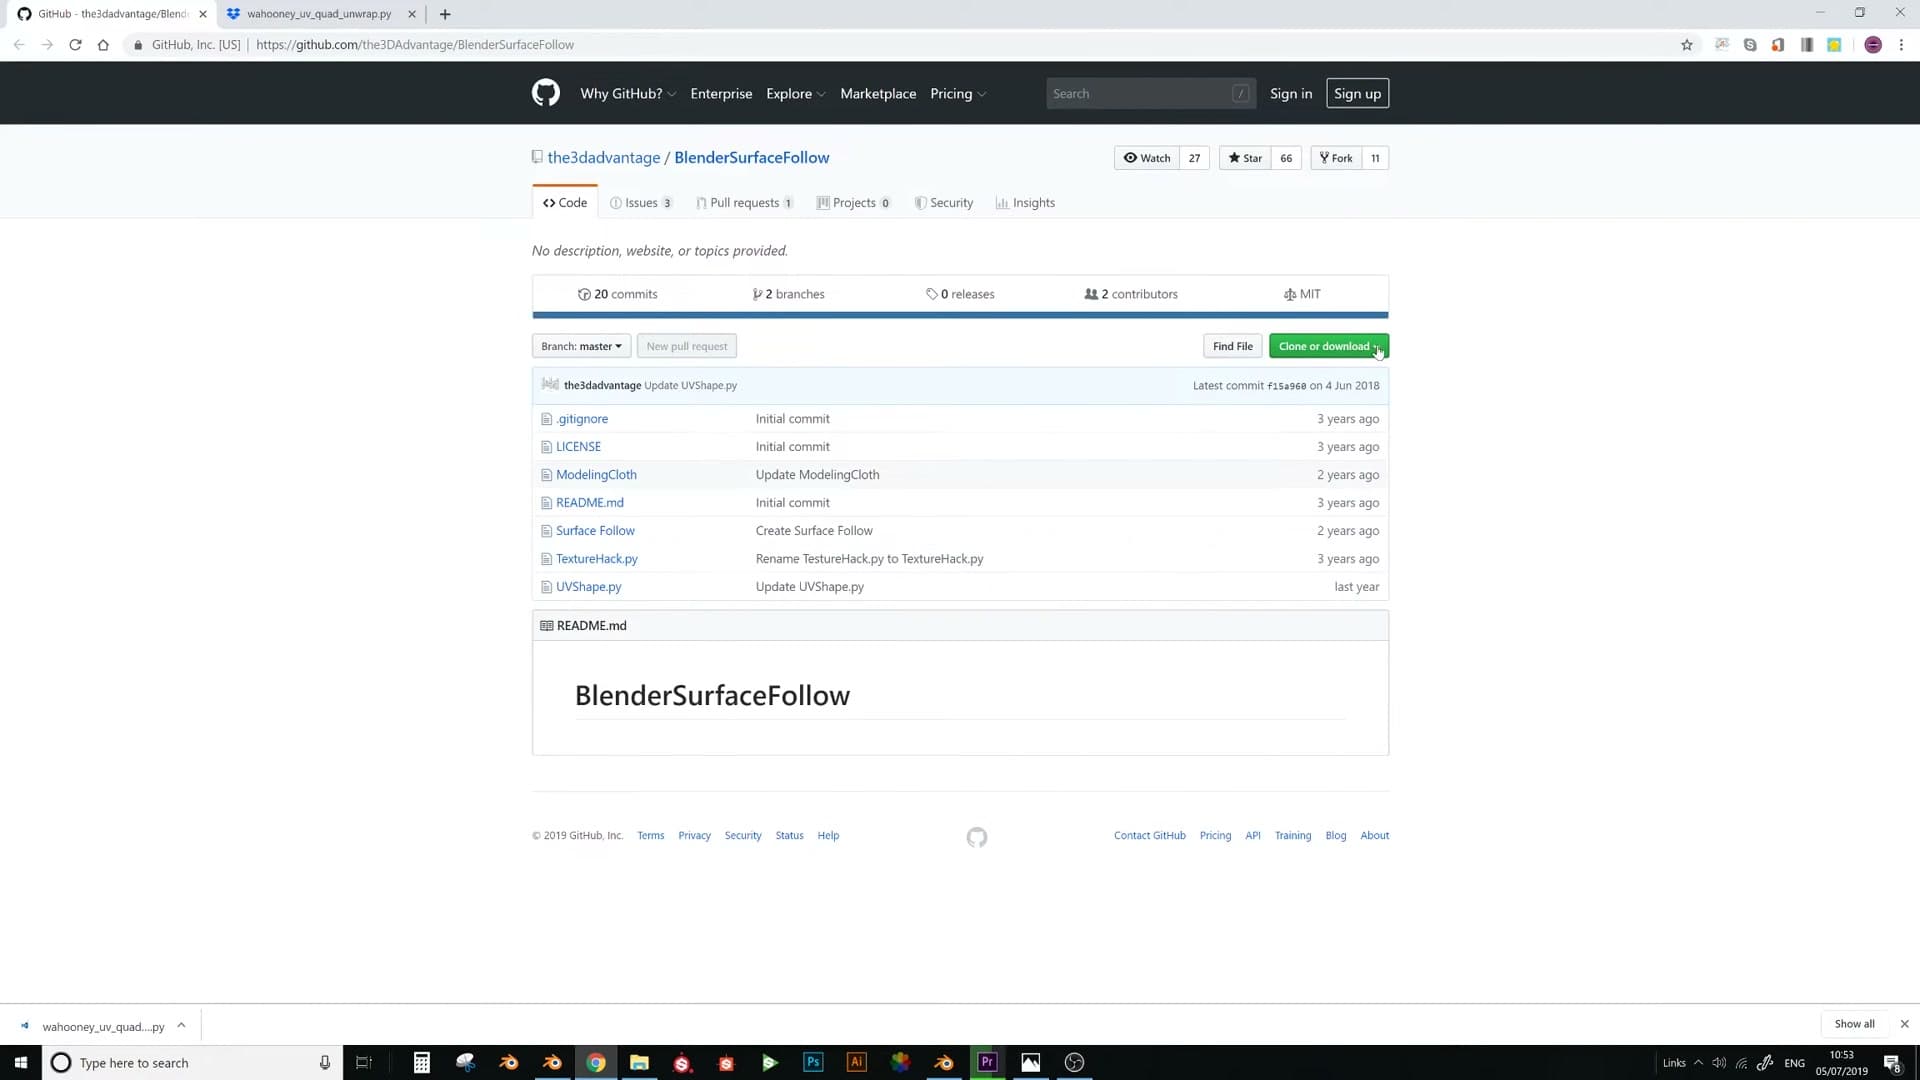
Grab both add-ons: Blender Surface Follow and Quad Unwrap. Each is distributed as a single .py file.
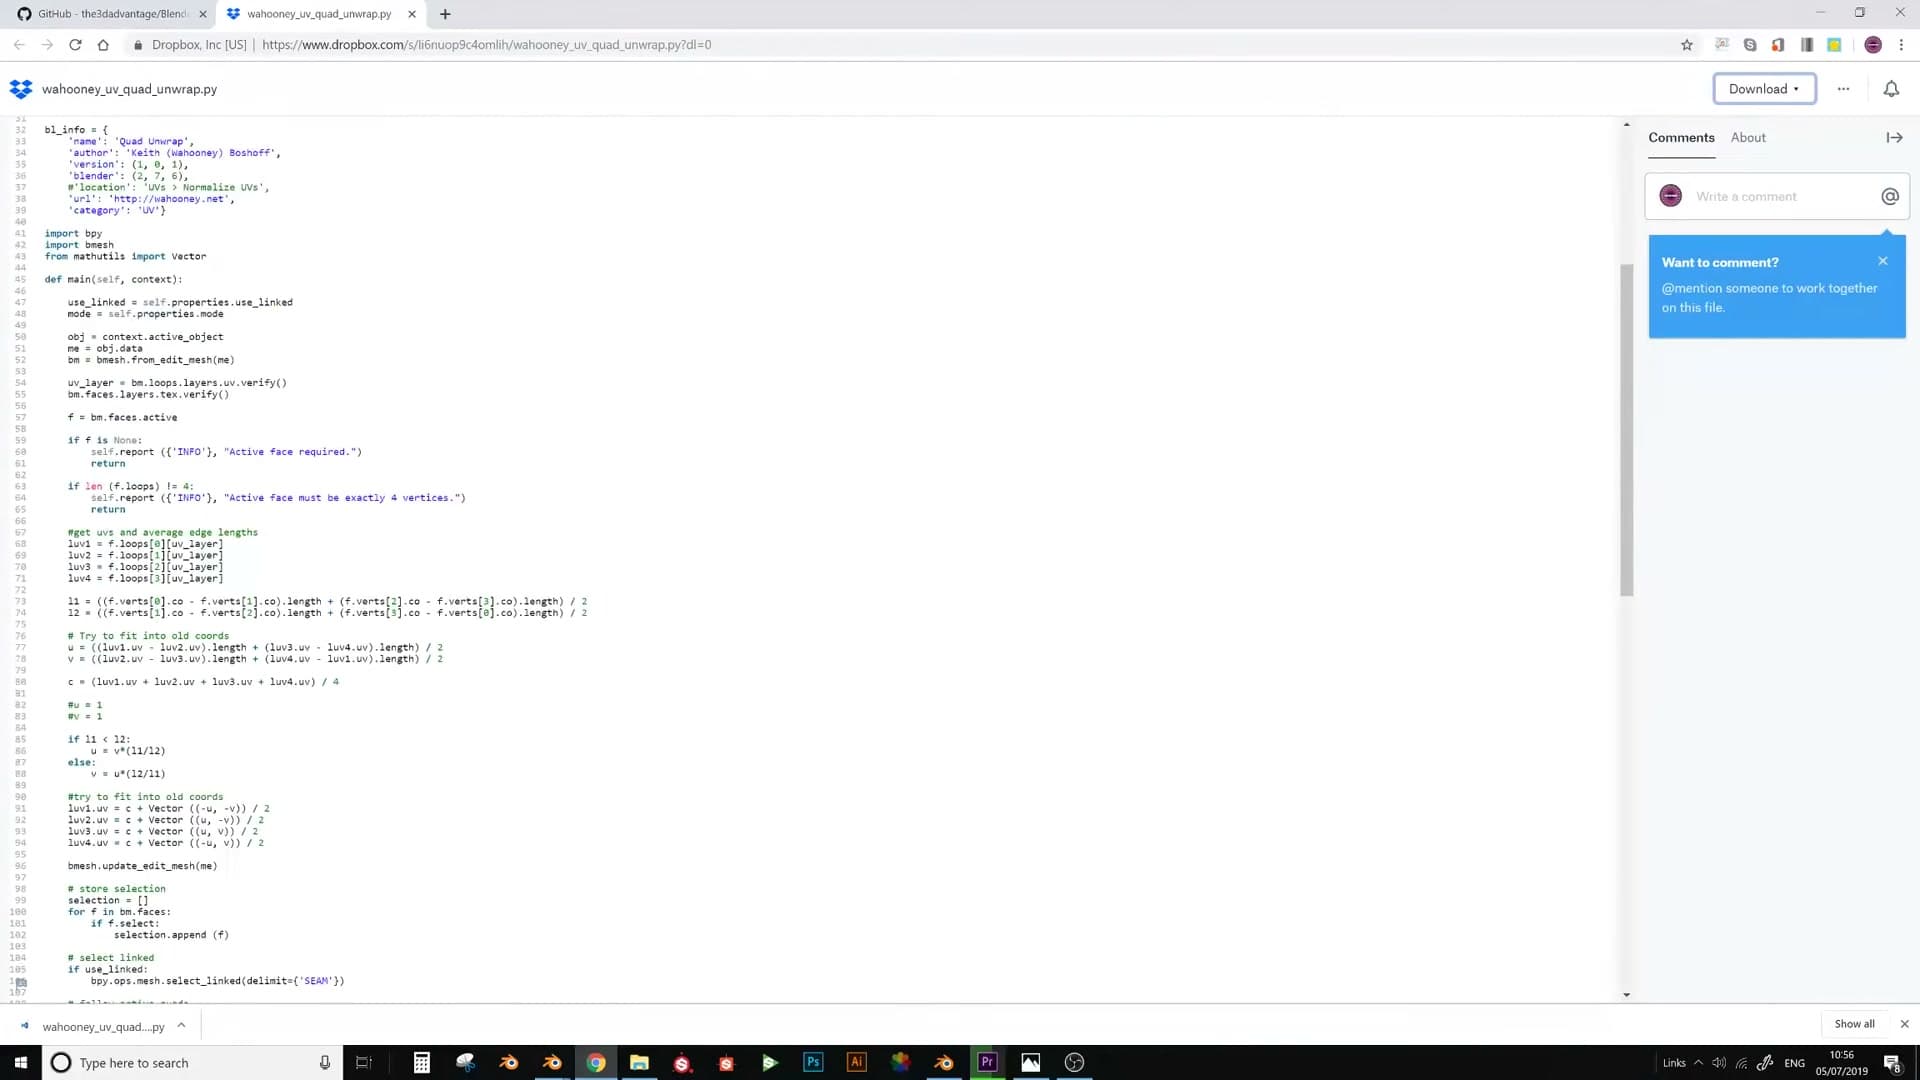
In Blender 2.79, open File → User Preferences → Add-ons, click Install Add-on from File, and point it at each .py in turn. Tick the checkbox next to each one to enable it. Once both are active, two new panels become available in the N-panel. The Surface Follow panel is the one you'll come back to as soon as the UV is ready.
Cylinder, loop cuts and proportional editing
Start with the default cylinder and pull it down so the base sits on the ground plane.
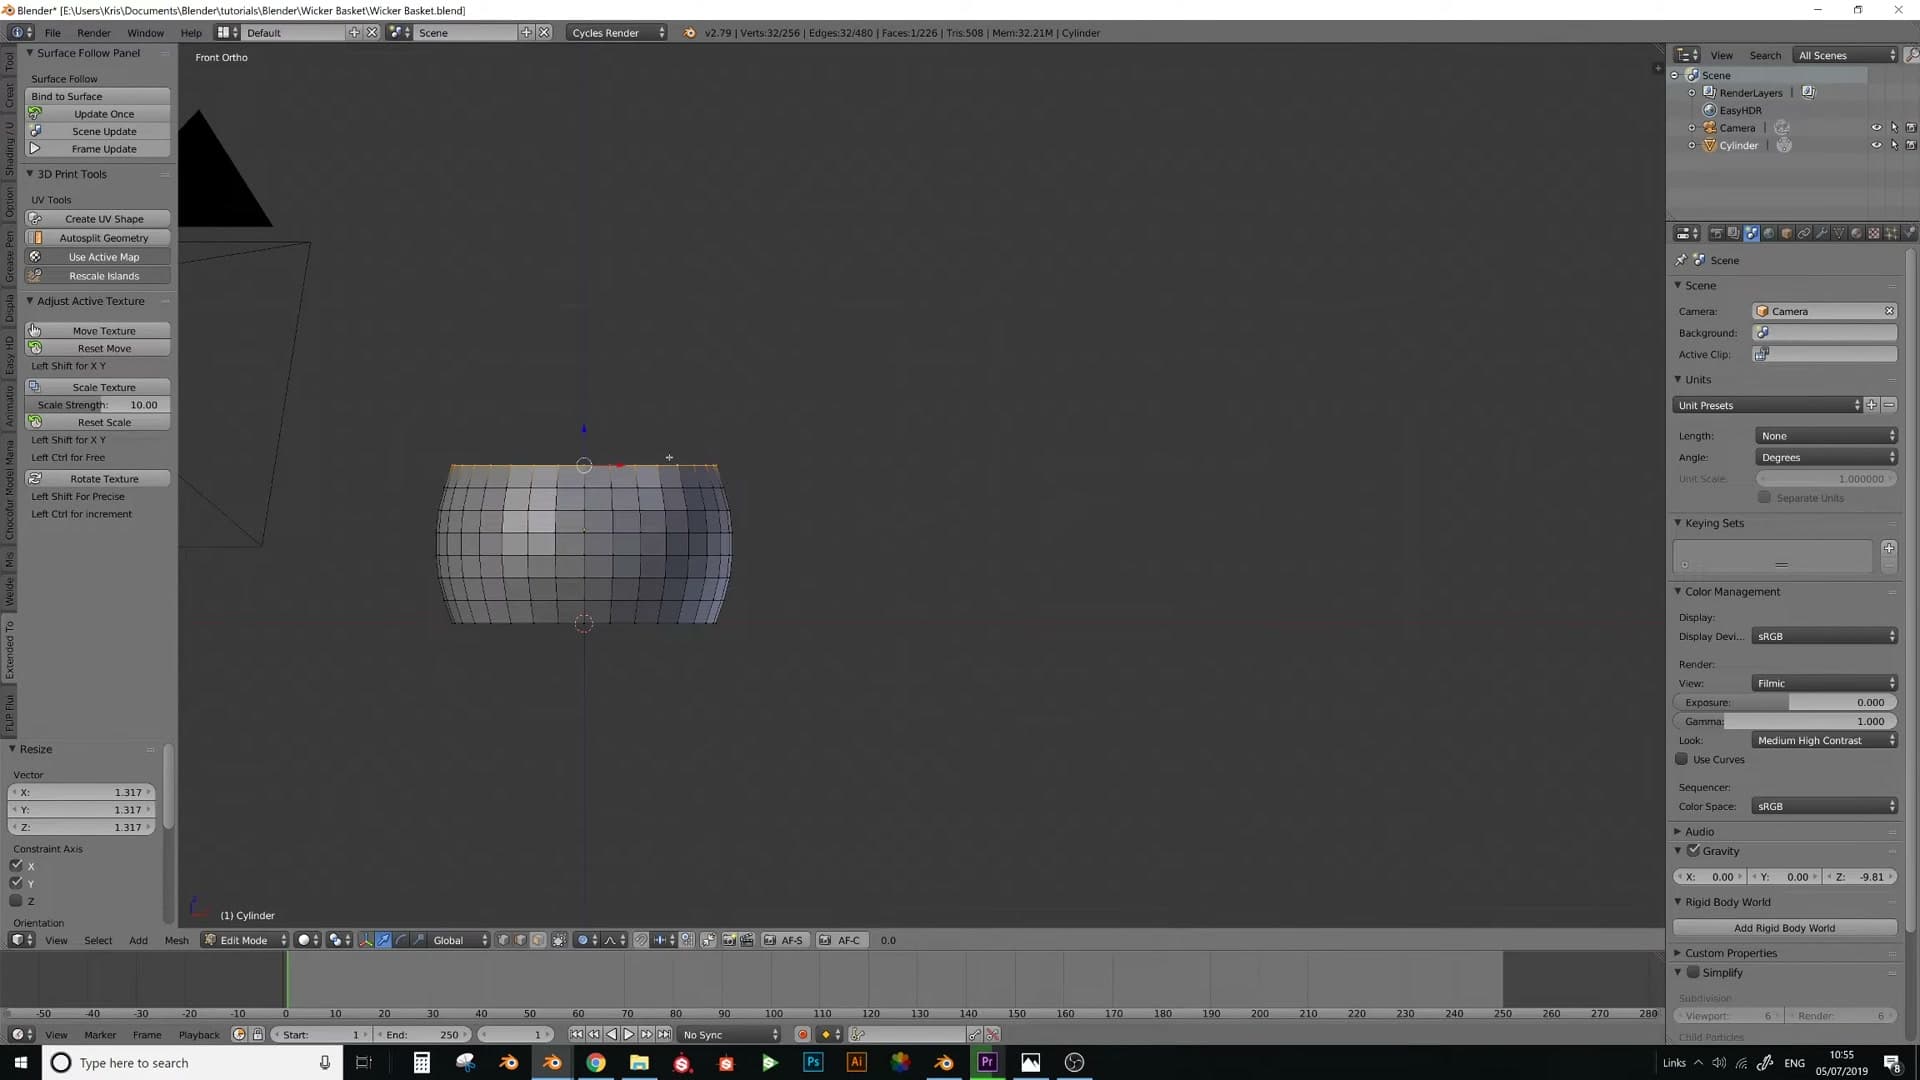
In Edit Mode, run Ctrl+R along the side of the cylinder and scroll the mouse wheel up to add a few horizontal loops down its length. Confirm the cuts with a click.
Select the centre loops, press O to enable proportional editing, and scale on the Z axis. The proportional falloff bows the middle loops outwards so the basket gets a belly. Pull the top loop in slightly on X and Y as well so the rim sits narrower than the body. Exact dimensions don't matter at this stage; just chase a basket silhouette you're happy with.
Removing caps, marking the seam and a first unwrap
With the silhouette where you want it, remove the top and bottom n-gon caps so all that's left is the side wall of the cylinder. That's the surface the weave will wrap onto.
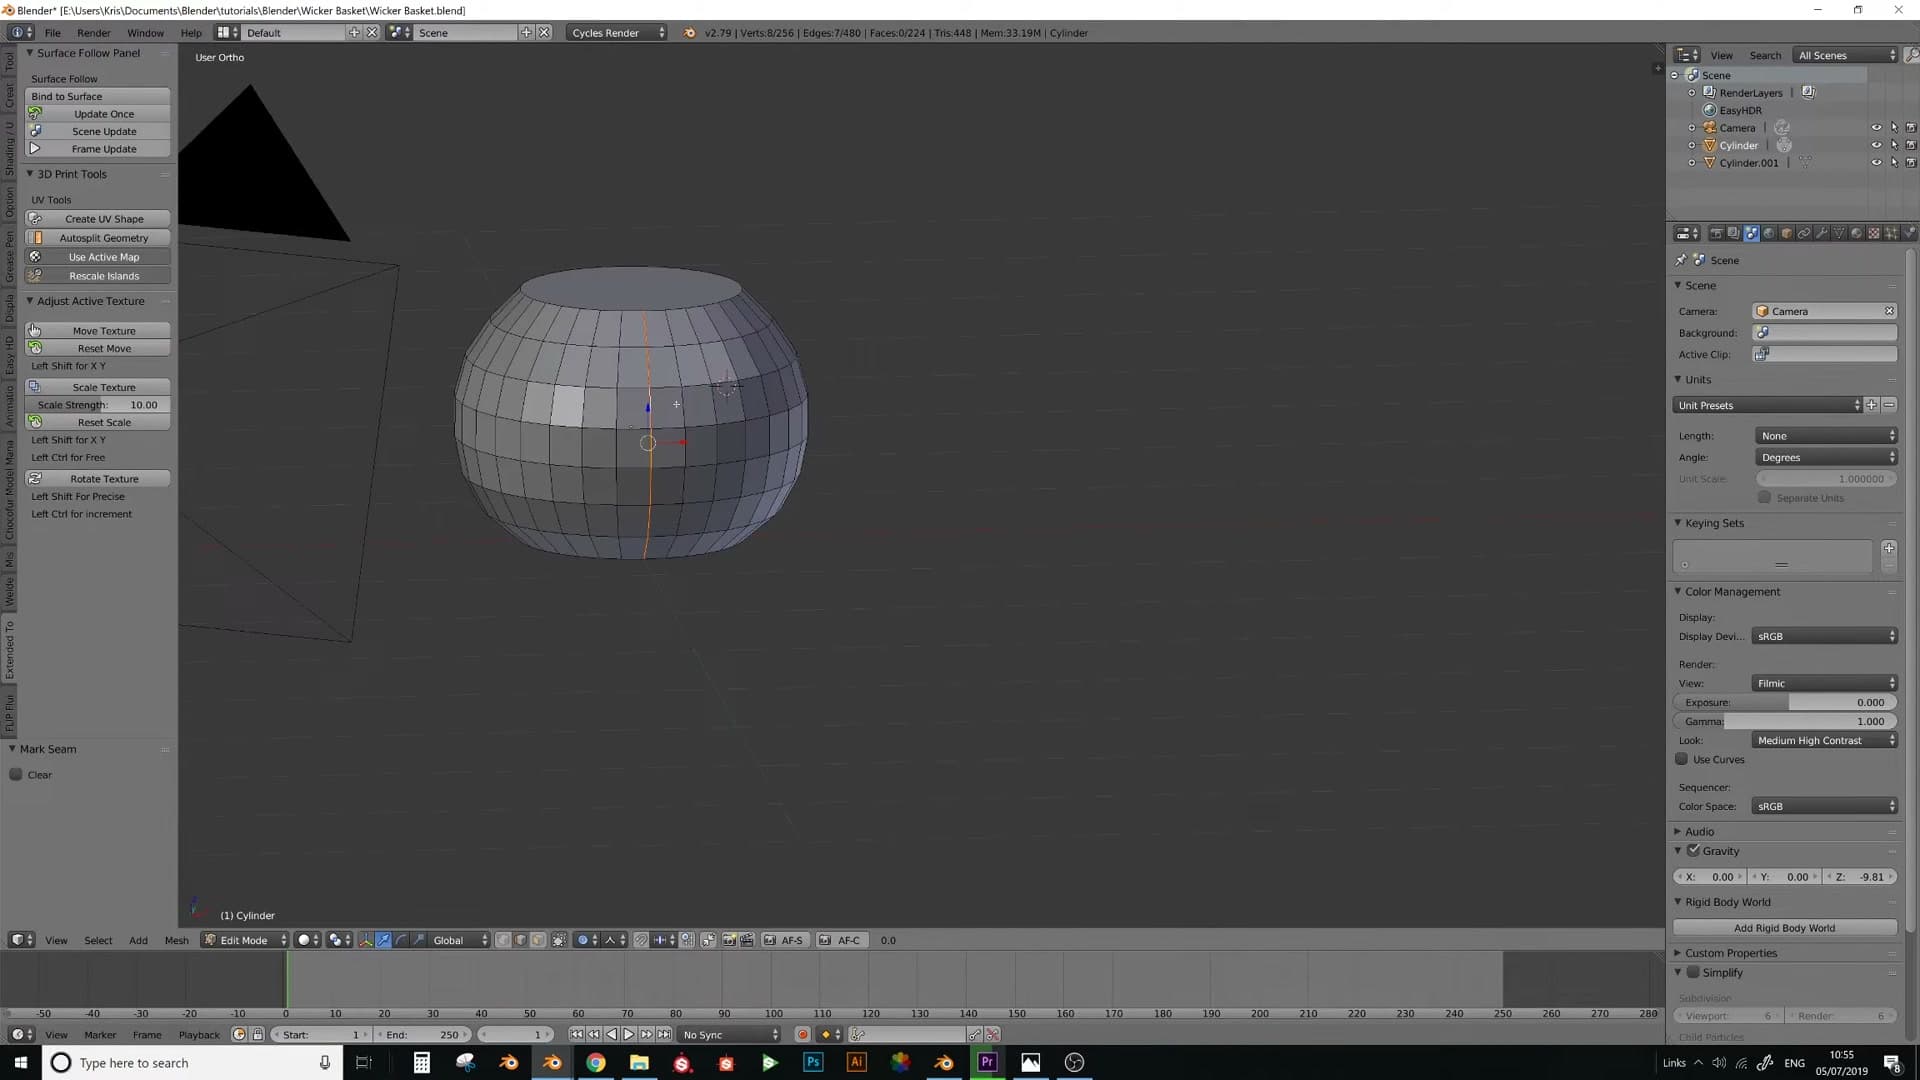
The cylinder now needs a seam so it can unfold flat. Hold Alt and click a single vertical edge to grab the full loop top-to-bottom, then right-click and choose Mark Seam. One vertical cut is all it takes to let the cylinder lay out as a single strip.
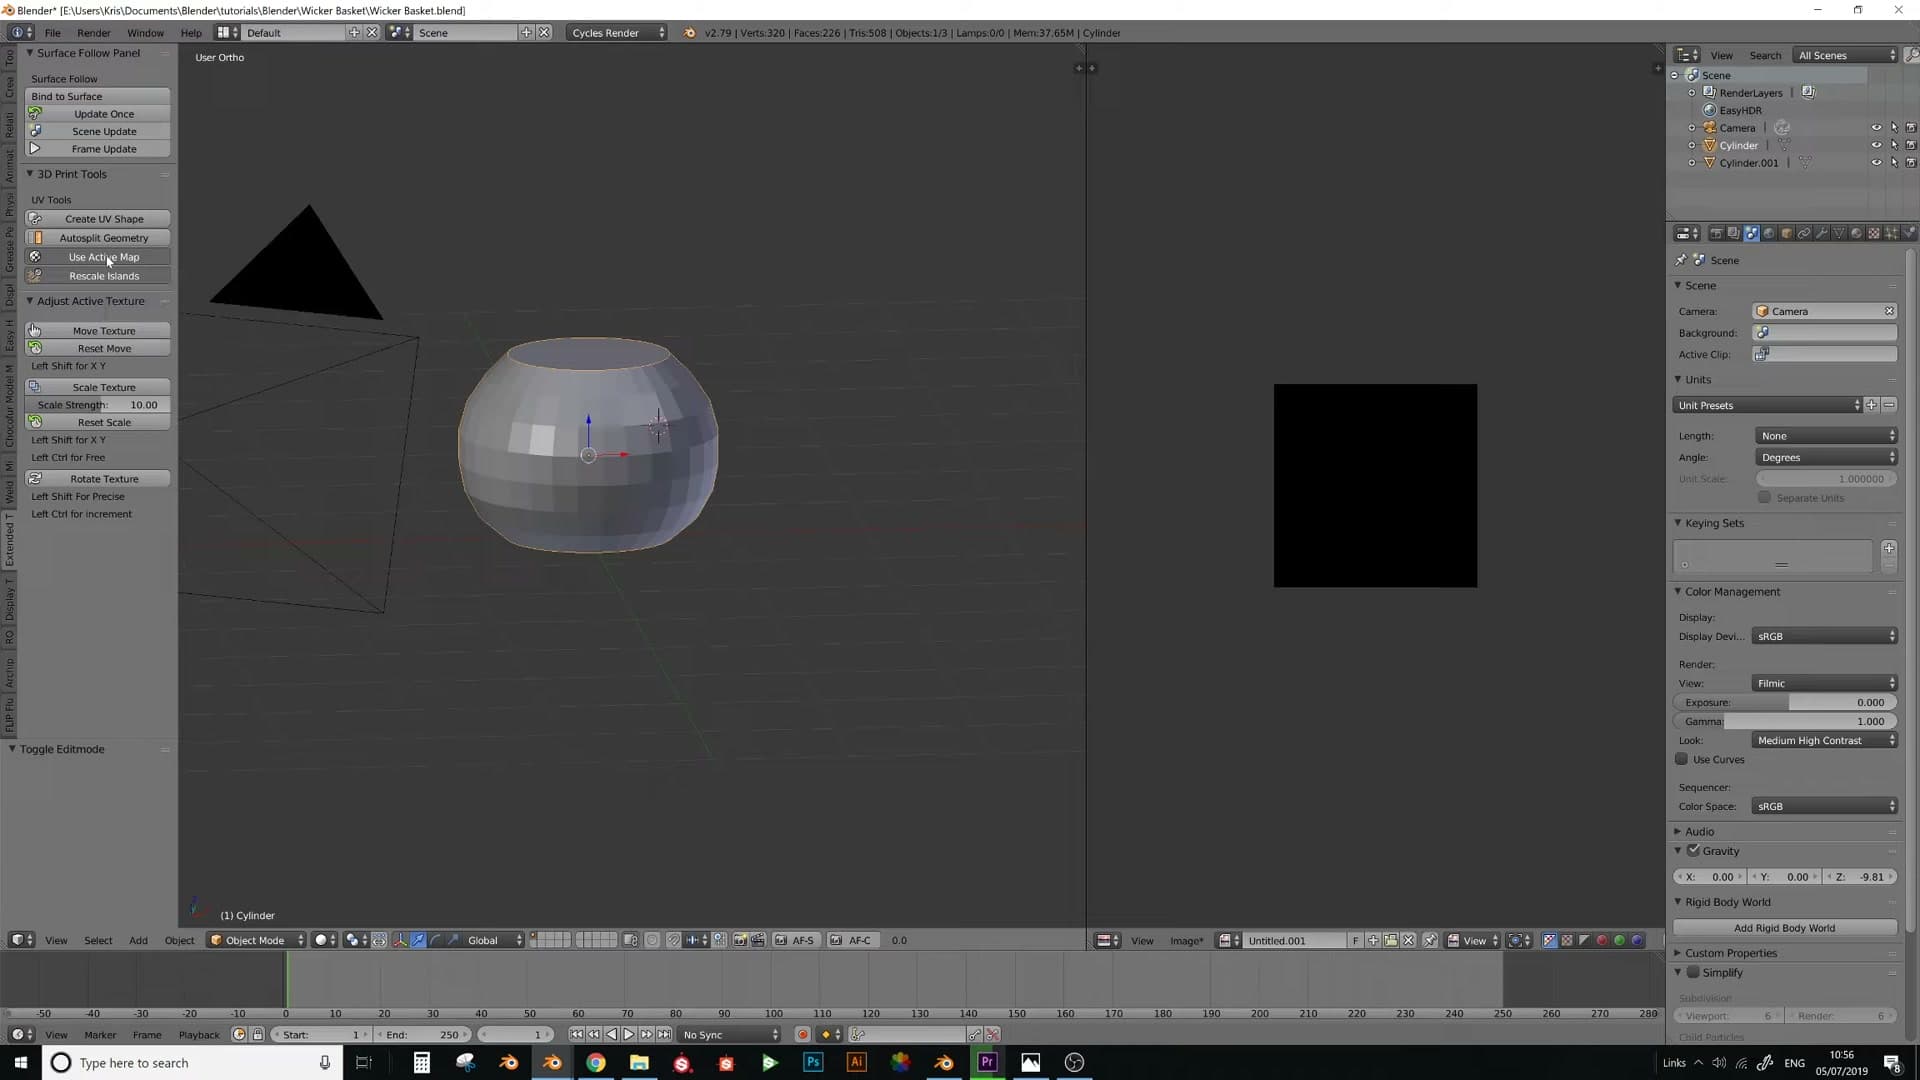
Open a second editor area and switch it to a UV/Image Editor so you can see the UV layout as you work. Select all faces of the side wall and run a default Unwrap. The resulting island is roughly rectangular, but the top and bottom edges bow inwards because the cylinder profile tapers. That curvature is the problem: the weave needs a perfectly flat strip, which is what Quad Unwrap is for.
Quad Unwrap and the flat UV rectangle
The workflow here is two steps: flatten the UVs with Quad Unwrap, then bake that flat layout into a real mesh plane that the weave will sit on.
In Edit Mode, click a single face on the side wall to make it the active face. Press Space, type Quad Unwrap, and run the operator. The UV island redraws as a perfect rectangle. The curved top and bottom edges from the default unwrap are gone.
Now jump over to the Surface Follow panel in the N-panel and work down its buttons: Rescale → Rescale Islands → Use Active Map → Create UV Shape. The last button generates a flat mesh in 3D space matching the UV layout. That's the plane the weave will be built on later.
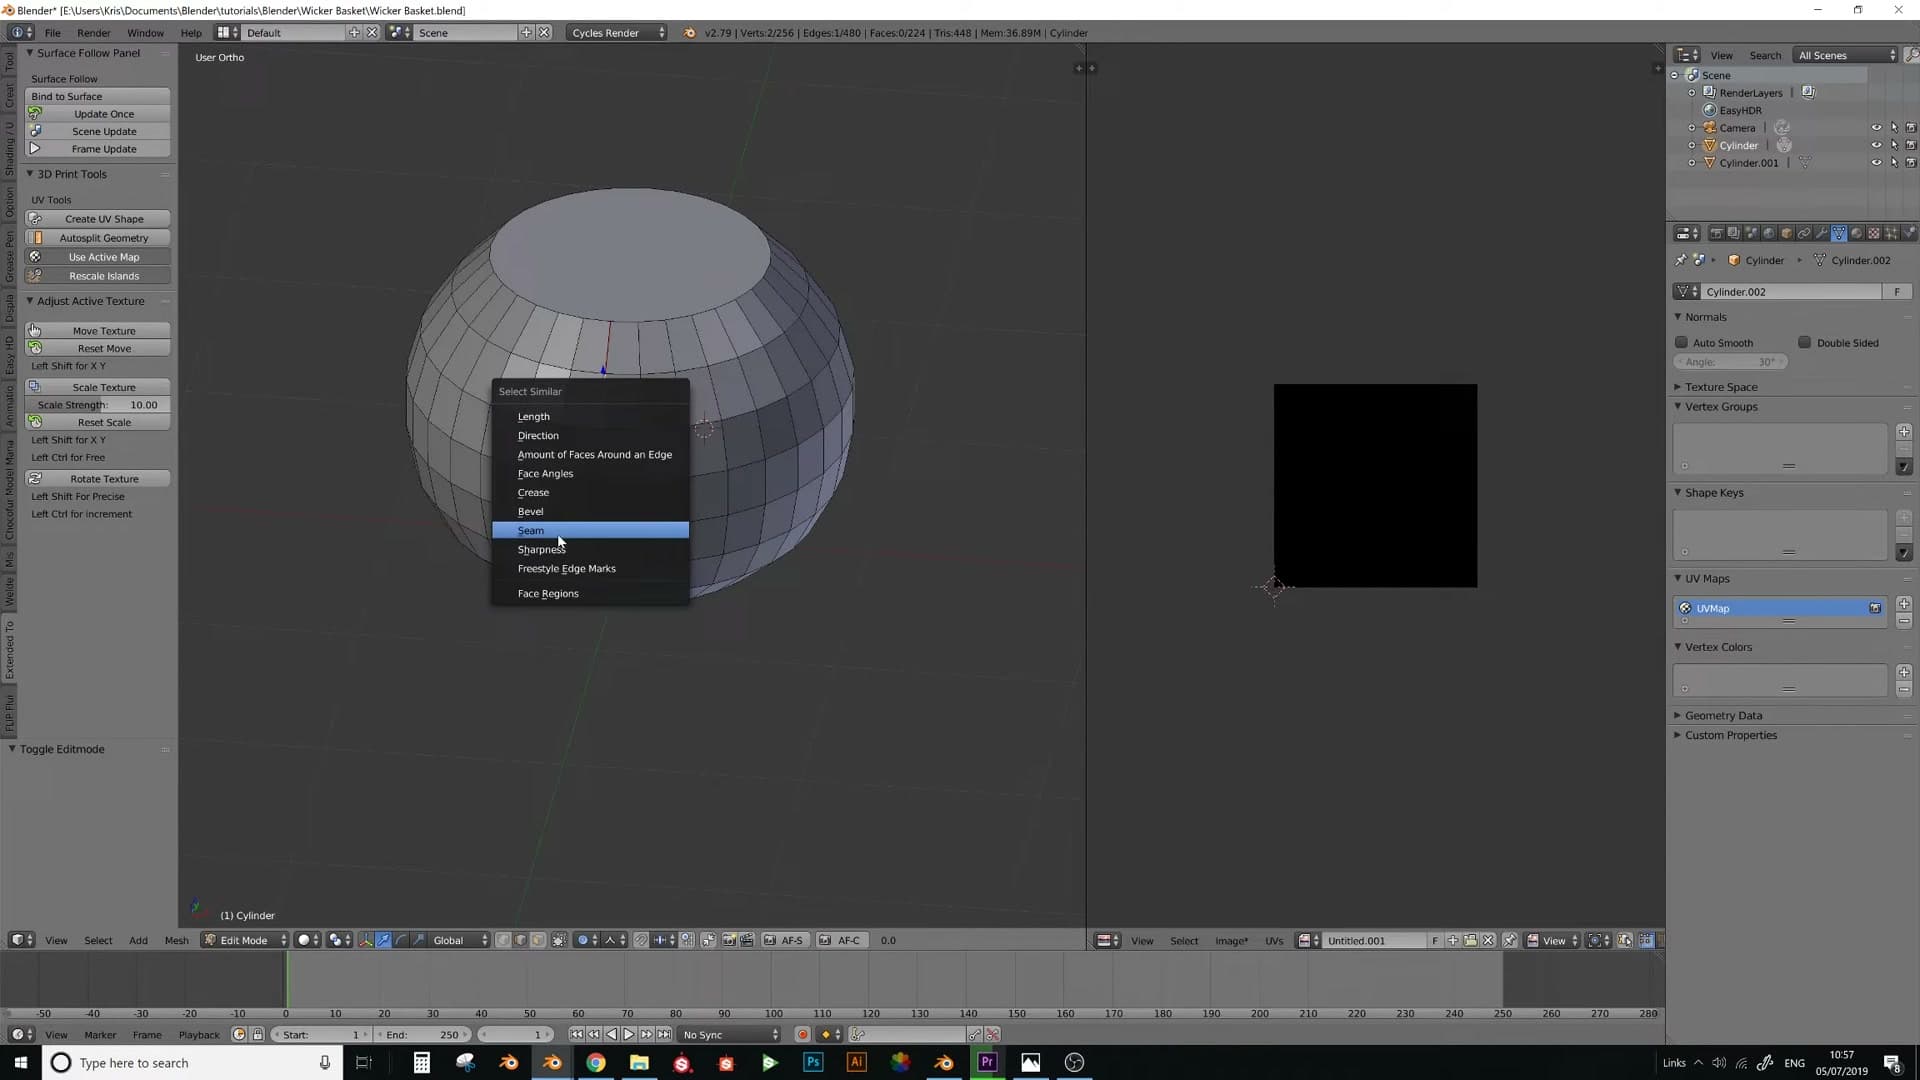
The first attempt will look a bit twisted, because the seam edge is still topologically connected and the add-on is trying to fold the strip closed on itself. Delete the broken shape, then back on the cylinder right-click one of the seam edges, press Shift+G and choose Seam to select every seam edge in one go, and press V to rip the seam open.
Run Create UV Shape a second time. This time the result is a completely flat rectangular plane, no twist, no fold. Save the file, close 2.79, and reopen it in 2.8 to carry on with the weave.
Building the Archimedean spiral curve
Enable the Extra Objects add-on, drop in an Archimedean spiral, duplicate-and-rotate to close the loop, then snap the ends so they tile cleanly across the flat plane.
Enabling Add Mesh / Add Curve Extra Objects
The Archimedean spiral primitive isn't in Blender's default Add menu. It ships as part of the Add Curve: Extra Objects add-on, bundled with Blender but disabled by default. Switch over to Blender 2.8 (the rest of the build runs in 2.8) and pull up the Preferences window.
Type Extra Objects into the Add-ons search bar. Two matches come up. Tick both checkboxes, but the one driving this step is Add Curve: Extra Objects. Close Preferences, press Shift+A, and hover over Curve. Alongside the usual Bezier and NURBS entries there's now a Curve Spirals submenu; pick Archimedean and a flat spiral drops into the scene.
Tuning spiral parameters and joining two halves
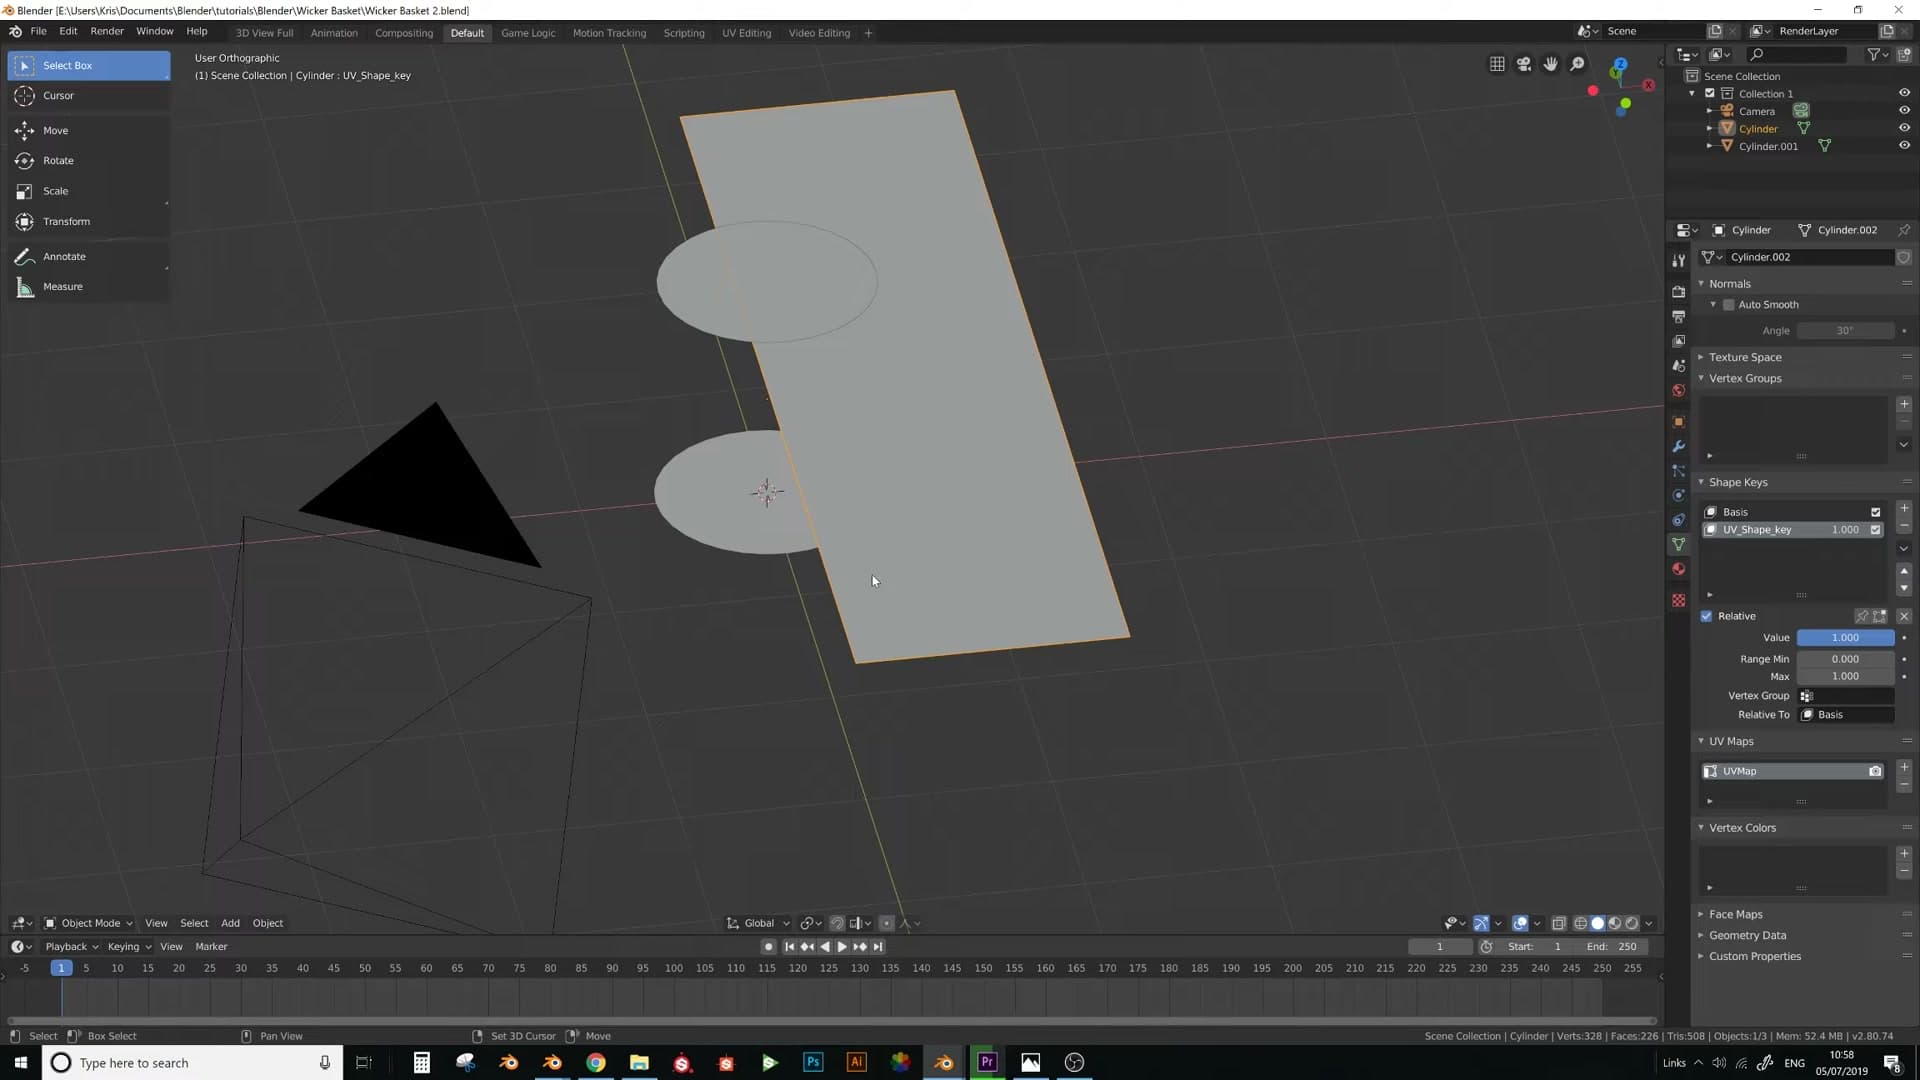
Open the operator panel in the bottom-left corner of the viewport (the collapsible Add Curve Spirals box that appears immediately after creating the spiral) and dial the curve down to the bare minimum geometry. Heavy resolution at this stage will balloon once the curve is bevelled, arrayed, and wrapped around the basket. Keep it lean now; add detail right at the end.
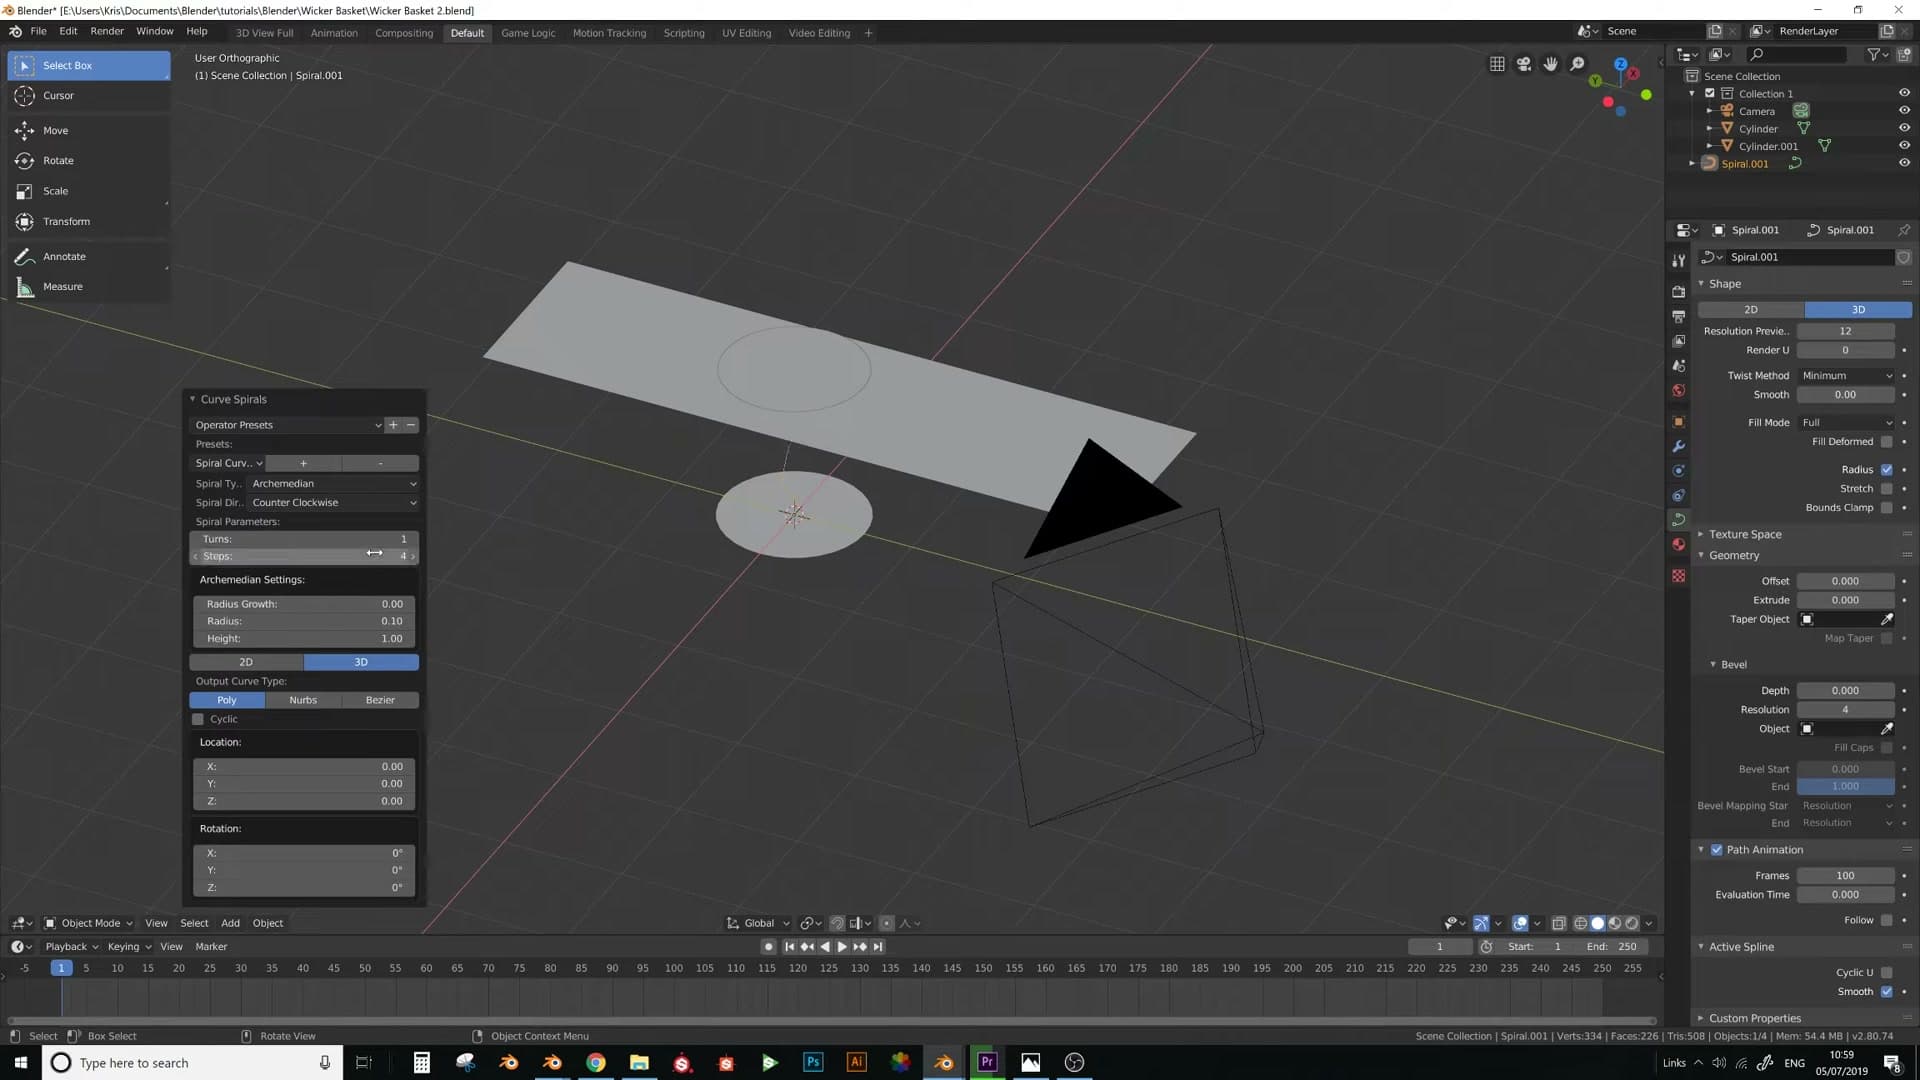
Set Height to 1, drop the other spiral parameter to 0.1, and reduce Steps to 4. The result looks jagged and almost faceted. That's intentional. Four steps is enough to keep the spiral's shape readable while the curve carries the least geometry Blender will let you assign.
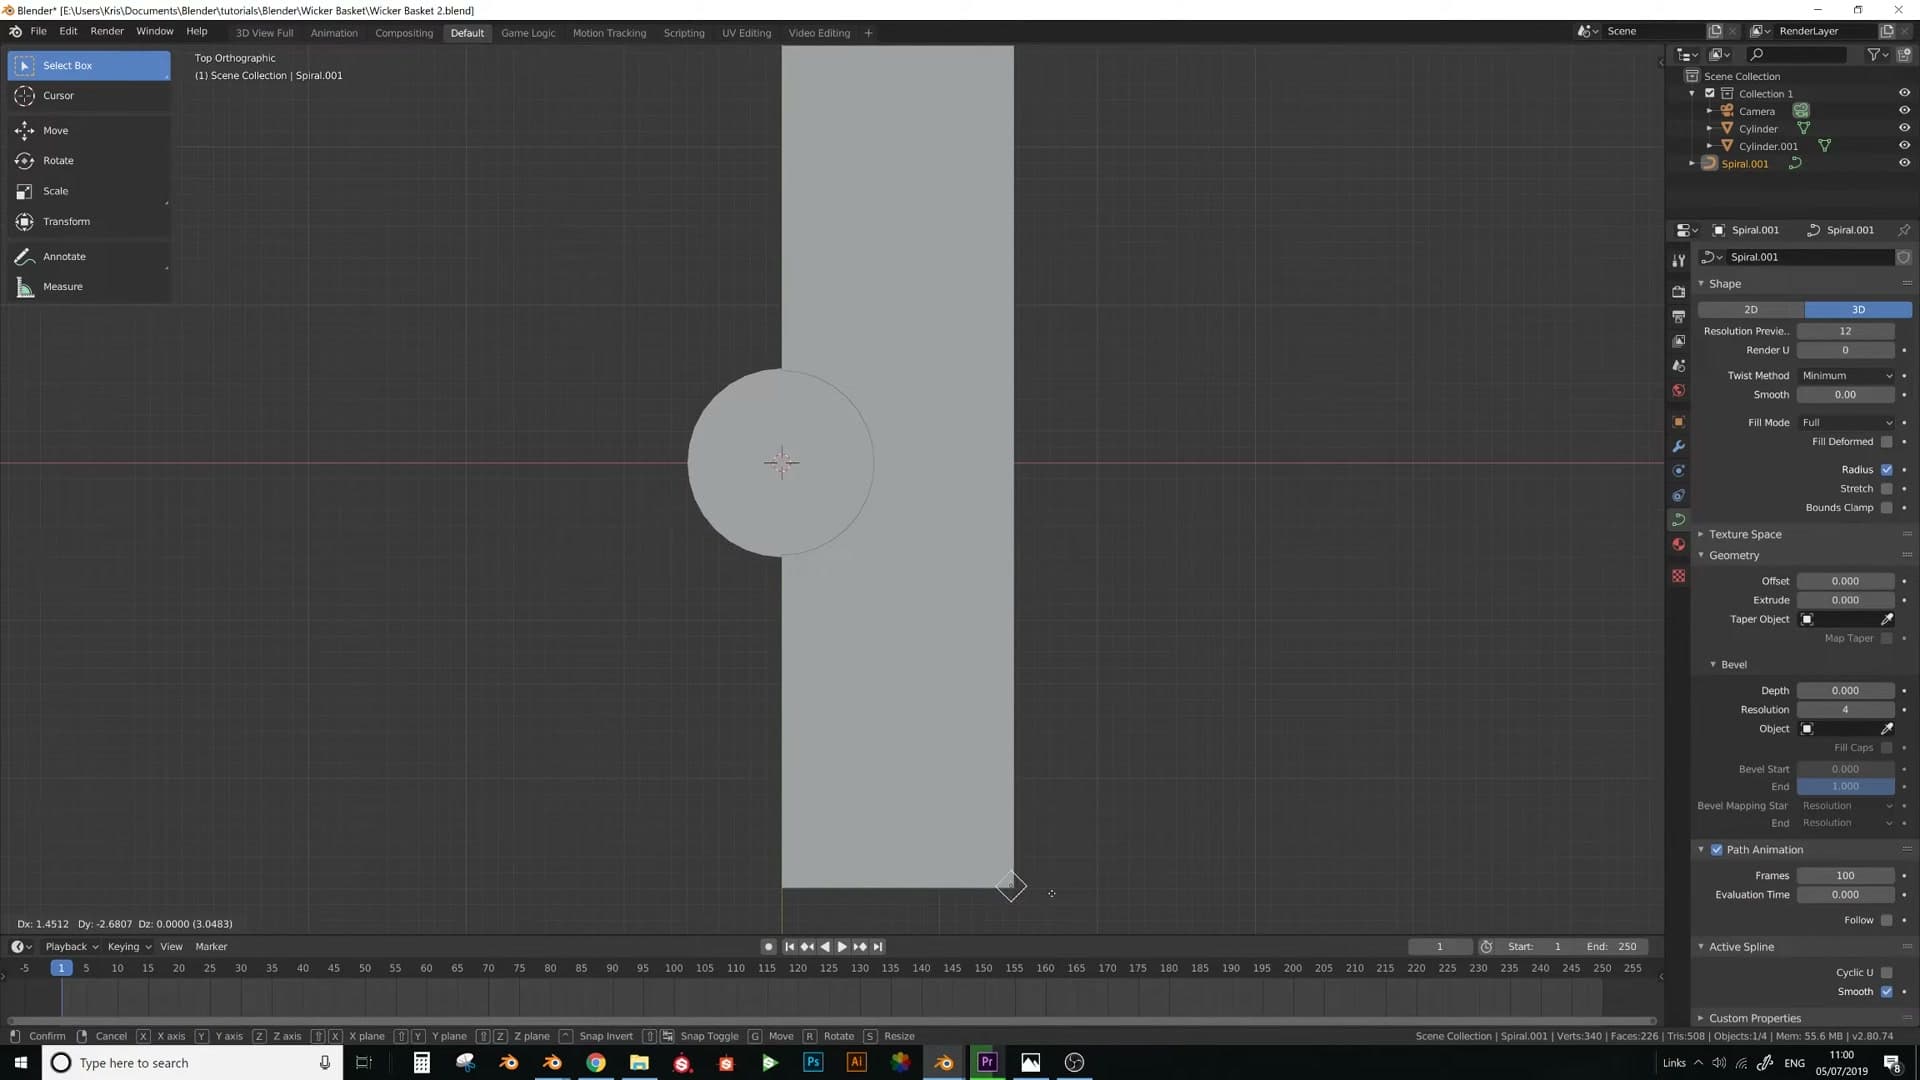
With one spiral in place, the next move is to mirror it so the two interlock. Select the spiral, press Shift+D to duplicate, then R Z 180 to rotate the copy a half-turn around the Z axis. The two curves now sit on top of each other forming a single woven unit. Select both and press Ctrl+J to join them into one object.
Snapping vertex ends to seamlessly tile
Slide the joined unit over to one edge of the working area and rotate it 90 degrees so it lies along the axis you'll be arraying down. Scale it inward until the strands are the proportions you want. They'll be stretched by the basket cylinder later, so eyeball something reasonable.
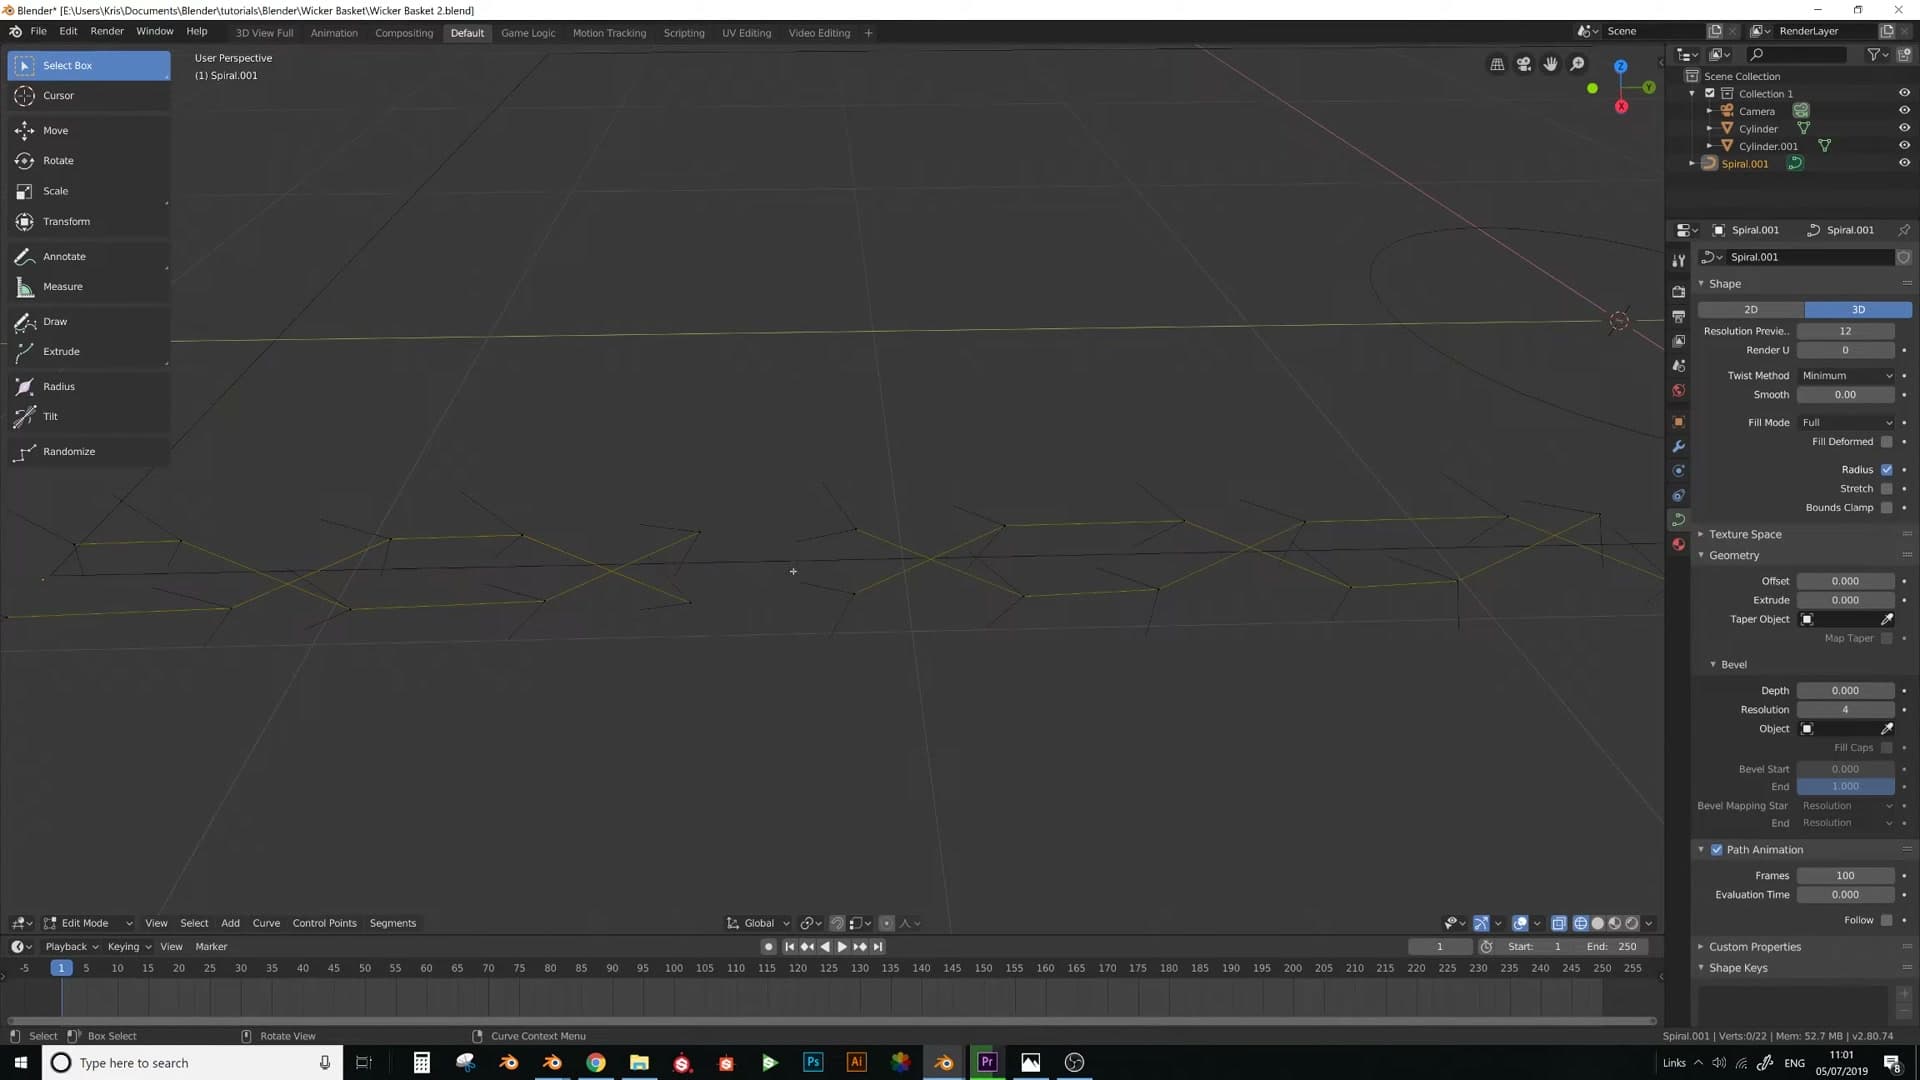
Now duplicate the unit so the next copy snaps cleanly onto the end of the first. Tab into Edit Mode, select all the control points, press Shift+D, and start dragging along the Y axis. Before letting go, press Shift+Tab to toggle snapping on and set the Snap To target to Vertex in the snap dropdown next to the magnet icon. With snap live, hover over the end vertex of the original spiral and the duplicate locks onto it. Confirm with G Y if you need to nudge it precisely into place.
Toggle snap back off, then rotate the duplicate R Y 90 so its threads sit perpendicular to the original where they meet. The two units now share a vertex, but with one redundant control point on either side of the join. Delete the innermost vertex of each spiral, then merge the two survivors. You're left with the same total vertex count, but a single continuous curve flowing through the seam, ready for the Array modifier.
Arraying the weave across the plane
Apply the rotation, then array the joined spiral unit with Merge enabled so vertices stitch together. Keep curve resolution at zero until later.
Array modifier with Merge across the flat strip
Before arraying anything, apply the joined spiral's rotation so the modifier doesn't inherit a rotated transform. Use Ctrl+A → Rotation on the object, then add an Array modifier from the modifier stack.
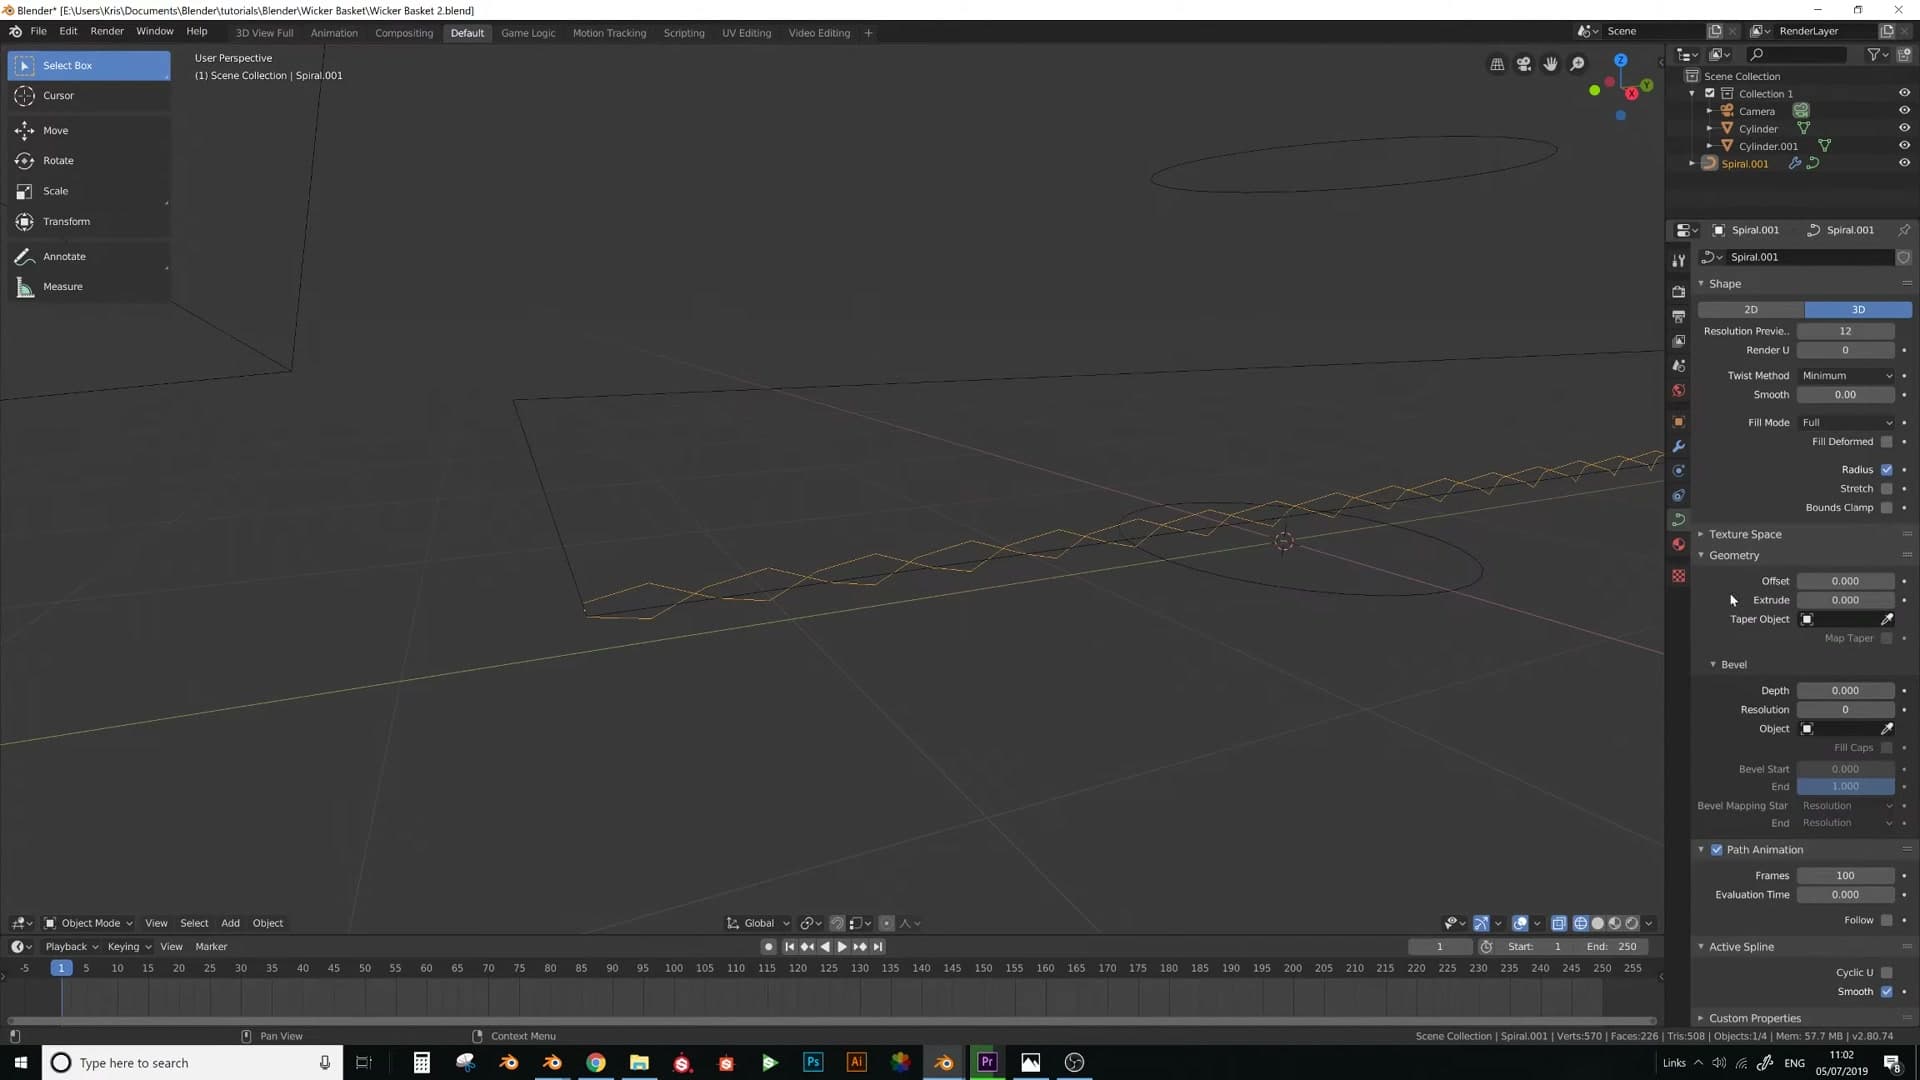
Set the Relative Offset Y to 1 (leave X and Z at zero). The spiral repeats along its own length, and each copy lines up flush with the previous one to form a continuous flat strip.
At this point it's worth scaling the unit down a touch for finer weave detail. Nudge the spiral so its end vertex is touching the very edge of the next copy as closely as possible, then jump to the top of the modifier stack and scale on Y so the seam between repeats meets exactly. The tighter that contact, the cleaner the join.
The critical setting is Merge. Tick the Merge checkbox on the Array modifier so that whenever the end vertex of one spiral lands on the start vertex of the next, they collapse into a single vertex. Without it the array looks continuous but is actually a stack of disconnected segments.
Why curve bevel must stay at zero for now
It's tempting to add the round profile to the curve now so you can see what the weave is going to look like. Resist. The moment you bevel the curve at this stage, the seams between array copies stop merging cleanly.
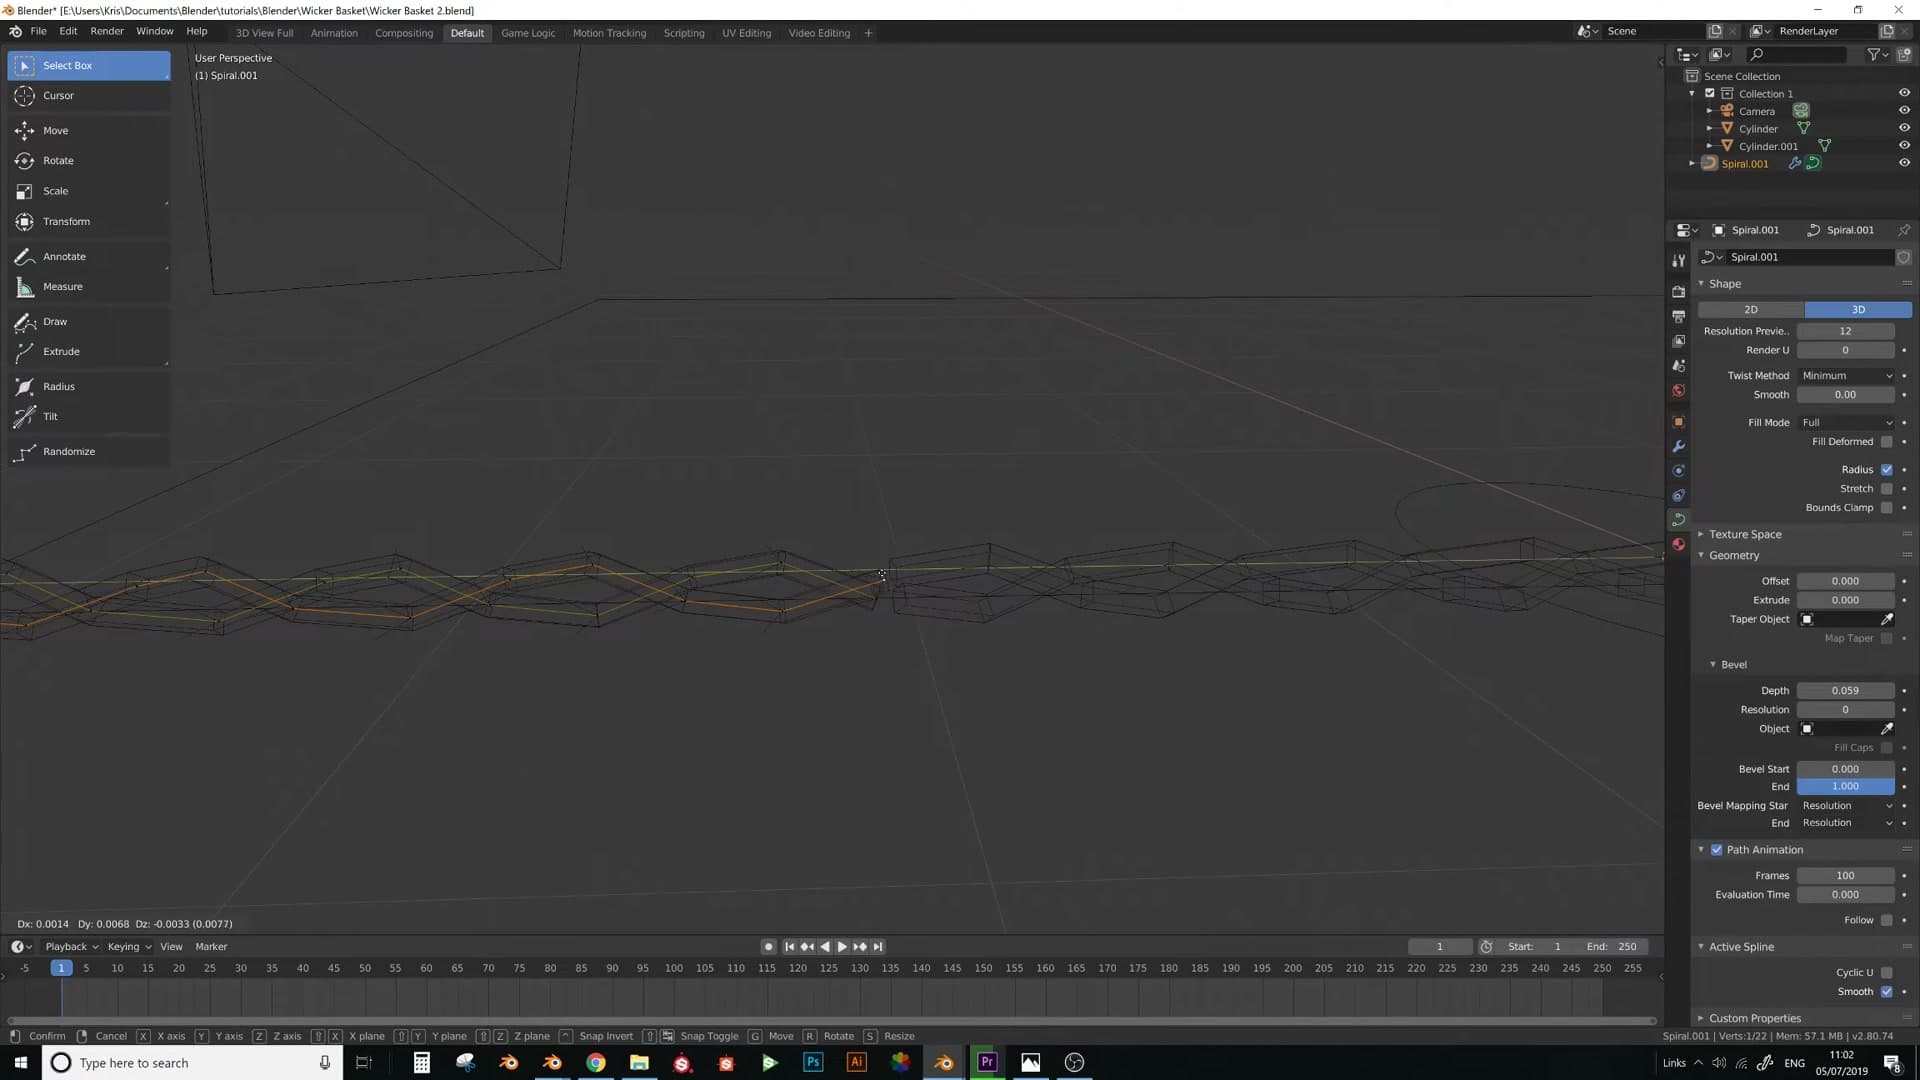
The reason is geometric: Merge only works when the cross-sections of two curve segments meet perpendicular to each other. The Archimedean spiral is constantly curving and rotating along its path, so where one copy ends and the next begins, the tangent angles don't quite line up. The bevel rings on either side meet at slightly different orientations, and the merge fails along that join.
You can fight it by tweaking handle positions and rotations until the angles line up, but it's painful work for no real payoff at this stage. Far easier to leave the curve's Bevel Depth at zero for now, let Merge stitch the spiral into a continuous flat strip, and add the profile geometry back once the weave has been bound to the basket.
With bevel kept at zero, the array merges perfectly along the whole strip.
Adding the horizontal support wires
Drop a path curve between two weave rows, subdivide it, and array it along Z so a horizontal support sits centred between each spiral pair.
Creating the support path curve
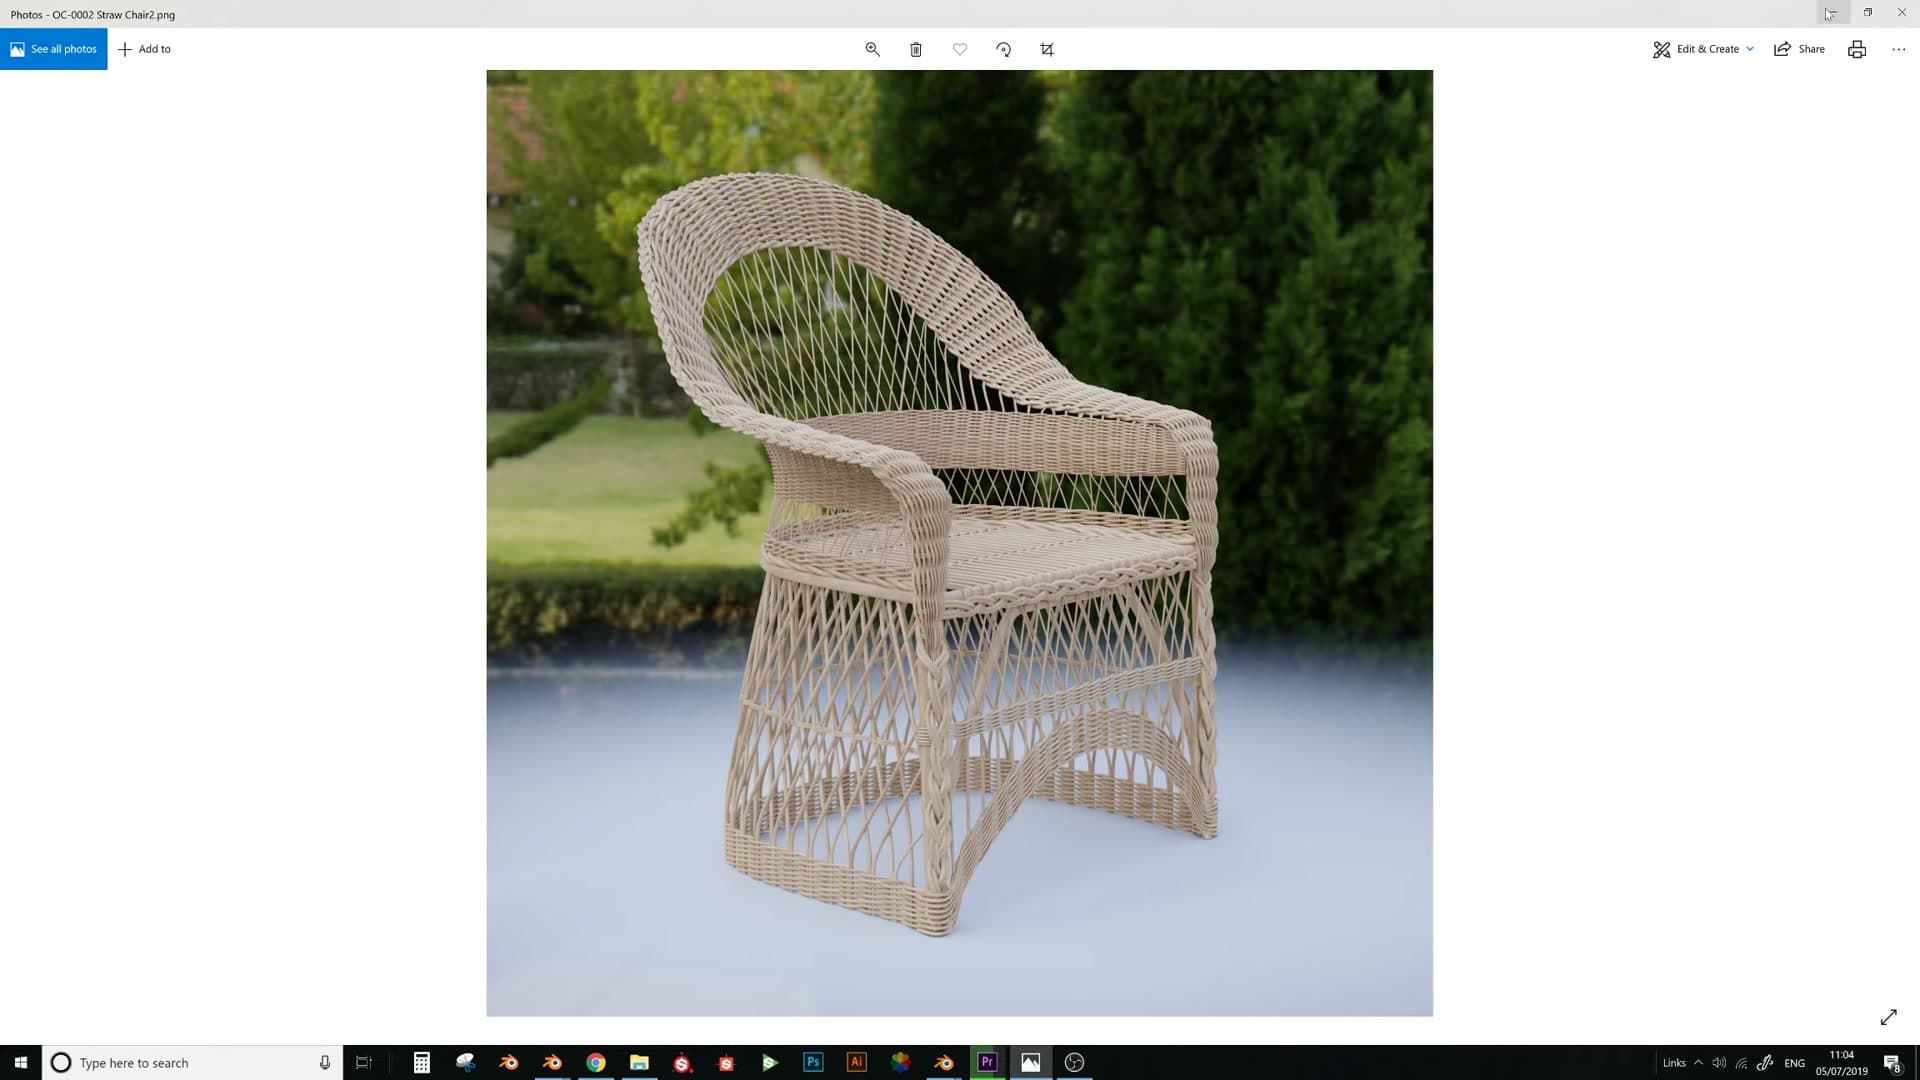
Look back at the reference photo and you can see thin horizontal wires running between every pair of spiral rows. These are the supports that stop the weave from unravelling, and they need adding before the binding step so they wrap with everything else.
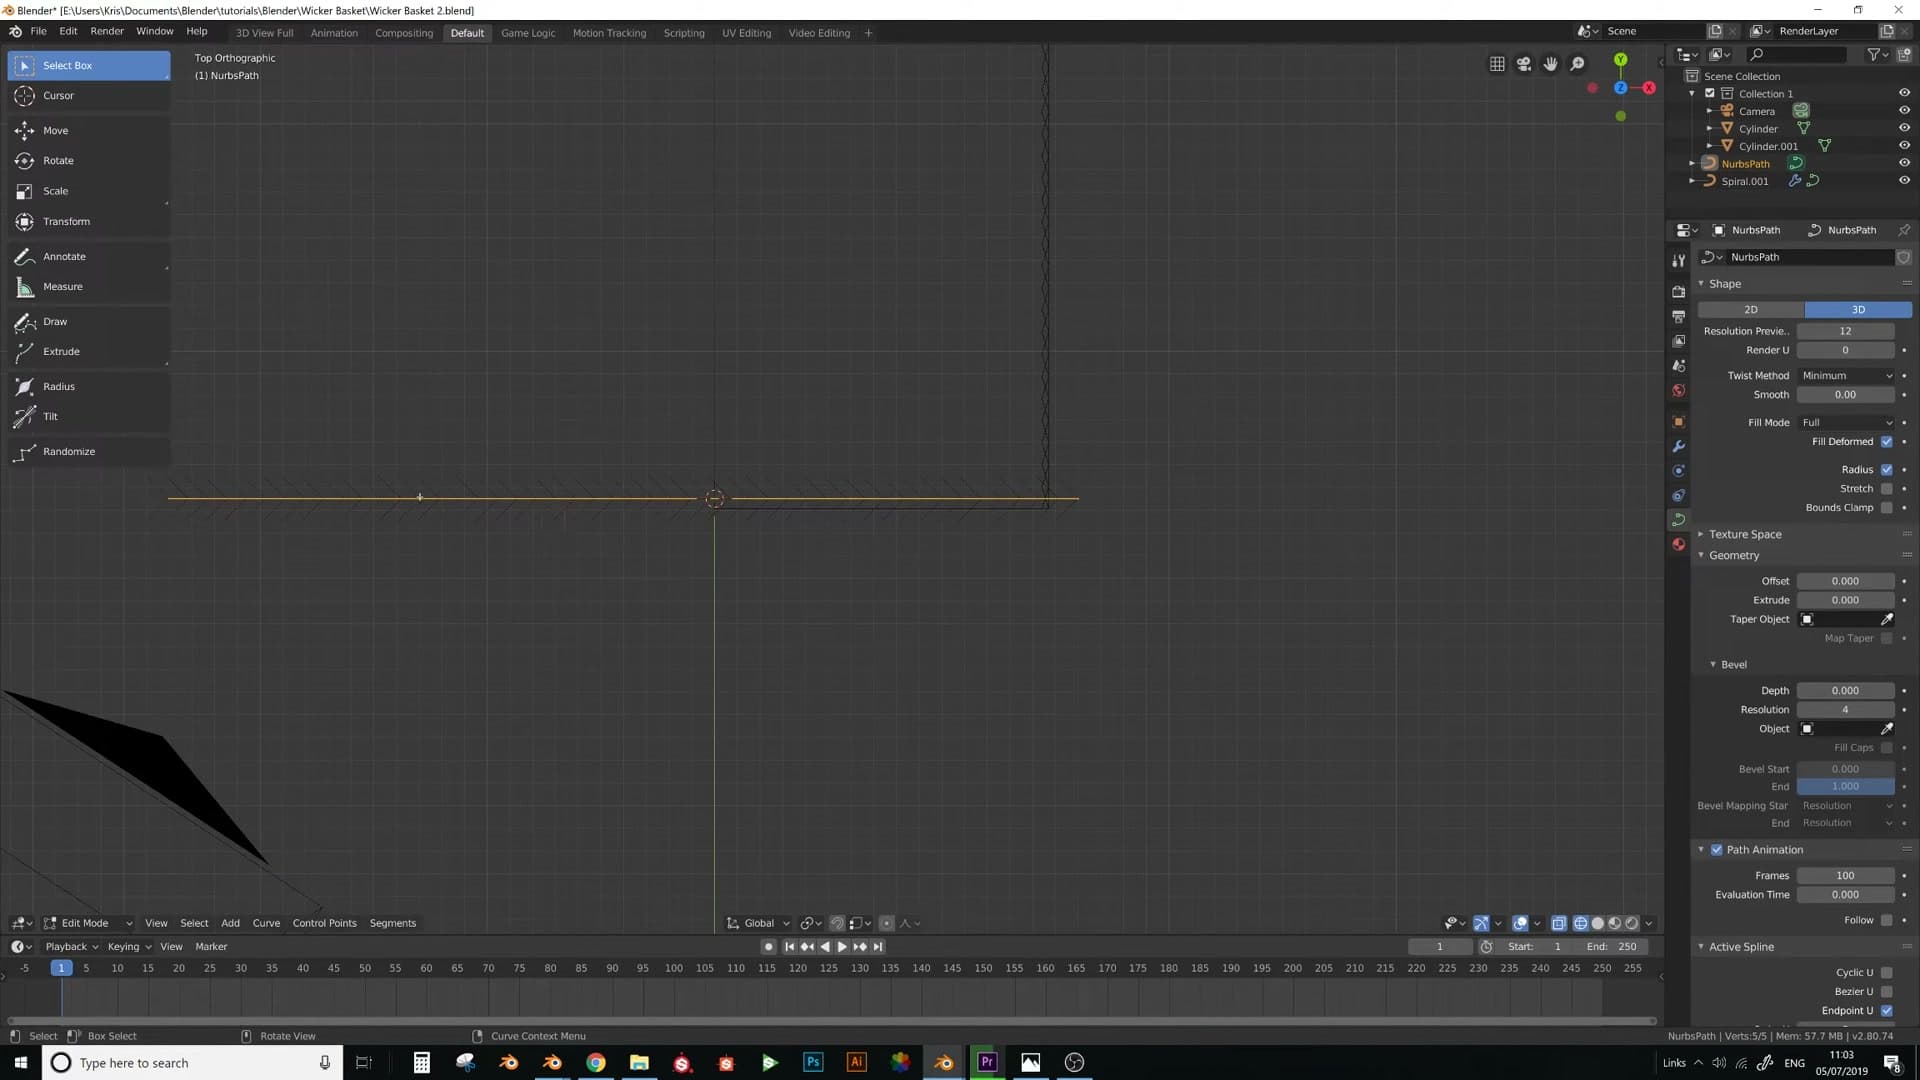
Snap the 3D cursor to the start of the first gap with Shift+Right-click, then add a path curve from Add → Curve → Path.
Scale the new path on the X axis so it spans the full width of the flat weave, then slide it down until it sits centred between two adjacent spiral rows.
Subdividing and arraying the supports
A default path only carries a handful of control points, which won't bevel into a smooth tube once the weave is wrapped to the cylinder. Add more by right-clicking in the viewport and choosing Subdivide. Run it a second time if the curve still looks too sparse.
Give the curve thickness via Bevel Depth in the curve properties. Drop the bevel Resolution to zero and turn the preview U steps right down too. The subdivisions you just added are providing the length-wise geometry, so the curve doesn't need extra steps stacked on top.
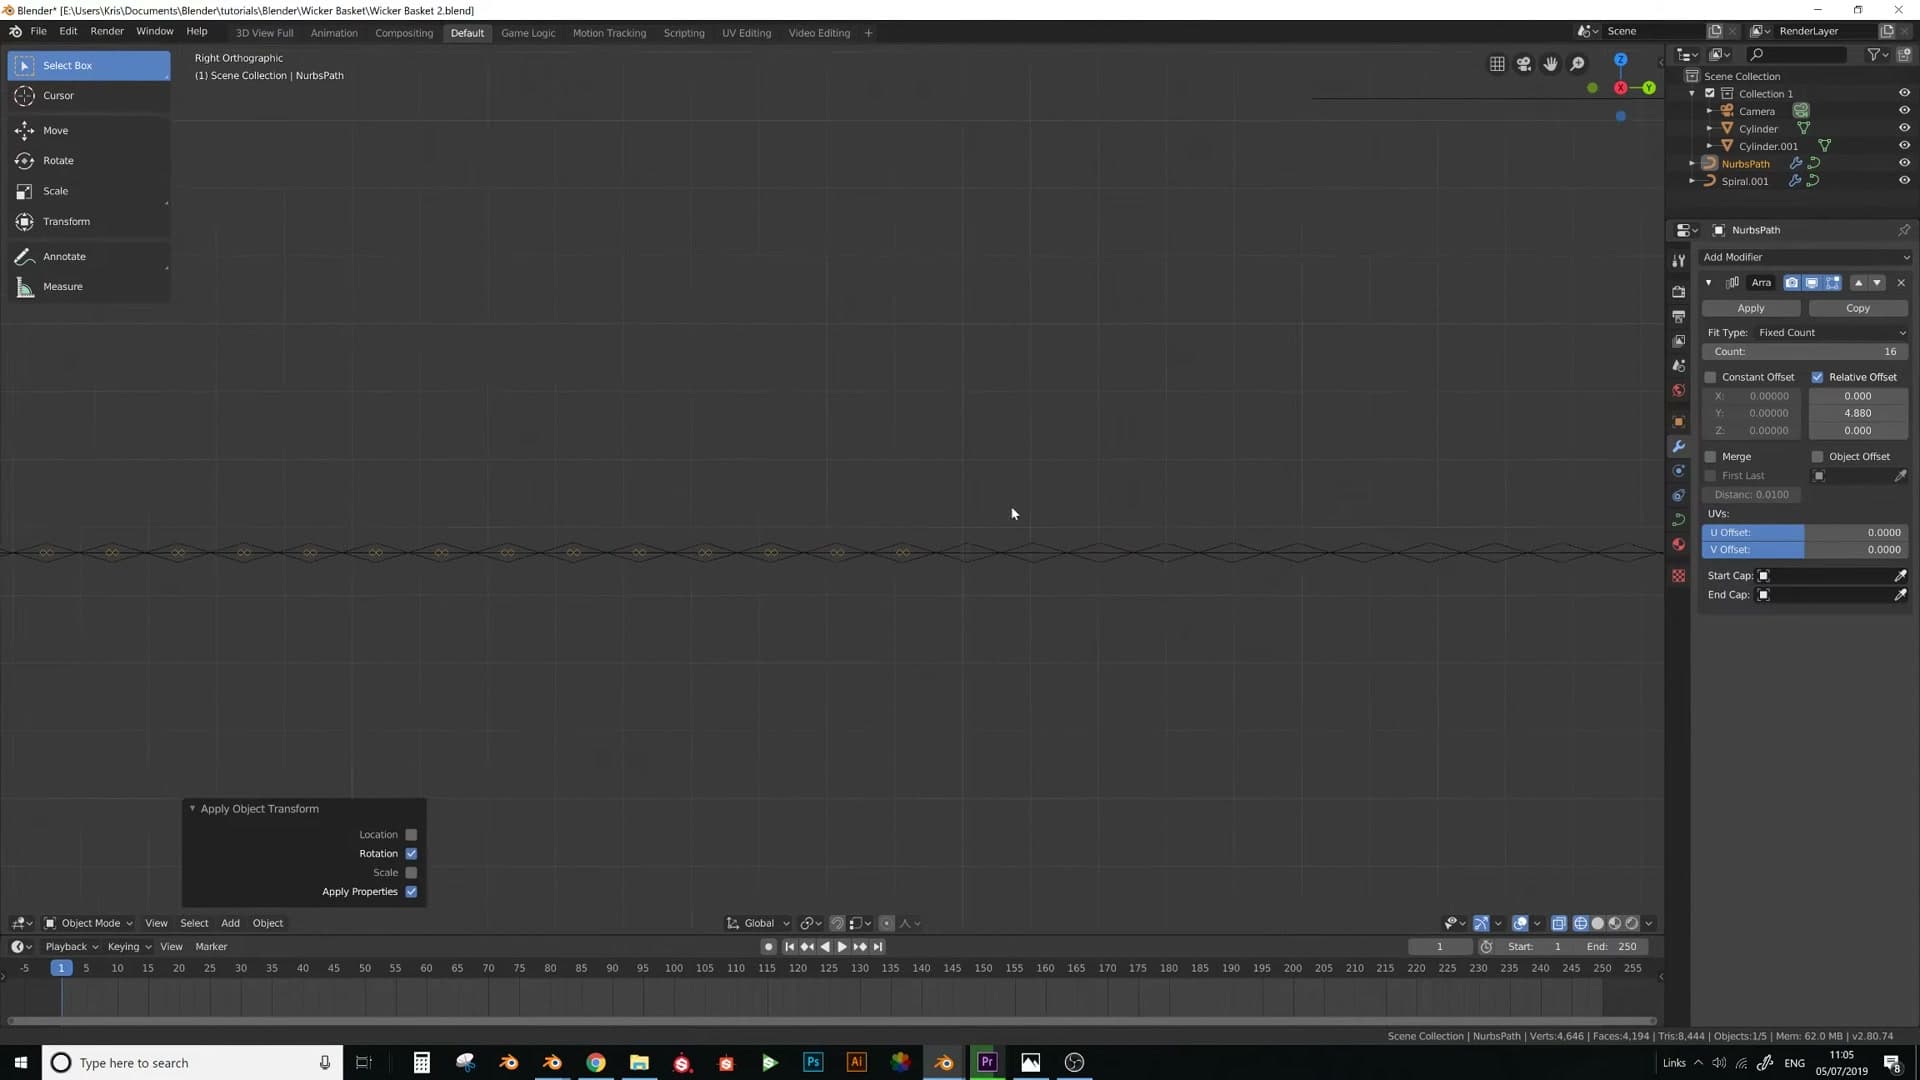
The reference shows two parallel strands per support, not one. Duplicate the curve with Shift+D and constrain the move to the Y axis, then drop the copy alongside the original so both supports sit in the same gap between weave rows.
Add an Array modifier to step the pair up the rest of the weave. Apply rotation first with Ctrl+A → Rotation so the offset axes line up with world space, then set the relative offset to 1 on the axis running up the weave, zero the others, and crank the count up until supports appear all the way along.
Scale the offset until each support lands centred between its pair of spiral rows, matching the spacing in the reference photo. Nudge the count up or back once the spacing looks right. Too many is fine to start with, since you can dial it back to fit the basket's height.
Tuning thickness and overlap
Temporarily preview the bevel and subsurface to check overlap, then scale the weave on Z so strands sit just-touching without clipping through each other.
Preview bevel and subsurface to check overlap
Before going any further, preview what the weave will actually look like with its final geometry on. Temporarily give the curve some bevel depth so the strands have thickness, and add a Subdivision Surface modifier on top. Without that subsurface, the strands read as noticeably chunkier than they will in the final result.
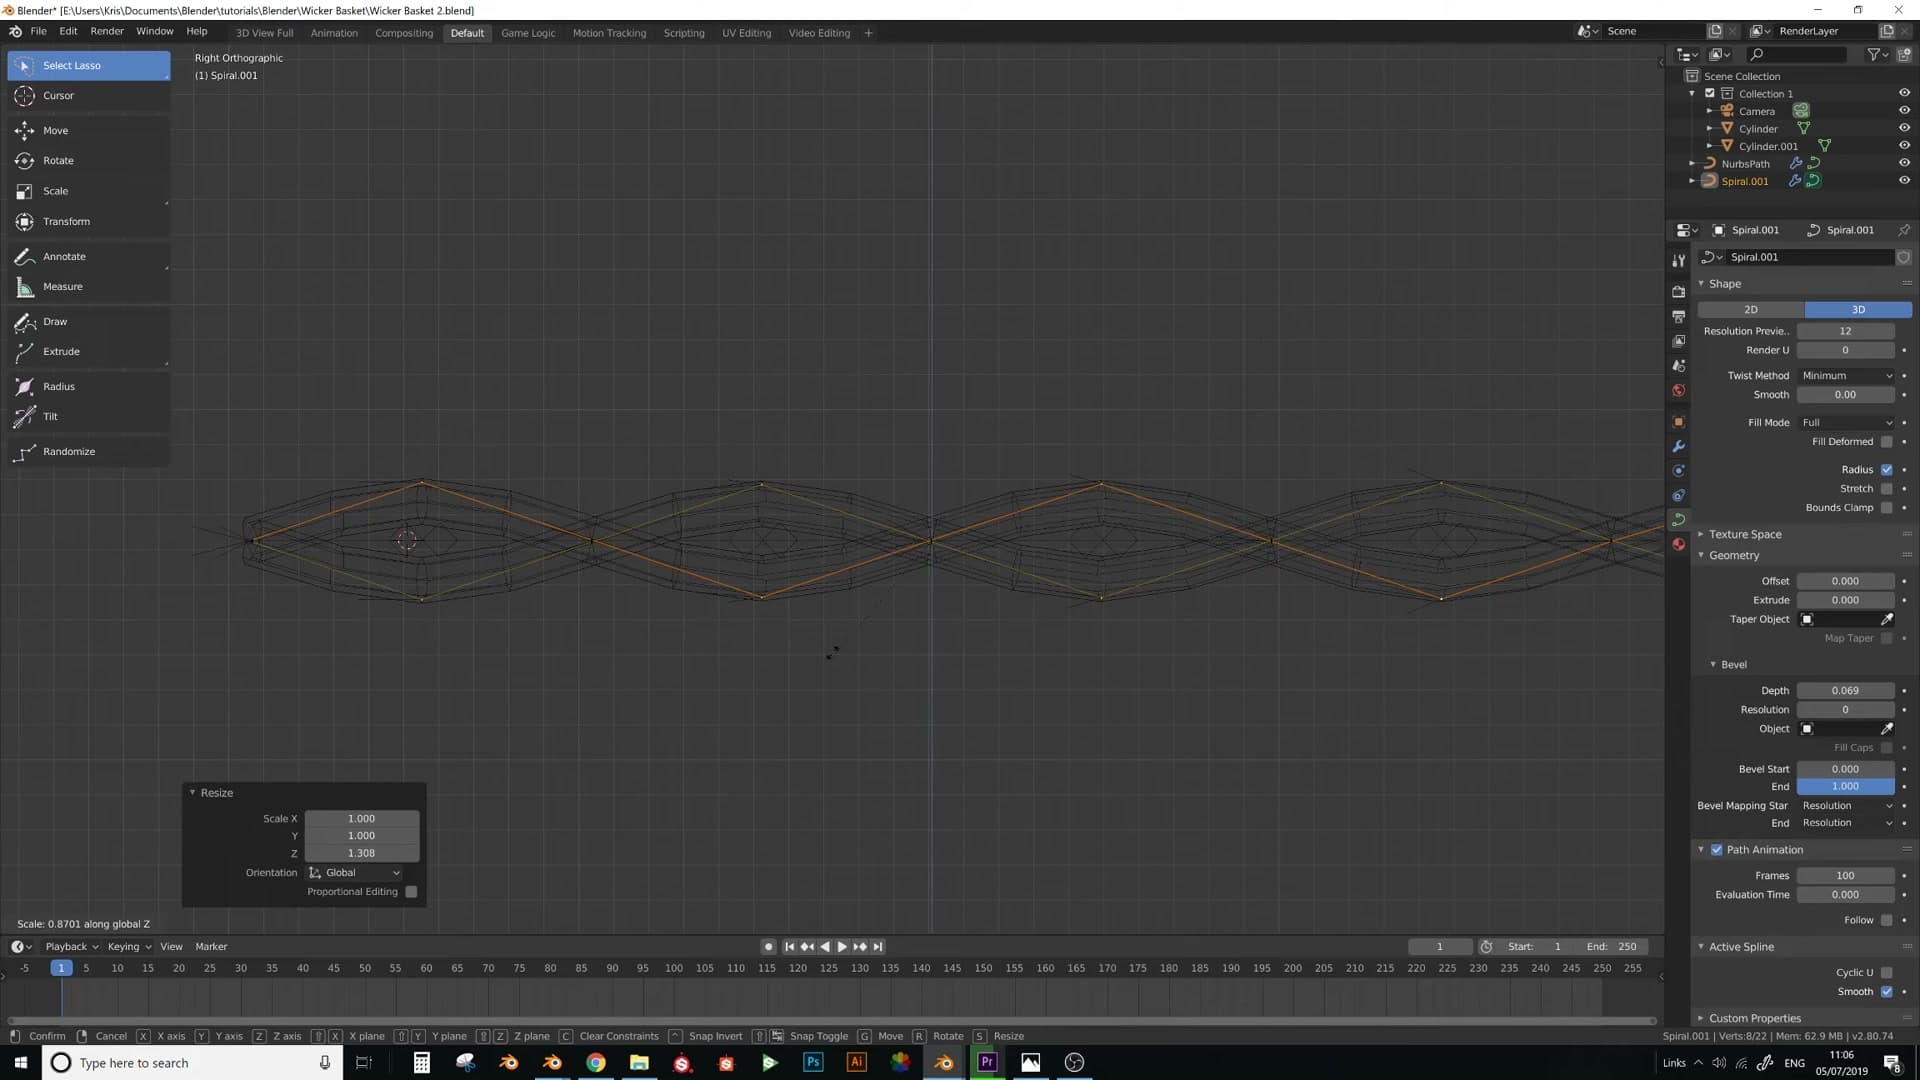
With the preview on, you'll likely see that the strands are overlapping each other a bit too aggressively where they cross. To fix it, select the crossing strands and scale them down on the Z axis so they sit just-touching rather than ploughing through one another.
This whole preview step is throwaway. You'll strip the geometry off again in a moment so the Surface Deform bind has a clean flat curve to work with. The point is purely to sanity-check spacing before you commit.
Adding the second array for back-side strands
The single array you've built so far only covers one side of the weave. To fill in the back-side strands, duplicate the array setup and adjust the offset so the new set runs in the opposite direction.
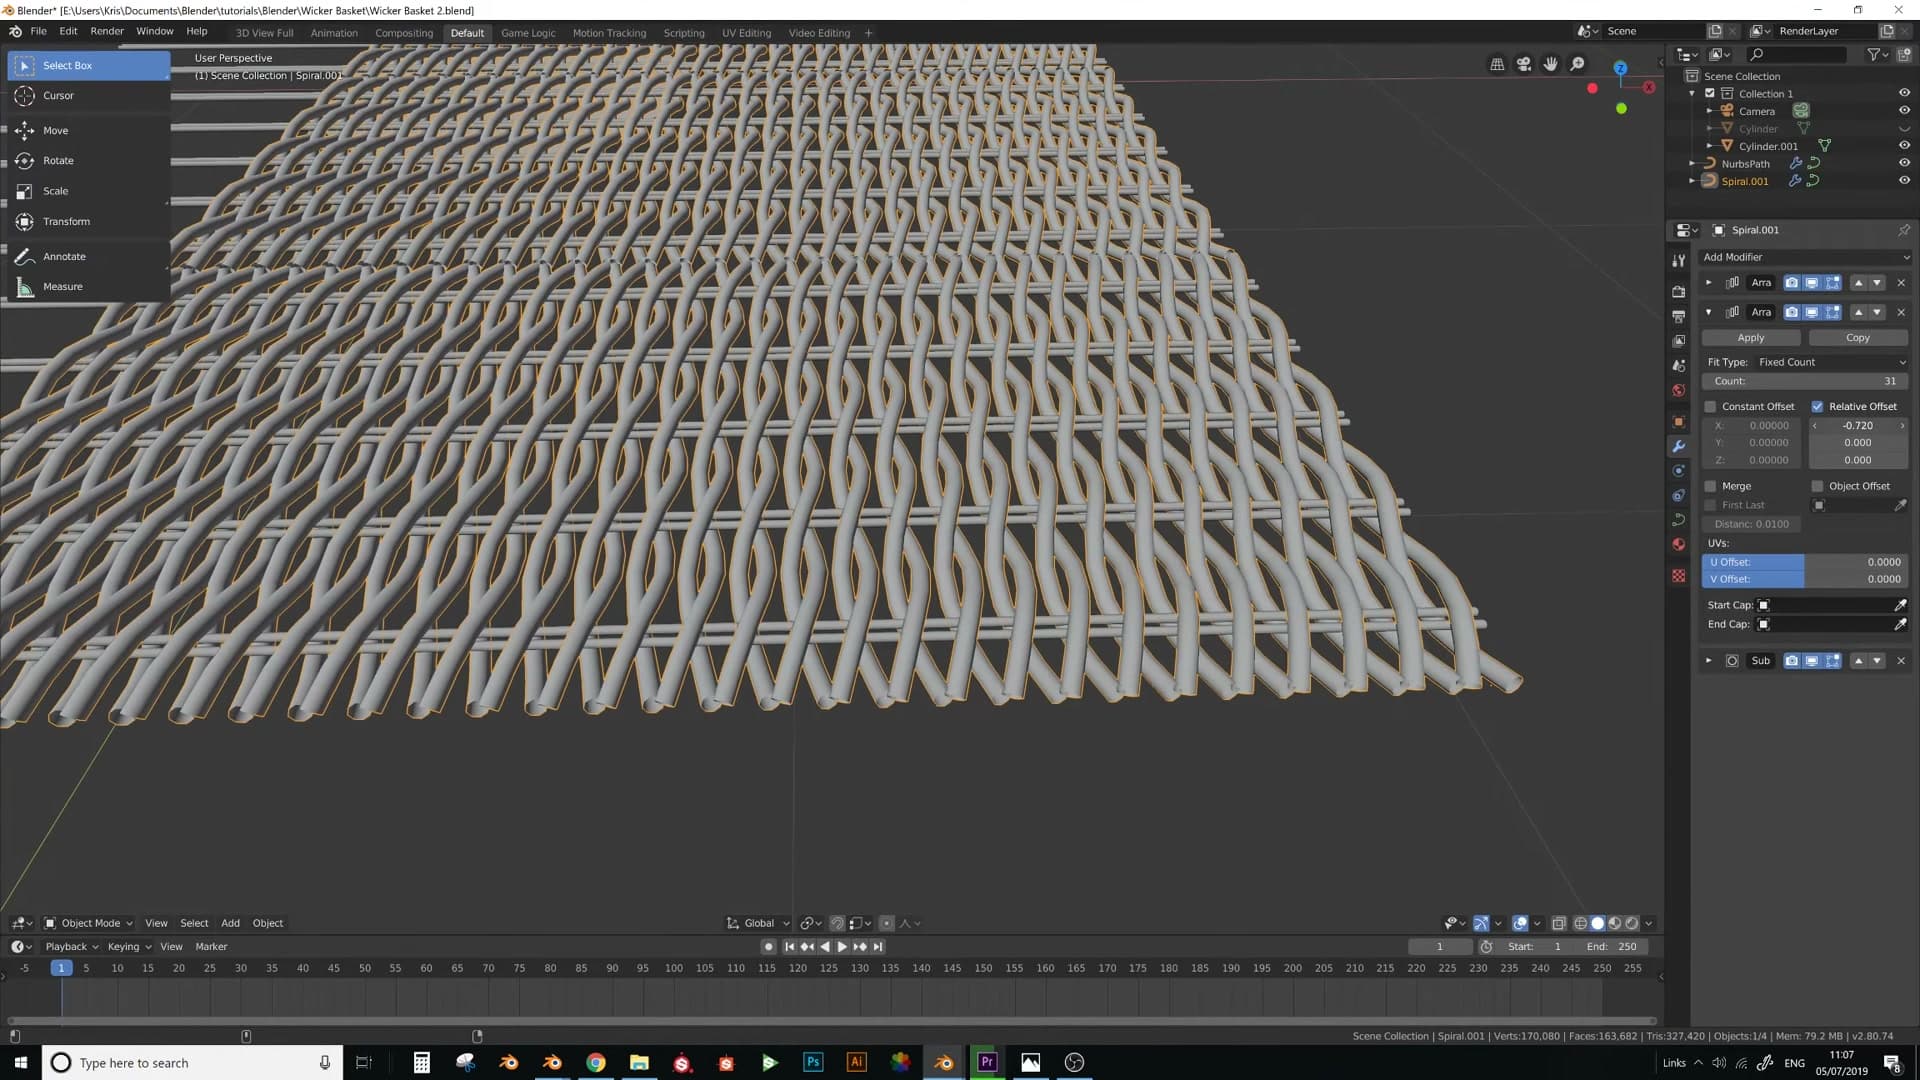
Copy the array, then set the relative offset to -1 on the same axis you used before (it's easy to type 1 by mistake, so make sure it's negative). Add a few more array counts so the back side covers the full length of the weave.
To inspect the spacing cleanly, hide the underlying plane with H and add the subdivision back temporarily. You'll notice the strands look like they're not touching at all. That's because Merge is still enabled and is welding any vertices that fall too close together. Turn Merge off briefly so you can see the true spacing, then nudge the strands inwards until they're just barely overlapping. Add a few more iterations if needed.
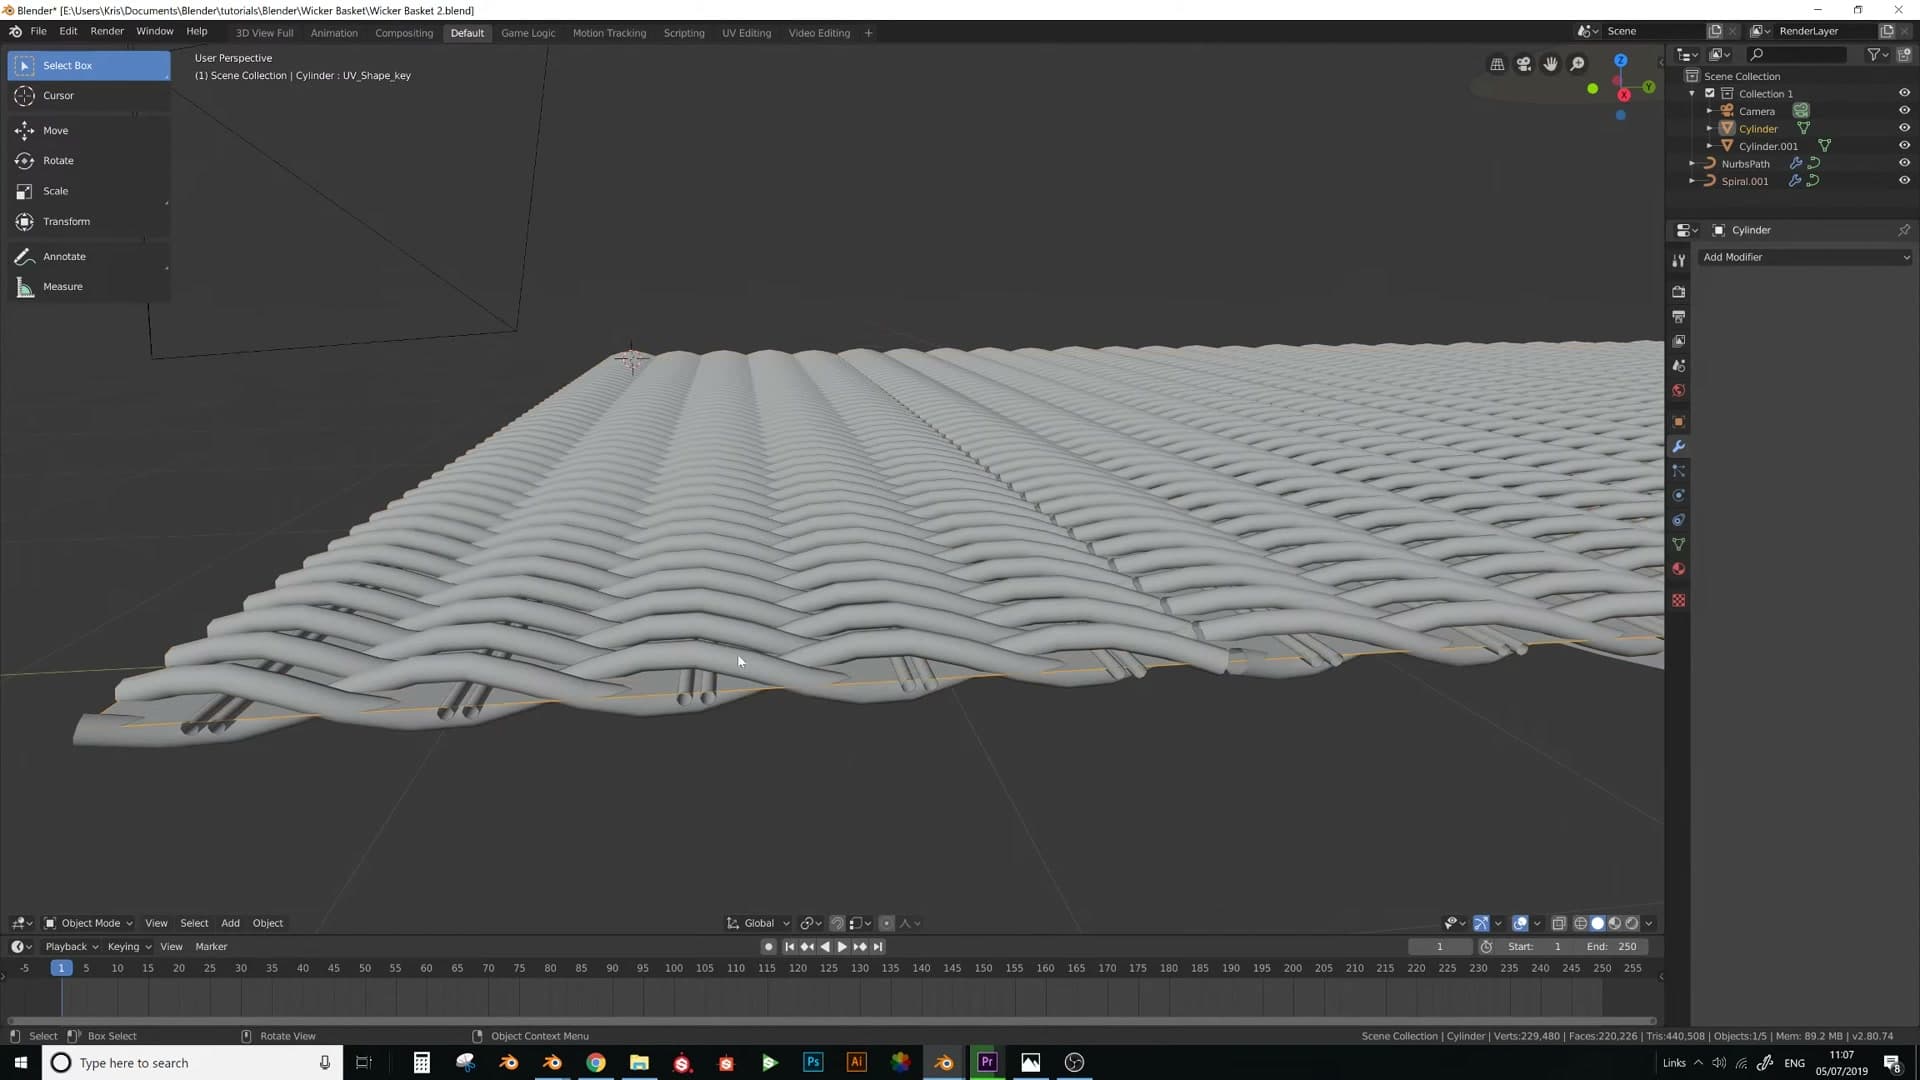
Press Alt+H to bring the plane back. With both arrays in place and aligned, you now know the weave will sit correctly once the geometry is reapplied. Remove the bevel and subdivision preview again so the curve is back to a flat, lightweight state. You'll layer the geometry on once more after the Surface Deform binding is done.
Surface Deform binding to the basket
Convert the curves to mesh, join them, then Surface Deform bind to the cylinder. Dropping the flat plane's Z makes the weave conform to the basket's tapered profile.
Convert, join and bind to the cylinder
Before you bind anything, tidy the array back into shape. Drag the array's offset back to where it was so the strands fill the whole flat strip with just enough overlap. Once the bevel geometry is back on, the seams will line up cleanly. Turn the Subdivision Surface modifier off on both spiral objects so you are binding a clean low-poly mesh, and double-check that the two arrays still align across the plane.
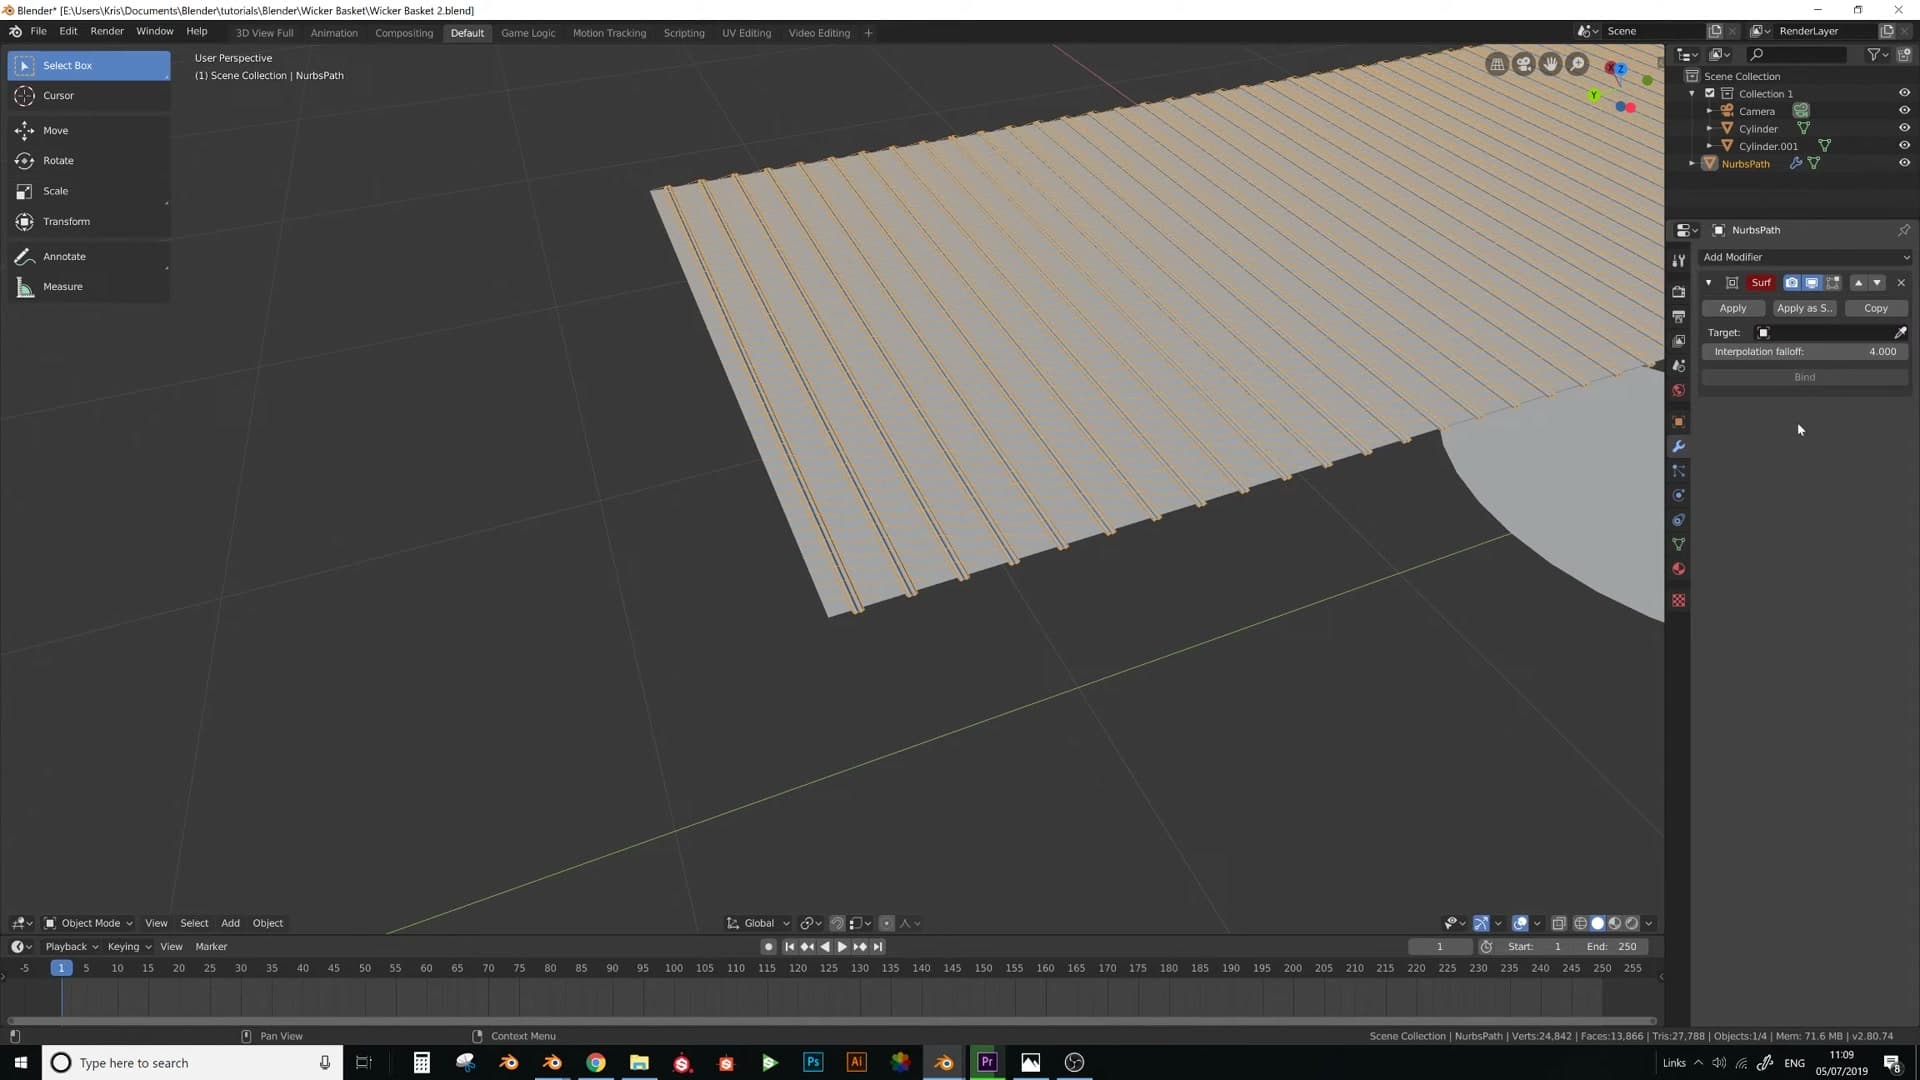
With both spirals selected, convert them to mesh and press Ctrl+J to join them into a single object. This is the woven plane that the Surface Deform modifier needs: one mesh, lying flat, sitting just above the cylinder.
Now add a Surface Deform modifier to the joined weave, set the target to the flat plane underneath the cylinder, and click Bind. The modifier captures the weave's position relative to that plane so it can follow it later.
Wrap the weave and re-add curve depth
With the bind in place, select the flat plane itself, find its Z offset, and bring it back down to zero so it collapses onto the cylinder. The Surface Deform modifier drags the weave with it, and the strands snap around the basket. The tapered profile you sculpted earlier flows straight through into the weave.
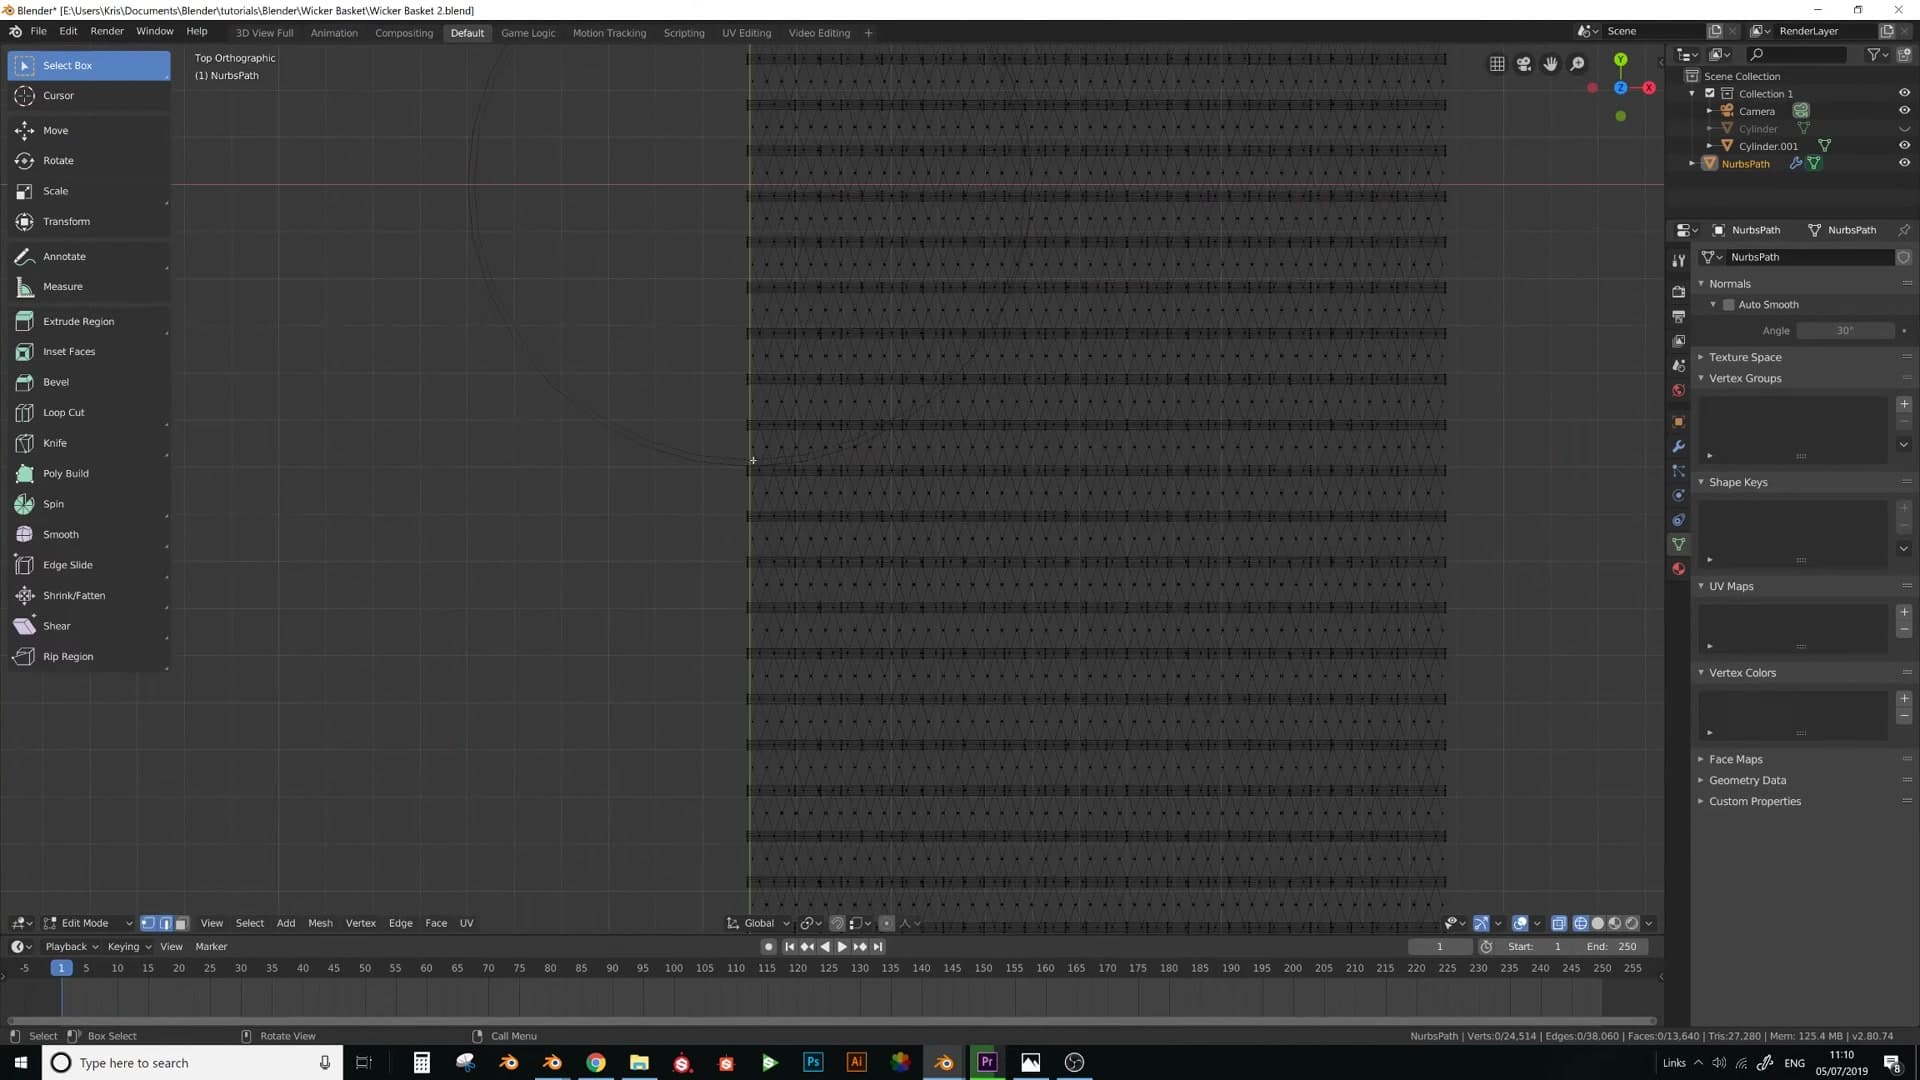
The weave is wrapped, but it is still flat ribbons with no thickness. Drop into wireframe mode, apply the Surface Deform modifier on the woven mesh, then go into Edit Mode and start separating the individual strands. Hover over a face, press Ctrl+L to select linked, then P to separate by selection. Repeat for each strand so every one becomes its own object ready to be turned back into a curve.
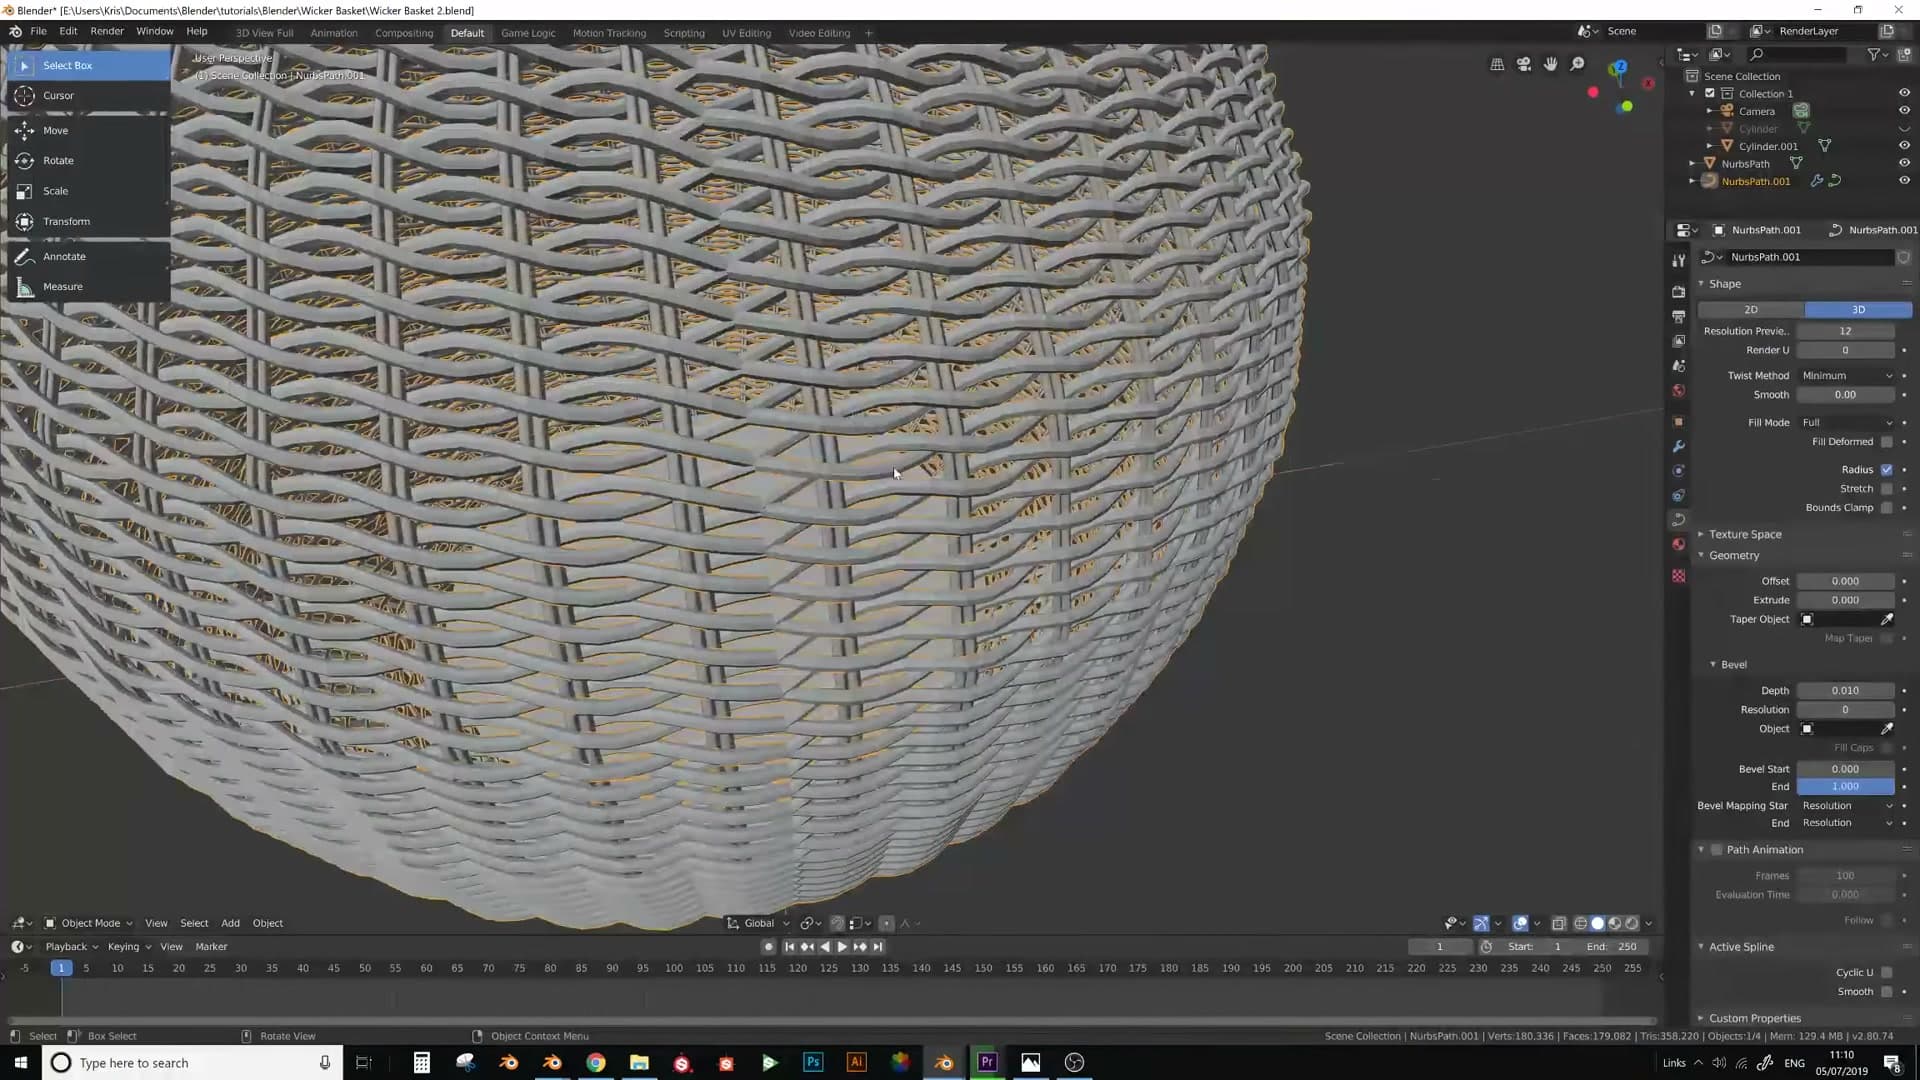
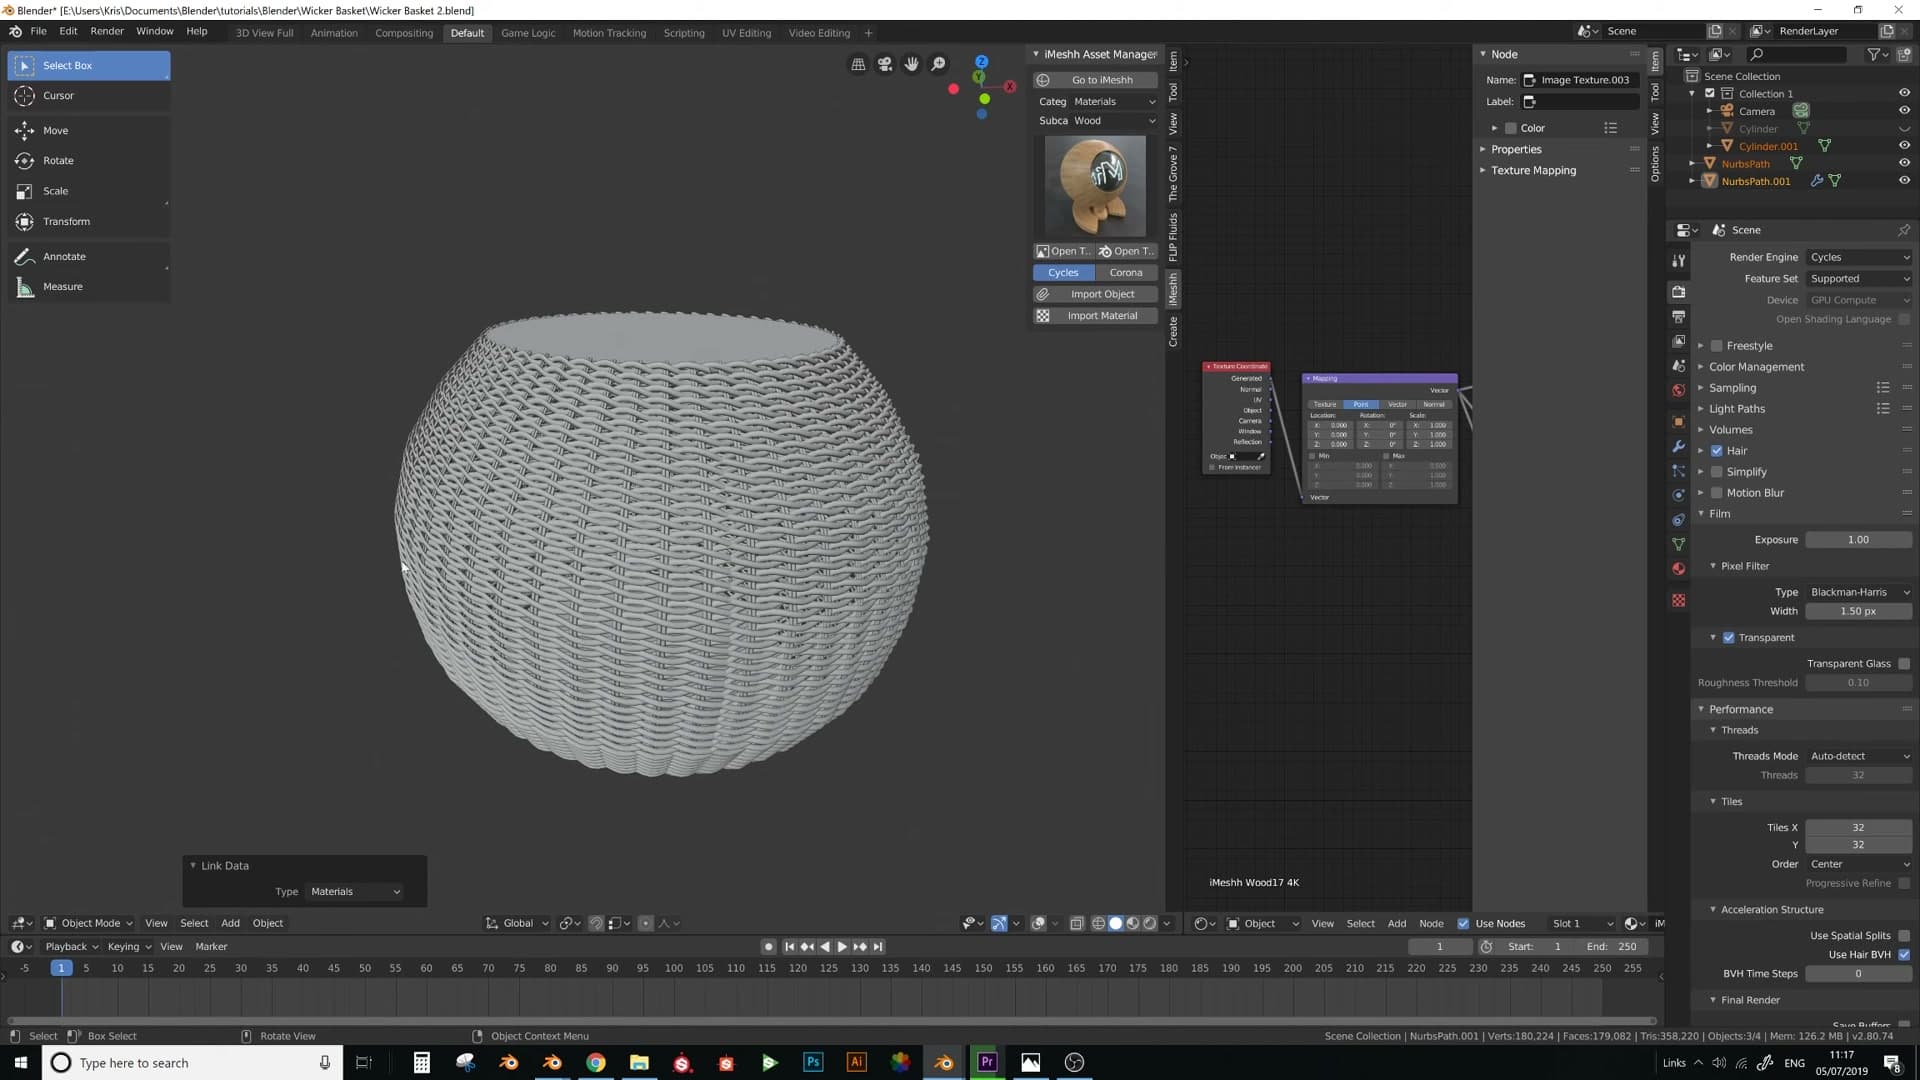
Once the strands are split out, convert them back to curves and re-add the depth you stripped out earlier. Add a Subdivision Surface modifier, turn the bevel resolution back up from zero, and right-click Shade Smooth. The flat woven ribbons fatten back into round strands, and the basket finally reads as a real wicker weave.
Fixing broken weave joins at the back seam
Where the array meets itself some merges fail. Strip the bevel, Alt+M each pair At Center, Shift+R to repeat, then put the geometry back.
Spotting the visible gap in the weave
With the weave wrapped around the cylinder, rotate around to the back of the basket and look carefully at where the two ends of the array are meant to meet. In most spots the merge has worked, but you will usually find a few pairs of strand ends that haven't joined cleanly, leaving a visible discontinuity running up the seam.
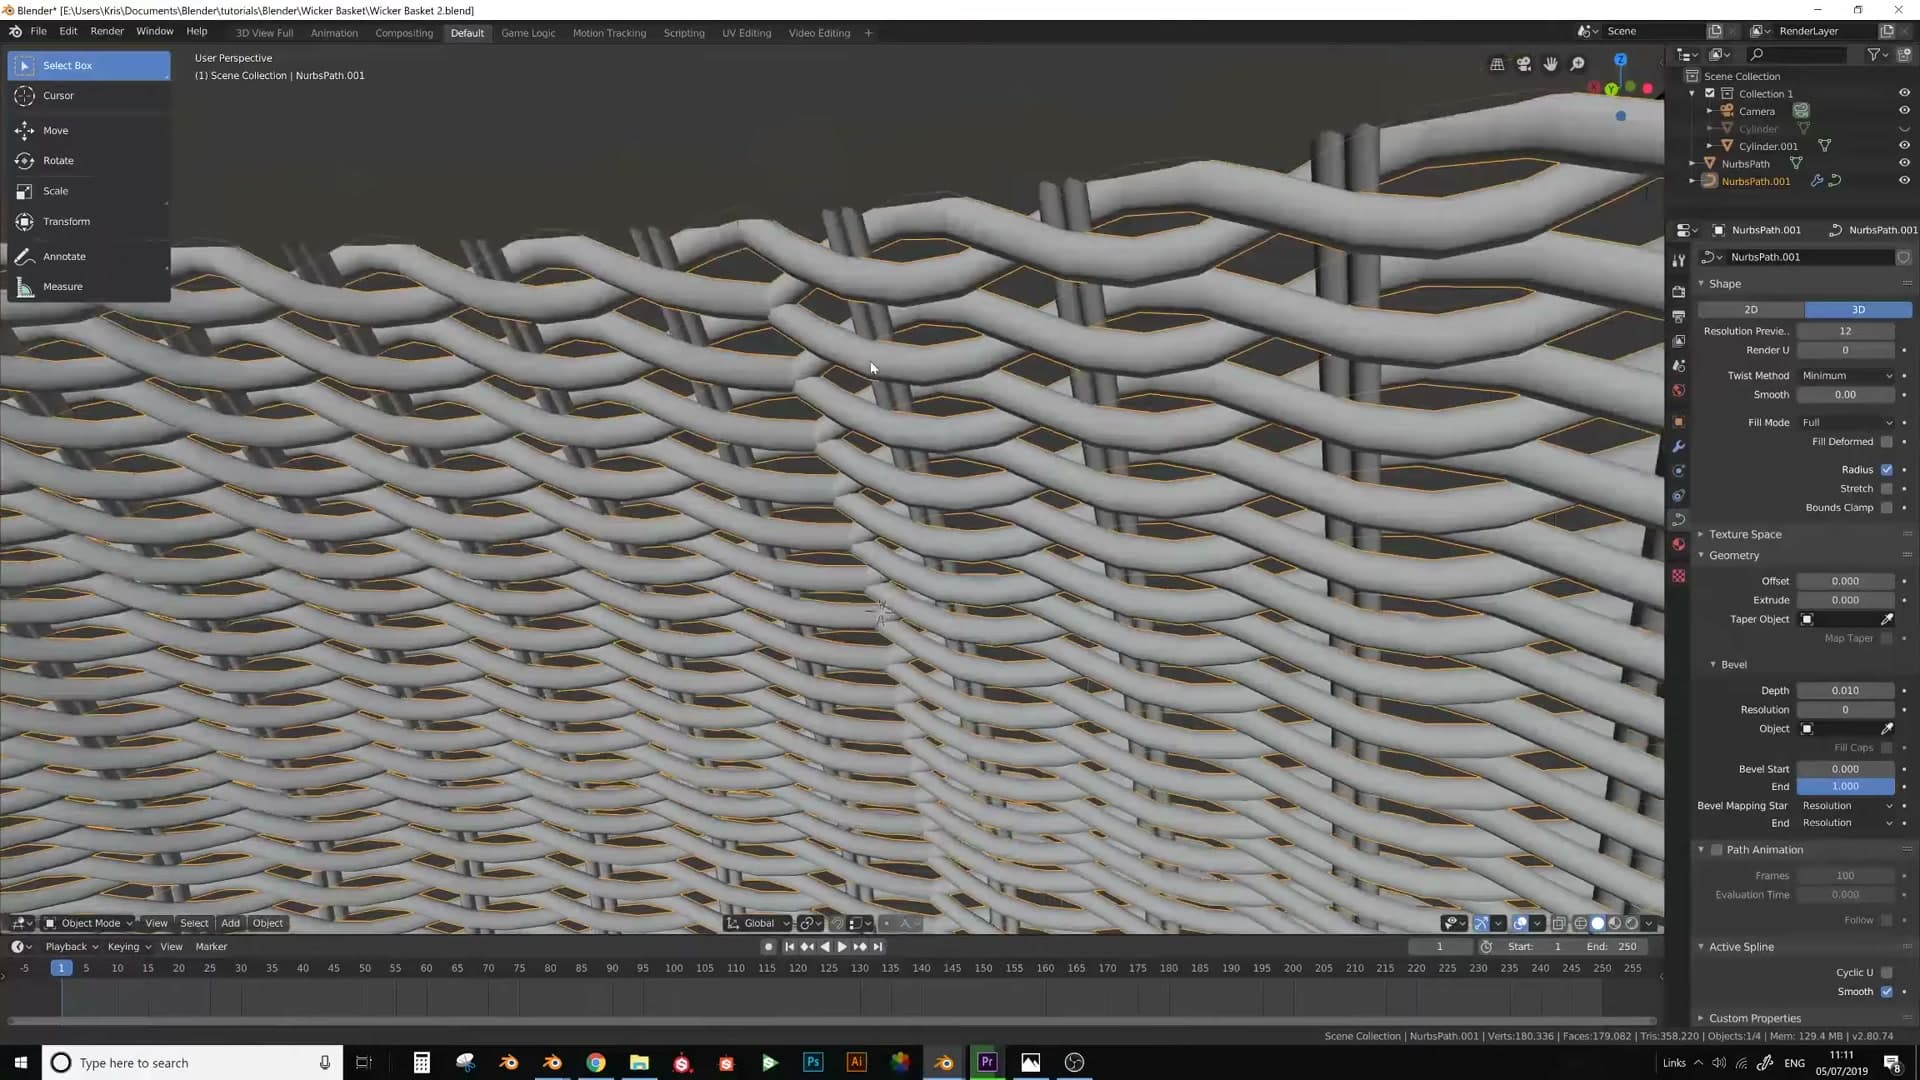
Before you start fixing anything, do a Shift+Right-click right next to the gap to drop the 3D cursor there. The seam is fiddly to navigate to, and the cursor gives you a permanent landmark to snap back to if you lose your place while orbiting.
Manually merging stubborn vertex pairs
The instinct is to pick two unmerged vertex ends, press F to fill an edge, and then dissolve one of them. That works for some pairs, but on others Blender will refuse the operation outright. I'm not sure of the exact cause. My guess is that the curve handles are twisted or oriented in a way that prevents a clean merge.
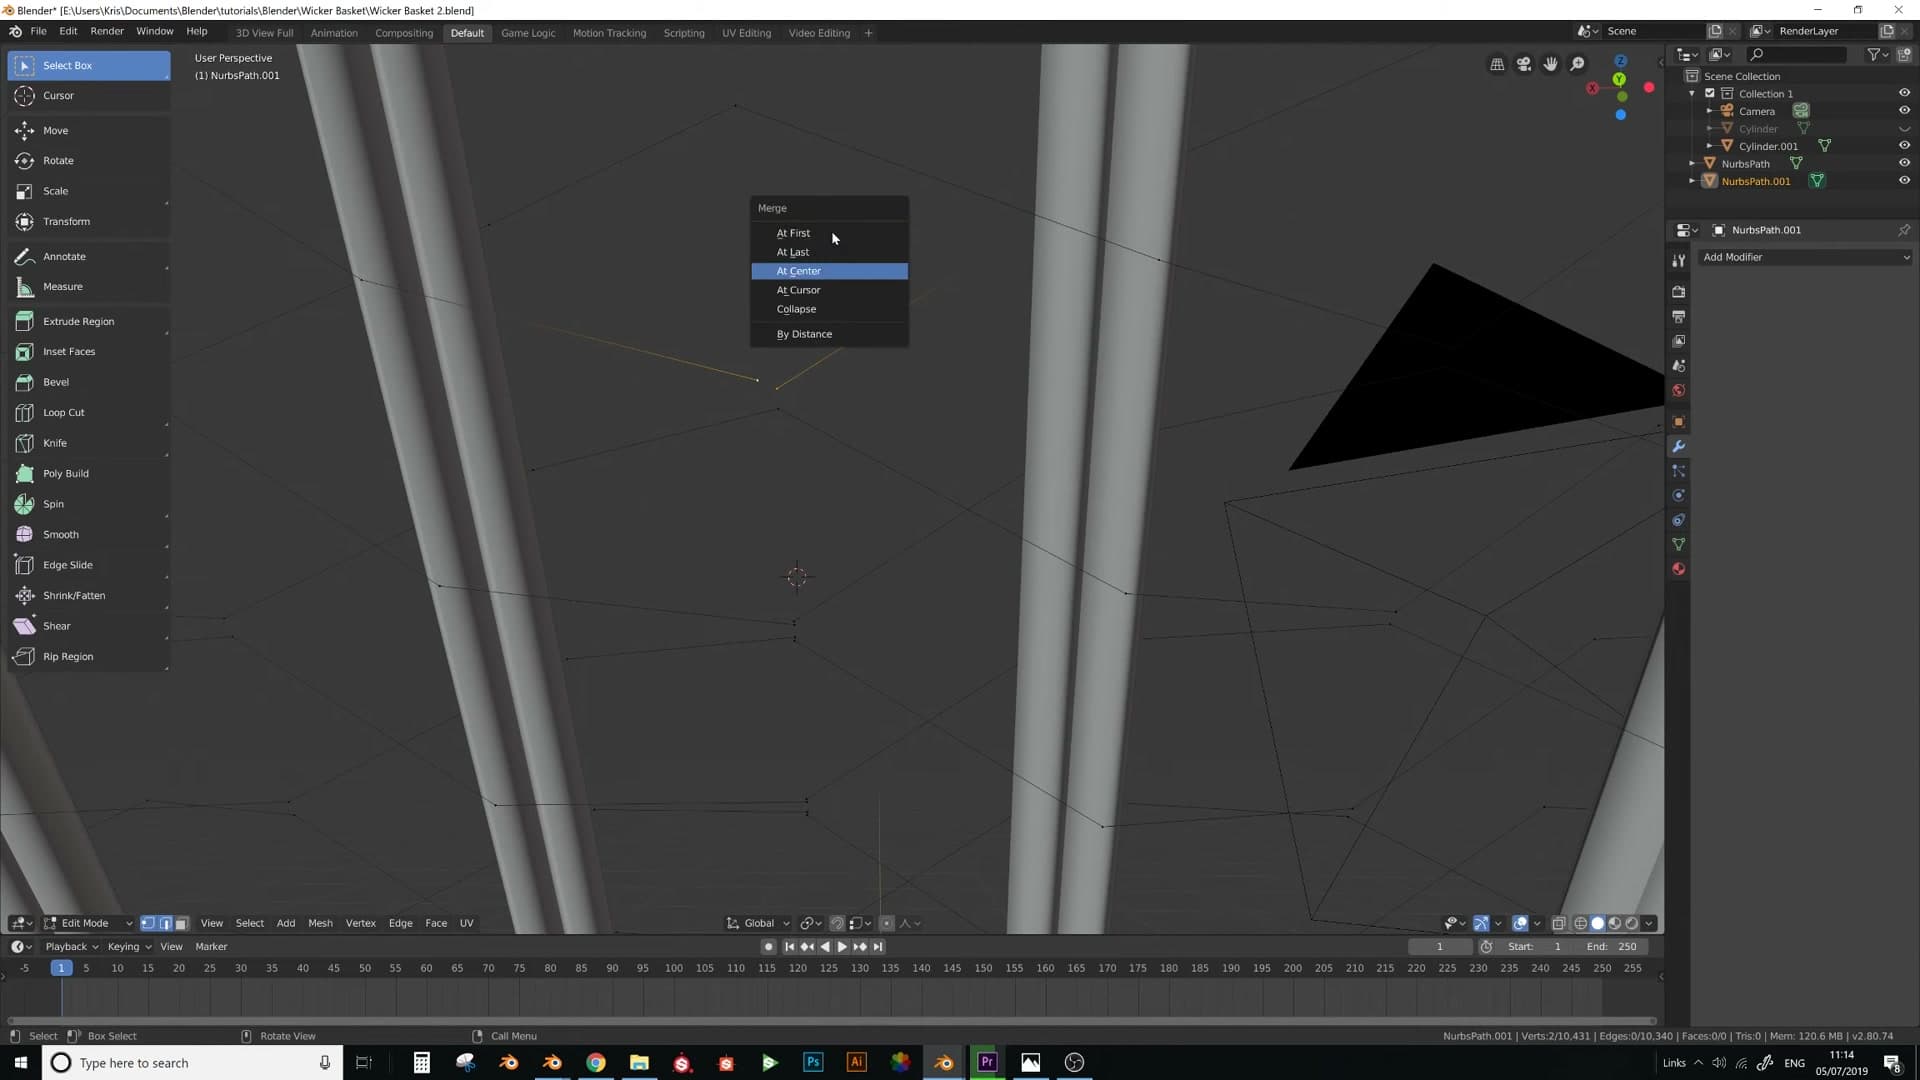
The reliable workaround is to strip the curve back to plain geometry first. Remove the Subdivision Surface modifier, then convert the object back to a mesh so you're working with raw vertices rather than a curve with bevel depth.
Now select the two stubborn vertex ends, press Alt+M and choose At Center. The pair collapses into a single vertex. Move to the next broken pair, select them, and instead of repeating the menu press Shift+R. That re-runs the last operator, so each subsequent merge is a single keystroke. Work your way down the seam pair by pair until every gap is closed.
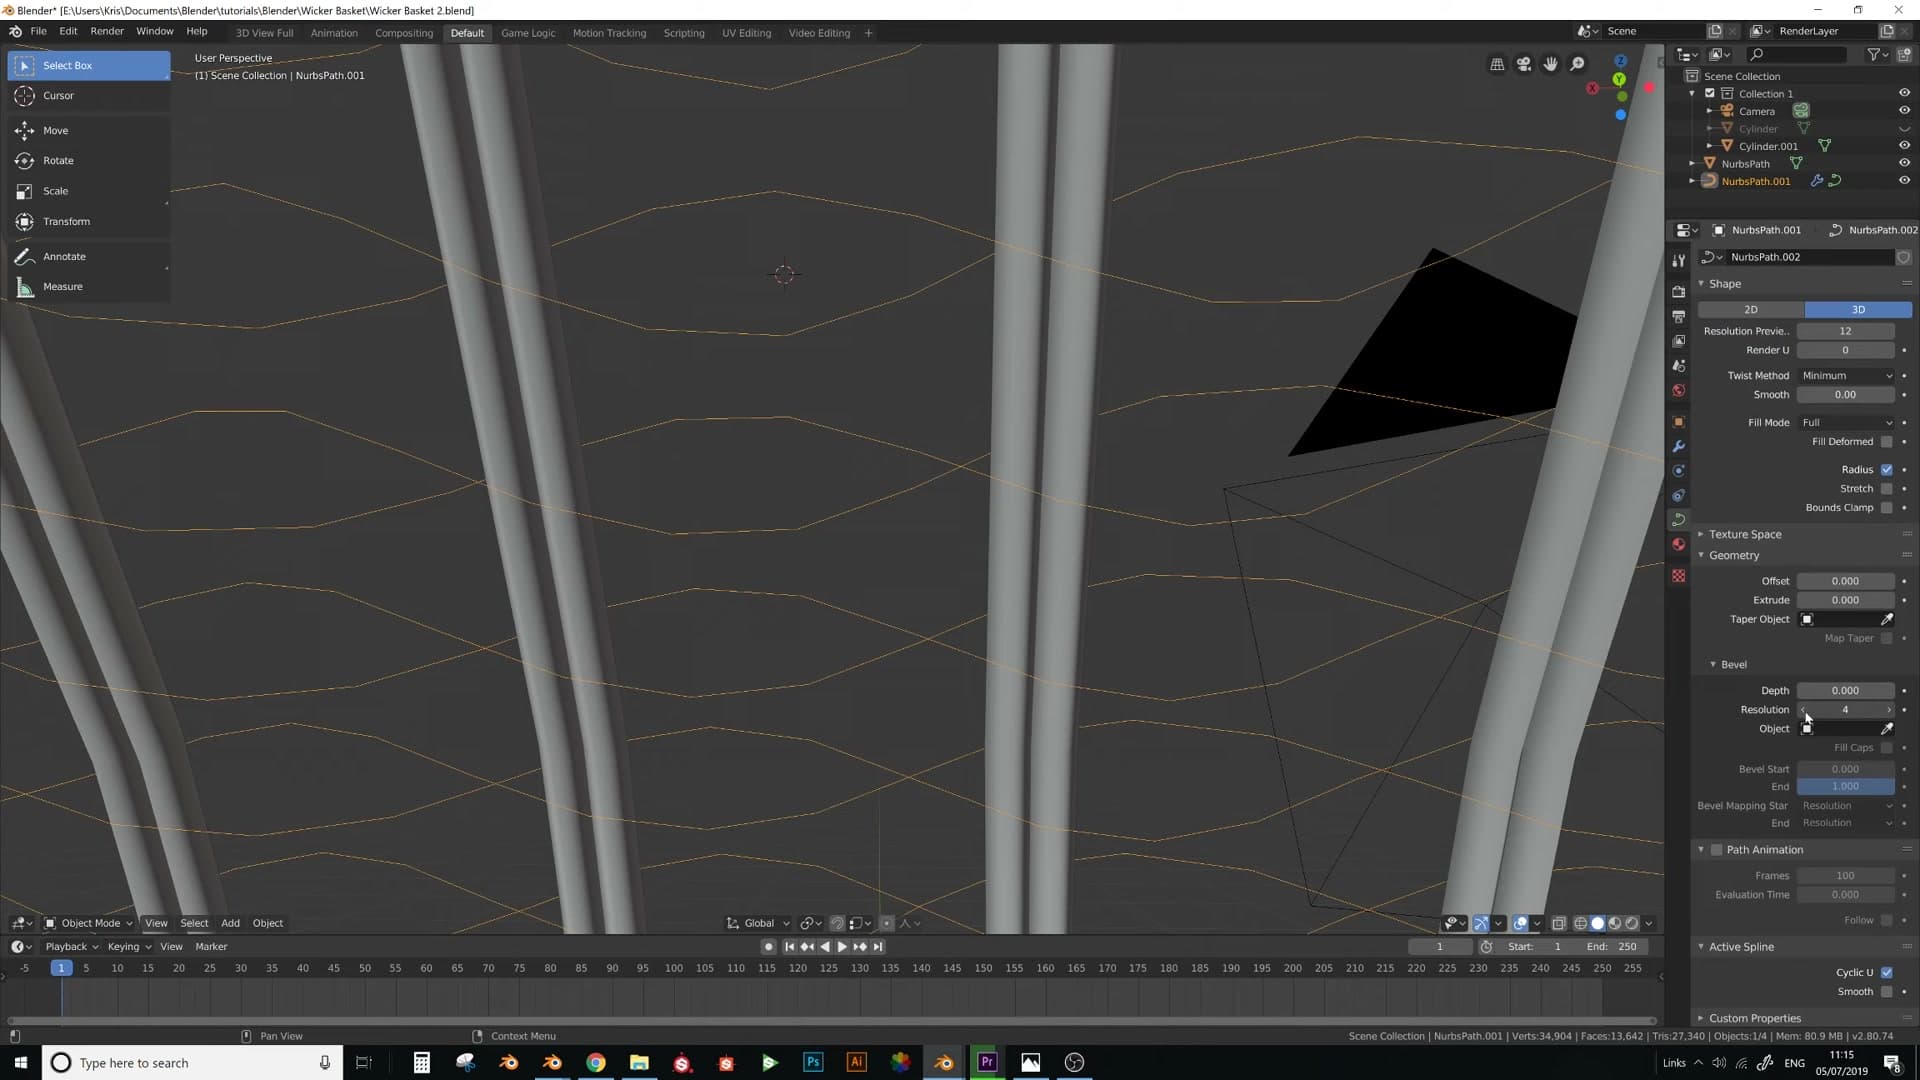
Once the seam is continuous, convert the mesh back to a curve, re-enable the Subdivision Surface modifier, and dial the bevel depth and resolution back up to restore the strand thickness. Right-click and apply Shade Smooth, and the join now flows around the basket as a single continuous weave.
UV unwrap and the wood material
Mark a seam down each strand, unwrap, and apply an iMeshh wood material using Generated UVs so the texture follows the weave automatically.
Mark seams and unwrap the final mesh
To prep the basket for a proper material, turn off the Subdivision Surface modifier and convert the strands back to a mesh. You can't mark seams on raw curve data. You need real edges to work with.
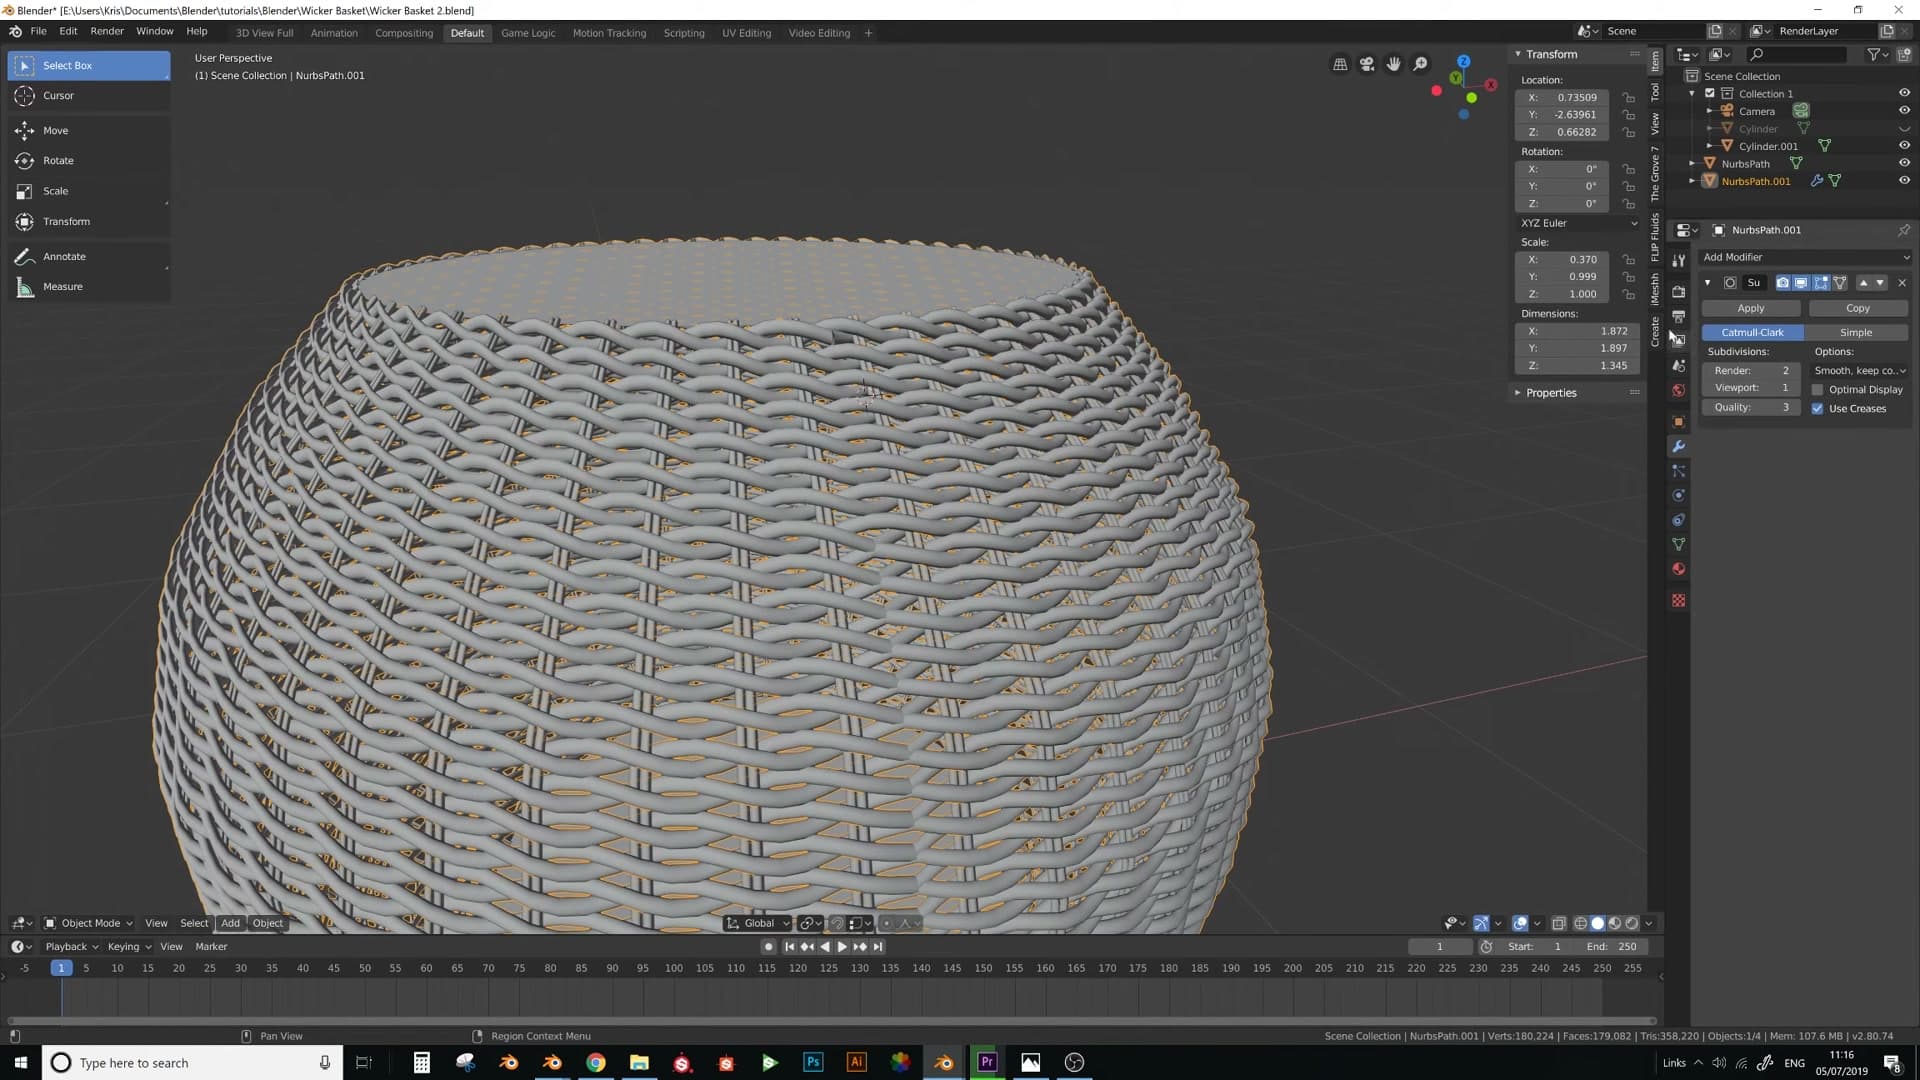
Now select an edge loop that runs the full length of each strand, following its spiral path all the way along. Step through every strand and do the same, then add the additional edge loop I show in the video so each strand has a clean break for the unwrap.
With every loop selected, mark them as a seam, press Space to bring up the operator search, and run Unwrap. Each strand flattens out into its own UV island, ready for a texture.
Re-enable the Subdivision Surface modifier so the strands keep their rounded shading, and you're ready to drop a material on.
Wood material with generated UVs and final render
Add a material slot and import a wood material from the iMeshh library. Open the asset browser, navigate to materials → woods, and pick one. The strands haven't been unwrapped perfectly here, so the texture won't sit cleanly out of the box.
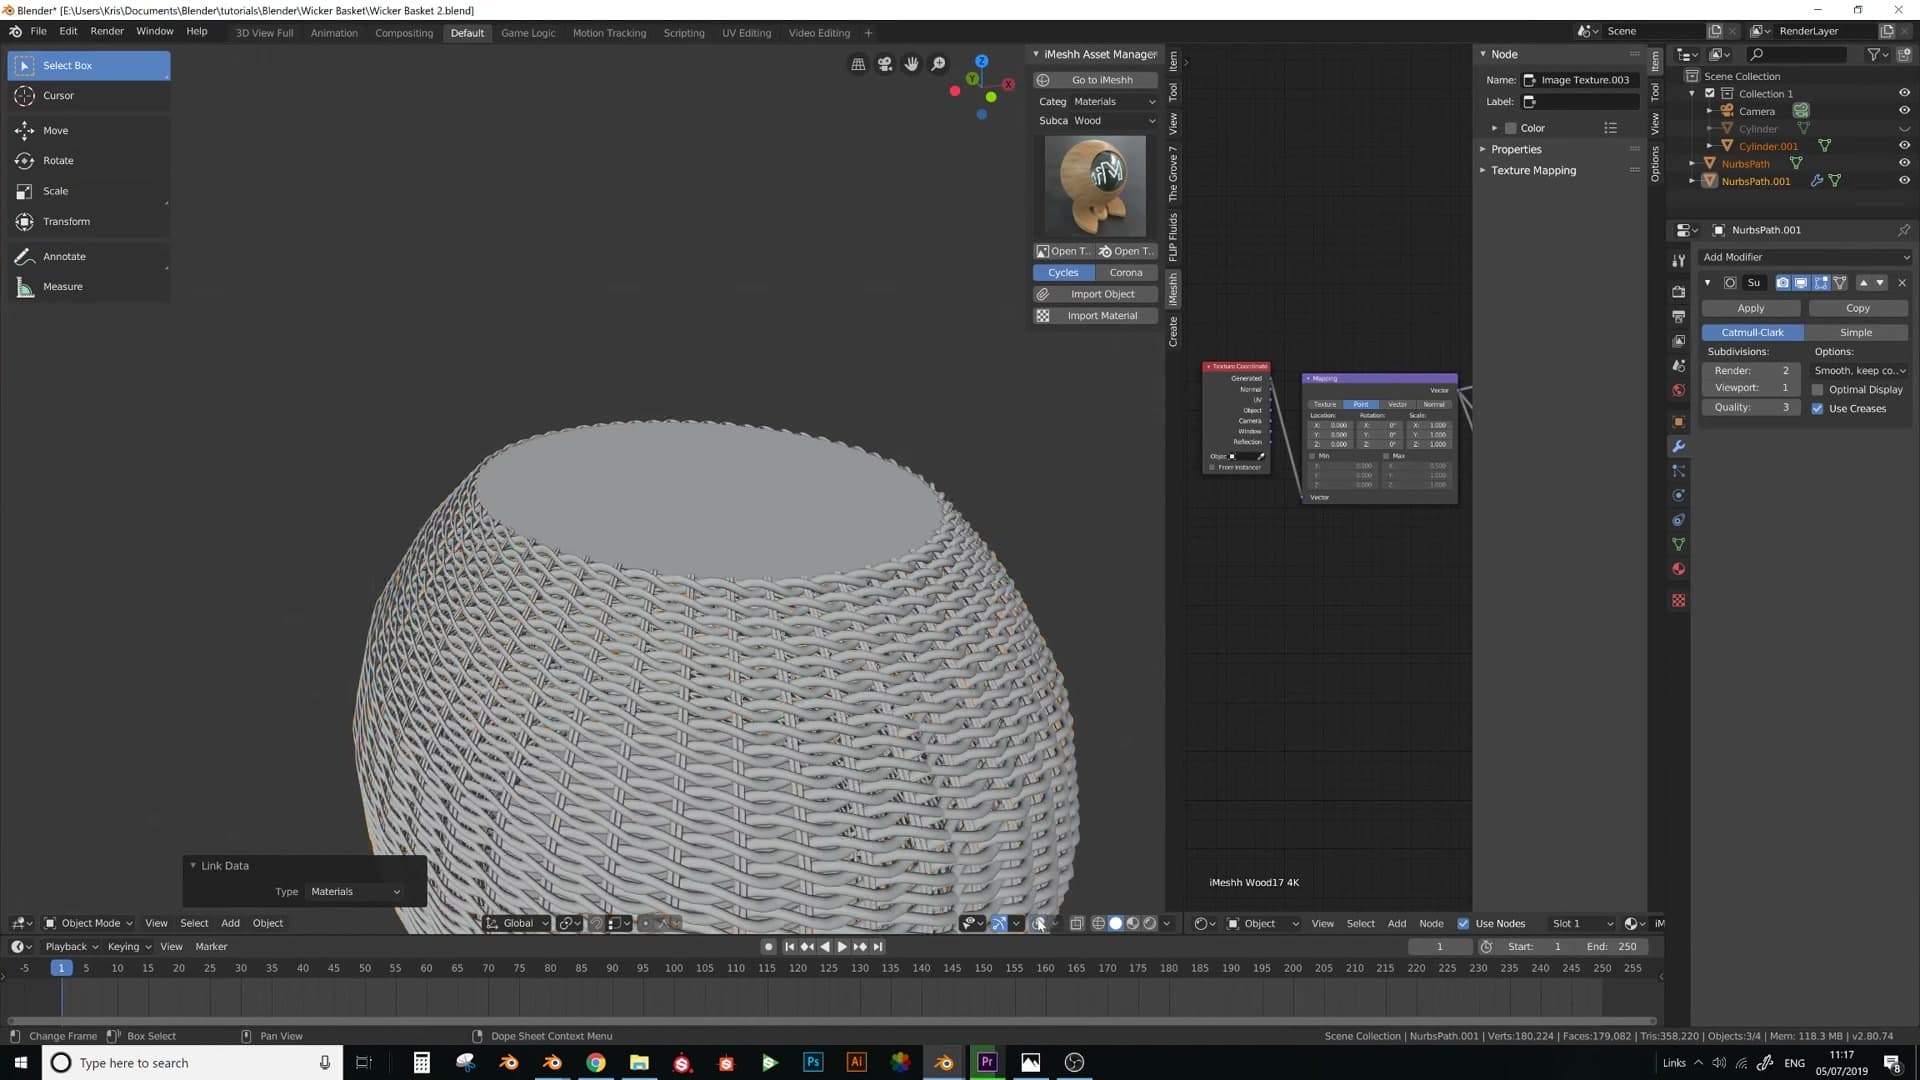
The fix lives in the Shader Editor. Switch the wood texture's Vector input to Generated coordinates. Blender then projects the texture using each strand's bounding box, so the grain flows along the weave automatically without needing a tidy UV layout.
Back in the viewport, select the rest of the strands followed by the textured one so it's the active object, then press Ctrl+L → Materials to link the wood material across every strand. Tap Z → Rendered to flip into rendered view.
That's the wicker basket done. The same workflow scales to any shape: model the form, flatten the section that needs weaving, build the weave on the flat plane, then wrap it back into place with Surface Deform. If your final render shows jagged edges along the strands, it's almost always because the original base mesh was too low-poly. Give it more geometry before binding the weave and the result smooths right out.
Tools and credits
Everything mentioned in this tutorial, with links.
- Blender (the renderer this entire build runs in).
- iMeshh (studio platform: project management, client review, asset library, invoicing). The asset library used in this tutorial is included with every iMeshh Pro plan.
- Poly Haven (free CC0 textures and HDRIs).
Pillar guide: Modelling hub