Why dust is the realism trick nobody talks about
Dust is everywhere in real spaces but rarely shows up in renders. Learn why it matters, where it actually settles, and the discipline needed to use it on client work without making scenes look uncared-for.
The forgotten surface imperfection
Everyone is hunting for that one quick trick to push their renders into believable territory. Sharper edges, better HDRIs, smarter shaders, a thousand tutorials on each. Almost nobody talks about dust.

Dust is technically just another surface imperfection, but it behaves differently to scratches or fingerprints. You generally only see it at lower viewing angles, and it only really settles on the top of objects. You rarely catch dust clinging to the underside of anything. Once you start looking for it, you realise how camera angle and surface orientation completely control where it reads.
It is also everywhere. Every room, every shelf, every surface in your house has a thin film of it sitting on top. That mismatch (ubiquitous in real life, absent from almost every render) is exactly why adding it earns you so much realism for so little effort.
When to use dust (and when not to)
Before getting into the node setup, a quick word on restraint. If you are producing a render for a client, they almost certainly want the scene to look clean. A pristine product shot or a polished interior is what they are paying for, not a documentary of a neglected room.
Treat dust as an edge-breaker rather than a full overlay. A subtle amount across the tops of a few hero objects breaks up perfectly clean edges and stops surfaces feeling stamped out of CG. Push it any further and the scene tips from lived-in straight into uncared-for, which is rarely what anyone briefed you for.
The goal is just enough dust to suggest the room exists in the real world, and never so much that it looks like nobody has cleaned it in a year.
Scene setup: dog, HDRI and a linked-material plane
Build a minimal test scene with a free iMeshh metal dog, an HDRI lighting environment and a ground plane. Linking the dog's material to the plane lets the dust shader be tested on both surfaces at once.
Importing the metal dog and the artist workshop HDRI
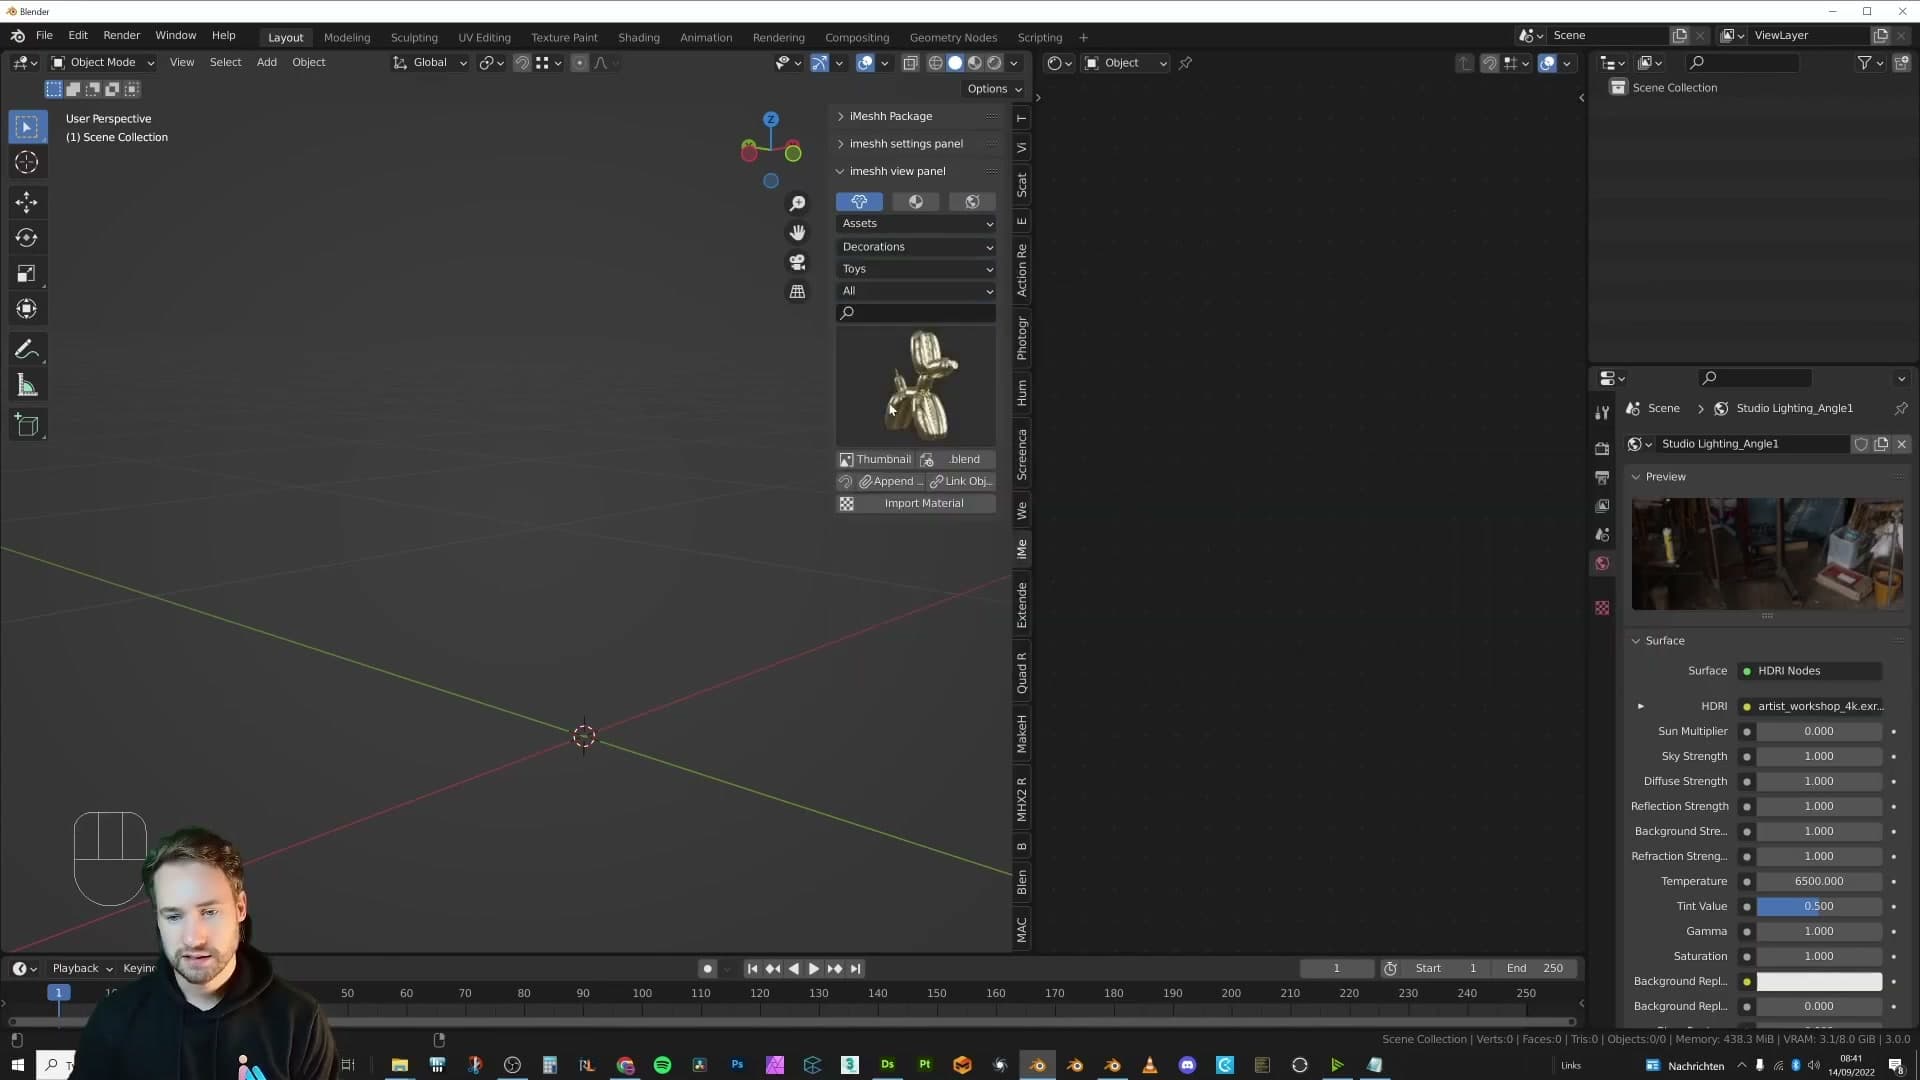
Before any dust nodes go in, you need a test surface that reads believably under light. I use a metal dog from the iMeshh free section: half joke, half deliberate choice. The asset ships with subtle surface imperfections baked into its shader, which is useful. Dust on a perfectly clean surface looks fake; dust over existing micro-detail looks earned.
Grab the dust texture I made alongside the tutorial. The download link sits in the video description. You'll wire it into the shader in the next module, but downloading it now keeps the workflow uninterrupted.
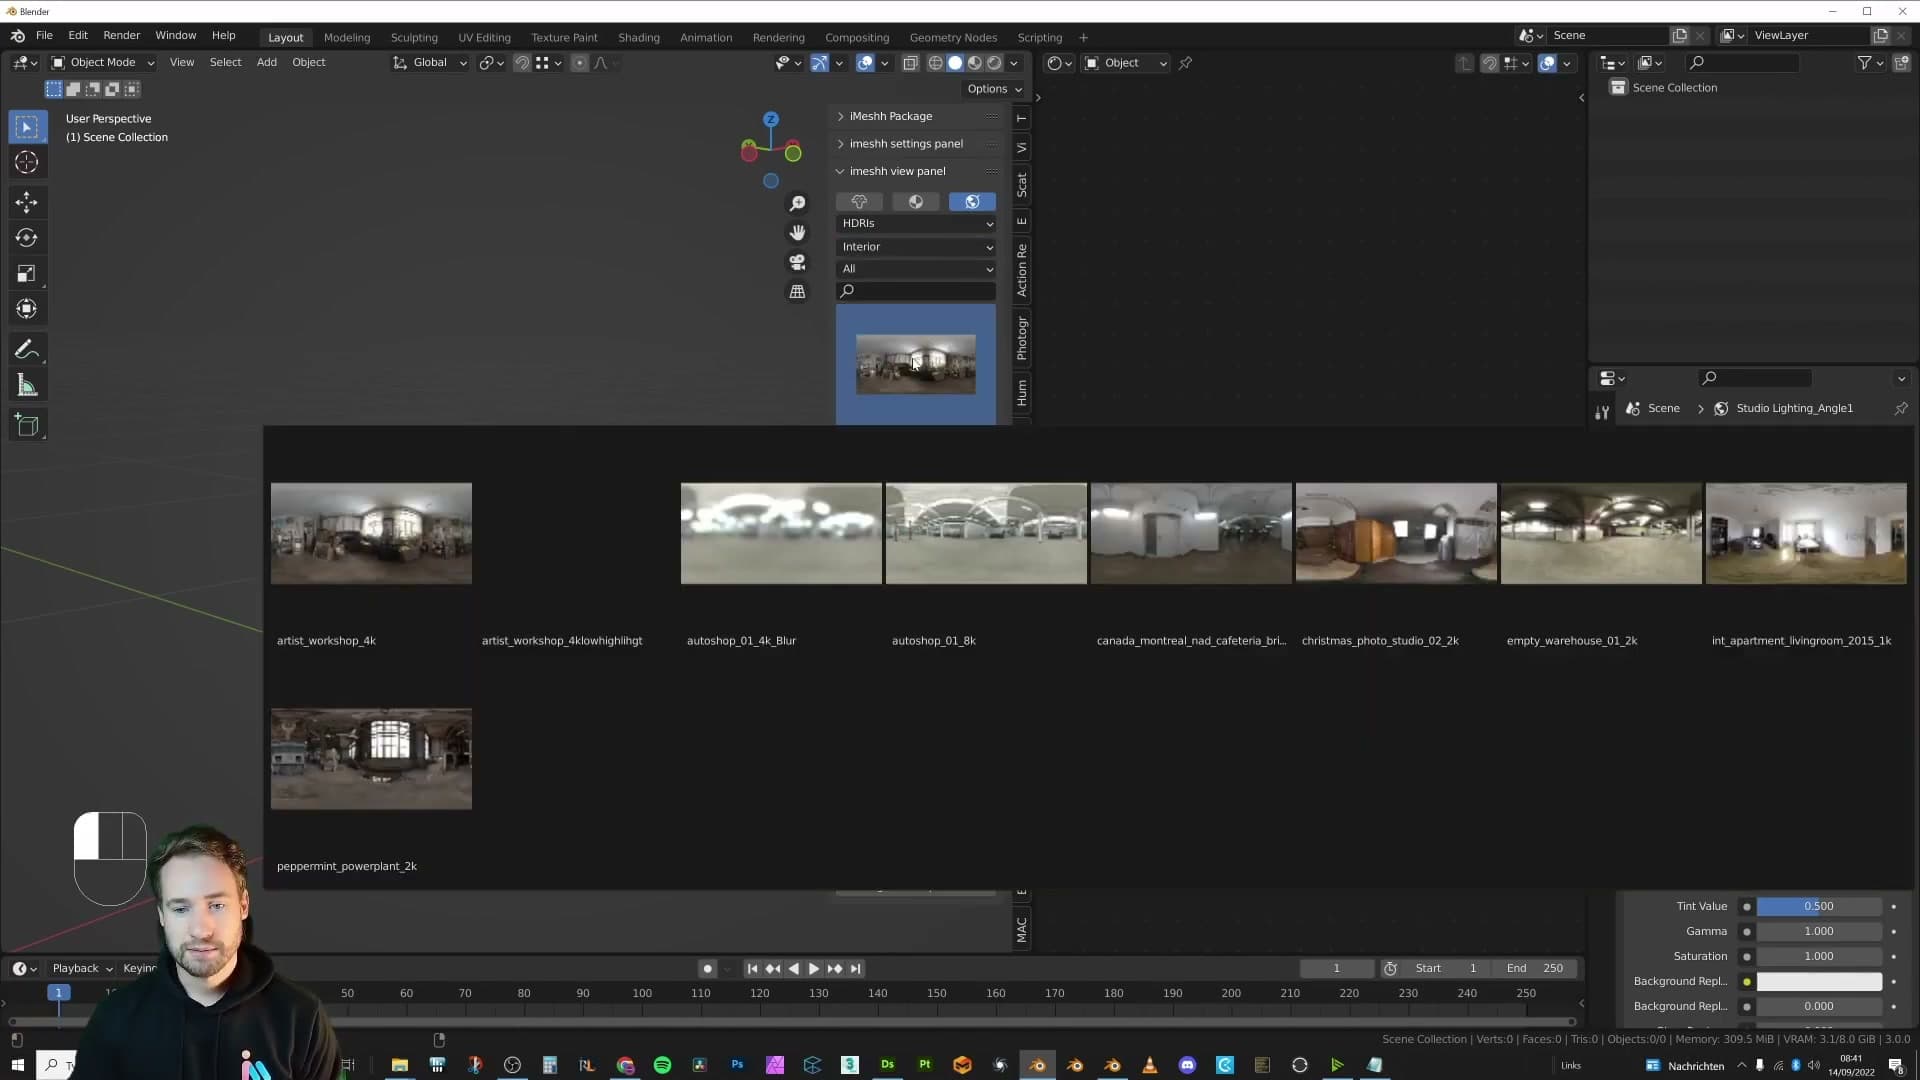
For lighting, open the iMeshh Asset Manager and pull in the Artist Workshop HDRI from HDRI Haven (now rebranded as Poly Haven). It gives a soft, directional industrial light that flatters reflective surfaces without overwhelming them.
Switch the Asset Manager from HDRIs over to Objects and append the dog into the scene the same way. With one lit object on screen, you've got the minimum viable setup to start judging shader work.
Adding a plane and linking the dog's material with Ctrl+L
Add a plane beneath the dog with Shift+A → Mesh → Plane. The plane gives you a flat surface to test the dust shader on, sitting next to a curved one. That contrast is useful, because dust behaves differently on horizontal flats than it does on sloped or vertical geometry.
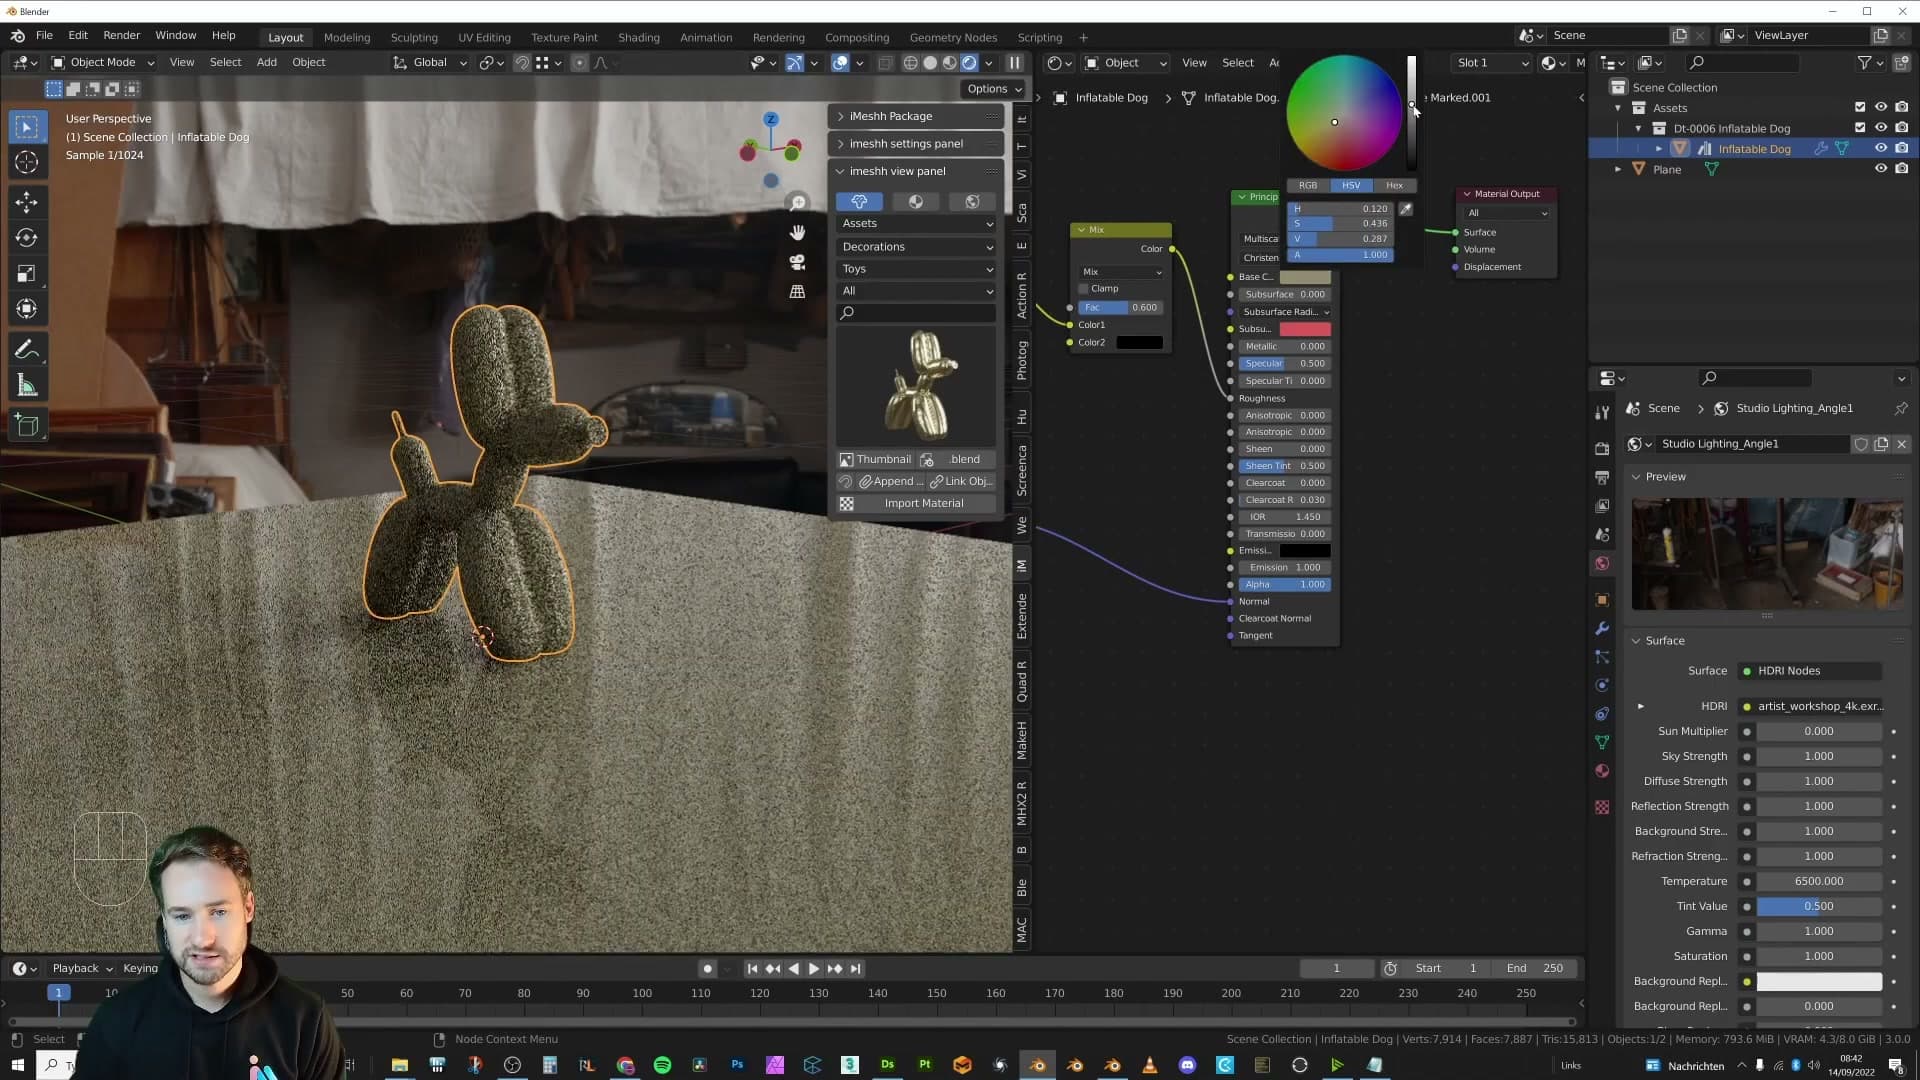
With the plane selected, hold Shift and click the dog so the dog becomes the active object. Press Ctrl+L and choose Link Materials. Both meshes now point at the same material datablock, so every node change you make to the dog's shader appears instantly on the plane as well.
For the build that follows, I drop the material's metallic value so the surface reads more neutrally. It's easier to see what the dust nodes are doing when you're not also fighting strong metal reflections. The scene is darkened slightly at the same time to keep the dust mask readable.
Finally, drag the dust texture file directly into Blender to confirm it loads cleanly. You won't plug it into the shader graph yet (that happens once the masking nodes are in place), but having it sitting in the file means there's no break in the workflow when you reach for it.
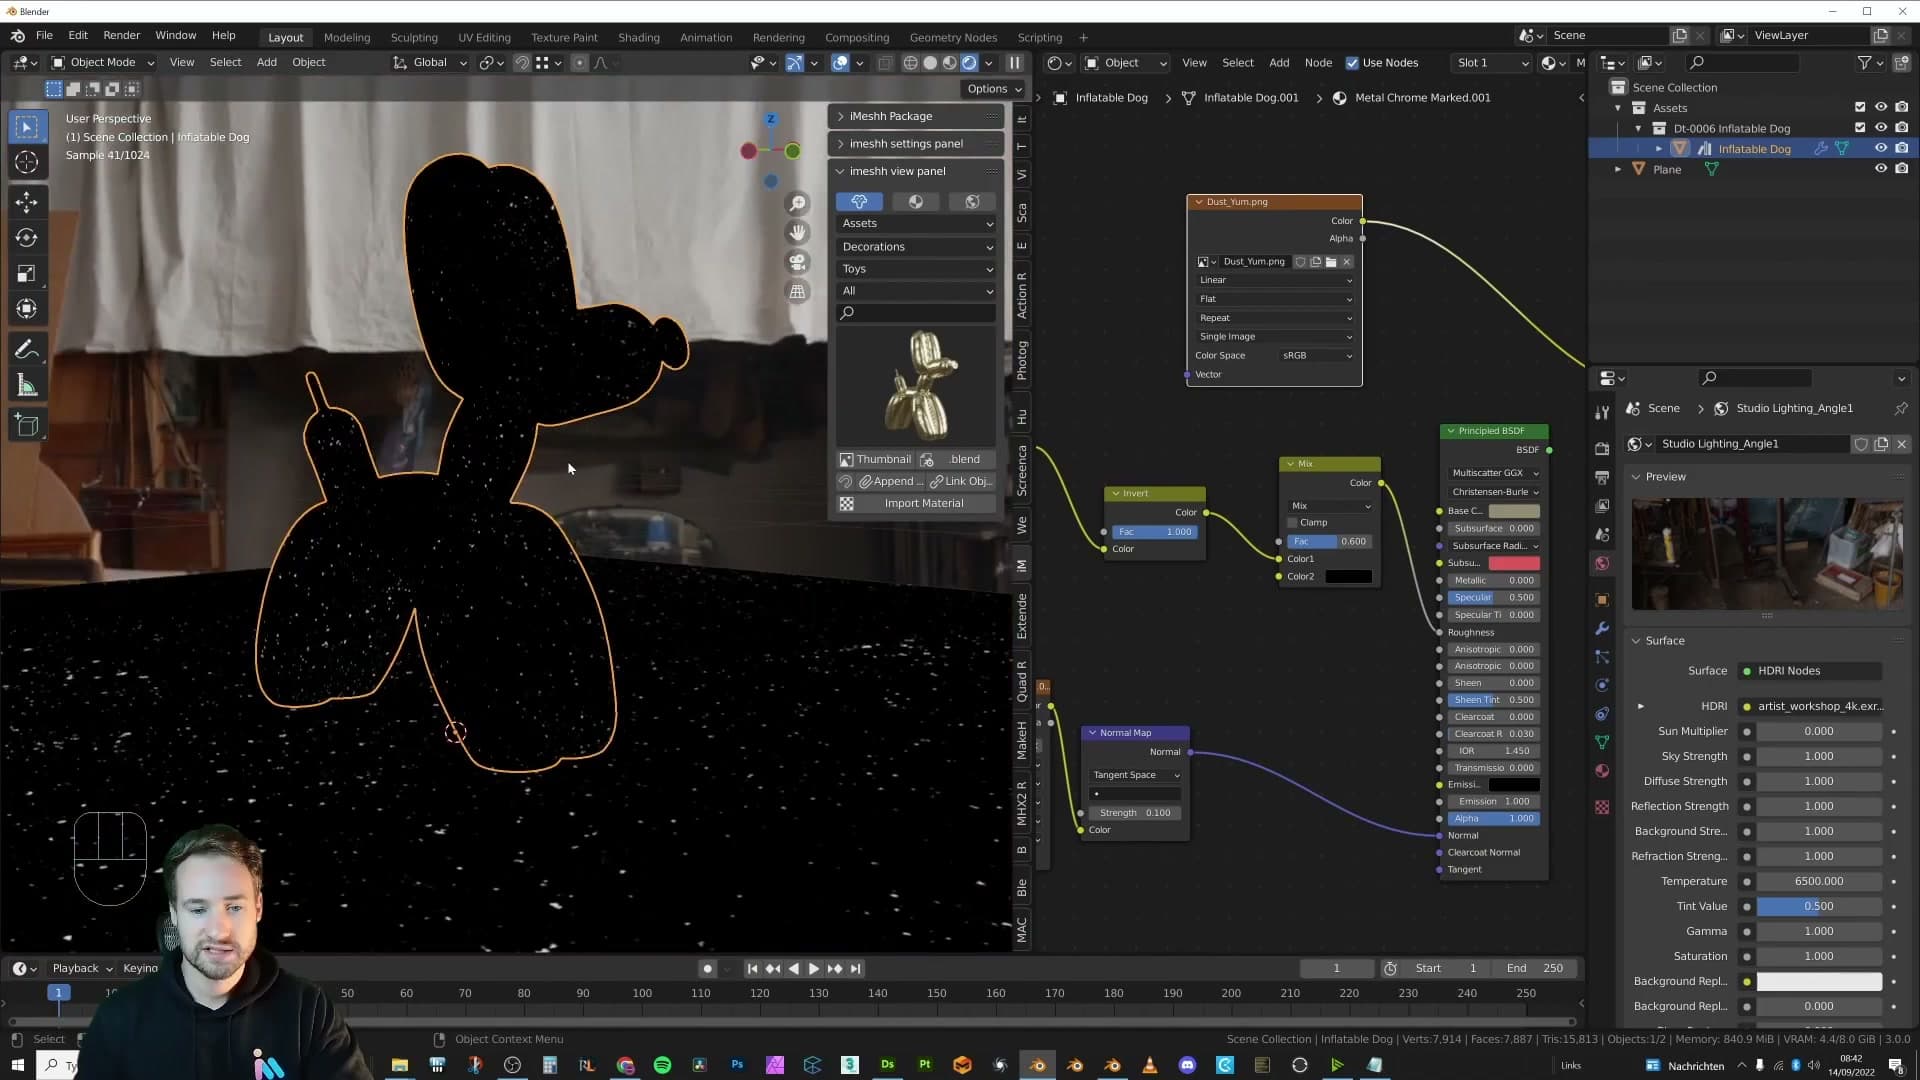
Building the top-surface mask from geometry and viewing angle
Use the Geometry node's Normal output with Separate RGB to find which faces point up, then bias the result with a Layer Weight node so dust only reveals itself at grazing camera angles.
Enabling Node Wrangler and adding the Geometry node
Before adding any nodes, enable Node Wrangler. Go to Edit → Preferences → Add-ons, search for Node Wrangler and tick the box. It is the add-on that powers the search shortcut and viewport preview tricks you will lean on for the rest of this build.
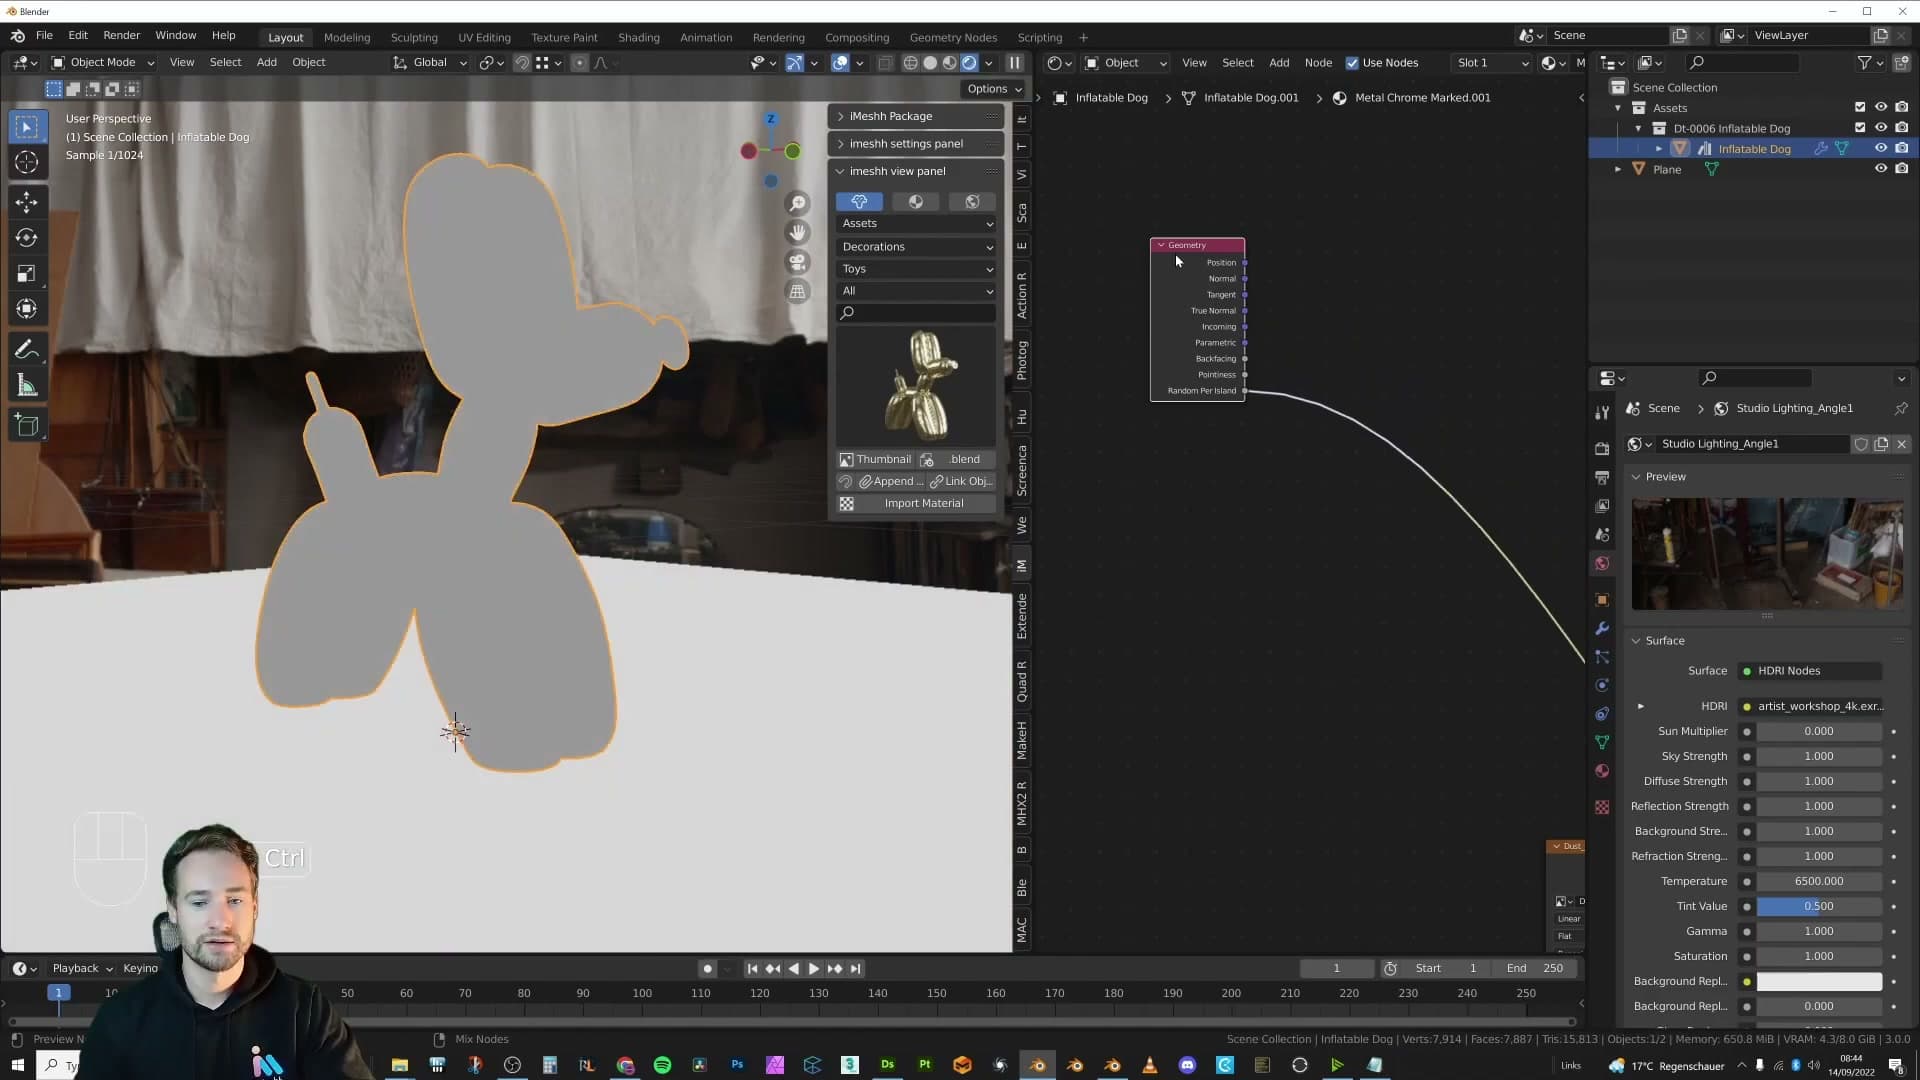
With Node Wrangler on, press Shift+A then S to open the node search, type geometry, and drop in the Geometry node. To work out which of its many outputs you actually want, hold Ctrl+Shift and click the node. Blender cycles through each output in turn, wiring it temporarily to a viewer so you can see exactly what each one looks like on your object. The output you want here is Normal.
Isolating top-facing surfaces with Separate RGB on the Normal
The Normal output bundles all three surface axes into a single colour vector, so on its own it cannot tell Blender which direction counts as “up”. You need to split those axes apart. Press Shift+A then S, search for Separate RGB, and plug the Normal into its input.
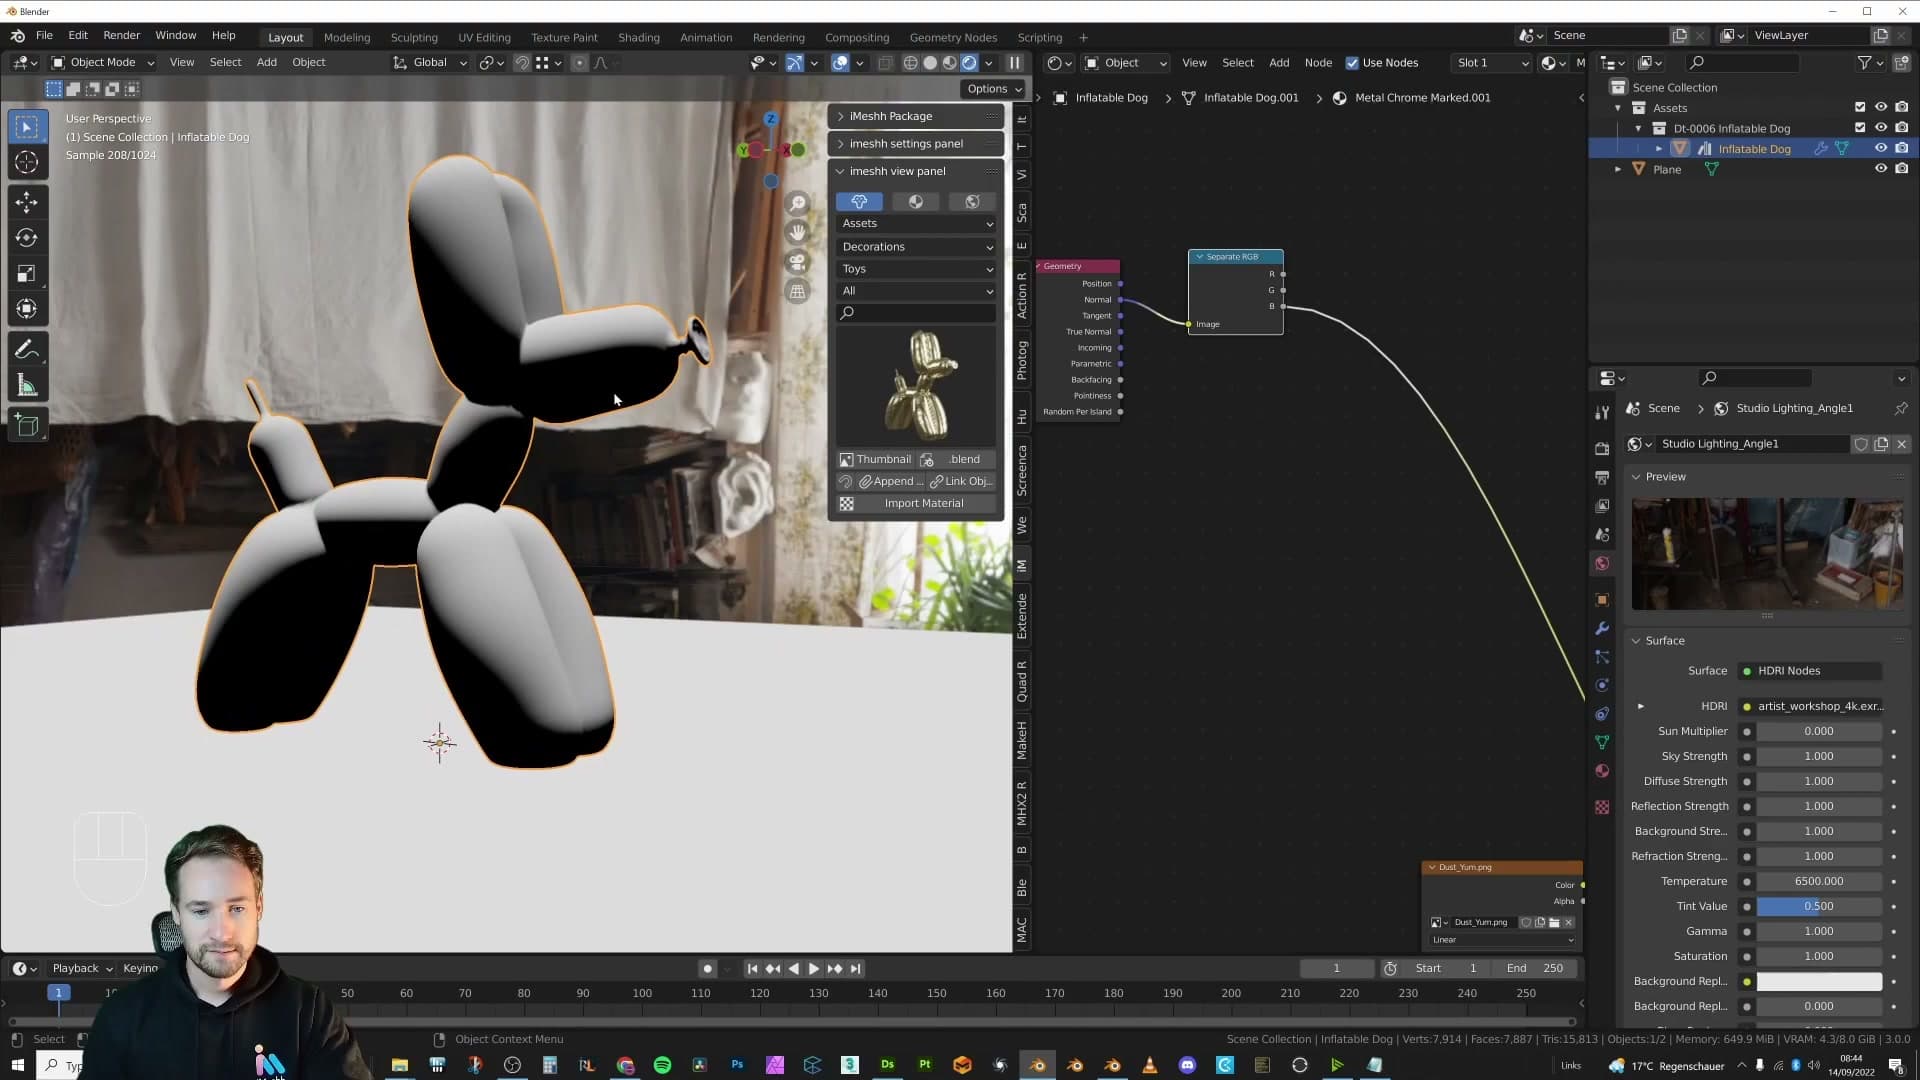
Now Ctrl+Shift+click through each of the three outputs to compare them. Red maps to the X axis, Green to Y and Blue to Z (the top surface). With the Blue output connected the underside of every face goes black and the upward-facing side goes white, which is exactly the mask shape you need so dust never clings to vertical or downward-facing geometry.
Layer Weight and a Multiply MixRGB for grazing angles
Real dust reads most convincingly at glancing angles. A dusty tabletop looks almost clean straight-on, but the moment you drop down level with it the surface goes pale. To recreate that, press Shift+A then S and add a Layer Weight node. Its Facing output produces white where surfaces glance away from the camera and black where they point directly at it. Lower the Blend slider for more white, raise it for more black; set it to 0.34.
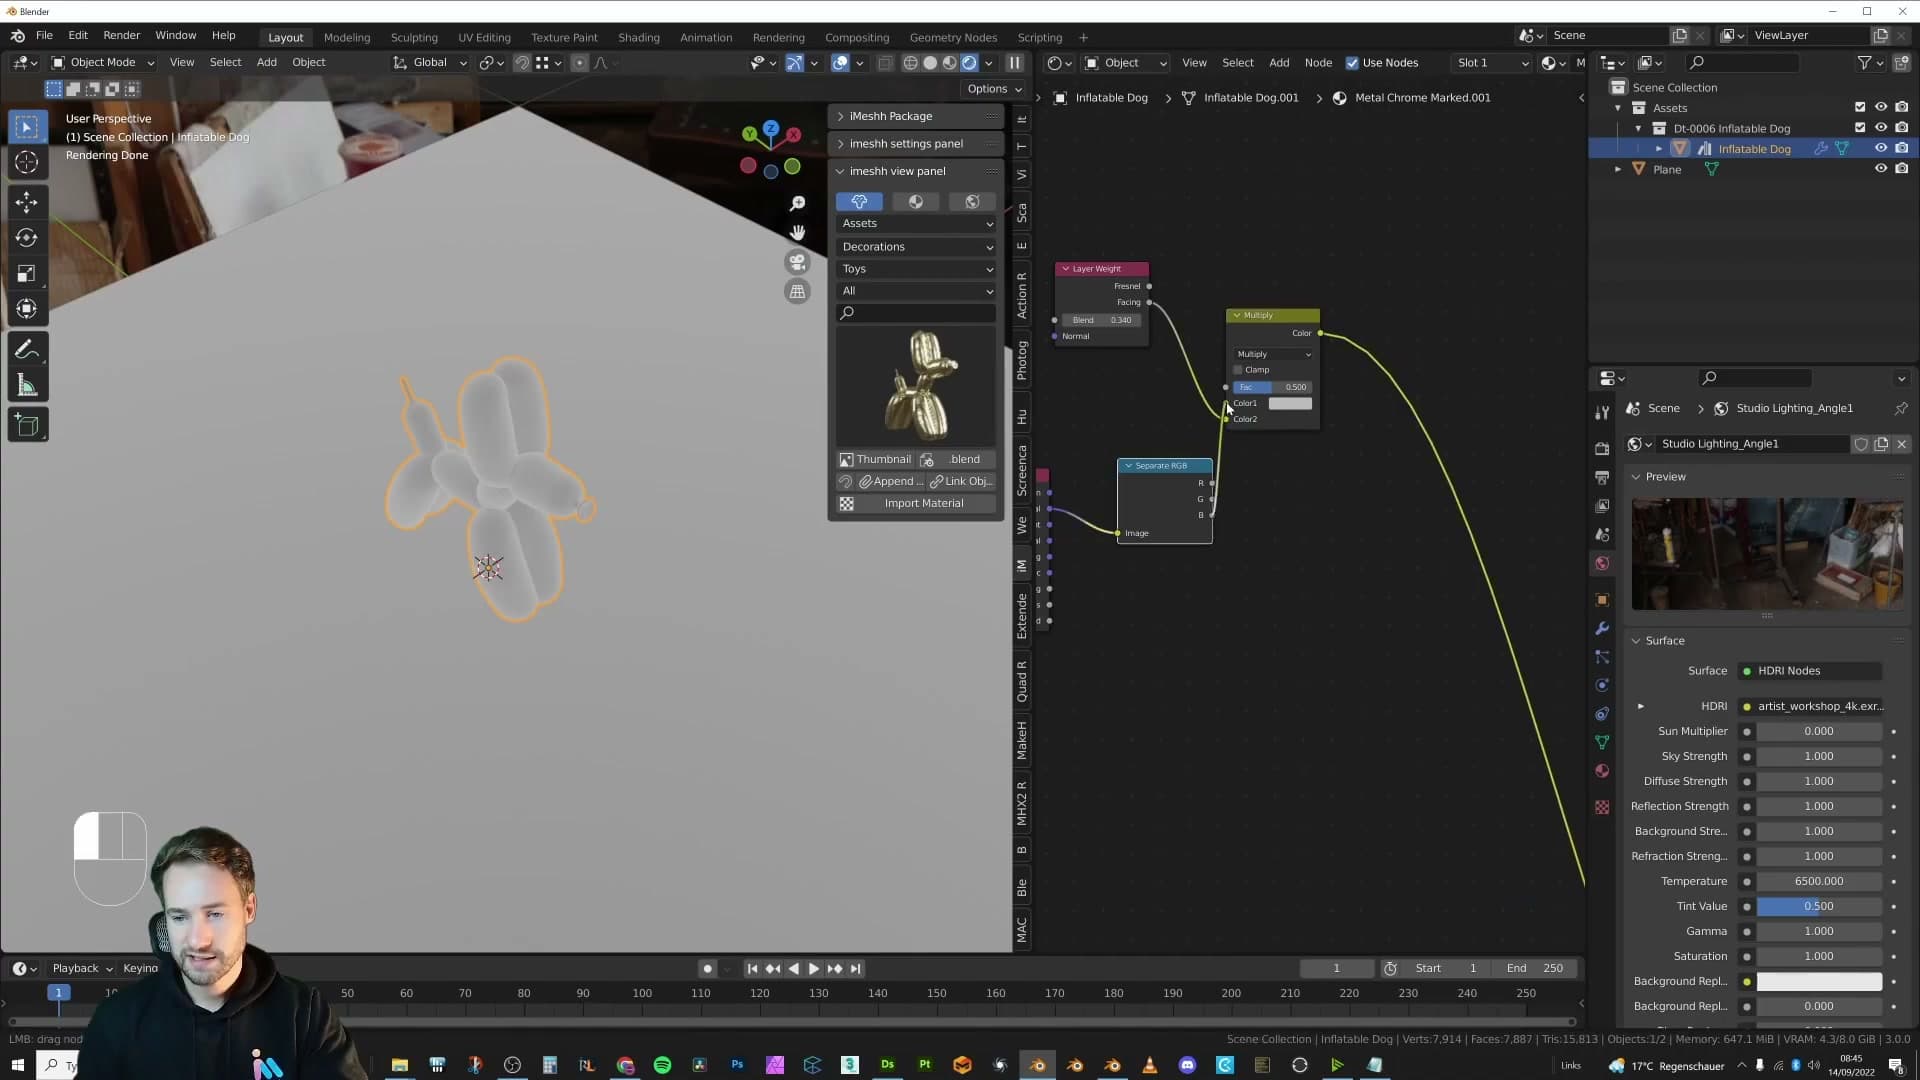
Next you need to combine the top-surface mask with the Layer Weight result so dust only appears where both conditions agree. Shift+A, S, search for MixRGB, and switch its blend mode to Multiply. Feed the Separate RGB Blue output and the Layer Weight Facing output into its two colour inputs, then set the Fac to 0.928.
The mask now does two things at once. Top-facing surfaces stay bright, undersides drop to black, and the planes that face squarely into the camera dim down so they will end up reading as cleaner than the ones glancing away. Tilt the camera up and down and you will watch the same plane swing between bright and dark. That's exactly the way real dust catches your eye when you change viewing angle.
Adding the dust texture and combining masks
Drag in a grayscale dust texture, drive its UVs with a Mapping node, then crush the blacks with a Color Ramp. Multiply the result against the top-surface mask so the dust only appears where the texture says it should: on the top of objects.
Importing the dust texture with Ctrl+T mapping and a Color Ramp
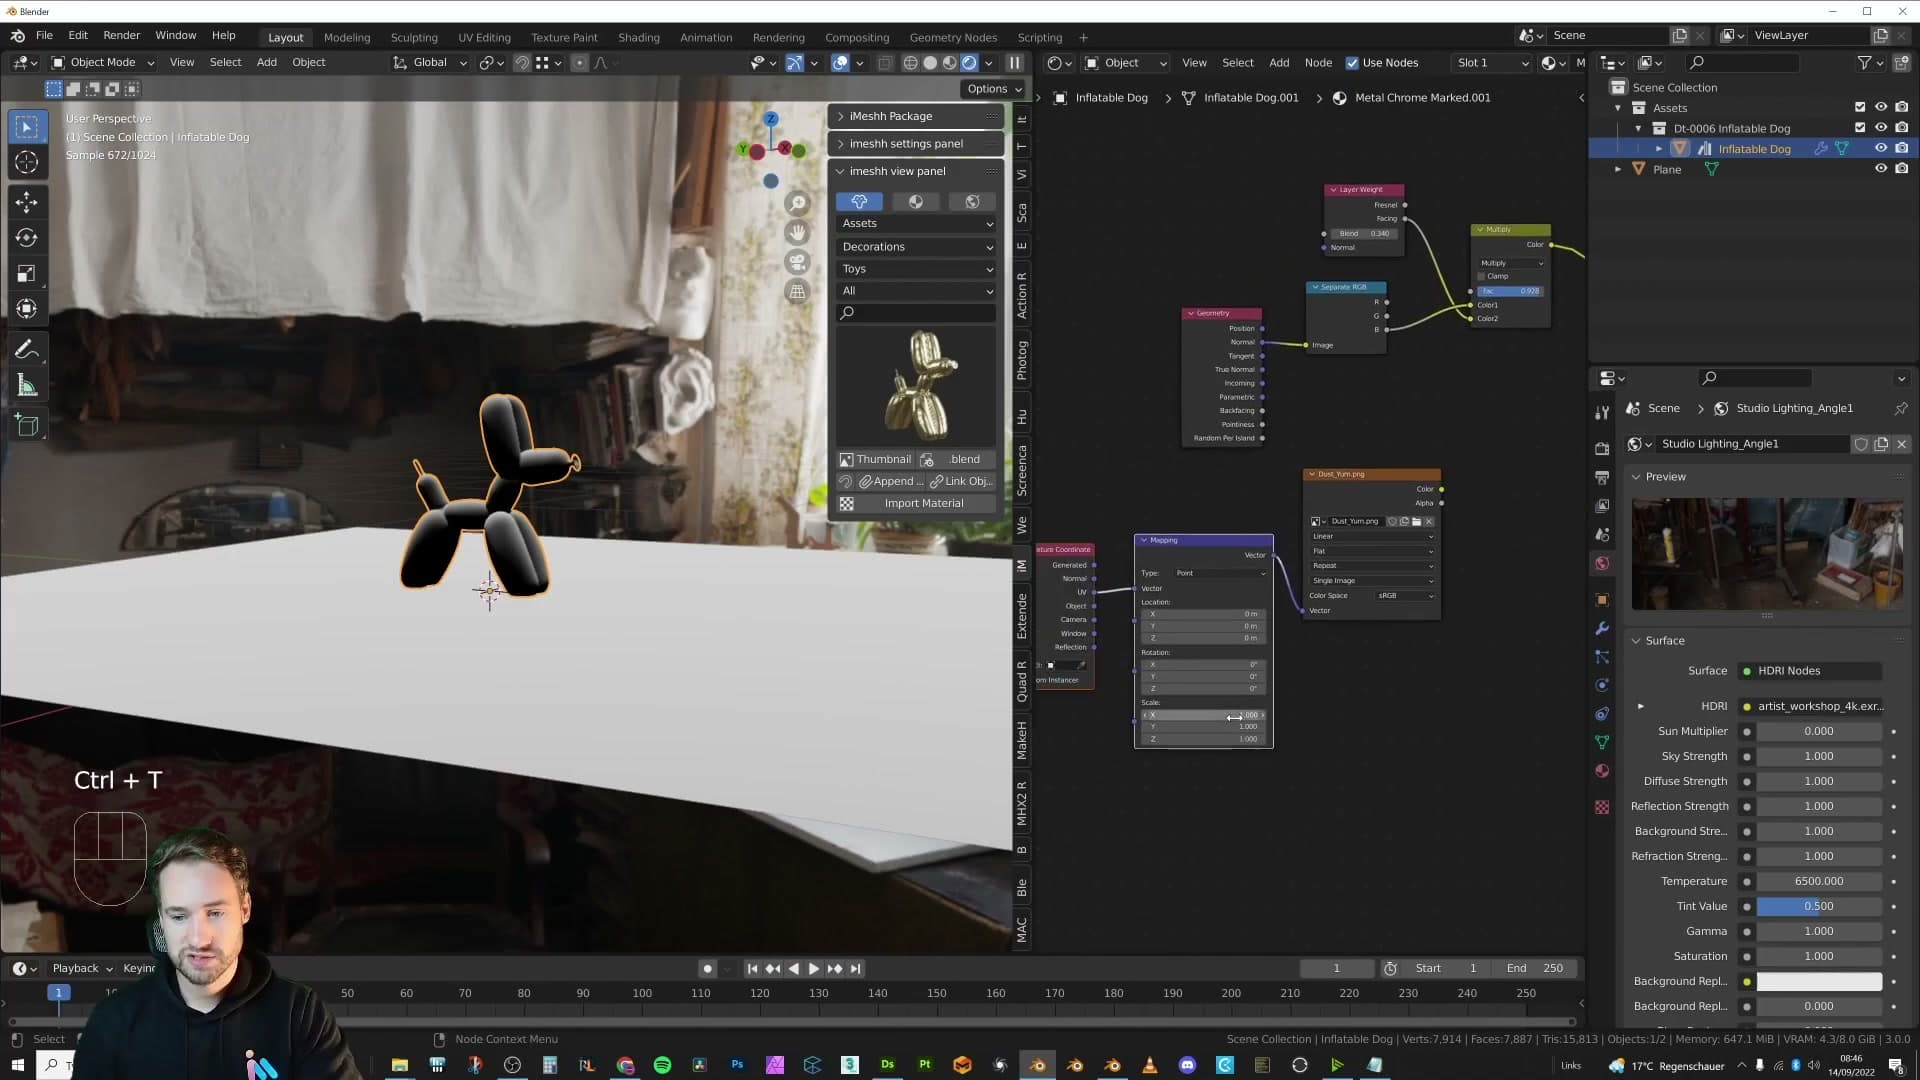
Drag your grayscale dust texture into the shader editor as an Image Texture node. With the new node still selected, press Ctrl+T to fire Node Wrangler's auto-mapping shortcut. It spawns a Texture Coordinate and Mapping node pair already wired into the image. The Mapping node is the important half: it gives you a Scale socket you can dial later, so the dust pattern can be rescaled per object without re-importing the texture.
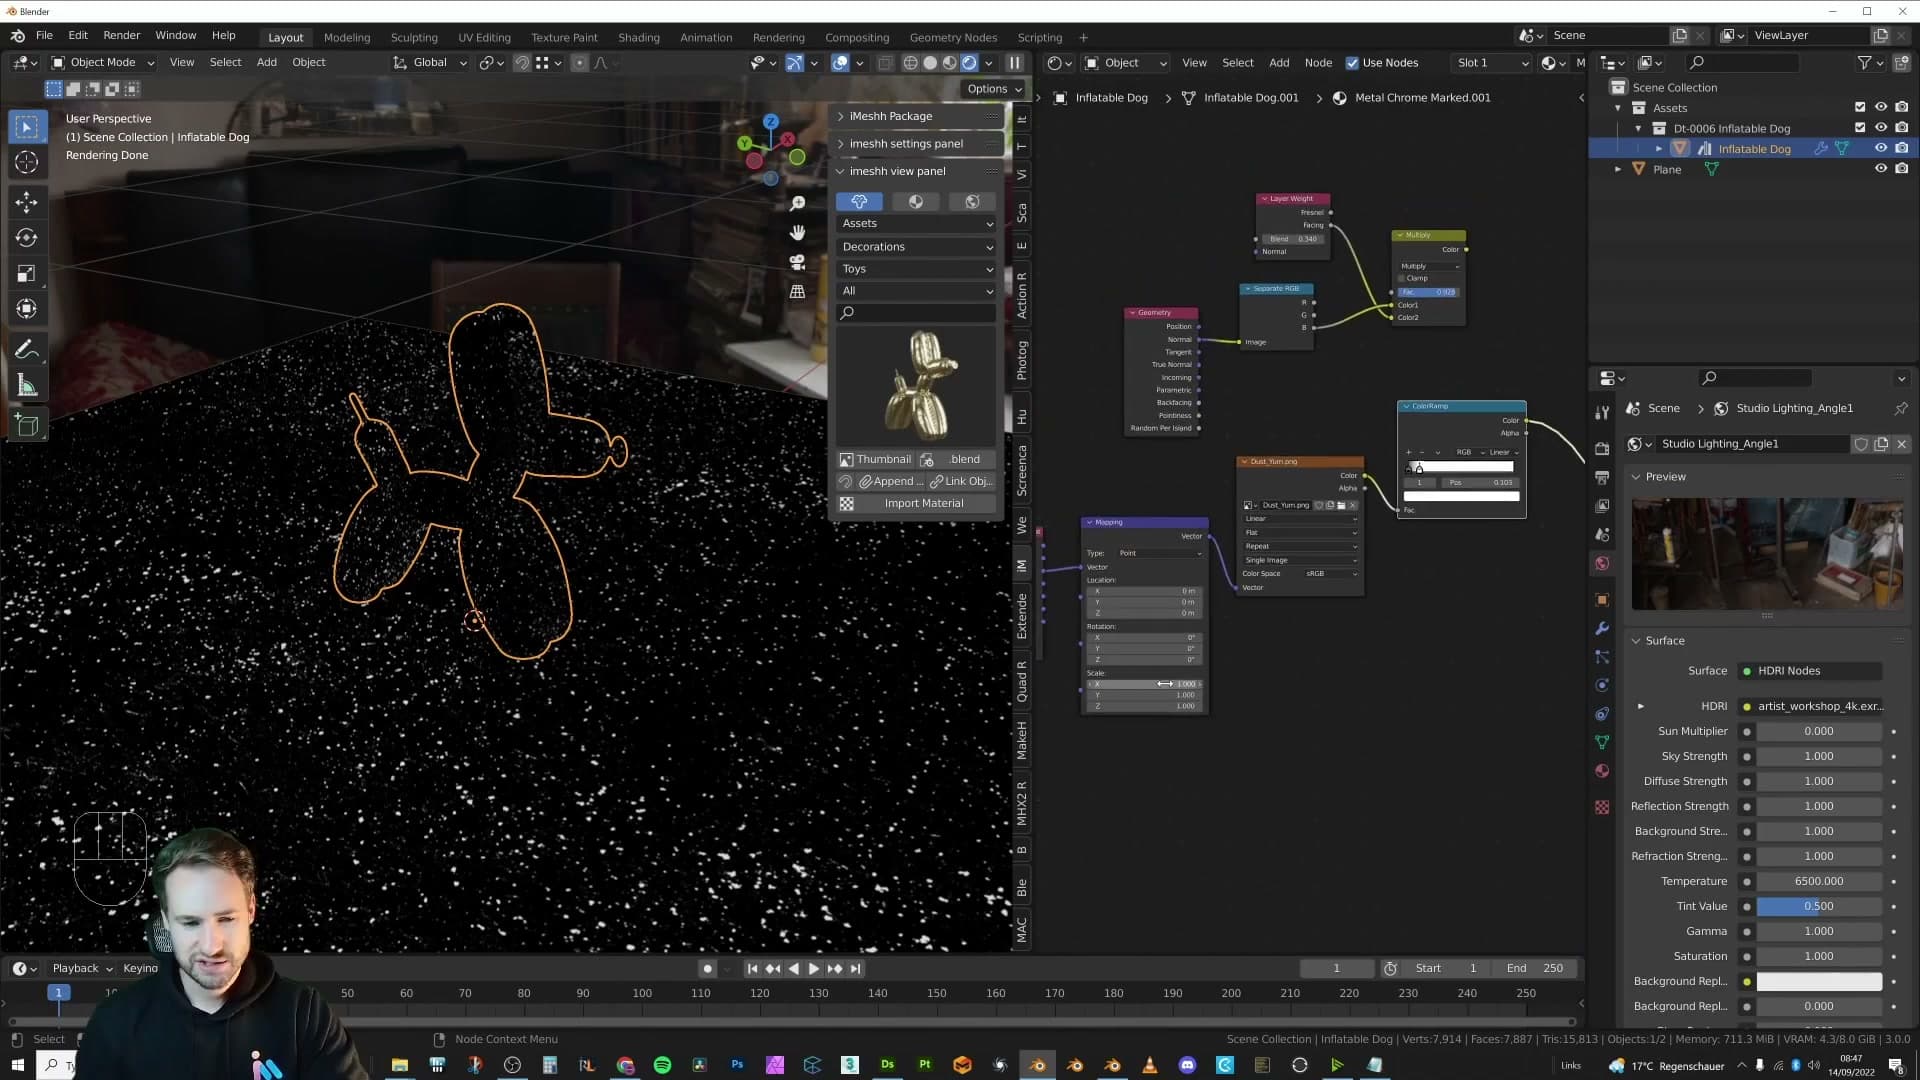
Drop a Color Ramp after the Image Texture, then hold Ctrl+Shift and click the Color Ramp. That uses Node Wrangler's preview link to route the current node's output straight to the Material Output, so you can watch the mask resolve live in the viewport while you tune it.
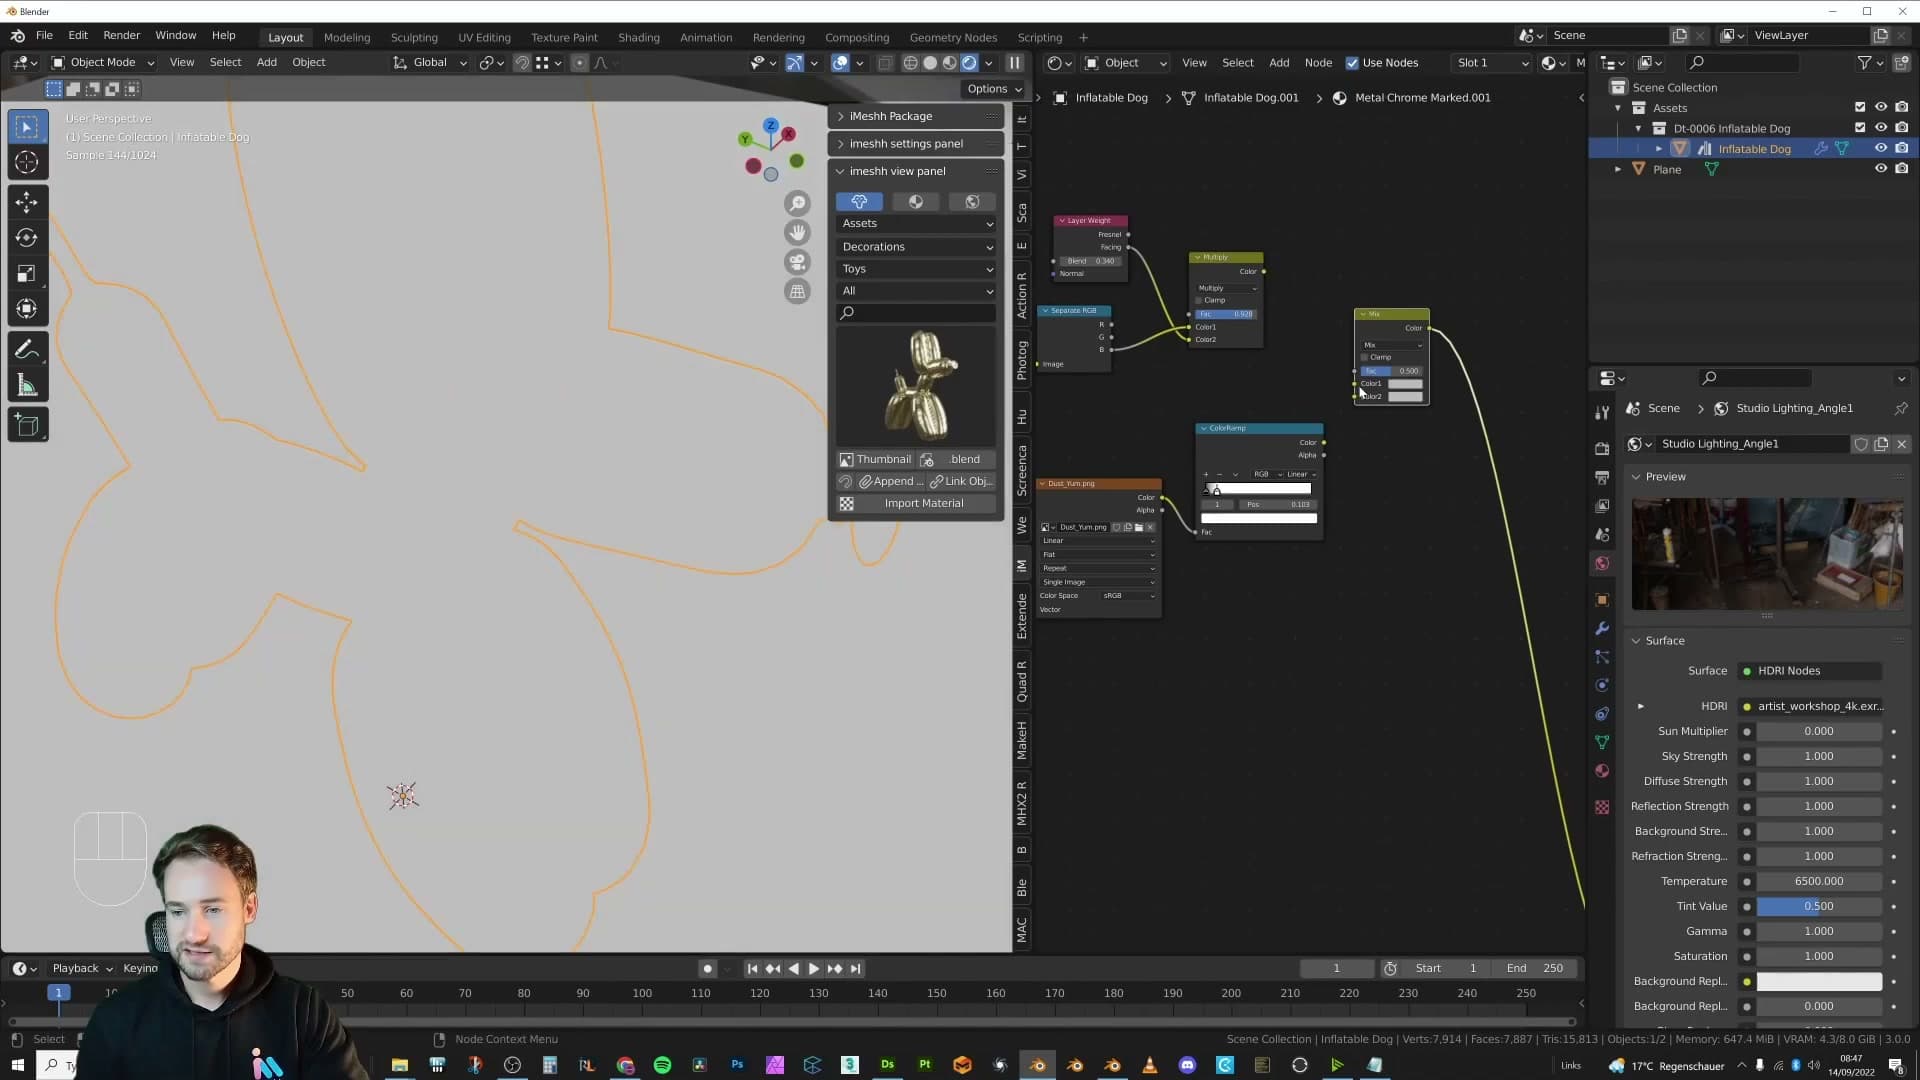
Slide the white stop on the Color Ramp to the left to crush the midtones out. The more aggressively you push it, the harder the cut between "dust" and "no dust," and the more graphic the pattern reads. If the texture looks too heavy at this point (too much dust blanketing the object), back the value off until you have a clean black-and-white pattern with clear dust shapes rather than a uniform grey overlay.
Combining the texture mask with the top-surface mask
You now have two black-and-white masks living in the node tree: the top-surface mask built earlier from the Geometry normal and Layer Weight combo, and the new mask coming out of the dust texture's Color Ramp. Dust should only appear where both agree: upward-facing geometry AND a "dust on" pixel from the texture.
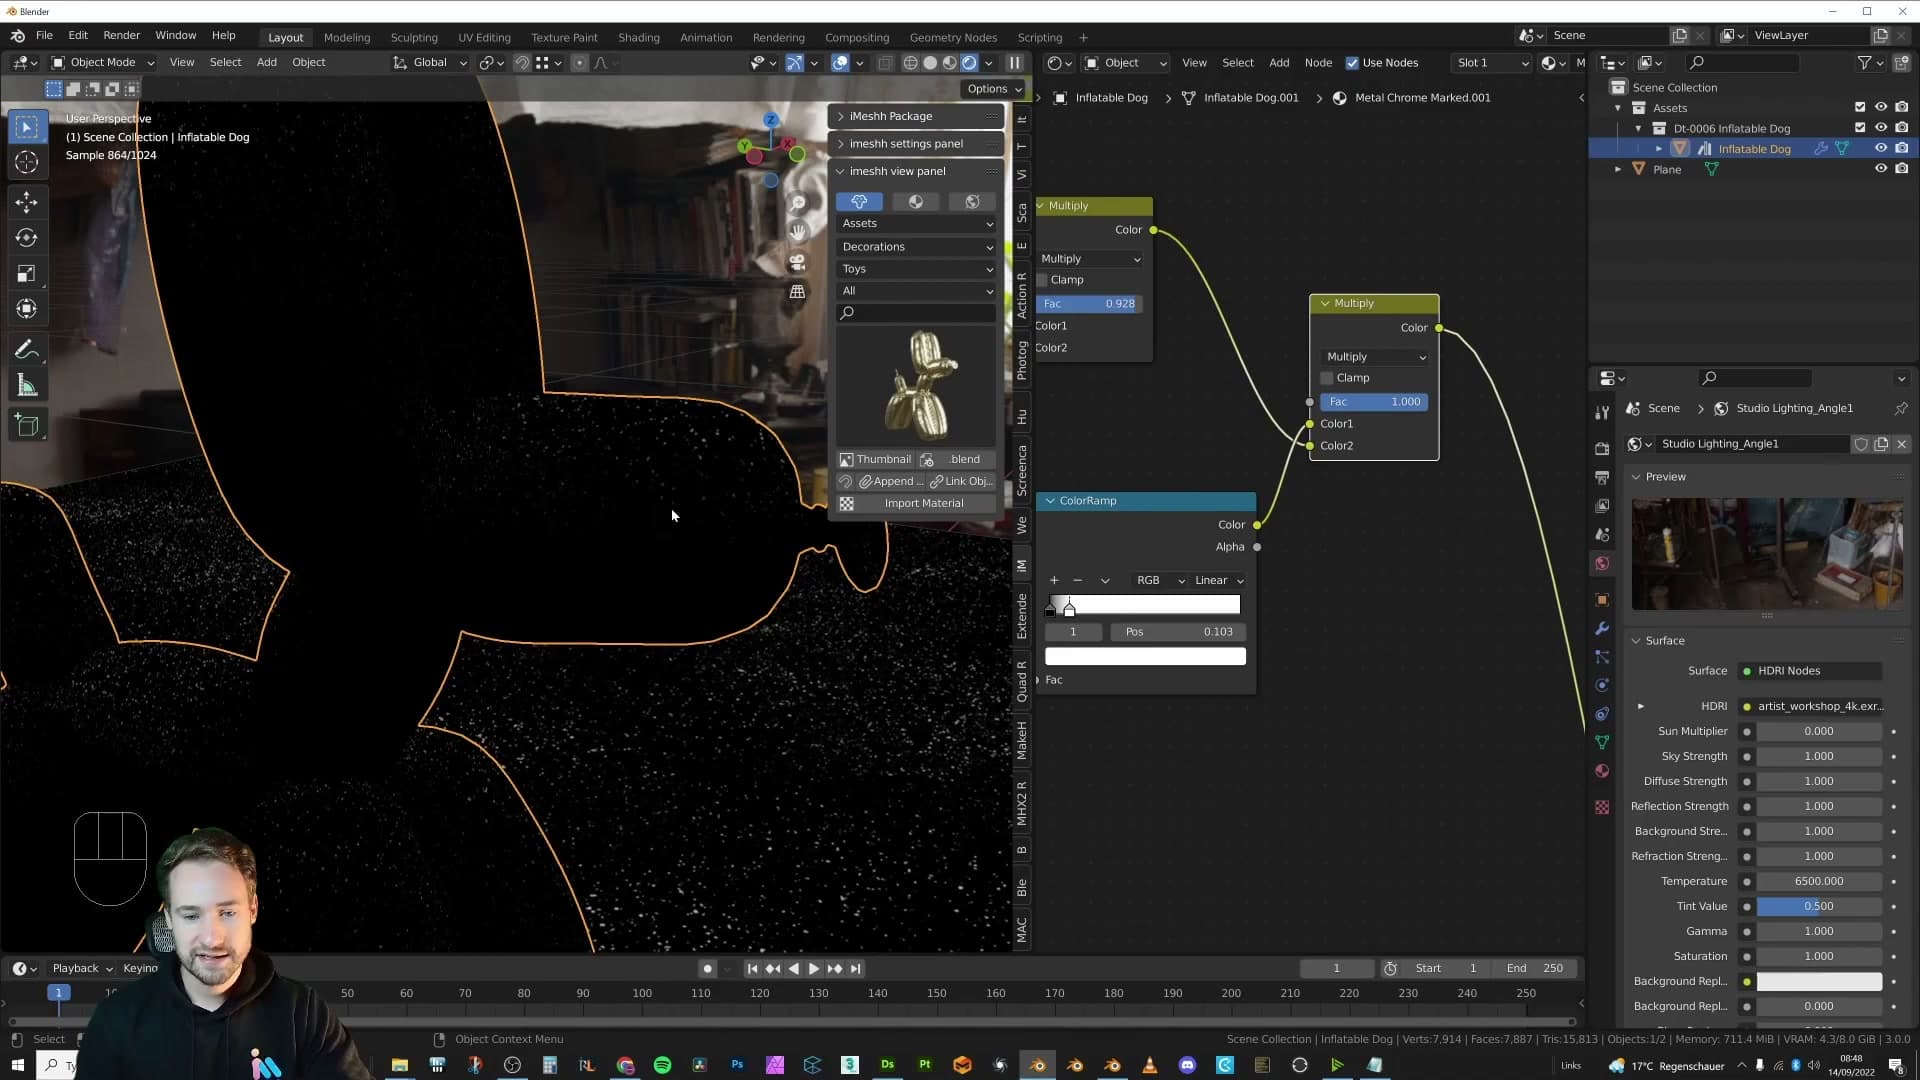
Add another MixRGB node (Shift+A then S, then search for Mix RGB) and set the blend type to Multiply. Plug the Color Ramp's output into one of the colour inputs and the existing top-surface mask into the other, then slide the Fac up so the multiply is fully active.
The two masks now intersect. Black areas from the dust texture cancel out any white from the top mask, so white only survives where both inputs were white. Dust patches follow the texture's variation but stay strictly on the upward-facing parts of the geometry. No more blanket coverage.
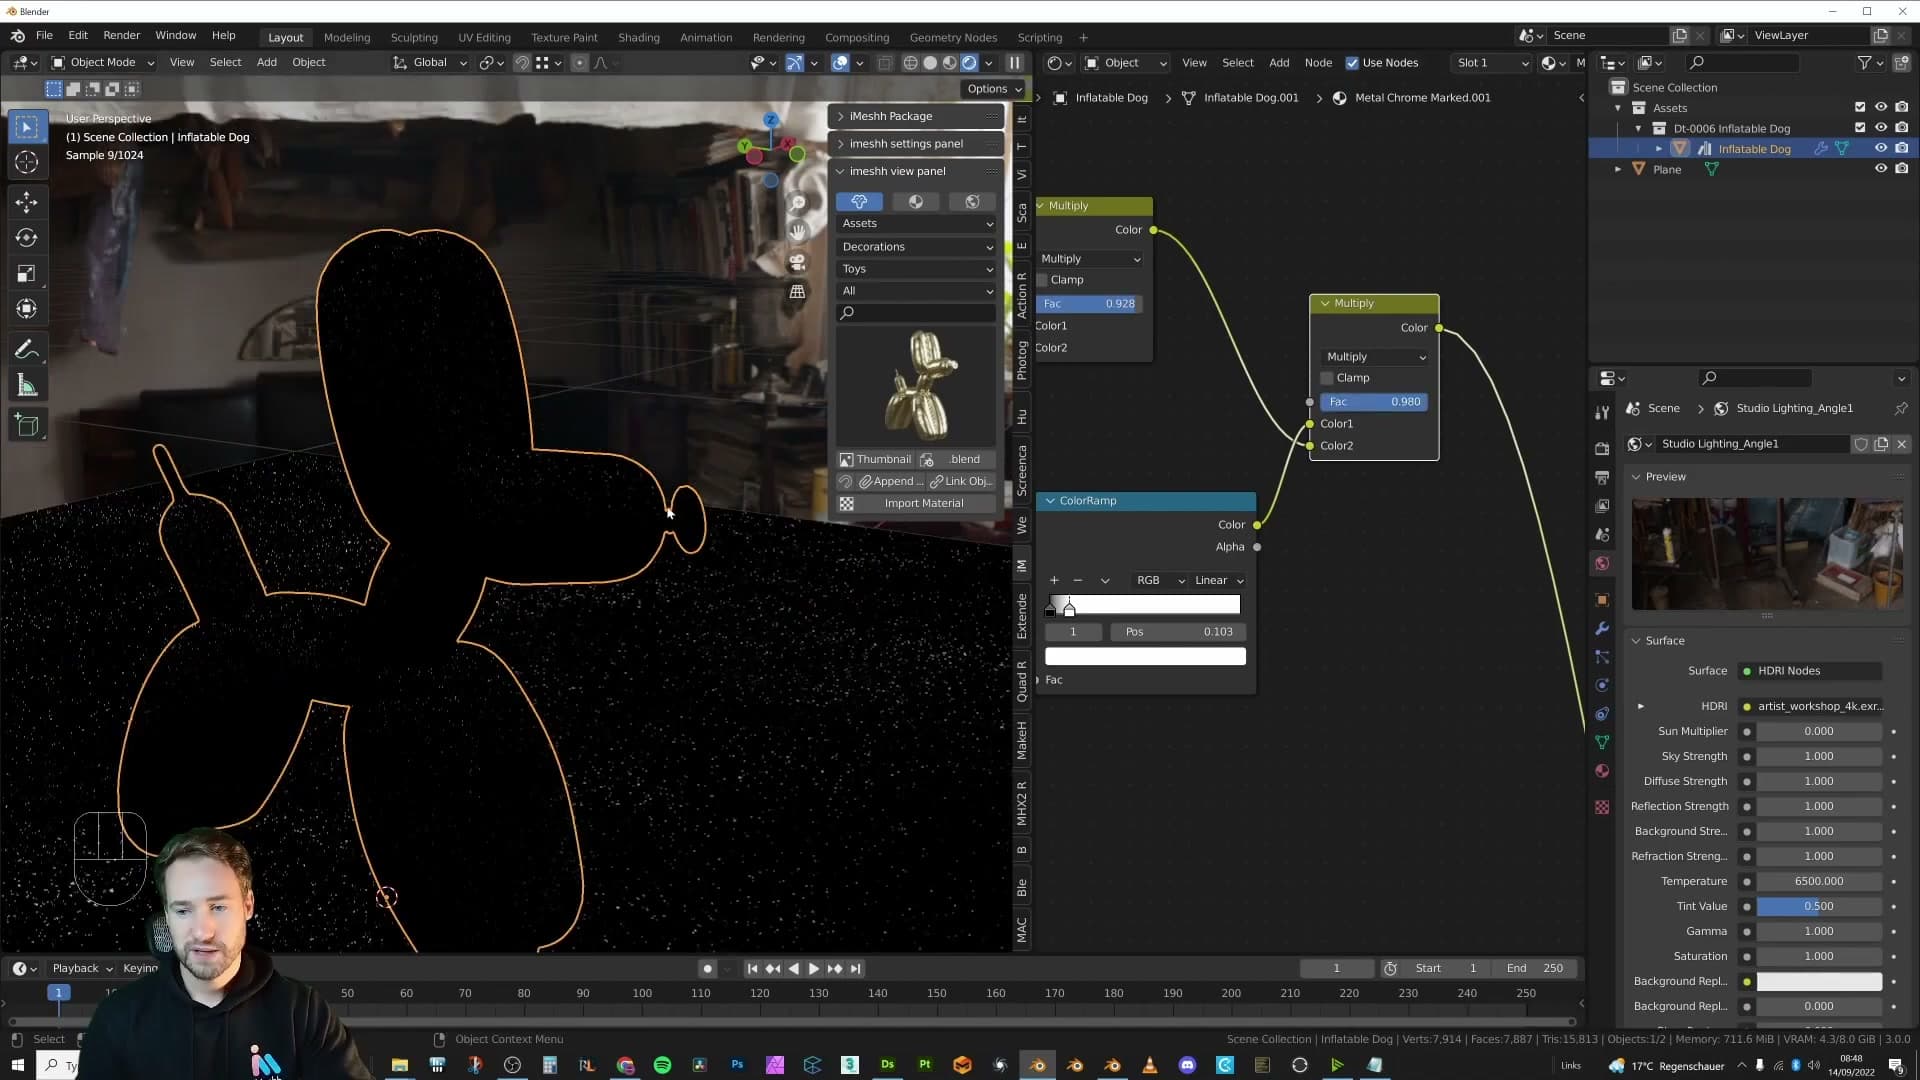
If you want a heavier, more neglected look with dust creeping onto the undersides too, drop the Multiply Fac down to around 0.98. Pulling it just below 1 weakens the intersection enough to let faint dust bleed across the rest of the object, which sells a really dusty surface rather than a freshly-cleaned one.
Building the dust material and blending it in
Boost the mask with a Math Multiply node, build a fully diffuse Principled BSDF for the dust itself, and use a Mix Shader to layer the dust over the base material, driven by the mask you just built.
Math Multiply node to control dust strength
The Math node from the previous module is already set to Multiply, and its value socket on the right becomes the dust-strength dial for the entire shader. Crank it up and the mask is exaggerated; pull it down and the mask barely contributes anything.
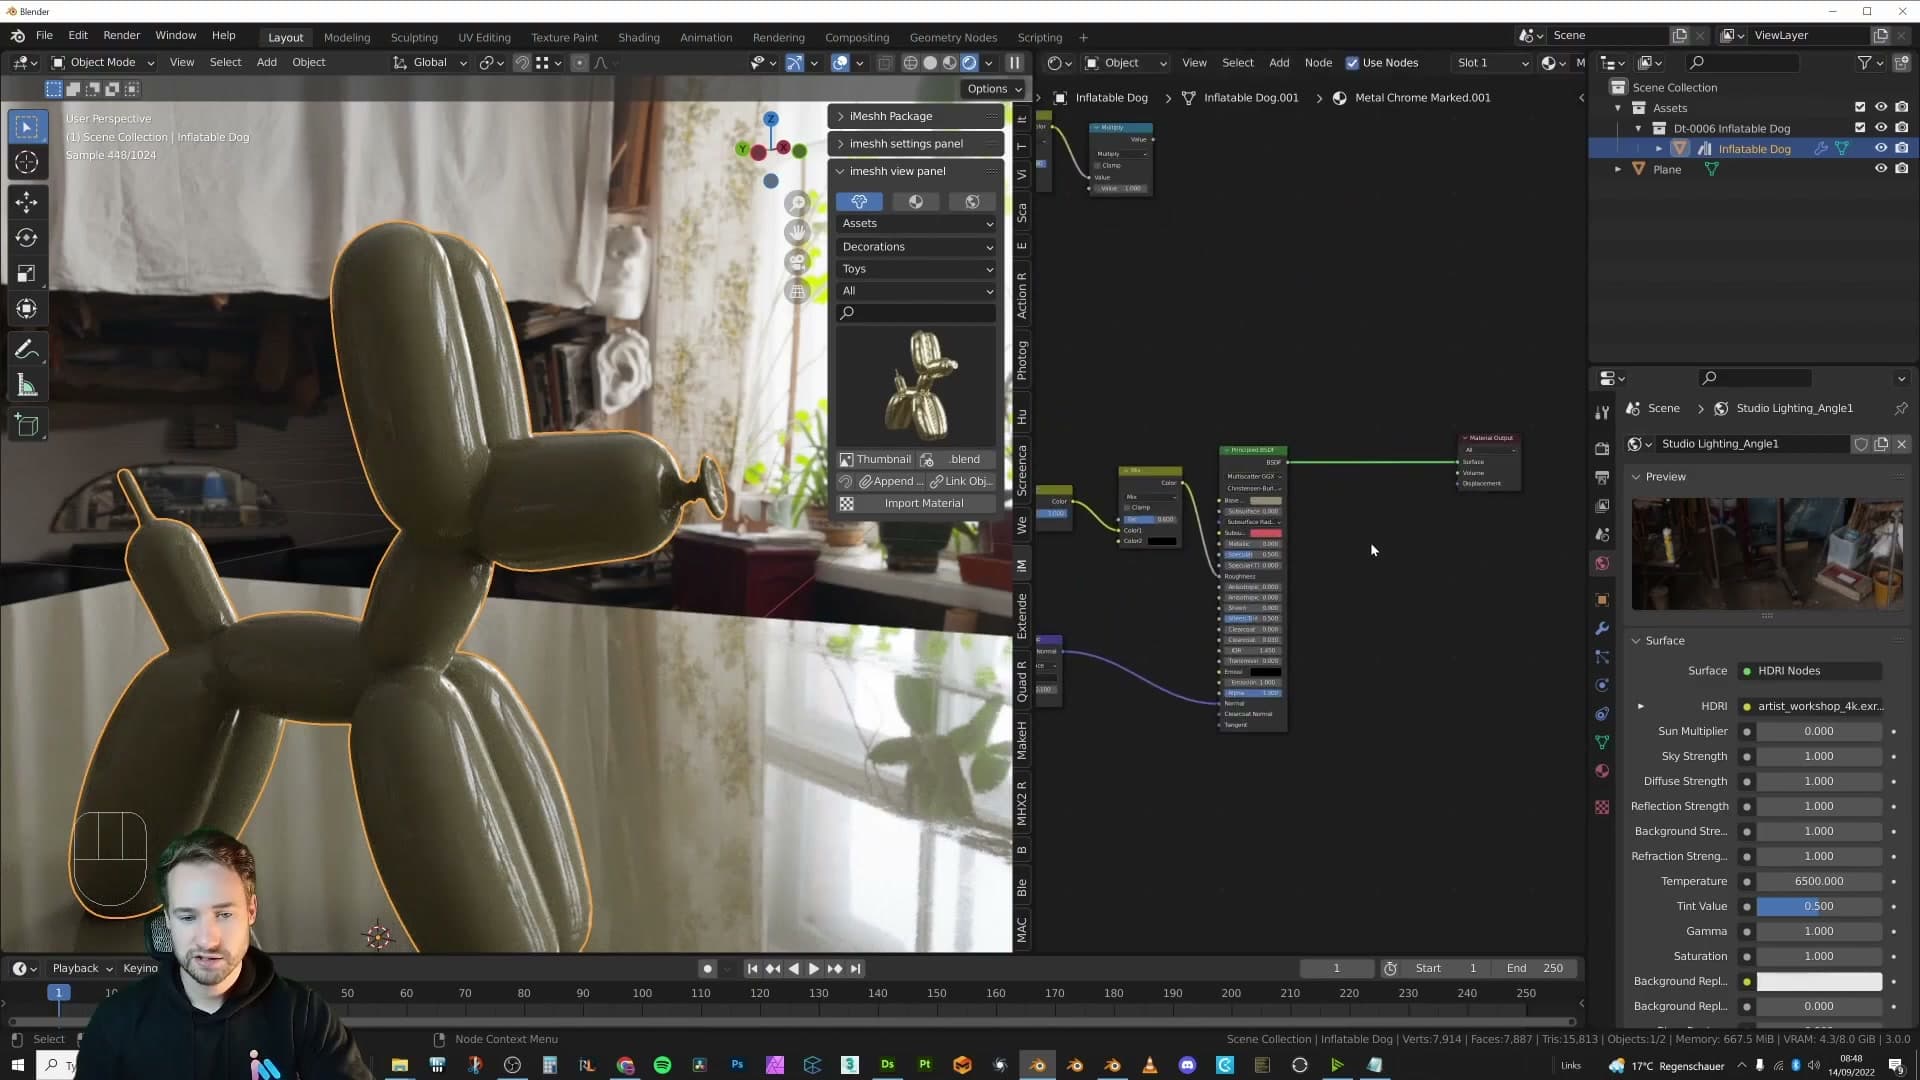
Try the two extremes first to feel the range. With the value at 50 the dust is unmistakable, blanketing every top-facing surface the mask covers. Drop it to 1 and the dust all but disappears. The mask is still wired in, but it's barely registering.
For a mid-tone object like the one in this scene, 10 is a sensible starting point. You get clear dust pooling on the upward-facing detail without the surface looking abandoned. Lighter objects get a bit harder to read at the same strength, so if the dust is getting lost against pale paint or chrome, push the multiplier higher until it shows up again.
A non-reflective Principled BSDF for the dust itself
With the mask boosted, you now need a material for it to reveal. Press Shift+A then S to open the Node Wrangler search, type principled, and drop a second Principled BSDF into the graph next to your existing material.
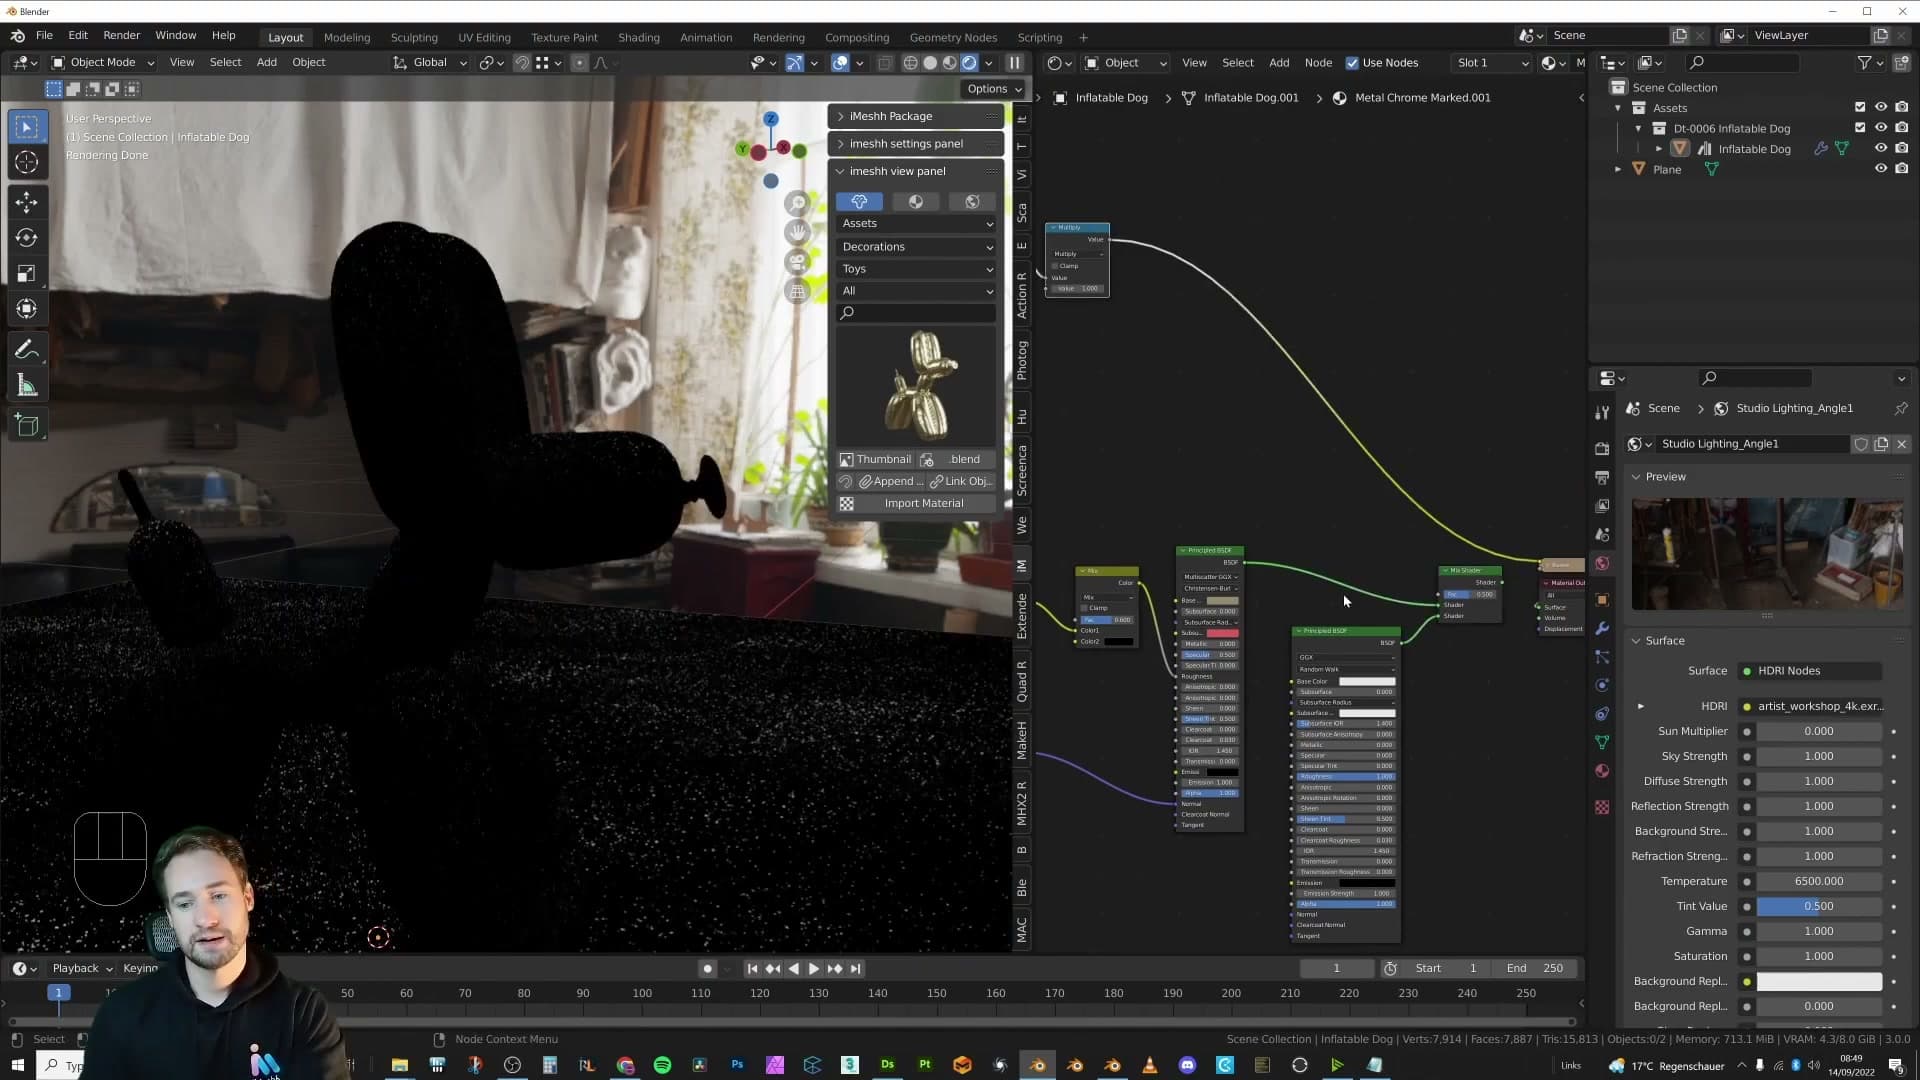
Real dust isn't reflective. It's a fine particulate that scatters light evenly in every direction. To capture that, set Specular to 0 and Roughness to 1. The BSDF is now fully diffuse with no glossy lobe at all, which is exactly how a thin layer of dust should read. Leave the colour on its default white; that's the soft, neutral particulate you're after.
Mix Shader with the mask as the blend factor
The last piece is a Mix Shader that swaps between the base material and the dust BSDF depending on what the mask says. Press Shift+A then S again, search for mix shader, and drop it in front of the Material Output.
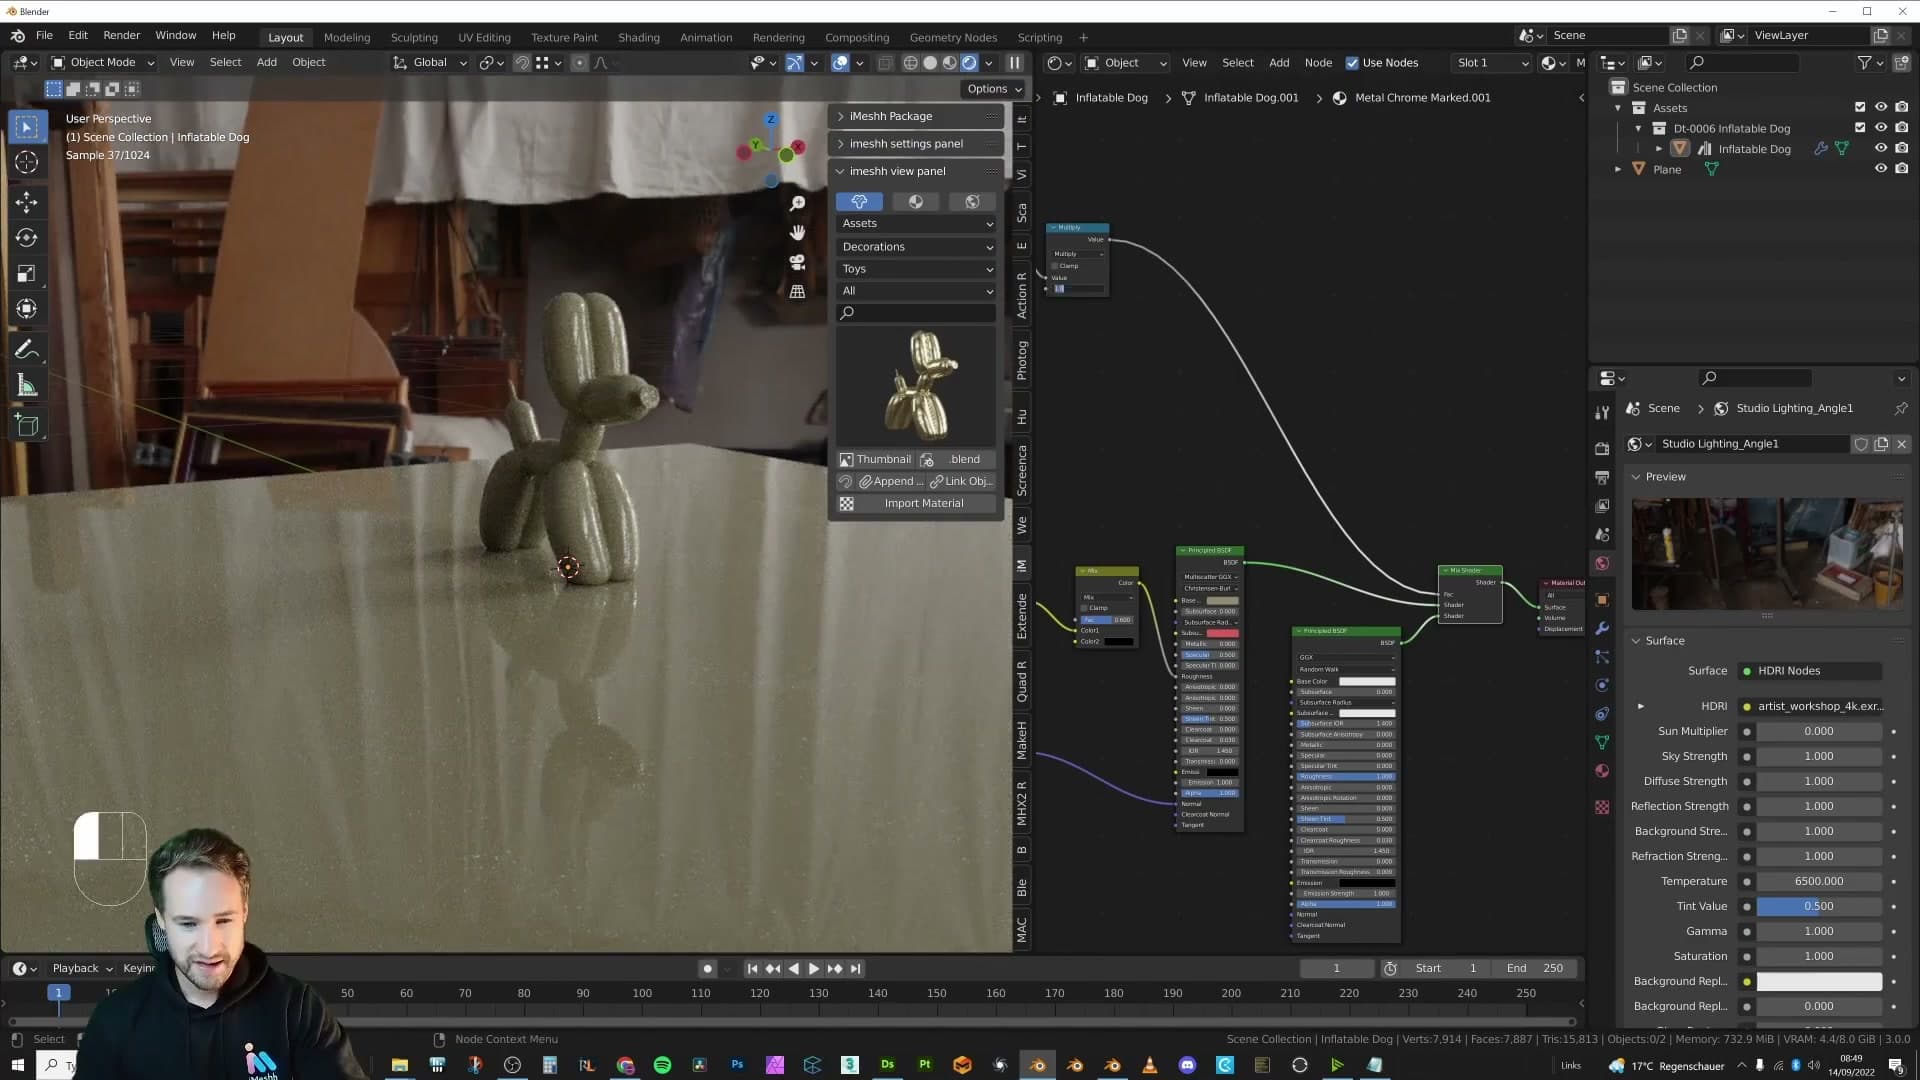
Wire the original base material into the top shader input and the new diffuse dust BSDF into the bottom one. Then plug the mask (the output of all the work in the previous module, run through the Math Multiply) into the Factor socket. The Mix Shader now treats the mask as a per-pixel blend: where it's black you see the clean base material, and where it's white you see dust.
Tumble around the viewport and the behaviour you built the mask for finally kicks in. On the ground viewed at a shallow grazing angle, the dust reads clearly. Look straight down at a top-facing surface and the dust falls away, because Layer Weight has pulled the mask towards zero wherever the camera sits perpendicular to the surface. That's the realism cue you've been chasing: dust where the eye catches it at a glance, not painted uniformly across every horizontal face.
Wrapping the dust shader into a reusable Node Group
Select the dust-specific nodes and Ctrl+G them into a Node Group. Expose Dust Amount, Texture Scale (driven through a Combine XYZ for the Vector Scale input) and Dust Z Value so the whole shader can be appended into any scene and dialled per object.
Selecting the dust nodes and grouping with Ctrl+G
The node tree works, but in its current state it is a sprawling mess that you do not want to rebuild every time you start a new scene. The fix is to wrap the dust-specific section into a Node Group so the whole shader collapses down to a single tidy node with a handful of sliders on the front.
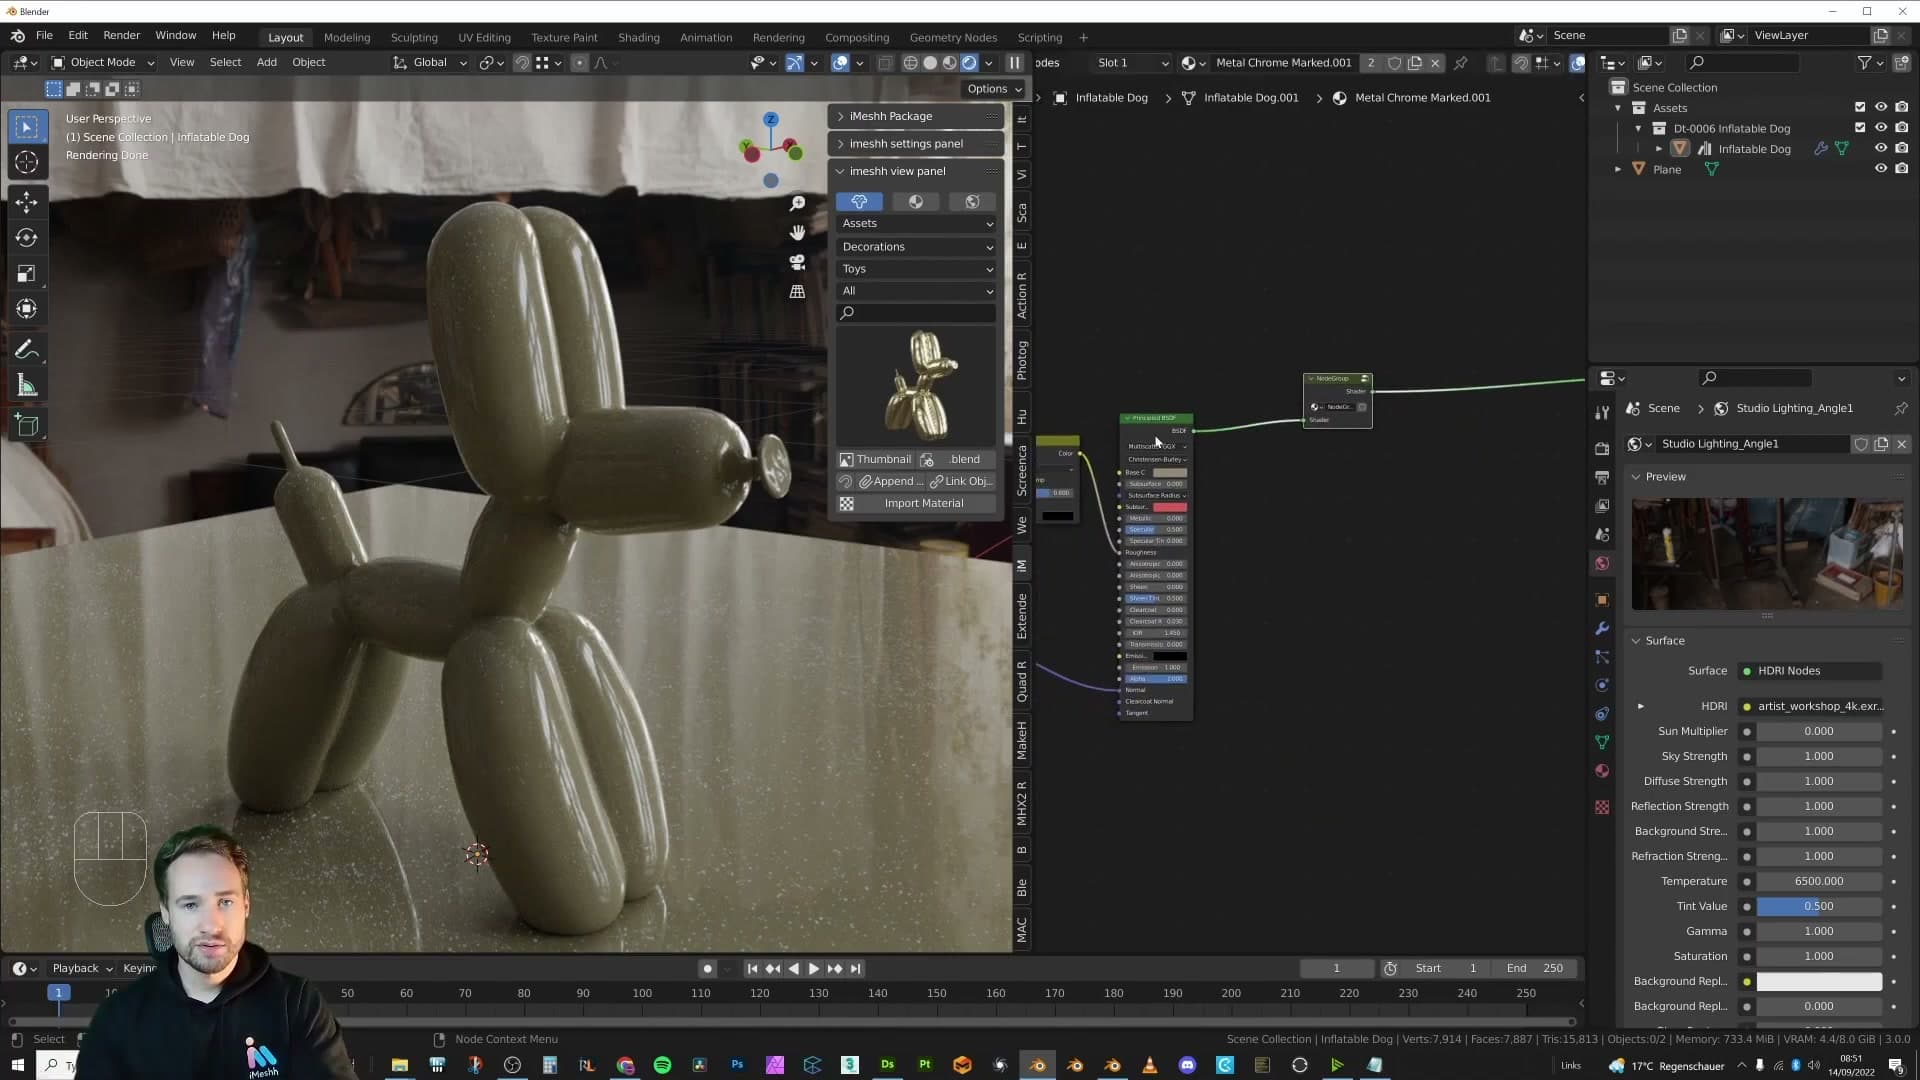
Box-select every node that belongs to the dust setup: the geometry and mask nodes on one side, the texture, color ramp and dust BSDF on the other. Leave the base material and the final Mix Shader / Material Output untouched, since those are not part of the dust group.
With the dust nodes selected, press Ctrl+G. Blender drops you inside the new group and you can see the single input on the left and single output on the right. Step back out with Tab and the dust shader is now one neat node. When you build a new material, you simply plug the base shader into the group's input and the dust appears on top. You cannot yet adjust anything from outside, which is what the next few steps fix.
Exposing the Dust Amount input
The first slider you want on the outside of the group is the overall dust amount: the multiply value that controls how strong the mask reads against the base material.
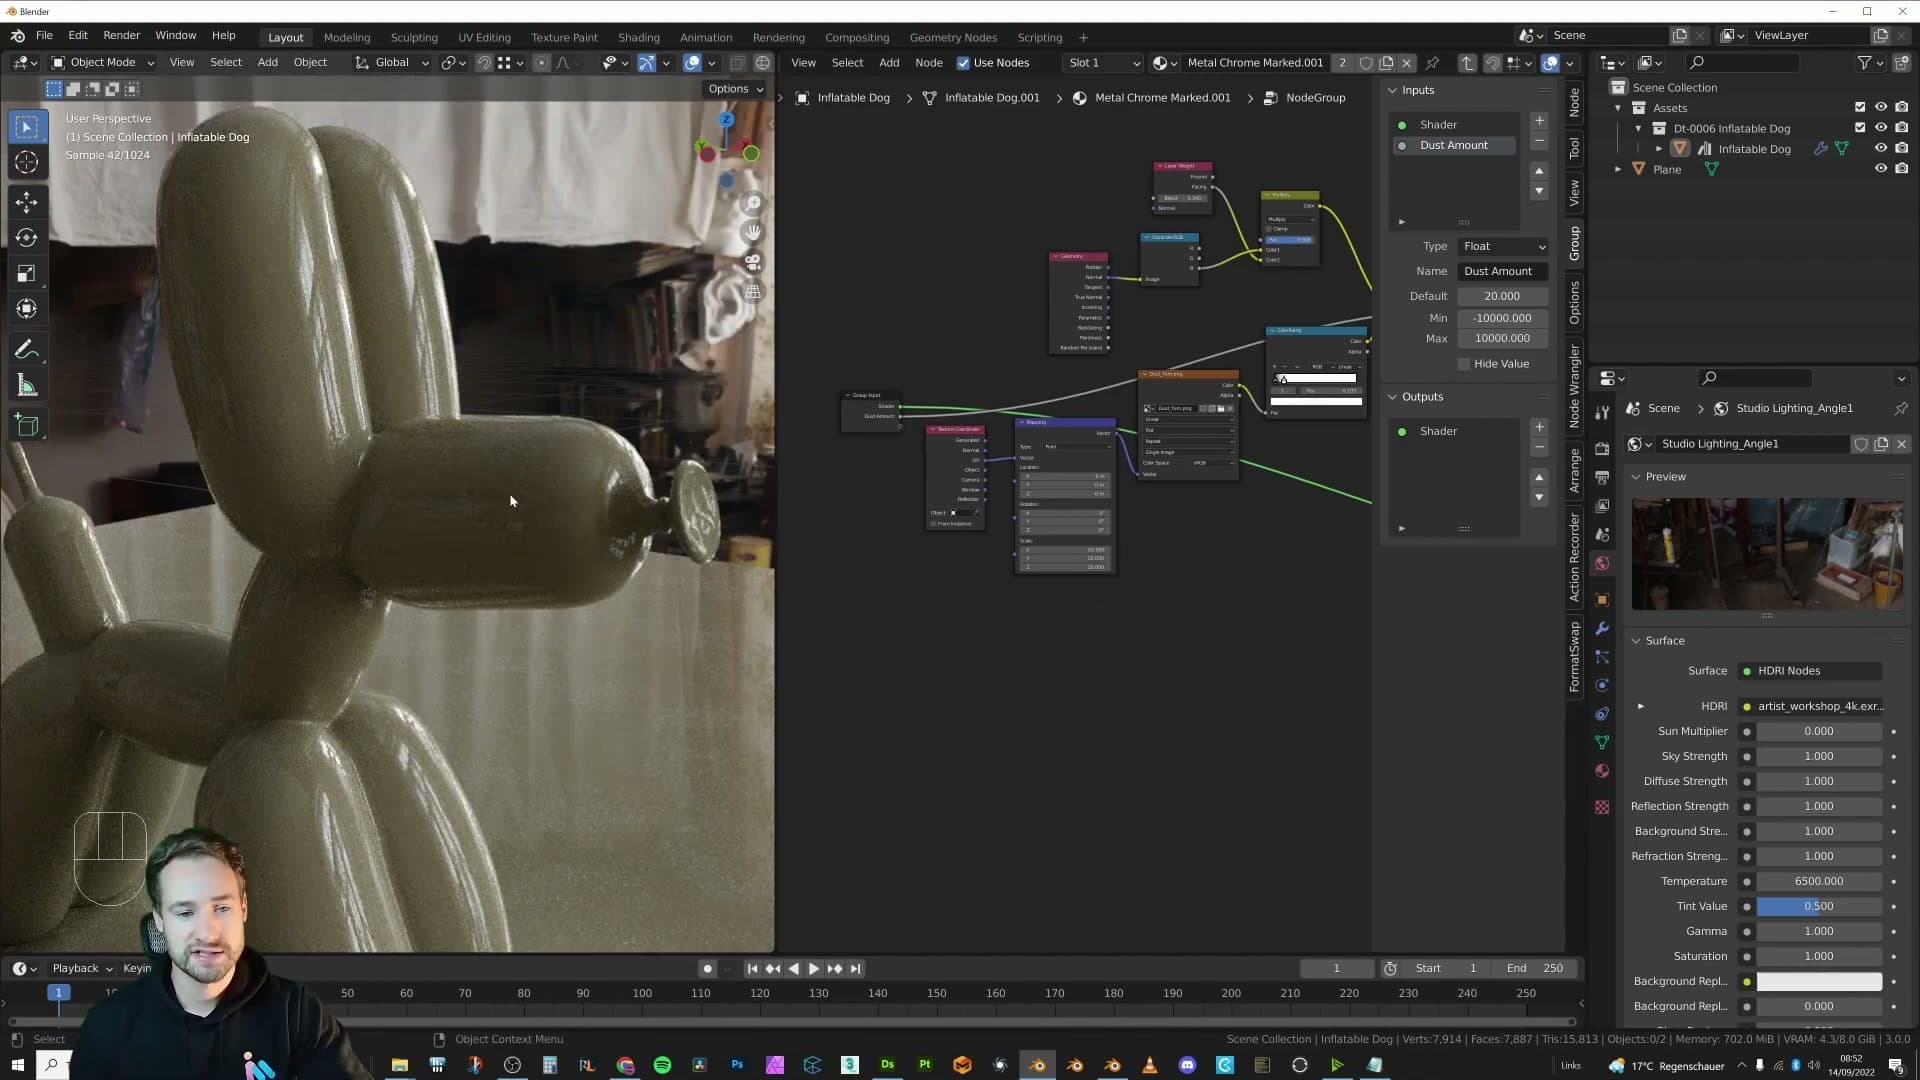
Dive back into the group with Tab. Take the input that currently feeds the Multiply node and drag it onto the empty socket on the Group Input node on the far left. That creates a new exposed input. Do the same with the Multiply node's output, dragging it onto the Group Output node on the right so the result of the multiply is what leaves the group.
Step out of the group again and you will see the new socket appear on the front of the node. Press N to open the side panel, switch to the Group tab, and rename the socket to Dust Amount. You can now dial the multiply value from outside the group without ever opening it up again.
Driving the texture scale via Combine XYZ
The next thing worth exposing is the texture scale, because what reads well on one object often looks wrong on another. A finer dust suits smaller props; a coarser pattern suits larger surfaces.
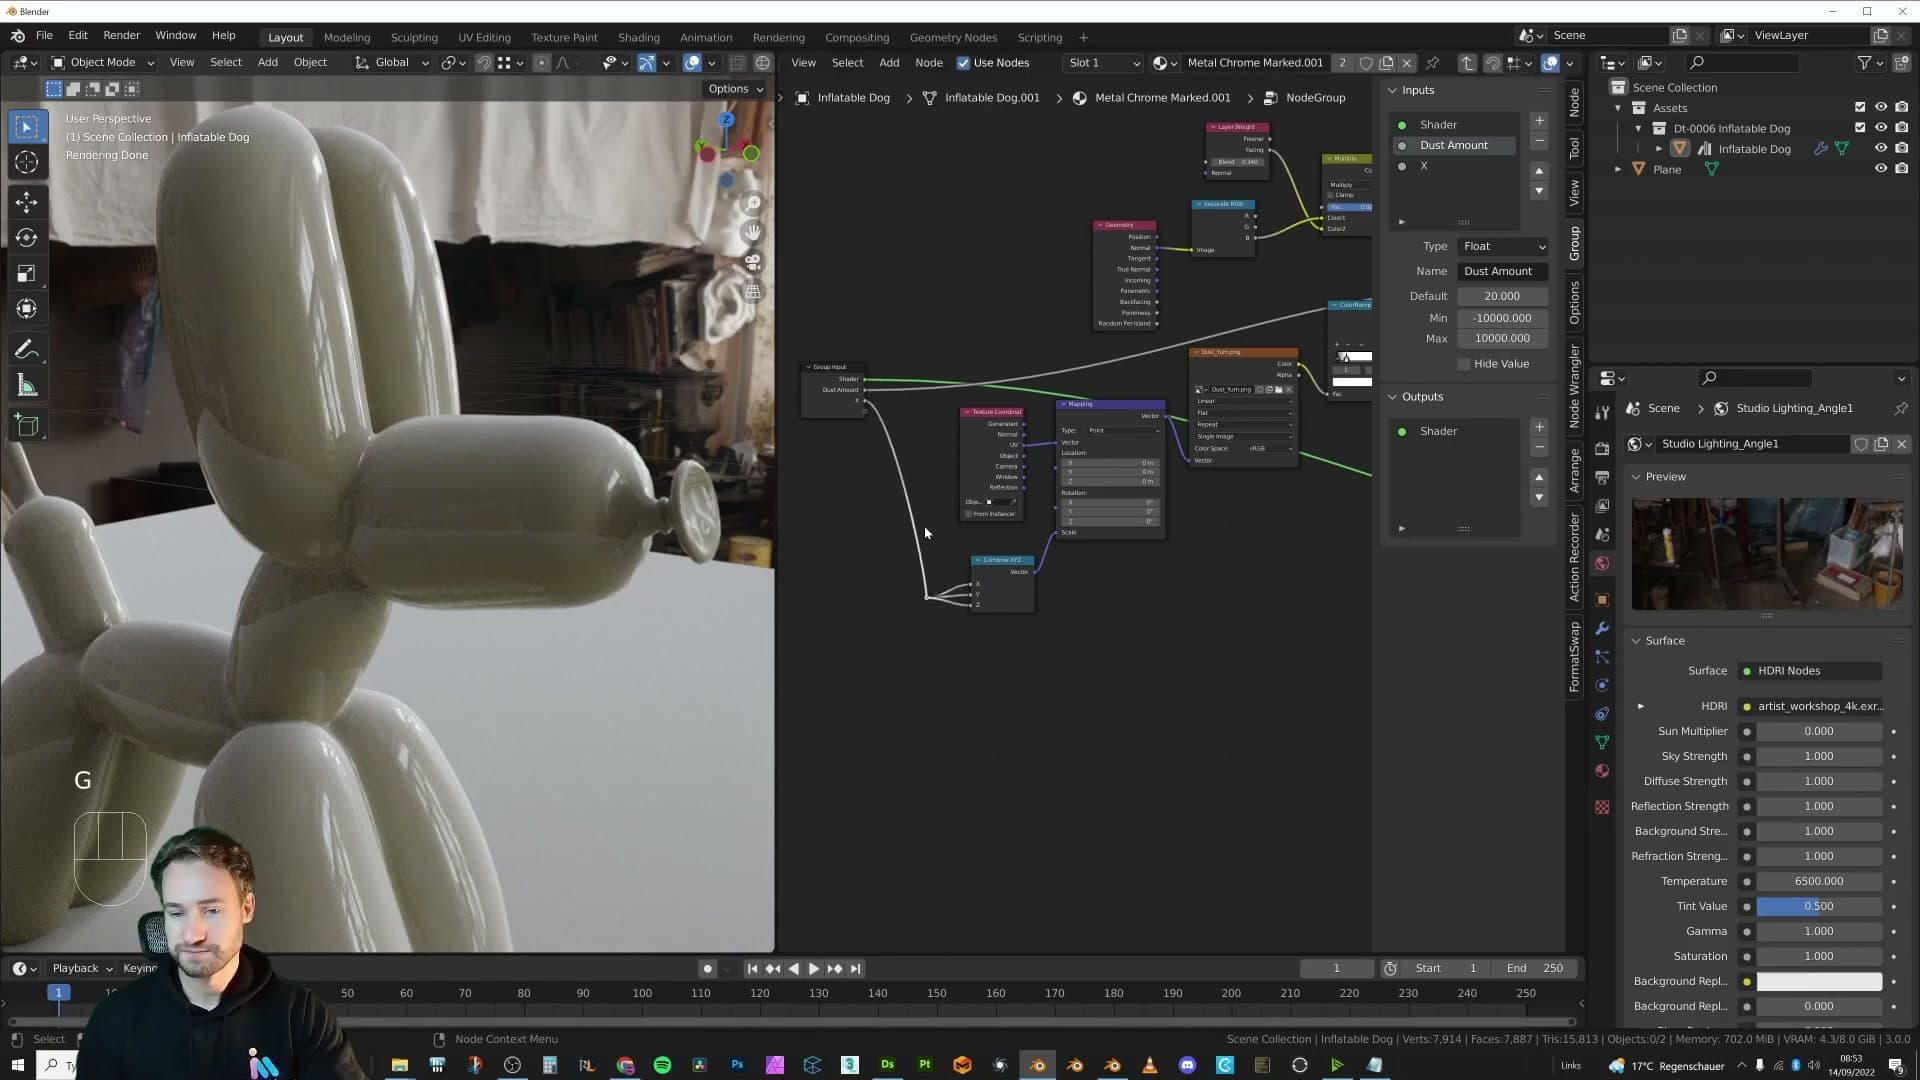
Inside the group, add a Combine XYZ node and plug its vector output into the Scale socket of the Mapping node. The Mapping Scale expects a vector, so a single scalar value cannot drive it directly. Combine XYZ is the bridge. Take one of the X inputs on Combine XYZ, drag it to the Group Input node, and then reroute the same value into the Y and Z inputs so all three axes scale uniformly from a single slider.
To keep the tree readable, hold Shift and right-click drag to draw a line between sockets. Node Wrangler converts it into a reroute point so the wires do not crisscross.
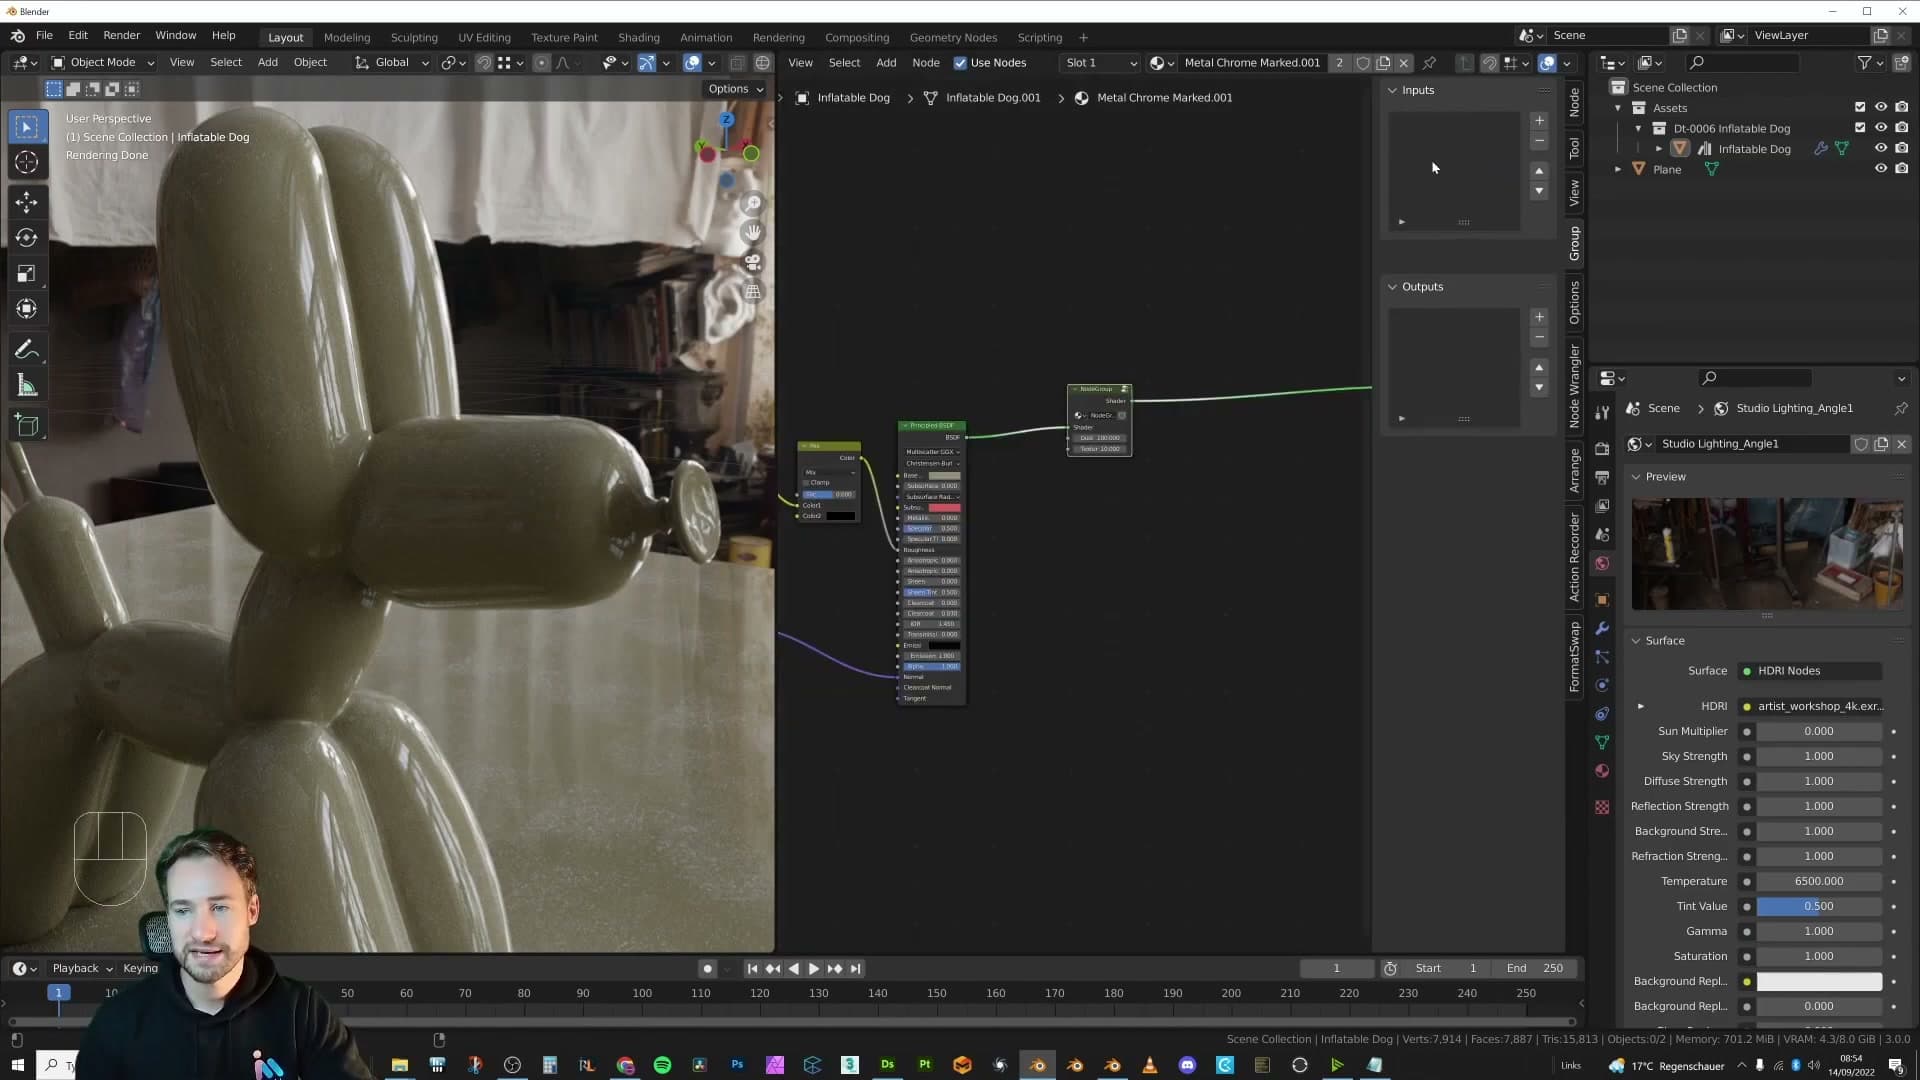
Rename the new exposed socket to Texture Scale. Pop back out to the group and try it: setting the value to 1 gives you the base size, and dragging the slider down to smaller fractions produces progressively finer dust grain. Push it the other way to make the texture larger.
Exposing Dust Z Value for the top-bias slider
The last slider worth exposing controls how strictly the dust hugs the top of the object: the threshold on the Z-axis mask that decides whether dust spreads over the entire surface or sits only on upward-facing faces.
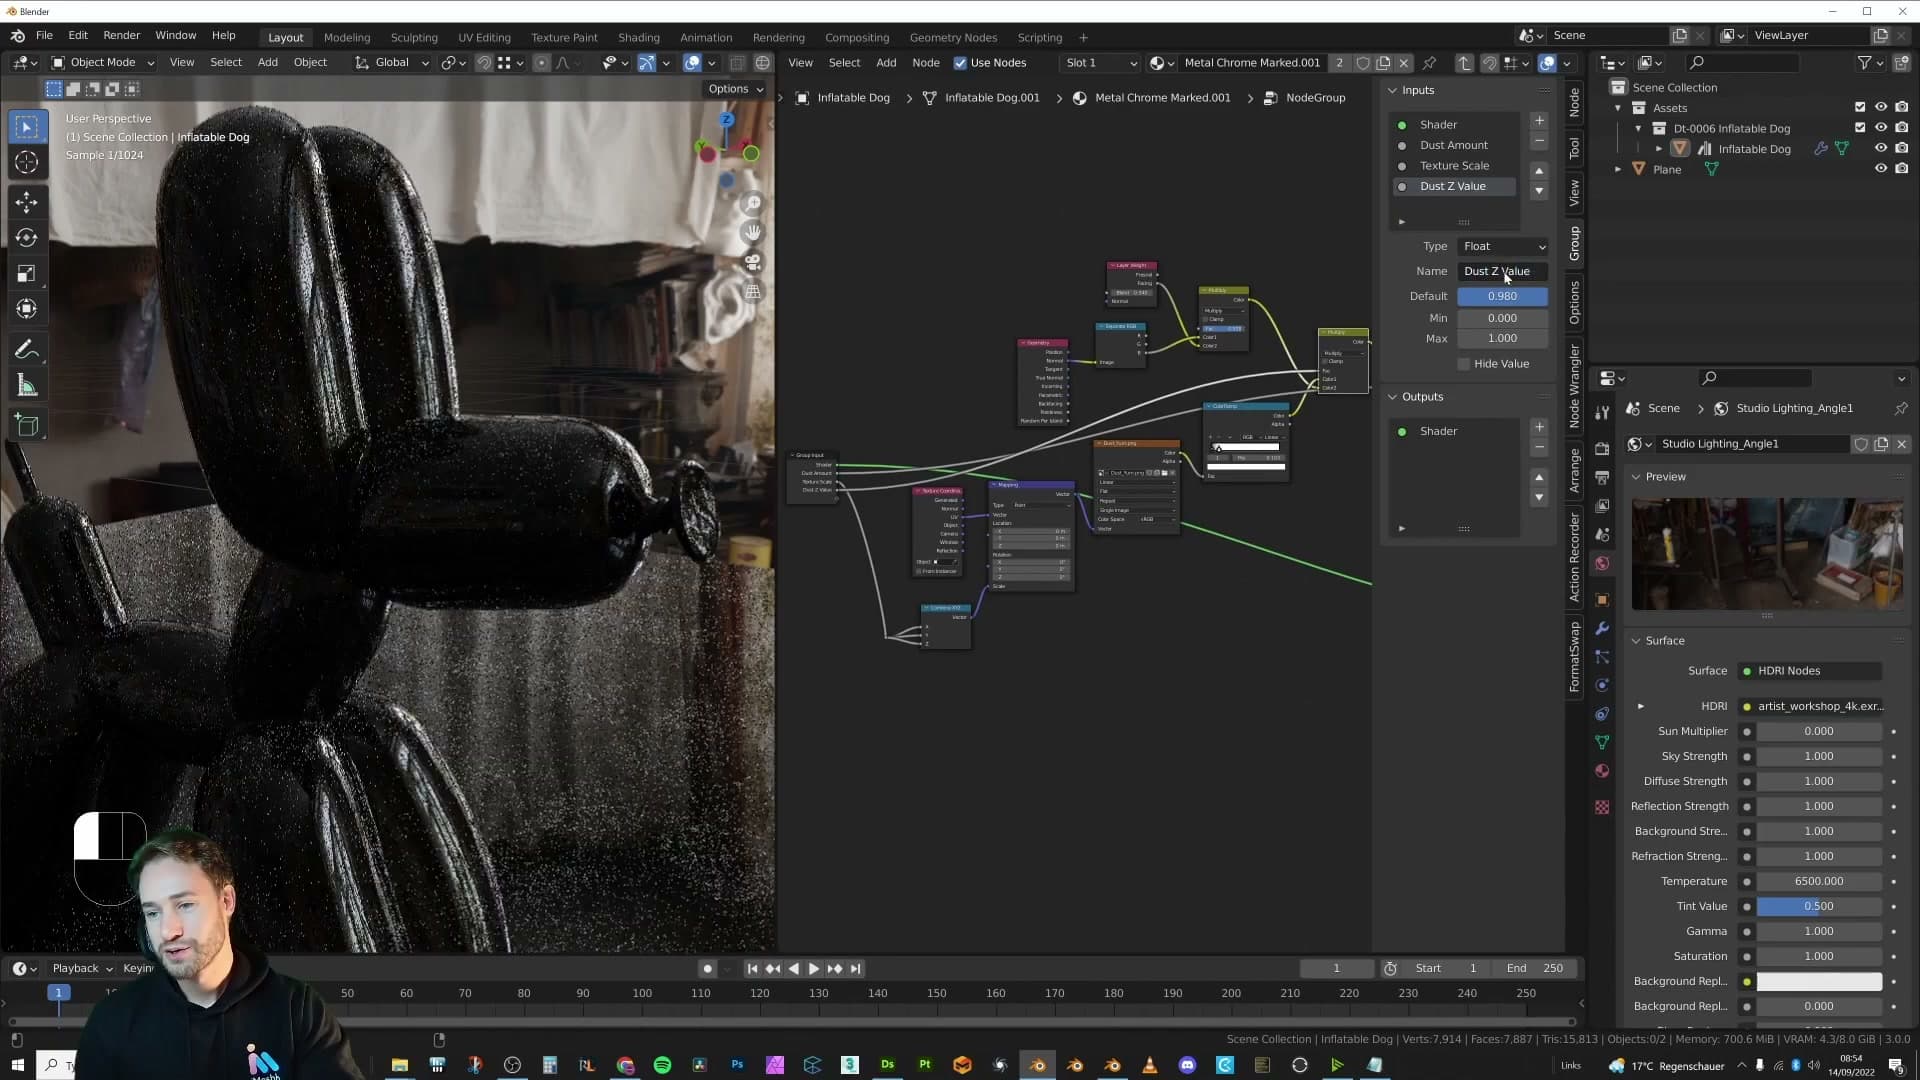
To make the effect easier to see while you wire it up, temporarily set the base material to a flat black so the dust reads clearly against it. Inside the group, find the value that biases the normal mask towards the top: sliding it low spreads the dust over almost the whole object, while pushing it close to 1 confines the dust to the very top.
Drag that input onto the Group Input node to expose it, then rename the new socket to Dust Z Value. Back outside the group, sliding the value down puts more dust low on the object, and sliding it up keeps the dust on top. Somewhere in the middle usually reads best.
Saving the group for use in any scene
With all three sliders wired up, rename the group itself to Dust so it is easy to find later. The front of the node now exposes Dust Amount, Texture Scale and Dust Z Value. That's everything you need to tune the effect per object without ever opening the group up again.
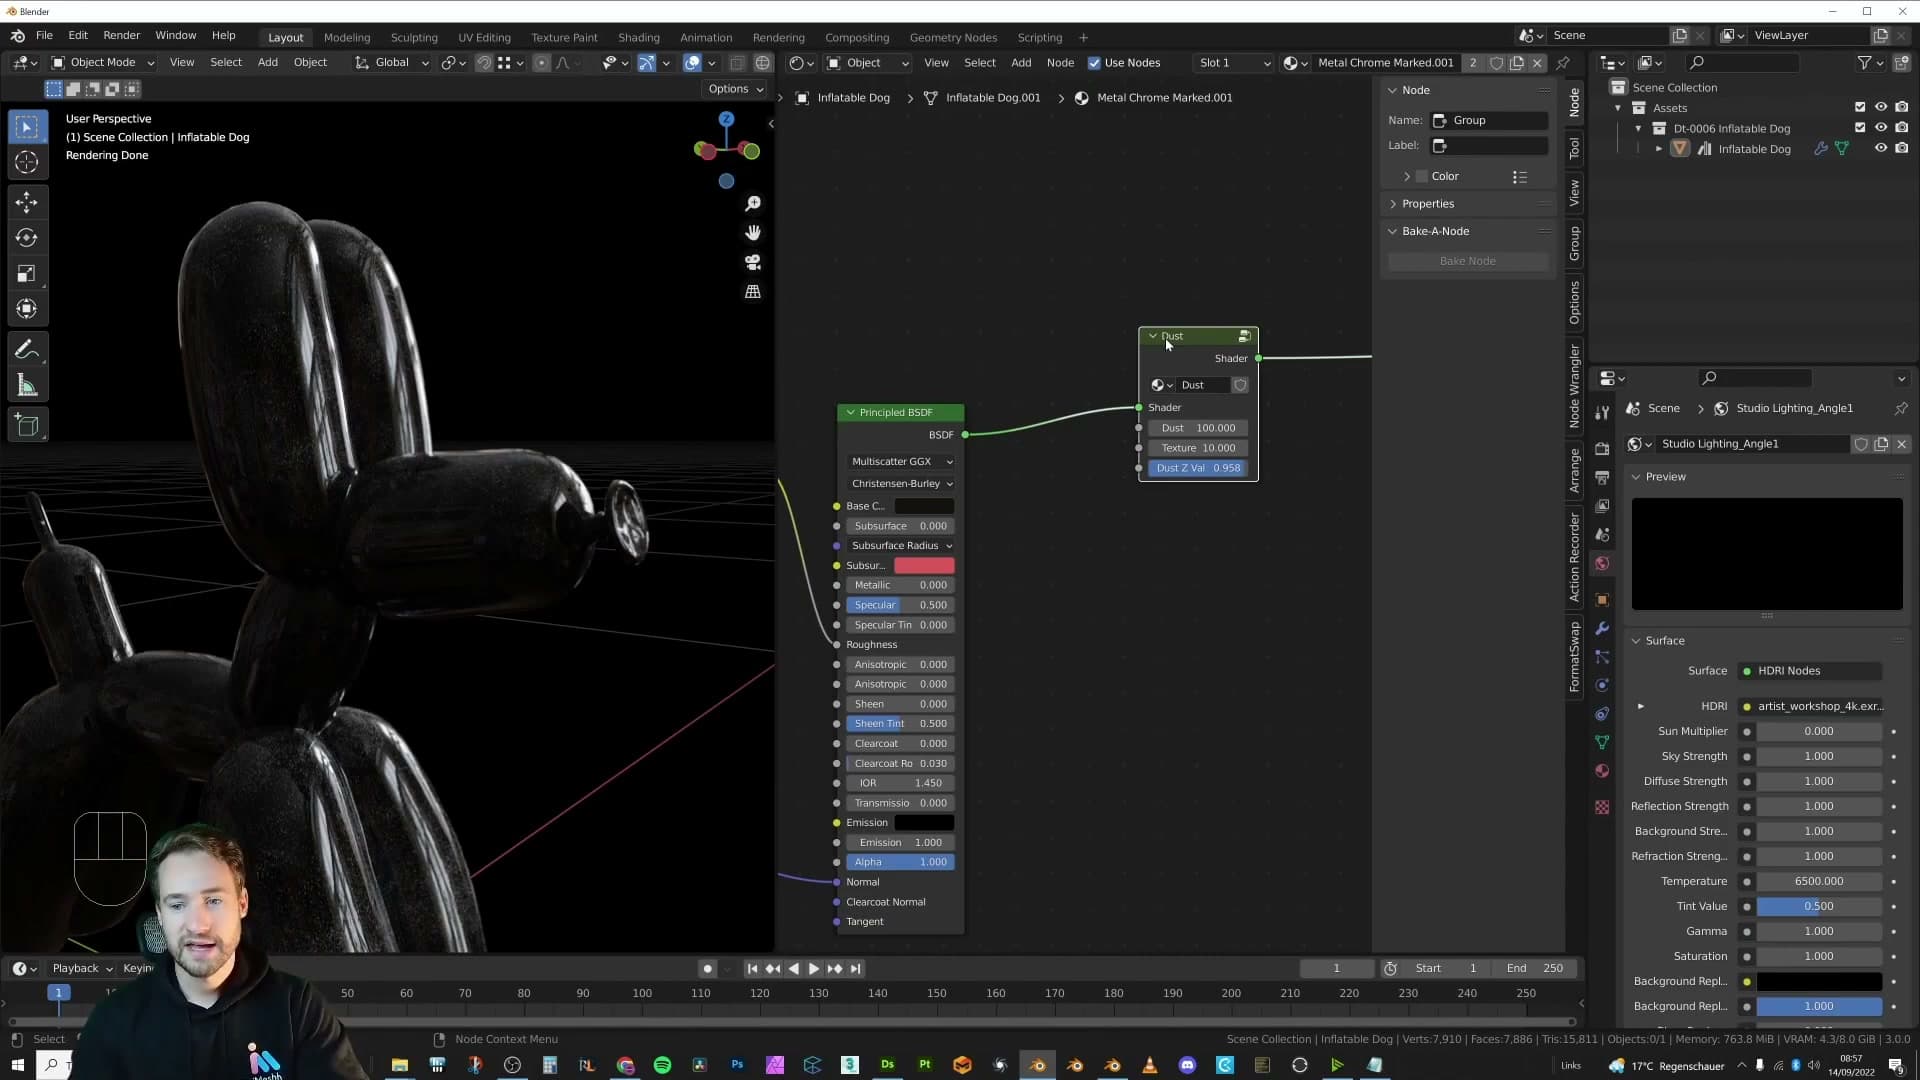
How you set those values depends on the colour and size of the object underneath. Lighter materials need a much higher Dust Amount before the effect reads; darker ones need almost nothing. The Texture Scale should be matched to the size of the surface, though pushing it too large eventually reveals repeating patterns in the source image. If that becomes a problem on your scene, swap in a different grayscale dust texture from the web.
To reuse the shader across projects, save the .blend file that contains the group. From any other scene you can then go to File → Append, navigate into that file's NodeTree folder, and pull the Dust group across. Drop it between a base shader and the Material Output, dial the three sliders, and the dust travels with you.
Tools and credits
Everything mentioned in this tutorial, with links.
- Blender: the renderer this entire build runs in.
- iMeshh: studio platform (project management, client review, asset library, invoicing). The asset library used in this tutorial is included with every iMeshh Pro plan.
- Poly Haven: free CC0 textures and HDRIs.
Pillar guide: Texturing Displacement hub