Scene overview: what we're building
A quick tour of the finished world space: a building inside a Nishita atmosphere with real planets, clouds and stars, and the base scene we start from.
From base scene to full world space
Blender can build a complete world space entirely from inside the scene. It still feels a little surprising the first time you see it work. The trick is to treat the sky itself as geometry: a large sphere wrapping the scene, with everything you care about either sitting inside it or floating just beyond it.
Inside the sphere lives the building and its volumetric clouds. Outside the sphere, in true space, sit the planets. They are full spherical objects with their own materials, lit independently so they read as actual worlds rather than flat painted dots on a dome. There is no HDRI driving any of this; the sky, the clouds, the planets and the stars are all built procedurally in Blender.

This first tutorial walks through the full setup so you can build the same kind of world from scratch.
The starting building scene
The starting point is a simple architectural scene: a building, a small pond of water at the front, and some trees and foliage softening the edges. Nothing exotic. It is the kind of base scene you would normally drop a sun lamp and an HDRI onto and call done.
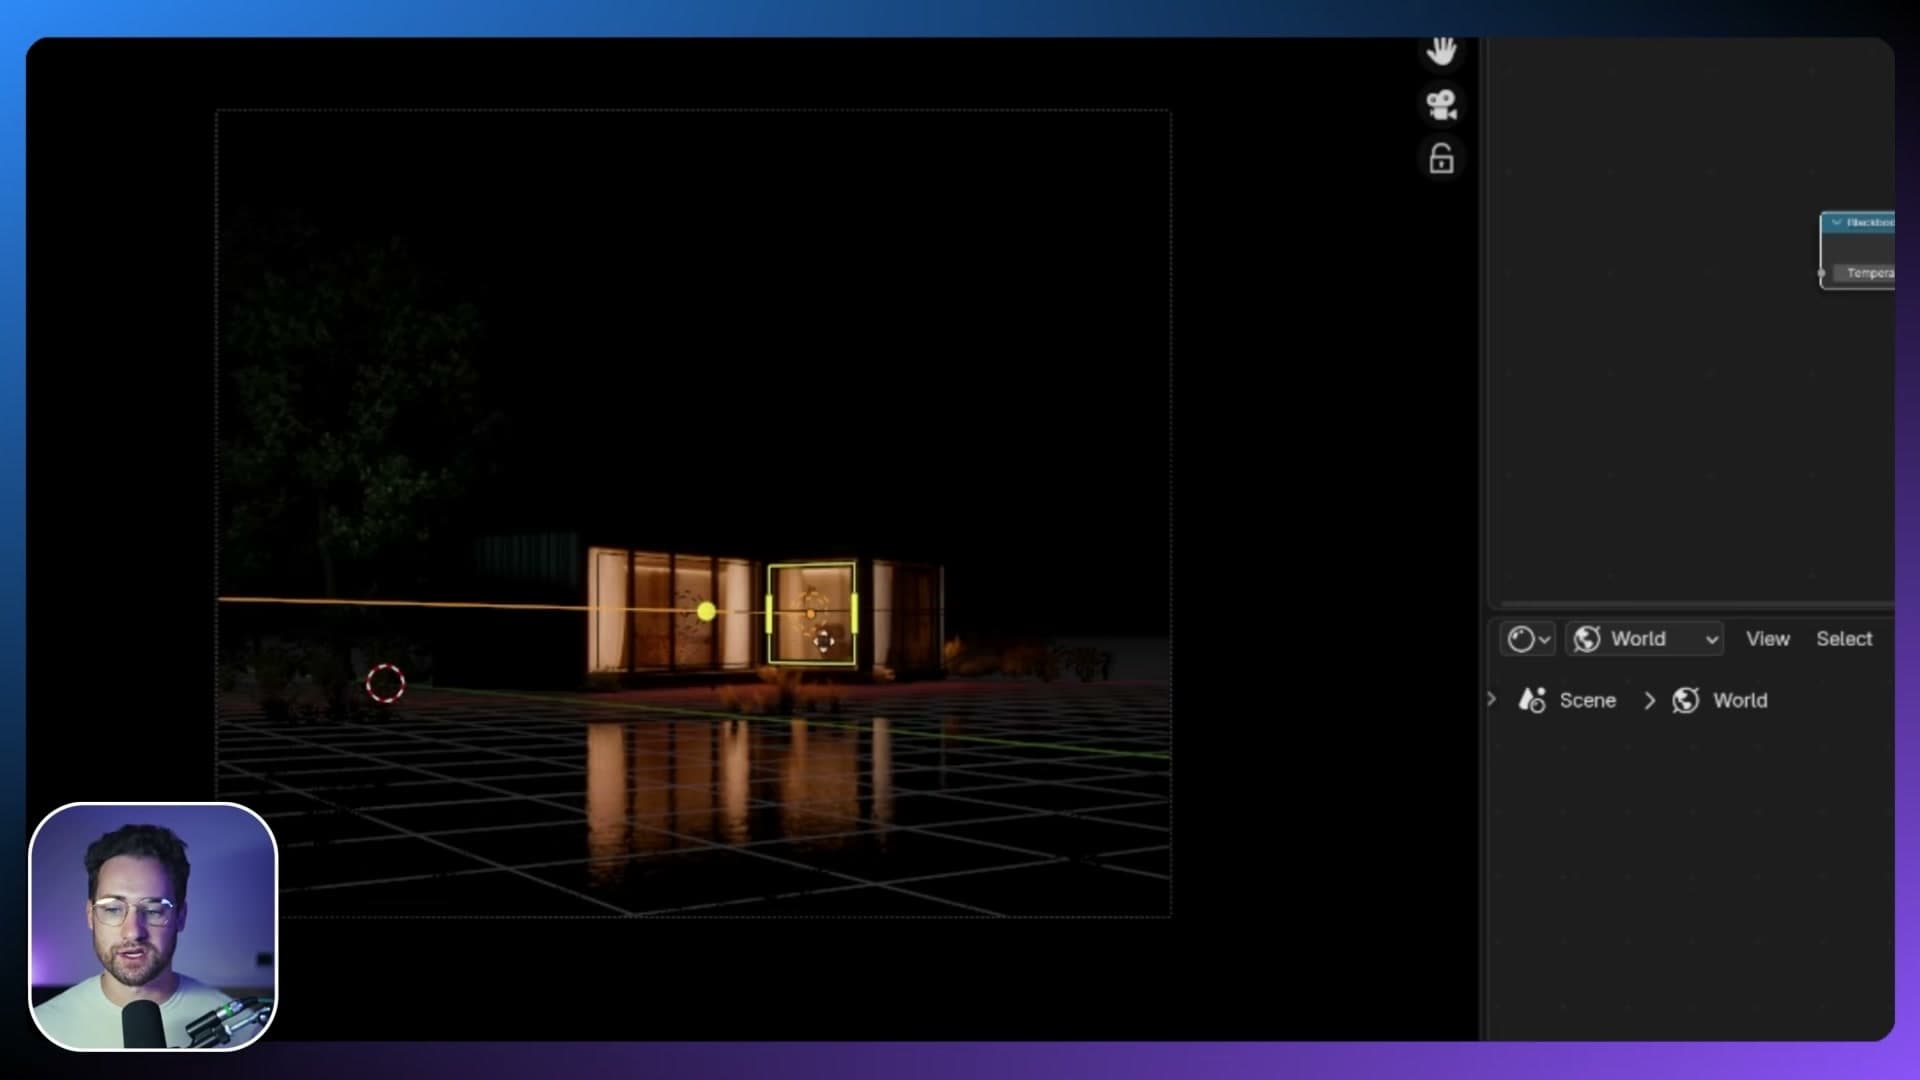
There is one detail worth pointing out before any sky work begins. An area light sits just outside the windows, shining outward onto the surrounding foliage. It reads as if the light is spilling out of the building from the interior, and it gives the exterior plants a warm, occupied feel that a plain sun lamp alone would not produce.
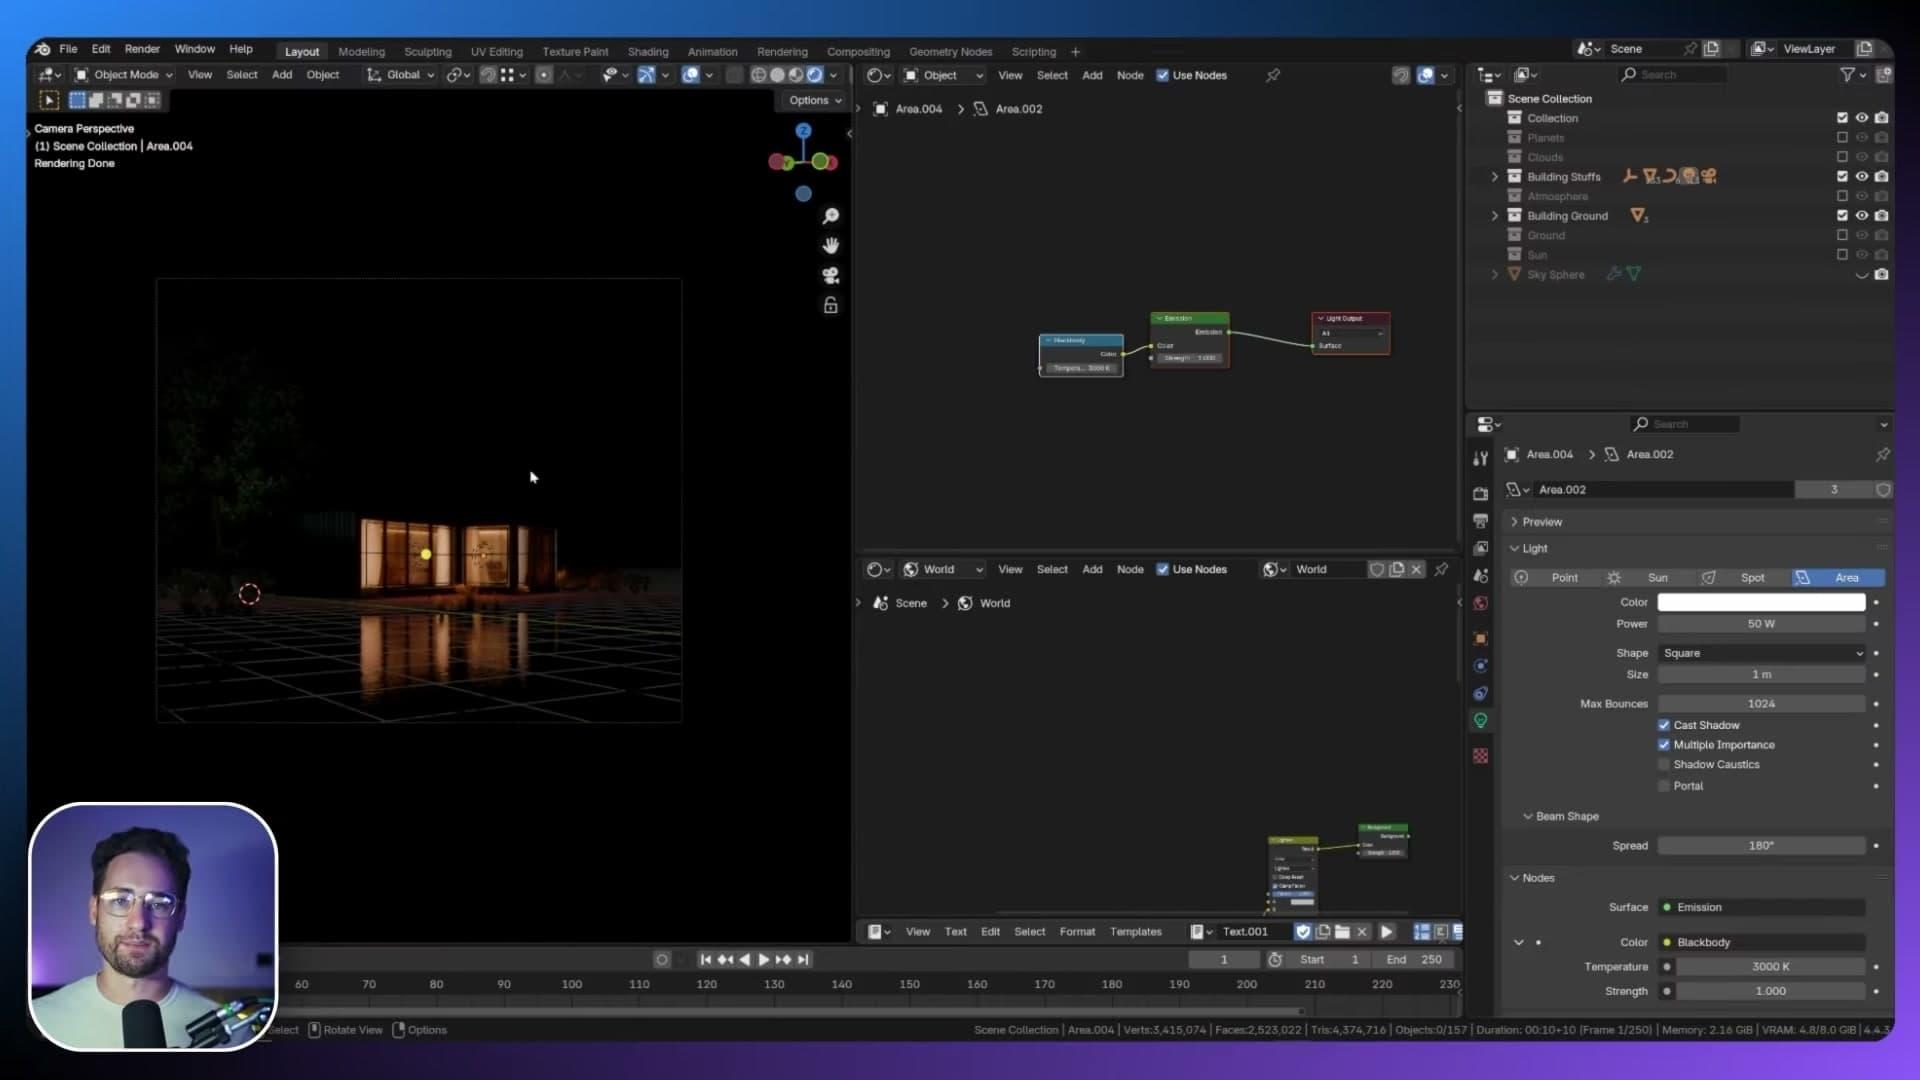
From here the scene gets considerably more involved, so the rest of the tutorial steps through each piece of the world setup in order.
Build the atmosphere with a Nishita sky sphere
Add a UV sphere as the sky, apply a Nishita sky texture and project it correctly using a Texture Coordinate node so the sky behaves like a real atmosphere.
Adding the UV sphere as your sky
The trick to this whole setup is treating the sky and the sun as two separate things. The sky sphere you're about to build is the atmosphere of the scene (a finite shell of air around the world), and the sun lamp will sit outside that shell, the way it does in real space. Keeping those two layers physically separated is what lets you put planets between the atmosphere and the sun later on.
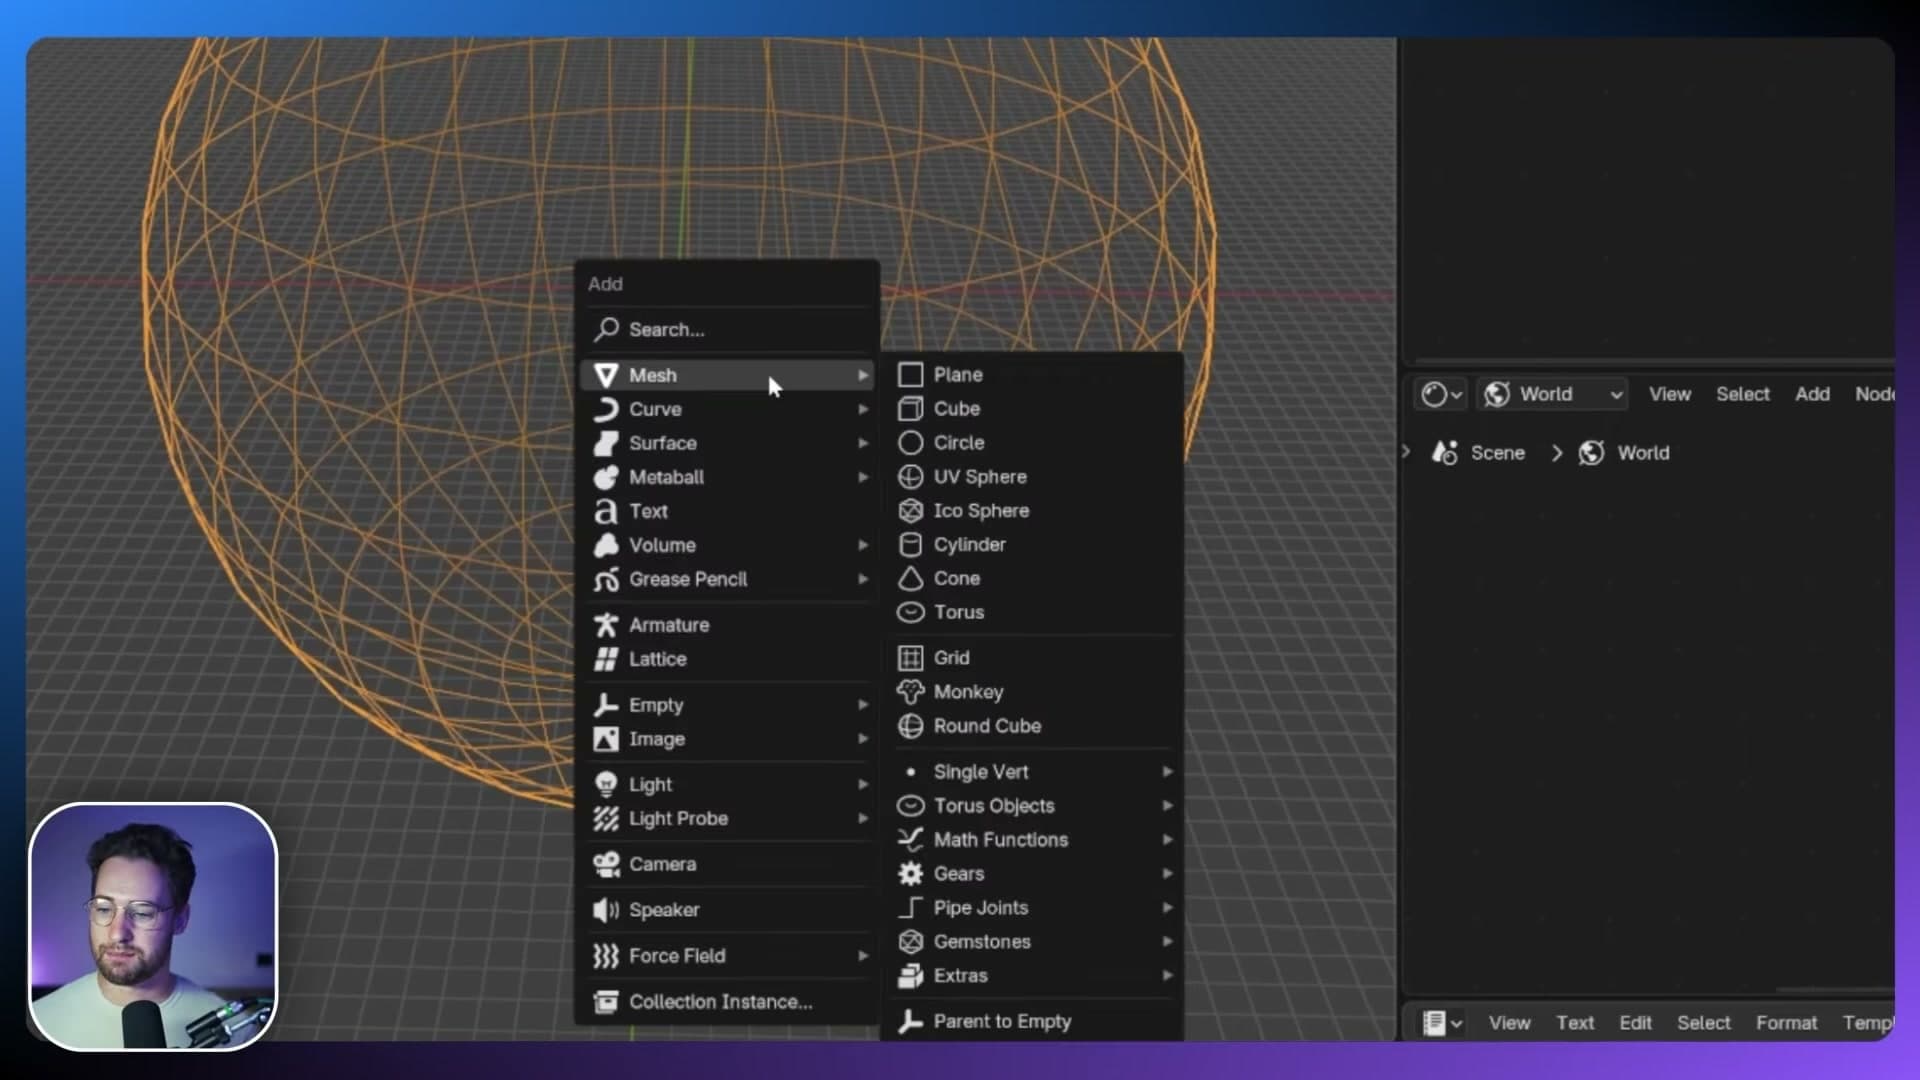
Start with the shell itself. Press Shift+A, choose Mesh → UV Sphere, and drop it into the scene at the default size. That sphere is the sky. Everything inside it will be lit by its atmosphere; everything outside it (sun, planets, stars) will live in true space.
Plugging Nishita into the sphere with Texture Coordinate
Switch the viewport to Rendered shading so you can see the sky update as you build the shader. With the UV sphere selected, open a new material and add a Sky Texture node set to the Nishita model. Plug its Color output straight into the Material Output's Surface input.
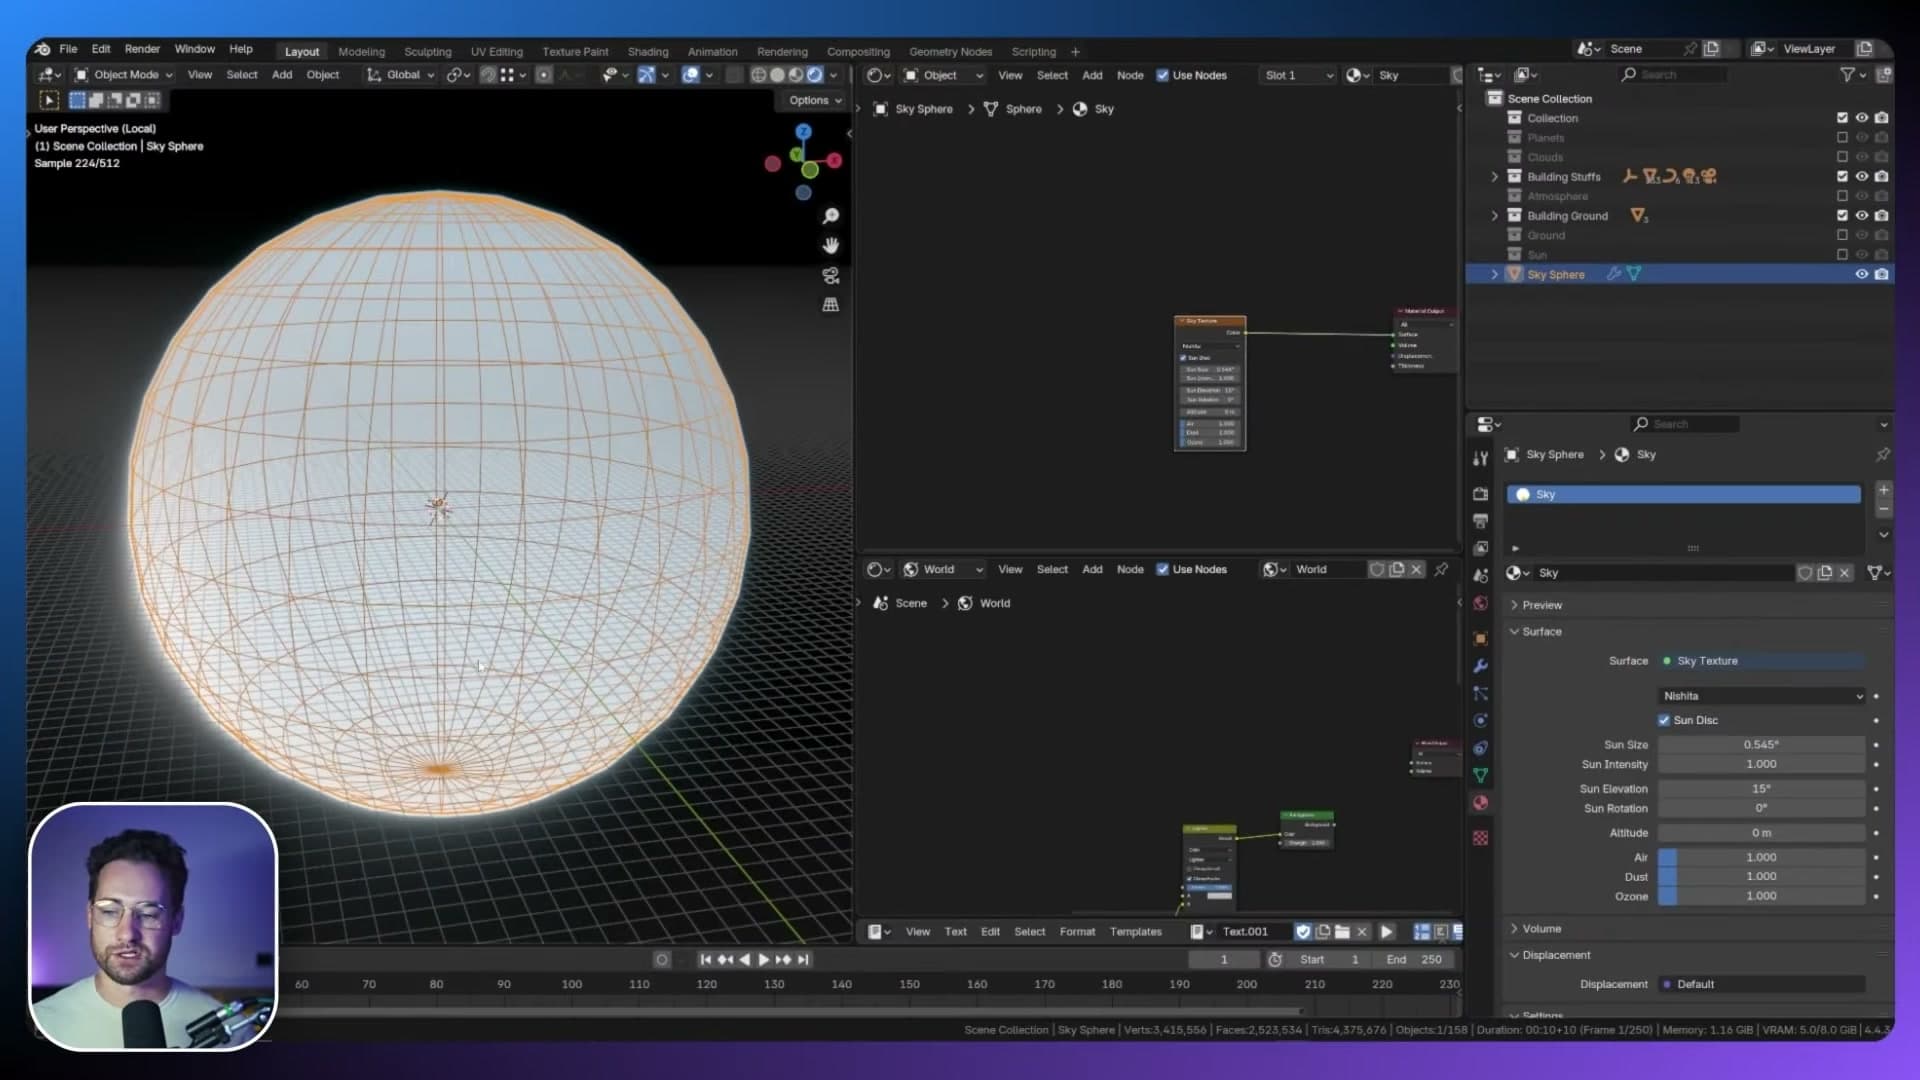
At this point the sphere looks wrong. There's no mapping, so Blender doesn't know how to project the sky onto the geometry. Fix it in two steps:
1. On the Sky Texture node, disable Sun Disc. You'll bring the sun back later as a separate object, so it shouldn't be baked into the atmosphere shell. 2. Add a Texture Coordinate node and plug its Object output into the Sky Texture's Vector input. That gives the texture a coordinate space tied to the sphere itself, so the sky projects cleanly around the inside surface.
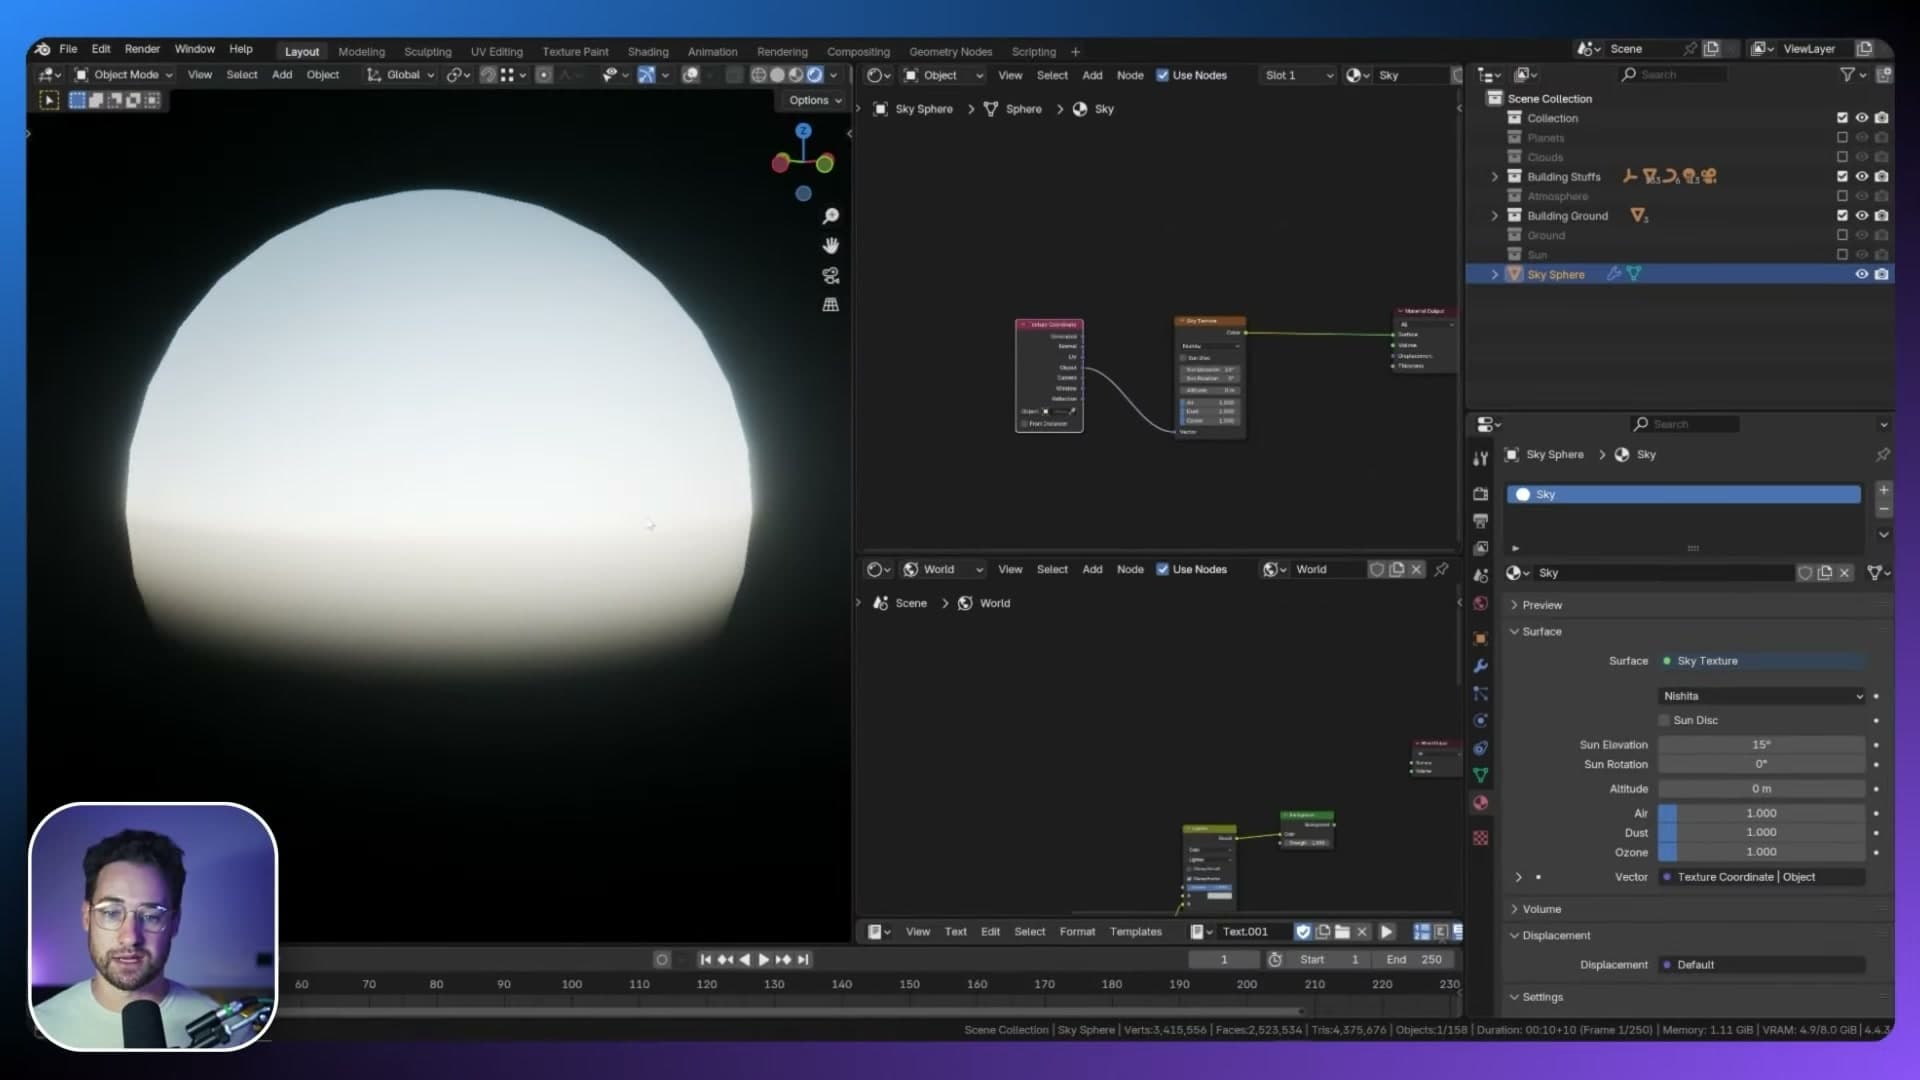
Drop back into the main scene and you'll see the geometry lit by the new atmosphere. There's no visible sun yet. That's intentional. The sky colour and ambient light are already doing real work. This shell is now your atmosphere; the sun lamp comes in the next module.
Place planets outside the atmosphere
Scale planets far beyond the sky sphere, extend the camera and viewport clip distances to keep them visible, then mix a Transparent BSDF into the sky so we can actually see them.
Scaling planets beyond the sky sphere
Drop a couple of planets into the scene as-is and you'll spot the problem straight away: they sit inside the sky sphere, so the atmosphere lights them as though they were objects on the ground. They should be in space, not basking in your sunset.
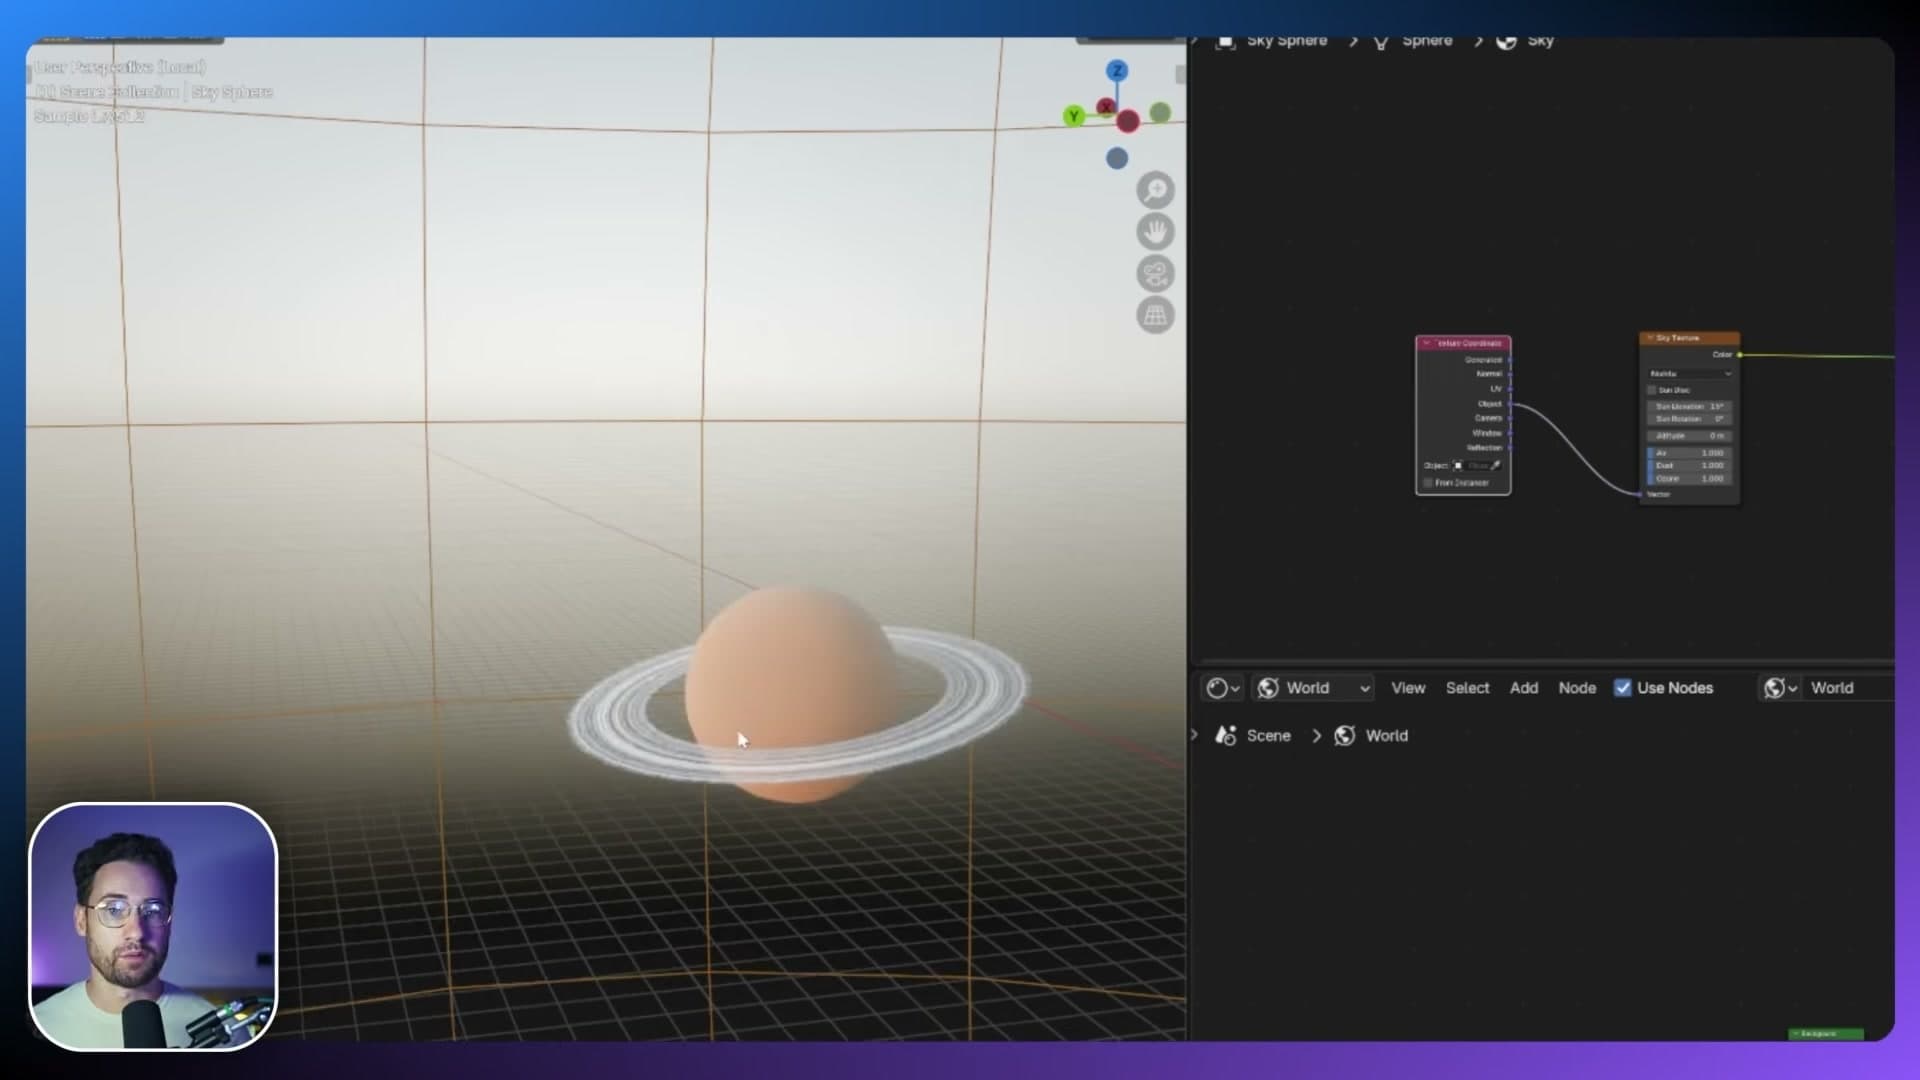
Before you scale them, snap the 3D cursor to roughly where the camera is and set it as the pivot point. Because everything scales away from that point, the planets stay glued to the same spot in the camera view no matter how far out you push them.
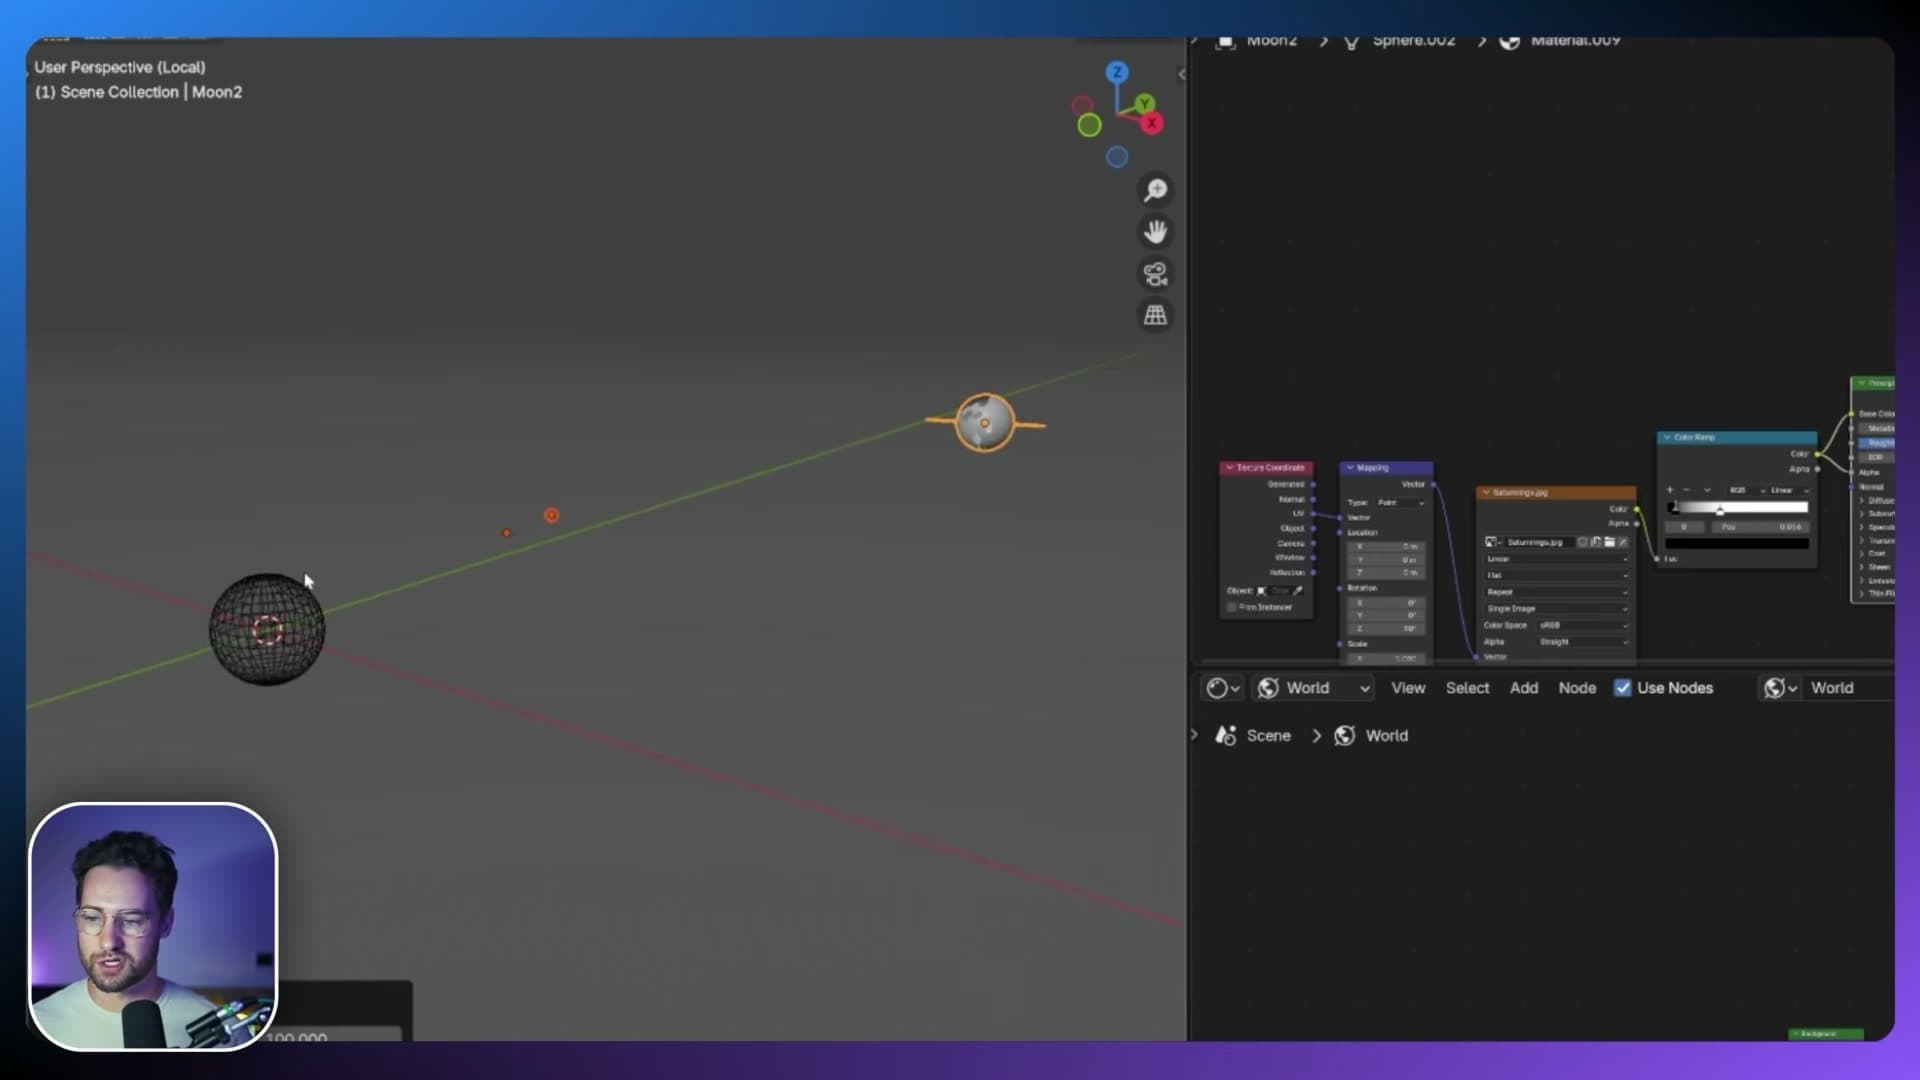
Now scale the planets by around 100×. They'll punch straight through the sky sphere and look like they've vanished from the viewport, but from the camera they're still framed exactly as before, just much, much further away. That distance is what stops the atmosphere's volumetric light and any cloud cover from influencing how they're lit.
Camera clip end and 3D view distance for huge scenes
Working at this scale only holds together if Blender is actually willing to draw things that far from the camera. Two clip-end values need raising:
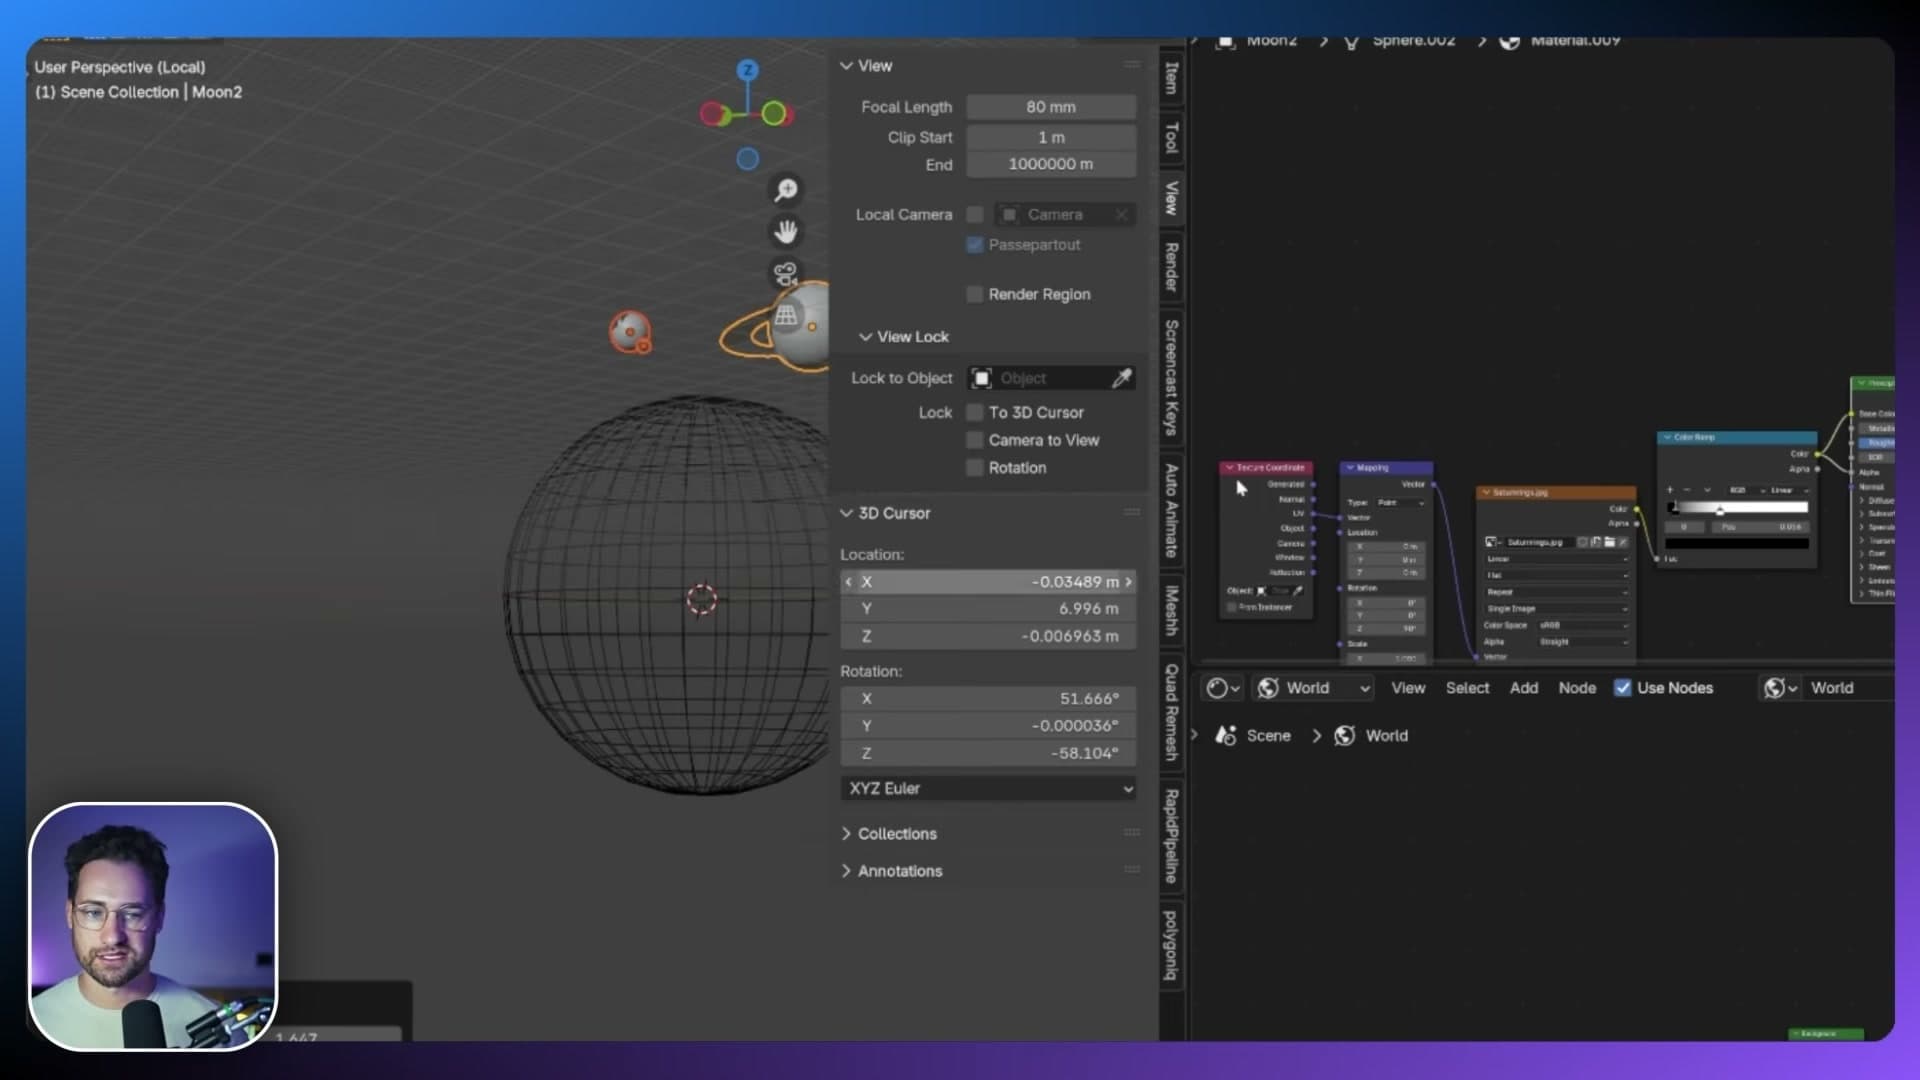
1. Viewport Clip End (in the N-panel under the View tab). At the default value the planets sit well past where the viewport stops rendering, so you'd see nothing at all. 2. Camera Clip End (in the camera's Object Data properties). Same story: the camera has to be told to look out far enough to catch the planets.
Set both to something dramatically larger than the defaults so the whole scene comfortably fits inside the clipping range.
You could go the other way and scale the entire scene down instead, but I found that approach made the lighting values feel janky and harder to manage. Working at a larger scale is a bit weird in places, but it's easier to wrangle the lights.
Mixing a Transparent BSDF so light passes through
Render from the camera once the planets are scaled out and you'll notice they've disappeared completely. The atmosphere is doing its job. It isn't fully transparent, so anything sitting behind it gets veiled out.
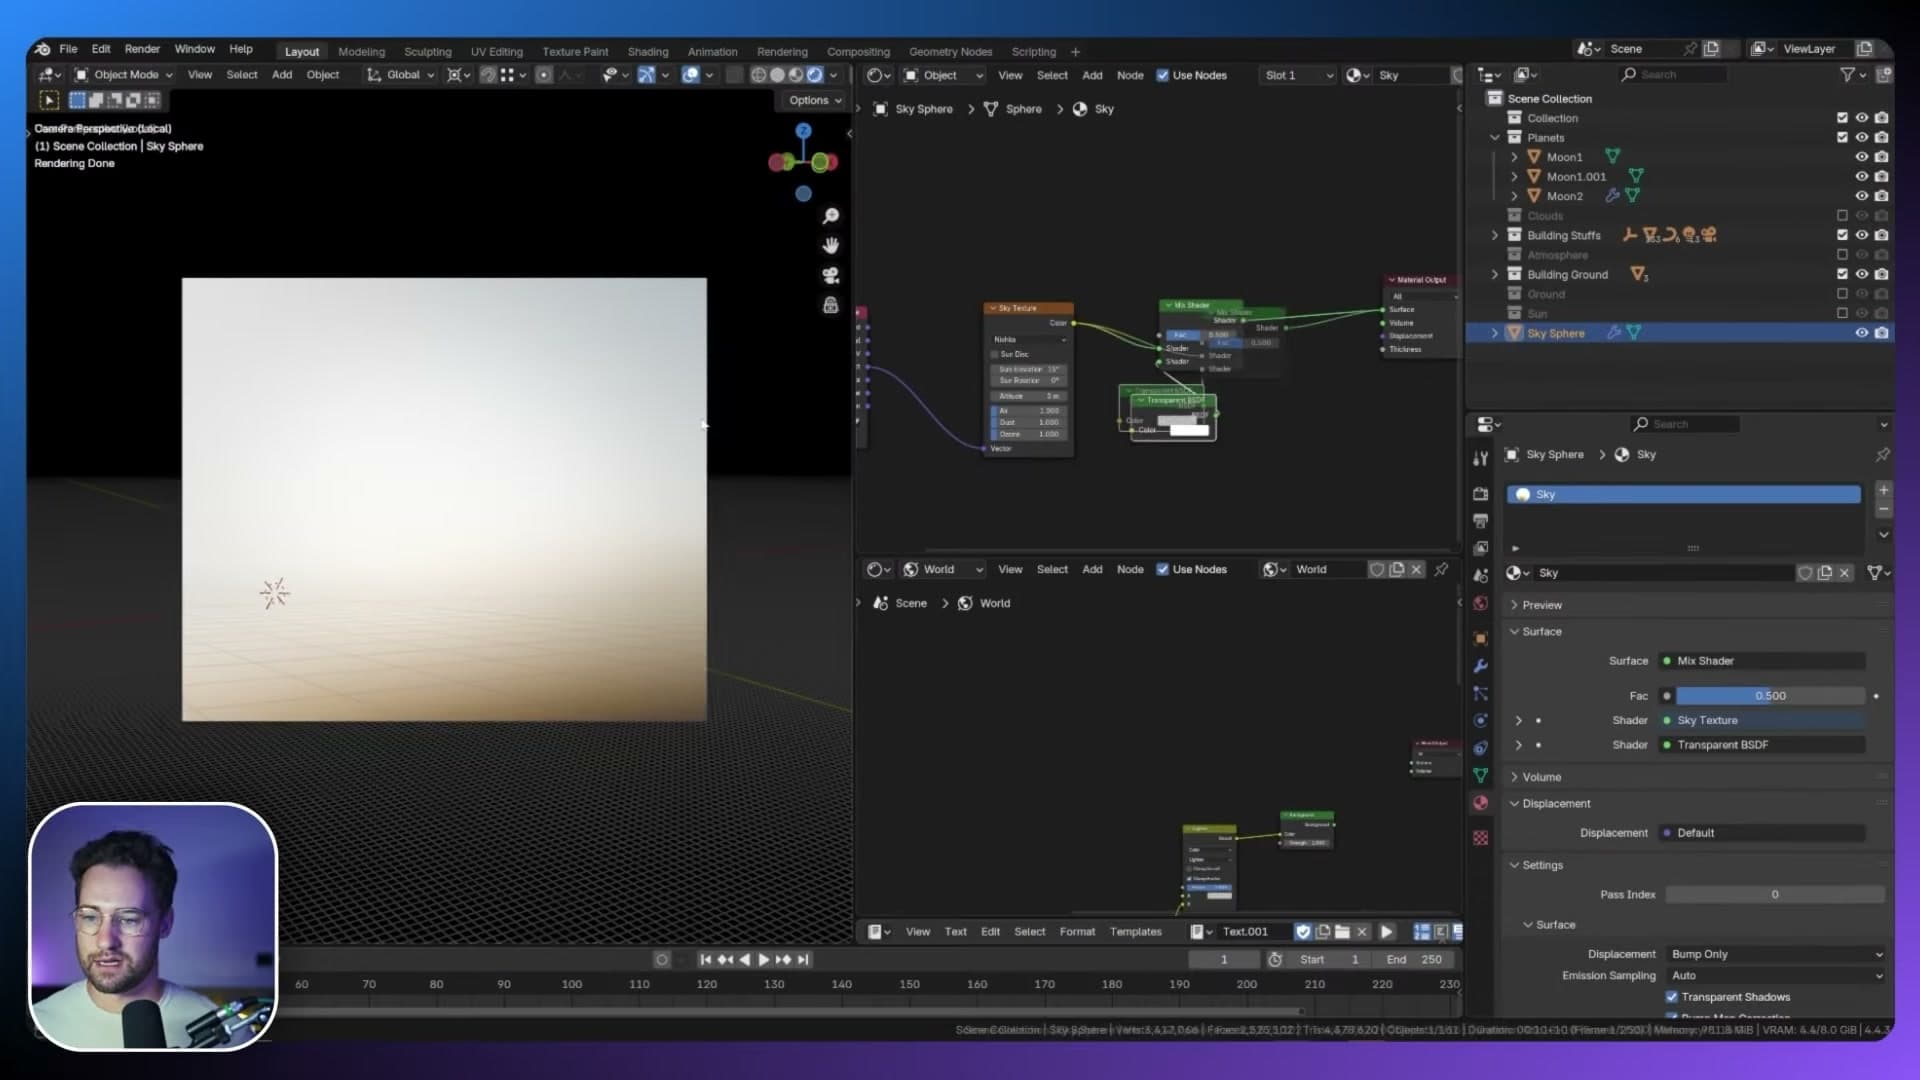
Fix it on the sky material itself (named sky in this scene; you'll reference it again later when wiring up drivers). In the shader editor:
1. Add a Mix Shader between the Sky Texture's Background output and the World Output. 2. Add a Transparent BSDF and plug it into the Mix Shader's second input. 3. Dial the Mix factor until the planets read through the atmosphere without flattening the sky behind them.
With the sky now partly see-through, the planets are visible from the camera but there's a new problem waiting on the other side: because they live outside the sphere, the HDRI isn't lighting them at all. It's genuinely space out there, so the next module sets up a sun lamp to put light back on them.
Recover the sun disk with two duplicated worlds
Because the sky needs sun disk off for the texture coordinate trick to work, we duplicate the world, turn the sun disk back on, and subtract the two worlds so only the disk shows.
Duplicate the world and enable the sun disk
Open the World properties and start by copying your existing world to a fresh datablock. It already carries the Nishita values you set up in the previous module, so duplicating it is faster than rebuilding the network from scratch. Once it is pasted in as a new world, duplicate that copy so you end up with two matched worlds sitting side by side.
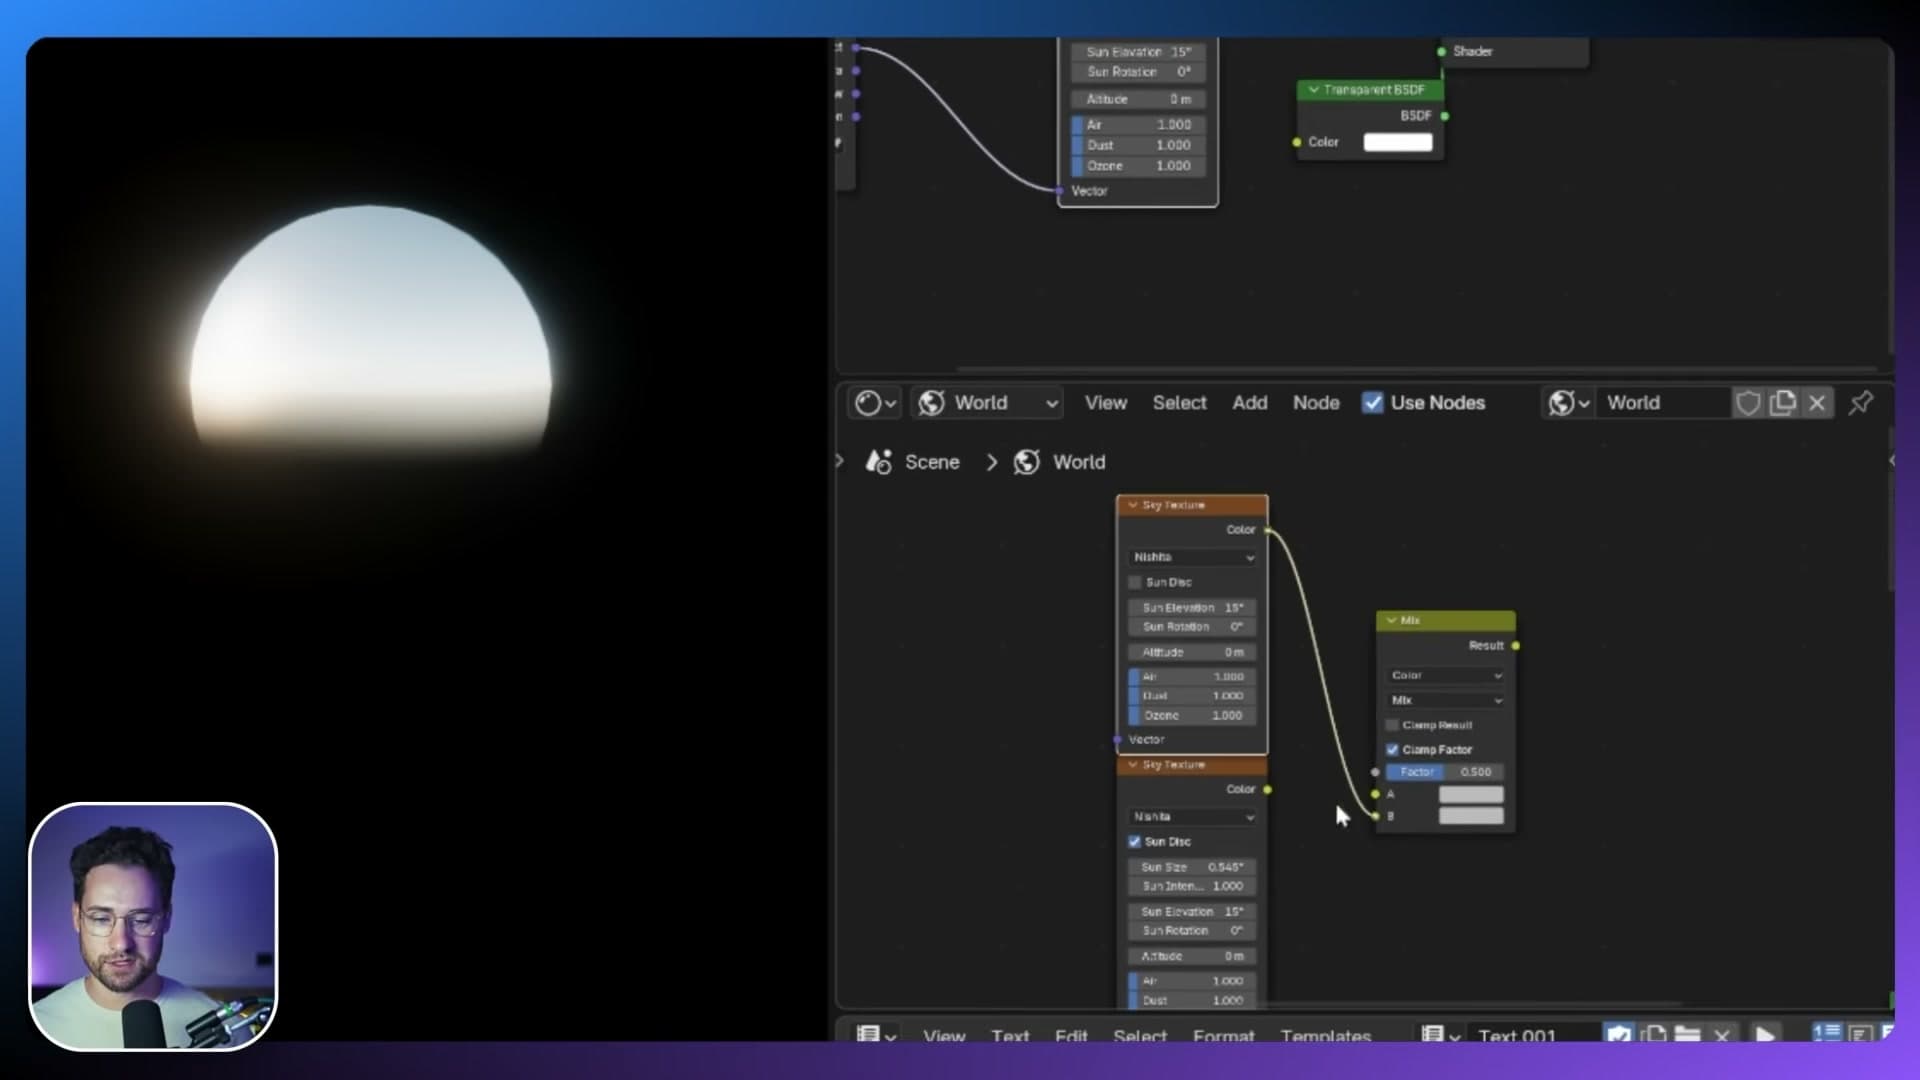
On the duplicated world, open the Sky Texture node and switch the sun disk back on. You now have a paired set: one world with the sun disk hidden (the one your Texture Coordinate trick relies on) and a second world that is identical in every respect except the disk is visible.
Subtracting the two worlds with Mix Color
Back inside the original world's node tree, add a Mix Color node and feed both skies into it. Plug the no-sun-disk sky into the bottom input and the sun-disk-on sky into the top input, then change the blend mode to Subtract and push the Fac slider all the way up to 1.0.
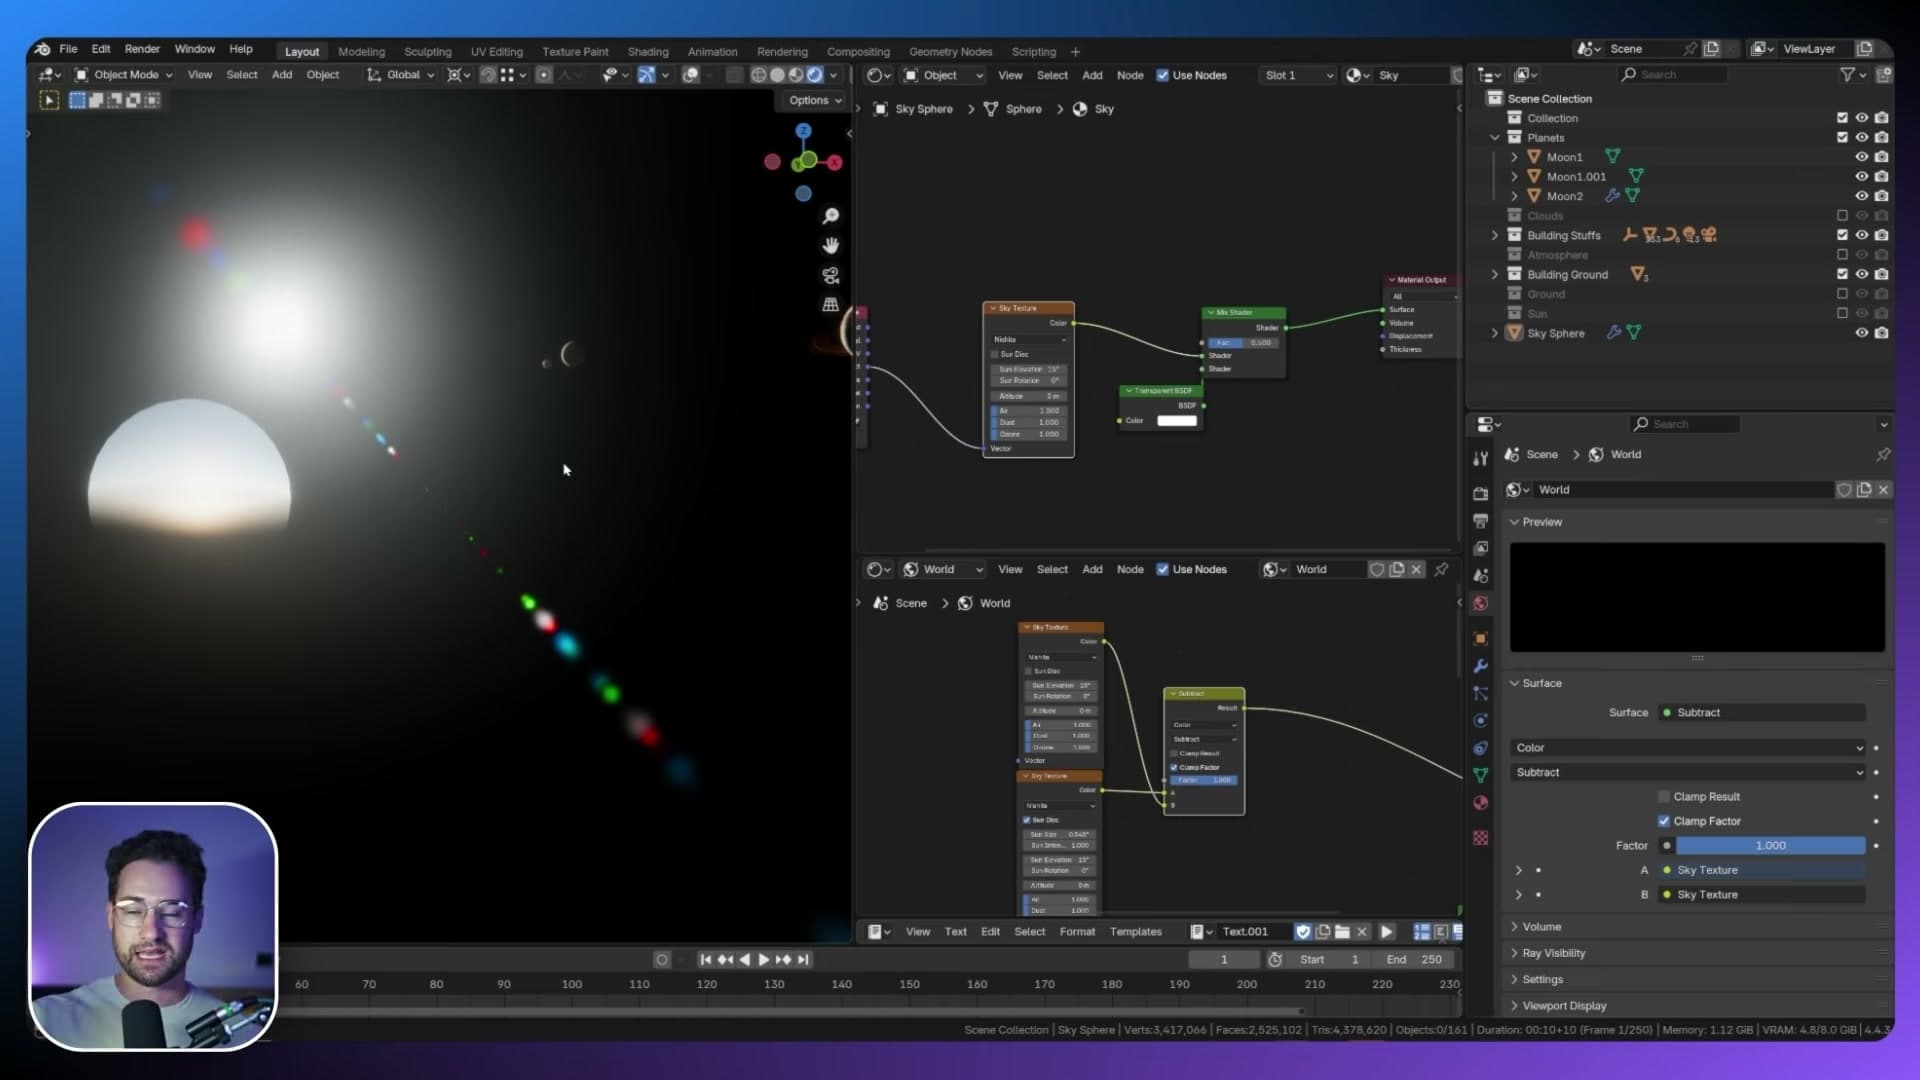
The reasoning is straightforward. Both worlds are identical apart from the sun disk, so subtracting one from the other cancels the matching atmosphere and leaves only the difference. That difference is the sun disk on its own, with the in-atmosphere shading around it already baked in. Exactly what you lost when you disabled the disk for the texture coordinate trick.
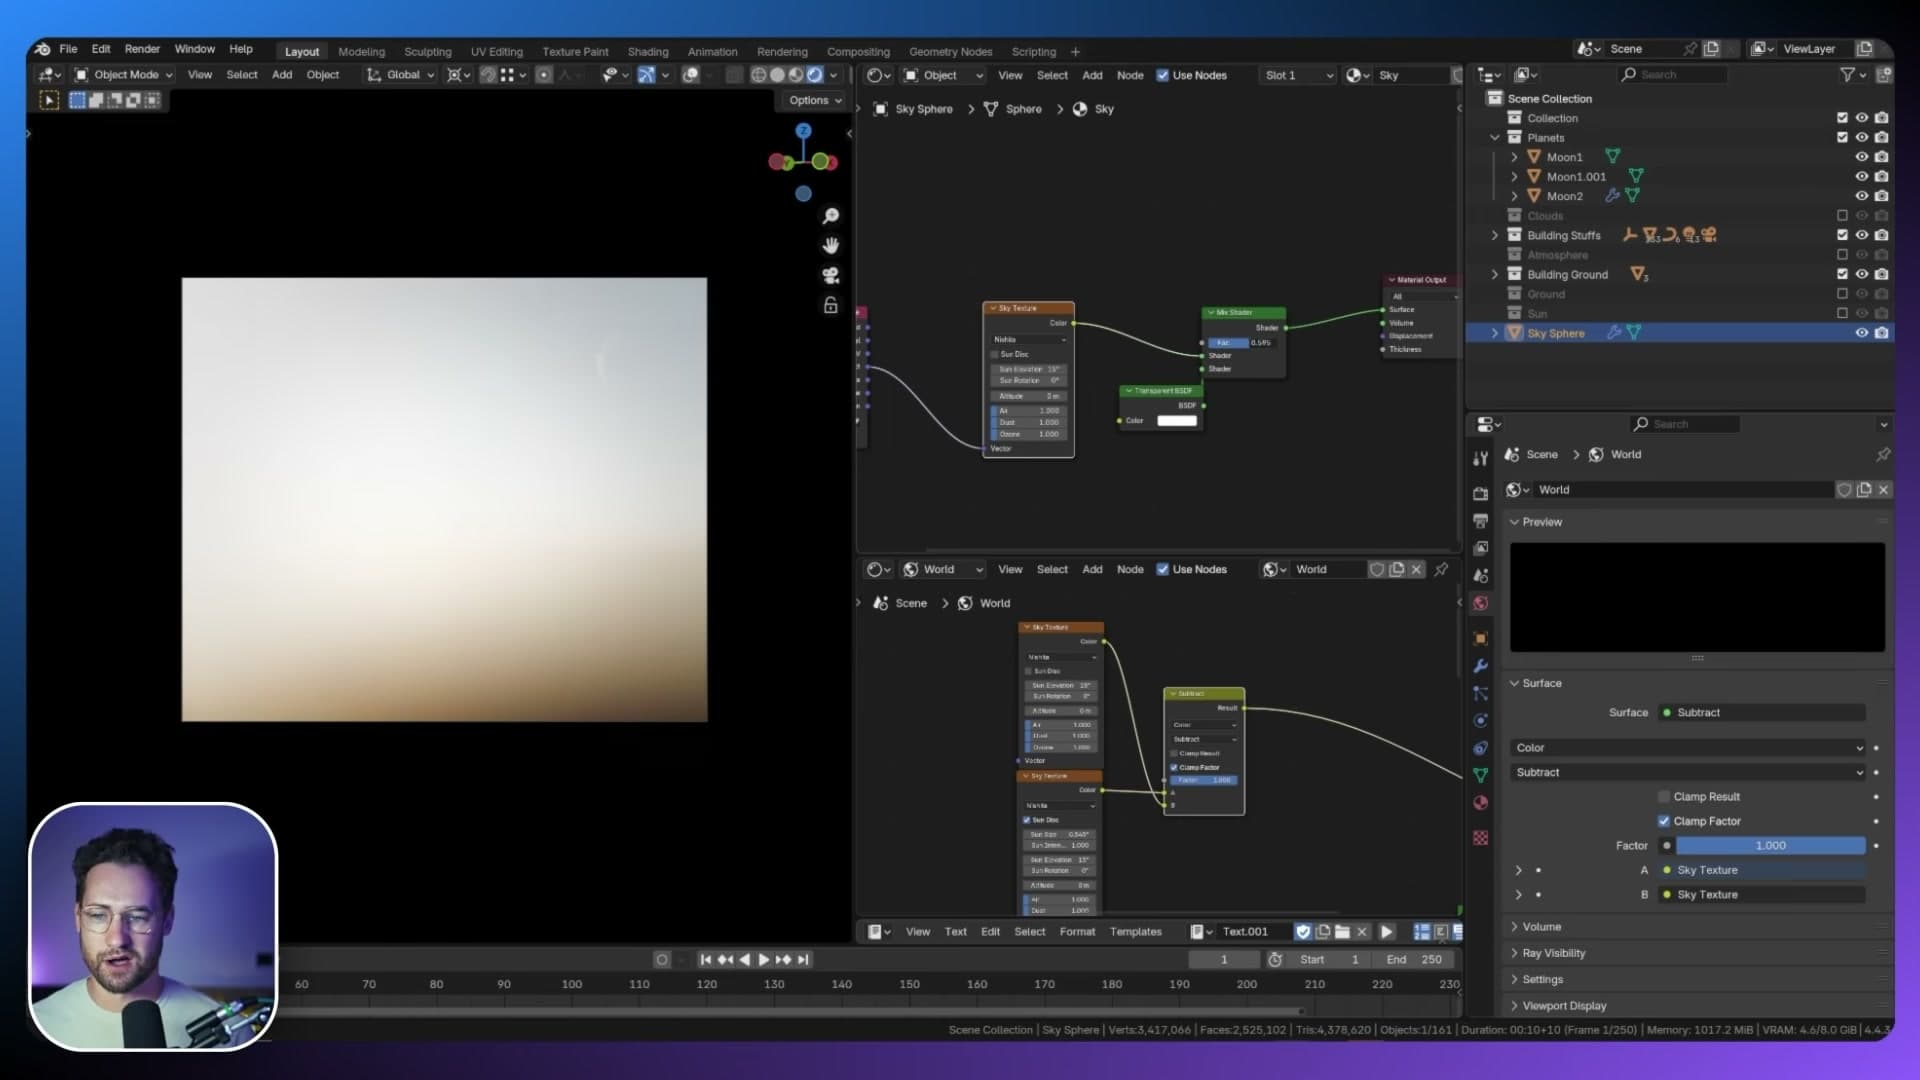
Route the Mix Color output into the Background node and switch back to the camera view. The sun now reads as an infinitely distant point, the planets pick up real sunlight across their surfaces, and the scene starts to look properly realistic rather than a flat ball-in-fog.
If the planets still feel a touch hard to see, drop back to the sky-sphere's Mix Shader factor from the previous module. Roughly halfway, perhaps a little more, is where the transparency tends to settle for the most convincing balance between atmosphere and the objects sitting behind it.
Sync a dedicated sun lamp to the sky and link it to planets
Add a real sun lamp for space lighting, then chain drivers so its rotation tracks the sky's sun_elevation and sun_rotation, and finally light-link it so it only touches the planets collection.
Adding a sun lamp at 5000 strength for the planets
With the sun disc back in the sky shader you've got correct internal lighting, but the atmosphere's low-elevation reddening still bleeds onto the planets sitting outside the sphere. The planets should be in clean space light, not in a sunset glow. The fix is a separate, dedicated sun lamp that only touches the planets. Add one from the menu: Add > Light > Sun.
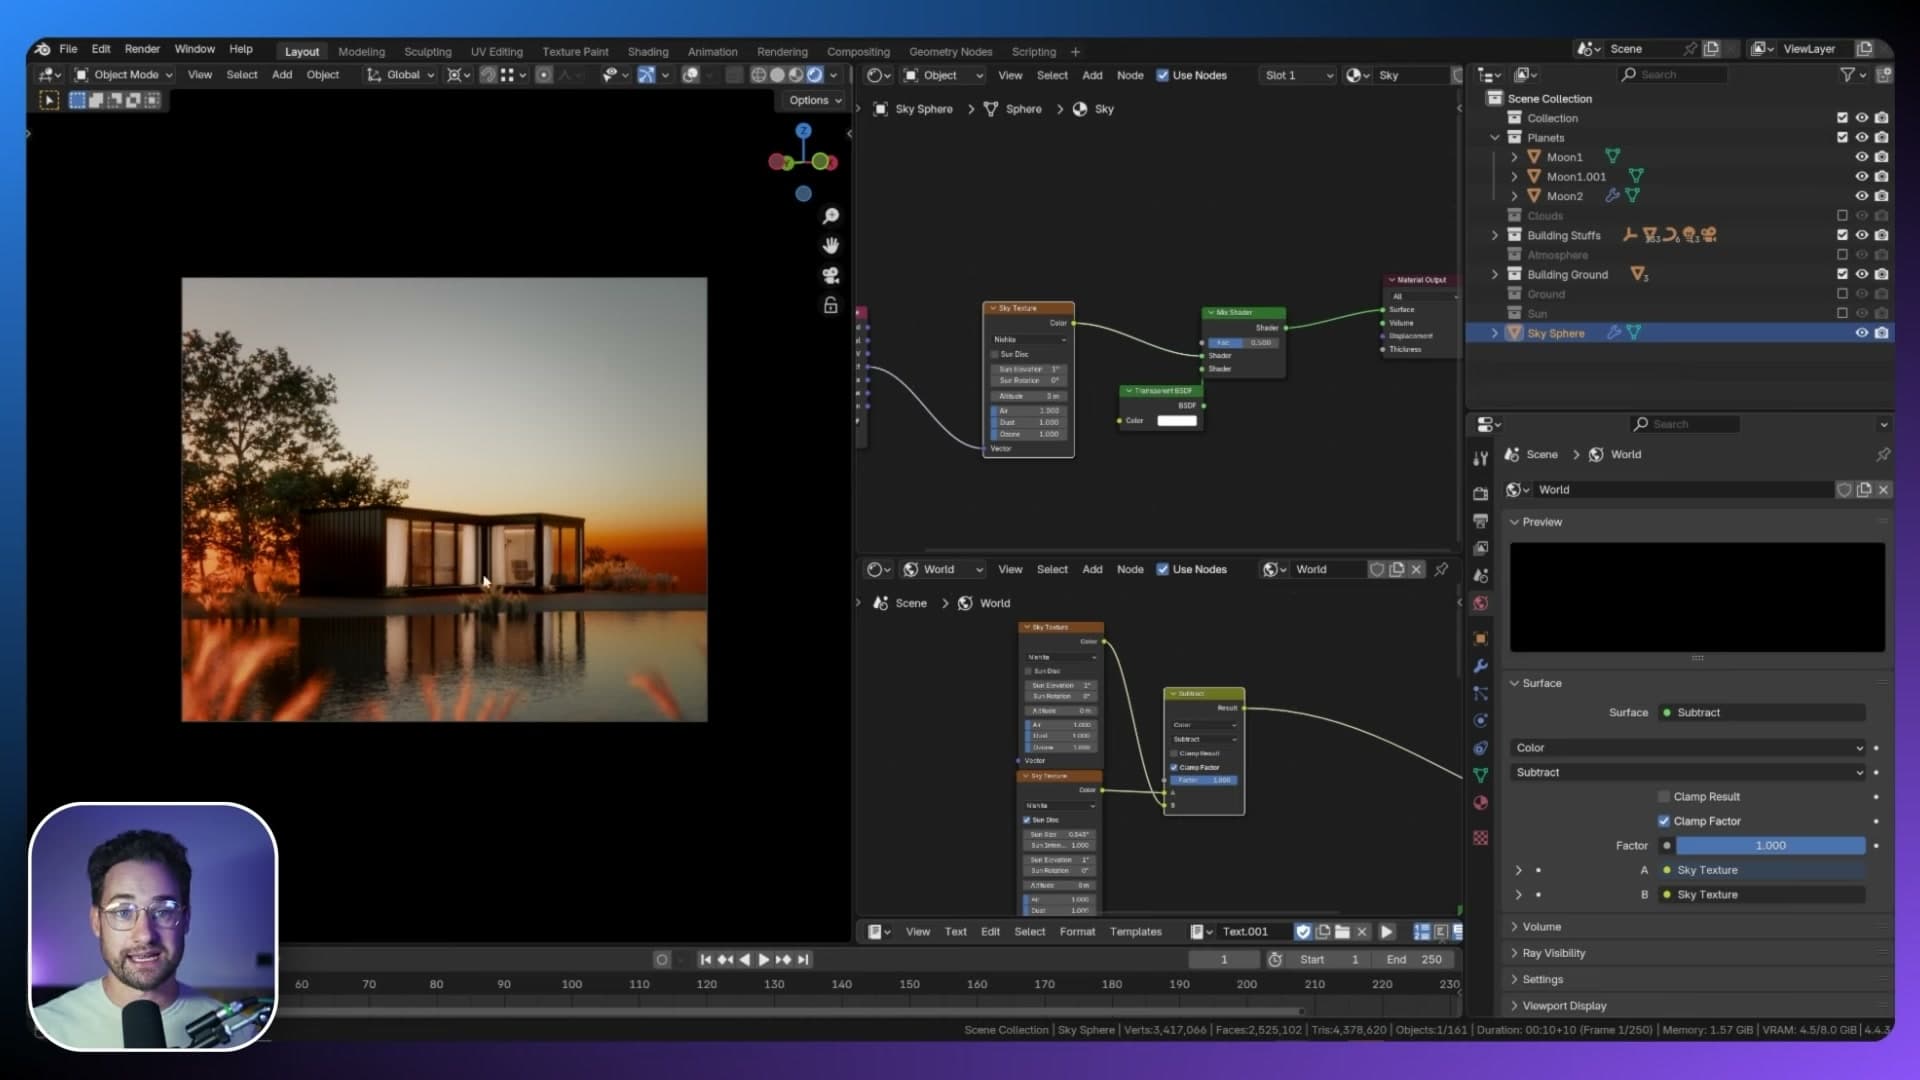
A Blender sun lamp behaves as if it sits infinitely far away, so in local view at the default strength you won't see anything light up. Push the Strength up to around 5000 and the planets pop into view, lit by the new lamp. Rotate the lamp and the shading reacts correctly, but its direction is currently disconnected from the sky's sun. That's the next thing to fix.
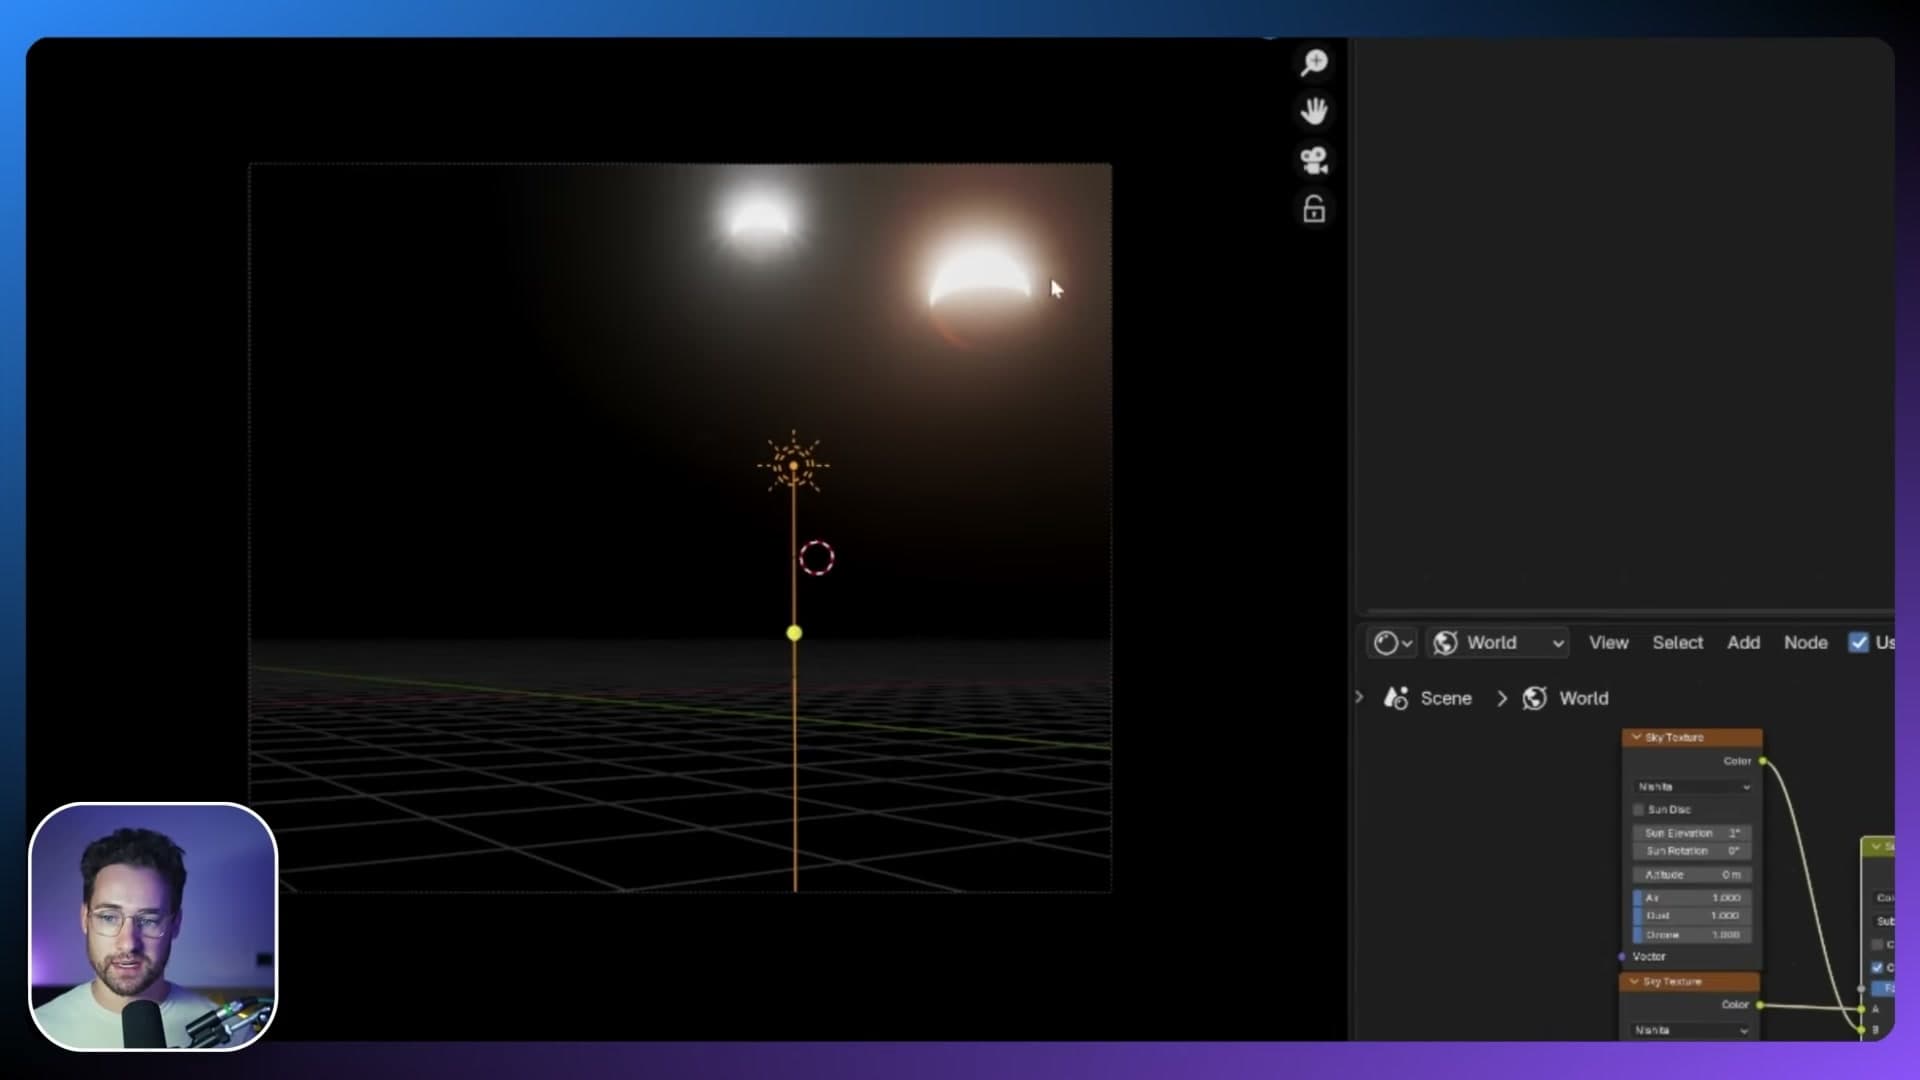
Driver for X rotation from sun_elevation
To lock the lamp's orientation to the sky, press N in the 3D viewport, open the Item tab, and find the rotation values for the lamp. Each axis needs its own driver.
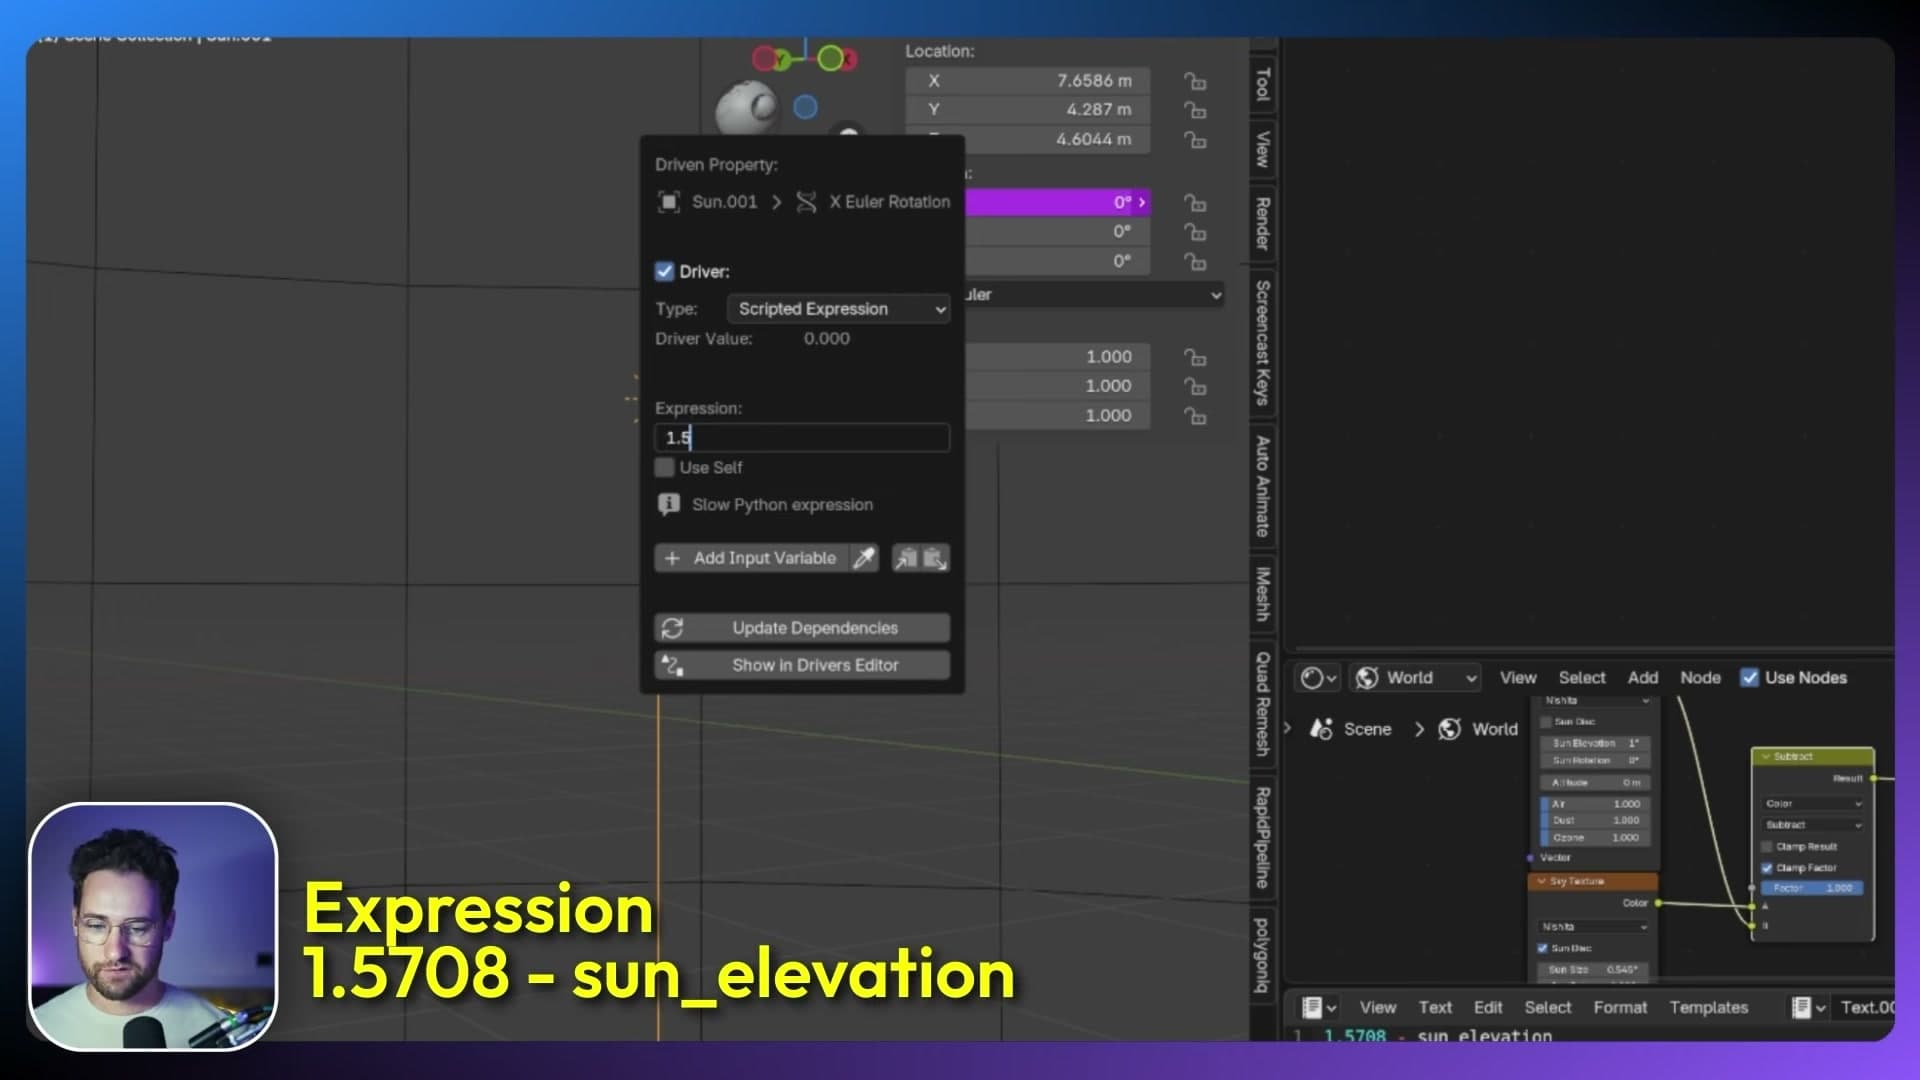
Right-click the X Rotation field and choose Add Driver. Delete the default expression and type 1.5708 - sun_elevation. That constant is π/2 in radians. Blender's Sky Texture stores elevation as the angle above the horizon, while the lamp's X rotation is measured from vertical, so subtracting one from the other converts between the two conventions.
Blender may flash a one-time warning about a script trying to run. Accept it with Allow This Time. Reopen the driver with Edit Driver, then add an input variable. Set the property type to Single Property, name the variable sun_elevation, set the ID type to Material, and pick the sky material you built earlier.
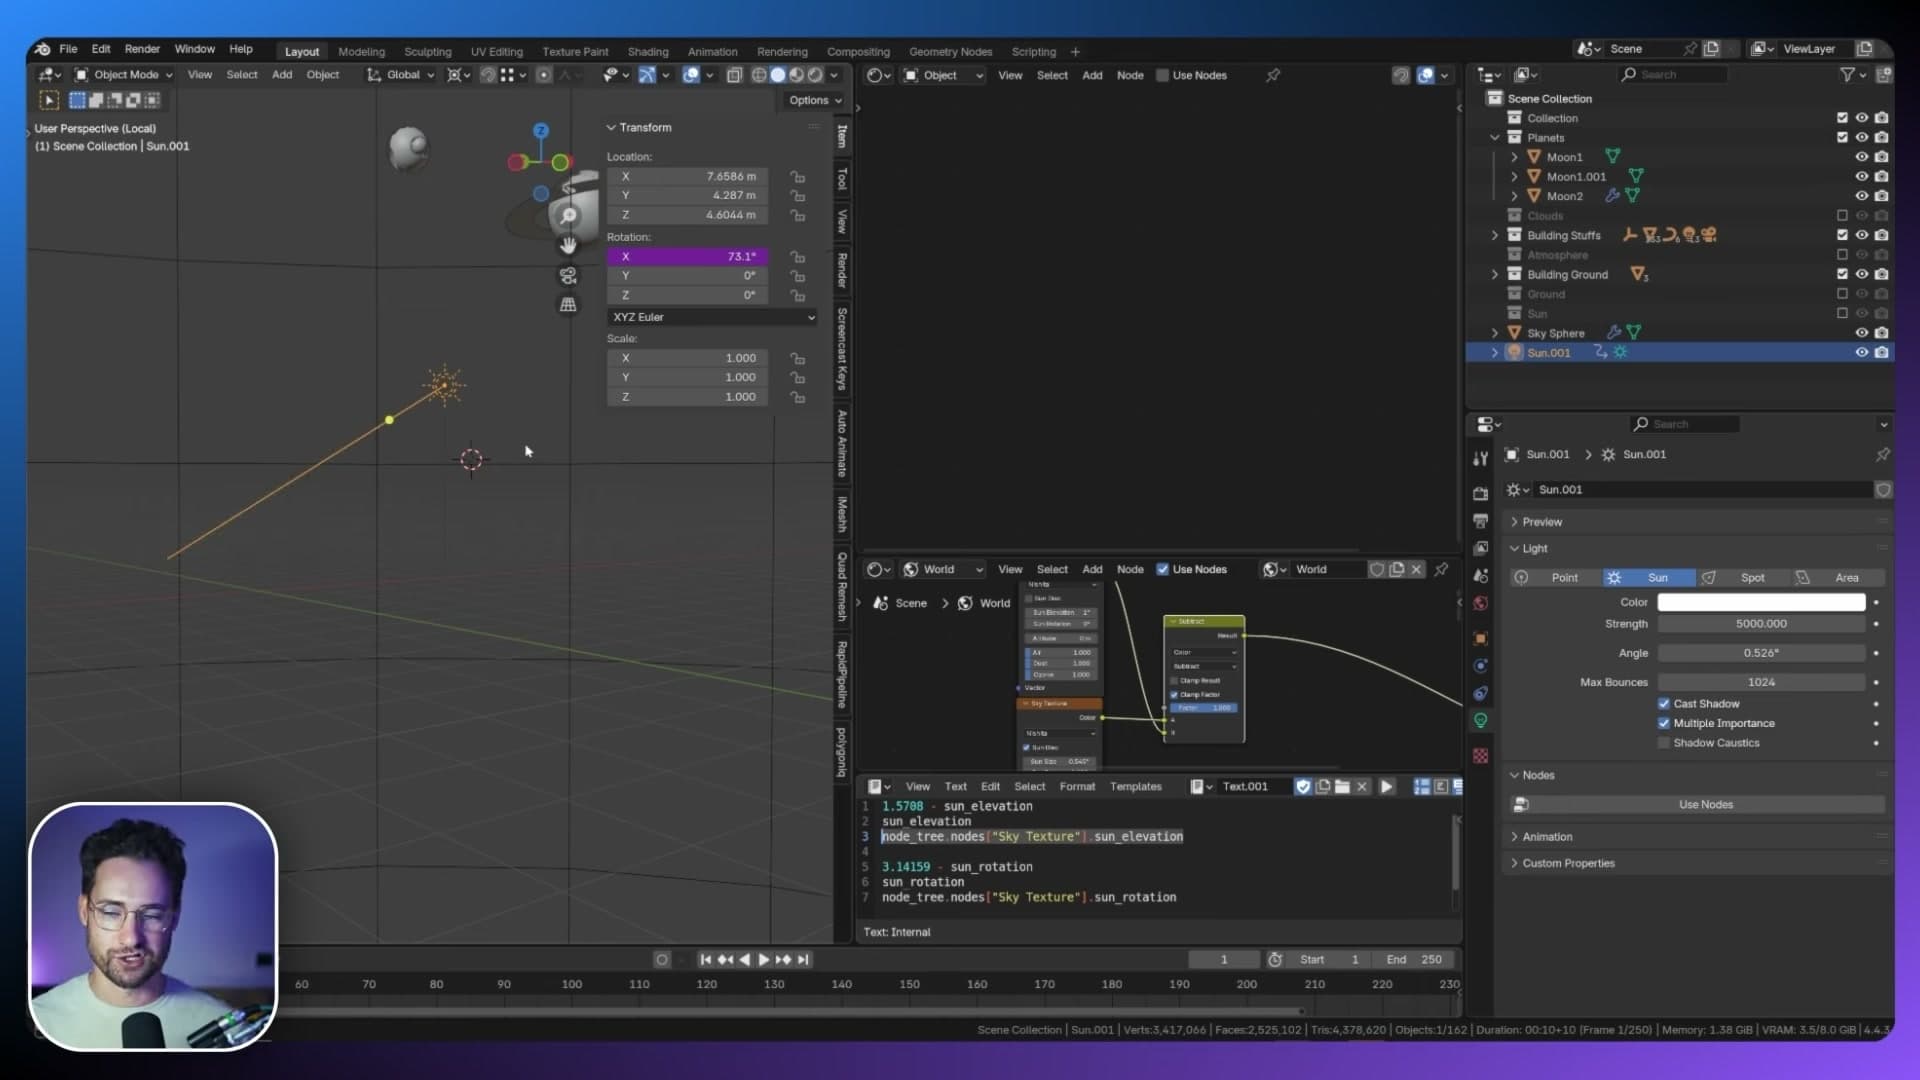
The variable still needs a data path pointing at the sky texture's elevation field. Paste in the path string and close the driver editor. If you now drag the sky's elevation, nothing happens. Blender's dependency graph doesn't always update cross-block drivers on the fly.
Driver for Z rotation from sun_rotation
Repeat the process for the lamp's Z Rotation. Right-click, choose Add Driver, and replace the default expression with 3.14159 - sun_rotation. The constant is π in radians (180°), which flips the lamp's azimuth so it points the same way as the Nishita sky's sun.
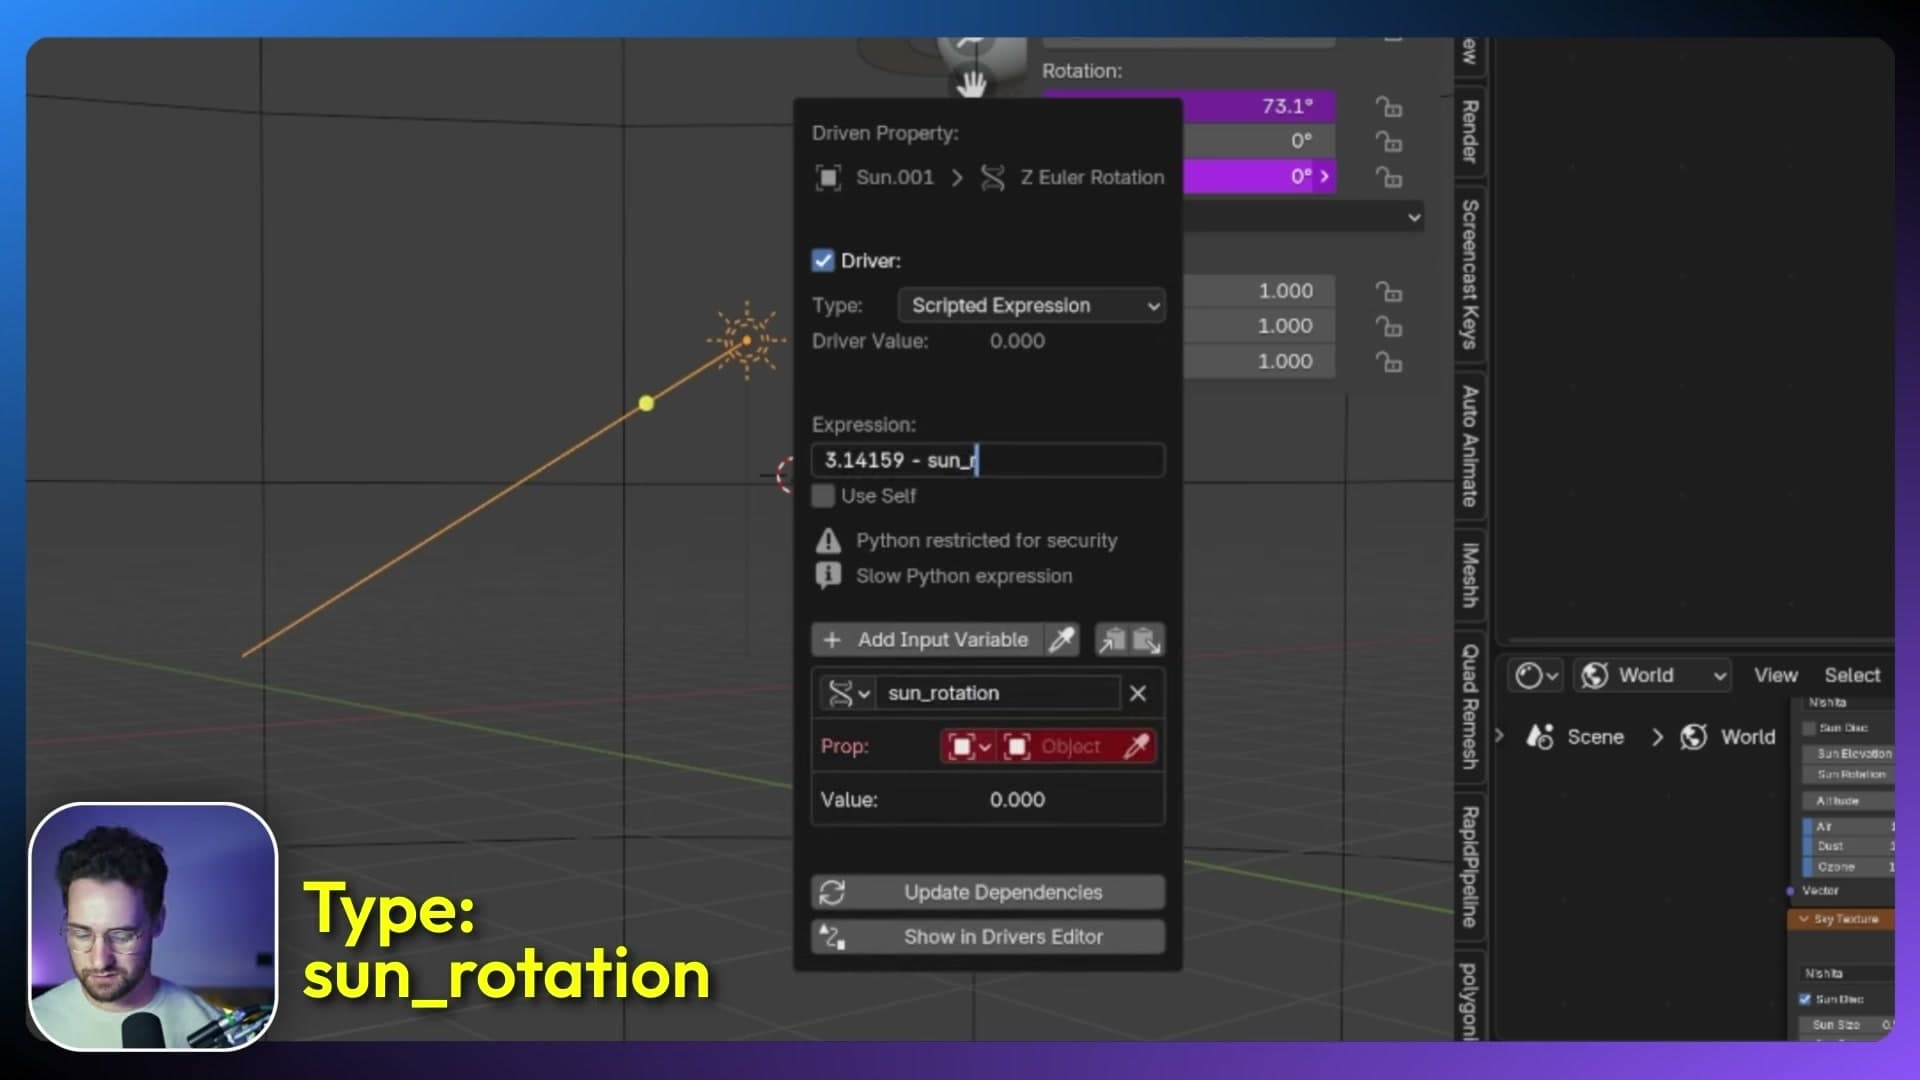
Add an input variable and call it sun_rotation. I accidentally typed sun_elevation on the first attempt and had to correct it. The rotation driver needs to read from the rotation property, not the elevation one. Set the ID type to Material, choose the sky material, and paste the rotation data path into the field.
Drag the sky's Sun Rotation slider, give the lamp an S jolt to refresh, and the lamp now tracks both elevation and rotation. Its shadow direction matches the sun disc in the sky shader exactly.
Copy as New Driver across every sun in the scene
The dedicated planet sun is now driven, but any other suns in the scene (the second world's sun used for the subtracted sun disc, plus any other HDRI-style sun lamp) are still loose. Rather than rebuild the drivers by hand on each one, copy them.
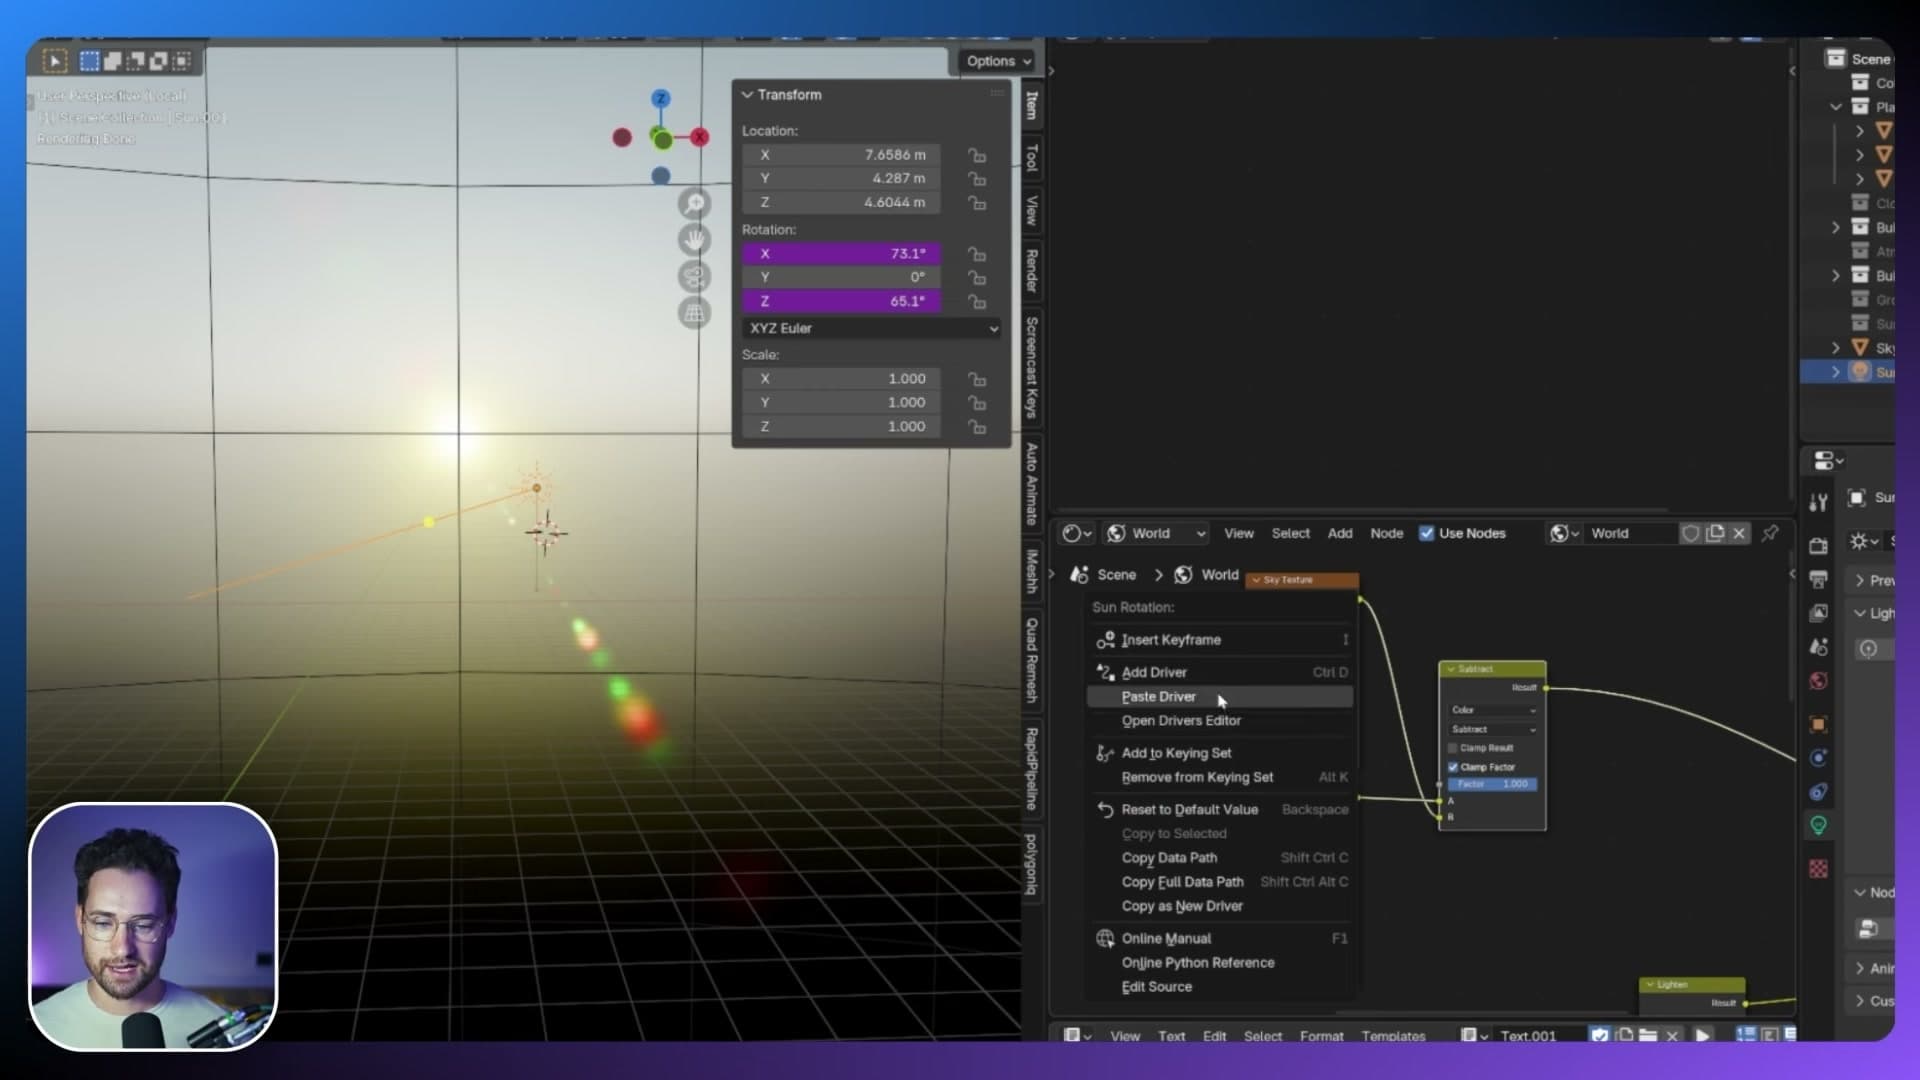
Right-click the field that already has the driver (the X rotation you set up first) and choose Copy as New Driver. On the next sun's X rotation, right-click and choose Paste as New Driver. Repeat for Z rotation with the sun_rotation driver, then do the same again for the third sun so every sun in the scene is wired up.
With all the drivers in place, every sun rotates in lockstep. Push the sky's elevation or rotation and they all realign. As before, any lamp that hasn't refreshed visually just needs an S nudge to catch up.
Light-link the sun lamp to the planets collection
The new sun is pointing the right way, but as a normal Blender light it currently illuminates everything in the scene, including objects that should be lit by the sky's own sun disc. Light-link it so it only sees the planets. Select the lamp, open Object Properties, scroll down to Shading > Light Linking, click into the receivers field, and type planets to add the planets collection as the only receiver.
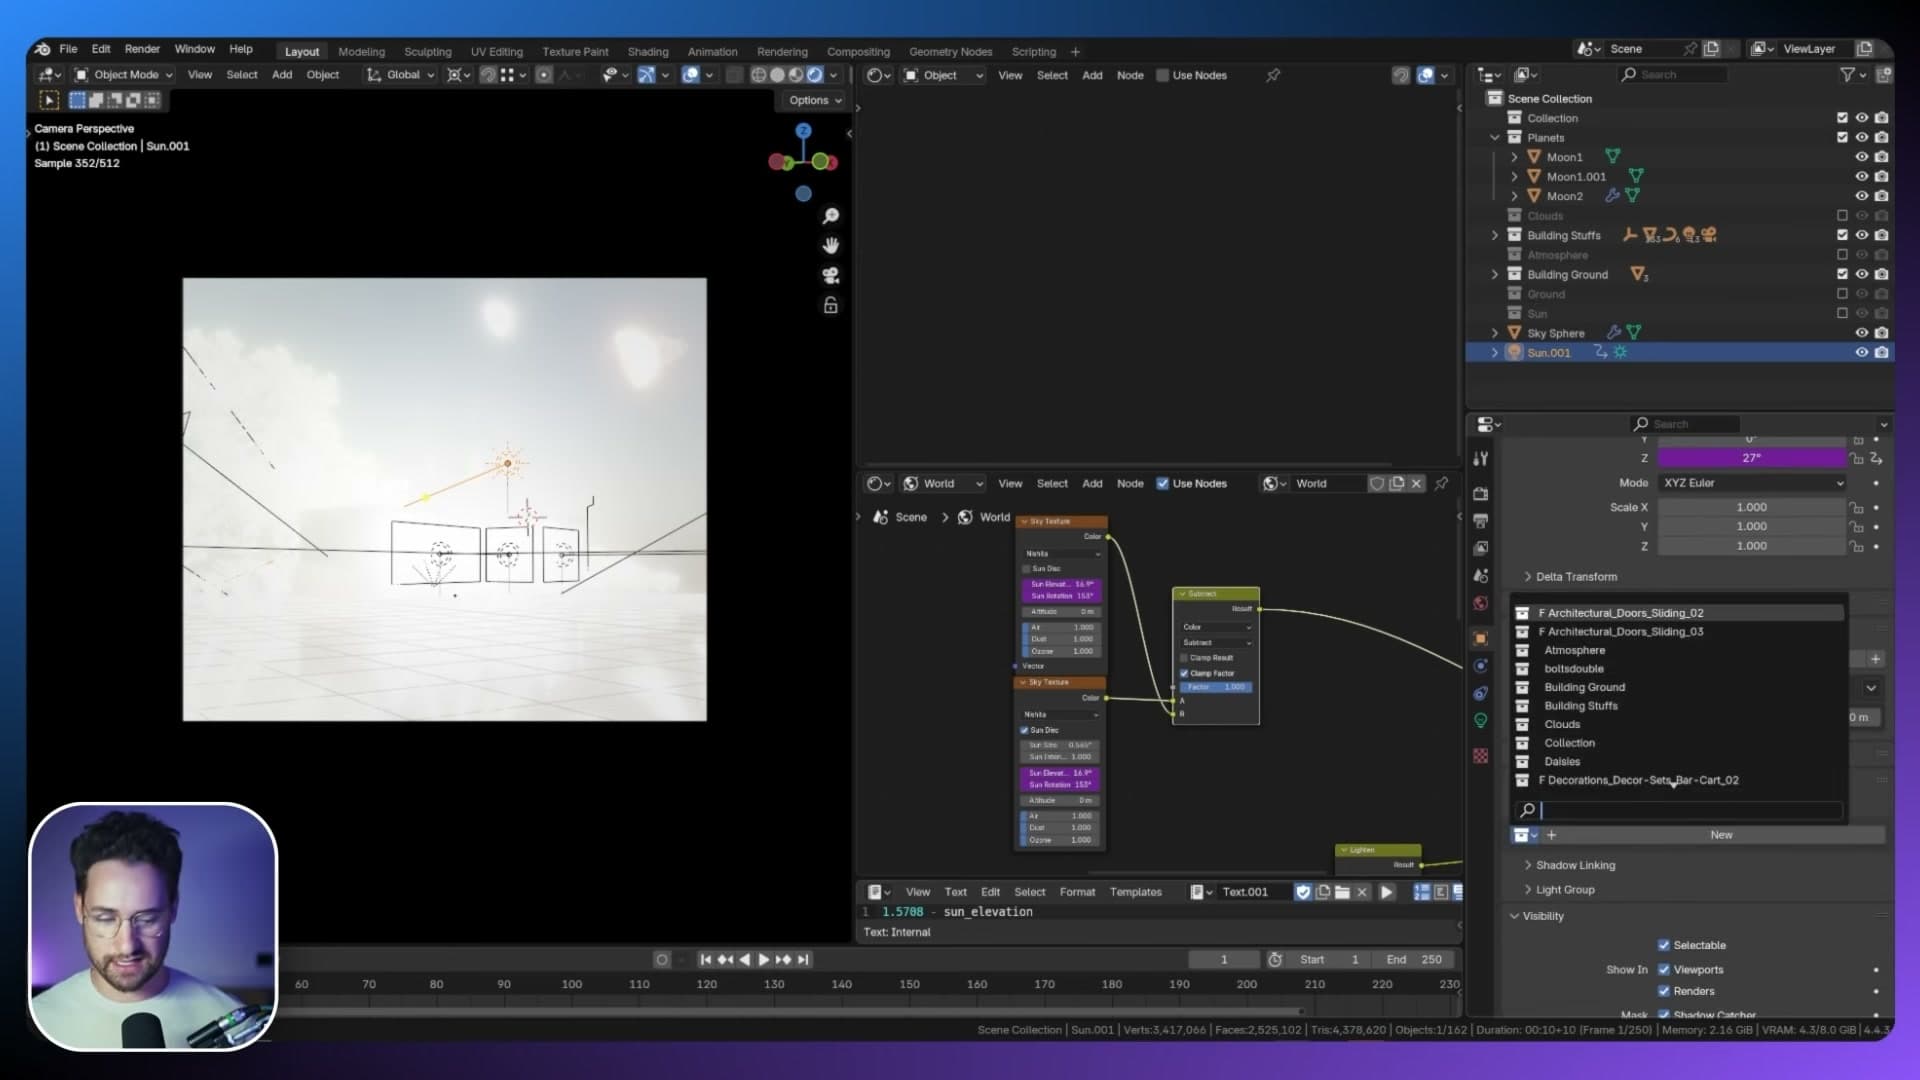
Now the lamp affects nothing outside that collection. The atmosphere's reddened low-elevation sun keeps colouring the sphere's interior contents, while the planets stay in clean, unfiltered space lighting. Drop the sky sphere's elevation and rotation back to sensible starting values (I dial elevation down to about 1 and rotation back to roughly 0) and the scene is ready for clouds and stars.
Volumetric clouds at realistic altitudes
Scale the sky sphere up to enclose multi-layer cloud volumes, then walk through the noise-into-colour-ramp shader, gradient distance fade and cloud-band masks that make the layers feel real.
Scaling the sky sphere to enclose the cloud layers
With the planets and sun behaving, the next layer is clouds. I pre-built three cloud volumes at different altitudes: wispier shapes towards the top, thicker formations lower down, and a third volume displayed as a bounding-box wire so all three are visible at once in the viewport.
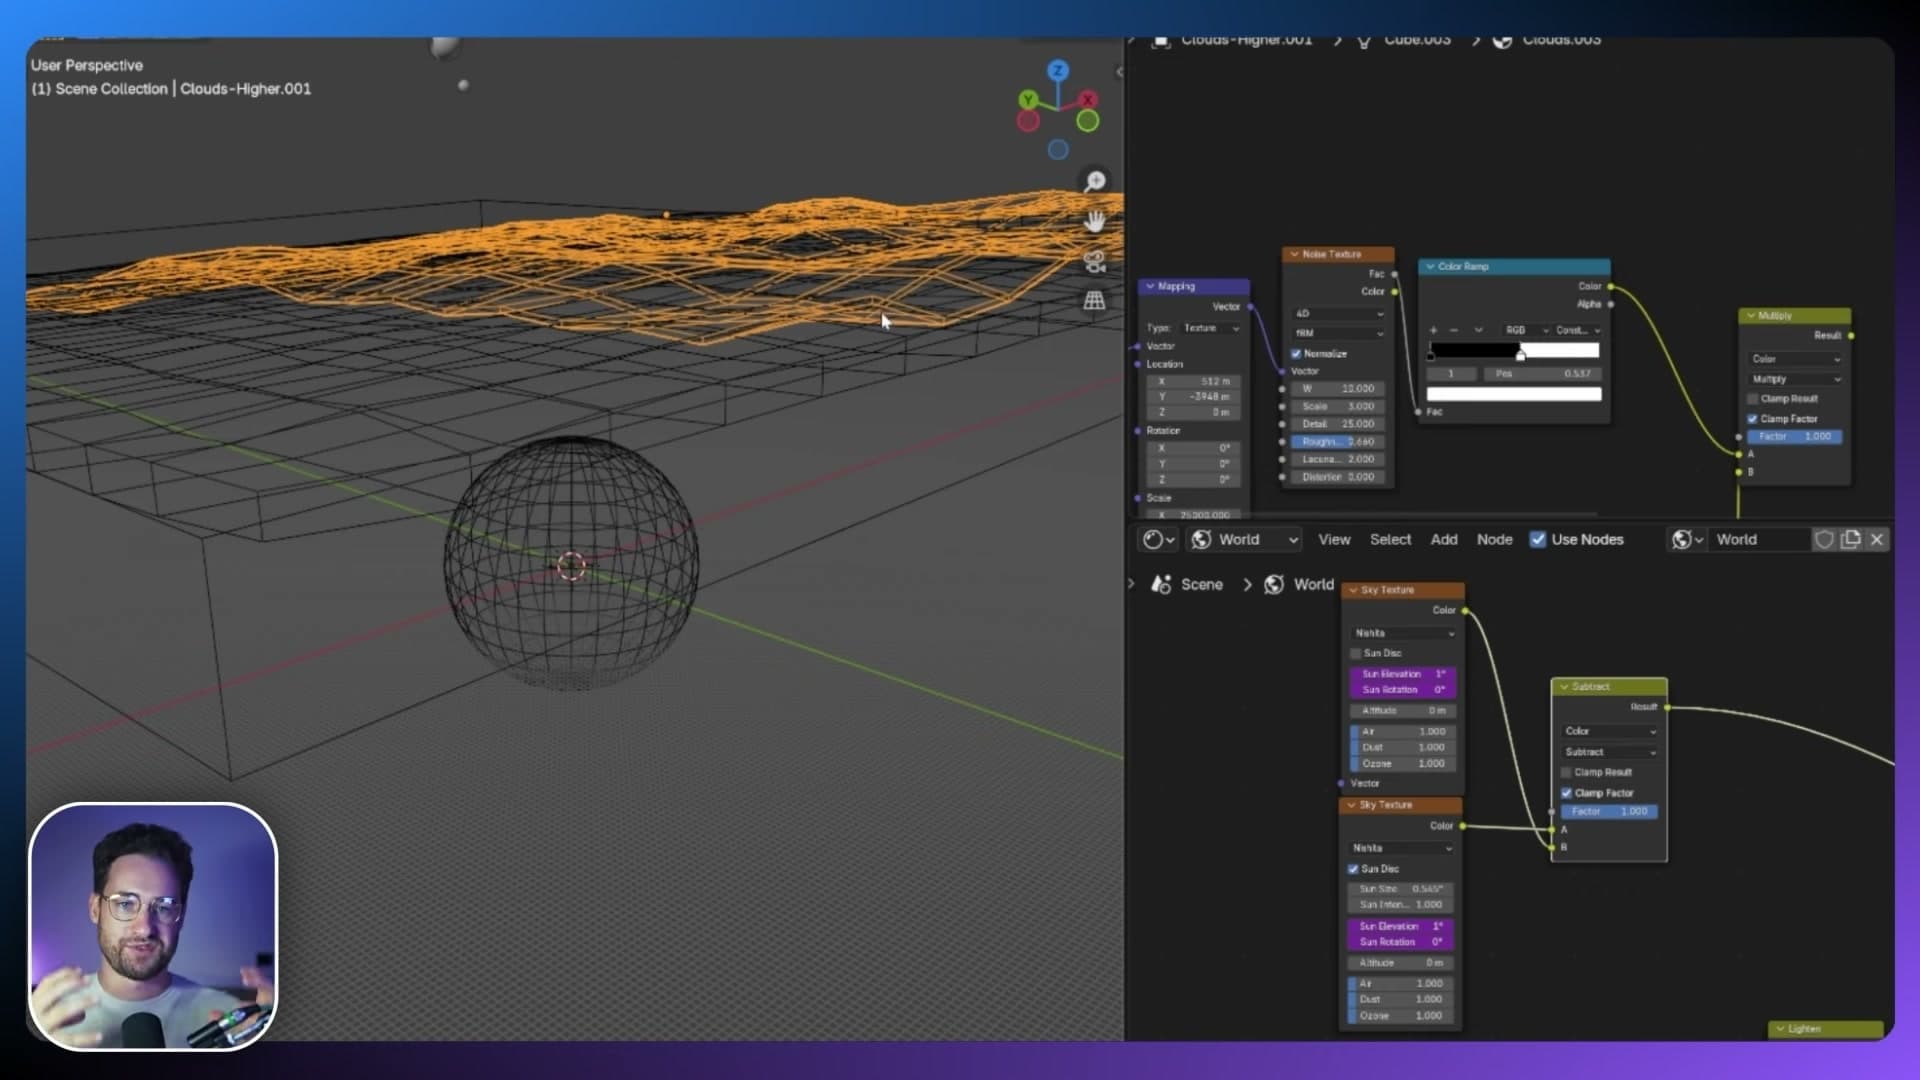
The problem is immediate: the cloud layers stick out beyond the sky sphere you set up earlier. For the scene to read correctly, the sphere has to grow until it fully contains them. Planets can sit wherever they like (they're so distant that a few hundred metres either way makes no visible difference), but clouds need to sit at roughly believable altitudes for the sky to feel real.
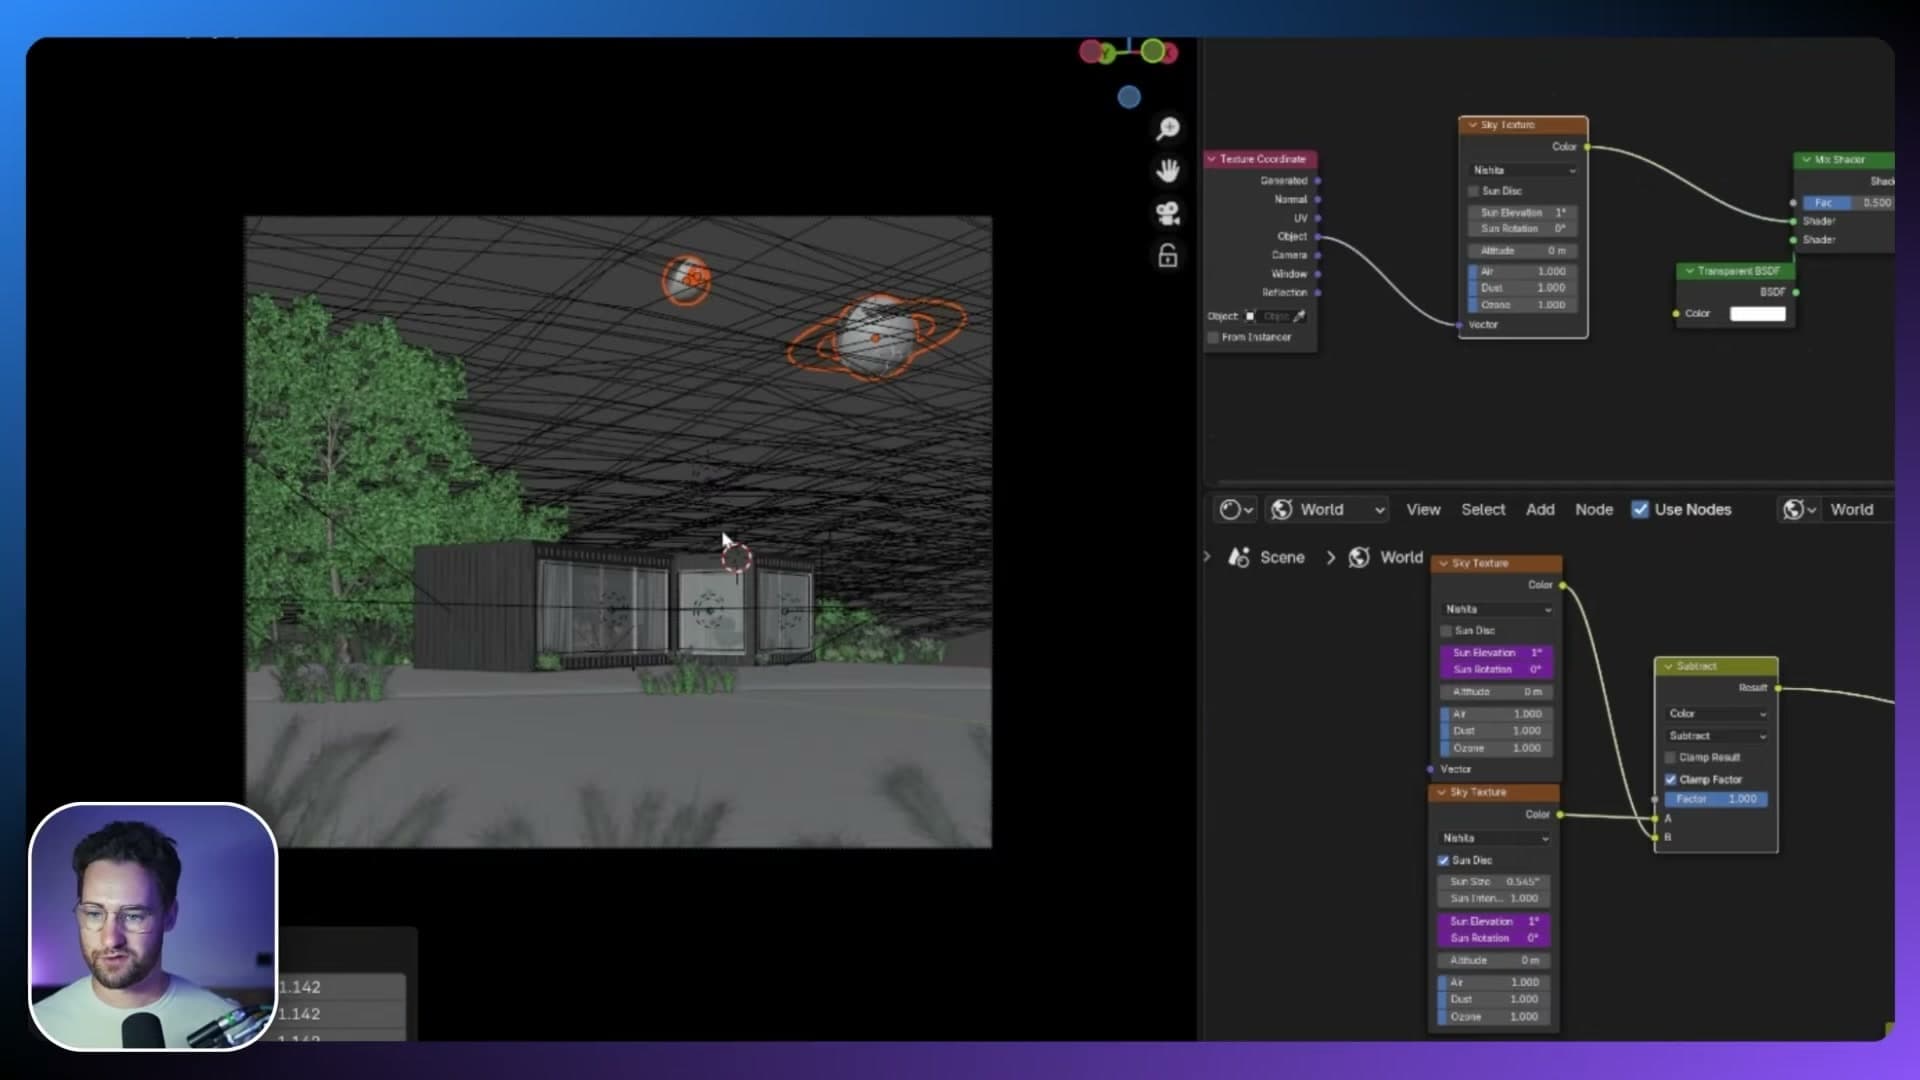
Scale the sky sphere up from its origin point, with all three cloud layers selected for reference, until the sphere comfortably encloses every cloud volume. Drop back into camera view and the clouds now drift overhead, sitting inside the world rather than poking through its skin.
Cloud shader: noise texture into colour ramp
Switch to render preview and the layers light up as proper volumetric clouds, working with the real sunlight from your Nishita sky. Hide one of the lower layers and you can see how each one contributes. The result is genuinely convincing, and remarkable for something built entirely inside Blender's world space.
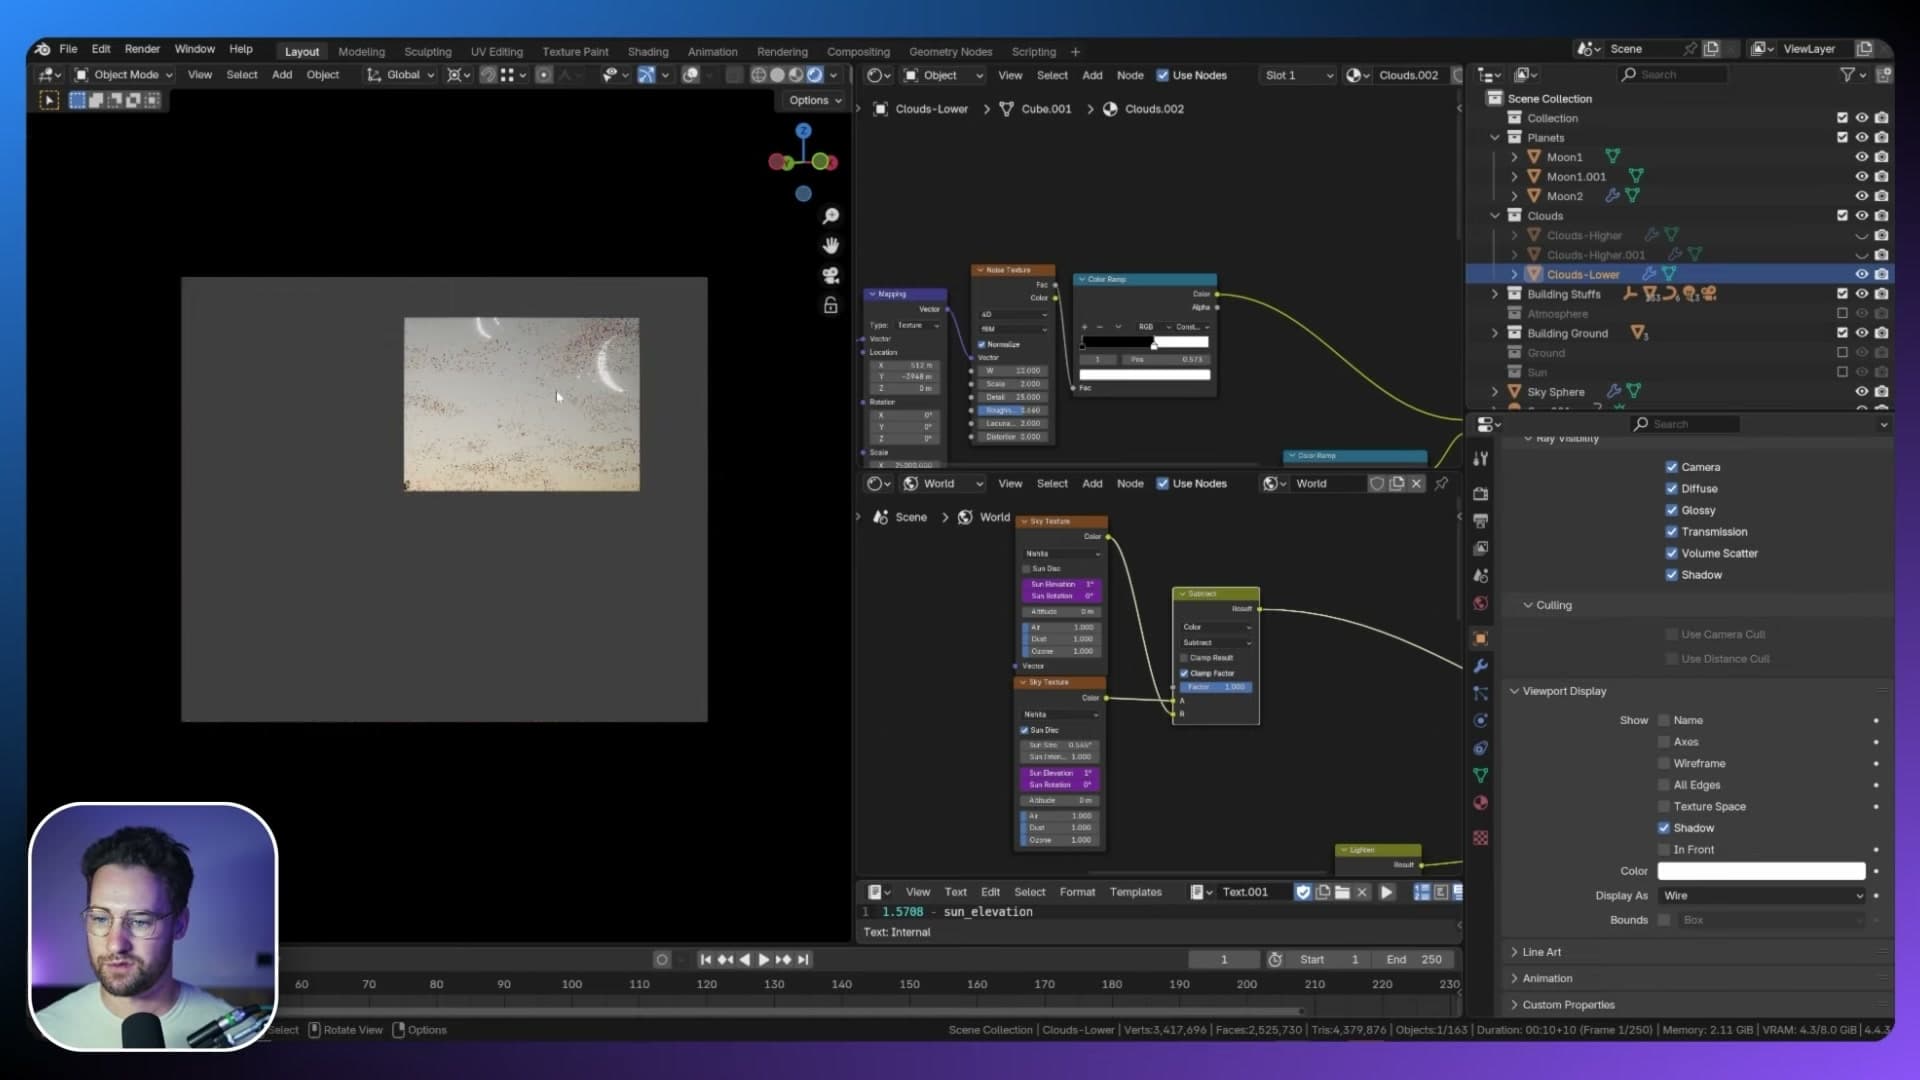
Underneath the wow factor the shader is simple. Each cloud layer is a Noise Texture piped into a Color Ramp. The noise gives the volume its random, broken-up shape; the colour ramp decides where the cloud is dense, where it thins out, and where it disappears entirely.
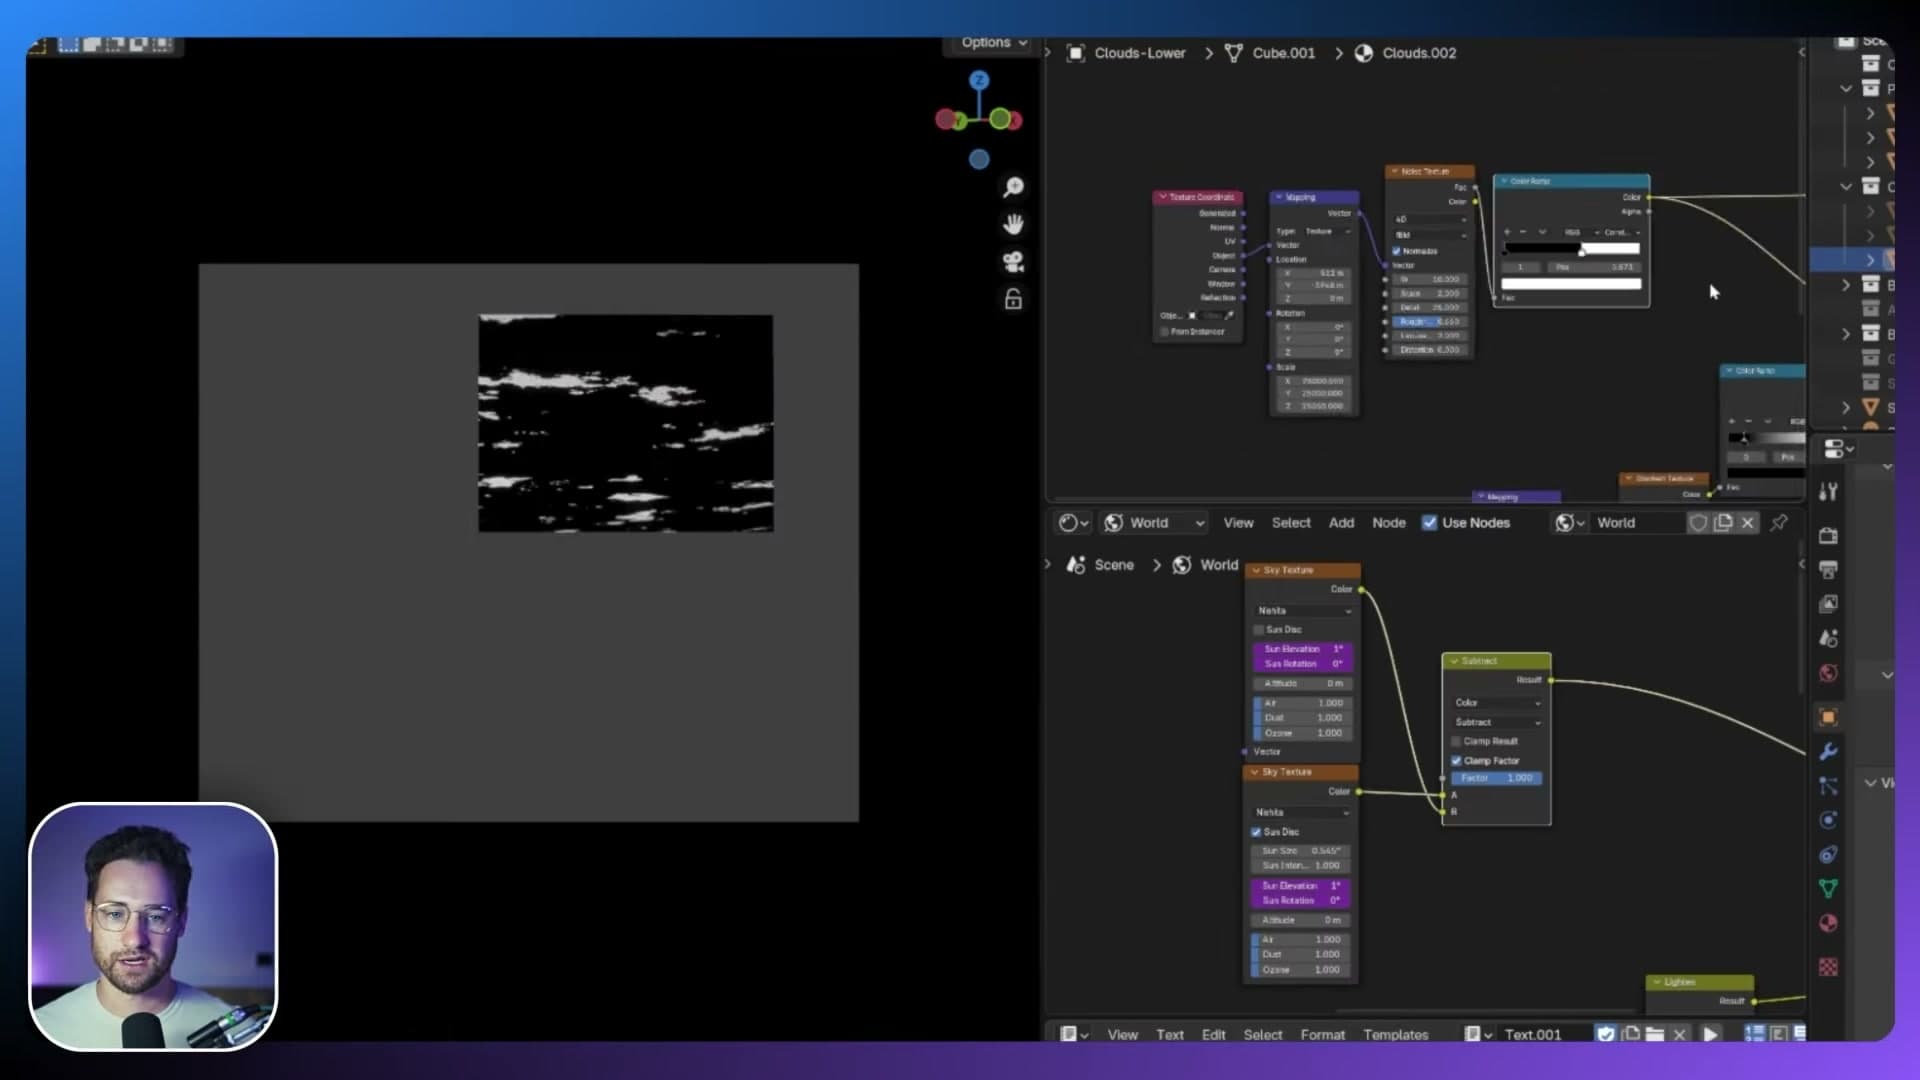
Two controls do most of the work. The noise texture's scale and detail change the randomness: how chaotic or smooth the cloud forms look. The colour ramp's black and white stops change how thick the cloud is, sliding the threshold between solid mass and empty sky.
Gradient masks and cloud bands
The noise-and-ramp output isn't used on its own. It feeds into a Multiply node alongside a Gradient Texture. That gradient acts as a distance mask: clouds near the camera stay opaque, while clouds further out fade towards invisible. Without it the edge of the sphere becomes obvious; with it the cloud field falls off naturally into the horizon.
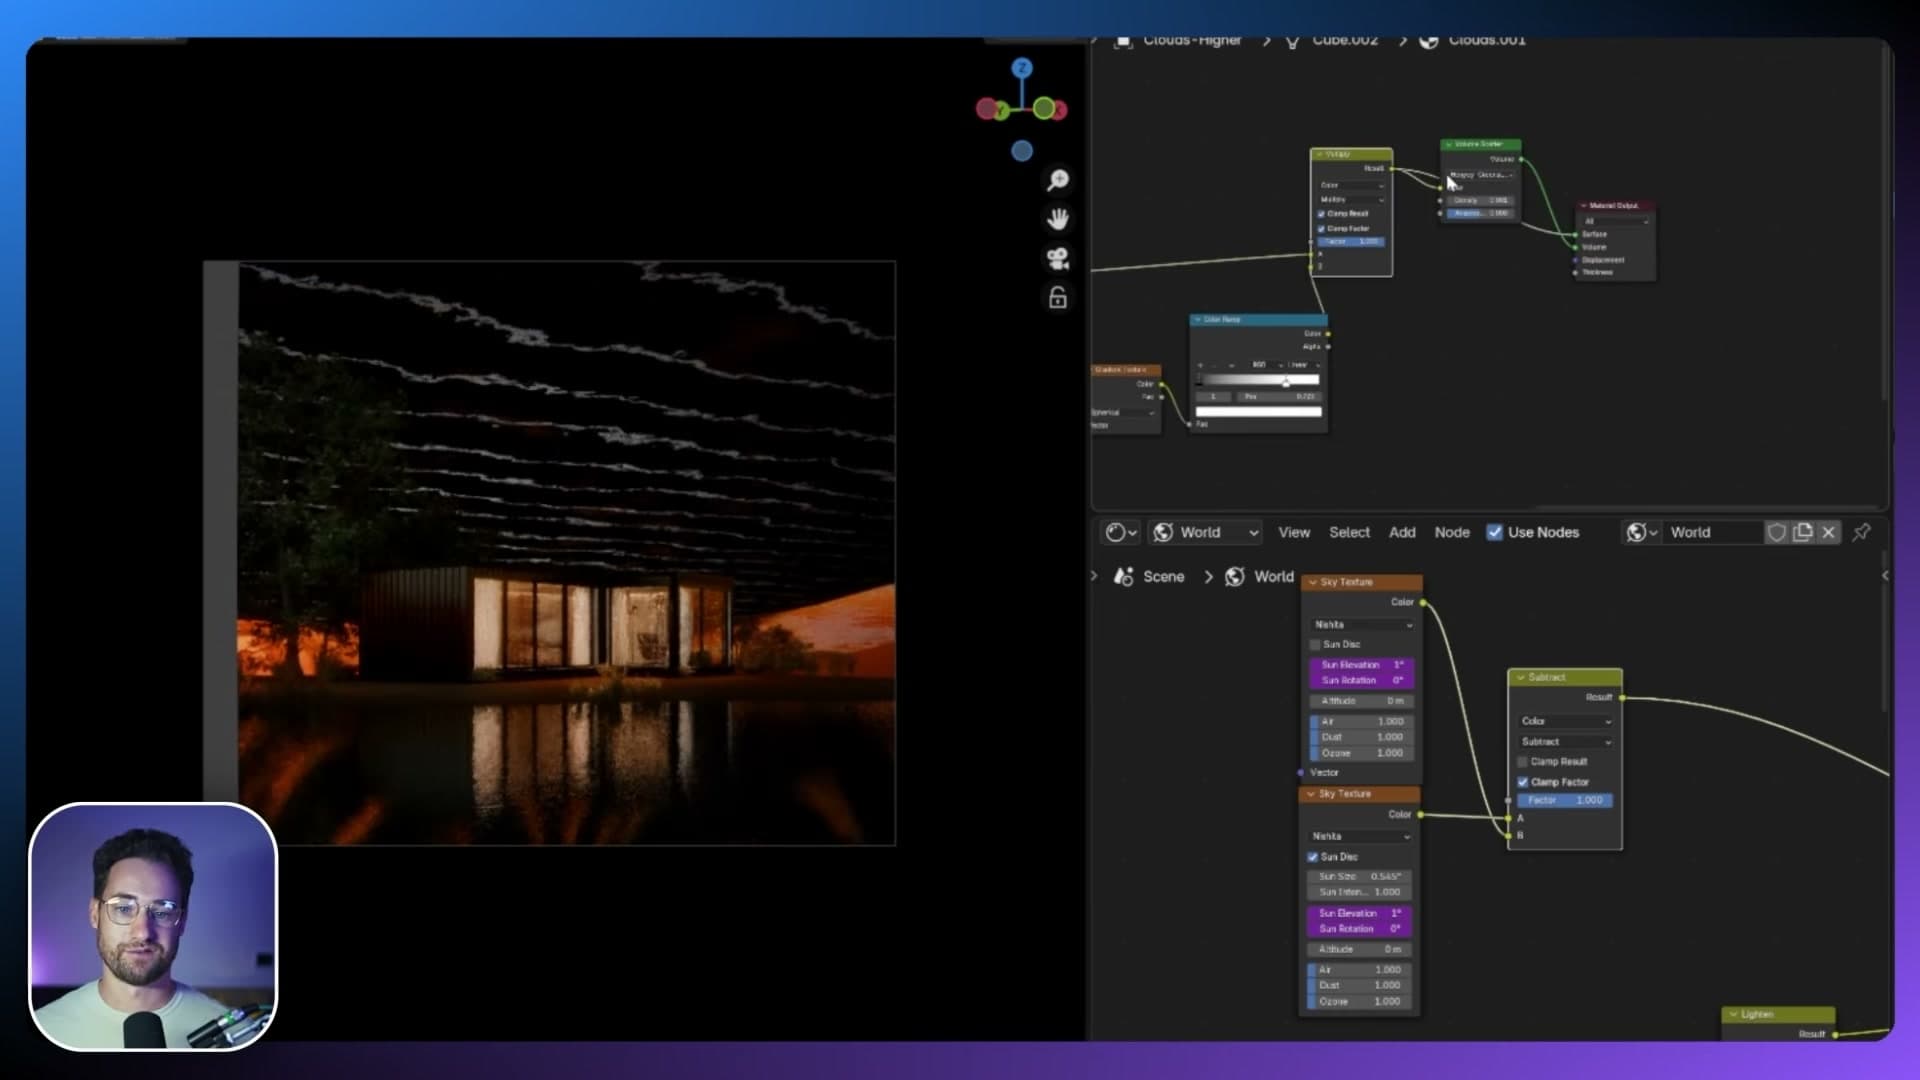
The multiplied result then plugs into a Volume Scatter and out to the volume output of the material. Slide the gradient's stops and you can watch the coverage grow or shrink. Pulling it down spreads cloud across more of the sky; easing it back leaves you with the scattered look I was after.
The higher cloud layer gets one extra trick: bands. Real skies often show distinct streaks where cloud lines up at altitude, so I mask the upper layer with another gradient to recreate that. On its own it's subtle, but stacked with the other two layers it adds the final touch of realism that sells the sky as a place rather than a backdrop.
Distant ground, mountains and atmospheric haze
Add a very large displaced ground for mountains in the distance, then wrap the scene in a volume-scatter atmosphere box to simulate real-world haze.
Displaced mountains in the distance
The scene still needs a ground, and more importantly something to sit on the horizon so the sky has a believable silhouette to read against. For this build, a separate very large ground plane has already been prepared off to one side (much bigger than the immediate terrain), with a displacement map driving its surface so the geometry breaks up into peaks and valleys.
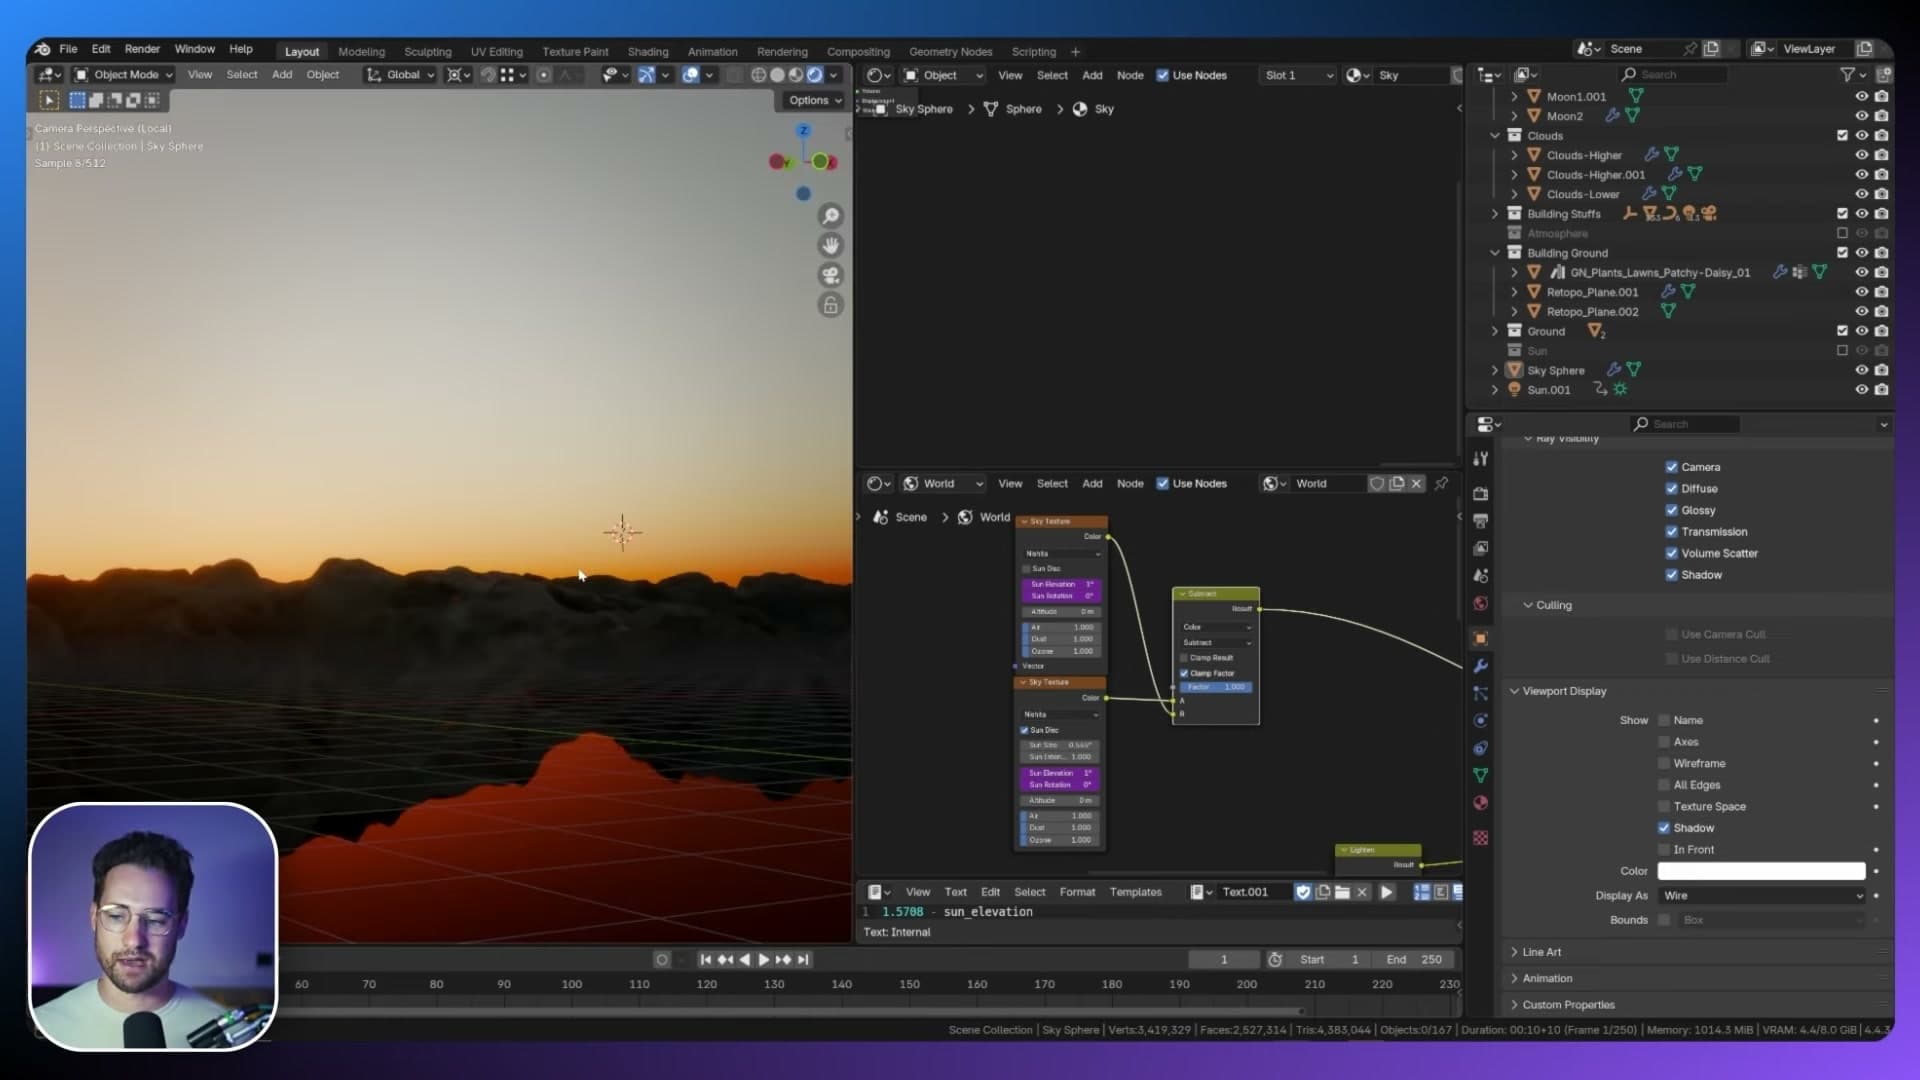
Place that plane far enough away that it reads as a distant range rather than nearby hills. When you switch into render preview the displacement resolves and the silhouette starts to look like mountains in the distance, which is exactly what you want sitting underneath the Nishita sky.
Atmosphere box with volume scatter
Mountains that far away should never render crisp. In the real world there is always air between you and them, and that air scatters light. To fake that inside Blender, wrap the scene in an atmosphere box: a single mesh large enough to enclose everything you want the haze to affect, with a Volume Scatter shader on its volume output. Volume Scatter is the same node used for clouds and fog, so it does exactly the job you need here.
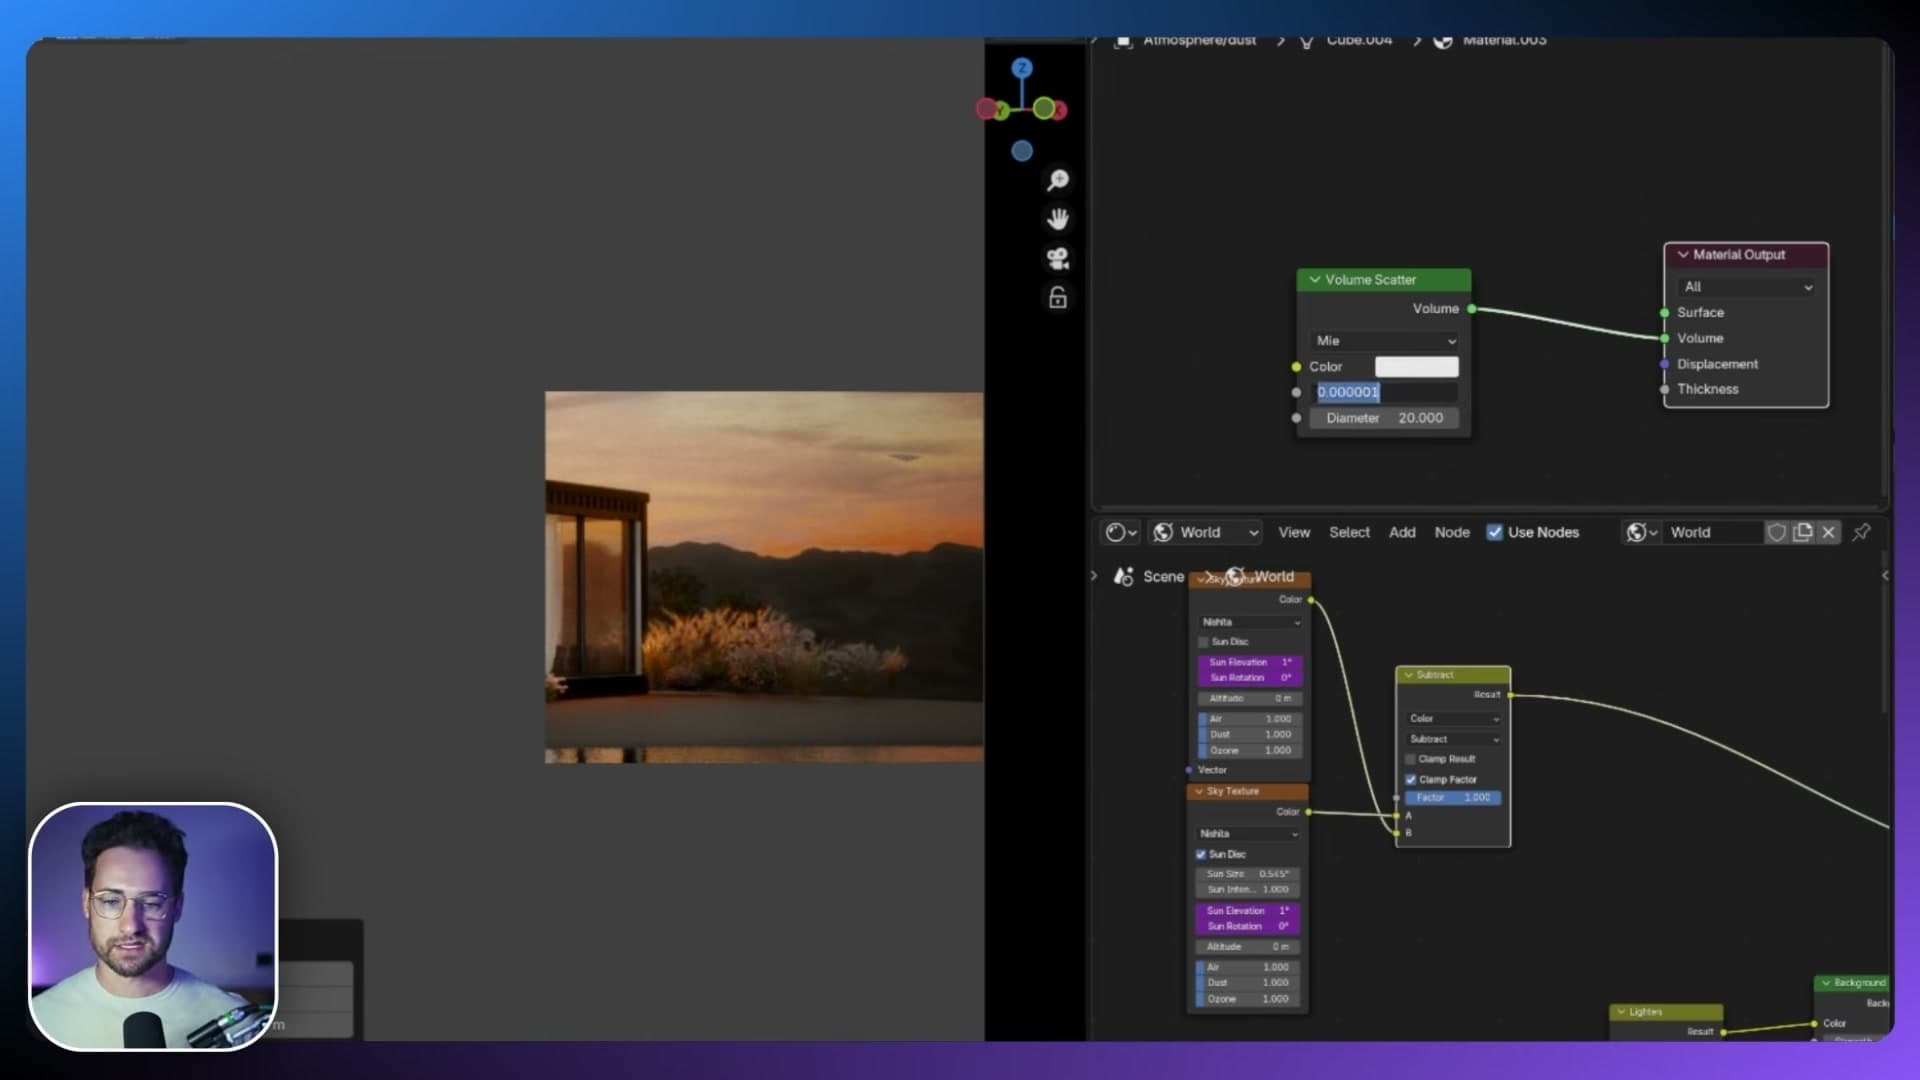
Scale the box up until it covers the whole scene, then jump back into render preview. The distant mountains pick up a soft haze in front of them and start to recede into the sky the way real terrain does at a distance. If you want a heavier, foggier mood, push the Volume Scatter density up. The effect responds smoothly and everything inside the box keeps interacting with the sun and sky correctly, because nothing here is faked with a post-process.
While you have the atmosphere visible, this is also a good moment to play with the sun height to see how the haze reacts to changing light. Select the sky sphere, find the Sky Texture node and nudge the elevation up to around 5. Because the sun rotation on the lamp is driver-linked to the same value, the lamp follows the sky automatically and the haze immediately picks up a warmer, lower-sun colour.
Final lighting tweaks and grass
Re-adjust sun elevation, jolt the drivers across all suns so they update together, and switch the foreground grass on for the hero render.
Re-adjusting elevation and jolting drivers
With the sky elevation raised back up to 5, the atmosphere itself updates instantly but the driver-linked sun lamps don't always catch up on their own. Blender's dependency graph can be lazy when the value you changed is buried inside a shader node, so the new sun position shows in the sky while the sun lamps in the scene are still pointing at the old angle.
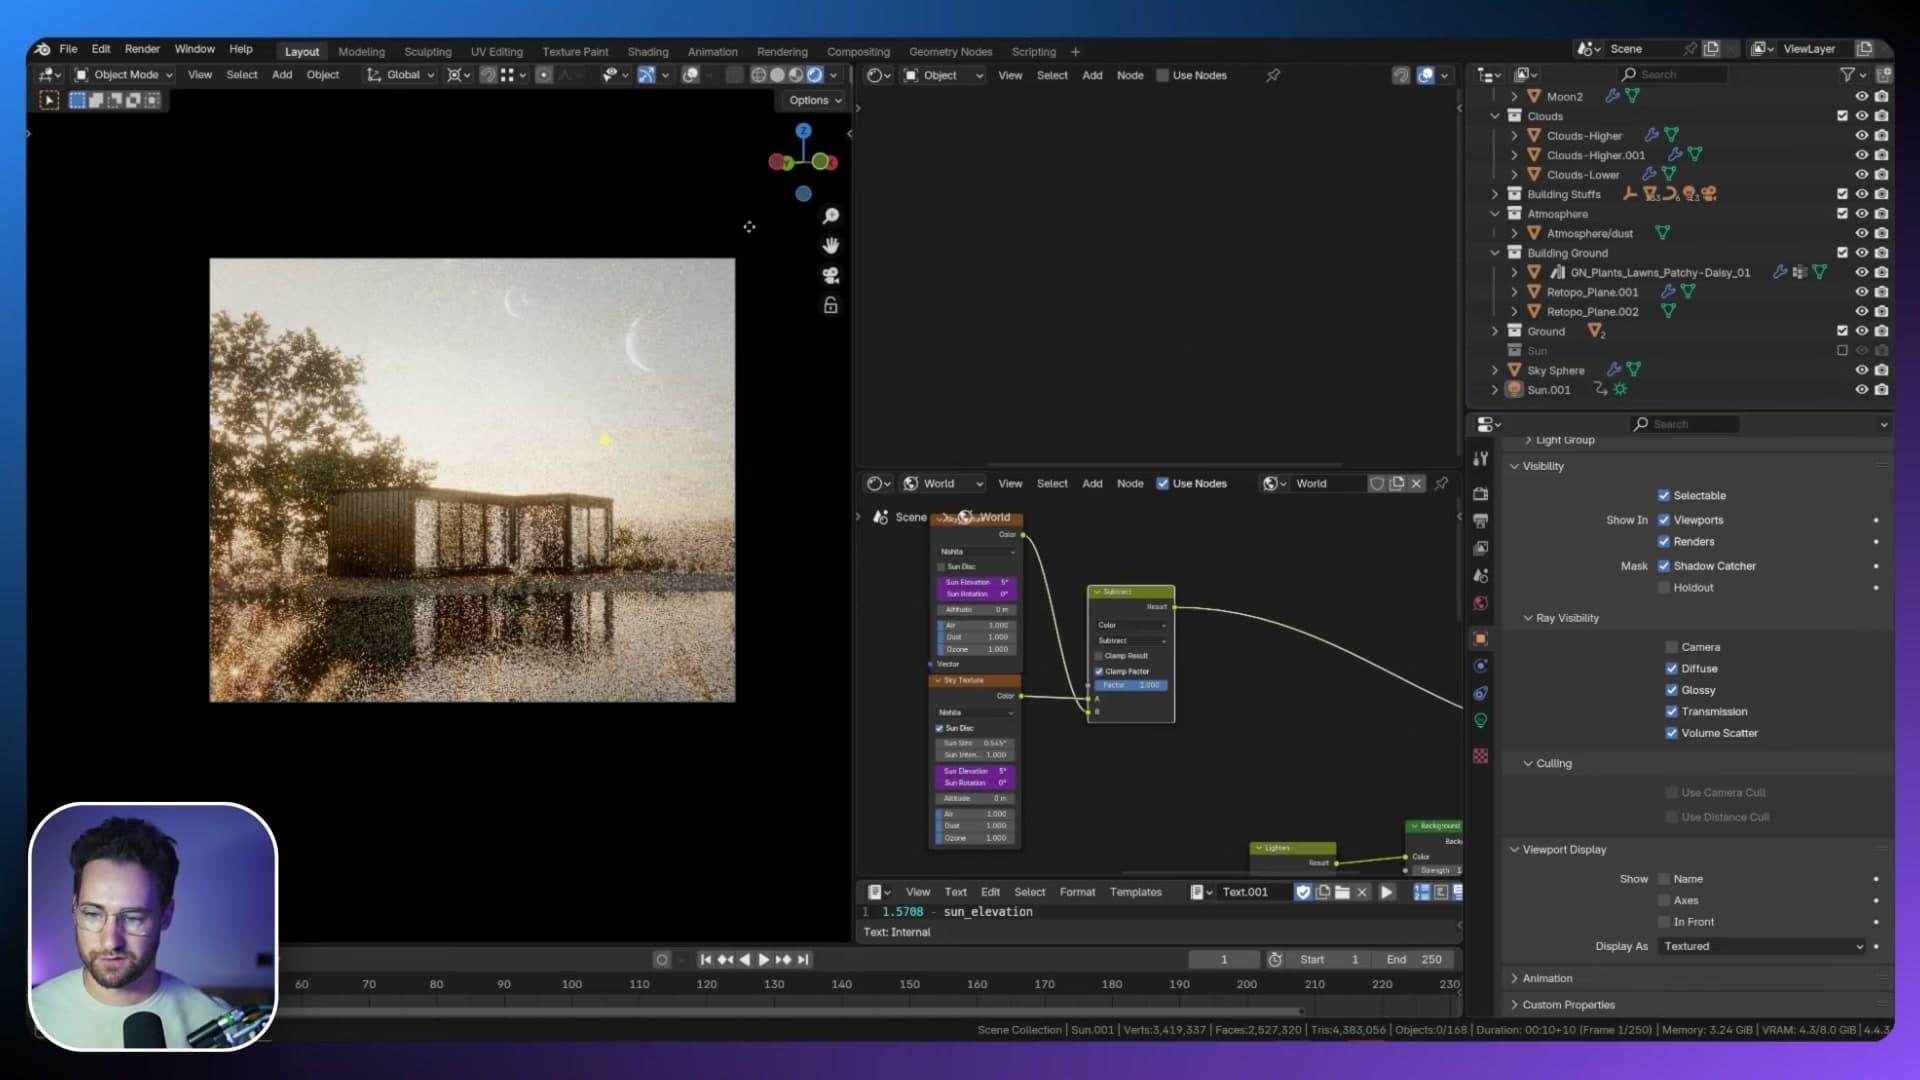
To force a refresh, click on the main sun lamp, press S to start a scale and immediately Esc to cancel it. That tiny no-op nudge is enough to jolt the dependency graph, and every driver-linked sun in the scene snaps to the new elevation and rotation in one go.
Turning on the foreground grass
On the ground plane, toggle the grass particle system back on. With the new sun angle locked in across the whole driver chain, this is the final hero look.
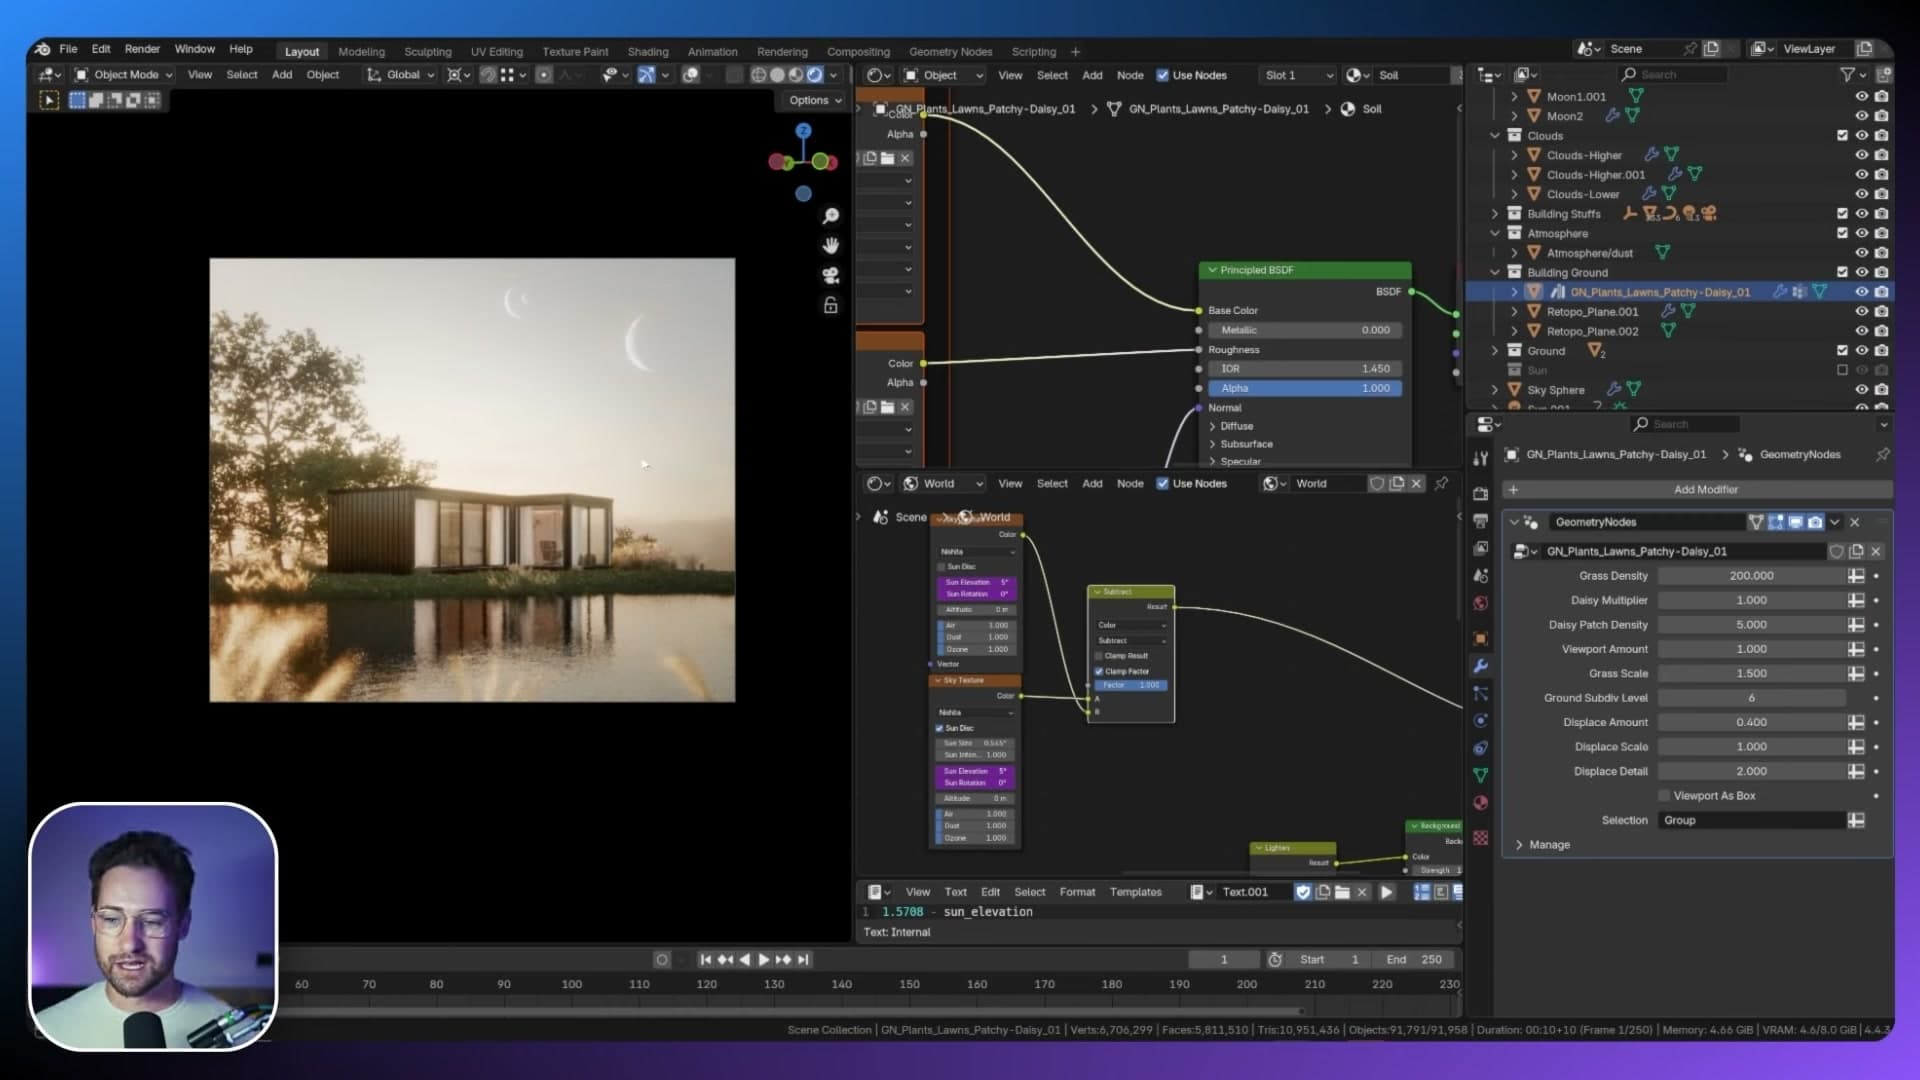
Notice that the clouds have become quite thin and faint now that the sun is high. Light is only passing through a slim cross-section of droplets, so very little gets scattered back toward the camera. Earlier in the build, with the sun sitting low on the horizon, that same beam cut through far more cloud thickness and the clouds read as solid, obvious shapes.
Combined with the atmosphere box, the result is a soft morning-haze effect: you can still pick out the clouds in the sky, but the distant hills sit behind a gentle veil. That's the payoff of the whole driver-linked, shader-driven approach. Slide elevation or rotation to any value and the sky, the sun disc, every sun lamp, the haze and the cloud scattering all rebalance themselves without breaking.
Project a star field onto the camera
Build stars in the world shader using a noise texture for the dots, a Voronoi mask for patchy clusters, and a vertical gradient that pushes them toward the zenith.
Noise texture base for the star field
With the atmosphere, clouds and sun in place, the last layer is a procedural star field. Select the sky sphere, switch to the World tab and open its shader graph. The stars live inside the same world material as the sky, not on a separate object.
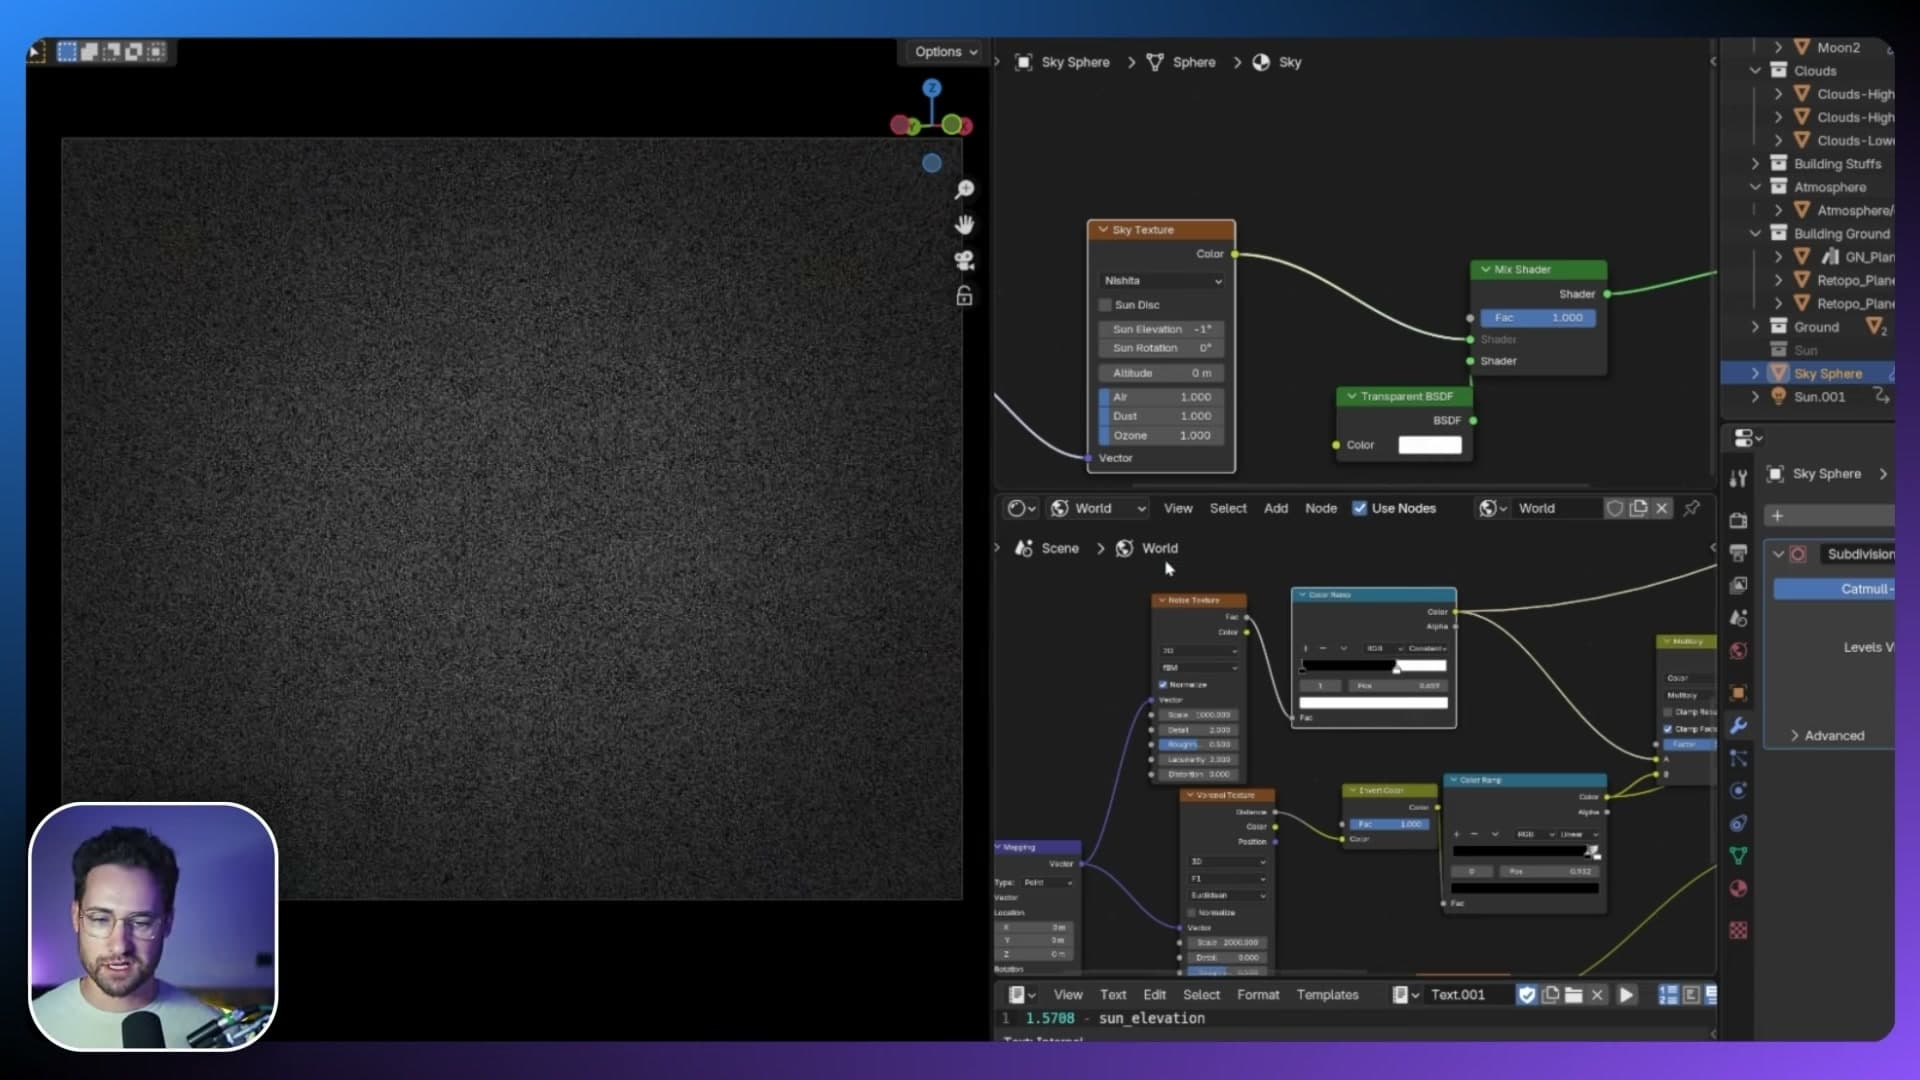
Add a Noise Texture and drive its Vector from a Texture Coordinate node's Window output. The Window output projects the texture in screen space, so the dots stay locked to the camera frame no matter which way you look. You never need to fly real star geometry around the scene. Run the noise into a Color Ramp and crush the white stop hard against the black stop until only the brightest peaks of the noise survive as tiny pinpoints.
While you're tuning the shader it helps to push the sky sphere's transparency to 100% so you can see the stars on their own without the daylight atmosphere washing them out. The result is already recognisable as a star field, but it's also obviously procedural, with the dots spread perfectly evenly across the frame. Real night skies don't behave like that; they have darker stretches and brighter clusters. The next two nodes fix that.
Voronoi mask for patchy star clusters
To break up the uniform field, add a Voronoi Texture and multiply it into the masked noise. The Voronoi's cell pattern gives you natural-looking patches: clumps of stars surrounded by darker gaps, instead of a single continuous dusting across the whole sky.
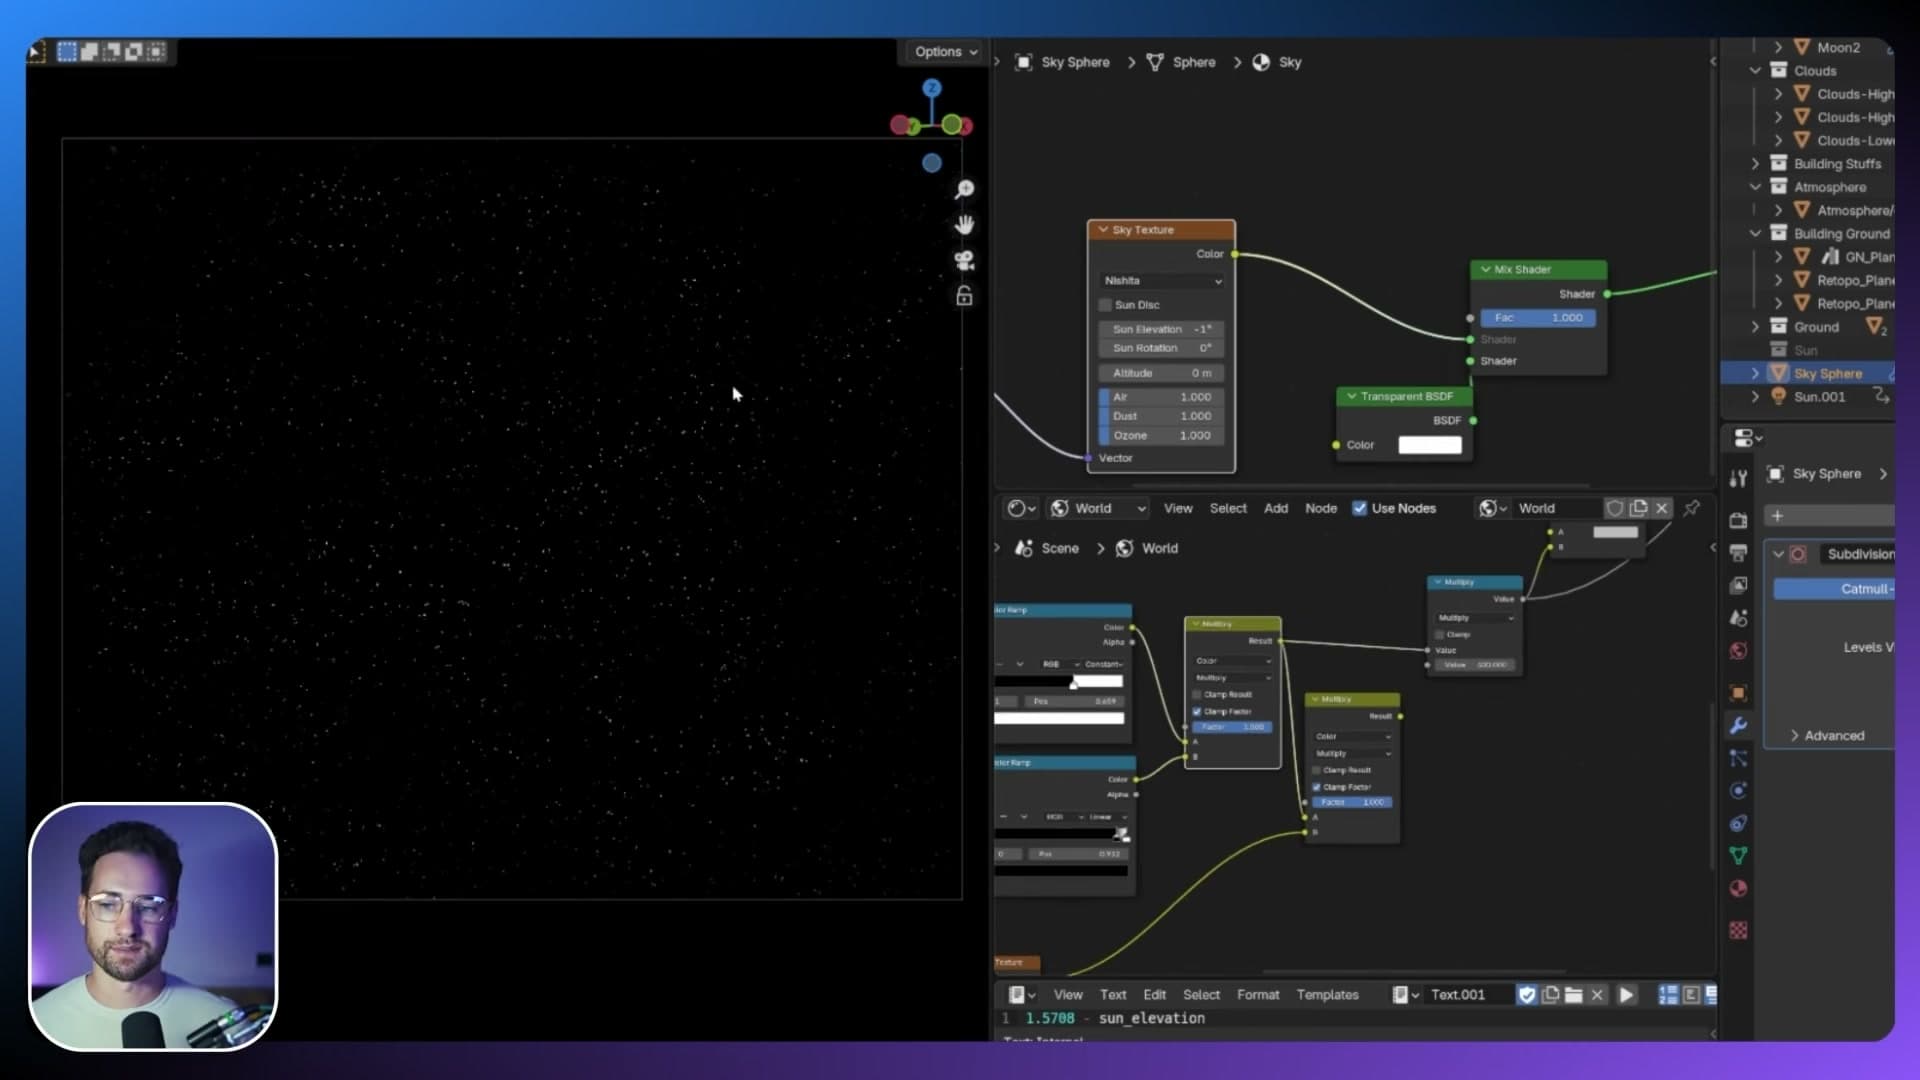
Temporarily plug the multiply node straight into the Background so you can preview the combination on its own. You should see uneven groupings of stars, with whole regions punched out where the Voronoi cells fall darker. That's much closer to how a real sky reads: some areas get stars, others stay empty.
Gradient mask and sun-tinted brightness
There's one more piece of physical reality to add. Stars are easier to see directly overhead than near the horizon, because ground lighting and atmospheric haze along the horizon wash out the faintest dots. Add a Gradient Texture, also driven from the Texture Coordinate's Window output, running vertically from bottom to top, and multiply it into the star result. The stars now fade out toward the lower half of the frame and concentrate toward the zenith. That's exactly the way a real night sky behaves.
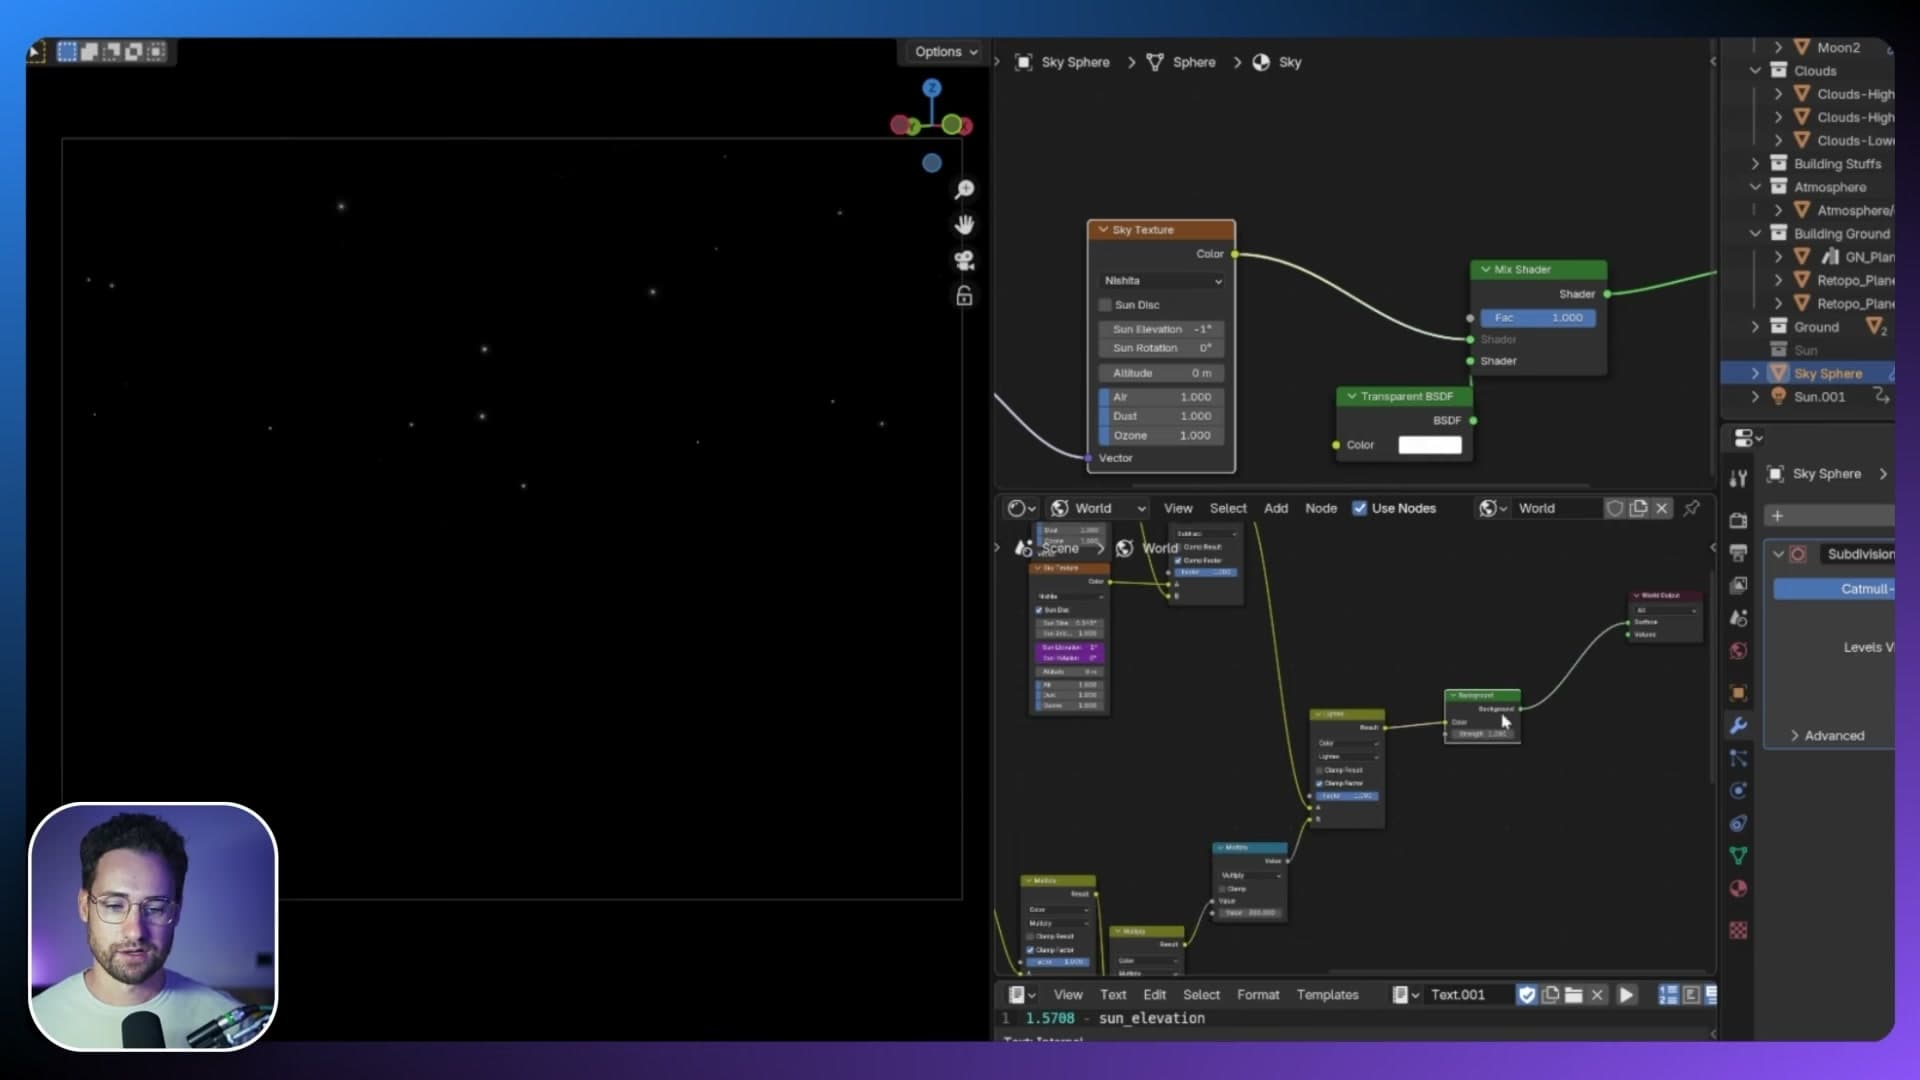
Finally, fold the stars back together with the sun you built earlier. Take the sun-disc output from the subtracted-worlds setup and route it alongside the masked star noise into a Mix Color node set to Lighten. Lighten keeps whichever input is brighter at each pixel, so the bright sun disc dominates wherever it appears and the stars take over everywhere else without either layer fighting the other.
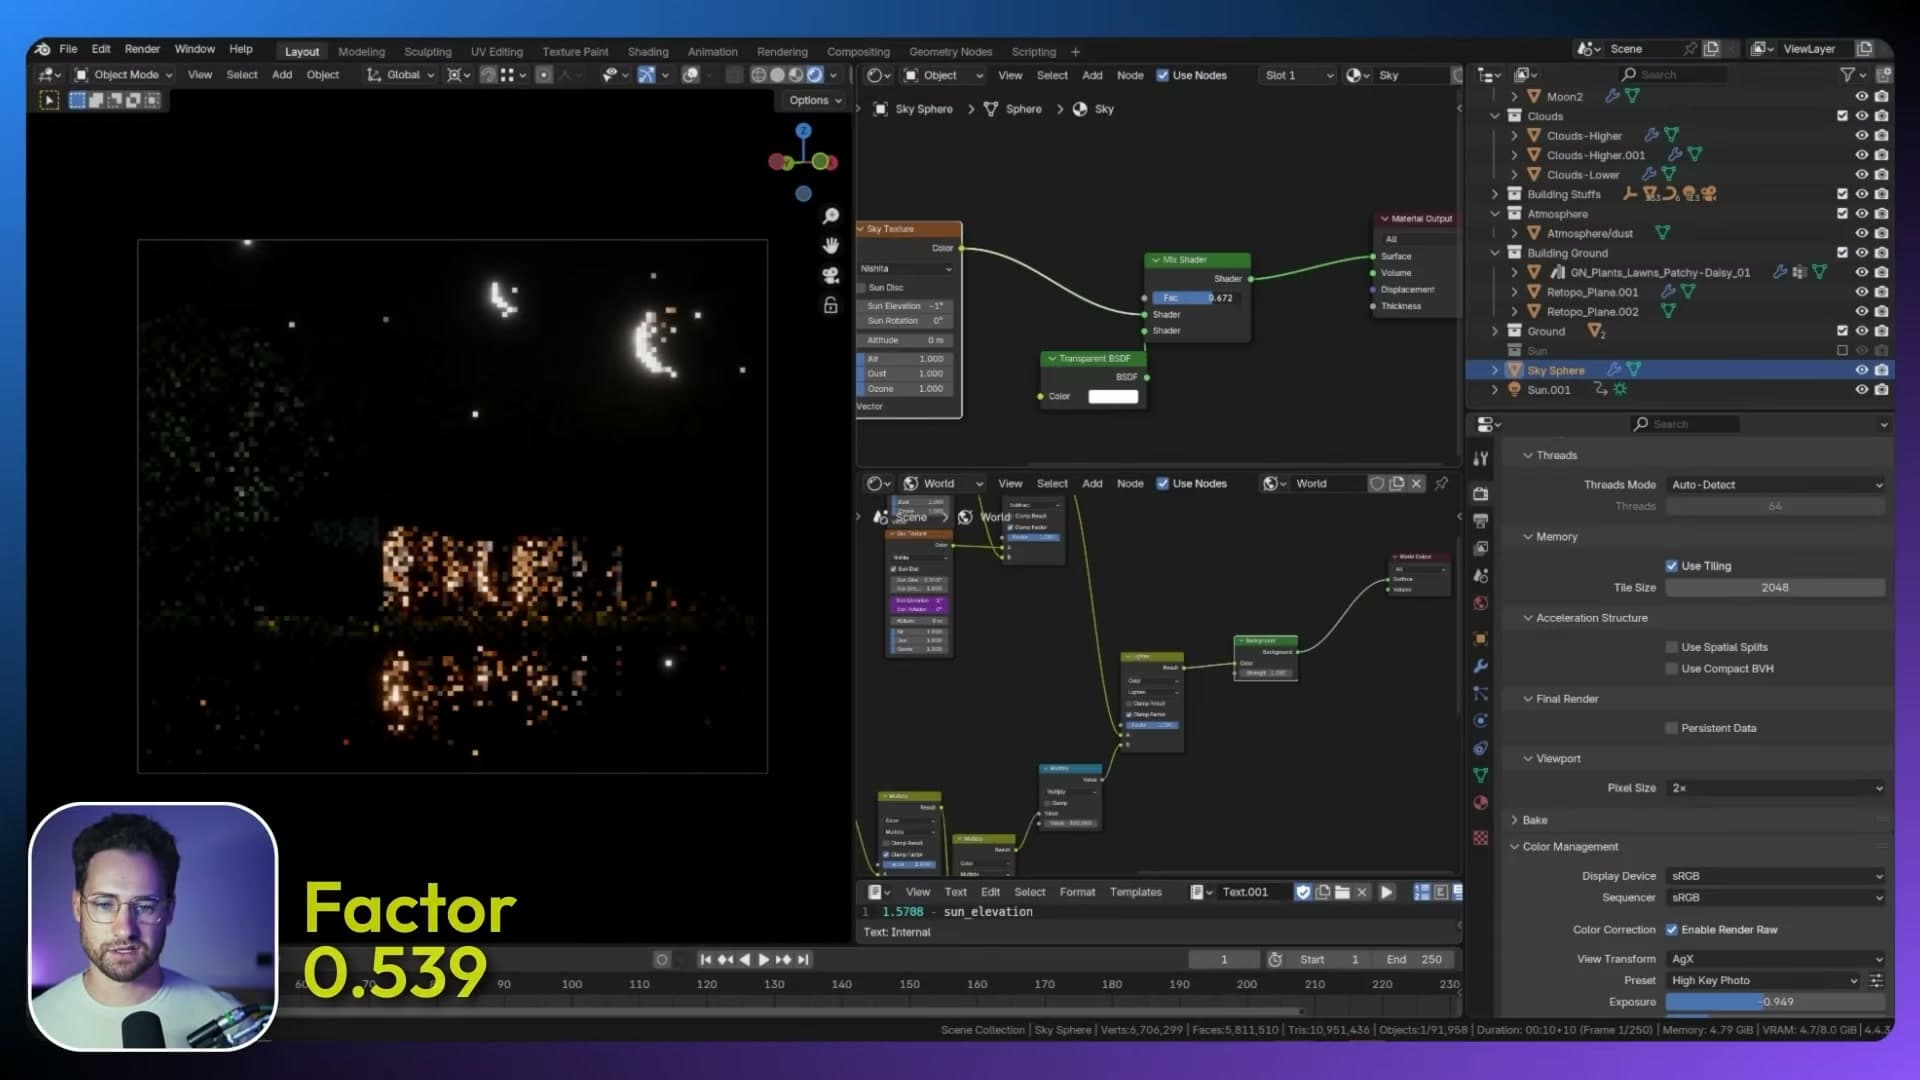
Plug the Mix Color into the Background node and use the Background's Strength to balance the overall brightness of the world. Drop the sky sphere's transparency back to its working value and you'll see faint stars peppering the upper sky alongside the sun, the clouds and the Nishita atmosphere. A complete world space built entirely from procedural shader nodes, with no HDRI involved.
Wrap-up and creative extensions
The finished render reveals planets, clouds, haze and stars all interacting correctly in one viewport, plus ideas for spaceships, nebulae and coloured planets.
The finished scene and where to take it next
Step back from the node graph and the final viewport tells the story: specks of stars dusting the upper sky, planets sitting cleanly outside the atmosphere, volumetric clouds drifting across the building, and the building itself catching reflections from all of it. Everything you set up over the previous modules (the Nishita sphere, the subtracted sun world, the driver-linked lamps, the cloud volume, the atmosphere box, the projected stars) is now interacting in one scene rather than living on separate render layers.
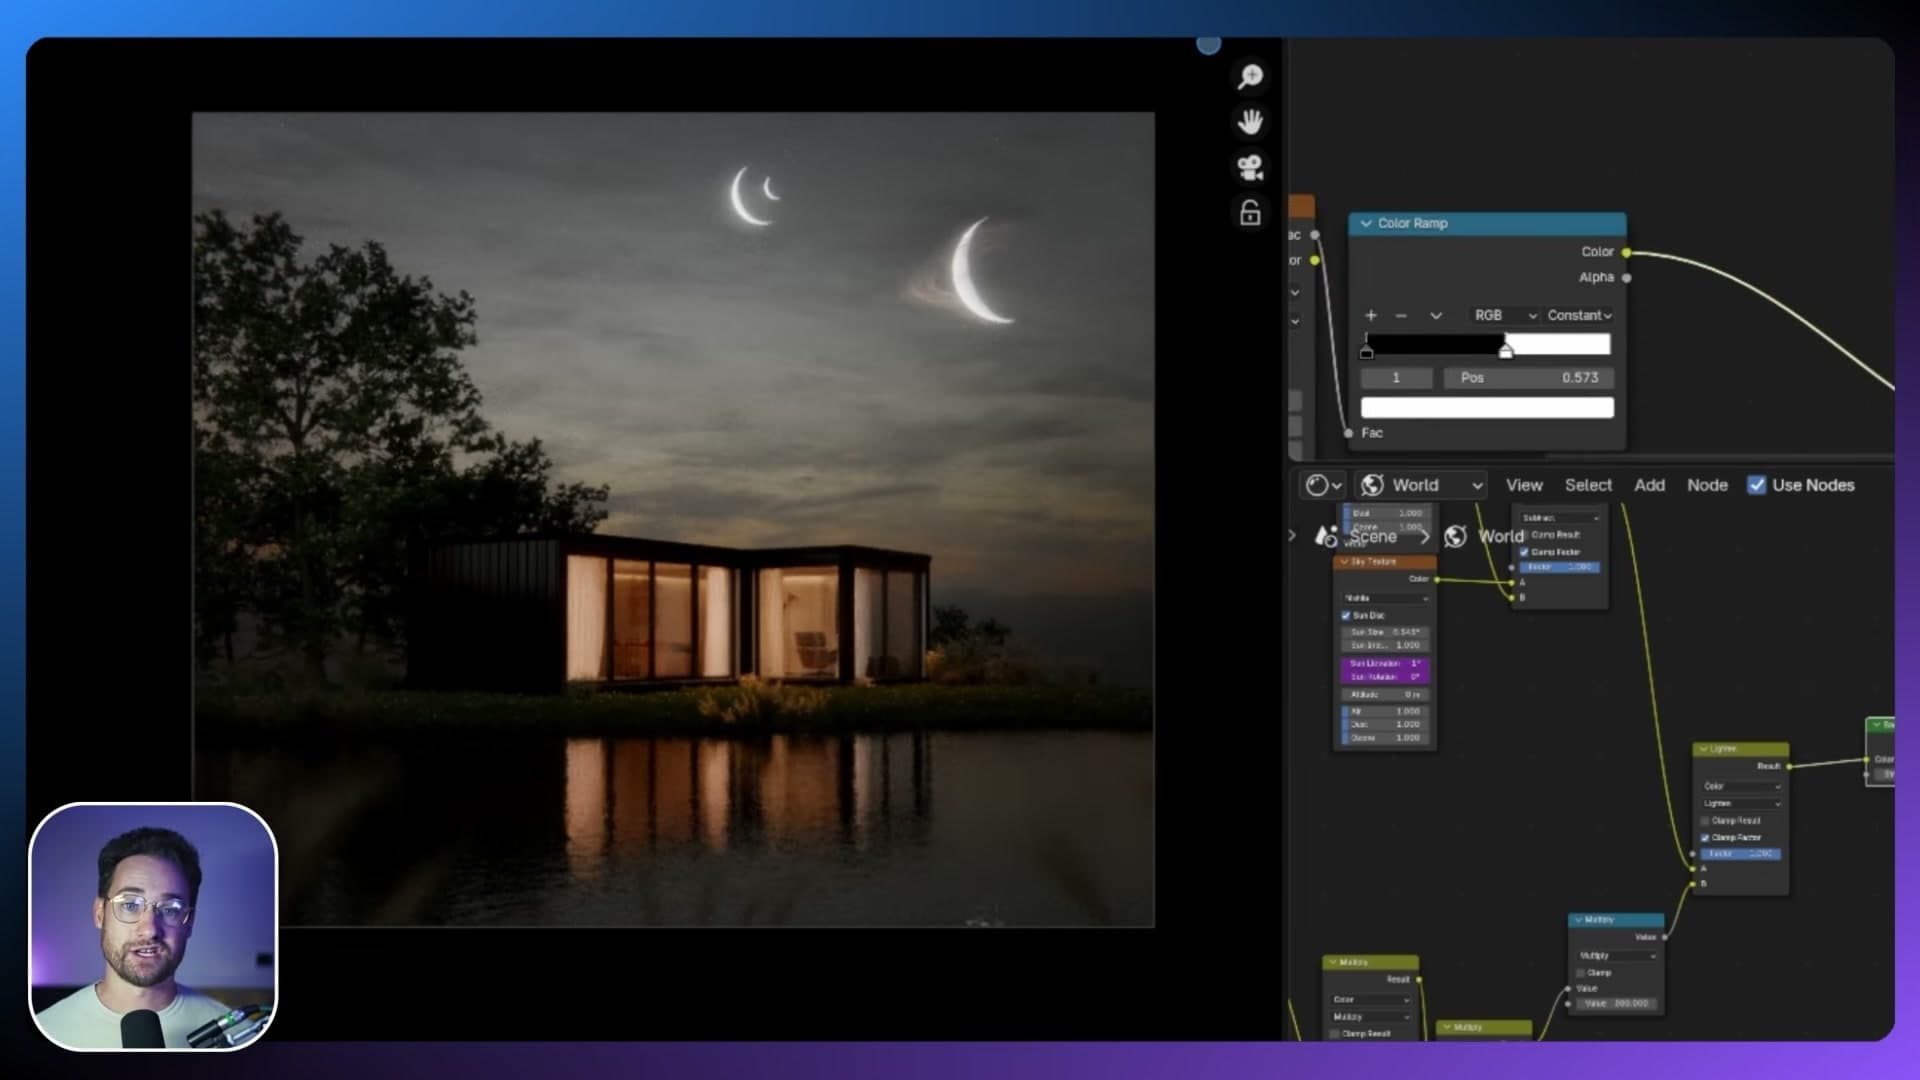
If you prefer the traditional approach, you can still split this into view layers and render the planets, clouds, atmosphere and building as separate passes for compositing. That route gives you more control in post, but it isn't required here. The whole point of this experiment was to prove that a complete world space (sky, sun, clouds, haze, stars and architecture) can coexist in a single Blender scene and respond to one another live in the viewport. Nudge the sun elevation and you can watch the clouds catch the light at the same time as the building does.
Treat the file as a starting point rather than a destination. Swap the building out for your own project and you've got a reusable star-landscape backdrop. From there, the obvious creative extensions are to recolour the planets so each one glows a different hue, drop a distant spaceship into the mid-ground, or model up a nebula in the deep background to fill the empty space between the stars.
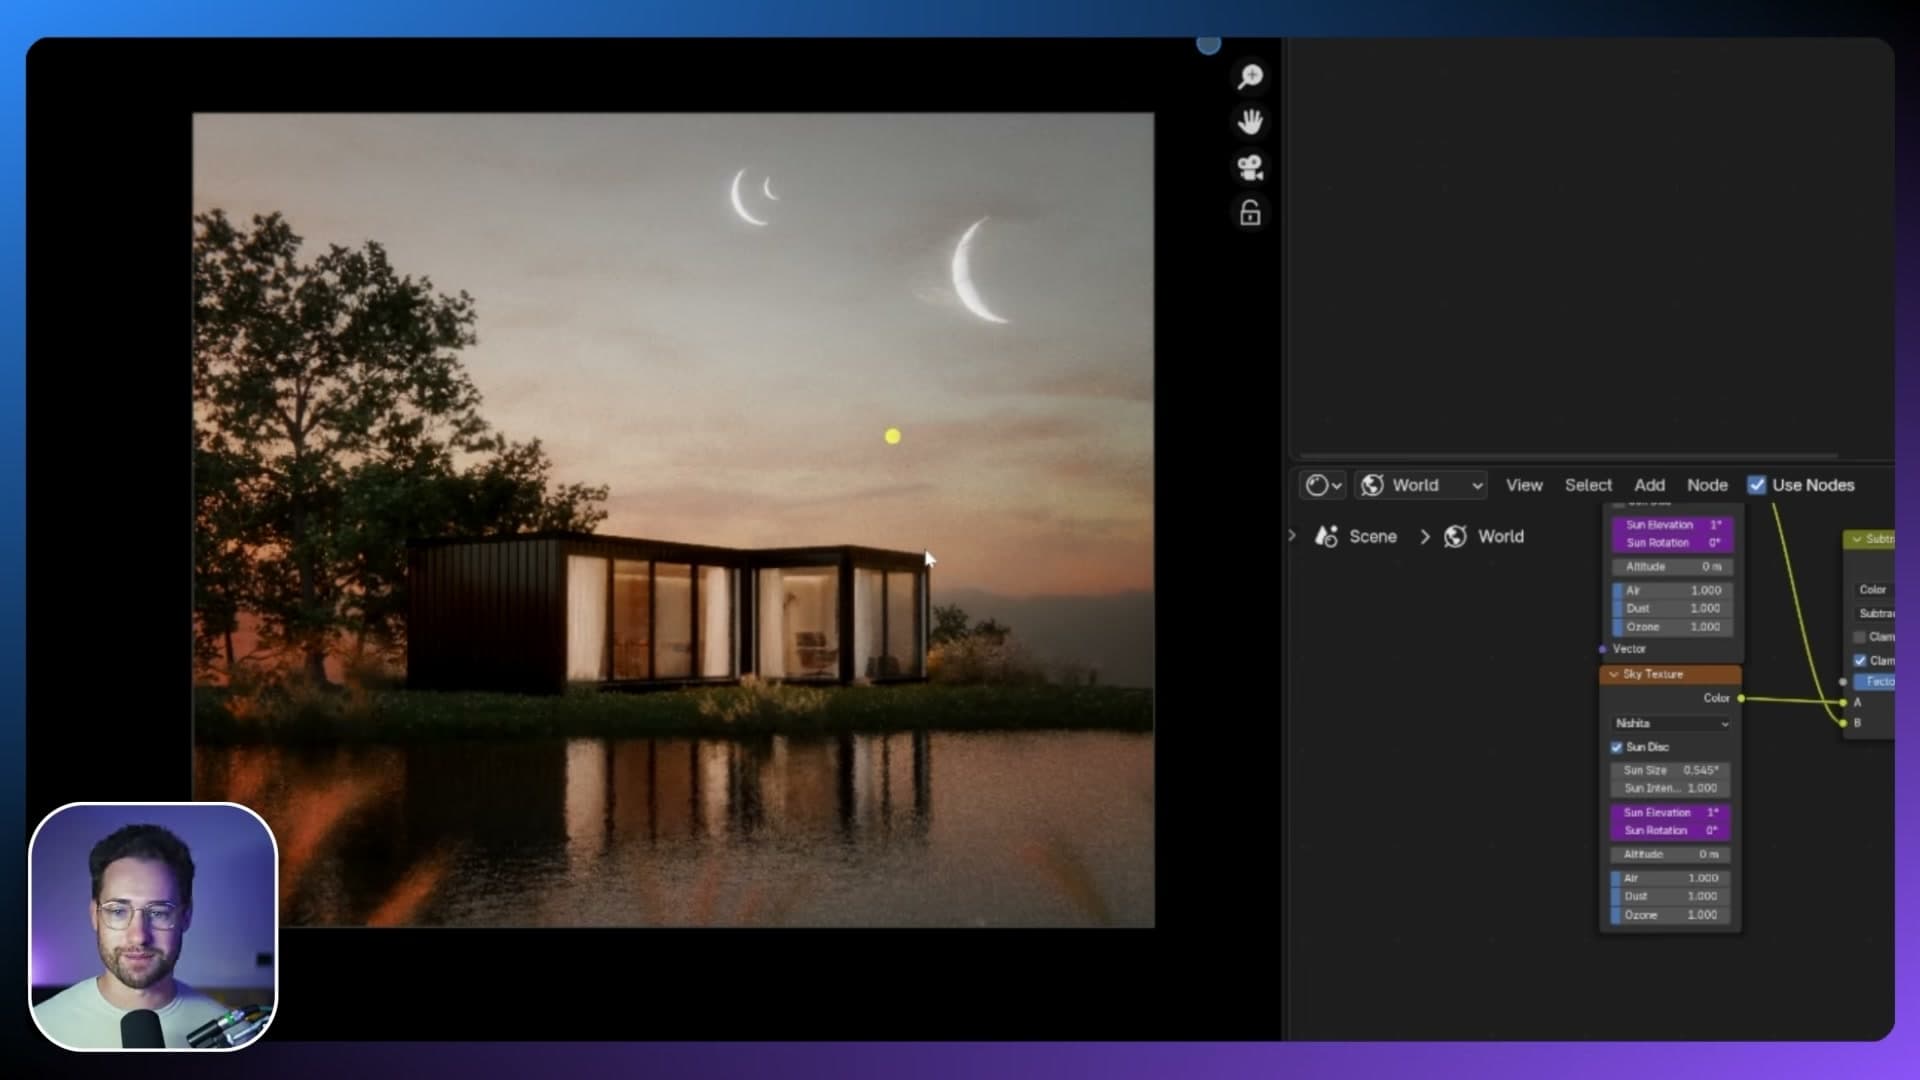
That wraps the build. If you enjoyed working through it, the finished scene is available to iMeshh subscribers alongside the rest of the library. A like or subscribe on the video helps keep this kind of long-form tutorial coming.
Tools and credits
Everything mentioned in this tutorial, with links.
- Blender (the renderer this entire build runs in).
- iMeshh (studio platform: project management, client review, asset library, invoicing). The asset library used in this tutorial is included with every iMeshh Pro plan.
- Poly Haven (free CC0 textures and HDRIs).
Pillar guide: Lighting hub