Why creases need real geometry, not a normal map
Quick framing of what we're building in Part 2: real wrinkle geometry cut into the Part 1 sofa shell, ready for subdivision surface to round into believable fabric folds. Sets up the crease workflow before touching any tools.
Picking up from Part 1 and the crease plan
This is Part 2 of the Chesterfield sofa build. The shell you assembled in Part 1 is sitting in the viewport with its panels in place but its fabric still looking suspiciously flat. The job for this video is to fix that: add the creases that turn a hard panelled shape into something that reads as upholstery.
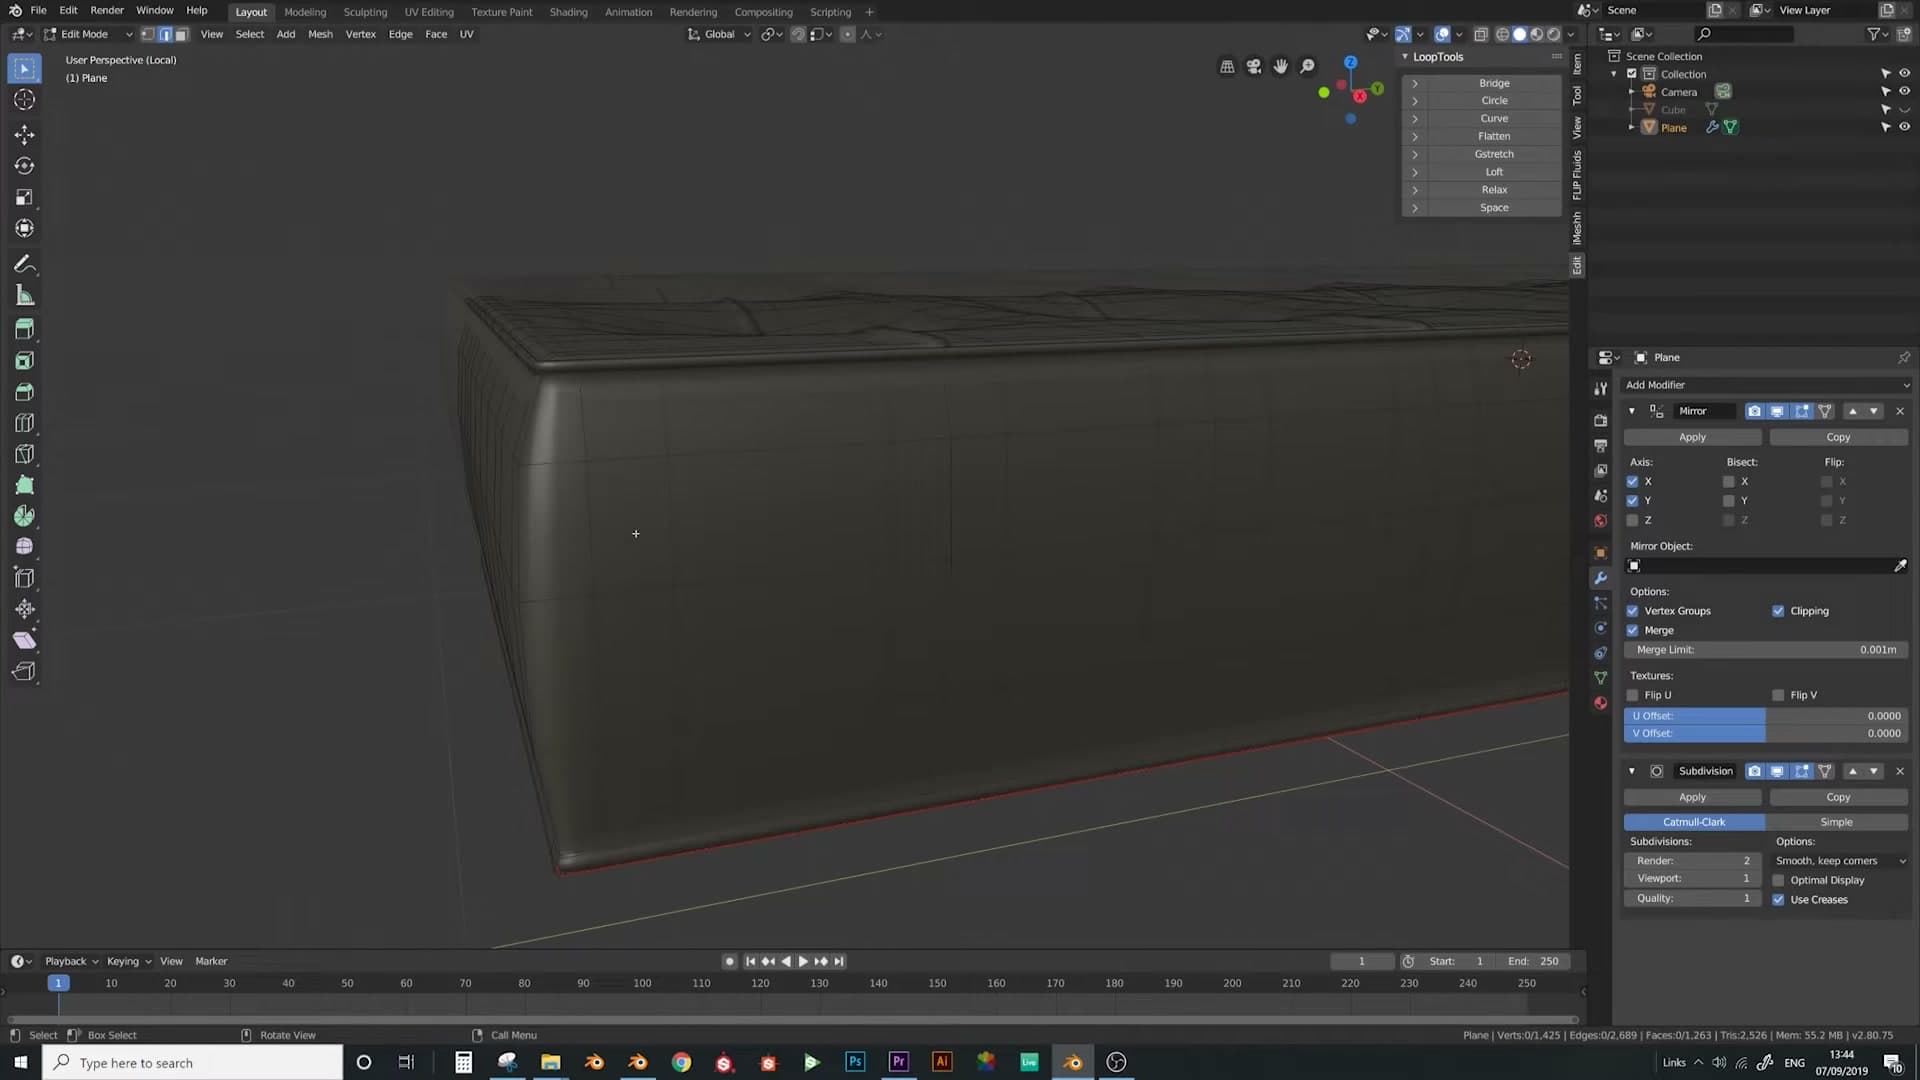
The plan is straightforward: cut a network of lines into each fabric panel with the Knife tool, then push some of those lines in and others out so subdivision surface rounds them into folds. We start on the long edge of the seat panel, laying down cuts along its length before any vertex moves anywhere.
The Blender 2.8 knife-cut stray-vertex bug
Demonstrates the 2.8 knife glitch where clicking on an existing edge inserts a phantom vertex you have to dissolve. Decides to sidestep the issue entirely by doing the cuts in Blender 2.79 and Appending the result back.
Reproducing the stray-vertex bug live
Before you commit to laying down a web of knife cuts, you need to know about a quirk in Blender 2.8. The rule of thumb is to click exactly on the line, but even when you do, the knife sometimes drops an unwanted vertex in the middle of the edge for no obvious reason.
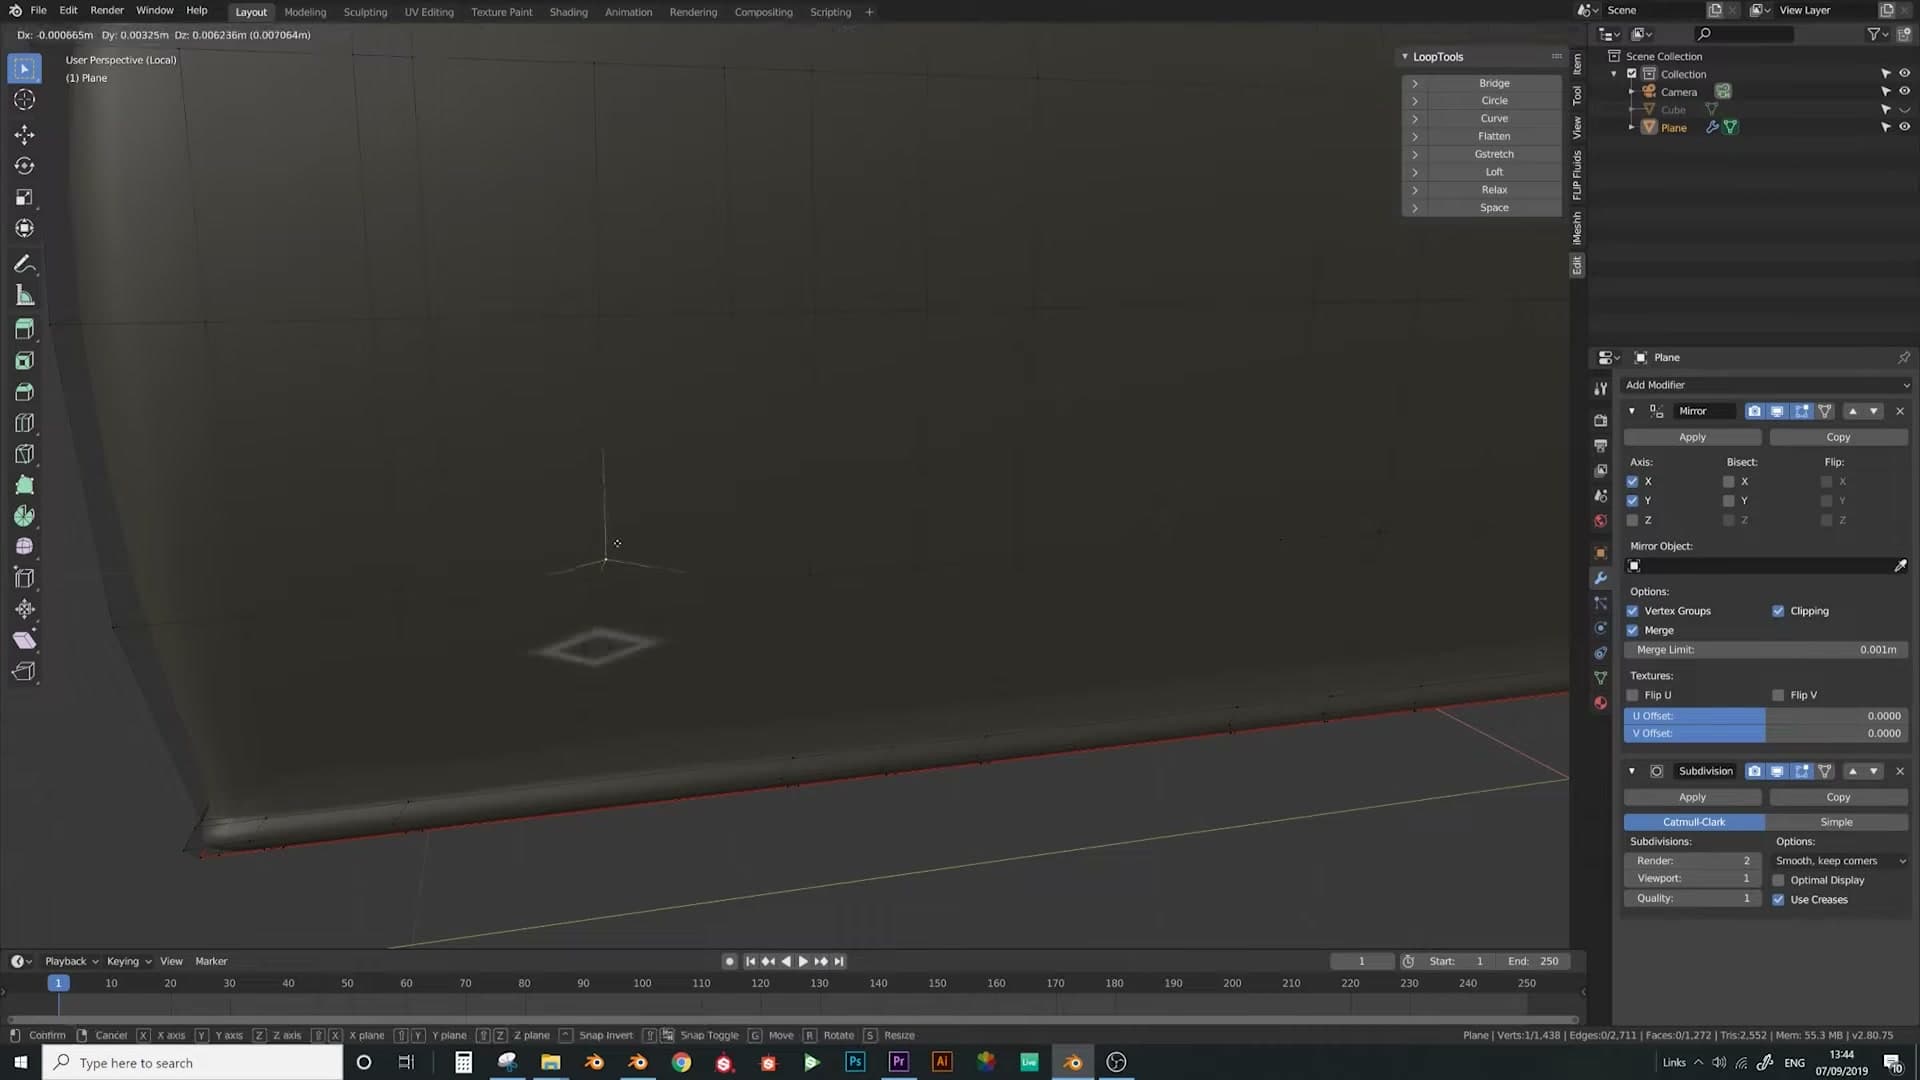
It happens live in the recording: a click that lands cleanly on an existing edge still spawns a stray vertex sitting on its own. The cut is otherwise fine, but that extra vertex has to go, which means selecting it and running Dissolve Edge every single time it shows up.
Across a whole sofa panel that adds up fast. You finish the cuts, then spend just as long hunting down and dissolving every phantom vertex the knife dropped along the way.
Appending the plane into Blender 2.79
Rather than fight the bug cut by cut, the workaround is to do the knife work in Blender 2.79 and bring the finished mesh back into 2.8. I tried cleaning the strays up by hand on a previous attempt and found it was simply too time-consuming to be worth it.
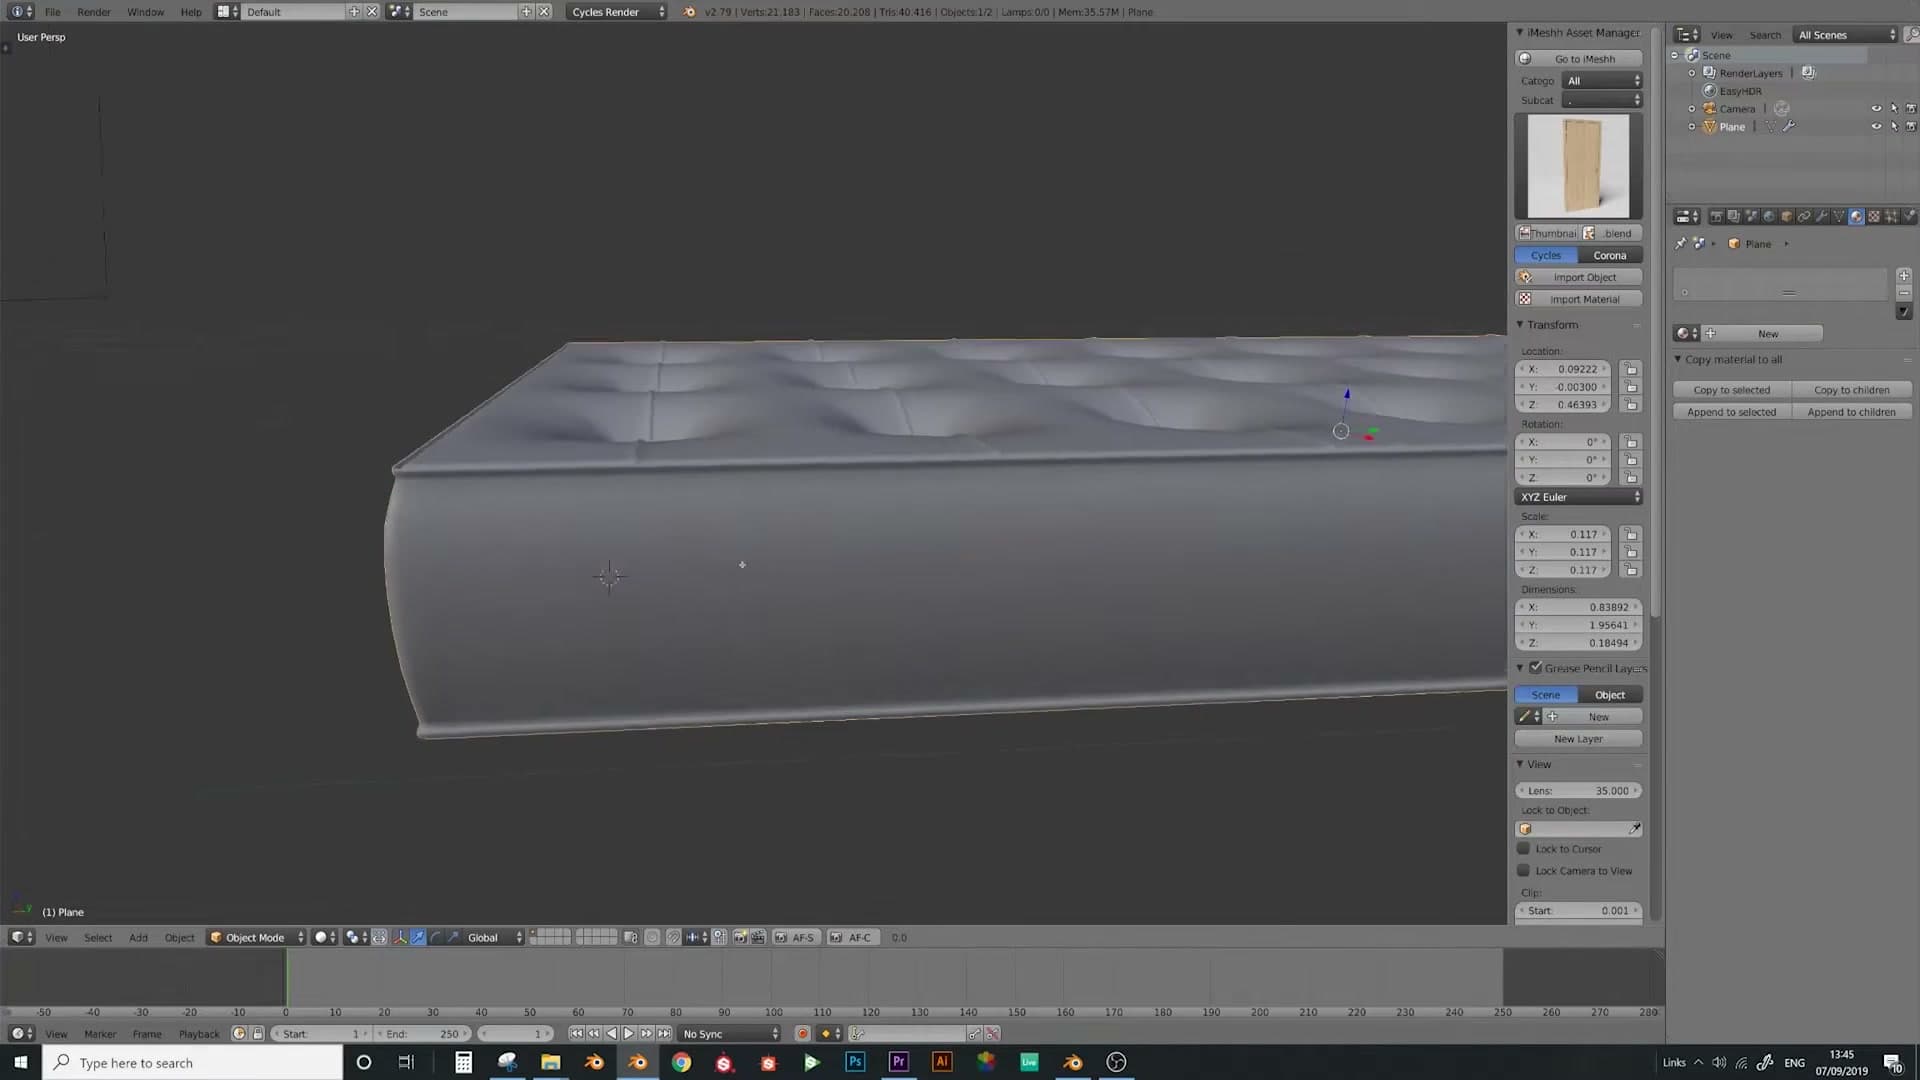
Open Blender 2.79 alongside 2.8, load the file with your sofa panel, and you're ready to cut. Once all the crease lines are in place, the same mesh comes back into 2.8 via Append for the rest of the workflow.
One small visual note: the panel looks a little different in 2.79 because it's a 2.8 model loaded into the older viewport. I strip the material off so it reads as a plain grey plane and the knife cuts stay easy to see against the surface.
Cutting the crease pattern down the side edge
Lays in a tangled web of knife cuts along the side panel in Blender 2.79: verticals, diagonals and curved cuts. N-gons are ignored because subdivision will absorb them into the crease shape.
First pass of vertical knife cuts
With the plane appended into Blender 2.79, the knife behaves the way it should. Press K to start a custom cut, walk it down the face of the side panel, and click to drop each vertex. The one rule worth obeying religiously: stop exactly on a line. Ending a cut floating in the middle of a face, or just shy of an existing edge, is what spawned the stray vertices back in 2.8. Although 2.79 is more forgiving, the habit will save cleanup later.
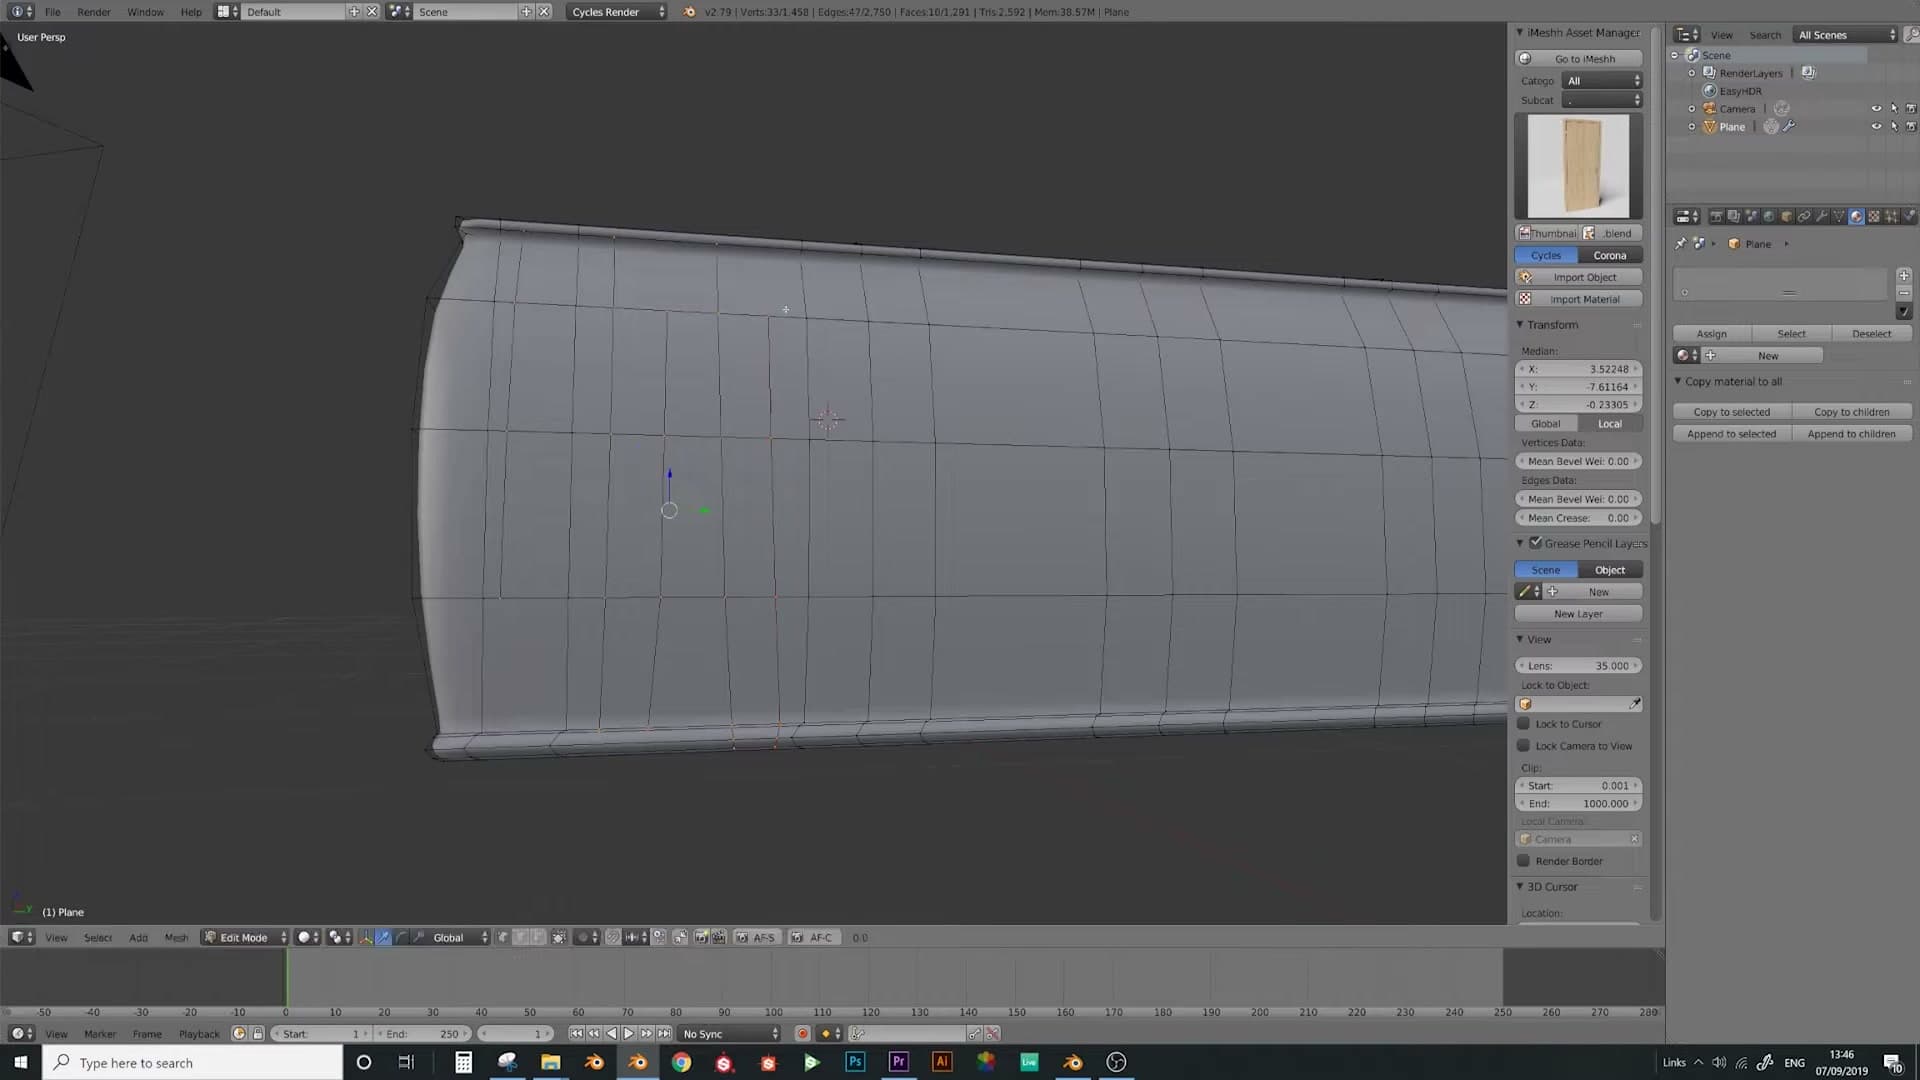
Lay in a first pass of broadly vertical cuts running the full height of the panel. Then break the rhythm: bring a couple of shorter cuts down from the top edge by maybe two segments, run another one all the way down, and let the next stop only a little way up from the bottom. The aim is not a tidy grid. It's a deliberately random ladder of edges that the deformation step can play with.
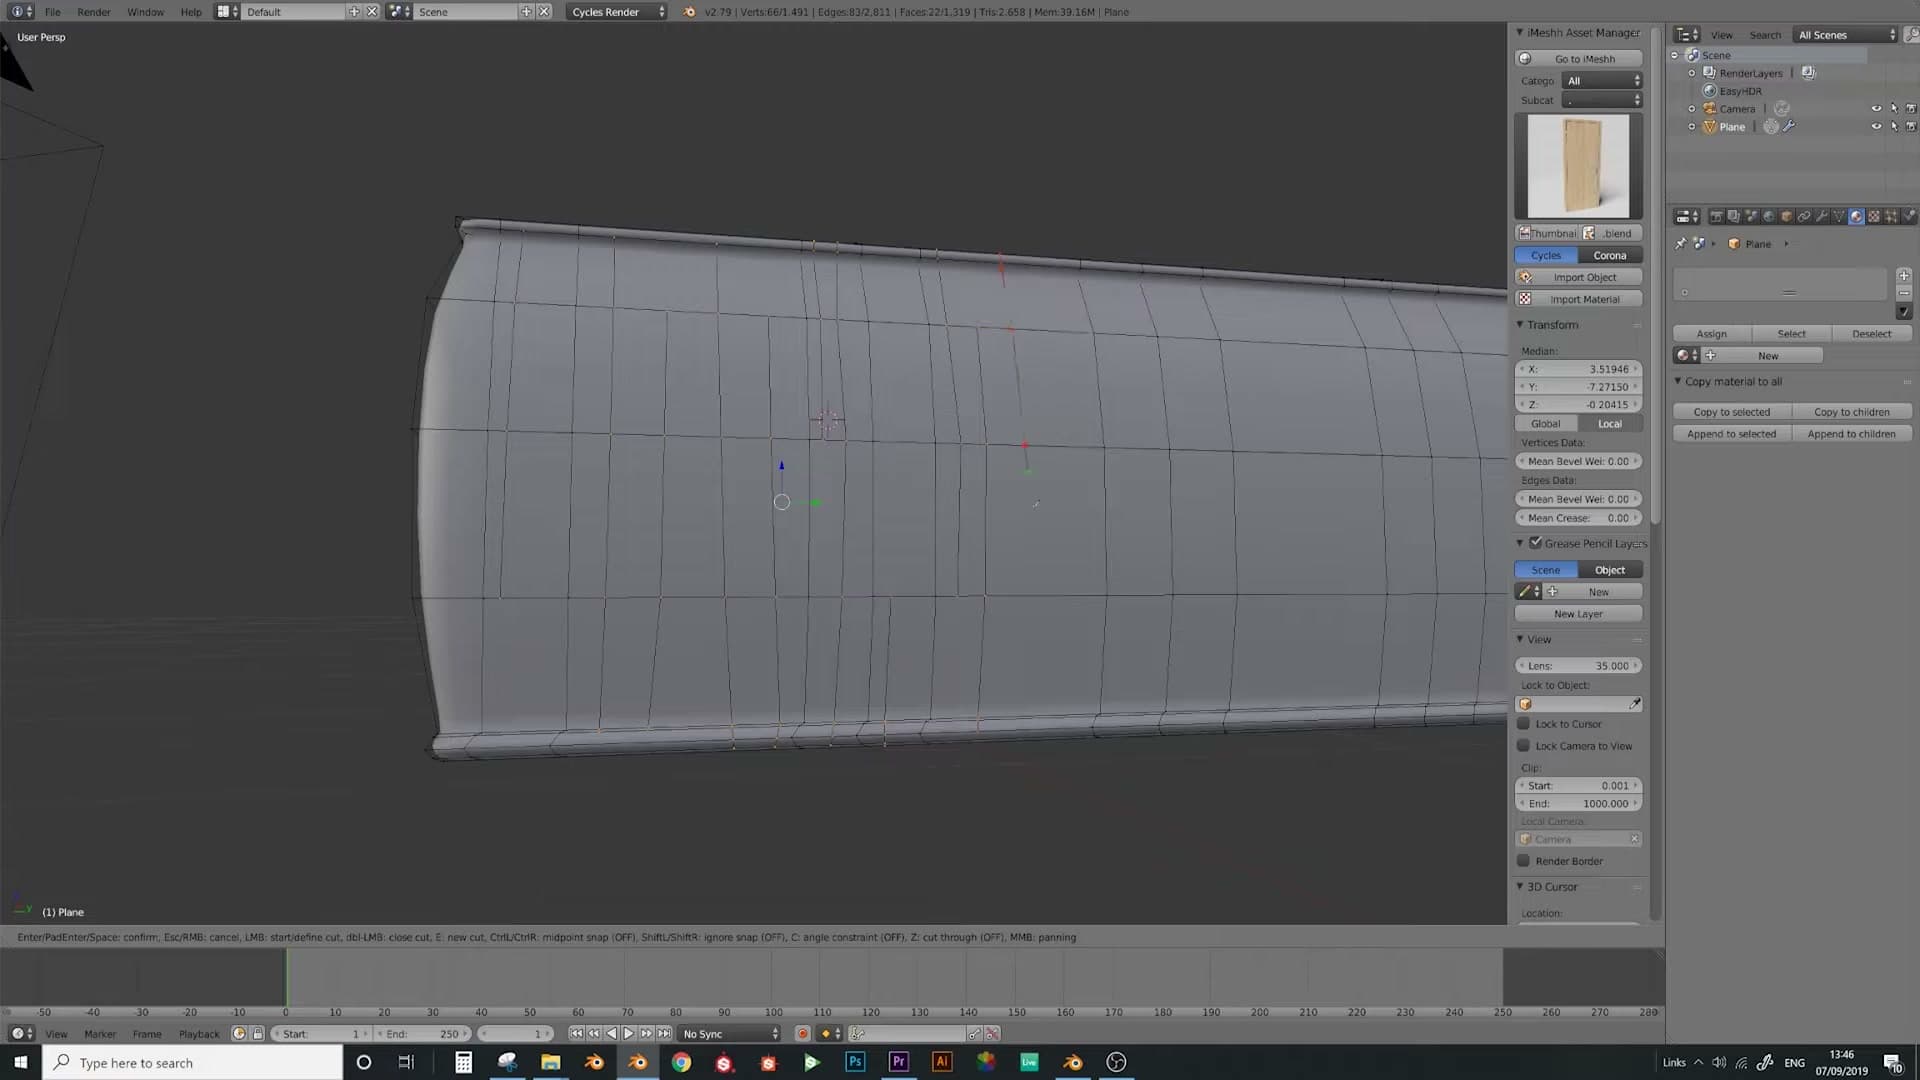
You'll notice you're creating n-gons all over the panel: faces with five, six or more vertices around their perimeter. That is fine and, in fact, the whole point. When the subdivision surface modifier kicks in later, it rounds those n-gons into soft folds, and the irregular shape of each n-gon becomes the shape of a crease.
Carry the cuts on right to the end of the side edge, working from one corner of the panel to the other. Don't worry about perfection. Variation is what sells fabric. Once the whole face is sliced up, take a quick pass with the mouse to confirm none of the cuts have left stray vertices floating mid-face the way 2.8 did. In 2.79 they should all read clean.
Adding curved and diagonal cuts for variation
A panel made entirely of vertical cuts will crease like a comb: straight, parallel folds that immediately read as CG. The fix is to mix in some cuts that don't run straight down.
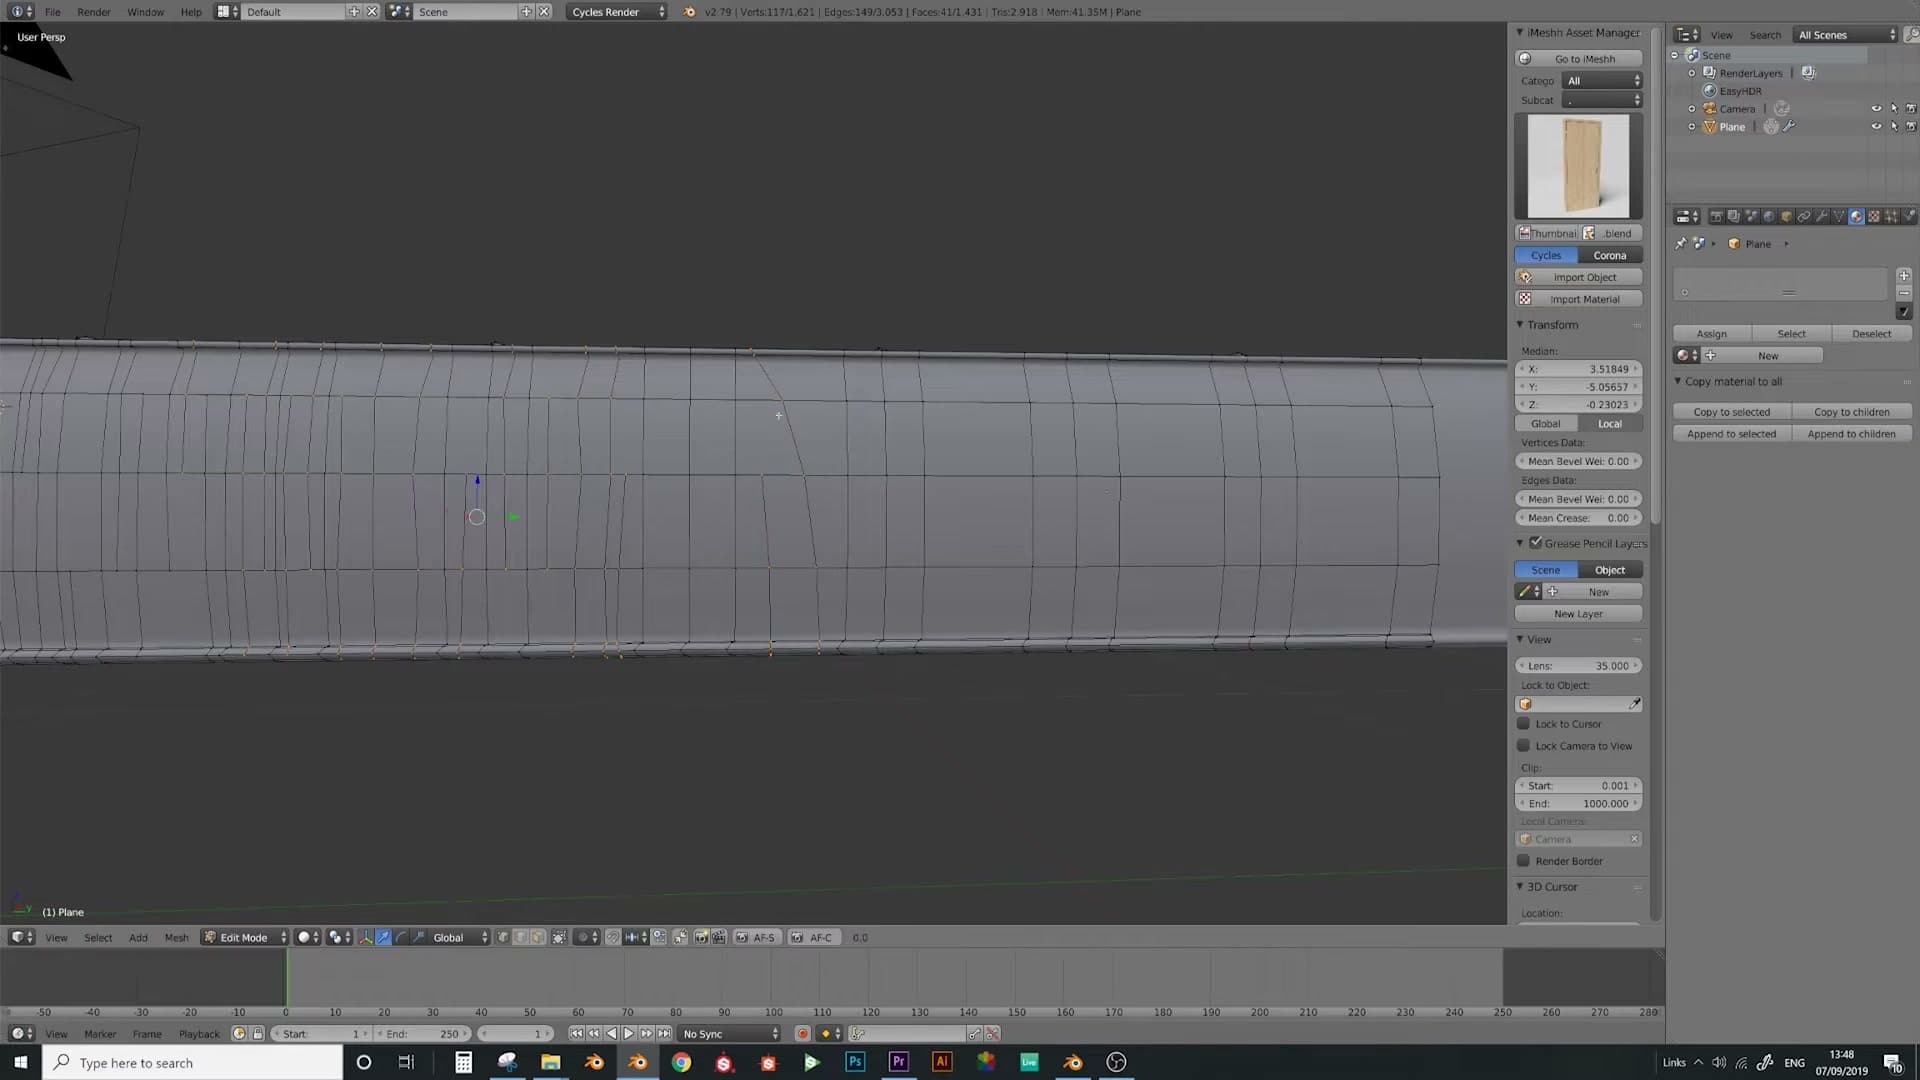
Add a few diagonal cuts that slice across the panel at an angle, then bring a couple of shorter cuts up from the bottom to meet or cross them. Where two cuts curve gently towards each other you get the makings of a curved crease, which is far closer to how real upholstery folds than any vertical line.
How many you add and where is genuinely open to interpretation. There's no correct pattern. The guiding thought is just that creases on a real sofa don't go straight down all the time; they wander, they branch, they curve around stitching and tension points. Sprinkle enough diagonals and curves into the cut pattern that the panel no longer looks like graph paper, and you're done with this edge.
Cutting the top edge and the centre cushion area
Carries the crease pattern across panel seams onto the top edge, then fills the central seating area with full-length and partial cuts that meet the side-panel creases. The continuity is what makes the result believable.
Continuing crease lines across the seam onto the top edge
With the side panel handled, move up to the top edge of the cushion and lay down the same pattern of knife cuts. The mirror is still live, which is fine, because you'll apply it later before pulling the verts out at different widths.
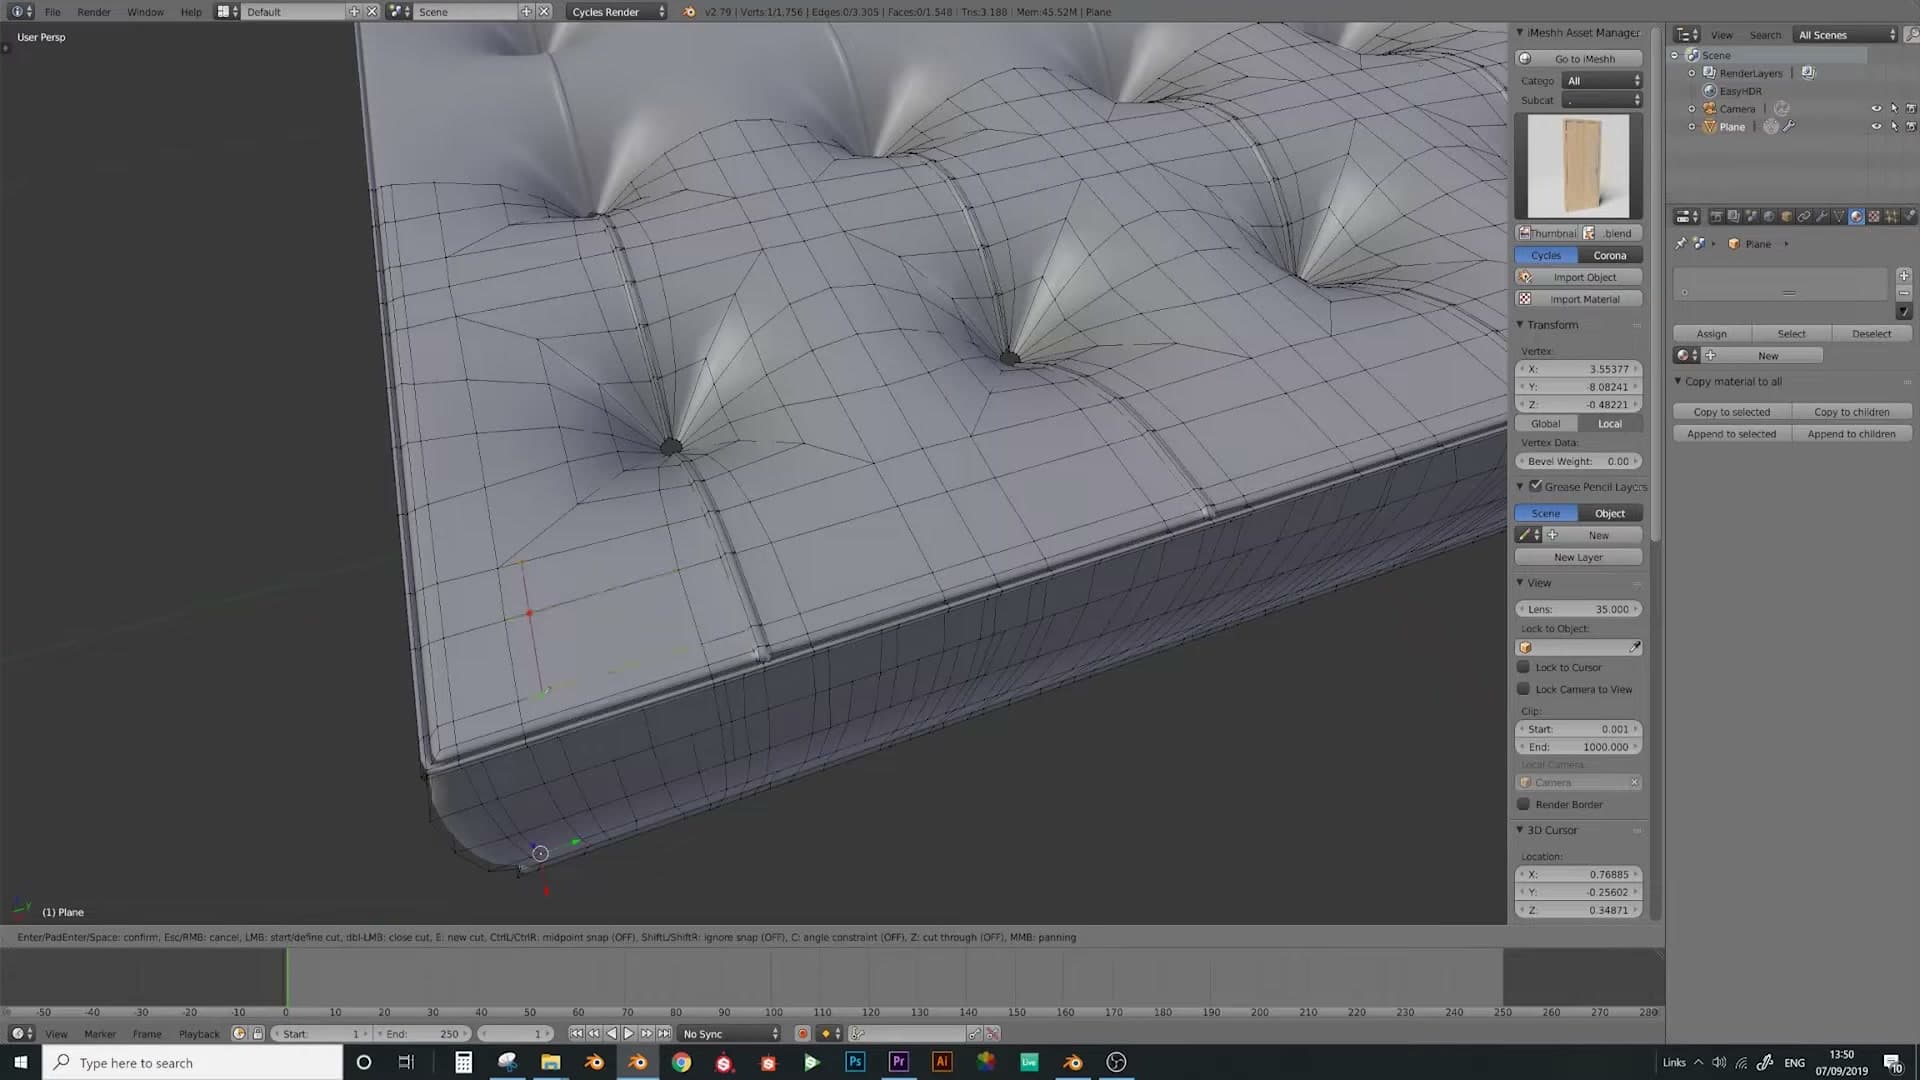
The trick on this edge is to start each new cut at the point where one of the side cuts finished. Real creases don't stop at a seam; they continue onto whatever surface comes next. Carrying the lines across the panel boundary is what makes the fabric read as one continuous piece rather than two flat sections bolted together.
Run the cuts all the way along the top in the same loose, random web you used on the side. None of this needs to be perfect. Variation is the point.
Where it helps, drag a cut down so it dips back into the side panel rather than ending flush at the seam. That little overlap blurs the panel break and lets the crease merge into the rest of the material.
Cutting the centre seating panel
Once the top edge is done, move on to the centre seating panel. Same system: random knife cuts to set up the creases. With no panel seams in the middle to plan around, you have more freedom over where the lines fall.
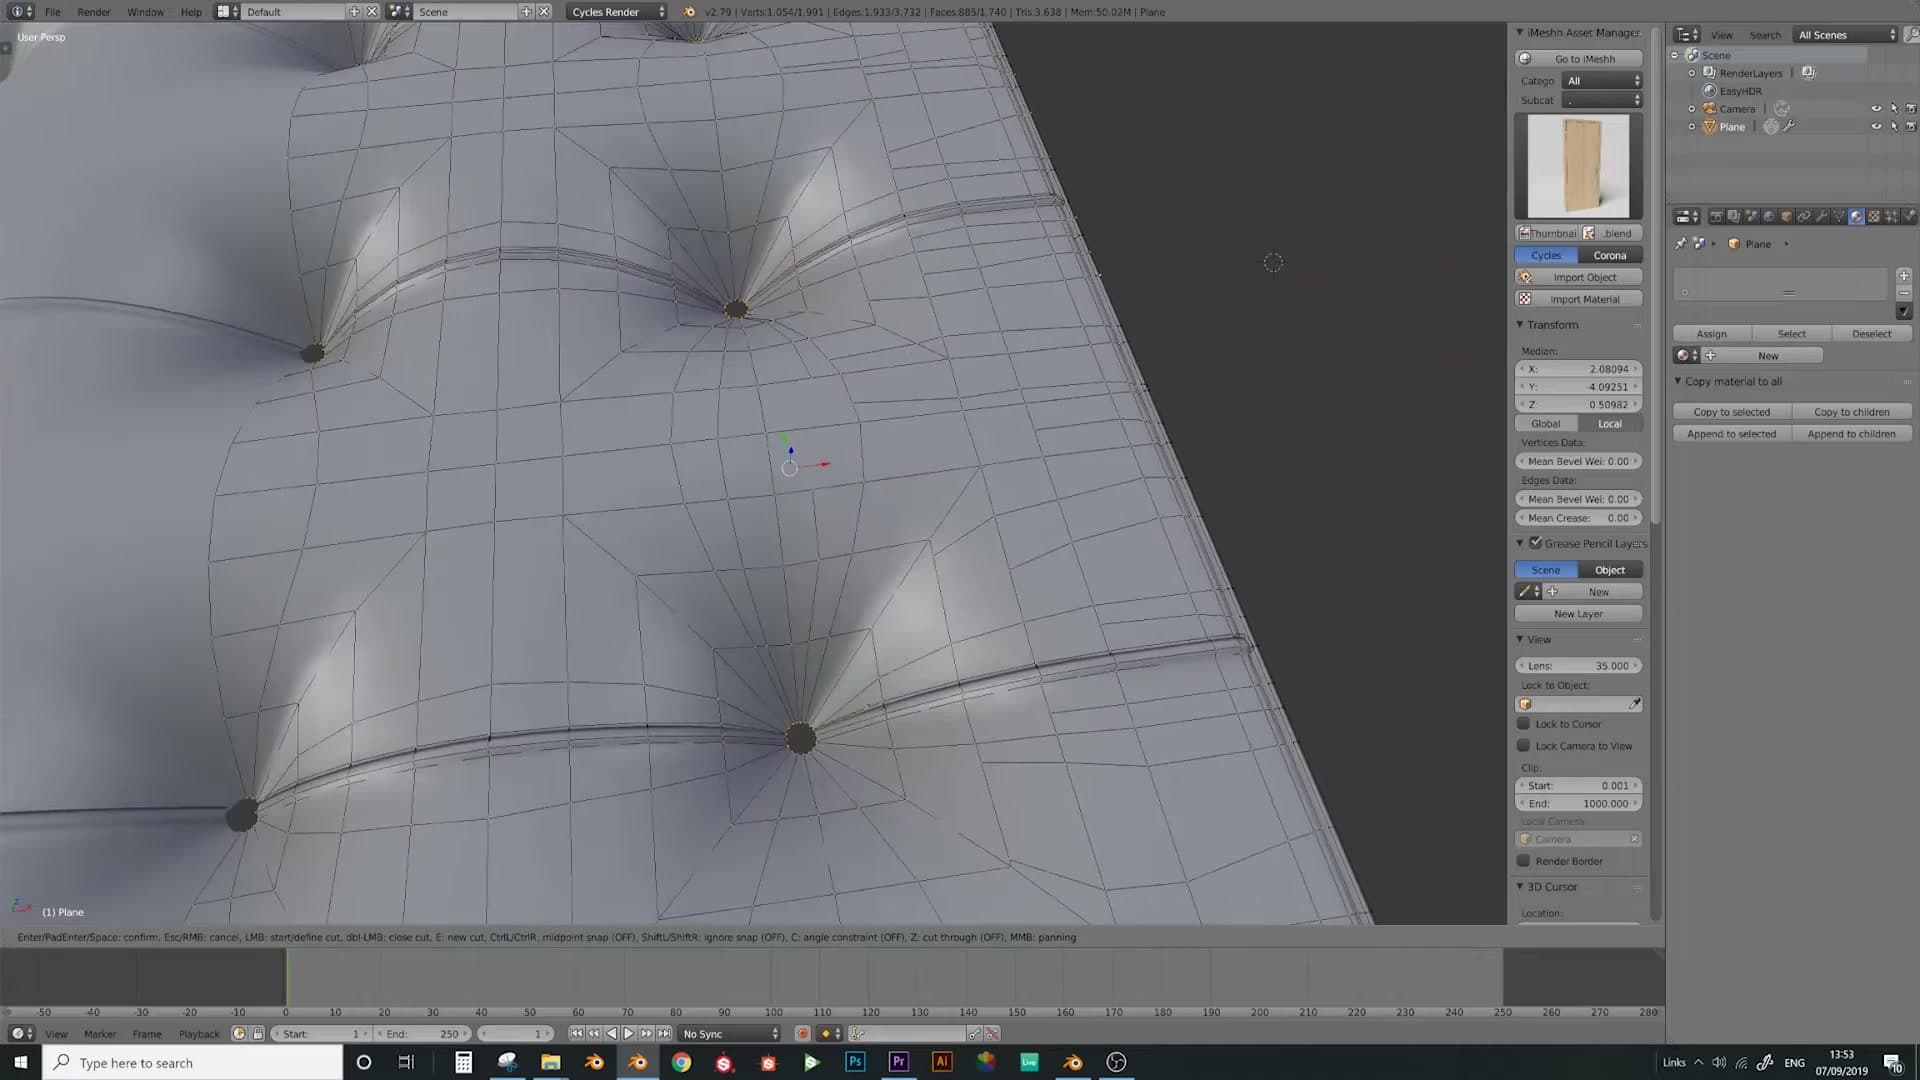
Some of the cuts can run the full length of the panel, from one end straight to the other. Lay a couple of these down first as long spine creases across the seat.
For the rest, start near the centre and pull each cut out a short distance. Mirror that on the opposite side so both halves of the panel get a similar amount of detail.
Add a few more cuts that curve around the panel as well. Where it feels natural, link them up to the creases you already made on the side and top edges. The folds then flow visually from the perimeter into the centre instead of sitting as two unrelated patterns.
This part is a bit time-consuming, so don't rush it. Keep adding cuts until the whole centre panel is covered in a varied web of lines.
Bringing the cut mesh back into Blender 2.8 and re-stacking Mirror
Saves the 2.79 file, Appends the cut mesh into the 2.8 project, reapplies the fabric material, then applies the X-axis Mirror and adds a fresh Mirror with Clipping so every crease edit propagates to the opposite side.
Re-importing the cut mesh and reapplying material
With the knife cuts laid down across every panel, save the Blender 2.79 file. Switch back to your 2.8 project, shove the original uncut plane out of the way so you don't confuse the two, and Append the freshly cut mesh into the scene.
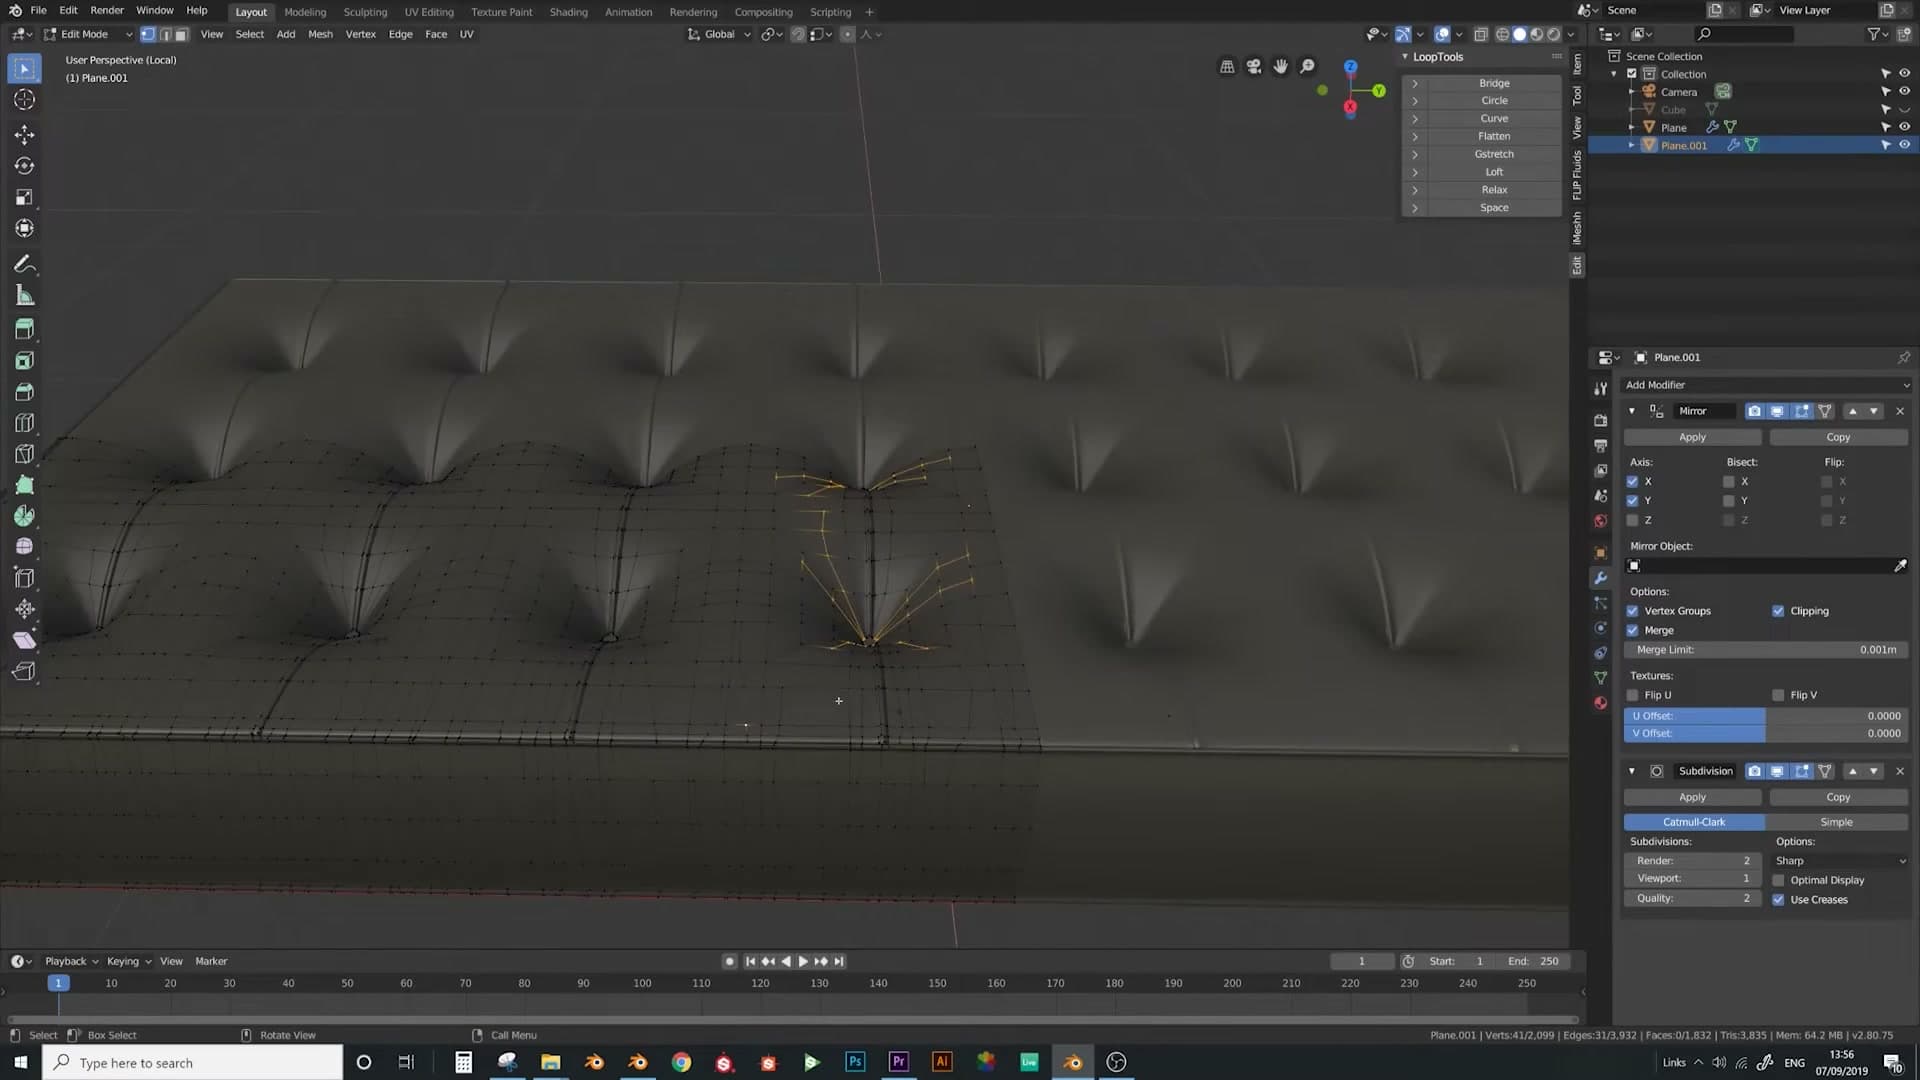
The reimported mesh comes in without its shader, so reapply the same fabric material you set up earlier. You now have a fully cut, properly shaded plane sat in 2.8, ready for crease sculpting and untouched by the knife bug that started the whole detour.
Run your eye over the geometry to confirm none of the cuts spawned stray vertices on the way through. You may find the odd extra vert here or there, but in practice that's almost always a misclick rather than the tool itself.
Applying X mirror and re-adding a fresh Mirror with clipping
Before you start edge-selecting, sort the Mirror modifier out first. Otherwise any crease you push in later will only happen on one half of the sofa. Apply the existing Mirror so the cuts you made in 2.79 bake into real geometry on both sides of the centre line.
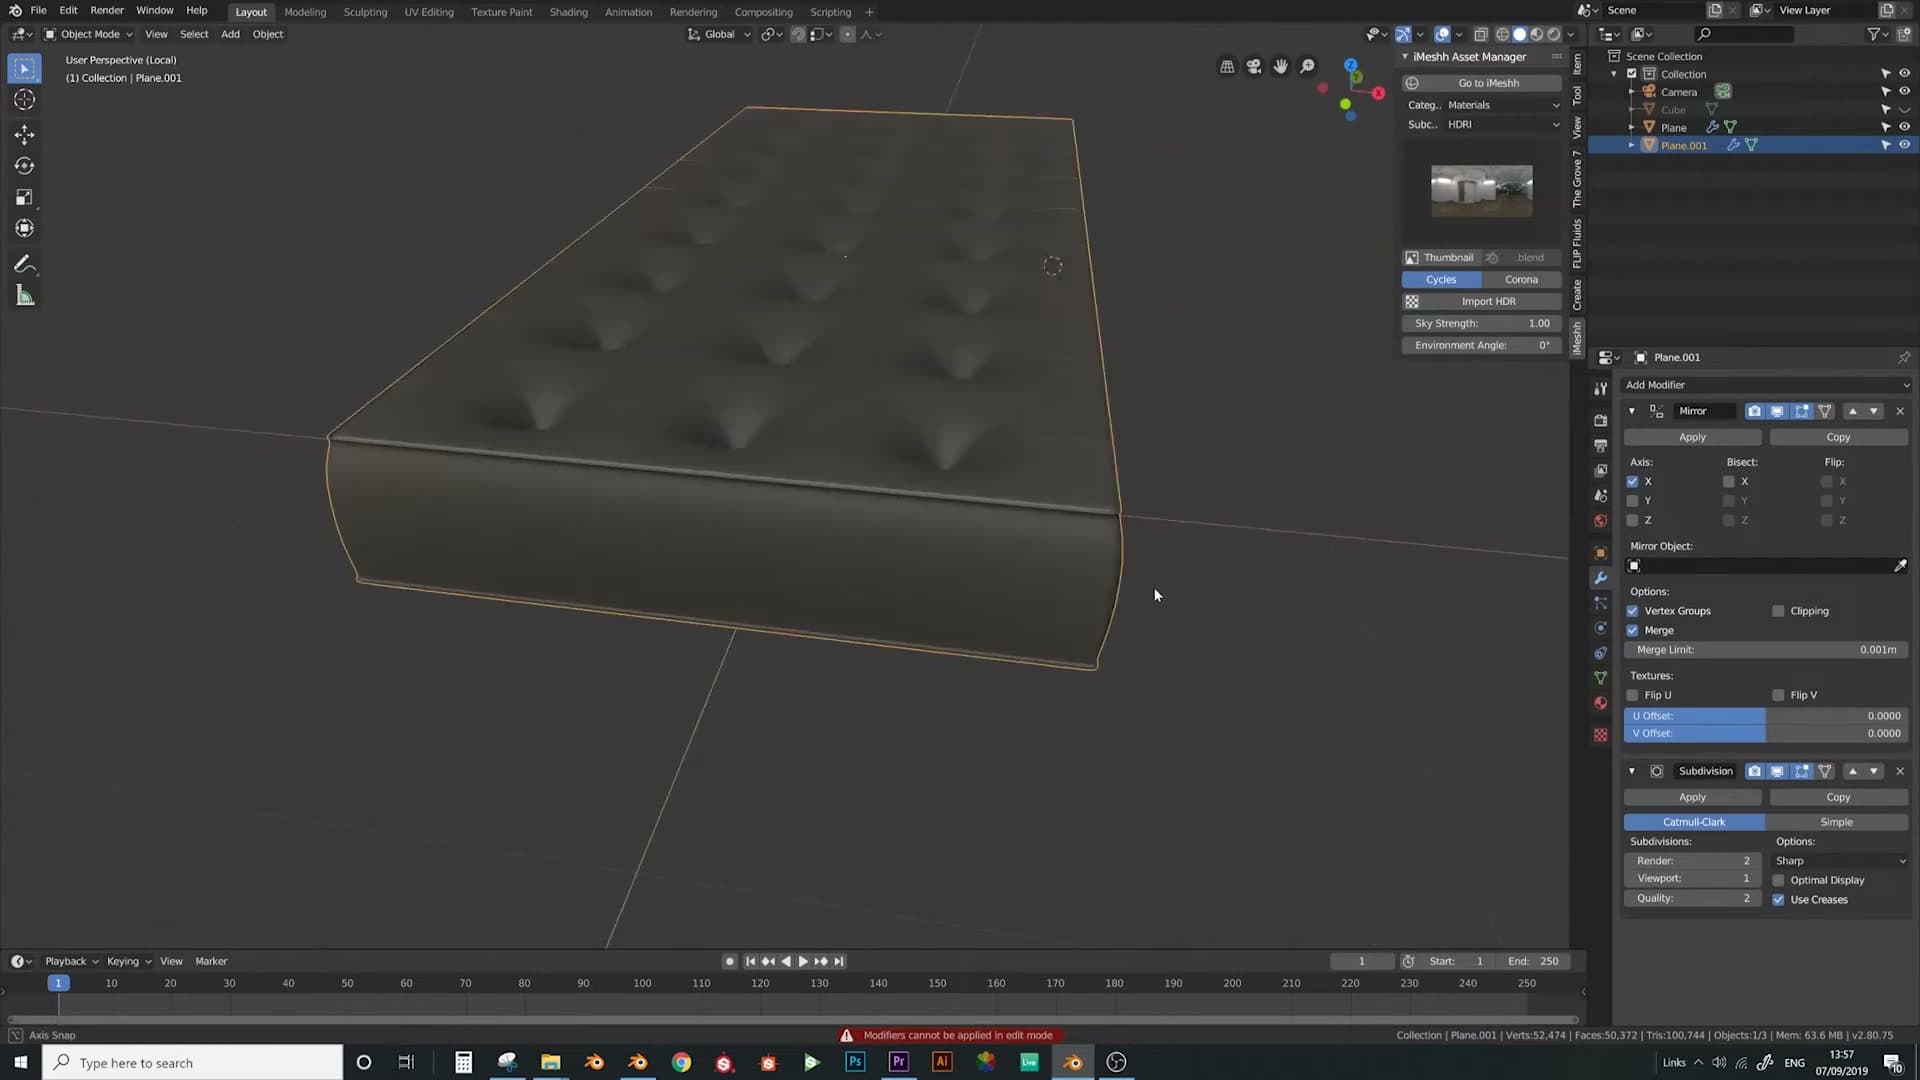
With that done, add a fresh Mirror modifier on top of the stack and turn Clipping back on. From here on, every edge you shrink in or fatten out will mirror automatically to the opposite side, and Clipping keeps the centreline verts locked together so no seam appears down the middle of the cushion.
Pushing the side-panel creases with Alt+S
Hold Alt+Shift to loop-select non-adjacent random edges, drop the top and bottom verts in wireframe so creases don't pierce through the mesh, then Alt+S to scale some out and others in. That random in/out is what reads as wrinkled fabric.
Loop-selecting non-adjacent edges with Alt+Shift
With the cuts in place, the next job is to pick which crease lines bulge out and which sink in. Stay in edge select and Alt+Shift+Click a crease line to grab the whole loop, then keep adding more loops with further Alt+Shift+Clicks. Work your way around the panel selecting some of the loops, but not all of them.
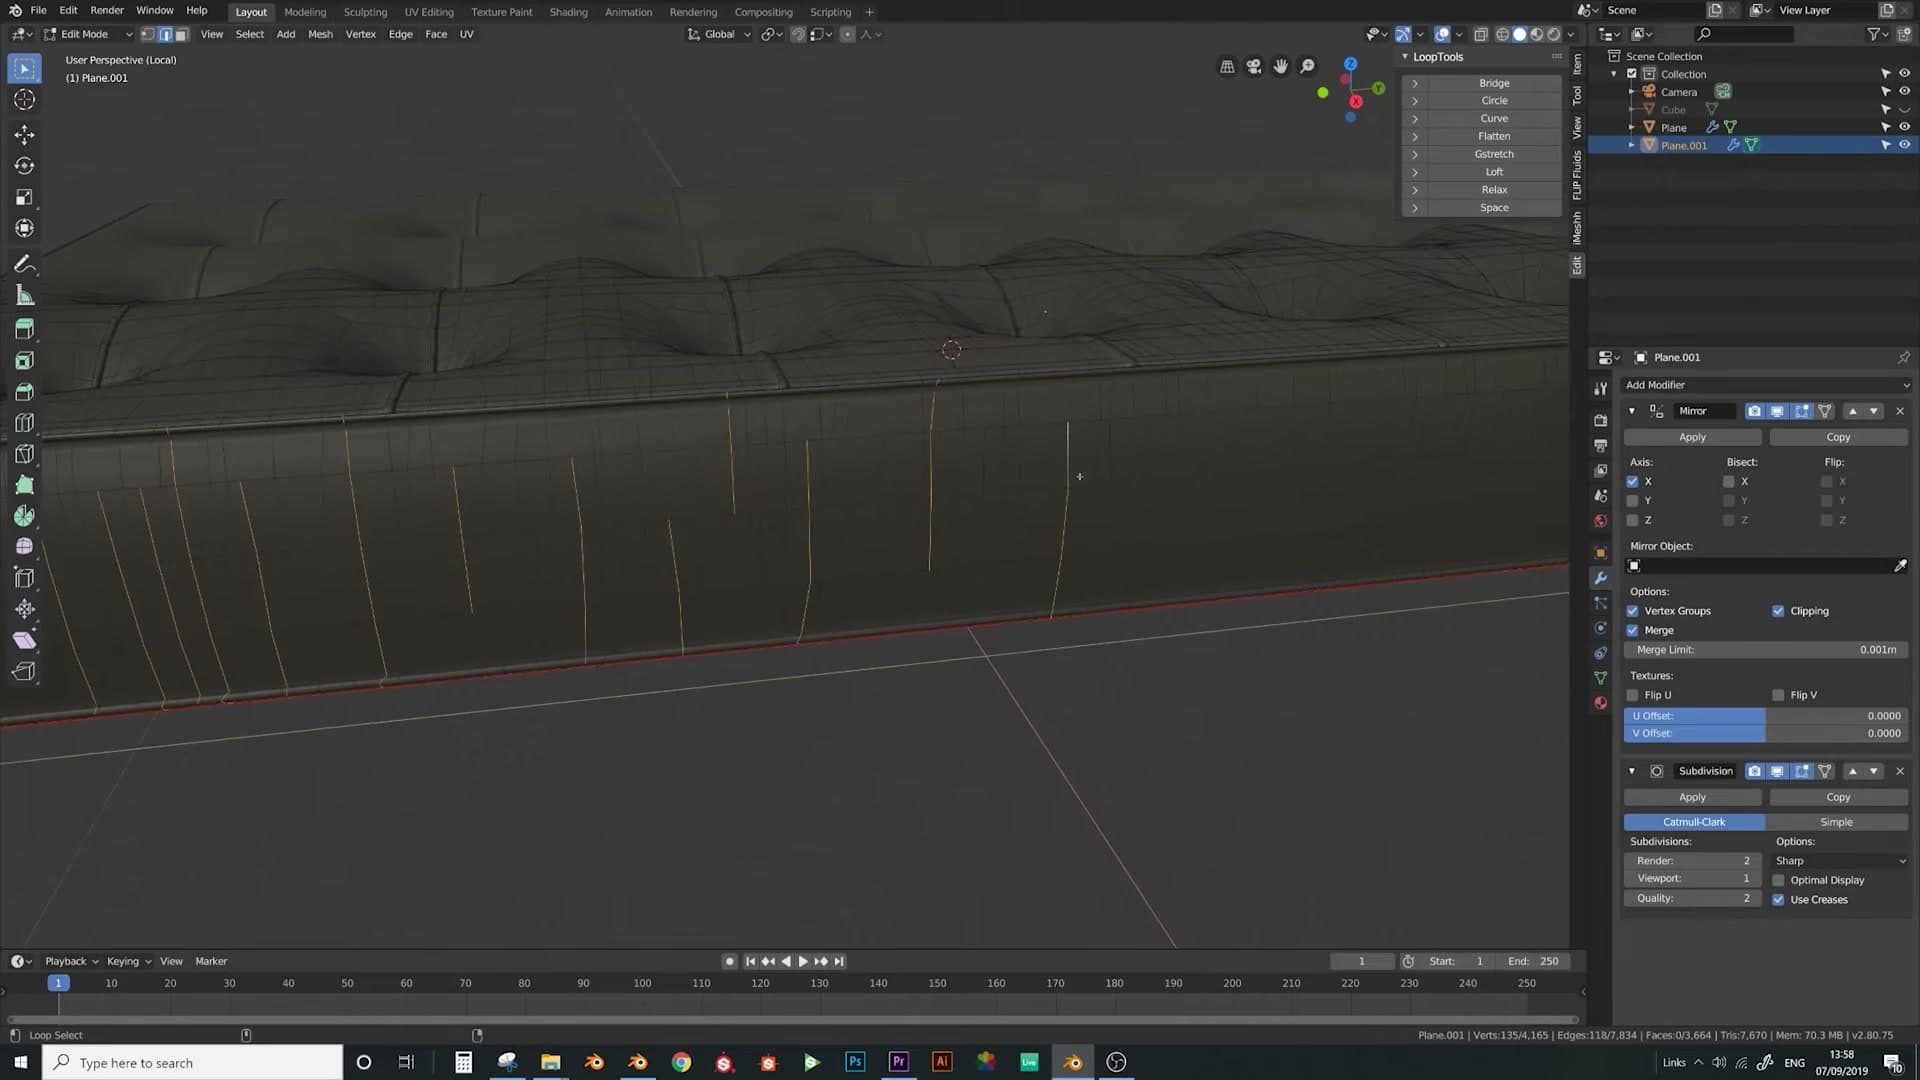
The one rule: never pick two loops that sit right next to each other. Adjacent loops will scale as one chunk when you push them, which kills the variation you're trying to create. You want a scattered, random spread: some loops grabbed, some skipped, in no particular pattern.
Don't worry about getting the selection perfect at this stage. You'll do a second pass with a different random set in a moment, and you can fine-tune individual edges after that.
Trimming top and bottom verts in wireframe
Before scaling anything, you need to strip out the verts that sit on the very top and bottom edges of the panel. If those move with the rest of the loop, the crease will tear straight through the cushion and you'll see through the mesh. Not what you want.
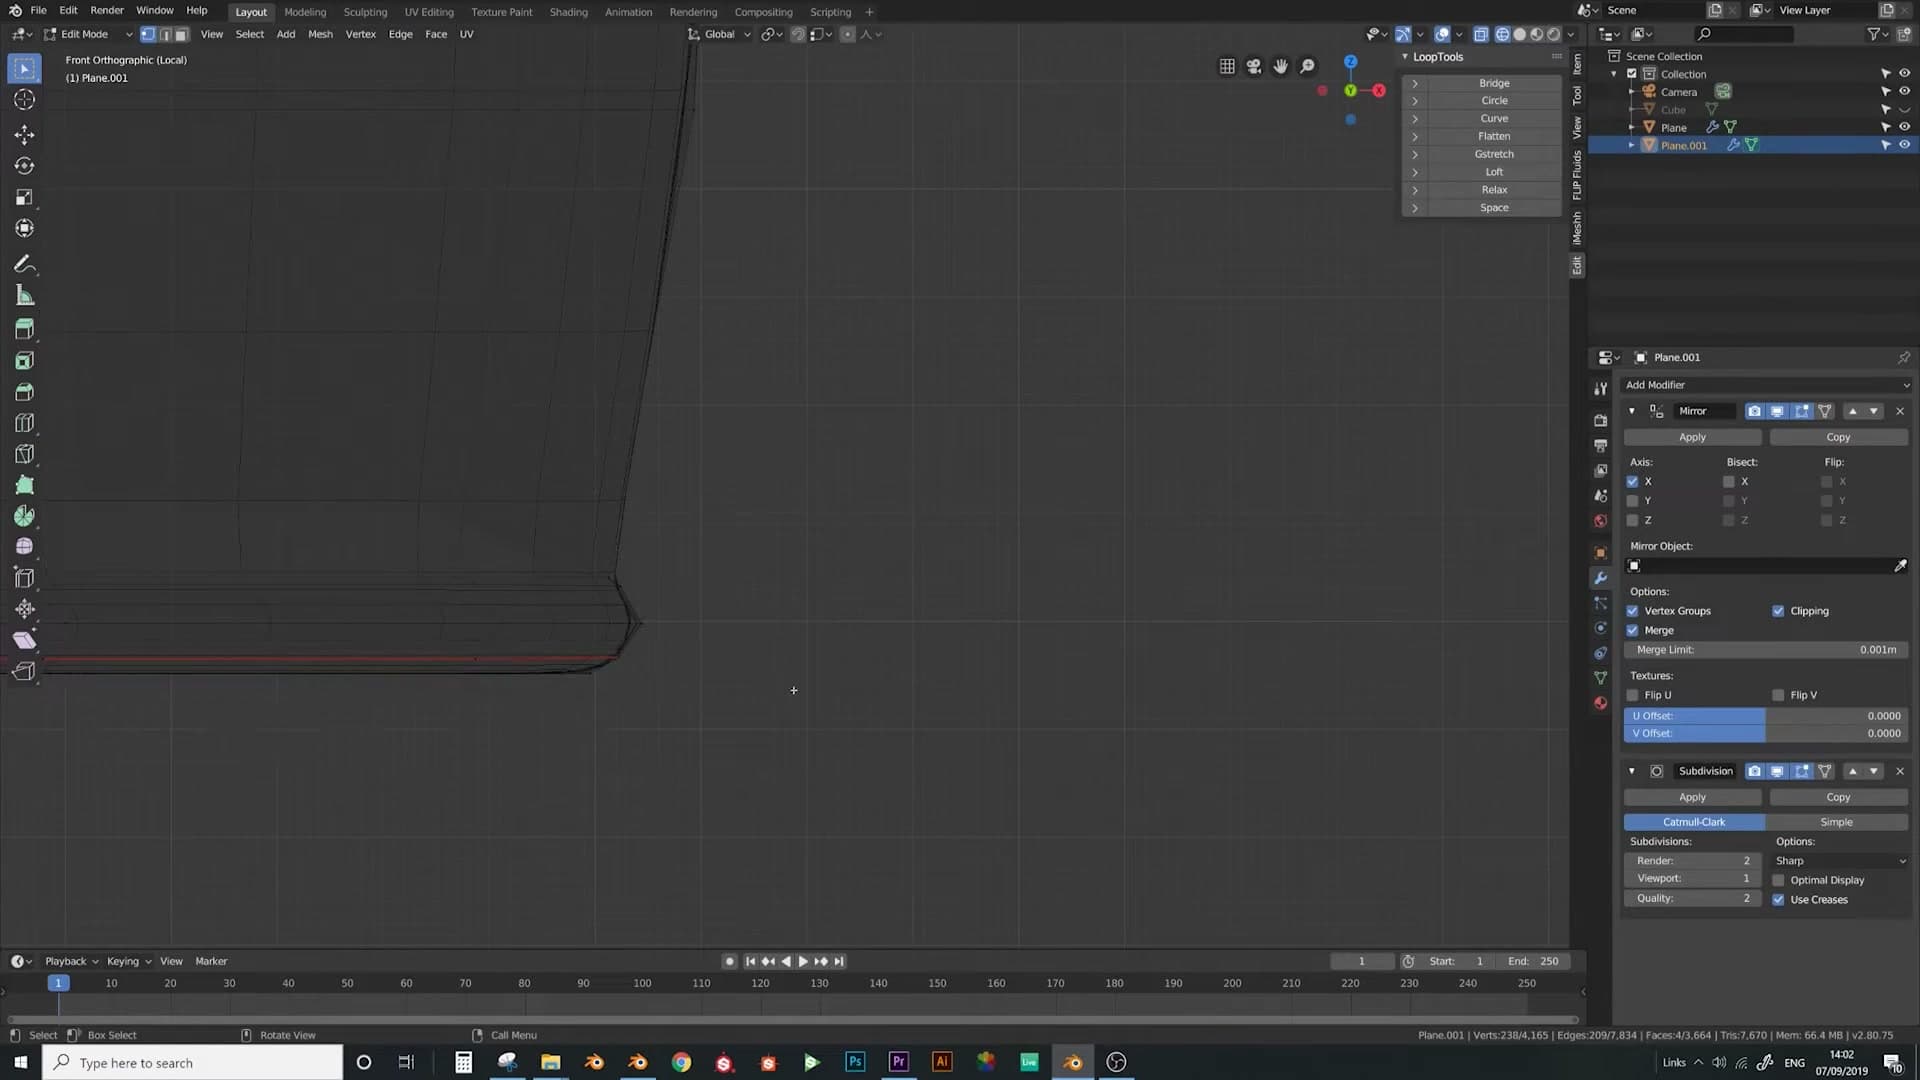
Switch to wireframe shading and drop into vertex select mode so you can see every vertex the loops have picked up. Rotate round to a clean side view, then box-deselect any verts sitting on the top edge of the panel. Repeat the same pass along the bottom edge, deselecting any verts that would otherwise pull the crease underneath the sofa.
If you spot stray edges lingering after the vertex pass, flip back into edge select and deselect those too. Once the selection only contains verts living in the middle of the panel, nothing on the perimeter, you're ready to push them.
Alt+S to push creases out, then a second pass inwards
Drop back into solid shading and press Alt+S (Blender's shrink/fatten), then drag outwards just a touch. The selected loops swell along their normals and the first set of creases starts to read.
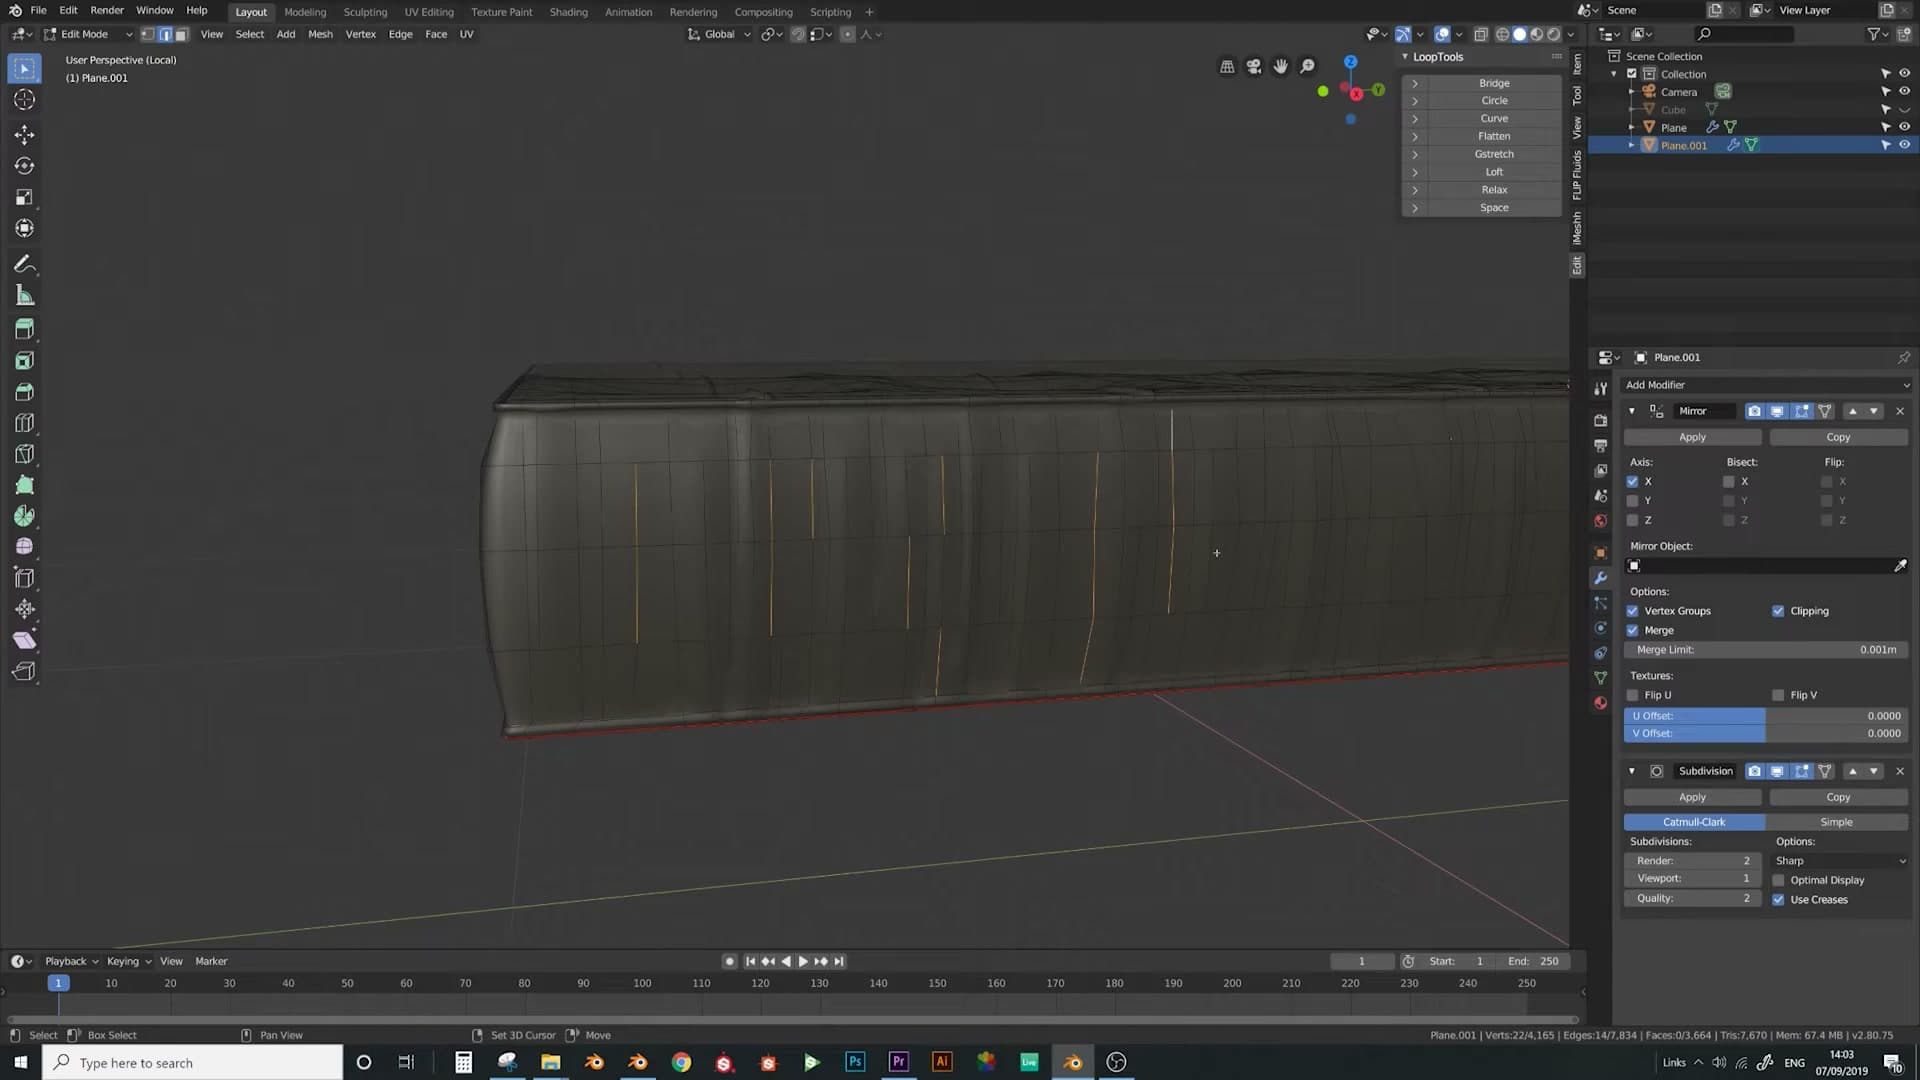
Now do the whole thing again with a fresh random selection. Alt+Shift+Click a different scatter of non-adjacent loops, trim the top and bottom verts in wireframe the same way as before, then hit Alt+S and pull inwards this time. The recessed valleys between the earlier bulges are what start to sell it as fabric rather than a smooth panel.
From here it's purely a judgement call. Spot a flat patch where a crease is missing? Grab those edges and push them out. See a fold that's too proud? Pull it back in. I describe it as "goes in then out": alternating individual loops so neighbouring creases never run in the same direction.
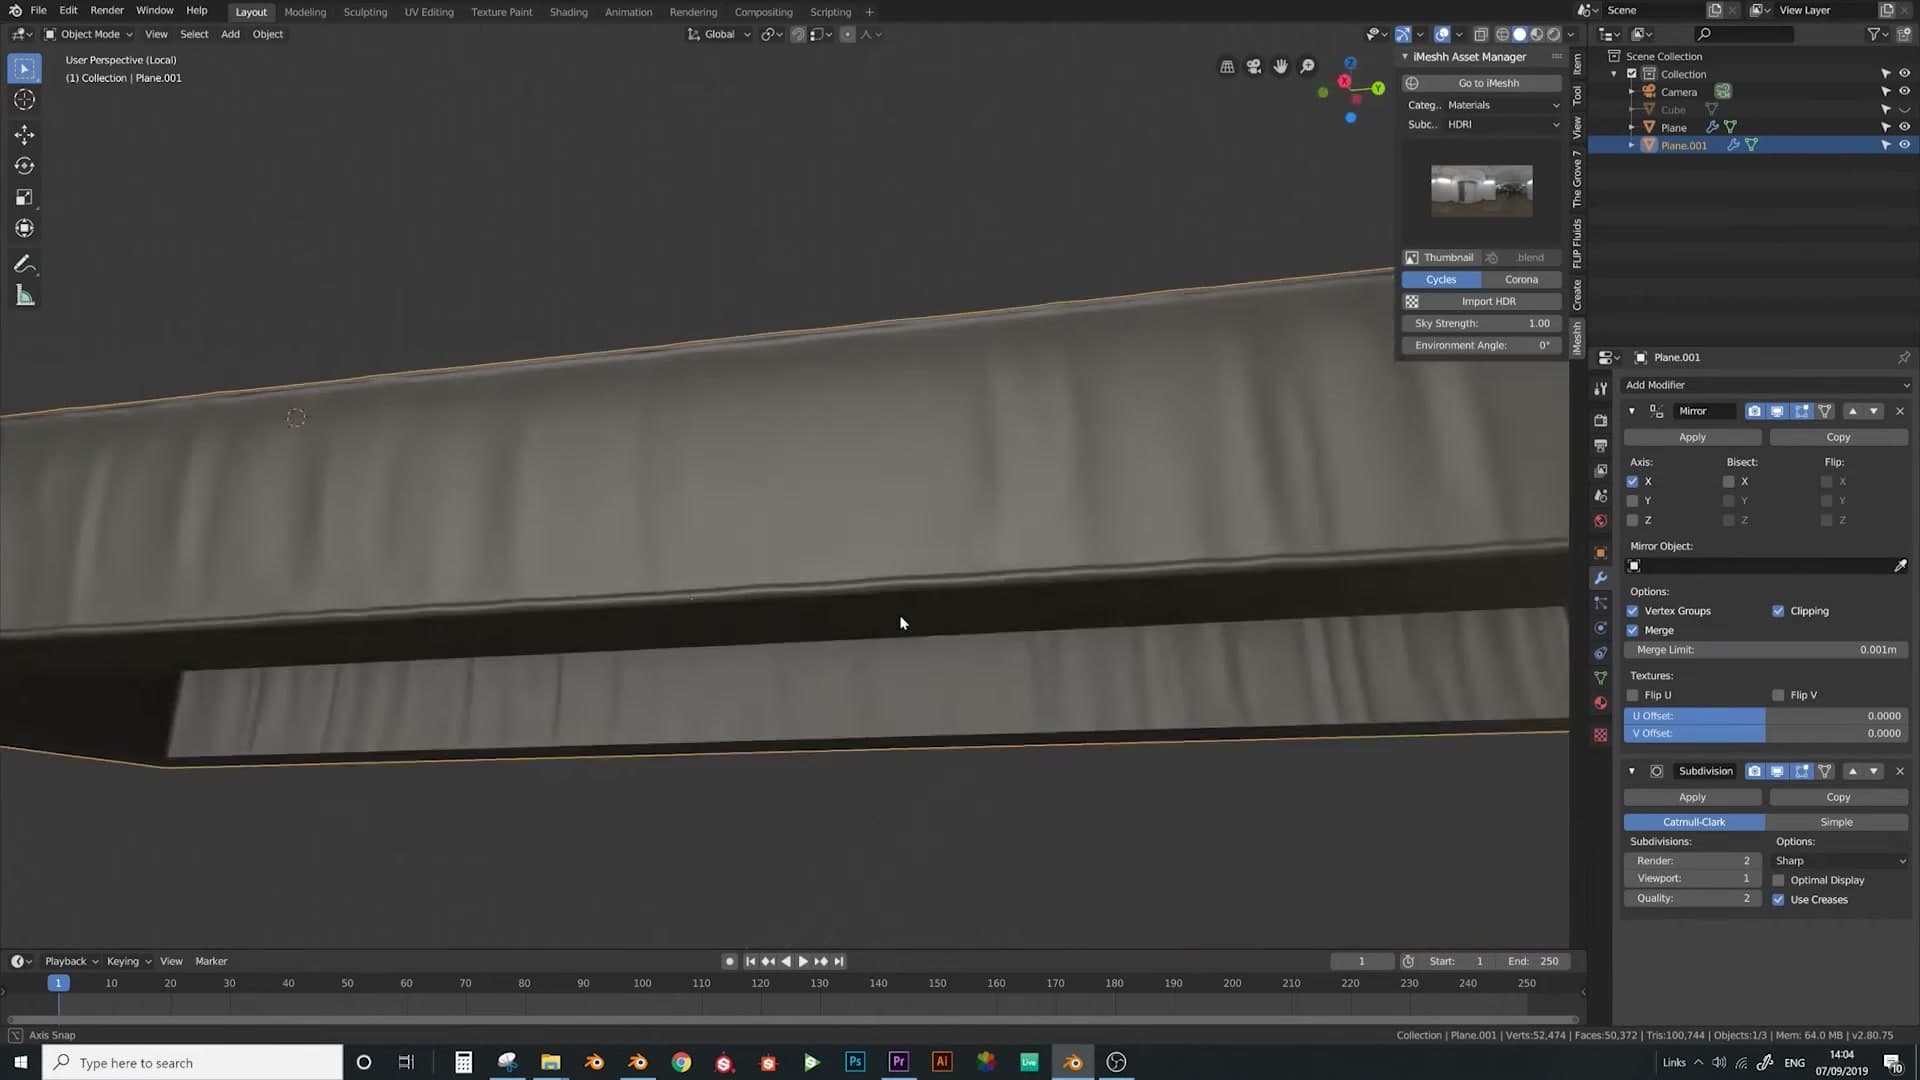
Once the panel is reading as a random mix of pushed-out folds and pulled-in valleys, it'll look genuinely creasy. The randomness is the whole point. Uniform spacing or matching depth would immediately read as CG.
Creasing the top edge and the centre seating panel
Repeats the loop-select + Alt+S workflow on the top rail and the centre cushion, this time selecting some full-span edges and some partials. Adds a raking area light in Eevee to test the result as you go.
Top edge: random loops, then in and out
Before touching the top rail, drop into rendered view to see how the side panel is reading. Switch the viewport shading to Rendered (Eevee), press Shift+A and add an Area light. Scale it down and turn on Contact Shadows in the light properties.
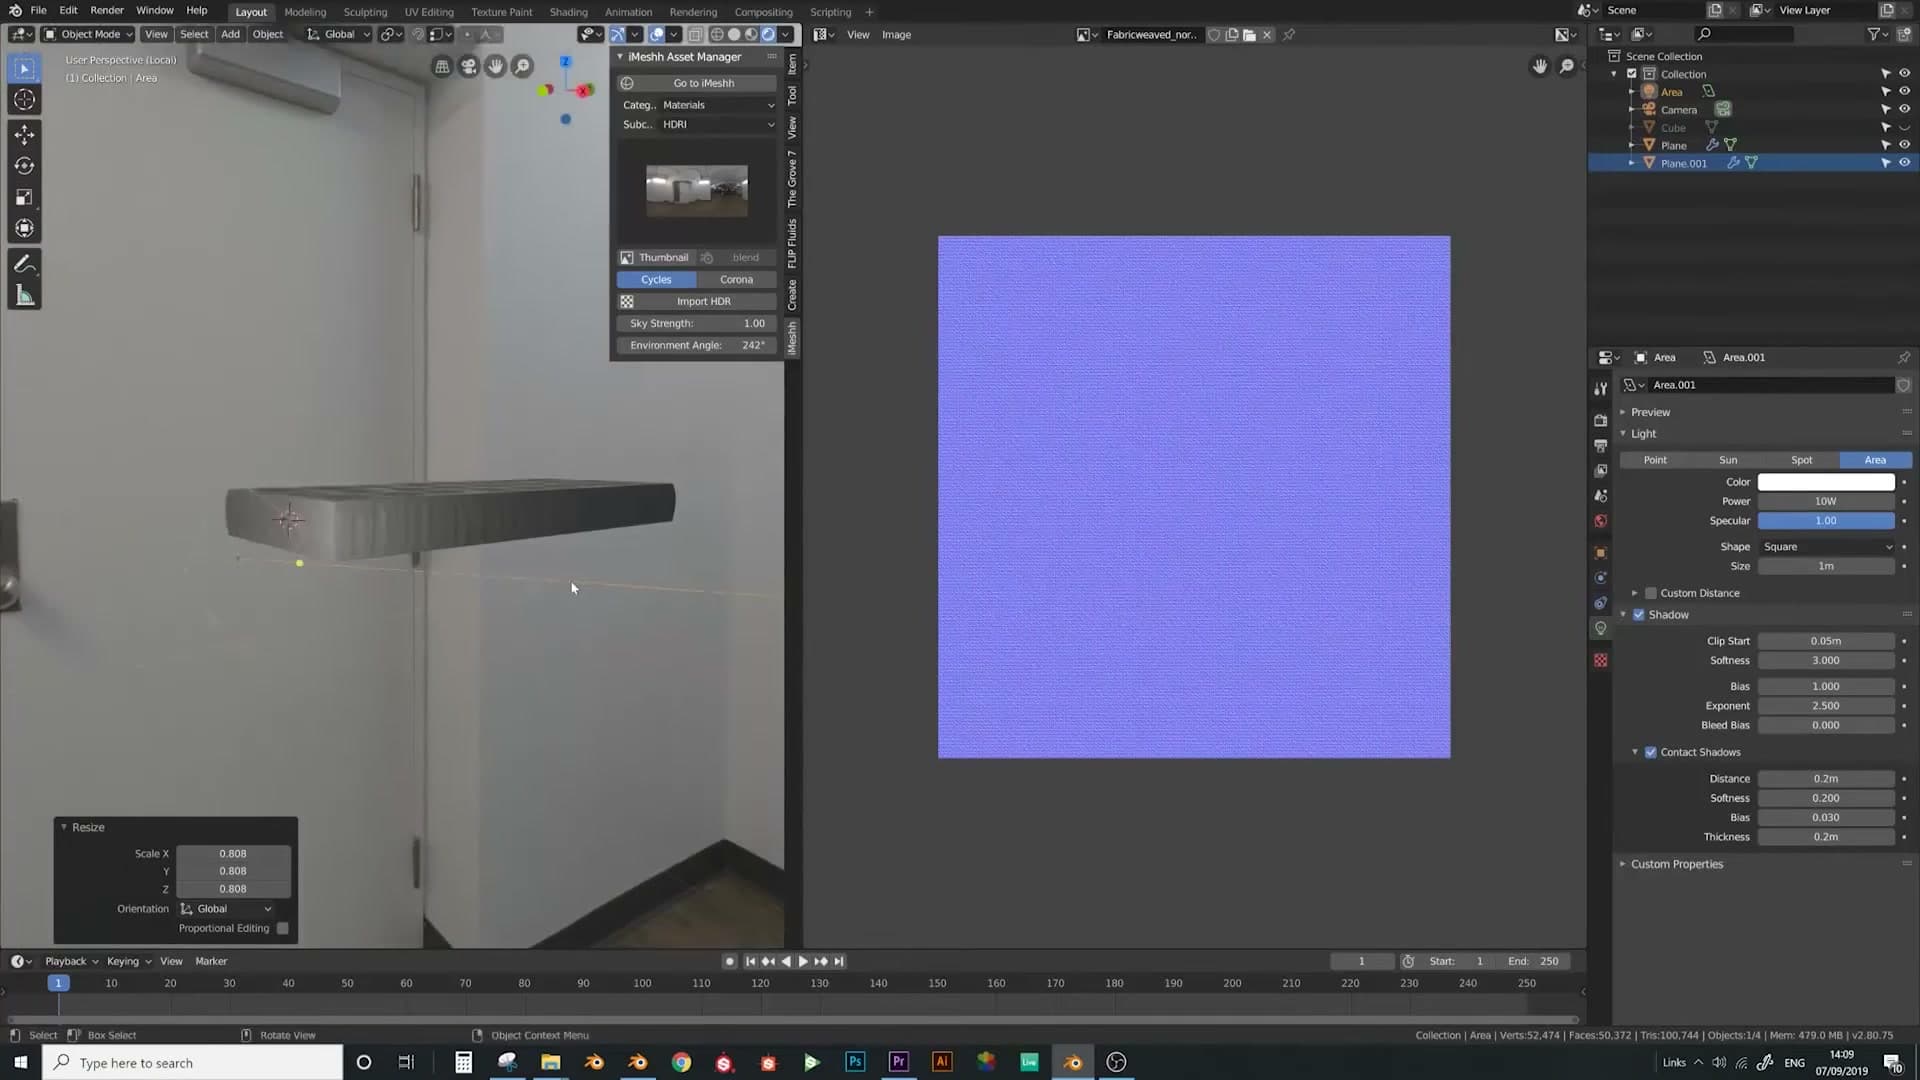
Angle matters here. A high-angle light makes the creases easier to read at a glance, but if you swing the light around to the side you get the flannel effect raking across the fabric itself. That's the look you are really chasing. Once that is sitting nicely, move on to the top edge.
The workflow on the top rail is the same loop-select trick as before, with one twist: this time you can select whole edge loops that run all the way across the panel, not just partials. Alt+Shift click your random edges, keeping clear of any that sit right next to each other. Expect to spot a few mistakes as you go. Leave them for now and clean them up in a moment.
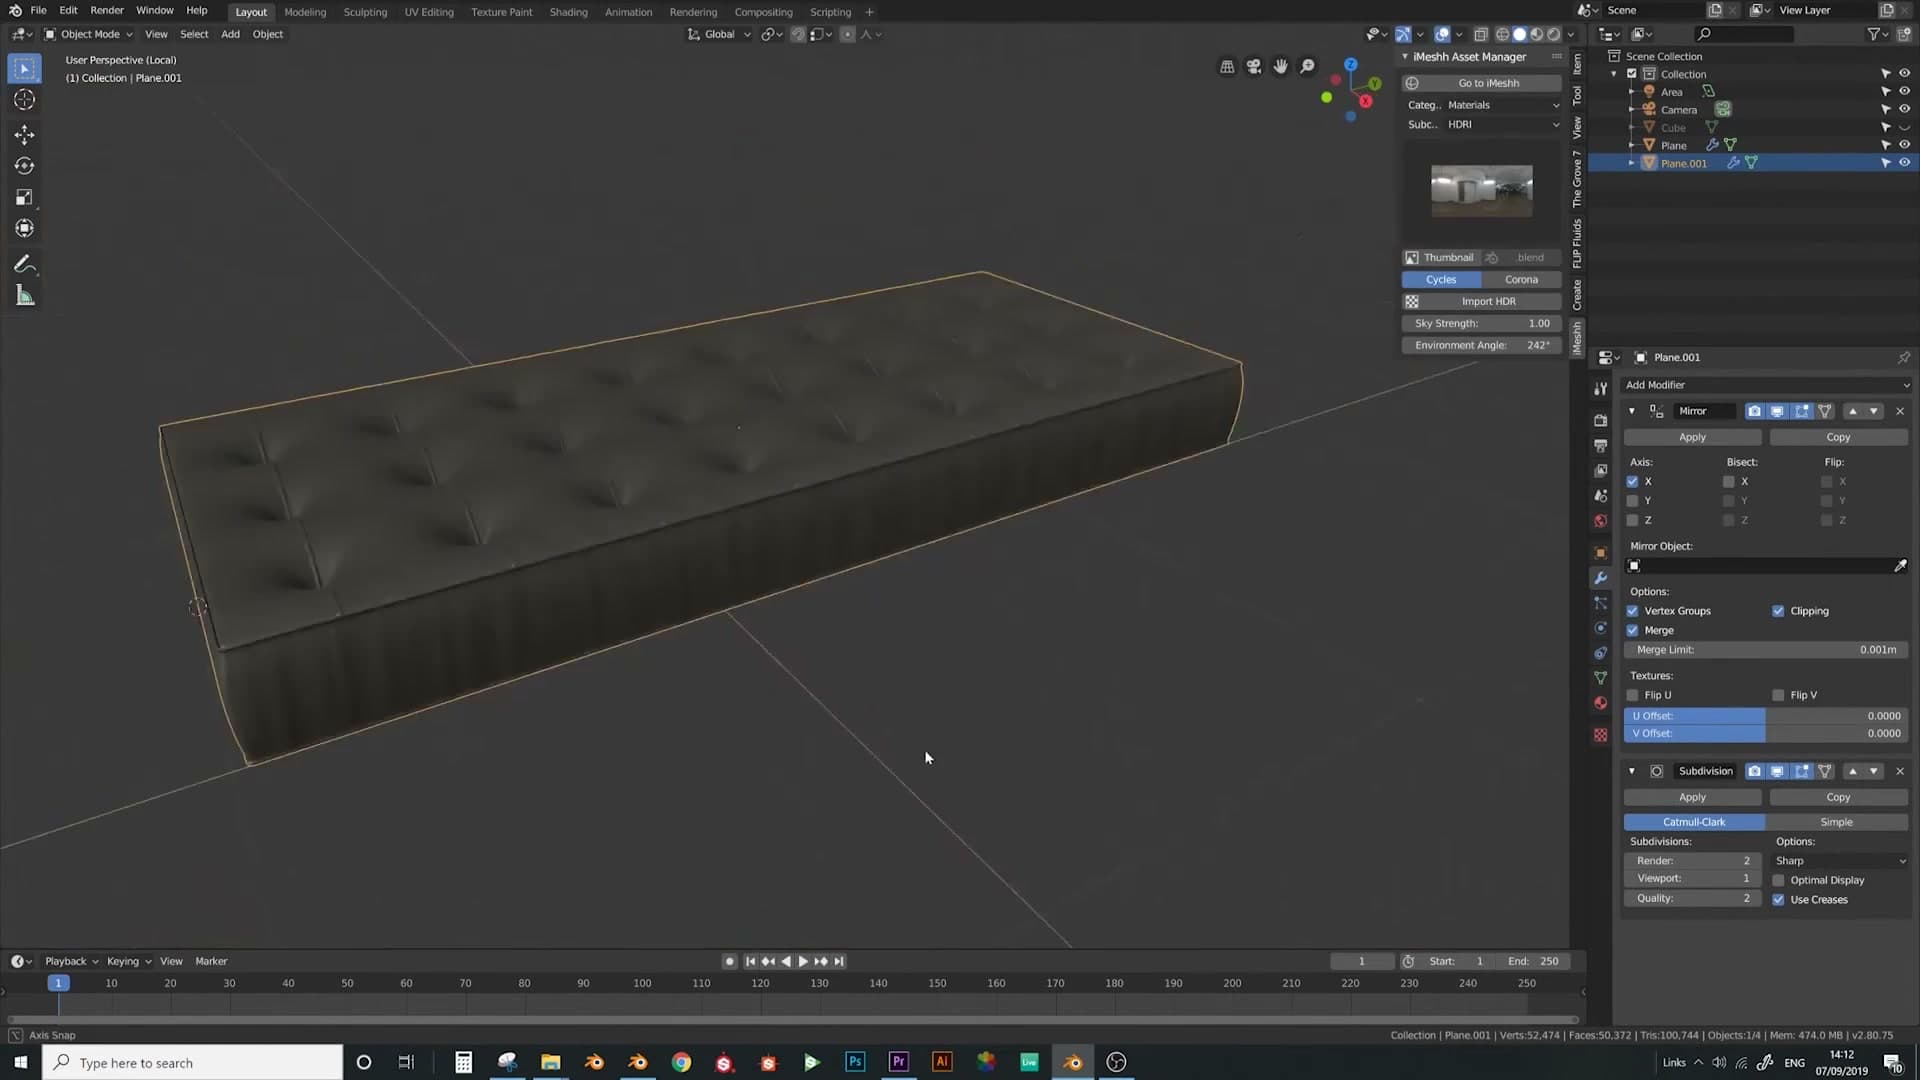
Drop into side view and switch to wireframe so you can see through the mesh. Tab into vertex mode and deselect any verts that sit on the very top or bottom of the rail, plus anything caught in the crevice between panels. If those move, the creases will poke through the outside of the sofa. Back into edge mode, tidy up any stragglers, then hit Alt+S.
Push some loops inward and bring others up and out. The randomness is the whole point: a row of edges all shrunk the same direction reads as ribbing, not fabric. Alternate, eyeball it, and run Alt+S a second or third time on smaller selections until the top edge has a believable mix of pushed-in tucks and raised folds.
Centre panel creases and Eevee preview
The centre seating panel gets the same treatment. Run an Alt+Shift edge-loop selection straight across the cushion, picking up a load of edges in one go, then thin the selection out by hand.
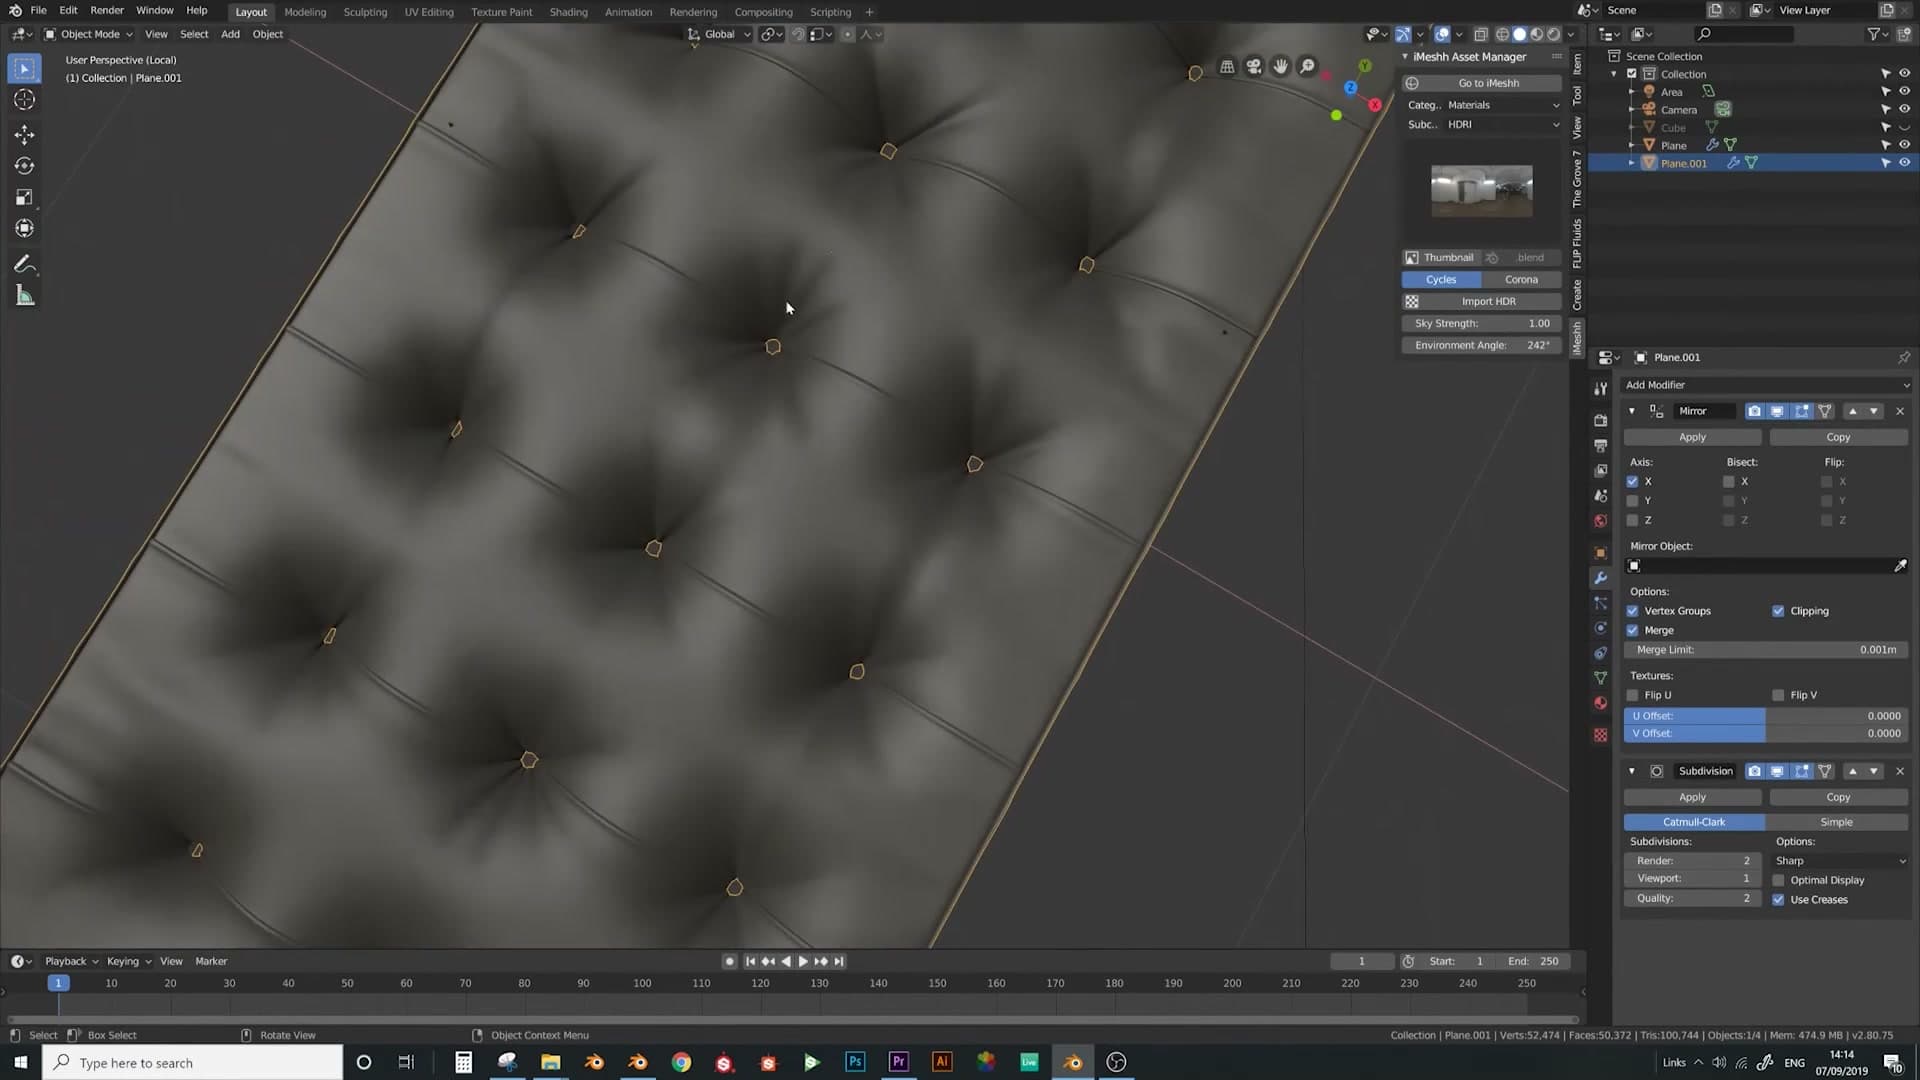
Two things to watch for. Don't let too many of your selected loops meet in the middle of the panel: that kills the effect in the places where it should be strongest. And don't leave loops sitting right next to one another, because adjacent creases blur into a single fat fold instead of two separate ones. Vary the lengths and break a few loops up so they finish at different points across the cushion.
Some of your selection will wrap around the corner onto the side panel. Switch to wireframe, deselect those wraparound edges, then go back into solid view. Press Alt+S and bring this set inward. That pulled-in tuck is what gives the centre panel its sunken, pinched look.
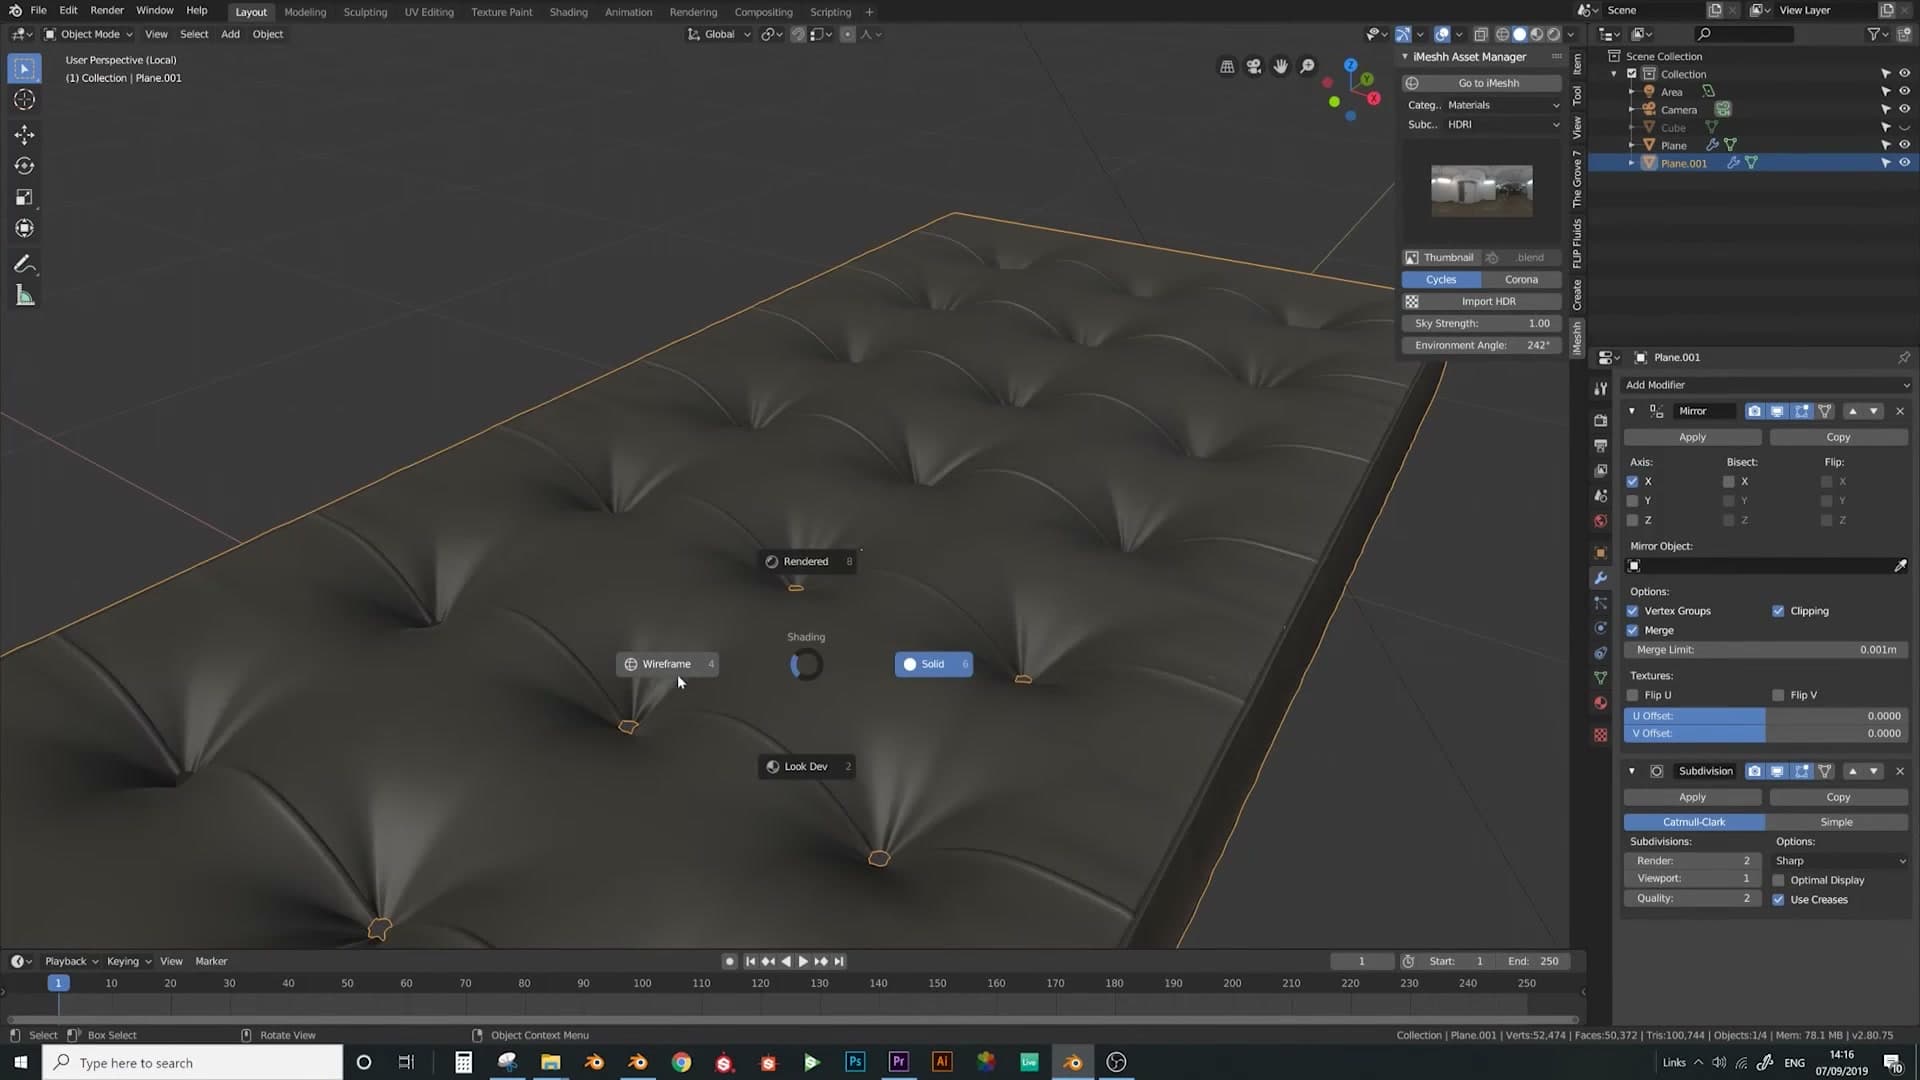
To add a second pass of detail, temporarily disable the Subdivision Surface modifier so you can see the base cage clearly. Select another random batch of edges on the same panel, hit Alt+S again and push them in, then turn subdivision back on.
Flip into rendered view. The creases should now read as real fabric folds under the raking light. Eevee handles the soft shadowing well enough that the illusion holds even before any texturing. You will notice some stretching across the deformed areas; that gets sorted later when you re-apply the UV unwrap on top of the new geometry.
Cleaning up stray vertices and what comes next
Hunts down the handful of stray verts and double points left behind by the knife pass, dissolves them, and sets up the next part: adding the wooden edge frame and the cushions.
Dissolving stray verts and doubles
Before signing off on the creases, take a moment for any last refinement. You can keep adding more cuts and pushing more edges in or out wherever the fabric still looks too uniform. There's no fixed stopping point. It's completely up to you when to call it done.
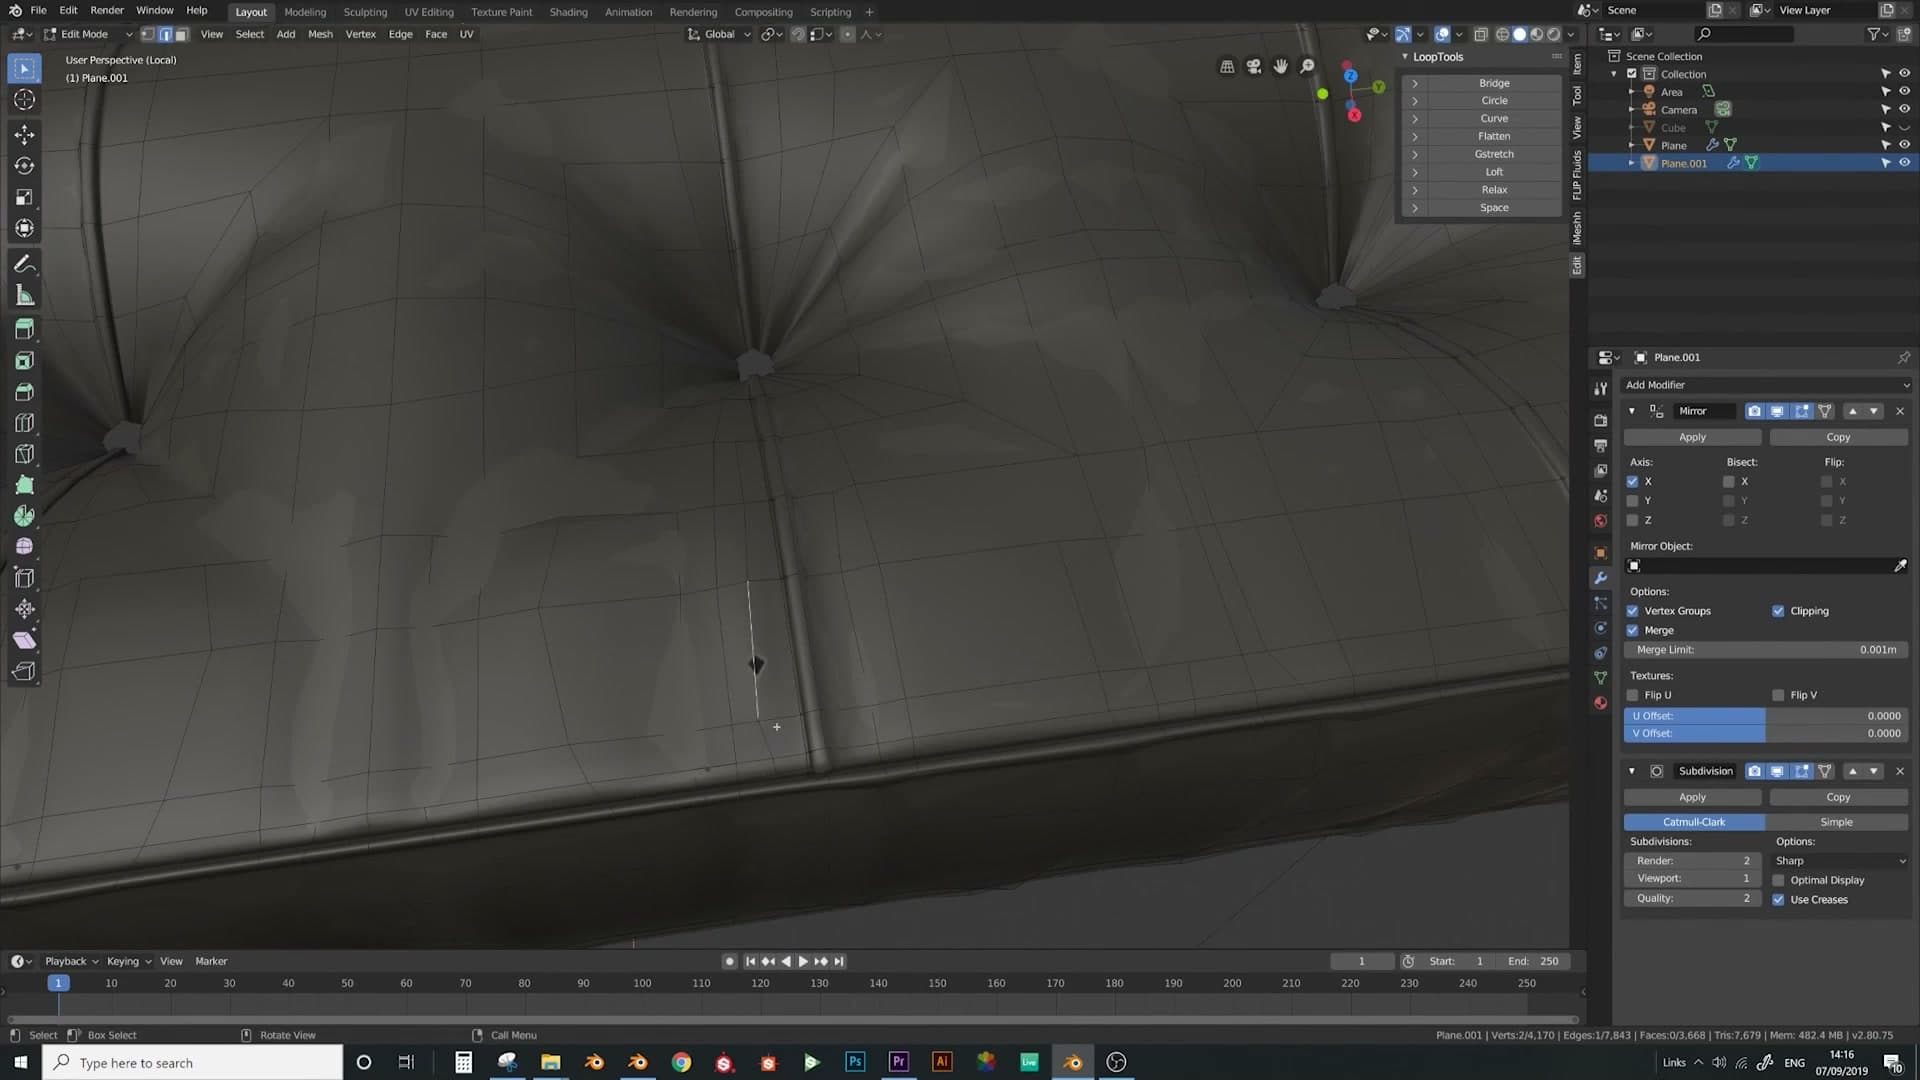
Once you're happy with the overall look, sweep the mesh for errors. The knife cuts inevitably leave a few stray vertices behind: isolated verts sitting on an edge that aren't actually connecting anything, plus the occasional double sitting on a join. They're easy to miss in edit mode, but with subdivision surface on they cause subtle shading wobbles on the smoothed result.
Work your way around the mesh and dissolve each one as you find it. Select the stray vert and use Dissolve Vertices to remove it cleanly without leaving a hole. There's usually one near the top of the panel, another on the side, sometimes a lone double that just needs taking out. A handful at most. A minute of cleanup and the mesh is tidy.
Next up: edge frame and cushions
That wraps the wrinkle pass. The next stage is adding the wooden edge frame around the seat and back, and after that, dropping the cushions on top. The sofa is essentially done at that point. See you in the next video.
Tools and credits
Everything mentioned in this tutorial, with links.
- Blender: the renderer this entire build runs in.
- iMeshh: studio platform (project management, client review, asset library, invoicing). The asset library used in this tutorial is included with every iMeshh Pro plan.
- Poly Haven: free CC0 textures and HDRIs.
Pillar guide: Modelling hub