Scene Prep and Vase Modeling
Lock the studio set away in its own collection so you can focus on a fresh cylinder, then block out a simple vase with extrudes, insets and edge loops to give the gradient mask something to land on.
Isolate the studio set in a locked collection
In this iMeshh tutorial you'll build a single object that splits between two materials using a gradient texture. A short ceramic-meets-painted-metal vase is the demo, but the same shader graph drops onto any shape you want to weather.
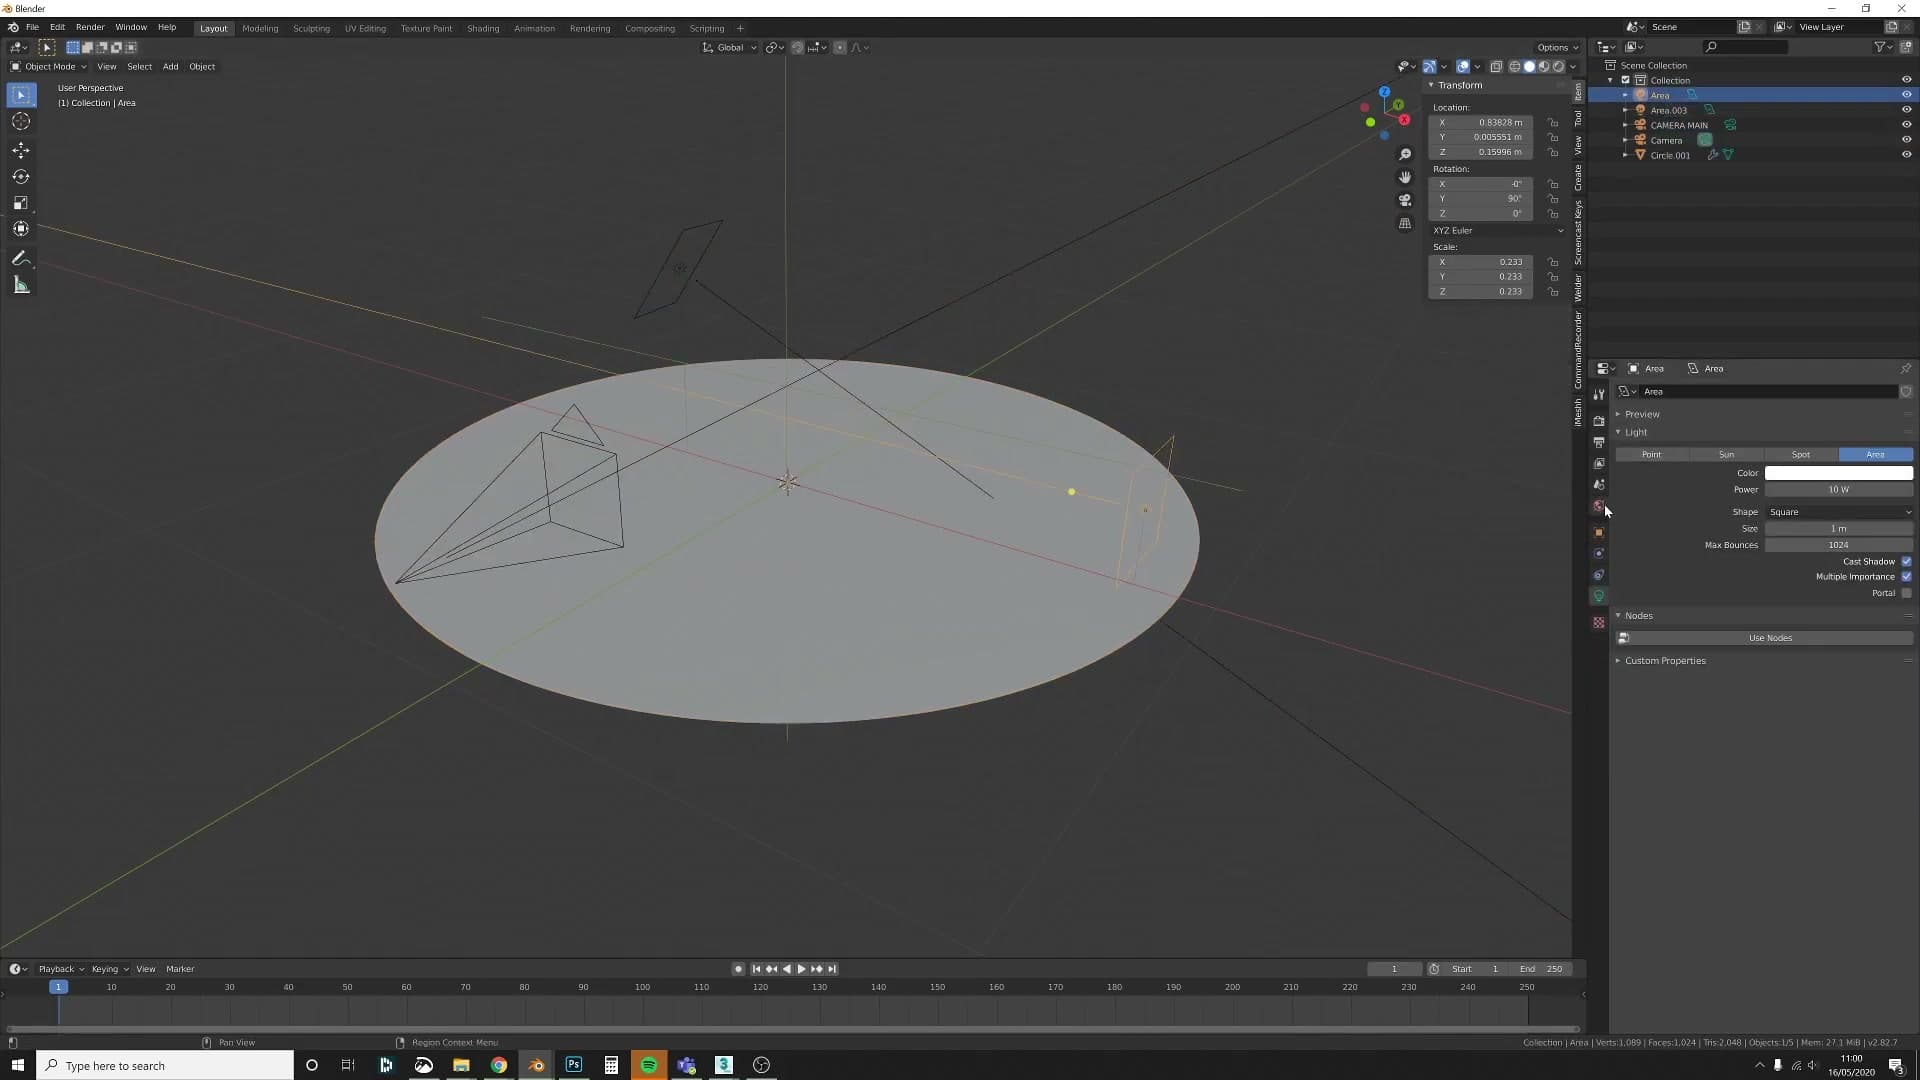
The starting scene is deliberately bare. A circle backdrop sits under a camera and two area lights, with an indoor HDRI on the world. Nothing about it is precious. It just gives the vase a stage to sit on while you focus on the shading.
Before you add any new geometry, get the studio set out of the way. Select everything currently in the scene and move it to a new collection, then rename that collection to don't touch so future-you knows the rule.
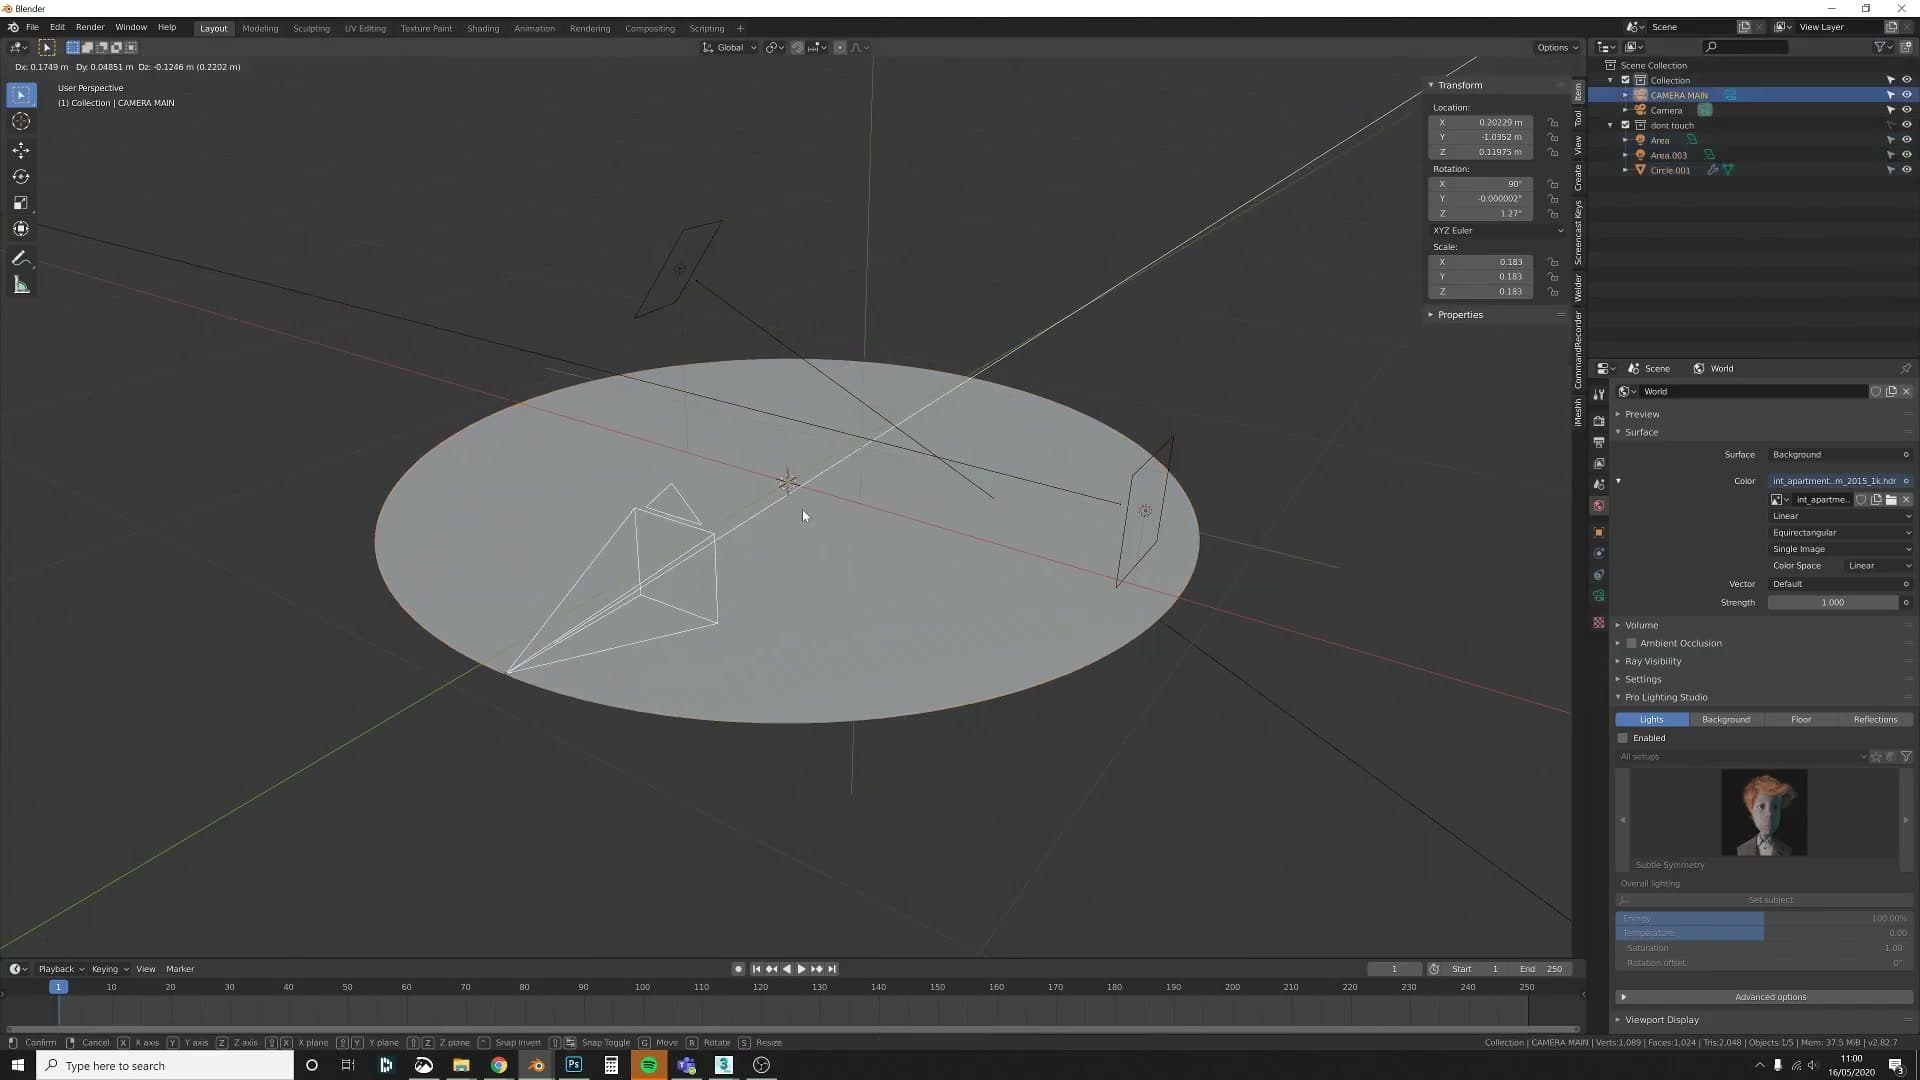
Click the selection-disable button next to the collection in the outliner so its contents can no longer be picked. With the set safely parked, the only things you'll be working on for the rest of the tutorial are the camera and the cylinder you're about to add.
Block out the vase cylinder
Add a fresh mesh cylinder and scale it right down to vase size. The exact proportions don't matter. Anything roughly bottle-shaped will do, because the gradient mask only needs a vertical surface to fade across.
Drop into edit mode and work on the top cap. Press E to extrude, or I to inset, and push the new face back down inside the cylinder to carve out the opening. Swap between the two freely. You're after a simple silhouette, not a hero asset.
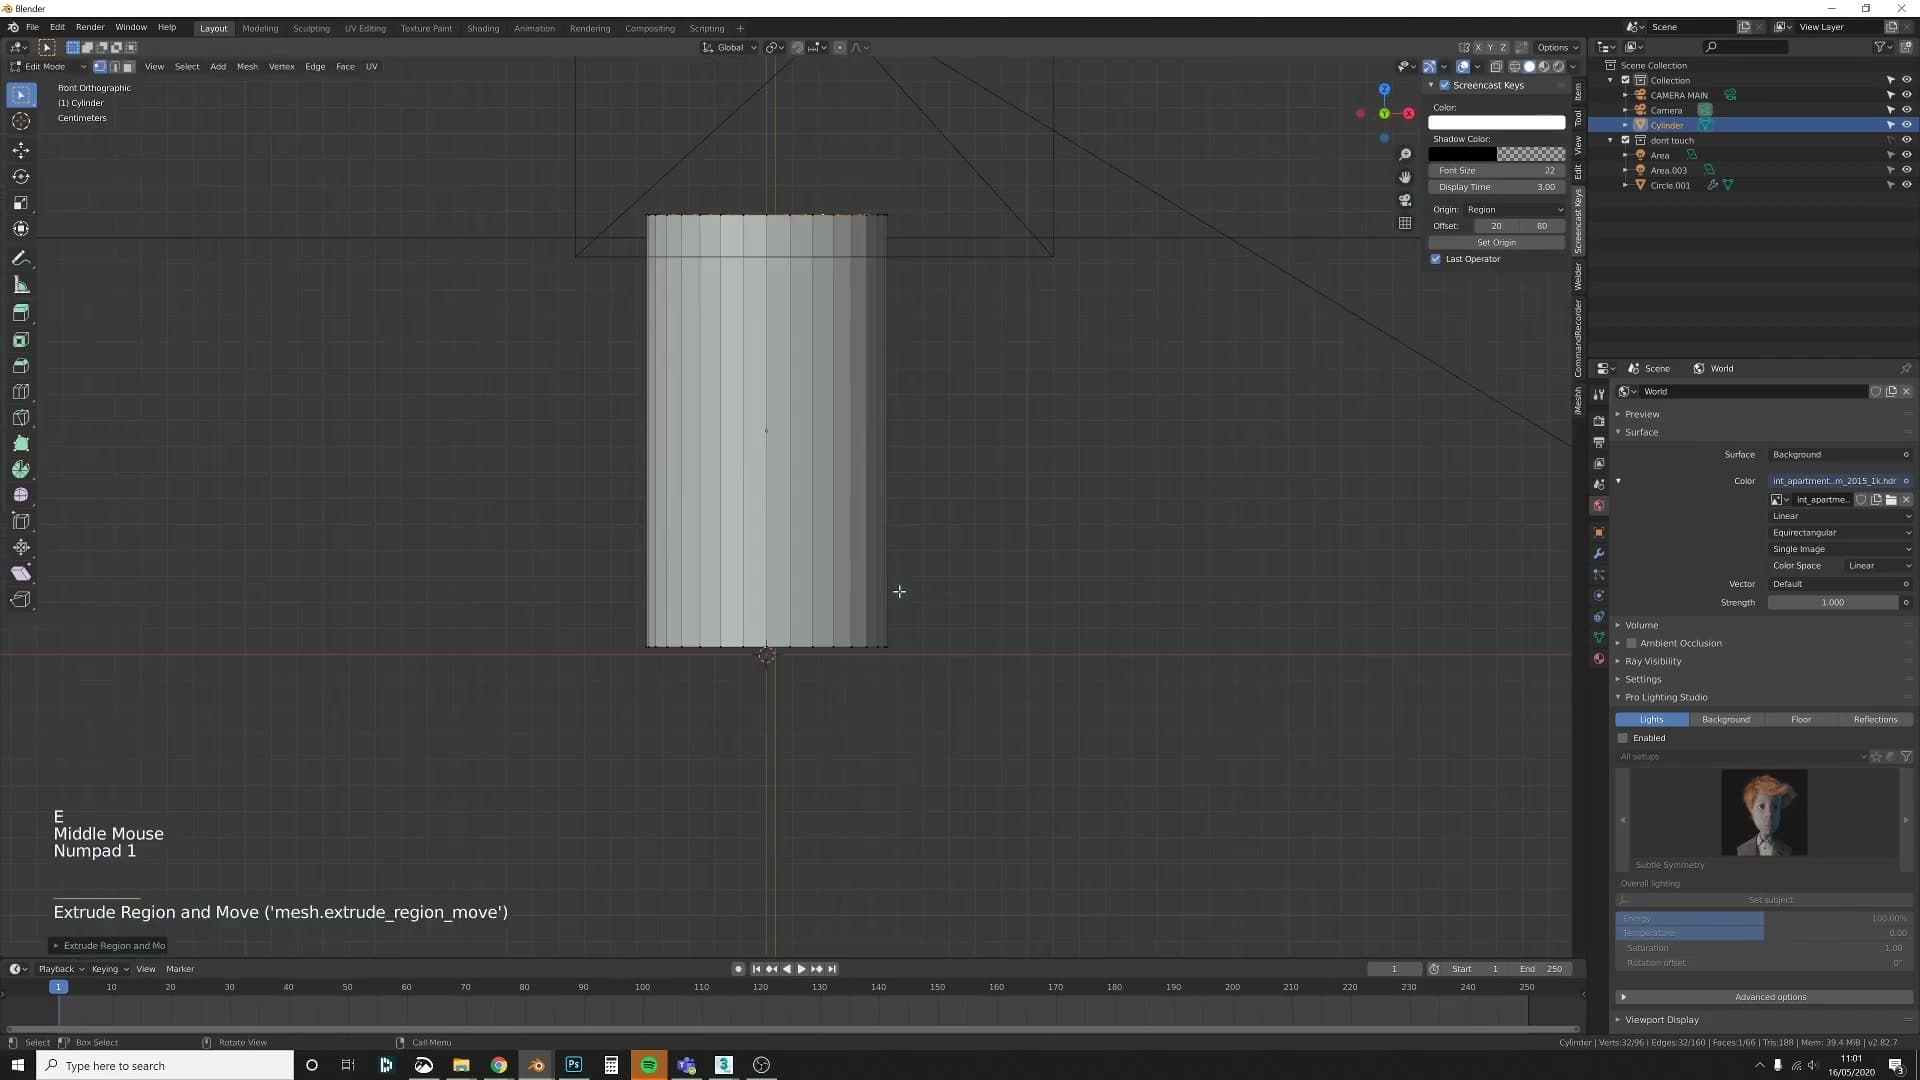
Now tighten the silhouette. Press 2 to switch to edge select, grab the hard top and bottom edges, and use Ctrl+B to bevel them into a couple of tight edge loops. That gives the smooth shading something firm to hold onto at the rim and base.
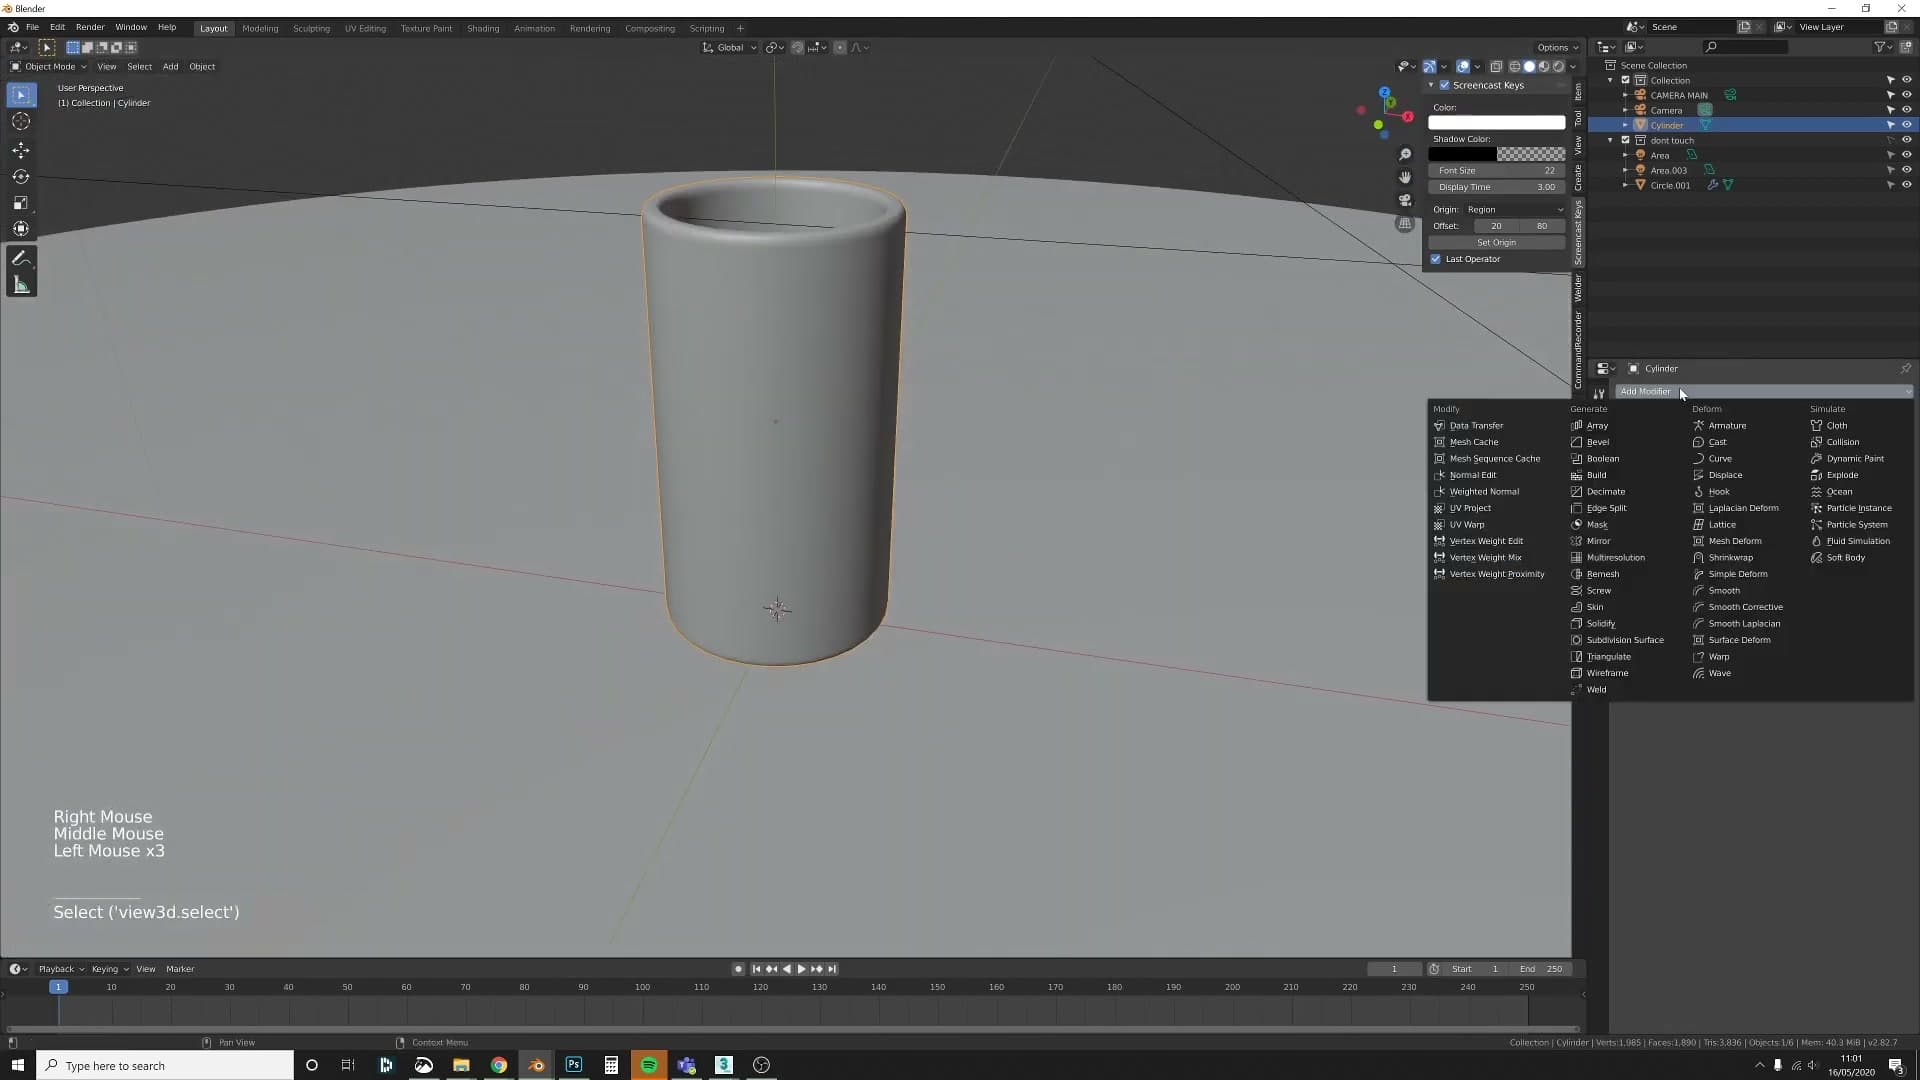
Shade smooth the mesh, and if you want the surface even softer you can stack a Subdivision Surface modifier on top. Add one more edge loop near the rim and another near the base so those creases stay sharp once the subsurf rounds everything else off.
UV Unwrap and Base Concrete Material
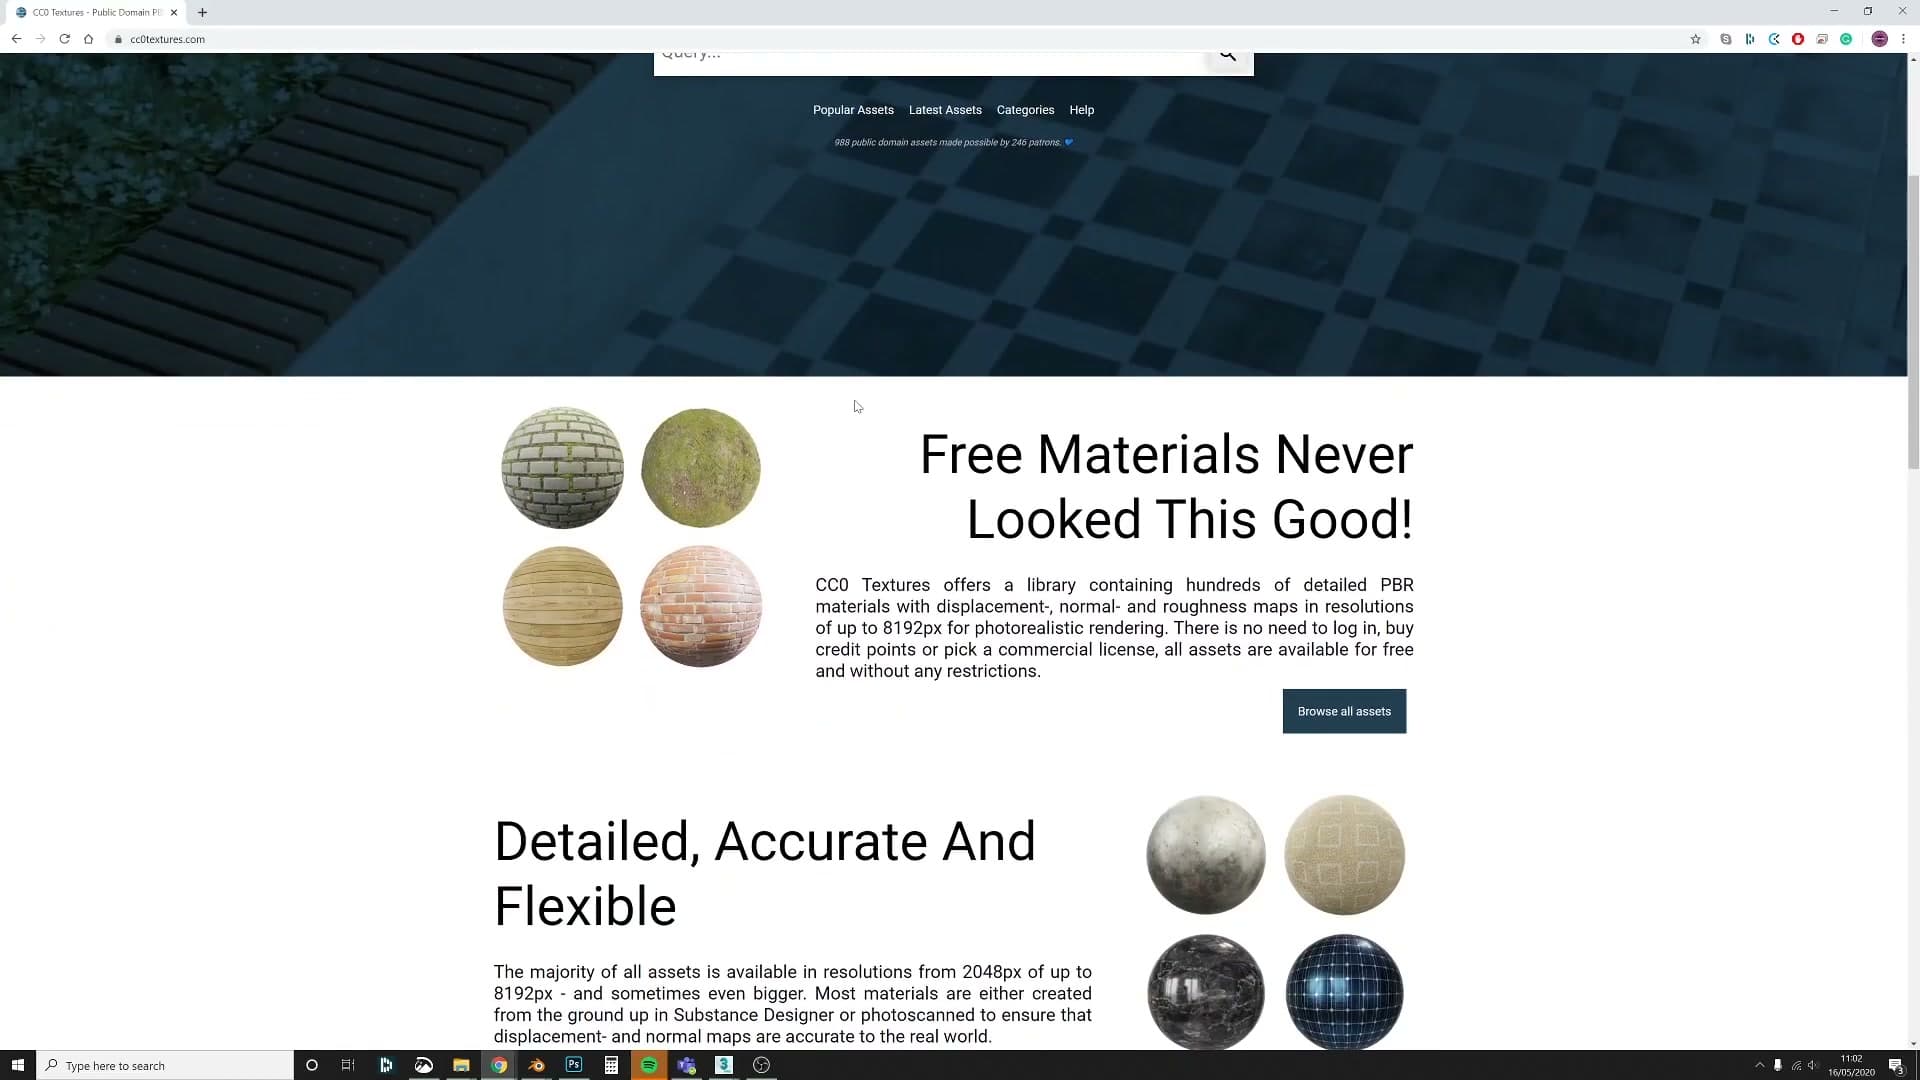
Mark seams along the inside edge of the vase, unwrap the cylinder, then load a CC0 concrete PBR set with Node Wrangler. Square up the UVs so the texture seam disappears into the inside crease.
Mark seams and unwrap the mesh
Switch into edit mode and drop into edge select. You can only mark seams while edges are the active selection mode, and the option simply will not appear in vertex or face select.
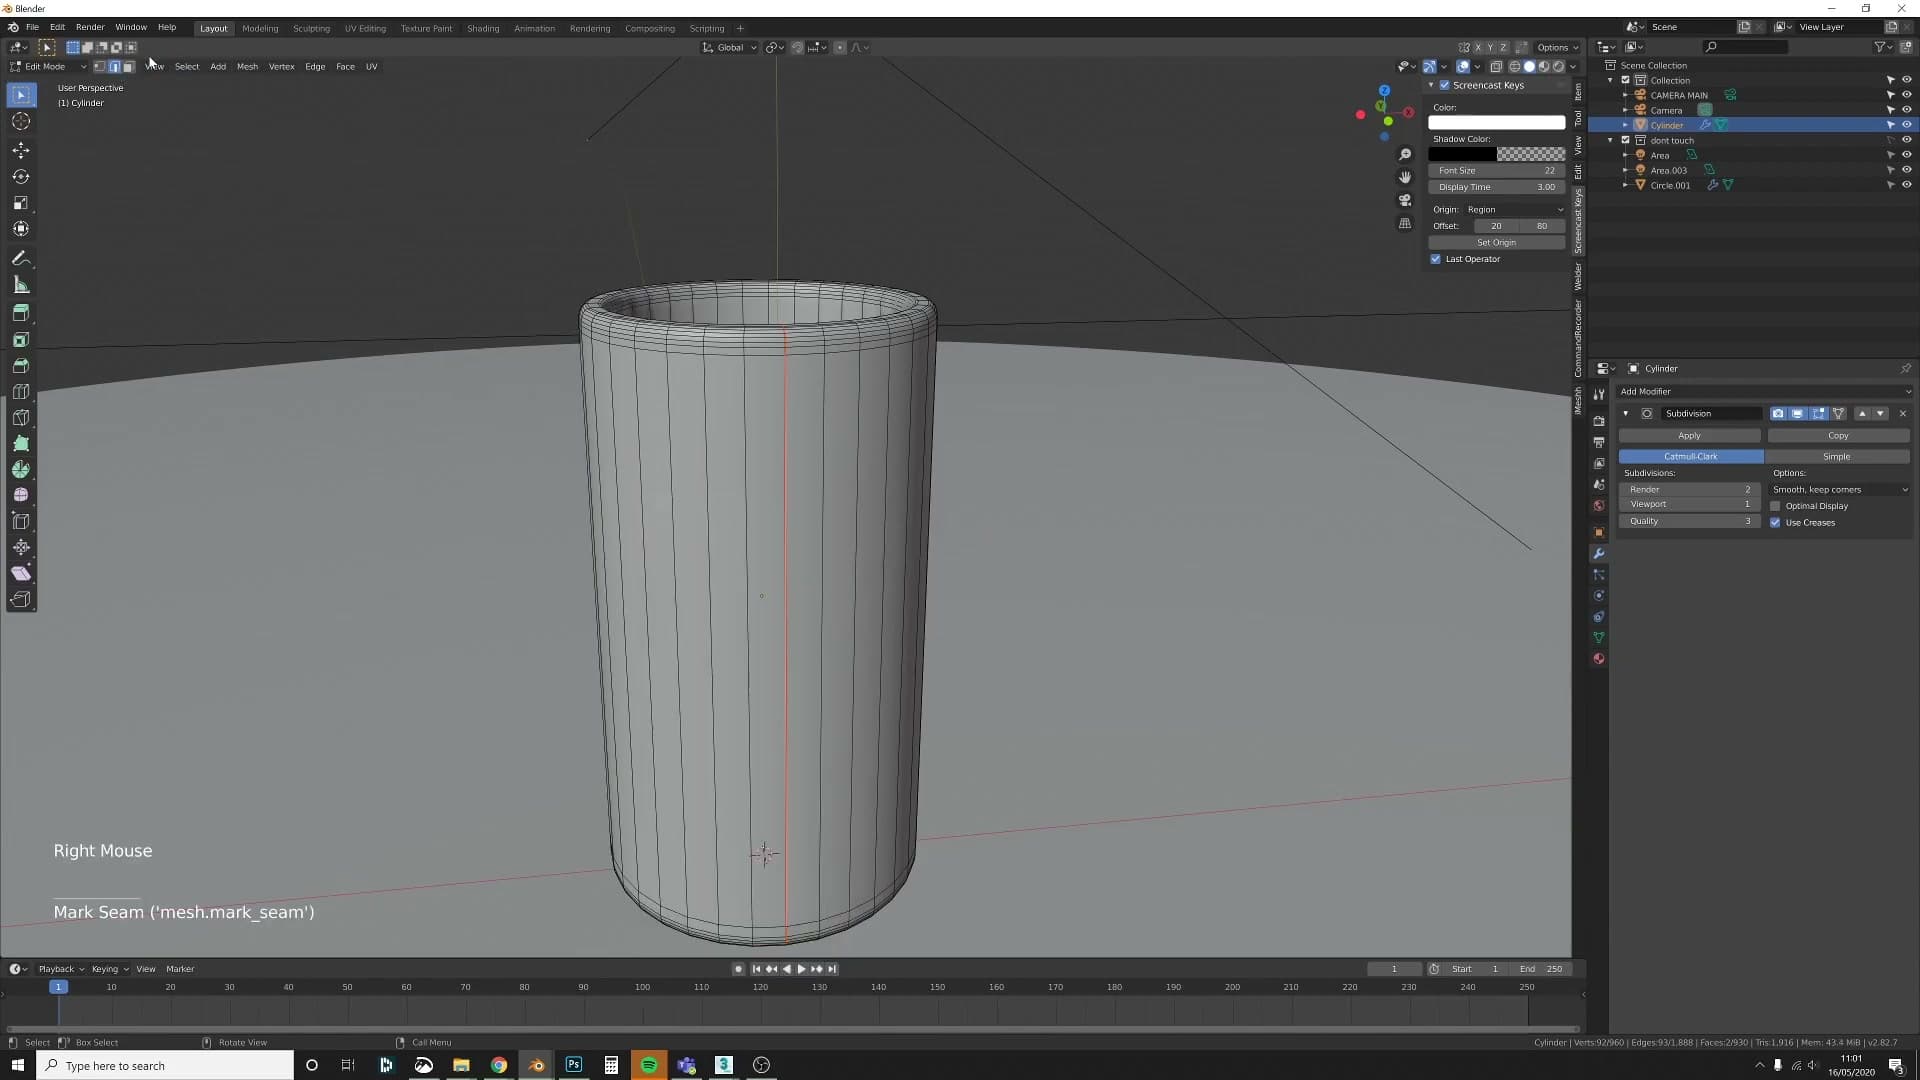
Walk a loop selection around the vase to define where the UVs are allowed to split open: the bottom ring, the inside edge where the wall meets the base, the inside edge where the lip curls back over, and the vertical edge running up the inside of the cylinder. Right click and choose Mark Seam to commit the selection.
Select the whole mesh with A, press U, and choose Unwrap. Open a UV editor in a second viewport so you can see the result. It is messy and uneven, with the cylinder wall stretched across the texture space. That mess is what the next two steps will tidy up.
Load a CC0 concrete material with Node Wrangler
Split off a Shader Editor area, select the vase, and add a new material slot. Before you do anything else, open Edit › Preferences › Add-ons and confirm that Node Wrangler is enabled. The next shortcut depends on it.
With an empty Principled BSDF selected in the shader editor, press Ctrl+Shift+T. A file browser opens. Navigate to a CC0 Textures concrete floor PBR set, click the colour map, then Ctrl-click the normal, roughness and specular maps to add them to the selection. Confirm and Node Wrangler wires the entire chain in a single drop: image textures, normal map node, colour space settings, all done.
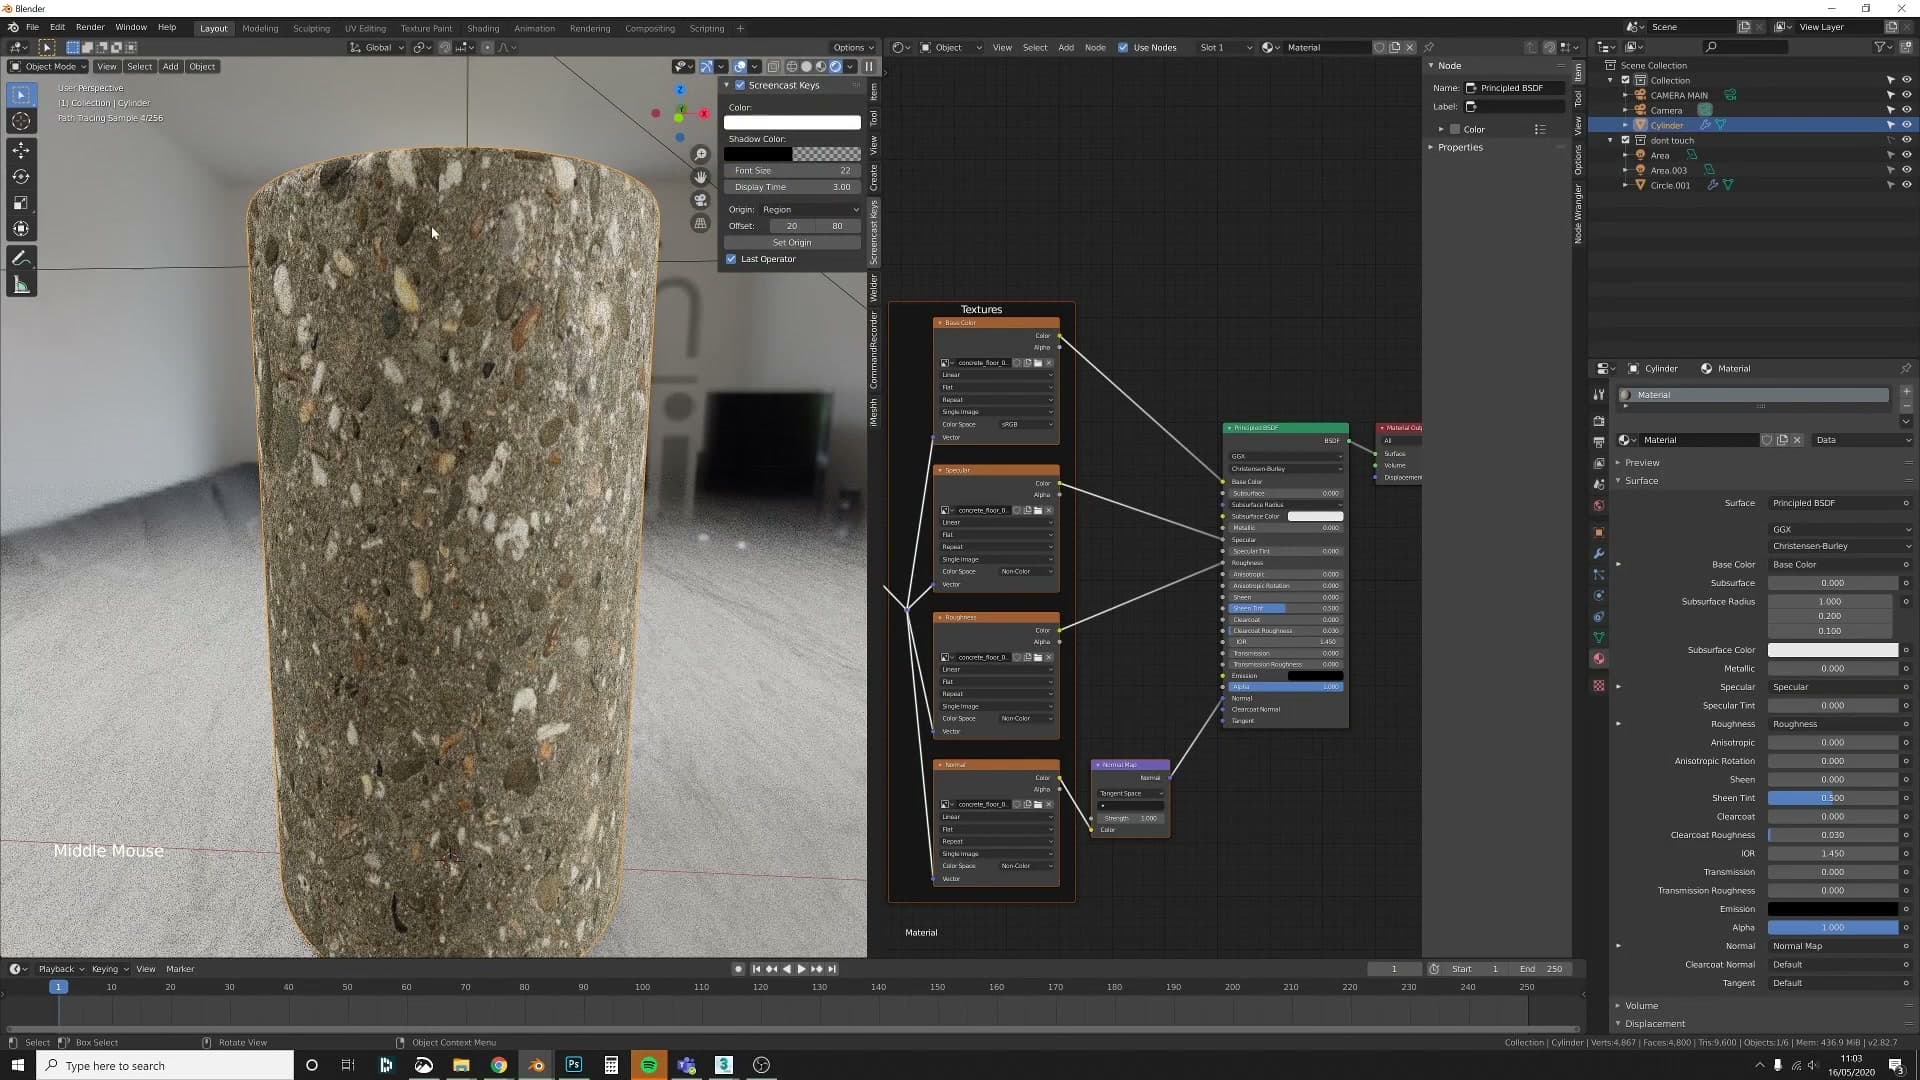
The vase now reads as concrete, but pan around it and you will spot a hard vertical line running top to bottom on the cylinder wall. That is the texture tiling against itself at the seam you marked, and the unsquare UVs are pushing the join into plain sight. Squaring the UVs and rotating the seam round to the inside of the vase is what hides it.
Square the UVs and hide the seam in the inside crease
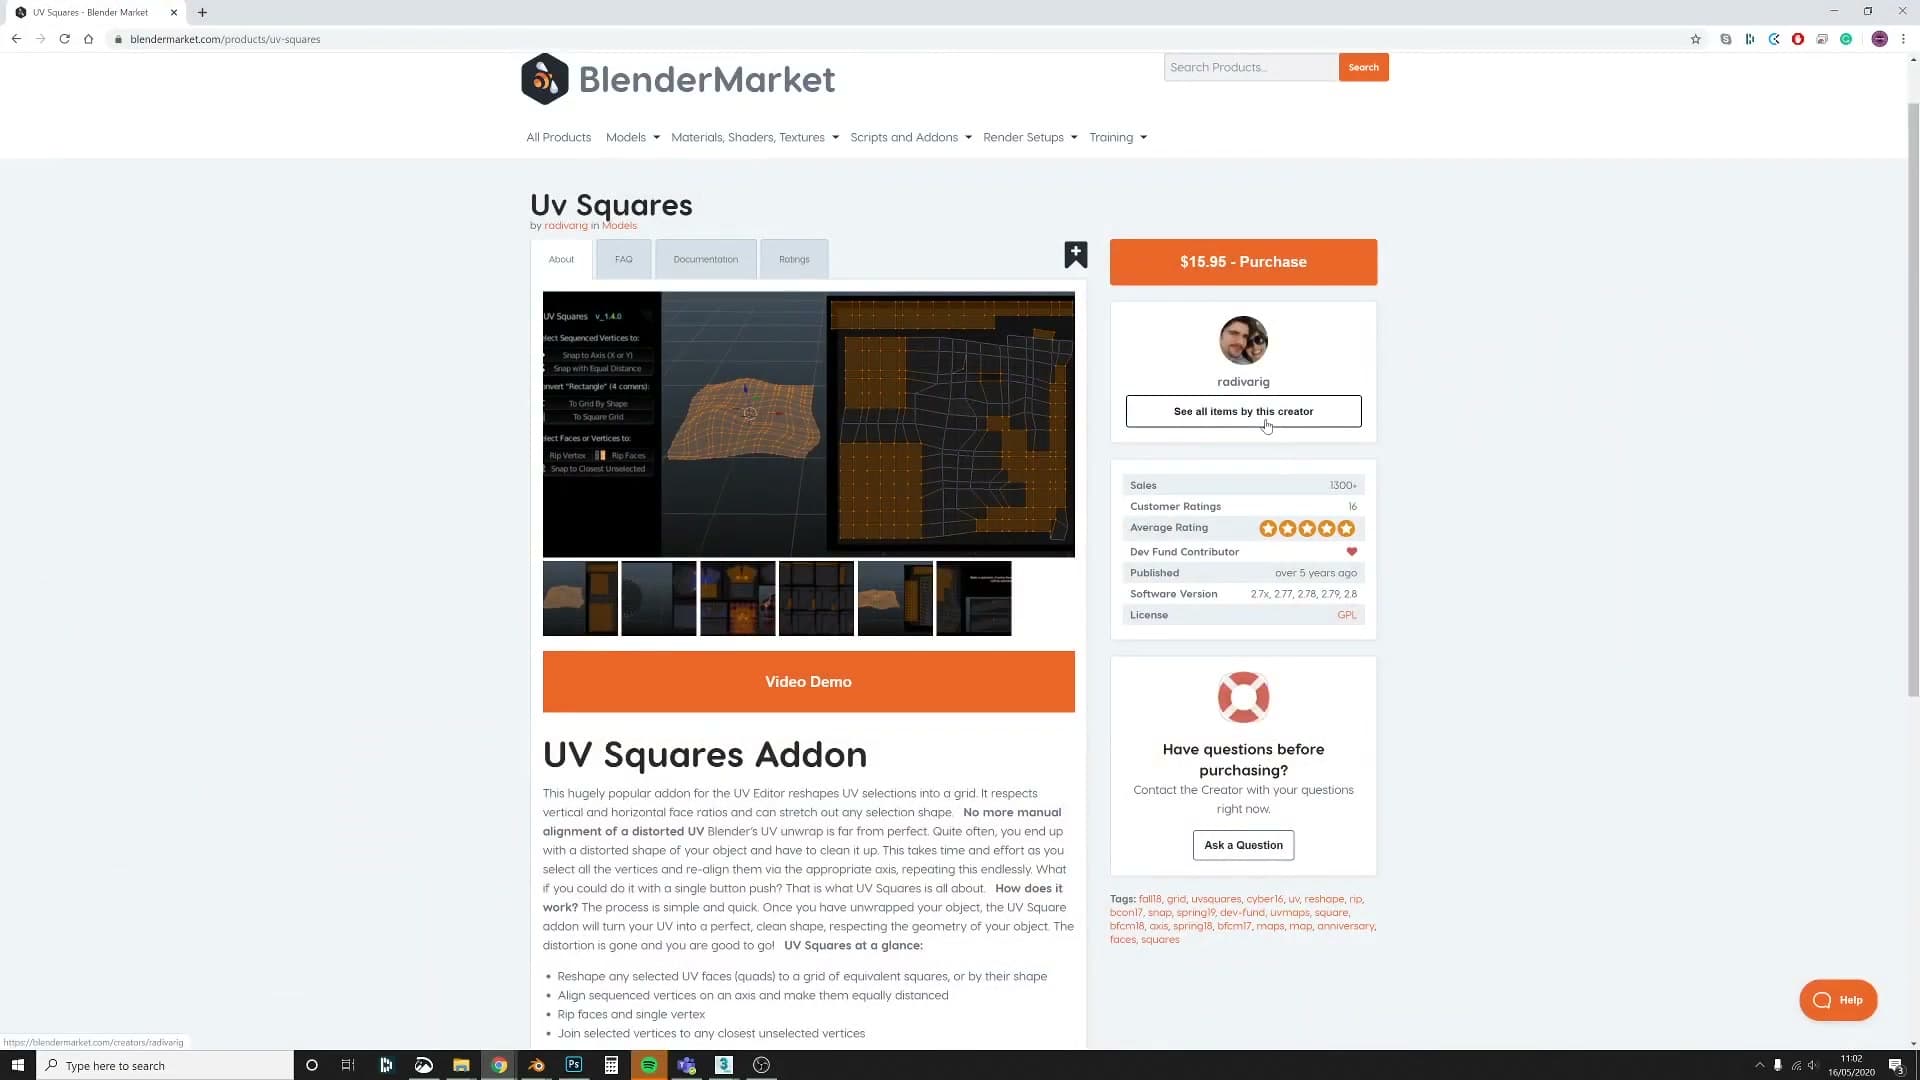
Open the UV editor's N panel and look for the paid UV squaring utility I use. With every UV island selected, hit its square button and the whole stretched unwrap collapses into a clean rectangle. The proportions are wrong and the seam is in the wrong place, but the UVs are finally rectangular and that is what the rest of this fix needs.
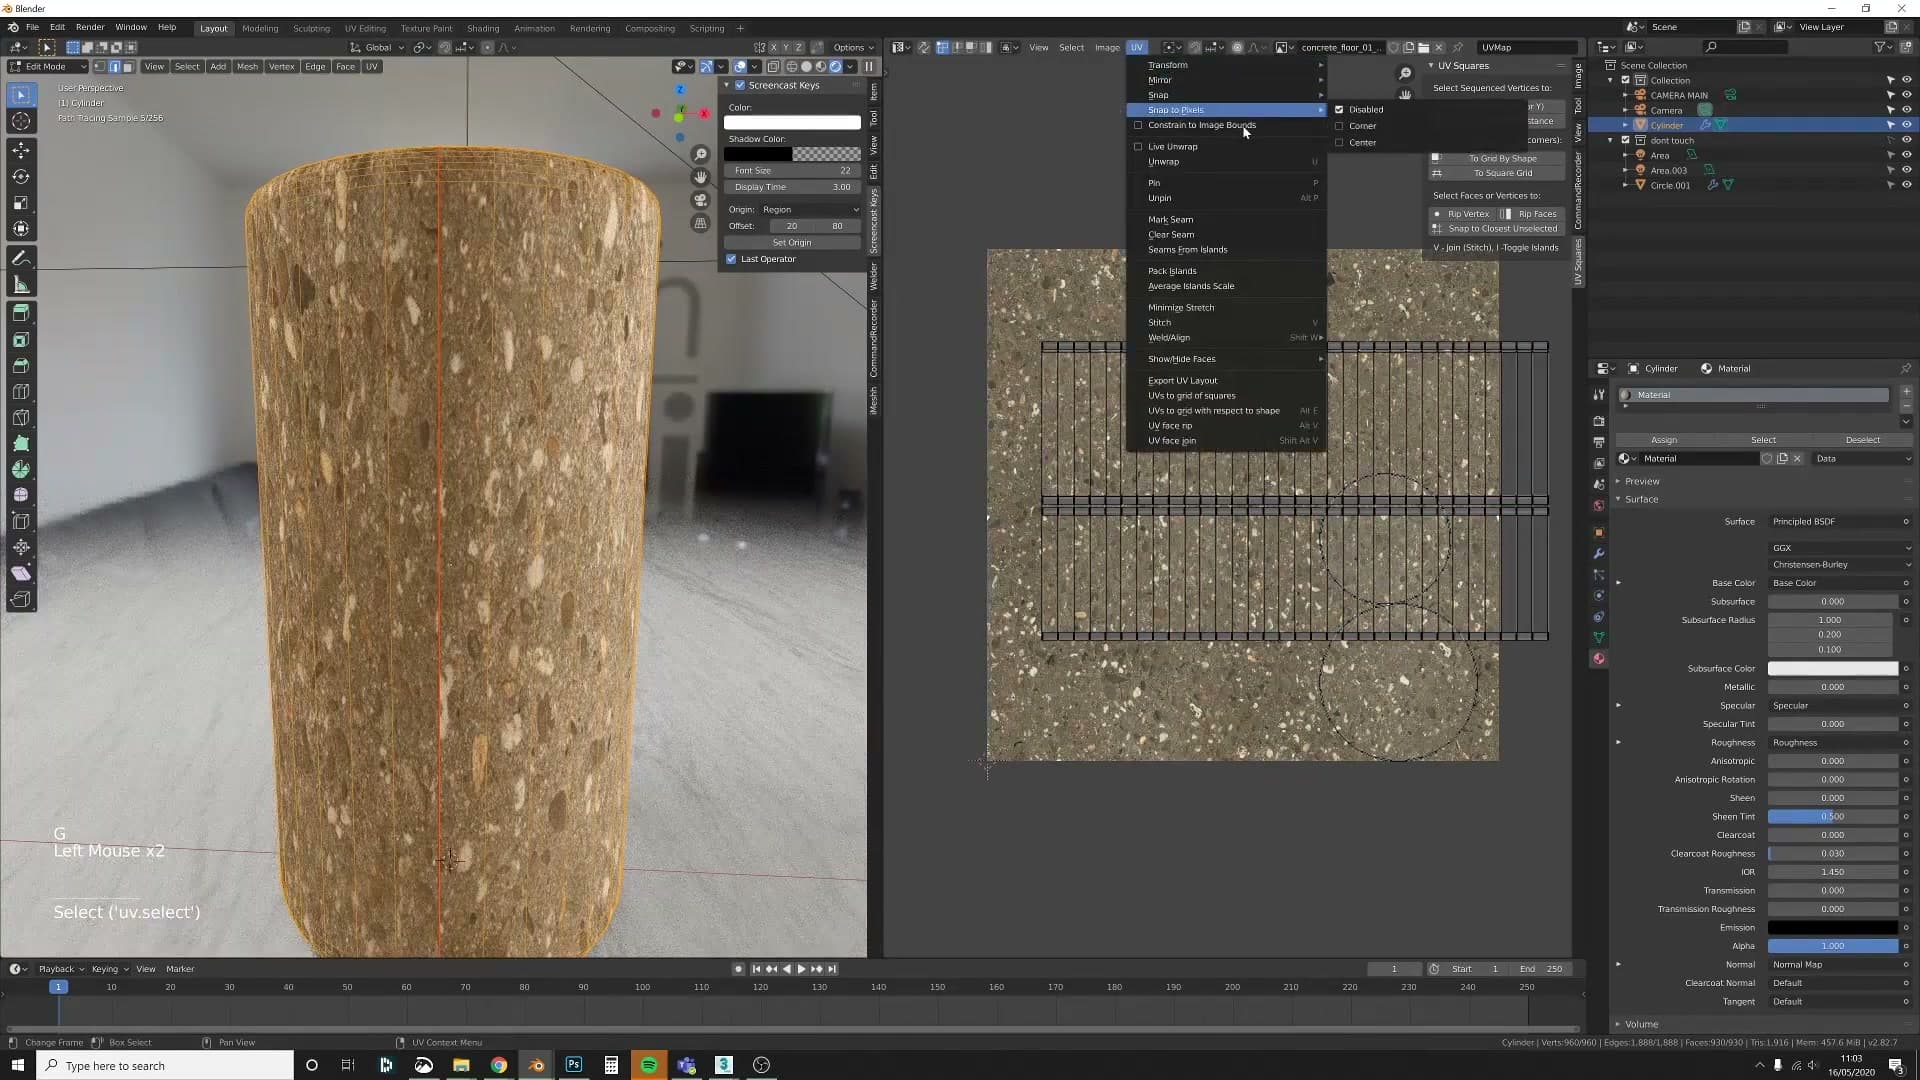
The seam currently runs across the top edge of the UV rectangle, which means it cuts the texture in half on the outside of the vase. Rotate the UV island by 90° to swing the seam round to one side. With a single vertex on that corner selected, choose UV › Snap › Cursor to Selected to park the 2D cursor exactly on the texture corner.
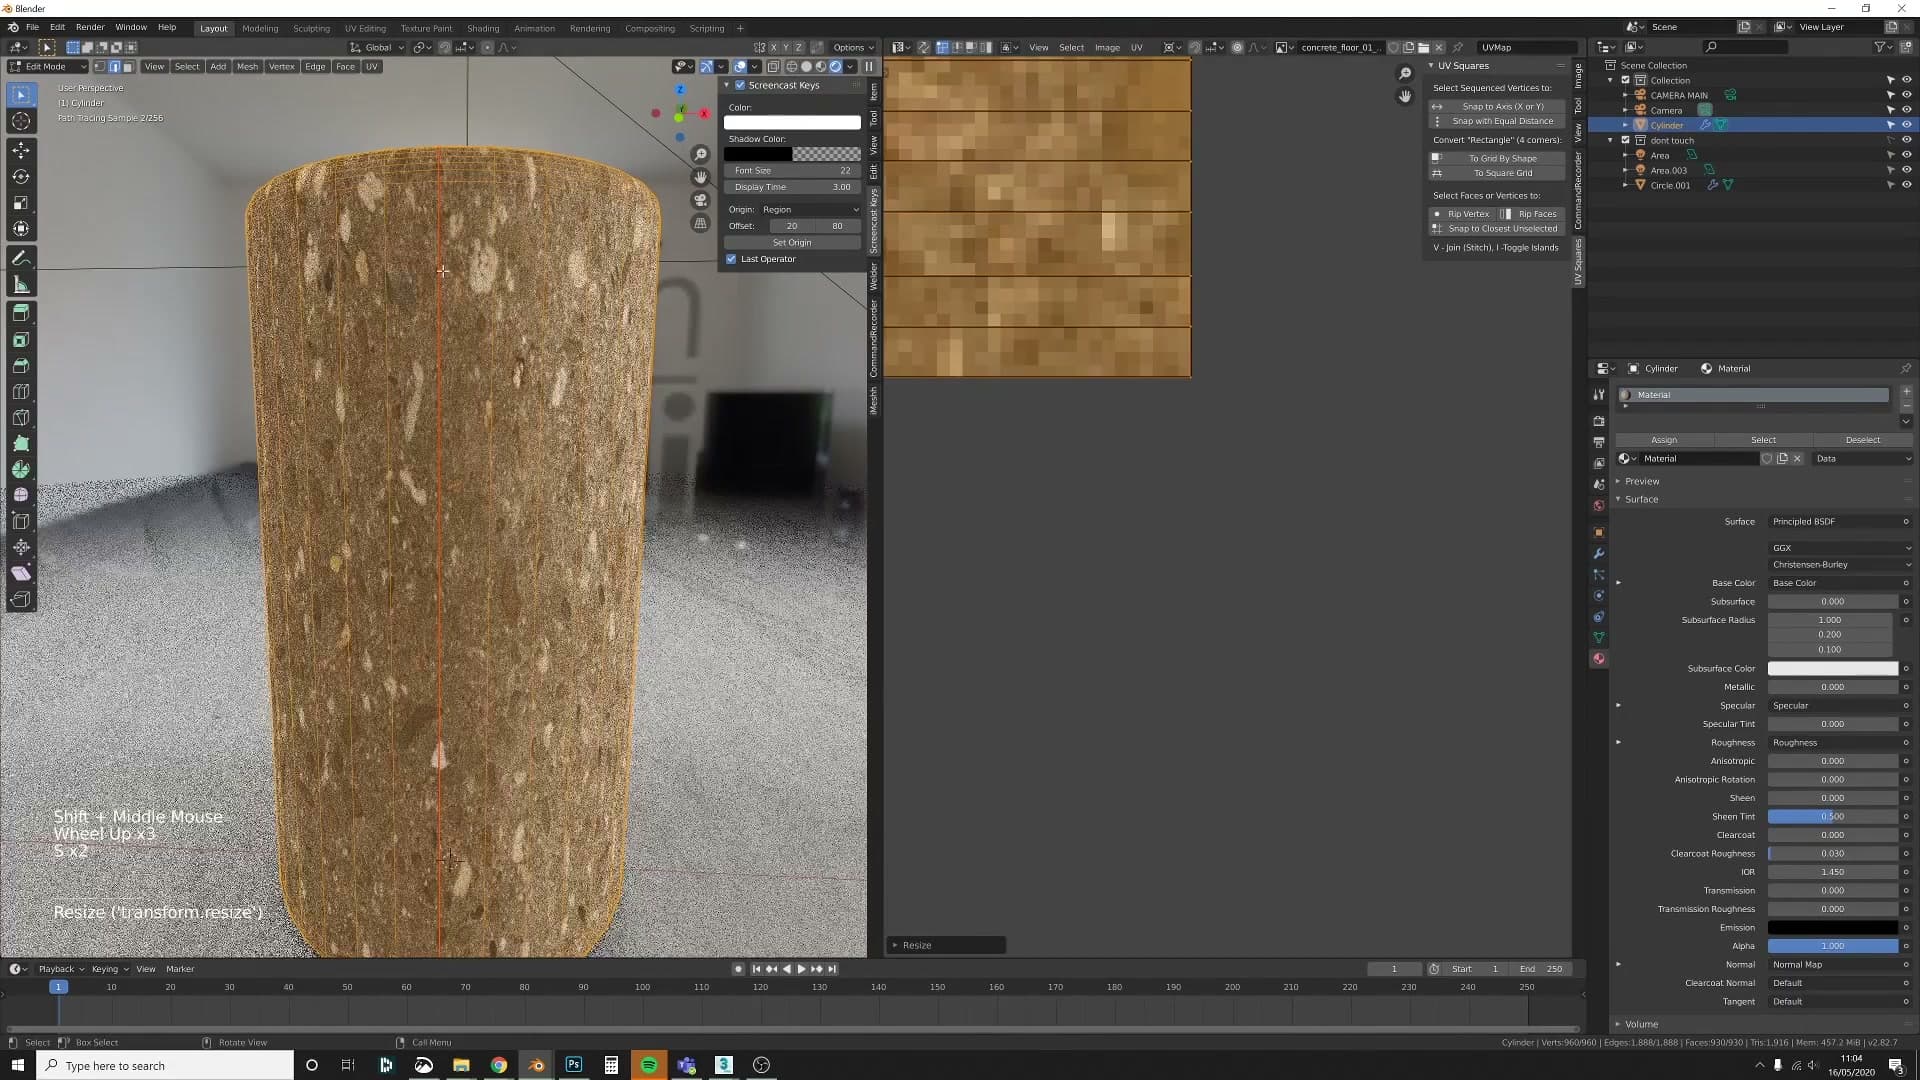
Select every UV again and drag the island so the snapped corner sits flush against the texture corner. Set the pivot so scaling happens from the 2D cursor, then scale the island up until its far edges land exactly on the opposite edges of the texture square. Zoom in to confirm the corners line up with no overhang.
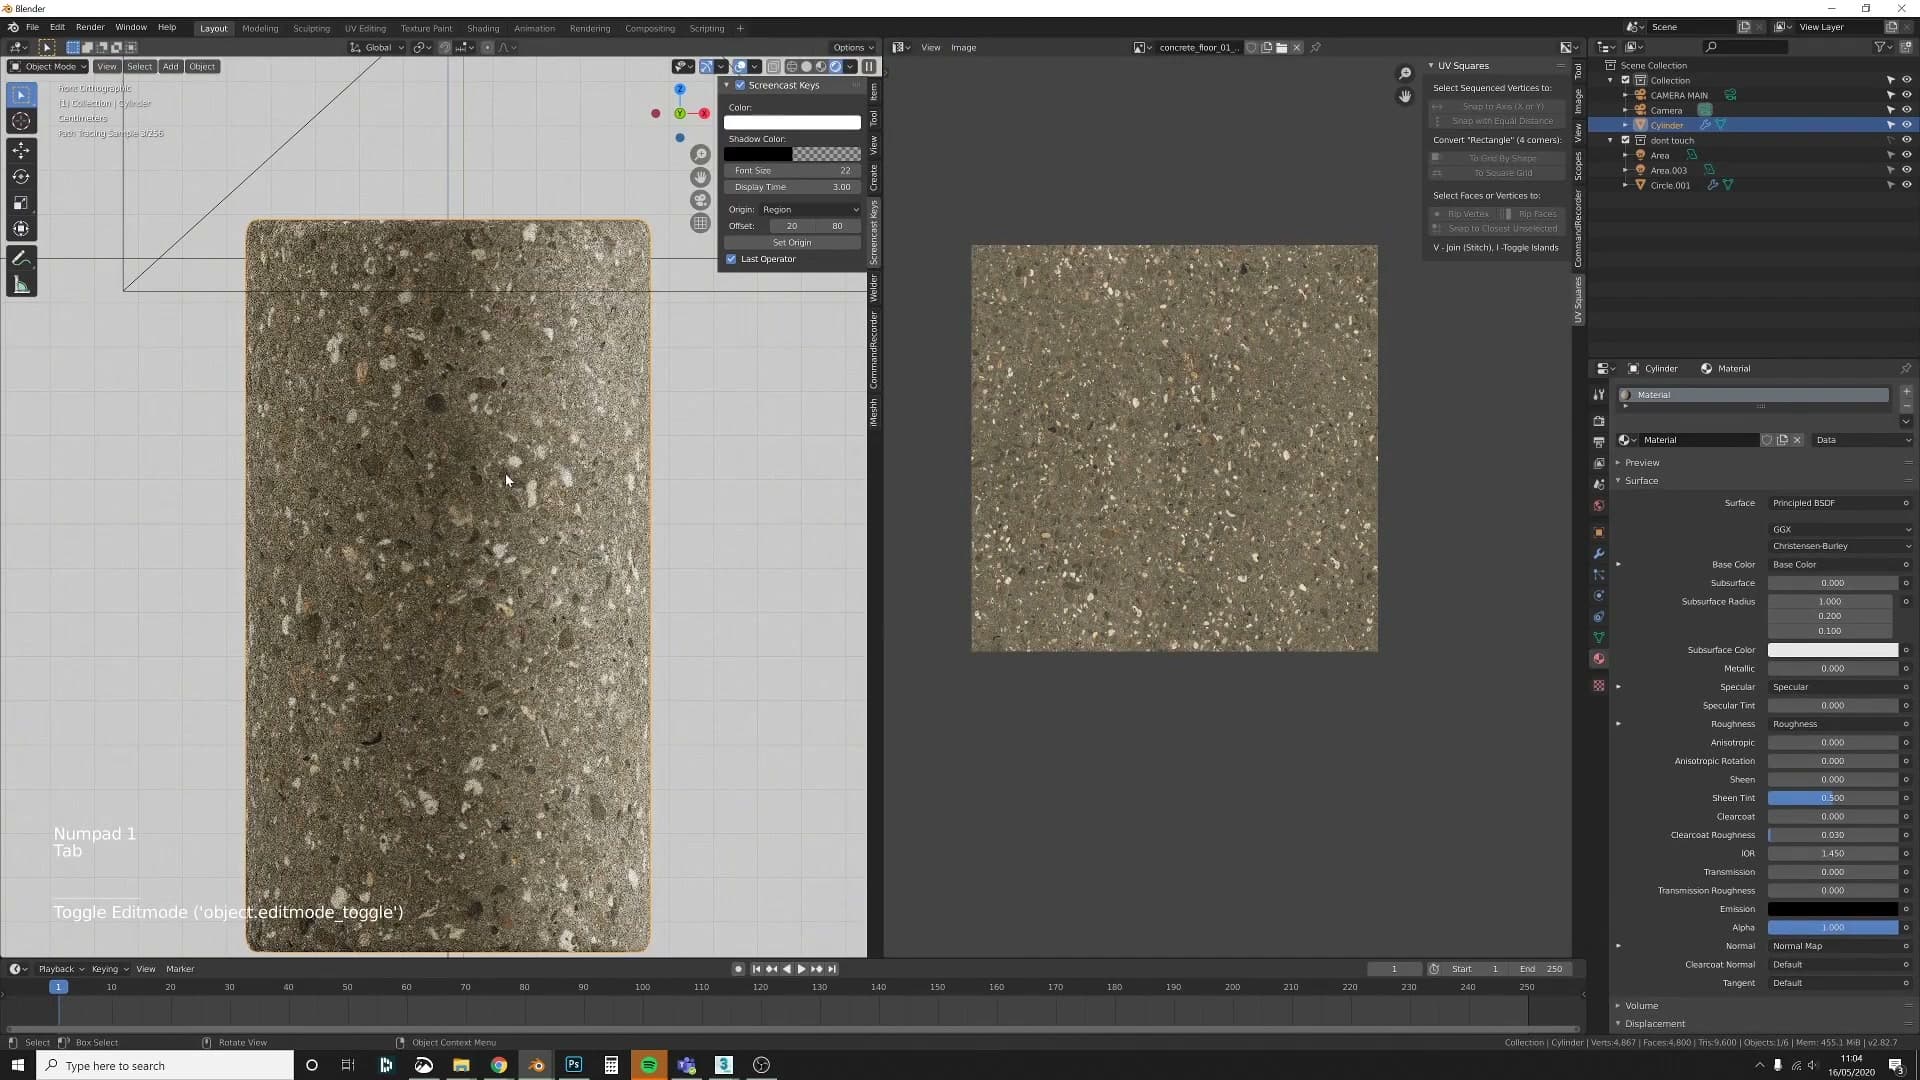
The seam now travels along the inside curl of the lip and down the inside wall of the vase, invisible from any camera looking at the outside. The horizontal scale is correct, but the texture is still stretched vertically because the cylinder is taller than it is wide. Scale the UVs up on Y until the concrete grain looks the right size on the model, and the base material is done.
Building the Gradient Mask
Add a Gradient Texture with Ctrl+T Texture Coordinates, rotate it onto the vertical axis, and use a Color Ramp to tighten the band. Then multiply an image-texture noise over the top to give the boundary realistic roughness.
Add a Gradient Texture with Texture Coordinates
With the concrete base shader done, the goal now is to drive the painted gold metal onto the mesh through a mask that fades along the vertical axis. Head back to the shader editor and shove the existing nodes aside to make room for the mask network.
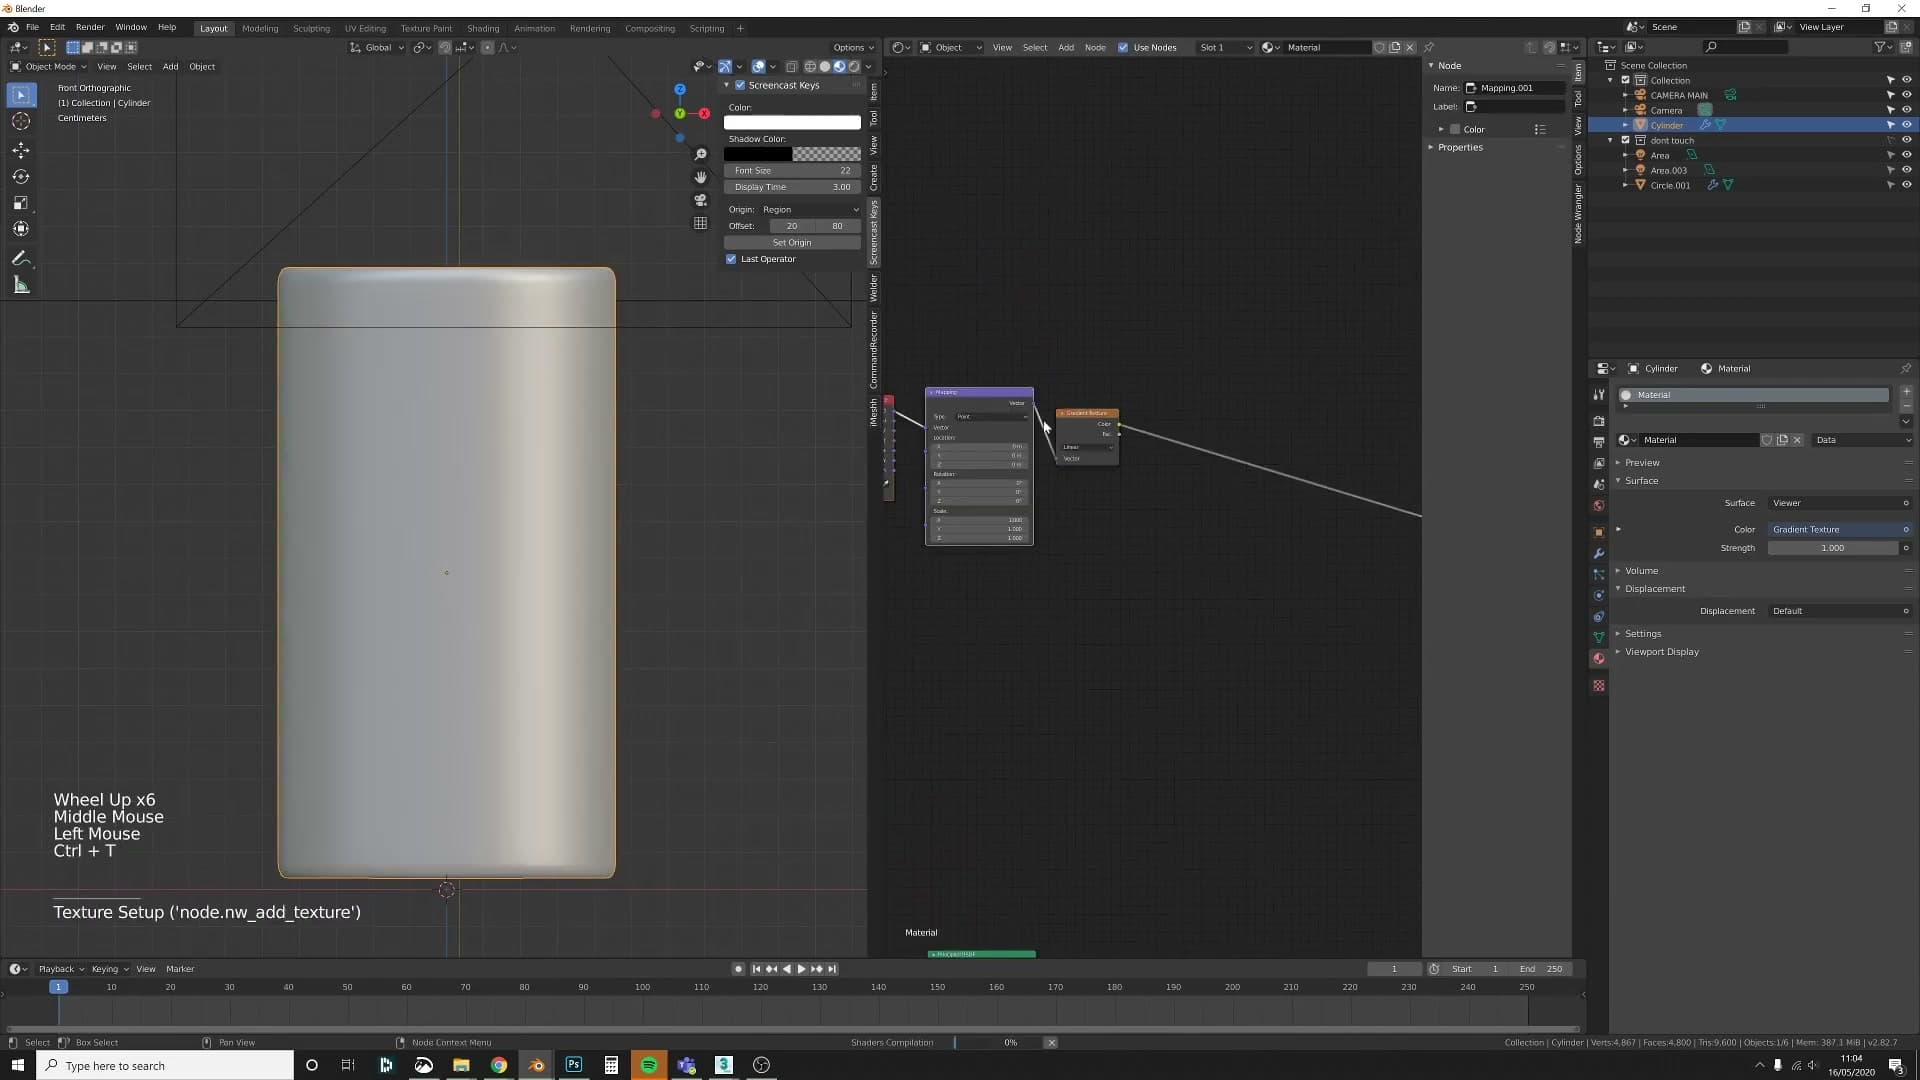
Add a Gradient Texture, and with the node selected hit Ctrl+T. Node Wrangler drops in a Texture Coordinate node and a Mapping node already wired into the gradient. It doesn't really matter whether you use Generated or UV for the coordinate input. Generated works fine straight out of the box, whereas UV means you would then need to nudge the UV map itself to get the gradient sitting where you want it.
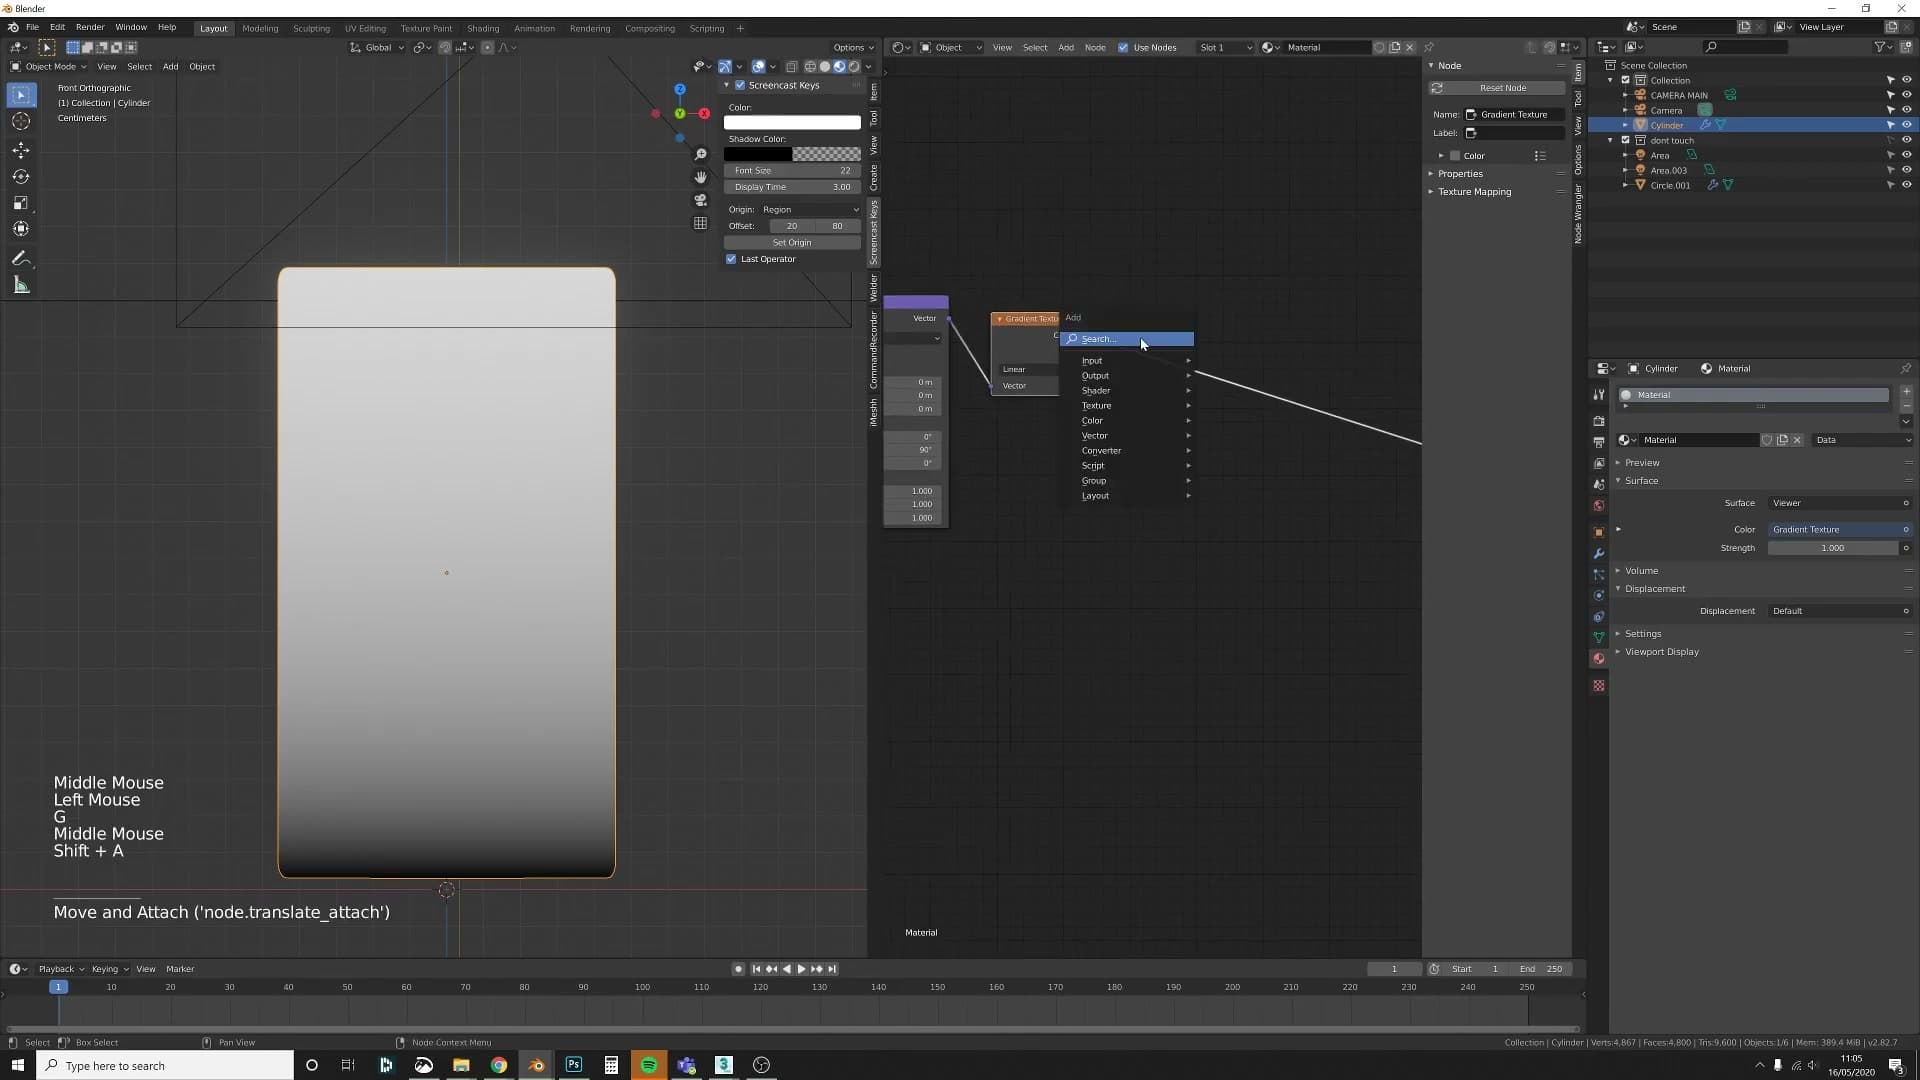
The default orientation runs the gradient the wrong way for a vase, so rotate the Mapping node 90° on Y to flip the band onto the vertical axis. Then pipe a Color Ramp out of the gradient and pull the two stops closer together to tighten the transition. That Color Ramp is your handle on the mask: slide the stops to move where the band sits, and squeeze them together to harden the falloff.
Roughen the gradient with a noise image and Multiply
A clean linear gradient never looks right on a real-world surface. Paint chipping and wear never fall in a perfectly straight line. To break up the boundary you stack a noise pattern over the gradient and combine the two so the transition reads as something the world did to the object, not a sliced ramp.
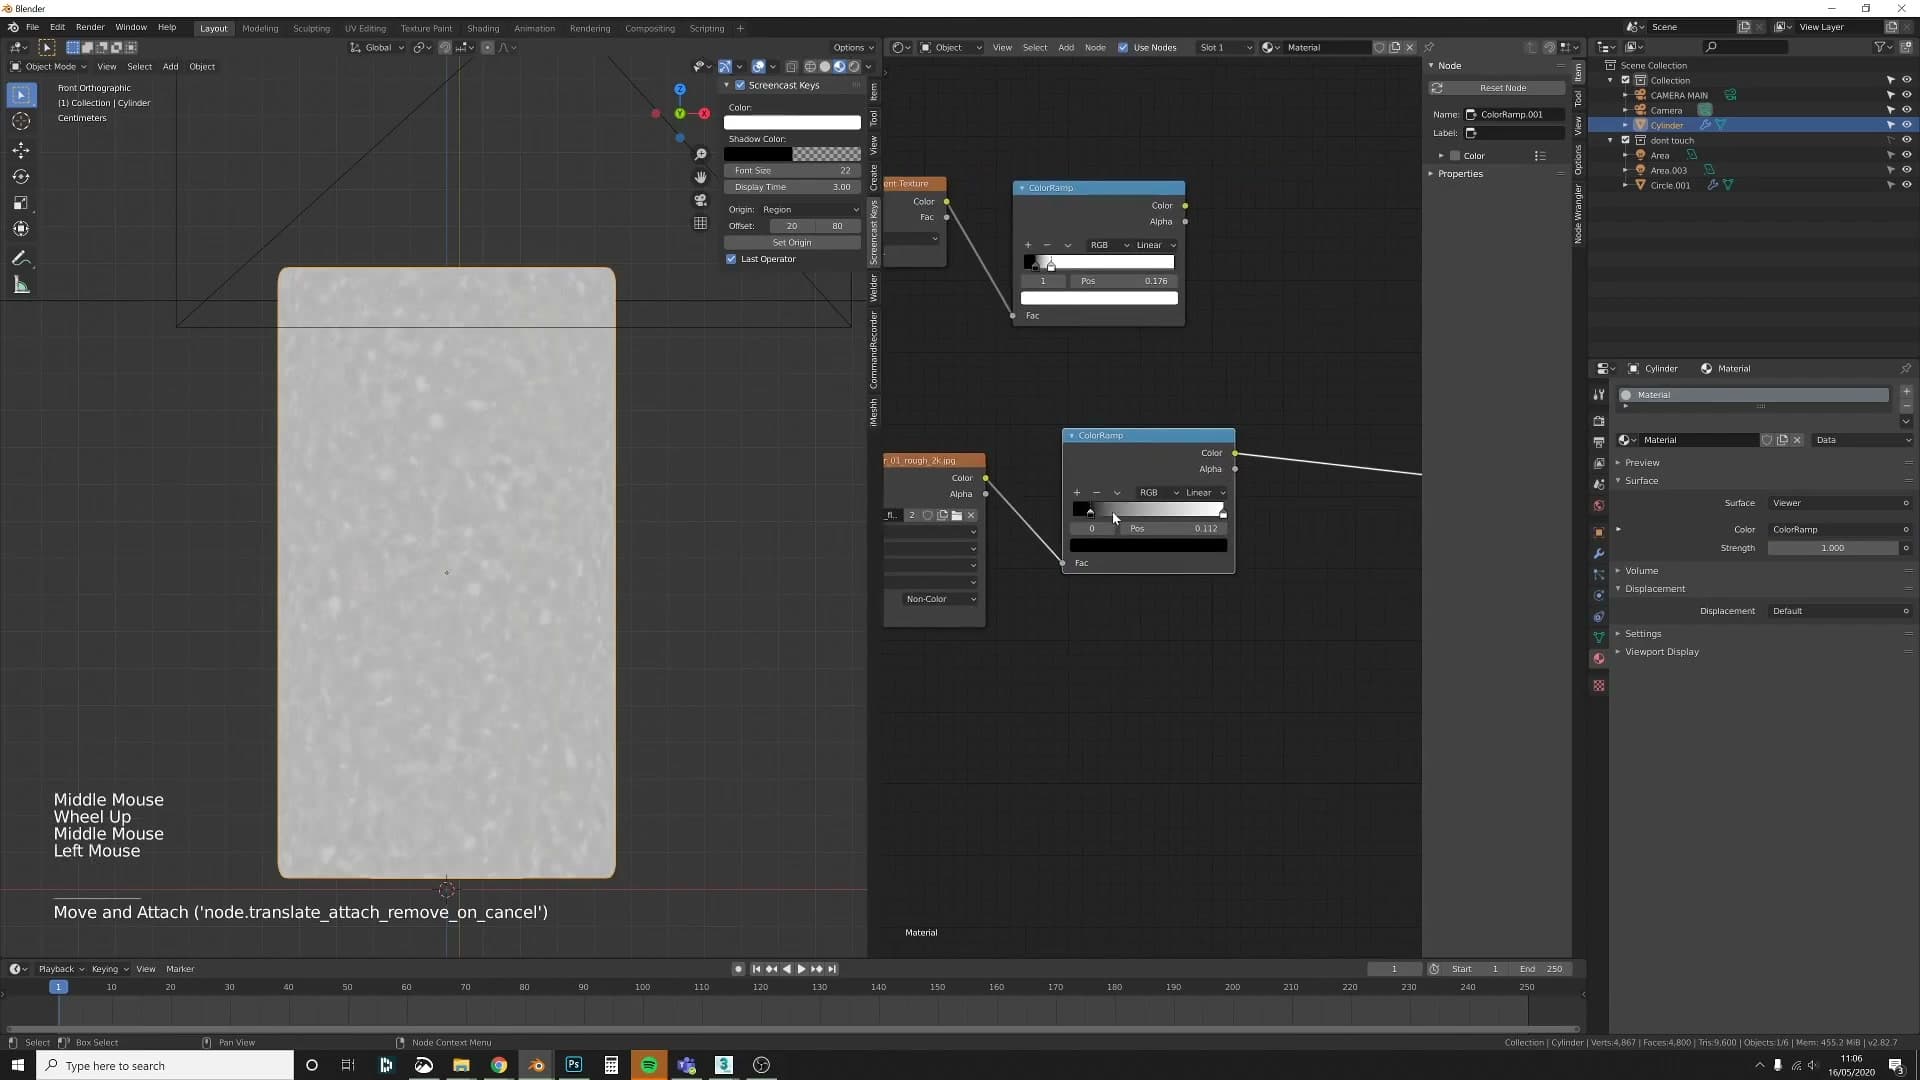
Drop in an Image Texture node and load a high-contrast noise image. Any of the grungy black-and-white maps in your library will do, the rougher the better. Pipe it into a second Color Ramp and squeeze both stops inward until you push the image to punchy black and white rather than soft grey noise.
Now combine the two masks. Add a Mix RGB node, set its blend mode to Multiply and the factor to 1.0, then feed the gradient Color Ramp into one colour input and the noise Color Ramp into the other. Multiplying the noise against the gradient knocks chunks out of the clean ramp, leaving you with the rough, irregular boundary you actually want.
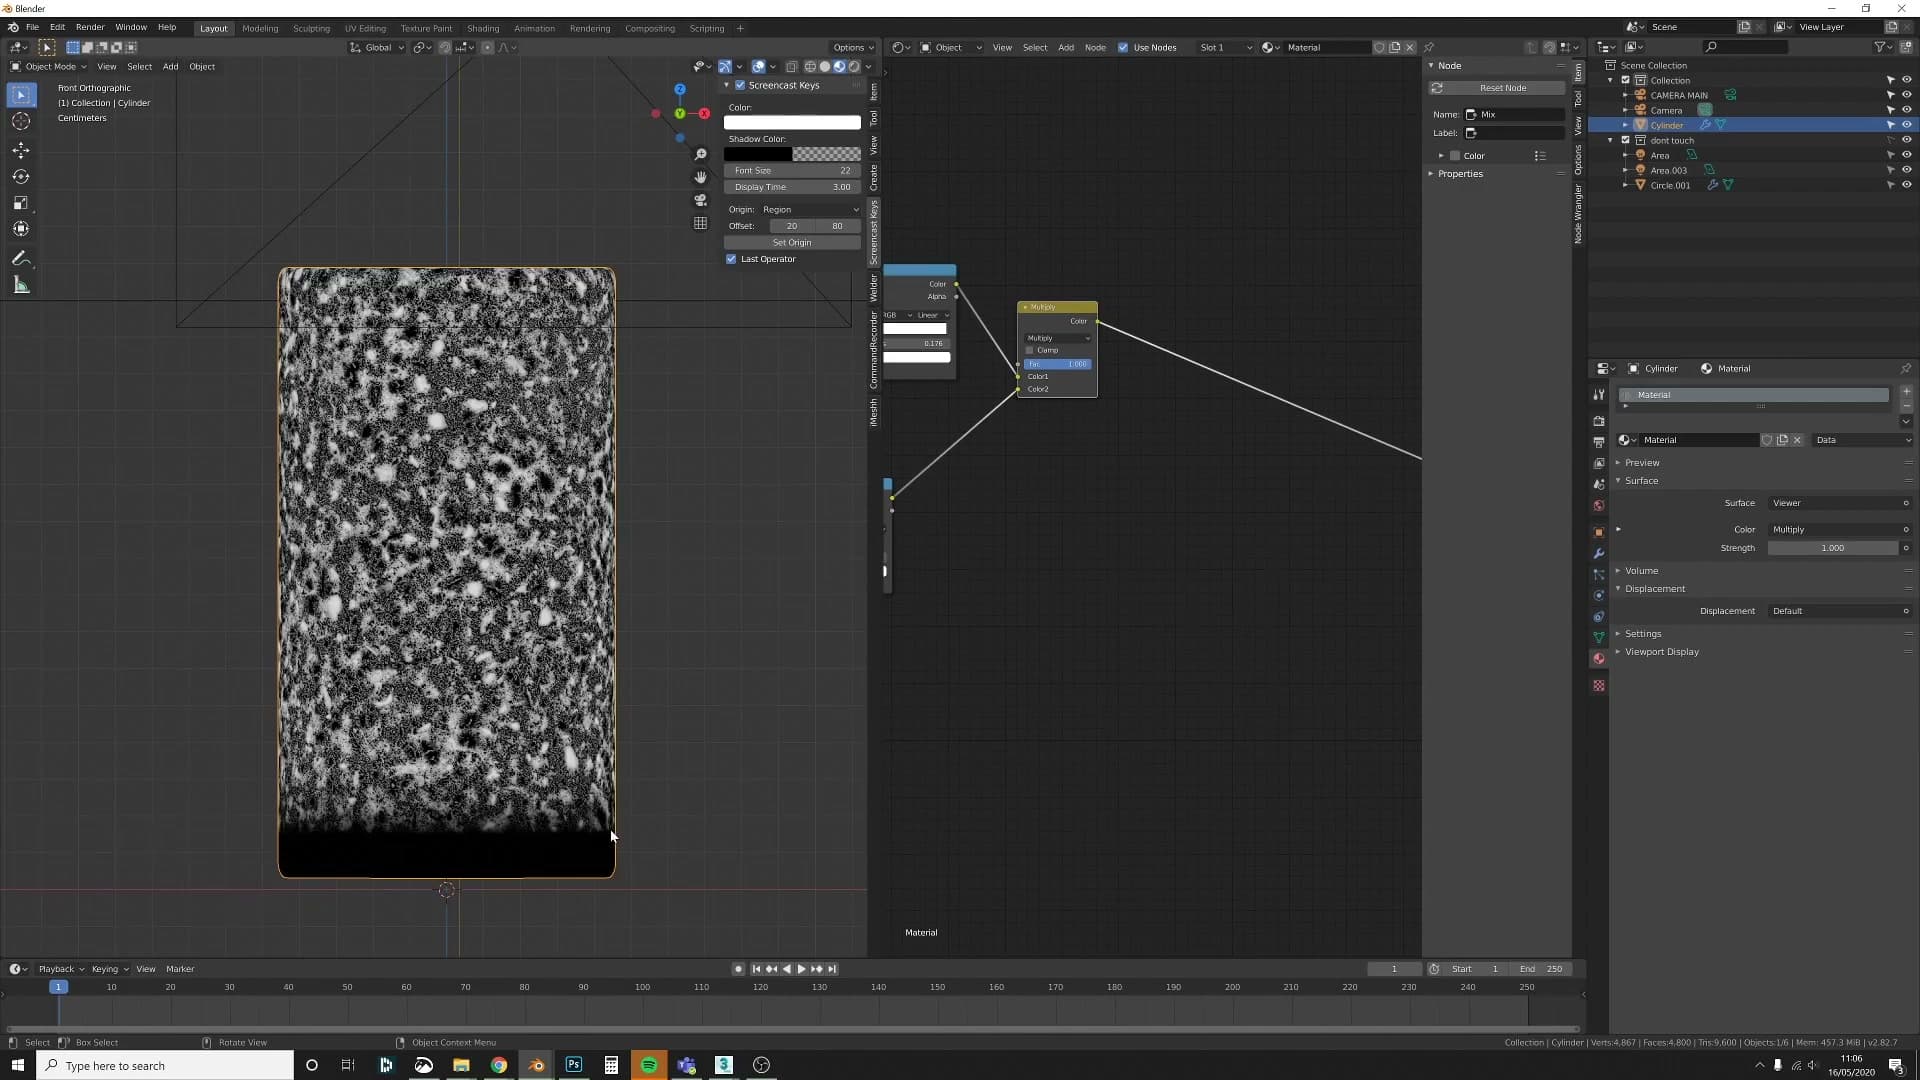
Hover over the Multiply node and press Ctrl+Shift to preview the result in the viewport via Node Wrangler's viewer. You'll see the gradient band has gained a chewed-up edge instead of a clean line. That is exactly the shape real-world wear takes. The catch is that the noise also bleeds outside the gradient zone into areas that should stay clean, and that is the problem the next step fixes.
Clamping the Mask with Screen Blending
Drop a second Color Ramp through a Mix RGB set to Screen so the noisy areas outside the gradient zone get pushed straight to white, leaving a controllable wear region rather than a vase-wide chaos pattern.
Clamp unwanted noise with a Screen blend
The multiplied noise gives you the rough edge you wanted, but it also scatters dark patches all over the vase. Every black pixel in that noise becomes another spot where the paint chips through. To rein it in, add a second Color Ramp and pipe it into a fresh Mix RGB node set to Screen. The Color Ramp gives you a clean white-on-black gradient you can shape; the Screen blend uses that white to push the unwanted areas of the underlying mask straight to pure white.
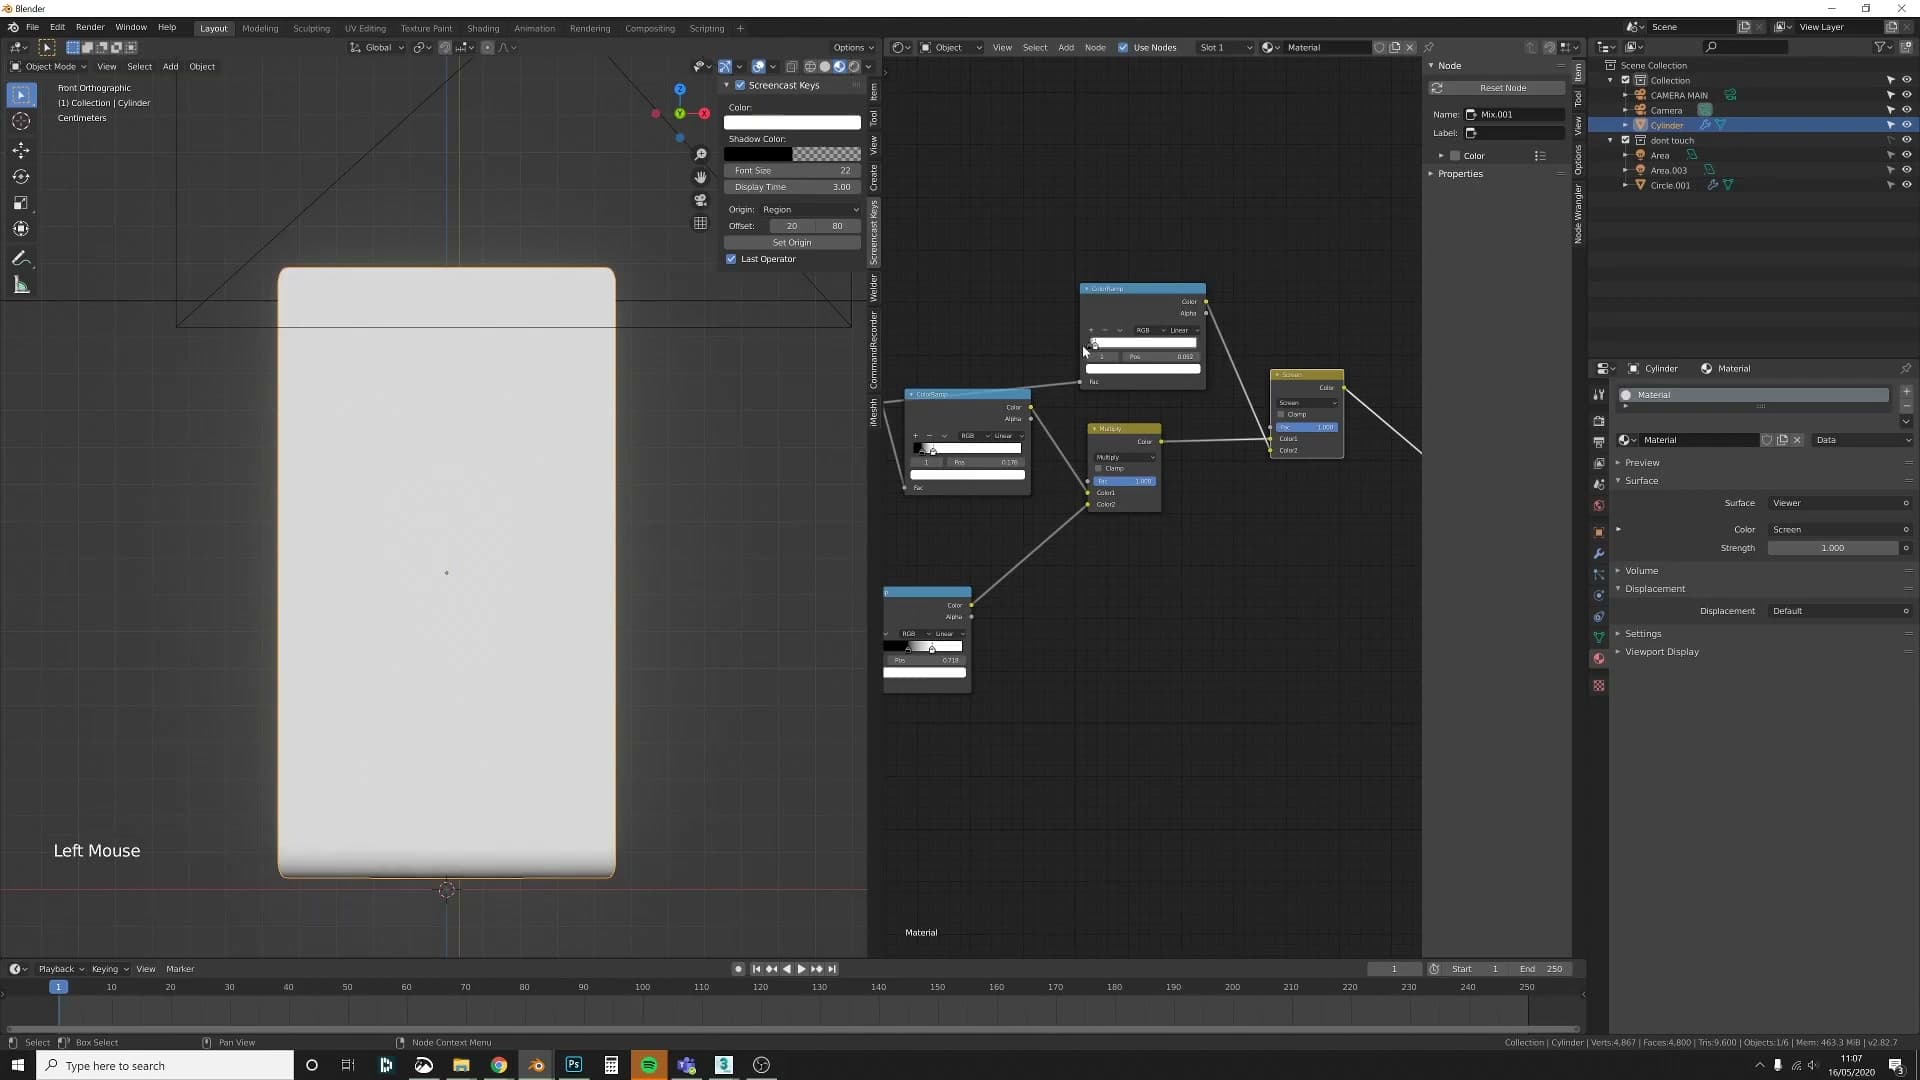
The logic is worth pausing on. Screen overlays white onto black, so anywhere your second ramp is fully white, the multiplied noise underneath gets erased and forced to white as well. Anywhere it's black, the noise passes through untouched. Drag a pure-white slider across the preview and you can watch the entire mask screen out in one go. That is proof the blend is doing what you want before you start dialling it in.

From there, slide the black and white stops of the new Color Ramp inwards to carve out the zone where wear is allowed to live. Pull one stop down, drag the other up the gradient, and the noisy region collapses into a controllable band rather than bleeding across the whole vase. Leave the handles roughly framing the area you want chipped. You'll fine-tune the exact position once the second mask is stacked on top.
Painted Gold Metal and the Mix Shader
Build a simple painted-metal shader with a normal map, low roughness and a gold tint, then drive a Mix Shader with the gradient mask so the concrete fades into the painted metal exactly where you want it.
Build the painted gold metal base
With the concrete side of the shader behaving the way you want, add a second material to the vase. This one is deliberately simple: a painted metal rather than a full PBR set, because the gradient mask is doing the heavy lifting and you want the two surfaces to read as obviously different.
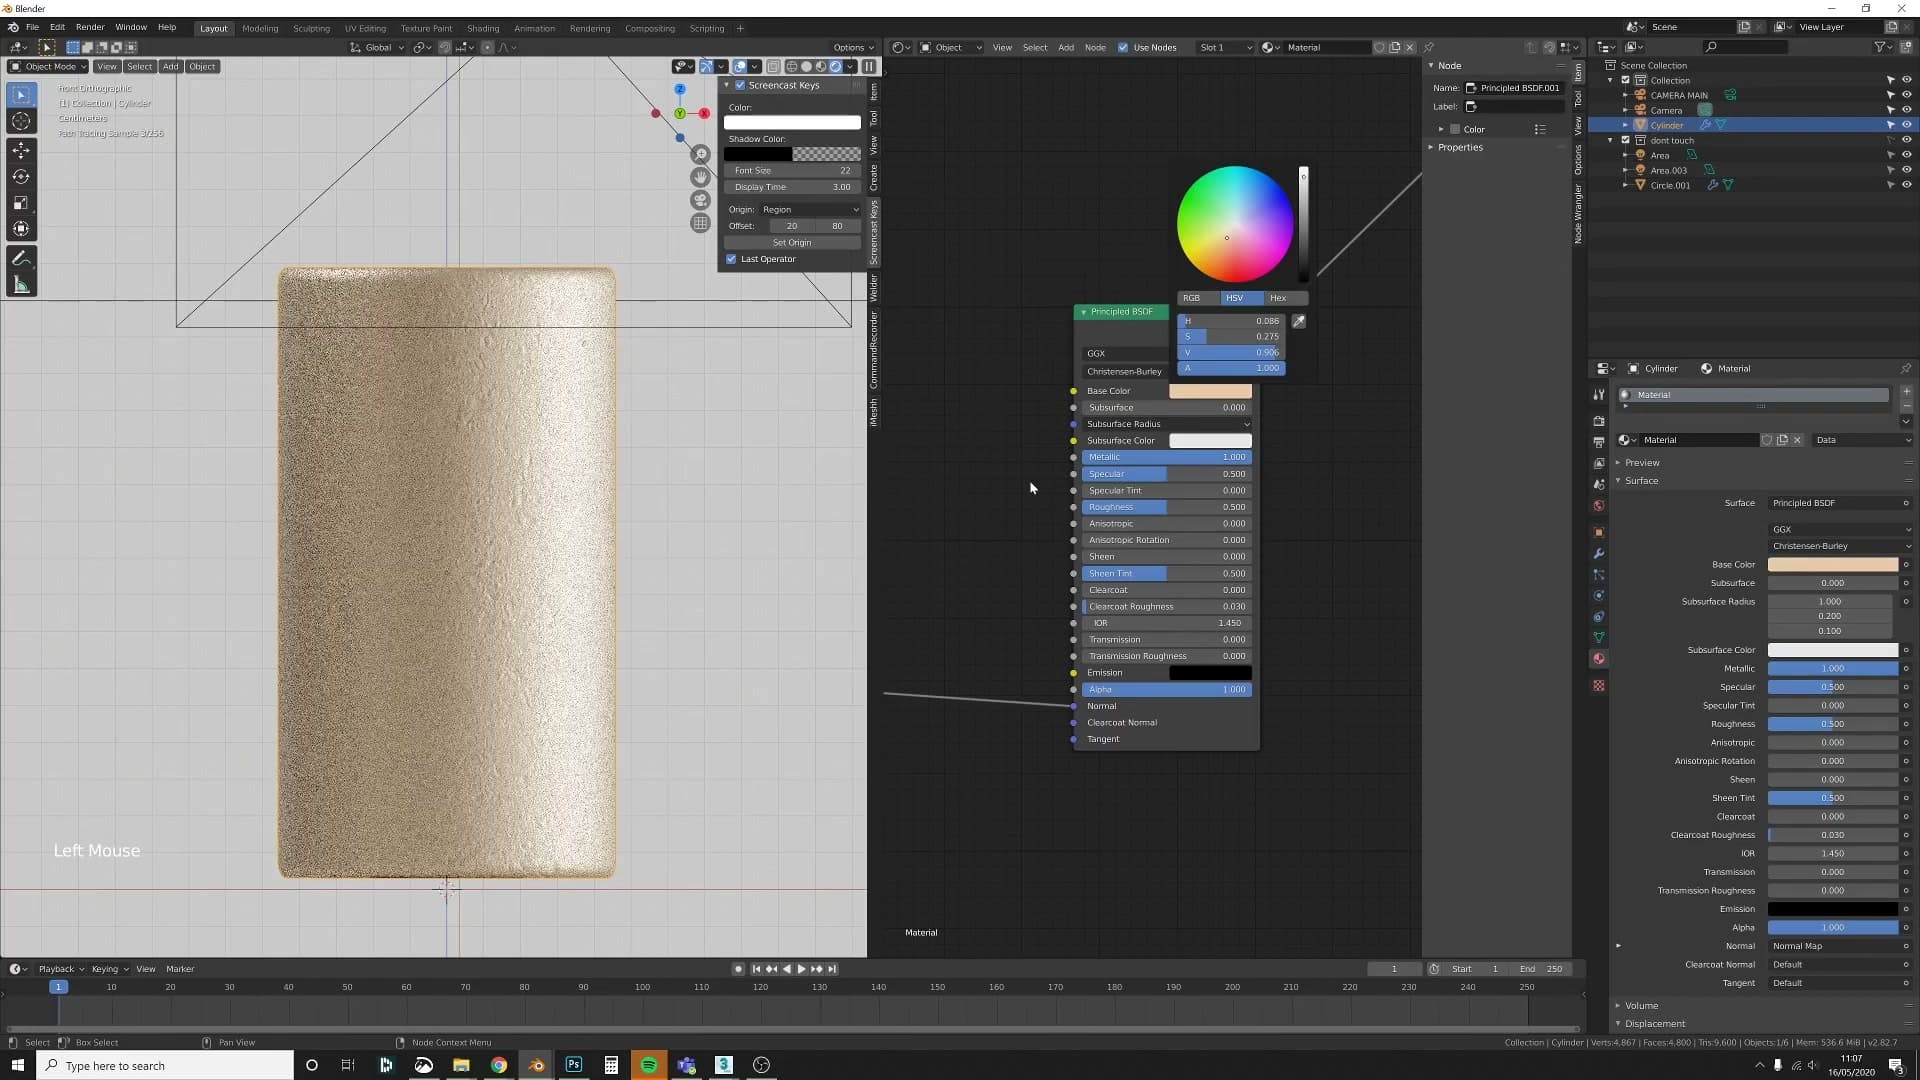
Start from a fresh Principled BSDF and wire in a normal map so the surface isn't perfectly flat. Push Metallic up so it reacts like a metal underneath the paint, then drop Roughness down a touch so it picks up a softer, painted sheen rather than a mirror finish.
Nudge the base colour towards a warm gold. You're not trying to fake real gold leaf here. Just enough tint that, once the mask kicks in, the chipped areas read as a painted metallic gold against the grey concrete. At this point the material on its own already looks like painted metal.
Drive a Mix Shader with the gradient mask
Add a Mix Shader and feed both materials into it: the concrete into one input and the painted gold into the other. If the wear ends up on the wrong half of the vase you can simply swap the two sockets later. The mask itself doesn't care which way round it's wired.
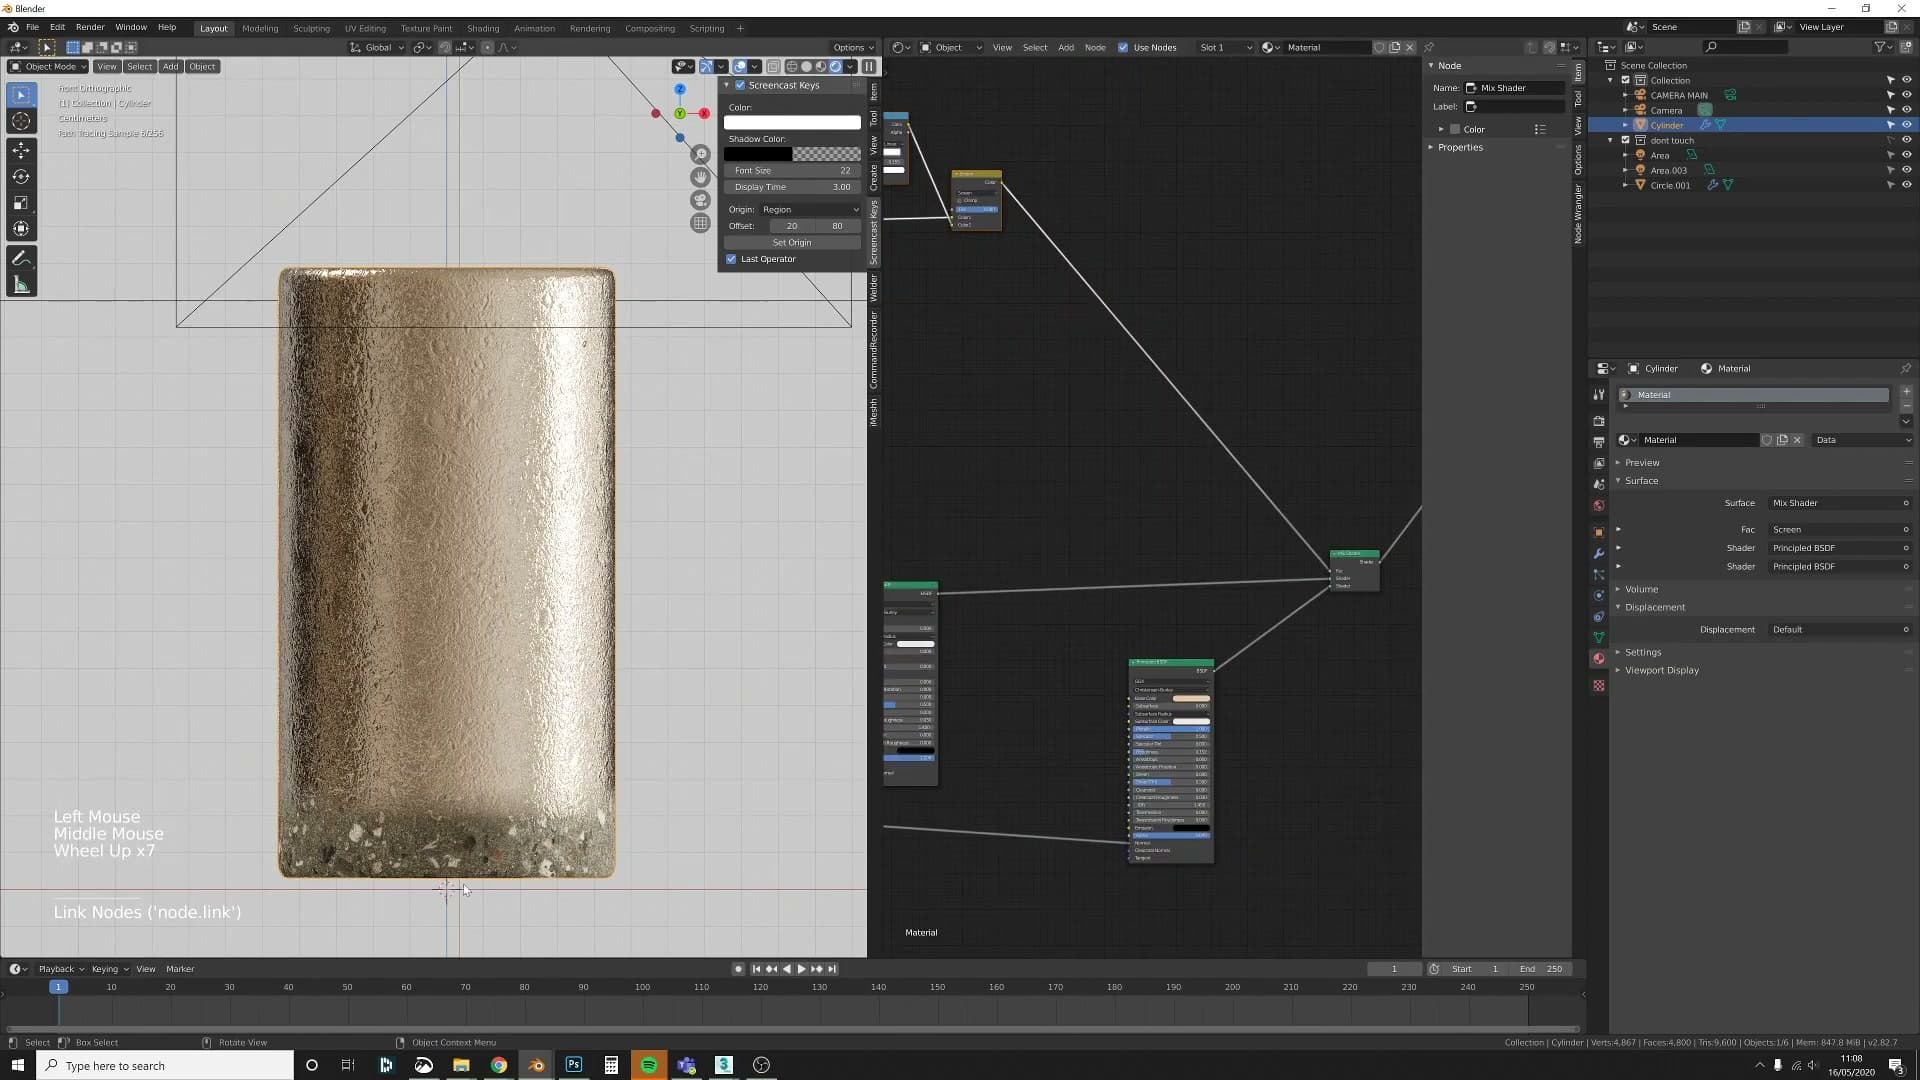
Bring the gradient mask network you built earlier across into this material and plug its output into the Fac socket of the Mix Shader. As soon as it's connected you'll see the gradient doing its job: one material fading into the other along the axis you set up.
If the materials are sitting on the wrong ends of the gradient, flip the two Color Ramp stops rather than rewiring anything. To make the next bit easier to read, temporarily change one of the stops to a bright pink so the mask itself is unmistakable against the rest of the vase. You can put it back to gold once you've finished placing the line.
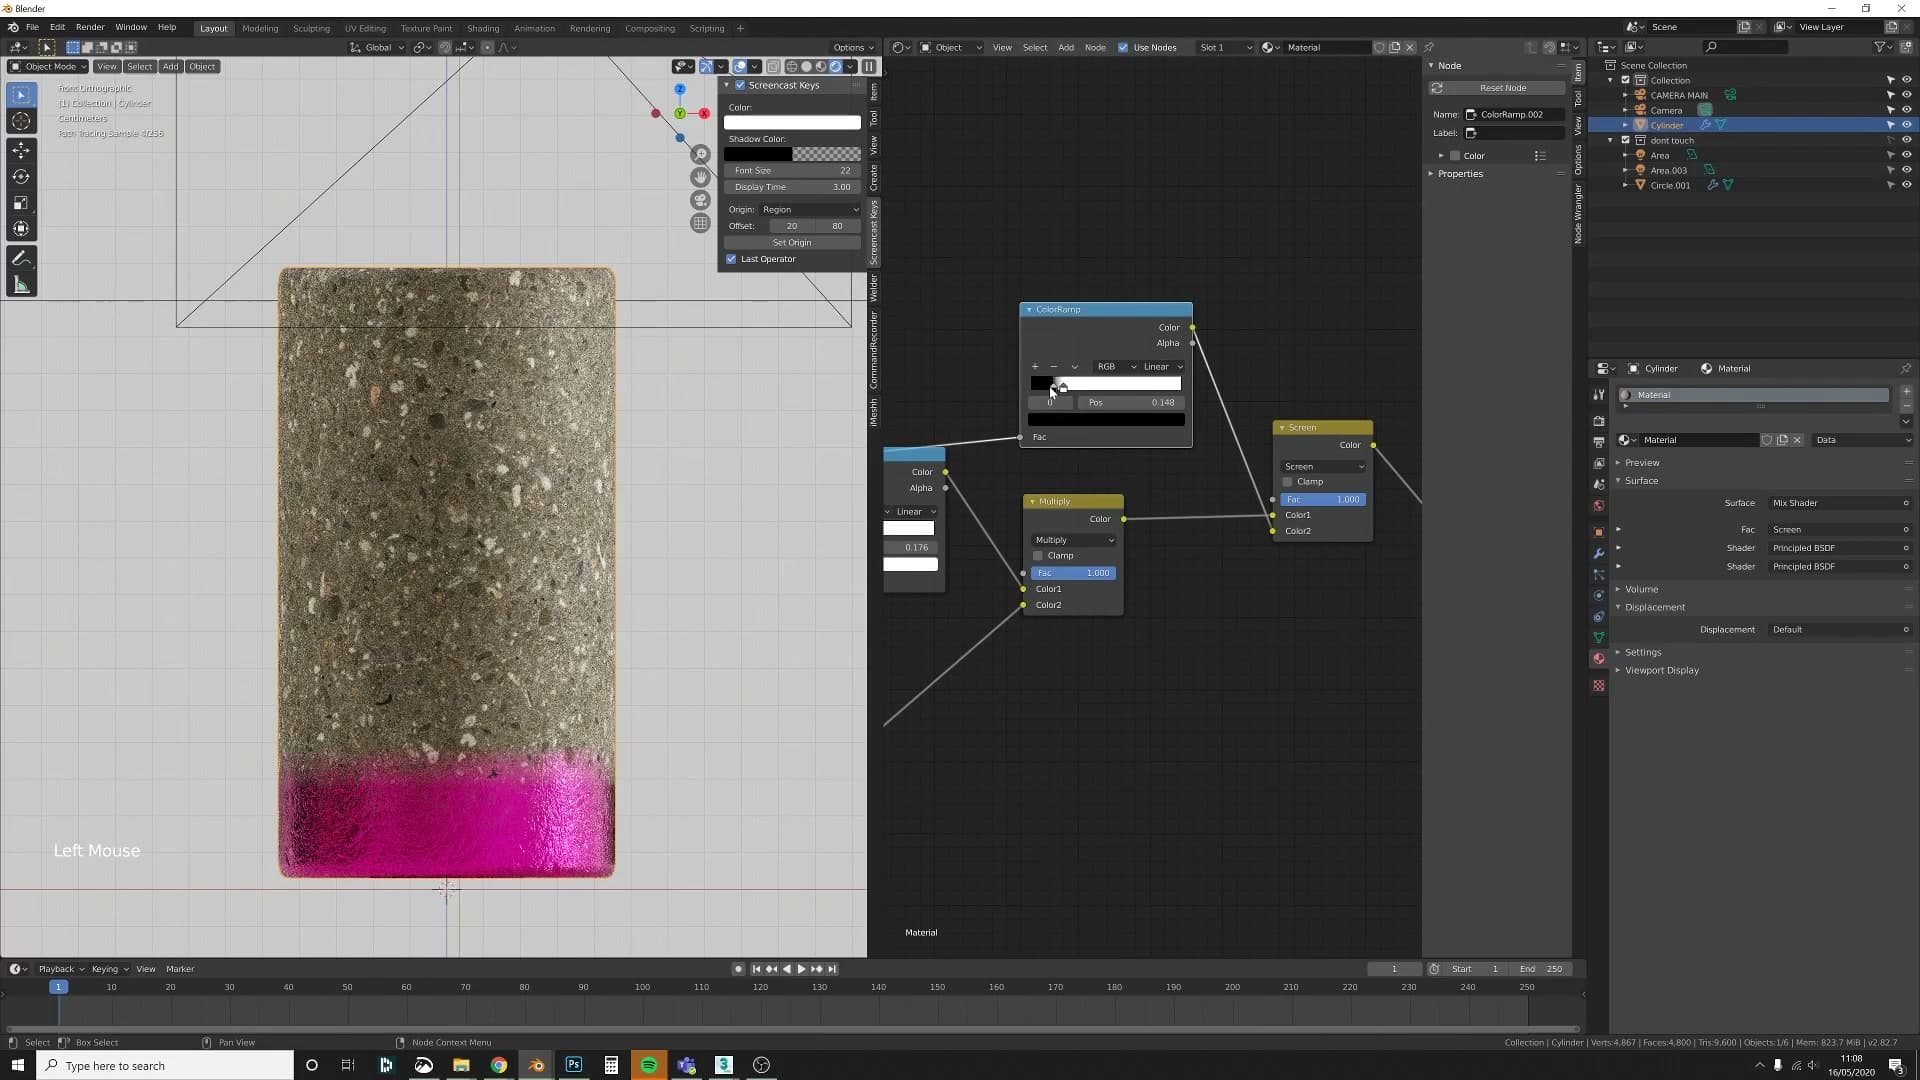
Now slide the Color Ramp stops to push the wear up or down the vase. Keep a little distance between the two stops so the boundary stays soft instead of becoming a hard, ruler-straight line. That softness is what sells it as wear rather than a sticker.
Once the position feels right, switch the stop back from pink to the painted gold colour. The vase now fades cleanly from concrete into painted metal, and you're ready to repeat the trick from the opposite end.
Stacking Top and Bottom Masks
Duplicate the entire mask network, rotate the second Gradient Texture -90° on Y, and chain a second Mix Shader so the same painted-metal base chips off at both the top and bottom of the vase.
Duplicate the mask for a top-down gradient
With the bottom-up mask working, you need a second copy of the same network doing the same job from the opposite direction. Grab the whole mask chain (Texture Coordinate, Mapping, Gradient Texture, Color Ramps, image texture and Mix RGBs) and duplicate it with Shift+D. There are tidier ways to lay this out, but dragging the duplicate roughly into place next to the original is fine for the wiring that follows.
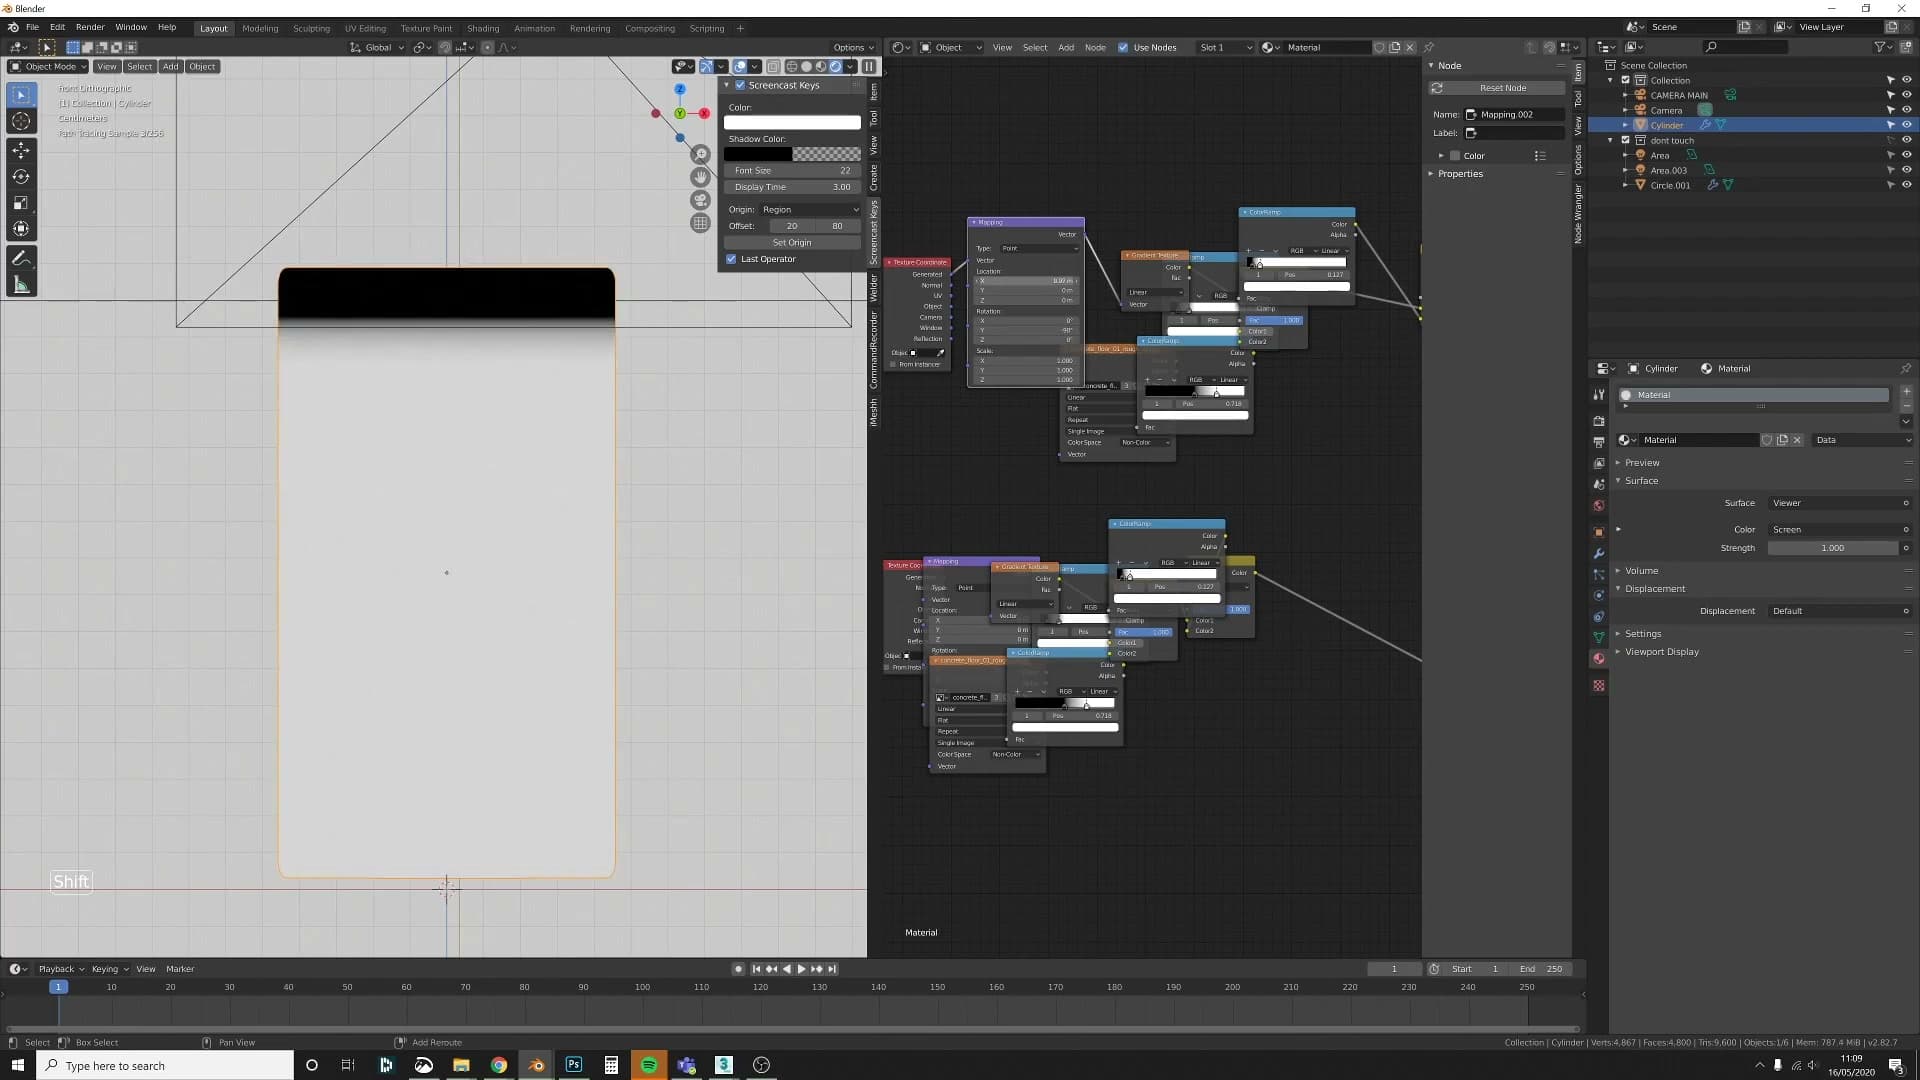
Select the duplicated Mapping node and rotate the gradient -90° on the Y axis. That flips the new mask so it travels in from the top of the vase rather than up from the bottom. Nudge the Color Ramp sliders on the duplicate to position the band where you want the paint to break. The same dragging trick you used on the first mask applies here.
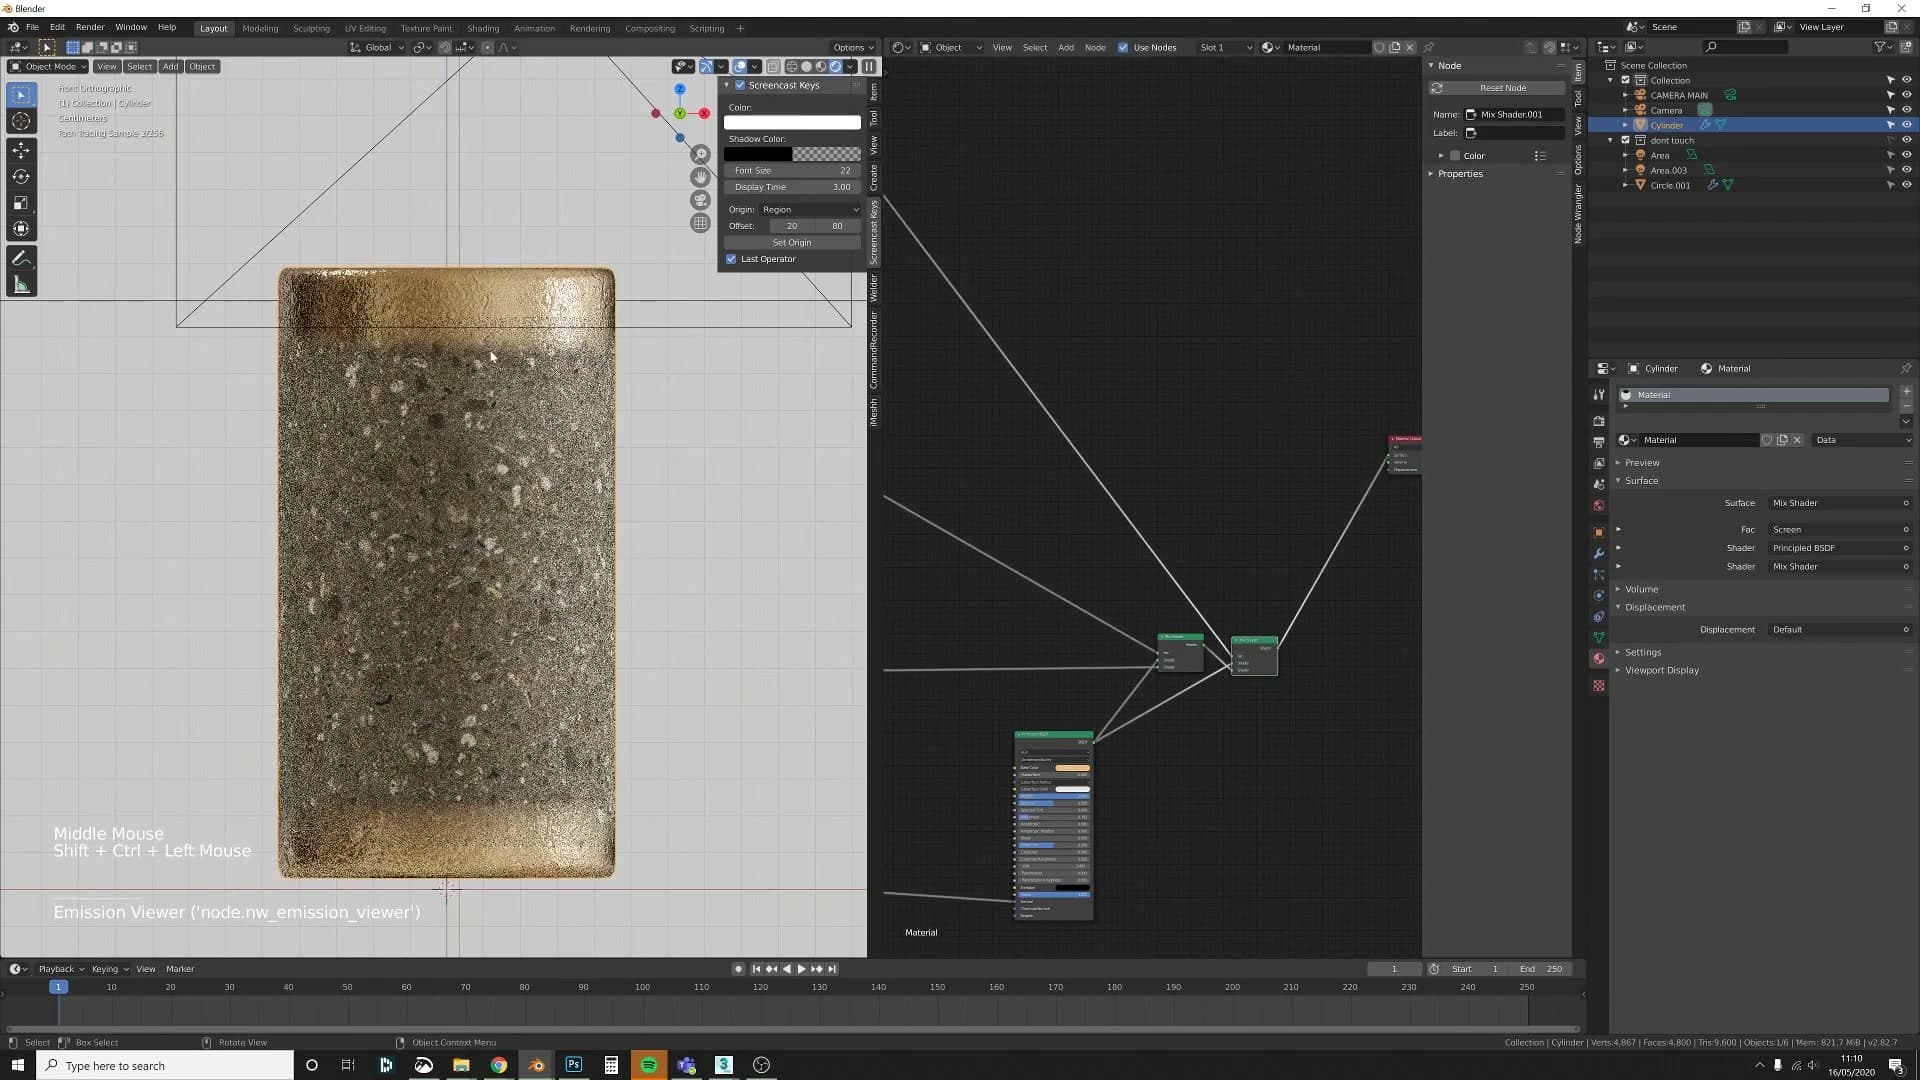
Now add a second Mix Shader after the first. Plug your painted-metal shader into one input and the output of the original Mix Shader (the concrete-to-metal blend you've already built) into the other, then wire the new mask into the factor. The vase now reads as a single base material that chips away at both ends, paint at top and bottom flaking off to reveal the concrete-and-metal blend through the middle.
Push the mask for a chipped-paint look
With both masks in place, the rest is dialling in. Go back into the Color Ramps and the Multiply step and push the contrast harder than you'd think. The more aggressively you drive the mask, the more the boundary resolves into individual stones poking through the gold rather than a smooth gradient band.
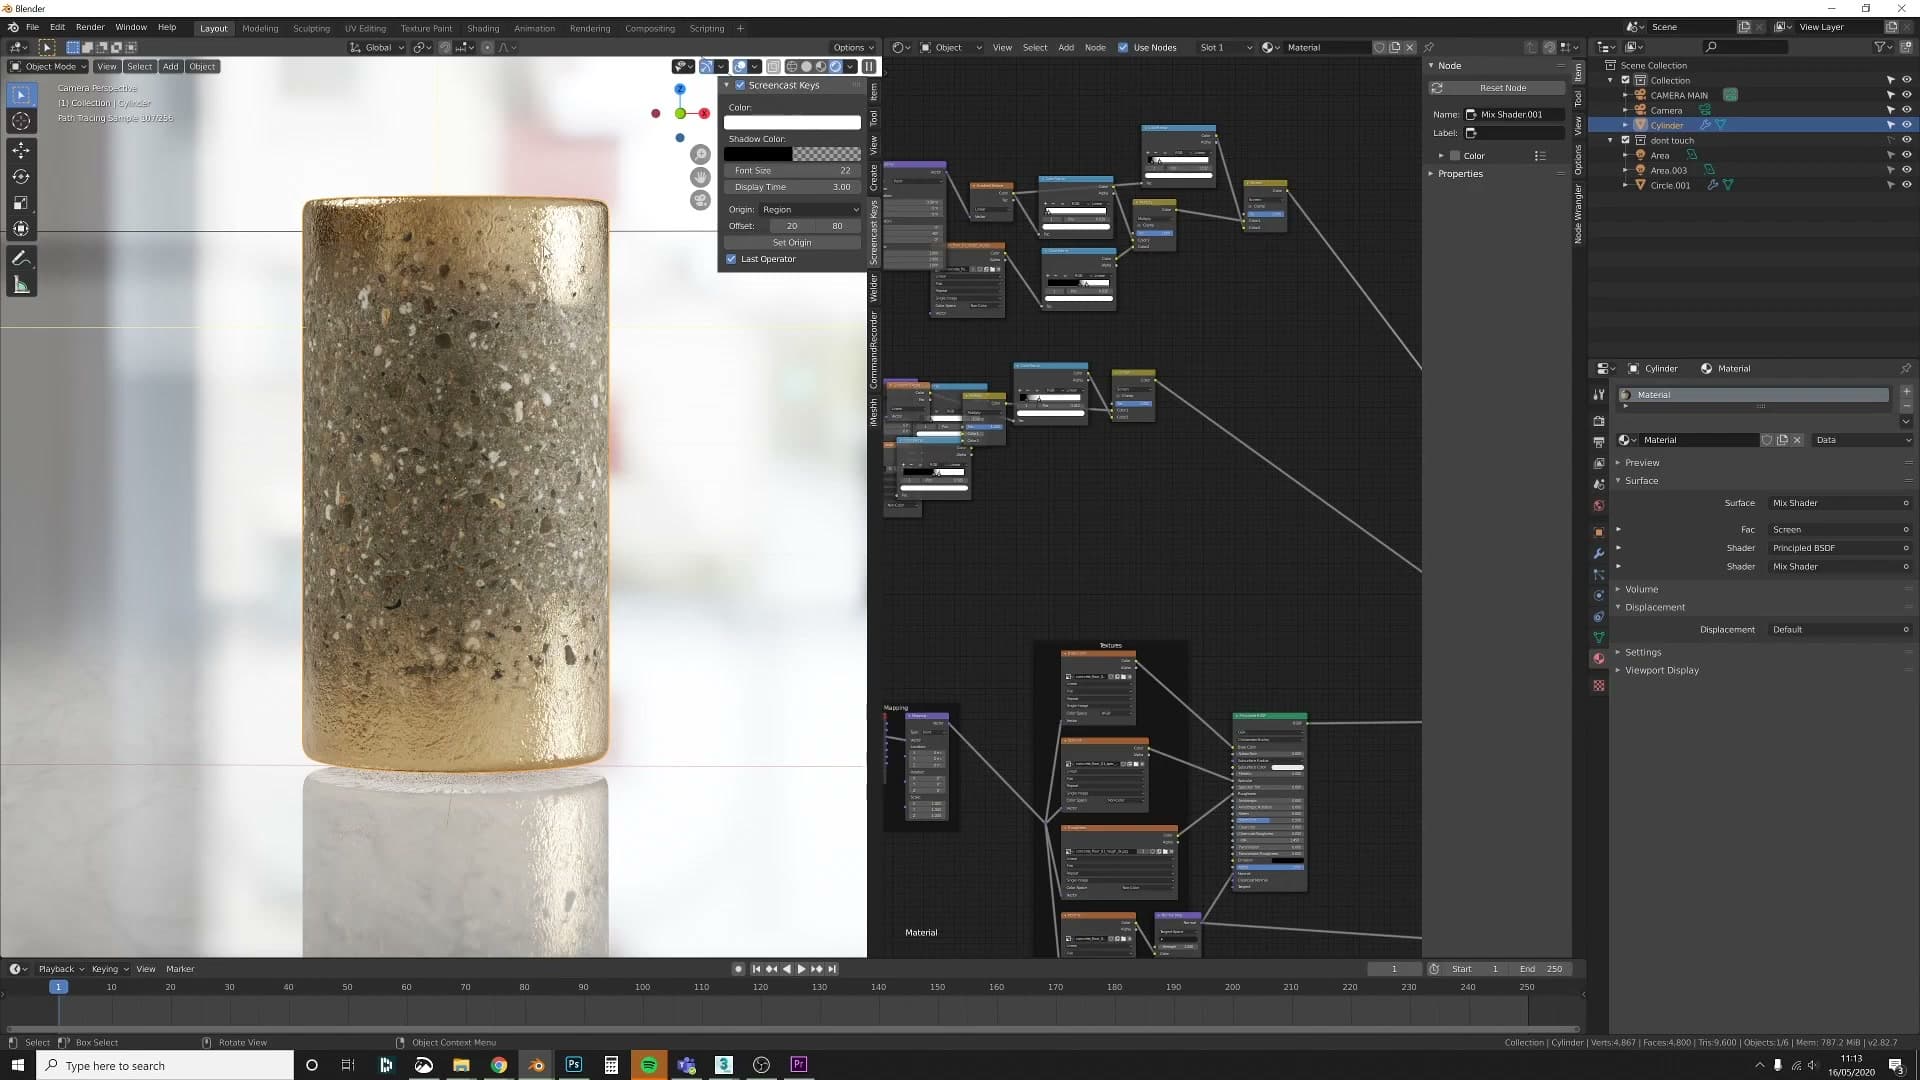
Once the contrast is high enough you'll see whole stones revealed inside the painted area, as if the paint has chipped off those specific stones. That's the look you're chasing: a clean fade at the top and bottom edges plus little bursts of bare concrete in the middle where the noise punches through. The detail of the underlying material starts to come through and the whole surface reads as something that's been weathered rather than painted.
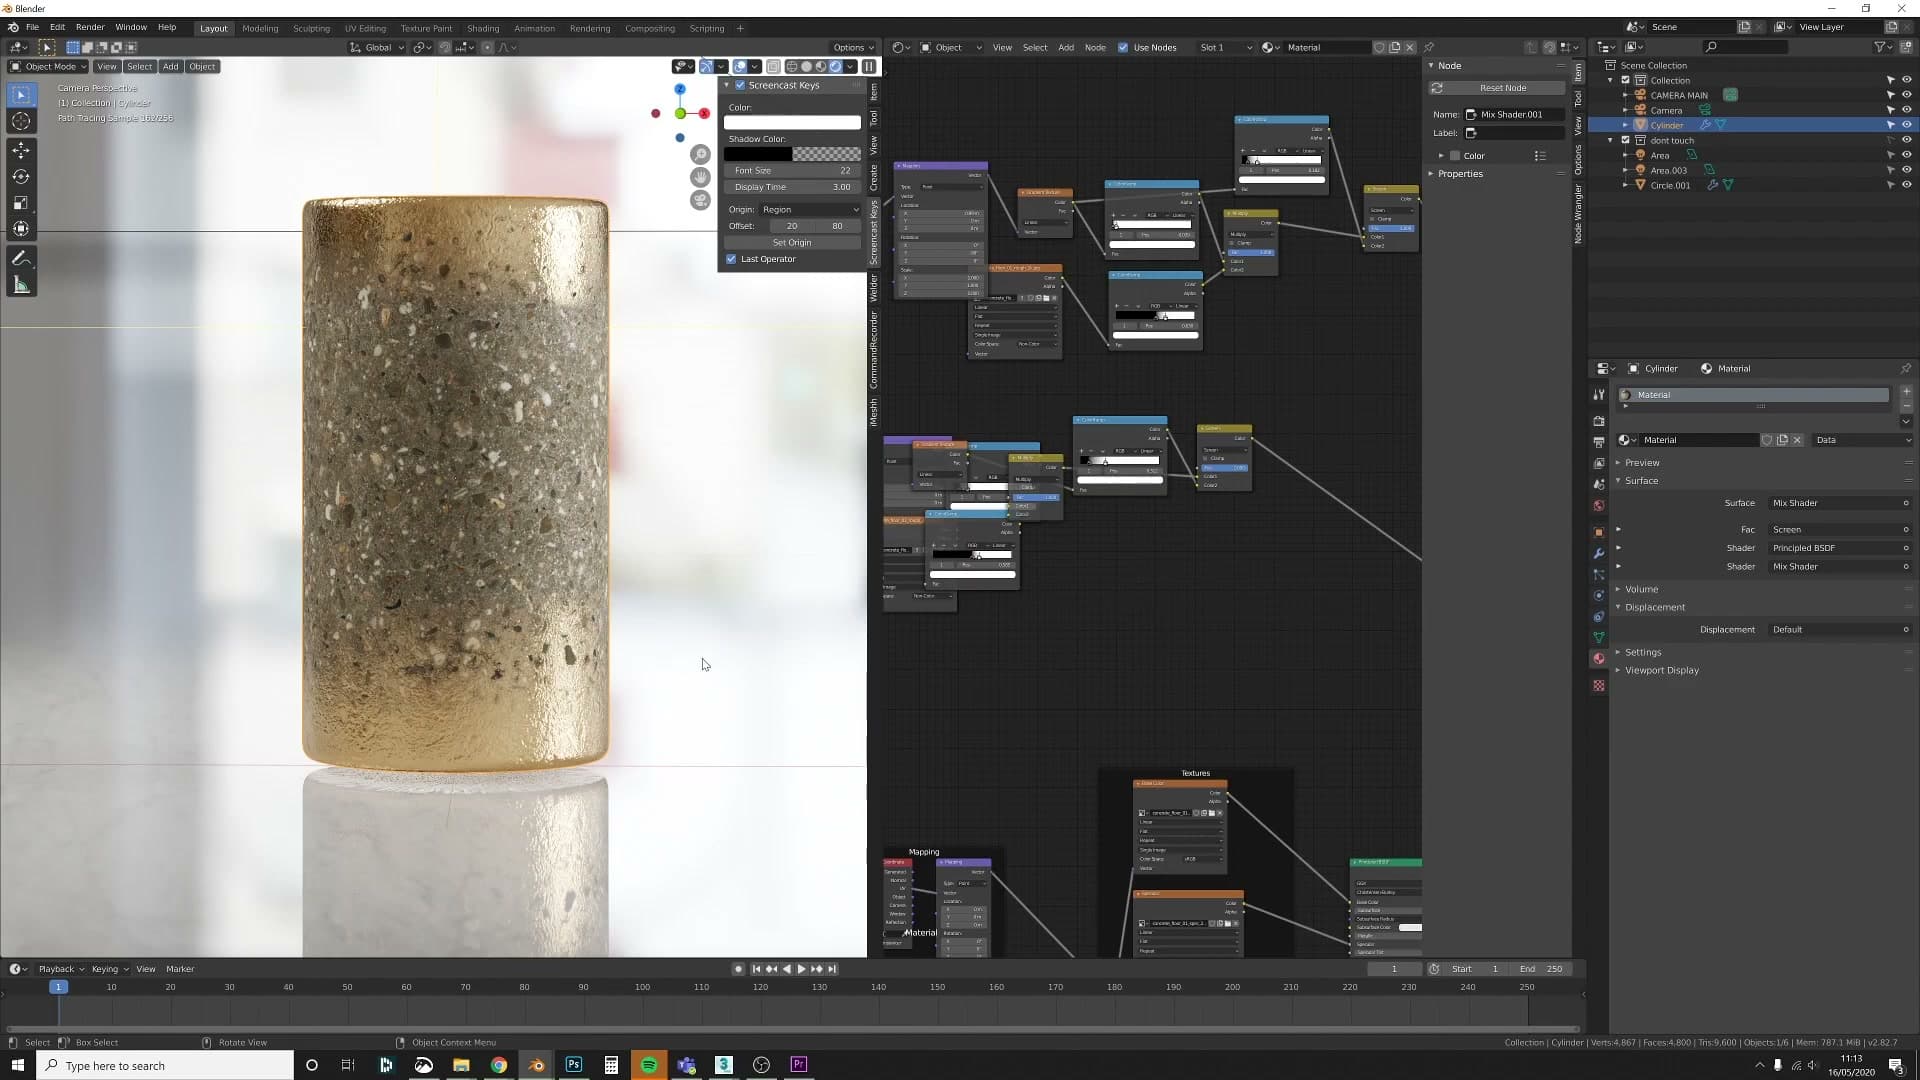
From here it's taste. The same network handles anything from a barely-worn paint job to a heavily chipped one. Keep nudging the ramps and the Multiply strength until the vase reads the way you want it to. That's the tutorial.
Tools and credits
Everything mentioned in this tutorial, with links.
- Blender (the renderer this entire build runs in).
- iMeshh (studio platform: project management, client review, asset library, invoicing). The asset library used in this tutorial is included with every iMeshh Pro plan.
- Poly Haven (free CC0 textures and HDRIs).
Pillar guide: Materials Shaders hub