Why beveling sparks debate in the comments
The video opens with the criticism that adding extra loop cuts to bevels is unnecessary when Auto Smooth or Weighted Normals exist. Kristian explains why he still prefers supporting loop cuts and demonstrates the gradient problem they fix on a simple cube.
The comment that prompted this video
Every time a new model goes up on the iMeshh YouTube channel, a handful of comments land asking the same question: why bother adding extra loop cuts beside every bevel when Auto Smooth or the Weighted Normals modifier would do the job? This video is the long answer.
I have a clear preference for supporting loop cuts and I want to show you exactly why. Rather than just defend one workflow, I use the video to walk through the main bevel methods side by side. You may end up preferring a different one for your own work, and that is fine. The point is to see the tradeoffs in one place.
There are plenty of more elaborate techniques for complex hard-surface shapes, but a plain cube is enough to demonstrate what each approach actually does to the shading. That is what every example in this post is built on.
Adding supporting loop cuts to a basic bevel
Start with a default cube and press Ctrl+B for a quick bevel along one edge, then right-click and pick Shade Smooth. You will see something odd: the shading gradient drifts across the face next to the bevel, so the whole edge reads as softly rounded even though the geometry is still sharp. The bevel is doing its job, but the smooth shading is being interpolated across far too much of the surrounding surface.
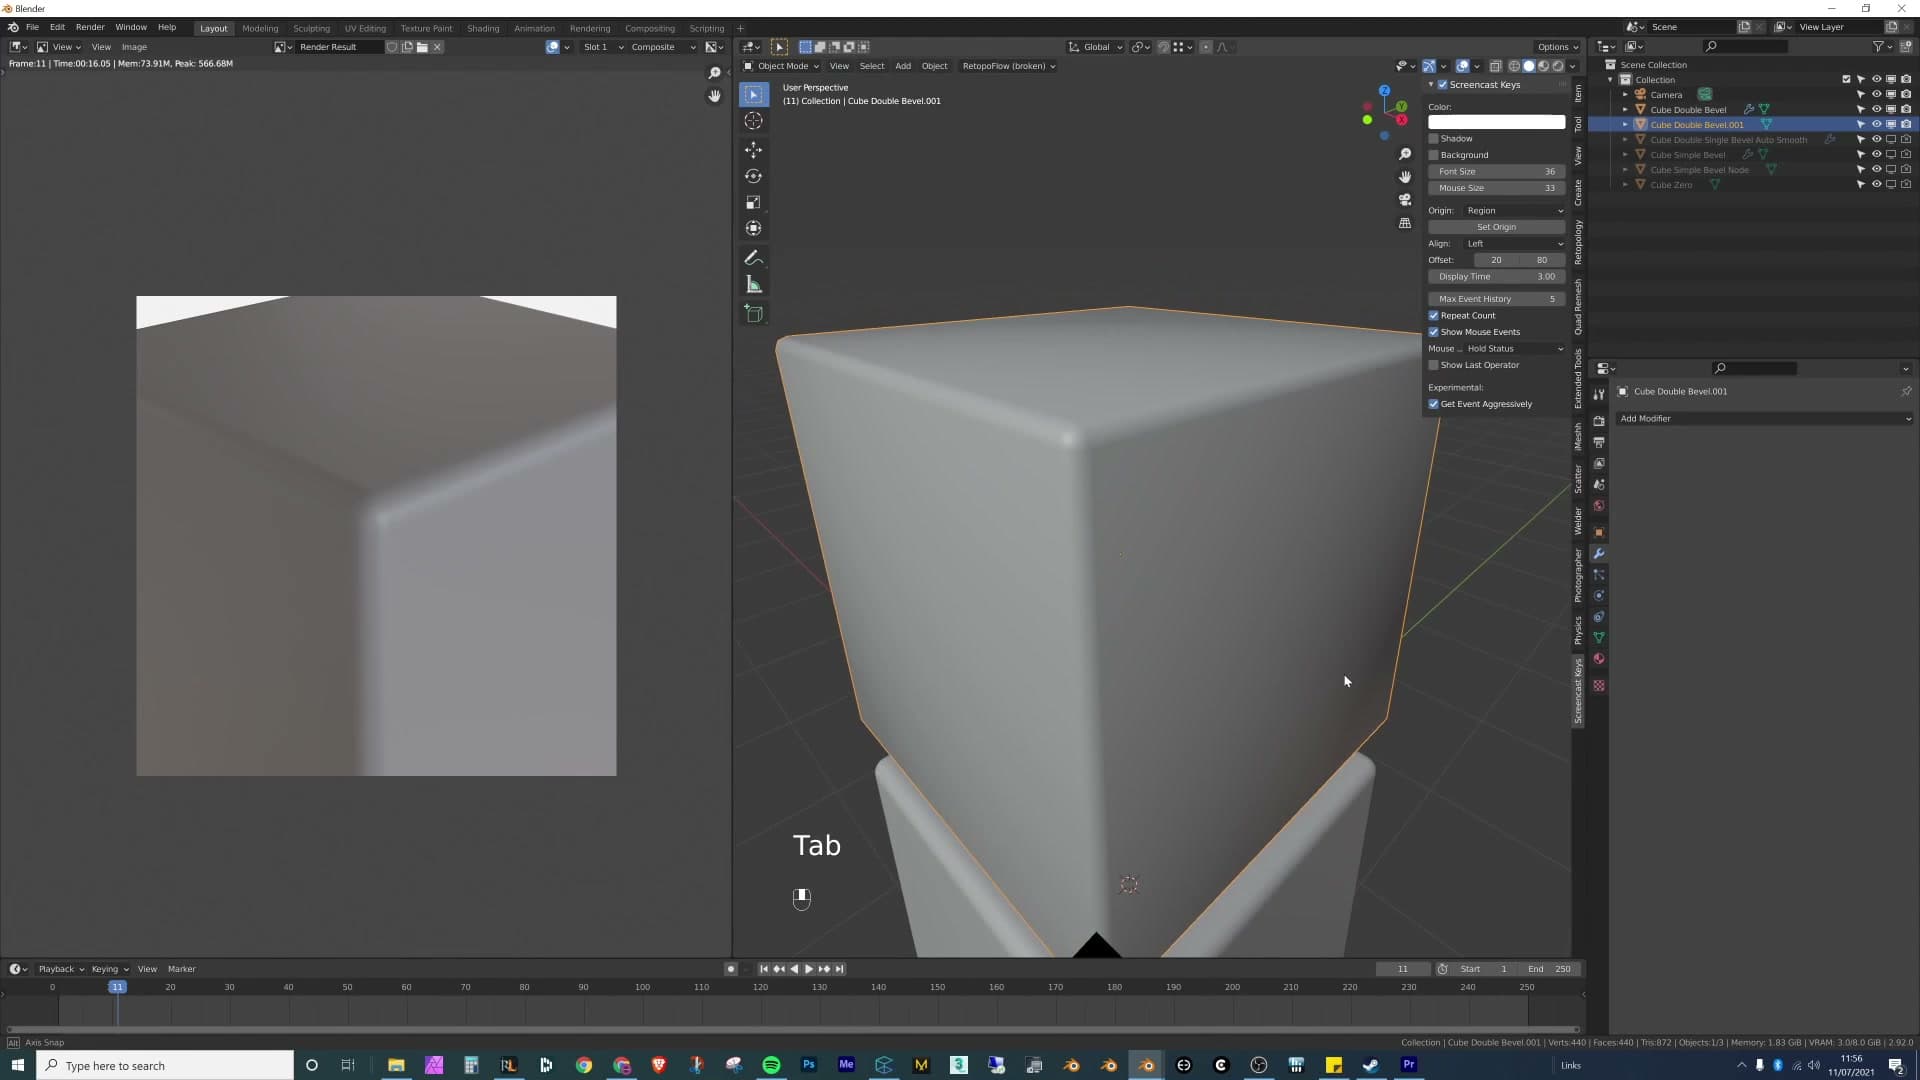
To clean that up, drop a supporting loop cut tight against each side of the bevel with Ctrl+R and slide it in close. Do the same on the opposite edge of the bevel. With both loops in place, the smoothing gradient is now confined to the narrow bevel strip itself, and the two flat faces either side of it shade cleanly with no soft halo.
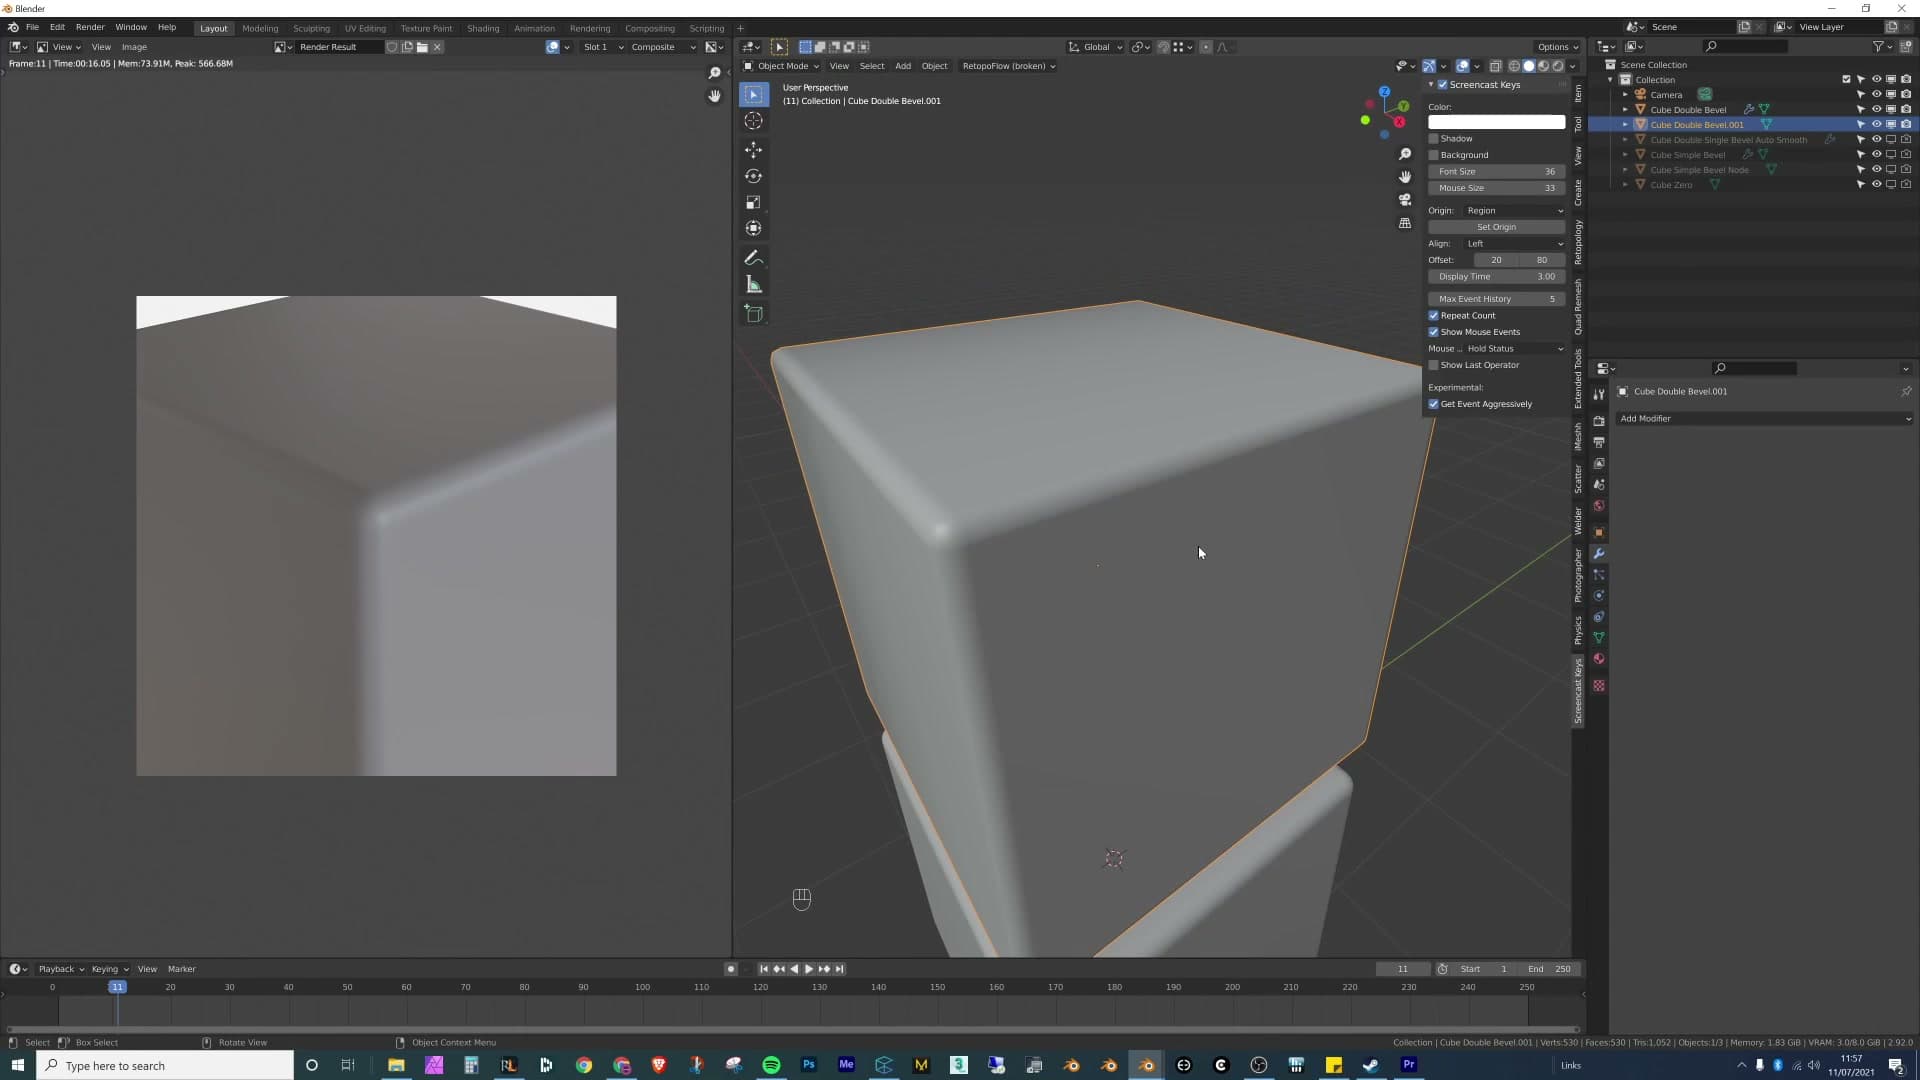
That is the workflow I reach for on almost every model. Some viewers have pushed back on it in the comments, calling the extra geometry a mistake or unnecessary noise, and for game models where every polygon is being budgeted that criticism has some weight. On the cube here it only costs a handful of extra faces, which on an archviz prop is a perfectly reasonable trade for clean shading.
A tour of Blender's bevel options
Before defending my loop-cut habit, I survey the alternatives: the Bevel shader node for instant edges that never touch the geometry, and the Bevel modifier for real geometric bevels. Each has a clear use case and a clear weakness.
The Bevel shader node for instant edges
Start with the default cube and a fresh material. In the shader editor, add a Bevel node and plug its output into the material's Normal input. Every edge of the cube now reads as bevelled, instantly. Drop the same node into any other material and you get the same effect, with no extra geometry, no support loops and no thinking required.
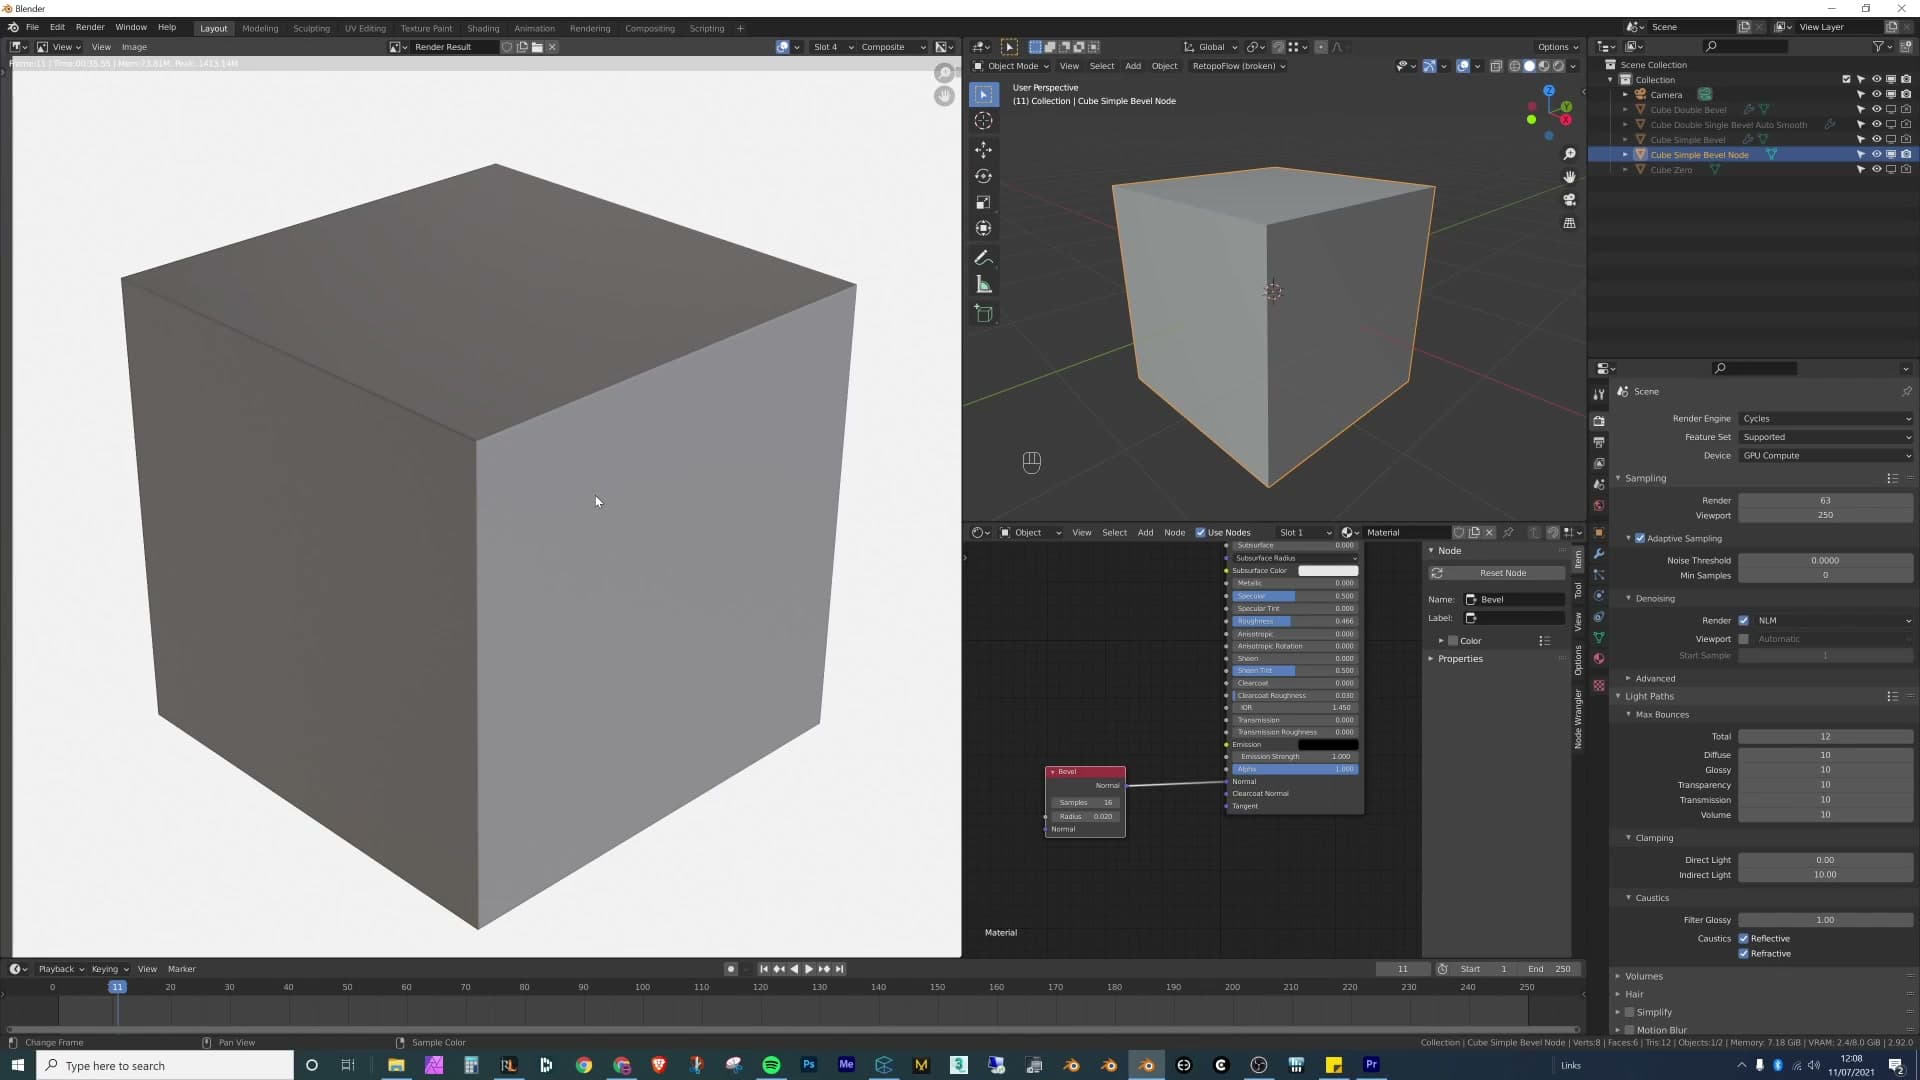
The catch is that the node doesn't actually change anything about the mesh. It nudges the surface normals so the shader fakes a soft edge. Zoom in and the silhouette is still razor sharp; the corner against the background never curves. You'll also see a hard line running down the centre where two fake bevels meet, and a soft gradient creeping along the back-facing edges that a real geometric bevel would tuck out of sight behind the object.
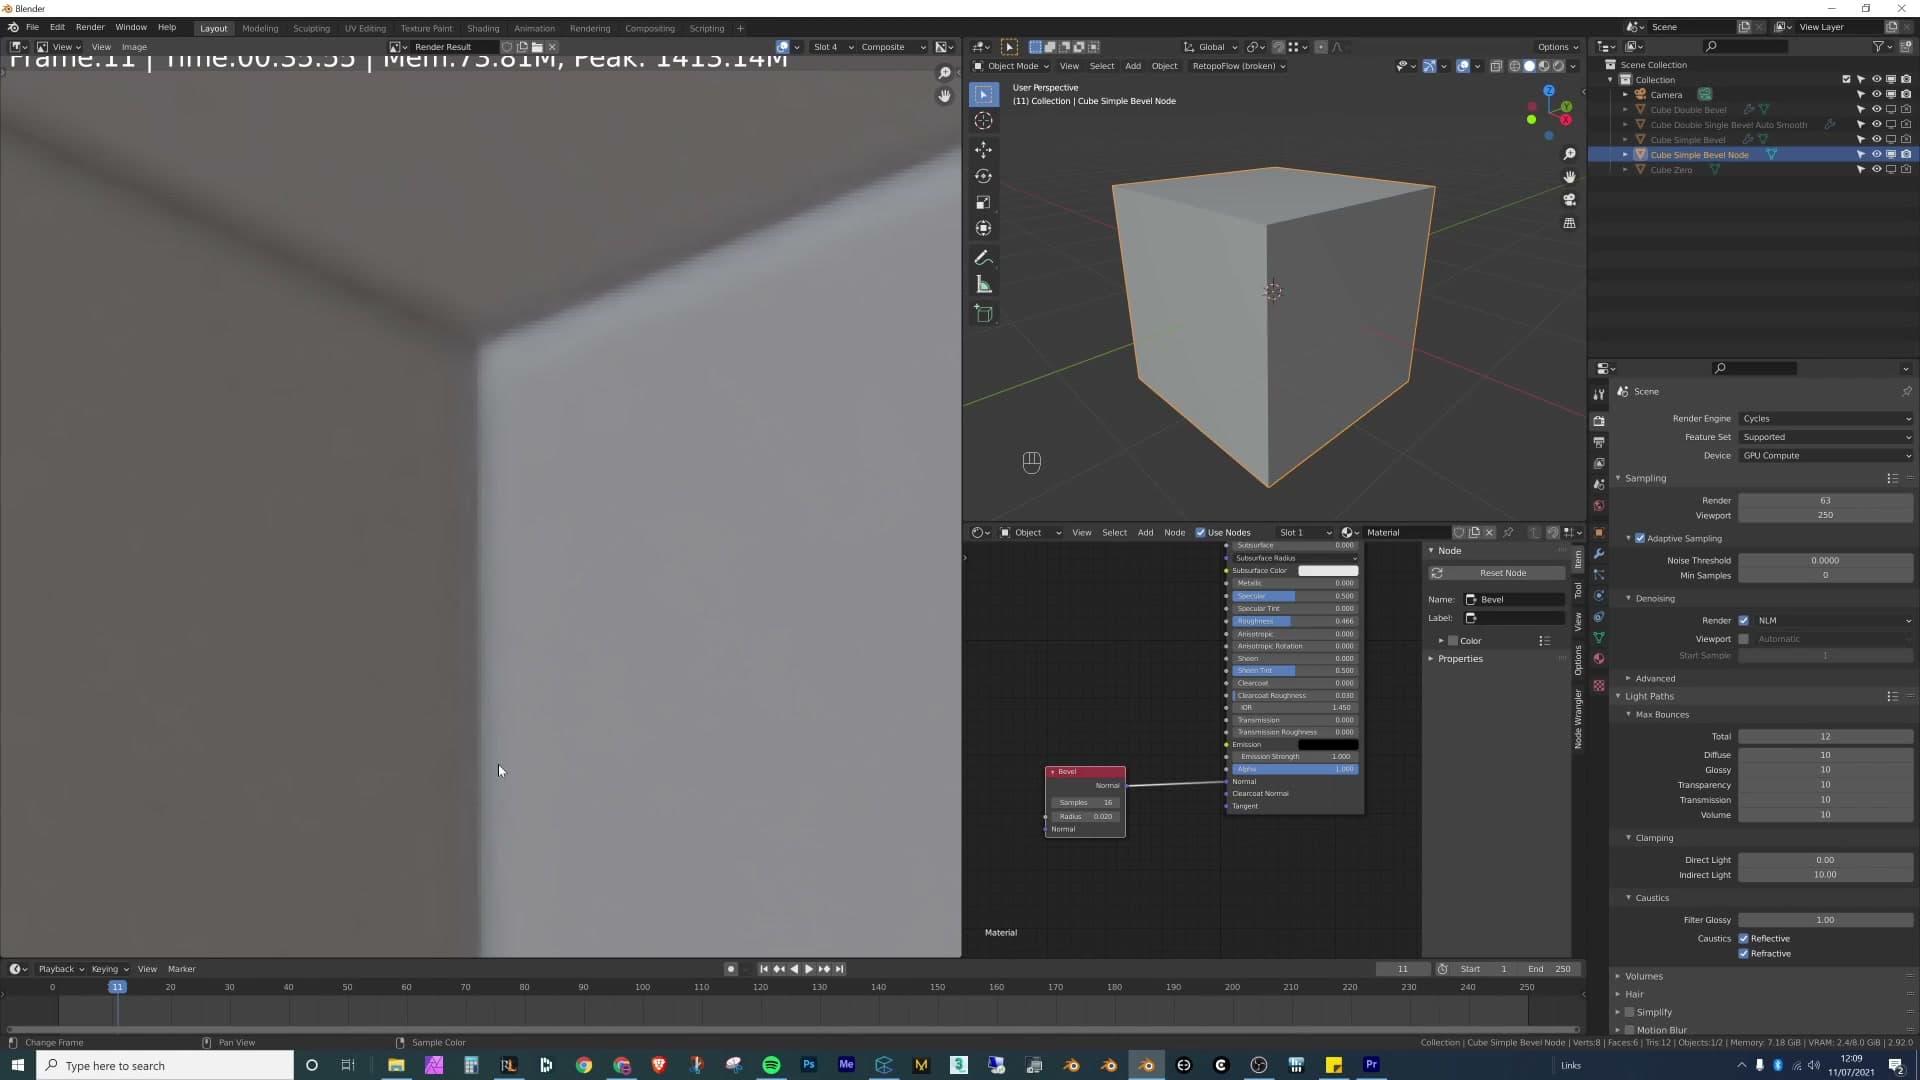
There's a render-time cost too. The node samples the surrounding geometry to work out where the edges sit, and the more samples you ask for, the longer each pixel takes to resolve. The default sits around 8 samples, and pushing it higher for cleaner results stacks straight onto your normal Cycles budget.
The Bevel modifier for real geometry
For the same comparison, swap the shader node out and drop a Bevel modifier onto the cube instead. Now the corners are made of real geometry. The modifier carves supporting edges into the mesh and rounds the corner over as many segments as you ask for, so the silhouette actually curves and the edge catches light the way a chamfered corner would in real life.
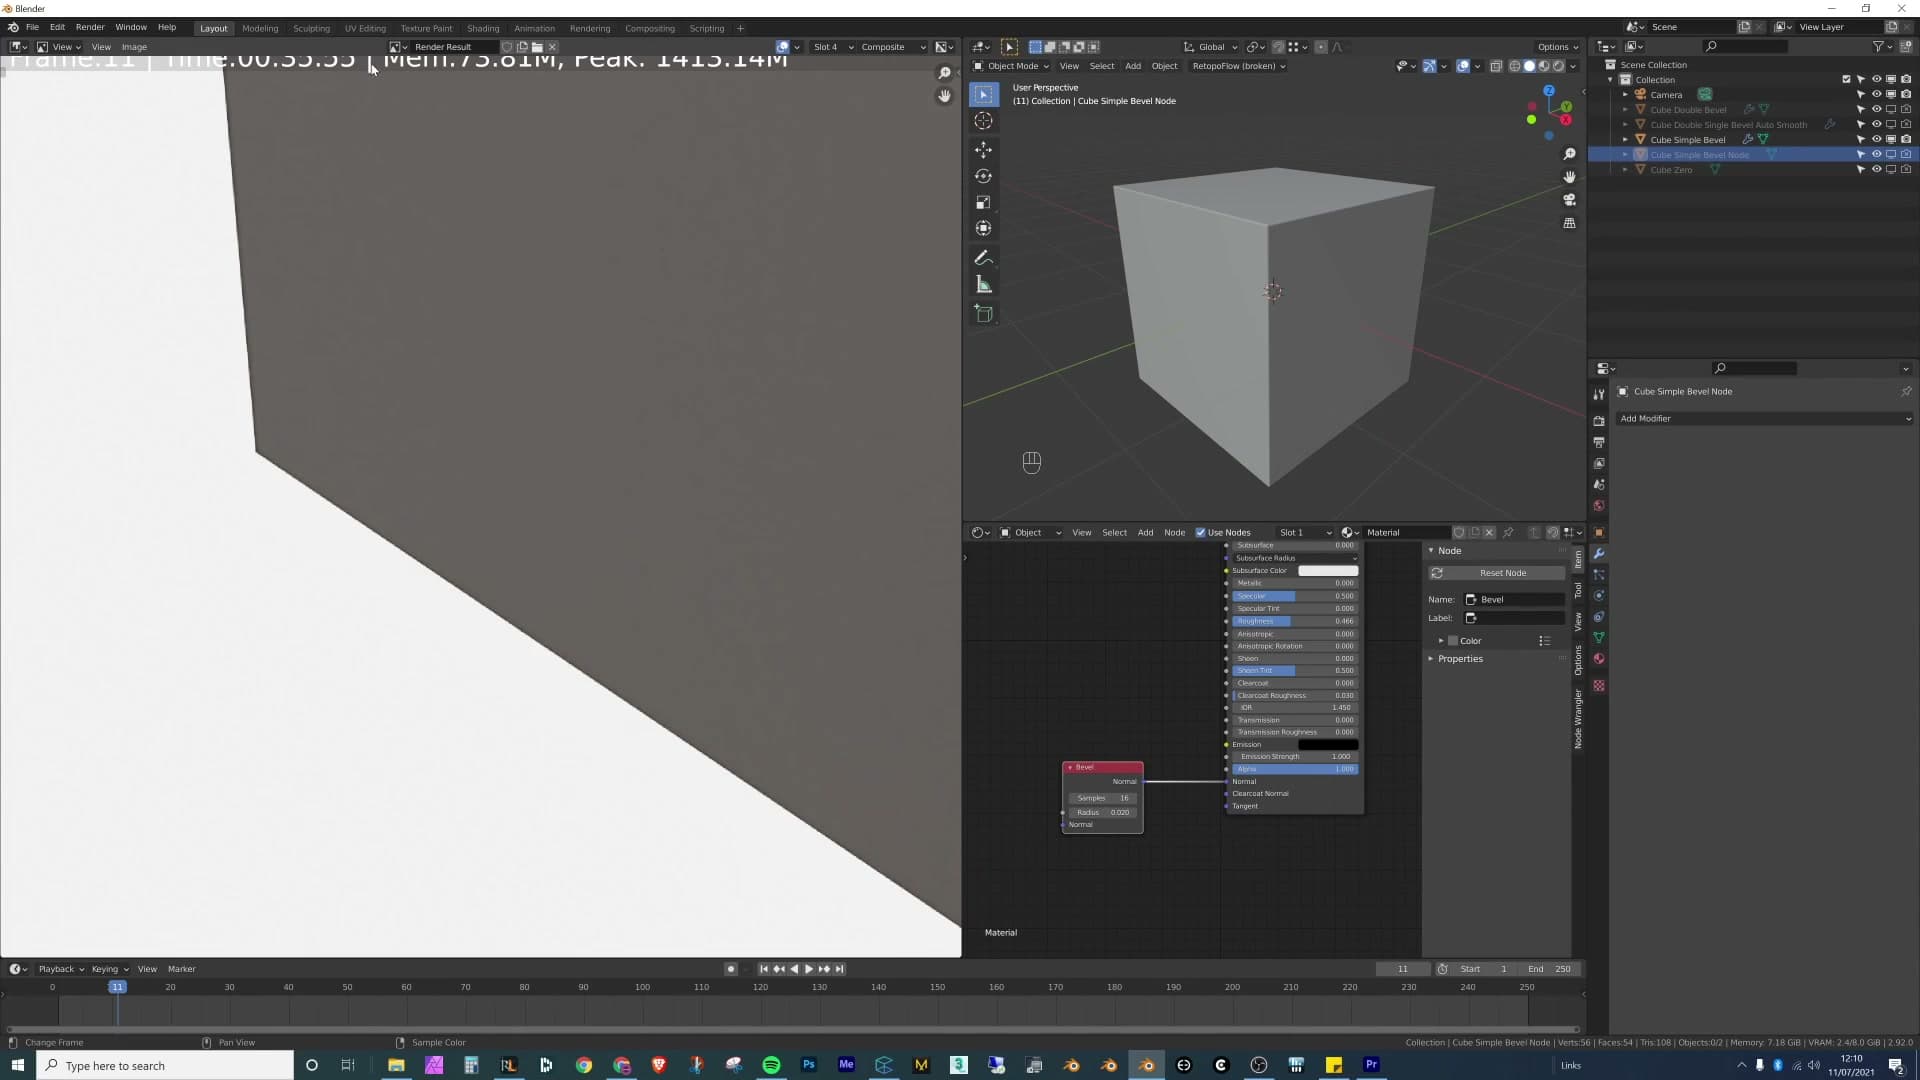
Place it side-by-side with the shader-node version and the difference reads instantly. The bevelled edge falls away behind the object's silhouette rather than ghosting into a gradient, and the hard line down the centre is gone. It's smoother, more natural, and the moment the camera gets close enough to notice the seam, this is the one you'll reach for.
Fixing shading artefacts on smooth-shaded bevels
Smooth shading exposes the gradient problem on Bevel modifier output too. I walk through the standard fixes: flat shading for distance, Auto Smooth with a sensible angle, Harden Normals inside the modifier, and Weighted Normals as a fallback on already-applied geometry.
Flat shading hides facets at a distance
Before reaching for smooth shading, look at how the Bevel modifier reads with flat shading on. The curve isn't actually smooth: the individual bevel segments show up as visible facets along each rounded edge.
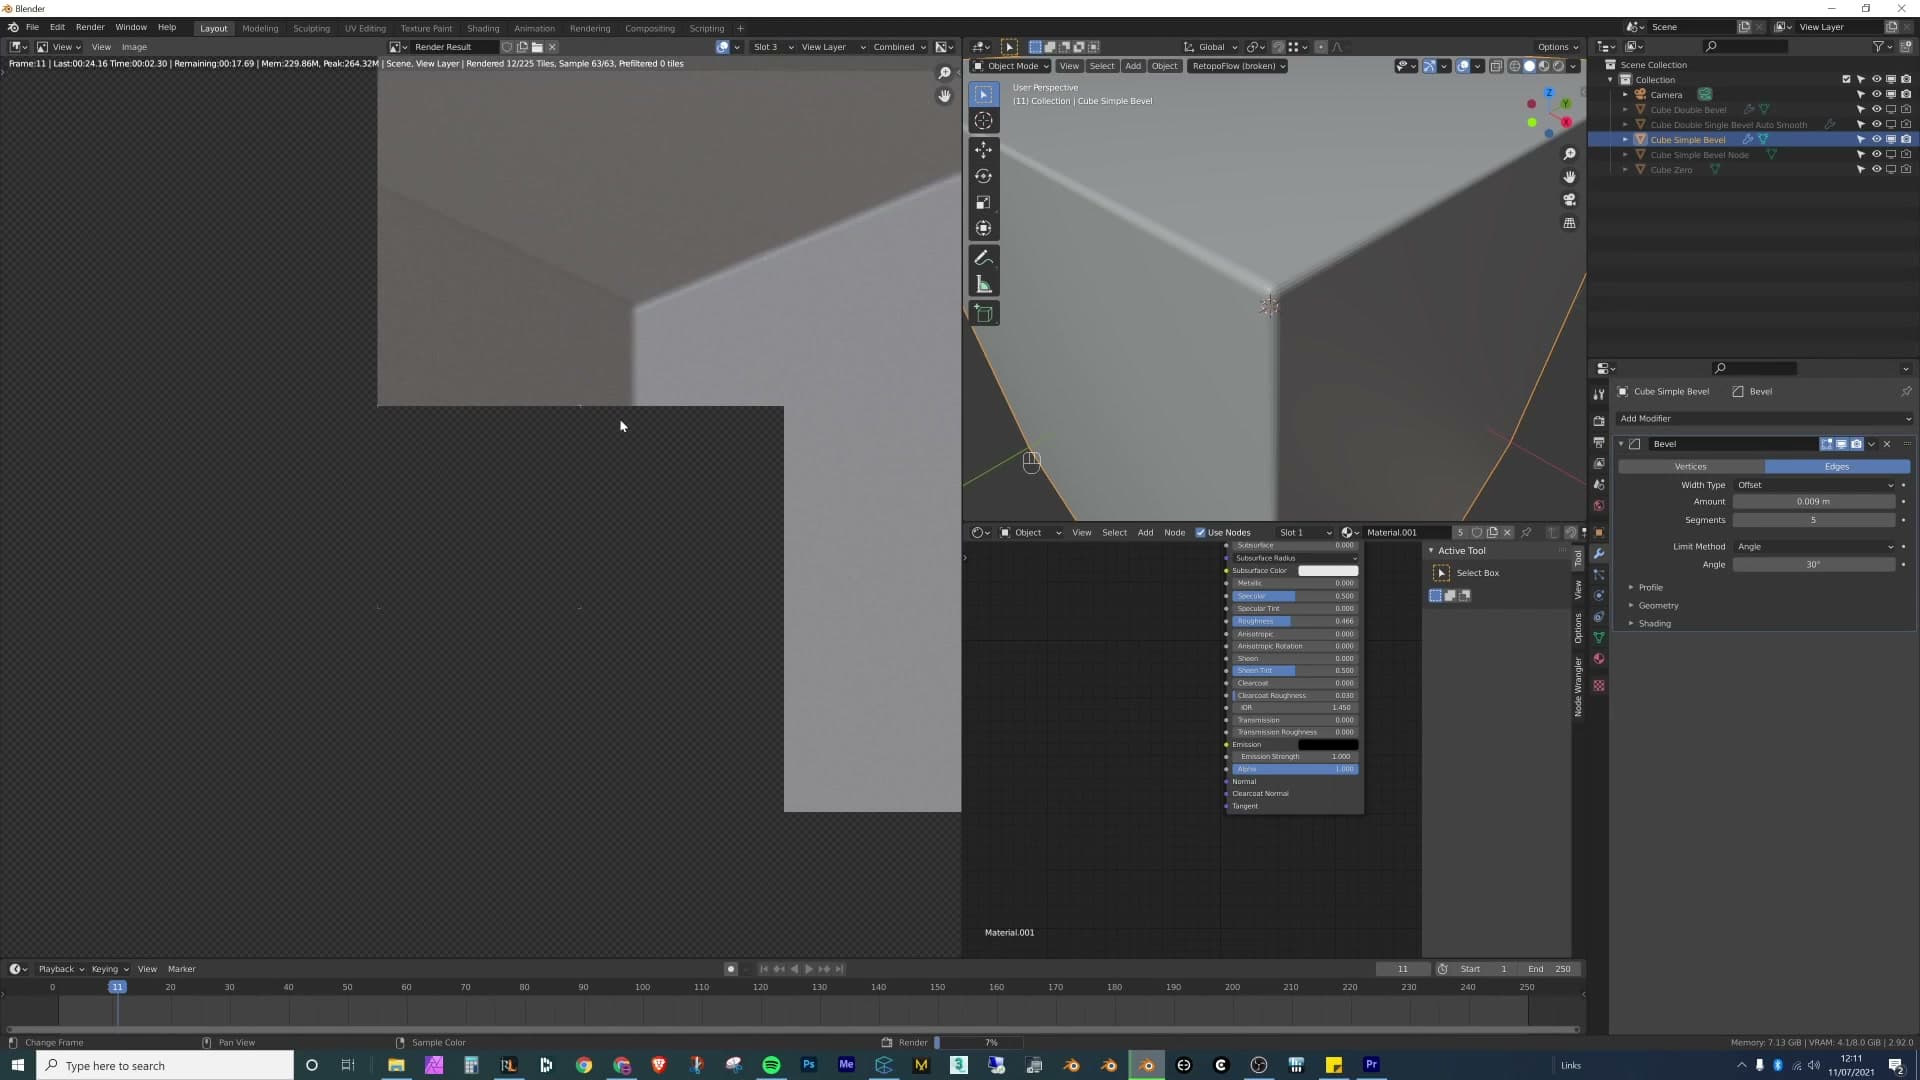
Pull the camera back and those facets dissolve. From any reasonable distance the bevel reads as smooth, and no one viewing the final render will spot the segmentation. Adding more segments to the bevel helps too: extra geometry tightens the curve so even a slightly closer shot can survive flat shading.
Get right up to it, though, and the facets come back. Flat shading is a fine choice for background props and anything the camera never lingers on; it stops being enough the moment you want a hero shot of a bevelled edge.
Smooth shading exposes the gradient on the face
For an object the camera gets close to, you'll want smooth shading on the bevel. Switch the object to Shade Smooth and the bevel itself reads beautifully. The curve becomes a single continuous surface with no visible segmentation.
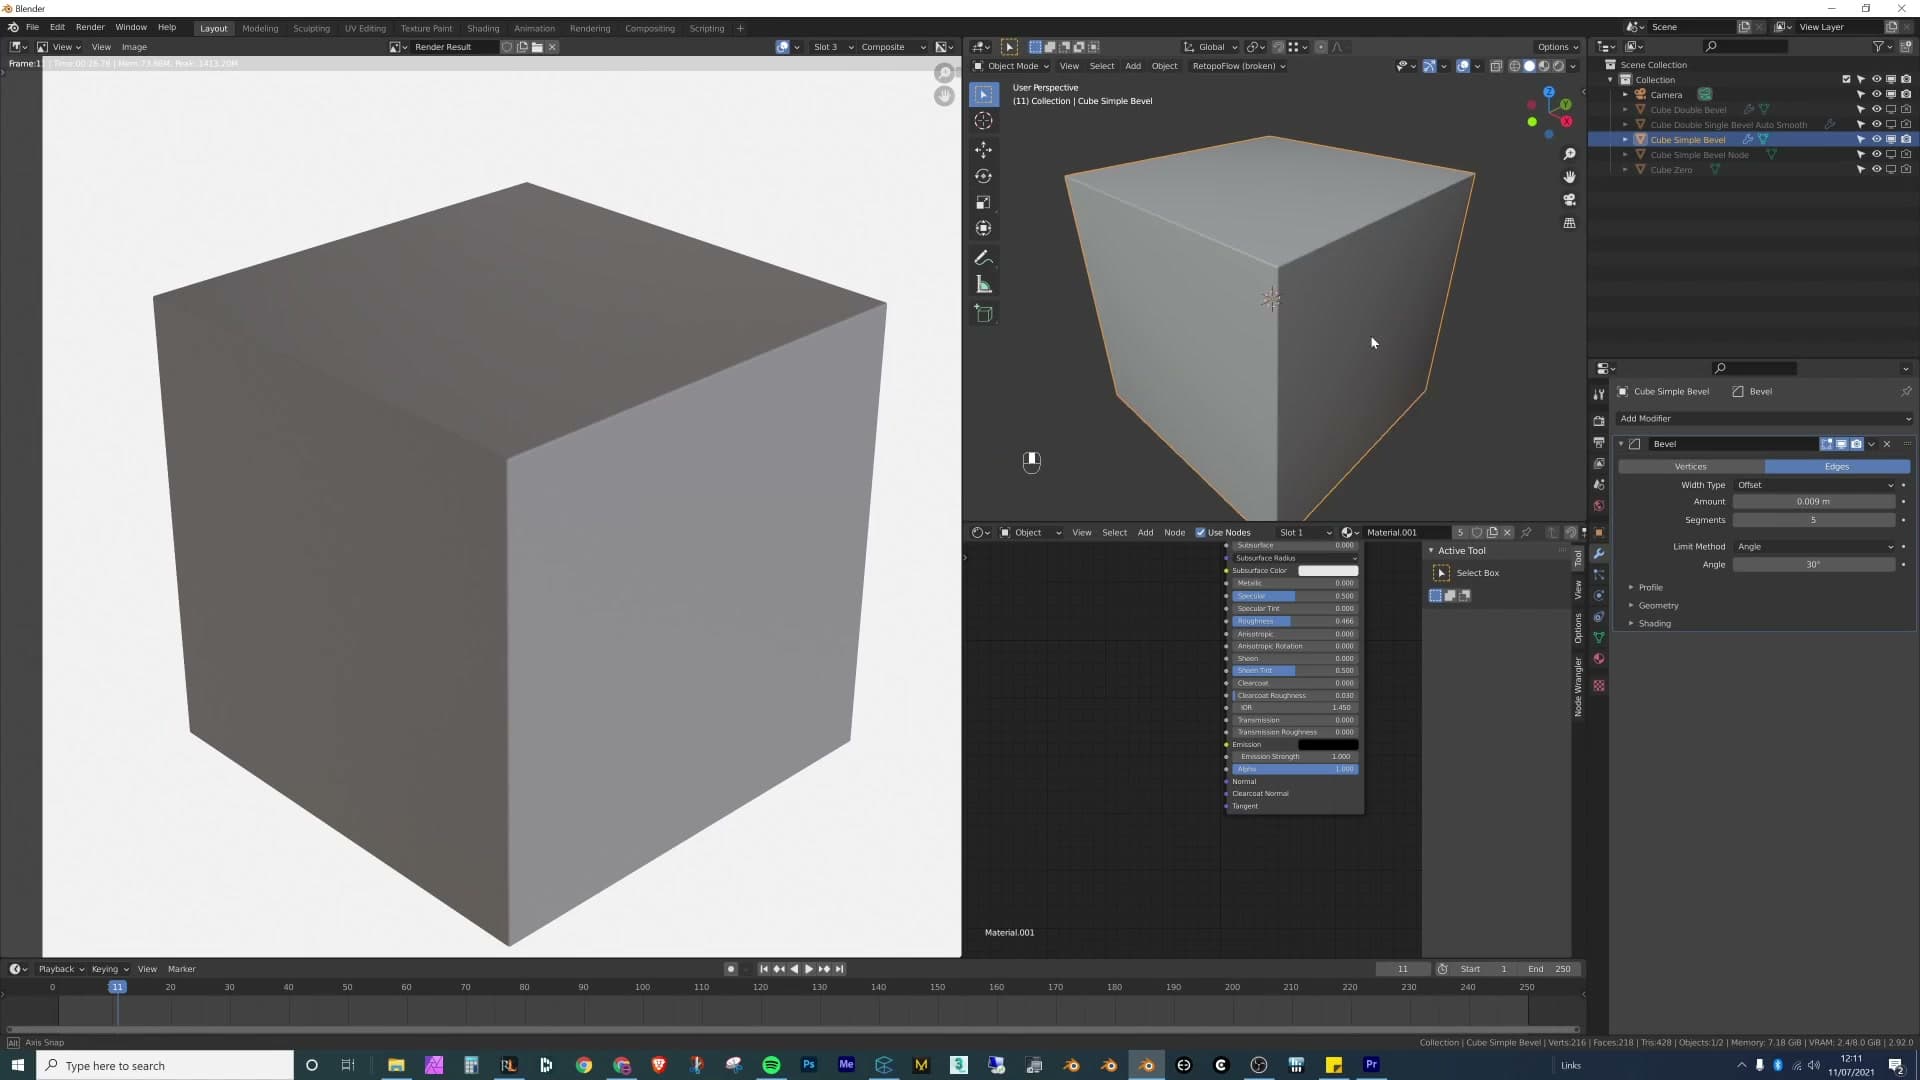
Smooth shading introduces a new problem in exchange, though. A soft gradient appears across the flat face on either side of the bevel. The arc of the bevel itself is fine; the issue is the way the smooth normals from the bevel bleed out across the neighbouring face. That gradient is what the rest of this module is about removing.
Auto Smooth and Harden Normals
There are several ways to kill the gradient. The standard pair is enabling Harden Normals inside the Bevel modifier's Shading section, and then switching on Auto Smooth on the object itself.
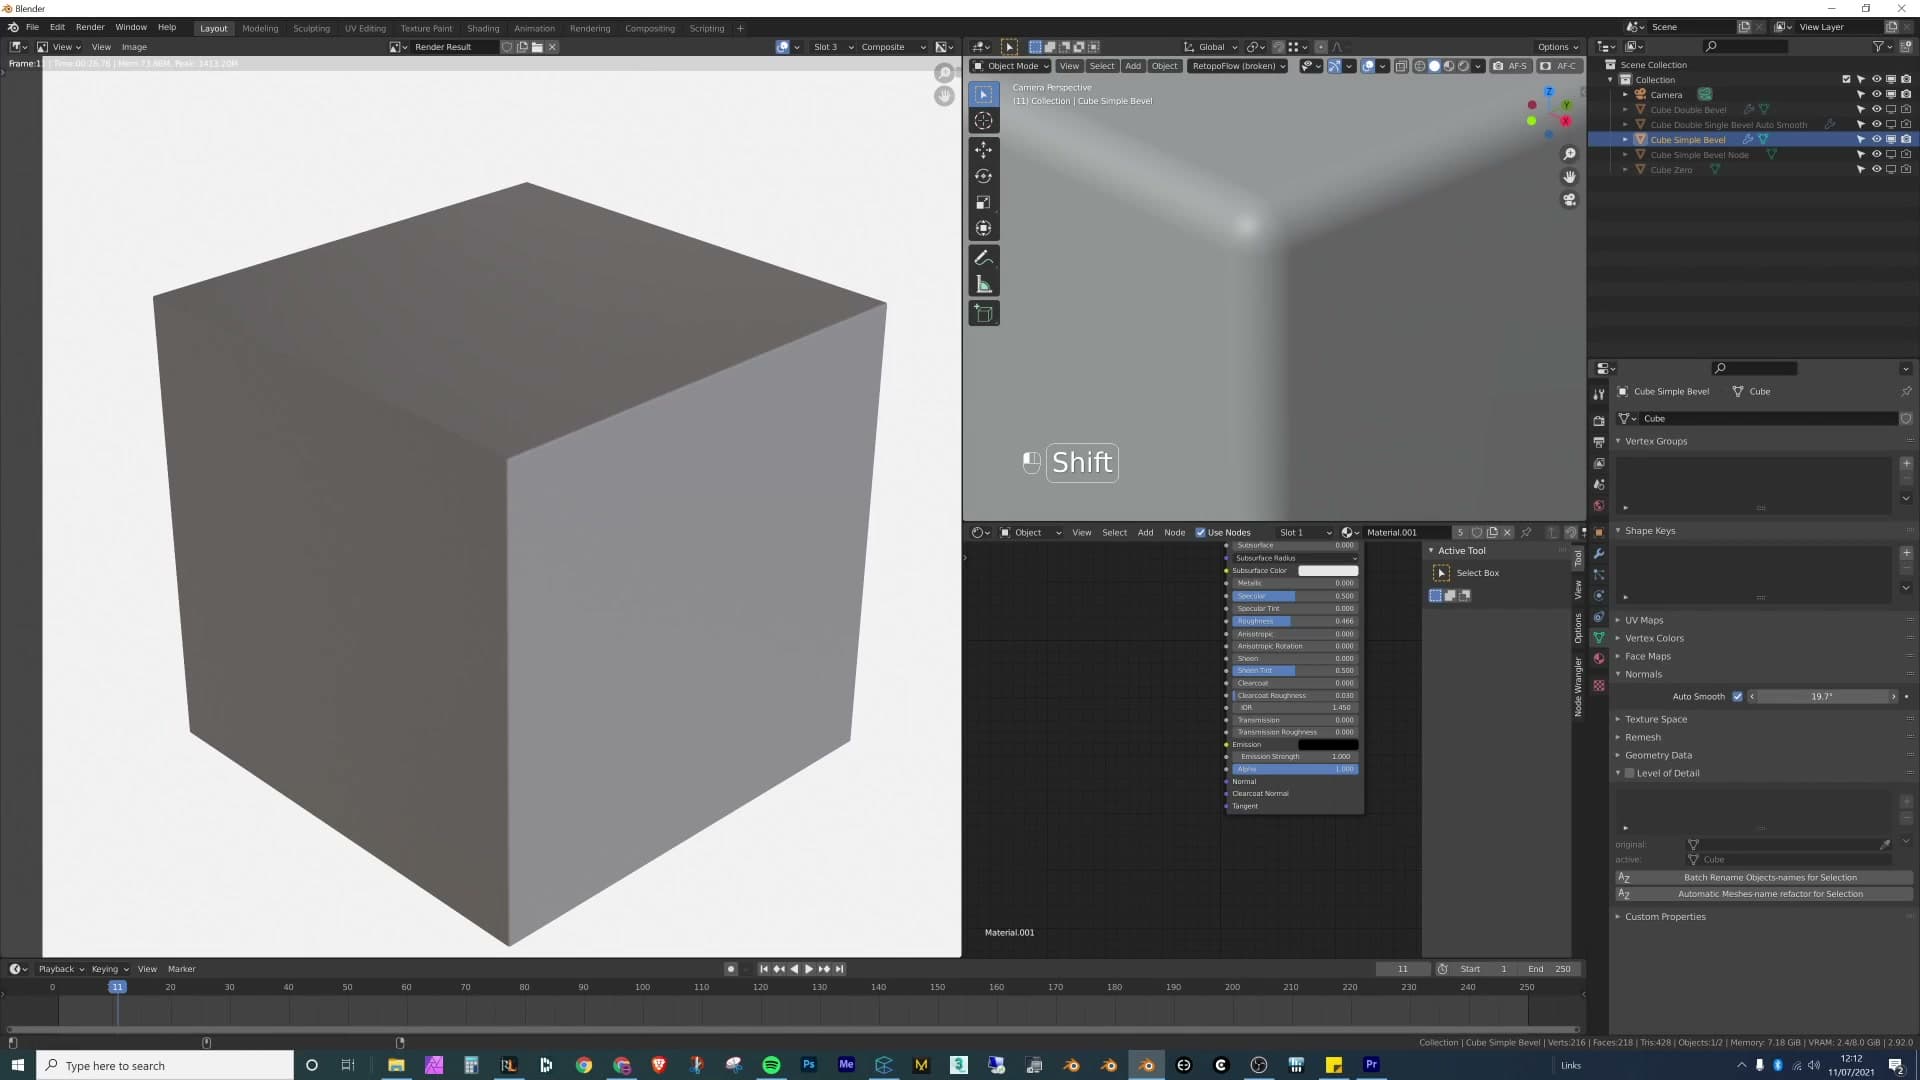
With both active, the flat face cleans up and the bevel still reads as smooth. Turn Harden Normals off again, though, and the gradient can return. Auto Smooth works on an angle threshold, and if the angle between the bevel and the adjacent face doesn't cross that threshold, Auto Smooth won't separate the normals there and the gradient bleeds back across the face.
Drop the Auto Smooth angle down while watching the viewport and you can see which edges are being treated as smooth versus sharp. As the angle gets smaller, fewer edges qualify as smooth and the affected regions shrink. It's a useful diagnostic when you can't tell whether Auto Smooth is catching a particular edge. For some meshes you'll still need Harden Normals layered on top of Auto Smooth to get every edge looking completely clean.
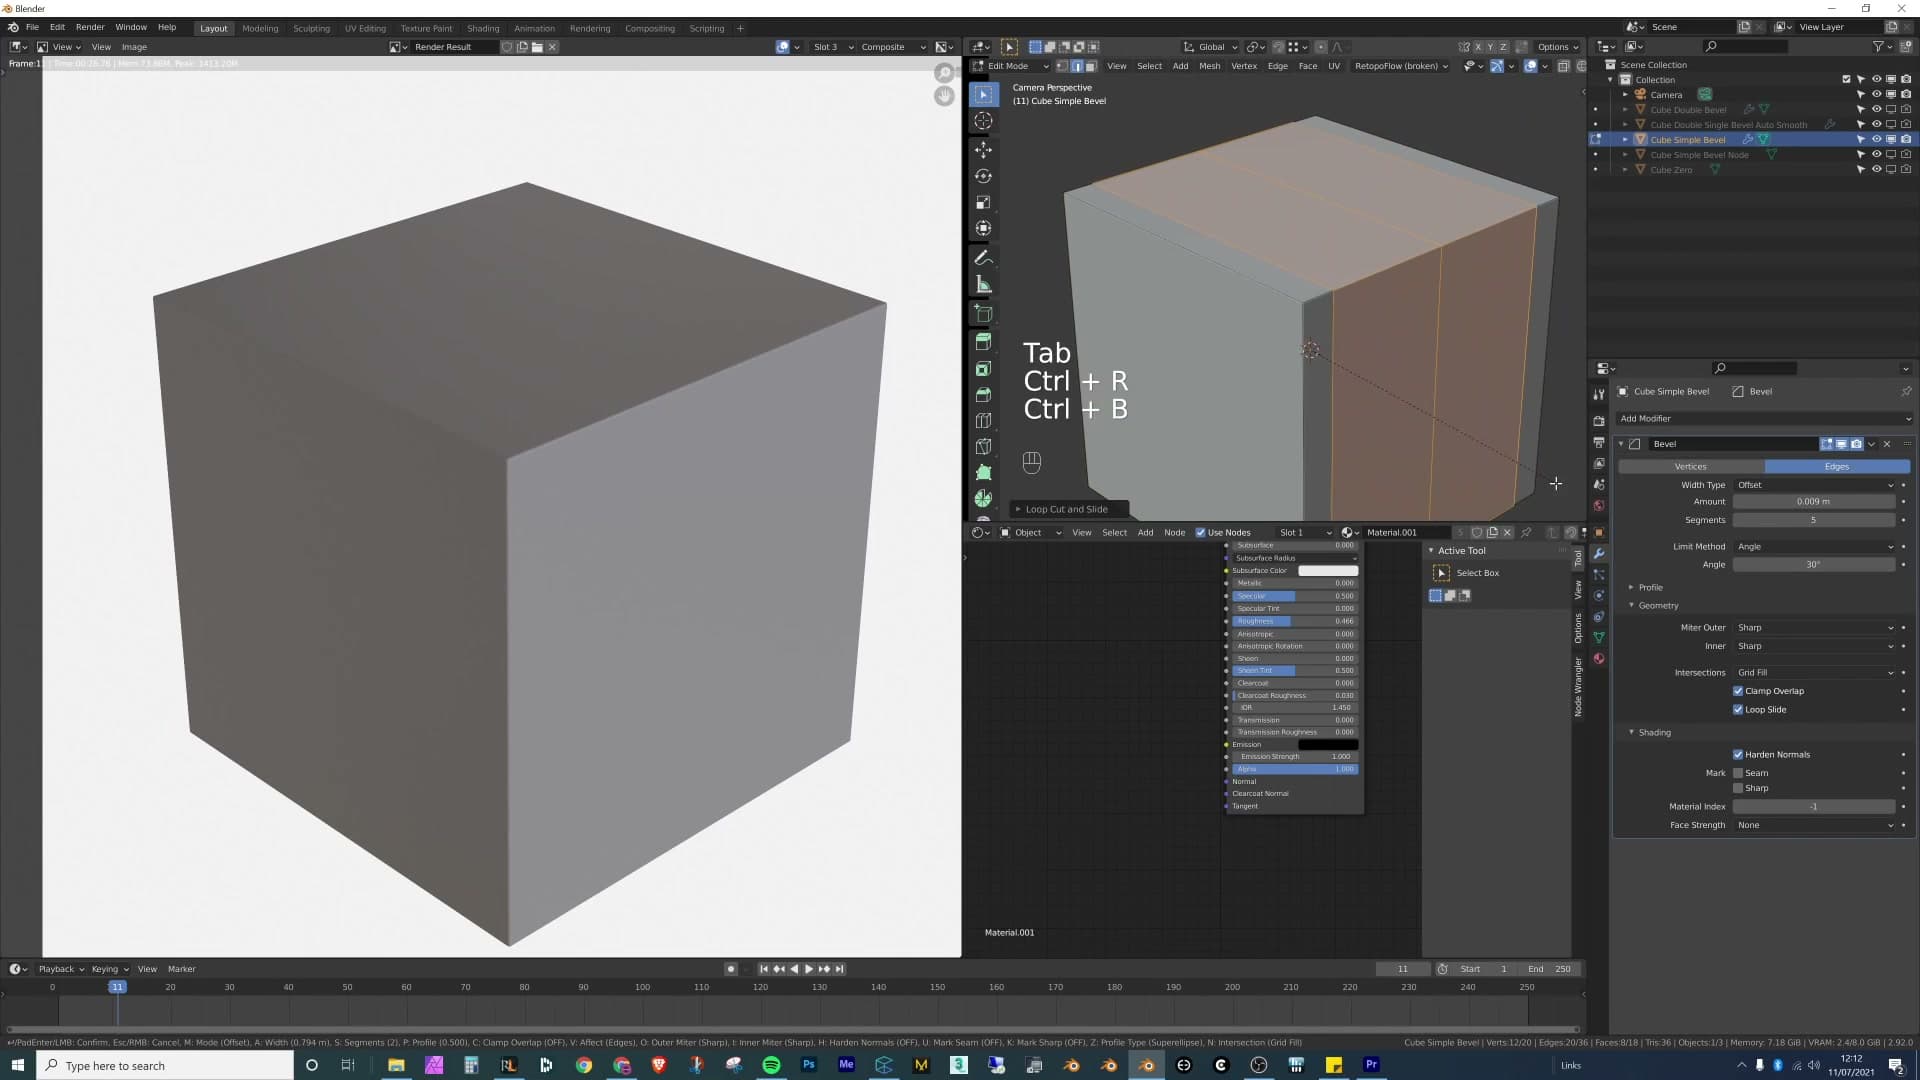
At this point everything looks correct: the surfaces are smooth, the edges are sharp, the gradient is gone. So why bother adding extra loop cuts at all? That's the question the next module answers with a practical example.
Weighted Normals as a fallback
Harden Normals is only available while the Bevel modifier is still live on the stack. If you've already applied it, or you bevelled the geometry by hand with Ctrl+B, that route is closed. The fallback is the Weighted Normals modifier.
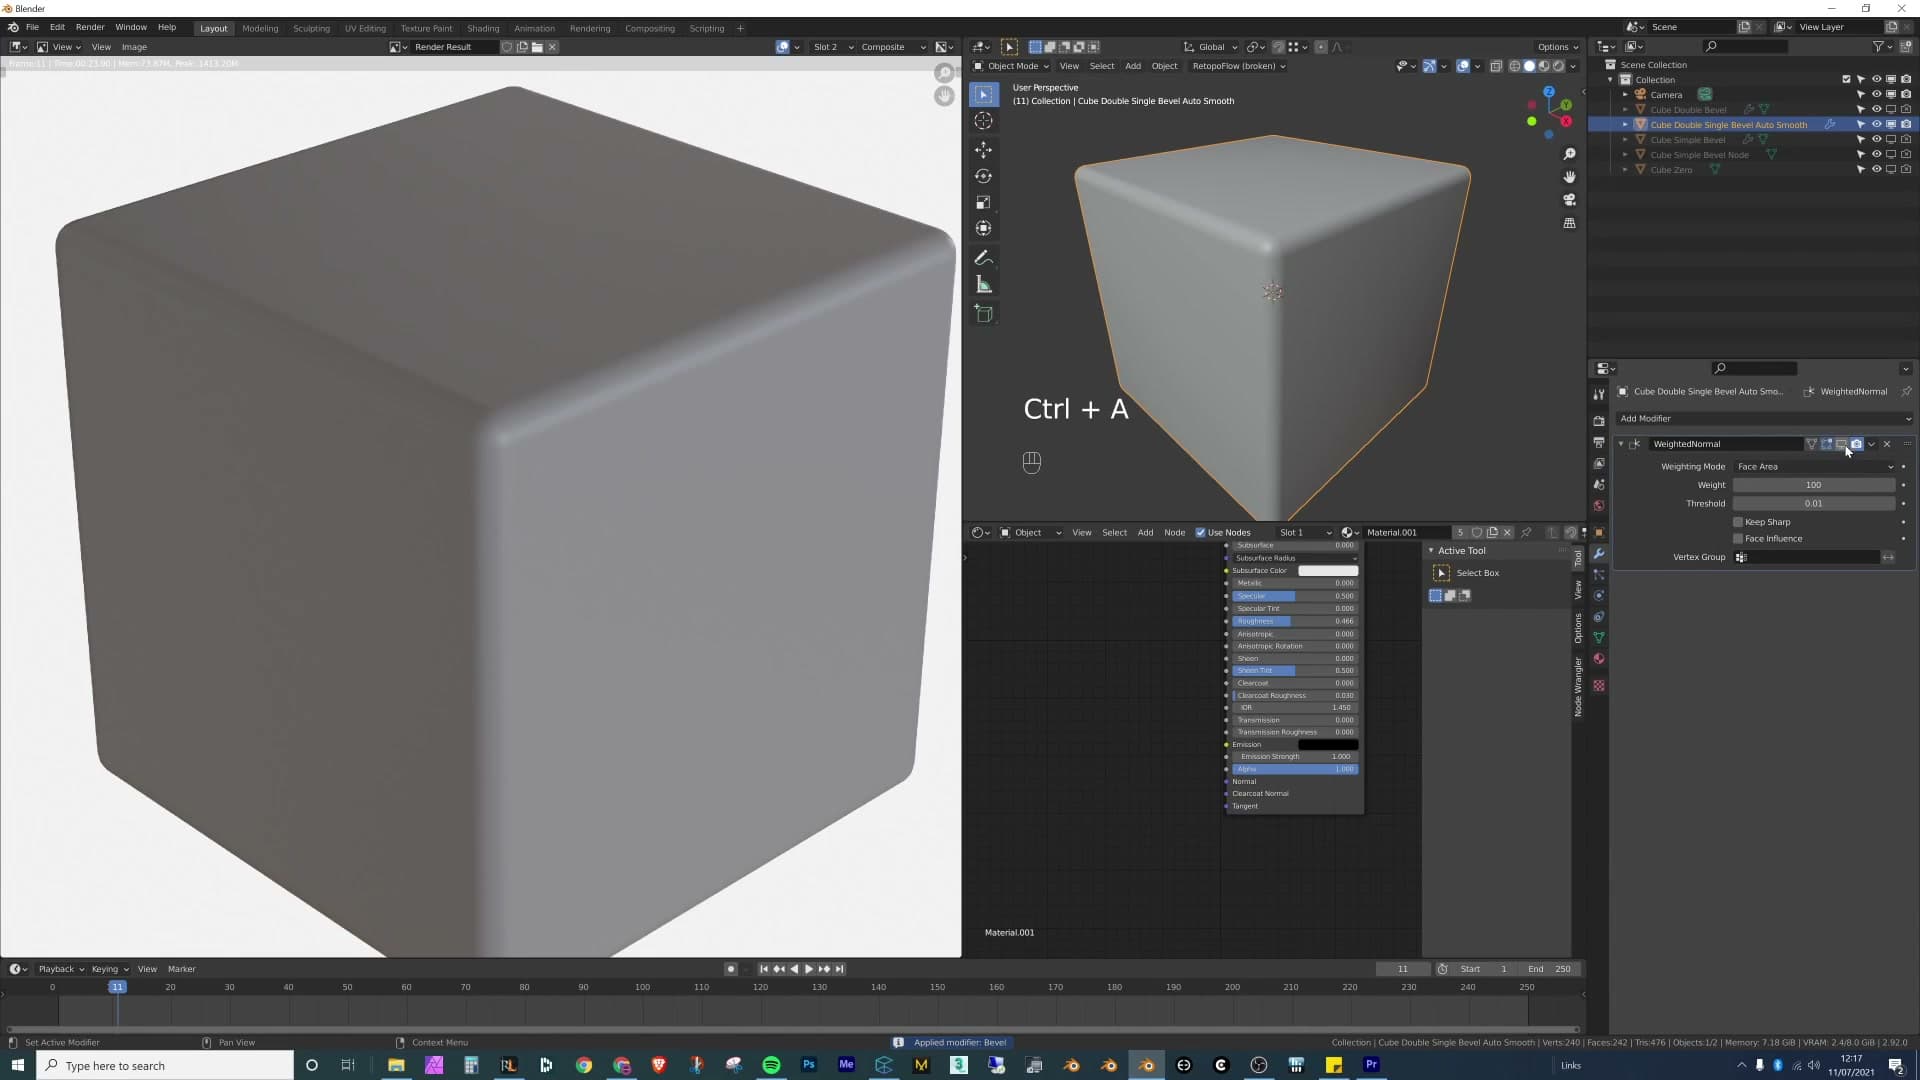
Stack Weighted Normals on top of the now-applied bevel and it does much the same job: it finds the face, weights the surrounding normals towards it, and hardens the edges around it. With Harden Normals turned off, or no longer available because the bevel has been applied, Weighted Normals on its own is enough to clean up the gradient.
The render comes out smooth: the bevel reads as a continuous curve, the face stays flat, and the seam between them is sharp. Same result as the Harden Normals route, just reached from geometry that's no longer driven by a modifier.
The double-bevel supporting-edge trick
My preferred method, recreated procedurally. A first Bevel modifier with shape set to 1.0 inverts into the face to build supporting edges, then a second Bevel modifier rounds the central edge between them. The exact loop-cut structure you'd hand-model, generated for free.
Building supporting edges with a reverse bevel
The supporting-edge approach works well, but you don't have to cut those loops by hand every time. My preferred setup builds them with the Bevel modifier itself and then runs a second bevel on top to round the central edge between them. The same topology you'd hand-model, generated for free by the modifier stack.
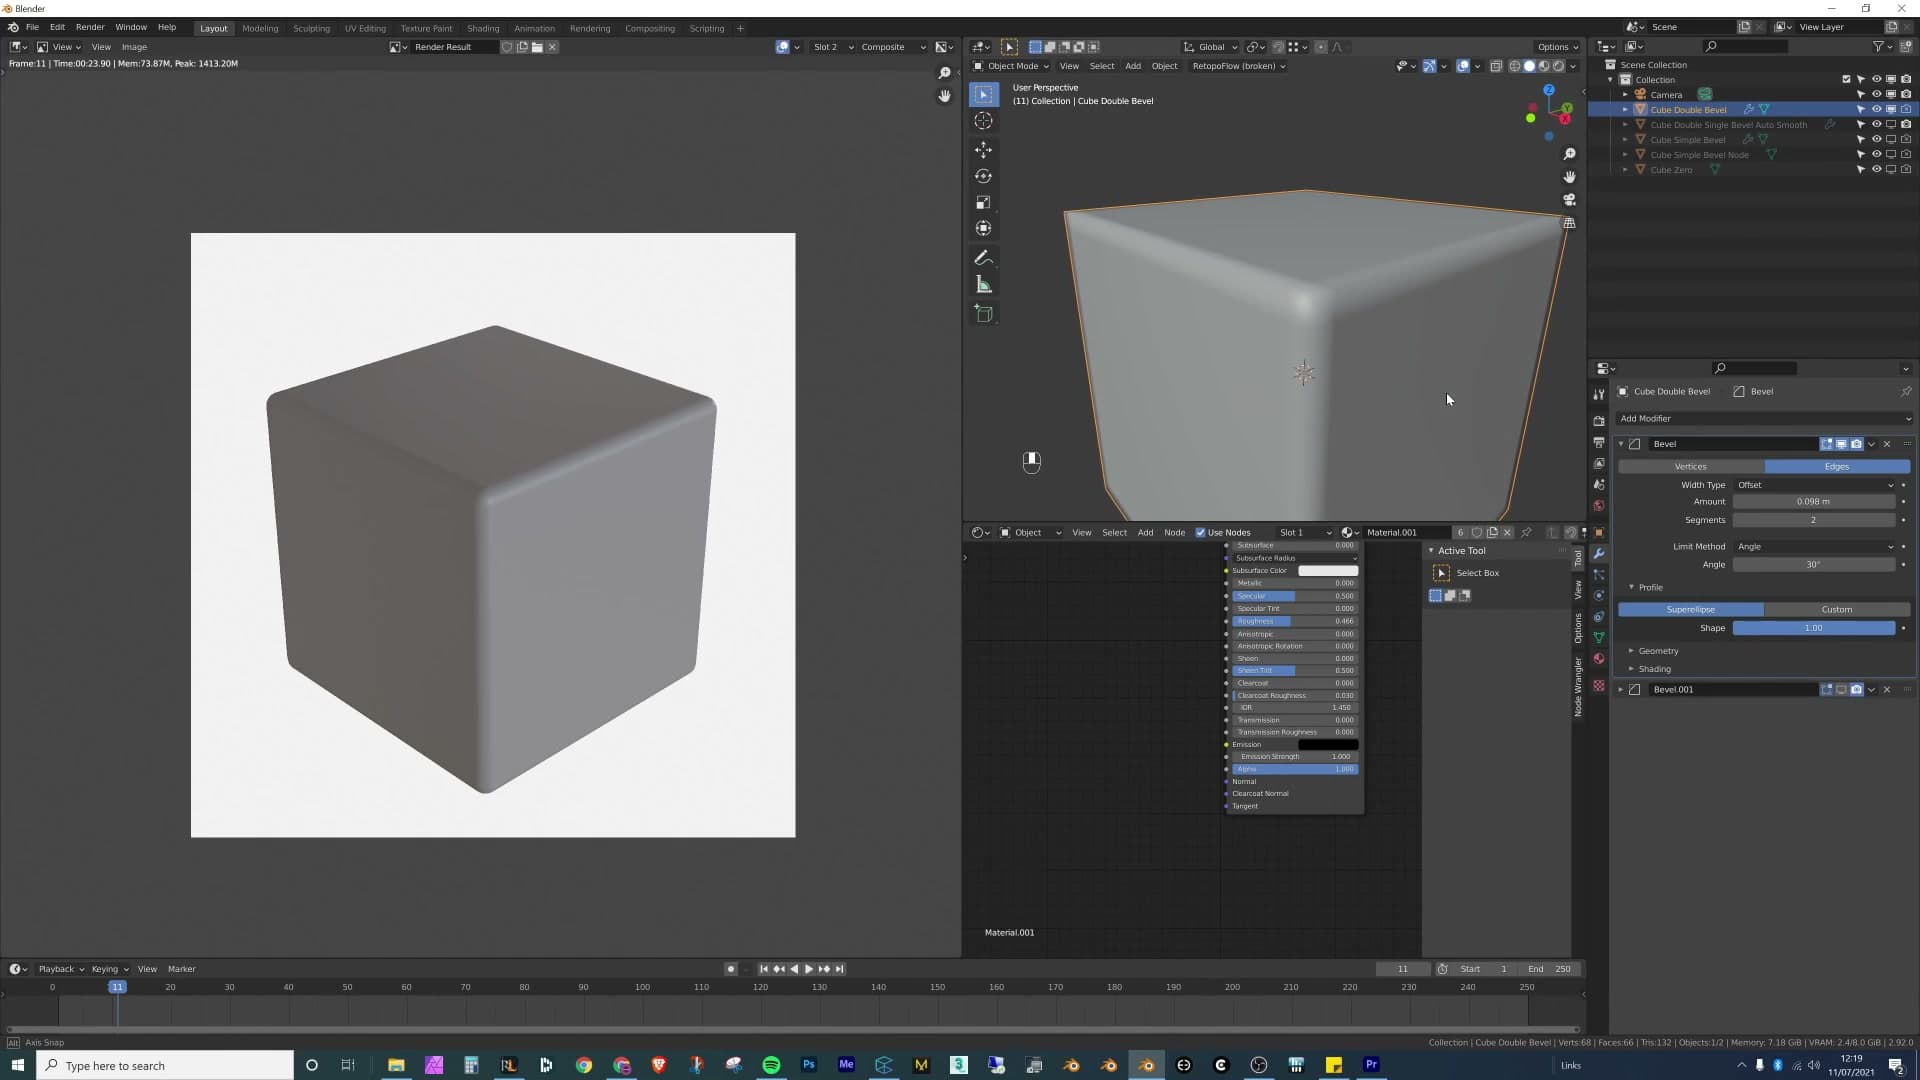
Add a Bevel modifier and set its Shape value to 1.0. Instead of rounding outwards into a soft chamfer, the modifier pushes into the face and widens the corner into a flat plateau bracketed by two new parallel edges. Think of it as a reverse bevel: you're not softening the corner, you're carving the support structure into the surface either side of where the original edge used to be.
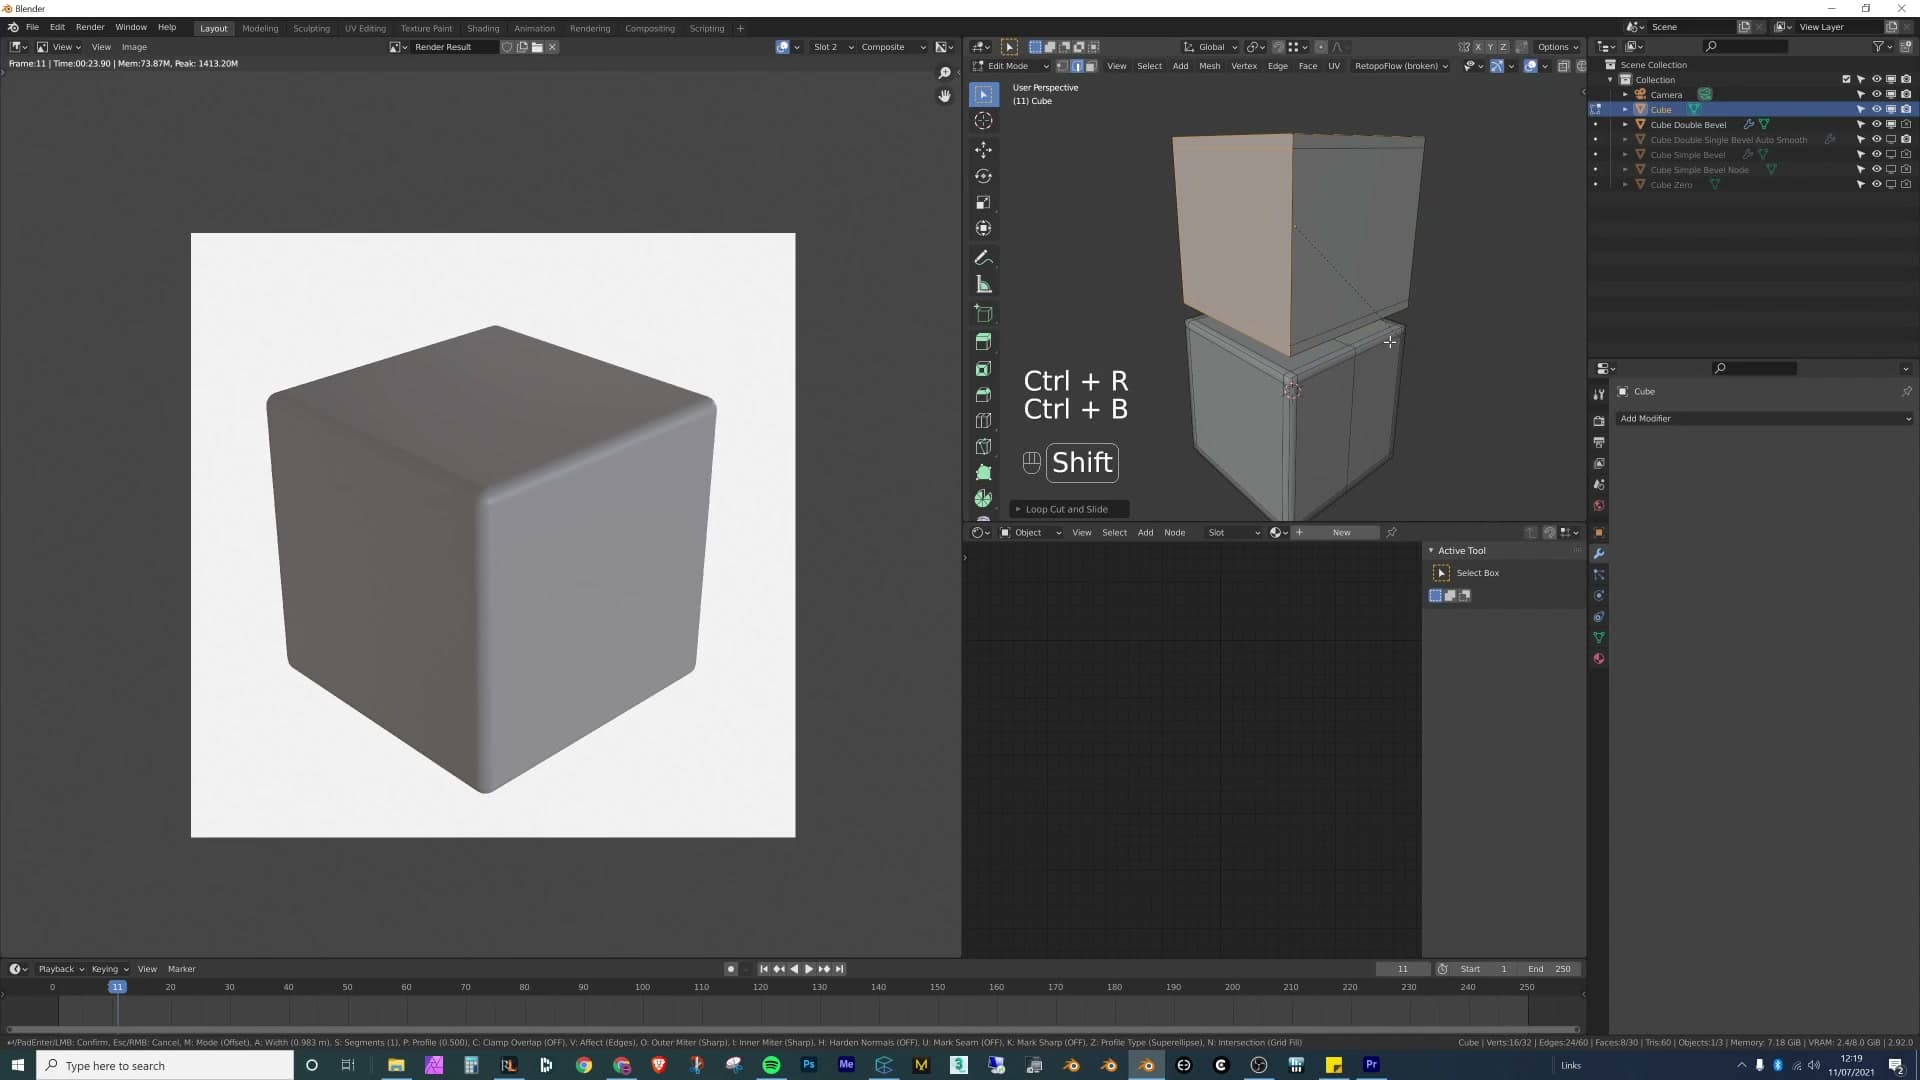
Switch to wireframe and the trick is obvious. Where the cube previously had a single sharp edge, it now has two parallel edges sitting close to where that edge used to be. That is exactly the supporting-edge structure you'd have built manually with Ctrl+R loop cuts. You've essentially done it backwards: the modifier has arrived at the same topology procedurally, ready for a second bevel to clean up the corner that now sits between the two supports.
Adding the second bevel and matching widths
With the supporting edges in place from the first modifier, add a second Bevel modifier above it in the stack. This one runs with a normal rounded shape and targets the central edge that sits between the two support edges manufactured by the first bevel. The result is the same chamfered-with-loop-cuts geometry you'd model by hand, generated entirely by the modifier stack with nothing applied destructively.
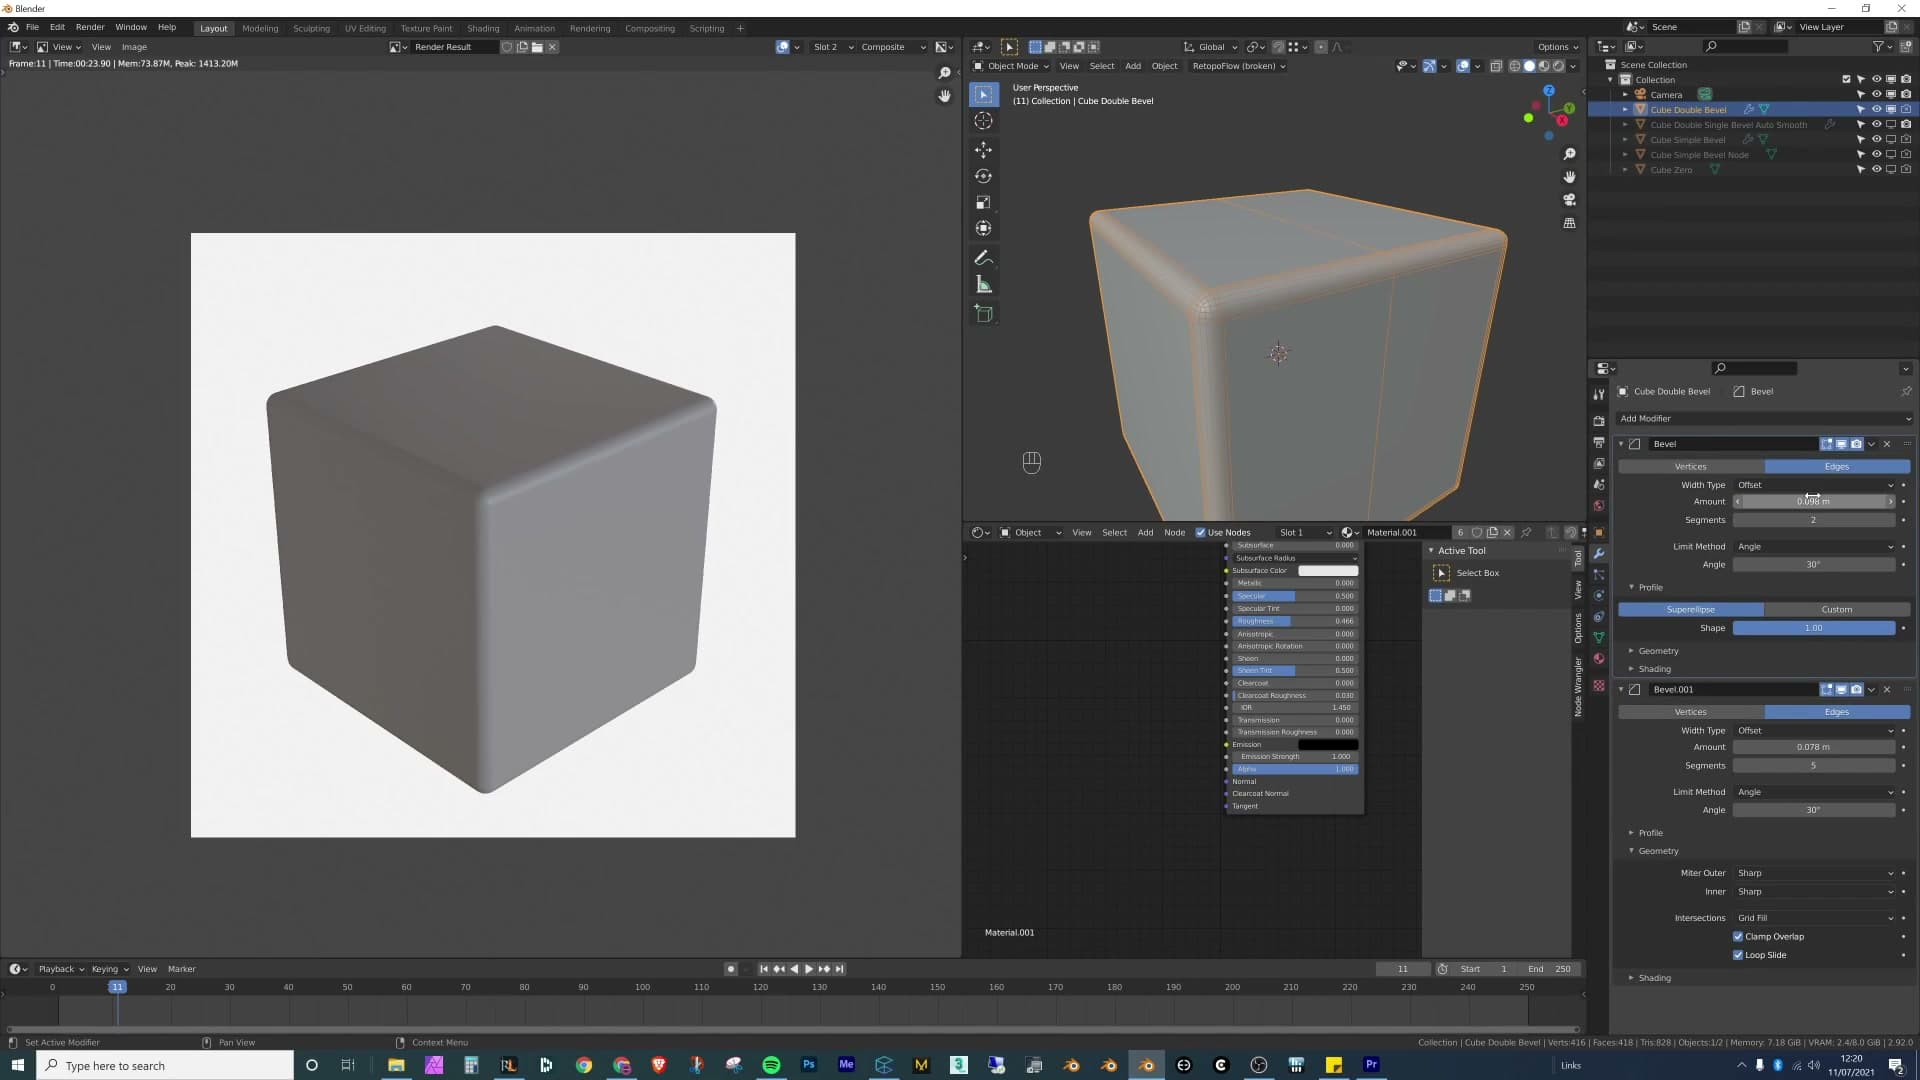
The trick to keeping the shading clean is matching the two bevel widths. My rule of thumb is that the supporting edges need to sit close to where the rounded bevel actually starts, which means the two widths want to be roughly similar. If the first (reverse) bevel is significantly wider than the second, the support edges drift outwards across the face, the gradient you were trying to kill creeps back in, and the corner starts to look strange again.
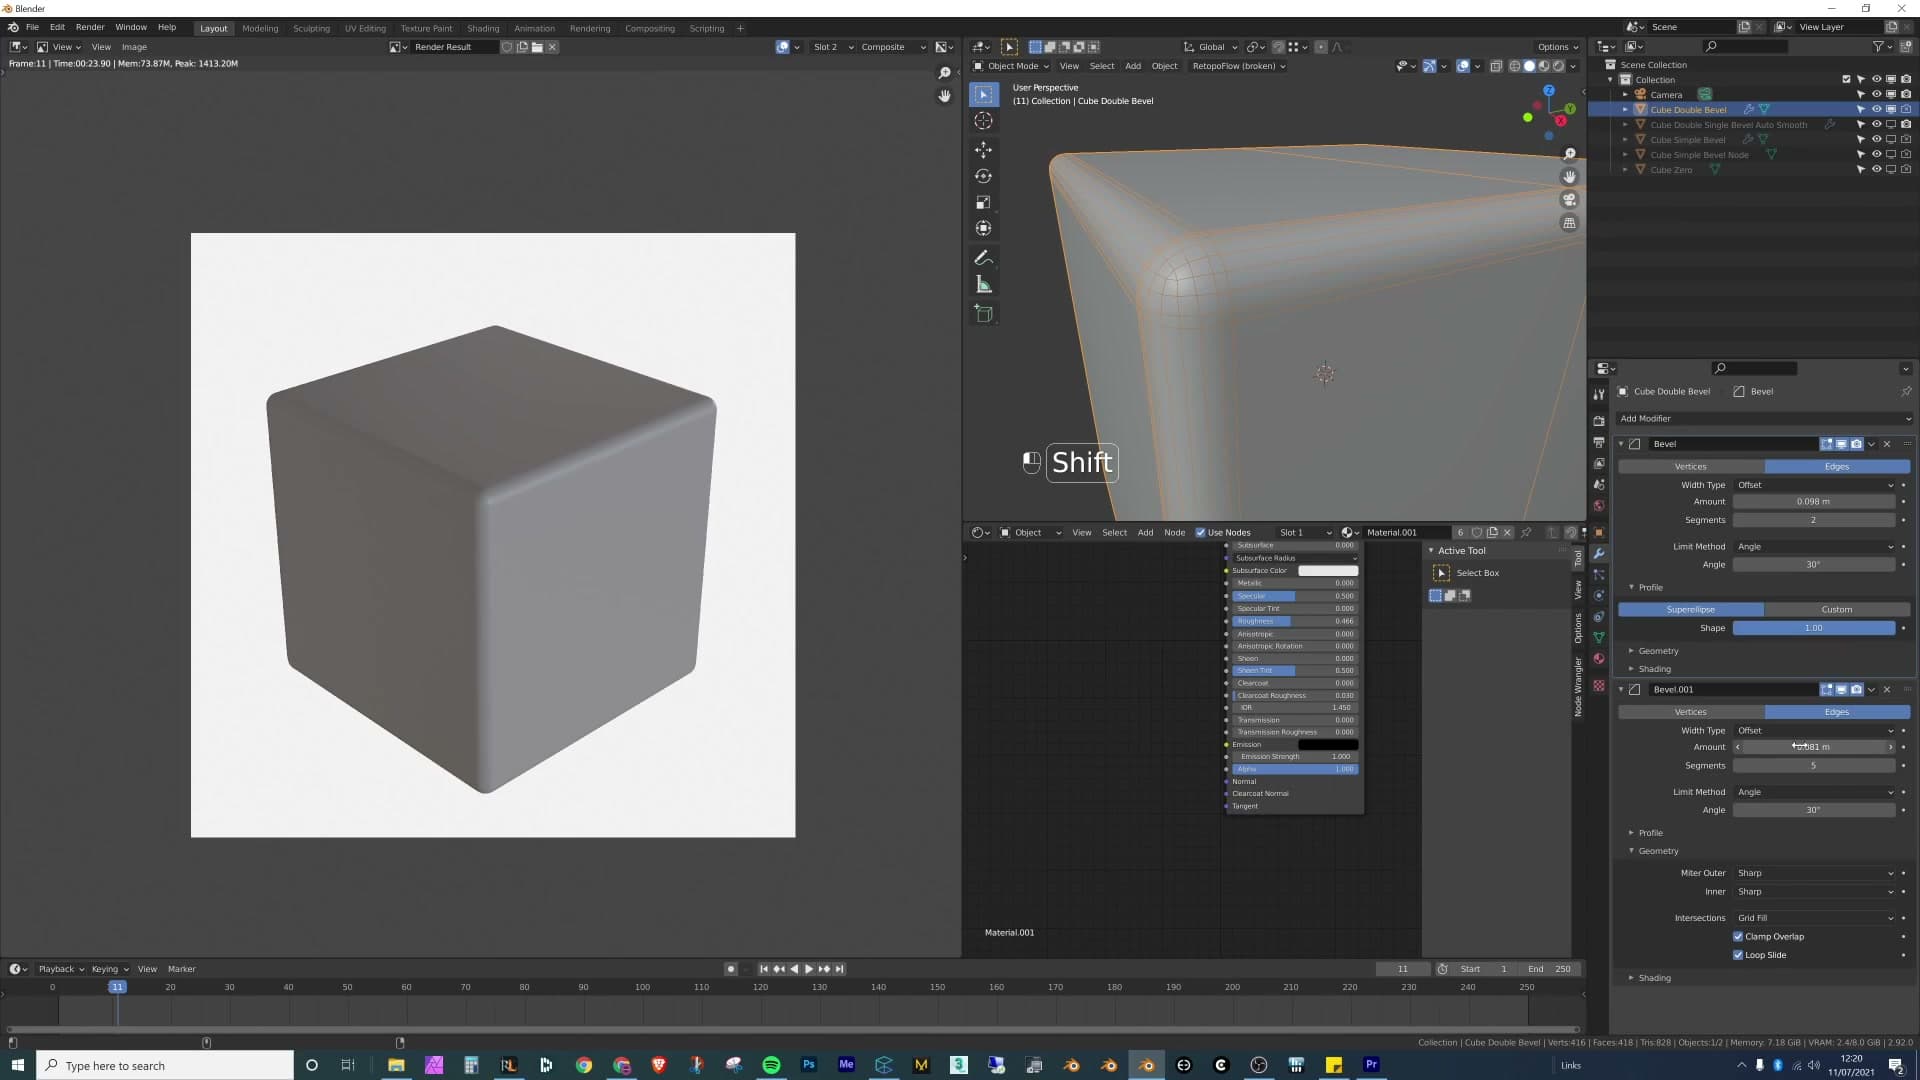
Hit render and the edge reads as completely smooth, with none of the faint sharp creases or stray gradients the other methods leave behind. Compared directly against the same cube using only Auto Smooth, the difference is subtle. But it's exactly the kind of subtle that separates a close-up render that holds up under scrutiny from one that doesn't.
Render comparison and choosing your method
Side-by-side renders make the difference visible. The double-bevel cube has no gradient, while the Auto Smooth cube still shows a faint sharp line running along the bevel. I explain why a close-up of a worktop pushed me to the loop-cut workflow as my default.
Side-by-side: double bevel vs Auto Smooth
Render both cubes in the same shot and the difference stops being theoretical. On the double-bevel cube, the edge reads as completely smooth. The shading rolls across the bevel and onto the surrounding faces without a break, which is exactly what a real chamfered edge does under area lighting.
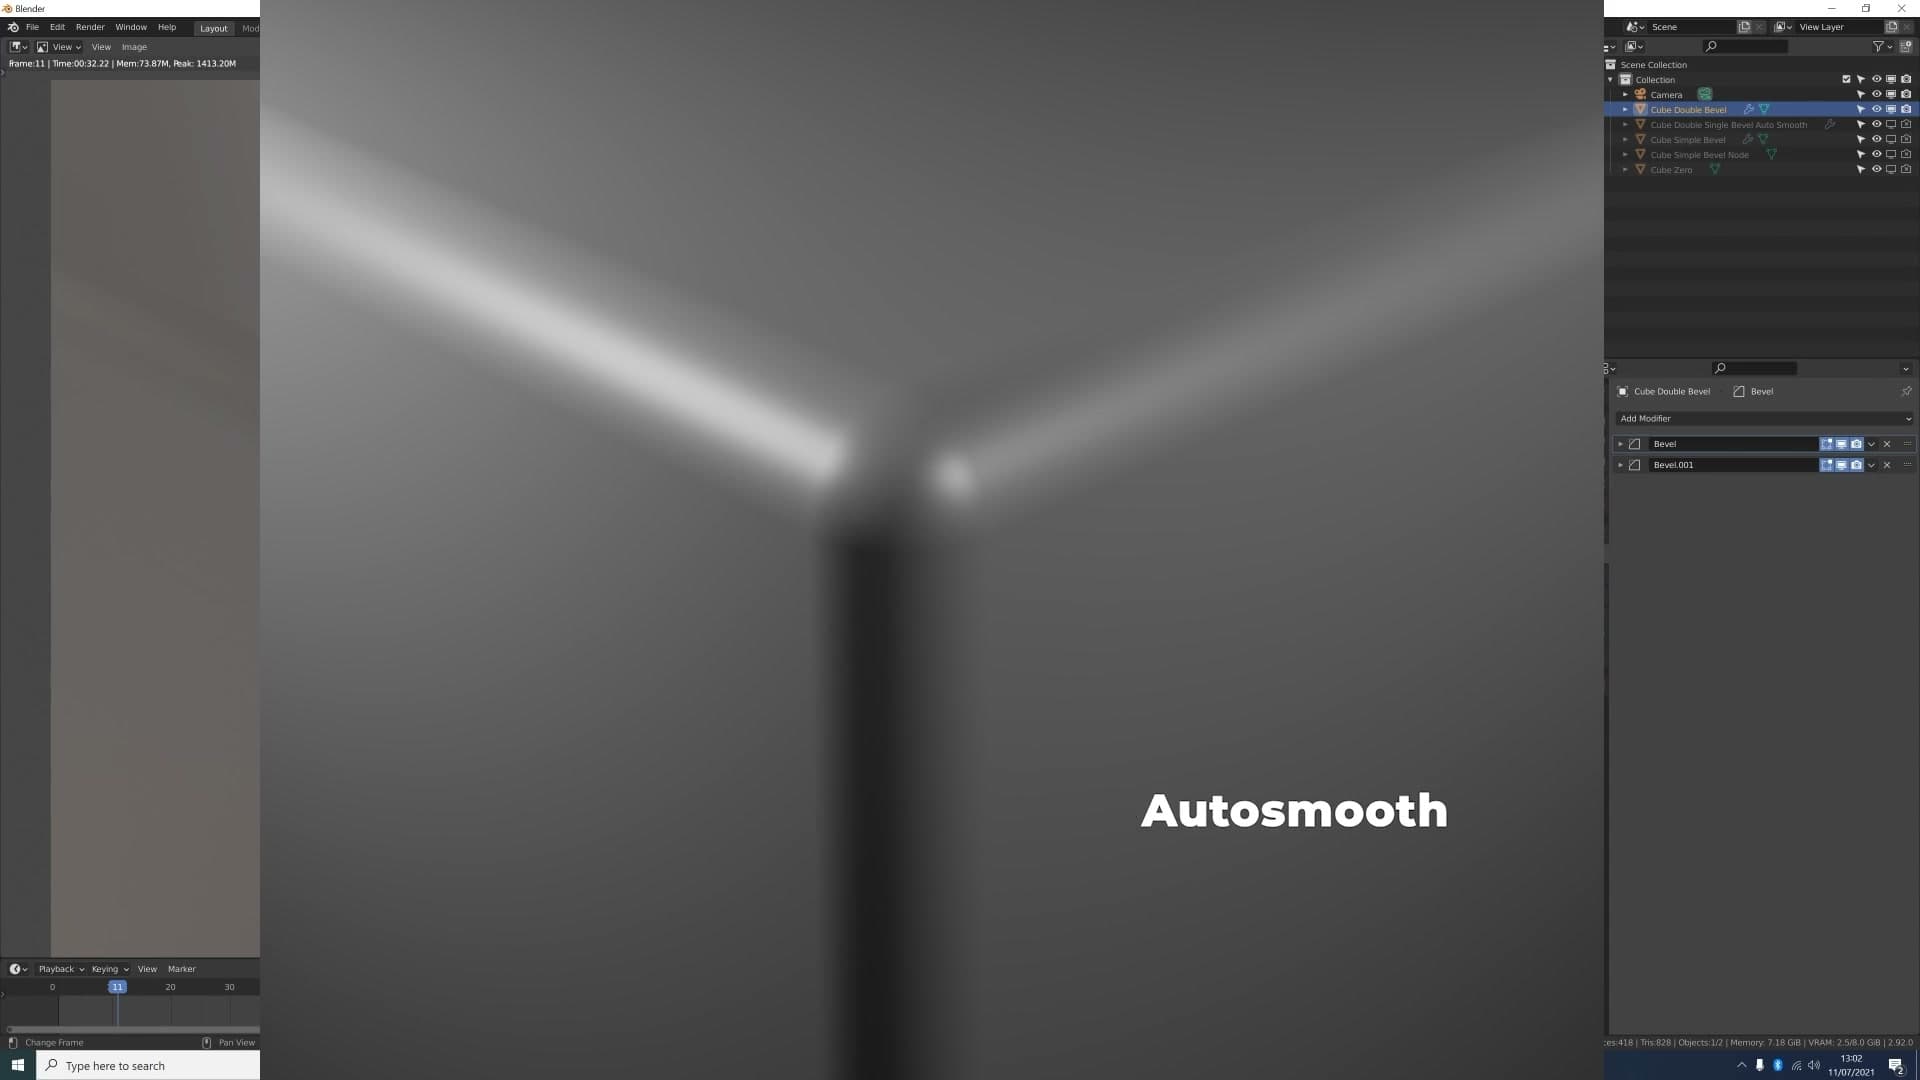
Switch your eye to the Auto Smooth cube and there is a definite sharp edge running along all of those bevel faces. It is subtle. You have to look for it, but once you have seen it you cannot un-see it. The hard-edge threshold that Auto Smooth uses to decide which edges to split is the thing producing that faint line, and no amount of Harden Normals fully removes it on a smooth-shaded surface.
That subtlety is the whole point of the comparison. On a background prop the seam disappears into the noise of the render. On a hero surface it doesn't. My go-to example is a kitchen worktop with a close-up of food sat on it. The camera lingers, the bevel runs right through the frame, and a sharp line that should not be there on a bevelled edge becomes the thing your eye keeps returning to.
That worktop shot was the moment he stopped reaching for Auto Smooth by default. A bevel is meant to read as completely smooth, and if a method leaves a crease behind, it has not really finished the job.
Why this became my go-to workflow
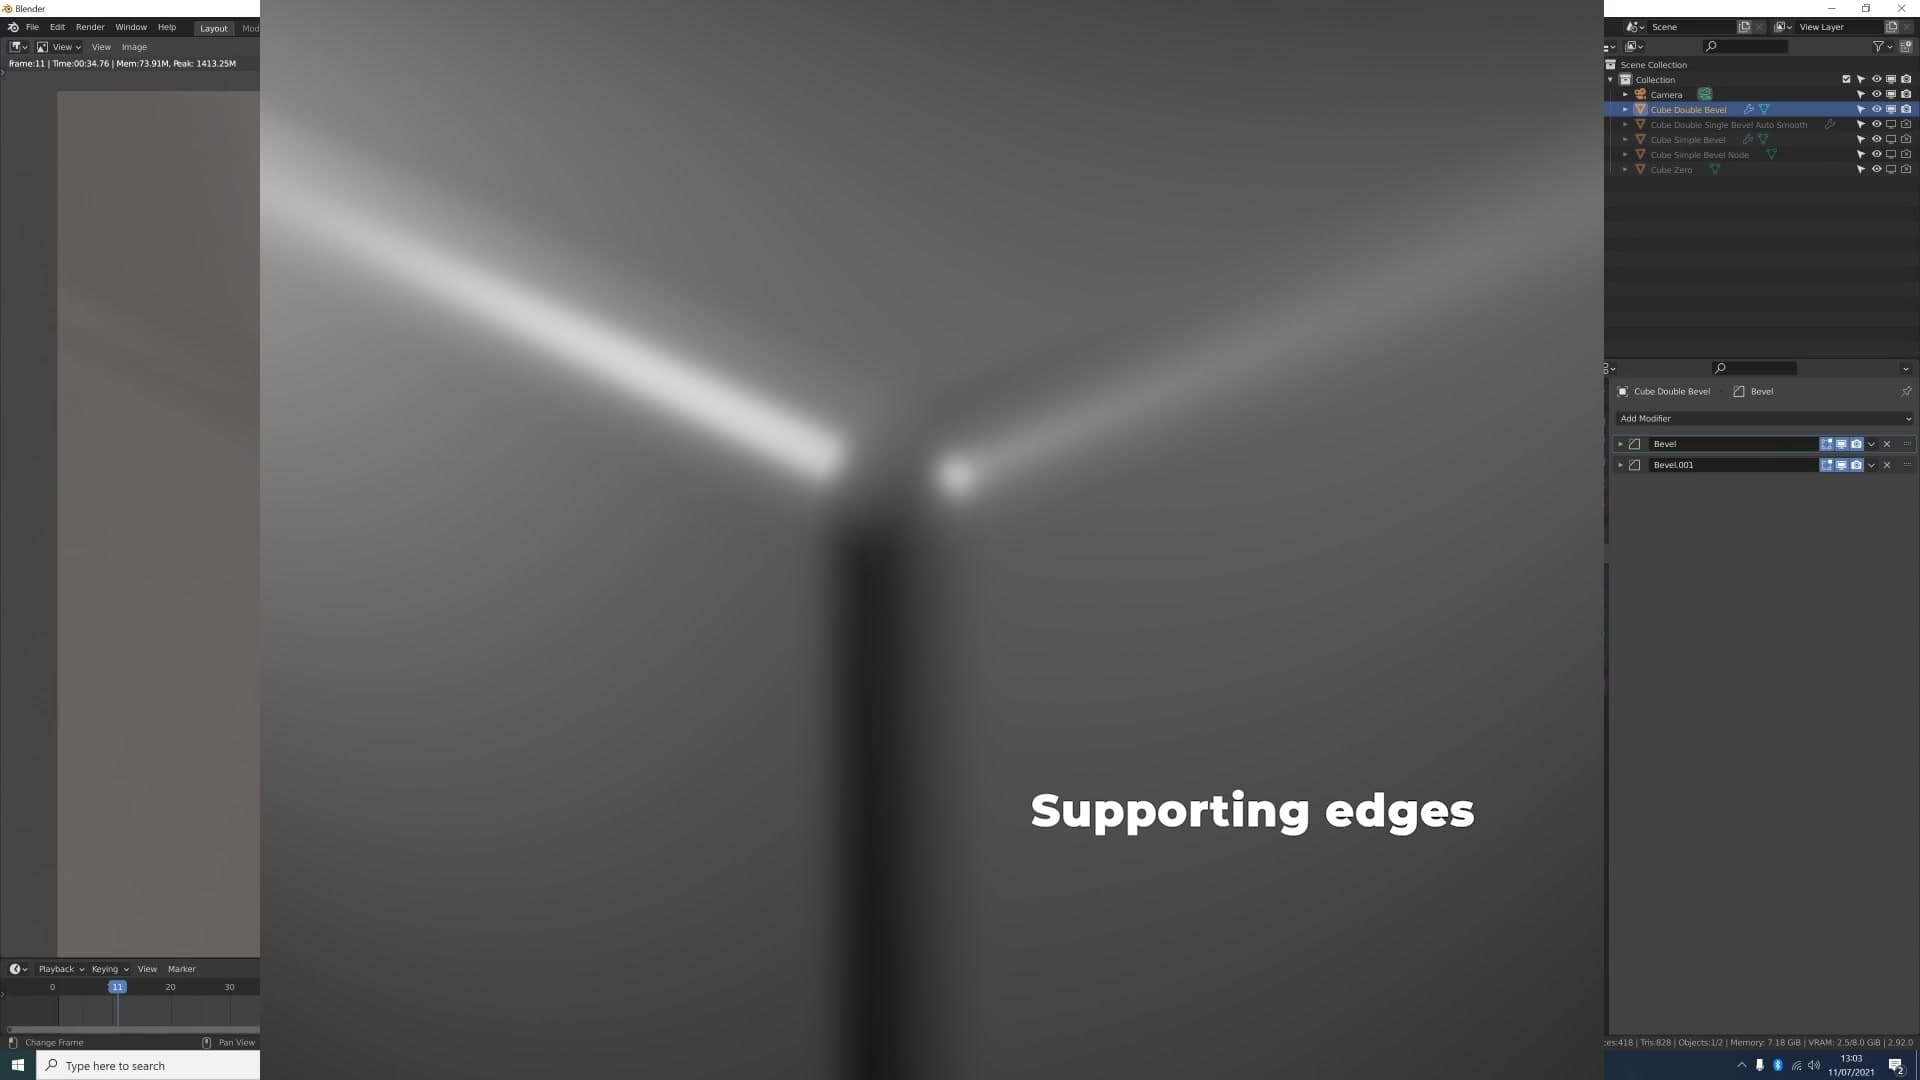
After the worktop render, I switched to the supporting-loop-cut method as my default and kept using it. The more I reached for it, the more it became the automatic answer for any bevel on a hero surface, until Auto Smooth dropped out of my workflow entirely for close-up work.
The double-bevel modifier stack on top of that solves the one real downside of manual loop cuts: edge count. Hand-cutting two supporting loops next to every bevel does add geometry, and that geometry makes the object fiddlier to edit later. Letting two stacked Bevel modifiers generate the supporting edges procedurally means the base mesh stays clean. You can still tweak the cage, and the support edges rebuild themselves on top.
None of this is a takedown of Auto Smooth. For most furniture, most background props, most renders where the camera does not get close enough to read the seam, Auto Smooth with Harden Normals looks perfectly fine and is faster to set up. The double-bevel trick is the one to reach for when the bevel is going to be in shot at close range and you want it to read as a real, smooth, chamfered edge with nothing distracting running through it.
Pick the method that fits the shot. Bevel shader node for distant background geometry, Bevel modifier with Auto Smooth for the bulk of a scene, double-bevel only when the camera gets close enough to see the difference.
Tools and credits
Everything mentioned in this tutorial, with links.
- Blender (the renderer this entire build runs in)
- iMeshh: studio platform (project management, client review, asset library, invoicing). The asset library used in this tutorial is included with every iMeshh Pro plan.
- Poly Haven (free CC0 textures and HDRIs)
Pillar guide: Texturing Displacement hub